How to Make a 3D Printed Selfie With Your Phone
(Image credit: Tom’s Hardware)
If you’ve ever been interested in 3D scanning, you might be surprised to find out that you may already have a 3D scanner in your pocket. Using the front-facing TrueDepth camera on the iPhone X and newer (sadly, Android is not supported), you can create a 3D scan of your face, export it as a 3D model, and create a copy using a 3D printer. In this article, we’ll go over the process of how to create a 3D selfie using your phone and how to 3D print it. No 3D sculpting experience is required, as the app we’ll be using creates a fully printable model with no modifications required.
We’ll be using the iPhone app FaceApp by Bellus3D for this article. The app is free to download and use, and you can create unlimited scans with it for free. The app costs $0.99 to export a 3D model for printing, but you can take as many scans as you want before printing to get the hang of the scanning process.
What You’ll Need
- 3D Printer: In this article, we’ll be using the Anycubic Vyper FDM 3D printer, one of the best 3D printers you can buy in 2021.
- Filament: For quickly printing models on the Vyper, PLA is a great material choice. We’ll be using Begonova brand PLA for this article.
- Slicer App: Ultimaker Cura is the slicer app we’ll be using with the Anycubic Vyper, but your slicer may be different depending on your printer. Most of the steps are similar for all slicers, so you should be able to follow along regardless of what you’re using.
- iPhone: Most 3D scanning apps require a LiDAR sensor (like the front-facing TrueDepth camera on the iPhone X and later), so you’ll want to check to make sure this is a feature you have on your phone. We’ll be using an iPhone 11 Pro in this article, but the app we’re using is compatible with iPhone X and later.
- Bellus3D FaceApp: There are many 3D scanning apps you can use to make a 3D model of your face, and most use a similar process.
 We’re going to use the Bellus3D FaceApp for iOS which gives fast and easy results.
 - SD Card: The Anycubic Vyper requires an SD card to transfer sliced files from your computer to your printer, so you’ll want to make sure you have one on hand. If your printer has Wi-Fi, however, you can also transfer your STL file that way.
Getting Started
(Image credit: bellus3d.com)
Before we get started, you’ll need to download the FaceApp scanning app on your iPhone, as well as the slicer app for your 3D printer.
1. Download the FaceApp scanning app from the iOS App Store . This is a free app to download and use, so you can experiment with the software without buying any scans or subscriptions.
2. Download the slicer software for your 3D printer. We’ll be using Ultimaker Cura, a free app, with the Anycubic Vyper but other slicer apps for FDM 3D printers such as PrusaSlicer, Simplify3D, FlashPrint and others will have similar workflows.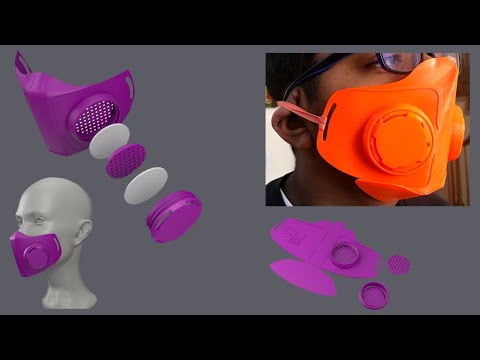
Part 1: Create a 3D Selfie Using Bellus3D FaceApp
(Image credit: Bellus3D)
The first part of this project is going to be creating a 3D model of your head to 3D print. The model we create needs to be 3D printable, so we’re going to make a full model of your head and ensure that it is in a file format that your 3D printing software can use after exporting it. By the end of this step, you should have a 3D model that’s ready to use.
1. Open Bellus3D FaceApp on your iPhone and take note of the different scan options. FaceApp offers three separate modes for scanning: Face, Face + Neck, and Full Head.
2. Select the Full Head option to create a 3D model that can be printed.
(Image credit: Bellus3D)
3. Follow the prompts from FaceApp and rotate your head to the sides, up, and down to allow the app to fully capture your face. FaceApp will take this scan data and automatically generate a mesh of your face while extending the side edges to create the back of your head.
Image 1 of 3
(Image credit: Tom’s Hardware)
(Image credit: Tom’s Hardware) (Image credit: Tom’s Hardware)4. Select ‘Light’ then ‘Surface’ once the scan has finished to see the mesh of your 3D scan. The mesh is the actual geometry of the model without the colored texture wrapped around it. This is what we’ll be 3D printing, so we want to make sure it looks satisfactory before continuing. If you’re not happy with the mesh, you can redo the scan until you have one you’re satisfied with.
(Image credit: Tom’s Hardware)
5. Unlock the model for 3D printing by selecting ‘Unlock’. Once unlocked, the scan can be shared as a 3D model or just a link to see the scan in 3D.
(Image credit: Tom’s Hardware)
6. Toggle the Watertight setting to create a solid 3D mesh. This will create a solid base for your model, which allows it to be 3D printed.
7. Select HD for mesh resolution to create a high resolution mesh. This will have more detail at the expense of a slightly higher file size, but it will result in a sharper 3D model.
8. Select export STL file to export a 3D printable file. Once exported, this file can be loaded into your slicer app to prepare for 3D printing.
Part 2: Preparing the 3D Scan for 3D Printing
In this step, we’ll be creating a 3D printable file from our 3D scan. If this is your first time printing a 3D model, you can learn more about the process in our guide to making your first 3D print from an .STL. Once exported from FaceApp, the 3D scan is ready to be sent to your slicer app to prepare it for 3D printing. The model itself will export from the app as watertight (not requiring any holes to be filled), so no additional sculpting is required.
(Image credit: Ultimaker)
1. Import the 3D Scan .STL file by dragging it into the Cura workspace. Notice that the model imports at full size (the size of your actual head), so we’ll need to resize and angle it before printing.
(Image credit: Ultimaker)
2. Scale the model so it fits entirely inside the build volume of the 3D printer. We scaled this model down to 35% for this article, but you can make it bigger or smaller.
3. Rotate the model to reduce the amount of support material generated. By rotating the model on the Y axis so it’s facing upwards, the amount of support material generated underneath the eyes and nose is minimized. Rotating about 45 degrees should give the best results without making the model unnecessarily difficult to print.
(Image credit: Ultimaker)
4. Slice the model to preview the full toolpath before printing. You’ll want to make sure you have selected ‘Supports’ to generate support material before printing. You can see the difference in amount of support material generated between the original model and the rotated model, which results in a faster, cleaner print.
Image 1 of 2
(Image credit: Ultimaker)
(Image credit: Ultimaker)5.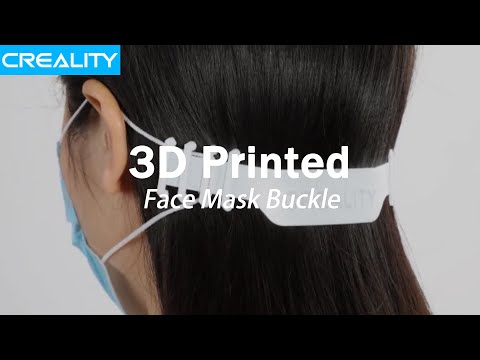 Examine the toolpath to check for any issues before printing. This model was sliced using the default slicer app settings included with the Anycubic Vyper, with only some minor changes made to speed up the print.
(Image credit: Ultimaker)
6. Save and export the model to the SD card once it has been sliced and prepared for printing. Once this step is complete, your 3D scan is fully prepared for 3D printing.
Part 3: Printing the 3D Selfie
Once the model has been sliced and is ready for export, it’s time to transfer the file to the printer and begin the printing process. In this step, we’ll go over what’s required to load the model in the printer and start the print. These steps are specific to the Anycubic Vyper 3D printer, but most FDM 3D printers will be prepared in a similar fashion.
1. Load the PLA filament into the printer and make sure the bed has been properly calibrated. Properly calibrating the bed of the printer is a critical step of the 3D printing process, and you can read about the process in more detail in our guide to printing your first model.
(Image credit: Tom’s Hardware)
2. Insert the SD card into the printer and select the exported model to begin the printing process. At 35% of life size, this print took five hours and 26 minutes to complete.
(Image credit: Tom’s Hardware)
3. Remove the model from the bed once the print has completed. On the Anycubic Vyper, this is easily accomplished by flexing the textured platform and allowing the part to easily detach.
(Image credit: Tom’s Hardware)
Part 4: Removing Support Material and Final Steps
In the final step of this article, we’ll remove the support material from this print and prepare it for display.
1. Remove the support material from the model while being careful not to damage the surface of the model or your hands. The support material should detach from the surface of the model without leaving any marks or defects.
Image 1 of 2
(Image credit: Tom’s Hardware)
(Image credit: Tom’s Hardware)2. Check the model for any defects or areas that didn’t print correctly. At this point, your 3D selfie is complete and ready for display.
(Image credit: Tom’s Hardware)
Once the part is finished, you will have successfully created a 3D selfie of yourself using a 3D scanner app and a 3D printer. You can take this idea even further by using this 3D selfie as part of a chess piece, creating a custom bobble-head for your friends, or making a family portrait by scanning your family and printing their 3D selfies.
(Image credit: Tom’s Hardware)
Andrew Sink first used a 3D printer in 2012, and has been enthusiastically involved in the 3D printing industry ever since. Having printed everything from a scan of his own brain to a peanut butter and jelly sandwich, he continues to dive ever more deeply into the endless applications of additive technology. He is always working on new experiments, designs, and reviews and sharing his results on Tom’s Hardware, YouTube, and more.
Topics
3D Printing
Can we 3D print a better face mask to stop a pandemic?
Part of Pandemic-Proof, Future Perfect’s series on the upgrades we can make to prepare for the next pandemic.
Some of the most indelible images of the early pandemic were of the personal protective equipment (PPE) crisis in our hospitals — photos of doctors and nurses wearing repurposed garbage bags, swim goggles, and snorkeling masks as the supply of PPE dwindled in the face of Covid-19’s assault.
Those images underscored just how unprepared we were to deal with a fast-moving pandemic. US hospitals relied heavily on overseas suppliers, especially in China, for PPE, and there are no regulations requiring hospitals or states to keep a certain level of stock in case of a crisis. Most didn’t; US health care operates under tight financial pressures, and just-in-time sourcing is — in normal times — more cost-effective.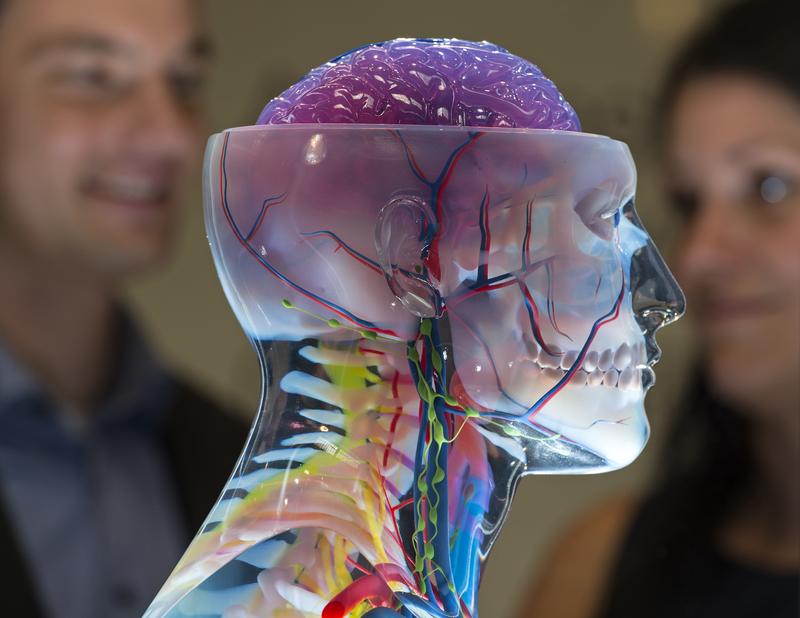 The result was a supply crunch that hampered our response against the pandemic.
As the country waited for US manufacturers to scale up PPE production and for supply chains to stabilize, a fascinating stopgap solution emerged: 3D printing. In the face of a shortage of masks, a coalition of private, public, and volunteer groups coalesced to fill a void, their efforts centered on producing and distributing 3D-printed masks.
Their work, to be sure, was not nearly enough to meet the shortfall. But as a stopgap, they undoubtedly helped, especially at the local level where such operations were focused — and it all suggests a limited but promising role for 3D printing in the fight against future pandemics.
“The Wild West of PPE”
It is hard to overstate just how terrible the PPE crisis of the early days of the pandemic was, especially for the health care workers at the front lines of the crisis.
The shortage led to a fierce search for masks and other equipment that pitted hospitals and states against one another. John Hick, medical director for emergency preparedness at Hennepin Healthcare in Minnesota, recalls the lengths to which his hospital needed to go to secure shipments from the increasingly insufficient stock. “We knew the supply chain was not going to be able to keep up with the pandemic. And it didn’t,” he told me.
Meanwhile, supply companies in China tried to work around the export restrictions put in place by the Chinese government early in the pandemic. “When we were receiving samples of masks and gowns from China,” Hick told me, “a lot of times they would come in a box wrapped in clothing, so that from an export standpoint, it would look like they were sending those and not PPE.”
Premier Inc, a health care supply company, told me that orders rose 17-fold in the early days of Covid-19, and that hospitals all over the country were sending representatives overseas in a frantic attempt to buy up any remaining supplies they could. Sometimes they were lucky, but personnel unfamiliar with the process and without preexisting relationships with vendors often returned with counterfeit products — or sometimes nothing at all.
It was the “Wild West of PPE,” remembers Hick.
That’s where 3D printing came in.
The promise of printing PPE in a pandemic crisis
3D printers can make solid, three-dimensional objects from digital designs. Following a digital blueprint, material like plastics or metal powders are laid down in successive layers, one added after another — one reason why 3D printing is also known as additive manufacturing.
Given enough raw material and a digital design to work from, 3D printers can manufacture physical objects like face shields and masks within a few minutes or hours. It’s far from perfect — additive manufacturing has generally been relied on more for prototyping designs than full-scale manufacturing — but the desperate need for PPE early in the pandemic provided an opportunity to push the limits of 3D printing technology.
This is exactly what the COVID 3D Trust project tried to facilitate, once the shortages of PPE became clear early on in the pandemic. The group was founded under the umbrella of the National Institutes of Health (NIH) 3D Print Exchange, a program the agency launched in 2014 to support bioscience research; they mainly printed 3D models of molecules being studied in biology research labs.
They already had the necessary infrastructure and were able to work closely with the Food and Drug Administration (FDA) and the Department of Veterans Affairs (VA) to support cutting-edge biomedical work, printing masks and face shields for health care workers. In just 10 days in March 2020, they were able to provide a platform that would host a crowdsourced repository of 3D-printed designs for masks, face shields, and other supplies such as nasal swabs for testing — all of them tested by the VA to meet the FDA’s emergency use authorization standards for PPE.
Meanwhile, the Advanced Manufacturing Crisis Production Response, (AMCPR) Exchange, a website platform run by America Makes (a public-private partnership for promoting innovative work like 3D printing), provided a separate platform to connect small-scale manufacturers to buyers. According to Meghan McCarthy, the program lead at the NIH 3D Print Exchange, the demand was clear: Traffic to the COVID 3D Trust site jumped rapidly, from 15,000 users per month before the pandemic to 30,000 users per day in March 2020.
The AMCPR’s success relied on individuals, volunteer groups, university organizations, and commercial entities that stepped up to contribute their local 3D printing capacity toward providing PPE needed for the Covid-19 response efforts.
Among them was the Illinois PPE Project, a volunteer-led effort that came together when the urgent need for PPE in nearby hospitals became glaring and the response from established institutions proved lackluster. The project was able to arrange for veterans to make product deliveries, use donated loading dock space from local companies, and rely on volunteer efforts to call hospitals and find out who had the most pressing needs.
A report put together by America Makes estimated that its effort produced and delivered 38 million face shields and face shield parts, over 12 million Covid-19 diagnostic nasal swabs, over 2 million ear savers, and hundreds of thousands of mask components and ventilator parts. (The ear saver is an attachment that can be used to make masks more comfortable by removing pressure from the ears. That may not matter to the average person temporarily wearing a mask as they dip into a store, but it is highly relevant to health care providers, who often have to wear a mask for the entirety of a 12-hour shift.)
Nation of Makers, a nonprofit founded to support the “maker” community — a subculture oriented around engineering new hardware and tinkering, often through the use of 3D printing — estimates that nearly 50 million total units of PPE and other medical supplies were produced for the Covid-19 response by local additive manufacturing groups by January 2021. It’s an eye-popping number — though still small in the context of domestic mass manufacturing and total demand within the health care system; in March 2020, the US Department of Health and Human Services contracted with companies for 600 million N95 masks to be delivered over an 18-month period.
A stopgap, not a solution
As those figures suggest, 3D printing is inherently small-scale. It’s not a long-term solution for meeting the PPE demand in the health care system, and will never be as cost-effective at scale as traditional mass manufacturing. Its main value is that it can be done locally, with minimal lead time, and can temporarily fill in the gap to buy time for larger-scale manufacturing and shipping to catch up.
3D printing also has value as a means of prototyping new PPE designs. Digital designs can be quickly revised during the additive manufacturing process to try out new approaches. One notable success during this pandemic was the stopgap surgical mask, a sterilizable mask with a replaceable filter that meets FDA standards and is currently going through the CDC’s NIOSH approval process for N95 masks.
Other promising projects made it to the prototype stage; in particular, the Bellus3D app (which is unfortunately now shutting down) hoped to offer a service for scanning an individual’s face to be combined with 3D printing to create a custom-fitted reusable and sterilizable mask, or a customizable plastic frame to improve the seal of a surgical mask.
But additive manufacturing is just that: additive. Preparing for the next pandemic will require reforming supply chains and enhancing emergency stockpiling for conventionally made PPE as well.
The wish list of upgrades is long: moving away from just-in-time shipping when it comes to PPE; tax incentives or hospital regulations to incentivize PPE production year-round; and new mechanisms to improve visibility of PPE supplies and chains across hospitals and states, among many others.
But we now have a grasp of the limits of 3D printing in an emergency and how much more we can push them. It almost certainly saved some lives this time around, and it may well be even more consequential in the next pandemic.
Will you support Vox’s explanatory journalism?
Millions rely on Vox’s journalism to understand the coronavirus crisis. We believe it pays off for all of us, as a society and a democracy, when our neighbors and fellow citizens can access clear, concise information on the pandemic.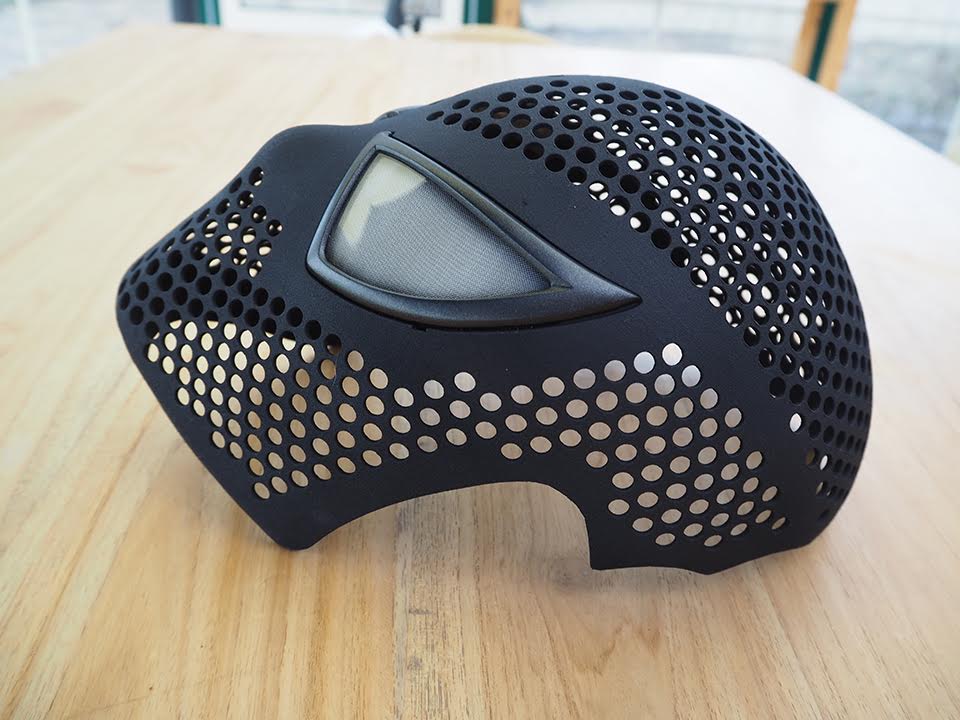 But our distinctive explanatory journalism is expensive. Support from our readers helps us keep it free for everyone. If you have already made a financial contribution to Vox, thank you. If not, please consider making a contribution today from as little as $3.
Optimization of community-led 3D printing for the production of protective face shields | 3D Printing in Medicine
- Case study
- Open Access
- Published:
- Peter Chengming Zhang1,2,
- Yousuf Ahmed3,
- Isra M. Hussein3,4,
- Edem Afenu3,5,
- Manon Feasson6 &
- …
- Anser Daud
ORCID: orcid.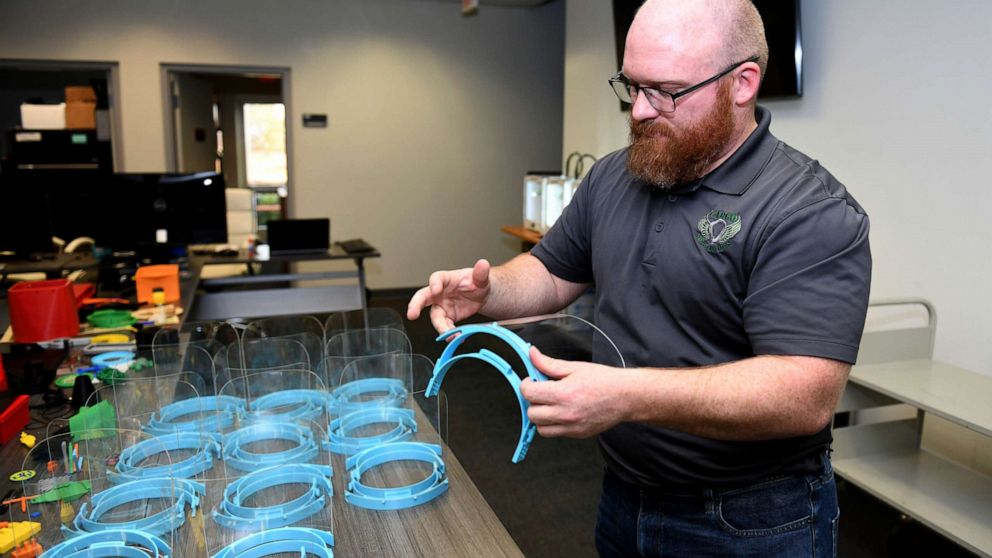 org/0000-0002-4322-26103
3D Printing in Medicine
volume 6, Article number: 35 (2020)
Cite this article
-
2080 Accesses
-
5 Citations
-
7 Altmetric
-
Metrics details
Abstract
Background
As the healthcare system faced an acute shortage of personal protective equipment (PPE) during the COVID-19 pandemic, the use of 3D printing technologies became an innovative method of increasing production capacity to meet this acute need. Due to the emergence of a large number of 3D printed face shield designs and community-led PPE printing initiatives, this case study examines the methods and design best optimized for community printers who may not have the resources or experience to conduct such a thorough analysis.
Case presentation
We present the optimization of the production of 3D printed face shields by community 3D printers, as part of an initiative aimed at producing PPE for healthcare workers. The face shield frames were manufactured using the 3DVerkstan design and were coupled with an acetate sheet to assemble a complete face shield. Rigorous quality assurance and decontamination protocols ensured community-printed PPE was satisfactory for healthcare use.
Conclusion
Additive manufacturing is a promising method of producing adequate face shields for frontline health workers because of its versatility and quick up-start time. The optimization of stacking and sanitization protocols allowed 3D printing to feasibly supplement formal public health responses in the face of a global pandemic.
Background
With the COVID-19 pandemic causing worldwide personal protective equipment (PPE) supply to diminish, this shortage presented a serious public health concern [1]. PPE includes protective gear such as face shields, masks, gowns, and gloves. Healthcare institutions are at high risk for the transmission of COVID-19, and for clinicians working in direct patient care, PPE is necessary for protection [2]. In Canada, where 115,000 cases have been reported as of July 28, 2020 [3]. Historically, PPE items were generally labelled as single-use. However, during COVID-19, countries such as Canada implemented measures to preserve the supply of PPE. This was a short-term solution to ensure that healthcare professionals remain protected, and included extending the use of PPE items such as masks and face shields [4].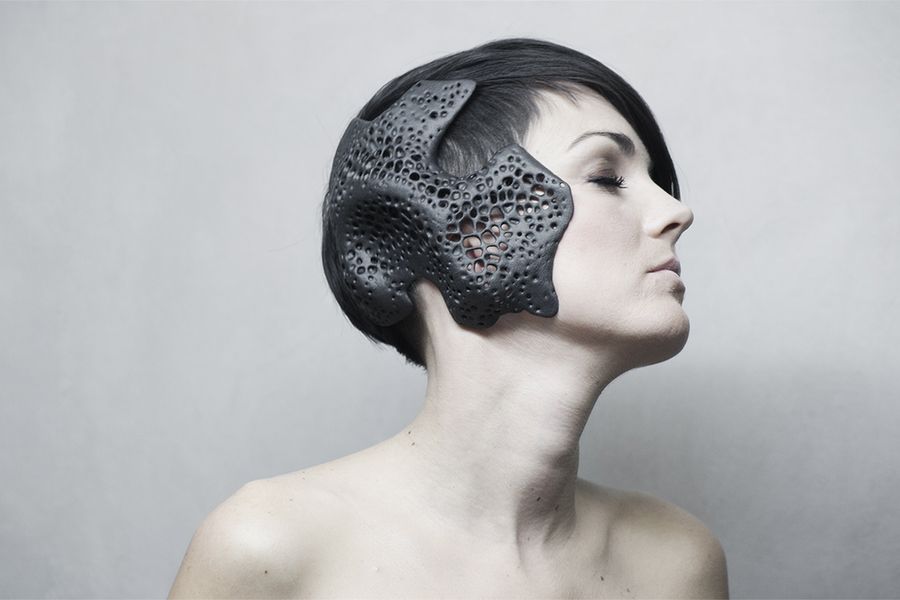 Nevertheless, the ongoing shortage of PPE continued to force frontline workers to improvise, at times even using garbage bags for protection [5].
As manufacturers struggled to keep up with the global demand for PPE [6], the role of 3D printing in augmenting PPE supply increased in popularity and has been widely encouraged by the support of the general community [5, 7, 8]. Institutions such as libraries, universities, and other sources of 3D printers were made idle by the quarantine measures as a response to the pandemic and were readily available to scale up the production of 3D printed PPE. As an integral component of PPE, face shields typically consist of a frame and a transparent plastic sheet attached together, serving as a physical barrier to large droplet transmission. Due to the simplistic, plastic design of face shield frames, 3D printing is a viable option for the production of face shields.
The advantages of 3D printed face shields are worthy of further investigation, particularly those pertaining to automation, consistency between products, and availability of open-source designs and feedback [7,8,9,10].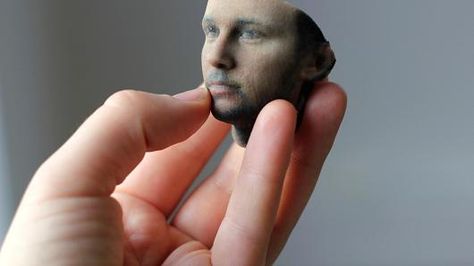 Organizations such as 3Dverkstan, Youimagine, and Prusa have made a variety of 3D PPE designs available [11,12,13]. In an effort to select the ideal protocol and design to produce face shields, it was imperative that it be cost-effective to print in terms of filament usage, require minimal set-up (i.e., no costly molds or fixtures needed), be optimized for production speed and adequate quality, and be comfortable for healthcare workers to wear for extended periods of time.
Due to the simultaneous development of various 3D printed face shield designs, models were optimized for a different printer models and required adjustment by outside developers during the production process [7]. For this reason, concepts such as stacking, a method used to increase output of face shields in a single printing event, had to be employed to improve efficiency. While this information is readily available to the public, a process of trial and error is necessary to supplement existing literature and serve the practical needs of the initiative.
This report describes the production of 3D printed face shields by a grassroots initiative in Ontario, the province in Canada with the second highest cases of COVID-19 [3], and discusses findings pertaining to the feasibility, sanitization, and stacking processes in manufacturing PPE in the form of 3D printed face shields. By disseminating our findings, we aim to eliminate avoidable costs and challenges for future similar initiatives.
Case presentation
Initiative description
Our grassroots initiative served a greater metropolitan area within Ontario, Canada, providing donations of 3D printed face shields to healthcare facilities. Community printers across the province were recruited from institutions and owner-operators and were given standardized Stereolithography (STL) files to print face shield frames. Within the team of printer operators, there was a variety in printing expertise, ranging from academics in engineering to hobbyist owner-operators. When evaluating possible models for our product, the goal was to test and select a design that could be printed by contributors regardless of skill or prior experience. Transparent plastic sheets were obtained from distributors and laser cut to specification. Prior to delivery to end-users, these components were sanitized and packaged in a laboratory setting. Throughout the course of the initiative, 25,000 face shields were delivered to over 165 nonprofit centers and healthcare facilities.
Design
In an effort to rapidly launch this project to meet the PPE demand, the initiative began by donating to a hospital-led PPE drive requesting available 3D printers in the community to print Shawn Lim 3HP v17 face shield frames (Fig. 1) [14]. This design consists of a flat visor frame that wraps around the head with three triangular shaped hooks spaced around the midpoint in front of the frame. These hooks allow for a standard 3-hole punched sheet of plastic to be clipped onto the frame to complete the face shield. Since the frame is designed to rest on the forehead and not the ears, elastics are required to keep the face shield snug to the head. The use of elastics is needed to provide tension and hold the face shield onto the forehead. Moreover, the use of elastics accommodates various head shapes and sizes. The face shield went through multiple design iteration loops until it was optimized for ease of printing and met satisfactory comfort levels for long-term use.
Fig. 1
The Shawn Lim face shield design: a computerized image adapted from the Shawn Lim STL file [14] under creative commons license CC-BY-NC-SA
Full size image
Among newly developed designs, the Swedish 3DVerkstan frame (Fig. 2) was quickly gaining popularity amongst international healthcare institutions [12], as this model was reviewed and recommended by the NIH for use in a clinical setting [16]. The 3DVerkstan design consists of a flat, tapered visor that wraps around the head with 6 rectangular hooks spaced evenly around the front and sides of the frame. These hooks allow for a standard 6-hole punched sheet of plastic to be clipped onto the frame. Unlike the Shawn Lim design which utilizes 3 slim arrow-like hooks placed at the midpoint, the 6 tapered hooks ensure more stability when adhered to a face shield. The 3DVerkstan design shifts some of the tension from the headband to the shield, placing less workload on the elastic. This design is more rigid than the Shawn Lim frame and provided increased stability when attached to a plastic face shield as it utilized 3 additional hooks. The frame is also more conducive to stacking (Fig. 3) compared to other designs due to its broader surface area (3356 mm2) and shorter height (5.12 mm), enabling multiple units to be printed on the same printer bed. With these considerations in mind, after supplying the hospital PPE drive, printing production was switched over to the 3DVerkstan design. Print settings for manufacturing 3DVerkstan faceshields are outlined in Table 1.
Table 1 3DVerkstan Print Specifications Ranges [15, 16]
Full size table
Fig. 2
The 3DVerkstan North America face shield design (a) computerized image, (b) a printed frame and (c) a labelled 8. 5 X 11 clear acetate shield with an assembled printed frame from 3Dverkstan STL file [15] under creative commons license CC-BY-SA 4.0 International
Full size image
Fig. 3
The stacked 3DVerkstan North America face shield design with 0.6 mm spacing developed by our team (a) computerized image and (b) a printed set, adapted from 3Dverkstan STL file [15] under creative commons license CC-BY-SA 4.0 International
Full size image
Stacking
While printing multiple masks simultaneously on the print bed was advantageous, stacking prints was not advised for novice 3D printing operators due to increased difficulty in maintaining consistent print quality. Generally, stacking prints requires more set-up and experimentation with printer-specific settings to mitigate the added risk of stringing, wrapping, or breakage during disentanglement of the stack.
Autodesk Fusion 360 software (Autodesk Inc., Version 2.4.2, California, U. S.) was used to import a version of the open source 3DVerkstan design and develop a 24 stack STL file with a 0.3 mm gap distance. This is because the gap distance between separate face shields for a stack is dependent on factors such as nozzle size and layer height. The gap distance on the STL file should be either equal to or a multiple of the layer height used in slicer settings for printing the stack, in order to prevent stringing and enable easy detachment [17]. Print settings for manufacturing stacked 3DVerkstan faceshields are outlined in Table 2.
Table 2 Standardized 3DVerkstan Stacking Settings [15,16,17]
Full size table
Procurement of filament and plastic sheets
The design of the face shield involved the use of only two materials: 3D printing filament and transparent plastic sheets. We prioritized minimizing costs, and emphasized ease of production over durability, as the face shields were not intended for prolonged use. We explored standard thermoplastics used for 3D printing that had been discussed by biomaterial engineers and commercial face shield developers in various 3D printing communities. The most cost-effective options for 3D printing filaments were PLA and PETG.
While PLA is marginally cheaper, PETG is more durable and amenable to heat-disinfection. PLA and PETG were observed to have similar tensile strengths of 58 MPa and 56 MPa, respectively [18]. However, PETG has a significantly greater modulus of elasticity and thermal resistance (18 GPa and 80 °C) when compared to PLA (5 GPa and 60 °C) [11].. In addition, PETG is more resistant to various environmental conditions such as sun, rain, and cold, when compared to PLA [19]. Despite these slight mechanical advantages that PETG has over PLA, it was observed that PLA and PETG were both effective options for the production of face shield frames.
The design team experimented with vinyl and acetate sheets for the shield component of the face shield. In addition to cost-effectiveness and ease of production, transparency and stability of the plastic when attached to the frame was a primary consideration. Plastic sheets were cut into 8. 5″ by 11″ rectangles and required hole-punch sized cutouts for the frame to sit in. It was found that 10 mm was the minimum sheet thickness that was firm yet pliable enough to adapt to the curved shape of the 3D printed frame. Initially, large vinyl sheets were purchased from plastic manufacturers directly, but these were not well suited for laser cutting due to the production of toxic fumes. Instead, focus shifted to more cost-effective acetate binder covering sheets that were directly sourced from supply store distributors. Ultimately these pre-cut 8.5 × 11 clear acetate sheets of 10 mm thickness were chosen as they only required hole-punching to match the 3D printed frame.
Disinfection
3D printing is intrinsically a sterile process due to the high temperatures required for production [20]. However, one of the largest challenges posed by 3D printed material designed for use in medical practice, is the re-sterilization and disinfection process required once it has been exposed to the external environment.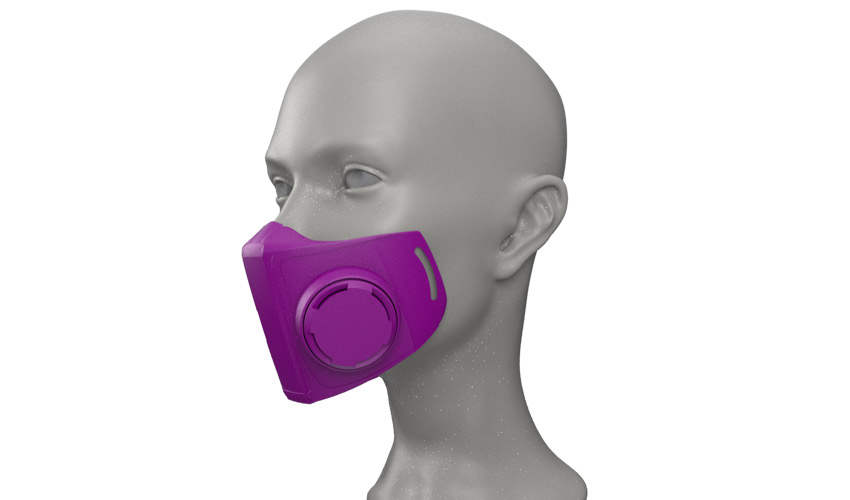 Such challenges are the result of the relatively low glass transition temperatures of the thermoplastic, eliminating numerous sterilization techniques. The glass transition temperature is the temperature at which the polymer changes from a rigid to a malleable state. This was a significant obstacle to overcome due to the nature of the 3D printed frames being printed by members of the greater community, and the number of hands it passed through during shipping and handling prior to distribution to end-users.
The use of 70% ethanol is effective in inactivating COVID-19 [21, 22]. Alcohol-based antiseptics are regularly used in healthcare settings, are easily accessible, and do not leave behind any residue. This ensures that once the frames are delivered, the facilities using these frames may continue to use their normal disinfectant wipes or alcohol-based products to disinfect after use. For these reasons, we chose to use 70% ethanol as the disinfectant of choice. The developed protocol involved completely submerging the PLA and PETG frames in 70% laboratory-grade ethanol for 10 min to ensure bacteria and viruses were eliminated during disinfection (SARS was seen to be inactivated when in contact with 70% ethanol for 1 min and COVID-19 at 5 min) [23,24,25].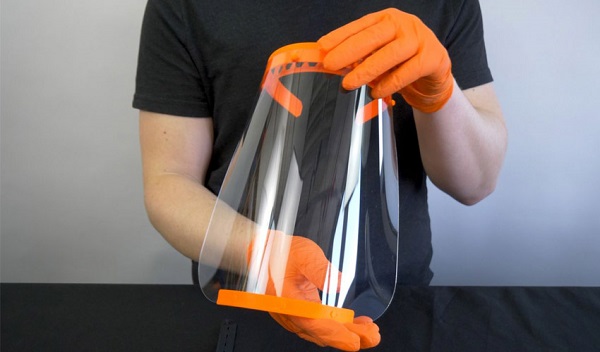 It is important to note that surface exposure time to ethanol-based products may differ depending on the product, and users should refer to protocol by the United States Environmental Protection Agency when uncertain [22]. Once the frames were placed and covered in a basin containing 70% ethanol, they were left to dry on a disinfected rack lined by diapers. These frames were then placed in a sterile bag to further dry overnight. Throughout this process, frequently changed masks and gloves were worn to avoid contamination. Once completely dry, the disinfected frames were packaged in bundles of 20 into clean resealable plastic bags for distribution.
Discussion
Regulatory barriers to face shield production
Given that Health Canada Medical Device Establishment Licence (MDEL) considerations include the processing of a licensing application, as well as in-house production of PPE, we decided to forego licensing in order to meet the direct needs of healthcare workers in a timely manner.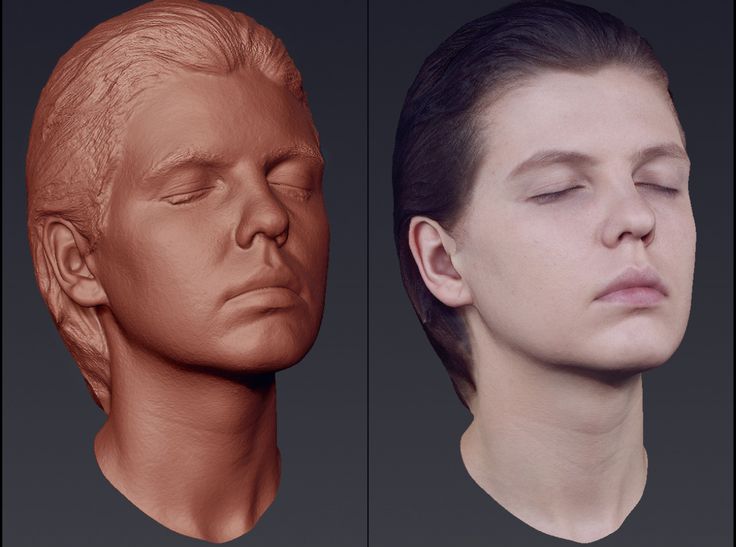 Although an MDEL was not obtained, we ensured due diligence in production, decontamination, and communication about the processes involved to ensure that the face shields were reliable and safe for use. In order to do this, the components of the face shield, the 3D printed visor and the plastic sheet, were delivered disassembled to the receiving organization, and a waiver of liability was signed by the organization receiving the donation. Disassembly minimizes further points of contact by volunteers, ensures decontamination is retained, and maximizes the number of face shields that can be transported at a time.
Quality versus production capacity
Print speed is a key variable associated with optimal face shield quality and production capacity. The 3DVerkstan design’s recommended print settings (e.g. 0% infill, 1.6 mm wall thickness) fostered the printing of face shields at stable speeds (40–60 mm/s), while printing at very high speeds to increase production (60–125 mm/s) resulted in issues such as overheating of face shields frames due to insufficient cooling.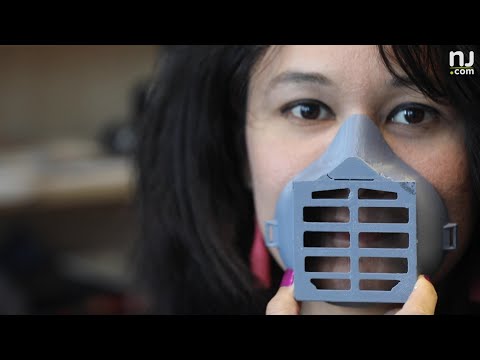 In addition, other printing errors such as wrapping, ringing, and weak layer adhesion often occurred [26, 27].
Stacking was a means of maintaining quality while increasing production speed. This method was only carried out by advanced printing operators who had the expertise to troubleshoot and conduct experimental runs until optimal print settings for their printers were identified. It was essential for stacks printed at high speeds to maintain quality without resulting in breaks during detachment.
In future endeavors, we recommend that novice printer operators maximize their printer bed by arranging at least 2 shields on the bed, and printing at comfortable speeds (40–50 mm/s) when using simple printers with small print nozzles (0.4 mm). In addition, to optimize time spent managing printing, we suggest alternate modes of production for novice printer operators, such as printing singles during the daytime and printing stacked face shield frames for overnight prints. Furthermore, the use of post-production treatment protocols, such as sanding or an acetone wash, should be performed to remove 3D printing lines that render the face shield as less visually aesthetic to ensure end-user peace of mind.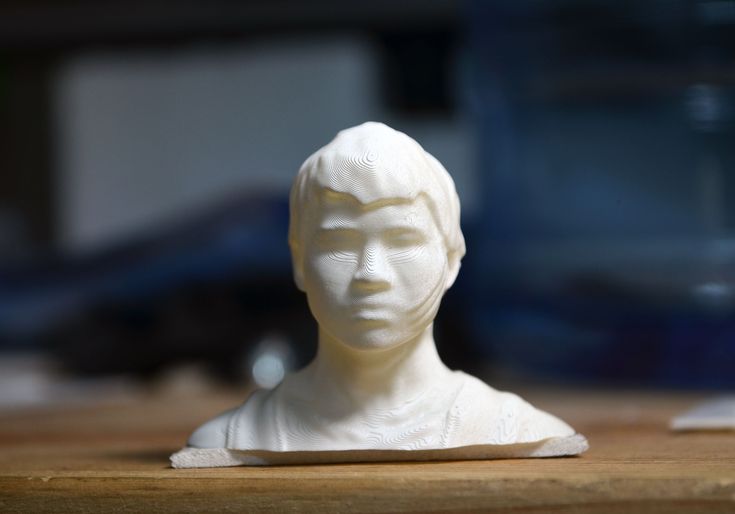
Disinfection troubleshooting
It is important to note that sterilization and disinfection are both decontamination processes, however, they execute different degrees of organismal destruction. While both are essential for proper healthcare delivery, sterilization destroys all microbial life whereas disinfection eliminates many or all pathogenic microorganisms, with the exception of bacterial spores. In this particular case, sterilization is not essential for safe and effective use of the 3D printed face shields, as per CDC guidelines [28].
Unsuccessful techniques that were performed included thermal sterilization (i.e. autoclave and dry heat), laboratory glassware washer, and EtO/H2O2 gas sterilization. Each technique presented unique challenges. As previously mentioned, PLA and PETG were chosen as the thermoplastic filaments of choice which have a glass transition temperature of approximately 60–65 °C and 80–85 °C [29], respectively. Autoclaving is one of the most rigorous and accessible sterilization techniques, requiring elevated pressure and a sustained temperature of 121 °C for a defined period of time [30]. When the 3D printed frames were exposed to the pre-set autoclave dry plastics cycle conditions, the frames warped and fused together. Furthermore, autoclaving and steam sterilization have been found to decrease the mechanical strength of such plastics [31]. The Laboratory Glassware Washer G 7883, Miele Professional was thereby trialed due to its low temperature settings and sanitization capabilities, however, the results were much the same. Finally, a hot air dryer was trialed at the recommended and verified temperature of 65 °C for 60 min to eliminate potential bacteria and viruses present on the surface. While this method was successful, disinfection was limited to the number of frames that could be disinfected at one time and by the longer exposure time [21]. Alternative sterilization methods, such as low-temperature gas sterilization using EtO or H2O2, have been validated for use on 3D printed materials [30]. However, these protocols are not cost-effective nor readily available, as their use had been reserved for re-sterilization of N95 masks used by frontline workers.
Bleach, or 10% sodium hypochlorite, is a commonly utilized disinfectant amongst similar PPE initiatives. However, a concern of using bleach is that if the protocol is not followed precisely (e.g. the frames were not thoroughly rinsed with water, the bleach solution is not diluted correctly, or the frames are submerged for an inappropriate amount of time) the solution can cause potential degradation of the material, effectively altering the integrity of the frames [32, 33]. This is in part a consequence of using Fuse Deposition Modeling, which results in a porous structure of the printed material [34, 35]. Bleach is an extremely corrosive agent that degrades even the most resistant materials (e.g. epoxy), must be remade daily, and must be disposed of carefully as it cannot be poured down the sink [33]. In addition, the use of bleach over time has the potential to cause yellowing of the plastic shield, compromising visibility. Furthermore, we discovered that using bleach incorrectly on these items may also cause skin and eye irritations for the user [32]. Based on these findings, it was necessary to find an alternative disinfection protocol that would have less variability.
Limitations of ethanol
While there are many benefits to using ethanol, there are a few shortcomings that must be taken into consideration. Ethanol is a volatile molecule that evaporates very quickly. Products must be completely submerged for the appropriate amount of time to ensure complete disinfection and should be used in a well-ventilated area. Furthermore, 100% ethanol cannot be obtained by the general public and therefore must be obtained and used in a certified facility. Finally, there are a number of thermoplastics that can degrade from prolonged exposure to various incompatible liquid solvents [34]. For this reason, it is important to select a disinfectant based on the characteristics of the selected plastic.
Conclusion
The manufacturing and optimization of 3D printed face shields involved several novel considerations. While the role of 3D printing in medicine has become increasingly recognized, this report provides novel insight of its potential capacity in public health through the mobilization of a wider range of community member contributors. The processes of stacking, the cost-benefit optimization in reducing quality in exchange for increased output, and sanitization and disinfection protocols were evaluated and tested in this initiative. It should be recognized that as the COVID-19 pandemic continues, and with future pandemics an inevitability, such community-led efforts may once again become necessary [36, 37]. For this reason, it is important that future grassroots initiatives are well-equipped to provide efficient and effective supplementation of necessary PPE. The importance of such initiatives is also highlighted by the observation that resources that have been prioritized for healthcare communities are regularly unavailable to the public, such as retail or service employees. We hope that the technical lessons learned from this initiative can inform future public health interventions that leverage 3D printing and provide insight for future community-led 3D printing initiatives.
Availability of data and materials
All data generated or analysed during this study are included in this published article.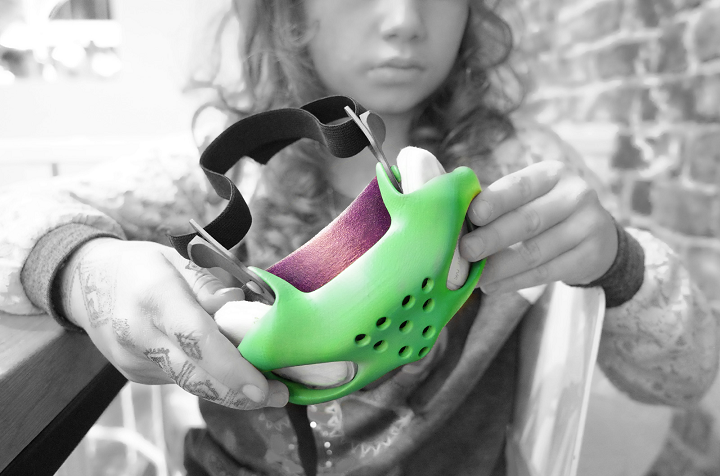
References
-
Garcia Godoy LR, Jones AE, Anderson TN, Fisher CL, Seeley KML, Beeson EA, et al. Facial protection for healthcare workers during pandemics: a scoping review. BMJ Glob Health. 2020;5:e002553. https://doi.org/10.1136/bmjgh-2020-002553.
Article
PubMed
PubMed CentralGoogle Scholar
-
Cook TM. Personal protective equipment during the coronavirus disease (COVID) 2019 pandemic – a narrative review. Anaesthesia. 2020;75:920–7. https://doi.org/10.1111/anae.15071.
CAS
Article
PubMedGoogle Scholar
-
Government of Canada. Coronavirus disease (COVID-19): Outbreak update. Canada.ca. 2020. https://www.canada.ca/en/public-health/services/diseases/2019-novel-coronavirus-infection.html. Accessed 5 Aug 2020.
Google Scholar
-
Flanagan ST, Ballard DH. 3D printed face shields: a community response to the COVID-19 global pandemic. Acad Radiol. 2020;27:905–6. https://doi.org/10.1016/j.acra.2020.04.020.
Article
PubMed
PubMed CentralGoogle Scholar
-
Sinha MS, Bourgeois FT, Sorger PK. Personal protective equipment for COVID-19: distributed fabrication and additive manufacturing. Am J Public Health. 2020;110:1162–4. https://doi.org/10.2105/AJPH.2020.305753.
Article
PubMed
PubMed CentralGoogle Scholar
-
Novak JI, Loy J. A quantitative analysis of 3D printed face shields and masks during COVID-19. Emerald Open Res. 2020;2:42. https://doi.org/10.
35241/emeraldopenres.13815.1.
Article
Google Scholar
-
Tino R, Moore R, Antoline S, Ravi P, Wake N, Ionita CN, et al. COVID-19 and the role of 3D printing in medicine. 3D Print Med. 2020;6:1–8. https://doi.org/10.1186/s41205-020-00064-7.
Article
Google Scholar
-
Shahrubudin N, Lee TC, Ramlan R. An overview on 3D printing technology: technological, materials, and applications. In: Procedia Manufacturing. Amsterdam: Elsevier B.V.; 2019. p. 1286–96.
-
Frazer JS, Shard A, Herdman J. Involvement of the open-source community in combating the worldwide COVID-19 pandemic: a review. J Med Eng Technol. 2020:1–8. https://doi.org/10.1080/03091902.2020.1757772.
-
YouMagine. YouMagine. Additive Content B.V. 2020. https://www.youmagine.com/. Accessed 17 Oct 2020.
Google Scholar
-
Prusa3D. Prusa3D — Open-Source 3D printers by Josef Prusa. Prusa Research a.s. 2020. https://www.prusa3d.com/. Accessed 17 Oct 2020.
-
Bot Camp. Easy 3D printable healthcare visors. Toronto: Bot Camp; 2020. https://botcamp.org/2020/03/22/3d-printable-healthcare-visors/. Accessed 5 Aug 2020.
-
3DVerkstan. Protective Visor — Print Guide. Stockholm: 3DVerkstan; 2019. https://3dverkstan.se/protective-visor/protective-visor-print-guide/. Accessed 6 Aug 2020.
-
Lars Brubaker. 3DVerkstan 3D printed face shield head band. Stockholm: National Institutes of Health 3D Print Exchange; 2020. https://3dprint.nih.gov/discover/3dpx-013306. Accessed 5 Aug 2020.
-
Vladimir Mariano. How to successfully stack face shields.
Desktop Makes 2020. https://www.desktopmakes.com/post/2020/04/18/how-to-successfully-stack-face-shields?fbclid=IwAR2VKNH0EJexU15lV1GXpsNqi2Rif1ZTFBOjNrmIlaSvyQYE35QxiPgDC5k. Accessed 5 Aug 2020.
Google Scholar
-
Snopczyński M, Kotliński J, Musiałek I. Testing of mechanical properties of materials used in FDM technology. Mechanik, vol. 92; 2019. p. 285–7. https://doi.org/10.17814/mechanik.2019.4.37.
Book
Google Scholar
-
Filament2Print. PETG vs PLA. Nigran: Filament2Print; 2019. https://filament2print.com/gb/blog/50_petg-vs-pla.html. Accessed 5 Aug 2020.
-
Neches RY, Flynn KJ, Zaman L, Tung E, Pudlo N. On the intrinsic sterility of 3D printing. PeerJ. 2016;2016. https://doi.org/10.7717/peerj.2661.
-
Prusa Knowledge Base. Prusa Face Shield disinfection. Prusa Research.
2020. https://help.prusa3d.com/en/article/prusa-face-shield-disinfection_125457. Accessed 6 Aug 2020.
-
United States Environmental Protection Agency (US EPA). List N: Disinfectants for Use Against SARS-CoV-2 (COVID-19). Washington: US EPA; 2020. https://www.epa.gov/pesticide-registration/list-n-disinfectants-use-against-sars-cov-2-covid-19. Accessed 6 Aug 2020.
-
Török G, Gombocz P, Bognár E, Nagy P, Dinya E, Kispélyi B, et al. Effects of disinfection and sterilization on the dimensional changes and mechanical properties of 3D printed surgical guides for implant therapy — pilot study. BMC Oral Health. 2020;20. https://doi.org/10.1186/s12903-020-1005-0.
-
Rutala WA, Weber DJ, Healthcare Infection Control Practices Advisory Committee. Guideline for disinfection and sterilization in healthcare, 2008 facilities, 2008. 2019.
Google Scholar
-
Alastair Jennings. Troubleshooting Guide to Common 3D Printing Problems. All3DP. 2020. https://all3dp.com/1/common-3d-printing-problems-troubleshooting-3d-printer-issues/. Accessed 5 Aug 2020.
-
Hironori Kondo. 3D Printing: Ghosting / Ringing — 3 Easy Fixes. All3DP. 2019. https://all3dp.com/2/3d-printer-ringing-easy-fixes/. Accessed 5 Aug 2020.
Google Scholar
-
Centers for Disease Control and Prevention (CDC). A Rational Approach to Disinfection & Sterilization. Washington: CDC; 2016. https://www.cdc.gov/infectioncontrol/guidelines/disinfection/rational-approach.
html?fbclid=IwAR1XMSVlLGb2byZISe29UQgBEDFm7qD75vMrBoctqmb5IqQkCsS0v5e_Wes. Accessed 7 Aug 2020.
-
Park JY, Hwang SY, Yoon WJ, Yoo ES, Im SS. Compatibility and physical properties of poly (lactic acid)/poly (ethylene terephthalate glycol) blends. Macromol Res. 2012;20:1300–6. https://doi.org/10.1007/s13233-012-0203-2.
CAS
ArticleGoogle Scholar
-
Oth O, Dauchot C, Orellana M, Glineur R. How to sterilize 3D printed objects for surgical use? An evaluation of the volumetric deformation of 3D-printed Genioplasty guide in PLA and PETG after sterilization by low-temperature hydrogen peroxide gas plasma. Open Dent J. 2019;13:410–7.
CAS
ArticleGoogle Scholar
-
Chen JV, Tanaka KS, Dang ABC, Dang A. Identifying a commercially-available 3D printing process that minimizes model distortion after annealing and autoclaving and the effect of steam sterilization on mechanical strength.
3D Print Med. 2020;6(9):10.
-
World Health Organization. Infection prevention and control of epidemic-and pandemic-prone acute respiratory infections in health care. Geneva: WHO Press 2014. www.who.int/about/licensing/copyright_form/en/index.html. Accessed 6 Aug 2020.
-
Ontario Agency for Health Protection and Promotion (Public Health Ontario). At a glance, Disinfectant tables. In: Guide to infection prevention and control in personal service settings. 3rd ed. Toronto: Queen’s Printer for Ontario; 2018.
Google Scholar
-
Erokhin KS, Gordeev EG, Ananikov VP. Revealing interactions of layered polymeric materials at solid-liquid interface for building solvent compatibility charts for 3D printing applications. Sci Rep. 2019;9:20177. https://doi.org/10.1038/s41598-019-56350-w.
CAS
Article
PubMed
PubMed CentralGoogle Scholar
-
Barrett K, Bscn YN, Mschq TI, Khan YA, Mac Phd S, Naimark D, et al. A model to estimate demand for personal protective equipment for Ontario acute care hospitals during the COVID-19 pandemic Running title: Estimated demand for PPE in acute care. medRxiv. 2020;:2020.04.29.20085142. https://doi.org/10.1101/2020.04.29.20085142.
-
Rowan NJ, Laffey JG. Unlocking the surge in demand for personal and protective equipment (PPE) and improvised face coverings arising from coronavirus disease (COVID-19) pandemic – implications for efficacy, re-use and sustainable waste management.
Sci Total Environ. 2021;752:142259. https://doi.org/10.1016/j.scitotenv.2020.142259.
CAS
Article
PubMedGoogle Scholar
-
Bot Camp. Advanced 3D print settings. Toronto: Bot Camp; 2020. https://botcamp.org/2020/04/11/advanced-3d-print-settings/. Accessed 5 Aug 2020.
Download references
Acknowledgements
We acknowledge the contributions of the professional and undergraduate students from McMaster University and the University of Toronto who belong to the 3DPPE GTHA core team, in alphabetical order:
Hassaan Abdel-Khalik
Junaid Ahmad
Yazad Bhatena
Arjan Dhoot
Sophie Emerson
Lanujan Kaneswaran
Maroof Khalid
Maham Khalid
Carlos Khalil
John Kim
Alysha Laviolette
Lucia Lee
David Lee
Maria Leis
Tiange Li
Shah Malik
Chris McChesney
Miranda McDermott
Sagar Patel
Danny Quan
Mahsa Rad
Fayyaz Rizvi
Sinthu Senthillmohan
Samveg Shah
Harris Sheikh
Max Solish
Gaurav Talwar
Jessica Trac
Kartikay Tyagi
Nina Vujovic
Danning Zhang
Michael Zon
Most importantly, the authors wish to extend our endless gratitude to the front-line healthcare workers who are risking their lives to protect citizens in the fight against COVID-19.
Funding
Funding sources had no role in this publication.
Author information
Authors and Affiliations
-
Leslie Dan Faculty of Pharmacy, University of Toronto, Toronto, Ontario, Canada
Peter Chengming Zhang
-
Rotman School of Management, University of Toronto, Toronto, Ontario, Canada
Peter Chengming Zhang
-
Faculty of Medicine, University of Toronto, Toronto, Ontario, Canada
Yousuf Ahmed, Isra M. Hussein, Edem Afenu & Anser Daud
-
Institute of Health Policy, Management, and Evaluation, University of Toronto, Toronto, Ontario, Canada
Isra M. Hussein
-
Institute of Biomedical Engineering, University of Toronto, Toronto, Ontario, Canada
Edem Afenu
-
Department of Laboratory Medicine and Pathobiology, Faculty of Medicine, University of Toronto, Toronto, Ontario, Canada
Manon Feasson
Authors
- Peter Chengming Zhang
View author publications
You can also search for this author in
PubMed Google Scholar - Yousuf Ahmed
View author publications
You can also search for this author in
PubMed Google Scholar - Isra M.
Hussein
View author publications
You can also search for this author in
PubMed Google Scholar - Edem Afenu
View author publications
You can also search for this author in
PubMed Google Scholar - Manon Feasson
View author publications
You can also search for this author in
PubMed Google Scholar - Anser Daud
View author publications
You can also search for this author in
PubMed Google Scholar
Contributions
PCZ YA IMH AD Conceptualization, data curation, formal analysis, project administration, resources, supervision. PCZ YA IMH EA MF AD investigation, methodology, writing, reviewing/editing, final approval of the version to be published. All authors agreed to be accountable for all aspects of the work
Corresponding author
Correspondence to
Anser Daud.
Ethics declarations
Ethics approval and consent to participate
N/A
Consent for publication
All authors have approved the manuscript and agree with its submission to BMC 3D printing in Medicine.
Competing interests
None.
Additional information
Publisher’s Note
Springer Nature remains neutral with regard to jurisdictional claims in published maps and institutional affiliations.
Appendix
Appendix
Acronyms
Coronavirus Disease 2019 (COVID-19).
Computer Aided Design (CAD).
Ethylene Oxide (EtO).
Hydrogen Peroxide (H2O2).
National Institutes of Health (NIH).
Personal Protective Equipment (PPE).
Polyethylene terephthalate glycol (PETG).
Polylactic acid (PLA).
Shawn Lim 3HP V17 design (Shawn Lim).
Stereolithography (STL).
Three-dimensional Printing (3D Printing).
Print Settings.
Shawn Lim 3HP v17 frames.
Printing a single Shawn Lim frame can take between 15 and 30 min depending on the type of printer, printer settings, and print quality desired. Printers were advised to maximize printer bed capacity by printing 2 frames simultaneously.
Suggested print settings for the Shawn Lim frame [14, 38]:
-
100% infill
-
No use of print supports, rafts, or brims
-
0.3 mm layer height (for faster printing)
-
100 mm/sec or higher print speed depending on printer
-
Initial layer with a slower speed of approximately 30 mm/s
-
Wall thickness 1.6 mm
-
Wall line count 4
Advanced print settings were used to guide experienced printers as well as printers who were willing to print stacks overnight. Examples of other advanced print settings that were used by seasoned printers were maximizing printer bed area by printing more face shields on the same bed, printing at maximum speed, and stacking.
3DVerkstan frames.
Printing a single 3DVerkstan frame face shield can also take between 15 and 30 min depending on the type of printer, printer settings, and print quality desired. Printers were advised to maximize printer bed capacity by printing 2 frames on the same printer bed.
Suggested print settings for the 3DVerkstan frame:
-
0% infill
-
No use of print supports, rafts, or brims
-
Initial layer with a slower speed of approximately 20 mm/s
-
Wall thickness 1.6 mm
-
Wall line count 4
To account for variations in the types of printers used with respect to their specifications, print settings were suggested in ranges.
Rights and permissions
Open Access This article is licensed under a Creative Commons Attribution 4.0 International License, which permits use, sharing, adaptation, distribution and reproduction in any medium or format, as long as you give appropriate credit to the original author(s) and the source, provide a link to the Creative Commons licence, and indicate if changes were made. The images or other third party material in this article are included in the article’s Creative Commons licence, unless indicated otherwise in a credit line to the material. If material is not included in the article’s Creative Commons licence and your intended use is not permitted by statutory regulation or exceeds the permitted use, you will need to obtain permission directly from the copyright holder. To view a copy of this licence, visit http://creativecommons.org/licenses/by/4.0/. The Creative Commons Public Domain Dedication waiver (http://creativecommons.org/publicdomain/zero/1.0/) applies to the data made available in this article, unless otherwise stated in a credit line to the data.
Reprints and Permissions
About this article
A 3D Printed Selfie – What It Is and How to Make One
3D Insider is ad supported and earns money from clicks, commissions from sales, and other ways.
Turning your phone camera to your face and taking a photo – a selfie – is so 2010. It’s now 2021, so it’s time to add a new dimension to your selfie game.
There are now various online services that can make a “3D printed selfie” for you. What exactly is a 3D printed selfie and how is it made? Can you make one yourself if you own a 3D printer?
What is a 3D printed selfie?
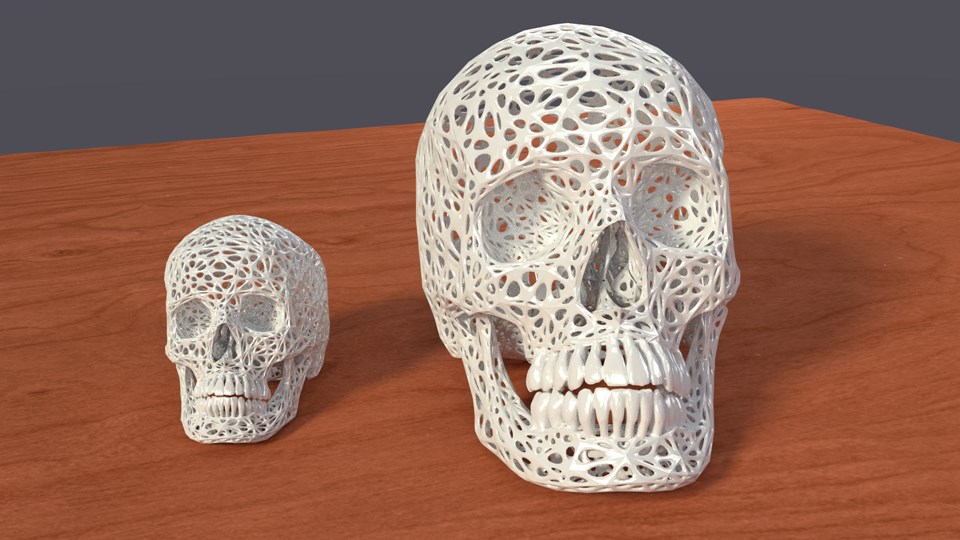
In a nutshell, a 3D printed selfie is simply a miniature 3D model of yourself. It can be a reproduction of just your face or an entire body model. Of course, you can also make a 3D model of another person – the word “selfie” is only being used in this context to make the concept easier to market.
3D printed selfies are products of the combined technologies of 3D scanning and 3D printing. They have become quite popular in the last couple of years as personalized gifts, mementos, or souvenirs for guests at events.
Making your own 3D printed selfie
If you already own and use a 3D printer, then you have almost all the hardware you will need to come up with a 3D printed selfie. The only question now is how to transfer a human face into a digital 3D modeling platform.
Scanning your face
The first step in making a 3D printed selfie is making a 3D scan of your face or your subject. There are two ways to do this – using a face scanning app on a smartphone, or by an actual commercial 3D face scanner.
If you’re just doing this for fun, then downloading a free face scanning app will be a lot more practical. The most common recommendations are Bellus3D Face App for iOS and Sony 3D Creator for Android. If you have an iPhone with a LiDAR sensor, you can also consider the much more powerful Scandy Pro 3D Scanner.
Companies that offer 3D printed selfies as a product will likely use standalone 3D scanners. Compact 3D scanners can be used for facial scanning. Full-body 3D scanning, on the other hand, is typically done using an array of sensors that scan different parts of the human body simultaneously.
If this is your first time doing a face scan, you will likely need to experiment with your app’s settings to get a good result. You will want to make sure that the 3D model is watertight, as it cannot be 3D printed otherwise. Set the resolution of the 3D model to the highest possible value. When it comes to face scans, you will want the model to be as detailed as possible.
Once the results look good, export the file as an STL file. You will then have to open this using a slicer software.
Preparation for 3D printing
With your face now fully modeled in 3D, you will then need to prepare the file for 3D printing. This is done using slicer software. There are lots of equally good software options out there. Good recommendations include Simplify 3D and Ultimaker Cura. Prusa Slicer is also worth considering if you’re looking for a slicer that is free and open-source.
If you have exported your model as an STL file, it should be immediately compatible with your slier. Your model should already be watertight at this stage. If not, you can fix this easily in the slicer.
You will then want to scale down the model to fit your 3D printer and to change its orientation to reduce the number of supports. The best way to do this is to orient the model so that the face of the model is facing away from the build plate. This means that the supports will be attached to the back of the head, which is much less visible.
You should be fine with the default settings for infill, layer thickness, and wall thickness. If you’re making a “miniature” figure, then you can go ahead and set 100% infill.
If you have done a final inspection, then save and export the sliced model to an SD card or directly to your printer via wired or wireless connection.
3D printing and finishing
Before getting started with the actual 3D printing, make sure to do the usual maintenance work first. The most important things to do are to level the print bed, make sure that the nozzle is clean, and use filament that has already been dehydrated. 3D printed selfies are very detailed and have little room for error.
A 3D printed selfie can take between 5 to 12 hours to print depending on the size and level of detail. Most people use PLA for 3D printed selfies as it is much easier to work with and can be printed at higher speeds.
After 3D printing, you have the option of sanding, polishing, or painting the 3D printed selfie as you see fit. The amount of work that will go into post-processing will largely depend on the size of the 3D printed selfie and the level of detail you’re going for.
3D printed selfie services
Do you want to have a 3D printed selfie but can’t be bothered to make one yourself? 3D printed selfies are so popular nowadays that several companies offer them as a service. You can either send in a 2D photo of your face for digital reconstruction or have your body 3D scanned using one of their professional full-body scanners.
Shapify is one of the more popular companies in this market. The approach of Shapify is multi-pronged. Enterprise customers can purchase the Shapify Artec booth – a full-body 3D scanning booth that can scan a person in 12 seconds and produce a detailed 3D model right after. Shapify also sells a handheld version of this 3D scanner, called the Eva.
Shapify also offers the option of sending in your own 3D scan so they can do the printing for you. They have a free software download on their website. The only caveat is that you will need a Microsoft Kinect camera to use the software.
My 3D Worlds further simplifies the process by only requiring customers to send in a 2D photo of any person they want to be modeled. Using the picture as a reference, the company constructs digital models which then have to be approved by the customer before printing.
Although this business model adds a lot of work for the service provider, it allows My 3D Worlds to cast a larger net over their potential market. After all, convenience is an essential factor for customers nowadays.
Few other businesses are offering similar services such as Holodeck 3D Studios, Reconstruct Me, and Twindom. Again, the services these companies offer can range from on-site full-body 3D scanning to 3D reconstruction from standard 2D photos.
Most 3D printed selfie services that can produce an output within a few minutes do so by using gypsum as the base material for 3D printing. Using binder jetting technology, a full-color gypsum reproduction can be made in around 5 to 10 minutes. The biggest downside of gypsum is that it’s a fairly fragile material – think of it like a porcelain figurine but still much more brittle and prone to cracking.
Final thoughts
It’s easy to see the appeal of a 3D printed selfie, as it’s essentially a miniature figure of yourself. 3D printed selfies make excellent keepsakes and will certainly catch the attention of people in any event.
If you’re curious about 3D printed selfies and have a 3D printer at home, then you can take a stab at making your own. The great thing about modern 3D scanning is that you can do it using just your phone. Professional 3D scanning equipment, on the other hand, is so much more precise and faster to use.
3D printed selfies are huge businesses now. Try and get in touch with a company that’s near you to see what they can come up with.
Warning; 3D printers should never be left unattended. They can pose a firesafety hazard.
3D Printing of Medical Devices, Accessories, Components, and Parts During the COVID-19 Pandemic
The FDA continues to take creative and flexible approaches to address access to critical medical products in response to COVID-19. During the COVID-19 pandemic, the need for certain medical devices, including personal protective equipment (PPE), may outpace the supply available to health care organizations because of the high demand and overall interruptions to the global supply chain. We recognize that the public may seek to use 3D printing to assist in meeting demand for certain products during the COVID-19 pandemic. As part of our effort to protect the public to the extent possible, we are including answers to frequently asked questions for entities who 3D print devices, accessories, components, and/or parts during the COVID-19 emergency.
Q. What are the FDA’s general recommendations for 3D printing medical devices?
A. The FDA has previously issued guidance on the Technical Considerations for Additive Manufactured Medical Devices. This guidance outlines the FDA’s recommendations for 3D-printed devices from the device stage to process validation and acceptance activities of finished devices.
Q. Can 3D printing be used to make gowns, masks, respirators, and other types of personal protective equipment (PPE)?
A. PPE includes protective clothing, gowns, gloves, face shields, goggles, face masks, and respirators or other equipment designed to protect the wearer from injury or the spread of infection or illness. While it is possible to use 3D printing to make certain PPE, there are technical challenges that have to be overcome to be effective enough. For example, 3D-printed PPE may provide a physical barrier, but 3D-printed PPE are unlikely to provide the same fluid barrier and air filtration protection as FDA-cleared surgical masks and N95 respirators.
Q. Can I use PPE made by 3D printing?
A. 3D-printed PPE can be used to provide a physical barrier to the environment. However, 3D-printed PPE are unlikely to provide the same fluid barrier and air filtration protection as FDA-cleared surgical masks and N95 respirators.
Q. Will 3D-printed masks provide the same fluid barrier protection and air filtration as FDA-cleared surgical masks and N95 respirators?
A. 3D-printed masks may look like conventional PPE. However, they may not provide the same level of barrier protection, fluid resistance, filtration, and infection control.
Q. What should health care providers do if using a 3D-printed mask?
A. Health care providers should:
- Check the 3D-printed mask’s seal for leaks.
- Confirm that they can breathe through any makeshift filter materials.
- Exercise caution in surgical environments where the need for liquid barrier protection and flammability is a concern.
- Recognize that the mask may not provide air filtration enough to prevent transmission of infectious agents.
- Safely dispose of infectious materials and disinfect any part they intend to reuse.
Q. Can accessories, components, or parts for medical devices be 3D printed?
A. Entities should use original parts or those with the same specifications, dimensions, and performance, if available. While it is possible to use 3D printing to print certain accessories, components, and parts, some complex products (e.g., working pumps, electronics) are not easily 3D printed. It may help to use plans from original parts when available and verify that any 3D-printed products fit and work properly before they are used in a clinical setting. Entities engaged in 3D printing are encouraged to work with relevant medical device manufacturers.
Q. Can entire medical devices be 3D printed?
A. While the FDA understands that 3D printing may occur to provide wider availability of devices during the COVID-19 public health emergency, some devices are more amenable to 3D printing than others. The FDA is willing to discuss these and other issues with manufacturers and facilities. Entities should email [email protected] for more information.
Additional Resources
The FDA has included external websites from organizations that are being used to facilitate regulatory and basic science innovation with 3D printing technologies to respond to COVID-19:
- Coronavirus Disease (COVID-19)
- America Makes (the National Additive Manufacturing Innovation Institute)
- Department of Veterans Affairs Innovation Ecosystem
- National Institutes of Health 3D Print Exchange
- Medical Glove Conservation Strategies — Letter to Health Care Providers
Contact Information
If you have questions about 3D printing to meet product demand during the COVID-19 emergency, please email COVIDManufacturing@fda. hhs.gov. For general questions, contact the Division of Industry and Consumer Education (DICE) or email [email protected].
3D-printed face mask
As the COVID-19 pandemic increased demand for PPE in early 2020, Rowan University faculty and students responded to a hospital’s request for help by designing a reusable face mask that could be produced by anyone with a 3D printer. The project met immediate needs with hundreds of masks printed by volunteers. By late spring, the success of the project led to a collaboration to refine the design and professionally produce thousands.
A global effort
Rowan engineering and medical students developed a prototype for a durable, lightweight, reusable face mask. Further refined after feedback from users around the world, the designs shared here are provided “as-is.” It is not a replacement for N95 masks.
Developed in collaboration with medical professionals, the mask may serve in clinical and field use. If printed, used and maintained correctly, the mask provides a mechanical barrier.
Ease of assembly and use
The 3D-printed design contains two components: a contoured body and a filter housing. No special tools are needed for assembly. The replaceable nonwoven filter materials recommended for the filter housing are widely available. Users will supply and install the elastic or cord.
The mask can be printed in three sizes, all with the same size filter housing. The contoured mask may be more closely molded to the user’s face by submerging the edges in hot water and pressing it to reform the shape against the face.
Downloadable resources
Assembly, use and disinfection instructions (PDF)
3D fabrication instructions (PDF)
NEW — V4 Masks and Filter — Greatly improved breathability, larger strap holes, and nose notch for those who wear glasses.
The following STL files must be downloaded into 3D printing software:
- Small adult mask — small_rowan3dprintedmask_v4.
stl (2.6MB)
- Medium adult mask — medium_rowan3dprintedmask_v4.stl (2.6MB)
- Large adult mask — large_rowan3dprintedmask_v4.stl (2.6MB)
- Filter — filter_rowan3dprintedmask_v4.stl (572KB)
Helpful information about printing the Rowan face mask
Questions or feedback?
Please visit our survey site: go.rowan.edu/3Dprintedmasksurvey
Email us at [email protected]
Disclaimer and License Information
(Full information provided on downloadable PDFs)
Disclaimer
The mask information is provided as research information only and has not been tested for commercial use. The design and masks made from the design have NOT been tested or approved pursuant to FDA, OSHA, or NIOSH standards. The mask Information is experimental in nature and the safety or efficacy for use in humans has not been proven or tested. Users should make every effort to use an available N95 mask if feasible.
This design is for an adult mask.
License
Information is provided with permission for the recipient to freely use, copy and modify without restriction in accordance with the Creative Commons License.
Reusable 3D-Printed Adult Face Mask: (Easy-to-print, filter required) by lafactoria3dis licensed under the Creative Commons-Attribution license. By downloading this item, you agree to abide by the license: Creative Commons – Attribution – Non-Commercial – No Derivatives
Mass production: Rowan’s reusable face mask
The Rowan University and its private industry partners are also producing 50,000 reusable face masks for distribution. Based on Rowan’s 3D-printed version, the masks are lightweight, durable and made in New Jersey.
Rowan will coordinate with regional emergency management agencies to distribute masks to area hospitals and first responders. The University also will distribute the masks to its two medical schools, Rowan Medicine clinical practices, and affiliated hospitals, as well as its research labs and students.
The mask body is made from Santoprene TPV, an American-made, high-performance plastic donated by ExxonMobil. Tri-Tech Tool & Design (South Bound Brook, N.J.) donated the steel injection mold to make the mask bodies, as well as the engineering expertise and labor needed to convert the 3D-printed mask into an injection molded design. Precision Laser Technology (Rochester, N.Y.) donated laser engraving for the mask face.
Rowan University Foundation provided additional funding to complete the project, including costs for the melt-blown polypropylene filter material and elastic bands. Abilities Solutions (Westville, N.J.) and its neurodiverse workforce assembled, packaged and warehoused the 50,000 masks at cost.
Provided fully assembled and ready to use, the mask provides a mechanical barrier. It is not a replacement for N95 masks.
To reuse the mask, users can disinfect the reusable parts and replace the filter material as necessary with new, nonwoven material such as an allergy reduction filter or coffee filter sandwiched between fabric layers. Avoid using HEPA filters used for furnaces or HVAC equipment, vacuums, etc; they may contain fiberglass, which can be an inhalation hazard.
Global feedback on Rowan’s 3D-printed design
Users from at least 144 countries around the world visited Rowan’s 3D-printed face mask page and downloaded the designs about 50,000 times.
print your photos in 3D! — qbed
| Detailed instructions for 3D printing of lithophanes |
|---|
3D printed lithophane from kraftly.com
Modern 3D printers allow you to create many original and unique things, and one of them is 3D photo-lithophanes, which are gaining more and more popularity as a customized gift for loved ones or just an original product for sale. Let’s take a look at what linophane is and how to print it.
Article content:
What is lithophane?
Designing a lithophane
Selecting a photo
Converting a photo into a 3D model
Creating and printing a 3D model of a lithophane in Photoshop
How to slice a lithophane?
Seal of lithophane
What is lithophane?
Classic lithophane is a three-dimensional image on thin translucent porcelain that can only be seen when illuminated from behind by a bright light source (such as the sun or an ordinary light bulb). The image will appear in gray tones. Traditionally, lithophanes were created in several stages: first, the image was cut out of wax, then, based on the wax model, a mold was created from plaster, into which porcelain was cast, after which the image was fired.
German lithophane of the 19th century, on the left — without illumination, on the right — with illumination. Photo — Diego Verger
The first lithophanes appeared almost simultaneously in several cities of Europe — France, Germany, Prussia and England — at the end of 1820s and their three-dimensionality was strikingly different from the two-dimensional engravings popular at that time and daguerreotypes . The fact is that the quality and quantity of light interacting with lithophane significantly changes the characteristics of the image itself — such dynamism arouses great interest in the viewer. For example, lithophane inserts in windows change their appearance throughout the day depending on the quality and intensity of the sun’s rays.
Modern 3D printers allow you to print lithophane from any high contrast photo. How? Varying the thickness of different sections of the 3D model to render different shades of gray when the lithophane is backlit: thin sections let in more light and look brighter, while dense parts of the print let in little light and create dark details in the image. Don’t panic, you don’t have to manually calculate the thickness of different sections of the digital model — there are many programs that create 3D models for lithophanes automatically and for free! Let’s get down to business!
Back to Contents
Designing the Litophane
First we need to create a digital model of the lithophane.
Choosing a photo
The first step to a great printout is choosing a suitable photo , because not all images will look good in the form of a lithophane.
-
Firstly, the finished lithophane will be displayed in grayscale, so images where color plays an important role or where there is a lot of color detail will not work. You can try to convert the photo to b / w in Photoshop or any other program to make sure that you like the picture even if there are no colors.
-
Secondly, it is better to give preference to contrasting photos — so the printed linofan will look more interesting (unlike the image, where adjacent details will merge due to lack of contrast). Again, you can add contrast to the selected photo in Photoshop or any other program.
An example of a low-contrast image, not quite suitable for lithophane printing. Photo — Christina Ryumina
-
Thirdly, avoid photos consisting only of small details , it can be difficult for the printer to print them.
For lithophanes, images with large contrasting details, such as portraits, are more suitable. Images with a single-color background without details are also good, for example, portraits against a backdrop or against a clear sky. You can clean up the background or create a color fill instead of an existing background in Photoshop or any other program.
Contrast photo on a plain background is ideal for printing lithophane. You can further clean up the background and add photo contrast in any post-processing program. Photo — Christina Ryumina
An example photo with lots of detail is not the best choice for creating a lithophane. Photo — Christina Ryumina
Of course, you don’t have to follow these tips. If you print on a high-quality printer with high resolution, then you can handle any details! For example, SLA printers allow you to print smaller details than their FDM counterparts (read more about 3D printing methods here), so a photo for printing on an SLA printer may contain small elements.
Convert photo to 3D model
0011
-
You can convert photo with free online Image to Litophane converter.
-
Models for lithophanes can be created in Photoshop CC by downloading a special Operation (Action) from the official website (read detailed instructions below), or in Blender: these programs have more options to edit the model. It is worth considering that a subscription to Photoshop CC is paid.
-
Cura software (version 13.11 and higher) from Ultimaker will also work. The program is easy to use and allows you to smooth the model, but it does not have the ability to edit the image and create a frame around it.
-
You can use the Customizable Lithopane from printer manufacturer MakerBot on Thingeverse. Here you can add a hole in the frame of the lithophane so you can hang your masterpiece, but in this application your photo resolution will be compressed to 100×100 pixels.
Another disadvantage: the application can be quite slow, because the Thingeverse website Customizer creates a model and STL file instead of your computer.
-
There is also a free 2D to STL converter for Windows. There are options for smoothing the model, but no way to edit the image.
-
You can create a model for lithophane in a paid Photo to Stereolithographic file converter. This program allows you to create lithophanes on spheres, cubes and other shapes, but the interface here is not the most understandable.
-
There is a nice free Portuguese converter where the language can be changed to English after installation by going to the Iniciar menu, then Idioma and finally selecting English. Here is a link to download the program. In this converter, you can create a frame for the image, edit it before creating a 3D model, and also enlarge / reduce the image. The converter generates models quite quickly, so you can experiment with 3D model settings until you are completely satisfied with the result.
The list of programs, of course, is not exhaustive. You can use any converters of 2D files to 3D models that support export to STL. In this article, we will be using Photoshop CC to create a 3D model from a photo.
Create and print a 3D model of Lithophane in Photoshop
Attention! The operation only works if the interface language in your Photoshop CC is English. You can change the language by going to menu Photoshop CC → Preferences → Interface.
To add an action in Photoshop, go to the program, go to the top menu in Window → Actions or click the icon Play in the side menu (see screenshot below).
Going into the Actions panel in Photoshop
Opening the operations panel, click on the menu icon (see screenshot below) and select the command «Load Actions. ..» . We go to the location where your downloaded Lithophane folder and the operation «Make Lithophane.atn» are located and select it. The operation is now available in your Photoshop.
Loading the operation «Make Lithophane.atn»
Operation «Make Lithophane.atn» is ready to go
Open the image you are about to print. You can convert it to black and white, add contrast and make any changes, then print the visible layers into one by pressing Ctrl + Shift + Alt + E (English), or simply merge the layers through the menu Layers (in any case , you will be prompted to merge layers when starting the operation). In the layers panel (marked in blue in the screenshot below), select the layer with the final version of your image and name it Background (or select the Background itself directly if you haven’t changed anything). Then open the «Make Lithophane» operation folder, select «Make 100mm x 6.25mm Lithophane» (marked in red in the screenshot), press Play (marked in green in the screenshot). The operation automatically converts the 2D image into a 3D printable object: Photoshop converts the image to Grayscale, inverts the tones, creates a 3D depth map, as well as a frame and a flat surface on the back of the image.
Starting the operation of creating a digital model of lithophane
Litophane in Photoshop CC
To print a 3D object, click on the top menu 3D → 3D Print (marked in red in the screenshot below) or click on the print icon (marked in pink). Next, you will see the 3D printing settings panel (see screenshot below). Select a printer (or specify Printer: STL File if you want to export the model as STL), set Printer Units , Detail Level . Determine the size of the model by setting the X / Y / Z values. Option Scale to Print Volume will create the largest printout that will fit in your printer’s camera.
Click on the icon marked in green in the screenshot below to have Photoshop prepare your model for printing. Photoshop will analyze the object and show you a print preview with supports in a new window (supports are turned on and off by ticking Scaffolding ). From the same window, we can print or export the model.
Preparing the model for printing/exporting
Model
print/export window
Do not forget that the size and thickness of the lithophane, as well as the amount of detail in the photo and model, affect the printing time. Depending on these settings, it may take 30 minutes or 5 hours to print.
How to slice lithophane?
The slicer will help convert our model into a printer-friendly G-code (read more here). To open a 3D model in a slicer, you need to export it as a STL file. To do this, in the Photoshop 3D printing settings panel, select Printer: STL File , export the model as described above, and open it in your slicer to set up the location of the model on the platform and set other parameters. You can also export photos to STL from any of the other converters mentioned above and then open the file in a slicer.
To achieve optimal printing results, it is recommended to slice the lithophanes as follows:
-
Set straight infill to 100% at an angle of 30-35°. 100% infill will provide the best quality lithophane, as there will be no honeycomb inside the layers, which will spoil the tones in the printout.
-
Set the minimum layer height that your printer supports.
This way you will ensure high resolution details and the maximum number of shades of gray in your lithophane.
-
Print as slowly as possible. Speaking of FDM, slow printing will help you avoid retraction problems, because most of the print is created with little extrusion, which can provoke a huge amount of retraction. To prevent your printer from smearing your printouts with unwanted material smudges and your extruder from clogging due to fast retractions, it is best to print as slowly as possible.
-
Select the optimal lithophane slicing parameters available in your slicer. Different slicers provide different options. Choose the slicer you like, however, be aware that some slicers take longer to layer the model than others, for example, Cura usually slices faster than Slic3r. Experiment!
-
Do not scale the model in the slicer. The model should be scaled in Photoshop or other converters mentioned so as not to lose resolution when printing.
Litophane Printing
Now it’s to load our STL file into the printer via USB or SD card (or whatever methods are available on your printer). The faster the connection, the better, since lithophanes can contain a lot of detail, and some types of connection may not be fast enough to send the entire G-code to the printer, and the printer will begin to slow down and smear material on the printout.
Make sure your printer platform is in good condition to avoid warping your printout. Be sure to check the printer calibration and set the correct print temperature to match the melting temperature of the selected material.
It is best to use white material for printing, as colored materials will not give the same strong lithophane effect. Printing lithophane is best with ABS or HIPS, avoiding PLA : If you are going to put lithophane on a window, then PLA can melt in the sun.
Soft light is ideal for illuminating lithophane. Lithophanes make excellent lamps and even lanterns.
Lithophane lamp. Original photo here
Lantern-lithophane. Original photo here
Back to Contents
Back to Contents
Gallery
What 3D Printing Can Do
WATCH
Glossary
3D Modeling and Additive Manufacturing Terms
WATCH
DIYK. 10 Comments
0 Likes
the world’s first hand and face transplant
Analytics and business
Implementation stories
Medicine
Experts recommend
Author: Kirill Romanov
Author: Kirill Romanov
Trends 2021: 1. New opportunities for 3D printing in medicine | 2. Digital communications and remote interaction | 3. 3D printing combined with virtual and augmented reality | 4. The growing role of quality management systems | 5. Further introduction of 3D printers in the work of clinics | 6. Increasing the availability of 3D printers | How 3D technology helped bring about the world’s first successful hand and face transplant
In 2020, due to the coronavirus pandemic, many industries around the world have been hit by a crisis never seen before. Most of them managed to endure this test, especially the healthcare sector, which had to face an incredible workload, as well as a shortage of materials, equipment, medicines and labor.
The COVID-19 pandemic has made it clear that fundamental changes are needed in the healthcare sector. At the same time, the crisis has shown that innovative technologies, in particular 3D printing, can solve the most important needs of the industry. Therefore, it is not surprising that the pace of adoption of 3D printing in medical institutions continues to grow.
2020 has been a year of challenges. We hope that 2021 will allow us to look more confidently into the future and realize the full potential of innovative technologies in medicine. Let’s take a look at this year’s biggest hospital 3D printing trends, and then talk about a unique operation using Materialize 3D solutions.
iQB Technologies Experts Recommend Article: 3D Printing Industry Stands Up to Fight Coronavirus
1. New opportunities for 3D printing in medicine
In 2020, there was an acute shortage of essential medical supplies. The main reason is repeated disruptions in long supply chains during the pandemic. Thus, the advantages of 3D printing directly in medical institutions became apparent. With speed and versatility, 3D labs can quickly and easily adapt to new environments. If necessary, they can be used to print anything: from anatomical models for planning surgical operations to personal protective equipment.
Preoperative layout printed on a ProtoFab SLA600 DLC photopolymer 3D printer (iQB Technologies project)
In 2021, when supplies are still intermittent, 3D printing is becoming a reliable and reliable assistant in the fight against this problem due to its availability. Necessity is always the impetus for change. It is the need for 3D printing that can expand the range of its application in healthcare.
2. Digital communications and remote interaction
Today, when remote work has become an integral part of our lives, the need for new ways of effective interaction has increased more than ever. In healthcare, the rapid development of digital technologies will increase the demand for telemedicine — the remote diagnosis of diseases and the treatment of patients. Digital technologies will become indispensable for the interaction between doctors, patients and 3D laboratories. Now it is much easier to overcome the barriers to their distribution.
With Materialize Mimics Viewer, an online platform for desktop and mobile devices, you can share 3D patient anatomical models, surgical planning diagrams, and medical device drawings. The platform greatly simplifies remote interaction and collaboration. This powerful, yet simple and user-friendly solution allows clinicians to review clinical case files and share opinions. It is not required to be in the same office with other specialists.
Using the Mimics Viewer, clinicians and other professionals can collaborate effectively to create 3D anatomical models, planning diagrams, and device drawings
Want to learn more about the possibilities of 3D printing in healthcare? Our experts will answer your questions and develop a project for the implementation of 3D solutions for a medical center, hospital, clinic or research institute. Apply online !
3. 3D printing combined with virtual and augmented reality
They were once used to create video games. Now modern imaging technologies, such as virtual and augmented reality, are becoming more and more indispensable in clinical practice, complementing the 3D printing process.
With the development of hardware and specialized software, their potential has increased significantly. In addition, these technologies have become much more accessible. This will definitely not only increase the use of virtual technologies in teaching and visualization of clinical cases, but will also facilitate 3D device prototyping and perhaps even help surgeons perform operations.
With an immersive effect, advanced visual presentation technologies will bring communication and interaction of specialists to a new level. Materialize believes that augmenting 3D printing with VR is the easiest and most cost-effective solution for remote planning and collaboration.
Virtual model of the pelvic bone
4. The growing role of quality management systems
In the European Union, manufacturers of 3D printers for medical facilities will be able to operate under Article 5 of the Medical Devices Regulation under several conditions. According to these conditions, medical equipment produced using 3D printing can only be used by the legal entity that created it. In addition, healthcare organizations should be equipped with appropriate quality management systems.
In the United States and a number of other countries, legislation governing the use of 3D printing in medicine has not yet been sufficiently developed. However, as its popularity grows, the need for quality management systems is only growing.
Materialize strives for the highest quality in everything. As part of the global support program for medical 3D printing, we rely on our rich 30-year experience in the development of quality management systems for medical equipment.
5. Further implementation of 3D printers in the work of clinics
The update to the DICOM standard (including encapsulated STL and OBJ files) has increased the prospects for integrating 3D printing and planning into the work of healthcare organizations. Files for 3D printing can now be easily archived and retrieved from Image Transfer and Archiving Systems (PACS). This simplifies the data tracking process as 3D image files are now linked to electronic health records.
DICOM-encapsulated STL files are supported by version 23 of the Mimics Innovation Suite (MIS) anatomical design software, and new OBJ files are supported by MIS version 24, which will be released in May 2021.
6. Increasing the availability of 3D printers
3D printing technologies are constantly improving. Manufacturers of 3D printers strive not only to improve the quality of their products, but also to make their cost optimal. As a result, high-quality additive systems for medicine are becoming more affordable.
Increasing the availability of additive technologies will give impetus to the introduction of 3D printing directly in clinics and open up new opportunities for its application in healthcare.
We would like to illustrate what has been said with a story about an unparalleled operation, which has largely become possible thanks to the achievements of the 3D industry and the experience of not only doctors, but also engineers in additive technologies and 3D modeling.
Image-based planning and 3D printing have revolutionized personalized patient care. This technology provides surgeons with detailed information and allows them to be much better prepared for surgery.
Materialize’s developments played a decisive role in the world’s first double hand and face transplant, which was successfully performed at Langone Health in New York in February of this year. Materialize’s innovative 3D planning and printing tools provide the speed and precision needed for this unique procedure. Surgeons are increasingly using them in their work and for less complex operations, as they help improve treatment outcomes.
A 22-year-old patient was involved in a car accident, as a result of which he received severe burns to his face and hands. Significant soft tissue damage prevented him from leading a normal life. For 14 months, Materialize medical engineers and NYU Langone surgeons rehearsed the operation in the lab to develop a precise plan of action. The team included Dr. Eduardo D. Rodriguez, Helen L. Kimmel Professor of Reconstructive Plastic Surgery, and Hansjörg Wyss, Head of Plastic Surgery at NYU Langone. Once a suitable donor was found, they only had 24 hours to give the patient a chance at a new life.
iQB Technologies experts recommend article: How 3D modeling helps to explore the retina at the nanoscale
For 14 months, Materialize medical engineers and NYU Langone surgeons rehearsed the operation in the laboratory to develop a precise plan of action
Patient Joe DiMeo before and after surgery / Photo © NYU Langone
In the months leading up to the operation, Materialize engineers coordinated the development of the action plan and created a 3D screen model based on the CT scan data. This allowed surgeons and engineers to virtually plan the operation and visualize various options in three dimensions, as well as recreate the full anatomical structure of the bone and determine the required level of surgical intervention. In addition, the design allowed surgeons to virtually select and place implants to determine their optimal placement. Once the action plan was finalized, Materialize engineers printed customized surgical guides, anatomy models, and graft instruments.
During this historic operation, Dr. Rodriguez and his team of sixteen used 3D cutting and drilling templates printed by Materialize. A fully controlled system for moving and placing bone fragments was tailored specifically to the patient’s anatomy and helped to use medical instruments with high precision, reducing the overall time of the operation. Materialize engineers also designed and 3D printed sterilizable nerve and blood vessel identification tags, implant transport models, and a splint for optimal implant placement during soft tissue reconstruction.
Materialize engineers coordinated the development of the operation plan and created a 3D screen model based on computed tomography data
Preoperative planning allowed surgeons to virtually select and place implants to determine their optimal placement.
Taking into account the anatomy of the patient, a fully controlled system for moving and placing bone fragments was selected, which helped to use medical instruments with high accuracy, reducing the overall time of the operation.
“Such complex tissue grafting operations bring together a large team of specialists and pose new and unique challenges,” says Dr. Rodriguez. “They require careful planning, and everything must be done in a short time and with high efficiency and accuracy. Virtual 3D planning and the creation of individual 3D tools for patients allow us to gain additional information at the planning stage and increase speed and accuracy directly during the strictly time-limited operation.”
Brian Crutchfield, Vice President and General Manager of North America, said, “Image-based planning and 3D printing have revolutionized the personalized patient experience. This technology provides surgeons with detailed information and allows them to be much better prepared for surgery. Leading clinics use 3D planning and printing services because it helps predict the course of treatment, which would not be possible without the use of 3D technology.”
Materialize pioneered many outstanding medical 3D printing solutions and helps researchers, engineers and clinicians create innovative, customized therapies that help improve and save lives. The Materialize software and services platform serves as the basis for certified medical 3D printing for clinical and research purposes, and includes virtual planning tools, 3D anatomical models, custom surgical guides, and implants.
Materials provided by Materialize
Article published on 04/08/2021, updated on 03/04/2022
How are 3D printing standards improving the performance of Olympic athletes?
You are here
Home
Some of the Olympic cycling teams competing in Tokyo made extensive use of 3D scanners and 3D printers to customize equipment and fit bike parts to the exact requirements of the athletes. The teams used 3D printers to make new bike handlebars and chains, avoiding the use of expensive tooling/moulds.
Application of 3D printing to assist athletes outside of the Tokyo Olympics
To be fair, 3D printing advances are also being applied to other sports disciplines. For athletes competing in the upcoming Paralympic Games, for example, 3D printing offers an effective way to create lighter and more aerodynamic prostheses, as well as wheelchairs.
Chevrolet is now actively outfitting its INDYCAR and NASCAR racing cars with 3D printed parts including oil tanks, intake manifolds and fuel tank caps. The company uses this technology both at the stage of prototyping and at the stage of final production. London-based Cavendish Imaging is using the technology to produce protective masks that allow athletes with facial injuries (such as a broken nose/cheekbone) to continue playing. Using special software, the company 3D-scans the athlete’s face and creates a model, on the basis of which the individual protective mask is printed.
This innovation reduces the athlete’s downtime associated with injury and prevents further injury while healing. The company’s masks have already been worn by several professional football and rugby players, including former Chelsea Football Club captain John Terry and footballer Sergio Ramos. Most bicycle helmets are made of foam, which is not completely safe in the event of a fall. HEXR has created a new type of helmet in polyamide 11 (PA 11). The product is made by 3D printing to provide maximum personalization through 3D scanning of the head shape and thus increase protection.
Another sport supported by the 3D printing industry is surfing. The French startup Wyve is already developing surfboards using this technology, which allows you to create personalized products with an original translucent design. The company produces boards from recycled plastic waste, offering the end user a reliable solution with optimal performance. An original way to combine sustainability and innovation in one project. 3D printing of sports shoes may soon be on the stream. More and more sporting goods manufacturers including Adidas, Nike and Reebok are using the technology in question. A prime example is the Adidas 4D Fusion sneakers. The reason for the growth in the use of 3D printing in this area is again the possibility of personalization. 3D technologies can be used to scan a consumer’s foot, develop a 3D model, and print in record time. The result is footwear adapted to the morphology, needs and style of the consumer. When it comes to ski boots, skiers often have to choose between high performance and comfort: boots that are too loose, yet more comfortable, can’t provide the level of control they need. Using the latest 3D printing technology, Tailored Fits has developed ski boots that combine comfort and performance. Thanks to 3D scanning technology, Tailored Fits can 3D print the inside of the boot to suit any individual, providing a direct transfer of energy. And the buckle-free design ensures free circulation, helping you feel the slopes and keep your toes cool.
The Value of 3D Printing Standards
In short, in the world of sports today, 3D printers are being used to produce a wide variety of objects to improve the performance of athletes, from sneakers and ski boots to surfboards and racing car parts. This technology additionally comes to the rescue in case of accidents and injuries.
International standards have played a critical role in ensuring the reliability, efficiency, and safety of 3D printers and related device components, as well as consumables used in advanced equipment in this category. A number of technical committees and subcommittees make a significant contribution to standardization work. For example, ISO / IEC STK 1, a joint technical committee of the International Electrical Commission (IEC; IEC) and the International Organization for Standardization (ISO; ISO), develops standards on the topic of 3D printing and 3D scanning , including the fundamental standards that form the basis of new documents.
In addition, a number of IEC technical committees and subcommittees are working to determine the feasibility of preparation, development and harmonization of international standards on electrical and electronic components installed inside 3D printers. Relevant parts and components include, but are not limited to, switches and relays covered by IEC/TC 17 (Switching and control gear) and TC 121 (Switching and control gear and low voltage assemblies) technical committees. Servo drives and stepper motors used to move the extrusion head of the 3D printer / sintering laser are covered by TC 2 (Rotating Equipment) standards. Power supplies for 3D printers cover papers authored by TC 9 experts6 (Transformers, reactive coils, power supplies and their combinations).
The most important components are the different types of lasers used to sinter metals and polymers. TC 76 (Optical Radiation Safety and Laser Equipment) is the leading body for the standardization of lasers, including high-power laser equipment used in industrial facilities and research centers that serve, among other things, the 3D printing industry.
Source
Tags:
3D scanners, 3D printers, Tokyo Olympics, Application of 3D printing to help athletes, 3D scanning, new type of polyamide 11 (PA 11) helmet, 3D technology, 3D technology print, sneakers Adidas 4D Fusion
Other materials:
- How 3D printing is developing the medical industry
- Additive manufacturing of molding equipment from polymer and composite materials
- Additive technologies in the system of secondary vocational and higher education
- House on a printer: developers talk about 3D printing of new buildings in St. Petersburg
- Quality is the top priority
Attention!
We accept news, articles or press releases
with links and images. [email protected]
Printing organs: how ears, skin and noses are made with a 3D printer
- Natalka Pisnya
- BBC Russian Service, USA
Subscribe to our Context Newsletter: it will help you understand the events.
Image copyright, Masela family archive
Photo caption,
Luc Masela with his parents one month after the artificial bladder transplant. year 2001.
Luc Masela, now 27, is an athlete with a degree in economics, works for a large exhibition company, travels a lot and recently met, in his words, «the most beautiful girl in the world.» Both she and most of his current friends were extremely surprised when they learned that 17 years ago he survived a dozen and a half operations.
Luke was born with spina bifida — and although he was able to walk, his bladder was severely damaged. By the age of 10, he almost did not leave hospitals: due to improper functioning of the bladder, fluid began to return to the boy’s kidneys, doctors diagnosed an irreversible pathology of the organ.
You need JavaScript enabled or a different browser to view this content
Video caption,
«3D printed» organs are here
Doctors offered the family two solutions: lifelong dialysis or the creation of a new bladder from a segment of the intestine. This would guarantee Luke several years of medically supervised life and a high risk of developing cancer.
The urologist in charge of the boy suggested that Masela’s family take part in an experimental program to grow a new bladder from his own cells. Then, in 2001, it sounded like science fiction: only nine people took part in the program before Luke. Despite this, his family agreed.
«The essence of the operation was reduced to two stages: first, a piece of bladder tissue was taken from me, and over the next two months, cells were grown in the laboratory in order to grow a new healthy bladder from them,» says Luke.
Photo copyright, Masela family archive
Photo caption,
Luc Masela, 17 years after the artificial bladder transplant
Next was the transplant operation, which, according to him, lasted 16 hours. “I opened my eyes and saw a cut through my entire stomach, tubes of all possible sizes were sticking out of me, except for them — four IVs and a bottle-feeding machine,” he recalls. “I stayed in the hospital for another month, I was prescribed bed rest, after that I stayed at home for another month.
The operation was performed by Dr. Anthony Atala, Pediatric Regenerative Surgeon. In two months, out of a hundred patient cells, scientists created one and a half billion. Further, an engineering structure was created on a collagen frame: the bladder was “sculpted” like a two-layer pie, the core of which dissolved over time, and it started working like a normal organ, taking root thanks to Luke’s own cells.
- An animal capable of regrowing its head
- The birth of a chimera: why do scientists need a human-animal hybrid?
- Swedish company 3D prints body parts
Luke and Dr. Atala haven’t seen each other for 10 years after leaving the hospital. Once a dying child became the champion of the school wrestling team and went to college.
The professor led the Wake Forest Institute of Regenerative Medicine in North Carolina in those 10 years, but Luke never forgot for a moment: his bladder was one of the most complex and most successful projects in his early practice.
By 2018, Atala won the Christopher Columbus Award for «work on a discovery that will have a significant impact on society»; The Times and Scientific American magazines at various times named him «Physician of the Year», he was also recognized as «one of the 50 scientists on the planet who in the next 10 years will change the way we live and work.»
How to print a new face
In the mid-2000s, the Atala team turned their attention to an ordinary household 3D printer and wrote special software for it, later specialized machines were created for the laboratory. Now the laboratory «grows» up to 30 different types of cells and organs, as well as cartilage and bones.
One of the team’s latest achievements is ears and noses grown outside the human body.
The main customer and sponsor of Atala’s developments is the US Department of Defense, and many of the patients are military victims of military operations.
It works like this: first, a CT scan of the ear or nose is done. One of Atala’s assistants, Joshua Corpus, jokes that at this stage, people often ask to «improve» the shape of the nose if they thought theirs was too wide or hooked, and the ears if they were too wide.
After that, a special computer code is written, and the printing of the basis of the organs begins.
For this, a bioresorbable polymer, polycaprolactam, is used. At the same time flexible and durable, in the human body it disintegrates within four years.
After printing, the layers of polycaprolactam resemble lace, their place after transplantation will be taken by the person’s own cartilage tissue in a few years.
Polycaprolactam is then saturated with a gel created from the patient’s cells, cooled to -18 degrees Celsius — so the cells, according to scientists, are not damaged, they are «alive and happy. »
Image caption,
Printing a test kidney sample on a bioprinter
In order for the polymer and gel structure to take shape and become something more durable, ultraviolet light is used in the laboratory — it does not damage cells.
The future implant is printed for 4-5 hours, then it is finally formed and inserted under the epidermis.
Skin can also be grown: children affected by fires were the first to take part in the early trials of Atala — after the «printing» of the skin, scientists observed the patients for several more years. The new skin did not crack, did not burst, and grew with the children.
The most difficult work, according to the scientist, is facial wounds: it is not enough just to stretch the skin, you need to accurately calculate the geometry, align the swelling, the structure of the bones, and understand how a person will look after that.
In addition to the skin and ears, Atala can «print» the bones of the jaws, grow blood vessels and cells of some organs — the liver, kidneys, lungs.
This technology is especially appreciated by oncologists: on the basis of patient cells, it is possible to recreate the body’s response to various types of chemotherapy and observe the reaction to a particular type of treatment in the laboratory, and not on a living person.
But the liver, kidneys, lungs and heart are still being tested. Atala says he raised them in miniature, but creating organs from various tissues to real size requires a lot of additional research.
But, according to him, cells were grown in the laboratory and a vagina was created for a girl who was born several years ago with a congenital deformity of the genital organs — several years have passed since the transplant.
Image caption,
Bioprinted polycaprolactam ear implant base
Atala smiles and adds that his team is also working on a working penis. This research has been going on for several years, and the most troublesome for scientists is the complex structure of tissues and the specific sensitivity of the organ itself.
Among others, Igor Vasyutin, a Russian post-graduate student of the First Moscow State Medical University (MGMU) named after Sechenov, is working on this under laboratory conditions. He is a cell biologist, Atala’s right hand.
Vasyutin has been in the USA for about a year — he came on an exchange. He is ready to talk about the behavior of stem cells for hours, but becomes less verbose when it comes to Russian science.
Vasyutin’s alma mater has not reached mass regeneration of human organs and is still training on animals: local scientists «printed» a mouse thyroid gland on a 3D printer.
However, they are also involved in the study of human organs. According to the head of the Institute of Regenerative Medicine at MSMU Denis Butnar, several years ago the Institute recreated a special engineering design of the buccal mucosa. She functioned perfectly for the first six months, but subsequently had to undergo a second operation.
Image caption,
Ultraviolet test sample of an ear implant
In Russia, however, over the past few years, the Italian surgeon-transplantologist Paolo Macchiarini, the man who was the first in history to perform a synthetic organ transplantation operation — a plastic tube that replaced the patient trachea.
- Paolo Macchiarini: the rise and fall of the famous surgeon
However, seven of his nine patients died, and the breathing tubes implanted in the remaining two subsequently had to be replaced with donor ones.
Several criminal cases were brought against him, including on charges of pressure on patients and fraud, and the world’s leading doctors called Macchiarini’s operations «ethical Chernobyl.»
Will printed organs replace donors?
At the zenith of his career, Macchiarini argued that a new perspective was opening up for humanity: it was possible to «print» any human organ on a printer, create an engineering structure from it enriched with the patient’s stem cells, and obtain an ideal prosthesis.
Be that as it may, complex human organs — the liver, kidneys, heart, lungs — have not yet been able to grow any regenerative surgeon.
Bioprinting of the so-called simple organs, however, is already available in the US, Sweden, Spain and Israel — at the level of clinical trials and special programs.
The US government is actively investing in such programs — in addition to Wake Forest, cooperating with the Pentagon, the Massachusetts Institute of Technology also receives significant amounts to recreate the work of the liver, heart and lungs.
Image caption,
Skin application test on a burnt wound
According to Professor Jorge Raquela, a gastroenterologist at the Mayo Clinic Research Center, «Bioprinting is one of the most exciting branches of modern medicine, it has huge potential, and the turning point of the most important discoveries is already close.»
Meanwhile, Pete Basillier, head of R&D at analytics firm Gartner, insists technology is advancing much faster than understanding the implications of 3D printing.
Such developments, according to Basilière, even if created with the best of intentions, give rise to a set of questions: what will happen when «improved» organs are created, the basis of which will not only be human cells — will they have «superpowers»? Will a regulatory body be created to monitor their production? Who will check the quality of these organs?
More than 150,000 Americans are on the waiting list for organ transplants each year, according to a report from the US National Library of Medicine. Donor organs will receive only 18% of them; every day in the United States, without waiting for a transplant, 25 people die. Organ transplants and subsequent rehabilitation cost insurance companies and patients $300 billion in 2012 alone.
- A 3D printer helped a cyclist who lost his jaw
- Genetically modified pigs — human organ donors?
- The world’s first child who received both hands transplanted plays baseball
Most Americans are potential donors: upon obtaining a driver’s license, they voluntarily answer the question of whether they agree to donate their organs in the event of a car accident or other dangerous incident . In case of consent, a small «heart» and the word «donor» appear in the corner of the document.
Professor Atala’s driver’s license is like that — despite all his achievements and faith in the press, he is ready to share his with others.
Neither the professor himself, nor his subordinates hide the fact that science is not yet able to «print» organs for thousands of those who need transplantation right now. According to him, it will take several decades to replace donor organs with grown ones at the mass market level.
The work of Atala and other specialists in the field of regenerative medicine remains more experimental than mass, and is still «tailored» for each individual patient.
3D printing services for custom parts in Moscow!
TOTALPRINT3D provides custom 3D printing services in Moscow and throughout Russia.
We 3D print functional parts, spare parts, prototypes and figurines from plastic from
1 pc. with a guarantee of quality and timing.
| Order 3D printing |
3D printing of plastic parts
with a guarantee!
TOTALPRINT3D provides custom 3D printing services in Moscow and throughout Russia.
We 3D print functional parts, spare parts, prototypes and figurines from plastic from 1 piece.
| Order 3D printing |
Today, 3D printing is the fastest and most economical way to make almost any plastic part!
Consider manufacturing parts for your ideas and projects using the most popular technologies (FDM, SLS, SLA, DLP) from industrial plastics and composites.
Why 3D printing should be ordered from us?
Manufacture from 1 part
We manufacture both piece parts and small series orders.
Own fleet of equipment
We do not resell the services of other manufacturers. All orders are made only by the Totalprint3D team using their own equipment!
Proven materials
We use only proven engineering plastics and composites based on them from a domestic manufacturer!
We work with Phys. and Yur. persons
We work under an agreement with individuals and legal entities. If necessary, we conclude a confidentiality agreement (NDA).
Strict reporting
You can check the progress of work at any time! We will send a detailed photo and video report!
Convenient payment system
For individuals, we use card payments through the online cash desk.
For legal entities and individual entrepreneurs, payment is made by bank transfer.
Professional team
Our team consists of young engineers with more than 5 years of experience in 3D technologies in various industries!
Precise dimensions
We ensure the accuracy of manufacturing parts from 0.05 mm!
We do post-processing of parts
At the request of the customer, we produce finishing products: chemical polishing, grinding and painting products.
Examples of 3D printing in TOTALPRINT3D:
More projects you can see in our INSTAGRAM.
Materials for 3D printing:
We have selected 20 of the most popular materials for 3D printing, which will be suitable for most of your tasks.
Base resins
Composite resins
Photopolymers
Special materials
Base resins
Composite resins Photopolymers Special materials
ABS is the base material used for 3D printing. Its main advantage is high rigidity, interlayer adhesion and excellent machinability with an abrasive tool. Of the negative properties of this material, it should be noted toxicity (in no case should contact with food be allowed), rapid destruction under the influence of ultraviolet radiation and poor resistance to solvents.
Medium strength, suitable for body and functional parts operating in non-aggressive environments. It softens at about +70 degrees.
Perhaps the most common plastic for 3D printing!
Low shrinkage, high stiffness and solvent resistance. However, it has low heat resistance (it softens at +50 degrees), it is rather difficult to process with abrasive and cutting tools at high speeds and is destroyed under the influence of ultraviolet radiation.
This material is perfect for making product prototypes and unloaded functional parts.
ATTENTION! Advertising claims about environmental safety and suitability for contact with food have no evidence base! Plastic decomposes only in special bioreactors!
This material is also called «ABS killer». It has medium hardness, does not dissolve in anything, does not shrink during printing and is resistant to ultraviolet radiation, it is quite well processed by abrasives and cutting tools. It softens at about +70 degrees.
Suitable for everything! It is acceptable to use with food products (cutting for dough and mastic).
This material is almost similar in properties to ABS plastic, but it is suitable for contact with food products (you can make punches for biscuits!) and in the case of special solvent treatment, you can get a transparent product. Ideal for bottle mockups, neon letters and lights).
The material is similar in properties to ABS, but unlike ABS, it is UV resistant. Suitable for parts that are installed outdoors.
Impact-resistant glass-filled (30%) polyurethane-based composite with heat resistance up to 110 degrees. «Soft» version of TPU GF-10.
Possesses high chemical resistance to solutions of acids and alkalis, fats, oils, xylene, diesel fuel. Limited to gasoline, kerosene, acetone, dichloromethane. Excellent for drilling and threading. Very difficult to sand and paint (special primer required).
WARNING! Available in off-white and black only.
Impact-resistant glass-filled (10%) composite based on polyurethane with heat resistance up to 110 degrees for printing large gears, strong housings, mechanically loaded parts, aerodynamic body kits for cars.
Possesses high chemical resistance to solutions of acids and alkalis, fats, oils, xylene, diesel fuel. Limited to gasoline, kerosene, acetone, dichloromethane. Excellent for drilling and threading. Very difficult to sand and paint (special primer required).
ATTENTION! Available in off-white and black only.
Composite based on ABS and PA6 with 8% fiberglass.
Suitable for end-to-end applications where high impact and UV resistance is required.
Inert to most available chemical solvents, ideal for underhood printing and auto tuning.
WARNING! Available in off-white and black only.
Impact-resistant carbon-filled (5%) material for mechanically loaded parts (gears, tool elements, housings, etc.). Resistant to all types of solvents, gasolines, acids and alkalis, oils and fats.
Works well with abrasive and cutting tools, incl. at high speeds.
Structural composite based on chopped glass fiber reinforced ABS. Fiberglass content — 12%.
It has outstanding strength characteristics (compared to most 3D printing materials), increased hardness, elasticity, tensile and compressive strength, low print shrinkage.
Unlike plastic FORMAX — not electrically conductive!
VIKA softening point: 118°C.
Available in black only.
High impact flame retardant (UL94 V-0) polymer/polymer composite based on ASA (acrylonitrile styrene acrylate) modified with polycarbonate (PC). Designed for professional use. Ideal for the manufacture of connector blocks for wires, electrical instrument cases, electrical connectors, parts with increased fire safety requirements. Possesses the highest resistance to burning, self-extinguishing.
Engineering material based on ABS with added carbon fiber (30%), capable of withstanding heavy loads and high temperatures, with virtually no shrinkage during printing.
Compared to conventional ABS, it has the following advantages:
- Increased strength and rigidity
- Very good dimensional stability
- Lightweight
- Excellent final surface (hidden layers)
ATTENTION! Conductive material!
The material is similar in its characteristics to TOTALPRO CF-5 carbon fiber, but due to the foaming structure it has a reduced density (up to 0. 8 g/cm3 versus 1.15 g/cm3 for CF-5). This property makes it possible to successfully use this plastic in the manufacture of elements of unmanned aerial vehicles and radio-controlled aircraft / helicopters, as well as in the creation of objects with positive buoyancy.
If you ask us «what is the strongest plastic for 3D printing?», then the answer is unequivocal — ULTRAN 630! This is the most durable material for 3D printing currently available in Russia (in terms of tensile strength, it is comparable to aluminum alloys). In addition to outstanding strength, it is resistant to all external influences (solvents, ultraviolet, etc.) and is the most heat-resistant plastic (it softens after 135 degrees).
Excellent for:
- surgical items to be sterilized in steam autoclaves;
- power parts;
- parts exposed to aggressive chemical attack;
If you are familiar with Lost Wax Casting (LPM), then this material is for you! This modified wax is designed to create printing waxes of simple and complex parts for further casting from metal (usually steel, aluminum, bronze, brass).
Flexible materials of various stiffness are intended primarily for 3D printing of rubber-like products.
Gray photopolymer base.
Highly detailed and medium durability.
Suitable for figurines, mock-up parts and accurate prototypes.
Orange high precision photopolymer.
Has very high (~130 degrees) heat resistance and amazing detail. Hard and brittle. It is intended, first of all, for high-precision details of mock-ups, figurines, master models for pouring into silicone.
Photopolymer with enhanced impact and bending strength. Ideal for various technical parts subject to cyclic loads (latches, clamps, carabiners, etc.).
Structural photopolymer, properties similar to ABS plastic.
Excellent for micro gears and functional parts.
Photopolymer with heat resistance up to 190 degrees! It has high rigidity and is intended for functional parts operating for a long time at high temperatures (bushings, dielectric spacers, etc. )
Price of 3D printing services:
Attention! The minimum order amount is 4000r.
You can see the full price list for the services provided in the PRICES section
3D printing «PRO»
From 30 r/cc
3D printing with structural composite plastics based on ABS, polyurethane and polyamide, reinforced with glass and carbon fibers.
It is used in the manufacture of functional parts subject to various loads (mechanical, thermal, chemical).
| ORDER |
3D printing «LIGHT»
From 8 r/cc.
3D printing with base plastics PLA, ABS, SBS, PETG
It is used for models, figurines, decorative details, templates, equipment and other products that are not subject to mechanical and thermal stress.
| ORDER |
Where are we?
Detailed contact information and directions to the pickup point can be found in the CONTACTS section
Where are we located?
Detailed contact information and directions for
to the pickup point can be found in the CONTACTS section
E-mail: zakaz@totalprint3d. ru
Phone: +7(495)109-19-72
Office and production:
Moscow, Vnukovo, st. 1st regular road 6
Receiving samples and issuing orders:
Moscow, Leningradsky pr-t 45Gk37
ONLY ON WEEKDAYS! from 8:00 to 17:00.
Working hours:
Weekdays: 10:00-19:00 (break 13:00-14:00)
Weekends: 10:00-16:00 (break 13:00-14:00)
Download company details
Aureus 3D printer: application and features
If you had told someone in the early 80s that in just three decades they could 3D print just about anything, they probably wouldn’t have believed you. But we are now in 2019 and 3D printing has become more popular than ever, with both individuals and large companies implementing it in a wide variety of their workflows.
3D printing has begun to penetrate into many spheres of life and activity, and has helped to facilitate the process of manufacturing various products several times. This option is used in manufacturing, medicine, architecture and many other industries, providing users with a unique opportunity to create high-quality products such as industrial items, shoes, body parts, cars, and even houses! In addition, such technologies have found application in jewelry. Products have become not only more unique and neat, but the master himself saves a lot of time. The higher the quality of your 3D model, the more you can do with it. In addition, the model gives a real opportunity to change the created concept at any time. The customer will no longer be able to change his mind, and spend so much time as a jeweler. Everything is possible with a modern printer. So how do you actually get a great 3D model? Well, this is where 3D scanning comes into play.
Features
The Aureus 3D printer provides high printing speed and makes it suitable for making multiple jewelry molds simultaneously in a large printing chamber. However, the Aureus 3D printer is able to provide good print surface quality. With a large printing chamber and lighting technology, it can mass-produce jewelry molds at high speed.
The printer is equipped with a quick release platform that retains its calibration and supports interchangeable resin reservoirs. It also features a new monochrome LCD panel for better print quality and a redesigned UV LED optics panel for faster printing.
3D printing can be used to create unique and stylish items in metals such as gold, silver, bronze, copper and brass. The equipment is easy to operate, and suitable for sketching future work. The master saves a lot of time, effort and money.
The production process starts directly with the 3D printing of a selected or pre-created 3D model with wax. The 3D printer uses wax-like resin as the printing material. Then one or more wax sprues will be attached to the selected model variant. The model will then be spring-attached to the wax tree along with several other models. The wood is then placed in a flask and covered with thin plaster. When the plaster hardens, it forms a mold for metal casting. The plaster mold is then placed in the oven and heated for several hours until the wax is completely burnt out.
Benefits
Until now, the complexity of the design and manufacturing process has made custom jewelry an expensive perk. However, with the help of digital tools, jewelers have already begun to offer personalized pieces as part of their core service or as an added value. If you go to a jeweler today and ask for an engagement ring, you will often have the opportunity to customize a unique design.
3D printed jewelry fitting significantly reduces the feedback loop between designer and customer.
The jeweler and the client can discuss the design together and within an hour the client can hold and try on a real, physical model of the ring. In jewelry retail, on-site digital design coupled with the speed of 3D printing has greatly reduced the feedback loop between designer and customer.
The transition from design to production becomes easier and faster, as hand-carving a precious piece is no longer a requirement. Sample pieces can be custom-made according to the customer’s wishes, 3D re-printed, and then manufactured using investment casting, resulting in a significant reduction in the cost of custom 3D printed jewelry.
Main advantages of the Aureus 3D printer:
- Fast data collection. When done correctly, products can be scanned in less than a minute.
- Economy. Avoid costly mistakes and reduce those costly man-hours.
- Easy to use. Even a complete beginner can use most 3D scanners. But each model comes with instructions that will help you quickly understand the features of operation.
- Realistic textures and vivid colors for your waterproof 3D model.
- Mobility. Create quality 3D scans on the go, wherever your application takes you.
The Aureus 3D printer allows you to create a finely detailed, master wax model. The Aureus 3D printer can create much more complex and intricate geometries than can be cut by hand. You can print anything your CAD software can create, so it even makes great designs more accessible to artists who may lack carving skills. Also, depending on the piece, you can even create geometry that is nearly impossible with hand carving.