Was sind PCIe-SSDs und wie werden sie als Startlaufwerk für einen Dell PC verwendet?
Artikelnummer: 000132410
Dieser Artikel enthält eine Anleitung zu den verschiedenen SSD-Typen (Solid State Drive), die in den PCIe-Anschluss Ihrer Hauptplatine passen. In dieser Anleitung wird auch erläutert, wie Sie solch ein Laufwerk als Hauptstartlaufwerk auf einem Dell PC verwenden.
Zusammenfassung:
Dieser Artikel enthält eine Anleitung zu den verschiedenen SSD-Typen (Solid State Drive), die in den PCIe-Anschluss Ihrer Hauptplatine passen. In dieser Anleitung wird auch erläutert, wie Sie solch ein Laufwerk als Hauptstartlaufwerk auf einem Dell PC verwenden.
Dieser Artikel enthält eine Anleitung zu den verschiedenen SSD-Typen (Solid State Drive), die in den PCIe-Anschluss Ihrer Hauptplatine passen. In dieser Anleitung wird auchWeitere Informationen
Artikelinhalt
Symptome
Inhaltsverzeichnis:
- Einführung
- Was ist eine PCIe-SSD und wie funktioniert sie?
- Kann ich ein Betriebssystem darauf installieren?
- Weitere Informationen:
Einführung
Dieser Artikel enthält Informationen zu den PCIe-SSDs (Peripheral Component Interconnect Express), die ursprünglich nur für Dell Server verfügbar waren, jetzt aber auf anderen Systemen angeboten werden. Wir zeigen Ihnen, was eine PCIe-SSD (Solid State Drive) ist und wie sie funktioniert. Wir werden auch erläutern, was erforderlich ist, um eines dieser Laufwerke als Startlaufwerk mit einem installierten Windows-Betriebssystem zu verwenden, und alle anderen relevanten Informationen durchgehen, die beim Umgang mit diesem Gerätetyp hilfreich sind.
Zurück zum Anfang
Ursache
Was ist eine PCIe-SSD und wie funktioniert sie?
PCIe-SSDs sind Solid-State-Laufwerke, die nicht die SATA-Chipsatz-Schnittstelle der Hauptplatine für die Kommunikation zwischen der SSD und dem Windows-Dateisystem verwenden.
In die SSD ist ein eigener Speichercontroller integriert, der nicht mit dem Standard-SSD-Controller-Chip verwechselt werden darf, den alle SSDs verwenden. Der Speichercontroller in PCIe-SSDs verwendet einen Treiber, der entweder vom Hersteller oder vom Betriebssystem selbst bereitgestellt wird. Er muss vom SSD-Nutzer installiert werden.
PCIe-SSDs sind keine SATA-Laufwerke, obwohl einige eine oder mehrere Gemeinsamkeiten mit SATA-Laufwerken haben.
Es gibt verschiedene Möglichkeiten, eine PCIe-SSD an eine Hauptplatine anzuschließen:
- Ein Standard-PCIe-Steckplatz (mindestens x4)
- Ein M.2-Steckplatz
Hinweis: Nicht alle SSDs mit einem M.2-Anschluss sind PCIe-SSDs.
- Eine U.2-Adapterkarte und ein Kabel, das an einen M.2-Steckplatz angeschlossen ist, oder eine Hauptplatine mit integriertem U.2-Anschluss (für einen 2,5″-Formfaktor mit einer PCIe-Schnittstelle).
- M.2-PCIe-SSDs können mit einer M.2-zu-PCIe-Steckplatzadapterkarte verwendet werden.
Hinweis: Wenn Sie eine PCIe-Adapterkarte mit mehreren x4-SSDs verwenden, denken Sie daran, die Karte in einen Steckplatz mit gleicher oder größerer Kapazität als die Gesamtzahl der Karten einzubauen. (Zum Beispiel: Wenn 2 x4 SSDs mit Adapter eingebaut werden sollen, ist ein x8-PCIe-Steckplatz oder höher erforderlich. Für diese Karten wird x16 empfohlen, das bis zu 4 x4 SSDs aufnehmen kann./i.s3.glbimg.com/v1/AUTH_08fbf48bc0524877943fe86e43087e7a/internal_photos/bs/2017/w/a/X5ApecT7ucIh36HPL10Q/ssd-colorful.jpg) ) Andernfalls werden Laufwerke möglicherweise nicht erkannt.
) Andernfalls werden Laufwerke möglicherweise nicht erkannt.
PCIe-SSDs erhöhen die Leistung, indem sie statt der SATA-Schnittstelle (die bisher maximal 10 Kanäle hat) PCIe verwenden. (Was derzeit maximal 25 Kanäle hat.) Dies eignet sich besonders für das Zwischenspeichern und Cachen von Anwendungen. PCIe ist ein Mehrzweckbus, der alle Arten von Daten an den Prozessor weiterleitet. Die mangelnde Spezialisierung erschwert jedoch die Programmierung. Dies bedeutet, dass Sie eventuell einen Kompromiss zwischen Interoperabilität und Leistung in Kauf nehmen müssen.
Es gibt zwei Arten von nicht-physischen Schnittstellen. AHCI und NVMe.
- AHCI
-
(Advanced Host Controller Interface) ist das gleiche Protokoll, das auch von SATA-SSDs verwendet wird.
- NVMe
-
(Non Volatile-Memory Express) ist ein Protokoll, das speziell für SSD-Festplatten entwickelt wurde.
 Es hat nichts mit SATA gemeinsam und ersetzt AHCI durch eine bessere Methode für den Umgang mit Festkörperspeichern. PCIe-NVMe-SSDs verfügen außerdem über einen eigenen NVMe-Speichercontroller, der in das Laufwerk integriert ist.
Zurück zum Anfang
Lösung
Kann ich ein Betriebssystem darauf installieren?
Unterstützte Windows-Betriebssysteme
Sie können Windows 7, 8, 8.1 und 10 verwenden. (Einige Laufwerkshersteller sagen, dass sowohl 32- als auch 64-Bit-Versionen funktionieren. Andere geben an, dass nur die 64-Bit-Versionen ordnungsgemäß funktionieren.)
Die Installation unter Windows 7 kann schwierig sein, insbesondere bei einem PCIe-NVMe SSD-Laufwerk. Für dieses Problem steht ein Windows 7-Hotfix unter folgendem Link zur Verfügung:
-
Aktualisierung zum Hinzuzufügen systemeigener Treiberunterstützung in NVM-Express unter Windows 7 und Windows Server 2008 R2 (nur Englisch)
Unterstützte BIOS-Typen
Das UEFI-BIOS ist derzeit das einzige, das diese Geräte unterstützt.
Achten Sie immer darauf, dass Sie die neueste Version Ihres BIOS installiert haben.
Achten Sie auch darauf, dass Ihr BIOS für die Verwendung des EFI-Bootloaders konfiguriert ist.
Anweisungen vor der Installation
Hier sind einige verschiedene Methoden, um eine PCIe-SSD für eine Windows-Installation vorzubereiten.
Normalerweise ist der am häufigsten beschrittene und einfachste Weg, um auf einem Dell PC in das BIOS zu gelangen, das schnelle Tippen auf die Taste <F2> am Dell Begrüßungsbildschirm während des Systemstarts. Dies sollte Sie auf den meisten Systemen direkt in das BIOS führen.
- Methode 1
- Methode 2
- Methode 3
Methode 1
-
CSM (Compatibility Support Module) ist standardmäßig auf dem Start-Bildschirm in Ihrem BIOS aktiviert. Klicken Sie auf CSM, um weitere Optionen anzuzeigen.
-
Suchen Sie nach der Option Launch Storage OpROM Policy im CSM.
 Ändern Sie die Standardeinstellung von Legacy Only in UEFI.
 -
Im Bildschirm Storage Configuration ist der SATA-Modus standardmäßig auf AHCI eingestellt, der in RAID oder IDE geändert werden kann. (Verwenden Sie NIEMALSIDE.) In den meisten Fällen bleibt es AHCI, da Sie möglicherweise zusätzliche SATA-Treiber verwenden oder eine AHCI-PCIe-SSD haben.
-
Speichern und beenden Sie das BIOS und kehren Sie dann zurück.
-
Ihr PCIe-SSD-Laufwerk wird möglicherweise nicht im Bildschirm Storage Configuration oder der Liste der Startreihenfolge angezeigt, aber achten Sie darauf, dass Ihre Windows-Installationsmedien (USB oder optisches Laufwerk) in der Liste der Startreihenfolge angezeigt werden.
-
Sie sollten UEFI sehen: Eintrag <Installationsmedien-Gerätename> in der Liste.
 (Wobei <Installationsmedien-Gerätename> das Gerät ist, auf dem das Installationsmedium ist.)
 -
Wenn Sie etwas mit einem AHCI-Präfix sehen, ignorieren Sie es. Sie müssen den mit dem UEFI-Präfix verwenden.
-
Nachdem Sie den UEFI-Eintrag ausgewählt haben, speichern und beenden Sie das BIOS erneut. Die Installation von Windows sollte beginnen.
-
Die Windows-Installation läuft normal ab. Befolgen Sie eine Anleitung für die zu installierende Version.
-
Sobald Windows installiert ist, sollte das Startlaufwerk in der BIOS-Liste der Startreihenfolge als Windows Bootloader oder Windows Bootloader: <SSD-Name> angezeigt werden, je nach BIOS-Version.
-
Denken Sie daran, wenn Sie eine PCIe-NVMe-SSDverwenden, den Treiber vom Hersteller des Laufwerks zu installieren.
Methode 2
-
CSM (Compatibility Support Module) ist standardmäßig auf dem Start-Bildschirm in Ihrem BIOS aktiviert. Klicken Sie auf CSM und setzen Sie es auf Disabled.
-
Dies hat in Launch Storage OpROM Policy dieselbe Auswirkung wie das Ändern der Standardeinstellung auf UEFI Only.
-
Für diese Methode muss die Videoquelle Ihres PCs GOP-kompatibel (Graphics Output Protocol) sein. (Eine vollständig genutzte UEFI-Firmware erfordert dies, da es sich um ein EFI-Grafikprotokoll handelt.)
-
Im Bildschirm Storage Configuration ist der SATA-Modus standardmäßig auf AHCI eingestellt, der in RAID oder IDE geändert werden kann. (Verwenden Sie NIEMALSIDE.) In den meisten Fällen bleibt es AHCI, da Sie möglicherweise zusätzliche SATA-Treiber verwenden oder eine AHCI-PCIe-SSD haben.

-
Speichern und beenden Sie das BIOS und kehren Sie dann zurück.
-
Ihr PCIe-SSD-Laufwerk wird möglicherweise nicht im Bildschirm Storage Configuration oder der Liste der Startreihenfolge angezeigt, aber achten Sie darauf, dass Ihre Windows-Installationsmedien (USB oder optisches Laufwerk) in der Liste der Startreihenfolge angezeigt werden.
-
Sie sollten UEFI sehen: Eintrag <Installationsmedien-Gerätename> in der Liste. (Wobei <Installationsmedien-Gerätename> das Gerät ist, auf dem das Installationsmedium ist.)
-
Wenn Sie etwas mit einem AHCI-Präfix sehen, ignorieren Sie es. Sie müssen den mit dem UEFI-Präfix verwenden.
-
Nachdem Sie den UEFI-Eintrag ausgewählt haben, speichern und beenden Sie das BIOS erneut. Die Installation von Windows sollte beginnen.

-
Die Windows-Installation läuft normal ab. Befolgen Sie eine Anleitung für die zu installierende Version.
-
Sobald Windows installiert ist, sollte das Startlaufwerk in der BIOS-Liste der Startreihenfolge als Windows Bootloader oder Windows Bootloader: <SSD-Name> angezeigt werden, je nach BIOS-Version.
-
Denken Sie daran, wenn Sie eine PCIe-NVMe-SSDverwenden, den Treiber vom Hersteller des Laufwerks zu installieren.
Methode 3
-
Stellen Sie sicher, dass die neueste kompatible Version eines UEFI BIOS auf Ihrem PC installiert ist.
-
Richten Sie die Liste der Startreihenfolge im BIOS so ein, dass die Medienquelle für die Windows Installation an erster Stelle ist. (Sei es ein USB-Stick oder ein optisches Laufwerk.)
-
Speichern und beenden Sie das BIOS und die Windows-Installation sollte beginnen.

-
Auf dem Bildschirm Wo soll Windows installiert werden?:
-
Wenn die SSD aufgelistet ist, wählen Sie sie aus und klicken Sie auf Weiter.
-
Wenn das SSD-Laufwerk nicht aufgeführt wird:
-
Klicken Sie auf Treiber laden.
-
Navigieren Sie zum Speicherort, an dem Sie die Datei vom Hersteller gespeichert haben.
-
Wählen Sie die Datei aus und laden Sie sie.
-
-
-
Ihre SSD sollte nun aufgelistet sein, wählen Sie sie aus und klicken Sie auf Weiter.
-
Folgen Sie den restlichen Installationsanweisungen, bis die Installation abgeschlossen ist.
-
Stellen Sie im BIOS die SSD als Gerät unter Primary Boot ein.
-
Speichern Sie die Einstellungen und verlassen Sie das BIOS.

-
Starten Sie Windows und öffnen Sie den Geräte-Manager für Ihre Betriebssystemversion.
-
Suchen Sie unter Speichercontroller das Gerät, klicken Sie mit der rechten Maustaste darauf und wählen Sie Treibersoftware aktualisieren.
-
Navigieren Sie zu dem Ort, an dem Sie die neueste Version gespeichert haben, und laden Sie sie.
-
Starten Sie Ihren PC neu, um die Installation abzuschließen.
Hinweis: Für die Installation eines Windows-Betriebssystems empfiehlt es sich, während der Installation nur das gewünschte Startlaufwerk mit Strom zu versorgen.
Zurück zum Anfang
Weitere Informationen
Weitere Informationen:
M.2-SSDs
Beachten Sie bei der Identifizierung Ihres Laufwerks, dass es verschiedene Laufwerke gibt, die bestimmte Merkmale aufweisen. Zum Beispiel: M. 2-SSDs sind SATA-Laufwerke, die weit verbreitet sind und häufiger als PCIe-SSDs verwendet werden. Während diese Laufwerke die M.2-Schnittstelle gemeinsam nutzen können, weist der Teil des Laufwerks, der mit dem M.2-Steckplatz verbunden ist, je nach Laufwerkstyp eine andere Laufwerkskonfiguration auf. M.2-SATA-SSDs haben zwei Steckplätze im Schnittstellenanschluss, M.2-PCIe-SSDs haben nur einen Steckplatz im Schnittstellenanschluss.
Nicht standardmäßige PCIe-SSDs
Es gibt einige PCIe-SSDs, die nicht die M.2-Schnittstelle verwenden. Sie verwenden in der Regel eine x8-PCIe-Steckplatzschnittstelle, nicht die standardmäßige x4-Schnittstelle. Diese Laufwerke werden in der Regel auch als RAID 0-Arrays konfiguriert, wobei zwei Sätze von NAND-Chipgruppen mit ihren eigenen SSD-Controllern verwendet werden. Es gibt auch andere, noch seltenere Laufwerkstypen, die Sie wahrscheinlich nicht nutzen werden.
Zurück zum Anfang
Gewährleistung abgelaufen? Kein Problem. Besuchen Sie die Website Dell.com/support und geben Sie Ihr Dell Service-Tag ein, um unsere Angebote anzusehen.
HINWEIS: Angebote sind nur für Kunden in den USA, Kanada, Großbritannien, Frankreich, Deutschland und China verfügbar. Trifft nicht auf Server und Storage zu.
Artikeleigenschaften
Betroffenes Produkt
Desktops & All-in-Ones, Laptops, Tablets, Workstations
Letztes Veröffentlichungsdatum
03 Jun 2021
Version
7
Artikeltyp
Solution
Vielen Dank für Ihr Feedback.
Derzeit ist kein Zugriff auf das Feedbacksystem möglich. Bitte versuchen Sie es später erneut.
Die folgenden Sonderzeichen dürfen in Kommentaren nicht verwendet werden: ()\
Use M2 SSD NVME as an external drive to boot Windows 10
Asked
Modified
1 year, 3 months ago
Viewed
4k times
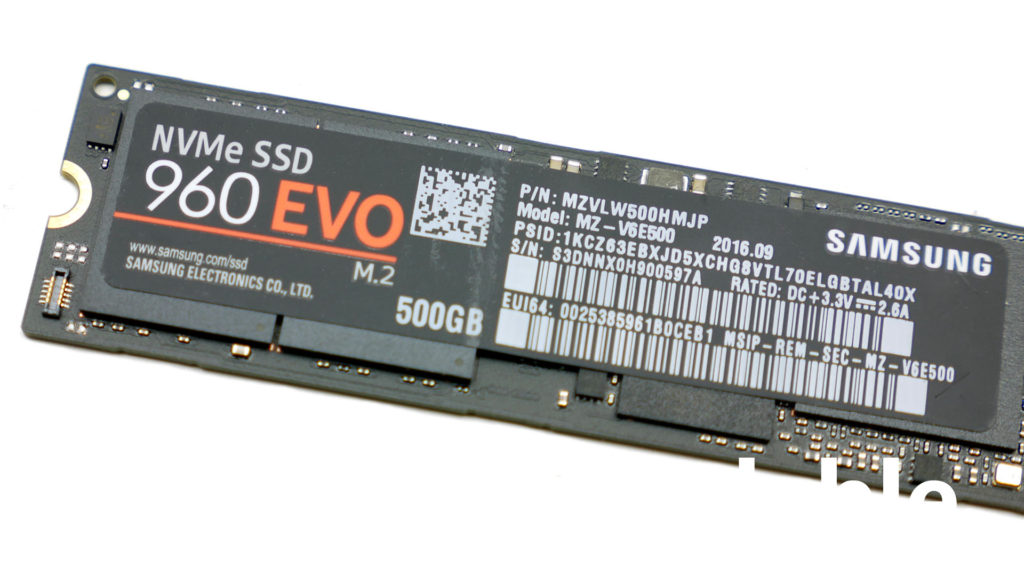
I have a *Samsung M2 SSD NVME * drive with Windows 10 on it. Can I use this drive in combination with an external enclosore (like this ICY BOX) to boot into Windows 10 on a ThinkPad x230?
Edit: It’s not about the enclosure but if it’s possible to boot into Windows 10 from an external drive on a ThinkPad x230 through USB. (I need a workaround because the x230 doesn’t come with an USB-C port or internal adapter for a M2 SSD NVME drive)
- windows-10
- ssd
- external-hard-drive
- samsung-ssd
3
I have a *Samsung SSD NVME * drive with Windows 10 on it. Can I use this drive in combination with an external enclosure (like Icy Box 1817M-C31) to boot into Windows 10 on a ThinkPad x230?
You do understand you will be connecting an NVMe SSD to a USB 3.2 Gen 1 port. USB 3.2 Gen 1 is also known as USB 3.1 Gen 1 and also USB 3.0. This will obviously come with huge performance costs. However, a USB enclosure that specifically indicates supports NVMe can be used with your machine.
Outside of Windows To Go, it’s extremely tough to boot Windows on an external drive on any device. Windows to Go was discontinued over 2 years ago by Microsoft because its performance was abysmal. Windows To Go required specific storage devices to event install through the built-in capabilities of Windows 10 Enterprise.
When booted from an external device, Windows will most likely be considered a Windows To Go installation. Rufus continues to support the creation of Windows To Go devices. Sadly, I will be unable to confirm if Rufus will treat an NVMe device connected through that adapter as a removable drive.
It’s not about the enclosure, but if it’s possible to boot into Windows 10 from an external drive on a ThinkPad x230 through USB. (I need a workaround because the x230 doesn’t come with a USB-C port or internal adapter for an SSD NVME drive)
It’s doubtful that you will be able to install Windows to the device and boot from it. I suspect due to it being an external device, WinPE will not even offer the device, as something Windows can be installed to. This is due to the fact Windows does not like being installed on external removable storage devices. Windows To Go was the solution to that problem, which was discontinued since the performance was abysmal.
Even if you are able to install Windows and boot to the installation contained on the device, you will find that the Windows will be extremely slow. You shouldn’t have a problem using it as an external SSD storage device.
1
Short answer: yes.
You can install Windows on the drive that you connect via the enclosure.
However if your laptop has an SSD inside I would recommend sticking with that. While this would work I don’t think you’re going to see any great performance with your boot disk over USB even if it is NVME due to the USB constraints.
You can use an external samsung T5 (540MB/s) or an internal ssd drive (go for sata 2.5″) with a decent USB enclosure (might be cheaper).
It is used by Mac computer users to install windows with Bootcamp on external drive with decent performance (Think playing Rocket League type of performance).
Remind 5 years ago, most of people were still cursing Windows, Microsoft and Bill Gates altogether for the slowness of Windows, even with a 8 core CPU, because it was installed on an internal high-end 7500RPM HDD maxing 80MB-160MB/s at write and read speed (fresh Windows install before inevitable fragmentation occurring over time).
With a samsung T5 or similar drive on par with USB 3 transfert rate, you will never get fragmentation issues and your external SSD will be at worse 3.5x faster than the best HDD ever made in human history.
There is videos and tutoriels indicating how to install windows on external drive on Mac computer demonstrating overall acceptable disk performance.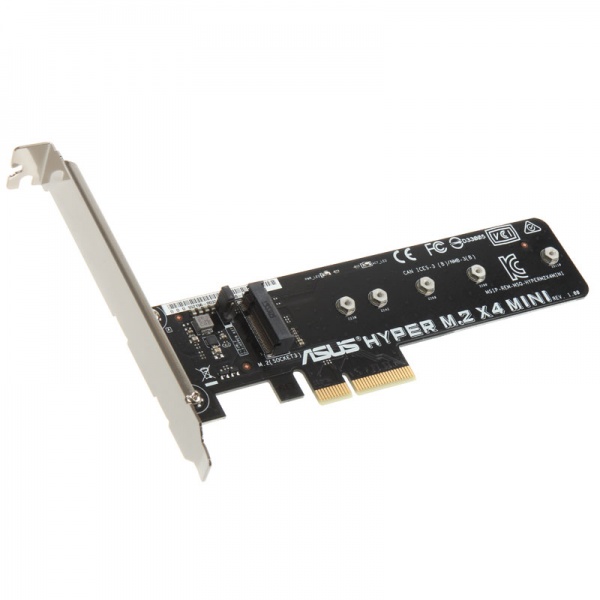 All you need is rufus or WinToUsb (Pro version if you want to install Windows Pro), a windows computer, native or virtual machine, and a usb key and your external drive.
Here a video for mac Bootcamp on external drive:
https://9to5mac.com/2020/07/14/install-windows-mac-external-ssd-drive-boot-camp-2020-video/
Your Answer
Sign up or log in
Sign up using Google
Sign up using Facebook
Sign up using Email and Password
Post as a guest
Required, but never shown
Post as a guest
Required, but never shown
By clicking “Post Your Answer”, you agree to our terms of service, privacy policy and cookie policy
How to boot Windows 10 from NVMe based PCIe storage, featuring Samsung 950 PRO M.
 2 SSD in a Supermicro SYS-5028D-TN4T |
Posted by Paul Braren on Nov 5 2015 (updated on Jul 18 2017) in
How to boot from NVMe (Non-Volatile Memory express). Why is that a thing to learn? Well, consider that it’s an entirely new storage technology. The issue is not so much about the tiny M.2 2280 form factor, or PCIe or U.2 connections. It’s everything to do with leaving legacy SATA/AHCI behind, which I’ve been wanting to do since well before my April post. This is not your slower Surface Book or Macbook air NVMe. This 950 PRO is faster than both of those, much faster. Especially for writes. Current the fastest consumer SSD in the world, and my initial tests sure seem to confirm this, partially because it’s paired with a SuperServer that allows it to shine, with 4 lanes of PCIe 3. 0 goodness.
Available now on Amazon in 256GB and 512GB sizes, 1TB not expected until early next year.
This is a very exciting day for me, the arrival of the final piece of my home lab storage strategy. And it seems to exceeed the high expectations of 2500MB/s reads and 1500MB/s writes. See also:
- 950 Pro review: Samsung’s first PCIe M.2 NVMe SSD is an absolute monster
Oct 22 2015 by Orestis Bastounis
You have some BIOS tweaks to do even if you use a PCIe card, like the recently tested Intel 750 Series PCIe NVMe. The YouTube video’s commenter Dan L sums up the 750’s intended use-case nicely:
Intel 750 is considered enterprise drive whereas Samsung 950 Pro is designed for client users. The reason why I didn’t buy Intel 750 is because it mainly focus on higher queue depths such as data center, web server, and file server. In addition, it draws maximum power of 22watts and boot time was incredibly slow, though Intel released the new firmware update but boot time was still slower than Samsung SM951 and even Samsung 950 Pro.

(above image from page 5 of Booting from an NVMe PCIe Intel Solid-State Drive — Technology Brief)
Whatever NVMe drive you buy, you’ll still likely need to meet all of the following requirements, if you plan to also use it as a boot device:
- a newer system, such as the Xeon D-1540 or Skylake chipsets (2015 or later)
- modern OSs have the NVMe driver built-in, like Windows 8.1/10 or Windows Server 2016 (the Microsoft NVMe driver is generally slower, replace it with vendor provided driver once Windows is installed)
- a UEFI BIOS that supports boot from NVMe (not something you can assume)
(on this system’s X10SDV-TLN4F motherboard, BIOS 1.0a or 1.0b both allow boot from NVMe) - an M.2 PCI-E x4 slot (as in 4 lanes, key to obtaining the maximum speeds)
- BIOS in UEFI boot mode (nice bonus is that it allows your bootable device to be larger than 2TB, since Windows will use GPT rather than legacy MBR)
- some mobos also require CSM (Compatibility Support Mode) be turned on, read ASRock example here, this Supermicro mobo has CSM Enabled by default
- a willingness to do any required BIOS upgrades and/or BIOS configuration changes (varies by motherboard manufacturer)
Sounds a little like a hassle.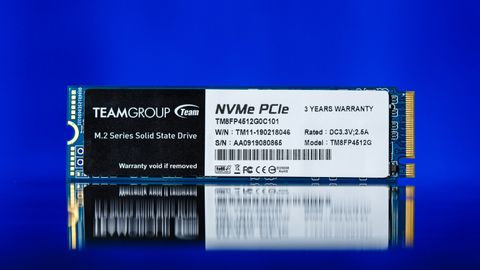 The below video will demonstrate that it’s really not, at least with this system, using Windows 10 that has built-in NVMe support.
Feb 8 2016 Update — With the benefit of hindsight, I’ve since learned that BIOS 1.0a may have needed the tweaks outlined below, but for BIOS 1.0b, all that’s really required is to be sure you have the BIOS in UEFI mode when doing the install to NVMe, which lays down a GPT (not MBR) partition. The steps needed for other motherboard vendor BIOS configuration may be quite different.
What’s the benefit of going through a bit of extra effort to be able to boot from NVMe? The convenience of one C: drive in Windows combined with an increased speed and reduced latency versus traditional 2.5″ SATA SSDs, illustrated below.
Source: Intel
- From Download Windows 10, use the Download Tool 64-bit link to get MediaCreationToolx64.exe
- Insert a USB 3.0 flash drive such as the SanDisk Ultra Fit and create the bootable install media
- insert this flash drive into one of the blue rear USB 3.
 0 ports of the Supermicro SYS-5028D-TN4T
The default is Legacy, change these [and BIOS boot mode] to EFI - power up
- press Del to get into BIOS
- set BIOS to defaults, reboot
- set BIOS to UEFI mode
- go to SATA Configuration
- change all SSDs you have from Hard Disk Drive to Solid State Drive
- press ESC, then select PCIe/PCI/PnP Configuration
- select M.2 PCI-E 3.0 X4, change from default [Legacy] to [EFI]
- select SLOT 7 PCI-E 3.0 X16, change from default [Legacy] to [EFI]
- optionally, for better speed, select Onboard Video Option ROM, change from default [Legacy] to [EFI], this allows you to do the next step
- press ESC, select Security, select CSM Support, change from default [Legacy] to [EFI]
- press ESC, select Boot Settings, Boot Mode Select, change from [Dual] default to [UEFI]
- press ESC, Save Changes and Reset
- if you have no data on any drives, your system will likely automatically boot from the USB drive (if not, press F11 at boot time to manually select USB UEFI)
- perform a normal Windows 10 installation, you’ll have a GPT drive type, and if you clone it someday to a >2TB drive, it will still be bootable
- for this drive, the speed is slower with Windows 10’s Microsoft NVMe driver, from Samsung’s SSD site, download and install the Samsung NVMe Driver Installer, then reboot when prompted
That’s it, you now have an incredibly fast boot time, and an amazing performer. Just a normal Windows 10 PC, only much faster.
Thorough step-by-step look at the above steps, and more, including some basic ATTO, Crystalmark, and AS SSD benchmarks.Brief unboxing, followed by simple installation into a Supermicro SYS-5028D-TN4T.Samsung 950 PRO M.2 NVMe SSD installed, with 128GB of Samsung DDR4 in the background.
work-in-progress…
Nov 07 2015 Update — Benchmark Results are in! See:
- World’s fastest consumer SSD — Samsung 950 PRO M.2 NVMe benchmark results
Everything below is a peek at some early attempts to create a baseline of expected performance, before I head over to VMware ESXi 6.0 to perform these same tests again, but with Windows 10 then «living» as a VM on a VMFS datastore on this 950 PRO.
ATTO Disk Bench under Windows 10 on SYS-5028D-TN4T. Intel 750 Series NVMe 400GB versus Samsung SM951 128GB versus Samsung 950 PRO 512GB.Yep, that just happened, the world’s fastest consumer SSD, running in my home. I’m pretty darn excited about this leap forward in speeds. Especially shines where it’s needed most, at that 4K transfer size. Click twice for full zoom.
Thanks to YouTube commenter Dan L yet again! He’s mentioned above, and added another tip, mentioning BIOS’s CSM setting. Being a tinkerer, I headed back into the BIOS, and turned CSM off. What do you know, performance increased! Not a big change, but noticable, as you look over this image carefully. The above procedure has now been tweaked accordingly, and the video has been annotated.
Dan L goes on to give more excellent advice:
Keep in mind that some PCIe slots are connected directly to PCH (Platform Controller Hub) which runs in PCIe Gen2 Lanes instead of PCIe Gen3 lanes. So I encourage people to refer to user’s manual as well as UEFI BIOS to check which PCIe slots are directly connected to PCIe Gen3 lanes.
Now compare this to yesterday’s run. The ONLY change was turning off CSM in the BIOS. Click the picture above twice to get to the full resolution, then use your left and right arrow keys to toggle/compare. Yep, it’s even faster!This shows consistency between runs. Click the image twice to really zoom in, so you can pan around.
Well that was unexpected! Turns out the 950’s built in thermal protection was likely the reason the speeds dropped toward the end of these very first ATTO Disk Benchmark runs I did yesterday.
Silly me, after recording the installation of the M.2 drive, I had failed to put the PC’s cover back on. Yep, this server is running far from me in my basement. Given months of experience with all the other components and drives in this system barely going up a degree with the lid off, even under heavy stress tests. So usually heat is a non-issue with this system, at all.
Now let’s think about the tiny surface area of M.2 for moment. If it’s using using up to 7 watts when under heavy load, well, that heat has to go somewhere. Given the small surface area, well, it’s no surprise that airflow certainly matters. You’ll even see that on Nov 4th in my older 950-related post, where I already had the nifty thermal video displayed there, so it didn’t take me long to figure out. I’ll publish my «tinkering» video with the 2nd M.2 in the PCIe slot soon, and revisit whether CSM really matters. This is just preliminary findings, as I actually like finding out stuff from accidents. It’s called tinkering. And it’s certainly nice to see even faster speeds now.
Nov 05 2015 PC cover OFF.Nov 06 2015 PC cover ON.
All the basic benchmarks and observations will belong in a new post, here at TinkerTry. Stay tuned!
Meanwhile, here’s a convenient copy of the thermal tests:
Turning the fan higher and leaving the lid on resolves any minor issues with thermal protection kicking in. At the expense of fan noise, of course. That D: drive on the Lycom PCI adapter held up a little longer (ran a little cooler) than the motherboard M.2 slot does, when put under heavy stress. Seems unlikely that you’d have an issue with it in normal use.
Here’s a first run of ATTO test, with BIOS default system fan speed, and cover back on the stock SuperServer 5028D-TN4T.Cover on, CSM off, Fan Max — first run of each test, >30 seconds cool-off between each of the 3 tests.
I’ve since learned that 1.0a really needs all those BIOS tweaks above, but BIOS 1.0b does not. In fact, other than turning on UEFI mode in the BIOS, the rest of the tuning is optional. Boot from NVMe will «just work»! See also:
-
You can boot from a Samsung 950 PRO NVMe M.2 SSD in a PCIe slot — tested with Supermicro 5028D-TN4T & Lycom DT-120 M.2 to PCIe adapter
Jan 27 2016 -
Recommended BIOS Settings for Supermicro SuperServer SYS-5028D-TN4T
Jan 15 2016 -
Benchmark Optimized BIOS Settings for Supermicro SuperServer SYS-5028D-TN4T
Jan 13 2016 - New Windows 10 NVMe driver 1.4.7.16 released for Samsung SSD 950 PRO M.2
I also plan to do some thermal testing of my various SSDs, see also my newly-published video:
I’m just warning up, more videos featuring thermal imaging to come!It looks like you have JavaScript disabled. Click here to view the video above.Video and Audio sped-up 4X, showing Samsung SSD 950 PRO M.2 NVMe during initial power-up and boot. You’ll even hear the BIOS speaker beep at the end of POST.
This article and video, and my articles about the Intel 750 Series NVMe SSD, wouldn’t have been possible without the temporary loan of a second Samsung 950 PRO and a second Supermicro SuperServer Bundle 2 by Trond Eirik Haavarstein aka Eric @xenappblog of xenappblog.com
You might even spot a familiar name among the presenters at xenappblog’s upcoming virtual expo. Be sure to sign up early, because hundreds typically attend his events 😉
Note that the 950 PRO can work on both BIOS and UEFI systems, details below, here’s an excerpt:
Samsung says this is backwards compatible with Legacy BIOS systems so long your system can initialize IDE devices (like most chipsets), it can use this SSD. Your ONLY requirement is a free PCIe x4 slot and a modern OS with the appropriate NVMe driver.
— SkOrPn
-
World’s fastest consumer SSD — Samsung 950 PRO M.2 NVMe benchmark results
Nov 07 2015 -
How to install Samsung 950 PRO M.2 SSD in a PCIe slot — tested with Supermicro 5028D-TN4T & Lycom DT-120 M.2 to PCIe adapter
Nov 05 2015 -
World’s Fastest Consumer SSD — Samsung 950 PRO NVMe M.2 SSD 256GB/512GB available for pre-order now, arriving Oct. 30
Oct 22 2015 - Intel 750 Series NVMe PCIe SSD supported by ESXi 6.x out-of-the-box, install Intel’s VIB for full speed
Sep 29 2015
- Superguide: SuperServer home virtualization lab storage tiers, platinum through bronze, how many efficient drives fit inside this tiny chassis?
Sep 25 2015
Here’s where I talk about my plans to use the 950 PRO for both VMware ESXi 6 read cache and VMFS datastore duties, for my favorite VMs.
-
Supermicro Superserver 5028D-TN4T UEFI BIOS 1.
 0.b and IPMI 02.14 released — improves boot from M.2 or NVMe support
Sep 23 2015 -
Samsung announces 950 PRO V-NAND NVMe M.2 SSD, 512GB 2.5 GB/s version arrives in October, 1TB next year
Sep 22 2015 - Detailed assembly and configuration instructions for Supermicro SuperServer Workstation Windows 10 Pro bundle
Aug 19 2015
This Dell article added Jul 18 2017:
-
What are PCIe SSDs and how to use them as a boot drive for a Dell PC?
by Dell:This article provides information on the PCIe SSD’s which were initially available on Dell servers, but are now being offered on other systems. We will take you through what a PCIe SSD is, does and how it does it. We will also cover what’s needed to use one of these drives as your boot drive with a Windows Operating System installed and go over any other relevant information that would be useful to know when dealing with this type of device.

Note : Best Practice for a Windows operating system Install is to only have the desired boot drive powered during installation.
-
Booting from an NVMe PCIe Intel Solid-State Drive — Technology Brief
Apr 2015 by Intel -
Samsung 950 PRO 256GB and 512GB M.2 NVMe PCIe SSD Review
Oct 22 2015 by Allyn Malventano at PC Perspective -
Samsung 950 Pro M.2 NVME SSD Review (256/512GB) – The NVMe Effect
Oct 22 2015 by Les Tokar at The SSD Review - The Samsung 950 Pro PCIe SSD Review (256GB and 512GB)
Oct 22 2015 by Billy Tallis at AnandTech
Install and boot from an NVMe SSD on a Dell OptiPlex 9020, 7020 or 3020
In this post I will show you how you can modify the BIOS of your Dell OptiPlex 9020, 7020 or 3020 so that they can support an NVMe SSD drive as a boot device. These machines have a UEFI BIOS, but they do not contain an NVMe driver. By adding the driver into the BIOS you can boot from a PCIe NVMe SSD.
I managed to achieve these speeds:
Drive Speed result for OptiPlex 7020 Drive Speed result for OptiPlex 3020
The speed results above are from the same SSD. ( Samsung 970 EVOPlus )
It took me quite a bit of research to figure out how to do this modification. But it is actually very easy and provides an immense boost in speed. Here is the card and SSD installed and working in OptiPlex 7020.
Warning
This blog post contains instructions on how to modify your BIOS.
You could easily break your machine. Proceed at your own risk!
Required Hardware
In order to carry out this upgrade, you will need a few things:
- An NVMe SSD.
 I used a 512Gb Samsung 970 EVOPlus
 - An NVMe to PCIe Adapter, I used this one from Amazon.
- A Dell OptiPlex 9020, 7020 or 3020 to upgrade.
I have personally tried this procedure on the 3020 and 7020 Small Form Factor and a 9020 Minitower. It works for every variant of the machine. There are slight variations in the procedure for each machine.
Procedure Overview
This process involves five steps:
- Upgrade your current BIOS if required.
- A18 for the OptiPlex 7020.
- A20 for the OptiPlex 3020.
- A25 for the OptiPlex 9020.
- Backup your current BIOS.
- Add NVMe driver support into the BIOS backup.
- Writing the modified BIOS back to the system.
- Install the PCIe NVMe SSD and Adapter.
- Optimise BIOS settings.
Machine Preparation
Before starting the the physical installation of the NVMe SSD you can do all of the required preparation while the machine is running on your existing drive.
Upgrade your BIOS
The first step, is to upgrade your current BIOS:
- A18 for the OptiPlex 7020.
- A20 for the OptiPlex 3020.
- A25 for the OptiPlex 9020.
Just download the BIOS update from the Dell website and run the update. Before the update runs it will show your current version and the version that you will be updated to:
Install Intel Management Engine Components
Next install the Intel Management Engine Components from Dell. These management components will allow you to access the BIOS in order to back it up. Reboot once after installation of the management tools.
Download Intel Management Engine Tools
Now download Intel ME System Tools and extract the Zip file to your machine. For the purposes of this blog post I will assume that it has been extracted to: C:\Intel ME System Tools v9.1 r7.
The Intel ME System Tools will be used to backup the BIOS and write the modified image back to the machine.
Backup your current BIOS
Parts of the BIOS are protected and cannot be read to or written from. In order to get a complete backup the machine must be put into service mode.
- Switch the machine off completely.
- Disconnect it from the mains Power.
- Move the jumper from the two pin PSWD connector, to the two PIN SERVICE_MODE connector. It is located between the Power Supply and the PCI Slot closest to it:
Note: If you have a spare jumper you could leave the password jumper in place.
Service Mode pins for Dell OptiPlex 7020 SFFService Mode Pins for Dell OptiPlex 3020 SFFService Mode Pins for Dell OptiPlex 7020/9020 Mini Tower
Once the machine is in service mode, turn it back on, you will receive some warning notifications:
First a warning informing you that the password has been disabled. Don’t worry about this as you will be putting the password jumper back where it should be soon. It will show this message:
Next, you will also receive a message notifying you that service mode is enabled:
Press F1 to continue and continue to boot normally
When your machine is booted up again you can take a backup of your existing firmware. Open a command prompt as administrator:
Run the following commands:
cd "\Intel ME System Tools v9.1 r7\Flash Programming Tool\WIN64"
fptw64.exe -d backup.bin
The example above is from an OptiPlex 7020, the output from the 3020 will look slightly different as it only has a single flash device and will give output such as:
Platform: Intel(R) H81 Express Chipset
Reading HSFSTS register... Flash Descriptor: Valid
    --- Flash Devices Found ---
	MX25L6405D    ID:0xc22017    Size: 8192KB (65535Kb)


- Reading Flash [0x800000] 8192KB of 8192KB - 100% complete.
Writing flash contents to file "backup. bin"...
Memory Dump Complete
FPT Operation Passed
bin"...
Memory Dump Complete
FPT Operation Passed
You will now have a file named backup.bin which contains a full backup of your BIOS. Leave the command prompt open as we are going to use it again to write the modified BIOS back.
Modify the BIOS Image
Download and open UEFITool 0.28.0 to modify your BIOS (Direct link to version I used).
Open the backup.bin from the previous step in UEFI Tool and expand it like so:
Scroll to the bottom of this section and you should see an area that looks like this:
Now, download this NVMe Express Driver and save it to your machine. Next, right click on the final DXE Driver before the Freeform entries. Specifically these is IDs:
- D95D6B4F-92FA-4E78-9C48-C68C0813688E for the OptiPlex 7020 or 9020
- 6C58FC74-64DA-4D83-8BCD-9FD574C97316 for the OptiPlex 3020
Right click the item and choose Insert After:
Choose the file NvmExpressDxe_Small. ffs that you just downloaded and you will see it appear right after the item that you selected:
Now go to File -> Save Image File and save the file as nvme.bin.
Write the new BIOS to the machine
You are now ready to write the new file back to the machine. Go back to the command prompt session. Type the following command:
fptw64.exe -bios -f nvme.bin
You should get output like this:
Shut down the machine and take the jumper off the service pins and move it back to the password reset pins if you took it from there.
Install the PCI NVMe SSD
If you have not yet installed your SSD into the machine, you can do it now. For the 7020 use the blue PCI slot, it is approximately twice as fast as the smaller black one.
For the 3020 you need to install it into the PCI Slot closest to the Power Supply.
Optimise BIOS Settings
Now that you have written the new BIOS, restart the machine.
You should be able to see the adapter in the BIOS:
If you are not going to have any SATA drives connected you need to disable them in the BIOS, here you can see I have disabled all of the ports that do not have a drive connected:
Disabling the un-used ports prevents an error on startup.
Finally, if you want the maximum possible speed from your new drive, consider disabling C-States in the BIOS. This makes it marginally faster, but I doubt you would notice much difference:
Conclusion
Upgrading a Dell Optiplex 9020, 7020 or 3020 with PCI NVMe Solid State drive is a brilliant upgrade, and completely transforms the machine. Especially if you are upgrading from a hard drive.
Again, here is the PCI adapter that I used:
- 512Gb Samsung 970 EVOPlus
- NVMe to PCI Adapter (The adapter comes with a heatsink also)
If you try it, I would love to know how you got on and what your results were.
Data Center DC1000B – M.2 (2280) NVMe Server Boot Drive (SSD) – 240GB and 480GB
Search Kingston.com
To get started, click accept below to bring up the cookies management panel. Next, tap or click on the Personalization button to turn on the chat feature, then Save.
Your web browser is out of date. Update your browser now for better experience on this site. https://browser-update.org/update-browser.html
DC1000B
- Intro
- Reviews
- Specifications
- Resources
- Datasheet
Buy
Kingston’s Data Center DC1000B is a high-performance M.2 (2280) NVMe PCIe SSD using the latest Gen 3.0 x 4 PCIe interface with 64-layer 3D TLC NAND. DC1000B offers data centers a cost-effective boot drive solution with the reassurance they are purchasing an SSD designed for server use. The DC1000B is ideally suited for use in high-volume rack-mount servers as an internal boot drive(s) as well as for use in purpose-built systems where a high-performance M. 2 SSD is needed that includes on-board power loss protection (PLP).
- M.2 (2280) NVMe PCIe SSD Gen 3.0 x 4, performance
- NVMe for server boot workloads
- Application optimised capacities (240GB — 960GB) keep costs low
- On-board (PLP) Power Loss Protection
- Self-Encrypting Drive (SED) with AES-XTS 256bit
Enterprise Data Centre NVMe Boot SSD
M.2 NVMe SSDs are evolving within the data centre providing efficiencies in booting servers to preserve valuable front-loading drive bays for data storage. Whitebox and Tier 1 Server OEMs are beginning to equip server motherboards with one or sometimes two M.2 sockets for boot purposes. While the M.2 form-factor was originally designed as a client SSD form-factor, its small physical size and high performance make it attractive for server use. Not all SSD are created equal and using a client SSD in a server application may result in poor inconsistent performance.
Applications
Boot drives are used primarily for booting an OS, but in many use cases today the boot drive has a secondary purpose; logging application data and/or configured as a high-speed local cache drive. Therefore, the DC1000B was designed with added endurance (0.5 DWPD for 5yrs) to handle the OS workload as well as the extra write workload of caching and data logging. In addition to being designed for long term reliability the DC1000B is designed to deliver enterprise level performance consistency and low latency features typically not found on client SSDs. Available in 240GB and 960GB capacities1.
M.2 (2280) NVMe Performance
Incredible speeds of up to 2.6GB/s and 200K IOPS.
Optimised Server Boot Drive
Enhanced for boot workloads as well as caching and logging applications.
On-board (PLP) Power Loss Protection
Reduce the possibility of data loss and/or corruption on ungraceful power-off.
Maximise Drive Bays
Move boot drives internally frees up front loading drive bays for additional data storage.
- Specifications
| Form Factor | M.2, 22mm x 80mm (2280) |
| Interface | PCIe NVMe Gen3 x4 |
| Capacities1 | 240GB, 480GB, 960GB |
| NAND | 3D TLC |
| Self-Encrypting Drive (SED) | AES 256-bit Encryption |
| Sequential Read/Write | 240GB – 2,200MBs/290MBs 480GB – 3,200MBs/565MBs 960GB – 3,400MBs/925MBs |
| Steady-State 4k Read/Write2 | 240GB – 111.000/12.000 IOPS 480GB – 205.000/20.000 IOPS 960GB – 199.000/25.000 IOPS |
| Latency Read (Avg) | 161µs |
| Latency Write (Avg) | 75µs |
| Power Loss Protection (Power Caps) | Yes |
| SMART Health Monitoring and Telemetry | SMART, Telemetry and other Enterprise Class Diagonistic capabilities |
| Endurance | 240GB — 248TBW (0. 5 DWPD/5yrs)3 5 DWPD/5yrs)3480GB — 475TBW (0.5 DWPD/5yrs)3 960GB — 1095TBW (0.6 DWPD/5yrs)3 |
| Power Consumption | 240GB: Idle: 1.82W Average Read: 1.71W Average Write: 3.16W Max Read: 1.81W Max Write: 3.56W 480GB: Idle: 1.90W Average Read: 1.74W Average Write: 4.88W Max Read: 1.81W Max Write: 5.47W 960GB: Idle: 1.29W Average Read: 1.67W Average Write: 4.25W Max Read: 1.78W Max Write: 5.73W |
| Storage temperature | -40°C ~ 85°C |
| Operating temperature | 0°C ~ 70°C |
| Dimensions | 80mm x 22mm x 3.8mm |
| Weight | 240GB – 8g 480GB — 960GB – 9g |
| Vibration operating | 2.17G Peak (7–800Hz) |
| Vibration non-operating | 20G Peak (10–2000Hz) |
| MTBF | 2 million hours |
Warranty/support
Backup the existing BIOSOpen a command prompt as an administrator and change to the directory where you extracted the Intel ME System Tools. Then navigate to the subdirectory \Flash Programming Tool\Windows64 (or Windows if you are on 32-Bit installation). Within that directly use the command: fptw64.exe -d backup.bin Modify the BIOS and Inject the NVMe DriverNext, open UEFI Tool and open the backup.bin file. Expand the sections as per the following screenshot: Scroll to the bottom of this section and you should see an area that looks like this: Next, right click on item with the name D95D6B4F-92FA-4E78-9C48-C68C0813688E and choose Insert After. Choose the file NvmExpressDxe_Small.ffs that you just downloaded earlier and you will see it appear right after the OemLinkDELLPwdLib section: Now go to File -> Save Image File and save the file in the same location as the flash tool as NVME.bin. Go back to your command prompt and run the command: fptw64.exe -bios -f nvme.bin Shut down the machine and remove the jumper from the service pins and move it back to the password reset pins if you took it from there. The BIOS modification is complete! Install the PCI NVMe SSDIf you have not yet installed your SSD into the machine, you can do it now. If possible use the Blue X16 PCI slot, it is much faster than smaller black one. Optimise BIOS SettingsNow that you have written the new BIOS, restart the machine. If you do not have any SATA drives connected you will receive a warning on start-up that says: Alert! Hard Drive not found You can fix this by going into the BIOS Setup and then System Configuration -> Drives. Untick all the SATA ports which do not have drives connected. Finally, if you want the maximum possible speed from your new drive, consider disabling C-States in the BIOS. This makes it marginally faster, but I doubt you would notice much difference. ConclusionNow you can install an operating system of your choice or clone one of your existing drives to your new NVMe drive and enjoy a decent performance increase. Upgrading the Dell Optiplex 7010 with PCI NVMe Solid State drive is a brilliant value upgrade, and completely transforms the machine. Especially if you are upgrading from a hard drive. Again, here is the PCI adapter that I used:
If you try it, I would love to know how you got on and what your results were. Using New NVMe SSDs as a Boot Disk on Legacy BIOS Legacy Systems (for any OS) Following in the footsteps of this post, where, in my opinion, the solution is not so elegant and not for all BIOS & OS.
Problem
Old BIOSes do not see new NVMe SSDs, unlike EFI (UEFI). Modern operating systems, as a rule, see these disks, and after loading the OS, you can work with the disk, but the old BIOS does not, therefore, you will not be able to boot from the new fast disk. Well, because you can’t give a command to load what you can’t see. PreludeAn NVMe SSD drive, as a rule, has an M.2 connector, and works, as it were, directly with the processor, via the PCI-E bus. Therefore, if your motherboard does not have an M.2 connector, then first it is recommended to get a PCI-E >> M.2 adapter, or a PCI-E RAID controller for an M.2 SSD. There are few advanced NVMe SSD drives that have their own legacy device emulator. For example Samsung 950 Pro has an extra rom to boot as a Legacy device on older BIOSes. But the entire EVO series does not have such an opportunity. Solution
A bit of history
Many years ago, when Intel began supplying Apple with its processors and components for use in Macs, there was a need to pre-test hardware for compatibility with MacOS. Then Intel engineers wrote a tricky DUET bootloader, which is a UEFI emulator that boots on top of the Legacy BIOS and allows you to run operating systems that require UEFI (MacOS, for example). However, using DUET «directly» is not a very trivial task (example, or another, b-rrr…), requiring a lot of manual operations, depending on the specific hardware and OS, and understanding what exactly you are doing. Later, DUET was taken as the basis for several multi-loader projects. One of them is Hackintosh — a project to install the latest MacOS on any Intel, and later AMD machines. As a result of the development of Hackintosh, the multifunctional bootloader Clover (Clover) appeared, which, of course, is sharpened for loading MacOS and Intel, but now it can be successfully used to boot anything on almost anything. Here it is, Clover, we will use to solve our problem. Clover ConfiguratorClover itself is also tuned not anyhow, and in order to somehow facilitate the tuning process in the future, the Clover Configurator tuning utility was released, and many manuals for use. But the trouble is that Clover Configurator only works in MacOS, and on Windows you can only run it in VmWare at best. Clover Web Configurator Some users recommend using Clover Web Configurator instead of Clover Configurator. True, it is not a fact that the press for your MB will be on the list. And the documentation on Clover is voluminous and detailed. But, try, and suddenly. There are also rumors (in the comments) that the author of Clover himself (SergeySlice) does not recommend using Clover Configurator, but recommends editing the configuration file by hand. Let’s not go this way … we have paws and Mustday. Boot Disk Utility (BDUtility.exe)Especially for those who have paws, one Russian enthusiast wrote the BDUtility.exe utility, which itself downloads the latest release of Clover, makes the necessary minimal settings and writes the resulting image to a USB flash drive. Don’t be afraid of the outrageous site, the utility works perfectly 🙂 To download the utility, click on the picture with the letters «Bu» and a blue arrow in the middle of the site 🙂 Note
If there is an extra SATA drive… Theoretically, you can try to put Clover on an extra SATA disk or even a memory card, if there are any in the system and booting from them is supported (I have no disks left, demolished everything, buzzing, and there was no option to boot from memory cards). In any case, the documentation for Clover allows this. However, in this case, you will have to manually conjure the boot area.
Creating an installation flash driveIf you managed to download the BDUtility utility, run it. It runs under Windows and with administrator rights, be careful. The happy owner of other operating systems should skip this step and return to Clover Configurator above. Run BDUtility.exeNext, you need to perform a series of settings so that the utility downloads the latest Clover distribution, configures it and writes it to your USB flash drive. The flash drive must be inserted into a USB port, and preferably cleanly formatted.
BDUtility setup:
Now that the flash drive is ready, try booting from it. Don’t forget to set your BIOS to boot disk => your flash drive. If the download succeeds, the screen should appear something like this, with a list of current download options. You can try to find your boot entry and load the current OS. NVMe driversIf your NVMe SSD is already in your computer, don’t try to find it in Clover’s settings — it’s not there. The fact is that by default Clover does not load drivers for NVMe devices. Drivers must be included in the download manually. To do this, open the flash drive in the explorer. Go to the folder G:\EFI\CLOVER\drivers\off (where drive «G» is your flash drive, and folder «off» is the folder with unconnected Clover drivers). Find the file NvmExpressDxe.efi Press Ctrl + C to copy the file to the clipboard, and copy the file to the folders G:\EFI\CLOVER\drivers\BIOS and and EFI\CLOVER\drivers\UEFI . We reboot the computer, boot from the Clover flash drive and observe the number of icons on the screen indicating boot options — there should be more of them, because now Clover sees your NVMe SSD.
Installing a new OS on a new NVMe SSD
Next, in order to take advantage of booting from a fast NVMe SSD, we need to actually put the system on it. And there is a nuance. In order to avoid problems in the future with attempts to boot from your NVMe disk from under Clover, it is highly recommended not to transfer your current system to a new disk, but to install a new system on the NVMe disk from scratch. The problem is rooted in the type of bootloader your operating system was chosen and used when it was installed on the computer. If you now have a system with a BIOS without NVMe support, then the current OS bootloader is focused on the BIOS, and not on the EFI.
Transferring such an OS to an NVMe disk and using it to boot in EFI mode just won’t work, you will need to manually change the OS bootloader , and this is laborious, not quite justified and fraught, IMHO. Therefore, we boldly stock up on a license key for the new OS (well, or find where the old one is) and go to the Media Creation Tool download page to make a boot disk for your Windows operating system. The fact is that for some time now Microsoft has begun to include both BIOS and EFI bootloaders in the image created by the Media Creation Tool. And now this bootable flash drive can boot absolutely on any systems with Legacy BIOS, UEFI and EFI. And before, you had to process the resulting boot image and integrate Rufus into it to boot in EFI mode (for example, scroll to the middle). Note
OS installation
Installing the operating system on the new NVMe SSD is quite regular and fast. In the Clover interface, find the download from the flash drive with the distribution of your OS. Next, the installation of the OS should begin. At some point, the system will reboot (you are installing Windows), and you will have to choose to continue booting from your NVMe SSD, again, do not mix it up! Do not choose to re-boot from the OS distribution, otherwise the installation will simply start over, and we need it to continue from the SSD and, preferably, complete. After installing a new system on your new NVMe SSD, an entry will appear in Clover that a new OS was installed from under it. Also, the boot icon for the new OS should appear first in the list of downloads, and if I’m not confusing anything, then it will be called «Boot Microsoft EFI Boot from EFI» . And after the final installation of the OS, remove the USB flash drive with its distribution so that it no longer appears in Clover and in My Computer. And in your BIOS, the disk boot order should always start with a clover stick until you upgrade the hardware to support EFI. Then, and only then, can you proudly put your now aged NVMe SSD first! . That’s it, actuallyNow, every time you reboot, you will be taken to the Clover interface and press the Enter key (if your OS is listed first). But then enjoy the new system and fast SSD 🙂
PS UPD How to boot from M.2 SSD Windows 10? Focus on 3 waysHow Boot From M 2 Ssd Windows 10 Summary :What is M.2 SSD? How to install Windows 10 on M.2 SSD? How to boot from M.2 SSD? This post from MiniTool will show you how to set up M.2 as your boot drive in three different ways. If you want to know how to install Windows 10 on an NVMe SSD and get the best performance, keep reading. Quick Navigation:What is an M.
When it comes to improving computer performance, choosing the fastest storage device is the smart move. So, an M.2 SSD would be a good choice. M.2, also known as the next generation form factor, is an interface standard for ultrabooks or tablet computers that can be used to replace mSATA SSDs.
M.2 SSD has more flexible physical characteristics, which allows you to use modules of different widths and lengths. Overall, it is smaller than an mSATA SSD. M.2 SSD supports PCIe 3.0, SATA 3.0 and USB 3.0 while mSATA SSD only supports SATA. The M.2 SSD delivers fast speeds and stores more data than most mSATA SSDs. M.2 SSD has a maximum speed of 4GB per second while SATA SSD can only handle 600MB per second. For more information about M.2 SSD, you can read the post: M. With faster speed, more and more users would like to install M.2 SSD in their computers and ask if they can boot from M.2 SSD or set up M.2 as boot drive. Of course you can. In the next section, we will explain how to boot from an M.2 SSD or how to install Windows 10 on an M.2 SSD. 3 ways to boot from M.2 SSDIn this section, we will show you 3 ways to boot from M.2 SSD. If you don’t want to reinstall the OS on an M.2 SSD, you can try the first two methods. It will be much easier for them to install M.2 as their boot drive. If you want to clean install Windows 10, use the third method. Note: To boot from M.2 SSD, first check if your computer supports M.2 interface. Method 1: Clone OS to M.2 SSD via MiniTool ShadowMaker To install Windows 10 on M.2 SSD, you can clone the OS from the source drive to M.2 SSD and boot from it. So, to clone OS on M.2 SSD, you can use the clone tool — MiniTool ShadowMaker, which will help you clone OS from HDD to SSD without damaging the original data. It is also a product of professional Windows backup software to keep your PC and data safe by creating backup images. So, with so many features, just download it using the following button or choose to buy the extended version. Now, here is a guide on how to install M.2 as a boot drive. Step 1 Install M.2 SSD on PC First you need to install M.2 SSD on your PC. You can read the post How to Install an M.2 SSD in a Desktop PC take the link. Step 2: Install and run MiniTool ShadowMaker
Step 3. Select clone source and destination
Step 4 Start cloning OS to M.2 SSD.
When the disk cloning process is completed, you will receive the following warning message. Step 5. Set M.2 SSD as boot drive
When all steps are completed, you can boot your computer with M.2 SSD. Thus, setting M.2 as a boot drive is very easy. Method 2: Clone OS to M.2 SSD using MiniTool Partition Wizard To install Windows 10 on M.2 SSD and boot from M.2, we will show you the second method. So you can also clone OS to M. MiniTool provides another tool to clone an operating system to an M.2 SSD. This is the MiniTool Partition Wizard. is a partition magic designed to optimize partition and disk usage, such as extending a partition, performing data recovery, partition repair and so on. With so many features, download it right away to have a try. Now we will show you how to clone OS to M.2 SSD and how to boot from M.2 Windows 10 boot disk. Step 1. Install M.2 SSD in your computer First you also need to install M.2 SSD in your computer. For detailed operating instructions, you can use the first method listed above. Step 2 Start cloning OS to M.2 SSD. 1. After installing the M.2 SSD on your computer, install the MiniTool Partition Wizard and run it. 2. After entering the main interface of MiniTool Partition Wizard, select the source system disk and select Copy from context menu to continue. 3. Select the target drive. Here you have to select M.2 SSD as the target drive. Then press next . 4. Select the available copy options. Then press next .
buy now 5. Then carefully read the note about changing the boot order if you want to boot from M.2 SSD. Then press End to continue. 6. Finally, you can review the changes and click Apply to execute them. Step 3: Change Boot Order in BIOS After cloning OS to M.2 SSD, you need to enter BIOS settings to change boot order and set M.2 SSD as default boot drive. After you have completed all the steps, you can successfully boot your computer with M.2 SSD. In addition to the disk clone function, MiniTool Partition Wizard also provides Move OS to SSD function that allows you to move OS to M.2 SSD. Method 3: Install Windows 10 on NVMe SSDIn the above part, we showed you how to set up a Windows 10 M.2 boot disk in two ways. In this part, we will show you the third way. If you don’t want to use the original operating system and want to install a new one, try this method. Before reinstalling the OS, please back up your important files. Here’s a guide to installing Windows 10 on an M.2 SSD. Step 1: Create your Windows 10 9 installation media0263
|
