How to Combine Multiple ISO Files Into a Single Bootable ISO Image
There are hundreds of Linux Live CDs available online, and almost all are absolutely free. Many are indispensable for various purposes, such as desktop recovery, security, penetration testing, system rescue, drive cloning, and much more. Then, there are hundreds of Linux distributions that work as a bootable CD.
Of course, you don’t want to carry around heaps of CDs. Thankfully, you can combine multiple ISO files into a single bootable ISO image using MultiCD. It saves space, lets you carry a huge range of tools, and is completely free.
What Is MultiCD?
MultiCD is a Linux shell script you can use to build a multiboot CD image. It works with a wide range of bootable Live CDs, including Arch Linux, Debian, Mint, and Ubuntu (full list). There are many options — your only limit is the size of the disk you use.
You can also use MultiCD to create a bootable USB flash drive, although it will be a read-only drive. As most people no longer use spinning CDs for storage, instead opting for super cheap flash memory, it is highly likely you have a spare USB flash drive lying around. You can find details on using MultiCD with a USB flash drive toward the end of the article, plus a few alternative options.
Create a Multiboot CD With MultiCD
Now, here’s how you combine multiple ISO images into one.
For reference, I’m running this tutorial on Ubuntu Desktop 20.04.
The first thing to do is to download and update MultiCD. Press CTRL + ALT + T to open the terminal. Alternatively, right-click your desktop and select Run a Terminal. Now, input the following command to download MultiCD from its git repository:
git clone git://github.com/IsaacSchemm/MultiCD.git
Alternatively, you can download the latest MultiCD version via the project’s GitHub link.
Next, create a new folder. I’ve named mine MultiCD to keep things easy.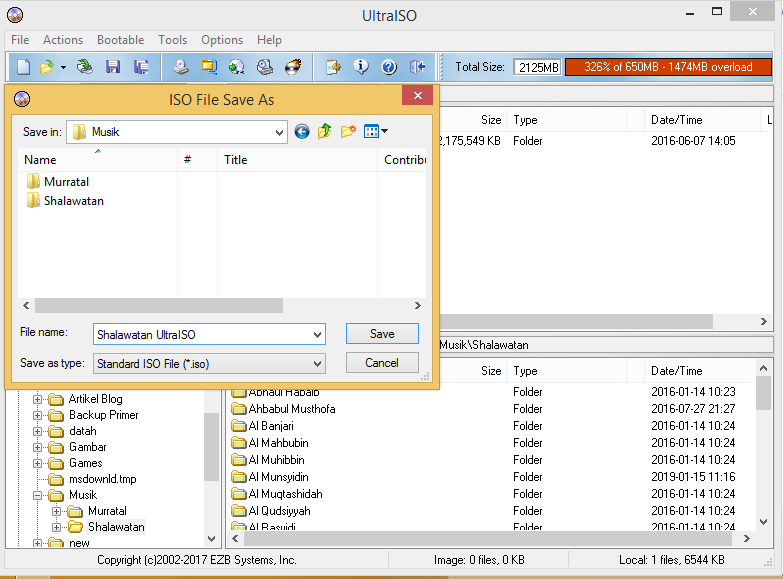 Now, extract the contents of the MultiCD archive to the MultiCD folder.
2. Copy Your ISOs to the MultiCD Folder
Now, you must select the ISOs you want to include in your multiboot CD. You’ll have to download the individual ISO files before continuing, making sure to use files on MultiCD’s supported ISOs page.
Furthermore, you must rename each ISO before copying it to the MultiCD folder. The MultiCD script expects file names in a certain format. If you don’t use that format, it won’t work. The specific file names are also available on the supported ISOs page. For example, you would rename your Linux Mint ISO to linuxmint.iso.
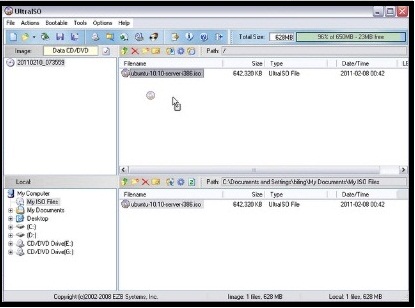
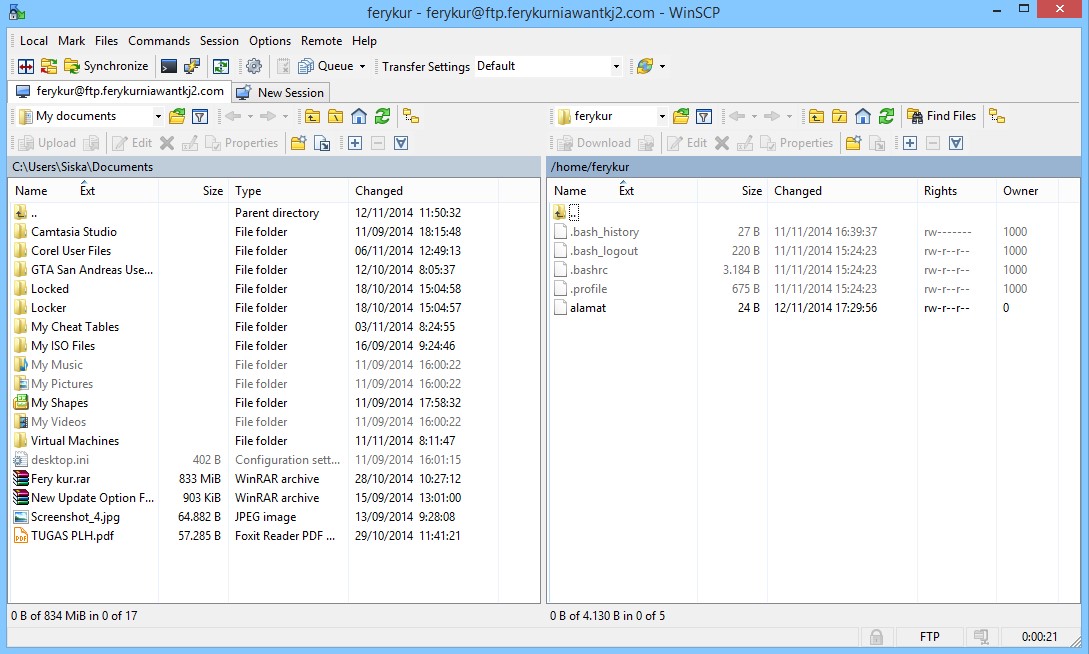
Here’s how my MultiCD folder looks before running the script in the next section.
If you want to try MultiCD but don’t want to spend ages downloading ISOs, check out this list of the smallest free Linux distros. They’re tiny — but functional!
3. Run the MultiCD Creator Script
Once you have your ISOs in order and your disc in the drive, you’re ready to create your multiboot CD.
Open a terminal in the MultiCD folder containing your ISOs. Now, input the following command:
Chmod +x multicd*.sh
./multicd.sh
You may have to run the script as root for it to work. If that is the case, add sudo to each command and enter your password when challenged.
After the script completes, a new folder named build will appear in the MultiCD folder. You’ll find the multiboot output ISO in the new folder.
4. Burn the MultiCD to Disc
Your final step is to burn the MultiCD ISO to a disc. Now, I no longer own a disc drive. However, the following steps work for both discs and USB flash drives, so anyone can follow along.
- In the MultiCD build folder, right-click the ISO file, and select Open With Disk Image Writer.
- Select the Destination, be that a USB drive or a CD/DVD. Now, select Start Restoring.
- Wait for the process to complete.
 When it finishes, your multiboot CD or USB flash drive will be ready to go.
Now you have a bootable Linux CD, you can check out the risks of dual-booting Windows and Linux on the same system.
Create a Multiboot USB with Multisystem
MultiCD is a great way to create a multiboot CD or DVD, combining multiple ISOs into a single file. MultiCD also works with bootable USB flash drives, too — but it isn’t the only option available.
The next part of this article guides you through the creation of a multiboot USB drive using the Multiboot LiveUSB Tool.
1. Download and Configure MultiSystem
First up, head to Pendrivelinux and download the MultiSystem LiveUSB Tool. Now:
- When given the choice, Open with Archive Manager.
- Select Extract in the top-left corner, and extract the file to a memorable location.
- In the folder you extracted to, right-click and select Open in Terminal.
- Now, input the following command:
./install-depot-multisystem.sh
If the install fails and returns the Error: xterm, run sudo apt install xterm, let the process complete, then attempt to install MultiSystem again.
2. Add Linux ISOs to MultiSytem
Now, head to Accessories and select MultiSystem. Next, select your USB drive from the bottom panel, then select Confirm. If the process fails, restart your system.
You can now begin to add Linux ISOs to MultiSystem in preparation for the creation of the multiboot USB drive. However, the ISOs must be added one at a time, as well as entering your password.
Unfortunately, this makes the construction of a large multiboot USB drive somewhat time-consuming using MultiSystem.
Drag and drop the Linux ISOs you want to add to your MultiSystem USB drive. MultiSystem will automatically detect the ISO, assign it a name, and add it to the GRUB bootloader list.
Unsure which ISOs to include? Consider our list of the best Linux distros to dual-boot.
MultiSystem has an advanced menu, too. The advanced menu contains the option to download other Linux Live environments for use with MultiSystem. There is a lengthy list to choose from, covering various Linux tools and operating systems.
Once the download completes, you drag the ISO into MultiSystem, ready for use.
The advanced menu also contains the options to test your multiboot USB drive using QEMU or VirtualBox. Also, you can customize GRUB Settings, as well as the addition of command line boot options.
Easy Ways to Merge ISO Files
These two methods allow you to combine multiple ISO files into a single file. It saves physical space (no more piles of discs) and means you can carry around an extensive selection of tools and operating systems.
[5 Tools] How to Combine ISO Files into a Non-stop One
Q:»Does anyone know how to combine ISO files to make a single ISO? I have a bunch of ISO files that are separately ripped from DVD. I want to put them together to create an intact video. Any advice? Thanks!» — User from Anandtech Forum
Based on the above question, take a scenario where you have extracted multiple video segments that are saved as ISO format and hope to join them into an intact one. In the face with this, what would you do?
Due to the extensive development of technical software, you may simply find out a desktop video joiner to achieve this. But how exactly do you choose a reliable yet professional ISO video merger? To know it, please peruse this article, which collects 5 video joiner software to merge ISO files easily and safely.
- Part 1. Joyoshare Video Joiner [Windows & Mac]
- Part 2. Kate’s Video Joiner [Windows]
- Part 3. Freemore Video Joiner [Windows]
- Part 4. Comparison
- Recommendation: 2 Online ISO Joiners
Part 1. How to Combine ISO Files with Joyoshare Video Joiner
Why recommends Joyoshare Video Joiner among numerous desktop merging tools to combine ISO files? First and foremost, it is an overall joining program that supports a wide variety of file formats, such as ISO, VOB, MP4, MKV, DVD, WMV, AVI, M4A, M4V, OGG, etc.
Not only that, it also transfers video/audio files to various formats and even converts them to be compatible with many devices. What else makes it gain popularity is the poweful and advanced merging features. With the help of it, losslessly joining unlimited files into one and customizing files with cool effects will be a breeze.
Main Features of Joyoshare Video Joiner
Easily extract audio from any videos
Work well with all kinds of file formats
A combination of joining, cutting, editing features
Quickly merge ISO files without the risk of quality loss
Support previewing, renaming files, and adjusting order of files
Feature high-speed mode and encoding mode to satify different needs
Try It FreeTry It Free
-
Step 1Run Joyoshare Video Joiner and add ISO files
The first thing to do is finishing the installation of Joyoshare Video Joiner on your computer. Next, it is time to add your ISO files. The program offers two ways to do it.
 One is simply dragging files to the designated position. The other one is to hit on «Open File» to choose them from your local files.
 -
Step 2Select a mode to merge ISO files
After inputing ISO files to the program, then you should tap on «Format» to choose a merging mode and an output format. To join ISO files with original quality, please pick the high-speed mode. Suppose these files need to be edited, just choose the encoding mode. By the way, users selecting the encoding mode have the right to customize the output format by clicking a gear icon.
-
Step 3Cut ISO files
When returning to the first interface, you could preview these video files. If you find something unpleasant, just move the timeline to remove it. Besides, renaming and rearranging files are allowed at this time.
-
Step 4Edit ISO files
This step is not for every user but for those who merge files using the encoding mode. If you are one of them, now you can press on «Edit» to customize your ISO files.
 For example, you are allowed to trim/rotate them, adjust aspect ratio, add visual effects, insert subtitles and unique watermark, and more.
 -
Step 5Combine ISO files
The last thing to do is just touching the «Convert» button. Then Joyoshare Video Joiner will start merging your ISO files. Once done, the merged ISO file can be found in the local file.
Part 2. How to Combine ISO Files with Kate’s Video Joiner
Kate’s Video Joiner is a free and simple-to-use joining program only available for Windows. It is designed to join multiple video files of same and different format into a single video. What’s more, it well supports a range of formats covering DVD, AVI, WMV, MOV, DIVX, 3GP, and many other. Of course, a visualized interface also characterizes it. For beginners to combine ISO files, Kate’s Video Joiner is a great choice with the exception of Joyoshare Video Joiner.
Step 1: Firstly, you need to download and install Kate’s Video Joiner on the computer and then to open it;
Step 2: Afterward, import your ISO files by clicking the «Add» button;
Step 3: Once all ISO files are uploaded, rearrange your ISO files as you like and then select an output format. To set up video quality, go to «Advanced»;
Step 4: Finally, tap on «Join». In a moment, your ISO files are merged losslessly and seamlessly.
Note: Although come with a «Preview» button, it has no built-in media player. You need to load preview in external player.
Part 3. How to Combine ISO Files with Freemore Video Joiner
Freemore Video Joiner is a professional freeware, providing an easy solution to merge video files in DVD, AVI, DivX, XviD, MPEG, WMV, ASF, 3GP, FLV, and hundreds more formats into a seamless file. Developed with a built-in editor, it supports basic editing like trim, special effects, delay audio, and redefine file parameters. What’s more powerful is that it is equipped with a video downloader and DVD ripper, enabling you to firsthand paste link to download videos and read DVD to extract video clips to merge.
Step 1: Have Freemore video joiner downloaded and installed on your Windows computer. Next, run it and import ISO files by dragging or «Add»;
Step 2: Then, play and preview your ISO videos. You can trim them by entering start time and end time or add effects to videos if necessary;
Step 3: Now, go for «Profiles» and choose a desired output format. To customize output quality, click on «New/Edit» to adjust codec, bitrate, aspect ratio, FPS, etc;
Step 4: Once done, return to the main window and determine an output path. Lastly, press on «Start» to join ISO files into one.
Part 4. Comparison & Tips
Below is a comparison table of the 3 ISO video joiner software above, so that you can quickly learn their respective strengths and weaknesses, thereby singling out a perfect one to combine ISO files for you.
| Program | Joyoshare Video Joiner | Kate’s Video Joiner | Freemore Video Joiner |
| Merge ISO files losslessly | Yes | Yes | Yes |
| Mode to merge | High-speed and encoding modes | Single | Single |
| Speed to merge | 60X faster | Instant | Maximum conversion speed |
| Preset output quality | Yes | Yes | Yes |
| Re-order video | Yes | Yes | No |
| Resize video | Yes | Yes | Yes |
| Supported OS | Windows & Mac | Windows | Windows |
| Drag-and drop interface | Yes | No | Yes |
| Supported formats | All general format and multiple devices | AVI/WMV/MPEG/MOV/MP4/DVD/3GP/ASF/VCD | More than 300 types of media files |
| Video effects | Yes | No | Yes |
| Preview and cut video | Yes | No | Yes |
| Add music to video | Yes | No | No |
| Price | Free usage for 5 times | Free | Free |
| Directly rip ISO from DVD | No | No | Yes |
Bonus tip:
From the above table, you know that only Freemore Video Joiner in all three of these programs can function as an ISO joiner and a DVD ripper, allowing you to directly extracting ISO files from DVD to combine. To give more help, share another one integrating the features of merging and ripping — Joyoshare Video Converter.
Try It FreeTry It Free
It’s an all-in-one video converter and editor. In addition to the ability to convert video and audio to 150+ formats at 60X quick speed, it is also a powerful DVD ripper that could losslessly extract audio and video from DVD, and easily load encrypted DVDs with protections. Similarly, it offers an option to merge all uploaded or ripped videos together with no quality degradation.
The Introduction of 2 Online Video Joiners
After knowing how to combine ISO files on desktop, you will learn the other two video mergers in the below section to mix ISO files together online.
The fact remains that online tools make video merging much easier even if they might take limited features. For some who have no strict requirement on joining files, an online video merger is wholly satisfied.
-
Kapwing
Kapwing is definitely a creative online video editor, which provides various utilities to combine videos, trim videos, loop videos, add audio/image/text to video, crop GIF/photo, and so on.
 Its UI is friendly. You can easily drag and drop your ISO files to it or upload files by pasting links. If necessary, before merging you are able to edit your files like adjusting aspect ratio, choosing background color, etc. Note that it is a paid web service.
 -
WeVideo
Aside from Kapwing, another online video merger to be mentioned is called WeVideo. It is not only a video merger but also a video editor. After all, besides combining, it has the ability to personalize files with all motion effects, green screen, and more as well as making videos on any platform including Windows, Mac, Chromebook, and mobile. Plus, it is simple to use and supports a large number of file formats. If you do not mind it will cost you some, WeVideo is a nice choice in merging ISO files.
(Click to rate this post)
Updated on Jul 15, 2020 7:00 PM
How to combine multiple ISO files into one bootable ISO image • Oki Doki
There are hundreds of Linux Live CDs available online, and almost all of them are absolutely free. Many of them are needed for various purposes such as desktop recovery, security, penetration testing, system recovery, disk cloning, and more. In addition, there are hundreds of Linux distributions that work like a bootable CD.
Of course, don’t carry around piles of CDs. Luckily, you can combine multiple ISO files into one bootable ISO image using MultiCD. It saves space, allows you to carry a huge set of tools, and is completely free.
What is MultiCD?
MultiCD is a Linux shell script that can be used to create a multiboot CD image. It works with a wide range of bootable Live CDs including Arch Linux, Debian, Mint and Ubuntu (full list). There are many options — your only limit is the size of the disk you are using.
You can also use MultiCD to create a bootable USB drive, although it will be a read-only drive. Since most people no longer use spinning CDs for storage, opting instead for ultra-cheap flash memory, it’s highly likely that you have a spare USB stick. You can find detailed information about using MultiCD with a USB stick at the end of the article, as well as several alternatives.
Windows programs, mobile applications, games — EVERYTHING is FREE, in our closed telegram channel — Subscribe 🙂
Creating a Multiboot CD Using MultiCD
And now here’s how you combine several ISO images into one.
For reference, I’m running this tutorial on Ubuntu Desktop 20.04.
The first thing to do is download and update the MultiCD. Press CTRL + ALT + T, to open the terminal. Or right-click on the desktop and select « Start terminal» . Now enter the following command to download MultiCD from the git repository:
git clone git://github.com/IsaacSchemm/MultiCD.git
Alternatively, you can download the latest version of MultiCD from the project link on GitHub.
Then create a new folder. I named mine MultiCD to make things easier. Now extract the contents of the MultiCD archive to the MultiCD folder.
2. Copy your ISO Images to the MultiCD Folder.
You must now select the ISO images you want to include on the multiboot CD. You will need to download the individual ISO files before proceeding, make sure you are using the files on the MultiCD Supported ISOs page.
In addition, you must rename each ISO before copying it to the MultiCD folder. The MultiCD script expects filenames in a specific format. If you don’t use this format, it won’t work. Specific filenames are also available on the supported ISOs page. For example, you will rename ISO- Linux Mint image to linuxmint.iso .
This is what my MultiCD folder looks like before running the script in the next section.
Not enough hard disk space? Install one of these small and lightweight Linux distributions to make your computer usable again.
3. Run the MultiCD Creator Script.
Once you’ve placed your ISOs and disk in your drive, you’re ready to create a multiboot CD.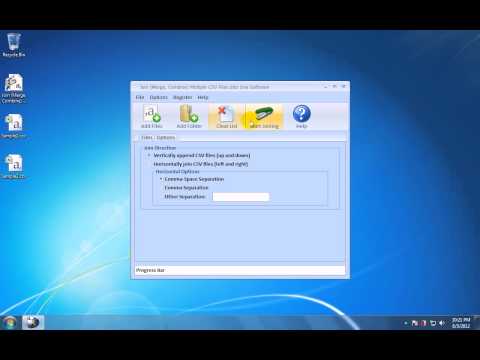
Open a terminal in the MultiCD folder containing your ISO images. Now enter the following command:
Chmod + x multicd * .sh
./multicd.sh
You may need to run the script as root to make it work. If so, add sudo to each command and enter your password when prompted.
After the script completes, a new folder named build will appear in the MultiCD folder. In the new folder you will find the multiboot output ISO image.
4. Burn MultiCD To Disc.
Your last step is to burn the MultiCD ISO to disc. Now I no longer have a disk drive. However, the following steps work for both discs and USB sticks, so anyone can follow them.
- In the MultiCD build folder, right-click the ISO file and select Open with Disk Image Writer .
- Select destination whether it is a USB stick or CD/DVD. Now select Start recovery .
- Wait for the process to complete. When it finishes, your multiboot CD or USB drive will be ready to go.
You now have a bootable Linux CD and can test the risks of dual booting Windows and Linux on the same system.
Create a Multiboot USB With Multisystem
MultiCD is a great way to create a multiboot CD or DVD by combining multiple ISOs into one file. MultiCD also works with bootable USB drives, but that’s not the only option available.
In the next part of this article, you will learn how to create a multiboot USB flash drive using the Multiboot LiveUSB Tool.
1. Download And Configure MultiSystem
First go to Pendrivelinux and download the MultiSystem LiveUSB Tool. Now:
- When given a choice, Open with Archive Manager .
- Select » Extract» in the top left corner and extract the file to a memorable location.
- In the folder you extracted to, right-click and select » Open in terminal.
- Now enter the following command:
./install-depot-multisystem.sh
install MultiSystem again.
2. Add Linux ISOs to MultiSytem
Now go to «Accessories» and select « Multisystem» . Then select your USB drive from the bottom bar, then select Confirm. If the process fails, reboot the system.
You can now begin adding Linux ISOs to MultiSystem in preparation for creating a multiboot USB drive. However, the ISOs must be added one at a time, and a password must also be entered.
Unfortunately, this makes creating a large multi-boot USB stick rather cumbersome when using MultiSystem.
Drag and drop the Linux ISOs you want to add to your multi-system USB drive. MultiSystem will automatically detect the ISO, give it a name, and add it to the GRUB bootloader list.
Not sure which ISOs to include? Consider our list of the best dual-boot Linux distributions.
The MultiSystem also has an extended menu. The advanced menu contains the ability to load other Linux Live environments for use with MultiSystem. There is a long list to choose from, covering various Linux tools and operating systems.
Once the download is complete, you drag and drop the ISO into the MultiSystem, ready to use.
The advanced menu also contains options for testing your multiboot USB stick with QEMU or VirtualBox. In addition, you can configure GRUB options as well as add boot options from the command line.
Easy Ways to Combine ISO
Files These two methods allow you to combine multiple ISO files into one file. This saves physical space (no more disk piles) and means you can carry around a wide variety of tools and operating systems.
Programs for Windows, mobile applications, games — EVERYTHING is FREE, in our closed telegram channel — Subscribe 🙂
How to merge all iso images of Windows 7/8.1 into one?
Windows 8.1 AIO (All-in-One) is an image of the Windows 8. 1 operating system that includes all editions released by Microsoft in both bit depths (32 bit or 64 bit). After creating an all-in-one image, you will have one image of the Windows 8.1 operating system, and not several images with different editions. The All-in-One system image includes 6 or 8 editions of Windows 8.1, depending on whether the Single Language editions are added to the build.
Original Windows 8.1 images can be downloaded from the official website. If the laptop comes with a Windows 8.1 license, then the resulting image will automatically pick it up during installation without entering a key.
The instructions are also suitable for Windows 7. In this case, the ei.cfg file does not need to be edited. In other words, in 7-ke, if you do not need distributions with different bitness in the image, you can simply delete the ie.cfg file completely and the versions will be unlocked.
In one case, Windows 8.1 AIO includes the following editions (6 editions):
Windows 8. 1 x64;
Windows 8.1 Pro x64;
Windows 8.1 Enterprise x64;
Windows 8.1 x86;
Windows 8.1 Pro x86;
Windows 8.1 Enterprise x86.
Otherwise, the Windows 8.1 AIO image consists of 8 editions:
Windows 8.1 x64;
Windows 8.1 Pro x64;
Windows 8.1 Enterprise x64;
Windows 8.1 Single Language x64;
Windows 8.1 x86;
Windows 8.1 Pro x86;
Windows 8.1 Enterprise x86;
Windows 8.1 Single Language x86;
WinAIO Maker Professional will help us create an image that combines all editions of Windows 8.1.
Creating a Windows 8.1 AIO operating system image is no different than creating a Windows 8 AIO.
Preparing to create Windows 8.1 AIO
To create an image of Windows 8.1 AIO (all in one), I use the original Russian images of the Windows 8.1 with Update (November 2014) operating system: Windows 8.1 x64, Windows 8.1 Enterprise x64, Windows 8.1 Single Language x64, Windows 8.1 x86, Windows 8. 1 Enterprise x86, Windows 8.1 Single Language x86. In total, 6 different images will be used.
Single Language editions commonly used on laptops have been added to this image and can optionally be omitted from this system image. Each Windows 8.1 image, 32-bit and 64-bit, contains two separate images: Windows 8.1 (Core) and Windows 8.1 Pro.
Create 6 folders on drive «C» with names that correspond to a certain edition and bitness of the Windows 8 operating system. On drive «C» of my computer, I created folders: «Win8x64», «Win8x64Enterprise», «Win8x64SL», «Win8x86» , «Win8x86Enterprise», «Win8x86SL».
Next, using the WinRAR or 7-Zip archiver, extract the files from the Windows 8.1 images to the appropriate folders.
You will now need to unlock your Windows 8.1 image to access both Windows 8.1 and Windows 8.1 Pro editions. To do this, you will need the EI.CFG file with the contents:
[Channel]
Retail
Create a file with the name «EI» and the expansion of «CFG».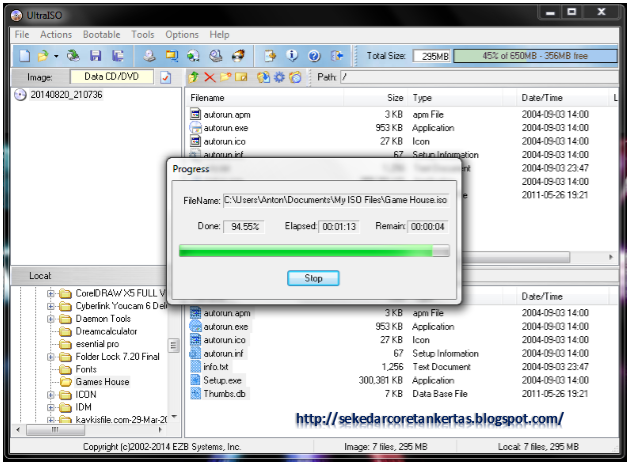 Copy the «ei.cfg» file to the «Win8x64» and «Win8x86» folders: in each of these folders, open the «sources» folder, and put the «ei.cfg» file there.
Do not delete the ei.cfg file», we still need it.
In most cases, you can do without manipulating the ei.cfg file. The program itself will find all Windows assemblies in the iso file.
Creating a Windows 8.1 x86 x64 AIO
To create a Windows 8.1 All-in-One image, we need the free WinAIO Maker Professional program. Download the program from our website, the application does not require installation on a computer.
Run the program from the folder. In the WinAIO Maker Professional window, click on the «Select WIMs» button.
In the Explorer window, open the «Win8x64» folder, enter the «sources» folder, open the «install.wim» file.
In the program window, you will see that Windows 8.1 Pro and Windows 8.1 64-bit editions have been added.
Next, one by one, add the “install.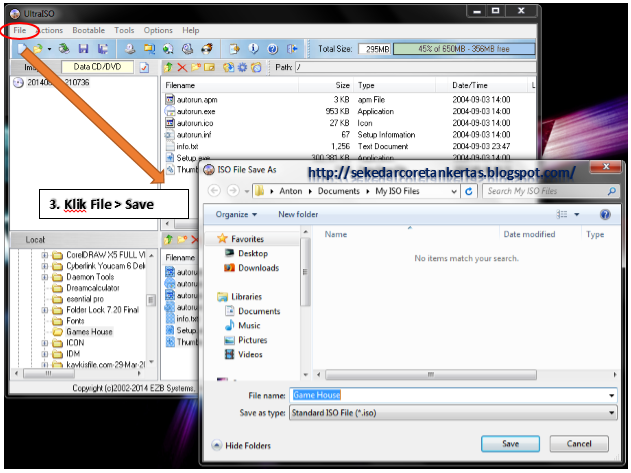 wim” files from the “Winx8x64Enterprise”, “Win8x64SL”, “Win8x86”, “Win8x86Enterprise”, “Win8x86SL” folders to the program.
After that, click on the «Save all chages» button to save the changes.
Click the Yes button in the message box.
When finished, you will see a message that all changes have been completed successfully.
The WinAIO Maker Professional window contains all added editions of Windows 8.1. Next, click on the «Save all into ISO» button to save editions of the operating system in a single image.
In the window that opens, label the image (Win8AIO), select a save location, and name the image. I chose to save drive «C», the image name is «Windows 8.1 AIO».
To start creating a Windows 8 disk image, click on the «Make ISO» button.
After the system imaging process is complete, a message appears indicating that the Windows 8.1 AIO image was successfully created in «ISO» format.
Folders on the C drive where Windows images were extracted can be deleted and are no longer needed.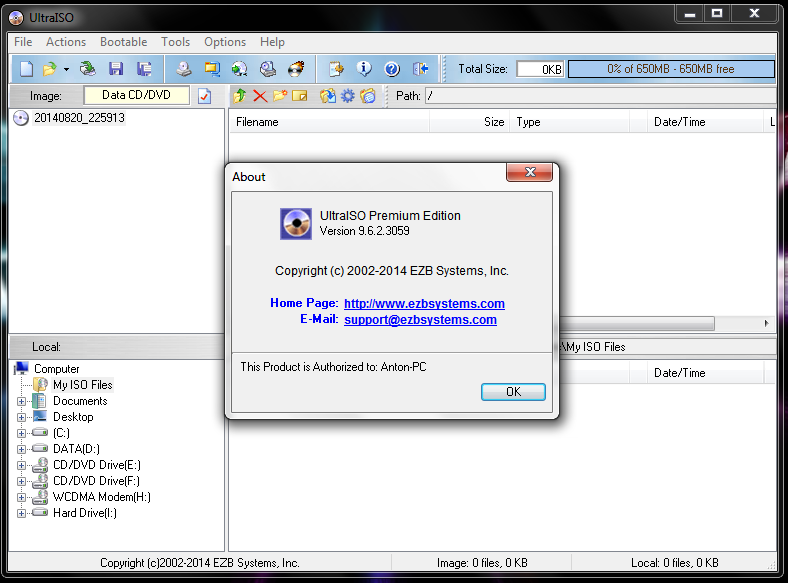
Next, you need to add the “ei.cfg” file to the created Windows 8.1 image in order to remove the window for entering the key, which opens at the very beginning of the installation of the operating system (it does not allow you to go to the window for choosing the system to be installed). In principle, this operation is no longer mandatory, because if you use a computer sold with a Windows 8.1 license for installation, then the key entry window will not even be displayed. Otherwise, you can simply enter the product key.
To work with the system image, you will need UltraISO, or another similar application.
Run the UltraISO program, enter the «File» menu, select «Open …». Add the Windows 8 AIO image to the program, and then in the added image, open the «sources» folder.
In the bottom area of the UltraISO program, open the folder on your computer that contains the previously created «ei.cfg» file. Drag the «ei.cfg» file into the «sources» folder.
Go back to the «File» menu, select «Save As.