Why Does My Computer Freeze at BIOS? (Explained)
Disclaimer: This post may contain affiliate links, meaning we get a small commission if you make a purchase through our links, at no cost to you. For more information, please visit our Disclaimer Page.
You rely on your computer for playing games and checking email as well as doing work for school or your job. There are few things worse than turning it on and finding that it freezes. While you can restart your computer, there’s no guarantee that this will fix the problem. A common time for a computer to freeze is at BIOS (Basic Input/Output System).
BIOS is a type of firmware that handles the needs of your operating system. If you do a cold boot and turn on your computer via the power/start button, it will enter BIOS.
This allows the system to check on all of your components and accessories to ensure they work properly, including your keyboard and mouse. We’ll go over why your computer freezes and BIOS and what you can do.
Table of Contents
Can You Use Your Phone if Disconnec…
Please enable JavaScript
Can BIOS Cause Computer Freeze?
BIOS can cause your computer to freeze. This can occur because you modified or changed any of your system’s settings or you have a serious issue with your operating system. Using an unregisterd or unlicensed version of Windows can cause this issue too.
3 Types of Computer Freezes
There are different types of freezes that can affect your computer. One is a hang freeze, which will require that you shut down your computer and restart it. A random hang occurs when your system no longer responds and can happen multiple times.
During a generic freeze, your computer freezes for an unknown reason but does not require a lot of time or steps to fix. In many cases, your system will work itself out and begin responding again.
There is also a single app freeze.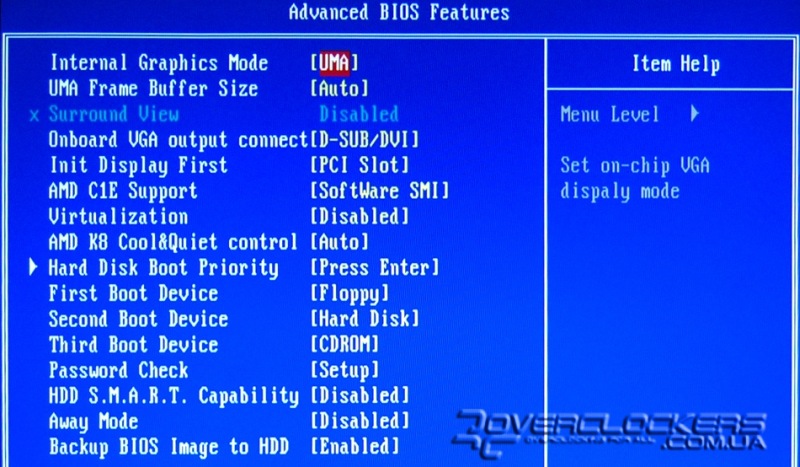 This relates to a specific app and may require that you delete it from your computer. Any of these freezes can cause you to lose valuable or important data.
There could also be other reasons your computer freezes. Stellarinfo has a great article about the 10 reasons your computer freezes.
Why Does My Computer Freeze at BIOS?
If you do a simple Google search for why does my computer freeze at BIOS?, you’ll find that this is a common problem that many people experience. It can occur every time you turn on your computer or a few times a month.
It often happens when you update your system. Did you recently upgrade to a newer version of Windows and found that your computer keeps freezing when you try to use it? You may even find that you need to restart the system several times before you finally see your desktop.
Another reason your computer freezes is that you modified the BIOS settings. Many people online say that anyone can modify their settings, but we only recommend this if you have computer experience.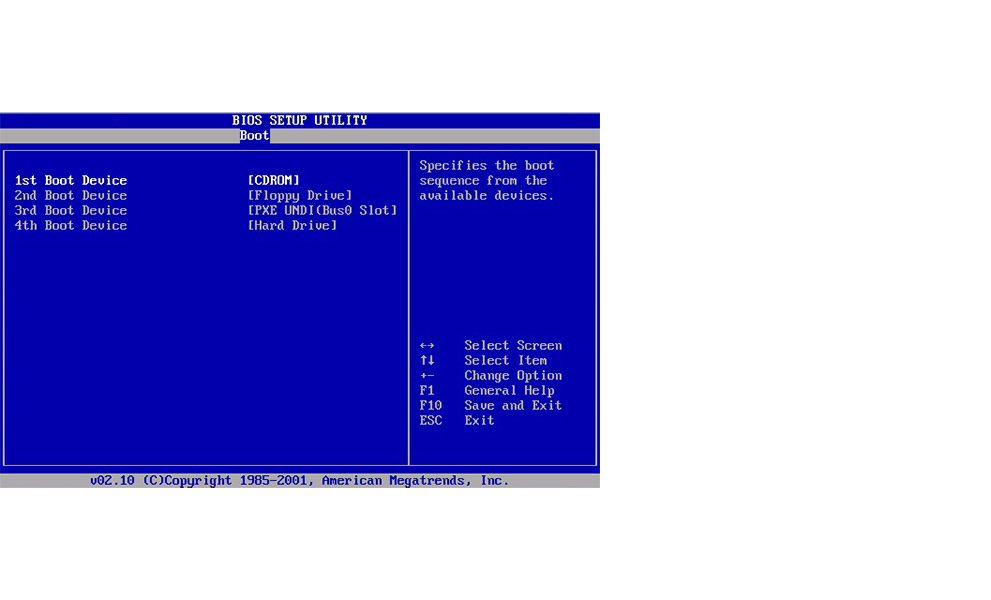
We’ll go over how you can reset the BIOS settings in another section to keep your system from freezing. Some of the other reasons your computer freezes at BIOS can include:
- You made recent changes to your CMOS
- A program you downloaded made changes to your BIOS settings without your permission.
- You used a device with a USB cord without properly installing it or using the right driver.
- The computer suffered a corruption that affects your sound card or other components.
- You enabled fast start and caused your computer to try to skip BIOS.
- The computer has a defective HDD.
How to Stop My Computer Freeze at BIOS
To keep your computer from freezing at BIOS, you may need to reinstall everything. Start with your power cables and peripherals before moving on to your internal data. You then need to reinstall your expandable cards and memory modules.
Make sure that you unplug both your mouse and keyboard and uninstall any drivers they use.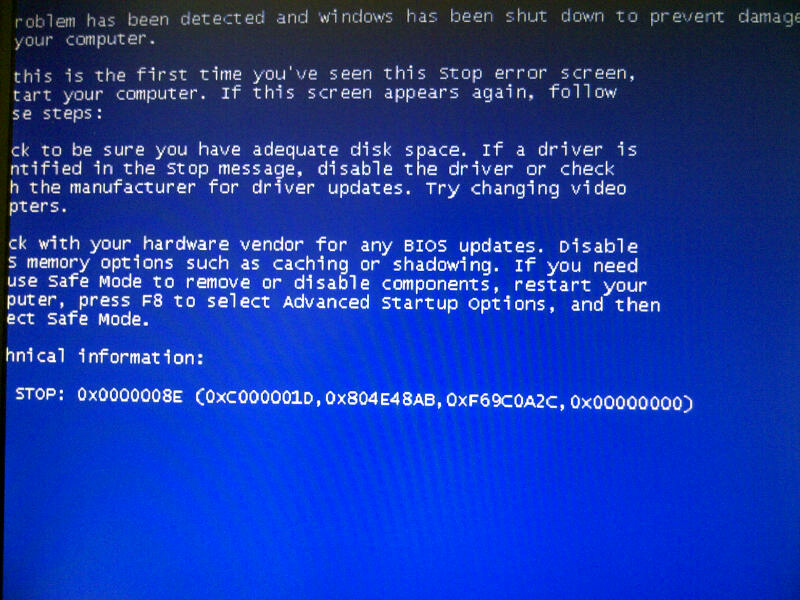 You can always reinstall them later. Once you remove everything, restart your computer.
Head into your Control Panel and begin installing the apps and drivers that you used before. It’s important that you reinstall them one at a time. After the download finishes, restart your computer and see if the problem persists. Unfortunately, we found that this doesn’t always offer the solution that you need, though.
You may have an issue that requires more work on your part. That is why we wanted to look at some of the other ways you can get your computer to stop freezing at BIOS.
Check the HDD
If your computer freezes at BIOS, try checking your HDD (hard disk drives). Any loose cables can keep the system from identifying and using your HDD. Simply using a firm touch to push the HDD back in place and using the right SATA cable can help.
You may want to remove the HDD and look for defects on another system. If a different computer cannot recognize your HDD, you found the root of your problem and will need to replace it.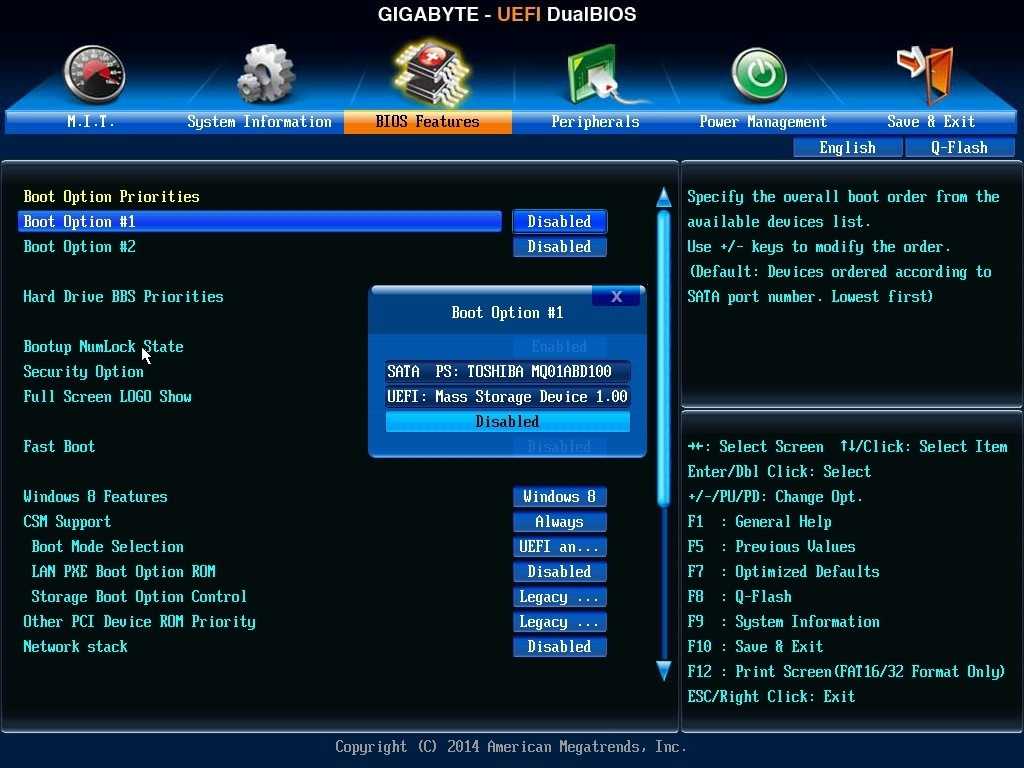
MBR Issues
The MBR (master boot record) on your computer forces your computer to recognize and use Microsoft Windows when you turn on your system. A defective MBR or one that is corrupted will no longer work the way it should.
When you turn on your computer, it cannot run Windows and may freeze during BIOS. The only way to get your computer unfrozen and working again is to replace the MBR.
Non-working RAM
Similar problems occur because of issues with your RAM (random-access memory). RAM sticks give you extra storage and room for programs and games or other files. Many systems today have a minimum of two RAM sticks. Use your settings to check the RAM.
You may find that only one of the two sticks is working. Removing and replacing one of the sticks is a possible remedy.
If you find that the RAM sticks work but you still have problems with your computer freezing, there’s a good chance that you have a dead motherboard or a dead motherboard slot.
How to Reset Your BIOS Settings
As we said above, you should not change your computer settings unless you have some experience. If all else fails, resetting your BIOS settings might be the best way to unfreeze your computer and keep it from freezing.
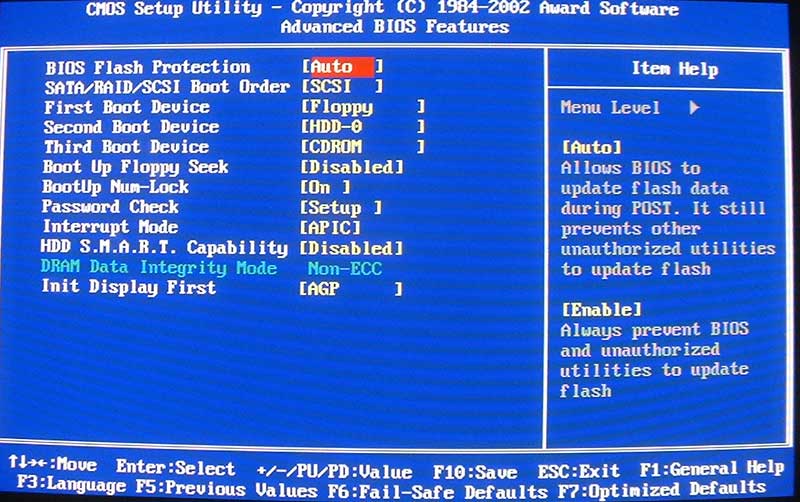
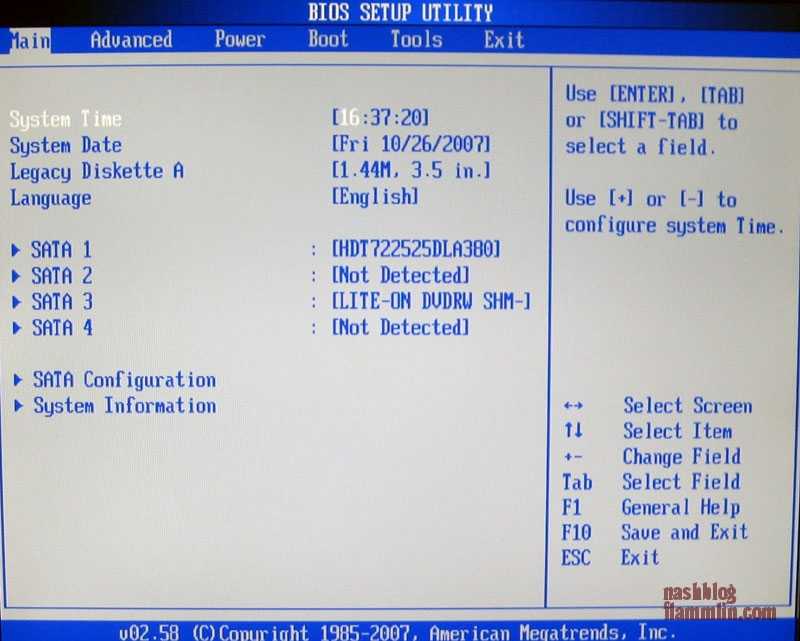
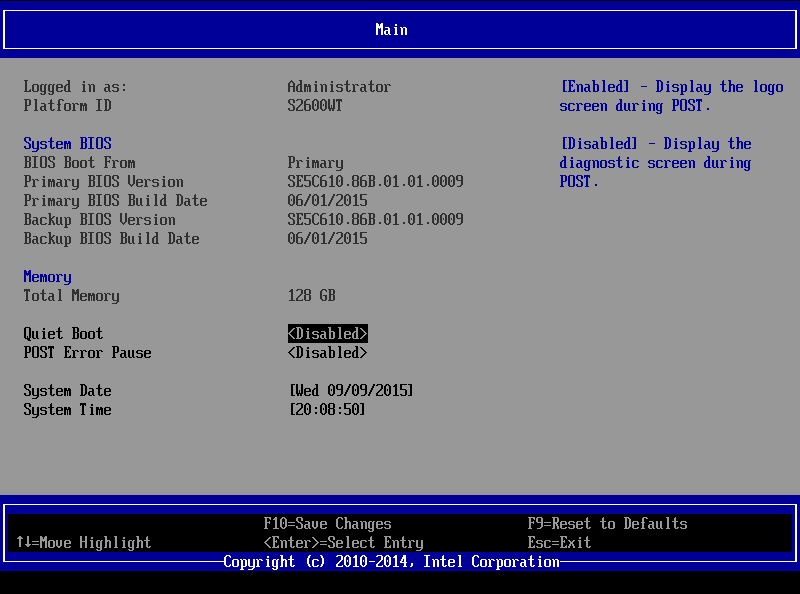
To modify your settings, turn your computer off and restart it. During the Power-On Self-Test (POST), hit the F1 key.
You should check with your computer’s brand though, as some brands require that you press F2 or F10. Some computers even require that you use the ESC or DEL key to enter the BIOS menu.
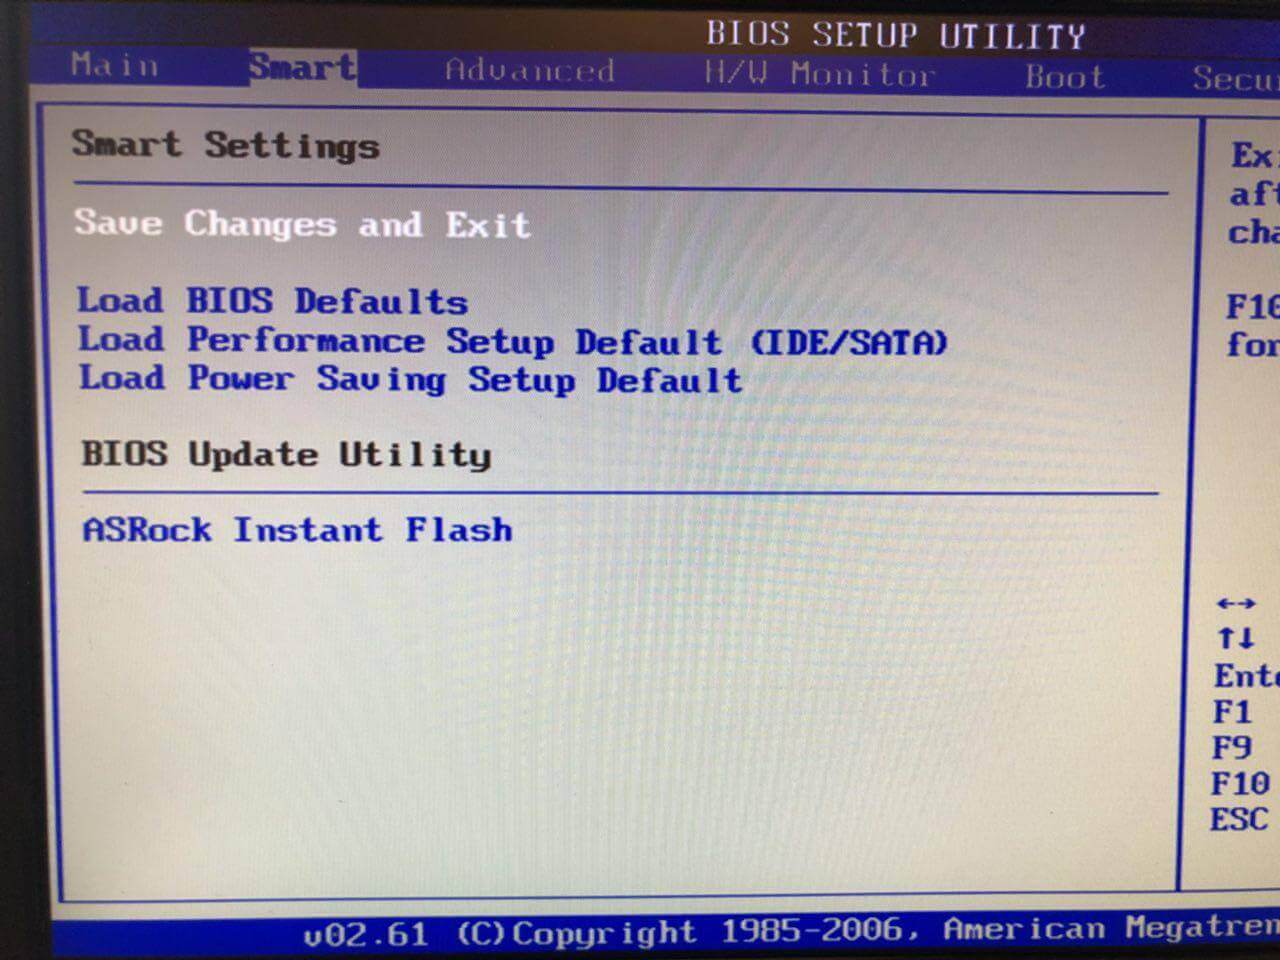
Look for the “Load Setup Defaults,” which your computer may call “Rest” or “Load Optimized Defaults.” You will need to use your arrow keys to select this option. This will bring up a window that asks if you’re sure you want to restore a previous version of your settings. Hit the “Y” or “Enter” key to agree.
Once you save the new settings, the computer will restart and run Windows. You can try this method before or after trying some of the other remedies we found.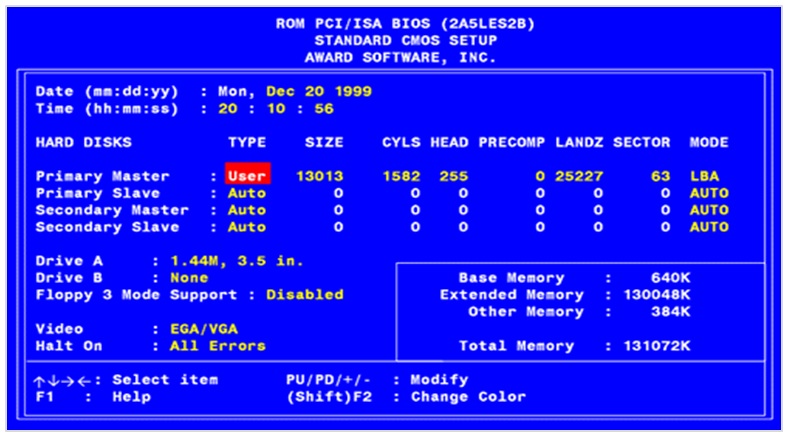
If the issues persists, have a professional take a look at it. There could be other problems causing your computer to freeze at BIOS.
What to do if My Computer Freezes During BIOS Update?
Most computers will ask for your permission to update. If you keep saying no, though, the system may require that you update at some point. This can lead to your computer freezing in the middle of an update.
Even if your computer tries to restart later, it will keep freezing when it reaches BIOS. This may occur because the update bricked your motherboard, which will require that you replace it or your entire computer. Before you worry about spending money, try restarting your computer. This may give the system a chance to reinstall the update.
If you have an ASUS computer, see if it came with a USB. ASUS includes a USB with many of its top models that have a version of the original operating system on it. Turn your computer off and switch off the motherboard.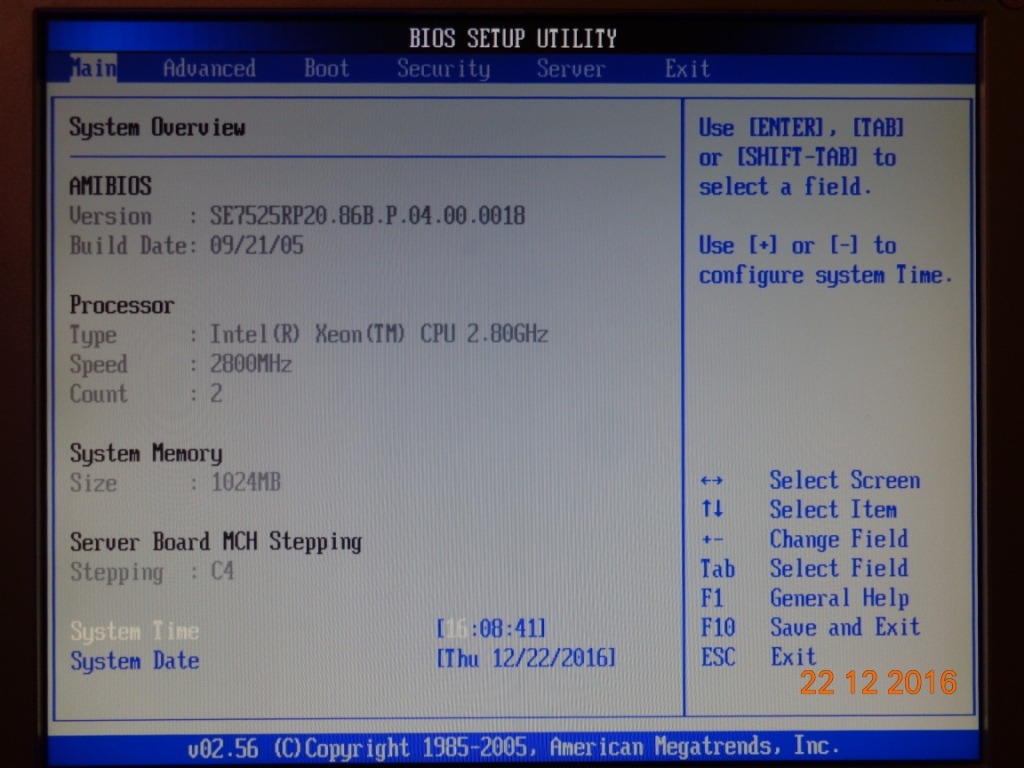
You also need to unplug the computer and clear your CMOS. Insert the USB into one of your open ports and restart the computer.
Though it can take up to 10 or 20 minutes to work, you can run the system via the USB. Go into your BIOS settings as described above and rename your BIOS file. You can then remove the USB and turn on the motherboard before switching on your computer.
How to Prevent Other Freezes
Besides BIOS issues, your computer may freeze for other reasons. Make sure that you don’t have an unregisterd or unlicensed version of Windows or open too many files at the same time.
An easy way to see if your computer has enough free space is when you load your Task Manager. Press the “CTRL” button at the same time that you hold down the “ALT” and “DLT” buttons to bring it up.
You can then see how much space your open programs use and close any that uses too much space.
You should also update any programs that you use often and look for driver updates.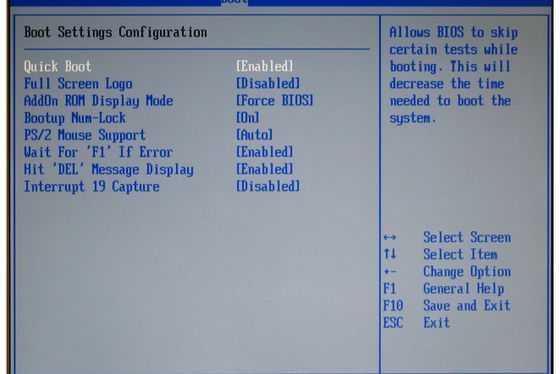 Whether you use a video game controller with your PC or an external mouse with your laptop, you need to keep the drivers updated. Microsoft has tools that allow you to check your operating system and download updates as soon as they become available.
While it can take hours for Windows to update to a new version, it will save you hassles later.
Don’t forget to scan your computer every week. Antivirus software helps you find malware such as spyware and adware that can make your system run slowly and cause it to freeze or crash.
Keep Your Computer from Freezing at BIOS
Stop your computer from freezing at BIOS with a look at what causes this problem, including motherboard issues and changes to your settings. Use any of the methods we found to get your computer working again whenever it freezes.
Related posts:
report this ad
Why Does My Bios Keep Freezing? [Answered 2022]- Droidrant
There are many reasons why your computer may keep freezing, including defective hardware or device drivers. To fix this problem, you should first disable any faulty hardware. If this does not work, replace the faulty hardware. If you can’t locate the hardware, try downloading it from a different computer and installing it on your computer. Sometimes, the computer freezes because the system is too overloaded with software or hardware. This could also be caused by running too many programs at once.
Another possible cause of a computer’s freezing problem is a malfunctioning hard drive. A failing hard drive can cause a host of problems, so it’s best to scan it with a free hard disk diagnostic tool. Another possibility is a blue screen of death, which provides additional information. You can try to scan your computer by running a free tool such as CrystalDiskInfo to find out the cause of the freezing.
Related Questions / Contents
- How Do I Fix BIOS Freeze?
- How Do I Fix BIOS Problems?
- How Do I Fix Windows 10 Stuck in BIOS?
- Can BIOS Cause PC Crash?
- How Do You Reset BIOS?
- Does BIOS Update Require Reboot?
- When You Boot the Computer It Hangs After?
How Do I Fix BIOS Freeze?
If your PC is freezing, you may need to do a BIOS reset to fix the problem. To fix a BIOS freeze, reboot your computer and press the F1 key while it is in POST. Your computer should then reload into the BIOS settings. Sometimes a problem with the RAM can also cause a freeze. If you notice that one or more RAM sticks are not working, you can replace them with new ones. Occasionally, dead motherboard slots can also cause the computer to freeze. If you can’t access the BIOS, try a different motherboard or computer.
Another possible cause of a BIOS freeze is an improperly installed HDD. You can try reinstalling your HDD or removing it and checking for damaged components. If this doesn’t work, your system might need an updated BIOS. You can also check the HDD and make sure it is properly connected to your computer. It is also important to check your power supply, as a bad one can cause the BIOS to freeze.
How Do I Fix BIOS Problems?
If you have a computer and want to troubleshoot BIOS problems, you’re in luck. There are several steps that can help you fix this system’s complexities.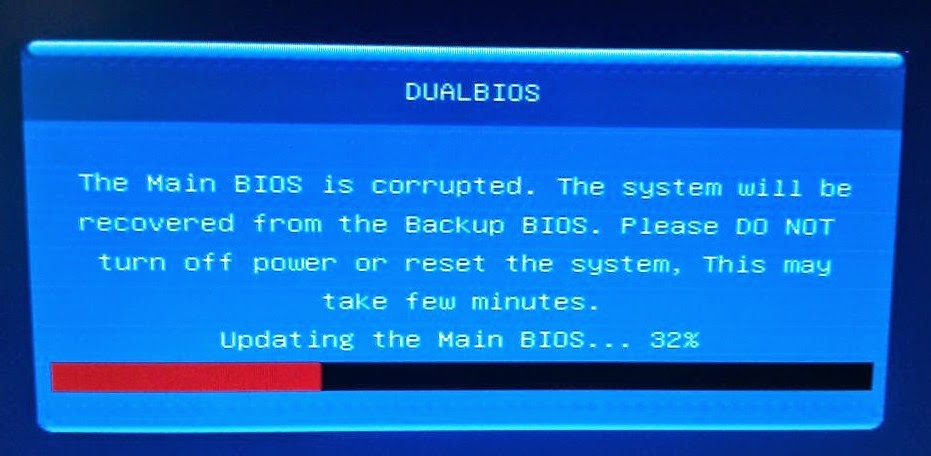 One of the most common BIOS problems involves POST (the power-on self-test). By searching for specific error messages, you can quickly diagnose the problem and fix it. To fix the BIOS, first go to your computer’s manufacturer’s support page and download the latest version of MiniTool Software.
If you have a BIOS issue that cannot be solved by the manufacturer’s instructions, a re-set of the BIOS might be required. To do this, open the BIOS in the Settings tab. Click on the Update & Security option. If this doesn’t work, you can always remove the chip and replace it. Otherwise, you may have to buy a new motherboard. If you’re not sure whether a BIOS problem can be fixed, read on to learn more.
Sometimes the problem is caused by an incorrectly connected drive. If you don’t have a bootable disk, you might notice this error. This error is often caused by a bad USB drive or a faulty hard drive. If your computer is still freezing after this, you can try disconnecting the new device and rebooting your PC. Sometimes this solution won’t work, so try a few things to determine what may be wrong.
How Do I Fix Windows 10 Stuck in BIOS?
Whenever you boot your PC, it may sometimes be stuck in the BIOS screen, indicating that the boot process is not complete. If this happens to you, the easiest way to solve the problem is to try reinstalling the operating system. Reinstalling the operating system or hard disk can fix the BIOS screen challenge. However, this process can be difficult if the computer is too old or it has many problems. To avoid such problems, you should always install the latest version of Windows 10 from the manufacturer’s website.
Another way to fix this problem is to reset the BIOS. You can do this easily and instantly, but you should know a little about the hardware of your computer to do this properly. To reset the BIOS, you must remove the CMOS battery from the motherboard. This will reset the BIOS settings to factory defaults. Once you’ve done this, restart your PC to see if it works.
Can BIOS Cause PC Crash?
Can BIOS Cause PC Crash? can be a real concern for computer owners. CMOS stands for Complementary Metal Oxide Semiconductor. This is an integral part of your system’s hardware. Most crashes aren’t caused by faulty software, but by malicious viruses. However, your computer could be experiencing this issue due to hardware problems. You may not notice this symptom until your computer is in a state of limbo.
You can fix the problem by reinstalling your system. Reinstalling your computer may solve the BIOS freezing problem. It’s recommended that you unplug your external devices, power cables, memory modules, and expandable cards before performing this procedure. Once the computer is up and running, you can then start reinstalling the drivers one by one. This should solve the BIOS freezing problem. If you can’t figure out which device is causing the freezing problem, you can also try removing the faulty one.
Another simple method to fix BIOS issues is to rename the BIOS file. If you cannot do so, try rebooting your computer. This will fix the error and may help with other computer issues. ESC and DEL are other common keys to press when your computer freezes. Another way to fix the BIOS freeze is to check the CAS latency, which refers to RAM. When CAS latency is incorrect, your computer could freeze and RAM may lock up.
How Do You Reset BIOS?
If your computer is freezing at the BIOS, the first thing to do is to restart it. This should resolve the problem. Another reason why your computer is freezing is that your HDD cables are not properly connected. To fix this, you can firmly push the HDD into its place. You can also check for any possible defects with the HDD by removing it and checking its connections. If you are unable to fix the problem, you can try other methods to make the PC work again.
One of the most common solutions for computer freezing is to replace faulty hardware, such as the memory and video card. However, if you don’t have these two components, your computer may still freeze. If this is the case, you can try downloading the device drivers from the manufacturer’s website. You can also use another computer to install the necessary drivers. But, before you do this, you should ensure that the problem is not caused by software or hardware.
Does BIOS Update Require Reboot?
BIOS updates improve a computer’s stability and compatibility. They may also add new features or correct bugs, and they may also fix security issues. However, BIOS updates are not always necessary for general troubleshooting. Before you begin the update process, make sure your computer is fully charged. You should also make a backup copy of any important files. To learn how to perform a BIOS update, read the following tips.
If your computer does not automatically recognize your devices, updating your BIOS will help you fix this. Firstly, determine the model of your motherboard. Next, locate the corresponding BIOS version for Windows 10. Once you have located the appropriate BIOS file, download and save it to a free pen drive. Make sure the BIOS file is uncompressed or uncorrupted before you attempt the update, as a corrupted BIOS file will damage your computer’s functionality.
To perform a BIOS update, you must boot your computer. It will require a restart, so be careful not to interrupt the process. If you interrupt the BIOS update process, you can create more problems. You should also make sure your computer does not crash or freeze during the process. Then, try again later. It might not be necessary to reboot your computer, but it can make your computer unresponsive.
When You Boot the Computer It Hangs After?
If the error keeps coming up after the CMOS or POST, it is possible that the problem lies in the motherboard. A PC technician can perform a thorough diagnostic test on the computer to pinpoint the cause and recommend a solution. Sometimes, the problem is as simple as a motherboard issue, but there are other causes that can lead to the same problem. In any case, we recommend you to consult a PC technician if you cannot figure out the issue on your own.
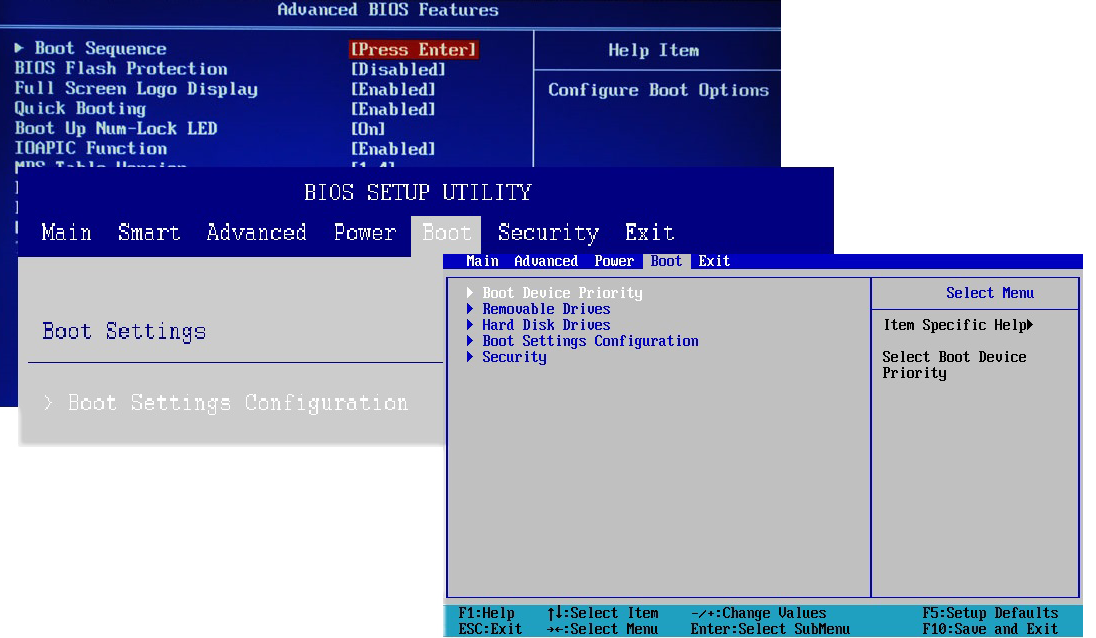
If the issue is confined to the POST process, you may need to remove USB storage devices and optical drives. Without bootable data, the computer may hang during this process. If you cannot remove these devices, try changing the boot order. By default, the internal hard drive is the preferred boot device. If it is not, you can install a new graphics card. But if this does not solve the problem, you should try troubleshooting the error.
Computer stuck on BIOS Splash Screen
If when you boot your Windows 11 or Windows 10 system, you find that the computer is stuck on then BIOS Splash Screen, then this post is intended to help you. In this post, we will identify the potential causes, as well as provide the most adequate solutions to resolve the issue.
When your PC is stuck on the BIOS splash screen, you simply cannot do anything else on your system since you have to move from there to boot your computer to the desktop normally. This issue may occur due to any of the following reasons;
- Bad RAM stick or memory slot.
- Incorrect or wrong Boot configuration.
- Corrupt BIOS.
- Bad Windows update
If your Windows PC is stuck is on the BIOS Splash Screen for a long time and can’t enter BIOS, then here are comprehensive, & proven solutions to fix the issue:
- Initial checklist
- Startup Repair computer using Installation Media
- Restore BIOS to default settings
- Clear CMOS
- Perform System Restore
- Clean Install Windows
Let’s take a look at the description of the process involved concerning each of the listed solutions.
1] Initial checklist
Before you try the solutions below, as a possible quick solution, you can do the following, and after each task see if your system can boot normally without getting stuck on the BIOS splash screen:
- Boot PC without connected peripherals. External peripherals can sometimes conflict with your system and trigger errors of all sorts. So, disconnect all peripherals including your printer, scanner, webcam, mouse, iPod, external storage devices etc.
- Hard reboot PC. It’s likely your PC is experiencing minor and very temporary BIOS Power-On Self-Test (POST) errors – so, hard rebooting your system since it’s stuck will help it to reload the correct settings and boot successfully.
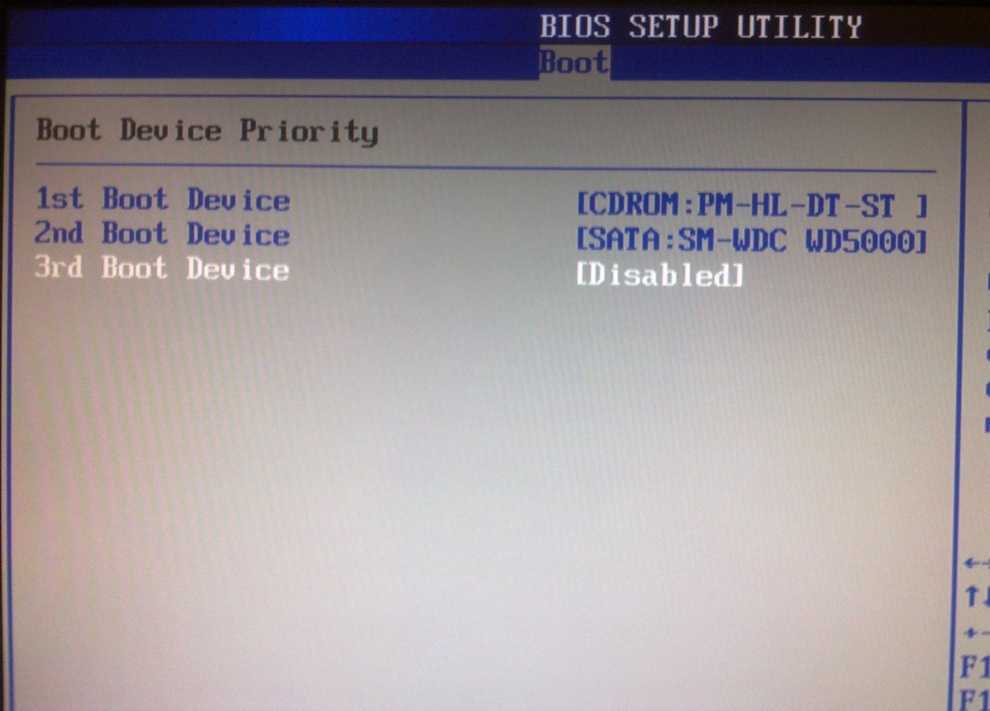
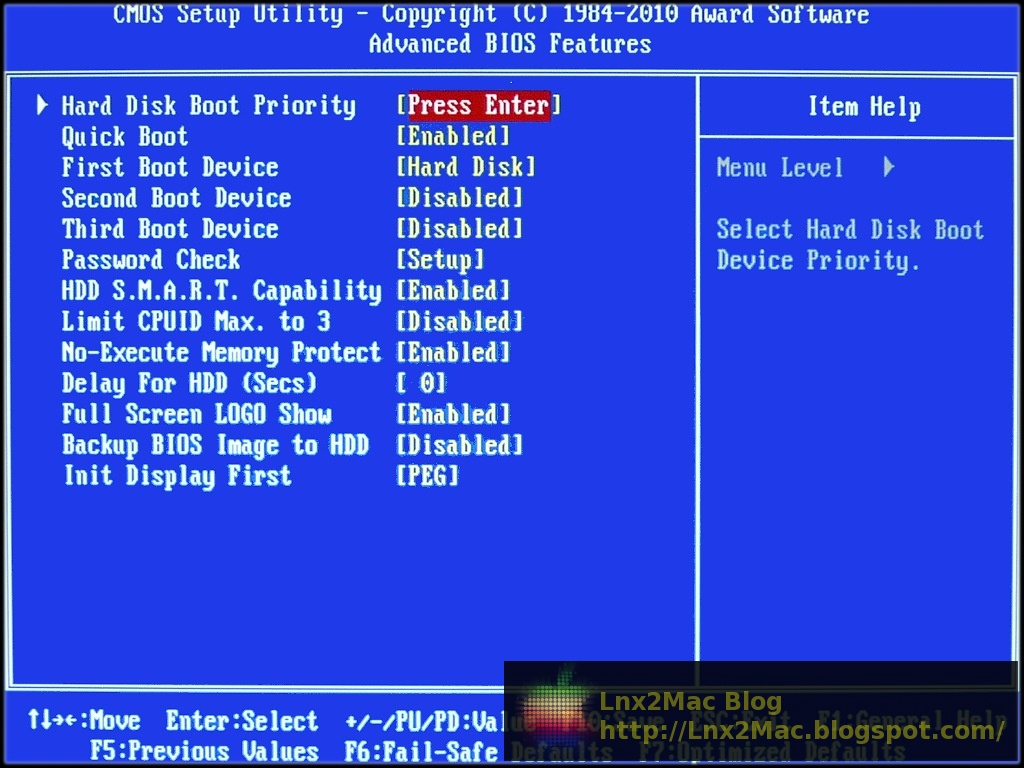
- Check boot order. Incorrect or wrong boot configuration is a likely culprit. So, if you have changed the boot order, your PC will struggle to figure out where to boot from – so, change the boot priority and set the hard drive on top of the list.
- Check physical RAM. As your computer is unresponsive during startup, it’s likely your RAMs are not well installed, or in some cases, one or more of your RAM modules or RAM slots is faulty. So, remove your RAMs from the memory slots and reinsert your RAMs back into the slot one by one while trying to boot each time. The issue isn’t with your RAM modules if your computer starts without one or more of the RAMs – then it’s likely one or more memory slots on your motherboard are defective.
 You may want to try removing the modules and insert them in different slots to find if one of the slots is faulty.
 - Rollback BIOS update. A botched BIOS update is a likely culprit. So, if you recently updated BIOS, you can downgrade BIOS to a previous version. Likewise, if the issue started after a recent Windows update, you can uninstall update when Windows is unable to boot..
2] Startup Repair computer using Installation Media
If your Windows 11/10 computer is stuck on BIOS Splash Screen, even after you have gone through the initial checklist, you can try to boot and repair your computer using Installation Media.
The Windows Startup Repair can fix some of the most common problems using the advanced recovery method in some cases where you are unable to boot into Windows 11/10 and cannot access your files – your data will not be lost during the repair process.
3] Restore BIOS to default settings
In cases like this, it is safe to reset the BIOS to default.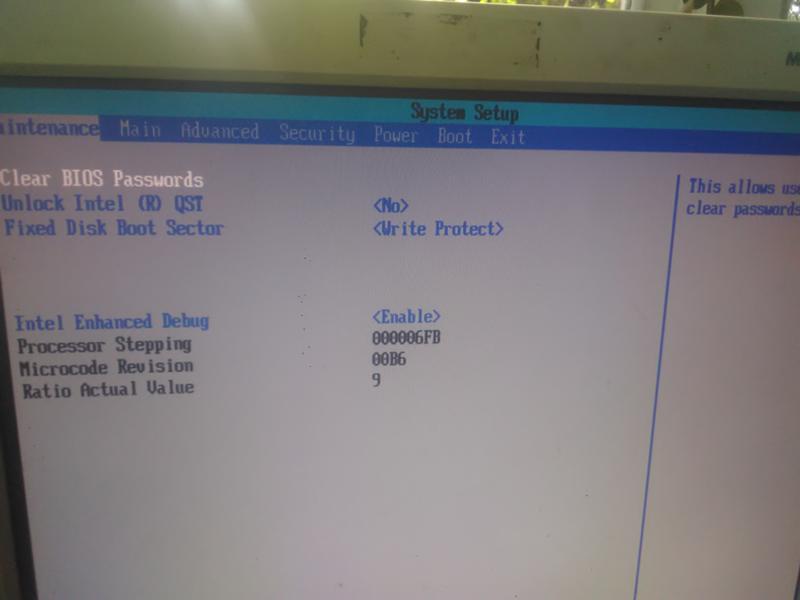 Most often, resetting the BIOS will reset the BIOS to the last saved configuration, or resets your BIOS to the BIOS version that shipped with the PC. Sometimes the latter can cause issues if settings were changed to take into account changes in hardware or OS after installation. In any case, though, resetting BIOS to default settings is a simple procedure for new and experienced PC users alike.
4] Clear CMOS
On the RAM of your computer’s motherboard, a CMOS chip is present – with the help of a CMOS Battery, the chip can be powered constantly, hence, your computer’s setting will not get deleted. So, when you turn ON your computer the CMOS chip will provide the necessary information to the BIOS to boot your computer.
The essence of clearing or resetting the CMOS battery on your MOBO is to reset your BIOS to factory settings.
5] Perform System Restore
You can perform this task in either of two ways: boot into Safe Mode and then perform System Restore normally by selecting a restore point when you know your PC was booting perfectly fine without issues OR in the case where your PC won’t boot to the desktop, you can perform System Restore via Advanced Startup Options.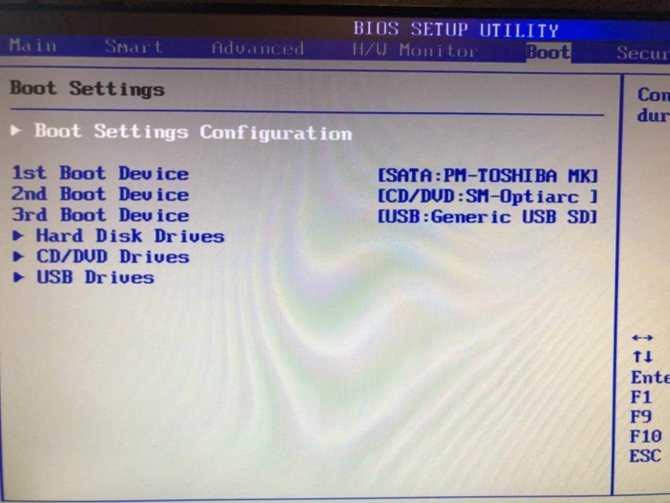
If system restore didn’t work to resolve the issue at hand, you may reset Windows 11 using Advanced Startup Options and see if that helps. Otherwise, try the next solution.
6] Check if motherboard is faulty
Ultimately, the issue you’re currently facing might not be software-related. In this case, you need to check if your motherboard is bad. If the PC is still under warranty or the MOBO itself is a new purchase, you can have the hardware diagnosed by an authorized PC hardware technician. In any case, if the hardware is faulty, you will need to replace the MOBO.
Hope this post helps you!
Related post: Computer unable to boot into BIOS
How do I get rid of BIOS splash screen?
Access the BIOS and look for anything that refers to turning on, on/off, or showing the splash screen (the wording differs by BIOS version). Set the option to disabled or enabled, whichever is the opposite of how it is currently set. When set to disabled, the screen no longer appears.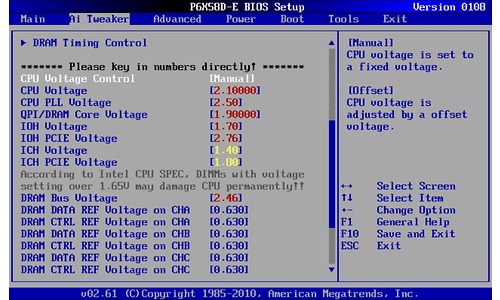
Read: Windows is stuck on loading some screen
What is Splash Screen?
In general computer terminology, the splash screen (alternatively referred to as a boot screen, boot skin, or welcome screen) is an introduction page that is displayed as a program or computer is loading or booting. Typically, the splash screen can include a logo or other image, as well as a company name, and sometimes the company’s slogan.
What to Do if PC is Stuck on BIOS Screen
BIOS is an important part of every motherboard as it enables users in troubleshooting their computers. As an acronym, it means the Basic Input Output System. BIOS helps you in booting your computer so if it has a problem and you are stuck on its screen, then you need help and you need it fast. This is because if you cannot move on from the BIOS screen, then you simply cannot do anything else on your system since you have to move from there to boot your computer.
But there is a way. This article will show you ways you can resolve this issue so pay careful attention.
- What to Do if PC is Stuck on BIOS Screen?
- Recover Data When PC is Stuck on BIOS Screen
What to Do If PC Is Stuck on BIOS Screen?
Going straight to the essence of this article, learn what to do if your PC gets stuck on the BIOS screen by following the methods explained below:
- 1. Restore Default Settings of BIOS
- 2. Clear the CMOS (BIOS)
- 3.Use UEFI Boot and Check Your Boot Order
- 4. Repairing Computer Using Windows 10 Bootable Media
1. Restore Default Settings of BIOS
First, you need to access BIOS settings before your reset it. Follow the steps below to do these:
- Boot your computer and while it is still loading, continually press the key that will lead you to BIOS. On the screen, you may get hints on the exact key to press, which is mostly «F2», though it’s «DEL» for some laptops. Whichever one it is; your computer will load the BIOS settings when you hit the right key enough times.
- Now that you are in, launch the prompt «Load Default Options» by hitting the key F9. To confirm the restoration of your BIOS default settings, click «Yes».
- You can also go to the «Security» button and reset your BIOS there. Although the menu options are different for different motherboards, there will always be one option on the list for BIOS reset.
- Click to «Save» > «Exit».
2. Clear the CMOS (BIOS)
The essence of clearing your motherboard’s CMOS battery is to reset your BIOS to factory settings. The steps to do this are outlined as follows:
- Put off any device that is externally attached to your computer.
- Disconnect the power cord of the computer system from its AC power source.
- Remove the case cover of the computer.
- Locate the motherboard’s CMOS battery. You can find the battery in a vertical/horizontal battery holder on the motherboard.
 Alternatively, you can see it connected via a wire to an installed onboard header.
- Now, remove the battery and if it is in a holder, take note of its – and + orientation. Take your time to pry the battery-free from what’s connecting it. If it is connected by a wire, disconnect the wire.
- Hold on for a minute to five before reinserting the battery into the motherboard.
- Cover back the computer with its case cover.
- Plug back every peripheral device you initially detached from the computer.
- Power on your PC.
3. Use UEFI Boot and Check Your Boot Order
The more recent versions of computer systems have replaced BIOS with UEFI. UEFI means Unified Extensible Firmware Interface. This replacement is because UEFI is faster than BIOS and its security features are better improved than BIOS. Thus, it makes sense that one of the ways you can fix the issue of PC being stuck on the BIOS screen is to use UEFI to check your boot order.
Now to do this, go to BIOS as shown in solution (1) above, then do the following:
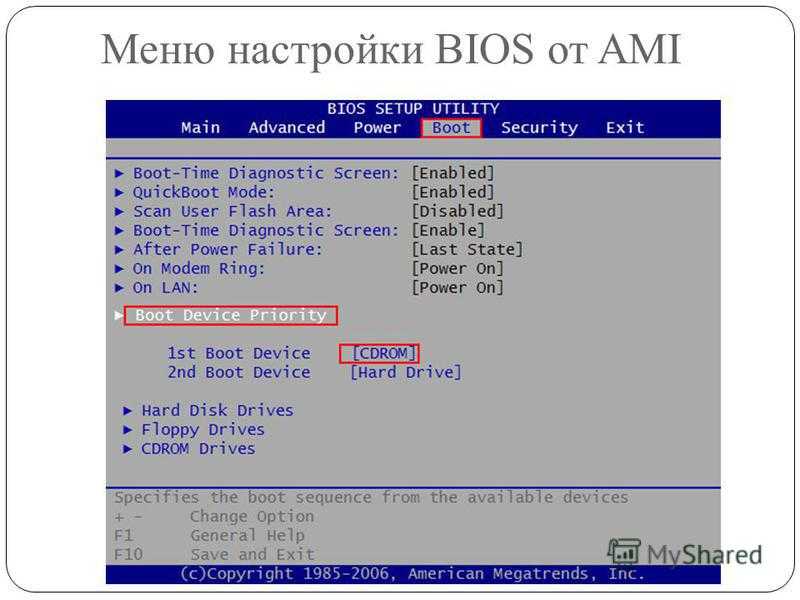
- Scroll to the section for «Boot» and tap to enable the «UEFI boot» option.
- Check your boot order. Set your SSD or hard drive as the device to first boot. Then press «Enter».
- Now restart your computer.
4. Repairing Computer Using Windows 10 Bootable Media
To use a DVD media or a bootable installation USB to repair or boot your computer, follow the steps below and do advanced troubleshooting:
Step 1: Download the ISO Version of Your Windows:
Download the same ISO version of Windows as the one installed on your PC. Note that this is not compulsory but it can become useful when you need to do a fresh installation of Windows. ISO file of your Windows version helps keep the store of all the setup files you may need for this fresh Windows installation.
Step 2: Create the DVD Drive or a Bootable USB
Use any of the available tools online to create a bootable thumb drive.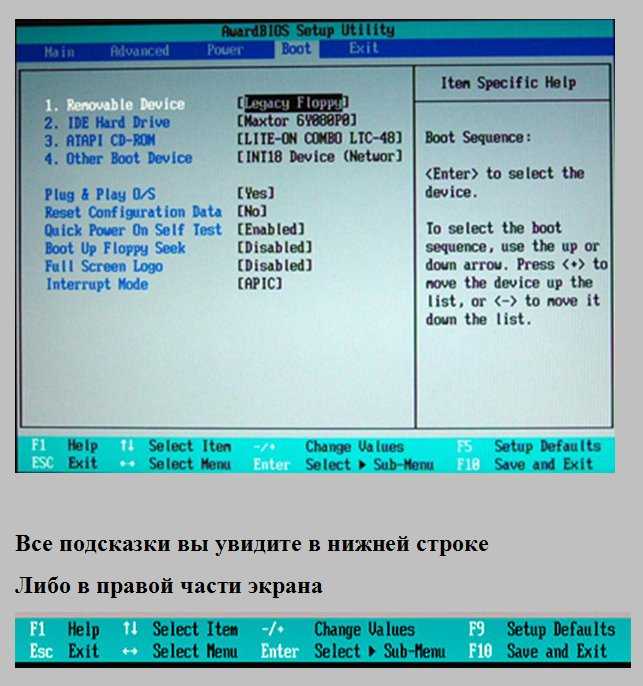 Although not specifically a tool for creating bootable USB, a recovery tool like Recoverit Data Recovery helps you create bootable USB before you can recover your files from a computer stuck on the BIOS screen. The use of this tool will be outlined in detail in the next section of the article.
You can also create a repair bootable USB on a working computer using these steps:
- Connect the USB drive to the working computer; check that it is detected.
- Go to the search box and input «recovery drive», then select the option «Create a recovery drive»
- Check the box beside the instruction «Backup system files to the recovery drive». Move on to the next window.
- Choose a USB thumb drive and again select «Next».
- Begin the operation by selecting «Create»
Boot into your PC’s UEFI or BIOS and arrange the boot order so that the USB will come first, then the hard disk.
Step 3: Boot from the Bootable Media and Repair Your Computer
Boot your computer from the bootable media you have created. It will begin a process of Windows 10 installation but do not click on «Next» to continue as this will only end up with you installing another Windows OS. Instead, what you should do is go to the bottom of the screen and choose «Repair your computer» to move to the Advanced Recovery proper.
Step 4: Perform Advanced Recovery Troubleshooting
This step consists of the following:
- Click the «Advanced options» button.
- Move to click «Troubleshoot».
- Select «Startup Repair» from the list of options in the «Advanced options» window. A set of instructions will guide you in fixing the problems which prevent you from booting your computer; ensure you follow them.
- Next, a screen will pop up with your admin account name.
- Click on this account and make a verification that the account is yours by inputting the password associated with its email.
- Once the above is done, your computer will go through diagnosis and any problem related to its booting will be resolved.

- Now you can restart your computer, knowing it will properly and not get stuck on the BIOS screen.
Recover Data When PC is Stuck on BIOS Screen
When your PC gets stuck on the BIOS screen and you urgently need some important data from the system, there is a way you can access them; consult the software Recoverit Data Recovery. This tool can recover data from crashed systems, corrupted SD cards, formatted drives, damaged internal hard drives, etc.
Download | Win Download | Mac
The tool’s interface is user-friendly and even if you are an amateur user, you can easily use it. Therefore, follow the steps below and recover data from your PC if it is stuck on the BIOS screen:
Step 1 – Create Bootable Media
You need another computer that works fine, to begin with. So, plug either the DVD/CD or USB you used in solution (4) above into this working computer. Creating bootable media as this will help you gain access to your drive so that Recoverit can help you retrieve your data.
Once the CD/DVD or USB is plugged in, download and install Recoverit Data Recovery. Select the option to «Recover from Crash Computer» under the tab «Advanced Recovery», then select «Start».
The next window is where you get to create the bootable media. Depending on which device you are using, choose CD/DVD or USB, then click «Create». If you have chosen a USB, you will be prompted to format it. Click «Format» > «Create».
In the next window, Recoverit will download the needed firmware for creating the bootable media. Then, it will format your drive before finally creating the bootable media. Once this is completed, you will be notified. Eject your DVD/CD or unplug your USB, as the case may be.
Step 2 – Boot Computer with Bootable media
Go to the BIOS settings of the computer that’s stuck on the BIOS screen. Change the boot order to let the computer from a USB drive or CD/DVD. Insert the DVD/CD into the problematic PC or plug in the bootable USB into it.
Reboot your faulty computer; you will now be able to gain access. Also, plugin an external drive that you can use as storage for the data you are about to recover.
Step 3 – Select Recovery Mode
Two options of recovery mode will be presented to you: «Data Recovery» and «Hard Disk Copy». Choose «Data Recovery» mode. Go to the drive where you originally stored your files and select them. Once you choose to «Start», Recoverit will scan the drive and retrieve all your files.
Step 4 – Recover and Save
You can preview your files even as they are getting retrieved, one after the other. Once the scanning is over and all your data have been retrieved, select the external drive you plugged in step (2) above as the location where you wish to save your files.
Select «Recover» and your retrieved data will be saved in the drive.
The Bottom Line
You can no longer be stuck on the BIOS screen when booting your computer because now you know what to do if confronted with such a situation.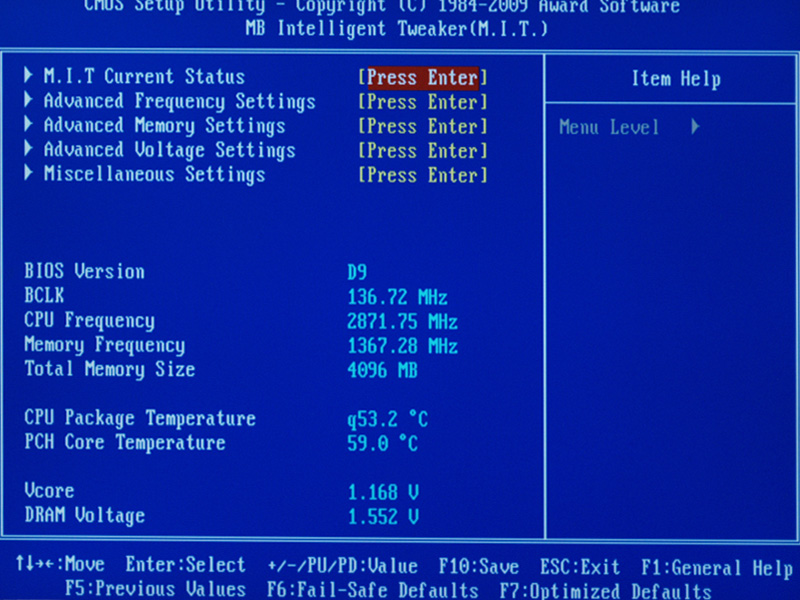 All of the steps that have been outlined are practical and easy-to-follow. Do not forget to use the professional Recoverit Data Recovery if you are in a hurry to use data from a PC stuck on the BIOS screen.
Recent Videos from Recoverit
View More >
You can explore more from Wondershare Video Community.
Download | Win Download | Mac
6 Methods to Solve Computer Keeps Freezing (#5 Is Awesome)
Is your computer often freezing for no reason? Don’t worry. This article will show you 6 solutions to stop your computer from freezing all the time; we will also show you how to recover data using the professional data recovery software — MiniTool Power Data Recovery.
Computer Keeps Freezing
Many users complain that their computers keep freezing. Let’s have a look at a real case study from howtogeek. com:
com:
I built my computer a few months ago and now it randomly freezes. Sometimes for 5-10 minutes but other times a hard restart is required. I have disabled some programs from running when the computer boots up such as Skype and that fixed it for about a week but now it is doing it again. howtogeek.com
So you may want to know how we fix a computer that keeps freezing?
Video Watch
This post will cover the causes and solutions to a slow computer, as well as solutions to recover lost data using a professional file recovery software.
Helpful Article: Here, you might be interested in this issue: Computer Runs Slow Even with Windows 10 or 8? – Speed It up Now.
Top 9 Reasons for «Why Computer Keeps Freezing»
It is important to identify the actual causes for a computer that keeps freezing. The 9 most common causes of why Windows 10, Windows 8 or Windows 7 keeps freezing are shown below.
1. Too Many Programs Opening
Every program in your computer requires certain amount of both internal and external (hardware) resources to function. If multiple programs are running concurrently, your computer might not have enough memory or computing power to support all of them.
In this situation, you should right-click Task Manager, choose Task Manager, click the Processes, find the program that is frozen and click End Task. It is recommended to run programs you need at a time.
2. Driver Corruption or Errors
Drivers are used for communications between hardware devices and the operating system. Outdated or damaged drivers could be reasons to why your Windows keeps freezing. Therefore, you should make sure that your drives are always updated.
3. Overheating
Excess heat can slow down a computer, eventually causing computer freeze. If the temperature is high enough, it can even damage the integrated circuit of your system processor and render it unusable.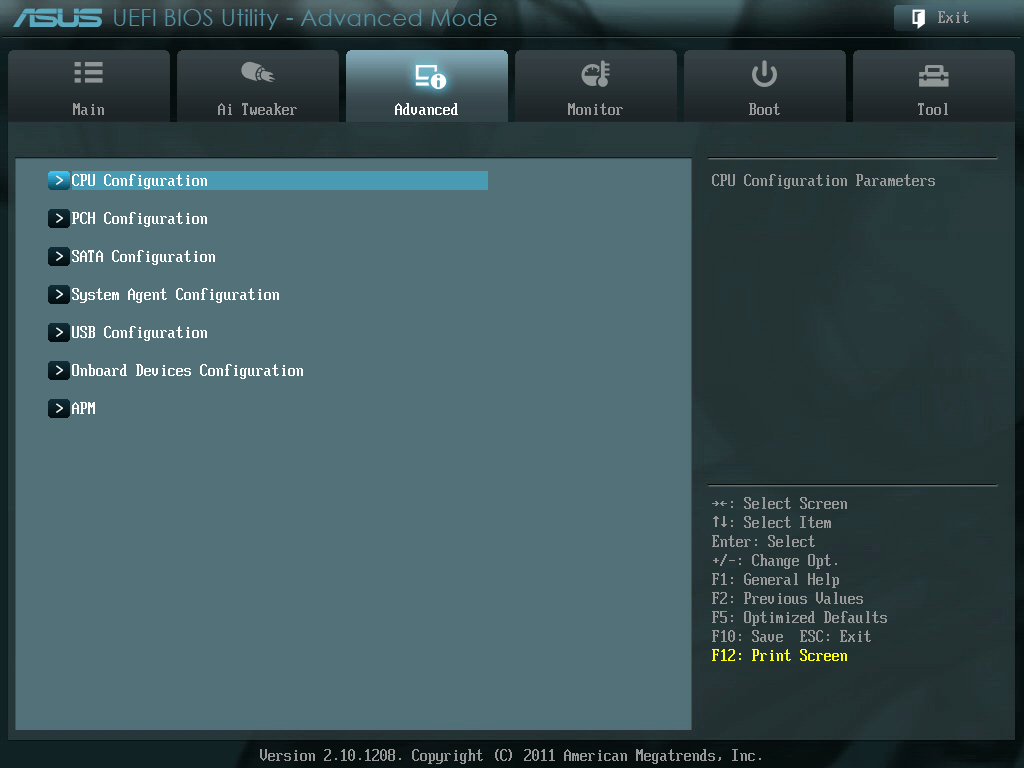
To avoid this, please make sure your computer is thoroughly vented. Computer casing should be used for harsh environments.
4. Insufficient RAM
If your computer freezes frequently and regularly, you might have insufficient RAM. You can consider upgrading your RAM or reinstalling the operating system to solve this issue.
5. BIOS Settings
Modifying BIOS settings may put the system in the freeze mode. Resetting the BIOS to default could fix your freezing problem.
6. Faulty External Devices
Faulty USB or other external devices such as the mouse and keyboard can cause the computer to freeze. You can try connecting one device at a time to investigate the root cause. Also try updating the USB device drivers to fix this computer keeps freezing problem.
7. Computer Viruses
Viruses could also be the main cause for a computer to freeze. You should perform an antivirus check regularly.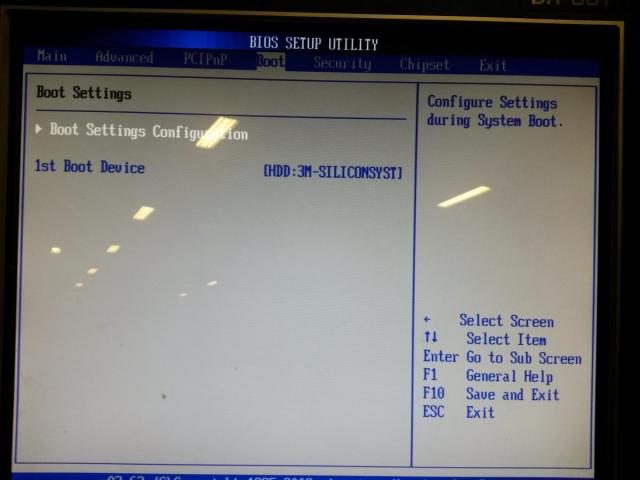
8. Corrupted or Missing System Files
According to our investigations, we found that Windows 10 / Windows 7 keeps freezing due to corrupted or missing system files.
9. Software Errors
Regardless of the vendor, any third-party software could be freezing your computer.
Some applications may take up a lot of memory to attempt to perform actions or access resources that Windows cannot understand. If your computer isn’t able to handle the strain, it can get hung up and freeze. To fix this, you should update all third-party software that is installed on your computer.
In addition to the above-stated reasons, there are other reasons like broken memory card, low disk space, etc. No matter what the cause is, our main focus is to fix this problem without affecting the original data. Next, let’s see how we can protect our data while solving this issue.
Click to Tweet
How to Fix Computer Keeps Freezing
Method #1. Free up disk space on C drive
If your C drive is running out of space, your Windows 10 or Windows 7 will keep freezing because it is where the system files are stored.
Therefore, make sure you have enough free disk space on the C drive. If not, you can try deleting some unwanted data or programs on your C drive. Alternatively, you can directly add more free space to the C drive using MiniTool Partition Wizard.
Useful Article: Here, our previous post Extend Partition will show you more details.
Method #2. Update all device drivers to the newest
Users can turn to the best driver update software or Windows Update to update your drivers.
1) Right-click This PC in Windows 10/8 or My Computer in Windows 7, then click on Manage, and click on Device Manager.
2) Open the category that you think contains the device you want to update its drivers.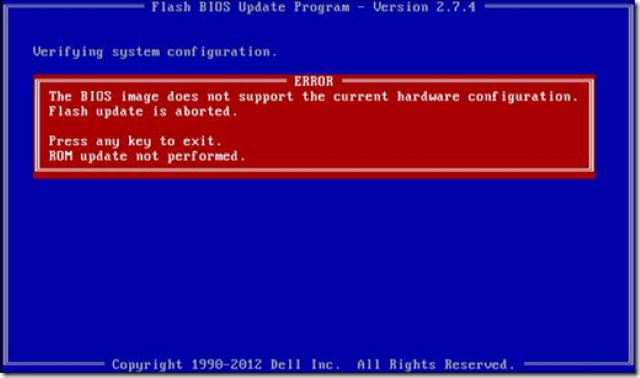
3) Update drivers depending on your version of Windows:
Windows 10/8 users: Right-click the hardware’s name or icon and choose Update Driver Software…
Windows 7 users: Right click on the hardware’s name or icon, choose Properties, and choose the Update Driver… button under the Driver tab.
Method #3: Run Memory Check
If you suspect your computer has memory problems, you can run the Windows Memory Diagnostics utility by completing the following steps:
Press Windows and R keys, type mdsched.exe in the text input box and press Enter.
Too check for problems immediately, click Restart now and check for problems (recommended). Note: if you want to check later, click Check for problems the next time I start my computer.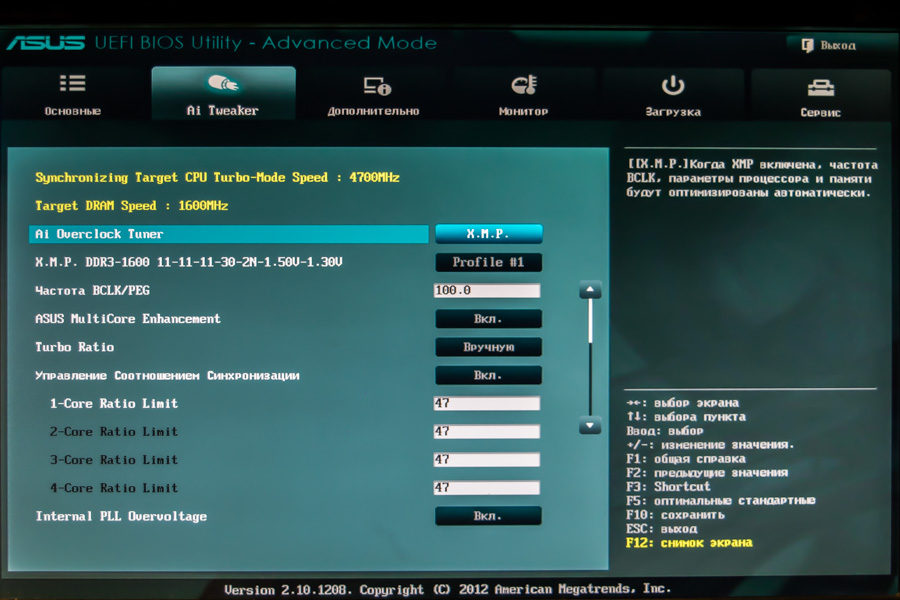
Windows will then restart, and you will get the following window showing the progress of the check and the number of passes it will run on memory. It might take several minutes for the tool to finish.
Method #4: Run System File Checker
In case of system files are missing or corrupted, you can try the following steps to restore them to solve the Windows 10 freezes issue.
1) Click Start, and then type cmd into the search box. (DON’T press Enter button!!!).
2) Right-click Command Prompt and choose Run as administrator, and click Yes.
3) Type sfc /scannow and press Enter.
4) Windows will now scan your system for corrupted files and attempt to fix them if found.
5) Type exit and press Enter.
Method #5. Perform System Restore
If your Windows 10, Windows 8 or Windows 7 computer still freezes after trying all the solutions listed above, then your Windows might be corrupted.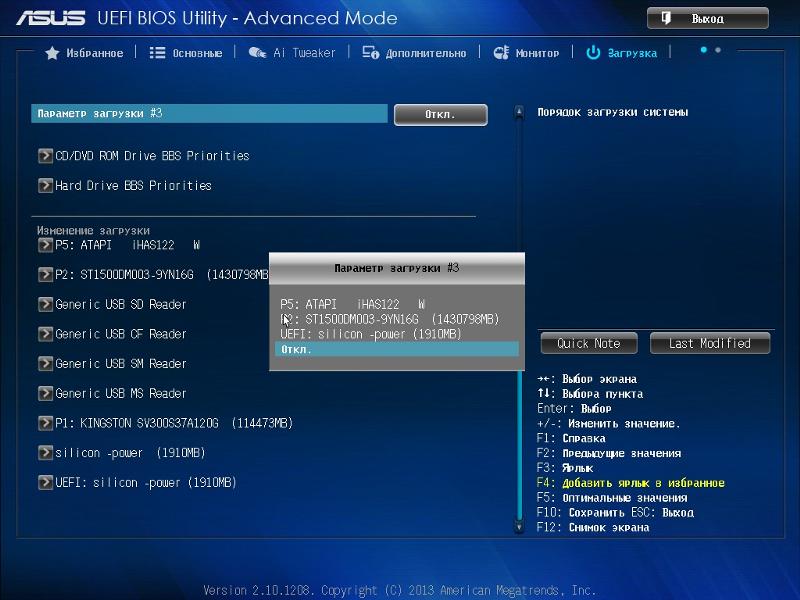 In this case, you might need to try restoring your operating system.
Warning: System reinstallation is a good solution to fix a computer keeps freezing. However it will delete some data on your PC. Therefore we recommend you to back up your data in advance.
MiniTool Power Data Recovery can help retrieve lost data easily when your laptop keeps freezing or is not responding. Most importantly, it is a read-only tool which can help you effectively recover lost data without affecting the original data.
The steps are:
Download MiniTool Power Data Recovery to recover data from your computer that keeps freezing, even recover data when your PC isn’t booting.
Free Download
Step 1. Install this professional data recovery software on a normal working computer, launch it and then click the Bootable Media button next to the Key icon at the top toolbar.
Step 2. Click on the WinPE-based media with MiniTool plug-in.
Step 3. Choose a media destination to create bootable CD/DVD or USB drive.
Step 4. Connect the bootable drive to your computer that is freezing, and boot from the bootable drive to get the following window.
Step 5. In the MiniTool PE Loader interface, click on the MiniTool Power Data Recovery to navigate to its main interface.
Step 6. In the main interface, select the target drive you want to recover. You can also click Devices tab and select the whole disk to scan.
Step 7. Scan the selected drive. Here, if you find all the files you needed during the scan, you can stop the scanning process. However, for the best result, it is recommended to wait until the full scan finishes.
In this window, you can click the Scan Settings feature in the left panel to specify needed file system (such as FAT12/16/32, NTFS, and NTFS+) and file types (including Documents, Archive, Graphics/Picture, Audio, E-mail, Database and other files) before scanning.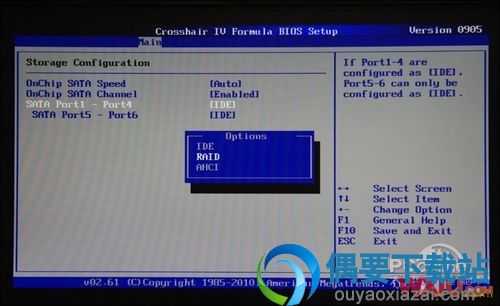
Step 8. Select all needed files, then click Save to store them in a safe place. We recommend storing the files on another drive. Otherwise, the original data could be overwritten, resulting data unable to be recovered.
If MiniTool Power Data Recover lists a lot of found files in a neat tree view, you can use the Filter feature to quickly find the files you need.
For example, if you only want to recover pictures, you can choose «*.jpg, *.gif, *.png, *.psd, *.tif» from the drop-list of By Filename/Extension and then click OK, as shown below.
SEE! With MiniTool Power Data Recovery, without affecting the original data, I effectively and quickly recovered lost data from my computer of which Windows 10 keeps freezing. Now, I want to share this tool with you to help you get rid of data loss problems.Click to Tweet
After data recovery, you can try reinstalling Windows to solve the laptop keeps freezing and not responding issue. Here, you can find more details from this post: Reinstall Windows 10.
How to Free Download MS Excel 2021 for Win 10 32/64 Bit & Win 11?
In this post, we will introduce the Microsoft Excel 2021 free download for Windows 10 32/63 bit, Windows 11, Mac, Android, and iOS devices.
Read More
Method #6. Take PC to Repair Shop
If none of the above options work, you have no choice but to take your PC to a computer repair shop and allow a computer technician to diagnose and fix the problem.
What would you do when your computer keeps on freezing? You can attempt the solutions above to solve this issue.
If you have any other good solutions, please share your techniques with us in the following comment. We really appreciate your advice.
If you have difficulty recovering lost data by using MiniTool Power Data Recovery, please feel free to contact us via [email protected]. We will solve it as soon as possible.
My PC freezes randomly even in BIOS
keylog keylog
-
-
#1
My computer freezes randomly when in Windows (windows 7 pro 64 bits) and even in BIOS. It can freeze 4 times in an hour or not freeze for many hours when it’s used or not, completely randomly.
It has the following hardware:
CASE: Xigmatek Midgard Case (CPC-T55DB-U01)
PSU: CoolerMaster M520 Real Power Modular
CPU: Intel Core I7-950 (s1366, 3.06GHz, 8MB, Box)
MOTHERBOARD: Gigabyte GA-X58A-UD3R (s1366, DDR3, X58), REV 2.0
RAM: OCZ 6GB DDR3-1333 Ram Kit OCZ3G1333LV6GK — (240 Pin DIMM)
VGA: Palit GTS 450 Sonic (PCI-Express, GDDR5, 1GB) — (128 bit)
HDD: Western Digital Caviar Black WD1002FAEX 1TB HDD (64MB Cache, 7200RPM, Sata III)
DVD-RW: LG LS Gh32LS50 DVDRW + / — (Sata, Bulk)
I have used BurnInTest, memtest86 and unigine programs to test the hardware and no errors are found.
I booted with the memtest86 cd-rom and I tested it for 9 hours without errors and my system didn’t freeze during the tests. But in BIOS it freezes. Does this fact means that in Bios the system loads something else that makes my computer to freeze ???
Any suggestion appreciated.
Thanks in advance.
Advertisements
-
-
#2
My computer freezes randomly when in Windows (windows 7 pro 64 bits) and even in BIOS. It can freeze 4 times in an hour or not freeze for many hours when it’s used or not, completely randomly.
It has the following hardware:
CASE: Xigmatek Midgard Case (CPC-T55DB-U01)
PSU: CoolerMaster M520 Real Power Modular
CPU: Intel Core I7-950 (s1366, 3.06GHz, 8MB, Box)
MOTHERBOARD: Gigabyte GA-X58A-UD3R (s1366, DDR3, X58), REV 2.0
RAM: OCZ 6GB DDR3-1333 Ram Kit OCZ3G1333LV6GK — (240 Pin DIMM)
VGA: Palit GTS 450 Sonic (PCI-Express, GDDR5, 1GB) — (128 bit)
HDD: Western Digital Caviar Black WD1002FAEX 1TB HDD (64MB Cache, 7200RPM, Sata III)
DVD-RW: LG LS Gh32LS50 DVDRW + / — (Sata, Bulk)I have used BurnInTest, memtest86 and unigine programs to test the hardware and no errors are found.
I booted with the memtest86 cd-rom and I tested it for 9 hours without errors and my system didn’t freeze during the tests. But in BIOS it freezes. Does this fact means that in Bios the system loads something else that makes my computer to freeze ???
Any suggestion appreciated.
Thanks in advance.Click to expand…
This sounds like an intermittent hardware problem and I suspect
the memory. The BIOS uses some areas of RAM which Memtest can’t
address.
Try swapping the DIMM modules between slots. This should then
put any bad module into a memory area which Memtest can get at.
There are other possibilities, but this is easy to try as a
first step.
HTH
David W. Hodgins
-
-
#3
My computer freezes randomly when in Windows (windows 7 pro 64 bits) and even in BIOS.
It can freeze 4 times in an hour or not freeze for many hours when it’s used or not, completely randomly.
Click to expand…
PSU: CoolerMaster M520 Real Power Modular
VGA: Palit GTS 450 Sonic (PCI-Express, GDDR5, 1GB) — (128 bit)Click to expand…
I booted with the memtest86 cd-rom and I tested it for 9 hours without errors and my system didn’t freeze during the tests. But in BIOS it freezes. Does this fact means that in Bios the system loads something else that makes my computer to freeze ???
Click to expand…
My guess is lack of power.
Check the label on the psu. One article I found suggests it’s only rated
for 19 amps on the +12V rail, which I doubt is enough for a GTS 450.
Regards, Dave Hodgins
-
-
#4
keylog said:
My computer freezes randomly when in Windows (windows 7 pro 64 bits) and even in BIOS.
It can freeze 4 times in an hour or not freeze for many hours when it’s used or not, completely randomly.
It has the following hardware:
CASE: Xigmatek Midgard Case (CPC-T55DB-U01)
PSU: CoolerMaster M520 Real Power Modular
CPU: Intel Core I7-950 (s1366, 3.06GHz, 8MB, Box)
MOTHERBOARD: Gigabyte GA-X58A-UD3R (s1366, DDR3, X58), REV 2.0
RAM: OCZ 6GB DDR3-1333 Ram Kit OCZ3G1333LV6GK — (240 Pin DIMM)
VGA: Palit GTS 450 Sonic (PCI-Express, GDDR5, 1GB) — (128 bit)
HDD: Western Digital Caviar Black WD1002FAEX 1TB HDD (64MB Cache, 7200RPM, Sata III)
DVD-RW: LG LS Gh32LS50 DVDRW + / — (Sata, Bulk)I have used BurnInTest, memtest86 and unigine programs to test the hardware and no errors are found.
I booted with the memtest86 cd-rom and I tested it for 9 hours without errors and my system didn’t freeze during the tests. But in BIOS it freezes. Does this fact means that in Bios the system loads something else that makes my computer to freeze ???
Any suggestion appreciated.
Thanks in advance.Click to expand…
I would start by using a search engine, and look for
GA-X58A-UD3R freezing
and see what pops up. Sometimes, it’s a BIOS issue, in
which case, a different BIOS version might give relief.
(The BIOS can even influence the OS operation, as
SMM continues to run in the background and when SMM
interrupts the system, the OS can’t even tell it is
happening.)
(SMM is sometimes used for adjusting the number of operating
phases of the VCore regulator…)
http://en.wikipedia.org/wiki/System_Management_Mode
Looking at the customer feedback here, I can see a few issues.
http://www.newegg.com/Product/Product.aspx?Item=N82E16813128423
You could try testing with one stick of RAM at a time in the
system, and see if the freezing stops or not. Three sticks
means three tests to run.
Freezing issues are not easy to fix. For example, some people
do load testing, and the system never freezes when load tested.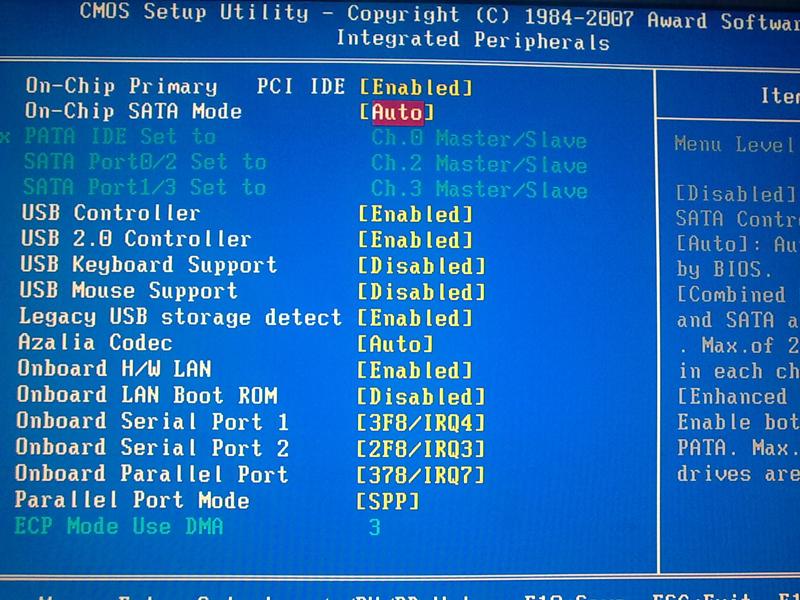
But if you leave the thing idle for five minutes, it freezes.
That can be… very frustrating. And while it’s tempting to
assume SpeedStep or Cool N’ Quiet VCore adjustment is doing it,
that isn’t always the case. Usually, there will be some
ACPI adjustments in the BIOS you can make, to stop SpeedStep
changes (like disabling all the C states, disable EIST and so on —
on my current motherboard, you have to change a *lot* of settings,
to stop SpeedStep completely). But even if you try that, there
doesn’t seem to be a strong correlation between freezing and
VCore changes. The engineers at Intel and AMD have done a
good job of margining their designs, and picking appropriate
load lines for their processors.
And the fact it is freezing in the BIOS, is a great observation,
as it gets the OS off the hook It means there is a real
hardware issue.
It could also be a defective power supply, but then the question
you’d ask, is why there isn’t a stronger correlation to power draw.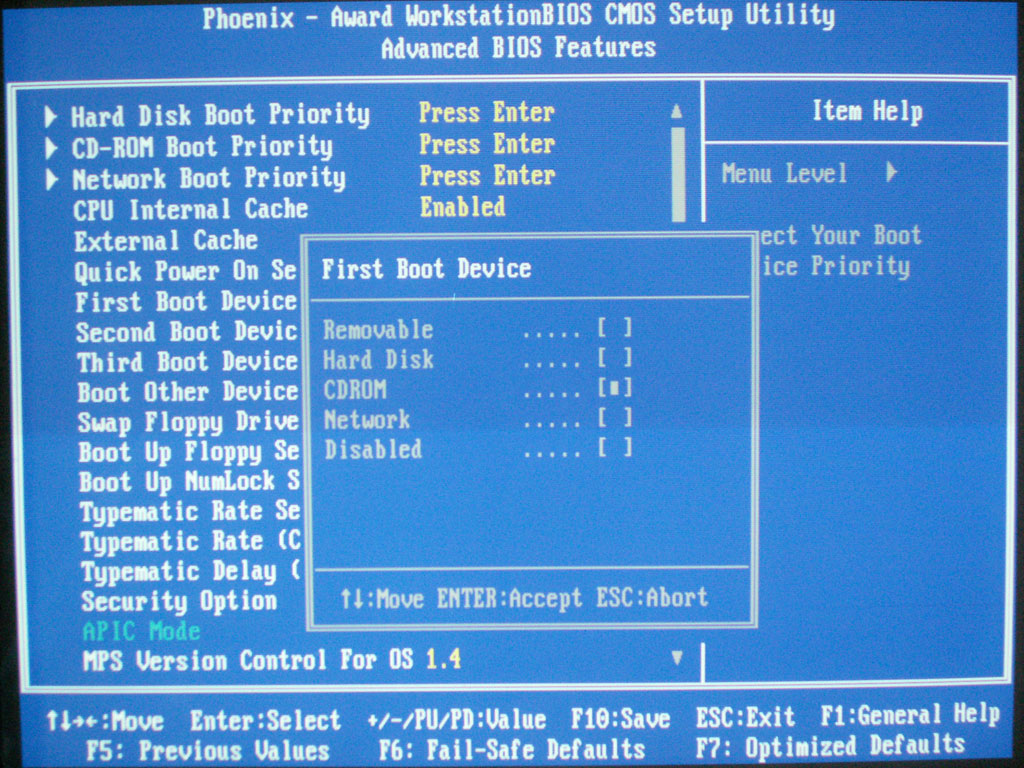
For example, if it froze every time you entered a 3D game, I’d
be more tempted to blame the power supply. Apparently the GTS 450
only draws 11W at idle, and 84W in Crysis, so in many (non-gaming)
situations, it isn’t a major contributor.
Swapping in a different supply, is the easiest way to check for
that kind of thing (defective power supply). Mainly because,
it’s too hard to test the power supply with easily available
tools. Swapping it out, is the next best thing. A power supply
can have faults in its dynamic behavior, that you can’t check
with a multimeter.
Paul
John McGaw
-
-
#5
My guess is lack of power.

Check the label on the psu. One article I found suggests it’s only rated
for 19 amps on the +12V rail, which I doubt is enough for a GTS 450.Regards, Dave Hodgins
Click to expand…
Given the OP’s symptoms that seems less than likely. True, the video
subsystem can draw a lot of power but it doesn’t do so all the time. In the
BIOS it will be drawing virtually nothing. If the problem came up during 3D
game play then I might go along with the PS theory but that is far from
random as was described.
That said, I don’t really have a solid theory which might solve the
problem. The closest I’ve come is a Q6600 computer which had memory which
was just slightly bad/out of spec/mistimed/incompatible/screwed/whatever
and which would cause BSODs when it felt like it but which could pass
burnin testing and memory testing for extended periods without a glitch.
keylog keylog
-
-
#6
I updated the bios to X58A-UD3R FF from X58A-UD3R FA two days before.
Today my computer froze again inside Windows and then for the first time itcould not boot at all, giving a short beeps sound. According to the motherboard’s manual this was «Continuous short beeps: Power error».
I just started to think that I found the problem and it must the PSU unit that is fault.
But I decided to open the case and check the memory modules. The computer was able to boot again only when I put off all the three memory modules and put them back again. (I put off one memory module at a time and tried to boot the computer each time). After I put the memory modules back again the computer boots ok.
Now I am confused again. Do you have any other speculation??
Thanks again.
Advertisements
keylog keylog
-
-
#7
I updated the bios to X58A-UD3R FF from X58A-UD3R FA two days before.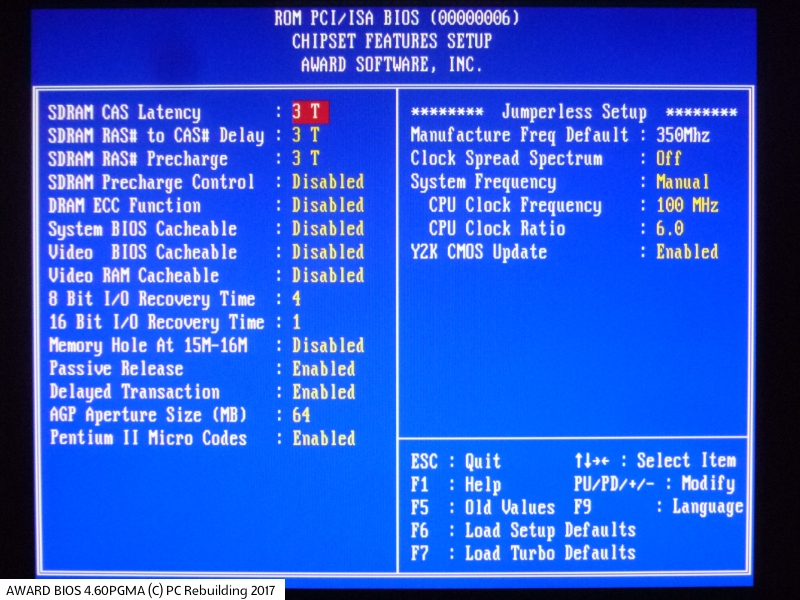
Today my computer froze again inside Windows and then for the first time itcould not boot at all, giving a short beeps sound. According to the motherboard’s manual this was «Continuous short beeps: Power error».
I just started to think that I found the problem and it must the PSU unit that is fault.
But I decided to open the case and check the memory modules. The computer was able to boot again only when I put off all the three memory modules and put them back again. (I put off one memory module at a time and tried to boot the computer each time). After I put the memory modules back again the computer boots ok.
Now I am confused again. Do you have any other speculation??
Thanks again.
David W. Hodgins
-
-
#8
Now I am confused again.
Do you have any other speculation??
Click to expand…
It’s an old system with dirty connectors. Remove everything, clean
all connectors with Isopropyl alcohol, and then try it again.
If it still freezes up, then look at replacing the psu with one that
has enough amps on the +12V rail.
Btw, the reason I suspect the lack of amps on the +12v rail, is that
I’ve seen it before. The system would randomly lock up, or reboot.
What finally got me to suspect it was a power problem, was that with
three usb devices connected, it would not boot. Any two of the three
was ok, but all three, no way. Replacing the 500w psu with 24 amps on
the +12v rail, with a 750w unit with 50w on the +12v rail fixed the
problem.
Regards, Dave Hodgins
-
-
#9
keylog said:
I updated the bios to X58A-UD3R FF from X58A-UD3R FA two days before.
Today my computer froze again inside Windows and then for the first time it could
not boot at all, giving a short beeps sound. According to the motherboard’s manual
this was «Continuous short beeps: Power error».I just started to think that I found the problem and it must the PSU unit that is fault.
But I decided to open the case and check the memory modules. The computer was able
to boot again only when I put off all the three memory modules and put them back
again. (I put off one memory module at a time and tried to boot the computer each
time). After I put the memory modules back again the computer boots ok.Now I am confused again. Do you have any other speculation??
Thanks again.Click to expand…
I don’t really know what a «Power Error» is. The thing is, the power supply has
its own «Power Good» kind of signal. And the motherboard regulators also can
have status signals, indicating their respective outputs are close to full
voltage. The motherboard won’t come out of reset, unless those Power Good
signals are all asserted. So to a certain extent, if the power levels were
bad, the motherboard would just give a black screen (stuck in reset).
The motherboard has the option of reading system voltages with the Hardware
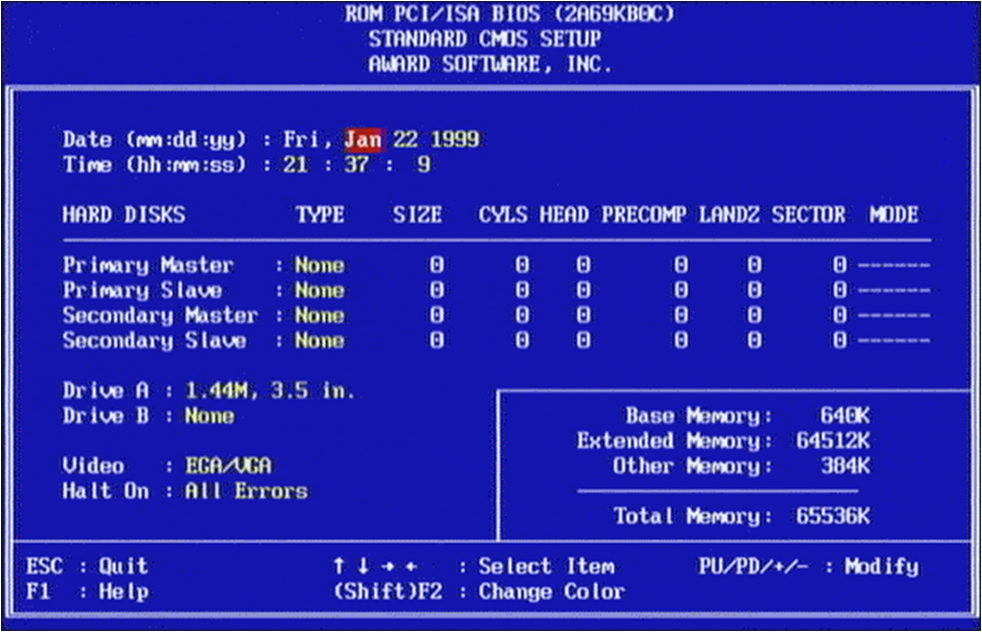
Monitor. To check that, enter the BIOS, and go to the Hardware Monitor page
and check the voltage readouts there. The BIOS may highlight values it is
unhappy with (values which it considers out of range). The ATX spec may allow
+/-5% deviation from the ideal value. The hardware monitor used crude measurement
techniques, and a multimeter may give better results, when you actually need
to verify voltages.
Things I’d try:
1) Re-seat processor. Remove the heatsink, clean off the paste, pull the
processor out of the socket. Look for damage, burnt pins or the like. Be
careful, not to get paste or residue into the socket pin area. Inspect
the gold pads on the CPU.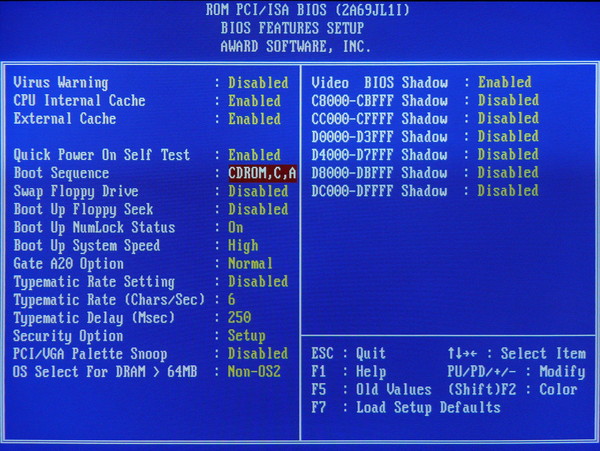 If the socket is working properly, there should
be tiny scratch marks on each pad (proving there was contact with the «points»
in the socket. Reapply thermal paste, reinstall the heatsink/fan. If you don’t
have thermal paste, you’ll have to pick up a tube of it.
The purpose of re-seating the processor, is to try to solve a contact problem.
*Don’t* use abrasives on the processor. Similarly, there is *no* cleaning
procedure for the LGA1366 socket. If the socket is fouled with debris, it’s
a writeoff. The processor could be cleaned with isopropyl alcohol, but if
you use abrasives, the super-thin gold plating would be ruined. Gold is too
expensive now, for companies to be applying 50 micron coatings.
2) Strip system to minimum hardware, and test a bit at a time. The beep
codes received, should correspond to the error type. For example, if
you get «short beeps» when all three RAM sticks are removed, and also
get «short beeps» when some RAM is present, perhaps the short beep code
is actually a memory error ? With no video card, and some good RAM present,
you should receive a different code for the missing video card. Be careful
to always shut off the power supply at the back, before swapping any hardware.
You could also consider testing with a PCI Port 80 Test Card, but only
do so if you already own one. They’re not a good investment, due to the
inability to get accurate tables of code values, to allow interpreting
the displayed value. I don’t see a table of values in your manual for
example. (Some motherboards come with a Port 80 two digit LED display,
soldered onto the motherboard, to perform this test function.)
3) Enter the BIOS and check the settings. It could be, you haven’t set something
that the hardware needs. On an LGA1366, there isn’t much room for Vdimm adjustment,
due to the limited 1.50 to 1.65V suggested operating range. If you have purchased
memory which needs more than 1.65V, you’ll need to set the memory to more
slack timing settings, to have it work well. Normally, a three DIMM «kit»
for an LGA1366 system, will stay within the 1. 65V limit.
Things we can’t really resolve that way:
1) Unknown kind of AYX power supply issue. Swap in another one (even one with a
lower power output rating) for a quick check. Does the system become more
stable ?
2) Consider the possibility that the motherboard is defective.
Paul
keylog keylog
-
-
#10
Thank you Paul,
In fact, when my system was unable to boot, I saw exactly the behavior you mentioned in your first paragraph: The motherboard gave a black screen with a «short beeps sound» that was repeated (loop) after automatic reset (stuck in reset as you mentioned)…
-
-
#11
keylog said:
Thank you Paul,
In fact, when my system was unable to boot, I saw exactly the behavior you mentioned
Click to expand.
..
in your first paragraph: The motherboard gave a black screen with a «short beeps sound»
Click to expand…
that was repeated (loop) after automatic reset (stuck in reset as you mentioned)…
Click to expand…
The beep is generated under BIOS code control. If the BIOS is not working,
there can be no beeps.
To make a sound, requires the BIOS code to run.
When the computer is completely silent, and black screen, then that’s a hint
that perhaps no BIOS code is running.
Beep sounds are used, whenever video is unavailable. For example, if there
is no system RAM present, and a video card is plugged in, the code to drive
the video card likely needs a bit of RAM to work with. Since the video card
can’t be operated that way, the only choice is to beep.
There is some BIOS code, which is register based, and needs no RAM to work.
The processor reads instructions out of the BIOS EEPROM, and uses the registers
in the processor for storage. This is how the BIOS can beep the speaker,
when no RAM or video card is present.
But other BIOS code, eventually requires the reserved RAM areas to be
present and working.
When the computer knows (or thinks it knows) video is working, the
error message can be printed on the screen. For example, on my older
computers, if I unplug the PS/2 keyboard and mouse, I’ll get a
BIOS message printed on the screen telling me that. There is no
need to beep, because the motherboard knows I can see the screen,
and the PS/2 error stops the system and prevents booting (unless
that kind of error detection is turned off).
If the video is available, and the POST sequence finishes, the speaker
will beep once. This is similar to a «lamp test» feature on other
electronic devices. The single beep is there, to prove to you that
the computer case speaker is working. The single beep may also
corroborate that the computer thinks everything is running — for
example, if you got a black screen, and a single beep, then the
computer believes it has successfully programmed the video card,
so then you’d go looking for a broken or disconnected monitor as
the reason for the black screen.
*******
You have «short beeps sound», but it has yet to be proven that
the error message associated with that is «Power Error». What it
could be is a RAM error. Remove all RAM and see if the symptoms
are the same or not. By comparing beep codes for various
test cases, to the sound you heard, you may be able to deduce
what the error beep pattern means.
For example, if one of my computers beeps twice or three times,
I know it is RAM or video. But I don’t know which. And I seldom
believe what it says in the manual, as they may have switched the
values in the actual design.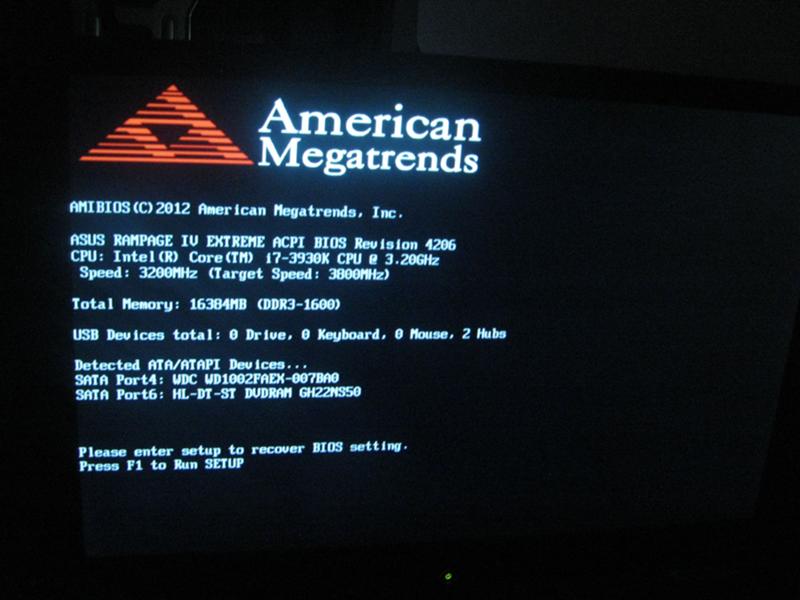
In that regard, POST behavior doesn’t come with iron clad
guarantees. What is written in the manual, is done by a
technical writer. And the tech writer, doesn’t always have
access to the design engineer. I know this, because of
how the management at my company did things. Sometimes, they’d
coax the tech writer, to «go away» And that forces the
tech writer, to «make up stuff» and «be creative». And it’s
done that way, because the engineer may be working on the
next motherboard, and management wants his time spent
strictly on the next new design. Leaving the tech writer
in a «vacuum». All in good fun of course.
Paul
Advertisements
Edwin T.
-
-
#12
yeah dude. .sometimes mem sticks need to be removed and replaced after
sitting around for a few years or with fluctuating temperature changes.(if
your computer is not within normal temp environment) Just follow the last
poster and clean em
ShadowTek
-
-
#13
I booted with the memtest86 cd-rom and I tested it for 9 hours without errors and my system didn’t freeze during the tests.
Click to expand…
I’ve had bad memory escape detection on a full 24 hours of memtest. I’d
suggest 48 hours as a minimum.
-
-
#14
ShadowTek said:
I’ve had bad memory escape detection on a full 24 hours of memtest.
I’d
suggest 48 hours as a minimum.Click to expand…
Memtest isn’t that good. You need a stress tester type application,
something that causes more stress than memtest does. And then that
test interval is put to better usage.
Some day, somebody will write a tool like memtest (something that
boots from floppy or CD), and applies stress like Prime95 or some
of the more modern stress testers, and without an OS being present.
That would maximize the amount of memory addresses that could be
stress tested.
Also, the memtest test cases, aren’t of equal value when it comes
to equivalent stress. How many times does an error show up in
Test #1 versus Test #5. If you’re going to leave it baking for
24 hours, then using the test most likely to complain, would be
the best choice. Some of the tests seem to be relatively useless,
which means you might want to run them for one pass for completeness,
but when «baking», run just the test that is most likely to flag
the memory.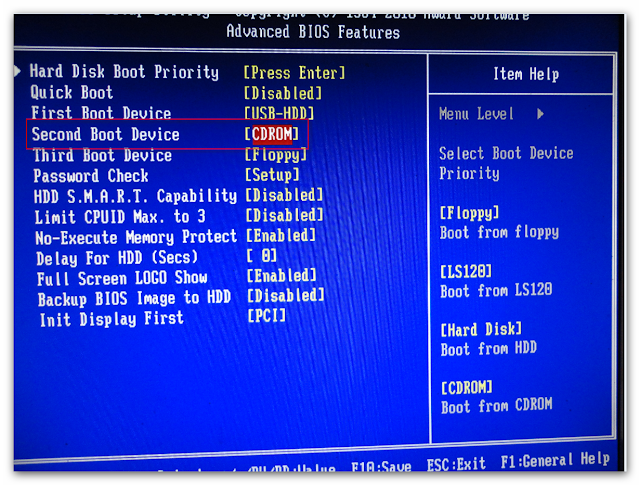
If the source code for memtest is still available, you might even
be able to modify it according to your purposes. I made a three
line mod to the program years ago, and managed to get the build
process to work. I haven’t tried anything like that lately, so
don’t know how easy it is now.
Paul
Advertisements
larry moe ‘n curly
-
-
#15
ShadowTek said:
I’ve had bad memory escape detection on a full 24 hours of memtest. I’d
suggest 48 hours as a minimum.Click to expand…
Unlike MemTest86, memtest isn’t very good because it runs only from
Windows, unless you pay HCI Design $15 for the self-booting version.
I’d also try Gold Memory because I’ve seen it find errors in a few
minutes that took MemTest86 several hours, and vice-versa.
Does anybody know of a recent evalution of memory diagnostics? The
newest one I’ve seen is RealWorldTech’s, which is over a decade old.
The bios on the computer freezes
At one point, an annoying and frightening nuisance can occur — the computer seems to turn on, but the boot stops at the motherboard splash screen. Today we will tell you why this happens and how to deal with such a malfunction.
Causes and Solutions for Hanging on the Splash Screen
The first thing to remember when faced with the problem of hanging on the logo of the board — the problem in most cases lies in the peripherals. Hard drives are especially often guilty of this, in particular those that are older than the motherboard. Sometimes the problem is a random glitch that can be easily fixed by resetting or updating the BIOS.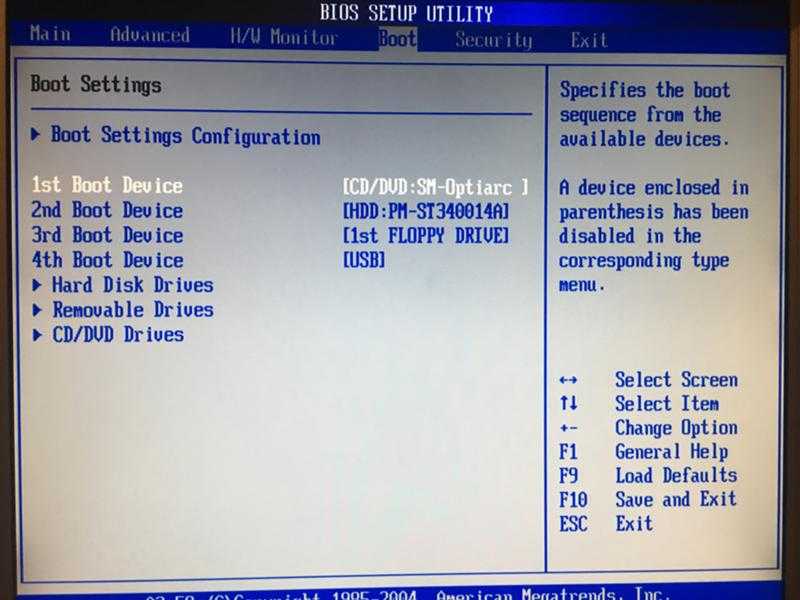 In the remaining cases, the problem still lies in the motherboard itself. Let’s consider each reason in more detail.
Cause 1: Crash in BIOS settings
In some cases, problems in the BIOS boot options are the cause of the freeze. This often happens when the computer crashes, trying to connect a “hot” IDE hard drive, or problems with the firmware. In the event of a failure in the BIOS settings, resetting them will help. Details on the necessary manipulations can be found in the manual below (methods 2, 3, 4).
In addition to the reset material, let’s add a life hack: leave the motherboard without a CMOS battery for longer than 10 minutes. The fact is that sometimes a residual charge may remain on the elements of the board, which does not dry out after the specified time has passed, and it may take several hours or even a day for a complete blackout. If resetting BIOS helped you, congratulations. Otherwise, proceed to the next reasons described below.
Cause 2: Peripheral conflict
The vast majority of logo hangs are caused by software conflicts between the motherboard and peripherals and/or an element such as a GPU, network card, hard drive, or one of the RAM sticks.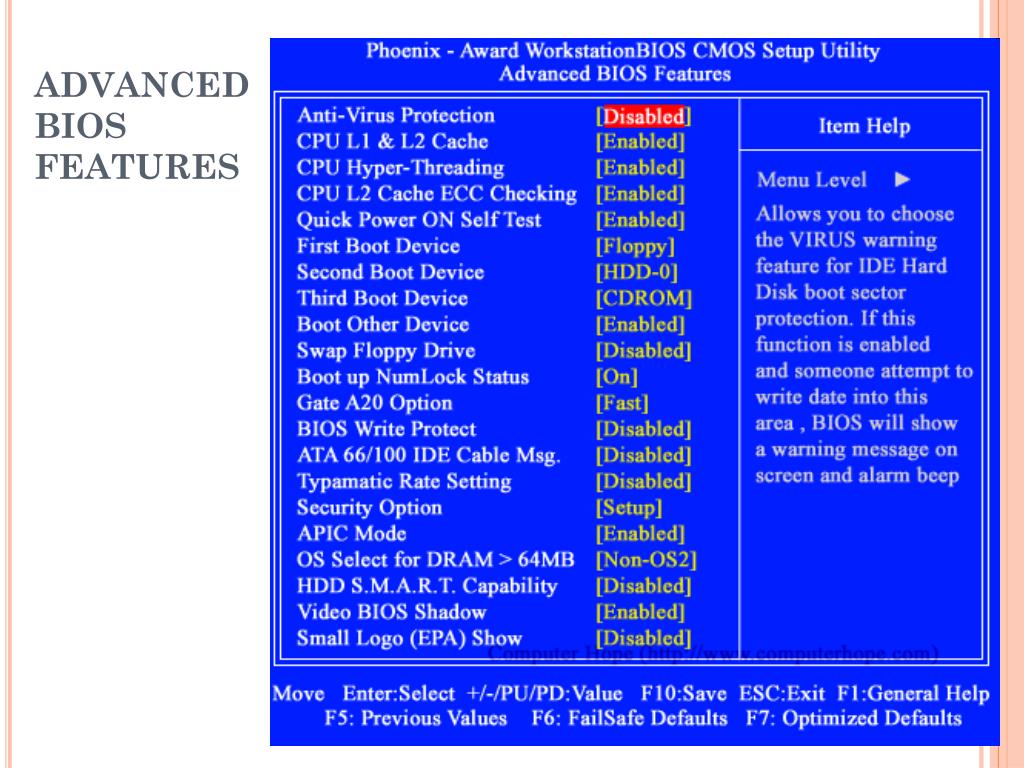 In this case, it is necessary to find the culprit of the problem and either replace it, or carry out one of the specific manipulations we have proposed. But before you start searching, follow the verification procedure according to this instruction.
If the problem is with the board, go to Cause 3. If the board is working, then check the rest of the computer, following the algorithm below.
- Disconnect the PC from the mains. Then remove the side cover of the case to gain access to the motherboard.
- Sequentially disconnect the hard drive, disk drives and drives from the board. Then carefully remove the cards (video, sound and network, if the latter is available) from the slots.
- Leave only one stick of RAM regardless of the number of slots. For reliability, you can move it to another slot.
- Connect your computer to the network in a safe manner. With a minimum set of equipment, the board should work normally.
- Connect components to the board one at a time, from RAM to disk drives.
 You will find the problematic element by iterating.
Attention! Do not try to connect a graphic, sound or network card, as well as an IDE hard drive to a working motherboard! In this case, you risk damaging both the board and the connected device!
Hard drives, video cards, and bad RAM elements usually cause problems. Consider the necessary procedure for each of the devices.
Hard drive
The most common cause of failures. In most cases, the disk simply fails, you can check it on another computer.
In addition, you can also try to connect the hard drive in IDE mode. To do this, follow this procedure.
- With the computer turned off, disconnect the HDD from the board.
- Turn on the PC and enter the BIOS.
- Follow path «Integrated Peripherals» — «SATA Raid/AHCI Mode» and select «Native IDE» .
On other types of BIOS, this option may be located in items «Main» — «Storage Configuration» — «Configure SATA As» or «Main» — «Sata Mode» .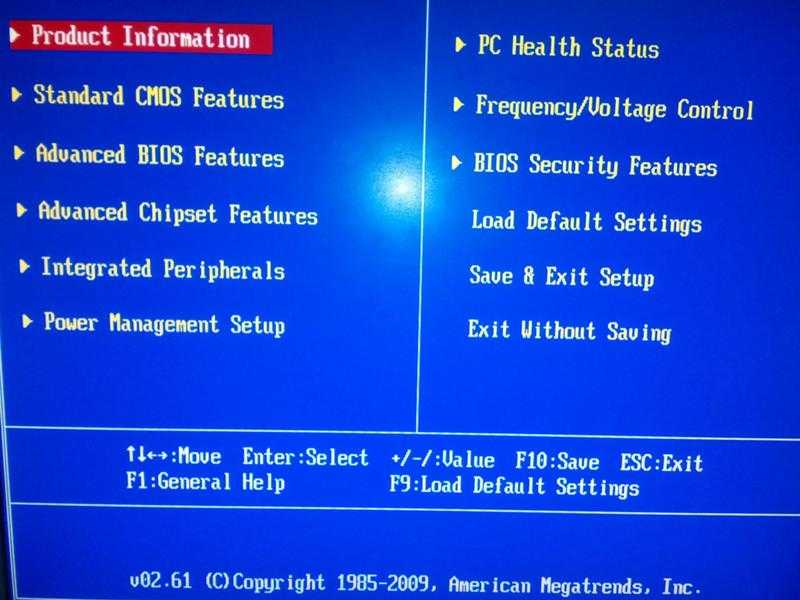
See also: How to speed up your hard drive
Exit BIOS and try to boot. If the hang is gone, copy important data from the disk and format it completely using the methods from the article below.
If the problem is still present, then you are most likely experiencing MBR and partition table corruption. When you connect such a drive to another computer, you will most likely encounter the RAW file system format. What to do in this case, read here:
Network card
The second common culprit for freezing at startup is an external network card. This element is very sensitive to voltage surges or static electricity. If this component fails, it can cause the self-diagnosis to fail, and as a result, enter it into an endless loop, not allowing it to boot further. The only solution in this case is to remove the problematic component.
Video card
Some GPUs have conflicts with boards, especially from lesser-known manufacturers.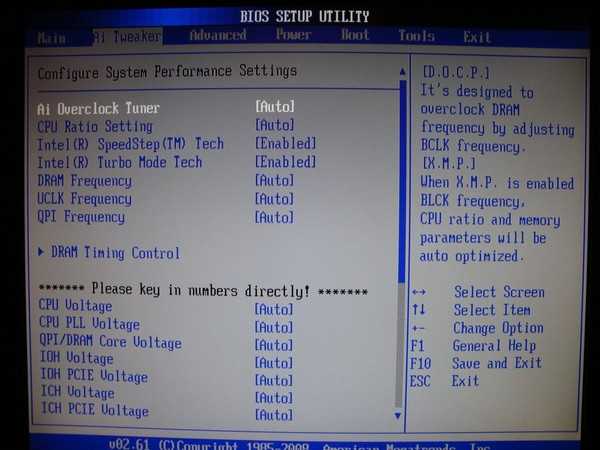 Sometimes the problem is caused by a mismatch between the internal software of the latest video cards from Nvidia and some models of motherboards from Gigabyte. Fortunately, there is a fairly simple solution — updating the BIOS. A typical procedure is described by us in a separate manual.
If this procedure does not help, then the only thing left is to replace either the GPU or the motherboard.
USB devices
Sometimes freezing during BIOS loading occurs due to a problematic USB device, and often these are not flash drives or external HDDs at all — there are cases when a 3G modem connected to a computer for recharging was the cause of the problem. The questionable device should no longer be connected to the board.
RAM
RAM sticks can also fail, especially in the event of a strong power surge. If you find a non-working element, replace it with a similar, but correctly functioning one.
Cause 3: System board failure
The worst, and unfortunately one of the most common causes of the problem.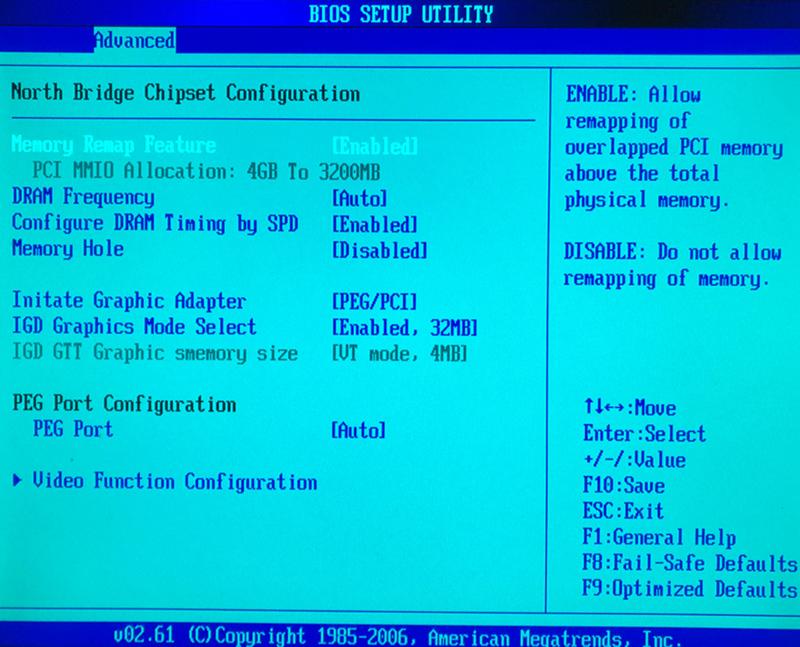 In most cases, motherboard hardware problems are difficult to repair, especially at home, so be prepared for the fact that this component will have to be changed.
Summing up, we want to remind you — take care of your computer and its stuffing from power surges and static discharges.
Thank the author, share the article on social networks.
A fairly large number of personal computer users are faced with a situation in which the computer freezes on the motherboard splash screen when turned on. As a rule, this happens with computers 3 years ago and older.
Very often the problem is easily solved by yourself at home. How exactly do you recognize them in this article.
Why does my computer hang on the motherboard splash screen?
The thing is that at this moment, when you see an image with the logo of your motherboard manufacturer, all devices connected to the computer (processor, RAM, hard drives and DVD drives) are interrogated and tested.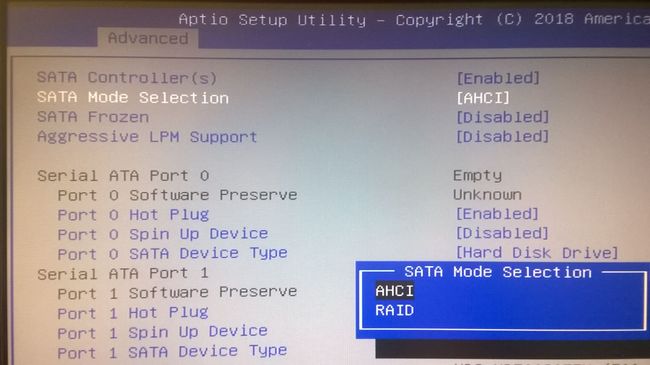
If successful, the computer continues to boot. If any of the devices does not respond, a hang may occur at this stage, which is the subject of this article.
What to do?
Very often this problem is caused by a banal non-contact, so the first thing to do if you have a problem with freezing on the splash screen of the motherboard is to turn off the computer, pull out the RAM, disconnect the connectors from all hard drives and DVD drives, and then reconnect everything .
One of the possible reasons is poor contact of the RAM
These cables need to be disconnected
It also does not hurt to reset the BIOS by removing the battery.
In 70% of cases it helps. If after that the problem still remains, then again turn off all hard drives and DVD drives and try to turn on the computer without them.
Disconnecting the hard drive cables
No freeze? Then we alternately try to connect one device at a time, each time turning on the computer.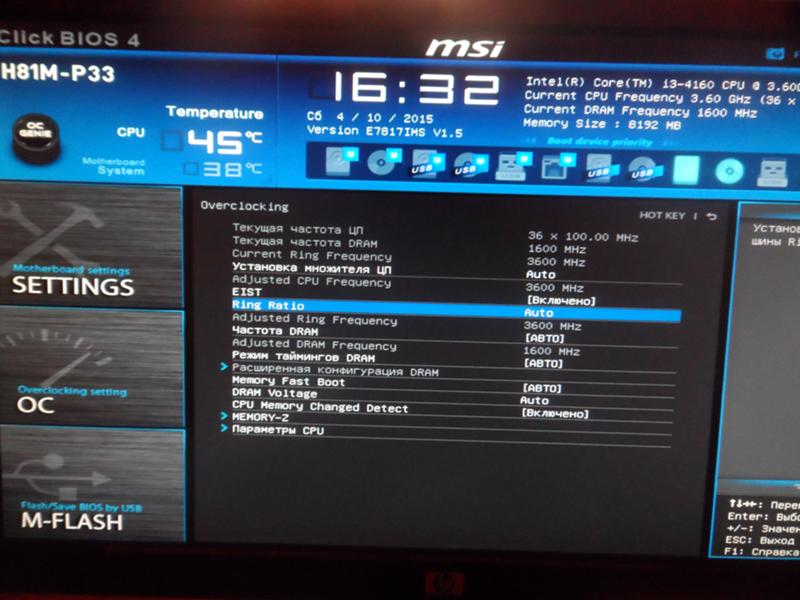 When you connect a hard drive or DVD drive, it will freeze again, that will be the culprit of the problem.
If, after resetting the BIOS, changing the RAM strips and with the hard drives and DVD drives disabled, the PC still freezes, then the problem is with the motherboard and most likely it will have to be replaced.
Today we will look at:
The most common way to install Windows is to use a bootable USB drive through the BIOS. However, although not often, there are times when you insert a bootable USB flash drive and the BIOS freezes. This is a very serious problem, since the installation of the operating system can be critical, and apart from the only flash drive, which, moreover, “breaks” the BIOS, you may not have anything.
In this topic, we will explain why in some situations the BIOS hangs with a flash drive and how to fix it.
Causes of malfunction
Before correcting the problem itself, it is necessary to figure out what is the primary source of its appearance. So, we have selected some of the most common factors due to which your BIOS may hang with a flash drive:
- The flash drive is not written correctly. If you simply write a virtual image of Windows to a USB flash drive, and then try to install the operating system with it, then this can lead to similar problems. Installation flash drives are created using special utilities, which is not the same as an ISO image.
- Incorrect BIOS settings. When trying to boot from a flash drive, you must make sure that this media is in the first place in the list of devices to boot. Otherwise, not the latest BIOS versions may freeze if another option is specified, but a bootable USB flash drive is connected to the computer.
- Device conflict. Similar BIOS freezes can occur due to a conflict between your motherboard and the connected USB drive. This is due to the fact that device developers are different, which means that the technologies could be used, respectively, are also different.
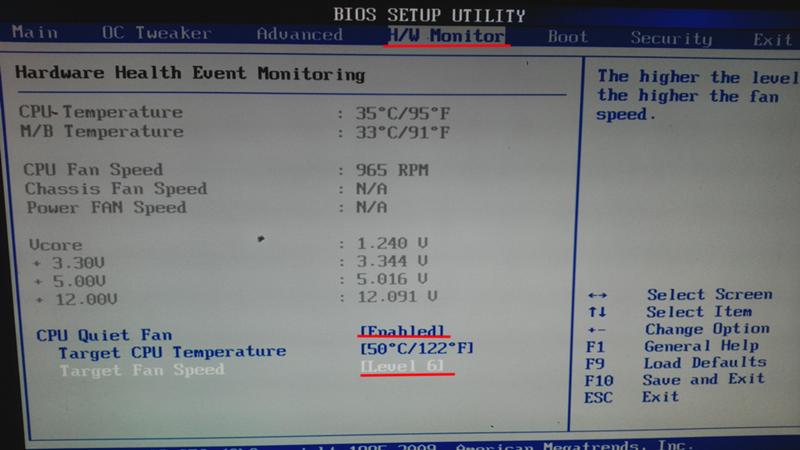
Troubleshooting
Let’s look at these points and try to understand how we can fix the situation.
Incorrect recording of a flash drive
As we have already said, special programs are used to create boot disks and flash drives. Under no circumstances should you upload a regular virtual image. Alternatively, you can use one of several utilities: Rufus, UNetbootin, Etcher, or others. If you know for sure that the installation flash drive was recorded using a similar program, try using another one and overwrite the installer.
Incorrect BIOS settings
We talked about how to properly configure the BIOS to start from a USB flash drive in more than one topic. We described this process in more detail in the article «How to install Windows through the BIOS.»
To avoid repeating ourselves on our part, we recommend that you follow the link above and read the material.
Device conflict
In case of a device conflict, the best solution to get out of this situation, when the BIOS hangs with a flash drive, is the BIOS firmware.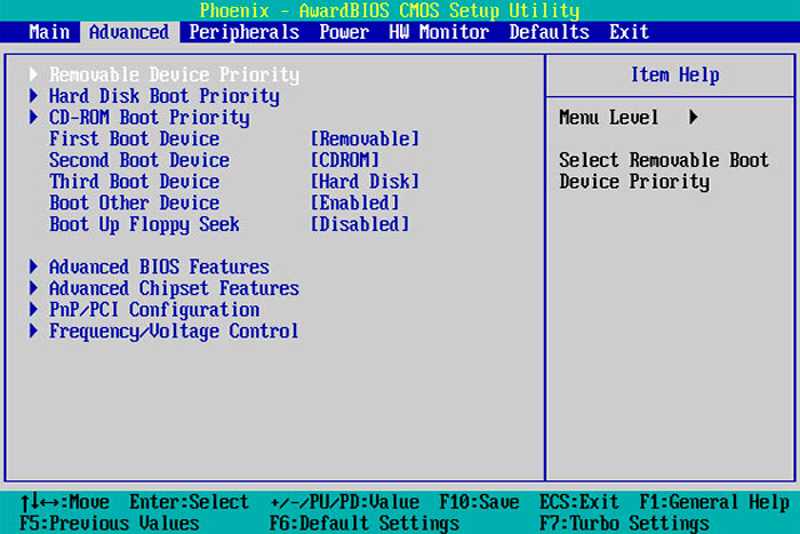
Current versions of this shell have almost eliminated these problems. Read more about BIOS firmware in the corresponding topic.
The computer does not boot past the motherboard splash screen
Contents
- Causes and solutions for the problem of freezing on the splash screen
- Video instruction
- Cause 1: Failure in the BIOS settings
- Cause 2: Conflict with the peripheral device 9002
- system board
- FAQ
At one point, an annoying and frightening nuisance can occur — the computer seems to turn on, but the download stops at the motherboard splash screen. Today we will tell you why this happens and how to deal with such a malfunction.
Causes and Solutions for Hanging on the Splash Screen
The first thing to remember when faced with the problem of hanging on the logo of the board — the problem in most cases lies in the peripherals. Hard drives are especially often guilty of this, in particular those that are older than the motherboard.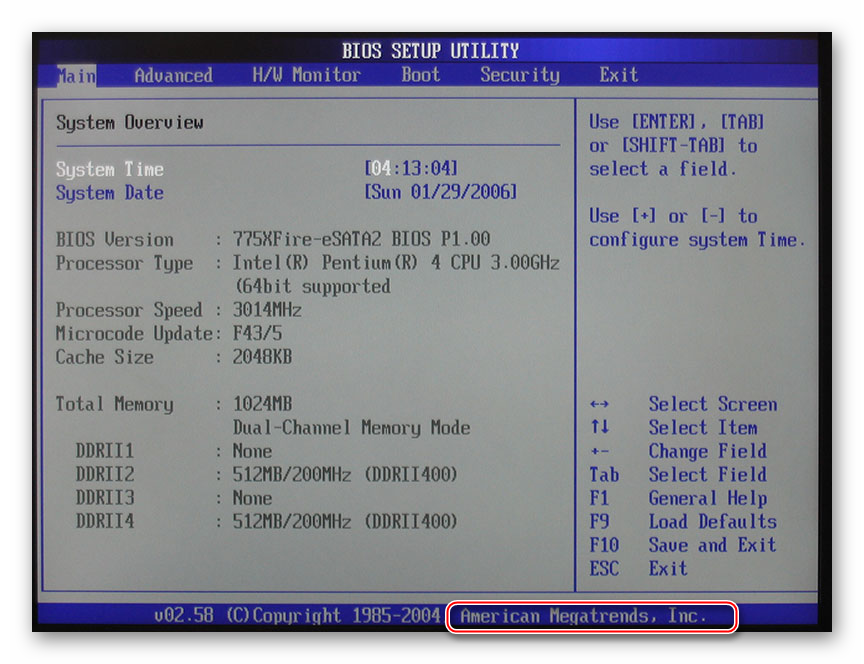 Sometimes the problem is a random glitch that can be easily fixed by resetting or updating the BIOS. In the remaining cases, the problem still lies in the motherboard itself. Let’s consider each reason in more detail.
Video instruction
Cause 1: Fault in BIOS settings
In some cases, the freeze is caused by problems in the BIOS boot parameters. This often happens when the computer crashes, trying to connect a “hot” IDE hard drive, or problems with the firmware. In the event of a failure in the BIOS settings, resetting them will help. Details on the necessary manipulations can be found in the manual below (methods 2, 3, 4).
Read more: Reset BIOS
In addition to the reset material, let’s add a life hack: leave the motherboard without a CMOS battery for longer than 10 minutes.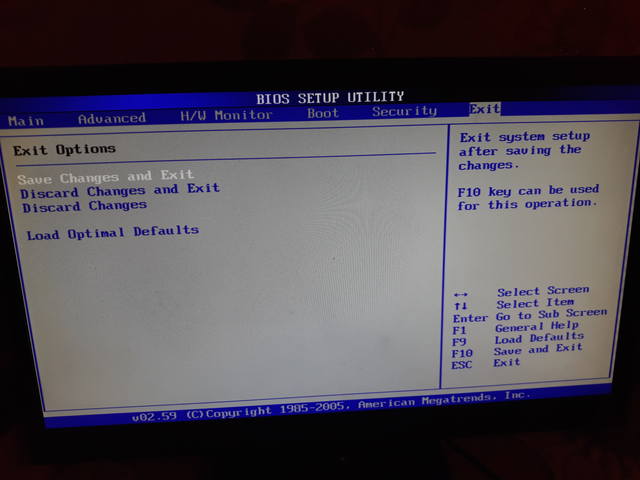 The fact is that sometimes a residual charge may remain on the elements of the board, which does not dry out after the specified time has passed, and it may take several hours or even a day for a complete blackout. If resetting BIOS helped you, congratulations. Otherwise, proceed to the next reasons described below.
Cause 2: Peripheral device conflict
The vast majority of cases of freezing on the logo are caused by a software conflict between the motherboard and peripherals and / or an element such as a GPU, network card, hard drive or one of the RAM sticks. In this case, it is necessary to find the culprit of the problem and either replace it, or carry out one of the specific manipulations we have proposed. But before you start searching, follow the verification procedure according to this instruction.
Lesson: Checking the functionality of the motherboard
If the problem is with the board, go to Cause 3. If the board is working, then you should check the rest of the computer components, following the algorithm below.
- Disconnect the PC from the mains. Then remove the side cover of the case to gain access to the motherboard.
- Sequentially disconnect the hard drive, disk drives and drives from the board. Then carefully remove the cards (video, sound and network, if the latter is available) from the slots.
- Leave only one stick of RAM regardless of the number of slots. For reliability, you can move it to another slot.
- Connect your computer to the network in a safe manner. With a minimum set of equipment, the board should work normally.
- Connect components to the board one at a time, from RAM to disk drives. You will find the problematic element by iterating.
Attention! Do not try to connect a graphic, sound or network card, as well as an IDE hard drive to a working motherboard! In this case, you risk damaging both the board and the connected device!
Hard drives, video cards, and bad RAM elements usually cause problems.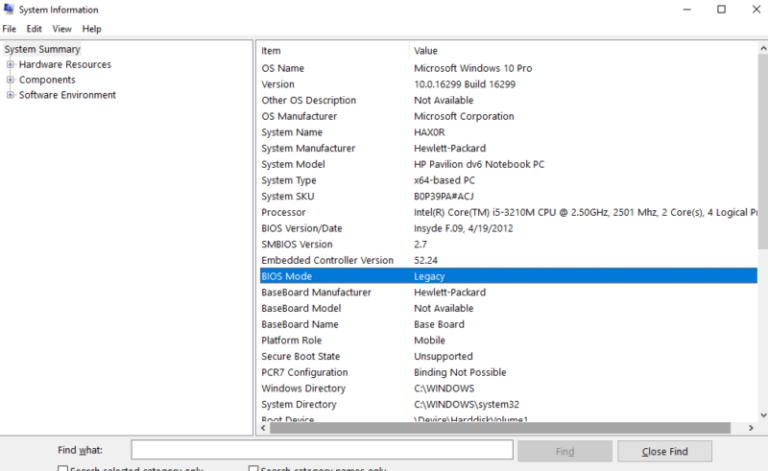 Consider the necessary procedure for each of the devices.
Hard drive
The most common cause of failures. In most cases, the disk simply fails, you can check it on another computer.
Read also: The computer does not see the hard drive
In addition, you can also try to connect the hard drive in IDE mode. To do this, follow this procedure.
- With the computer turned off, disconnect the HDD from the board.
- Turn on the PC and enter the BIOS.
- Take path «Integrated Peripherals» — «SATA Raid/AHCI Mode» and select «Native IDE» .
On other types of BIOS, this option may be located in items «Main» — «Storage Configuration» — «Configure SATA As» or «Main» — «Sata Mode» .
See also: How to speed up your hard drive
- Exit BIOS and try to boot. If the hang is gone, copy important data from the disk and format it completely using the methods from the article below.
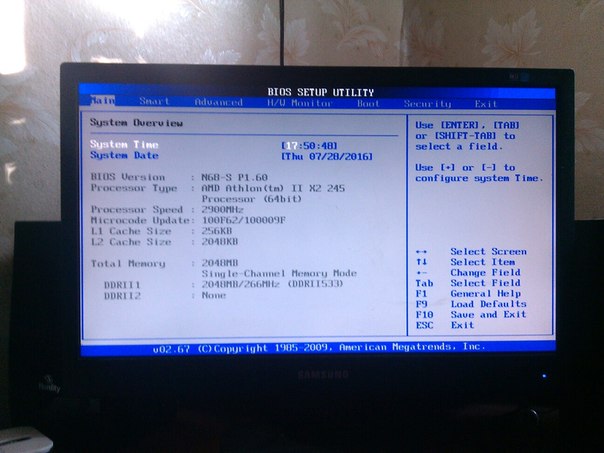
Lesson: What is disk formatting and how to do it correctly
If the problem is still present, then you are most likely experiencing MBR and partition table corruption. When you connect such a drive to another computer, you will most likely encounter the RAW file system format. What to do in this case, read here:
More details: RAW format on the hard drive and what to do with it
Network card
The second common culprit for freezing at startup is an external network card. This element is very sensitive to voltage surges or static electricity. If this component fails, it can cause the self-diagnosis to fail, and as a result, enter it into an endless loop, not allowing it to boot further. The only solution in this case is to remove the problematic component.
Video card
Some GPUs have conflicts with boards, especially from lesser-known manufacturers. Sometimes the problem is caused by a mismatch between the internal software of the latest video cards from Nvidia and some models of motherboards from Gigabyte.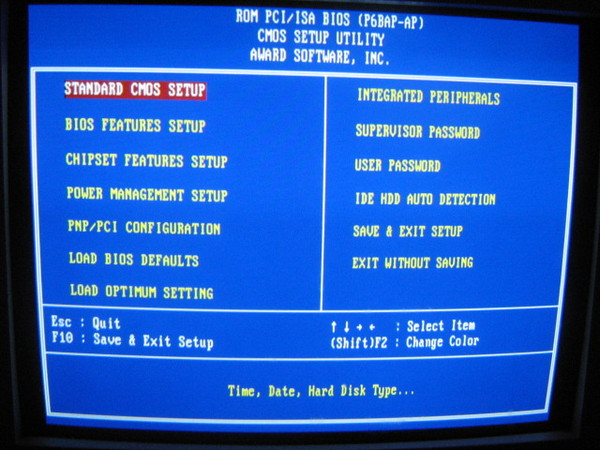 Fortunately, there is a fairly simple solution — updating the BIOS. A typical procedure is described by us in a separate manual.
Read more: Update the BIOS on motherboards
If this procedure did not help, then the only thing left is to replace either the GPU or the motherboard.
USB devices
Sometimes freezing during BIOS loading occurs due to a problematic USB device, and often these are not flash drives or external HDDs at all — there are cases when a 3G modem connected to a computer for recharging was the cause of the problem. The questionable device should no longer be connected to the board.
RAM
RAM sticks can also fail, especially in the event of a strong power surge. If you find a non-working element, replace it with a similar, but correctly functioning one.
See also: How to check the RAM for working capacity
Cause 3: System board failure
The worst, and, unfortunately, one of the most common causes of the problem.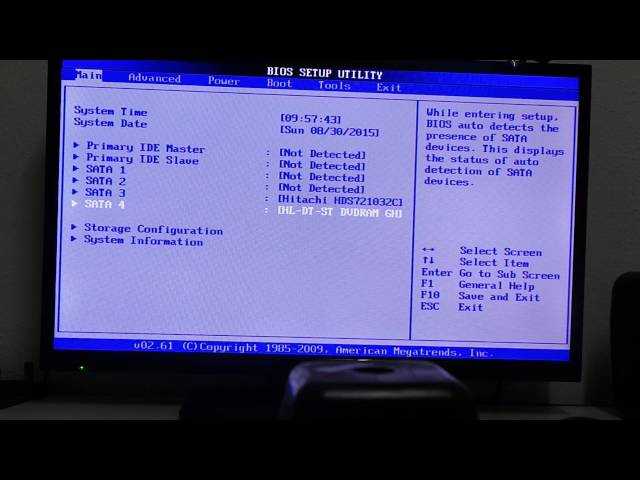 In most cases, motherboard hardware problems are difficult to repair, especially at home, so be prepared for the fact that this component will have to be changed.
Summing up, we want to remind you — take care of your computer and its stuffing from power surges and static discharges.
Computer stuck at BIOS splash screen
If you find your computer stuck at BIOS splash screen while booting into Windows 11 or Windows 10, this post is here to help you. In this post, we will identify the possible causes as well as provide the most adequate solutions to solve the problem.
When your computer is stuck at the BIOS splash screen, you simply can’t do anything else on your system as you have to navigate from there to boot your computer normally to the desktop. This issue can occur for any of the following reasons;
- Bad RAM stick or memory slot.
- Incorrect or invalid boot configuration.
- Damaged BIOS.
- Bad Windows update
If your Windows PC is stuck at the BIOS splash screen for a long time and cannot enter the BIOS, here are comprehensive and proven solutions to fix the problem:
Windows programs, mobile applications, games — EVERYTHING FREE, in our closed telegram channel — Subscribe 🙂
- Initial checklist
- Recovering the computer at boot using the installation media
- Restore the default BIOS settings
- Clear CMOS
- Perform a system restore
- Clean install Windows
Let’s take a look at the description of each associated process the listed solutions.
1]Initial checklist
Before trying the solutions below, as a possible quick fix, you can do the following and after each task see if your system can boot normally without getting stuck on the BIOS splash screen:
- Boot the PC without connected peripherals. External peripherals can sometimes interfere with your system and cause all sorts of errors. So, turn off all peripherals, including printer, scanner, webcam, mouse, iPod, external storage devices, etc.
- Hard reset PC. Your PC is likely experiencing minor and very temporary BIOS Power On Self Test (POST) errors, so hard rebooting your system after it freezes will help reload the correct settings and boot successfully.
- Check boot order. The likely cause is a bad or incorrect boot configuration. So, if you’ve changed the boot order, your computer will struggle to figure out where to boot from, so change the boot priority and put your hard drive at the top of the list.
- Check physical RAM.
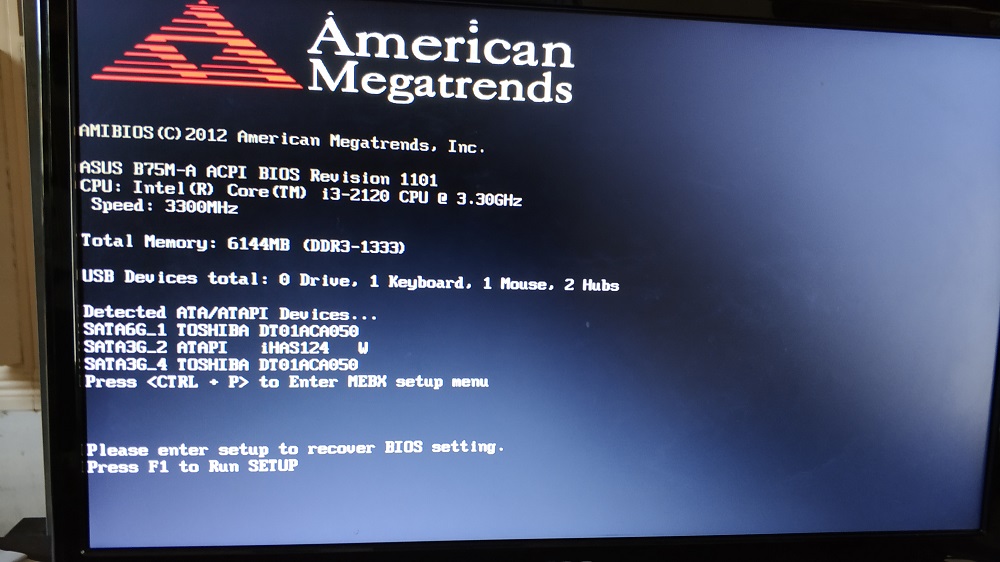 Since your computer is not responding during startup, it is likely that your RAM is installed incorrectly, or, in some cases, one or more of your RAM modules or RAM slots are faulty. So, remove your RAM from the memory slots and reinsert the RAM back into the slot one by one, trying to boot every time. The problem is not with your RAM modules, if your computer starts up without one or more RAM modules — then one or more of the memory slots on your motherboard is probably bad. You can try removing the modules and putting them in different slots to see if one of the slots is bad.
 - Roll back BIOS update. The likely culprit is a failed BIOS update. So, if you have recently updated the BIOS, you can downgrade the BIOS to the previous one. Likewise, if the issue occurred after a recent Windows update, you can uninstall the update when Windows fails to boot.
2]Recovering your computer at boot using installation media
If your Windows 11/10 computer is stuck at the BIOS splash screen, even after you have gone through the initial checklist, you can try to boot and repair your computer using the installation media.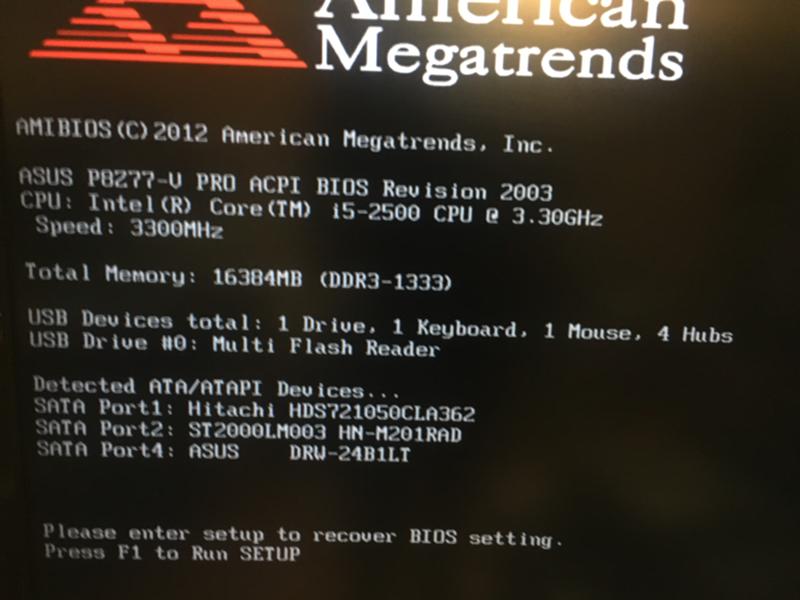
Windows Startup Repair can solve some of the most common problems with the advanced restore method in some cases where you can’t boot into Windows 11/10 and can’t access your files — your data won’t be lost during the restore process.
3]Restore BIOS settings to default.
In such cases, it is safe to reset the BIOS settings to default. Most often, resetting the BIOS will reset the BIOS to the last saved configuration, or reset the BIOS to the BIOS version shipped with the PC. Sometimes the latter can cause problems if the settings have been changed to reflect changes in hardware or OS since installation. Either way, resetting the BIOS to its default settings is an easy procedure for both new and experienced PC users.
4]Clear CMOS
There is a CMOS chip in your computer’s motherboard RAM — the CMOS battery can keep the chip powered all the time, so your computer’s settings will not be erased. Thus, when you turn on your computer, the CMOS chip provides the necessary information to boot your computer into the BIOS.
The essence of clearing or resetting the CMOS battery on your MOBO is to reset the BIOS to factory settings.
5]Perform a system restore
You can perform this task in one of two ways: boot into safe mode and then perform a system restore in normal mode, choosing a restore point when you know your computer booted without problems. OR If your computer does not boot to desktop, you can perform a system restore using advanced startup options.
If System Restore did not resolve the issue, you can reset Windows 11 using advanced startup options and see if that helps. Otherwise, try the next solution.
6] Check if the motherboard is defective
Ultimately, the problem you are experiencing right now may not be related to the software. In this case, you need to check if your motherboard is faulty. If the PC is still under warranty or the MOBO itself is a new purchase, you can have the hardware diagnosed by an authorized PC hardware technician.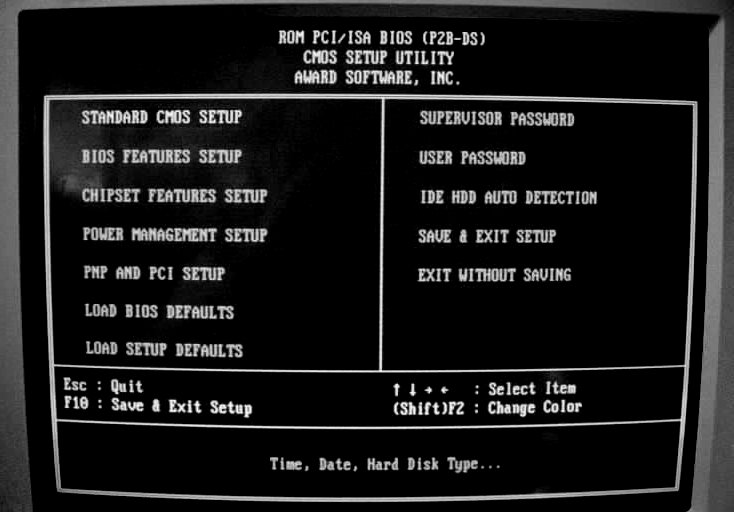 In any case, if the hardware is defective, you will need to replace the MOBO.
Hope this post helps you!
Related post: Computer cannot boot into BIOS
How do I get rid of the BIOS splash screen?
Enter the BIOS and look for anything related to enabling, enabling/disabling or displaying a splash screen (the wording differs depending on the BIOS version). Set the setting to «disabled» or «enabled», whichever is the opposite of how it is currently set. When disabled, the screen no longer appears.
What is a splash screen?
In common computer terminology , the splash screen (also known as the boot screen, boot skin, or welcome screen) is an introductory page that is displayed while a program or computer is loading or loading. Typically, the splash screen may include a logo or other image, as well as the name of the company, and sometimes the company’s slogan.
Programs for Windows, mobile applications, games — EVERYTHING is FREE, in our closed telegram channel — Subscribe 🙂
The computer freezes on startup or startup.
 What to do?
There are a number of reasons why the computer freezes at startup or at the «start screen» while Windows is loading.
In this manual, we will consider: a checklist for finding a problem, what happens during computer boot, we will find a breakdown. Then we will offer a solution.
Diagnostics and repair methods, also suitable for laptops.
What the failure looks like
- The computer freezes on the first screen. This happens at the moment when the BIOS / UEFI splash screen of the motherboard or the logo of the laptop manufacturer appears.
- The computer hangs while loading Windows OS.
- The computer freezes when the user’s Windows desktop appears.
It is important to correctly determine the time when the computer freezes. In the future, this will help to identify and eliminate the cause of the breakdown.
Checklist for troubleshooting and problem identification.
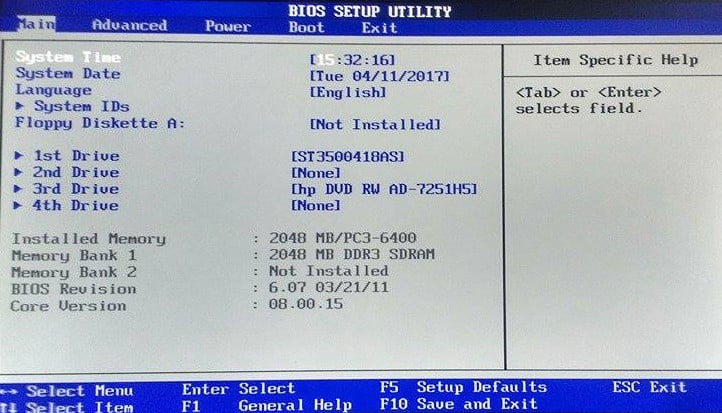 Diagnostics
* — the item in the «What’s happening» table is what is observed at the moment the computer is turned on (the moment at which the PC freezes). ** — alleged breakdowns are numbered (these are different breakdowns with different methods of elimination). *** — the way to eliminate a specific breakdown corresponds to the same number in the previous paragraph.
| What’s going on* | Suspected failure** | Solution*** |
|---|---|---|
| No display on screen | 1. BIOS failure. 2. Failure of one of the modules of the computer or laptop. a) In a stationary PC, the power supply, motherboard, and RAM often fail. b) The laptop has a motherboard. Due to constant overheating, the so-called. «bridge break». |
1. Call for service. Flash the BIOS on the programmer. 2. Diagnose your computer or laptop. Find the failed module and replace it. |
There is a picture. Computer, laptop freezes on the first (start) screen Computer, laptop freezes on the first (start) screen |
1. BIOS failure. 2. Incorrect BIOS setup (overclocking). 3. Device initialization problem. |
1. Reset BIOS. Set default settings. 1) Remove the battery on the motherboard. 2) Or \and close the special jumper near the CMOS BIOS battery. 2. Reset BIOS. Set default settings. 3. Check if the modules are installed correctly and their power is connected. Get-insert the memory module, video card. Check power supply connection. Check DVD drive and hard drive HDD for laptops. |
| There is a picture. | 1. Windows errors. Windows update error. 2. Damaged Windows registry. 3. Driver(s) not installed correctly. 4. One of the modules failed. Most often, either RAM or a computer motherboard. |
1. Load Last Known Good Configuration. Restore from safe mode. Reinstall Windows OS. 2. 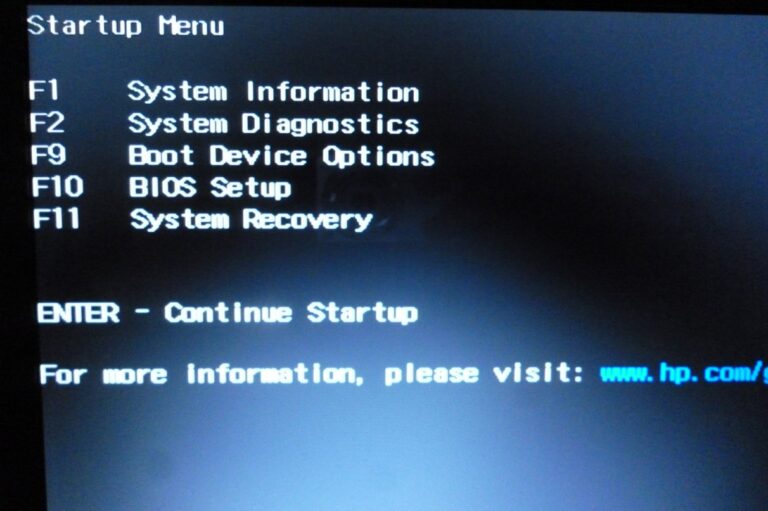 Load Last Known Good Configuration. Restore from safe mode. Load Last Known Good Configuration. Restore from safe mode. 3. Load Last Known Good Configuration. Remove driver from safe mode. 4. Check the RAM. Inspect the motherboard for swollen capacitors and chipped SMD elements. Replace modules or re-solder components. |
| System hangs when Windows has already booted to desktop | 1. Windows error. 2. Driver error. 3. User software error. Old, incorrectly installed programs. For example: several antiviruses are installed. 4. Overheating of the central processor due to a malfunction of the cooling system. The mount for installing a stationary PC cooler is broken. The laptop cooling system is installed incorrectly. |
1. Restore Windows. Reinstall Windows OS. 2. Go through safe mode. Remove the failed driver. 3. Go through safe mode. Remove all antiviruses and check the system performance. 4. Check the integrity and correct installation of the cooler of the device. 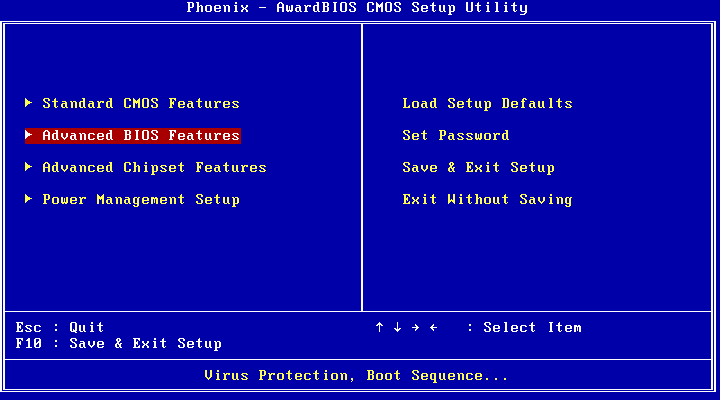 |
Why does my computer freeze during boot? Root Causes
- One of the most common causes is Windows software errors. Then there are failures in the operation of the motherboard of a computer or laptop. It can be: BIOS / UEFI failure, motherboard chipset failure: northbridge, southbridge, video card. The cause of friezes can also be: damage to electrolytic capacitors on the board, SMD elements, microcracks in the textolite. Sometimes the computer freezes due to problems with peripherals: problems with USB ports, Sound Card sound, Wi-Fi module, Bluetooth, Card Reader.
- The failure of the hard disk drive (HDD) of a laptop or computer can also be a source of problems.
The computer may hang during BIOS initialization, or it may not boot until Windows Welcome. - Overtemperature.
Computer or laptop hangs after running for several minutes (seconds). It is characteristic that the device may not immediately turn on until the temperature of the central processor decreases.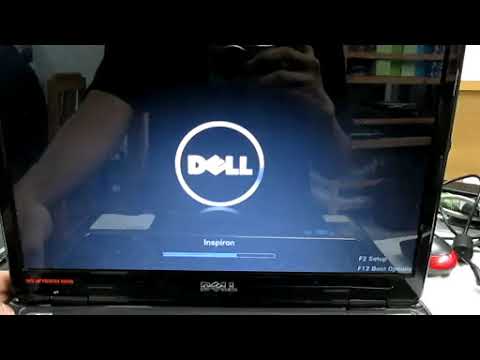
- Other software errors.
Programs such as antiviruses, virtual drive emulators, etc., that start their loading almost in sync with the operating system, can cause the computer to freeze during boot.
Problem search algorithm and its solution
- Computer diagnostics. The challenge is to find the source of the problem.
- Troubleshooting — repair. If necessary, replace components.
- Diagnostics and stress testing after repair to check the stability of the system.
Call or leave a request directly on the site! Our experts will be happy to help you!
This could be your ad
Why a computer with Windows 7, 10 freezes when loading tightly
There can be a lot of reasons for the Windows operating system to freeze when loading, so I want to talk about those that I personally and often encountered. Basically, these reasons are related to incorrect BIOS settings or the operation of input/output devices.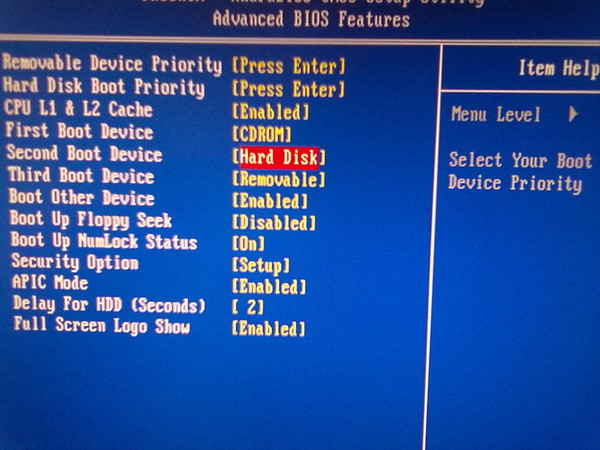
We are talking about just such a hangup of Windows startup, when we see this picture:
Windows startup
Many troubleshooting options can be eliminated by trying to boot Windows PE from a USB flash drive. If it does not boot, then the problem is 100% in the equipment and the first thing you need to check is the motherboard and connected devices.
If you do not know where to start checking, then start with the BIOS. Because it is not difficult and does not take as much time as other checks.
BIOS settings
Reset BIOS settings
When you boot your computer, press «Delete» and get into the BIOS settings. In any version of the BIOS, there is an option to reset the BIOS to optimal settings. This option may be called differently depending on the BIOS version: Load Optimized Defaults , Restore Defaults or Load Setup Defaults.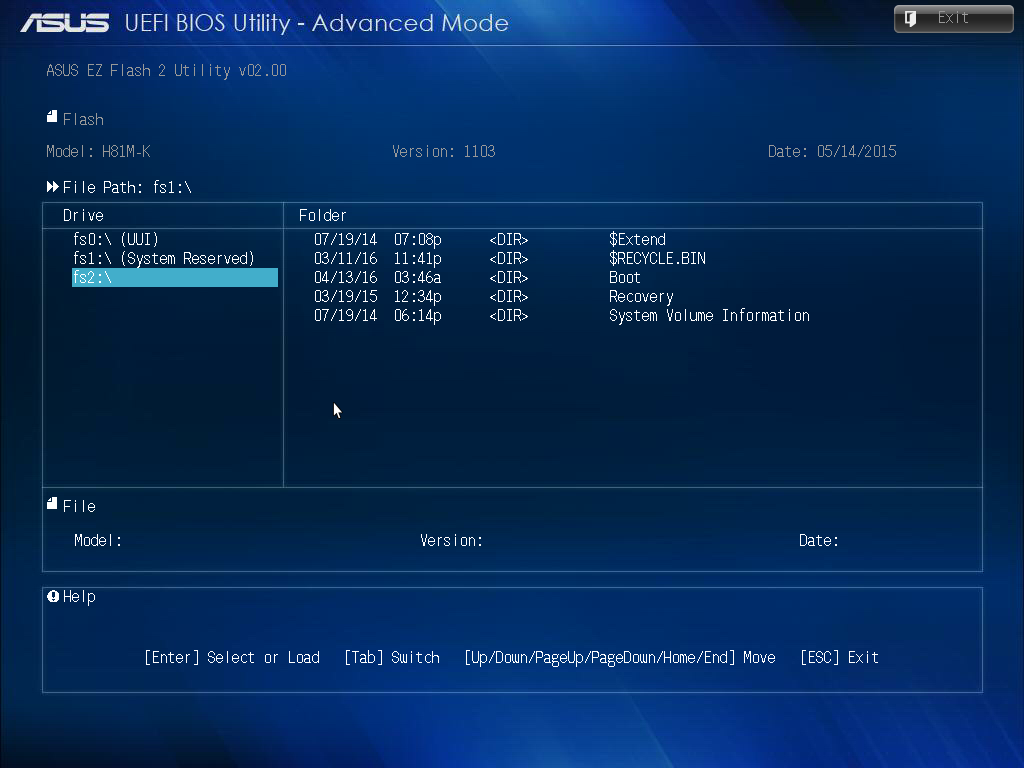
Reset BIOS settings
Do not forget to save the settings — item Save & Exit Setup . Again, depending on the BIOS, it can be called differently.
Disable booting via LAN and CD/DVD drive
If the optical drive or network interface fails, Windows startup may also hang. To check this option, disable the ability to boot the OS from these devices in the BIOS
Disable network boot
The disk drive can be disconnected from the motherboard or in the BIOS settings.
Disable AHCI 9 mode0011
You can try switching the SATA mode from AHCI to IDE mode.
In my practice, it was such that Windows refused to boot after writing an image created by Acronis to the HDD. Windows booted without problems only after switching the SATA operating mode to IDE in the BIOS.
switching SATA mode
Update BIOS
If resetting the settings did not help, you can also try update BIOS .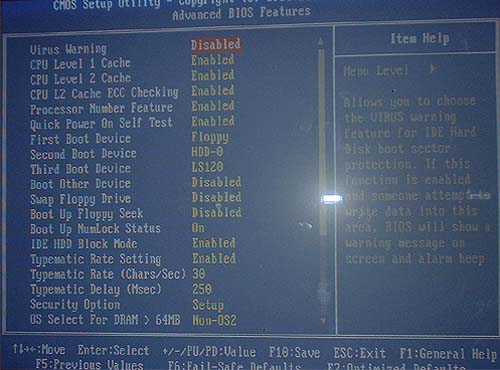
Caution! You can get a dead motherboard. It is better to use this option as an extreme one, when nothing else has helped.
The update process itself does not take much time. You can read about it here.
Common causes of Windows 10 freezing
If the computer freezes and does not respond to anything Windows 10, then the user needs to try to correctly identify the root cause. There are many reasons why this happens, in fact. But it is worth noting that some of them are much more common than others.
What the shell of the Windows 10 9 operating system looks like0003
Common causes of Windows 10 PC freezes:
- Hardware conflict;
- System problems;
- Two antiviruses;
- Virus removal;
- HDD/SSD instability;
- Are there processes with high CPU usage;
- Invalid BIOS setup;
- RAM problems;
- Explorer failure;
- Overheating of PC or gadget components;
- Device RAM failure;
- Faulty power supply or low power device.
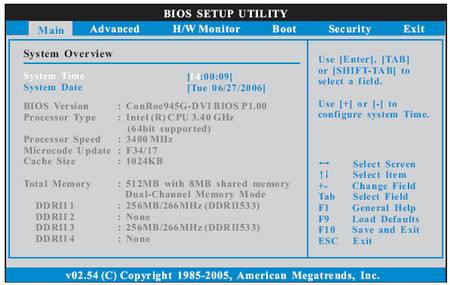
It is also worth adding that the computer often freezes tightly and only restarting Windows 10 helps as a result of system errors during the operation of Microsoft services.
Hard disk errors
You should check the hard disk for bad partitions using MHDD, Victoria or HDD Regenerator. I described how to use the MHDD program in this article. The Victoria program is very similar to MHDD, and the HDD Regenerator interface is very simple and should not cause any difficulties even for a beginner.
Checking the hard disk with the HDD Regenerator program
If the program did not find bad sectors or found and fixed the problem, then reboot and check.
If there are bad sectors, but the program failed to fix them, then install Windows on another disk
Diagnostics and “treatment” of Windows 7 freezes remove garbage, defragment, scan the disk for viruses, check the file system for errors and Windows files for integrity, remove unnecessary programs and add free space in the system partition.

We clean startup
To remove everything unnecessary from startup:
- run the system settings utility — open “Start” and enter the command msconfig.exe in the search bar;
- open the “Startup” tab in the utility and uncheck the boxes, disable applications that you do not need every time you start the computer;
- go to the «Services» tab, check the box «Do not display Microsoft services» and uncheck the services of programs you do not need, but only those that you know.
We clean the disk
To remove garbage and unused applications from the system:
- open the properties of the system disk;
- open the General tab and click the Disk Cleanup button;
- in the next window, click «Clean up system files» — this way you can remove the garbage that remains after updates, temporary files and much more unnecessary;
- by clicking «View files» you can see what will be deleted;
- while here, open the «Advanced» tab — from here you can proceed to remove unnecessary applications through «Programs and Features» and restore points — all except the last one.
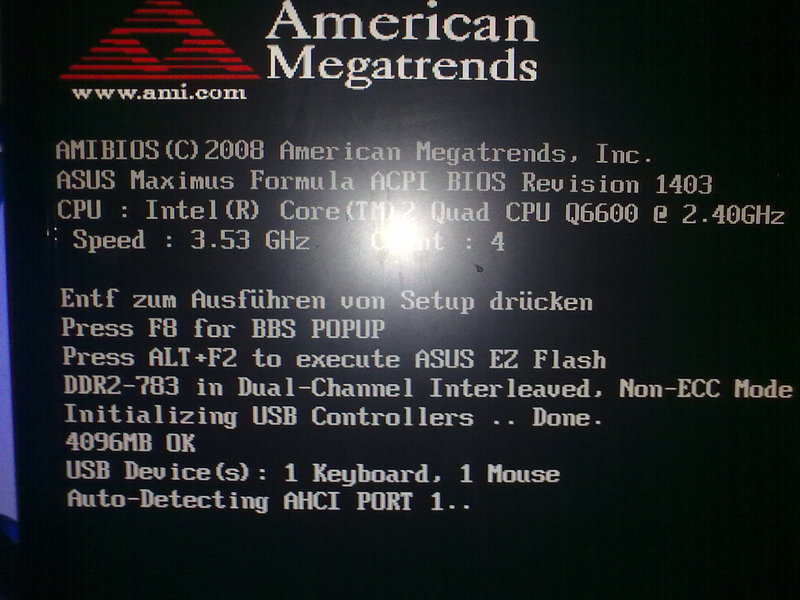
Defragmenting
If your PC has a conventional hard disk (HDD), it means that it needs to be defragmented periodically — to collect “scattered” parts of files and put them together. This is important because the system spends less time accessing complete files.
To start defragmentation:
- open the “Service” tab in the disk properties;
- click “Defragment” — first of all, you need to defragment the system disk;
- Here you can also configure the automatic defragmentation schedule.
Incorrect HDD controller driver
Windows may hang at startup if you replace the motherboard without first preparing the operating system.
In case of motherboard replacement, it is necessary to prepare the operating system for porting to new hardware using SYSPREP. Or you can simply upgrade the IDE ATA/ATAPI controller driver to the standard Windows driver. Then turn off the computer and replace the motherboard.
The most common problem is overheating
Computer parts generate quite a lot of heat during operation. For its efficient removal, cooling systems are installed inside the PC. But their work may be impaired due to dirt and dust, or they themselves may break, then overheating occurs. As a result, the computer begins to “slow down” or even turn off at the most unexpected moment.
Let’s look at some of the symptoms that may indicate that some computer components are overheating:
- The PC often freezes, especially when running games and other resource-intensive applications;
- Unexpected restart or shutdown of the computer;
- A sharp decrease in performance.
Users can fix this problem without the help of specialists, especially when it comes to stationary PCs. In this case, to troubleshoot, it is enough to clean the PC from dirt and dust.
Here is the procedure for cleaning the system unit:
- unplug the power cord;
- open the block cover;
- remove dust and dirt;
- cooling system check;
- replace thermal paste if necessary;
- assemble the computer and check its operation.
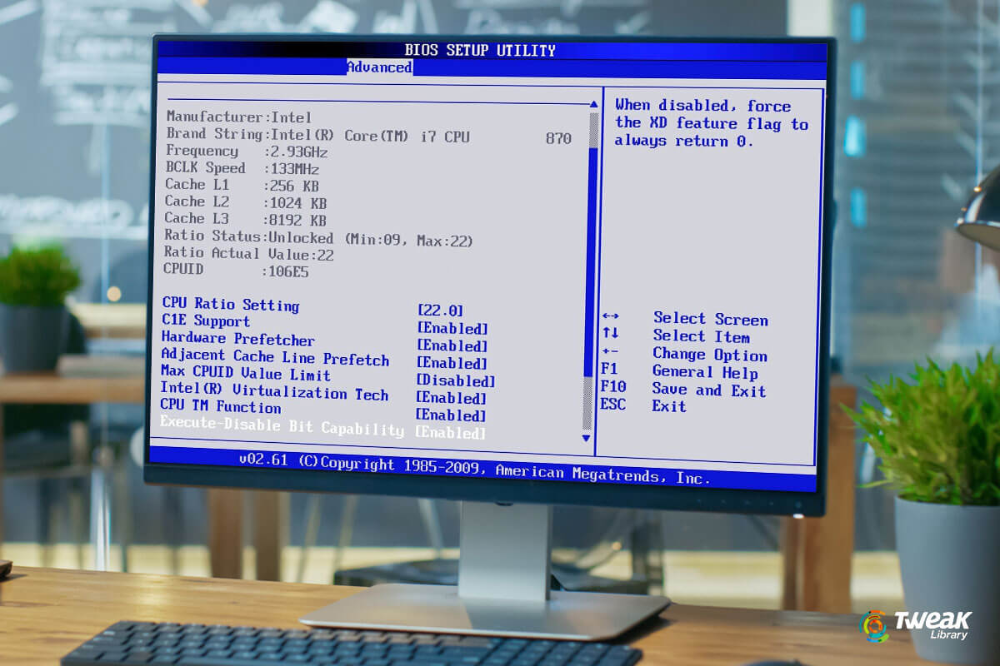
No special tools are required to clean your desktop PC. It is quite possible to get by with a soft brush and a screwdriver, a vacuum cleaner will not be superfluous, since it is more convenient to remove a large layer of dust with its help.
Notebook users are less fortunate, despite the fact that the cleaning process takes place in much the same way as for stationary PCs, it is extremely rare to complete it on your own the first time . The first time it is better to use the help of professionals.
RAM errors
Since the Windows boot process, and any other computer processes, are loaded into RAM, its malfunction can cause the entire system to freeze. To check the RAM, we will use the Memtest86 program.
Memtest86 runs an infinite number of memory test cycles. The Pass value indicates how many cycles have passed. Two check cycles are quite enough, and if the value of Errors = 0, then everything is in order with the RAM.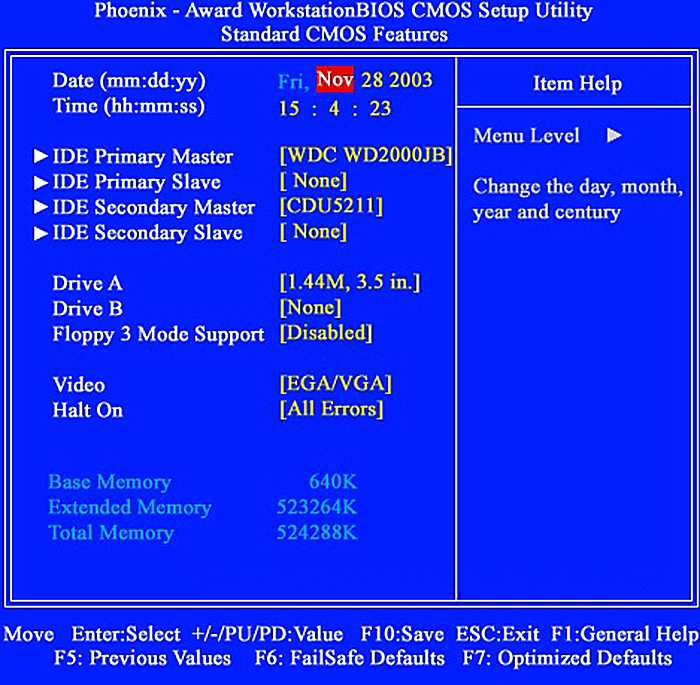
RAM errors in Memtest86
Do you know of any other reasons why Windows freezes on boot that I didn’t mention? Write comments.
Virus infection
If your computer freezes, viruses may be one of the reasons. To search for them, use an antivirus, such as Avast. The utility is free and differs from other similar programs in its small volume and resource consumption. Install Avast and on the main screen, click «Run Smart Scan». You can also specify scan settings using the «Settings» button in the upper right corner.
The progress of the Windows 7 virus scan is displayed as a percentage, above «Scanning in progress» on the right side of the window. If malware is found that slows down or freezes the system, they will be shown on the left side of the interface. The analysis can be interrupted by pressing the «Stop» button.
Tip! An alternative free antivirus that does not have a big impact on OS performance is 360 Total Security.
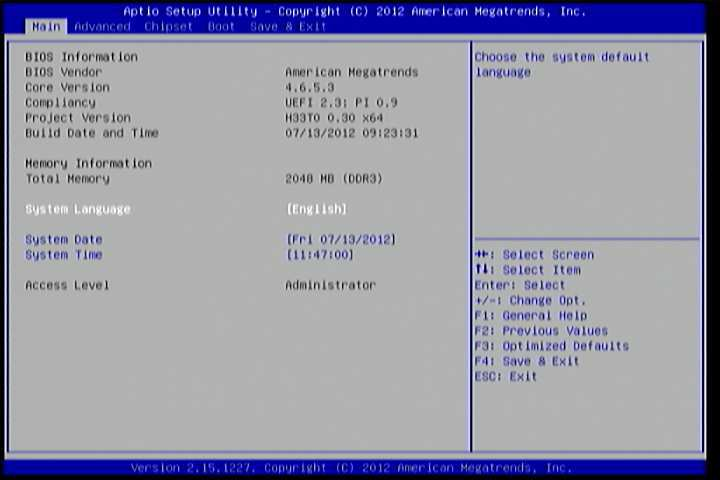
Browser difficulties
Users often experience slow performance while browsing the Internet. It is most often associated with the installation of unnecessary extensions and toolbars.
Consider how to remove unnecessary toolbars in Windows 7:
- open the «Control Panel»;
- go to the Add/Remove Programs section;
- uninstall unnecessary extensions.
Unused add-ons should also be disabled.
You can do it in Yandex Browser as follows:
- open the menu;
- select «Extras»;
- disable unnecessary extensions.
In most cases, performing these simple steps can significantly increase the speed of opening pages and working with the browser.
What can cause a computer to slow down or 12 reasons for your stress
In this article we will analyze the reasons for slowing down computers, both old and new.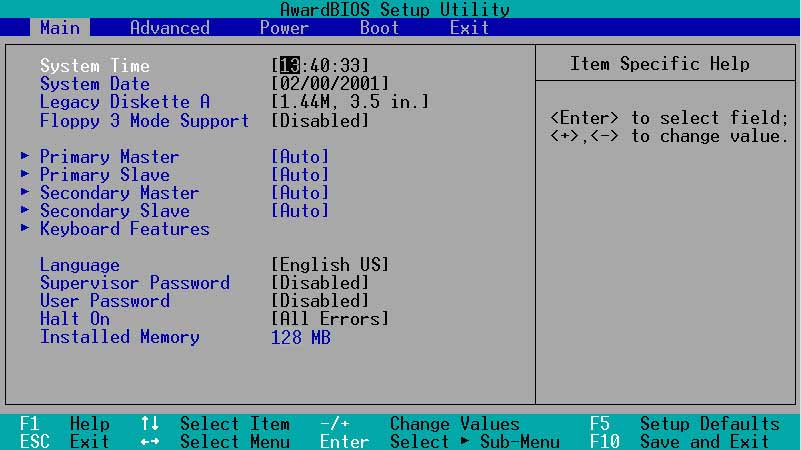
The first reason is that files themselves are on the desktop instead of shortcuts, this is especially true for outdated PCs with a small amount of RAM.
The second reason is a clogged registry, since many programs enter their data into the registry during installation, but do not clean them when they are removed from the computer. The problem is solved by cleaning the registry with programs like CCleaner.
Don’t forget to make a backup before every registry cleaning!
The third reason is a fragmented hard drive. This problem is solved by the usual defragmentation of the hard disk. I note that this is not relevant for SSDs, since they have a different principle of operation.
The fourth reason is the bottleneck. This topic is covered in voluminous articles and heated discussions on the forums. For modern PCs, the hard drive becomes the most common bottleneck, especially if it is from the green series, which has a plate rotation speed of not 7200 rpm, but only 5400.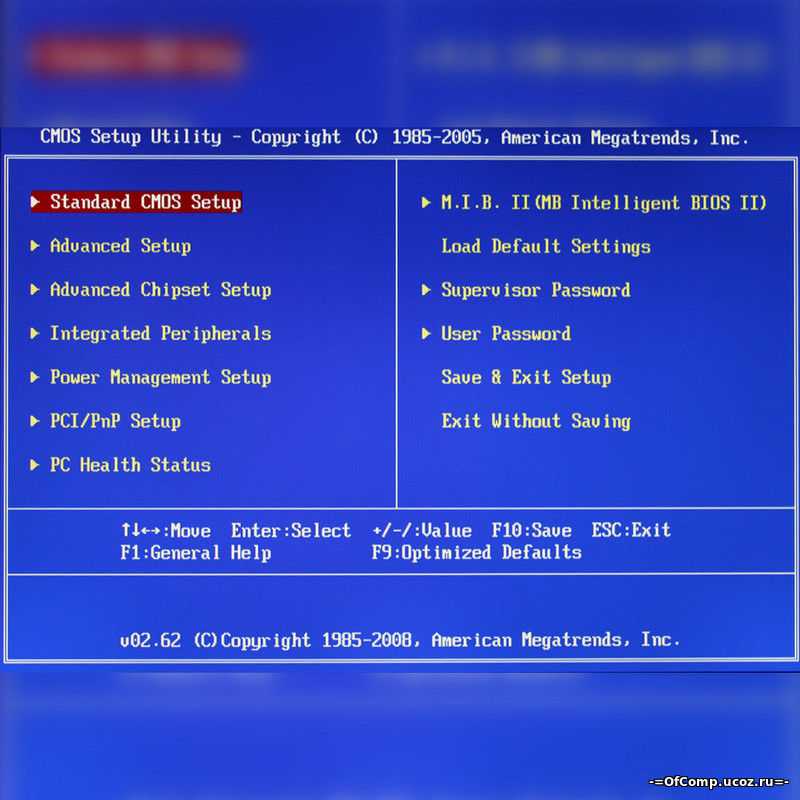 The problem is solved by installing an SSD and transferring the operating system and the paging file to it.
The second bottleneck in the rating was RAM, the volume of which computers are constantly lacking. For example, today a home non-gaming PC needs at least 8 GB of DDR4 RAM. If you play, then already 16 GB. And if you are processing high-resolution videos or photos, then 32 GB is already recommended. Moreover, it is important that two RAM modules work in dual-channel mode (they are in slots of the same color).
The fifth reason is the operating system. It’s no secret that most versions of Windows love to grow in size. I myself witnessed when Windows 7, from a base 2-3 GB, swelled up to 12 GB in a few years. Moreover, no files were transferred by the user to the folder with Windows itself. There is only one way out — reinstalling the operating system.
The sixth reason is drivers. The most interesting thing is that opinions differ here. So, according to the official opinion of component manufacturers (mainly video cards), almost every driver update optimizes the operation of the device and increases performance.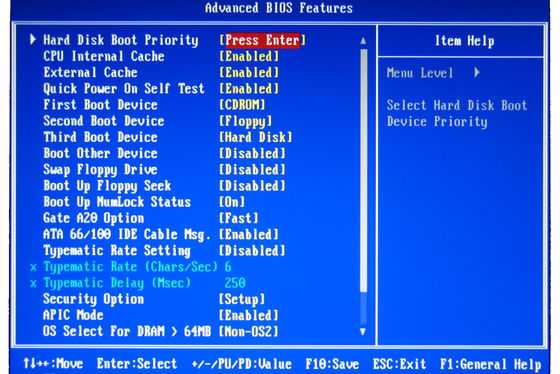 But in fact, the opposite often happens when, after installing an update, the computer starts to work more slowly …
The reason for the performance degradation was found by amateur enthusiasts who found themselves guilty of artificially obsoleting their products in order to force the user to buy newer components. By the way, smartphones have a similar problem.
The seventh reason is overheating. It is conditionally divided into wear of fans and drying of thermal paste, which leads to a deterioration in heat dissipation from the processor. As a result, with each overheating, automatic protection is activated, reducing the frequency of the processor. This problem is solved by replacing the thermal paste. The system unit of the computer must be cleaned of dust annually, otherwise it clogs the fans, heatsinks and vents, which leads to overheating.
The wear and tear of the fans and the drying of their lubricant is solved with a special lubricant or machine oil, or by replacing the fan in case of a breakdown. For example, I came across the fact that the fan on the video card simply burst and made shuffling sounds.
In some cases, the thermal stickers on the video card may need to be replaced. Especially if you play a lot or dabble in mining.
The eighth reason is viruses! This is the most significant reason, because viruses can do anything on your PC. For example, they can reduce computer resources, encrypt files, steal passwords, and damage hardware by creating maximum loads.
The ninth reason is unlicensed programs, including the operating system itself. As you know, licensed software contains mechanisms to protect against illegal use. Hackers, they are also called «crackers» (from the word crack — a program for bypassing software protection), during hacking, they often remove part of the program code, which then affects the stability of its work. The most notable examples are buggy builds of Windows and PC games that perform worse on the same PC where the original OS or game would run normally.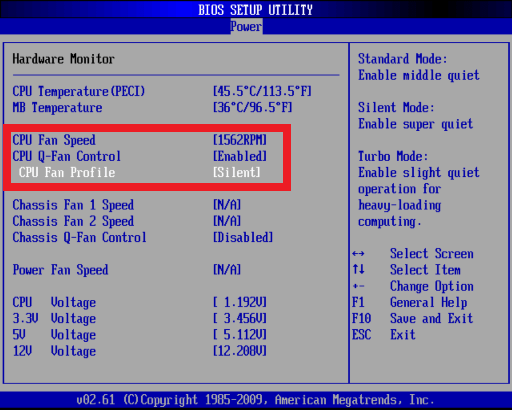
The paging file is too small
Open the system folder «This PC», right-click on any free space in the window and select «Properties». Click on the «Advanced Options» link. Click «Options» under «Performance» to access advanced settings.
On the Visual Effects tab, turn off window animations, transparency, and shadows. To do this, select the «Ensure the highest performance» option. Weak video cards do not always smoothly display the dynamic effects of the Aero interface, which causes it to freeze and Windows 7 slows down. Save the changed values, go to the «Advanced» section and click «Change».
The size of the paging file is set in one of three modes:
Uncheck automatic selection to access advanced options. There you can set the file size manually. Click «Specify Size» and enter the recommended value, which can be viewed at the bottom of the window.
Important! The specified amount of information will be blocked on the hard disk of the computer for use by the system.
It will not be available to store user data.
AnVir Task Manager utility to fix a program hang
This is a very easy-to-learn and resource-consuming program that will help you find the file that starts the process, see the level of trust in the application and remove processes.
- To use this application, download it from the official website https://www.anvir.net.
- Install the app, it’s very fast;
- Try to close the program using its functionality, if it doesn’t work, but the problem occurs constantly and restarting the computer does not help, you can delete the file used by the application in safe mode. You can take the path from the utility.
The computer freezes on startup or startup. 4 reasons
from Pavel Dzenisenka
There are a number of reasons why the computer freezes when turned on, on the «start screen» during Windows loading (5 — 15 seconds), when the desktop appears.
In this manual, we will consider: a checklist for finding a problem; what happens when the computer boots; find a breakdown. Then — search for a solution to the problem.
We will carry out urgent diagnostics of the computer in the workshop or at home with the departure of the master in Minsk. All services guaranteed. Contact.
Diagnostic methods and repair methods, suitable for desktop computers and laptops running Windows OS 7 / 8 / 10 / 11. This happens at the moment when the BIOS / UEFI splash screen of the motherboard or the logo of the laptop manufacturer appears.
It is important to correctly determine the time when the computer freezes. In the future, this will help to identify and eliminate the cause of the breakdown.
Checklist for troubleshooting and problem identification. Diagnostics
* — the item in the «What’s happening» table is what is observed at the moment the computer is turned on (the moment at which the PC freezes).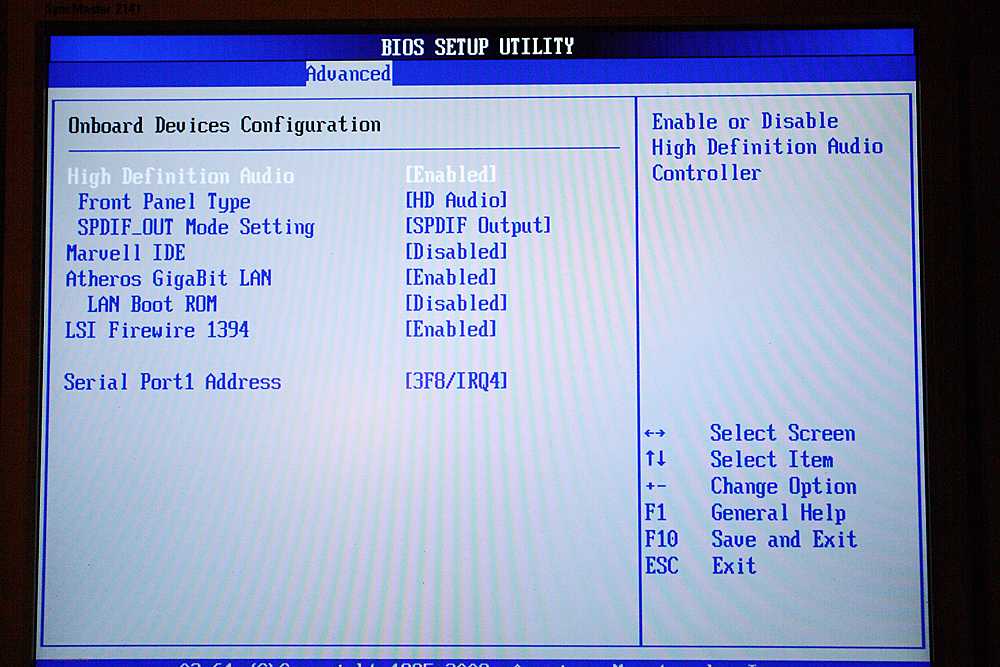 ** — alleged breakdowns are numbered (these are different breakdowns with different methods of elimination). *** — the way to eliminate a specific breakdown corresponds to the same number in the previous paragraph.
| What is happening* | Suspected failure** | Solution*** |
|---|---|---|
| No screen display | 1. BIOS failure. 2. Failure of one of the modules of a computer or laptop. a) In a stationary PC, the power supply, motherboard, and RAM often fail. b) The laptop has a motherboard. Due to constant overheating, the so-called. «bridge break». |
1. Call for service. Flash the BIOS on the programmer. 2. Carry out diagnostics of a computer or laptop. Find the failed module and replace it. |
| There is a picture. Computer, laptop hangs on the first (startup) screen | 1. BIOS failure. 2. Incorrect BIOS setup (overclocking).  3. Device initialization problem. |
1. Reset BIOS. Set default settings. 1) Remove the battery on the motherboard. 2) Or \and close the special jumper near the CMOS BIOS battery. 2. Reset BIOS. Set default settings. 3. Check whether the modules are installed correctly and their power is connected. Get-insert the memory module, video card. Check power supply connection. Check DVD drive and hard drive HDD for laptops. |
| There is a picture. PC freezes while loading Windows | 1. Windows errors. Windows update error. 2. Damaged Windows registry. 3. Driver(s) not installed correctly. 4. One of the modules failed. Most often, either RAM or a computer motherboard. |
1. Load Last Known Good Configuration. Restore from safe mode. Reinstall Windows OS. 2. Load Last Known Good Configuration. Restore from safe mode. 3. Load Last Known Good Configuration. Remove driver from safe mode. 4. 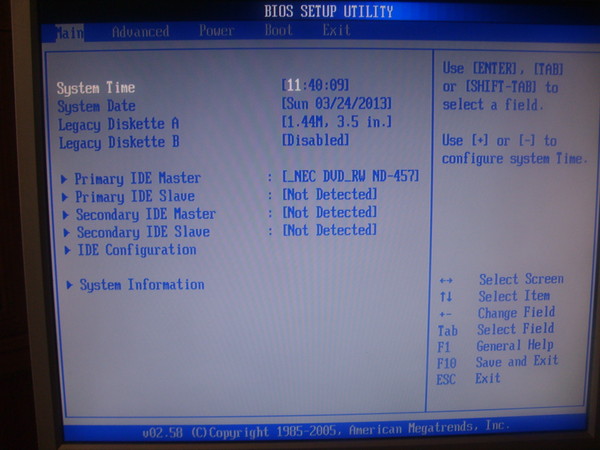 Check the RAM. Inspect the motherboard for swollen capacitors and chipped SMD elements. Replace modules or re-solder components. Check the RAM. Inspect the motherboard for swollen capacitors and chipped SMD elements. Replace modules or re-solder components. |
| The system freezes when Windows has already booted to the desktop | 1. Windows error. 2. Driver error. 3. User software error. Old, incorrectly installed programs. For example: several antiviruses are installed. 4. Overheating of the CPU due to malfunction of the cooling system. The mount for installing a stationary PC cooler is broken. The laptop cooling system is installed incorrectly. |
1. Restore Windows. Reinstall Windows OS. 2. Go through safe mode. Remove the failed driver. 3. Go through safe mode. Remove all antiviruses and check the system performance. 4. Check the integrity and correct installation of the cooler of the device. |
Why does my computer freeze during boot? Root Causes
- One of the most common causes is Windows error , as well as other software errors .
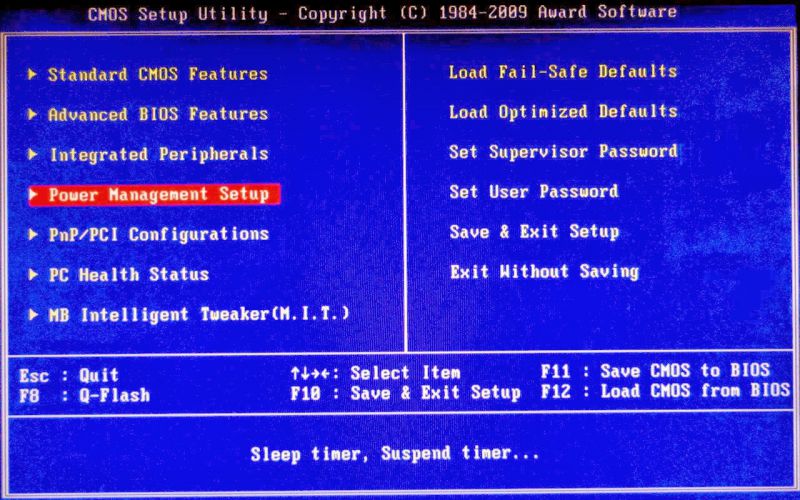 Drivers, antiviruses, virtual drive emulators, etc. start loading and working almost synchronously with the operating system. They can be the reason why the computer freezes during boot.
 - Software and hardware failures in the operation of the motherboard of a computer or laptop . This may be: BIOS / UEFI failure, failure of the motherboard chipset: north, south bridge, video card. The cause of friezes can also be: damage to the electrolytic capacitors on the board, SMD elements, microcracks in the textolite.
Sometimes the computer freezes due to problems with peripherals: problems with USB ports, Sound Card sound, Wi-Fi module, Bluetooth, Card Reader.
- The failure of the hard disk (HDD, SSD) laptop or computer can also be a source of problems.
The computer may hang during BIOS initialization, or it may not boot until Windows Welcome. - Overtemperature of components and modules . The computer or laptop freezes after working for a few minutes (seconds).