Troubleshooting
Troubleshooting
|
Epson Stylus Pro 4800
|
|
|||||||||||||||||||||||||||||||||
Problem Solver
Printer stops printing unexpectedly
The printer does not turn on or stay on
The printer prints nothing
Printouts are not what you expected
Print Quality Could be Better
Color documents print in black only
Printing could be faster
Roll paper cannot be cut
Paper feed or paper jam problems occur frequently
Roll paper does not eject properly
Clearing paper jams
Contacting Customer Support
Printer stops printing unexpectedly
Head cleaning, ink charging, or ink drying is in progress
Check to see if the Pause light is flashing. If so, the printer is in the process of head cleaning, ink charging or ink drying. During head cleaning, ink charging, and ink drying, PLEASE WAIT appears on the LCD. Wait until the printer resumes printing.
An error has occurred
Many common printer problems can be identified by the messages on the LCD.
You can also check the lights on the control panel for errors. See Lights.
For other messages not included in the following table, see Messages.
Error messages
|
|
|
|
|
|
|
|
|
|
|
|
|
|
|
|
|
|
|
|
|
|
|
|
|
|
|
|
|
|
|
|
|
|
|
|
|
|
|
|
|
|
|
|
|
|
|
|
|
|
|
|
|
|
|
|
|
|
|
|
|
|
|
|
|
|
|
|
|
|
|
|
|
|
|
|
|
|
||
|
|
||
|
|
|
|
|
|
||
|
|
|
|
|
|
|
|
|
|
|
|
|
|
|
|
|
|
|
|
|
|
|
|
|
|
|
|
|
|
|
|
|
|
|
|
|
|
|
|
|
|
|
|
|
|
|
|
|
|
|
|
|
|
|
|
|
|
|
|
|
|
|
|
|
|
|
|
|
|
|
|
|
|
|
|
|
|
|
|
|
|
|
|
|
|
|
|
|
|
|
|
|
|
|
|
|
|
|
|
|
|
|
|
|
|
|
|
|
|
|
|
|
|
|
|
|
|
|
 «nnnn» shows the code of the part.


 See Replacing the Paper Cutter.
 If you want to continue printing, press the Pause button.
 See Checking the paper path.


[Top]
The printer does not turn on or stay on
When the Pause light does not come on and mechanism initialization does not start even when the Power button is pressed to turn on the printer, try the following solutions for the problem.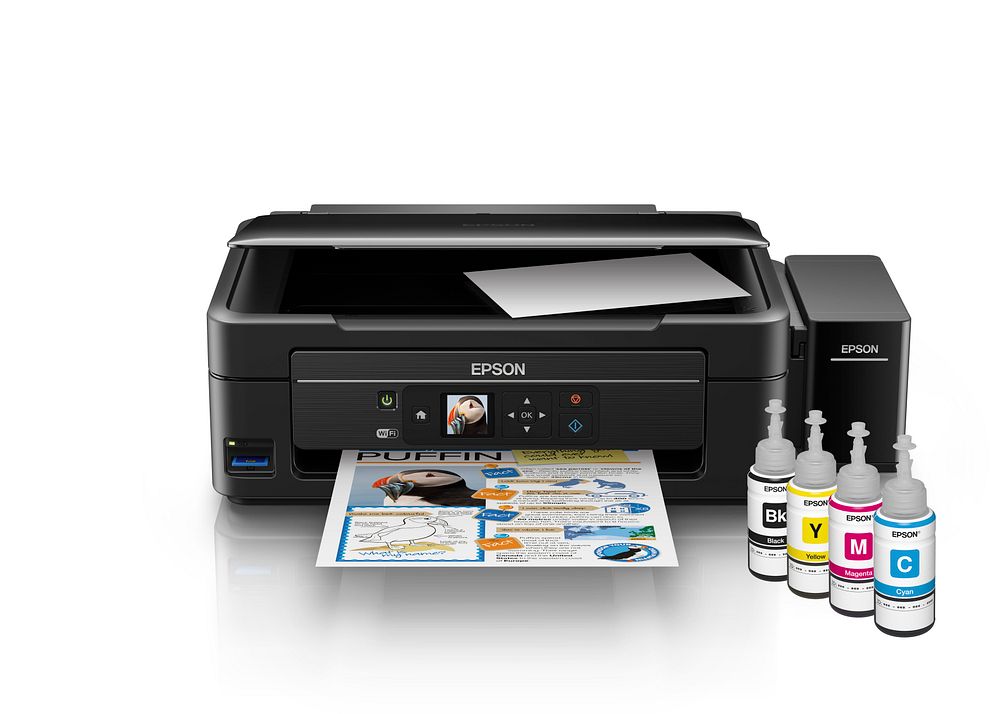
-
Turn off the printer and make sure the power cord is securely plugged into the printer.
-
Make sure your outlet works and is not controlled by a wall switch or timer.
-
Make sure the supplied voltage to the printer matches the rating voltage labeled on the printer. If not, turn off the printer and unplug the power cord immediately. Contact your dealer for assistance. See Contacting Customer Support.
|
Caution: |
|
[Top]
The printer prints nothing
The printer is not correctly connected to the computer
Try one or more of these solutions:
-
Turn off the printer and computer.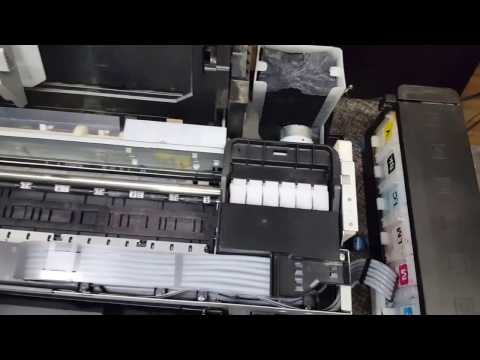 Make sure the printer’s interface cable is securely plugged into the correct terminal of the computer.
-
Make sure the interface cable specifications match the specifications for the printer and computer.
-
Make sure the interface cable is directly connected to the computer without passing through any device, such as a printer switching device, or extension cable.
Your Epson printer is not selected as the default printer
Install the printer driver if it is not installed yet, and follow the steps below to select your Epson printer as the default printer.
For Windows XP
|
Click the Start button, and Printer and Faxes. |
|
Right-click EPSON Stylus Pro 4800. 
|
|
Select Set As Default Printer, then close the window. |
For Windows 2000
|
Click the Start button, point to Settings and select Printers. |
|
Right-click EPSON Stylus Pro 4800 in the Printers window. |
|
Select Set As Default, then close the Printers window. |
For Mac OS X
Make sure that the printer driver Stylus Pro 4800 is correctly added to the Printer Setup Utility (for Mac OS X 10.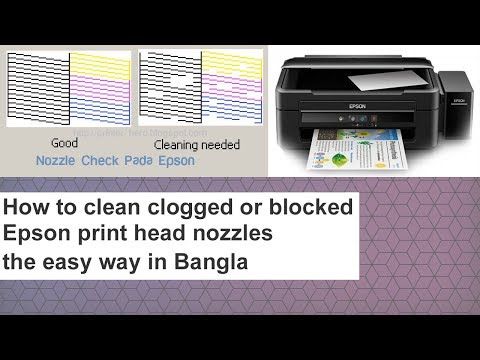 3), and the correct one is selected in the Printer Setup Utility.
Printer port setting does not match the printer connection port (for Windows only)
To select the printer port, follow the steps below.
For Windows XP
|
Click Start, click Control Panel, click Printers and Other Hardware, and then click Printers and Faxes. |
|
Right-click EPSON Stylus Pro 4800, then select Properties. |
|
Click the Ports tab. |
|
Make sure that your printer port is selected. 
|
For Windows 2000
|
Click Start, point to Settings, and then select Printers. |
|
Right-click EPSON Stylus Pro 4800 in the Printers window, then select Properties. |
|
Click the Ports tab. |
|
Make sure that your printer port is selected. |
Try one or more of these solutions:
-
Run the Head Cleaning utility. For Windows, see Cleaning the print head. For Mac OS X, see Cleaning the print head.
-
If the Head Cleaning utility does not work, replace the ink cartridges. See Replacing Ink Cartridges.
[Top]
Printouts are not what you expected
Incorrect, garbled characters, or blank pages print
Try one or more of these solutions:
-
For Windows, clear any stalled print jobs from the Progress Meter. See Using the EPSON Spool Manager.
-
If the problem persists, turn off the printer and computer. Make sure the printer’s interface cable is plugged in securely.
Incorrect margins
Try one or more of these solutions:
-
Check the margin settings in your application.
-
Make sure the margins are within the printable area of the page.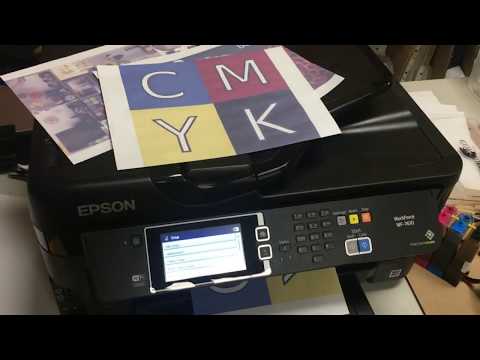 See Printable area.
-
For Windows, check the Borderless setting in the Paper menu. Make sure they are correct for the paper size you are using. See Making Settings on the Paper Menu.
-
Make sure the paper set position is correct. See Using Roll Paper, or Using Cut Sheet Media.
Inverted image
For Windows, turn off the Flip Horizontal setting in the Advanced menu. See Making Advanced setting.
For Mac OS X, turn off the Flip Horizontal setting in the Advanced Settings selected in the Print Settings selected in the Print dialog. See Advanced Settings.
Printed color differs from the color on the screen
Try one or more of these solutions:
-
Adjust the Color Density in the Paper Configuration dialog. For Windows, see Paper Configuration.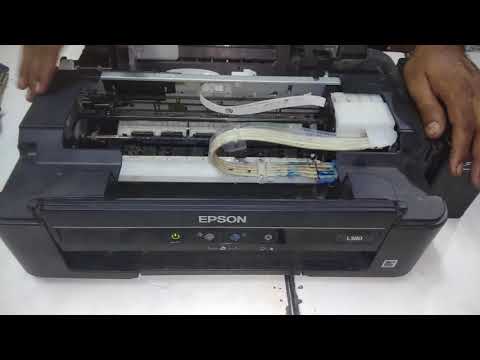 For Mac OS X, see Paper Configuration.
-
Make sure the media type setting matches the paper being used.
-
Since monitors and printers produce colors differently, printed colors will not always match on screen colors perfectly. However, the above color systems are provided to overcome color differences.
For Mac OS X, select ColorSync to color match your system in the Printer Color Management selected in the Print dialog. See Printer Color Management.
-
You can produce sharper images with more vivid colors.
For Windows, select PhotoEnhance in the Advanced menu. See Making Advanced setting.
-
For Windows, select Color Controls in the Advanced menu, and adjust color, brightness, etc. as required. See Making Advanced setting.
For Mac OS X, select Color Controls in the Printer Color Management selected in the Print dialog.See Printer Color Management.
A ruled line shifts
Perform the print head alignment. For Windows, see Aligning the print head. For Mac OS X, see Aligning the print head.
If the problem persists, perform the print head cleaning. For Windows, see Cleaning the print head. For Mac OS X, see Cleaning the print head.
Printout has smears on the bottom edge
Try one or more of these solutions:
-
If the paper is curled towards the printable side, flatten it or curl it slightly to the opposite side.
-
For Windows, if you use Epson special media, check the Media Type setting in the Main menu. See Making Settings on the Main Menu.
For Mac OS X, if you use Epson special media, check the Media Type setting in the Print Settings selected in the Print dialog.See Page Setup.
For paper other than Epson’s, register and select paper thickness in the SelecType mode. Make sure it is correct for the paper you are using. See Making the paper settings.
-
Set the PLATEN GAP to WIDE in the PRINTER SETTING of the SelecType mode. See PRINTER SETUP.
[Top]
Print Quality Could be Better
Click the caption under the illustration that best resembles your printout.
|
|
|
|
|
|
|
|
|
If you are having print quality problems, try the solutions offered here.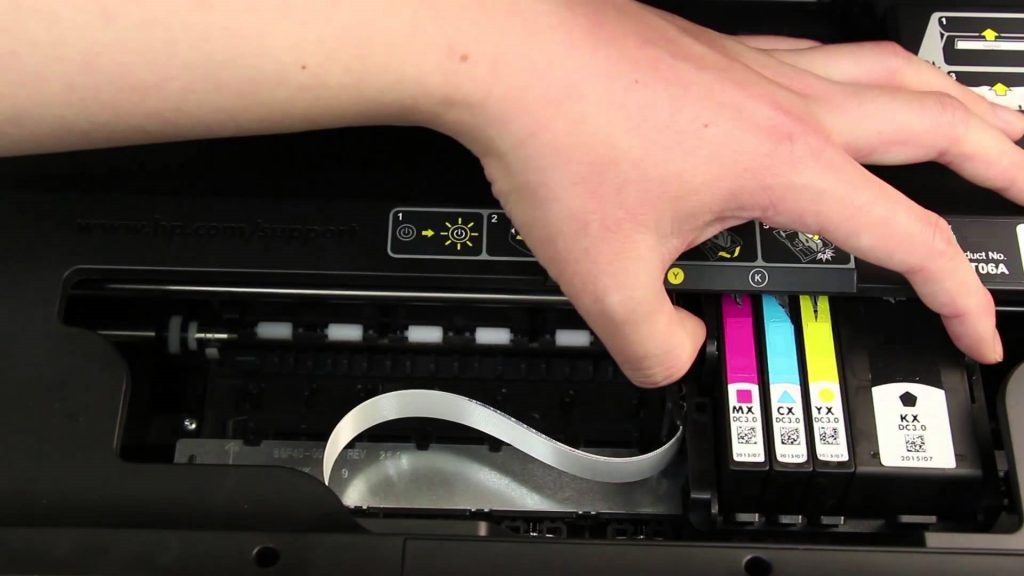
Horizontal banding
Try one or more of these solutions:
-
For Windows, check the Media Type setting in the Main menu. Make sure it is correct for the paper you are using. See Making Settings on the Main Menu.
For Mac OS X, check the Media Type setting in the Print Settings selected in the Print dialog. Make sure it is correct for the paper you are using, see Page Setup.
-
Make sure the printable side of the paper is face-up.
-
Run the Head Cleaning utility to clear any clogged ink nozzles. For Windows, see Cleaning the print head. For Mac OS X, see Cleaning the print head.
You can also clean the print head nozzles using the control panel. To clean the print head nozzles, press the Menu button for 3 seconds.
-
Check the Paper Feed value.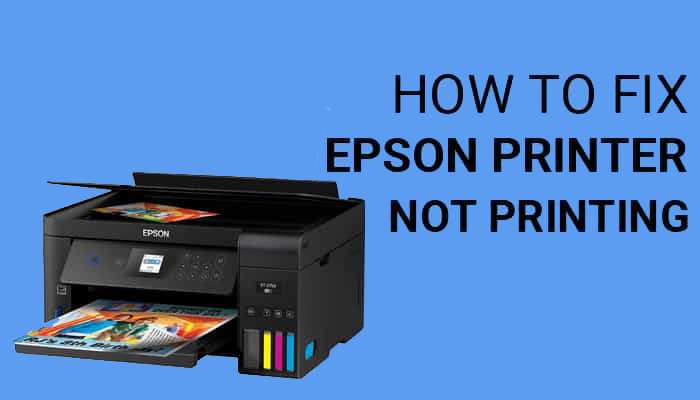 Reduce the value to improve light banding, and increase it for dark banding. For Windows, Paper Configuration. For Mac OS X, see Paper Configuration.
-
Check the Ink check light. If necessary, replace ink cartridges. See Replacing Ink Cartridges.
Vertical misalignment or banding
Try one or more of these solutions:
-
For Windows, turn off the High Speed setting in the Advanced menu. See Making Advanced setting.
For Mac OS X, turn off the High Speed setting in the Advanced Settings is selected in the Print Settings selected in the Print dialog. See Advanced Settings.
-
Run the Print Head Alignment utility. For Windows, see Aligning the print head. For Mac OS X, see Aligning the print head.
Faint printout or gaps
Try one or more of these solutions:
-
Make sure that the ink cartridges do not exceed the expiration date. The expiration date is labeled on the outside of the ink cartridge.
-
For Windows, check the Media Type setting in the Main menu. Make sure it is correct for the paper you are using. See Making Settings on the Main Menu.
For Mac OS X, check the Media Type setting in the Print Settings selected in the Print dialog. Make sure it is correct for the paper you are using. See Page Setup.
-
Run the Head Cleaning utility to clear any clogged ink nozzles. For Windows, see Cleaning the print head. For Mac OS X, see Cleaning the print head.
You can also clean the print head nozzles using the control panel. To clean the print head nozzles, press the Menu button for 3 seconds.
-
Check the Ink check light. If necessary, replace ink cartridges. See Replacing Ink Cartridges.
-
Select Standard as Platen Gap in the Paper Configuration dialog box. For Windows, see Paper Configuration. For Mac OS X, see Paper Configuration.
Blurry or smeared printout
Try one or more of these solutions:
-
For Windows, check the Media Type setting in the Main menu. Make sure it is correct for the paper you are using. See Making Settings on the Main Menu.
For Mac OS X, check the Media Type setting in the Print Settings selected in the Print dialog. Make sure it is correct for the paper you are using. See Page Setup.
-
If the paper you are using is not supported by the printer driver, make the paper thickness setting in the SelecType mode. See CUSTOM PAPER.
-
Make sure your paper is dry and the printable side is face-up. Also, make sure you are using the correct type of paper. See Paper for specifications.
-
Ink may have leaked inside the printer; wipe the inside of the printer with a soft, clean cloth.
-
Run the Head Cleaning utility. For Windows, see Cleaning the print head. For Mac OS X, see Cleaning the print head.
You can also clean the print head nozzles using the control panel. To clean the print head nozzles, press the Menu button for 3 seconds.
[Top]
Color documents print in black only
Try one or more of these solutions:
-
Make sure the color data settings in your application are correct.
-
For Windows, make sure Color or Color/B&W Photo is set in the Main menu. See Making Settings on the Main Menu.
For Mac OS X, make sure Color or Color/B&W Photo is set in the Print Settings selected in the Print dialog. See Color.
[Top]
Printing could be faster
Try one or more of these solutions:
-
Select High Speed on the Advanced dialog box. For Windows, see Making Advanced setting. For Mac OS X, see Advanced Settings.
-
For Windows, select the Automatic mode and move the slider towards Speed in the Main menu to increase print speed. See Making Settings on the Main Menu.
For Mac OS X, select Automatic mode and move the slider towards Speed in the Print Settings selected in the Print dialog to increase print speed. See Mode.
-
Do not run too many applications at the same time. Close any applications you are not using.
-
Change the interface card of your computer to IEEE1394 or USB 2.0.
-
Delete unnecessary files to make room on your hard disk drive.
|
Note for Windows: |
|
 For further tips, see Increasing the Print Speed.
[Top]
Roll paper cannot be cut
Try one or more of these solutions:
-
Make sure that paper cutter cover is set correctly. See Replacing the Paper Cutter.
-
Make sure that the is selected as the Paper Source on the LCD. Press the Paper Source button if necessary. Then press and hold the Paper Source button for 3 seconds. The printer cuts the roll paper.
-
Make sure that Normal Cut, Single Cut, or Double Cut is selected as the Auto Cut in the printer driver. For Windows, see Making the Auto Cut setting. For Mac OS X, see Auto Cut.
-
Cut the roll paper by hand if necessary. Check that the paper thickness of the roll paper loaded in the printer matches the paper specification (see Paper). If so, the paper cutter may be blunt and require replacement. See Replacing the Paper Cutter.
|
Note: |
|
[Top]
Paper feed or paper jam problems occur frequently
Try one or more of these solutions:
-
Before loading paper and guiding it through the paper insertion slot, adjust paper suction.
To adjust the paper suction using the printer driver, see Paper Configuration for Windows or see Paper Configuration for Mac OS X.
To adjust the paper suction using the control panel, see CUSTOM PAPER.
-
Make sure the paper is not folded or wrinkled.
-
Make sure the paper is flattened.
-
Make sure printing occurs within the operational temperature range.
-
Make sure the paper is not damp.
-
Make sure the paper is not too thick or too thin. See Paper.
-
Make sure no foreign objects are inside the printer.
-
For Windows, check the Media Type setting in the Main menu. Make sure it is correct for the paper you are using. See Making Settings on the Main Menu.
For Mac OS X, check the Media Type setting in the Print Settings selected in the Print dialog. Make sure it is correct for the paper you are using. See Page Setup
-
Make sure that the platen gap setting matches your paper. You can change the platen gap setting in the PRINTER SETUP of the SelecType mode. See PLATEN GAP.
-
For non-Epson special media, check the paper type selected in the CUSTOM PAPER of the SelecType mode. See Making the paper settings.
Whenever loading non-Epson special media, test if the paper can be loaded correctly before printing.
To clear Paper jams, see Clearing paper jams.
[Top]
Roll paper does not eject properly
Try one ore more of these solutions:
-
Roll paper is wound tightly and may feed with a curl. Flatten it before you load it.
-
Select Starwheel-Roll Curled as the Feed Roller Type in the Paper Configuration dialog box. For Windows, see Paper Configuration. For Mac OS X, see Paper Configuration.
[Top]
Clearing paper jams
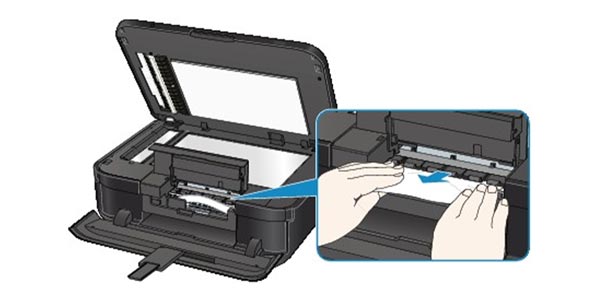
When roll paper is jammed
To remove jammed roll paper, follow the steps below:
|
Turn off the printer. |
|
Open the roll paper cover, and move the paper lever to the released position. |
|
Cut the paper at the paper insertion slot, and remove the roll paper. |
|
Remove the jammed paper from the front or rear side of the printer. 
|
If necessary, open the top cover, and remove the jammed paper.
When paper loaded from the paper tray is jammed
To remove jammed paper, follow the steps below.
|
Turn off the printer. |
|
Move the paper lever to the released position. |
|
Remove the paper tray from the printer. |
|
Carefully remove the jammed paper. 
|
If necessary, open the top cover, and remove the jammed paper.
If the paper is jammed around the rear cover, remove the rear cover by squeezing the knobs, and remove the jammed paper.
When paper loaded from the front manual feed slot is jammed
To remove jammed paper, follow the steps below:
|
Turn off the printer. |
|
Move the paper lever to the released position. |
|
Remove the jammed paper from the front or rear side of the printer. 
|
|
|
|
|
|
|
When paper loaded from the rear manual feed slot is jammed
To remove jammed paper, follow the steps below:
|
Turn off the printer. |
|
Move the paper lever to released position. |
|
Remove the jammed paper from the front.  If necessary, open the top cover and remove the jammed paper. If necessary, open the top cover and remove the jammed paper.
|
[Top]
Contacting Customer Support
If your Epson product is not operating properly and you cannot solve the problem using the troubleshooting information in your product documentation, contact customer support services for assistance. If customer support for your area is not listed below, contact the dealer where you purchased your product.
Customer support will be able to help you much more quickly if you give them the following information:
-
Product serial number
(The serial number label is usually on the back of the product.)
-
Product model
-
Product software version
(Click About, Version Info, or similar button in the product software. )
)
-
Brand and model of your computer
-
Your computer operating system name and version
-
Names and versions of the software applications you normally use with your product
Where To Get Help
Epson provides technical support and information on the installation, configuration, and operation of professional printing products through the Epson Preferred Protection Plan.
Dial (888) 377-6611, 6 AM to 6 PM, Pacific Time, Monday through Friday. Support hours and days are subject to change without notice.
Before you call, make sure you have your Unit ID number, which is included with the Epson Preferred Protection Plan information that came with your printer. You’ll also need your printer serial number and proof of purchase.
Epson also provides technical assistance 24 hours a day through the World Wide Web. You can reach Epson Support at http://support.epson.com. At this site, you can download drivers, firmware, and other files, look at product documentation, access troubleshooting information, and receive technical advice through e-mail.
You can purchase genuine Epson ink cartridges, paper, and accessories from an Epson reseller. To find the nearest authorized reseller, please call 800-GO-EPSON (800-463-7766). To purchase online, visit www.epsonstore.com (U.S. sales only). In Canada, please call 800-463-7766 for a reseller referral.
[Top]
| Next |
| Version NPD1123-00, Copyright © 2005, SEIKO EPSON CORPORATION |
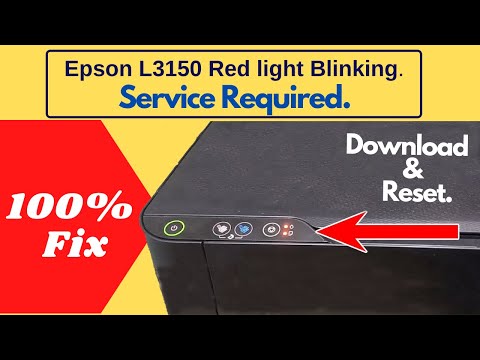
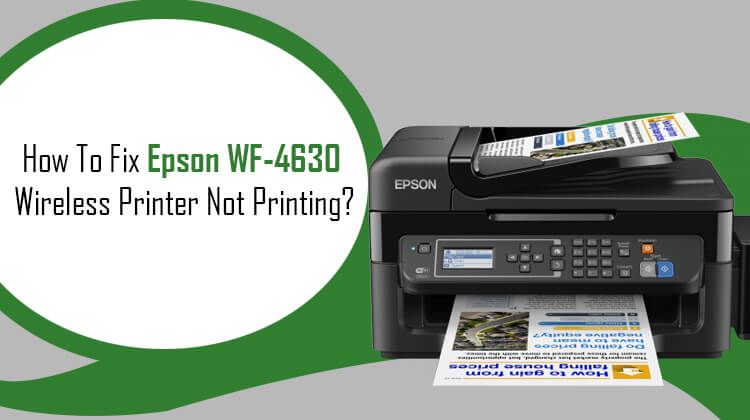
5 Quick Way to Fix it
Connection problems are often the trigger to this error
by Milan Stanojevic
Milan Stanojevic
Windows & Software Expert
Milan has been enthusiastic about PCs ever since his childhood days, and this led him to take interest in all PC-related technologies. Before joining WindowsReport, he worked as… read more
Updated on
Reviewed by
Vlad Turiceanu
Vlad Turiceanu
Editor-in-Chief
Passionate about technology, Windows, and everything that has a power button, he spent most of his time developing new skills and learning more about the tech world. Coming… read more
Affiliate Disclosure
- It’s very frustrating when your Epson printer won’t complete the printing job for no reason.
- When it happens, check the printer’s display for any error messages.
- You may start by troubleshooting your network connection settings.
XINSTALL BY CLICKING THE DOWNLOAD FILE
To fix various PC problems, we recommend Restoro PC Repair Tool:
This software will repair common computer errors, protect you from file loss, malware, hardware failure and optimize your PC for maximum performance. Fix PC issues and remove viruses now in 3 easy steps:
- Download Restoro PC Repair Tool that comes with Patented Technologies (patent available here).
- Click Start Scan to find Windows issues that could be causing PC problems.
- Click Repair All to fix issues affecting your computer’s security and performance
- Restoro has been downloaded by 0 readers this month.
Epson printers are among the top economical printers out there, which is reason enough for choosing one of these models for yourself.
On the other hand, Epson printers also encounter many issues. For example, the most common problems are printing blank pages, not printing when connected wirelessly, or even not printing after changing the ink toner.
In this article, we’ll be looking at some basic troubleshooting steps hoping to get your printer up and running again.
Before setting off, see if your printer displays an error message. Sometimes, these are clear enough to figure out what’s wrong. If otherwise, keep reading to find a solution.
Why is my Epson printer not printing when the ink tank is full?
It is an odd situation to have a full ink tank but still not be able to print. The common culprits are:
- A dislodged cartridge – The cartridge may be inserted but not correctly fitted. In such a situation, you still will not be able to print.
- A turned-off printer – You should double-check that the printer is on and that cables are correctly connected if you use a wired connection.
- Out of paper – Here is another thing to check. You may not have paper in the tray, so printing will not work.
- Clogged print head – In this case, you must clean the print head and make sure it is not stuffed with ink.
Here are a few variations to printer errors you may notice:
- Epson printer not printing color correctly – Verify that your paper’s type setting corresponds to the loaded paper.
 Also, verify that the printer software does not have selected the Grayscale or Black/Grayscale option.
 - Epson printer not printing black but has ink – In this situation, replace any empty or low-ink ink cartridges.
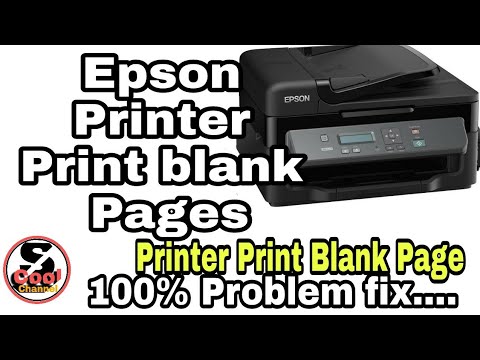
- My Epson printer is printing blank pages – This blank print error could be because you are low or out of ink.
- Epson printer not printing after changing ink – You must ensure that the ink tank is inserted correctly.
- Epson printer not printing wirelessly – Ensure that your product and PC are connected to the same wireless connection or network.
Why is my Epson printer not working after replacing ink cartridges?
A primary reason for this could be that the printer cartridges are not correctly fitted. In this case, you would have to remove them and reseat them. For particular model-specific instructions, go to the Epson printer manual or website.
If the printer head cleaning option is available, you should also use it.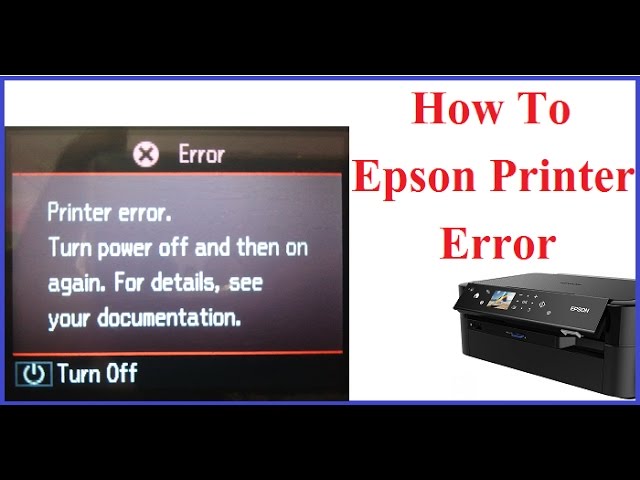
How do I get my Epson printer to print?
1. Check your printer connection
- If it’s a wireless printer, check that the Internet runs OK. Then, disconnect and reconnect the printer to the network, if necessary.
- Also, make sure that the printer is connected to the same network as your device.
- For a USB-connected printer, check that the cables are seated correctly into the ports. Then, change the USB port to see if there’s any change. For a USB-connected printer, check that the cables are seated correctly into the ports. Then, change the USB port to see if there’s any change.
2. Set your printer as the default printer
- Press the Windows key and click the Settings app.
- Click on Bluetooth & devices on the left pane, then select Printers & scanners from the right.
- Select your Epson printer, and click on the Set as default button.
Alternatively, uncheck the Let Windows manage my default printer box to allow the system to use your most recent printer.
3. Update your drivers
- Right-click on the Start menu and select Device Manager.
- Find your printer driver, right-click on it and select Update driver.
- Select Search automatically for drivers.
- Wait for the process to finish and reboot your PC.
Alternatively, you can use automatic updater software. Such tools are created to eliminate the hassle of frequently checking and updating your drivers manually.
Expert Tip: Some PC issues are hard to tackle, especially when it comes to corrupted repositories or missing Windows files. If you are having troubles fixing an error, your system may be partially broken. We recommend installing Restoro, a tool that will scan your machine and identify what the fault is.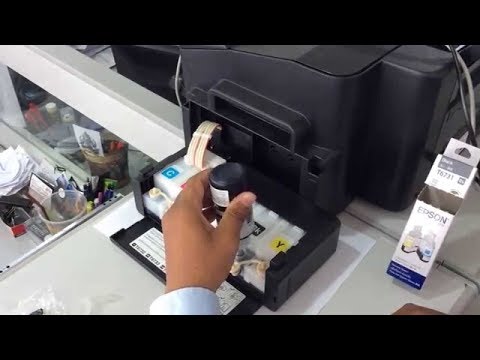
Click here to download and start repairing.
Out-of-date drivers may also cause this issue, so follow the steps above to update yours from Windows settings.
DriverFix is a solid updater that is very easy to use. It is always reported to match your hardware with its corresponding driver version, removing the errors that may appear if you install faulty drivers.
To update your drivers with DriverFix, download and install the app, run the DF scanner, select what drivers you want to edit, and follow the prompts with each step.
In addition, you can set up the software to do regular scans and updates and let it work in the background as you take care of other tasks.
DriverFix
Avoid such errors and keep all your drivers up to date.
Free Trial Download
4. Check ink cartridges
- Press the Windows key and click the Settings app.
- Click on Bluetooth & devices on the left pane, then select Printers & scanners from the right.
- Right-click on your Epson printer and select Printing Preferences.
- In the Maintenance tab, click on Epson Status Monitor 3.
Here, you can see whether you should replace any cartridges with a new one. Sometimes, old cartridges can cause issues. So it’s recommended to replace them with new ones.
Always make sure that the cartridges are set correctly into the tray.
Additionally, check that the cartridges, especially the black ones, are clogged. You can de-clog them using a pin.
5. Clear all print jobs
- Press the Windows key + R keys.
- Type services.msc in the box and hit Enter.
- Look for Print Spooler, then right-click on it and select Stop.
- Back to your desktop, open File Explorer and, in the address bar, type the address below and hit Enter.
%windir%System32spoolPRINTERS - Delete all the files in the folder.
- Press the Windows key + R keys.
- Type services.msc in the box and hit Enter.
- Look for Print Spooler, then right-click on it and select Start.
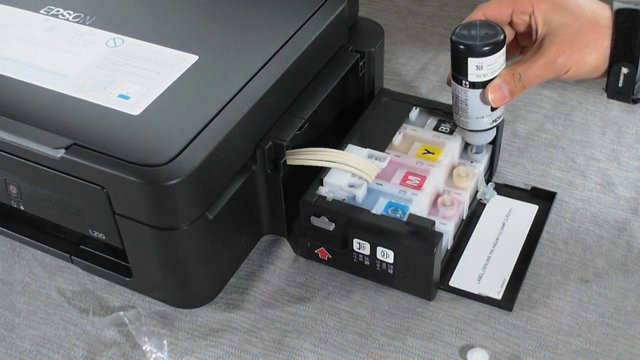
How do you reset Epson ink cartridges?
- Flip the ink cartridge so that you can see the microchip.
- Press its reset button, which can be discovered on top of the metal contacts, using the end of a pin or toothpick.
Alternatively, use a replacement chip. Depending on your cartridge, Epson ink stores may have Replacement Chips.
At least one of these steps should help you solve the printing issues with the Epson printer. Note that we have not written these solutions in any particular order. Instead, you should attempt what seems most applicable to your case.
Also, note that the Epson software makes it easier to avoid many errors using the printer.
Please comment in the dedicated section below if you have any additional solutions.
Was this page helpful?
There are 13 comments
Share
Copy link
Newsletter
Software deals
Friday round-up
I agree with the Privacy Policy regarding my personal data
How to Fix Epson Printer Not Printing Black Color Problem
Epson Printer is Not Printing Properly
In this guide, we have explained the causes for Epson printer not printing issues along with its easy to follow troubleshooting steps.
Troubleshooting Steps For ‘Epson Printer Is Not Printing Anything’ Problem :
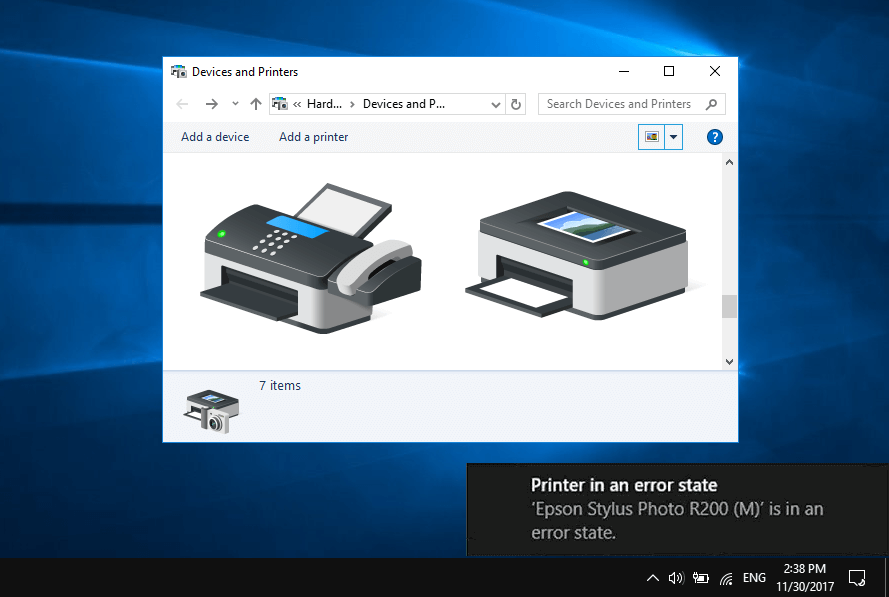
1 – Set Your Printer as the Default Printer :
One of the reasons why your Epson is printer not printing color is because it is not set as the default printer on your desktop.
Follow these steps to set your Epson Printer as the default printer :
- Firstly, press the Windows logo button and “R” at the same time on your keyboard.
- Run box will now be visible on your screen.
- Write “control panel” and press the “Enter” button on your keyboard.
- Now, Control panel will open on your screen. From here, click on “Devices and Printers” option.
- Thereafter, look for your printer model and then right-click on it.
- Now click on “Set as default printer” option.
Still not able to fix the issue, run our
Diagnostic Tool
2- Uncheck/Disable the use of Epson printer offline feature :
Follow the below-mentioned steps to do so :
- Open the run box by pressing the Windows key and “R” at the same time.
- Now, type “control panel” and then press enter.
- From here, select “Devices and Printers”.
- Now, right click on your printer and make sure that there’s no mark on the “Use Printer Offline” option (Should not be selected). If this option is selected, uncheck this option by clicking on it.

- Thereafter, right click on your printer again and check if there’s a tick mark on “Set as default printer”.
- Close the window and see if now you can print or not otherwise proceed to next solution to fix Printer not printing correctly issue
3- Check the print spooler service :
The basic function of the printer spooler service on the computer is to look after the print jobs and manage communication between your printer and computer.
In case if this feature is turned off, your Epson Printer will not work properly. Therefore, ensure that your Spooler is turned ON by following the below steps –
- Firstly, open the run box by pressing the Windows logo key and “R” at the same time.
- Type “services.msc” and then press “enter” on your keyboard.
- Now, services window will be visible on your screen. Here, double click on ‘Print Spooler’ option from the list.
- Now, check if the startup type is set at “Automatic” and its service status shows as “running”.
- If you don’t see as mentioned above, select the startup type to “Automatic” and then click on the “start” button.
- Lastly, click on OK and now your print spooler service will work.
4- Clear all the print jobs in queue :
A print queue is a list of print jobs that are to be printed. Sometimes these jobs gets stuck and disallows you to print anything.
However, you can simply clear the print jobs by following these steps:
- Firstly, open the ‘Run box’ from windows search option.
- Type “services.msc” and hit the enter button on your keyboard. Now, services window will be visible on your screen.
- Now, go to the service window and point to the print spooler and right click on it to open the ‘Properties’.
- Then, click on “stop” and click on “OK”.
- Thereafter, open ‘File Explorer’ (Press Windows logo key and “E” at the same time).

- Now, copy and paste this into the address bar “%windir%\System32\spool\PRINTERS” and press ‘enter’ key.
- Now, all the print jobs of your computer will be visible on your screen.
- Remove/Delete every file from this folder.
- Open the services window again and right-click on the “Print Spooler” to open properties. Here, click on the start option & click on “OK” button.
- Close everything and turn off the computer and printer. Unplug the power cord as well.
- Let them off for at least a minute. Then, plug in the cables and turn on the computer and printer.
- Finally, check if the Epson printer is now able to print either go to the next solution to fix this issue completely.
5- How to update Epson Printer Driver :
Sometimes the Epson Printer not Printing color correctly both side on page due to old or outdated driver.
Therefore, follow the below-mentioned steps to update the Epson printer drivers to its latest version:
- Firstly, open the “start menu”.
- At the search box, type the “device manager” option and then press the “Enter” button.
- Now, in the list of devices and components, right-click on the “Printer” option.
- At the system manager, click on “Update Driver”.
- Then, click on the “auto-search” option.
- Click on “Check for modified driver software”. It will automatically update the printer’s driver.
- Now, follow the onscreen instructions for driver setup to complete the installation process.
What to do if Epson printer is not printing in Black color ?
Follow these steps below if your Epson Printer won’t print black color.
A) Clean the Epson printer’s print-head :
- Firstly, open the ‘Control Panel’ from windows search option and search and open the option of ‘Devices and Printers’.
- Here, you will be able to see your installed Epson printer with a Green check mark on it. Right click on it and select the option of ‘Properties’.

- Now, click on the Hardware/Maintainance tab.
- Thereafter, click on “Head Cleaning” option from the next appearing window.
- Then, press the start button.
- Now, press the start option for head cleaning and keep on following the onscreen instructions.
Hence, by following these above steps your ‘Epson printer not printing color in black problem’ will be resolved easily.
C) Check the levels of the ink cartridge :
You need to make sure that the level of the ink cartridge is up to the mark. Follow the steps below to check:
- Open the control panel.
- Select the “devices & Printers” option.
- From here, right-click on the Epson printer and then select the “Print Preferences” option.
- Now, click on the Repair tab.
- Then, click on the maintenance menu and open ‘Epson Status Monitor’ by selecting it.
- Now the amount of ink in the cartridges will be visible.
- If it displays low, then refill them.
D) Connect Epson printer with correct port/slot :
Epson printer will not work if its not connected to correct port. However, this issue can be easily fixed by following these steps –
1. Open up the control panel.
2. Select the “devices & printers” option.
3. Right-click on your Epson printer and then click on “properties”.
4. Then, right-click on the “Epson Printer is not printing” option and select the “printer options”.
5. Now, go to the “Properties” window, and click on the “Ports” tab.
6. Now, select the “Add Port” option.
7. Thereafter, select the default TCP/IP port and then click on “Epson Printer Properties” on the new port.
8. Now, click on the “next” option.
9. Lastly, click on the “finish” button and restart your computer and printer and take a test print.
E) Update Epson Printer Firmware :
Make sure that your firmware is up to date otherwise your printer may encounter functioning problems. You can check this by follow the below steps –
- Open the start menu and type “Epson”. Here, from shown results select “Epson Software Updater”.
- Now, from the list select your Epson printer model.
- Wait until the software checks if there’s an update available.
- Ensure that there’s a tick mark in the box of “Firmware Updater” and then click on the “Install” button.
- Click on “Agree” and then click on “OK” to proceed.
- Wait until the software downloads the update.
- A new window will open. Click on “Start” button.
- Now, wait until the software gets completely updated. This process can take several minutes. Don’t turn off the printer between this.
- Click on the “Finish” button.
- Now click on “Ok”.
- Wait until it again checks for the updates.
- Click on the exit button when you see that there’s no update button.
So, we ensure that if you follow as mention above all the process you will never face again ‘Epson Printer not Printing Black Color’ Problem.
Now, we are going to list the reasons for the most common question of “why Epson printer is not printing black and white color or anything properly ?”. Refer to the below points-
- Spooler service may be stopped due to improper connection
- Epson printer is not connected well with computer or other device.
- Printer status is not set as “Default printer”
- Due to old or outdated printer driver Epson printer may have stopped printing.
- Dusty printer head may be a reason for this problem.
- Epson printer may be in offline mode due to which printing error may have occurred.
- Issue with the firmware of printer.
Conclusion :
These were some of the easy to-go-through guide for resolving Epson printer errors. Furthermore, if you are facing Epson printer not printing Black color properly , after changing the ink or after refill problem, refer to the last section of this article. Just follow these carefully to make your Epson printer work again.
Tags: epson printer not printing anything after windows 10 update, epson printer not printing black and white color, epson printer not printing black color after changing ink, epson printer not printing black color but has ink, epson printer not printing color properly from computer, epson printer not printing pdf documents correctly
How to Fix Blocked or Clogged Epson Printhead Nozzles: Cleaning and Unclogging Tips
Most
Epson printers have a permanent printhead. A permanent printhead has better quality and durability than a one-time-use printhead. However, the permanent printhead becomes a major problem when it is clogged. For the owners of Epson printers, there may be a day that we find the printer prints in stripes. Most people will blame the poor print on third party cartridges, ink quality, ink type switching, and so on. As an attempt to solve the problem, a person may switch back to an Epson cartridge. If the new Epson cartridge fixes the problem, the person would conclude that he or she should stay with Epson. If a new Epson cartridge didn’t fix the problem, the person would conclude that the refilling process broke the printer.
To understand why
Epson printers are so easy to clog and why sometimes a new cartridge will solve the problem, we need to understand the mechanisms behind clogging. There are three kinds of clogging:
- Clogging caused by debris, fibers, and other foreign objects
- Clogging caused by dried inks
- Clogging caused by air bubbles
The air bubble is the most common clog. The bubble can form when you are switching to a new ink, changing a cartridge, or experiencing room temperature fluctuation. It can also occur due to no reason at all.
Let’s explain why Epson’s cartridges seem less likely to clog than a refilled Epson cartridge. Epson cartridge has a built-in damper (Picture). The damper forces ink to flow one way only: from the cartridge to the damper and then from the damper to the outside. For a new Epson cartridge, the damper should be full of ink and thus less likely to have bubbles. However, most people use the cartridge until they see that a color runs out. By this time, the ink is depleted, and the damper is full of air. Once we refill the cartridge, the air in the damper can clog the printer. We recommend using a syringe to suck air from the cartridge ink outlet after each refill. Consequently, we will remove the air bubbles from the damper.
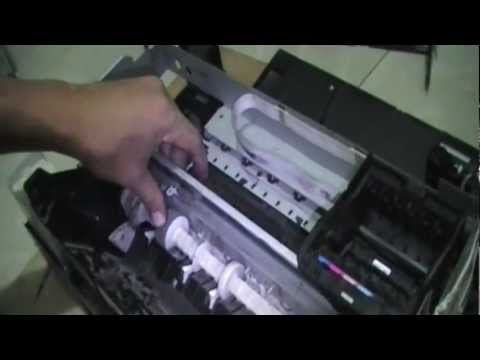
Another place that air bubbles can form is inside the printhead. We will take a closer look at where the cartridge feeds ink. There are small cone-shaped ink tubes (ink intake) on top of the printhead. When we change the cartridge, we may push some air into these intakes and create bubbles. This is why printers tend to clog right after a cartridge change.
|
|
||
|
Picture. 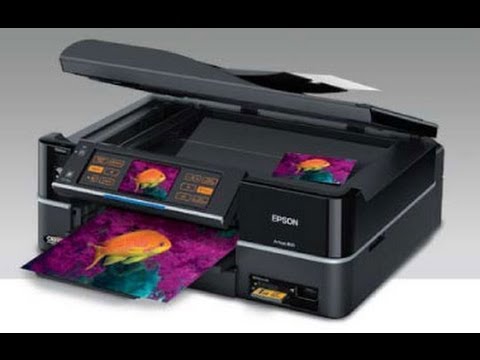 The red circle indicates ink intake. The red circle indicates ink intake.
|
Picture. A close-up of the ink intake. |
To deal with the air bubbles, many HP and Canon printers have built-in pumps. For example, an HP printer pumps air into an internal bladder, which squeezes ink out of the cartridge, and therefore flushes the air bubbles (or dirt) out of the printhead. On the contrary, Epson relies on two things: 1) an internal one-way damper that makes ink flow one-way only. 2) a built-in cleaning function which uses an external waste pad to suck and wipe the printhead. Each built-in cleaning cycle will remove some ink out of the cartridge and then dump the ink on a waste pad. However, the waste pad is poorly designed and often experiences overflowing. Once the inkpad overflows, ink will remain on the printhead and dry. The dried ink will create more clogging and make things worse.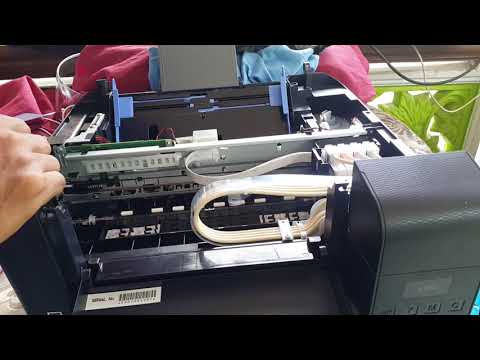 Thus, we do not recommend doing more than three head cleanings in a row.
We can illustrate the above scenario with an example. Our printer is missing a color (clogged by air bubbles). We did 7-8 built-in cleanings continuously and got it to work correctly. The bubbles were sucked out with ink, and we got back to regular printing. A day later, we found the printer was clogged again. Although the cartridge didn’t have any air bubbles, the printhead was clogged by dried ink.
If you search the word «Epson unclog» on YouTube, you can see most people simulating HP’s method. They inject fluid from the ink intake and collect waste ink with a paper towel underneath. However, this is a little bit of overkill for most clogs. Here at BCH, we perform this sequence, gradually increasing the effort and intensity of unclogging until a satisfactory result is reached.
Prevention
The best unclogging techniques are to start with prevention
Do not let the ink become depleted. If we allow the ink to become exhausted, then both the cartridge and the printhead will be full of air. When we refill a cartridge, we will use a syringe to suck the air from a cartridge’s outlet until we see ink coming out. Also, we may add a drop (1 ml) of Wetter Solution to each 100 ml ink to prevent it from drying
- BCH Wetter Solution
Built-In Cleaning Function
Epson’s self-cleaning is the most under-estimated and misunderstood method. Actually, Epson built a very powerful cleaning routine in the printer, just people don’t know how to utilize it. Most people only run one or two cleanings and give up. People worries that the cleaning will damage the printhead. Epson has a counter, that if we run more than 5 cleanings in a row, the printer will display «the printhead is damaged» and prevents from further cleaning. Therefore, we will never run more than three cleanings consecutively. We will run three cleanings, go to home screen (don’t need to wait), and then go to maintenance tab and do the next batch of cleanings.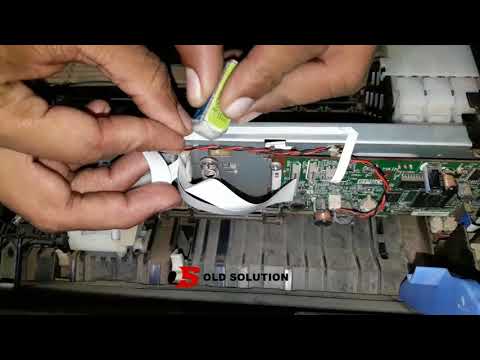
The following video shows how it is done, properly.
We will run the built-in «clean printhead» three times, then go to printer’s home screen, then back to the maintenance screen and run three more times. Afterward, we wait 12 hours, and then run 6 more times (3+3). We usually repeat the procedure three times before giving up on this method. If the technique works, we will clean the ink pad to prevent ink from drying on the printhead.
How to clean waste ink pads?
We will turn on the printer. The printer will unlock the printhead and let it move freely. Before the printer locks the printhead again, we will unplug the power cord. Thus, we can move the printhead away from its resting position.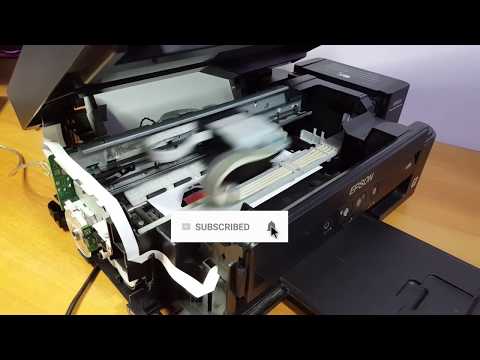 Then we will be able to see the exposed waste ink pad. We will use a paper towel to suck up the excessive waste ink and then power on the printer.
Positive Pressure — Cartridge
Slight positive pressure will wash out the air bubbles too. If we have a refillable cartridge, we will unplug the refill hole. Once the top of a cartridge is open to the air, there will be slight pressure to push the ink down and move air bubbles up. For refilled OEM cartridges, we will peel off the sealing tape and expose the drill hole. These methods create a little downward pressure on the cartridge. We will leave the cartridge in the printer overnight. We will check the result a day later and see if we need to move on to the next step. Furthermore, we will clean the waste ink pad afterward.
Positive Pressure — Titration
We can also use ink tubes to generate positive pressure. This kit (click here) consists of two tubes. These two different diameter tubes (1 ft each) can be cut and attached to each other. If we have 4 colors, we will cut each into 4 pieces, then connect to each other. The smaller tube will be attached to the ink intake and we can add cleaning solution to the larger tube. We then let the earth gravity to do the cleaning. The cleaning solution will gradually dissolve the clog and push open the nozzles. Once we see the cleaning solution is gone, we know the cleaning is completed. This video shows the process in action.
A less aggressive way of flushing the printhead
Wet Towel Method
If we decide the clog is due to dried ink, we can use a wet towel to soften the dried ink. We will unplug the printer while the printhead is unlocked, similar to the procedure in (2).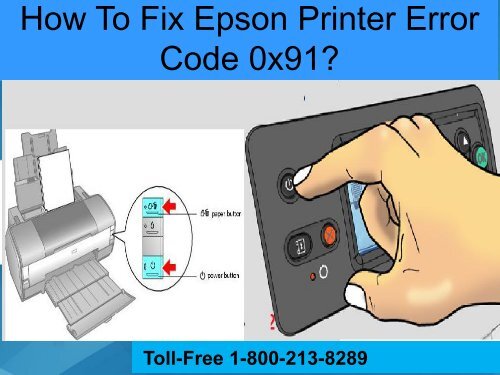 We will put a wet paper towel, soaked with hot water or cleaning solutions (LINK), in the middle of the printer. Then we will slide the printhead over the towel and let the printhead sit on top of the sheet for a few hours.
Printhead Flushing — Syringe
If we make a more rigorous attempt, we can remove the air bubbles and debris in the printhead by flushing it with liquid. We will take a syringe, fill it with liquid, and push the fluid through the cone-shaped ink intake. Some ink intakes fit a syringe, so we may not need special tools. A larger intake may need a tube to connect with the syringe.
If your printer’s ink intake are «nipples», you can use this syringe:
Size-S Syringe.
This method will flood the waste ink pad. Consequently, we will put a dry paper towel in the printer and slide the printhead on top of it, as in 4).
What liquid should we use?
Ink. The original ink is the most non-intrusive way. A «golden rule» in the ink industry says the dried ink must be able to be dissolved by the same ink. So the best solution is to use the same kind of ink in the cartridge.
Ink Base. The ink base is the liquid for making the ink before adding colorant. The ink base is a kind of ink without color. The ink base is less messy and non-intrusive to the printhead. BCH produces two kinds of ink base: dye base and pigment base.
- BCH Clear Ink Base for Dye Ink Cartridges
- BCH Clear Ink Base for Pigment Ink Cartridges
Warm water. Water is the cheapest solution. However, the printer cannot print on water, and we should flush it with a little ink afterward.
Cleaning Solutions. Cleaning Solution is used for stubborn clogs.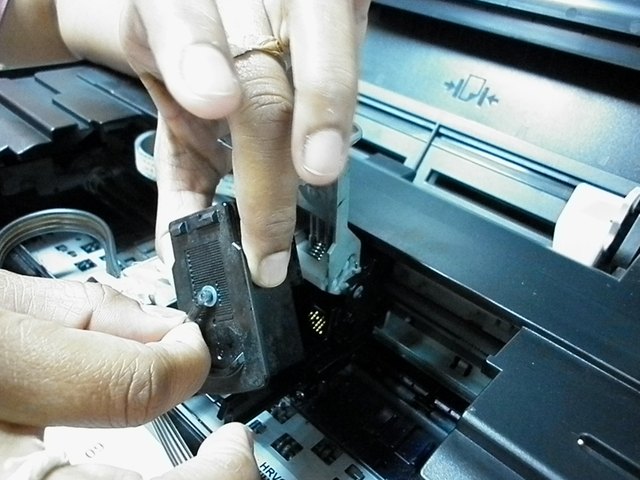 The cleaning solution can add extra push if other liquids have failed.
- BCH Dual Action Cleaning Solution for Dye and Pigment Ink
- BCH Triple Action Cleaning Solution for Dye, Pigment, and Sublimation Ink
Printhead Flushing — Cartridge
We can also take a set of refillable cartridges and fill them with cleaning solutions. Some people sell these as «cleaning cartridges».
Professional Cleaning
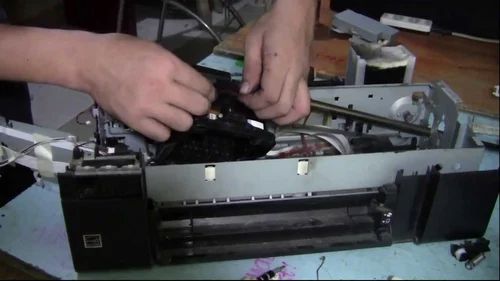
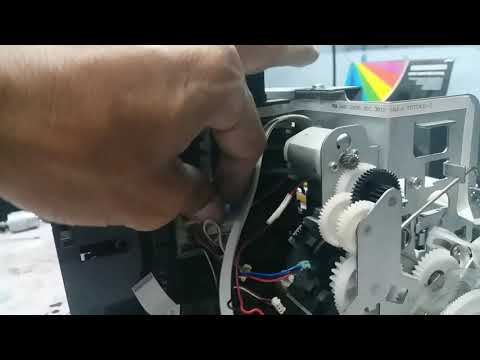
If the printhead flushing is not working, we may take the printhead out and clean it. We start by searching “remove xxx printhead” on YouTube. After we find a way to remove the printhead, we will take the printhead out.
First, we soak the printhead in cleaning solutions for a few hours. Then, we will use a high-pressure steamer to open up the nozzles and blow away debris. Finally, we will use an ultrasonic cleaner to remove clogging particles and dried ink.
This procedure should be done by professionals. We may lose a printhead this way. As a reference, we have a link here:
Videos:
Unclog Epson Artisan 1430
WF-3620 Won’t Recognize Cartridge & Clogged
Unclog WF-3640
Jan 21st 2019 BCH Technologies
Epson Printer not Printing black correctly [Solved] |
Printing errors are common in all kinds of printers.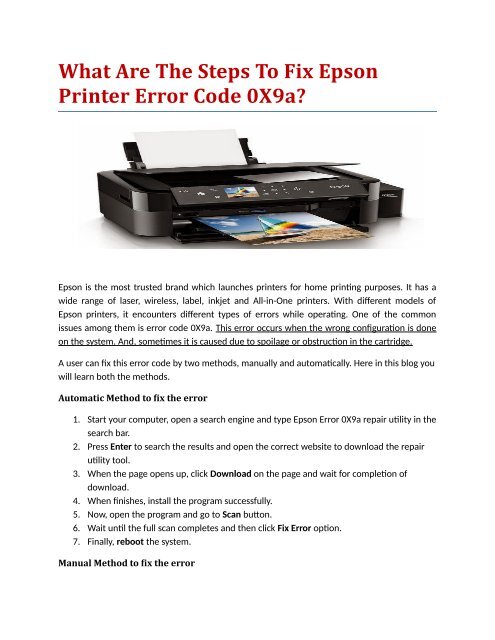 If you are an Epson printer user, you might have also faced the ” Epson printer not printing” issue. In this issue, your Epson printer does not print what you command it to print from your connected devices. As a result, you get no or blank prints from your Epson printer. There could be many factors responsible for this issue. That is why we have specified each & every reason responsible for the “Epson printer not printing” issue along with their solutions below. Have a look at them.
Epson printer not printing Error- Fix
Sometimes, small issues in your Epson printer does not allow it to print anything. That is why it is advised to run a small printer check before troubleshooting the “Epson printer won’t print” problem.
- Firstly, you have to check if your Epson printer is turned on.
- Now, ensure if your Epson printer is properly connected to the computer through the USB cable.
- You have to also verify if you have placed the ink cartridge correctly.

- Now, you have to check if you have properly inserted the printing papers into the printer’s tray.
- Check your Epson printer for error signals.
- Clean Your Epson Printer’s Printhead
If you don’t clean the printhead of your Epson printer properly. Then, it could give rise to the “Epson printer not printing” problem. When you don’t use your printer for a long time, its printhead gets clogged with ink and air. That is why you should print regularly from your Epson printer & clean its printhead. Each printer has an in-built cleaning tool for the printhead, That is why you don’t have to worry about this.
Also Read: Epson Printer is in Error state
- Clean out the Printhead of your Epson printer.
- Place the printing paper in your Epson printer’s tray.
- Open up the control panel of your Windows computer’s search located at its taskbar.
- Now, You will need to choose the “Printers and Tablets” option by clicking on it.
- Pick Computer & printer from the “Objects control panel” in Windows 10.
- Now, you have to Right-Click on your Epson printer and select the Print option from the Options menu.
- After that, Right-click on your non-printing Epson printer and click on the printing preferences option.
- At that point, you can simply click on the tab “Manage icon”.
- Now, you will see the “Epson Printer Preferences Maintenance” page, click on it.
- Under Epson Printer Repair, press on the “Head Cleaning” option.
- Now, simply push down the “Start” button.
- To repair the “Epson printer not printing” issue, you have to press the “Start” option for the Head Cleaning.
- Lastly, Follow the On-Screen instructions to complete it.
- Place a simple printing paper in the tray of your printer.
- Now, open up your Mac computer.
- After that, Tap on the Apple Menu And Go to its “Machine Settings”.
- On your Mac, click on its “Apple Menu” & select the “Device Preferences” option.
- There, Click on the “Scanner and Printer” option it shows you.
- Under the Device Preferences option, Click on the “Printers and Scanners” Option.
- After that, click on the Epson printer that doesn’t print and click on the mac “option & supplies” choice.
- Now, Go to the Utility tab first and then press the “Open Printer Utility” button.
- At this point, click on the “Utility” tab and open the “Mac Printer Utility”.
- Now, you have to simply click on the “Head Cleaning” option you see there.
- Under Printer Utility, press the “Head Cleaning” option to repair the Epson printer not printing error.
If you have already installed many printers with your computer, Then, it could also prevent your Epson printer from printing. For fixing this problem you will have to “Set your Epson printer to the defaults” on your computer, follow these steps.
- On your Windows 10 computer, click on the “Start” button & choose its Settings.
- Tap on the “Printer & Scanners” choice you see there.
- Now, you have to go to the “Devices” option and select “printers and scanners”.
- After that, click on the “Select your Epson Printer” from the Printer’s list, and then click on the “Manage” button.
- Lastly, you will have to just click on the “Set as Default” button to complete this process.
Note: Uncheck the option if you haven’t seen the “Set As Default option”.
You have now configured the Epson printer as your computer’s default printer. Try printing a paper now. You should patch an Epson non-printing printer error on your PC.
You have to check the ink levels of your Epson printer cartridge if your Epson printer is not printing anything. You can check the ink levels of your Epson by following the instructions below.
- Visit the Control Panel of your computer’s start menu.
- After that, you will need to Click & choose the “Computer & Printer” option there.

- Under the Control Panel option on your Windows 10 computer, press the “Computer & Printer” option.
- Now, you should Right-click the Epson Printer option under the “Print Preferences” window and choose the “Print Preferences” option.
- Right-click on your Epson printer and Pick the printing preferences option under the “devices & printers” option.
- Now, just simply snap on the “repair” tab.
- Select Open Status Monitor for Epson option.
- Under the maintenance menu, Open up the Epson Status Monitor by clicking on it.
- The amount of ink in the cartridges can be seen in the new pane.
- If any of them display low ink amounts, you can refill your cartridges by buying a fresh ink cartridge.
When you install your Epson printer incorrectly, It stops working in the desired way. As result, it starts to give you the “Epson printer not printing” error. If you see that error, Then you can re-install the Epson printer on your computer to fix this issue.
- Visit the “Program And Features” option by clicking on it under the Control Panel of your computer.
- Uninstall your Epson printer by right-clicking on it.
- Turn off your PC and printer now.
- Disconnect your Epson printer from the computer device.
- Restart your computer & Epson printer at the same time.
- Connect your Epson Printer to the computer
- On your computer, proceed to “reinstall” the Epson Printer.
If you don’t connect your Epson printer to the correct port. Then, it will not print what you command it. That is why be careful while connecting your Epson printer to your computer. Always insert its cables to the correct or accurate slots.
- Open up the windows settings of your PC from the settings option available under the start menu of your PC.
- Now, you have to tap on the “Computer and Printers” choice, there.
- Right-click on your Epson printer’s name and Visit its “Properties”.

- After that, you will need to “Right Click on the Epson printer not printing” option and choose the “printer options”.
- Click on the “Ports” tab under the “Properties” window, and press on the “Add Port” option.
- Now, Pick the default TCP/IP port and click on the “Epson Printer Properties” on the new port.
- After that, click on the “Next” option under the next tab.
- At that point, tap on the “Finish” button to proceed further.
- After that Tap on the “Submit” button.
- Lastly, Restart your computer and the printer.
Many times, your Epson printer doesn’t print because it does not have “updated printer drivers”. It results in your Epson printer, not printing. If you update your Epson printer drivers. Then, it will remove the printing error from it and your printer will start to print.
- Open the “Start Menu” of your computer by clicking on it.
- In the search box, search for the “Device Manager” option and press the “Enter” button.
- Now, Right-Click on the “Printer” option you see there in the list of devices & components.
- Under System Manager, press Update driver to repair the Epson printer, not printing issue.
- Then press on the “Auto Search” option for getting modified driver Apps.
- Now, Click on the “Check for modified driver software” automatically to upgrade the Epson printer’s
driver on your Windows 10 computer. - Follow Directions available On-Screen.
Sometimes, a few technical issues stop your printer from printing. In this case, you should wait for some time before proceeding forward. If your Epson printer’s printing does not resume even after a few minutes. Then, you should look out for a few things.
- Your PC will show you a “Waiting message” if it has any technical issue.
- Check your Epson printer, if it’s showing you any “odd signal lights”.
- The printer may require “head cleaning” for the cartridges, or it may take time due to job overload.
 If this is the case, Then, you should wait for at least 4-5 minutes to see if your Epson printer is working.
A very long printing task’s queue could also arise the “Epson printer not printing” error. If you face this issue, Then, you have to clear down the printing tasks que to fix this issue.
- You will see the long printing queues on your Epson printer. If you have given it the hundreds of documents to print or you have used it for a very long time, stopping your Epson printer from printing.
Follow these measures to clear your Epson printer’s printing queues
- Firstly, you have to press the Windows and R Key together from your Computer keyboard.
- It will open up the “Run” box on your computer.
- Now, you will have to type the “Services.MSc” in that run box.
- Now, click on the “ok” button from your computer’s mouse.
- It will open the “Services” window on your computer screen.
- Now, you have to right-click on the “Print spooler” option & click on the “Stop” option.
- After that, you will be required to open the “File Explorer” on your computer.
- Now, paste the %Windir%\System32\Spool\PRINTERS into its address bar.
- After a second, a folder will open up before you & you will have to remove all the files from it.
- Now, go back to the “Services” window & “start” the print spooler again by clicking on it.
- It will surely troubleshoot the “Epson printer not printing” issue.
Also Read: Epson communication Error
Epson printer printing Blurry
Sometimes, An Epson printer starts to print blurry documents, images you command it to print. You can solve this issue by following a few simple steps inside the settings menu of your Epson printer.
- First, you have to go to the “Menu” of your Epson printer device,
- Now, you will have to click on the “Main menu” option available there.
- Opt for the “Media type” according to your prints you need.
- Now, make sure if your paper settings are correct and correct it according to your printing needs to eliminate the “Epson printer printing blurry” error.
Epson Printer not printing black
Problematic printer cartridge & printhead is the main reason responsible behind the “Epson printer not printing black” issue. You should follow the below-mentioned steps to fix this issue.
- Firstly, Open your Epson printer’s panel & insert the printer cartridge correctly after taking it out from its place.
- Secondly, Make sure your Epson printer has sufficient black ink levels by checking its ink status.
- Sometimes, the Printer cartridge clogs down because of ink flow. In that case, you should clean the Clodges from it using a pin or something else.
- You can fix the “Epson printer not printing black” ink issue by cleaning its printhead using the distilled water, and sponges.
- The printhead of the printer can also be cleaned by running a cleaning cycle on your printer.
- In that case, you can also turn off your Epson printer and leave it for at least 15 minutes on rest.
- Using a clean & dry towel, wipe the printhead with it and slide it to its original place.
- Always use genuine cartridges and printing sheets that are compatible with your Epson printer.
Epson Printer Not printing properly
There could be multiple reasons responsible for the “Epson printer not printing properly” issue. You can follow the direction below to fix this issue properly.
- You should always place the printable side of the print sheet faced up while inserting it in the paper input tray.
- It is advised to “Run the Head Cleaning Utility” to clear the clogged ink nozzles on your Epson printer.
- After that, you can run the “Print Head Alignment Utility” to correctly address the Epson Printer Not Printing issue.
- Open the “main menu” of your Epson printer app.
- In the mode settings, you will have to select the “Automatic” mode.
- If the ink light is flickering, replace the dried-up ink cartridge on your Epson printer.
- Now, you will have to “Customize” the settings of the “Printable area” according to your needs & requirements.
- Change the Color settings in your printer program to print colors correctly & accurately while printing.
- Check if you have the correct “Media Type” setting in the driver of your Epson printer.
Also Read: Epson scanner not communicating with Epson scan
Epson printer not printing colors correctly
- Firstly, you have to check the color settings of your Epson printer & make sure it is not selected to “Black/Grayscale or Grayscale” settings.
- You will need to perform a nozzle search to check if any of the print head nozzles are clogged. You can clean the printhead of your Epson printer if you find any of the nozzle clogged.
- Check the ink cartridges of your Epson printer.
It might be old or low on ink and needs to be replaced.
- You will need to manage the colors of the prints on the color management option available under Epson printer’s software and get an almost similar color print of what you see on your computer screen.
- You should always use authentic Epson ink and paper to get the best printing performance.
If your Epson printer is not printing colors, or black ink properly, despite of performing all of the troubleshooting steps mentioned above. Then, you can contact Epson tech support to get the best help regarding it within no time.
You may also read: Epson printer offline
Epson Printer Not Printing: FIXED (Easy Troubleshooting Guide)
If your Epson Printer is Not Printing or getting problems with printing. Read this guide to resolve all Epson printing related issue with easy troubleshooting steps.
Table of Contents
Epson Printer Not printing problems and solutions
It is really very annoying when you have some urgent printing work & your Epson printer not printing as desired. Sometimes Epson printer stops printing suddenly. this problem is not with only Epson printer but it could be the case with any printer due to some technical reasons. Suddenly printer users may face problems in printing. There can be several reasons behind this problem with the printer. Most of these problems can be easily fixed by you. Read this post to know more.
Contents
Steps to Fix Epson Printer Not Printing Problem
More Problems with Epson Printer
Epson Printer Not printing: Problem Overview
Is your Epson printer not printing properly? Or is it not printing at all? whatever may be the situation or problem this post will help you resolve these Epson printer printing problems for sure. Several technical factors can cause Epson printer not working issue. Some of these factors can be very complicated in nature. Other factors may be simple. Reading this post can make you able to fix Epson printer and get it to work. You will be able to resolve below problems & queries of Epson printer.
- How to fix Epson printer not printing
- printer not printing properly
- printer not printing after changing/refilling ink
- Epson printer not printing wirelessly
- Why is Epson printer not printing black?
- Epson printer printing blank
- Epson printer problems and solutions
Steps to fix Epson Printer Not printing problems
- Clean Printhead For Windows OS
- Clean The Printhead For Mac OS
- Set Epson Printer As The Default Printer
- Check Ink Cartridge For Low Ink
- Use New Ink Cartridge
- Reinstall Epson Printer On Your Computer
- Installing Epson Printer On Windows
- Install Epson Printer On Mac OS
- Correct Port For Epson Printer
- Update Epson Printer Driver
- Wait For Epson Printer To Resume
- Clear Long Print Queues And Go Easy On Long Queues
How to Fix Epson Printer Not printing
Sometimes, it is possible that Epson printer not printing problem is caused by a small and simple reason. Hence, it is advisable to run a small check before troubleshooting the printer with complicated technical steps.
- Check whether the printer is turned on
- The printer is properly connected with the computer via USB
- Check whether the ink cartridge is set properly
- Check whether you have paper properly put in the tray
- Make sure that the printer is not giving any error signal
- Clean the Printhead of Your Epson Printer
Epson printer not printing issue may occur if the printhead is not clean properly. Sometimes due to less use of printer, Printhead get clogged. You need to clean the printhead to perform the print. Every printer has inbuilt tool to clean the printhead so you need not worry about this. To clean the printhead follow the below-given steps
-
Step-1
Clean Printhead For Windows OS
- Keep a plain paper in the tray.
- Search “Control Panel” in the search box on the Taskbar and open it.
- Click on devices and printers.
- Right-click on your Epson printer and choose Printing Preference from the options menu.
- Click on the manage tab.
- Now click on Head Cleaning.
- now click on Start.
- Follow the on-screen Instruction.
-
Step-2
Clean the Printhead for Mac OS
- Keep a plain paper in the tray.
- Go to the Mac OS desktop.
- Click on Apple Menu and Go to System Preferences.
- Click on printer and scanner.
- Now click on your printer and click on options & supplies.
- Click on utility tab and click on Open printer utility.
- now Click on Head Cleaning.
-
Step-3
Set Epson Printer as the Default Printer
When there are multiple printers installed then not setting the Epson printer as default will cause the Epson printer not working problem. Follow these steps to set the Epson printer as default on your computer
- go to the Start Menu and click on Setting.
- Click on the Printer & Scanners menu item.
- Go to Devices then Printers and Scanners.
- Select the Epson printer from the list of printers and click on the Manage option.
- then click on Set as default button.
Note: If you didn’t see “Set As Default” option Uncheck the box “Let Windows manage my default printer” screen-short has given Below.
Now you have set the Epson printer as the default printer on your computer. Now try printing a document. Epson printer not printing error should be fixed on your PC.
-
Step-4
Check Ink Cartridge for Low Ink
You can also check your Epson printer for low ink levels of cartridges to make sure it is not causing the Epson printer not printing/working problem. Epson Status Monitor 3 is the tool provided by Epson to view ink levels and printer status. Follow the below-given steps
- Search “Control Panel” in the search box on the taskbar.
- Now Click On Control Panel.
- Click on Device and Printer.
Note: If You Didn’t Find Device & Printer, Look Right Top Of The Page View By > Click On Down Arrow Icon > Then Select Large Icon.
- Right-click on the Epson printer listed in the window and Select the printing preferences option.
- Now Click on the maintenance tab.
- Click to open the Epson Status Monitor 3.
- In the new window you can see the ink level in the cartridges.
You Should refill your cartridges if any of them show low levels of ink. It is best practice to buy a new ink cartridge after few refilling.
-
Step-5
Use New Ink Cartridge
If you are using an old ink cartridge from a very long period of time then you will also need to change the cartridge as it may cause the Epson printer not working and printing. Many times, people get their old cartridges refilled but this does not always go well with the printers.
-
Step-6
Reinstall Epson Printer on Your Computer
Epson printer not printing/working can arise due to improper installation. Reinstall the Epson printer on your system to fix this issue. Follow the below-given steps
- Go to the Control Panel -> Programs -> Programs and features.
- Right-click on the Epson printer and click on uninstall.
- Now turn off your computer and printer.
- Disconnect the printer from the computer.
- Restart the computer and printer after a few minutes
- Connect the Epson printer with Computer
- Proceed to reinstall the Epson printer on your computer
-
Step-7
Installing Epson Printer on Windows
- Go to the Start Menu.
- Click on Settings.
- Now Click on Select Devices.
- then click on Printers and Scanners.
- Now Click on Add a printer or scanner.
- Follow the on-screen instructions.
-
Step-8
Install Epson Printer on Mac OS
- Click this link to download and install the Epson Connect Printer Utility for Mac
- Click on Continue upon opening the utility.
- now click continue and then click on Agree.
- Click on Install and
- pop-up window open and asking your mac computer login password.
Now the Epson printer is reinstalled on your Mac computer. This should fix the Epson printer not working issue.
-
Step-9
Correct Port for Epson Printer
Due to lack of proper port during printer installation Epson printer not working problem may occur. You can change the printer port for Epson printer without reinstalling the printer. Follow these steps to reassign a correct port for the printer
- Search “Control Panel” in the search box on the Taskbar and open it.
- now click on Device and printer.
- Select your Printer and Right Click on it and Go to printer properties.
- In the properties Window Select Ports Tab and click on add port.
- Select the Standard TCP/IP port and click on the new port.
- Click next on the Next page.
- Click Finish to close the wizard.
- Now click on the Apply button.
- Restart the computer and the printer.
When you will restart the computer and the printer, it should work fine.
-
Step-10
Update Epson Printer Driver
When the printer driver for Epson is out of date then it may also lead to Epson printer not working. To solve this problem is easy. Just perform the following steps to update Epson printer driver on your computer or laptop
Update Printer Driver on Windows
-
- Go to Start Menu
- Type Device Manager in the box and press Enter.
- Now Find the Printer and Expand it.
- Select your printer and right-click on it.
- Now click on update driver from the options menu.
- Then click on Search automatically for updated driver software.
- Follow the on-screen instruction.
-
Step-11
Wait for Epson Printer to Resume
Sometimes as it happens, the Epson printer may stop working unexpectedly. It is possible that some error has occurred or some technical process has halted the printer. In this case you should be patient. Do the following
- Check your desktop carefully for any wait messages
- Observe the Epson printer for any unusual signal lights
It is possible that printer is head cleaning the cartridges or it is taking time due to overload of work. If this is the case then you should wait for 4-5 minutes to see if printer starts to work.
-
Step-12
Clear Long Print Queues and Go Easy on Long Queues
A very long print queue on your Epson printer may result in Epson printer not working issue. If you are printing hundreds of documents or using your printer for a very long time then long print queue will be formed and prevent Epson printer from working.
Follow these steps to clear queues on computer
- Press the Windows logo key and R Key simultaneously.
- Type the services.
msc in the box.
- Find the printer Spooler.
- Right-click on Print Spooler and Click on Stop.
- Now go to Desktop and open File Explorer
- Type this address in the address bar (You can copy and paste as well).
- %windir%\System32\spool\PRINTERS.
- Delete all the files in the folder that opens.
- Now go back to Print Spooler Properties.
- Right-click on printer spooler and click on start.
This should fix the Epson printer not working problem
Epson Printer Not printing / Working Properly – More Problems with Epson Printer
Not Printing Black Ink
Epson printer may be unable to print in black ink. The reason behind can be some problem with the cartridge or Printhead. If your Epson printer not working properly and not printing the black ink while printing then follow the below given steps.
Set the Cartridge Properly
One of the major reasons behind Epson printer not printing black can be improperly set cartridge.
- Open the cabinet of the Canon printer
- Get the Black ink cartridge out
- Put the Cartridge back inside
- Take care to properly snap the cartridge in the place
Check the Ink Status
This is the first step to take. If the Epson printer is not printing black ink then ink can below.
- Double Click Epson Printer Icon on Your Desktop
- Go to Tools à Epson Status Monitor 3
- Check the level of Black Ink
If the black ink level in your computer is low then you need to change it.
Clean the Black Ink Cartridge
Sometimes the clog on the cartridge can be jammed because of the ink flowing through it. This jam can create Epson printer not working problem. Take out the cartridge from the printer and clean the clog with a pin.
Epson Printer Not Printing properly – Printing problems solution
Users of Epson printer sometime face problems related to the quality of print out. You get print but quality you do not get as expected. Due to improper settings on your computer Epson printer printing quality can be compromised on your computer. Following problems, you may face while printing, we will explain the solution to these problems.
Blurry Print Out
It is possible that Epson printer not working properly and giving a blurry printout. Configure the following settings in your printer
- Go to Epson Menu
- Click on the Main menu
- Select Media Type
- Check the settings for paper
Print out with Gaps
There can be many reasons for an improper print out with gaps. Try the following
- Go to Media Type in Main menu and check for Papers
- Check the Expiration Date of Ink Cartridge
- Run the head cleaning Utility
Horizontal or Vertical Misalignment
If the Epson printer is going too fast then it can cause horizontal and vertical misalignment. This can be fixed in the advance settings of Epson printer
- Open the Epson printer window
- Go to print settings
- Now go to advance settings tab
Here you can set the printing speed at a low pace. This will solve the misalignment problem on the printer.
Printer is Too Slow
If you have heavy printing work at your expense and you think that the printer is going slow then you can speed up the printing process.
- Go to the desktop
- Double click on the Epson printer icon
- Go to print settings
- Click on the Advance Tab
- Set the speed for printing
Tips to Avoid These Problems in Future
You can avoid printing related problems with your Epson printer and keep it as a new one even after a long time. Just take care of maintaining the printer. Follow the below guidelines to keep your Epson printer fine for a long period of time.
- Change ink cartridge after every few months
- Keep the print head clean during its use
- Keep cleaning the printer once in a month
- Use the Epson printer gently
- Keep the power cord and USB cable in shape
- Always take the printer to the authorized service center only until in the warranty period
- Do not try to fix the Epson printer by yourself
Contact Official Epson Support
If the above guide is not able to solve your Epson printer not working problem then you can also contact the official support for Epson printers. Here you will get expert support that can solve problems with your Epson printers.
Final Words: Conclusion
Epson printer may not work properly all the time. This blog can help you fix major issues with your printer. Do let us know in the comments below your thoughts about our blog. You can also ask us any questions related to your Epson printer.
- Post last modified:March 29, 2020
- Post published:December 9, 2019
- Post category:Epson Printer / Printers
report this ad
Price list for the repair of inkjet printers
| Service name | Price | Service description |
|---|---|---|
|
Diagnostics |
from500 |
Before starting work with the printer, it is necessary to accurately determine the cause of the breakdown in order to select the correct solutions. |
|
Printer drain installation (indiscriminate) |
from500 |
For the full operation of the printer and the launch of new cartridges, the printer merges part of the ink into a specially designed absorbent «diaper» material. This occurs when cleaning the print head, installing new cartridges, or after the printer has been idle. Most of the ink drains when cleaning. Over time, the absorbent material overflows and either needs to be replaced or, more economically, drained to the outside. At the same time, a tube is removed from the printer through which the waste ink is drained into a container located near the printer. The benefit is that with intensive printing you do not need to constantly pay for the cost of replacing the absorbent material, as well as the fact that you will clearly see the level of waste ink. |
|
Installing the drain on the printer (with disassembly) |
from 1000 |
In some cases, a design feature of the printer requires the printer to be disassembled to allow the drain to come out. In this case, the cost increases due to the features of the installation and the time spent. |
|
Reset waste ink counter (simple) |
from500 |
While the printer is in operation, it is technically necessary to partially dump the waste ink into a specially designed absorbent material «diaper» for cleaning the print head and in order to pull the ink into the print head. |
|
Reset waste ink counter (with code) |
from 1000 |
This option includes resetting the waste ink counter which requires the use of specialized software or a reset code. In this regard, this service is more expensive than a similar one with a simple reset. |
|
Cleaning the print head |
from2500 |
The work of an inkjet printer is based on the use of ink, which has one of the disadvantages of the possibility of running out and drying out when volatile compounds evaporate with direct access to air. Therefore, it is very important not to leave the printer idle for a long time and not to remove cartridges from it unnecessarily. A common problem is drying ink inside the print head or on the parking assembly. Which in the first case leads to the fact that the printer prints in stripes or does not print at all, and in the second case it leads to the print head getting stuck in the parking area due to blocking the moving parts of the parking lot with dried ink. To solve these problems, it is necessary to carry out a qualified cleaning of the print head and the parking unit, which our specialists will offer. |
|
Print head cleaning — intensive cleaning with aggressive mixtures |
from3000 |
Long periods of inactivity without printing, use of poor quality or old ink, or close proximity to heat may cause more severe clogging of the print head, parking assembly, and drain system. In these cases, it is necessary to move on to more effective measures. Use of aggressive mixtures, physical impact and possible conservation for long periods. The use of these procedures without prior preparation and in the absence of experience may result in the failure of your printing device. Use the services of professionals for such procedures, do not experiment! |
|
Cartridge installation |
500 |
If you have no previous experience with inkjet technology and you need advice and a demonstrative demonstration on installing or replacing cartridges in a printer, our specialists will provide you with advice and demonstrate clearly on your equipment. |
|
Install refillable cartridges with refill |
700 |
If you have no previous experience with inkjet technology and you need advice and a demonstrative demonstration on installing or replacing cartridges in a printer, our specialists will provide you with advice and demonstrate clearly on your equipment. (The demonstration is made on your equipment and on your consumables). |
|
Installation and refilling of CISS |
from 1500 |
If you have large print volumes, to save money on buying cartridges, a good solution is to install a continuous ink supply system (CISS). |
|
Paper Feeder Replacement / Repair |
from 1500 |
When printing large volumes or when printing on heavy paper, the paper feeder wears out over time. Also, often the cause of this problem is the ingress of foreign objects into the feeder, such as paper clips, stapler staples, etc. If in some cases it is possible to repair damaged elements, then in case of more serious damage, the problem can only be solved by completely replacing the feeder, for which it is necessary to disassemble the printer. The price for this service is calculated based on the complexity of the necessary actions. |
|
Print head replacement (PH) |
from 1500 |
Each printer element has its own resource. So the print head of the printer has a resource that it should depart without problems. After the exhaustion of this resource, the wear of the print head reaches a state after which it may fail. Also, long downtime without printing can lead to failure — drying of ink, use of low-quality ink and careless handling of the printer. In this case, it is necessary to replace the print head. And in some cases, the failure of the print head leads to the failure of the motherboard, which is fraught with the replacement of both the print head and the motherboard at once. The price of work depends on the model of the printer and the characteristics of the breakdown. |
|
Replacement / repair of contact group |
from 1000 |
In order for the printer to recognize and interact with cartridges, a contact group is located at the cartridge installation site. |
Repair of Epson printers in Moscow with the visit of a master, prices, warranty It should be noted that for many years the repair of Epson printers, if carried out, is often not the fault of the manufacturer.
Usually, breakdowns concern only those Epson devices, during the use of which elementary operating standards were not observed. If this happened, the AST-Print service company will solve this problem.
Repair of office equipment may be required in such cases: non-professional intervention, improper operation, long-term use. As a rule, the AST-Print service center receives equipment with various problems after unsuccessful repair work. This greatly increases both the duration of the repair and the cost. Because of this, it is recommended to immediately trust office equipment to experienced craftsmen who will carry out high-quality and professional equipment repairs.
If you need to repair Epson printers, the correct and financially beneficial solution is to apply to our company. Initially, we will provide you with consulting assistance. Immediately before repair work, a diagnosis of the mechanisms of a faulty device is carried out in order to correctly determine the appearance of problems.
The repair of devices will allow you to fully restore the functioning of broken equipment, and the price of such an event will make it possible to save on the purchase of a printer.
This brand’s laser machines stand out for their fast operation, convenient use and excellent print quality. However, Epson office equipment sometimes breaks down, just like other equipment.
A common cause for inkjet printers and MFPs to fail is problematic ink supply due to the print head drying out or overheating. Often, repairing an Epson inkjet printer makes it possible to restore its functional characteristics; for this, cleaning with special solutions and devices is used. Do not forget that in the case of self-cleaning of the head by washing with strong solutions, this will most likely provoke its complete malfunction. Even if the head becomes working immediately after such a procedure, it will not last long.
The next most common problem in diagnostics is a malfunction in the head control system. In this situation, the replacement of the main transistors in the control mechanism, which fail due to a short circuit or after a long overheating, will help.
If there is no reaction to switching on, the repair work of office equipment may consist in diagnosing and repairing the main electronic board. In this case, the choice of interchangeable spare parts will be required, which will significantly affect the price of such a repair.
A common occurrence for office equipment of this brand is encoder contamination. It is strictly forbidden to wash it with aggressive liquids, in particular alcohol. Usually, when contaminated with grease or leaking ink, this unit should be completely replaced.
Note that the repair of the device is required in case of mechanical failures of the paper feed units, positioning mechanisms, cables, and connectors, in case of breakdown of the carriage or other important systems of the device.
Our specialists will refill the cartridges if necessary and finalize the device.
Repair of the 1st category: diagnostics of malfunction of units and components of the equipment, which does not require disassembly of the apparatus, visual inspection, minor repairs, replacement of elements in the units of the apparatus (rollers, brake pads, etc.)
Repair of the 2nd category: diagnostics malfunction of units and components of equipment, requiring disassembly of the apparatus, visual inspection, repair, replacement of units and parts, requiring partial disassembly of the apparatus.
Category 3 repair: fault diagnosis by complete disassembly of the machine, fault detection, recovery of worn out parts, replacement of faulty parts, software update, complete cleaning of equipment, component repair, repair of power and control boards, soldering, etc.
The cost of consumables, assemblies, parts, assemblies is not included in the cost of repairs.
Issuance of a technical opinion is issued to the client upon request and is paid separately, regardless of the category of repair.
If it is impossible to repair the equipment due to the lack of spare parts, components, assemblies, due to the lack of supplies, the client pays for diagnostics.
Our masters will quickly and efficiently repair any Epson printer models. Because they always follow the repair procedure in accordance with each specific modification.
To repair Epson printers in Moscow, please contact us at a convenient time for you. You can order a visit of a specialist on the website of the AST-Print company.
ActionLaser
100 1000 1200 1500 1600 1700 1900
AcuLaser / AL
CX11, MX14 CX16 CX17 MX20 CX21 CX29 CX37 C900 C1000, C1100, M1200, M1400, C1600, C1700, C1750, C1900, C2000, M2000, M2300 , M2400, 2600, C2600, C2800, C2900, C3000, C3800, C3900, C4000, M4000, C4100, C4200, M8000, C8500, C8600, C9100, C9200, C9300
EPL
N1200, N1210, N1600, N1610, N2000 , N2010, N2050, N2550, N2700, N2750, 3000, N3000, 4000, N4000, 4100, 4300, 5000, 5200, 5500, 5600, 5700, 5800, 5900 6100 6200 7000 N7000 7100 7500 8000 C8000 8100 C8200 9000 9100
GQ
3500 5000
B300, B310, B500, B510
ColorWorks
C3500, C7500, C7500G
Expression Home XP
33, 103, 203, 207, 303, 306, 313, 323, 403, 406, 413, 423
Expression Premium XP
600, 605, 700, 710, 800, 820
GP
C831, M831
K101, K201, K301
L1110, L110, L130, L132, L211, L211, L211, L211, L211, L211, LP . , L1455, L1800, L3050, L3060, L3070, L3100, L3101, L3110, L3150, L3151, L4150, L4160, L6160, L6170,L6190, L7160, L7180
M100, M105, M200, M205, M1100, M1120, M1140, M2140, M3140, M3170
PictureMate PM240, PM260, PM280, PM290, 500
PP50, PP100
Stylus
C20, T20 , S22, T26, T27, C40, C42, C43, C44, C45, C46, C48, DX50, C60, DX60, C62, C63, C64, C65, C66, C67, D68, C70, D78, C79, C80, C82 , C84, C86, C87, D88, C91, D92, TX100, TX106, TX109, C110, TX117, TX119, D120, SX125, SX130, 200, TX200, TX209, TX210, SX215, SX218, TX219, SX230, C2 SX23 , 300, 400, TX400, TX409TX410, TX419, SX420, SX425, SX430, SX435, SX438, SX440, SX445, SX525, SX535, TX550, SX600, SX620, 800, 820, 1000, 1500, CX3200, CX3500, CX3600, CX3650, CX3700, DX38800, DX3885 , CX3900, DX4000, DX4050, CX4100, DX4200, DX4250, CX4300, DX4400, DX4450, CX4700, DX4800, DX4850, CX4900, DX5000, DX5050, CX5200, CX5400, CX5900, DX6000, DX6050, CX6400, CX6600, CX6900, DX7000, CX7300
Stylus Color
II, Photo, 200, 300, 400, 440, 460, 480, 500, 580,6 685, 740, 760, 777, 800, 850, 860, 880, 900, 980, 1160, 1520, 3000S
tylus Office
T30, T40, B42, TX300, BX305, BX320, TX510, BX525, BX535, TX600, BX625, BX630, BX635, BX925, BX935, T1100
Stylus Photo
EX, EX2, P50, T50, T59, R200, R220, R240, R265, R270, R285, R290, R295, R300, R320, R340, R360, R390, RX500, RX520, RX560, RX585, RX595 , 2595
750 790 PX800 R800 TX800 810 PX810 PX820 830 PX830 870 875 890 895 900
R1800, R1900, 2000, R2000, 2100, R2400, R2880, R3000
Stylus Pro
XL, XL+, 3800, 3880, 4000, 4400, 4450, 4800, 4880, 4900, 5000, 5500, GS6000, 7000, 7400, 7450, 7500, 7600, 7700, 7800, 7880, 7890, 7900, WT7900, 9000, 9400, 9450, 9500, 9600, 9700, 9800, 9880, 9890, 9900, 10000, 10600, 11800, 11880
StyLus Stylus Scan
2000, 2500 SureColor / SC
[P400, P600, P800, F2160, T3000, T3200, T3400, T5000, T5200, T5400, B6000, F6000, P6000, F6070, F6080, F6200, B7000, F7000, P7000, P7000V, T7000, F7070, F7080, F7100, F7200, T7200, P8000, P9000, P9000V, F9200, F2000(4C), F2000(5C), F2100(4C), F2100(5C), S30610, S40610, S60610, S80610, S80610 S50610(4C), S50610(5C), S70610(8C),S70610(10C)
SureLab / SL
100
WorkForce / WF , 2520, 2530, 2540, 2630, 2650, 2660, 3010, 3520, 3530, 3540, 3620, 3640, 7015, 7110, 7210, 7510, 7515, 7525, 7610, 7620, 7710, 7720, C17590, C20590, M20590
WorkForce Pro / WF
C529, C869, 4630, 4640, 5110, 5190, M5190, R5190, C5210, C5215, C5290, M5298, M5299, 5620, 5690, M5690, R5690, C5710 , C5790, M5799, 6090, 6590, 8010, 8090, C8190, 8510, 8590, R8590, C8690
0, 4095, M4095, 4515, 4520, 4525, M4525, 4530, 4533, 4535, 4540, 4545, 4590, 4595, M4595
|
Repair MFP EPSON ARTISAN 730 |
Repair EPSON EXPRESSION HOME XP-100 |
|
Repair EPSON EXPRESSION HOME XP-103 |
Repair MFP EPSON EXPRESSION HOME XP-200 |
|
Repair EPSON EXPRESSION HOME XP-203 |
Repair EPSON EXPRESSION HOME XP-207 |
|
Repair MFP EPSON EXPRESSION HOME XP-303 |
Repair MFP EPSON EXPRESSION HOME XP-306 |
|
Repair MFP EPSON EXPRESSION HOME XP-313 |
Repair MFP EPSON EXPRESSION HOME XP-315 |
|
Repair MFP EPSON EXPRESSION HOME XP-323 |
Repair EPSON EXPRESSION HOME XP-403 |
|
Repair EPSON EXPRESSION HOME XP-406 |
Repair MFP EPSON EXPRESSION HOME XP-413 |
|
Repair MFP EPSON EXPRESSION HOME XP-420 |
Repair EPSON EXPRESSION HOME XP-423 |
|
Repair EPSON EXPRESSION HOME XP-600 |
Repair EPSON EXPRESSION HOME XP-610 |
|
Repair EPSON EXPRESSION HOME XP-700 |
Repair EPSON EXPRESSION HOME XP-710 |
|
Repair MFP EPSON EXPRESSION HOME XP-720 |
Repair MFP EPSON EXPRESSION HOME XP-800 |
|
Repair EPSON EXPRESSION HOME XP820 |
Repair MFP EPSON K201 |
|
Repair MFP EPSON K301 |
Repair MFP EPSON L210 |
|
Repair MFP EPSON L222 |
Repair MFP EPSON L3050 (C11CF46405) A4 with Wi-Fi |
|
Repair MFP EPSON L3060 |
Repair MFP EPSON L350 |
|
Repair MFP EPSON L355 |
Repair MFP EPSON L355 |
|
Repair MFP EPSON L362 |
Repair MFP EPSON L364 |
|
Repair MFP EPSON L366 |
Repair MFP EPSON L382 |
|
Repair MFP EPSON L386 |
Repair MFP EPSON L456 |
|
Repair MFP EPSON L486 |
Repair MFP EPSON L550 |
|
Repair MFP EPSON L555 |
Repair MFP EPSON L605 |
|
Repair MFP EPSON L655 |
Repair MFP EPSON M200 |
|
Repair MFP EPSON M205 |
Repair MFP EPSON PREMIUM HOME XP-605 |
|
Repair MFP EPSON STYLUS CX3200 |
Repair MFP EPSON STYLUS CX3500 |
|
Repair MFP EPSON STYLUS CX3700 |
Repair MFP EPSON STYLUS CX3900 |
|
EPSON STYLUS CX4100 MFP Repair |
Repair MFP EPSON STYLUS CX4300 |
|
Repair MFP EPSON STYLUS CX4700 |
Repair MFP EPSON STYLUS CX4900 |
|
Repair MFP EPSON STYLUS CX5200 |
Repair MFP EPSON STYLUS CX5400 |
|
Repair MFP EPSON STYLUS CX5900 |
Repair MFP EPSON STYLUS CX6400 |
|
Repair EPSON STYLUS CX6600 MFP |
Repair MFP EPSON STYLUS CX6900F |
|
Repair MFP EPSON STYLUS 7300 |
Repair MFP EPSON STYLUS CX8300 |
|
Repair MFP EPSON STYLUS CX9300F |
Repair MFP EPSON STYLUS NX130 |
|
Repair MFP EPSON STYLUS NX420W |
Repair BFP EPSON STYLUS OFFICE BX305F |
|
Repair BFP EPSON STYLUS OFFICE BX320FW |
Repair BFP EPSON STYLUS OFFICE BX525 |
|
Repair BFP EPSON STYLUS OFFICE BX535 |
Repair BFP EPSON STYLUS OFFICE BX625FWD |
|
Repair BFP EPSON STYLUS OFFICE BX630 |
Repair BFP EPSON STYLUS OFFICE BX635FWD |
|
Repair BFP EPSON STYLUS OFFICE BX925 |
Repair BFP EPSON STYLUS OFFICE BX930 |
|
Repair BFP EPSON STYLUS OFFICE SX125 |
Repair BFP EPSON STYLUS OFFICE TX300F |
|
Repair of BFP EPSON STYLUS OFFICE TX510FN. |
Repair BFP EPSON STYLUS PHOTO PX650 |
|
Repair BFP EPSON STYLUS PHOTO PX660 |
Repair BFP EPSON STYLUS PHOTO PX700W |
|
Repair BFP EPSON STYLUS PHOTO PX710W |
Repair BFP EPSON STYLUS PHOTO PX720WD |
|
Repair BFP EPSON STYLUS PHOTO PX730WD |
Repair BFP EPSON STYLUS PHOTO PX800 |
|
Repair BFP EPSON STYLUS PHOTO PX810FW |
Repair BFP EPSON STYLUS PHOTO PX820FWD |
|
Repair BFP EPSON STYLUS PHOTO PX830FWD |
Repair BFP EPSON STYLUS PHOTO RX500 |
|
Repair BFP EPSON STYLUS PHOTO RX520 |
Repair BFP EPSON STYLUS PHOTO RX560 |
|
Repair BFP EPSON STYLUS PHOTO RX585 |
Repair BFP EPSON STYLUS PHOTO RX590 |
|
Repair BFP EPSON STYLUS PHOTO RX600 |
Repair BFP EPSON STYLUS PHOTO RX610 |
|
Repair BFP EPSON STYLUS PHOTO RX615 |
Repair BFP EPSON STYLUS PHOTO RX620 |
|
Repair BFP EPSON STYLUS PHOTO RX640 |
Repair BFP EPSON STYLUS PHOTO RX650 |
|
Repair BFP EPSON STYLUS PHOTO RX685 |
Repair BFP EPSON STYLUS PHOTO RX690 |
|
Repair BFP EPSON STYLUS PHOTO RX700 |
Repair BFP EPSON STYLUS PHOTO TX106 |
|
Repair BFP EPSON STYLUS PHOTO TX109 |
Repair BFP EPSON STYLUS PHOTO TX400 |
|
Repair BFP EPSON STYLUS PHOTO TX510 |
Repair BFP EPSON STYLUS PHOTO TX600FW |
|
Repair BFP EPSON STYLUS PHOTO TX650 |
Repair BFP EPSON STYLUS PHOTO TX659 |
|
Repair BFP EPSON STYLUS PHOTO TX700W |
Repair BFP EPSON STYLUS PHOTO TX710W |
|
Repair BFP EPSON STYLUS PHOTO TX800FW |
Repair MFP EPSON STYLUS SX130 |
|
Repair MFP EPSON STYLUS SX230 |
Repair MFP EPSON STYLUS SX235W |
|
Repair MFP EPSON STYLUS SX420W |
Repair MFP EPSON STYLUS SX425W |
|
Repair MFP EPSON STYLUS SX430W |
Repair MFP EPSON STYLUS SX435W |
|
Repair MFP EPSON STYLUS SX440W |
Repair MFP EPSON STYLUS SX445W |
|
Repair MFP EPSON STYLUS SX525WD |
Repair MFP EPSON STYLUS SX535WD |
|
Repair MFP EPSON STYLUS TX117 |
Repair MFP EPSON STYLUS TX119 |
|
Repair MFP EPSON STYLUS TX200 |
Repair MFP EPSON STYLUS TX209 |
|
Repair MFP EPSON STYLUS TX210 |
Repair MFP EPSON STYLUS TX219 |
|
Repair MFP EPSON STYLUS TX409 |
Repair MFP EPSON STYLUS TX410 |
|
Repair MFP EPSON STYLUS TX419 |
Repair MFP EPSON STYLUS TX550W |
|
Repair MFP EPSON WORKCENTRE 3220DN |
Repair MFP EPSON WORKCENTRE 4045B |
|
Repair MFP EPSON WORKFORCE PRO WP 4023 |
Repair MFP EPSON WORKFORCE PRO WP 4025DW |
|
Repair EPSON WORKFORCE PRO WP 4535 DWF 9 MFP0017 |
Repair MFP EPSON WORKFORCE PRO WP 4595 DNF |
|
Repair MFP EPSON WORKFORCE 7720DWF |
Repair MFP EPSON WORKFORCE PRO 7620DTWF |
|
Repair MFP EPSON WORKFORCE PRO 8590DWF |
Repair MFP EPSON WORKFORCE PRO M5690DWF |
|
Repair MFP EPSON WORKFORCE PRO R5690DTWF RIPS |
Repair MFP EPSON WORKFORCE PRO R8590DTWF RIPS |
|
Repair MFP EPSON WORKFORCE PRO WF-6590DWF |
Repair MFP EPSON WORKFORCE PRO WF-C869R |
|
Repair MFP EPSON WORKFORCE PRO WP4015DN |
Repair MFP EPSON WORKFORCE PRO WP4515DN |
|
Repair MFP EPSON WORKFORCE PRO WP4525DNF |
Repair MFP EPSON WORKFORCE WF PRO 5620DWF |
|
Repair MFP EPSON WORKFORCE WF-3520DWF |
Repair MFP EPSON WORKFORCE WF-3620 |
|
Repair MFP EPSON WORKFORCE WF-3640 |
Repair MFP EPSON WORKFORCE WF-4630DWF |
|
Repair MFP EPSON WORKFORCE WF-7515 |
Repair MFP EPSON WORKFORCE WF-7525 |
|
Repair MFP EPSON WORKFORCE WF-M5290 |
Repair MFP EPSON WORKFORCE WF-M5790DWF (C11CG02401) with WI-FI |
|
Repair MFP EPSON WORKFORCE WF7510 |
Repair MFP EPSON WORKFORCE WF7520 |
|
Repair MFP EPSON WORKFORCE WF7610DWF |
Repair MFP L14150 A3, Wi-Fi Epson (C11CH96404) |
|
Repair MFP L1455 A3, Wi-Fi Epson (C11CF49403) |
Repair MFP L3070 A4 Wi-Fi Epson (C11CF47405) |
|
Repair MFP L3100 Epson A4 (C11CG88401) |
Repair MFP L3101 Epson A4 (C11CG88402) |
|
Repair MFP L3110 Epson A4 (C11CG87405) |
Repair MFP L3150 A4, Wi-Fi Epson (C11CG86409) |
|
Repair MFP L3151 A4, Wi-Fi Epson (C11CG86411) |
Repair MFP L3156 A4, Wi-Fi Epson (C11CG86412) |
|
Repair MFP L3160 A4, Wi-Fi Epson (C11Ch52405) |
Repair MFP L4150 A4, Wi-Fi Epson (C11CG25403) |
|
Repair MFP L4160 A4, Wi-Fi Epson (C11CG23403) |
Repair MFP L4167 A4, Wi-Fi Epson (C11CG23404) |
|
Repair MFP L5190 A4, Wi-Fi Epson (C11CG85405) |
Repair MFP L566 A4, Wi-Fi Epson (C11CE53403) |
|
Repair MFP L6160 A4, Wi-Fi Epson (C11CG21404) |
Repair MFP L6170 A4, Wi-Fi Epson (C11CG20404) |
|
Repair MFP L6190 A4, Wi-Fi Epson (C11CG19404) |
Repair MFP L7160 A4, Wi-Fi Epson (C11CG15404) |
|
Repair MFP L7180 A3, Wi-Fi Epson (C11CG16404) |
Repair MFP L850 Epson A4 (C11CE31402) |
|
Repair MFP M2110 Epson A4 (C11CJ19401) |
Repair MFP M2120 A4 Wi-Fi Epson (C11CJ18404) |
|
Repair MFP M2140 Epson A4 (C11CG27405) |
Repair MFP M2170 A4 Wi-Fi Epson (C11Ch53404) |
|
Repair MFP M3140 Epson A4 (C11CG ) |
Repair MFP M3170 A4 Wi-Fi Epson (C11CG ) |
|
Repair MFP M3180 A4 Wi-Fi Epson (C11CG93405) |
Repair MFP Workforce WF-7710DWF Epson A3 (C11CG36413) |
|
Repair MFP Workforce WF-M5799DWF A4, Wi-Fi Epson (C11CG04401) |
|
|
Repair PLOTTER EPSON STYLUS PRO 4450 |
Repair PLOTTER EPSON STYLUS PRO 9880STD |
|
Repair Inkjet Printer L1110 Epson A4 (C11CG89403) |
Repair Inkjet Printer L120 Epson A4 (C11CD76302) |
|
Repair Inkjet Printer L1300 Epson A3 (C11CD81402) |
Repair Inkjet Printer L1800 Epson A3 (C11CD82402) |
|
Repair Inkjet Printer L805 Epson A4 (C11CE86403) |
Repair Inkjet Printer L810 A4 Epson (C11CE32402) |
|
Repair Inkjet Printer M1100 A4 Epson (C11CG95405) |
Repair Inkjet Printer M1120 A4 Wi-Fi Epson (C11CG96405) |
|
Repair Inkjet Printer M1140 A4 Epson (C11CG26405) |
Repair Inkjet printer M1170 A4, Wi-Fi Epson (C11Ch54404) |
|
Repair Inkjet printer M1180 A4, WI-FI Epson (C11CG94405) |
Repair Inkjet Printer SureColor SC-T3100 A1+ Epson (C11CF11302A0) |
|
Repair Inkjet printer SureColor SC-T3200 24 inch Epson (C11CD66301A1) |
Repair Inkjet printer Workforce Pro WF-M5299DW A4, Wi-Fi Epson (C11CG07401) |
|
Repair EPSON ARTISAN 50 INK PRINTER |
|
|
Repair EPSON B-300 INK PRINTER |
Repair EPSON B-310N INJET PRINTER |
|
Repair EPSON B-500DN INJET PRINTER |
Repair EPSON B-510DN 9 INJET PRINTER0017 |
|
Repair STRUMENEVIY PRINTER EPSON EXPRESSION HOME XP33 |
Repair EPSON K101 INJET PRINTER |
|
EPSON L100 INJET PRINTER |
Repair STRUMENEVIY PRINTER EPSON L110 |
|
EPSON L1800 INK PRINTER (C11CD82402) WITH L800 COLOR KIT 90 g BARVA |
Repair EPSON L200 INK PRINTER |
|
Repair EPSON L300 INJET PRINTER |
Repair EPSON L312 INJET PRINTER |
|
Repair EPSON L800 INJET PRINTER |
Repair EPSON M100 INJET PRINTER |
|
Repair inkjet printer EPSON M105 |
Repair EPSON PICTUREMATE 100 INK PRINTER |
|
Repair EPSON PICTUREMATE 240 INK PRINTER |
Repair EPSON PICTUREMATE 260 INK PRINTER |
|
Repair EPSON PICTUREMATE 280 INK PRINTER |
Repair EPSON PICTUREMATE 290 INK PRINTER |
|
Repair EPSON PICTUREMATE 500 INK PRINTER |
Repair inkjet printer EPSON PX-1004 |
|
Repair EPSON STYLUS C110 |
Repair EPSON STYLUS C20 INJET PRINTER |
|
Repair EPSON STYLUS C20SX |
Repair EPSON STYLUS C40UX |
|
Repair STRUMENEVIY PRINTER EPSON STYLUS C42S |
Repair EPSON STYLUS C42SX |
|
Repair EPSON STYLUS C42UX |
Repair EPSON STYLUS C43SX |
|
Repair EPSON STYLUS C43UX |
Repair EPSON STYLUS C44 |
|
Repair STRUMENEVIY PRINTER EPSON STYLUS C45 |
Repair EPSON STYLUS C48 |
|
Repair inkjet printer EPSON STYLUS C60 |
Repair EPSON STYLUS C62 |
|
Repair EPSON STYLUS C63 |
Repair EPSON STYLUS C63 PHOTO EDITION |
|
Repair EPSON STYLUS C65 PHOTO EDITION |
Repair inkjet printer EPSON STYLUS C67 |
|
Repair STRUMENEVIY PRINTER EPSON STYLUS C70 |
Repair inkjet printer EPSON STYLUS C79 |
|
Repair STRUMENEVIY PRINTER EPSON STYLUS C80 |
Repair EPSON STYLUS C82 |
|
Repair EPSON STYLUS C84 |
Repair EPSON STYLUS C84 PHOTO EDITION |
|
Repair inkjet printer EPSON STYLUS C86 |
Repair EPSON STYLUS C86 PHOTO EDITION |
|
Repair EPSON STYLUS C87 |
Repair EPSON STYLUS C87 PHOTO EDITION |
|
Repair EPSON STYLUS C87 PLUS INJET PRINTER |
Repair STRUMENEVIY PRINTER EPSON STYLUS C91 |
|
Repair EPSON STYLUS COLOR 1160 |
Repair inkjet printer EPSON STYLUS COLOR 3000 |
|
Repair inkjet printer EPSON STYLUS COLOR 460 |
Repair Repair STUD PRINTER EPSON STYLUS COLOR 480 |
|
Repair EPSON STYLUS COLOR 660 INK PRINTER |
Repair inkjet printer EPSON STYLUS COLOR 670 |
|
Repair EPSON STYLUS COLOR 680 INK PRINTER |
Repair inkjet printer EPSON STYLUS COLOR 760 |
|
Repair inkjet printer EPSON STYLUS COLOR 880 |
Repair inkjet printer EPSON STYLUS COLOR 900 |
|
Repair EPSON STYLUS COLOR 980 INK PRINTER |
Repair STRUMENEVIY PRINTER EPSON STYLUS OFFICE B42WD |
|
Repair EPSON STYLUS OFFICE T1100 9 INJET PRINTER0017 |
Repair STRUMENEVIY PRINTER EPSON STYLUS OFFICE T30 |
|
Repair STRUMENEVIY PRINTER EPSON STYLUS OFFICE T40W |
Repair inkjet printer EPSON STYLUS PHOTO 1270 |
|
Repair EPSON STYLUS PHOTO 1290 INJET PRINTER |
Repair STUMEN PRINTER EPSON STYLUS PHOTO 1290S |
|
Repair EPSON STYLUS PHOTO 1410 |
Repair EPSON STYLUS PHOTO 1500W |
|
Repair EPSON STYLUS PHOTO 2000P |
Repair EPSON STYLUS PHOTO 2100 INK PRINTER |
|
Repair EPSON STYLUS PHOTO 750 INK PRINTER |
Repair EPSON STYLUS PHOTO 790 INJET PRINTER |
|
Repair EPSON STYLUS PHOTO 810 |
Repair EPSON STYLUS PHOTO 830 INK PRINTER |
|
Repair EPSON STYLUS PHOTO 830U |
Repair EPSON STYLUS PHOTO 870 INJET PRINTER |
|
Repair EPSON STYLUS PHOTO 870SE INJET PRINTER |
Repair EPSON STYLUS PHOTO 895 |
|
Repair EPSON STYLUS PHOTO 9 INJET PRINTER00 |
Repair EPSON STYLUS PHOTO 915 INK PRINTER |
|
Repair EPSON STYLUS PHOTO 925 INK PRINTER |
Repair EPSON STYLUS PHOTO 935 INJET PRINTER |
|
Repair EPSON STYLUS PHOTO 950 INJET PRINTER |
Repair EPSON STYLUS PHOTO P50 INK PRINTER |
|
EPSON STYLUS PHOTO R1800 INJET PRINTER |
Repair EPSON STYLUS PHOTO R1900 |
|
Repair EPSON STYLUS PHOTO R200 |
Repair EPSON STYLUS PHOTO R2000 |
|
Repair EPSON STYLUS PHOTO R220 |
Repair EPSON STYLUS PHOTO R240 |
|
Repair EPSON STYLUS PHOTO R2400 INK PRINTER |
Repair EPSON Stylus Photo R265 |
|
Repair EPSON STYLUS PHOTO R270 |
Repair STRUMENEVIY PRINTER EPSON Stylus Photo R285 |
|
Repair EPSON STYLUS PHOTO R2880 |
Repair EPSON STYLUS PHOTO R290 |
|
Repair EPSON STYLUS PHOTO R29 INJET PRINTER5 |
Repair inkjet printer EPSON STYLUS PHOTO R300 |
|
Repair EPSON STYLUS PHOTO R3000 INKING PRINTER (C11CA86311) |
Repair EPSON STYLUS PHOTO R320 |
|
Repair EPSON STYLUS PHOTO R340 |
Repair EPSON Stylus Photo R360 |
|
Repair EPSON STYLUS PHOTO R39 INJET PRINTER0 |
Repair EPSON STYLUS PHOTO R800 |
|
Repair inkjet printer EPSON STYLUS PHOTO T50 |
Repair EPSON STYLUS PHOTO T59 |
|
Repair STUD PRINTER EPSON Stylus Pro 11880 B0 |
Repair EPSON STYLUS PRO 3800 A2 |
|
Repair EPSON STYLUS PRO 3880 |
Repair EPSON STYLUS PRO 4000C8 |
|
Repair EPSON STYLUS PRO 4400 |
Repair STREAM PRINTER EPSON STYLUS Pro 4450 A2 |
|
Repair EPSON STYLUS PRO 4800 |
Repair EPSON STYLUS PRO 4880 |
|
Repair EPSON STYLUS PRO 49 INK00 |
Repair EPSON STYLUS PRO 500 INK PRINTER |
|
Repair EPSON STYLUS PRO 5500 INK PRINTER |
Repair STREAM PRINTER EPSON STYLUS Pro 7700 A1 |
|
Repair EPSON STYLUS PRO 7800 |
Repair STREAM PRINTER EPSON STYLUS Pro 7890 A1 |
|
Repair EPSON STYLUS Pro 79 INJET PRINTER00 A1 |
Repair STUD PRINTER EPSON STYLUS Pro 9000 B0 |
|
Repair EPSON STYLUS PRO 9600 |
Repair STUD PRINTER EPSON STYLUS Pro 9700 B0 |
|
Repair STREAM PRINTER EPSON STYLUS Pro 9890 B0 |
Repair EPSON STYLUS Pro GS6000 |
|
Repair EPSON STYLUS S22 INK PRINTER |
Repair EPSON STYLUS T20 INJET PRINTER |
|
Repair EPSON STYLUS T26 |
Repair EPSON STYLUS T27 INK PRINTER |
|
Repair EPSON SureColor SC-B6000 44″ INJET PRINTER |
|
|
Repair EPSON INJET PRINTER |
Repair EPSON SureColor SC-F6000 44″ INJET PRINTER |
|
Repair STONE PRINTER EPSON SureColor SC-F6200 |
Repair STONE PRINTER EPSON SureColor SC-F7000 64″ |
|
Repair EPSON SureColor SC-F7100 64″ INJET PRINTER |
Repair EPSON SureColor SC-F7200 INJET PRINTER |
|
Repair INJET PRINTER EPSON SureColor SC-P400 |
Repair EPSON SureColor SC-P5000 INJET PRINTER |
|
Repair INJET PRINTER EPSON SureColor SC-P600 |
Repair INJET PRINTER EPSON SureColor SC-P6000 SPECTRO |
|
Repair INJET PRINTER EPSON SureColor SC-P7000V SPECTRO |
Repair INJET PRINTER EPSON SureColor SC-P800 |
|
Repair INJET PRINTER EPSON SureColor SC-P8000 SPECTRO |
Repair EPSON SureColor SC-P9 INJET PRINTER000 SPECTRO |
|
Repair INJET PRINTER EPSON SureColor SC-S30610 64″ |
Repair inkjet printer EPSON SURECOLOR SC-S40610 |
|
Repair INJET PRINTER EPSON SureColor SC-S70610 10C 64» |
Repair EPSON SureColor SC-T3000 24″ INJET PRINTER |
|
Repair EPSON SureColor SC-T5000 36″ INJET PRINTER |
Repair EPSON SureColor SC-T5100 INJET PRINTER |
|
Repair INJET PRINTER EPSON SureColor SC-T5200 36» |
Repair EPSON SureColor SC-T7000 44″ INJET PRINTER |
|
EPSON SureColor SC-T7200 44» INKJET PRINTER |
Repair INJET PRINTER EPSON SURELAB SL-D700 |
|
Repair JET PRINTER EPSON WORKFORCE 100W |
Repair EPSON WORKFORCE 30 INJET PRINTER |
|
Repair EPSON WORKFORCE PRO WF-5110DW INJET PRINTER |
Repair EPSON WORKFORCE PRO WF-8090DW INJET PRINTER |
|
Repair EPSON WORKFORCE PRO WF-C5290 INJET PRINTER |
Repair EPSON WORKFORCE PRO WF-C5790 INJET PRINTER |
|
Repair INJET PRINTER EPSON WORKFORCE PRO WF-R5190DTW |
Repair EPSON WORKFORCE PRO WF609 INKJET PRINTER0DW |
|
Repair inkjet printer EPSON WORKFORCE PRO WP4095DN |
Repair INJET PRINTER EPSON WORKFORCE WF-100W |
|
Repair inkjet printer EPSON WORKFORCE WF-2010W |
Repair inkjet printer EPSON WORKFORCE WF-7015 |
|
Repair inkjet printer EPSON WORKFORCE WF-7110DTW |
Repair EPSON WORKFORCE WF-M519 INJET PRINTER0DW |
Repair of Epson printers in a service center in Kharkov
Laser MFP is a mandatory attribute of any office that allows you to perform basic operations with documents (printing, copying, scanning). Modern multifunctional devices are very reliable, but in practice, due to active use, non-compliance with the operating rules in our service center in Kharkov, MFP repair is relevant.
Common breakdowns of Epson printers
2263
In each of these cases, additional diagnostics are necessary, since there may be several reasons for each of the faults. For example, if the all-in-one does not see the toner cartridge, this may indicate that the cartridge needs to be replaced or its chip needs to be reprogrammed. Depending on the results of the diagnostics, you can determine the cost of the subsequent repair of the Epson printer at home or at the customer’s office, at the contractor’s service center.
Repair of laser printers in the Fix Noutbuk service center
Direct repair of printers and multifunctional devices involves the replacement of faulty elements, as well as general maintenance, which acts as a preventive measure. The latter implies lubrication of rotating elements, cleaning from dust, which constantly accumulates and settles on the elements.
If you have a defective MFP, scanner, printer or other Epson office equipment, please contact our Fix Notebook service center. We specialize in their service, offering customers:
- affordable price for printer repair;
- constant availability of equipment in stock;
- any form of payment, which is convenient for legal entities;
- the ability to perform repairs at home or in the office;
- availability of a courier service to deliver a working printer to a customer;
- guarantee for services performed;
- fast repair due to the availability of spare parts.
You can get additional information, order repair of Epson printers in the city of Kharkiv by phone or by leaving a request on the site.
FAQ
Why won’t my Epson printer print?
Preliminary diagnosis required. Potential reasons are:
- lack of ink (powder) in the cartridge;
- printer failure;
- Port problems on the computer or MFP;
- incorrect cartridge installation;
- computer virus infection;
- Paper feeder failure.
Printer diagnostics will show the specific cause. If the problem is in the latter, then the error code that is displayed on the display will speed up the process. Often the problem can be identified by the user’s last actions with the device (mechanical damage or falls, repeated crumpling of paper sheets, poor print or scan quality, extraneous sounds).
How much does it cost to repair Epson printers?
The total cost depends on the specific problem. In practice, it is possible to repair an Epson printer for typical malfunctions for an amount within 1000 hryvnias. If we are talking about the failure of the entire scanning unit after several years of operation, then it makes sense to consider buying a new device.
For regular customers of our service center in Kharkov, we have special offers and discounts when applying for the repair of any type of office equipment.
Can I repair it myself?
Most problems can theoretically be solved on your own with the right skills and tools. There are enough videos on the Internet on a similar topic, but there is a risk of additional damage and problems due to experience and skills. It is more profitable to contact a trusted service center, where they will perform the work quickly, efficiently and take responsibility for the work.
What office equipment do we repair?
We service and repair copiers, laser printers, MFPs and other office equipment from Epson and other manufacturers. The only exception will be inkjet models, which are of limited distribution due to lower efficiency.
Is there a courier and delivery of the finished MFP?
Yes. For the collection of a faulty MFP and the delivery of an already repaired one. You can clarify the conditions and agree on the departure of the courier by phone, leaving a request on the site.
What is more profitable: replacement or repair of inkjet printers
Despite the frequently changing models of equipment and its regular technological improvement, some devices can please their owners for a long time. Naturally, with proper care for them and their timely prevention. Many users of printing equipment, having acquired a successful model, prefer repairing inkjet printers to buying a new, unfamiliar device.
When to repair color inkjet printers
As with the question of the truth, which everyone has their own, the consumer has his own opinion, whether laser printers and of course inkjet devices need repair. Although, both for owners of expensive production machines and for owners of a home printer, repairing an MFP can be much more profitable than purchasing a new device. Especially if the device breaks down due to wear of a low-cost part or simply due to an oversight during the operation of the equipment. What may be included in the repair of office equipment: printers, plotters, MFPs and other peripherals.
Repair of Epson inkjet printers
In inkjet technology, the central element of the mechanism is the print head, the main component in the cost of the device falls on it. Epson uses the piezoelectric printing principle. The company’s PGs are getting thinner and smaller, and their latest models are called thin-film micropiezo heads.
Fig. 1. Epson printer prepared for repair
Drying of the printhead nozzles, a common occurrence in the list of malfunctions of inkjet devices. And this, despite the coating that protects the nozzles from drying out. Self-washing of the part with aggressive compounds can lead to its destruction. In 80% of cases, this causes a short circuit in the head due to the deformation of the transistors in the control circuit. Restoration of PG Epson, in our workshop, is carried out with the recommended compositions, followed by its cleaning in an ultrasonic bath.
The reason for the failure of the inclusion in Epson devices may be a malfunction of the formatting board. Damage can also be caused by ink getting on the print head connectors. And, since a high voltage is needed to control the piezoelectric elements, its effect disables the main board, the cable and the PG itself. Restoration of these parts is within the power of our specialists; additional preventive maintenance of other elements of the device will be carried out.
Typical causes of failure include a paper jam, clogged encoder, print head position failure, or overfilled diaper. For high-quality restoration of the working capacity of the printing machine, office equipment with filled cartridges is accepted for repair.
Fig. 2. Epson assembly before delivery
HP inkjet printer repair
Although HP Photosmart or Deskjet are considered leaders in the occurrence of breakdowns as a result of operation, minor malfunctions are most often the cause. The abundance of plastic parts, sometimes responsible for labor-intensive areas of work, leads to their unexpected breakdown and printing stop.
Fig. 3. Plastic gears HP
What problems occur during the period of using HP:
- breakdown of the gear or pendulum switching mechanism;
- gear splitting on the media supply shaft;
- carriage teeth break;
- printhead failure: positioning distortion, drying or contamination;
- defect in cartridges: loss of contact between conductors and thermoelement, SG malfunction, clogged ink supply channels, etc.
;
- MFP scanner failure;
- malfunction of the mechanism for lifting and turning the display;
- main board defect.
Problems in the operation of electronic equipment, namely sensors, may appear in messages about the malfunction of individual components of the device. When, in fact, the problem is the failure of the sensor or its incorrect operation. If the width sensor or paper path is defective, there will be problems feeding the printer. Pollution of the SG position sensor or encoder (when the sensor working with it in pairs does not see the inflicted risks) can lead to complex breakdowns. If the printer cannot find the position of the print head, do not bring the device to a complete stop. Most likely, the problem is in these sensors.
Fig. 4. Unassembled HP printer
It is worth mentioning that not every workshop undertakes the repair of inkjet printers, Novosibirsk is in a better position in this regard. Our workshop will restore the performance of inkjet and laser printers of all brands.
Canon inkjet printer repair
The mechanics and some electronic components in Canon are similar in design to HP. Sometimes, adsorber overflow is a significant problem. It is impossible to replace the consumable on your own, our engineers will quickly resolve this misunderstanding and reset the «diaper».
Running out of ink in one of the cartridges can cause the print head to overheat. Scale forms on it, the nozzles become clogged and the print is of poor quality. It is possible that the printer stops seeing any color and stops printing. In all these cases, qualified cleaning of the print head is required.
Fig. 5. Remanufactured Canon Printhead
When Should You Buy a New Printer
When the cost of repair far exceeds the price of a new machine, the user will naturally prefer the more economical option. This happens when the print head is permanently disabled if it is installed directly in the machine body. Some printer models have a very expensive PG, and in principle the cost of the device itself, in this case, consists practically of it alone.
When the main board of a printing machine fails, the cost of repair will also be significant. And, of course, if a combination of breakdowns of several expensive elements of the printer mechanism led to the failure of the device.
If a device malfunction is detected, do not immediately leave for a new printer. By contacting our workshop, you can fix problems without significant costs. For the repair of printers, it is recommended to discuss the departure of the master in advance. In a telephone or electronic application, we suggest indicating:
- make and model of printer;
- possible causes of failure or describe the behavior of the printer;
- exact address and telephone number of the owner.
Tags for this article
Technical reference Printer arrangement
|
Troubleshooting |
Free* |
|
|
Cartridge refueling |
||
|---|---|---|
|
Cartridge Cartridge on exit |
1 1 week. |