How to troubleshoot and fix Windows 10 blue screen errors
Windows 10 Blue Screen of Death (BSoD)
(Image credit: Windows Central)
The Blue Screen of Death (BSoD) — also known as «blue screen,» «stop error,» or «system crash» — could happen after a critical error occurs that Windows 10 is not able to handle and resolve automatically.
You will typically experience a blue screen error during the upgrade process of Windows 10, when the computer boots up, or randomly when actively using the device. The most annoying part is that you’ll only see a solid blue background and a sad character face without enough information to determine the real cause of the problem.
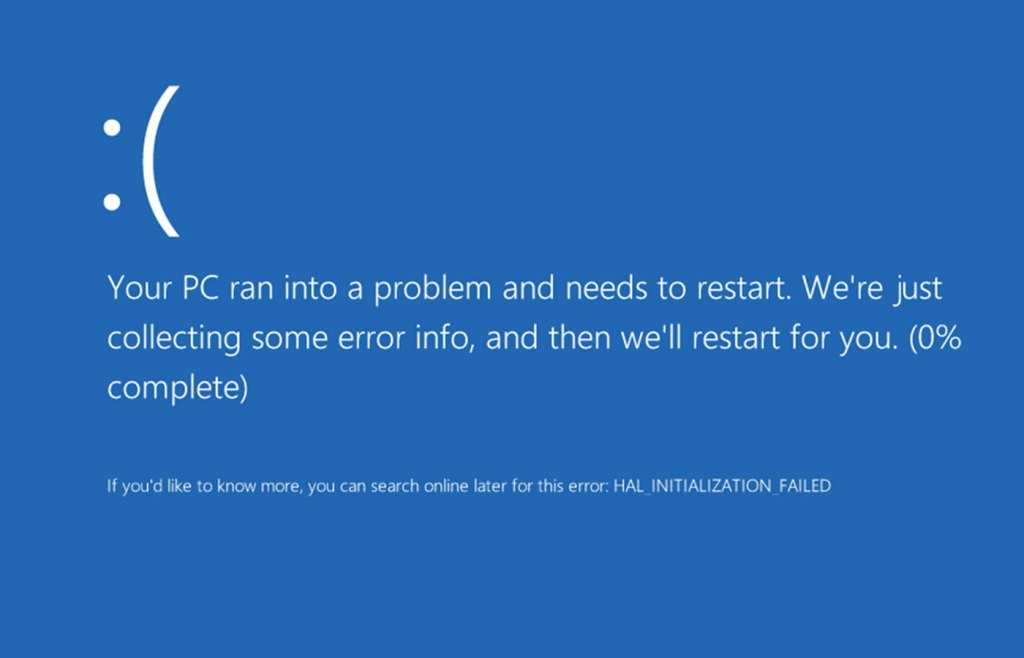
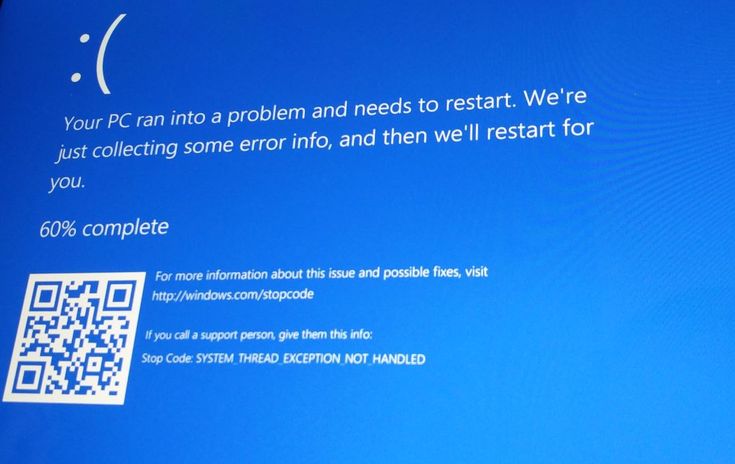
The system will display a message like, «Your PC ran into a problem and needs to restart. We’re just collecting some error info, and then we’ll restart for you.» Or general stop error codes (such as VIDEO_TDR_TIMEOUT_DETECTED, PAGE_FAULT_IN_NONPAGE_AREA, CRITICAL_PROCESS_DIED, SYSTEM_SERVICE_EXCEPTION, DPC_WATCHDOG_VIOLATION, or IRQL_NOT_LESS_OR_EQUAL). Or hexadecimal codes (such as 0x000000D1, 0x0000000A, or 0x0000007B), but they’re just hieroglyphics for regular users.
Although a stop error does not have a straight answer, it’s almost always a problem with a quality or feature update for Windows 10, recently installed driver, incompatible program, or hardware-related issue.
In this Windows 10 guide, we will walk you through the several troubleshooting steps to resolve a blue screen error.
- How to fix blue screen error during upgrade on Windows 10
- How to fix blue screen error without desktop access on Windows 10
- How to fix blue screen error with desktop access on Windows 10
How to fix blue screen error during upgrade on Windows 10
When you upgrade to a new version of Windows 10, a blue screen error may appear for many reasons. For example, it could result from a compatibility problem with an old program or security software. Or it could be because of corrupted files in the current installation or damaged installation media.
Typically, when an error occurs, the setup will revert the changes to the previous installation without an explanation.
If you are dealing with errors during the installation, uninstalling non-essential apps, clearing out corrupt downloads, disconnecting non-essential peripherals, or doing a clean install of Windows 10 may resolve the issue.
Uninstall incompatible app
To uninstall an app that may conflict with the Windows 10 installation, use these steps:
- Open Settings.
- Click on Apps.
- Click on Apps & features.
- Select the app that is causing issues and click the Uninstall button.
Source: Windows Central (Image credit: Source: Windows Central)
- Click the Uninstall button again.Quick note: If this is a classic desktop application, you may need to continue with the on-screen directions to complete the uninstall process.

Once you complete the steps, you may need to repeat the steps to uninstall additional apps, and then you can try the upgrade one more time. After the update, you can reinstall the apps again.
Redownload installation files
Sometimes, if you use the Windows Update option to upgrade a device, you could see a Blue Screen of Death when installation files were damaged during the download process. In this case, you can use the Settings app to clear the previous files, allowing the system to redownload the upgrade bits.
To redownload the upgrade files through Windows Update, use these steps:
- Open Settings.
- Click on System.
- Click on Storage.
- Under the main drive section, click the Temporary files item.
Source: Windows Central (Image credit: Source: Windows Central)
- Clear the already selected options.
- Check the Temporary Windows installation files option.

Source: Windows Central (Image credit: Source: Windows Central)
- Click the Remove files button.
After you complete the steps, open the Windows Update settings and proceed with the steps to upgrade the computer one more time.
If you continue with the same problem, you should consider using the Update Assistant utility to perform an in-place upgrade. Or, if the utility does not work, try using the Media Creation Tool to create an installation media to install the new version of Windows 10.
Analyze upgrade problem
Alternatively, you can also troubleshoot blue screen errors with the «SetupDiag» tool. SetupDiag is a Microsoft tool that offers an optional download to diagnose and determine why an update or upgrade failed to apply, which is valuable data that can help resolve any problems.
To use SetupDiag after the upgrade of Windows 10 failed with a blue screen, use these steps:
- Open the SetupDiag download page .

- Click the Download SetupDiag button.
Source: Windows Central (Image credit: Source: Windows Central)
- Select a destination folder to save the file.
- Click the Save button.
- Open File Explorer.
- Open the folder where you downloaded the file.
- Right-click the «SetupDiag.exe» and select the Run as administrator option.
Source: Windows Central (Image credit: Source: Windows Central)
- Right-click the SetupDiagResults.log file and select the Open option.
Once you complete the steps, the default text editor will open the file with the diagnostic results based on the known rules.
If an error was detected, the logs will describe the information to determine why the device blue screened during the update, and if it’s a known issue, you’ll also get the steps to resolve it.
Sometimes you won’t get any recommendations.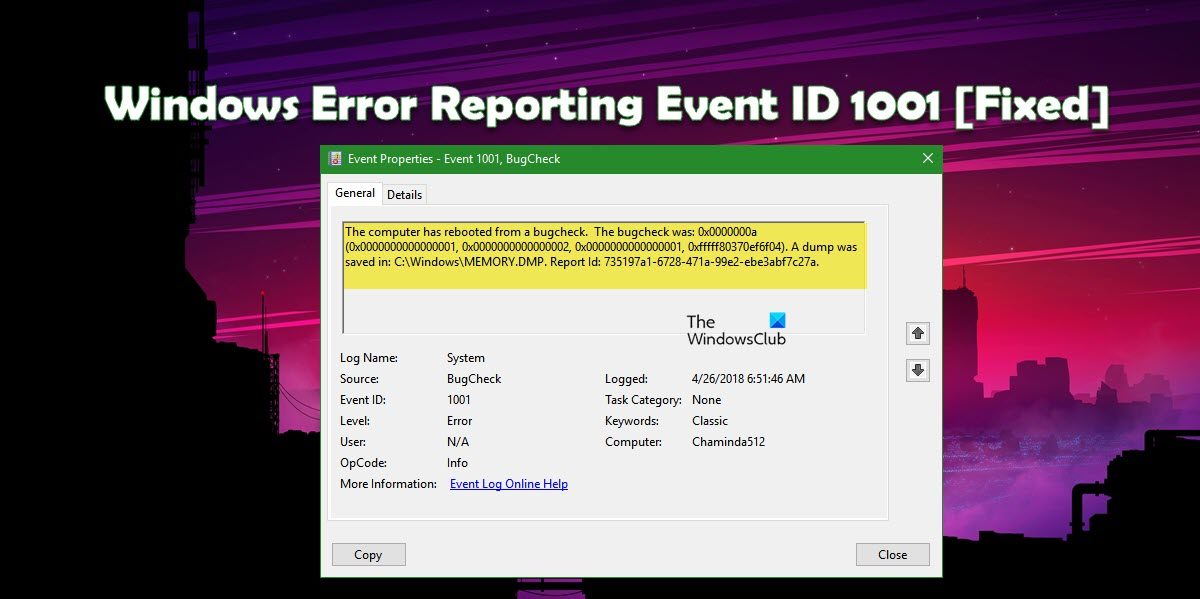 If this happens, follow the link that might be available in the log file or use the error code or any meaningful information to research the problem online. (Use this guide for more detailed instructions.)
Disconnect non-essential peripherals
Windows can also crash due to a hardware-related problem. As a result, it’s always recommended to disconnect all non-essential peripherals, including external hard drives, printers, secondary monitors, phones, and other USB or Bluetooth devices, before proceeding with an installation to minimize the chances of errors. The upgrade process only requires a keyboard, mouse, monitor, and internet connection.
After the installation, you can always reconnect the peripherals. If the issue persists, it could be a compatibility problem. You can usually resolve this issue by downloading and installing a newer driver version from your manufacturer’s support website.
If the computer uses the most recent driver, and the problem continues, it could be a compatibility issue with the new version of Windows 10, or the hardware in question may need to be replaced.
You can always visit the Microsoft health dashboard website to review any issues available with the latest release of Windows 10.
Perform clean installation
The best way to upgrade to a new version of Windows 10 is to erase everything and start from scratch with a clean installation. The process will help you avoid the Blue Screen of Death, and it will help improve system performance and resolve issues.
If you decide to perform a clean install, you first want to confirm that the computer can start from USB. This means that you may need to change the boot order of the Unified Extensible Firmware Interface (UEFI) or Basic Input/Output System (BIOS) firmware to configure the correct boot order.
Typically, the steps to open the motherboard firmware settings require pressing one of the function keys (F1, F2, F3, F10, or F12), the Esc key, or the Delete key as soon as the device starts. However, these settings are always different per manufacturer and even by device model. If you are not sure, it’s best to check the manufacturer’s support website for more specific details.
While in the firmware interface, open the «Boot» page, set the boot order to start from USB, and save the new changes. Once the device can start from the flash drive, create a bootable installation media and use it to start the Windows 10 setup, and then continue with the steps below.
To clean install Windows 10 avoiding blue screen errors, use these steps:
Warning: This is a friendly reminder that you’ll be making changes to your current setup, which can cause problems and even data loss if you don’t do it correctly. It’s recommended to make a temporary full backup before proceeding.
- Start PC with Windows 10 installation media.
- On «Windows Setup,» click the Next button.
Source: Windows Central (Image credit: Source: Windows Central)
- Click the Install Now button.

Source: Windows Central (Image credit: Source: Windows Central)
- Click the I don’t have a product key option to continue (assuming that your PC was already properly activated).
Source: Windows Central (Image credit: Source: Windows Central)
- Select the edition of Windows 10 (if applicable).Quick note: This selection must match the edition that the license activates. Otherwise, the product key won’t work, and you may need to reinstall Windows again.
Source: Windows Central (Image credit: Source: Windows Central)
- Click the Next button.
- Check the I accept the license terms option to continue.
- Click the Next button.
- Click on the Custom: Install Windows only (advanced) option.
Source: Windows Central (Image credit: Source: Windows Central)
- Select the partition with the current installation of Windows (usually «Drive 0»), and click the Delete button to remove the partition from the hard drive.
 Quick tip: If you have multiple partitions on the primary hard drive (Drive 0), select and delete each one. The setup will recreate the required partitions automatically. You don’t need to delete partitions from secondary drives to reinstall Windows 10.
Source: Windows Central (Image credit: Source: Windows Central)
- Select the empty drive labeled Drive 0 Unallocated Space.
- Click the Next button.
Once you complete the steps, the setup will begin installing Windows 10, avoiding many blue screen errors. After the installation, you’ll need to continue with the out-of-box experience (OOBE) to finish setting up the computer by creating a new account and selecting the preferred settings. You can use this guide to perform a complete installation of Windows 10.
How to fix blue screen error without desktop access on Windows 10
If the computer no longer starts correctly, you can use some of the advanced system features, such as System Restore, Safe mode, or the Advanced startup environment to resolve the problem.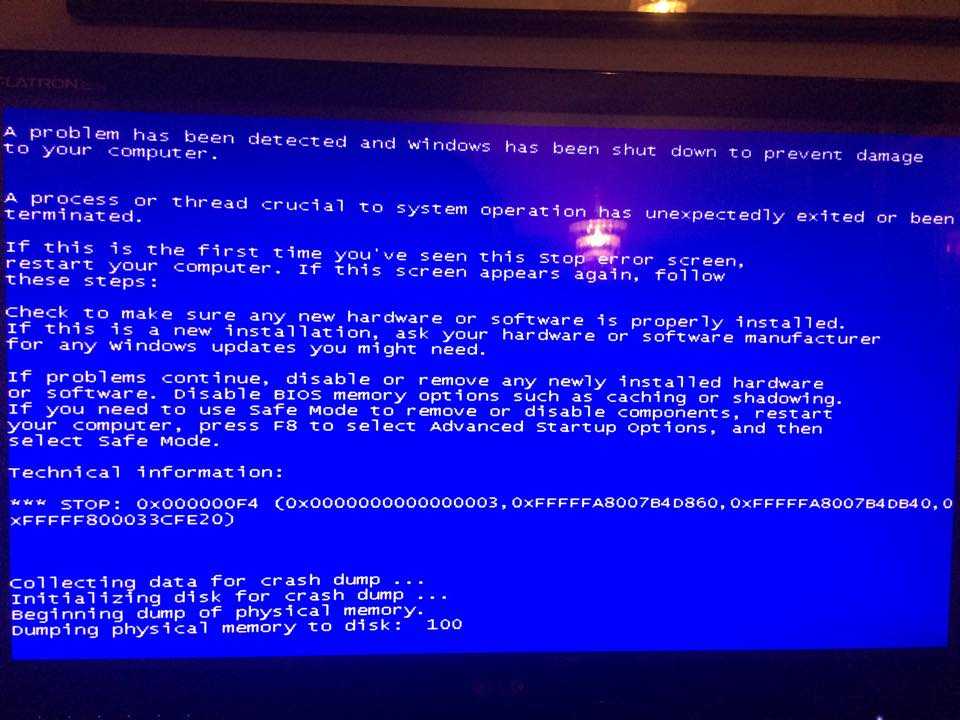
In case the error happened after adding new hardware, consider disconnecting it to double-check to see whether the new hardware is the reason the computer is bumping into this problem.
Resolve BSoD with System Restore
System Restore is a legacy feature that allows you to undo changes without affecting your files to roll back the computer to a previous point in time when Windows 10 was working correctly.
The only downside about this feature is that you have to enable it manually before using it. If System Restore was previously enabled and configured, you can use a restore point to fix the stop error.
On Windows 10, there are at least two ways to access System Restore through Advanced startup, including through the boot options menu or USB installation media. (Choose one of the methods below, and continue with the steps.)
Advanced startup access from boot
To launch the Advanced startup settings to access System Restore, use these steps:
- Start your computer.

- As soon as the Windows logo appears, press and hold the power button to interrupt the boot sequence.
Source: Windows Central (Image credit: Source: Windows Central)
- Repeat steps 1 and 2 two more times.
After the third interruption, Windows 10 should open the Advanced startup environment and continue with the steps below to access System Restore.
Advanced startup access from USB
You can also use Windows 10 installation media to open the Advanced startup with these steps:
- Start your computer using USB media.Quick tip: If the computer isn’t starting from USB, you’ll need to change your system’s BIOS settings to make sure it can boot from USB. You can usually access the BIOS by powering up your device and pressing one of the function, Delete, or Esc keys, but make sure to check your manufacturer’s support website for more specific details.

- Click the Next button.
- Click the Repair your computer option from the bottom-left corner.
Source: Windows Central (Image credit: Source: Windows Central)
Once you complete the steps, continue with the Restore Point instructions below.
Select Restore Point to fix bug check
To use a Restore Point to fix blue screen problems on Windows 10, use these steps:
- Click the Advanced Startup option.Quick note: If accessing Advanced Startup from USB media, you will have the Troubleshoot option instead (see step 2).
- Click the Troubleshoot option.
Source: Windows Central (Image credit: Source: Windows Central)
- Click the Advanced options button. (This step is not part of the process when using USB media.)
Source: Windows Central (Image credit: Source: Windows Central)
- Click the System Restore option.
Source: Windows Central (Image credit: Source: Windows Central)
- Select your account.
- Confirm your account password.
- Click the Continue button.
- Click the Next button.
- Select the most recent restore point to resolve the blue screen error.
Source: Windows Central (Image credit: Source: Windows Central)
- Click the Scan for affected programs button to determine the apps that may be affected using a restore point.
- Click the Close button.
- Click the Next button.
- Click the Finish button.
Source: Windows Central (Image credit: Source: Windows Central)
After you complete the steps, the feature will undo updates, drivers, apps, and system changes done after the point of restoration was created, fixing the system crashes.
Resolve BSoD with Safe mode
Windows 10 also has «Safe mode,» an environment that only loads the basic drivers and services needed to access the desktop to troubleshoot any issue, including system crashes.
You can access Safe mode by using the Advanced startup menu during boot or by using Windows 10 installation media. (Select one of the options below, and continue with the steps.)
Advanced startup access from boot
To access the Advanced startup settings to boot in Safe mode, use these steps:
- Start your computer.
- As soon as the Windows logo appears, press and hold the power button to interrupt the boot sequence.
Source: Windows Central (Image credit: Source: Windows Central)
- Repeat steps 1 and 2 two more times.
After the third interruption, Windows 10 should open the Advanced startup menu and continue with the steps below to access Safe mode.
Advanced startup access from USB
You can also use USB installation media to access the Advanced startup menu to enable Safe mode using these steps:
- Start your computer using USB installation media.
- Click the Next button.
- Click the Repair your computer option in the bottom-left corner.
Source: Windows Central (Image credit: Source: Windows Central)
Once you complete the steps, continue with the Safe mode instructions below.
Use Safe Mode to fix bug check
To access Safe mode to troubleshoot and fix Blue Screen of Death errors, use these steps:
- Click the Advanced Startup option.Quick note: If accessing Advanced Startup from USB media, you will have the Troubleshoot option instead (see step 2).
- Click the Troubleshoot option.
Source: Windows Central (Image credit: Source: Windows Central)
- Click on Advanced options. (This step is not part of the process when using USB media.)
Source: Windows Central (Image credit: Source: Windows Central)
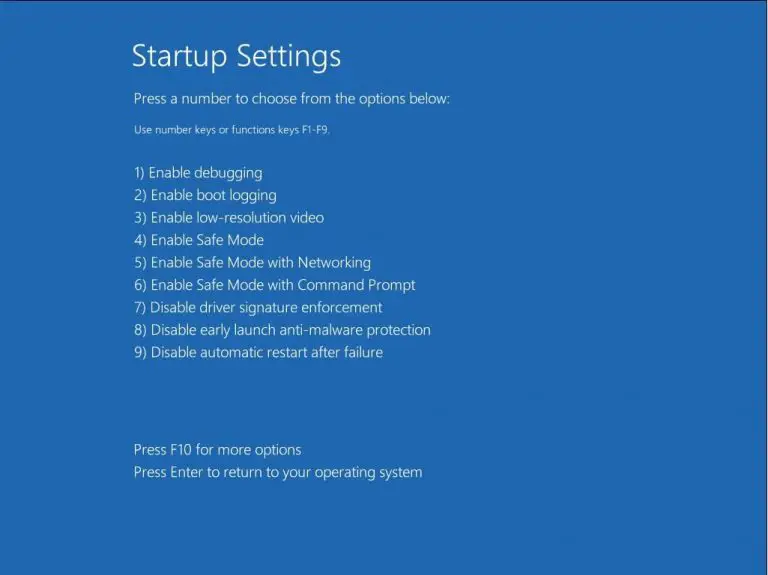
- Click the Startup Settings option.
Source: Windows Central (Image credit: Source: Windows Central)
- Click the Restart button.
Source: Windows Central (Image credit: Source: Windows Central)
- After your computer reboots, press the F4 (or 4) key to select the Enable Safe Mode option.
Source: Windows Central (Image credit: Source: Windows Central)
While in Safe mode, you can use the steps below to uninstall updates and device drivers that may be causing problems.
Remove buggy system updates
To uninstall a problematic update on Windows 11, use these steps:
- Open Settings.
- Click on Update & Security.
- Click the View update history option.
Source: Windows Central (Image credit: Source: Windows Central)
- Click the Uninstall updates option.
Source: Windows Central (Image credit: Source: Windows Central)
- Select the most recent update (refer to the «Installed On» column).
- Click the Uninstall button.
Source: Windows Central (Image credit: Source: Windows Central)
After you complete the steps, restart the device and confirm that the error is no longer happening.
Remove buggy device drivers
To uninstall an incompatible driver with Safe mode, use these steps:
- Open Start.
- Search for Device Manager and select the top result to open the app.
- Expand the branch with the device causing the problem.
- Right-click the device and choose the Uninstall device option.
Source: Windows Central (Image credit: Source: Windows Central)
- Click the OK button.
Once you complete the steps, restart the computer and determine whether the bug check has been resolved.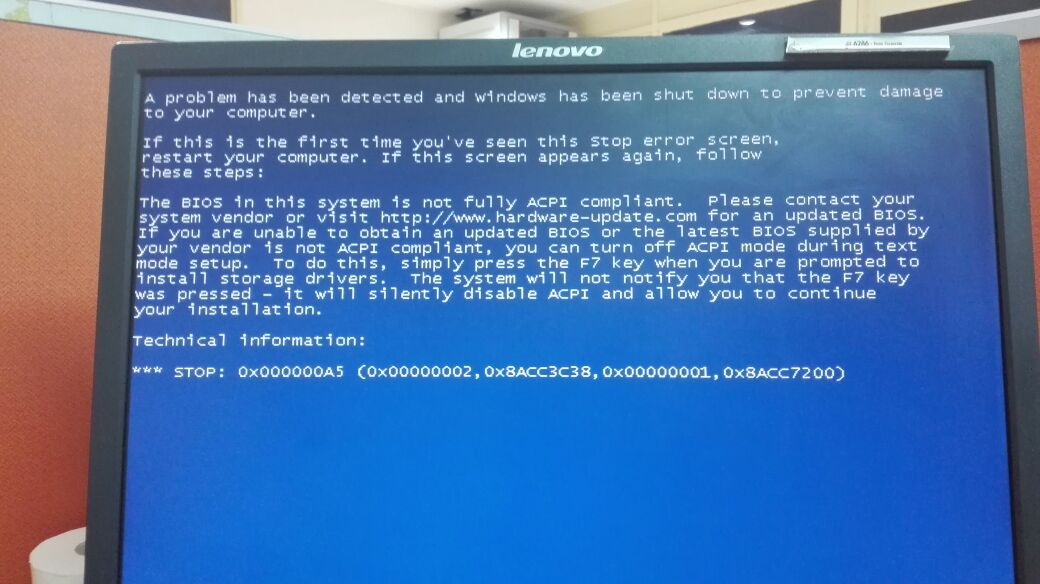
If, after removing the update, the computer no longer shows a BSoB error, block the update or driver to prevent Windows 10 from reinstalling it automatically until a newer update becomes available.
Troubleshoot bug check with Event Viewer
If you cannot see the error code during the blue screen or want more details about the problem, the Event Viewer records every hardware failure, driver malfunction, app crash, and more information, which you can use to diagnose most problems.
To troubleshoot blue screens with the Event Viewer on Windows 10, use these steps:
- Open Start.
- Search for Event Viewer and click the top result to open the app.
- Expand the Windows Logs group.
- Right-click the «System» category and choose the Filter Current Log option.
Source: Windows Central (Image credit: Source: Windows Central)
- Click the Filter tab.

- Use the Logged drop-down menu and select the time range when BSoD happened — for example, Last 12 hours.
- Under the «Event level» section, check the Critical and Error options.
Source: Windows Central (Image credit: Source: Windows Central)
- Click the OK button.
- Double-click to open each log to learn more details about the problem.
Source: Windows Central (Image credit: Source: Windows Central)
- Review event log details.Quick tip: When a blue screen occurs, the system will create a memory dump file, and it’ll restart the device automatically. This means that if you have a list with many errors because the computer rebooted immediately after the bug check, the error causing the problem is likely to be the one after a critical Kernel-Power event.
Source: Windows Central (Image credit: Source: Windows Central)
In the event log, the «General» tab includes a brief technical description of the error that might give you a hint of the blue screen problem.
In this guide, I forced a bug check using these instructions, so the event notes that the source of the problem was a «bug check» that caused the computer to reboot unexpectedly. However, it’s not always easy to determine the source of the issue. If you can’t find out the reason based on the event information, copy the description, source, and event ID and use it to research online for a possible solution.
Resolve BSoD with Advanced startup
Windows 10 also includes a feature to uninstall problematic updates directly from the Advanced startup menu.
Select one of the options to access Advanced startup, and continue with the instructions to remove quality or feature updates causing the Blue Screen of Death.
Advanced startup access from boot
To access the Advanced startup menu with the boot option, use these steps:
- Start your computer.
- As soon as the Windows logo appears, press and hold the power button to interrupt the boot sequence.
Source: Windows Central (Image credit: Source: Windows Central)
- Repeat steps 1 and 2 two more times.
After the third interruption, Windows 10 should open the Advanced startup environment, and then you can continue with the steps below to boot in Safe mode.
Advanced startup access from USB
To access the Advanced startup menu with USB installation media, use these steps:
- Start your computer using USB media.
- Click the Next button.
- Click the Repair your computer option in the bottom-left corner.
Source: Windows Central (Image credit: Source: Windows Central)
Once you complete the steps, continue with the Windows 10 Safe mode instructions below.
Uninstall quality or feature updates
To uninstall the most recent quality or feature update causing the Blue Screen of Death, use these steps:
- Click the Advanced Startup option.
 Quick note: If accessing Advanced Startup from USB media, you will have the Troubleshoot option instead (see step 2).
 - Click the Troubleshoot option.
Source: Windows Central (Image credit: Source: Windows Central)
- Click on Advanced options. (This step is not part of the process when using USB media.)
Source: Windows Central (Image credit: Source: Windows Central)
- Click the Uninstall Updates option.
Source: Windows Central (Image credit: Source: Windows Central)
- Click the Uninstall latest quality update to remove a recent monthly update. Or click the Uninstall latest feature update option to roll back to a previous version.Quick tip: If you select the Uninstall latest feature update option, you can continue with the same steps to remove the recent upgrade of Windows 10 (as long as it’s been less than 10 days since the installation).
Source: Windows Central (Image credit: Source: Windows Central)
- Select your user account to continue.
- Confirm your account password.
- Click the Continue button.
- Click the Uninstall quality update button.
Source: Windows Central (Image credit: Source: Windows Central)
- Click the Done button.
- Click the Continue option.
After you complete the steps, Windows 10 will remove the most recent cumulative update or feature update, fixing the blue screen problem on Windows 10.
How to fix blue screen error with desktop access on Windows 10
If you come across a Blue Screen of Death message, but you still have access to the desktop, the problem is usually the case of a missing system update, an issue with a specific driver, or a recently installed app.
Update Windows 10 and drivers
If you have access to the desktop, installing the latest updates for Windows 10 and drivers can help stop the blue screen error.
System update
Windows 10 downloads and installs updates periodically, but you may still need to check manually to download a critical update.
To download and install updates on Windows 10, use these steps:
- Open Settings.
- Click on Update & Security.
- Click on Windows Update.
- Click the Check for updates button.
Source: Windows Central (Image credit: Source: Windows Central)
If there’s an update available, but it does not download, try to download and install the missing quality update manually.
Driver update
When the problem is an outdated driver, you’ll need to download and install the latest version.
To install a newer version of a driver, use these steps:
- Open Settings.
- Click on Update & Security.
- Click on Windows Update.
- Click the Check for updates button (if applicable).
- Click the View optional updates option.Quick tip: If the option isn’t available, it means that Windows Update doesn’t have any updates for your system configuration.
Source: Windows Central (Image credit: Source: Windows Central)
- Click the Driver updates tab.
- Select the driver update.
Source: Windows Central (Image credit: Source: Windows Central)
- Click the Download and install button.
Once you complete the steps, the latest version of the driver should solve the problem. If no updates were available, you might need to check the manufacturer’s support website to download and install a newer driver using their instructions. If the support website doesn’t have a version higher than the one you already have, you may also want to try a beta version of the driver as it may contain a preview of the fix the company may plan to release on a future release.
Remove problematic updates, drivers, apps
Software and hardware companies can also release buggy updates that cause problems like BSoD on Windows 10.
Uninstall system updates
To uninstall a buggy system update, use these steps to remove it:
- Open Settings.
- Click on Update & Security.
- Click the View update history option.
Source: Windows Central (Image credit: Source: Windows Central)
- Click the Uninstall updates option.
Source: Windows Central (Image credit: Source: Windows Central)
- Select the most recent update (refer to the «Installed On» column).
Source: Windows Central (Image credit: Source: Windows Central)
- Click the Uninstall button.
After you complete the steps, the problematic update will be uninstalled, fixing the Blue Screen of Death error. You can also use these steps to prevent the Windows Update settings from trying to install the same update again.
Uninstall device driver
To uninstall a buggy driver, use these steps:
- Open Start.
- Search for Device Manager and click the top result to open the app.
- Right-click the device and select the Uninstall device option.
Source: Windows Central (Image credit: Source: Windows Central)
- Click the OK button.
Once you complete the steps, you should no longer see the bug check error on the computer.
Roll back device driver
It’s also possible to roll back the previous version of the driver to resolve the issue until another update replaces the buggy update.
To roll back to a previous version of the driver on Windows 10, use these steps:
- Open Start.

- Search for Device Manager and click the top result to open the console.
- Expand the category of the device with the problem.
- Right-click the device and select the Properties option.
Source: Windows Central (Image credit: Source: Windows Central)
- Click the Driver tab.
- Click the Roll Back Driver button (if available).Quick tip: If the option isn’t available, the system doesn’t have a backup of the previous driver.
Source: Windows Central (Image credit: Source: Windows Central)
- Select one of the available options to answer the question.
- Click the Yes button.
After you complete the steps, the older version of the driver will apply to the system, fixing the system crashes.
Disable device driver
If you cannot roll back the driver, another workaround you can use involves disabling the hardware to mitigate the blue screen error until a new update becomes available to fix the issue permanently.
To disable specific hardware on Windows 10, use these steps:
- Open Start.
- Search for Device Manager and click the top result to open the app.
- Expand the category of the device with the problem.
- Right-click the device and select the Disable device option.
Source: Windows Central (Image credit: Source: Windows Central)
- Click the Yes button.
Once you complete the steps, you should no longer experience system crashes.
Uninstall conflicting apps
If you have an app causing compatibility problems, the Blue Screen of Death is likely to happen randomly, or every time you launch the program.
You can get around this problem by downloading and installing the latest version of the app from the software support website. If an update isn’t available, it’s recommended to uninstall that program to mitigate the problem until a permanent solution becomes available.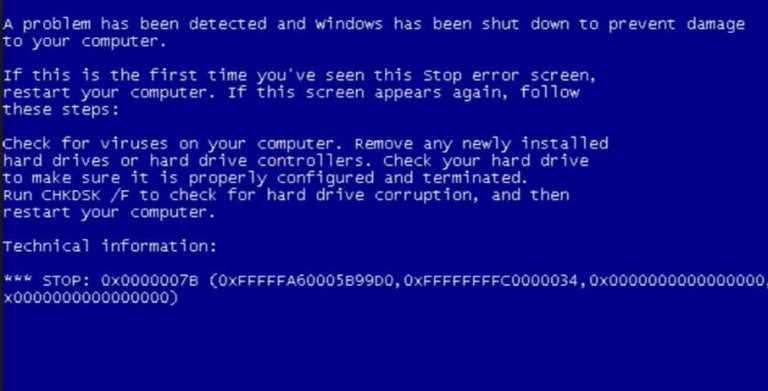
To uninstall a problematic app on Windows 10, use these steps:
- Open Settings.
- Click on Apps.
- Click on Apps & features.
- Select the app causing the Blue Screen of Death and click the Uninstall button.
Source: Windows Central (Image credit: Source: Windows Central)
- Click the Uninstall button again.
- Continue with the on-screen directions (if applicable).
Once you complete the steps, you should no longer experience blue screen error codes on the device.
Disconnect non-essential peripherals
On Windows 10, you may also see a Blue Screen of Death message after connecting new hardware (for example, graphics card, USB device, etc.). When this happens, the problem is likely because the hardware is not compatible, broken, or the system is attempting to install the wrong driver.
If it’s a compatibility issue, you may have to contact technical support or find a compatible replacement.
It’s rare, but if the system keeps applying the wrong driver, use the previous steps to uninstall and install the correct driver manually using the manufacturer’s instructions.
Run DISM and SFC tools
When dealing with a blue screen error, you can also use the System File Checker (SFC) combined with the Deployment Servicing and Management (DISM) tool to repair damaged system files to resolve the problem.
Repair image files with DISM
To repair the locally available image with DISM, use these steps:
- Open Start.
- Search for Command Prompt, right-click the top result, and select the Run as administrator option.
- Type the following command to repair the Windows 10 image and press Enter:
DISM /Online /Cleanup-Image /RestoreHealth
Source: Windows Central (Image credit: Source: Windows Central)
Once you complete the steps, the tool will download and replace any system file that may be damaged in the local image of Windows 10.
Repair blue screen error with SFC
To use the SFC command tool to repair the current setup using the local image (already inspected and repaired with the DISM tool), use these steps:
- Open Start.
- Search for Command Prompt, right-click the top result, and select the Run as administrator option.
- Type the following command to repair the installation of Windows 10 and press Enter:
SFC /scannowQuick tip: If errors are found, you may want to run the command multiple times to ensure that everything is fixed correctly.
Source: Windows Central (Image credit: Source: Windows Central)
After you complete the steps, SFC will repair any system files using the local image files to fix the blue screen problem.
You can also refer to this guide to learn more about using the DISM and SFC tool on Windows 10.
Troubleshoot bug check with Event Viewer
If you still can log in to your account, you can also use the Event Viewer to determine the reason for the problem to find a proper solution.
To check the event logs for hints about the Blue Screen of Death messages, use these steps:
- Open Start.
- Search for Event Viewer and click the top result to open the app.
- Expand the Windows Logs group.
- Right-click the «System» category and choose the Filter Current Log option.
Source: Windows Central (Image credit: Source: Windows Central)
- Click the Filter tab.
- Use the Logged drop-down menu and select the time range when BSoD happened — for example, Last 12 hours.
- Under the «Event level» section, check the Critical and Error options.
Source: Windows Central (Image credit: Source: Windows Central)
- Click the OK button.
- Double-click to open each log to learn more details about the problem.

Source: Windows Central (Image credit: Source: Windows Central)
- Review event log details.
Source: Windows Central (Image credit: Source: Windows Central)
In the event log, the «General» tab includes a brief technical description of the error, which might give you a hint of the bug check problem. If you can’t determine the reason based on that information, copy the description, source, and event ID and use them to search online for a possible solution.
When you experience a blue screen error, it’s always a sign that a program or hardware isn’t working correctly. Although there are a lot of troubleshooting steps you can use, you may still need assistance to resolve the problem. If you made it through all our recommendations, and the problem persists, you may want to consult the Windows Central forums or the official Microsoft forums . At this time, it’s also a good idea to contact your device manufacturer’s technical support for assistance.
Alongside the Blue Screen of Death, you may also encounter a black screen problem, which usually occurs because of an issue with the graphics driver, connection issue, or something in the installation. If the device experiences screen flickering issues, it’s likely a problem with an application or video driver.
More Windows resources
For more helpful articles, coverage, and answers to common questions about Windows 10 and Windows 11, visit the following resources:
- Windows 11 on Windows Central — All you need to know
- Windows 11 help, tips, and tricks
- Windows 10 on Windows Central — All you need to know
Mauro Huculak is technical writer for WindowsCentral.com. His primary focus is to write comprehensive how-tos to help users get the most out of Windows 10 and its many related technologies. He has an IT background with professional certifications from Microsoft, Cisco, and CompTIA, and he’s a recognized member of the Microsoft MVP community.
How to Fix a Windows Blue Screen of Death (BSOD)
(Image credit: Shutterstock)
Few things are more frustrating. You’re in the middle of working on a project, reaching a major milestone in a game or maybe just booting up your Windows 10 computer and, just like that, the entire OS crashes and presents you with a Blue Screen of Death, usually for no immediately apparent reason.
In Windows-speak, the term “Blue Screen of Death” is usually abbreviated as BSOD. It describes an error of some kind that hits the operating system hard enough that it’s forced to quit. Microsoft itself labels such errors with “stopcodes.” Thus these errors may also be generically named “stop errors.” Here’s an example that shows what a BSOD sometimes looks like:
A Modern Windows 10 BSOD (Deliberately caused, read on for details) (Image credit: Tom’s Hardware)
Understanding the BSOD Screen
The screen starts with an old-fashioned unhappy face emoticon “ 🙁 “ (a colon, followed by an open parenthesis). Next, you see a brief explanation that “Your PC ran into a problem and needs to restart.” Windows writes one or more log files when a stop error occurs, so you see language about “collecting some error info” and a counter that keeps track while it’s writing that data (shows as “25% complete) above.
Microsoft provides a scannable QR code in modern BSODs (lower left) that you can scan with a smartphone and look up that way. The message also provides a lookup URL for stopcodes, where you can enter a numeric stopcode (and where you’ll see most common stopcodes, including the one shown above). The most common stop codes include:
- CRITICAL_PROCESS_DIED
- SYSTEM_THREAD_EXCEPTION_NOT_HANDLED
- IRQL_NOT_LESS_OR_EQUAL
- VIDEO_TDR_TIMEOUT_DETECTED
- PAGE_FAULT_IN_NONPAGED_AREA
- SYSTEM_SERVICE_EXCEPTION
- DPC_WATCHDOG_VIOLATION
You can also download the Microsoft Error Lookup Tool (current version: Err_6.4.5.exe) to look up numeric error codes at a command prompt or in PowerShell, if you prefer.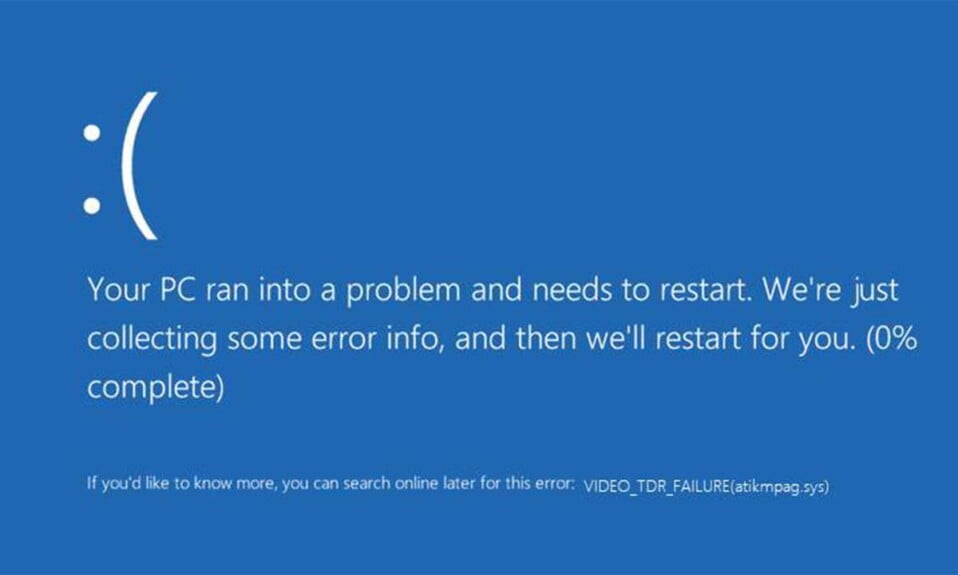
In Windows 10, BSODs Aren’t Always Blue
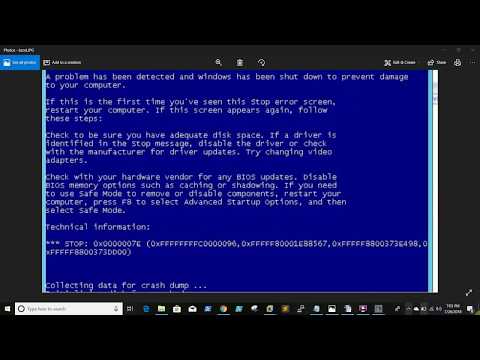
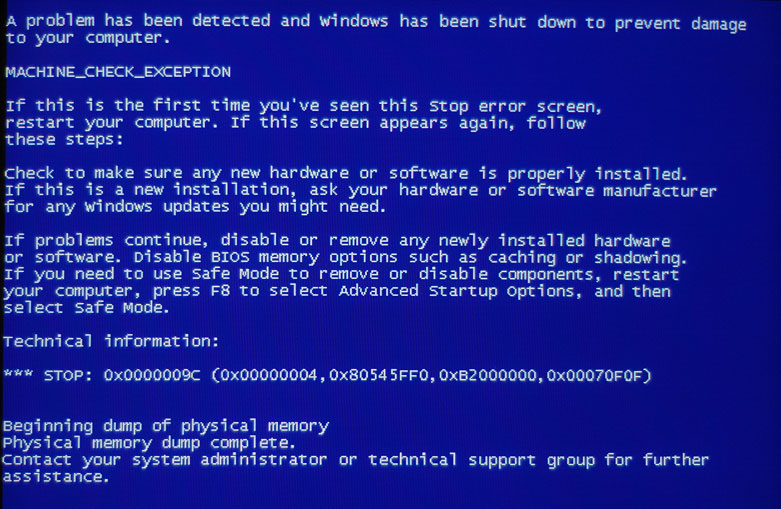
Before Windows 8 came along in October 2012, BSODs always appeared on dark blue screens. These were chock-full of text and instructions (see below). With Windows 8, Microsoft switched to a kinder, gentler format shown in the preceding screencap. They also whittled down the information that appears on screen. In fact, the background color in Windows 10 is sometimes green, which is why you may see some of them called GSODs (“Green Screens of Death”). Here’s an example of an old-fashioned, pre-Windows-8 BSOD to put this information into historical context:
The Old-fashioned BSOD includes troubleshooting advice, a numeric stopcode, and more. It always appeared against a dark-blue background, as shown. (Image credit: Tom’s Hardware)
Making Sense of BSOD Data
Though nobody wants to see a BSOD on a Windows PC, they do occur from time to time. In the vast majority of cases, the PC will restart itself automatically after an error log, called a crash dump or a dump file (extension . dmp) is created. By default, Windows 10 stores dump files in one of two locations.
You can manage crash dumps through Advanced System Settings in Windows 10 (type “Advanced System Settings” into the search box, then click “Settings” in the Startup and Recovery pane). You can also choose to toggle “Automatic restart” to off here, if you would prefer that any future BSODs stay on the screen until you get a chance to see them and write down (or take pic of) any relevant data.
Crash dumps come in various forms with associated typical sizes. (Image credit: Tom’s Hardware)
If you select “Small memory dump” as the option for saving crash dumps, such files show up as Minidump.dmp files. For all other selections, the crash dump is named Memory.dmp. Crash dumps get written to the %SystemRoot% folder, which usually expands to C:\Windows. By design, small memory dump files are limited to 256KB in size. Other memory dumps will vary in size up to the size of memory on the PC where the dump is collected. Thus, on a PC with 16 GB of RAM, a Complete memory dump file will always be 16 GB in size (and other dump files, except for the small memory dumps, can be as large as 16 GB, but will often be smaller).
Examining a crash dump file can be helpful when troubleshooting related causes. For more details, see our story on how to use a minidump file to fix your Windows BSOD. That said, many users simply search on the stopcode and/or the numeric error code when seeking remediation advice. (Note that Microsoft calls that numeric code a “bug check code” or “bug check string.”
What To Do When Troubleshooting a BSOD
The immediate tendency following a BSOD is to get right into fix-it mode, start looking things up, and attempting repairs. Not so fast! Microsoft explains the entire troubleshooting process in its “Troubleshoot blue screen errors ” tutorial. While you can – and probably should – read the Microsoft advice in its entirety, here’s a summary of key recommendations:
- Shut down the Windows PC that experienced the BSOD
- Disconnect all USB-attached devices except for mouse and keyboard (or wireless dongles).

- Reboot your system into safe mode from the Windows Recovery Environment (WinRE)
- If you recently installed new software, uninstall that software.
- If you recently installed a new device driver (or your BSOD info points to a driver or device), uninstall or roll back that driver (if you don’t really need the device you can disable it temporarily instead)
- Restart the PC, and see if the BSOD recurs. If not, you’ve probably isolated the cause and can start researching some kind of fix.
If the BSOD recurs despite the items taken out of the picture by removing, disabling or uninstalling them, whatever’s still left in the picture remains problematic. At this point you want to reboot into safe mode once again, and open an administrative command prompt or PowerShell session. From the command line, enter these commands, one at a time:
- DISM /Online /Cleanup-image /Restorehealth
- SFC /scannow
The first of these two commands finds and replaces any damaged operating system components in the side-by-side filestore (aka WinSxS). The second of these commands runs the System File Checker (SFC) and will repair any damaged files it finds.
Note that if SFC finds and fixes anything, you should run the command until it comes back with a clean bill of health (in some cases, I’ve had to run it two or three times before it came back clean). Note further that running either or both of these commands can take some time to complete, especially if one or both find items in need of fixing. Here’s what you want to see after your final SFC run:
Keep running SFC until it’s cleaned up all integrity violations. (Image credit: Tom’s Hardware)
Try NirSoft’s BlueScreenView Tool
There’s a complete BSOD handling infrastructure available from Microsoft, built around a tool called the Windows Debugger (aka WinDBG). You can download it as part of Microsoft’s free Windows Developer Kit if you really want to dig into the gory details. There are a lot of details to learn about, and minutiae to address, if you want to put this tool to work on crash dumps.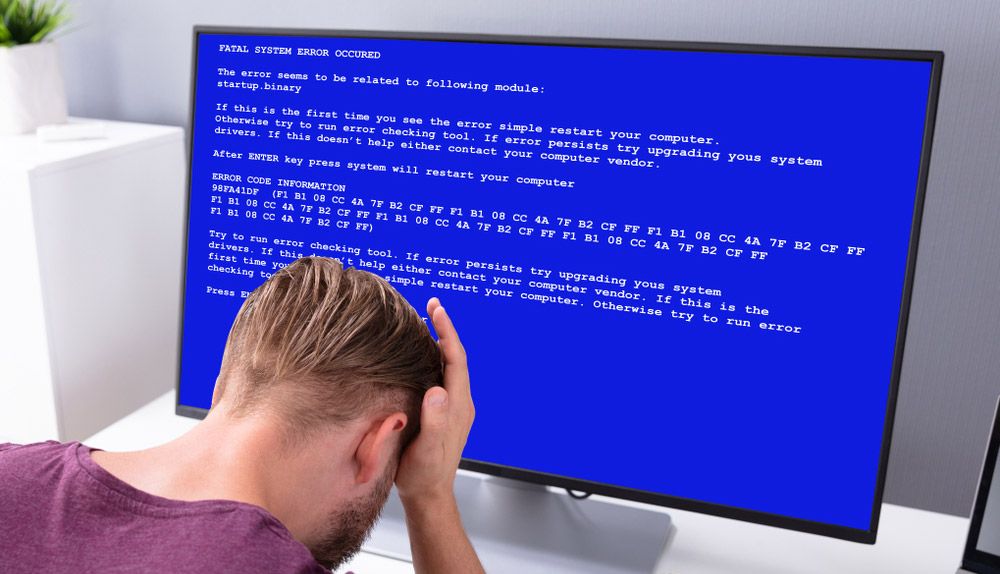 For non-IT professionals or non-developers, I recommend Nir Sofer’s excellent BlueScreenView utility instead. It’s set up to automatically load the symbol tables it needs to resolve error codes, and it knows where to find crash dumps in need of analysis. It also presents crash dump data in a highly-readable form.
As an illustration, I forced one of my test laptops (a Lenovo ThinkPad X390 Yoga) to blue screen at an administrative command line. There, I entered the string taskkill /im svchost.exe /f. Warning: typing this string into an administrative command prompt or PowerShell session will crash the PC immediately. That’s because it kills a key program named svchost.exe (Service Host) that supports DLLs in the Windows runtime environment. Because most (if not all) Windows programs use one or more DLLs this basically makes Windows inoperable. Thus, it causes an immediate BSOD with the CRITICAL_PROCESS_DIED stopcode (shown in the lead-in graphic for this very story).
When I fired up BlueScreenView on that PC, it found the Memory. dmp file that this BSOD created during its post-crash cleanup phase. Here’s what the application looks like:
BlueScreenView finds the latest crash dump. It shows key values in the top pane, details in the bottom pane. (Image credit: Tom’s Hardware)
The top pane of the window shows all the crash dumps it finds on the target PC. Because there’s only one in this case, I shrunk it down to show as many details from the bottom pane as possible. Even so, the data in the top pane is important, with information in certain columns of special interest. Column 1 shows the name of the dump file. Column 3 shows the stopcode, which it labels “Bug Check String.” Column 3 shows the associated hexadecimal error code, 0x000000ef, which it labels “Bug Check Code.”
For most genuine BSODs (remember, I forced this one to happen) the stopcode and the error code will often help affected users zero in on causes and potential cures for their woes. In my experience, at least 90% of BSODs become fixable simply based on this information.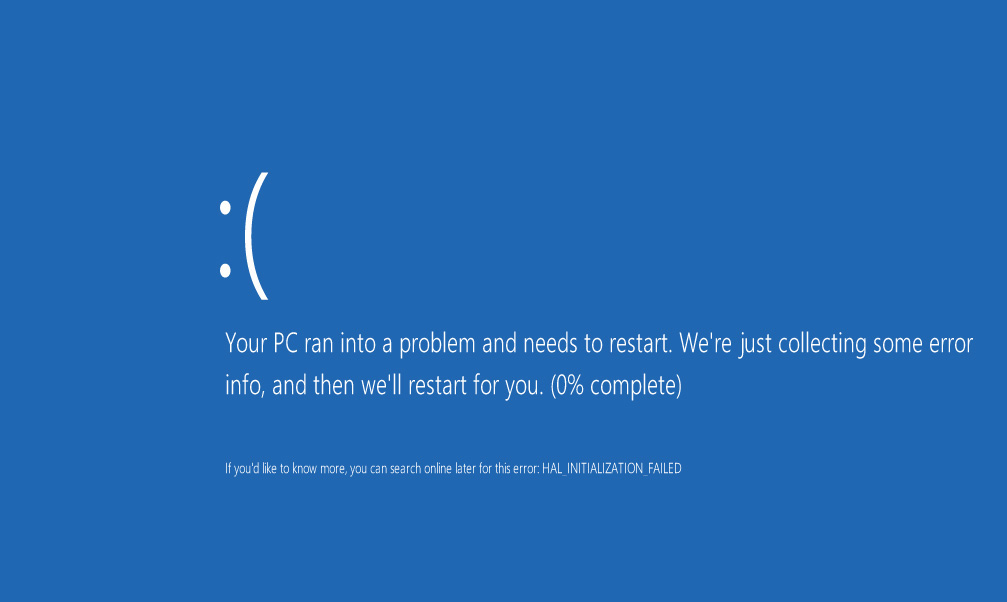 That’s because it will often be solved by disconnecting, disabling, or uninstalling related devices, drivers, applications, or updates – just as Microsoft recommends, and I summarized in the previous section.
What About that Other Problematic 10% of BSODs?
Some BSODs won’t be amenable to quick and easy fixes. When they come up, as they sometimes will, it’s time to ask for help in getting things figured out. I can recommend two terrific sources of troubleshooting assistance available online, each with its own dedicated user forum specifically focused on solving BSOD issues. Likewise, each one stipulates certain requirements on users seeking BSOD help.
Source number one comes from TenForums.com (key disclosures: I am a VIP member of this community; I contribute input and suggestions to its members daily). The TenForums venue is in its BSOD Crashes and Debugging forum. Posting instructions are explicitly provided, along with a collection of BSOD tutorials, including those on WinDBG Basics,and how to Install and Configure WinDBG for BSOD Analysis, Run BSOD Error Troubleshooter in Windows 10, and Enable or Disable BSOD Automatic Restart in Windows 10.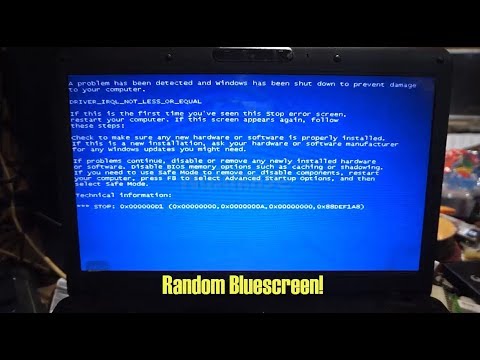
Source number two comes from British PC security and troubleshooting site BleepingComputer.com. They operate a user forum named Windows Crashes and Blue Screen of Death (BSOD) Help and Support. There, you’ll find pinned threads for the following topics (all of which are worth reading through):
- Sysnative Blue Screen of Death (BSOD) Academy: A series of detailed questions readers should answer to ask the experts at Sysnative for help with BSOD issues.
- BSOD Posting instructions: what information users should gather (based on downloading and running a Sysnative app) to obtain necessary dump files and content.
- BSODs but no Dump Files: instructions on how to configure a Windows PC to produce dump files whenever a BSOD occurs. Essential to know because diagnosis without dumps is nearly impossible.
Thus, you’ll have to read up a bit, download some tools, run some scripts and/or collect some logs that you’ll submit to make a semi-formal request for BSOD help.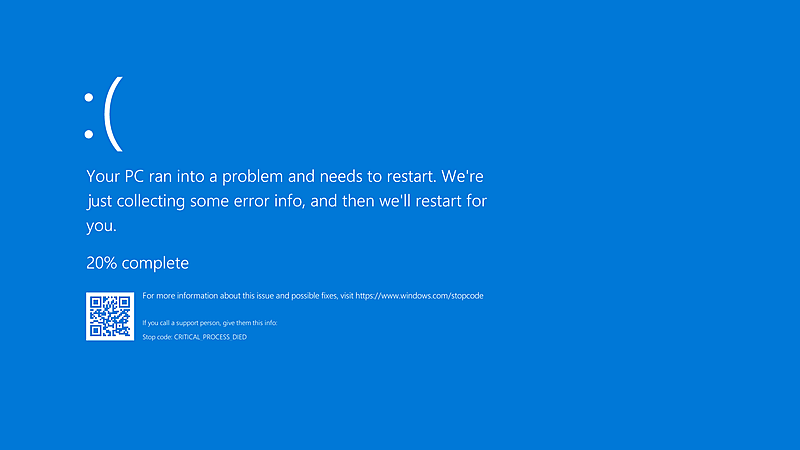 This will take one or more hours and force you to do some homework before such help becomes available. It may also involve numerous back-and-forth communications, where you’re asked to run additional diagnostic tools and collect additional logs and data to shed more light on your situation. Trust me: these guys know what they’re doing. I’ve seen only a handful of issues where users did everything asked of them where the BSOD experts couldn’t help them get things fixed.
Ultimately, where there’s enough will to get a Windows BSOD fixed, there’s a way to make that happen. Keep at it, and you’ll learn this for yourself.
Ed Tittel is a long-time IT writer, researcher and consultant, and occasional contributor to Tom’s Hardware. A Windows Insider MVP since 2018, he likes to cover OS-related driver, troubleshooting, and security topics.
Topics
Windows
How to Fix a Blue Screen of Death on a Windows PC
- You can try to fix the Blue Screen of Death on your Windows computer with a number of troubleshooting methods; below are the most common steps you can take.
- The Blue Screen of Death on Windows indicates a critical fault and forces your computer to restart. On a properly functioning computer, Blue Screen errors should be rare or nonexistent.
- Blue Screen errors are generally unintelligible and can have many causes, so the details of the error code are unlikely to tell you what the problem is.
The «Blue Screen of Death,» often abbreviated as BSOD or just called a Blue Screen, is the name that’s been given to a generic set of error messages Windows computers display when a critical fault has occurred. A Blue Screen means that Windows can’t proceed, so after displaying the error message, Windows will perform some behind-the-scenes housecleaning and restart. Unfortunately, there’s no opportunity to save your work, so a Blue Screen often involves losing data.
Blue Screen errors should be rare – if it happens to you frequently, you have a serious problem with your computer and should get the issue resolved professionally or replace the PC entirely. Even a very rare Blue Screen can be frustrating and costly (in terms of lost data or wasted time), though.
Unfortunately, these error messages are unintelligible to ordinary users (and rarely tell even experienced programmers or developers enough to make meaningful recommendations), and there can be so many potential causes that they are very difficult to troubleshoot.
How to fix a Blue Screen of Death on a Windows PC
These seven tips provide some general guidance for dealing with Blue Screen of Death error in Windows.
This is what a typical Blue Screen of Death looks like on Windows.
Microsoft
Uninstall incompatible software
Because there are so many potential causes, it’s helpful to start with the simplest possible fixes and work your way towards more complex or difficult troubleshooting steps.
Your BSOD won’t definitively identify the cause, but if you get the error more than once while running a particular program, that app might be to blame. If there’s an updated version available, be sure to upgrade. If not, try uninstalling that app to see if the problem goes away. You can follow the instructions in our article on uninstalling programs on Windows 10.
Start by uninstalling any non-essential software and programs that always seem to be running when you get a Blue Screen.
Dave Johnson/Business Insider
Because the problem might not be the program you were actively using when the BSOD occurred, you should also consider any other programs that were running in the background or that are currently idle, minimized to the taskbar, or running on a virtual desktop. Uninstall any software that seems to be running every time a Blue Screen occurs.
Run a memory checker
Defective memory – specifically, Random Access Memory, or RAM, could be causing a BSOD, and it’s one of several possible culprits if you get frequent, rather than only occasional, Blue Screens. Thankfully, there’s a memory-checking tool built into Windows.
In the Start search box, type «Memory» and then click «Windows Memory Diagnostic» when it appears in the search results. Click «Check for problems the next time I start my computer» and restart your computer to run the test.
After your computer restarts, you’ll need to find the test result. In the Start search box, type «Event Viewer» and then click «Event Viewer» when it appears in the search results.
In the pane on the left, click «Windows Logs» and then click «System.» In the pane on the right, click «Find» and search for «Memory Diagnostic.» You should see the test results – if there were any problems reported, defective memory could be causing a BSOD.
You can find your Memory Diagnostic results in the Event Viewer.
Dave Johnson/Business Insider
Check for hard drive errors
Similarly, a problematic hard drive could be causing a BSOD. To check it for errors, type «this PC» in the Start search box and click it when you see it appear in the search results. Right-click your «C» drive and choose «Properties.» Then click the «Tools» tab in the hard drive’s Properties window. In the «Error checking» section, click «Check» and follow the instructions to manually check the hard drive.
Remove non-essential peripherals
Blue Screen of Death is often caused by hardware issues rather than software problems – hence checking your memory and hard drive in the above troubleshooting steps. A fast and easy way to troubleshoot a recurring BSOD issue is to uninstall any external peripherals, such as printers, scanners, external storage, and so on. If these devices have special software installed, uninstall those as well.
Replace defective or incompatible expansion cards
It can be time-consuming and cumbersome to remove hardware from inside your PC, but if you have a recurring BSOD, this is sometimes the culprit. In particular, premium graphics cards and audio cards can be the root of the problem. For the graphics card in particular, try removing it and plugging your monitor into the motherboard’s built-in graphics; you should see a separate HDMI port on the back of your PC for this. You should also uninstall the Nvidia or AMD graphics card driver software.
Run SetupDiag after a failed Windows update
If you are having problems with a BSOD specifically when trying to update your PC’s Windows software, then a Windows tool called SetupDiag can help. This is a program that analyzes issues with your PC and can suggest why you are seeing a Blue Screen of Death when trying to update Windows.
To get started, go to Microsoft’s SetupDiag webpage and click «Download SetupDiag.»
After the download is complete, install the program and then run it. The program will display any issues it encountered, which might help you resolve your BSOD issue.
If you only get the BSOD when trying to update Windows, try SetupDiag.
Dave Johnson/Business Insider
Perform a clean install
If none of these troubleshooting tips have resolved your recurring BSOD, there are still some other root causes, but you’re generally faced with one of two primary possibilities: You have a software issue you haven’t yet isolated, or you have a critical hardware problem with your computer that can’t be easily repaired or replaced.
To eliminate the possibility of a software problem, you can perform a clean install of Windows. This erases all the content from your hard drive, which means you will need to reinstall all your programs.
To do this, click the Start search box and type «reset.» Click «Reset this PC» in the search results. In the «Reset this PC» section, click «Get started.» Follow the directions to reinstall Windows, keeping your files if you desire. When it’s done, you’ll have a clean, fresh new version of Windows without any of the software or drivers that might be causing the BSOD. If possible, use the computer in this state – installing only the most absolutely essential software – until you determine if the problem is resolved.
Perform a clean install as a last resort to root out your BSOD.
Dave Johnson/Business Insider
-
6 things to try if you can’t update your Windows 10 computer, from restarting the PC to updating your drivers
-
How to properly uninstall programs on Windows 10, to protect your computer and free up space
-
How to update or reinstall your drivers in Windows 10 to keep your computer running smoothly
-
How to download Nvidia drivers to keep your computer’s graphics running smoothly and vibrantly
-
Your Windows computer runs using ‘Drivers’ — here’s what they are, and how to find them
Dave Johnson
Freelance Writer
Dave Johnson is a technology journalist who writes about consumer tech and how the industry is transforming the speculative world of science fiction into modern-day real life. Dave grew up in New Jersey before entering the Air Force to operate satellites, teach space operations, and do space launch planning. He then spent eight years as a content lead on the Windows team at Microsoft. As a photographer, Dave has photographed wolves in their natural environment; he’s also a scuba instructor and co-host of several podcasts. Dave is the author of more than two dozen books and has contributed to many sites and publications including CNET, Forbes, PC World, How To Geek, and Insider.
Read moreRead less
11 Tips to Help You Fix the Windows 10 Blue Screen Error
The blue screen of death (BSOD) error is something every Windows user runs into sooner or later. It’s a frustrating problem, as it’s often tough to troubleshoot and can pop up out of nowhere.
We’ll walk you through some basic tips on how to fix a blue screen on Windows 10 (and 11), as well as provide resources for specific blue screen error codes.
What Is a Blue Screen?
In case you’re not sure what a blue screen problem even is, let’s first review this important Windows term.
What’s commonly called a «blue screen of death» in Windows 10, Windows 11, and other versions is technically known as a stop error or fatal system error. This occurs when the operating system crashes, meaning that it ran into some issue that prevented it from running safely. When this happens, Windows displays a blue screen with some information about the problem and then restarts.
Blue screens can happen for many reasons, which we’ll dig into below. Common BSOD causes include bad drivers, problems with hardware, and operating system errors.
Newer versions of Windows, like Windows 10 and 11, are more stable than earlier versions, so you hopefully won’t run into blue screens too often. You should also know that a blue screen occurring one time isn’t necessarily an issue. Sometimes Windows will freak out with a BSOD, then work perfectly fine after you reboot.
Thus, you should only need to dig into the following blue screen error fixes if you continually hit a blue screen.
1. Note Your Windows Blue Screen Stop Code
Since there are so many kinds, it’s tough to talk about how to resolve blue screen errors without knowing the specific error you’re hitting. Thus, the best place to start with fixing blue screens is by noting the actual problem.
In Windows 10 and 11, a BSOD contains a sad face emoticon, along with a simple error message. Below this, you’ll see a link to Microsoft’s blue screen troubleshooting page, a QR code, and a Stop Code field. If you want, you can scan the QR code with your phone’s camera to jump to a Microsoft support page.
The most important part is to note the stop code listed on the page, which will help you narrow your troubleshooting. If you miss the code initially, follow our guide to retrieving stop codes in Windows 10.
2. Try Specific Troubleshooting for Your Blue Screen Error Code
Now that you know what your specific issue is, you can move towards appropriate blue screen fixes. We’ve written troubleshooting guides for some of these:
- How to fix the Critical Process Died stop code
- Resolving the System Service Exception blue screen
- A guide to troubleshooting the Memory Management BSOD
- Fixing an Unexpected Store Exception stop error in Windows
- How to resolve Inaccessible Boot Device errors
- How to fix the Bad System Config Info error
- How to fix Windows 10 Error Code 0xc00000e
These aren’t the only blue screen errors you’ll come across, but they’re some of the most common. In case you can’t determine your exact error code, or the troubleshooting in those guides didn’t solve your issues, move onto the below more general blue screen error solutions.
3. Review Recent Computer Changes
Many times, you’ll start seeing blue screen errors after making a change to your system. Such changes can introduce problematic elements into an otherwise stable environment. Identifying this can help your troubleshooting.
For example, if you just installed a new printer, try unplugging it from your computer to see if the blue screen persists. If you recently ran a Windows update, head to Settings > Update & Security > Windows Update > View Update History.
On the next page with the list, click Uninstall updates and remove the most recent update to see if that solves the problem.
The same goes for software. If you started noticing the blue screens after installing a new program, try removing the app and see if that fixes your issues.
4. Check for Windows and Driver Updates
While bad updates can sometimes introduce issues, oftentimes Microsoft and third-party companies issue updates to fix problems like these. Visit Settings > Update & Security > Windows Update and apply any pending updates, just in case they hold the fix.
It’s also important to check your drivers, since they can often be a source of Windows 10 blue screens. To do this, press Win + X (or right-click on the Start button) to open the power user menu. Then choose Device Manager to open that utility.
Here, check for yellow triangle icons on any entries, which indicate a problem with the driver. You should double-check any devices that appear with this, as you may need to reinstall the driver or remove the device.
You can right-click an entry and choose Update driver to check for updates, but this isn’t always reliable.
Instead, you should visit the manufacturer’s website and grab the latest drivers from there. Follow our guide to updating Windows drivers for help.
5. Run a System Restore
The System Restore feature in Windows allows you to return your system to a previous state. It’s a handy troubleshooting tool, as it’s simple to use and lets you see if your issue is software-based.
Type recovery into the Start menu and open the Recovery Control Panel entry that appears. Here, click Open System Restore to launch the tool. After clicking Next once, you’ll see a list of restore points you can return to. Select one, then hit Scan for affected programs if you want to see what software will change.
Running a System Restore doesn’t affect your files, but it will uninstall any drivers or software you’ve installed since the restore point was made. In addition, it will reinstall anything you removed since that time.
Confirm your system restore, then you can start the process. This will take a few moments, then you’ll be back to your system like it was at the time. If you don’t get blue screens after this, your problem was likely software-related.
6. Scan for Malware
Malware can damage your Windows system files and result in a blue screen. You should run a scan for infection to rule out anything like this.
We recommend using Malwarebytes to run a scan. This will look for all sorts of rogue software and remove it for you. If it finds anything, reboot after the cleaning and see if your blue screen errors go away.
7. Test Your Computer Hardware
If you haven’t figured out why you’re getting a blue screen of death, you should next check your computer’s physical components. Sometimes a failing stick of RAM, or another bad component, can result in a blue screen.
We’ve shown how to test your PC for hardware failure. Use those tools to test your system and you should replace anything that you find is faulty.
8. Run an SFC Scan
Windows includes a command line tool called SFC (System File Checker). Running it checks for damaged Windows system files and attempts to fix them. Doing so may solve your blue screen issue.
Again, press Win + X (or right-click on the Start button) to open the power user shortcut menu. Choose Command Prompt (Admin), Windows PowerShell (Admin), or Windows Terminal (Admin), then type the following:
sfc /scannow
Give this some time to run, and you’ll see the results before long. If it found and applied any fixes, reboot and see if the blue screen issue stops.
9. Boot Into Safe Mode
Depending on the severity of your issue, you may be able to perform all of the above troubleshooting steps while working in Windows as usual. However, if you have a major issue, the blue screen errors might prevent you from working normally. In that case, you’ll need to boot into safe mode.
Safe mode allows you to load a basic Windows configuration with only the essentials that it needs to run. This prevents third-party apps from interfering with normal operations. If you can work in safe mode without hitting a blue screen, an installed app or service is likely causing the problem.
While in safe mode, you can run a malware scan, use System Restore, and otherwise troubleshoot as we’ve discussed.
10. Use Advanced Blue Screen Troubleshooting Tools
For deeper troubleshooting, you can utilize tools that interpret the information Windows dumps after it crashes to a blue screen. These are typically only for advanced users.
Follow our instructions on how to fix blue screen errors with WinDbg and BlueScreenView for help using a few of these tools.
11. Reinstall Windows
If all else fails, you’ll need to reinstall Windows on your computer. At this point, you’ve ruled out drivers, hardware, malware, and software issues, so there must be some deeper underlying problem on your system.
Follow our guide to resetting Windows 10 to learn the best way to do this.
Now You Know How to Solve Blue Screen Errors in Windows 10
Blue screen errors are frustrating to deal with, especially because they can block you from troubleshooting properly. But after walking through the above tips, you know what a blue screen error is and how to resolve it.
Going forward, it’s smart to watch for signs that your computer is about to crash, so you can hopefully prevent these issues from happening in the first place.
Advanced troubleshooting for stop or blue screen errors — Windows Client Management
-
Article -
- 19 minutes to read
-
Try our Virtual Agent — It can help you quickly identify and fix common Windows boot issues
Note
If you’re not a support agent or IT professional, you’ll find more helpful information about stop error («blue screen») messages in Troubleshoot blue screen errors.
What causes stop errors?
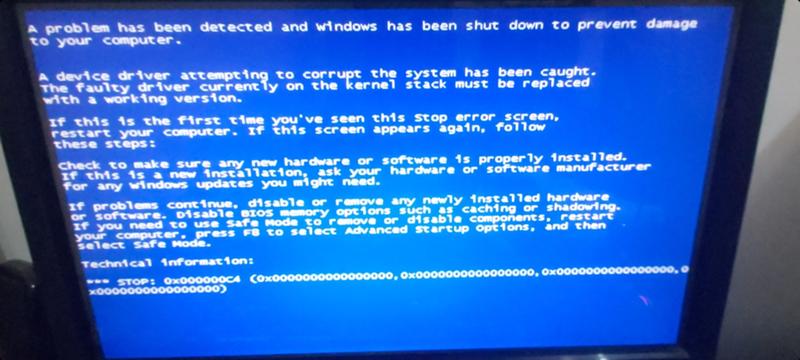
A stop error is displayed as a blue screen that contains the name of the faulty driver, such as any of the following example drivers:
atikmpag. sys
sysigdkmd64.sysnvlddmkm.sys
There’s no simple explanation for the cause of stop errors (also known as blue screen errors or bug check errors). Many different factors can be involved. However, various studies indicate that stop errors usually aren’t caused by Microsoft Windows components. Instead, these errors are related to malfunctioning hardware drivers or drivers that are installed by third-party software. These drivers include video cards, wireless network cards, security programs, and so on.
Our analysis of the root causes of crashes indicates that:
- 70% are caused by third-party driver code.
- 10% are caused by hardware issues.
- 5% are caused by Microsoft code.
- 15% have unknown causes, because the memory is too corrupted to analyze.
Note
The root cause of stop errors is never a user-mode process. While a user-mode process (such as Notepad or Slack) may trigger a stop error, it is merely exposing the underlying bug which is always in a driver, hardware, or the OS.
General troubleshooting steps
To troubleshoot stop error messages, follow these general steps:
-
Review the stop error code that you find in the event logs. Search online for the specific stop error codes to see whether there are any known issues, resolutions, or workarounds for the problem.
-
Make sure that you install the latest Windows updates, cumulative updates, and rollup updates. To verify the update status, refer to the appropriate update history for your system. For example:
- Windows 10, version 21h3
- Windows 10, version 21h2
- Windows 10, version 20h3
-
Make sure that the BIOS and firmware are up-to-date.
-
Run any relevant hardware and memory tests.
-
Run Microsoft Safety Scanner or any other virus detection program that includes checks of the MBR for infections.
-
Make sure that there’s sufficient free space on the hard disk. The exact requirement varies, but we recommend 10-15 percent free disk space.

-
Contact the respective hardware or software vendor to update the drivers and applications in the following scenarios:
- The error message indicates that a specific driver is causing the problem.
- You’re seeing an indication of a service that is starting or stopping before the crash occurred. In this situation, determine whether the service behavior is consistent across all instances of the crash.
- You have made any software or hardware changes.
Note
If there are no updates available from a specific manufacturer, we recommend that you disable the related service.
For more information, see How to perform a clean boot in Windows.
You can disable a driver by following the steps in How to temporarily deactivate the kernel mode filter driver in Windows.
You may also want to consider the option of rolling back changes or reverting to the last-known working state. For more information, see Roll back a device driver to a previous version.

Memory dump collection
To configure the system for memory dump files, follow these steps:
-
Select the Taskbar search box, type Advanced system settings, and then press Enter.
-
On the Advanced tab on the System Properties box, select the Settings button that appears in the section Startup and Recovery.
-
In the new window, select the drop-down below the option Write debugging information.
-
Choose Automatic memory dump.
-
Select OK.
-
Restart the computer for the setting to take effect.
-
If the server is virtualized, disable auto reboot after the memory dump file is created. This disablement lets you take a snapshot of the server in-state and also if the problem recurs.
The memory dump file is saved at the following locations:
| Dump file type | Location |
|---|---|
| (none) | %SystemRoot%\MEMORY. (inactive, or grayed out) |
| Small memory dump file (256 kb) | %SystemRoot%\Minidump |
| Kernel memory dump file | %SystemRoot%\MEMORY.DMP |
| Complete memory dump file | %SystemRoot%\MEMORY.DMP |
| Automatic memory dump file | %SystemRoot%\MEMORY.DMP |
| Active memory dump file | %SystemRoot%\MEMORY.DMP |
 DMP
DMPYou can use the Microsoft Crash Dump File Checker (DumpChk) tool to verify that the memory dump files aren’t corrupted or invalid. For more information, see the following video:
For more information on how to use Dumpchk.exe to check your dump files, see the following articles:
- Using DumpChk
- Download DumpChk
Pagefile settings
For more information on pagefile settings, see the following articles:
- Introduction to page files
- How to determine the appropriate page file size for 64-bit versions of Windows
- Generate a kernel or complete crash dump
Memory dump analysis
Finding the root cause of the crash may not be easy. Hardware problems are especially difficult to diagnose because they may cause erratic and unpredictable behavior that can manifest itself in various symptoms.
When a stop error occurs, you should first isolate the problematic components, and then try to cause them to trigger the stop error again. If you can replicate the problem, you can usually determine the cause.
You can use the tools such as Windows Software Development Kit (SDK) and symbols to diagnose dump logs. The next section discusses how to use this tool.
Advanced troubleshooting steps
Note
Advanced troubleshooting of crash dumps can be very challenging if you aren’t experienced with programming and internal Windows mechanisms. We have attempted to provide a brief insight here into some of the techniques used, including some examples. However, to really be effective at troubleshooting a crash dump, you should spend time becoming familiar with advanced debugging techniques. For a video overview, Debugging kernel mode crashes and hangs. Also see the advanced references listed below.
Advanced debugging references
- Advanced Windows Debugging, first edition book
- Debugging Tools for Windows (WinDbg, KD, CDB, NTSD)
Debugging steps
-
Verify that the computer is set up to generate a complete memory dump file when a crash occurs. For more information, see Method 1: Memory dump.
-
Locate the memory.dmp file in your Windows directory on the computer that is crashing, and copy that file to another computer.
-
On the other computer, download the Windows 10 SDK.
-
Start the install and choose Debugging Tools for Windows. The WinDbg tool is installed.
-
Go to the File menu and select Symbol File Path to open the WinDbg tool and set the symbol path.
-
If the computer is connected to the internet, enter the Microsoft public symbol server:
https://msdl.microsoft.and select OK. This method is recommended. com/download/symbols
 -
If the computer isn’t connected to the internet, specify a local symbol path.
-
-
Select Open Crash Dump, and then open the memory.dmp file that you copied.
-
Under Bugcheck Analysis, select
!analyze -v. The command!analyze -vis entered in the prompt at the bottom of the page. -
A detailed bug check analysis appears.
-
Scroll down to the STACK_TEXT section. There will be rows of numbers with each row followed by a colon and some text. That text should tell you what DLL is causing the crash. If applicable, it also says what service is crashing the DLL.
-
For more information about how to interpret the STACK_TEXT output, see Using the !analyze Extension.
There are many possible causes of a bug check and each case is unique. In the example provided above, the important lines that can be identified from the STACK_TEXT are 20, 21, and 22:
Note
HEX data is removed here and lines are numbered for clarity.
1  : nt!KeBugCheckEx
2  : nt!PspCatchCriticalBreak+0xff
3  : nt!PspTerminateAllThreads+0x1134cf
4  : nt!PspTerminateProcess+0xe0
5  : nt!NtTerminateProcess+0xa9
6  : nt!KiSystemServiceCopyEnd+0x13
7  : nt!KiServiceLinkage
8  : nt!KiDispatchException+0x1107fe
9  : nt!KiFastFailDispatch+0xe4
10 : nt!KiRaiseSecurityCheckFailure+0x3d3
11 : ntdll!RtlpHpFreeWithExceptionProtection$filt$0+0x44
12 : ntdll!_C_specific_handler+0x96
13 : ntdll!RtlpExecuteHandlerForException+0xd
14 : ntdll!RtlDispatchException+0x358
15 : ntdll!KiUserExceptionDispatch+0x2e
16 : ntdll!RtlpHpVsContextFree+0x11e
17 : ntdll!RtlpHpFreeHeap+0x48c
18 : ntdll!RtlpHpFreeWithExceptionProtection+0xda
19 : ntdll!RtlFreeHeap+0x24a
20 : FWPolicyIOMgr!FwBinariesFree+0xa7c2
21 : mpssvc!FwMoneisDiagEdpPolicyUpdate+0x1584f
22 : mpssvc!FwEdpMonUpdate+0x6c
23 : ntdll!RtlpWnfWalkUserSubscriptionList+0x29b
24 : ntdll!RtlpWnfProcessCurrentDescriptor+0x105
25 : ntdll!RtlpWnfNotificationThread+0x80
26 : ntdll!TppExecuteWaitCallback+0xe1
27 : ntdll!TppWorkerThread+0x8d0
28 : KERNEL32!BaseThreadInitThunk+0x14
29 : ntdll!RtlUserThreadStart+0x21
This issue is because of the mpssvc service, which is a component of the Windows Firewall. The problem was repaired by disabling the firewall temporarily and then resetting firewall policies.
For more examples, see Debugging examples.
Video resources
The following videos illustrate various troubleshooting techniques for analyzing dump files.
- Analyze dump file
- Installing debugging tool for Windows (x64 and x86)
- Debugging kernel mode crash memory dumps
- Special pool
Advanced troubleshooting using Driver Verifier
We estimate that about 75 percent of all stop errors are caused by faulty drivers. The Driver Verifier tool provides several methods to help you troubleshoot. These include running drivers in an isolated memory pool (without sharing memory with other components), generating extreme memory pressure, and validating parameters. If the tool encounters errors in the execution of driver code, it proactively creates an exception. It can then further examine that part of the code.
Warning
Driver Verifier consumes lots of CPU and can slow down the computer significantly.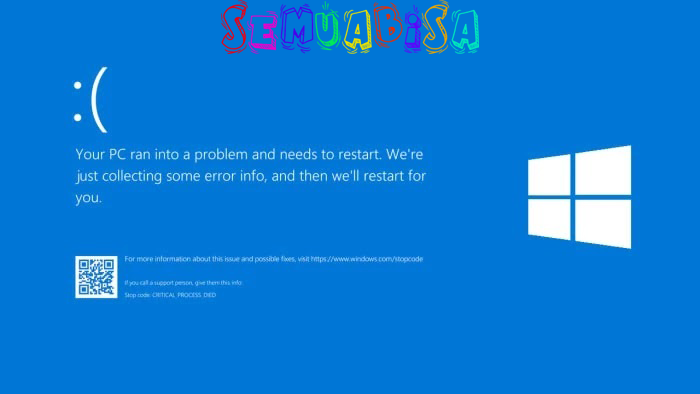 You may also experience additional crashes. Verifier disables faulty drivers after a stop error occurs, and continues to do this until you can successfully restart the system and access the desktop. You can also expect to see several dump files created.
Don’t try to verify all the drivers at one time. This action can degrade performance and make the system unusable. It also limits the effectiveness of the tool.
Use the following guidelines when you use Driver Verifier:
-
Test any «suspicious» drivers. For example, drivers that were recently updated or that are known to be problematic.
-
If you continue to experience non-analyzable crashes, try enabling verification on all third-party and unsigned drivers.
-
Enable concurrent verification on groups of 10-20 drivers.
-
Additionally, if the computer can’t boot into the desktop because of Driver Verifier, you can disable the tool by starting in Safe mode. This solution is because the tool can’t run in Safe mode.
For more information, see Driver Verifier.
Common Windows stop errors
This section doesn’t contain a list of all error codes, but since many error codes have the same potential resolutions, your best bet is to follow the steps below to troubleshoot your error.
The following sections list general troubleshooting procedures for common stop error codes.
VIDEO_ENGINE_TIMEOUT_DETECTED or VIDEO_TDR_TIMEOUT_DETECTED
Stop error code 0x00000141, or 0x00000117
Contact the vendor of the listed display driver to get an appropriate update for that driver.
DRIVER_IRQL_NOT_LESS_OR_EQUAL
Stop error code 0x0000000D1
Apply the latest updates for the driver by applying the latest cumulative updates for the system through the Microsoft Update Catalog website. Update an outdated network driver. Virtualized VMware systems often run «Intel(R) PRO/1000 MT Network Connection» (e1g6032e.sys). You can download this driver from the Intel Download Drivers & Software website. Contact the hardware vendor to update the network driver for a resolution. For VMware systems, use the VMware integrated network driver instead of Intel’s e1g6032e.sys. For example, use VMware types
 VMXNET, VMXNET2, or VMXNET3.
PAGE_FAULT_IN_NONPAGED_AREA
Stop error code 0x000000050
If a driver is identified in the stop error message, contact the manufacturer for an update. If no updates are available, disable the driver, and monitor the system for stability. Run chkdsk /f /r to detect and repair disk errors. Restart the system before the disk scan begins on a system partition. Contact the manufacturer for any diagnostic tools that they may provide for the hard disk subsystem. Try to reinstall any application or service that was recently installed or updated. It’s possible that the crash was triggered while the system was starting applications and reading the registry for preference settings. Reinstalling the application can fix corrupted registry keys. If the problem persists, and you have run a recent system state backup, try to restore the registry hives from the backup.
SYSTEM_SERVICE_EXCEPTION
Stop error code c000021a {Fatal System Error} The Windows SubSystem system process terminated unexpectedly with a status of 0xc0000005. The system has been shut down.
Use the System File Checker tool to repair missing or corrupted system files. The System File Checker lets users scan for corruptions in Windows system files and restore corrupted files. For more information, see Use the System File Checker tool.
NTFS_FILE_SYSTEM
Stop error code 0x000000024
This stop error is commonly caused by corruption in the NTFS file system or bad blocks (sectors) on the hard disk. Corrupted drivers for hard disks (SATA or IDE) can also adversely affect the system’s ability to read and write to disk. Run any hardware diagnostics that are provided by the manufacturer of the storage subsystem. Use the scan disk tool to verify that there are no file system errors.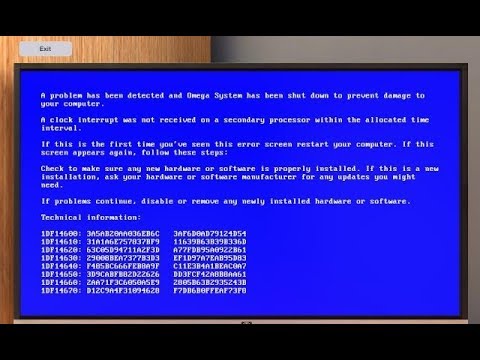 To do this step, right-click the drive that you want to scan, select Properties, select Tools, and then select the Check now button. Update the NTFS file system driver (Ntfs.sys). Apply the latest cumulative updates for the current operating system that’s experiencing the problem.
KMODE_EXCEPTION_NOT_HANDLED
Stop error code 0x0000001E
If a driver is identified in the stop error message, disable or remove that driver. Disable or remove any drivers or services that were recently added.
If the error occurs during the startup sequence, and the system partition is formatted by using the NTFS file system, you might be able to use safe mode to disable the driver in Device Manager. To disable the driver, follow these steps:
- Go to Settings > Update & security > Recovery.
- Under Advanced startup, select Restart now.
- After your PC restarts to the Choose an option screen, select Troubleshoot > Advanced options > Startup Settings > Restart.

- After the computer restarts, you’ll see a list of options. Press 4 or F4 to start the computer in safe mode. If you intend to use the internet while in safe mode, press 5 or F5 for the Safe Mode with Networking option.
DPC_WATCHDOG_VIOLATION
Stop error code 0x00000133
This stop error code is caused by a faulty driver that doesn’t complete its work within the allotted time frame in certain conditions. To help mitigate this error, collect the memory dump file from the system, and then use the Windows Debugger to find the faulty driver. If a driver is identified in the stop error message, disable the driver to isolate the problem. Check with the manufacturer for driver updates. Check the system log in Event Viewer for other error messages that might help identify the device or driver that’s causing stop error 0x133. Verify that any new hardware that’s installed is compatible with the installed version of Windows. For example, you can get information about required hardware at Windows 10 Specifications. If Windows Debugger is installed, and you have access to public symbols, you can load the
 c:\windows\memory.dmp file into the debugger. Then refer to Determining the source of Bug Check 0x133 (DPC_WATCHDOG_VIOLATION) errors on Windows Server 2012 to find the problematic driver from the memory dump.
USER_MODE_HEALTH_MONITOR
Stop error code 0x0000009E
This stop error indicates that a user-mode health check failed in a way that prevents graceful shutdown. Windows restores critical services by restarting or enabling application failover to other servers. The Clustering Service incorporates a detection mechanism that may detect unresponsiveness in user-mode components.
This stop error usually occurs in a clustered environment, and the indicated faulty driver is RHS.exe. Check the event logs for any storage failures to identify the failing process. Try to update the component or process that’s indicated in the event logs. You should see the following event recorded:
- Event ID: 4870
- Source: Microsoft-Windows-FailoverClustering
- Description: User mode health monitoring has detected that the system isn’t being responsive. The Failover cluster virtual adapter has lost contact with the Cluster Server process with a process ID ‘%1’, for ‘%2’ seconds. Recovery action is taken. Review the Cluster logs to identify the process and investigate which items might cause the process to hang.
For more information, see «0x0000009E» Stop error on cluster nodes in a Windows Server-based multi-node failover cluster environment Also, see the following Microsoft video What to do if a 9E occurs.
Debugging examples
Example 1
This bug check is caused by a driver hang during upgrade, resulting in a bug check D1 in NDIS.sys, which is a Microsoft driver. The IMAGE_NAME tells you the faulting driver, but since this driver is s Microsoft driver, it can’t be replaced or removed. The resolution method is to disable the network device in device manager and try the upgrade again.
2: kd> !analyze -v ******************************************************************************* * * * Bugcheck Analysis * * * ******************************************************************************* DRIVER_IRQL_NOT_LESS_OR_EQUAL (d1) An attempt was made to access a pageable (or completely invalid) address at an interrupt request level (IRQL) that is too high. This is usually caused by drivers using improper addresses. If kernel debugger is available get stack backtrace. Arguments: Arg1: 000000000011092a, memory referenced Arg2: 0000000000000002, IRQL Arg3: 0000000000000001, value 0 = read operation, 1 = write operation Arg4: fffff807aa74f4c4, address which referenced memory Debugging Details: ------------------ KEY_VALUES_STRING: 1 STACKHASH_ANALYSIS: 1 TIMELINE_ANALYSIS: 1 DUMP_CLASS: 1 DUMP_QUALIFIER: 400 SIMULTANEOUS_TELSVC_INSTANCES: 0 SIMULTANEOUS_TELWP_INSTANCES: 0 BUILD_VERSION_STRING: 16299.15.amd64fre.rs3_release.170928-1534 SYSTEM_MANUFACTURER: Alienware SYSTEM_PRODUCT_NAME: Alienware 15 R2 SYSTEM_SKU: Alienware 15 R2 SYSTEM_VERSION: 1.2.8 BIOS_VENDOR: Alienware BIOS_VERSION: 1.2.8 BIOS_DATE: 01/29/2016 BASEBOARD_MANUFACTURER: Alienware BASEBOARD_PRODUCT: Alienware 15 R2 BASEBOARD_VERSION: A00 DUMP_TYPE: 2 BUGCHECK_P1: 11092a BUGCHECK_P2: 2 BUGCHECK_P3: 1 BUGCHECK_P4: fffff807aa74f4c4 WRITE_ADDRESS: fffff80060602380: Unable to get MiVisibleState Unable to get NonPagedPoolStart Unable to get NonPagedPoolEnd Unable to get PagedPoolStart Unable to get PagedPoolEnd 000000000011092a CURRENT_IRQL: 2 FAULTING_IP: NDIS!NdisQueueIoWorkItem+4 [minio\ndis\sys\miniport.c @ 9708] fffff807`aa74f4c4 48895120 mov qword ptr [rcx+20h],rdx CPU_COUNT: 8 CPU_MHZ: a20 CPU_VENDOR: GenuineIntel CPU_FAMILY: 6 CPU_MODEL: 5e CPU_STEPPING: 3 CPU_MICROCODE: 6,5e,3,0 (F,M,S,R) SIG: BA'00000000 (cache) BA'00000000 (init) BLACKBOXPNP: 1 (!blackboxpnp) DEFAULT_BUCKET_ID: WIN8_DRIVER_FAULT BUGCHECK_STR: AV PROCESS_NAME: System ANALYSIS_SESSION_HOST: SHENDRIX-DEV0 ANALYSIS_SESSION_TIME: 01-17-2019 11:06:05.
0653 ANALYSIS_VERSION: 10.0.18248.1001 amd64fre TRAP_FRAME: ffffa884c0c3f6b0 -- (.trap 0xffffa884c0c3f6b0) NOTE: The trap frame doesn't contain all registers. Some register values may be zeroed or incorrect. rax=fffff807ad018bf0 rbx=0000000000000000 rcx=000000000011090a rdx=fffff807ad018c10 rsi=0000000000000000 rdi=0000000000000000 rip=fffff807aa74f4c4 rsp=ffffa884c0c3f840 rbp=000000002408fd00 r8=ffffb30e0e99ea30 r9=0000000001d371c1 r10=0000000020000080 r11=0000000000000000 r12=0000000000000000 r13=0000000000000000 r14=0000000000000000 r15=0000000000000000 iopl=0 nv up ei ng nz na pe nc NDIS!NdisQueueIoWorkItem+0x4: fffff807`aa74f4c4 48895120 mov qword ptr [rcx+20h],rdx ds:00000000`0011092a=???????????????? Resetting default scope LAST_CONTROL_TRANSFER: from fffff800603799e9 to fffff8006036e0e0 STACK_TEXT: ffffa884`c0c3f568 fffff800`603799e9 : 00000000`0000000a 00000000`0011092a 00000000`00000002 00000000`00000001 : nt!KeBugCheckEx [minkernel\ntos\ke\amd64\procstat.
asm @ 134] ffffa884`c0c3f570 fffff800`60377d7d : fffff78a`4000a150 ffffb30e`03fba001 ffff8180`f0b5d180 00000000`000000ff : nt!KiBugCheckDispatch+0x69 [minkernel\ntos\ke\amd64\trap.asm @ 2998] ffffa884`c0c3f6b0 fffff807`aa74f4c4 : 00000000`00000002 ffff8180`f0754180 00000000`00269fb1 ffff8180`f0754180 : nt!KiPageFault+0x23d [minkernel\ntos\ke\amd64\trap.asm @ 1248] ffffa884`c0c3f840 fffff800`60256b63 : ffffb30e`0e18f710 ffff8180`f0754180 ffffa884`c0c3fa18 00000000`00000002 : NDIS!NdisQueueIoWorkItem+0x4 [minio\ndis\sys\miniport.c @ 9708] ffffa884`c0c3f870 fffff800`60257bfd : 00000000`00000008 00000000`00000000 00000000`00269fb1 ffff8180`f0754180 : nt!KiProcessExpiredTimerList+0x153 [minkernel\ntos\ke\dpcsup.c @ 2078] ffffa884`c0c3f960 fffff800`6037123a : 00000000`00000000 ffff8180`f0754180 00000000`00000000 ffff8180`f0760cc0 : nt!KiRetireDpcList+0x43d [minkernel\ntos\ke\dpcsup.c @ 1512] ffffa884`c0c3fb60 00000000`00000000 : ffffa884`c0c40000 ffffa884`c0c39000 00000000`00000000 00000000`00000000 : nt!KiIdleLoop+0x5a [minkernel\ntos\ke\amd64\idle.
asm @ 166] RETRACER_ANALYSIS_TAG_STATUS: Failed in getting KPCR for core 2 THREAD_SHA1_HASH_MOD_FUNC: 5b59a784f22d4b5cbd5a8452fe39914b8fd7961d THREAD_SHA1_HASH_MOD_FUNC_OFFSET: 5643383f9cae3ca39073f7721b53f0c633bfb948 THREAD_SHA1_HASH_MOD: 20edda059578820e64b723e466deea47f59bd675 FOLLOWUP_IP: NDIS!NdisQueueIoWorkItem+4 [minio\ndis\sys\miniport.c @ 9708] fffff807`aa74f4c4 48895120 mov qword ptr [rcx+20h],rdx FAULT_INSTR_CODE: 20518948 FAULTING_SOURCE_LINE: minio\ndis\sys\miniport.c FAULTING_SOURCE_FILE: minio\ndis\sys\miniport.c FAULTING_SOURCE_LINE_NUMBER: 9708 FAULTING_SOURCE_CODE: 9704: _In_ _Points_to_data_ PVOID WorkItemContext 9705: ) 9706: { 9707: > 9708: ((PNDIS_IO_WORK_ITEM)NdisIoWorkItemHandle)->Routine = Routine; 9709: ((PNDIS_IO_WORK_ITEM)NdisIoWorkItemHandle)->WorkItemContext = WorkItemContext; 9710: 9711: IoQueueWorkItem(((PNDIS_IO_WORK_ITEM)NdisIoWorkItemHandle)->IoWorkItem, 9712: ndisDispatchIoWorkItem, 9713: CriticalWorkQueue, SYMBOL_STACK_INDEX: 3 SYMBOL_NAME: NDIS!NdisQueueIoWorkItem+4 FOLLOWUP_NAME: ndiscore MODULE_NAME: NDIS IMAGE_NAME: NDIS.
SYS DEBUG_FLR_IMAGE_TIMESTAMP: 0 IMAGE_VERSION: 10.0.16299.99 DXGANALYZE_ANALYSIS_TAG_PORT_GLOBAL_INFO_STR: Hybrid_FALSE DXGANALYZE_ANALYSIS_TAG_ADAPTER_INFO_STR: GPU0_VenId0x1414_DevId0x8d_WDDM1.3_Active; STACK_COMMAND: .thread ; .cxr ; kb BUCKET_ID_FUNC_OFFSET: 4 FAILURE_BUCKET_ID: AV_NDIS!NdisQueueIoWorkItem BUCKET_ID: AV_NDIS!NdisQueueIoWorkItem PRIMARY_PROBLEM_CLASS: AV_NDIS!NdisQueueIoWorkItem TARGET_TIME: 2017-12-10T14:16:08.000Z OSBUILD: 16299 OSSERVICEPACK: 98 SERVICEPACK_NUMBER: 0 OS_REVISION: 0 SUITE_MASK: 784 PRODUCT_TYPE: 1 OSPLATFORM_TYPE: x64 OSNAME: Windows 10 OSEDITION: Windows 10 WinNt TerminalServer SingleUserTS Personal OS_LOCALE: USER_LCID: 0 OSBUILD_TIMESTAMP: 2017-11-26 03:49:20 BUILDDATESTAMP_STR: 170928-1534 BUILDLAB_STR: rs3_release BUILDOSVER_STR: 10.0.16299.15.amd64fre.rs3_release.170928-1534 ANALYSIS_SESSION_ELAPSED_TIME: 8377 ANALYSIS_SOURCE: KM FAILURE_ID_HASH_STRING: km:av_ndis!ndisqueueioworkitem FAILURE_ID_HASH: {10686423-afa1-4852-ad1b-9324ac44ac96} FAILURE_ID_REPORT_LINK: https://go.
microsoft.com/fwlink/?LinkID=397724&FailureHash=10686423-afa1-4852-ad1b-9324ac44ac96 Followup: ndiscore ---------
Example 2
In this example, a non-Microsoft driver caused page fault, so we don’t have symbols for this driver. However, looking at IMAGE_NAME and or MODULE_NAME indicates it’s WwanUsbMP.sys that caused the issue. Disconnecting the device and retrying the upgrade is a possible solution.
1: kd> !analyze -v ******************************************************************************* * * * Bugcheck Analysis * * * ******************************************************************************* PAGE_FAULT_IN_NONPAGED_AREA (50) Invalid system memory was referenced. This can't be protected by try-except.Typically the address is just plain bad or it is pointing at freed memory. Arguments: Arg1: 8ba10000, memory referenced. Arg2: 00000000, value 0 = read operation, 1 = write operation. Arg3: 82154573, If non-zero, the instruction address which referenced the bad memory address. Arg4: 00000000, (reserved) Debugging Details: ------------------ *** WARNING: Unable to verify timestamp for WwanUsbMp.sys *** ERROR: Module load completed but symbols could not be loaded for WwanUsbMp.sys KEY_VALUES_STRING: 1 STACKHASH_ANALYSIS: 1 TIMELINE_ANALYSIS: 1 DUMP_CLASS: 1 DUMP_QUALIFIER: 400 BUILD_VERSION_STRING: 16299.15.x86fre.rs3_release.170928-1534 MARKER_MODULE_NAME: IBM_ibmpmdrv SYSTEM_MANUFACTURER: LENOVO SYSTEM_PRODUCT_NAME: 20AWS07H00 SYSTEM_SKU: LENOVO_MT_20AW_BU_Think_FM_ThinkPad T440p SYSTEM_VERSION: ThinkPad T440p BIOS_VENDOR: LENOVO BIOS_VERSION: GLET85WW (2.39 ) BIOS_DATE: 09/29/2016 BASEBOARD_MANUFACTURER: LENOVO BASEBOARD_PRODUCT: 20AWS07H00 BASEBOARD_VERSION: Not Defined DUMP_TYPE: 2 BUGCHECK_P1: ffffffff8ba10000 BUGCHECK_P2: 0 BUGCHECK_P3: ffffffff82154573 BUGCHECK_P4: 0 READ_ADDRESS: 822821d0: Unable to get MiVisibleState 8ba10000 FAULTING_IP: nt!memcpy+33 [minkernel\crts\crtw32\string\i386\memcpy.
asm @ 213 82154573 f3a5 rep movs dword ptr es:[edi],dword ptr [esi] MM_INTERNAL_CODE: 0 CPU_COUNT: 4 CPU_MHZ: 95a CPU_VENDOR: GenuineIntel CPU_FAMILY: 6 CPU_MODEL: 3c CPU_STEPPING: 3 CPU_MICROCODE: 6,3c,3,0 (F,M,S,R) SIG: 21'00000000 (cache) 21'00000000 (init) BLACKBOXBSD: 1 (!blackboxbsd) BLACKBOXPNP: 1 (!blackboxpnp) DEFAULT_BUCKET_ID: WIN8_DRIVER_FAULT BUGCHECK_STR: AV PROCESS_NAME: System CURRENT_IRQL: 2 ANALYSIS_SESSION_HOST: SHENDRIX-DEV0 ANALYSIS_SESSION_TIME: 01-17-2019 10:54:53.0780 ANALYSIS_VERSION: 10.0.18248.1001 amd64fre TRAP_FRAME: 8ba0efa8 -- (.trap 0xffffffff8ba0efa8) ErrCode = 00000000 eax=8ba1759e ebx=a2bfd314 ecx=00001d67 edx=00000002 esi=8ba10000 edi=a2bfe280 eip=82154573 esp=8ba0f01c ebp=8ba0f024 iopl=0 nv up ei pl nz ac pe nc cs=0008 ss=0010 ds=0023 es=0023 fs=0030 gs=0000 efl=00010216 nt!memcpy+0x33: 82154573 f3a5 rep movs dword ptr es:[edi],dword ptr [esi] Resetting default scope LOCK_ADDRESS: 8226c6e0 -- (!locks 8226c6e0) Cannot get _ERESOURCE type Resource @ nt!PiEngineLock (0x8226c6e0) Available 1 total locks PNP_TRIAGE_DATA: Lock address : 0x8226c6e0 Thread Count : 0 Thread address: 0x00000000 Thread wait : 0x0 LAST_CONTROL_TRANSFER: from 82076708 to 821507e8 STACK_TEXT: 8ba0ede4 82076708 00000050 8ba10000 00000000 nt!KeBugCheckEx [minkernel\ntos\ke\i386\procstat.
asm @ 114] 8ba0ee40 8207771e 8ba0efa8 8ba10000 8ba0eea0 nt!MiSystemFault+0x13c8 [minkernel\ntos\mm\mmfault.c @ 4755] 8ba0ef08 821652ac 00000000 8ba10000 00000000 nt!MmAccessFault+0x83e [minkernel\ntos\mm\mmfault.c @ 6868] 8ba0ef08 82154573 00000000 8ba10000 00000000 nt!_KiTrap0E+0xec [minkernel\ntos\ke\i386\trap.asm @ 5153] 8ba0f024 86692866 a2bfd314 8ba0f094 0000850a nt!memcpy+0x33 [minkernel\crts\crtw32\string\i386\memcpy.asm @ 213] 8ba0f040 866961bc 8ba0f19c a2bfd0e8 00000000 NDIS!ndisMSetPowerManagementCapabilities+0x8a [minio\ndis\sys\miniport.c @ 7969] 8ba0f060 866e1f66 866e1caf adfb9000 00000000 NDIS!ndisMSetGeneralAttributes+0x23d [minio\ndis\sys\miniport.c @ 8198] 8ba0f078 ac50c15f a2bfd0e8 0000009f 00000001 NDIS!NdisMSetMiniportAttributes+0x2b7 [minio\ndis\sys\miniport.c @ 7184] WARNING: Stack unwind information not available. Following frames may be wrong. 8ba0f270 ac526f96 adfb9000 a2bfd0e8 8269b9b0 WwanUsbMp+0x1c15f 8ba0f3cc 866e368a a2bfd0e8 00000000 8ba0f4c0 WwanUsbMp+0x36f96 8ba0f410 867004b0 a2bfd0e8 a2bfd0e8 a2be2a70 NDIS!ndisMInvokeInitialize+0x60 [minio\ndis\sys\miniport.
c @ 13834] 8ba0f7ac 866dbc8e a2acf730 866b807c 00000000 NDIS!ndisMInitializeAdapter+0xa23 [minio\ndis\sys\miniport.c @ 601] 8ba0f7d8 866e687d a2bfd0e8 00000000 00000000 NDIS!ndisInitializeAdapter+0x4c [minio\ndis\sys\initpnp.c @ 931] 8ba0f800 866e90bb adfb64d8 00000000 a2bfd0e8 NDIS!ndisPnPStartDevice+0x118 [minio\ndis\sys\configm.c @ 4235] 8ba0f820 866e8a58 adfb64d8 a2bfd0e8 00000000 NDIS!ndisStartDeviceSynchronous+0xbd [minio\ndis\sys\ndispnp.c @ 3096] 8ba0f838 866e81df adfb64d8 8ba0f85e 8ba0f85f NDIS!ndisPnPIrpStartDevice+0xb4 [minio\ndis\sys\ndispnp.c @ 1067] 8ba0f860 820a7e98 a2bfd030 adfb64d8 8ba0f910 NDIS!ndisPnPDispatch+0x108 [minio\ndis\sys\ndispnp.c @ 2429] 8ba0f878 8231f07e 8ba0f8ec adf5d4c8 872e2eb8 nt!IofCallDriver+0x48 [minkernel\ntos\io\iomgr\iosubs.c @ 3149] 8ba0f898 820b8569 820c92b8 872e2eb8 8ba0f910 nt!PnpAsynchronousCall+0x9e [minkernel\ntos\io\pnpmgr\irp.c @ 3005] 8ba0f8cc 820c9a76 00000000 820c92b8 872e2eb8 nt!PnpSendIrp+0x67 [minkernel\ntos\io\pnpmgr\irp.
h @ 286] 8ba0f914 8234577b 872e2eb8 adf638b0 adf638b0 nt!PnpStartDevice+0x60 [minkernel\ntos\io\pnpmgr\irp.c @ 3187] 8ba0f94c 82346cc7 872e2eb8 adf638b0 adf638b0 nt!PnpStartDeviceNode+0xc3 [minkernel\ntos\io\pnpmgr\start.c @ 1712] 8ba0f96c 82343c68 00000000 a2bdb3d8 adf638b0 nt!PipProcessStartPhase1+0x4d [minkernel\ntos\io\pnpmgr\start.c @ 114] 8ba0fb5c 824db885 8ba0fb80 00000000 00000000 nt!PipProcessDevNodeTree+0x386 [minkernel\ntos\io\pnpmgr\enum.c @ 6129] 8ba0fb88 8219571b 85852520 8c601040 8226ba90 nt!PiRestartDevice+0x91 [minkernel\ntos\io\pnpmgr\enum.c @ 4743] 8ba0fbe8 820804af 00000000 00000000 8c601040 nt!PnpDeviceActionWorker+0xdb4b7 [minkernel\ntos\io\pnpmgr\action.c @ 674] 8ba0fc38 8211485c 85852520 421de295 00000000 nt!ExpWorkerThread+0xcf [minkernel\ntos\ex\worker.c @ 4270] 8ba0fc70 82166785 820803e0 85852520 00000000 nt!PspSystemThreadStartup+0x4a [minkernel\ntos\ps\psexec.c @ 7756] 8ba0fc88 82051e07 85943940 8ba0fcd8 82051bb9 nt!KiThreadStartup+0x15 [minkernel\ntos\ke\i386\threadbg.
asm @ 82] 8ba0fc94 82051bb9 8b9cc600 8ba10000 8ba0d000 nt!KiProcessDeferredReadyList+0x17 [minkernel\ntos\ke\thredsup.c @ 5309] 8ba0fcd8 00000000 00000000 00000000 00000000 nt!KeSetPriorityThread+0x249 [minkernel\ntos\ke\thredobj.c @ 3881] RETRACER_ANALYSIS_TAG_STATUS: Failed in getting KPCR for core 1 THREAD_SHA1_HASH_MOD_FUNC: e029276c66aea80ba36903e89947127118d31128 THREAD_SHA1_HASH_MOD_FUNC_OFFSET: 012389f065d31c8eedd6204846a560146a38099b THREAD_SHA1_HASH_MOD: 44dc639eb162a28d47eaeeae4afe6f9eeccced3d FOLLOWUP_IP: WwanUsbMp+1c15f ac50c15f 8bf0 mov esi,eax FAULT_INSTR_CODE: f33bf08b SYMBOL_STACK_INDEX: 8 SYMBOL_NAME: WwanUsbMp+1c15f FOLLOWUP_NAME: MachineOwner MODULE_NAME: WwanUsbMp IMAGE_NAME: WwanUsbMp.sys DEBUG_FLR_IMAGE_TIMESTAMP: 5211bb0c DXGANALYZE_ANALYSIS_TAG_PORT_GLOBAL_INFO_STR: Hybrid_FALSE DXGANALYZE_ANALYSIS_TAG_ADAPTER_INFO_STR: GPU0_VenId0x1414_DevId0x8d_WDDM1.3_NotActive;GPU1_VenId0x8086_DevId0x416_WDDM1.3_Active_Post; STACK_COMMAND: .thread ; .
cxr ; kb BUCKET_ID_FUNC_OFFSET: 1c15f FAILURE_BUCKET_ID: AV_R_INVALID_WwanUsbMp!unknown_function BUCKET_ID: AV_R_INVALID_WwanUsbMp!unknown_function PRIMARY_PROBLEM_CLASS: AV_R_INVALID_WwanUsbMp!unknown_function TARGET_TIME: 2018-02-12T11:33:51.000Z OSBUILD: 16299 OSSERVICEPACK: 15 SERVICEPACK_NUMBER: 0 OS_REVISION: 0 SUITE_MASK: 272 PRODUCT_TYPE: 1 OSPLATFORM_TYPE: x86 OSNAME: Windows 10 OSEDITION: Windows 10 WinNt TerminalServer SingleUserTS OS_LOCALE: USER_LCID: 0 OSBUILD_TIMESTAMP: 2017-09-28 18:32:28 BUILDDATESTAMP_STR: 170928-1534 BUILDLAB_STR: rs3_release BUILDOSVER_STR: 10.0.16299.15.x86fre.rs3_release.170928-1534 ANALYSIS_SESSION_ELAPSED_TIME: 162bd ANALYSIS_SOURCE: KM FAILURE_ID_HASH_STRING: km:av_r_invalid_wwanusbmp!unknown_function FAILURE_ID_HASH: {31e4d053-0758-e43a-06a7-55f69b072cb3} FAILURE_ID_REPORT_LINK: https://go.microsoft.com/fwlink/?LinkID=397724&FailureHash=31e4d053-0758-e43a-06a7-55f69b072cb3 Followup: MachineOwner --------- ReadVirtual: 812d1248 not properly sign extended
References
Bug check code reference
How to troubleshoot a Blue Screen of Death (BSOD) — NO LONGER IN USE
A «blue screen» (or «stop error») is what’s commonly known as the Blue Screen of Death (BSOB), and it could appear while upgrading to a new version of the OS, when starting your computer, or just «out of the blue» when using Windows 10.
The biggest issue with a blue screen is that it’s literally a screen with a blue background and a sad face with not enough information to tell you the problem.
You’ll usually (not always) see a message that reads: «Your PC ran into a problem and needs to restart. We’re just collecting some error info, and then we’ll restart for you.» And a general error code (HAL_INITIALIZATION_FAID, PAGE_FAULT_IN_NONPAGE_AREA, CRITICAL_PROCESS_DIED or BAD_SYSTEM_CONFIG_INFO, for example) that can give you a clue of the issue. But most of the time it’s not enough to fix the problem.
Fortunately, you can often narrow down the blue screen to a problem with an update for Windows or a bad driver, incompatible software, or hardware you recently configured.
In this Windows 10 article, we’ll walk you through a number of troubleshooting steps to fix a blue screen error and get you up and running as soon as possible.
How to troubleshoot blue screen during an upgrade
A lot of times you’ll run into a BSOD as you try to upgrade to a new version of Windows 10. Typically, the reason could be a result of a third-party application, such as antivirus and security software, or incompatible hardware.
When you get the blue screen error, your system will automatically roll back any changes and restore the previous version of the OS.
You can troubleshoot this problem while trying to upgrade by doing the following.
Uninstall applications
An incompatible piece of software, such as an old program or third-party antivirus, is likely the root of the problem.
To resolve this issue, try uninstalling any unnecessary apps or a pieces of software you installed recently, using these steps:
- Open Settings.
- Click on System.
- Click on Apps & features.
-
Select the app and click the Uninstall button.
- Follow the on-screen directions to complete the uninstall process.
Repeat the steps to remove every piece of software that may be causing the problem.
Once you successfully upgraded to the latest version of Windows 10, you can reinstall the apps and they should work as expected.
Disconnect non-essential hardware
It could also be a hardware related problem. When trying to make an installation of Windows 10 remember to always unplug non-essential peripherals, including secondary monitors, printers, phones, external hard drives and other USB devices (you only need your mouse, keyboard and main monitor).
You can always reconnect the hardware after the installation. If you continue to have the same problem, you may need to install newer drivers, or it could also be an indication of incompatible hardware.
Re-downloading upgrade files
It’s possible that you’re getting a blue screen because of damaged setup files, in which case you’ll need to re-download the installation files.
If you’re trying to upgrade using Windows Update, you can do this by using the Disk Cleanup tool to delete previously downloaded installation files. When you do this, Windows Update will re-download the files again to upgrade the OS.
To use the Disk Cleanup tool, do the following:
- Open Start.
- Search for Disk Cleanup and click the result.
- Select drive «Windows (C:)» and click OK.
-
Click the Clean up system files button.
- Select drive «Windows (C:)» and click OK.
-
Check the Temporary Windows installation files option.
- Click OK to delete the files.
Once you complete the steps, you can try to upgrade one more time using Windows Update.
If you’re trying to upgrade using USB-bootable media, you may want to use the Media Creation tool to recreate your bootable media to jump to the latest version of Windows 10.
Doing a clean installation
Alternatively, you can prevent blue screen errors during an upgrade if you choose to delete everything and start fresh with a clean copy of the OS, instead of doing an in-place upgrade with USB-bootable media.
Important: This is a friendly reminder that performing a clean install of Windows 10 will delete everything on your system. It’s recommended that you do a full backup before proceeding.
Before you begin, if you’re upgrading from Windows 7 or Windows 8.1, you’ll need a product key to activate Windows 10. If you’re upgrading to a new version of Windows 10, you can skip entering the product key as the OS will reactivate automatically after the upgrade.
Also, your PC’s BIOS must be configured to boot from a USB flash drive. This can be different depending on your device, so make sure to check your computer manufacturer’s support website for instructions.
To do a clean install of Windows 10, do the following:
- Start your computer with the USB-bootable installation media.
- Click Next.
-
Click Install now.
- Click the I don’t have a product key link to skip this step.
- Check the I accept the license term option and click Next.
-
Select the OS you want to install.
-
Choose the Custom: Install Windows only (advanced) option.
-
Select and delete the primary partition with the Windows 10 installation. (It is usually labeled: Drive 0 Partition 2).
- Click Next.
- Follow the on-screen directions to complete the install process.
Once you complete the installation of Windows 10, you’ll need to reinstall all your applications and restore your files from backup.
How to troubleshoot blue screen during boot with desktop access
When you experience a BSOD and you can access the desktop, the problem can be an outdated driver or missing update. Or it can also be an issue with a recently installed application, Windows update, or device driver.
How to install updates and drivers
You can make sure your installation of Windows 10 and drivers are up to date by following these steps.
Installing latest Windows 10 updates
Although the OS installs updates automatically, it’s possible that an update may still be missing on your computer.
To check for updates on Windows 10, do the following:
- Open Start.
- Click on Update & security.
-
Click on Windows Update.
- Click the Check for updates now button.
Installing latest device driver updates
In the case that you’re getting a stop error because of an outdated device driver, you can do the following:
- Use the Windows key + X keyboard shortcut to open the Power User menu.
- Click on Device Manager.
- Expand the device causing the problem.
-
Right-click the device and select Update Driver Software.
-
Click the Search automatically for updated driver software option.
It takes time for device-driver updates to appear through Windows Update. This means that if you couldn’t find any new updates using Device Manager, you may have to check your device manufacturer’s support website to download and install newer drivers.
How to uninstall updates, drivers and applications
A blue screen error may also appear as a result of an incompatible or buggy update for Windows 10 or driver. If you can start your computer and get to the desktop, you can fix the problem by doing the following.
Uninstall Windows 10 updates
A BSOD error is more likely to occur after installing a new cumulative update for Windows 10 due to bugs or incompatibility problems.
If you’re still able to get to the desktop, you can try to uninstall any recently installed update using the following steps:
- Open Control Panel.
- Click the Uninstall a program link.
-
Click the View installed updates link from the left pane.
- Right-click the most recent update.
-
Select Uninstall to remove the update.
Once you complete the task, if you no longer see a stop error you can temporarily block the update from automatically installing using this guide.
Uninstall device drivers
If the stop error occurs after installing a driver, you can uninstall it using the following steps:
- Use the Windows key + X keyboard shortcut to open the Power User menu.
- Click on Device Manager.
- Expand the device causing the problem.
-
Right-click the device and select Uninstall.
- Click OK to confirm.
Alternatively, sometimes it’s possible to roll back to the previous version of the driver to see if the older version fixes the issue. You can use the same steps mentioned above, but on step No. 4 select Properties, and on the Driver tab, click the Roll Back Driver button, if available.
Once you complete the task, if you no longer see a stop error you can temporarily block Windows 10 from automatically installing the driver using this guide.
Uninstall software
It could also happen that you recently installed an application that isn’t compatible with the current version of Windows 10, and every time you try to open the app, a BSOD will appear.
To resolve this problem, check your software company’s support website to see if there is a new update available or upgrade you can download and install on your computer.
If there isn’t any new update, you’ll need to uninstall the application in question using the following steps:
- Open Settings.
- Click on System.
- Click on Apps & features.
-
Select the app and click the Uninstall button.
- Follow the on-screen directions to complete the uninstall process.
Disconnect non-essential hardware
Sometimes, you’ll see a blue screen after connecting new hardware to your computer. When this happens the problem could be that the device isn’t compatible, is broken, or the OS is trying to install the wrong driver.
If it’s an old device that you’re trying to connect, it’s probably not compatible with Windows 10. You can check your hardware manufacturer’s support website to find out whether or not it’s compatible. If it’s not, you may need to find a newer model or suitable replacement.
It could also happen that your peripheral went bad, in which case you’ll need to get a new one that is in working condition.
In the case the OS is trying to install the wrong driver, you’ll need to download the latest device driver from your manufacturer’s support website. Use the steps mentioned above to uninstall the current driver and install the one you manually downloaded.
How to troubleshoot blue screen during boot without desktop access
Other times, a BSOD will appear on Windows 10 after installing a new update or device driver, and you won’t be able to get to the desktop to fix the problem.
Quick Tip: If you can’t boot to your desktop, and you recently connected new hardware, such as an external hard drive, secondary monitor, or printer, try to disconnect any unnecessary hardware to see if that fixes the problem.
When this happens, you can use System Restore or Safe mode to troubleshoot and resolve the problem.
Fixing blue screen using Restore Point
If you can’t access the desktop, let your computer fail to start at least three times to trigger the automatic repair environment, and then do the following:
-
On the «Choose an option» screen select Troubleshoot.
- Click on Advanced options.
-
Click on System Restore.
- After your computer reboots, select your account and sign-in.
-
Click Next.
-
Usually, system restore points are automatically created when you install a new update, driver or app. You can also create a system restore point manually. Select the restore point created before the blue screen appeared.
- Click Next.
- Click Finish to apply the restore point.
Once you complete these steps, the system restore will remove updates and drivers configured after the restore point was created, which can help to fix the stop error.
Fixing blue screen using Safe mode
Alternatively, you can uninstall an update or device driver using Safe mode when you can’t access the desktop.
If you can’t access the desktop, let your computer fail to start at least three times to trigger the automatic repair environment, and then do the following:
-
Select Troubleshoot on the Choose an option screen.
- Click on Advanced options.
-
Click on Start Settings.
-
Click the Restart button.
-
After your computer reboots, press F4 or the 4 key to select Enable Safe Mode.
Once you’re in safe mode, depending on what’s causing the problem, you can use the following steps to uninstall an update or device driver.
Uninstall Windows 10 updates
- Open Control Panel.
- Click the Uninstall a program link.
-
Click the View installed updates link from the left pane.
- Right-click the most recent update.
-
Select Uninstall to remove the update.
Uninstall device drivers
- Use the Windows key + X keyboard shortcut to open the Power User menu.
- Click on Device Manager.
- Expand the device causing the problem.
-
Right-click the device and select Uninstall.
- Click OK to confirm.
If you no longer see a stop error after rebooting your PC, you can temporarily block Windows 10 from automatically installing the driver or update using this guide.
Wrapping things up
Getting a BSOD error on Windows 10 can be a frustrating experience, but as you can see in this guide, there is plenty you can do to troubleshoot and fix the problem.
If you’re still unable to resolve the issue, you can also make a note of any error message and contact your manufacturer for help. Sometimes, they may not have an update to fix the issue, but they may be able to offer a workaround.
And it’s not just the blue screen on Windows 10 that signals a problem. You may also come across a black screen, an issue that can be caused by a graphics driver, a connection problem with your display, or during the installation of the OS (or updates). Likewise, you may also experience a flickering screen, which usually is caused by an application or video driver problem.
Note: Memory issues can also cause Blue Screen issues and you can check your RAM (memory) here.
Blue Screen of Death (BSOD), what to do?
First you need to understand that there are two types of blue screens (BSoD) in the system. One is caused by a standard hard drive test that can run after a minor power outage when your computer has blacked out. And the second is caused by a technical failure or a conflict of some details in the computer or drivers.
Content:
- Causes of BSOD
- Hard drive failure
- Overtemperature
- Overclocking
- Failure of RAM and other hardware
- Program failure
- How to determine the cause of the blue screen of death
- Search by error codes
- Viewing and analyzing minidumps
- Universal measures
Causes of BSOD
Usually blue screens of death are caused by a malfunction of the computer hardware or drivers. Normal applications should not cause BSOD. In case of a crash, third-party programs do not cause a malfunction of the operating system. The most common causes of BSODs are hardware failures or issues with the Windows kernel level software. There are crashes associated with antivirus updates.
The blue screen usually appears when Windows detects a “STOP error”. This critical fall causes the Windows system to stop working. In this case, it remains only to forcibly turn off the computer and restart it. This procedure can result in the loss of unsaved data because the applications actually have no chance to save the changes. In an ideal scenario, programs should regularly save progress so that BSODs or other errors do not lead to data loss. Otherwise, you will need to repair your computer to recover data.
When a blue screen of death occurs, Windows automatically creates and saves to disk a “minidump” memory dump file that contains information about a critical failure. Users can view the information in the dumps — it can help identify the cause of the BSOD crash.
Hard disk failure
This blue screen is caused by problems in the electrical network, non-standard shutdown of the PC (for example, they pulled it out of the socket or kicked the button on the system unit), or during a thunderstorm there was a sudden power surge, from which the computer passed out.
Such a death is not terrible, just when the system starts, the built-in utility checkdisk (Chkdsk) is automatically activated. You can manually run this utility from the command line in order to check the health of a hard drive that has problems and glitches.
If you suspect that some hard disk clusters are damaged, you can run a check. Open a command line interpreter. To do this, press «Win + R» and enter «cmd» or through the search, write «cmd».
The command line must be run as an administrator, otherwise the command will not work.
If the blue screen of verification began to appear more and more often, then it is best to copy the photos, videos, documents, etc. that are important to you. to some external media and preferably reinstall the operating system with a full formatting of the hard disk, such formatting will mark damaged clusters and prevent information from being written to them.
Overheating
The blue screen of death is most often caused by overheating of the processor or video card. Such a problem can occur as a result of poor performance of the cooling system and the appearance of a large layer of dust in the cooler heatsink. The reason for overheating can also be poor contact between the surface of the processor and the heatsink. This problem occurs as a result of the heat transfer paste drying out.
In order to make sure that this particular problem occurs, it is necessary to measure the temperature of the CPU and video card. To do this, you can use special programs that show the current, minimum and maximum temperatures of the computer components from the moment it was started.
If the problem is overheating, then the user needs to follow these steps:
- clean the cooler radiator from dust;
- replace thermal paste;
- install additional fans in the case;
- lower the ambient temperature (for example, install an air conditioner in the room where the PC is located).
Overclocking
The blue screen of death can also appear as a result of overclocking the PC. Such problems usually arise in novice overclockers who are not aware of the possible consequences of unsuccessful overclocking of the CPU and RAM.
Failure of RAM and other hardware
RAM failure is most often the result of a bad connection. This problem is solved by turning off the computer and disconnecting it from the network. Next, you need to open the PC case and reconnect the RAM chipset. If the blue screen problem is still not resolved, then the user should contact the nearest service center.
RAM failure can also be caused by oxidation or contamination of the contacts. In this situation, you need to remove the RAM chipset and clean its contacts with a rubber eraser. Similar problems can occur in the work of other iron. To eliminate them, it may be necessary to replace all components of the PC one by one.
Program failure
BSoD can also occur as a result of software failure. However, this problem is rarely the cause of the blue screen of death. This is due to the fact that most modern programs are simply not capable of causing a BSoD. The only exceptions are anti-virus and accounting programs, as well as game protection systems and virtual disk emulators.
How to determine the cause of the blue screen of death
The following methods can be used to determine the cause of the failure:
- search by error codes;
- viewing and analyzing minidumps.
Error code search
Any error that led to the blue screen of death has its own unique code, thanks to which the user can identify the cause of the problem. The BSoD error is represented as a hexadecimal code. On the Internet, you can find instructions for eliminating any error that led to the blue screen of death. To do this, just enter the error code in any search engine. By specifying a hexadecimal code, the user will find out not only the cause of the malfunction, but also ways to eliminate it.
Viewing and analyzing minidumps
When a fatal error is detected, any operating system makes an emergency dump (snapshot) of the contents of RAM. This data is saved to the hard disk. There are 3 types of memory dumps: full, core dump, and minidump. To identify the cause of the blue screen, it is enough to use minidumps. To analyze them, you will need special programs (for example, BlueScreenView), thanks to which you can quickly identify failed drivers. After identifying the «weak spot», to restore the normal operation of the PC, it is enough to remove or update these drivers.
Universal measures
These general measures affect many system parameters and help restore normal operation. Including they can fix errors that lead to the blue screen of death.
- In System Settings, go to Windows Update and check for updates. If they are available, install them.
- Check the system with anti-virus software.
- Update drivers.
You can go to your computer manufacturer’s website and download all the drivers for self-installation. But you can also use free services like Driver Booster and DriverPack, which download and install drivers automatically.
- Test your computer in safe mode.
- Check CPU and GPU temperatures. Make sure your computer is not overheating. If the readings are higher than acceptable, cool down the computer.
- Check the hard disk and RAM for errors using special utilities.
- Reset BIOS settings.
- Restore Windows to a previous state.
- If the screen of death appears when you start your computer and Windows does not boot, please read this guide.
- If all else fails, try reinstalling Windows.
Eliminate BSOD or blue screen of death
Diagnosis and solution options for BSOD in Windows. The sequence of actions to use when a blue screen appears.
You have a blue screen of death or BSOD on your monitor screen. Yes, it’s annoying, but not fatal. From the error message, I do not understand what is the reason and how to fix it.
But there is a sequence of actions and methods that should be performed first of all, since they are universal and in most cases will help in eliminating a critical system error.
Contents
Diagnosing the problem
What have you changed recently
Try to remember what you have changed in the computer, its configuration and settings recently. The most common cause is a recent change in the computer’s software or hardware settings. This includes installing new drivers, getting OS updates.
A driver is software that allows the hardware installed in your computer to communicate with Windows and work properly. Hardware manufacturers and developers of drivers for them cannot take into account all possible configurations of both the hardware and software of the PC. In this connection, it is likely that the installed or updated driver causes a critical error.
Check the computer’s internal hardware
In some cases, a bad connection, bad contacts inside the computer can cause a blue screen. Open the case and check the connection of all cables, make sure that all wires are securely fastened, and that all available equipment boards are firmly seated in their slots.
If it is not difficult to check for a personal computer, then it is more problematic for laptop owners to do this. But you can check the hard drive and RAM to make sure they are connected correctly.
Use a small Phillips screwdriver to remove the removable panels at the back of the laptop that hide the hard drive and RAM or plus the motherboard, as in the photo below. Check the tightness of the plug connections.
Temperature
Check the temperature of the computer: processor, video card, hard drives. Overheating can cause equipment failure. One of the most common overheating is overheating of the video card. The second most likely culprit could be the CPU.
The temperature can be checked in most modern BIOSes or with special Windows programs such as SpeedFan.
Memory check
A common cause of failures is a bad RAM stick. When RAM starts to fail, it leads to unstable system operation.
You can test your RAM using a program called Memtest86. The program is free and free to download. You can run it by writing it to a bootable CD.
You need to restart your computer and boot from the disk. Memtest will automatically start testing the computer’s RAM, which may take a long time. We need to wait for the results.
Hard disk check
Run the CHKDSK function — it is used on the hard disk to scan for errors and fix possible problems. A failed hard drive can lead to a blue screen due to corrupted files.
To run CHKDSK:
- Open Computer → My Computer and right-click the drive you want to scan.
- Select Properties .
- On the Properties screen, select the Tools tab .
- Click the Check button in the error checking section.
- The computer will ask you to restart it to scan the disk.
Disable everything else
One way to determine the cause of the failure is to narrow down the search. To do this, you need to disable everything without which the computer can work, without which it can start. If the error disappears, you will know that one of the disconnected devices is the cause.
- To start a desktop computer, you need: motherboard, hard drive, power supply, RAM, video card and keyboard.
- If the motherboard has a video connector, then connect the monitor to it, and turn off the external (additional) video card.
- If there are several sticks of RAM, it is better to leave one of them, then alternate when loading options with different slots in the motherboard and memory sticks.
- If the PC starts without errors, then we try to connect one device at a time and start the system until an error message appears.
This will allow you to know exactly which equipment is causing the failure.
- Unfortunately, this method is not applicable to laptops, there is no way to turn off devices (at least for a novice user).
Have time to read the error message
Often the computer will reboot faster than you can read the error message, let alone write something down. It’s all about the Windows OS settings, which are set to automatically restart.
To read the message, boot into safe mode and uncheck «Perform automatic restart».
In short:
- System properties → Advanced system settings.
- Advanced tab.
- Options button under Startup and Recovery.
- Uncheck the Perform an automatic restart checkbox.
- Click Apply and reboot the system.
If you still can’t boot in safe mode, then you have time to read the code on the screen (about 1 second).
BSOD 9 code and name0043
When the blue screen appears in front of you again, you will have plenty of time to study it on the screen, since the computer will now restart only at your initiative.
What exactly is important and needs to be rewritten from the screen is described in detail in the section How to find out the cause of the BSOD. The error code always begins with the characters 0x and is located after the word STOP.
Then go to the BSOD error description page and enter the written code in the search form, you will find a description of the error and possible solutions.
BSOD solution
Booting in safe mode.
If the operating system cannot start, try booting into safe mode.
Safe Mode is a stripped-down version of Windows that leaves only essential components to boot, allowing it to boot during crashes in most cases.
To do this, while the computer is booting, press the F8 button until the boot menu appears, in which you must select Safe Mode with loading network drivers.
This will allow access to the Device Manager, drivers and startup.
Run a virus scan
Viruses and other malware can corrupt Windows files and can cause your system to crash. Always use an antivirus tool.
If the computer does not boot, there are two options:
- Use virus scanners in safe mode.
- use a LiveCD(LiveUSB) with an antivirus (this is a bootable disk from which you can boot and check a non-working system on the hard disk with an antivirus). Almost every antivirus vendor also distributes a LiveCD version.
Checking the integrity of system files
Using the built-in sfc utility https://allerrorcodes.ru/sfc-exe/, you need to check the integrity of all system files protected by the Windows file protection system.
- Run command line cmd.exe from administrator name : enter cmd.exe and press Enter .
- In the black screen that appears (which is the command line), enter sfc.exe /scannow .
- The system check will start and the changed files will be restored from the backup source.
Driver rollback
If the problem is in the hardware, the first thing to try is to roll back the drivers. Especially if you installed a new piece of hardware or a new driver into the system before the crash.
This process will restore an earlier version of the driver that the system was running smoothly.
- Open Device Manager. To do this, you can press the key combination Windows + Pause or open the Start menu and right-click on Computer (or a shortcut on the desktop called My Computer). Select Properties. Then Device Manager.
- Select the hardware whose drivers you want to roll back. It is possible to expand subgroups by clicking on the plus sign. Right-click on the hardware icon and select Properties.
- Go to the Driver tab. Select Rollback and Confirm.
- Try rebooting and check how it affected the BSOD fix
Rolling back Windows changes
If rolling back the drivers did not help, the next step is to roll back Windows changes. In other words, this is a rollback to the state of the system when it worked correctly.
In the search bar, enter the phrase Recovery. Open the found program and select the date before the error appeared.
This will restore the state of the computer to the selected date, everything that you installed later or updated, all these changes will be canceled. It’s as if no one just made them, since we returned to the past.
Insufficient hard drive space
If Windows runs out of space on the system drive (on which it is installed), it can cause system errors. Remove unnecessary files and programs from the system disk if the free space on it is less than 15% of the total.
Updating the system and drivers
If the rollback of drivers and changes does not work, you can try installing new versions of the drivers (if they have not been installed before) it is quite possible that the developers have already fixed the error and all that remains is to update.
- Click the Start button and type Windows Update in the search bar.
- Click check for updates.
- Follow the instructions.
Reinstalling Windows
The last option, which you can resort to if the previous ones did not help, is a complete reinstallation of Windows.
Make sure that all your important files are saved in a safe place, as the hard drive will be formatted during installation and your data will be lost.
If reinstalling Windows still did not solve the problem and the blue screen still appears, then the reason is still in the hardware. You need to find and replace the faulty part of the computer.
Replacement of defective equipment
- On a laptop, replacing everything but the RAM or hard drive can be difficult and costly.
- If RAM tests show errors, change the bad bar.
- If the hard drive tests reveal errors, the first step is to back up your data and replace it with a new hard drive.
- If the video card is defective, it can be expensive to replace.
And it is almost impossible to replace it in most laptops. For desktop computers, everything is easier, find a working video card, replace it for a while and see how the system behaves.
Troubleshooting STOP errors (blue screen errors) in Windows 7
Stop errors (sometimes called blue screen or black screen errors) can occur if Windows 7 causes a serious problem that results in unexpected shutdown or unexpected restart.
These errors can be caused by both hardware and software problems and can be difficult to resolve. Using the tools and methods below will help you get Windows back up and running in most cases.
If you can start Windows
The following tools and methods can be used to roll back the system to an earlier state and verify that the latest updates are installed.
System Restore is the easiest thing to do first. This tool can undo recent changes to the computer’s system files that may have caused the problem. System Restore will not affect your personal files, such as mail, documents, or photos.
«Starting System Restore»
-
Open System Restore by clicking the Start button and select . In the search box, enter System Restore. Then select System Restore from the list of results. If you are prompted for an administrator password or confirmation, enter the password or enter it.
-
Follow the instructions on the screen.
Windows generates a report when certain hardware or software problems occur. You can check the Action Center to see if there are solutions to the problem you report.
Finding Solutions
-
Click Maintenance .
-
Under Find solutions for reported problems , click Find solutions . If there are solutions for problems on your computer, Windows will notify you.
Open the Action Center by clicking the Start button, selecting Control Panel, and then in the System and Security group, clicking View Status computers».
Note: Information about some problems and how to solve them is available only to administrators. Accordingly, only administrators can troubleshoot such problems. To view details about such issues, sign in with an administrator account.
The latest updates from Microsoft may help resolve the issue. Windows Update helps you keep your computer up to date with the latest system updates and drivers. You can manually check if you have the latest Windows 7 Windows updates installed.
Check for updates
-
Open Windows Update by pressing the Start button. Enter 9 in the search field0393 Update , and then in the list of results select Windows Update .
-
In the pane on the left, click Check for updates , and then wait until Windows finishes searching for the latest updates for your computer.
-
To learn more about an update, click it in the list. Check the boxes next to the updates you want to install, and then click the OK button.
-
Click the Install updates button. Read and accept the license terms, and then click «Finish», if an update is required. If you are prompted for an administrator password or confirmation, enter it or jump.
If you recently installed a hardware device, such as a sound card or video card, the problem may be caused by an incorrectly installed device driver.
Make sure the latest driver is installed on the device. Drivers can usually be found on the device manufacturer’s website. Most drivers are installed automatically: once downloaded, just double-click the file to start the installation.
If the driver is not intended for automatic installation, follow the steps below.
Update driver
Log on as an administrator to perform this procedure.
-
Open Device Manager by clicking the » » button, clicking «Control Panel», clicking «System and Security», and then in the «System» group, select «Device Manager». If you are prompted for an administrator password or confirmation, enter the password or enter it.
-
In the list of hardware categories, select the device for which you want to update the driver and double-click it.
-
Go to tab «Driver», select «Update driver» and follow the instructions. If you are prompted for an administrator password or confirmation, enter it or jump.
Safe Mode starts Windows in a restricted state. Only the essential files and drivers needed to start Windows are launched, allowing you to troubleshoot software-related problems. For example, if a program starts right after Windows starts and cannot be closed, you can start Windows in Safe Mode and then try to uninstall the program.
Starting the computer in safe mode
-
Remove all CDs, DVDs, and other media from the computer, and then restart it.
Then press button «Start» button, click the arrow next to the «Shut down» button click «Restart».
-
Do one of the following:
-
If your computer has a single operating system, press and hold the F8 key while restarting the computer. You must press the F8 key until the Windows logo appears. If the Windows logo is displayed, you must try again; to do this, wait until the Windows logon screen appears, and then shut down the computer and restart it.
-
If your computer has multiple operating systems, use the arrow keys to select the operating system that you want to start in safe mode, and then press F8.
-
-
On screen Advanced Boot Options , use the arrow keys to select the safe mode option you want, and then press ENTER. For more information about the options available, see Advanced Boot Options (Including Safe Mode).
-
Log on using a user account with administrator rights.
When the computer starts in Safe Mode, Safe Mode will be displayed in the corners of the screen. To exit Safe Mode, restart your computer and let Windows start normally.
Some errors may be caused by problems with the computer’s hard drive and random access memory (RAM) rather than problems with Windows or other software on the computer.
Windows 7 tools that help you identify and fix certain hardware-related errors. If serious errors occur, you may need to contact the hardware manufacturer for assistance.
Check for hard drive errors
-
Open «Computer» by clicking the » » button, and then clicking the «Computer» button .
-
Right-click the drive you want to check and select Properties .
-
Click the Service tab, and then under Check disk for errors click the 9 button0393 Perform test . If you are prompted for an administrator password or confirmation, enter it or jump.
-
To automatically fix problems with files and folders detected during scanning, select the «Automatically fix system errors» checkbox. Otherwise, the Check Disk feature will report problems but not fix them.
-
To perform a thorough scan, select the Check and repair bad sectors check box. With this check, the system tries to find and fix physical errors on the hard drive, so this operation takes much longer to complete.
-
To search for both file and physical errors, check both boxes: Automatically fix system errors and Scan and repair bad sectors .
-
-
Press the «Start» button.
Check for memory problems
-
Open the Memory Diagnostic Tool by pressing the » » button and pressing the «Control Panel» button . Enter 9 in the search box0393 «Memory» and click «Diagnose computer memory problems». If you are prompted for an administrator password or confirmation, enter the password or enter it.
-
Specify when to run the tool. If you want to restart your computer and run the tool immediately, save the required data and close any running programs.
The Memory Diagnostic Tool will automatically run when you restart Windows.
If you cannot start Windows
The following tools can be used to uninstall or roll back software changes, fix Windows startup files, and restore your system from a previous backup. If none of these options fix the problem, you can reinstall Windows 7.
The System Recovery Options menu contains several of the following tools: This menu is preinstalled on your computer’s hard drive and is also found in Windows 7 installations.
Windows Recovery Steps
-
If you have a tablet or other touch screen computer, you may need to connect a keyboard and mouse to use Startup Repair and other tools in the System Recovery Options menu. For more information, see System Recovery Options in Windows 7
-
Remove all CDs, DVDs, and other media from the computer, and then restart it.
Press Start button , click the arrow next to the Shut down button click Restart button.
-
Do one of the following:
-
If your computer has a single operating system, press and hold the F8 key while restarting the computer. You must press the F8 key until the Windows logo appears. If the Windows logo is displayed, you must try again; to do this, wait until the Windows logon screen appears, and then shut down the computer and restart it.
-
If your computer has multiple operating systems, use the arrow keys to select the operating system that you want to start in safe mode, and then press F8.
-
-
On screen Advanced Boot Options , use the arrow keys to select the safe mode option you want, and then press ENTER. For more information about options, see Advanced startup options (including safe mode).
-
Log on using a user account with administrator rights.
-
Remove all CDs, DVDs, and other media from the computer, and then restart it using the power button.
-
Do one of the following:
-
If your computer has a single operating system, press and hold the F8 key while restarting the computer. You must press the F8 key until the Windows logo appears. If the Windows logo is displayed, you must try again; to do this, wait until the Windows logon screen appears, and then shut down the computer and restart it.
-
On screen Advanced Boot Options use the arrow keys to select System Restore , and then press Enter. (If System Restore is not listed, this means that the computer does not have any pre-installed recovery options or your network administrator has disabled them.)
-
Select the desired keyboard layout and click the Next button.
-
In menu System recovery options click Startup Repair , and then follow the instructions on the screen.
-
-
Insert the Windows 7 installation disc, USB flash drive, or system recovery drive, and then turn off the computer.
-
Restart the computer using the power button.
-
If prompted, press any key and follow the instructions on the screen.
-
On the Install Windows page or on the System Recovery Options page , select the language and other options, and then click Next. If neither the Install Windows page, nor the System Recovery Options page is displayed, and you are not prompted to press a key, you may need to change some system settings. To learn how to do this, see Boot your computer from a USB flash drive or Windows 7 installation disc.
-
If you are using the Windows installation disc, click Repair your computer.
-
Select the Windows installation you want to fix, and then click Next .
-
In menu System recovery options click Startup Repair , and then follow the instructions on the screen.
-
Remove all CDs, DVDs, and other media from the computer, and then restart it using the power button.
-
Do one of the following:
-
If your computer has a single operating system, press and hold the F8 key while restarting the computer. You must press the F8 key until the Windows logo appears. If the Windows logo is displayed, you must try again; to do this, wait until the Windows logon screen appears, and then shut down the computer and restart it.
-
If your computer has multiple operating systems, use the arrow keys to select the operating system you want to restore, and then press and hold the F8 key.
-
-
Select the desired keyboard layout and click the Next button.
-
In menu System Recovery Options Click System Restore , and then follow the instructions on the screen.
-
Insert the Windows 7 installation disc, USB flash drive, or system recovery drive, and then turn off the computer.
-
Restart the computer using the power button.
-
If prompted, press any key and follow the instructions on the screen.
-
On the Install Windows page or on the System Recovery Options page , select the language and other options, and then click Next.
If you do not see the Install Windows page, the System Recovery Options page, or the prompt to press any key, you may need to change some system settings. To learn how to do this, see Boot your computer from a USB flash drive or Windows 7 installation disc.
-
If you are using the Windows installation disc, click System Restore .
-
Select the Windows installation you want to fix, and then click Next .
-
On menu System Recovery Options click System Restore , and then follow the instructions on the screen.
-
Remove all CDs, DVDs, and other media from the computer, and then restart it using the power button.
-
If your computer has a single operating system, press and hold the F8 key while restarting the computer. You must press the F8 key until the Windows logo appears. If the Windows logo is displayed, you must try again; to do this, wait until the Windows logon screen appears, and then shut down the computer and restart it.
-
If your computer has multiple operating systems, use the arrow keys to select the operating system you want to restore, and then press and hold the F8 key.
When the computer starts in Safe Mode, Safe Mode will be displayed in the corners of the screen. To exit Safe Mode, restart your computer and let Windows start normally.
Startup Repair can detect and fix some system problems that may prevent Windows from starting, such as missing or corrupted system files.
If certain problems are detected, Startup Repair will run automatically. Alternatively, it can be started manually.
Starting Startup Repair using preset recovery options
Starting Startup Repair using the Windows 7 installation disc, USB flash drive, or System Repair disc
you can access it using your Windows 7 installation disc, USB flash drive, or system recovery drive if you created one previously.
To use this method, you must restart your computer using the disc or USB flash drive.
System Restore can be used from the System Recovery Options menu. System Restore works the same way it does in normal mode, with one exception: it cannot create restore points in this mode, so you won’t be able to undo the restore operation. However, you will be able to run System Restore again and select a different restore point (if one exists).
Launching System Restore using preset recovery options
How to run System Restore using the Windows 7 installation disc, USB flash drive, or system recovery disc using the Windows 7 installation disc or a USB flash drive, or from a system recovery disc if you created one earlier.
To use this method, you must restart the computer using the disk.
If you used a Windows Complete computer to create a system image backup as part of a backup plan, you can restore your computer using a system image.
A system image is a copy of a partition on a Windows hard drive. It also contains all the data that was on the partition when the image was created, including Windows, programs, and user data such as documents, pictures, and music. To use this option, you must first create a system image.
Restoring the system image replaces the contents of the hard disk with the contents of the system image. This means that any changes you have made, programs installed, or files saved since the system image was created are likely to be lost unless you have a recent backup of your data.
Recovering from a system image using preset recovery options
On screen Advanced Boot Options use the arrow keys to select option System Restore , and then press ENTER. (If System Restore is not listed, this means that the computer does not have any pre-installed recovery options or your network administrator has disabled them.)
Select the desired keyboard layout and click the Next button.
In menu System Recovery Options click System Image Recovery and follow the instructions on the screen.
Restoring from a system image using the Windows 7 installation disc, USB flash drive, or system recovery disc or a USB flash drive or system recovery drive if you created one earlier.
To use this method, you must restart the computer using the disk.
-
Restart the computer using the power button.
-
If prompted, press any key and follow the instructions on the screen.
-
On page «Install Windows» or page «System Recovery Options» select the language and other options and click Next. If you do not see the Install Windows page, the System Recovery Options page, or the prompt to press any key, you may need to change some system settings. To learn how to do this, see Boot your computer from a USB flash drive or Windows 7 installation disc.
-
If you are using the Windows installation disc, click System Restore .
-
Select the Windows installation you want to fix, and then click Next .
-
On menu System Recovery Options click System Image Recovery and follow the instructions on the screen.
If you failed Windows 7 in another way, you can reinstall Windows 7 using the original Windows 7 installation disc or installation files.
Reinstalling Windows 7 will remove all installed programs and restore default Windows settings. You will need to restore user files and reinstall any previously installed programs using the original installation discs or files.
Installing Windows 7 using the Setup option and formatting the hard drive
To install Windows 7, you must start your computer from the Windows 7 installation disc or USB flash drive.
-
Turn on the computer, insert the Windows 7 installation disc or USB flash drive, and then shut down the computer.
-
Restart your computer.
-
If prompted, press any key and follow the instructions on the screen.
-
If you accept the terms of the license agreement, go to page Review license terms , select the I accept the terms of license check box, and then click the Next button.
-
On page Select installation type , click Custom .
-
Select the partition you want to edit, click the desired formatting option, and follow the on-screen instructions.
-
When formatting is complete, press the button Next .
-
Follow the instructions to complete the installation of Windows 7, including renaming the computer and setting up the initial user account.
How to fix the Blue Screen of Death (BSOD) in Windows 10
It is no longer surprising for Windows 10 users to experience the Blue Screen of Death. BSOD, known as STOP error, is in fact the most famous screen of death among others.
In the previous article, we looked at Windows errors associated with the concept of «Screen of Death», in particular with the most popular blue screen of death BSOD.
So, what if you happen to experience this problem on your computer? There are several ways to fix the problem that plagues Windows 10 users.
- Article content:
- What to do first
- Disable automatic reboot
- Check the system for viruses
- Windows update
- Update hardware drivers and firmware
- How to fix the blue screen of death in Windows 10
- Booting into safe mode
- Use System Restore
- Fixing the Blue Screen of Death with Windows Troubleshooter
- Remove the faulty Windows update
- Reinstall Windows to fix blue screen of death
What to do first
Disable automatic reboot.
In most cases, Windows 10 defaults to restart when a STOP error occurs. In this situation, you do not have enough time to write down the error code associated with the BSOD. To start the process of fixing the failure, you need to hold the error message on the screen for a while.
How to do it:
- 1. Right click on My Computer .
- 2. Go to section Properties .
- 3. On the left side, select Advanced system settings .
- 4. In section Boot and restore click Settings .
- 5. Now in Section System Failure uncheck Perform automatic reboot .
- 6. Press OK to save and continue.
Check the system for viruses.
One of the causes of BSOD on your Windows 10 PC is data corruption. Apart from the usual scenarios, the data on the computer can be corrupted due to some malware.
So, if you happen to see the Windows 10 blue screen of death more often than usual, use your antivirus software to perform a full system scan. Windows Defender, the default antivirus in Windows 10, can be a good option too.
Windows update.
You must ensure that your computer is regularly updated with the latest security patches and other equally important items. This is one of the most important points to consider on the way to fixing the blue screen of death or even preventing it from occurring. Windows 10 users don’t need to do anything extra in most cases as system updates are installed automatically, but the process can be stopped.
Update hardware drivers and firmware.
Faulty drivers on your PC can also cause the Blue Screen of Death to appear. Thus, updating or restoring the software can save the device from BSOD.
Universal Windows drivers currently take care of most components. However, most are not all. Drivers that your operating system cannot update automatically, you will have to look for them on the manufacturer’s website.
At the same time, your BIOS or UEFI must be updated to its latest version. Remember to check if your components are experiencing excessive thermal stress, the Speccy utility will help you with this.
Higher temperatures can be caused by dust clogging of the fan. To prevent this, you need to clean your computer regularly.
Plug-in devices such as USB drives, printers, gamepads, etc. can also cause BSODs.
How to fix the blue screen of death in Windows 10
Booting into safe mode.
When you start your computer using Safe Mode, only the core Windows services and system drivers are loaded. If you have not experienced a blue screen of death, you can assume that the culprit of the error is a third-party driver.
How do I use safe mode?
Previously, in the case of Windows XP and 7, you could use the msconfig utility to load this mode or use the F8 key at startup. Windows 10 has added one new handy option for accessing Safe Mode.
- 1. Go to Settings > Update & Recovery > Recovery .
- 2. In section Advanced startup , click Restart now . Wait until a window with additional launch options appears.
- 3. Click Troubleshooting .
- 4. On the next screen, select Startup Options , click on Restart to enter Safe Mode.
Use System Restore.
By introducing System Restore to Windows, Microsoft has made it possible to roll back errors that we might inadvertently make on our devices. This can help if the cause of the blue screen of death is software that you recently installed.
You can try to find the various settings related to Windows 10 Recovery in Control panels > Recovery . To roll back the system to a previous restore point, click Open System Restore . To create a new point, click Configure System Restore > Create . Most likely the blue screen of death will be fixed if it is related to recent changes on your computer.
Fixing Blue Screen of Death using Windows Troubleshooter.
Try using the troubleshooting tool built into your system. To find it, open Settings > Update & Security > Troubleshooting .
Under the heading Troubleshooting , you can see a tool to fix errors that cause Windows to stop or restart unexpectedly.
Remove the faulty Windows update.
During the installation of a Windows update, in rare cases, an interruption of the process can occur and such incidents can lead to the blue screen of death. The easiest way to fix a BSOD in Windows 10 is to uninstall the erroneous update. The same should be done with applications that could damage important files on your PC.
You can uninstall the latest Windows update by visiting Settings > Update and recovery > Windows Update > Uninstall updates.
Reinstall Windows to fix the blue screen of death.
Obviously, the very last way to fix the blue screen of death is to completely reinstall the Windows operating system. For users running Windows 10 or 8.1, there is a built-in reinstall utility that does not require special installation media. For Windows 7, you will have to install the system using a bootable USB or CD.
If your hardware is not directly to blame for the BSOD, then the above tips and methods should help you. If the problem is in the components, you will have to replace it.
Just in case you need to recover information from your hard drive, Starus Recovery tools will help you. You can download and try programs for recovering deleted data for free!
Similar data recovery articles:
Date:
Tags: How to recover, Error, Recovery process
How to fix the Windows blue screen of death (BSOD).
13+8 steps
by Pavel Dzenisenka
This guide will help you fix the blue screen of death in Windows. Applicable to any version of Windows, including Windows 10, 8, 7, XP. The Windows Blue Screen of Death (BSOD) is real, but it can be fixed.
Need to know
- The Blue Screen of Death (BSOD), aka STOP Error, most often appears during Windows boot.
- Blue Screen of Death that is related to hardware or drivers can be easily identified by the STOP error code.
- If the blue screen flashes quickly and the computer restarts automatically, you need to turn off the «automatic restart on system failure» setting.
Windows Blue Screen of Death
The following are general steps to troubleshoot the Blue Screen of Death. Please see the list of Blue Screen Error Codes (BSOD) if you already know the STOP code and need a separate troubleshooting guide. Come back here if we don’t have a troubleshooting guide for your specific STOP code, or if you don’t know what STOP code you have.
Instructions: How to fix the Windows Blue Screen of Death
Troubleshooting Instructions:
- The most important step in troubleshooting the Blue Screen of Death is to ask yourself what you were doing just before the device stopped working. Have you just installed a new program or piece of hardware, updated a driver, installed a Windows update, etc.? If yes, then there is a good chance that the changes you made caused the BSOD. Revert your changes and check again for the STOP error. Depending on what exactly has changed, some solutions might include:
- Startup using Last Known Good Configuration to undo recent registry and driver changes.
- Use System Restore to undo recent system changes.
- Reverting a device driver to a version prior to the driver update.
- Some of these steps may require you to start Windows in safe mode.
If this is not possible, skip these steps.
- Check that there is enough free space on the drive where Windows is installed. Blue screens of death and other serious problems, such as data corruption, can occur if there is not enough free space on the primary partition. Microsoft recommends that you maintain at least 100 MB of free space, but with such a small amount of free space, problems regularly occur. Typically, Windows users are advised to leave at least 10% of the system drive free.
- Check your computer for viruses. Some viruses can cause a blue screen of death, especially those that infect the master boot record (MBR) or boot sector. Make sure your virus scanning software is fully up to date and configured to scan the MBR and boot sector. If you are unable to run a virus scan from Windows, use one of the free downloadable antivirus tools.
- Apply all available service packs and Windows updates. Microsoft regularly releases patches and service packs for its operating systems, which may contain fixes for the cause of your BSOD.
- Update drivers for your hardware. Most blue screens of death are related to hardware or drivers, so updated drivers can fix the cause of the STOP error.
- Check the system log and application log in Event Viewer for errors or warnings that may give more clues as to the cause of the BSOD.
- Revert hardware settings to default in Device Manager. The hardware in Device Manager should be set to default unless there is a good reason for it. There have been cases where non-default hardware settings have caused the blue screen of death.
- Reset BIOS settings to default. If you have customized the BIOS for yourself and do not want to load the default ones, try resetting the clock speed, voltage, and BIOS memory settings to the default values. See if this fixes the STOP error.
- Check that all internal cables, cards, and other components are installed and secured properly. Loosely installed hardware can cause a blue screen of death, so try reinstalling the following components and then checking for the BSOD again:0008
- Disconnect all internal data and power cables.
- Disconnect the memory modules.
- Disconnect any expansion cards.
- Run diagnostic tests on every piece of hardware you can test — there are free memory test programs and hard drive test tools. It is likely that the root cause of any blue screen of death is faulty hardware. If the test does not help, replace the memory or hard drive as soon as possible.
- Update BIOS. In some situations, an outdated BIOS can cause a blue screen of death due to certain incompatibilities. You can update the BIOS using special utilities. For example, using the Vantage program for Lenovo laptops.
- Start the computer with only the basic hardware. A useful troubleshooting step in many situations, including BSOD issues, is to start the computer with the minimum hardware required to run the operating system. If the computer starts successfully, this proves that one of the removed hardware modules was the cause of the STOP message. As a rule, the necessary equipment to run a computer with an operating system includes: a motherboard, a processor, RAM, a hard drive with a system partition, a keyboard, a video card, and a monitor.
- If you have not yet corrected the cause of the BSOD, continue below with software or hardware steps, depending on the troubleshooting direction described above.
Update drivers for your hardware to fix Windows BSOD
When software is the cause of the BSOD
If your troubleshooting leads you to the conclusion that a specific program may be the cause of the BSOD, follow these troubleshooting steps to resolve the issue:
- Check for and install any available software updates. Most programs allow you to check for updates through a menu item. If you can’t, or you don’t think it works, try one of these specialized software updaters.
- Reinstall the failing program. If the update does not work or is not possible, simply uninstall the program and then install a clean version of it again.
- Check with the developer for support information. It is possible that this BSOD is a problem that the program manufacturer has already encountered and has already documented a specific solution.
- Try a competing program if uninstallation proves that it is the cause of the BSOD. If there is simply no way to make the program work, then using a different but similar program may be your only option.
When hardware is the cause of the BSOD
If at the moment you think that the cause of the blue screen of death is hardware, there are options:
- Make sure that your hardware supports the operating system that is currently installed on your computer, laptop. Although unlikely, the hardware may not be compatible with a particular version of Windows.
- Update the hardware BIOS (firmware). In the same way that you can update software to fix a problem you’ve experienced while running Windows, updating hardware software, called firmware, if any, is a smart idea.
- Check the manufacturer’s website for support information for your PC model. Their knowledge base may have information on the subject that might help.
- Replace hardware.
At this stage, it is likely that the hardware itself has simply stopped working properly and needs to be replaced. If the hardware was indeed the only cause of the BSOD, the blue screen should go away after the module is replaced.
Source
Categories Windows, Instructions and solutions
So what if you encounter the Blue Screen of Death on your Windows 7/8/10/XP? How to solve this problem in an efficient and convenient way? If you do not know the correct methods, this passage will show you several ways to fix Blue Screen of Death on Windows system. Please read and study this.
- Part 1: What Causes Blue Screens of Death in Windows 7 / 8 / 10 / XP
- Part 2: How to Fix Blue Screens of Death
- Part 3: Frequently Asked Questions about Blue Screens of Death in Windows
Part 1: What Causes Blue Screens of Death in Windows 7 / 8 / 10 / XP
Blue Screen of Death is usually the result of a hardware problem, driver software, or improperly installed software. It can also be caused by low level software running in the Windows kernel. Quite often, a normal application on your Windows won’t cause this to happen, but sometimes it can. In addition, the operating system is not considered the source of the blue screen because it will not crash due to a program crash.
A STOP error will directly result in a blue screen of death. When the STOP error occurs, you will find that your Windows has completely crashed and is no longer working. The computer will then restart, but data and content will not be saved to the Windows system because the blue screen appears so abruptly that the program has little time to save the data.
In addition, another cause of the blue screen of death is file corruption or data loss. It is much more difficult and expensive to deal with this, so you are encouraged to prevent such a situation if possible. As soon as a file in your Windows crashes, check if the computer is too hot or fix the fan. One thing to illustrate, you won’t be able to open or use a corrupted file and it will probably be lost even if it can be recovered. So make sure you back up your Windows computer in a timely manner.
What’s more, if the data is not saved and lost while fixing blue screens of death, you can recover the missing data from a Windows computer. No special technology is required, but Apeaksoft Data Recovery can help you.
Apeaksoft Data Recovery is a professional data retrieval software for Windows and Mac computers. Whether your data is lost due to system crash like blue screen death, invalid pool header error, etc., or accidental deletion, emptied recycle bin, etc., it is capable of recovering files with ease.
Apeaksoft Data Recovery
4,000,000+ Downloads
Recover lost data from internal and external hard drive.
Deep Scan and Quick Scan to find deleted files.
Recover photos, videos, music, documents and system files.
Compatible with Windows 10/8/7 and Mac OS X 10.6 or higher (including macOS 11 Big Sur).
Free DownloadFree Download
Get detailed steps here to recover lost files from Windows computer.
Part 2 Fix Blue Screens of Death
Here we will show you the most complete and best methods to help you fix the blue screen of death problem using general fixes to solve it. Please follow the detailed instructions to do so.
Step 1, Recall the last activities on the computer
Before you start fixing the blue screen of death, first think about whether you installed the wrong application, connected new hardware, loaded custom disks, or changed system settings? If your answer is “Yes”, well, the recent actions you have taken may be the exact cause of the blue screen problem, which means that subsequent recovery depends on changes.
Step 2, Check the device is overheated
If the blue screen of death occurs when you use the computer in a high-performance environment for several hours, especially if the computer does not receive sufficient circulation or the computer is in an extremely warm state, you need to turn the computer off and leave him at rest for at least a few hours.
Step 3, Remove all unnecessary hardware
Then remove all unnecessary hardware from your computer, such as SD cards, USB drives, controllers, printer cables, HDMI cables, Ethernet cables, etc. Removing them will not affect the normal operation of your computer, on the contrary, hardware flaws can lead to a blue screen of death, so they must be removed.
You can keep a mouse and keyboard connected to the computer, after all, both of these hardware will not cause any problems.
Step 4, Waiting for the computer to restart
When your computer has a blue screen of death, Windows automatically diagnoses the problem, attempts to resolve any problems, and then restarts. In most cases, the blue screen error will disappear once the restart process is complete.
Step 5, Run a virus scan
If the above steps don’t work, you can run a virus scan to fix the blue screen of death. This does not rule out some unfortunate cases where sometimes a virus can make your computer think that it is faulty, which in turn will cause the blue screen to fail.
If any malware appears as a result of the virus scan, remove it immediately. If you are prompted with software options when checking for viruses during the scan, try to implement them. You should be aware that an incorrect setting can also lead to the blue screen of death.
Part 3: Frequently Asked Questions about Windows Blue Screens of Death
Is it bad to have blue screens on your PC?
No. Blue screens of death in Windows are a sign of hardware problems. This will not damage your computer hardware, but may result in data loss because you will then have to restart your computer without saving any files.
Can System Restore fix blue screens of death?
Yes. Restore can fix various system errors. But System Restore is not necessary as it will restore your computer to an earlier version and any data or settings you have made since that version will be erased. To fix blue screens of death in Windows, the first attempt may be to restart your computer.