Are BMX Bikes Good For Long Distance? (Do This Instead) – Pro Bike Corner
Have you ever asked yourself or your friend if BMX bikes are good for long distance or if you can even commute on a BMX? Well, you are at the perfect place to find the answer to such a question.
BMX bikes are not like your average bike. They are shorter. Have slightly different tires, and many of them do not have brakes. They are designed for a specific purpose in mind.
Are BMX bikes good for long distance? No. BMX bikes are not designed for long distance. The reason why BMX bikes are not so good for long distances is due to the lower tires and the lower overall height and length of the bicycle.
This, of course, has resulted in many people wondering whether BMX bikes are good for long-distance. That is a question that we are going to try and answer for you on this page.
Table of Contents
Are BMX Bikes Good for Long Distance?
BMX bikes are designed for off-road short-distance racing and stunts. They are not designed for long-distance or commuting riding at all.
As you may well know, when you ride a bike, it is important that you are able to extend your legs fully.
If you can’t do that, then you will have to put more effort into pedaling, and this means that you will tire out a lot quicker.
You can do this for short periods of time, but you won’t be able to do it over long distances.
BMX bikes are designed to be ridden standing up. It is very rare that anybody using a BMX bike properly will be sitting on the seat for more than a few minutes each session.
We are positive that you probably are not going to want to ride a bike standing up for hours and hours on end, right?
What are BMX Bikes Particularly Bad At?
BMX bikes are awful at traveling uphill. As everybody who rides a bike knows, traveling uphill is going to be awful even on the best bikes.
It still requires a lot of effort to travel up that hill. It is a good workout, but there are few cycling experiences worse than approaching a huge incline after a day of cycling.
There are two reasons why BMX bikes are bad at tackling hills:
? The first is that these bikes are small. As we said before; you are going to need to stand up if you want to put the full amount of effort into pedaling.
If you are traveling uphill, then this is going to be putting a massive strain on your back. A lot of people that regularly ride BMX bikes uphill will suffer from intense back pain.
Trust us, you do not want to be putting yourself through that.
If that wasn’t enough, the gearing ratio on BMX bikes is not going to be suited for cycling uphill.
This, again, means that you are going to need to be putting a lot more effort into your pedaling.
Since long-distance cycling is all about trying to conserve energy over multiple miles, this is probably not something that you want to deal with.
The seats are also going to be woeful for long-distance cycling. You have to remember that the seats on BMX bikes are very rarely used.
They are designed to be used standing up, after all. This means that when you do finally sit down on the BMX bike, it is not going to be the most comfortable experience in the world.
We certainly wouldn’t want to be doing it for multiple miles at a time.
? Finally; most BMX bikes are designed with the intention of you braking by putting your foot on the back wheel.
While there may be some basic brakes built into the BMX bike, they are going to be nowhere near the quality that a normal bike would have.
They can’t be. The shorter size of the BMX bike would have the brake cables get tangled up when doing stunts.
Since we can’t imagine that anybody would want to cycle long distances without brakes, because it is exceedingly dangerous, we really cannot recommend BMX bikes for long-distance riding for that reason alone.
Related reading: Are BMX Bikes Fast / BMX vs Mountain Bike Which One Is Faster?
What Bikes Are Good For Long Distance?
What bikes are good for long distance? Here are 3 most suitable bikes for long distance:
- Mountain bike with front suspension
- Touring bike or Cyclocross
- Hybrid Bicycle
? Purchase: You can purchase bikes for long distance today! Just follow the links (above) to Amazon where you can see current pricing.
Where Do BMX Bikes Thrive on Long Distance Rides?
It isn’t all bad for BMX bikes over long distances. There are times that they will thrive.
Not as much as a ‘normal’ bike, but we don’t want you to walk away with the idea that BMX bikes are completely terrible because they are not.
BMX bikes work especially well if you are doing a lot of traveling off-road. They have been built for that, after all.
So, while a BMX bike wouldn’t really be ideal if you are commuting along the road, but it could be if you are doing a lot of off-roading, assuming you have the right set of tires installed on it.
The reason why BMX bikes are so brilliant for off-roading is due to the lightweight nature of the bike, plus the superior handling when you are faced with bumpy terrain.
Again, we cannot stress enough how we would not recommend riding one for long periods of time, but if there is a huge off-roading section on your route, then we can probably let it slide.
Can You Convert a BMX Bike For Long Distance?
If you have little choice, you may be able to convert a BMX bike for long-distance riding.
It is still not going to be providing the most comfortable experience in the world, but it is better than nothing.
One of the main aims when you are converting a bike for long-distance is to try and sort out your bike’s seat. There are two things that you can do here:
? Invest in a better quality, padded seat. You can also get a quality seat cushion.
? Try to raise the seat as high as you possibly can. It won’t be as high as a normal bike, but it will still make your ride more comfortable.
You may also want to change out the tires on your bike. The chances are pretty high that your bike comes equipped with off-roading tires.
If you are traveling long distances, then you may want to switch these out for road tires (unless you are almost always going to be traveling off-road).
The road tires will grip the ground a little bit less, which should result in a more effortless cycle. Although, they are going to be awful when traveling on mud. There won’t be enough grip.
The final conversion will be the addition of a U-Brake on the back wheel. Standard brakes will not work here. Luckily for you, fitting a U-Brake shouldn’t be that much effort and can be completed using a simple set of bike tools.
Of course, make sure that you extensively test your brakes before you head out there on a long cycle.
Of course, this is something you will not need to do if your BMX bike already has a back wheel brake built onto it.
Remember; even with all of these conversions, it is still going to be difficult to travel long-distances on a BMX bike.
This means that if you are heading out for hours and hours at a time, do expect things to take a little bit longer than they normally would because you will need far more regular brakes, and the rest of the time you will be traveling at a slower pace.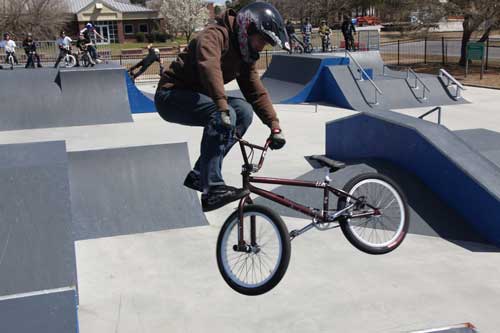
Can You Ride a BMX Bike For Your Daily Commute?
Now, we have talked about how you shouldn’t be riding a BMX for long distances. We figured we would talk a little bit about riding a BMX bike for your daily commute.
After all, some people have long daily commutes. A BMX bike may be ideal for some of these commutes.
To start with, just because it is your daily commute, it does not mean that your bike is going to be magically good.
It is still going to be difficult to ride uphill and on paved surfaces. That is never going to change.
However, we would still recommend a BMX bike for certain commutes.
BMX bikes, by their very nature, are small bikes. So, if you have to hop on public transportation at some point during that daily commute, then you may want to have a BMX bike.
A basic BMX is cheaper than a foldable bike. While it is a little bit larger, it is not going to be too large. This means that you can easily bring it on a bus or a train.
Once again, you would probably want to avoid using a BMX bike if there is a lot of uphill traveling on the commute.
You will be tired before you get to work. If you absolutely must ride a BMX bike on your commute, then we suggest that you invest in a decent quality BMX bike designed for park and street riding.
However, if you need to purchase a whole new bike, why not just buy the right tool for the job to begin with? it is going to be so much easier for you in the long run.
Are BMX Bikes Faster Than Mountain Bikes?
Are BMX bikes faster than mountain bikes? Yes, the average top speed for a mountain bike is 30 mph (48 kph) when riding downhill, which is 5 mph (8 kph) slower than a BMX bike.
In the table below you can see the average speed of the different types of bike models:
| Bike Models | Average Bike Speed (mph) | Average Bike Speed (kph) |
|---|---|---|
| BMX Race Bikes | 35mph descending a starting race ramp | 56 |
| Mountain Bikes | 30mph | 48 |
| Road Bikes | 50mph descending a hill | 80 |
| City Bikes | 20-25mph on city streets | 32-40 |
| electric Bikes | 28mph with electric assist | 45 |
| Gravel Bikes | >30mph on standard paths | >48 |
| Cruiser Bikes | 15mph down the beach boardwalk while holding your margarita | 29 |
| Fitness Bikes | 25mph on flat paths | 40 |
Average Bikes Speed Chart
Conclusion
BMX bikes are not good for long-distance rides. These bikes have been designed to travel fast over shorter distances, or for a bit of stunt jumping.
While you can convert a BMX bike for long-distance, it isn’t really recommended.
You would still be better served investing in a decent touring bike.
You might also like:
? Bicycle Repair Bag & Bicycle Tire Pump
? BMX Bike Helmets
? Garmin Edge Explorer Bike Computer
Purchase: If you are interested in the Garmin Edge 130 Plus Bike Computer then just follow the link to Amazon where you can see current pricing.
References:
https://www.tresna.co.uk/blog/commuting-with-bmx-bikes.htm
Love It? Share it!
0
shares
- Share
- Tweet
How to cycle uphill techniques —
Some of the useful techniques for cycling uphill from 3% long drags to 30% wicked hairpins.
Simple top 7 tips
The quickest 7 tips to cycling uphill I would give are:
- Avoid going into the ‘red’ too early on the climb.
 Don’t get carried away on the lower slopes, if you still have a long slog to the top.
 - Maintain a reasonable cadence of 65-80 rpm. It will be a lower cadence than normal, but avoid pushing a big gear at a very low cadence.
- Anticipate steep sections in advance by getting into lower gear before.
- Traffic permitting, avoid the steepest apex and go wide around corners to maintain the best rhythm and constant speed.
- Where possible remain seated. Save standing on the pedals for the really steep hills and steep sections.
- Stick to your own pace. It is counter-productive to try and stay with much quicker riders. You will lose more time in the long run.
- Know what you are climbing – length, gradient, max gradient, and likely time needed.
Preparation
The effort required to cycle uphill increases exponentially as the gradient increases. If you’re unfit/new to cycling don’t start off in the Lake District, it may put you off for life. You need a reasonable fitness before you tackle steep hills. Also, when you start to climb, you use your upper body and back more. Core strength exercises to strengthen upper back muscles will help a lot.
Climbing in saddle or out of saddle?
A big issue is whether to climb seated in the saddle or climb out of the saddle. In short, I find it best to be seated for long gradual climbs. Getting out of the saddle is useful for when the gradient really gets steep. Climbing out of the saddle is less aerodynamic and is harder work. It is good for short bursts of power, but you will tire more quickly.
Climbing in the saddle
Snake Pass, gradient 7%. Time 11. mins. All climb is done in the saddle.
Where possible, I try to remain seated when climbing. It is more efficient and you can maintain a high power for longer. It is also more aerodynamic. For novices, it is good training to try and climb whilst seated and get out of the habit of standing on the pedals as soon as the road goes uphill.
Climbing whilst out of the saddle
Matt Clinton on rake at 23%. Powering out of the saddle (notice handrail by side of road, it is steeper than it looks.) Photo Bob Tobin
Sometimes referred to as ‘standing on the pedals’. Here you employ a lot more muscles and upper body strength to help you pull up against the handlebars. If you stand up, you will get a short term increase in power. If you’re using a power meter, you will probably see your power increase significantly. This is great for acceleration or getting through a particularly steep section. But, when the fast twitch muscle fibres are exhausted, the burst of power will evaporate, and you will find your power dissipates.
Bear in mind, there is no hard and fast rule about climbing in the saddle. If you watch the Tour de France, you will see different riders have different styles. A light rider like Alberto Contador always seems to be out of the saddle rocking around all over the place. A heavier more powerful rider like Cancellara will be much more likely to be going up the Alpine climbs whilst seated. Shorter, lighter riders generally do better out of the saddle than heavier riders. Sometimes it’s good to get out of the saddle just to give your back muscles a stretch and break the monotony of climbing in the seated position.
Don’t forget the wind
Some of my hardest hill climbing experiences have actually been due to a super strong headwind, as much as the gradient. The closest I came to walking up a hill was Wrynose pass (25%) but, that day there was a super strong headwind. Obviously, if you can keep lower on the bike, it helps avoid the headwind. This is why it can be good to practise climbing seated. On the other hand, in 2013 the national hill climb had a 35mph tailwind, making it an advantage to do most of the climb standing up!
Rock solid core and minimising other movements
Talking of pro techniques – watching last year’s Vuelta Espagne I was struck by the stage where Vasil Kiryienka (Team Sky) won. On the last climb, he was absolutely solid on the bike. His lower and upper back wasn’t moving – only his legs were moving. He must have worked a lot on core strength, this increases power climbing because more effort is going to his legs and less into his upper body.
Best line to take climbing
This is a hairpin on Box Hill. The rider is taking a wide route.
Where possible you want to try and reduce the gradient of the hill by going wide on the corners and avoiding the apex. The shortest route is not the quickest. If you go through the apex you will break your rhythm and be forced to try harder. It is better to try and maintain the same gradient by going wide. You can keep in the same gear and maintain your speed; this is a secret of climbing, maintain your momentum where possible.
Pacing
Don’t really go into the red, until you see the finish line! Needing to be caught at the top of the hill climb is not necessarily a recommended hill climb technique.
One of the most important aspects of climbing hills is pacing. Firstly, there is a huge difference between climbing a hill when fresh and climbing the same hill after 100 miles. A sportive rider needs to pace his effort through the 100 miles to leave enough in the tank for the last few hills.
For the hills itself, it is important to have a rough idea of what you are facing. If you are doing an Alpine climb like Alpe d’Huez, I wouldn’t think of it as a short British hill climb, but more like a one hour time trial. If you’ve done a one hour time trial, you will have a better idea of pacing than you will doing five-minute British hill climb intervals.
The hardest hills are those which are long and steep for a long time. I once got caught out on Bushcombe Lane in Gloucester. It was 20-25% for a long time! It was winter, I wasn’t so fit and my lowest gear was only 39*25. 20% is OK, for a few 100 metres, but 1km of 20% is a different matter. Knowing the length of the hill would have made me hold back more at the bottom (I would also have much preferred to have a compact chainset) Knowing what to expect is important. It did have a 10/10 rating in 100 hill climbs, but I thought nothing in the South could be so hard.
See more: Pacing hill climbs
Gearing
Gearing is going to be an individual thing depending on the hill and your fitness. The ideal is to have the gearing to enable you to maintain a respectable cadence for the hills you will face. If you’re doing the Fred Whitton Challenge (including 30% hills after 100 miles, most riders will need a compact chainset with 34*28). Even pros can use compact chainsets when the situation requires it. During a stage race in Italy, British pro, Alex Dowsett (who won a time trial in Giro d’Italia, 2013) was asked by his mechanic whether he would like a compact chainset or 30 tooth ring to get over a 30% hill – he replied both! There’s nothing macho about struggling to get a 39*25 over a steep hill at 30rpm! I know because I’ve done it many times.
Wheelspin
The Rake on a wet day is prone to wheelspin.
Climbs can be made extra tricky by rain. As you stand on the pedals and make a big effort, the backwheel can spin and you lose traction. This is tough because, at the hardest point of the climb, you lose your speed and momentum.
Wheelspin can be reduced by reducing pressure in the back tyre, e.g 70-80psi in rear tyre rather than 90-100psi. Also, a 25″ rear tyre will have more grip than narrower tyres. Some tyres have better grip in the wet, e.g. Continental 4 Season.
Staying seated, if possible will help reduce wheelspin. The problem is that when the gradient is steep enough for wheelspin 20-25%, it’s usually impossible to do it seated anyway.
Avoid sudden surges in acceleration. You are more prone to wheel spin, if you have a sudden surge in power, e.g. if you lose momentum and then stand up and make a huge effort, you are most prone to wheelspin. If possible, you will be maintaining momentum and anticipate the steepest section. Make a big effort, just before you reach the steepest gradient and then carry this momentum through the steep section.
Sometimes, you just can’t avoid a bit of wheelspin, I just see it as part of the joy of hill climbing….
Over 10% gradient
As a very rough rule of thumb, if the climb goes over 10%, I start to think about getting out of the saddle. After a minute of being out of the saddle, you will probably find yourself wanting a bit of respite to get back in the saddle.
Cadence when climbing
When climbing I very rarely watch my cadence reading. However, as the gradient increases, generally, your cadence will fall. It is not efficient to try and maintain a high cadence on a really steep climb. Usually, on the flat, I average 95 rpm, for shallow gradients, this may fall to 85rpm; for steep hills it may fall to 65-75 rpm. When I’ve over- geared, it’s fallen to 30-50rpm, but this is no fun and inefficient.
If you don’t have enough gears and are forced to power you’re way up a climb at 40-50 rpm, this is very difficult and inefficient. You will get exhausted and go much slower. It has happened to me quite a few times, that I’ve struggled up a 25% hill at 40rpm, and it would almost have been quicker to get off and walk. (Though I have this hill climb pride which means I will rather ‘kill myself’ climbing at 30rpm than get off and walk)
For beginners, I would generally recommend training at a higher cadence on hills. I typically see novices try to force a lower cadence too early in the climb. It is good training to try and climb whilst maintaining a higher cadence than normal. Try and keep a target of 80rpm.
Climbing at a high cadence also gives you a bit more confidence should the gradient increase or you tire. It’s a bit of room for manoeuvre.
Use of gears
A common mistake is a reluctance to lower you’re gearing and either try to do a hill in the wrong gear (too high) or not have enough gears.
An important feature is to anticipate a steep gradient before it occurs. If you see the road veering up, lower your gear and start spinning a higher cadence. The main reason is that if you leave it too late, it is hard to change gear when the road is very steep. When you change gear, you momentarily disengage and lose speed. Once you’re on a 25% section, you don’t want to be making last minute changes.
One of my worst experiences climbing was in the 2012 National hill climb championship – after flailing around in a big gear, I had to go down a gear at the steepest 25% section of the Rake. A schoolboy error, after years of climbing hills. I was just too ambitious in trying to force a big gear up a steep hill. But, changing at 25% definitely knocks your momentum.
(If you have money to spare, I hear the electronic Shimano Di2 is very good for changing under pressure.)
It is important to use your gears to maintain a manageable cadence, but try to avoid very frequent gear changes because you do lose a little momentum when changing gears. Also, gears are most likely to fail you, when the hill is steepest. This is when standing on the pedals can be helpful in getting a bit of extra power for a short steep section, reducing the number of gear changes you need.
Hill climb racing is another article. But, over the years, I’ve tried to reduce the number of gear changes I make in a hill climb.
Will you really go faster on the big ring?
One thing I’ve never really understood about climbing hills is the anecdotal evidence you sometimes hear from ‘enthusiasts’ that ‘you’ll go faster on the big ring’ I’ve never really understood this. The only thing to be aware of is the chain line. If you ride 39*11, the chain is at an awkward angle and will be more inefficient. You would be much better off riding in a 53*15. Both gears give a speed of 25mph riding at 90rpm. But, how many climbs do you go up at 25mph?
To be honest, there are very few hills where the big ring is essential. If you ride 39*14 – that’s still 19.7mph at 90rpm.
- It’s a bad chain line, but if you rode 39*12 that’s – 22.9mph at 90rpm.
The main thing is you want to avoid a bad chainline (stretching the chain at an awkward angle e. g. 39*11 or 53*23) This can happen when climbing because you’re making so much effort you forget which chainring you are in. Also mid climb, you don’t really want to be switching between inner and outer ring mid climb unless you have to. You might be better off accepting a non-optimal chainline than going up to the big ring.
In the 2013, national hill climb championship, there was a roaring 30mph tailwind. Despite an average gradient of 10%, I did a lot of the climb in the big ring. But, near the end of the race, I tried to go from the inner ring to the outer ring, but the gear wouldn’t move. Perhaps I was too exhausted to move the front mech properly.
I suppose there is a vague sense of bragging rights if you can claim you went up a climb in the ‘big ring’.
Position of hands
Often in climbing, I have my hands on the top of the hoods. It is reasonably aerodynamic, comfortable and powerful.
A classic hill climb position with hands on top of the hoods. This is Norwood Edge in the Otley CC hill climb. I think this is Tom Cullen of Otley CC.
For long climbs, you often see Tour de France riders riding with hands on top of the handlebars. This is quite comfortable and some riders feel ‘it opens up the lungs to make it easier to breathe.’
Sometimes, in hill climbs, I find myself racing on the drop handlebars. This will be for hills with a gradient of 6% or less. It is the most aerodynamic position, but doesn’t really work when the hill is steep.
Time trial bike
It may be hard to believe, but for some hills of less than 3%, it can be quicker on a time trial bike. You’re very unlikely to choose a time trial bike unless you’re doing very specific hill climb races. But, if you do hilly time trials or hilly triathlons, it is important to practice hill climb intervals on a time trial bike and not just a road bike.
Psychology of cycling up hills
Park Rash, Yorkshire, 25% 30% on apex.
Definitely some hills can look intimidating. Even after years of cycling uphill, I get a thrill when I see the hairpins of a climb like Hardknott pass looming in the distance. It’s thrilling and challenging at the same time. There’s a lot to be said for concentrating on one section at a time and don’t worry about the rest of the hill. One of the best ways to tackle hills is to have the confidence that you know what you are climbing and that you are going to maintain a pace that you can manage to the top. This confidence from climbing hills will come from practice, knowing the hill and making sure you have the right gears.
If you look up, the difficulty can put you off. I remember last year racing Mow Cop, I was already in my lowest gear and I looked up where the gradient rose from 15% to 25%, this was a discouraging thought.
Practise
From a personal perspective, when I was learning to cycle I never remember reading an article on ‘how to cycle uphill’. You just cycled and after 20 years of cycling you realise that cycling uphill is not entirely different to cycling along the flat, except it’s much harder work. The best way to learn cycling uphill is simply to practise on different hills. The more you try different hills, the better you will know your limits and how to pace yourself. The best way to tackle hills is not to worry about rpm, cadence and technique but to have the confidence you know what to do and concentrate on the effort.
Weight
It goes without saying that weight becomes crucial for any hill. Lose weight and you will go faster. To give a rough idea of how much extra weight may handicap you. Two climbs
Rake. – Length 900 metres. Height gain – 100 metres Average Gradient 11%
Weight of rider 61Kg, power 500 watts
1 kg weight loss = Time Saved – 1.7 seconds
Alpe d’Huez – 14 km distance average gradient of 8.1%.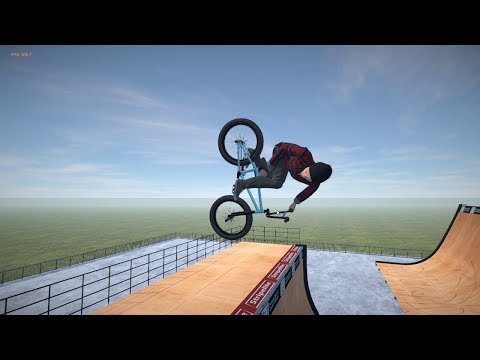 Height gain 1071 metres
power 400 watts
1Kg saved = 24.16 seconds
Climbing with a power meter
In the past year, I’ve been using a power meter whilst climbing. It’s quite interesting tool. Some things stand out.
As the gradient increases, you tend to see your power goes up quite quickly. When the gradient then reduces, it’s surprising how quickly the power evaporates. One training interval I do is trying to keep a constant power going up the hill. This involves paradoxically concentrating and trying harder on the flatter section. However, for getting up difficult hills, it is inevitable you will save your biggest effort and power output for the steepest section. Generally, I wouldn’t advise looking too closely at a power meter whilst climbing. It’s better to learn to climb on feel. But, in training, a power meter can be a useful tool to help learn what is a manageable effort. If you see you’re doing 500 watts at the bottom of Alpe d’Huez, it is a clear sign you’re going far too hard.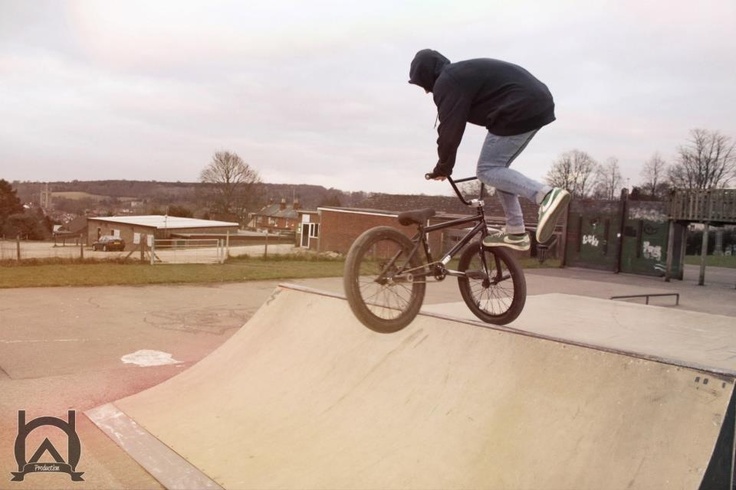 If you know you’re threshold power is 300 watts, that can be a rough guide to helping climbing long Alpine climbs.
A power meter can help with pacing. It particularly helps to check you aren’t going into the red too early.
Techniques for different hills
30% + Climbs
In the UK, there are a few hills with a 30% plus gradient. These include Hardnott Pass (both E+W) in Lake District, Rosedale Chimney (North York Moors, Ffordd Penllech (Wales, upto 40%) Millock, Cornwall.
30% is a real test and not to be treated lightly. I vividly remember climbing Hardnott Pass in Lake District, at one point there is a straight section of 30%. You have to fully commit to giving it everything to get up. I had a strange feeling of falling over backwards whilst climbing. It’s just really hard, I had to rely on going wide on the corners, and trying to recover. Just go in your lowest gear and stay in there all the way to the top.
Variable gradient 5-20%
Many British hill climbs are variable gradient. A series of ramps. To some extent, you can recover on the shallower gradient and save yourself for the steeper section.
Alpine Climbs – 1 hour +
For climbing long Alpine climbs, a different approach is needed. British hills typically may last 5-10 minutes. But, climbs like the Col du Tourmalet can easily take over 1 hour. As mentioned previously, a better guide is a one hour time trial, where you are riding at your threshold power.
Power climbs / ‘Big ring climbs’
Sometimes watching procycling, you hear commentators talk about ‘power climbs’ or they may even be referred to as ‘big ring climbs’. These are essentially climbs with shallow gradient. It means heavier riders can use their power to keep in touch. At 3-5%, the gradient is not sufficient to really favour the lighter ‘mountain goats’. The steeper the climb, the less important power is, and the more important power to weight ratio becomes.
Hill climbs
This is more a general article for climbing hills.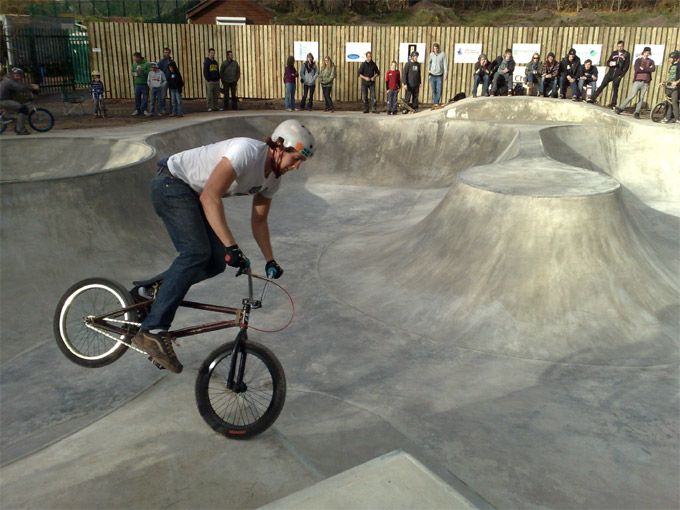 It’s not really geared towards those specialist hill climbers, who feel they haven’t really tried unless their legs go blue and they feel sick at the top of the hill, collapsing in an undignified mess. But, I’ll leave that for another article!
Riding Fixed
In the good old days, everyone would ride fixed. Now that’s a proper way to go up hill requiring a different technique!
Eric Wilson’s national hill climb bike from 1960s.
The art of weight saving
- Marginal gains for hill climb bike
How to enter hill climbs
- How to enter hill climbs
- Hill climb courses/events 2015
Related
- Hill climb intervals – how to get fit for cycling uphill
- Is it OK to walk up hills instead of cycling!?
- 100 hill climbs at Amazon.co.uk List of hardest hills in England
- Hill climb photos
Ride Faster Everywhere: Cycling Tips for Uphill, Downhill, Flat and Rolling Terrain
Share This Article
All riders have individual strengths and weaknesses, and sometimes they become apparent on specific types of terrain. Maybe you’re great on long and steady climbs, but you struggle on short and punchy ones. Or perhaps you thrive on the on-off nature of riding hills but struggle with the constant pedaling on long flat rides. To help you prepare for your next challenge, here is a guide to the best ways to ride faster, everywhere.
Ride Faster Uphill
This is the area people often focus on the most, but you have to be careful. Focusing too much on climbing can take away from your ability to ride well on the flats and rollers. Training for climbing is a huge subject, and you can find plenty of Trainright resources here. For cyclists who have already been training and doing climbing workouts, here are ways to get the best performance from your fitness.
Don’t start too fast
Many riders charge the bottom of a hill or sustained climb and then fade badly before reaching the summit. The goal is to meter your effort so you have power for the top third of the ascent, because cracking near the top will cost you more time than you can gain at the bottom. This becomes crucial when you’re in a group because you want to go over the top with other riders so you can draft and work together after the descent.
Find a rhythm
Especially for longer climbs, settle into an intensity level, breathing rate and cadence you can maintain. If you’re panting uncontrollably you’re riding at an unsustainable level. For prolonged climbs your breathing will be deep and labored when you’re near your maximum sustainable power, and you should able to speak in short phrases.
Pedal faster
Mashing too big a gear fatigues your leg muscles quickly, and spinning a ridiculously light gear is inefficient, has a higher oxygen cost, and spikes your heart rate. For most riders, the balance point between these extremes falls somewhere around 80-90rpm.
Best Workout: 5x3min PowerClimb
Long climbing repeats and other lactate threshold intervals are the cornerstones of climbing workouts. A great workout to add to your repertoire is a 5x 3minute PowerClimb workout. Each interval should be at about 120-125% of lactate threshold power, and you should take 5 minutes of easy spinning recovery between efforts. The idea is to pace your three-minute climb so your power output and pace start fading in the final 20-30 seconds. This means you don’t want to start out at full gas, crack at 60 seconds, and then ride the rest at an aerobic power output. You want to be above threshold the whole time. These efforts help build power and tolerance for short accelerations and changes in pitch on hills.
Ride Faster Downhill
Whether you’re coming down a mountain pass, pacing yourself during a gran fondo, or pushing the pace at the local group ride, descents are free speed. Don’t give up time you worked hard to gain on the preceding climb.
Get in the drops
Descend with your hands in the drops for better aerodynamics and weight distribution, but forget the super tuck. You want a low position, but don’t sit on the top tube. That position was banned by the UCI for a reason, and those riders were skilled than you. Not only are the risks reasonably high, but is also takes more energy to hold those positions than to keep your rear on the saddle and lower your shoulders. If your bike fit doesn’t enable you to comfortably descend in the drops, which is a problem we see frequently, then you need your fit adjusted.
Don’t ride the brakes
You shouldn’t ride descents with reckless abandon, but many riders make the mistake of riding the brakes too much on downhills. If you’re uncomfortable with speed, seek instruction to improve your skills and body position. Keep your gaze far forward to smooth out your line (like walking a balance beam) and take the time to learn how powerful your brakes are. Disc brakes, for instance, enable riders to brake later before turns, and from higher speeds. Always adjust your speed before a corner, rather than in the middle of it.
Weight outside foot and inside hand
The basics of cornering at speed are to look through the corner to where you want to exit (as opposed to looking at the apex of the corner), extend your outside leg and focus your weight through your outside pedal, and push your inside arm into the turn. With your pressure centered on the outside pedal and inside handlebar, your body will stay more upright while the bike leans more into the corner. This keeps your center of gravity closer to the line of your tires, which helps enhance traction. To tighten the line of your turn, apply more pressure with your inside hand. Read more on descending safely and confidently.
Ride Faster on Flat Ground
Even if you’re a great climber, you still need to be able to cover the ground between climbs at a good pace. And if climbing isn’t your strength, then the flats are where you can excel.
If you’re alone, don’t fight the wind
For the sake of your overall speed, don’t get in a fight with a climb or the wind.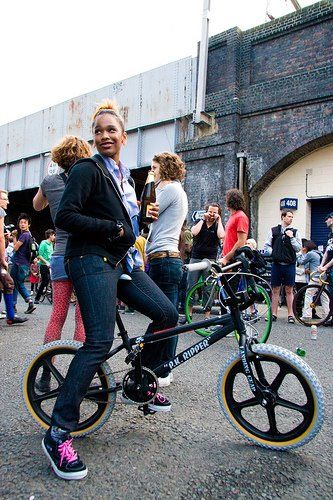 They’ll win. If you dig too deep before the climb is over, you’ll slow to a crawl. If you struggle against the wind on a long ride, you’ll just run out of energy sooner. Now, if you’re racing a time trial, digging deep into the wind is important because you can make up the most time during the hardest parts of the course. But if you’re on a long endurance ride, especially solo, gauge your effort on the power output or intensity level you can sustain, rather than the speed you want to go. It may feel painfully slow at times, but in the long run it’s faster than exhausting yourself and then crawling along at half power.
Stay on a wheel
During big multi-day rides at CTS Camps and Bucket List Events, we remind athletes to stay in the draft any time they drift too far to the side or open a gap. It’s not that the immediate cost is that high, but that small wasted efforts add up to a lot of wasted power and energy. Be diligent. Watch the wind and put yourself in the best position to stay in the draft.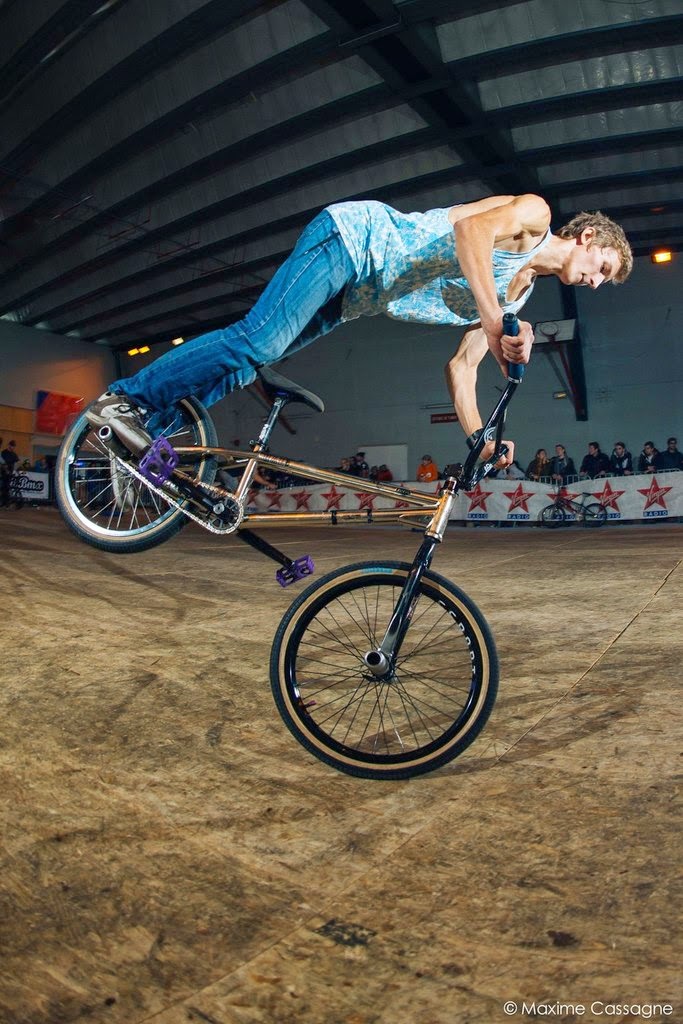 Read more about drafting and cycling in the wind.
Find the right group
In events like gran fondos, gravel races, century rides, or multiday tours, you want to be neither the strongest nor the weakest rider in your group. If you latch on to a group that’s way too strong, you’re likely to dig too deep too early and get dropped. If you’re too conservative you’ll end up in a slower group. When you’re the strongest rider in a slower group, it is hard for the other riders to help share the work. Ideally, you’re right in the middle so you can benefit from the stronger riders and also contribute your fair share.
Best workout: Tempo
Tempo intervals are best way to use shorter workouts to prepare for long flat rides. The intensity is below Functional Threshold Power (FTP) but harder than your cruising endurance pace. Aim to ride an uninterrupted interval of 30-45 minutes in a gear that brings your cadence down to about 70-75 rpm. This scenario helps you develop the aerobic power and neuromuscular adaptation to maintain inertia rolling along flat roads at moderate power output.
Ride Faster in Rolling Hills
Some of the hardest days I’ve ever spent on the bike were in rolling hills. Big mountain stages have long climbs, but they also have long descents. An endless succession of rolling hills can crush you if you underestimate the total amount of climbing you’re doing and use your energy unwisely.
Don’t charge the early hills
When the hill is only 30 seconds or a minute long it’s tempting to just charge up it with brute force. That might work for the first hour, but you’re burning through matches you’re going to need hours later. Stay seated and use your lower gears and higher cadence on the early hills so you have some brute force left for hills later in the day.
Pedal on the downhills
If you ride up the hills at a sustainable intensity instead of charging up them, then you have the ability to accelerate over the tops and keep applying power to pick up speed on the downhill. You end up with less of an “on-off” power profile and lessen the amplitude between the peak power on the hill and no power on the descent. Pushing even a moderate intensity on the descents helps you get further up the next roller before having to shift down and start spinning.
Keep your group together
Keeping a group together on rolling hills can be a challenge. Stronger riders can rip the group apart by setting an uphill pace that’s good for them but too hard for others. Over the top, the riders in the front of the group have to keep pedaling so the riders in the draft aren’t on the brakes all the way down the other side. Communication is key, and the people in the middle of the group should call the shots. They can tell if people in the back are starting to struggle on the uphill and are the first to start riding into the backs of those in front of them if the pace is too slow on the downhill.
Riding just a little bit faster – or a bit more economically – everywhere means you may not have to dig really deep anywhere.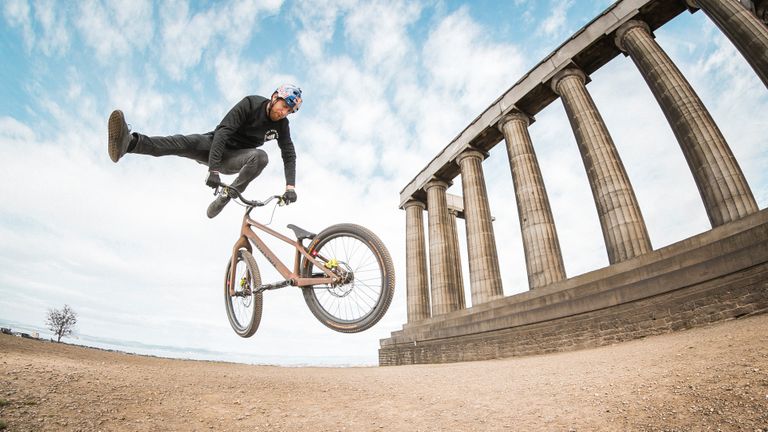 The bigger an individual effort the more it takes out of you, and the less you have in the tank for later. One of the big reasons we have coaches on the road with athlete during CTS Camps and Bucket List events is to help athletes manage their efforts and optimize their speed. As a result, athletes who may start out doubting their ability to ride big miles day after day reach the final finish line with smiles on their faces and an unparalleled sense of accomplishment.
Success in cycling isn’t just about how strong you are. It’s about how wisely you use your strength.
By Chris Carmichael,
Founder and Head Coach of CTS
Share This Article
14 Tips for Cycling Uphill For Beginners – Bicycle 2 Work
This post may contain affiliate links. If you click an affiliate link and make a purchase, I may earn a commission. Also, as an Amazon Associate, I earn from qualifying purchases.—
As a beginner cyclist, hills can seem harsh and even overwhelming. But there’s no need to avoid rides that include a few climbs just because you may be a beginner. With practice, a little skill, and the right knowledge, you might even begin to enjoy the challenge of cycling uphill.
If you want to get better at riding up hills on your bicycle, you need to employ the right strategies for cadence, momentum, posture, breathing, gearing, and fueling your ride. Knowing the best tips on how to get up hills will help you gain the confidence and ability you need to make it to the top.
Hill climbing takes more than just brute strength. It’s also part skill that you can learn and practice! If you want to get better at climbing, check out these tips for cycling uphill for beginners.
1. Plan Ahead
It helps to know what kind of a hill you’re about to climb, so if you can, plan ahead. Different hills require different strategies.
You might ride up a short, steep hill slightly differently from you would ride up a long, gradual climb. Rollers, or small rolling hills, require yet another strategy. So if you know what kind of hill is coming up, you can plan out how you’ll attack it.
Some bike computers, like Garmin, can tell you what category of hill is coming up, so you can know if you need to take it long and slow or hard and punchy. If you look at your courses on Strava, it will tell you the grade of the hills on your route, so you can plan and strategize before you even leave the house.
If you look at segments on Strava for where you will ride, you can see a visual representation of what the terrain looks like and how steep the hill is. While the data isn’t perfect, it will give you a good idea of what to expect, and you’ll be able to see how fast or slow other rides in your area have taken the hill.
The more hills you ride, the more you’ll know your abilities and the more confidence you’ll feel when you ride a new climb. If you can’t plan ahead and find yourself on an unfamiliar climb, take it easy if the hill is a lot longer and harder than you expect. It’s better to get to the top with extra energy and momentum than have to get off and walk halfway up.
2. Start Easy
A common hill-climbing mistake is to hit the hill too hard too early. If you start too strong, you’ll tire yourself out before you reach the top. Your legs and lungs will burn, leaving you gasping for air as your body tries to keep up with the effort.
Pace yourself instead! Start easy, and then you’ll have some gas left in the tank to push harder when near the apex.
Don’t worry if you see fellow riders surging ahead at the bottom. If they’re inexperienced hill climbers, they might be starting too hot. If that’s the case, you’ll probably pass them halfway up as they get tired.
But it is ok if your pals are faster than you – everyone rides at their own speed. Either way, if you’re on a no-drop group ride, faster riders will probably just wait for everyone else at the top so you can all regroup and enjoy the descent together.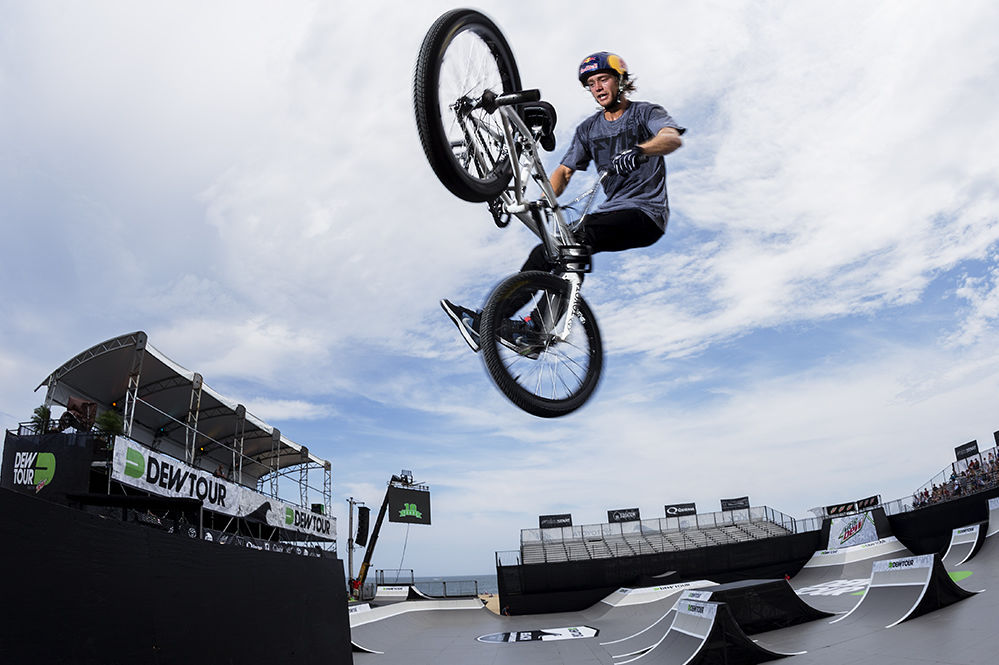
By starting easy, you can get yourself in a good groove. Aim for a comfortable cadence or pedaling speed. If you find yourself spinning the pedals too fast, then you can switch to a harder gear for a little more oomph.
Pace yourself well on the climbs, and you should have plenty of energy for the rest of your ride.
3. Use Your Momentum
If possible, and safe to do so, build up some speed before you get to the hill. Building up a little speed before the climb will give you some momentum to get you started up the ascent, and it will help save your legs!
If you’ve got a flat area of the road before your hill begins, start pedaling faster so you can get that momentum going. Then shift to an easier gear just as you start up the mountain. This method will help carry your speed and acceleration further up the hill. If you shift into too easy of a gear, though, you’ll lose that momentum too early.
Of course, don’t wear yourself out by riding too hard before the hill. Save some of that energy for the actual climb.
This technique works great if you’re riding small rolling hills, too. Use the descent of one hill to pick up some speed and momentum to help you fly over the next.
Shift into a harder gear if possible so you can pedal on the descent. Then shift to an easier gear to get yourself up and over the hill. Rollers can be a lot of fun once you get the hang of it!
4. Use Your Gears
The hardest part of hill climbing is knowing which gears to use and when to use them. While there is no ‘perfect’ gear to use, you’ll soon figure out what works for you if you keep practicing.
Err on the side of using a gear that’s too easy and spin your way to the top. It may make you go a little slower, but it won’t be as hard to get up that hill. The goal is to keep a comfortable cadence, so you don’t tire your leg muscles too quickly.
On the other hand, if you accidentally use a gear that’s too hard, you’ll burn out your legs before you get to the top.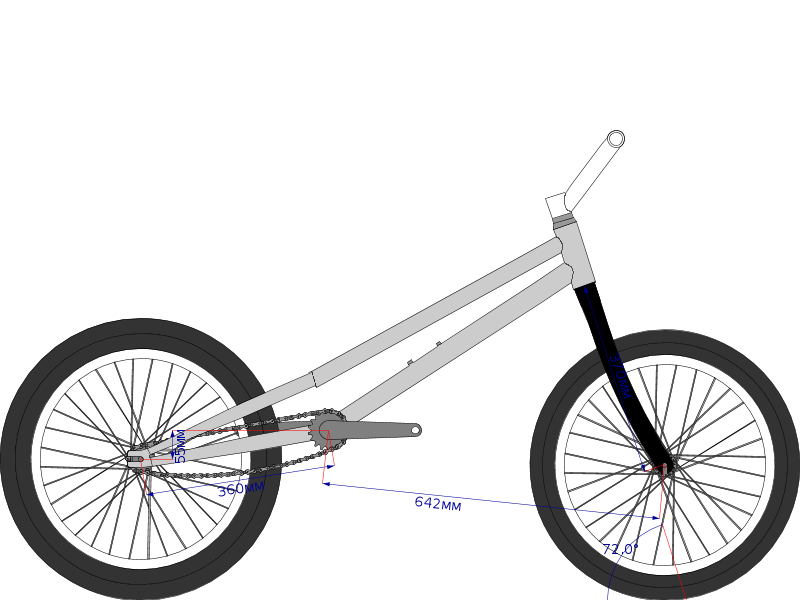 You might even fall if the gear you chose is too hard to turn over on your way up the ascent.
If you’re struggling to get up hills, you might need different gearing on your bike altogether. Mountain bikes tend to have a wider variety of gears to choose from, and they usually come with one very easy gear to help you spin your way up any steep hill. If you’re always running out of gears on your road bike, you may need to make a trip to your local bike shop to see if you can swap out the gears for something that gives you an easier time of getting up those challenging hills.
5. Shift Early
Newer bikes can shift under more tension than older bikes can, but you still want to shift early.
Move to an easier gear before you start climbing for a smoother shift and an easier time getting up.
If you plan to stand up to climb, shift down one to two times into a harder gear just before you hit the hill. Then stand up smoothly as you begin the ascent.
Sometimes, if you wait too long to shift, you might not be able to get your bike into the gear you want. If there’s too much tension on the chain, your bike won’t shift, or you might even drop your chain. If you drop your chain, you’ll have to stop and fix it.
Once you’ve stopped, you might have trouble getting started again if you’re on a steep climb. If the road is safe and you have plenty of room, you can try riding across the road instead of up. Riding across or diagonally up the road might give you a little flat space to help you start pedaling again. But don’t do this if there is traffic!
You might have to walk your bike until you can find a flat enough spot to get started again. Or simply turn around and ride down the hill until you can turn around and start back up again.
6. Relax and Breathe
We don’t always realize what our bodies are doing when we are focused on something hard. We tend to tense up and hold our breath, but that wastes energy and makes it harder to get up the hill.
Instead, try to relax as much as possible.
Keep your arms slightly bent and your shoulders down, without tension. It’s normal for your heart rate to rise as you climb hard. Take long, deep breaths to help keep your heart rate under control and to supply plenty of oxygen to your hard-working leg muscles.
If you find that your breathing and heart rate shoot up too quickly, you may be using too hard of a gear. Try an easier gear and breathe slowly and deeply.
7. Stand Up
Climbing out of the saddle can give you a power advantage when you need it most. By standing up, you put more of your weight onto the pedals so you can push down even harder. (Source)
However, on a steep climb, this can make your back wheel slip. If this is the case, try to shift your weight towards the back wheel to give it more traction.
Another reason to stand while climbing is to give your back and legs a break. If you find your legs aching or your low back hurts, climb out of the saddle for a minute just to give yourself a chance to stretch. You’ll feel better when you sit back in the saddle.
If the road is wet and slippery, you may not be able to get enough traction when you’re standing on the pedals. In this case, don’t stand up. Just put it in an easier gear and keep spinning in the saddle.
8. Fuel First
Nothing depletes your glycogen stores like climbing hard! (Source)
Glycogen is a fuel that your body stores in its muscles, and climbing uses it up fast. Give yourself an advantage by topping off before you hit the climb.
You probably need to eat about every half an hour on the bike. But if you’re doing a lot of climbing, you might need some extra energy. So eat up before you hit the climb, so you have enough energy to finish it.
Try a few bites of a Larabar, a gel, some sports drink, or whatever gives your body a boost.
9. Spin It to Win It
You might feel like you need to grind your way up the hill, but you’re more likely to tire yourself out this way. You’ll burn out your legs, burn up your fuel, and end up feeling like you dropped a lung somewhere along the road.
You’re better off choosing an easier gear and spinning up the hill with a higher cadence. It’s less taxing on your muscles.
Low cadence can induce fatigue, and the more hills you climb, the harder it will be to recover from that shaky, weak feeling. The more you can spin easy on the hills, the more hills you’ll be able to tackle in a single ride.
10. Lighten Up
If your bike is weighed down with too much stuff, you’ll have a more challenging time huffing it up that hill. Lose the load, when possible, to make your hill climbs easier.
Thanks to gravity, lighter riders can climb easier and faster, especially if they have more lightweight bikes and fewer items.
Leave the unnecessary weight at home, especially if you know you are climbing a lot of hills. Choose a lighter bike when possible. Some bikes are designed more for hills, so choose wisely when bike shopping! More lightweight components mean a lighter, faster bike.
Don’t overpack – only bring the gear that you need. If you’re guilty of packing everything, including the kitchen sink, you might want to rethink what goes in your saddlebag and forget the rest.
If mastering hills is a long-term goal, you may want to consider shedding excess weight from your body as well as your bike. Of course, always check with your doctor to make sure it is safe and appropriate to do so.
11. Hike-a-Bike
We’ve all been there. Sometimes, we breeze up the hill, and other times, the hill beats us. Don’t despair if you have to get off your bike and push. Just remember how far you got up the climb and try to make it a little farther the next time. Keep at it, and eventually, you’ll be able to climb the entire hill.
Pushing your bike uphill is still a workout, and you’ll still get to the top, even if it takes a little bit longer. Push for as long as you need to, then get back on and try again.
12. Pedal Through the Crest
Don’t stop pedaling until you’re going down the other side! Just keep pedaling up, over, and through the crest of the hill to make sure you make it to the descent. Otherwise, you’ll lose momentum as you slow near the top of the hill.
13. Practice Hill Repeats
Practice makes perfect, and the same goes for hills. If you find a nice, safe hill to ride, do it over and over. Climb the hill as many times as you can in a single session. Next time, try to add on a rep or two. If the hill is too easy, find a harder one. If hill repeats scare you, try them inside first, with a platform such as Zwift.
You’ll gain confidence and strength as you practice on familiar hills, which will help you even when you’re in unfamiliar territory.
Adjust your posture and engage your core.
It’s pretty hard to climb with your hands on the drop bars if you have them. But climbing with your hands on the hoods or the flat part of your handlebars will give you a more neutral position for your hands and torso.
Putting your hands on the flat part of the bars will open up your chest and make it easier to breathe and engage your glutes. But if you want to stand up to climb, you’ll probably need to put your hands back on the hoods.
When the going gets extra rough, you might need to engage extra muscle power to make your way up. Sit back in your seat, tuck your elbows in, and lean forward. Pull up on the handlebars with every pedal stroke to push the power from your upper body to your feet.
14. Think Uplifting Thoughts
It’s all too easy to think, “I just can’t do this,” when the uphill is hard. But you can probably dig a lot deeper than you realize, and your negative thoughts will just hold you back.
Instead, think of yourself as light and strong, floating your way to the top. Some people like to think of butterflies, helium balloons, or birds soaring overhead. Others like to think of loved ones that have inspired them.
Maybe you are motivated by riding up faster than your hill-climbing pals, or perhaps you just want to hurry up and get the pain and suffering overdone and over with! No matter your motivation, avoid the negative self-talk that will hamper your confidence and ability to get up the hill.
If you still aren’t convinced that you can make it up those hard climbs, check out this video by GCN:
With a little practice, perseverance, and some a little knowledge, you’ll learn what works for you. It helps to remember all of the times you have climbed a hill successfully! And how much fun it will be when you get to fly down the other side.
8 Top Tips For Biking Uphill Without Getting Tired
Riding uphill is one of the biggest challenges in cycling. It can be a struggle, sapping strength and speed. Unfortunately, there’s no silver bullet to get up climbs easier, but there are some tips you can follow to make riding uphill more comfortable.
Check out the 8 top tips below.
This post might contain affiliate links for which we may make a small commission at no extra cost to you should you make a purchase. Learn more.
1) Weight
The heavier you are, the harder every climb will be. It’s no surprise that elite climbers on the professional tour are all lightweight. The better your power to weight ratio is, the easier the climb will be.
Losing a few pounds is a quick way to make climbing a lot easier – and you’ll get the additional health and fitness benefits too.
2) Training
Unfortunately, biking uphill only really becomes easier if you do it regularly. The more hills you climb, the less tired you’ll get. Make sure you incorporate hilly routes into your training and embrace them.
Don’t avoid hills and stick to flat surfaces as you’ll struggle when the terrain kicks up. Hilly rides are the best way to prepare for climbing. If you live in a flat area, indoor trainers do a good job with mimicking hills.
3) Get your gears right
Choosing the wrong gear on a climb is a sure-fire way to burn out. If you are in a gear that’s too big, you’ll find your energy draining quicker and your efficiency will drop. In fact, you’ll end up being slower too.
The more gears you have, the easier the climbing will be. If in doubt, opt for a lower gear (your easiest cog) and then you can always change up a gear if need be.
4) Pacing the climb
It’s tempting to really attack climbs and get up them as fast as possible, but you’ll end up tiring yourself out a lot quicker. Pacing is really important to effective cycling uphill.
Don’t fall into the trap of racing up the hill straight away, settling in and finding the right gear will lead to a more enjoyable ride.
5) Fuel for more power
Regardless of cycling on hills or flat terrain, fueling is vital. If you want to have more energy for getting up climbs, make sure you have food beforehand and you are well hydrated.
Poor fueling quickly leads to low energy and tiredness. If you need a quick boost before a hill, energy gels are popular nutritional products cyclists use for an instant energy hit.
6) Cycling technique
If you feel like you are wasting a lot of energy on climbs, think about your cycling technique. If you are moving around in the saddle too much, you’ll be wasting energy.
Likewise, using your gears optimally is important for efficient cycling uphill. Some small tweaks can help conserve your energy levels and reduce tiredness.
7) Ride in a group
If you’ve ridden in a group before, you’ll already know the benefits of ‘drafting’. Have a look at professional races and you’ll see the main peloton cycling in a big group to conserve energy.
Cycling with other people means you can sit in behind someone else and receive an aerodynamic boost. This is especially important if there is a headwind. Sitting in behind another rider, known as drafting, results in between a 10-30% energy saving.
Obviously, if you are the lead rider, you’ll be doing more of the hard work. Riding in a group is a really effective way to save energy while maintaining speed. Just make sure you are confident with group riding before getting too close to another rider’s back wheel.
8) Preparation
It goes without saying that having the right bike, clothing and equipment makes cycling easier.
There are some quick things you can do to prepare for hills: Upgrade your wheels for lighter ones that perform better going uphill, make sure your bike is suitable for climbing, with a wide range of gear options, reduce weight on your bike by avoiding additional bags and so on, wear sweat wicking clothing to keep you cool when you are working hard, and make sure you’ve got water bottle cages for hydration.
If you are climbing during a sportive event or race, you can ditch some fluids and make the most of the feed stations instead. That’ll keep your overall weight on the bike lower.
Getting your preparation right will be a big game-changer for improving efficiencies and generally make cycling easier. Preparation also includes knowing the route. It helps with cycling uphill when you know when the climbs are coming.
You can then save energy beforehand, fuel at the right time, build up speed to help the start of the climb and so on. Mentally, as well, being prepared is an easy way to be ready for uphill climbs.
Conclusion
Finally, here are five summarizing common mistakes to avoid:
- Over gearing on the climb
- Not having the right bike and gear options for climbing
- Excessive body movement when cycling uphill
- Avoiding hills on training rides
- Poor nutrition and hydration before hills
Remember, cycling uphill will only get easier if you do it more. These tips will help with cycling efficiency and energy levels, but nothing can replicate hill training. The more you do it, the easier it will get.
Images credit: Pixabay
Chris Smith
Founder of Vivi Nation, the cycling, running and active living brand. Chris is a sports enthusiast, occasional triathlete and experienced cyclist, having led multiple cycle tours across Europe.
commuter — Looking for Techniques for Riding Uphill on a Single Speed
Asked
Modified
2 years, 1 month ago
Viewed
56k times
I commute on a Single Speed (SS) bike about 13mi round trip. Going home is not a problem as the gradients are low and I can climb them. However, going in to work the gradients are much steeper and I have a hard time climbing them. I usually need to stop and walk a bit. I am looking for any pointers on climbing hills on an SS. Thanks
Edit: I am not really looking for ways to avoid hurting myself, I am young and fit so that isn’t my biggest concern. I am more concerned with making my pedaling technique more efficient, especially for hill climbs. Another point I should mention is that I am using clipless pedals to increase my power output.
Verdict: I added this because I can only choose one best answer. I think that @GuyZee best addressed my question about technique, but @Steven offered a great deal of help with regards to getting a better mechanical advantage. Thanks to both of you for providing great answers.
- commuter
- clipless
- technique
- single-speed
- climbing
4
I ride both SS/FG and approach climbing hills much of the same way I would if I were on a geared bike with one very big exception. ..MOMENTUM. When on a heavily geared SS/FG I gain as much speed as possible going into the hill and push hard to maintain it throughout the climb.
Basic climbing tips:
- Slide back on saddle and drive heels through the bottom of the pedal stroke
- If you need to stand, do so while minimizing body sway and unnecessary counterproductive upper body motion
- Get into a rhythm — climb at your own pace
- Stay upright to keep lungs operating at full capacity
- Pull handlebars into your thighs as you drive pedals forward
Hope this helps!
3
@GuyZee covers most of the technique side, but I’d like to add that if you’re experiencing difficulty climbing hills, you should also use a lower gear. Faster cadences are a great way to build up your endurance and help with the hill climbs to boot.
Spinning is winning!
9
I have cycled to Holland from London and to Ireland and am about to cycle again to Holland, through Belgium and into France.
I agree strongly with Frank. Conditioning is what it’s all about. The only thing I would add is;
-
Going up hills on a SS — keep your breathing constant and powerful — work the lungs.
-
Push hard into the climb and then stand when you have to and then do what I call the push ups motion, pulling upward on the handlebars into your body and working hard.
-
There will be some hills where you have no option (and it is quicker) to get off and walk) but if you repeat steps 1 and 2 for a couple of months with decent distance on a regular basis, then your body will pump you up the hardest of hills.
-
Keep hydrated throughout — and if doing long distances eat the right foods — full of carbs, like flapjacks and snickers bars! That and energy drinks have helped me push hard up hills for years. Simplicity is key (although I do not discredit anyone’s more advanced knowledge of changing cogs etc — I would try that if I could afford to out of curiosity).
-
Don’t think too much! Keep yourself in a calm state and concentrate on your rhythm and not on cyclists around you or motorists (at the same time obviously keeping them in mind for safety!).
Good luck soldier.
I ride a SS fixed gear 3 times a week. My advice when the hill is hard and steep is to do what feels natural.
I am with M. Werner — couldn’t be better said!
A compromise idea might be to use 3-speed, Sturmey Archer hub gear.
There is a minor weight penalty and that handlebar lever will completely ruin the look of the bike, however you will get a gear for the hills/speedy standing starts, a cruising gear and an overdrive gear. You do have to ease off the pedals to change gear but you can also change when stationary. 3-speed is fun because you can rapidly downshift to first, go into high cadence mode, clear whatever you need to get past and then shift back to the cruising gear. Externally minimalist and bulletproof (I have a 3 speed from 1954), 3 speed will set you apart from those single-speeders lumbering away from the stop lights.
Implementing 3-speed could be a fun project if you build your own wheel from any old junk 3-speed wheel. The clips, cable and shifter are readily available after market for small sums, they will also fit onto your frame without requiring dropouts or any other frame bolt-ons. If you go with Sturmey Archer you will also have genuine retro, timeless classic-ness added to your bike.
As another suggestion — replace your single speed rear hub with a Sturmey Archer 2-speed, Duomatic hub. This is operated by back-pedaling, so you get to keep the clean, simple look of a single-speed, but you get a lower gear for hills. I have one — it works great.
The simplest answer is conditioning. Try pushing yourself hard for three minutes with three minute recoveries. Do this three times on the way to work. Do the workout two or three times a week. I ride a single speed ten to twenty miles a day before work. Using this simple program I got to the point where I was able to ride a single speed forty miles at altitude in a few weeks. Regarding equipment a higher saddle often helps with climbing.
Given that you’re riding a single-speed, my advice would be: Coast down the hills, and pedal up. This conserves your energy best and gives you more power going uphill.
The reason is that a certain amount of downhill pedaling is wasted. Gravity will pull you down a hill, so you have to pedal a certain amount just to go faster than gravity would move you anyway.
Uphill, on the other hand, every bit of energy you expend is useful.
So you’ll be most efficient if you coast down and pedal up.
In contrast to the accepted answer:
- of course, stand up
- pedal calmly, do not pull the handlebars in (because that causes inscreased knee stress)
- sway. Move your body up and foreward, then step and stand on the pedal; repeat
The point is to never have to «pull on the bars and push hard». That’s tiring and unhealthy.
I agree with the advice given by @GuyZee: It’s all about momentum. Make sure you have established a rhythm with your cadence (rolling start) and just before the climb, push and never look back! I do this personally, with the addition of adapting a road biker’s stance (leaning slightly forward at least) and it works quite well. Not to mention that the next time I climb that hill, I feel considerably stronger and more confident.
I’d agree with most that has been said (Campagnolo excepted, some people just don’t get simplicity!). Like most things, practice makes things easier by a combination of strength build up and technique refinement. I regularly do distances of 40+ miles on my fg and haven’t changed cogs, position, equipment once it works. So much is psychological rather than physical! I guess that if you read this after a year or so riding ss you’ve either cracked the difficulty and are gloating, or you’re still finding hills tough. Hope it’s the former!
My wife has just got a ss and loves the immediacy of riding up hills.
You say you’re young and strong, as a 60 year old I guess I could say that my fg is keeping me old and strong!
Enjoy…..
use single speed for high end and just rely upon your grip on handle and pedals.Doing so u can increase the inertia of your mtb so that it moves way along with u. Secondly,if u use fenders in rain,please remove them if not required.That’s all i can say.
1
Your Answer
Sign up or log in
Sign up using Google
Sign up using Facebook
Sign up using Email and Password
Post as a guest
Required, but never shown
Post as a guest
Required, but never shown
By clicking “Post Your Answer”, you agree to our terms of service, privacy policy and cookie policy
How to bike uphill faster: 12 tips
Is going uphill a struggle? Look with surprise at the pros who climb hills with ease and do not understand how they do it so easily?
We’ve put together 12 tips to help you ride steep hills more efficiently.
1. Lose weight
There is a main factor — the ratio of weight and strength, the better it is, the easier it is to climb. Strong legs and a minimum of body fat physiologically facilitate the process of lifting yourself and the bike up the slope.
Nobody wants to hear remarks about being overweight. And yet, if there are extra pounds, then getting rid of them will increase your efficiency on the ascent and the slides will no longer bring pain and disappointment.
2. Fitness
Good heart and lung fitness certainly helps. Months or years of cardio training has a positive effect on the ability to “do” steep slides. Equally important is the factor of strong legs accustomed to loads — this helps to go uphill without stopping.
3. Lighter bike
A lighter bike makes going uphill easier. If you manage to lose a few kilograms of excess weight from yourself, that’s great. However, removing excess weight from the bike should not be seen as an expensive excess.
And yet, weight loss is best done comprehensively and thoughtfully.
For example, a lighter saddle, seatpost, handlebars and stem will make the bike a little lighter, but the effectiveness of such lightening will tend to be zero if heavy wheels are left.
The fact is that the wheels are unsprung rotating mass, which means that a lot of energy is spent not on overcoming rolling resistance and gravity, but on spinning two heavy flywheels.
In other words — lighter wheels make it much faster and easier to accelerate, maintain high speed and brake. There are many ways to take weight off a bike, however, if we are talking about the process of moving and spinning, then even removing 100 grams from each wheel will feel like something incredible.
4. Maintaining cadence
The best way to climb a mountain with high efficiency is to pedal with a cadence of 80-100 rpm (cadence — cadence). It should be the same as on flat sections of the road. Thus, downshifting is enough to facilitate climbing. In this case, the speed of movement drops, but … Pushing a heavy gear uphill is tiring and even harmful.
5. Gear selection
If you have super strong legs, heart and lungs, you can go uphill in high gear. In fact, you can handle the standard transmission, which most often contains sprockets 52/39or 53/39.
Yes, we are talking about road bikes. On MTB chainrings tend to have fewer teeth (44/32 or so) due to the fact that their design does not allow for long trips on flat roads, the fork seems to hint at this.
To be clear, 52/39 is the two stars in the front. One with 52 teeth and the other with 39 teeth. The cassette (rear stars) can contain from 8 to 12 gears. Although yes, there are already transmissions for 13 gears, but they have not yet become widespread.
However, the need of most mere mortals is to shift the gear lighter. Bicycle manufacturers take this into account and complete their products with 50/34 or 52/36 sprockets.
Another clarification is that the fewer teeth the front sprocket has, the easier it is to pedal.
The more teeth the sprockets have at the back, the easier it is to pedal.
Another solution — a triple system — there are already three stars in front, not two. An additional star significantly expands the range of gears. And the easiest gear is obtained by switching to the smallest star in front and the largest star in the back. Then at cadence 90 the speed of movement may not even reach 5 kilometers per hour, but the traction will be locomotive — any and even the steepest hill will submit.
And vice versa. A large chainring in the front and a small one in the rear allow you to develop little power on the wheels, but at the same time spins them up to high speeds. In such a gear, most likely, you will not even be able to move if you try to go up even on a slight slope.
Regretting a lot of passes will be much less common than regretting not having them on a 30% upswing.
6. Get out of the saddle
Research has been carried out to find out the optimal mode of pedaling — standing or sitting. It turned out that road cyclists generate the ideal level of power while remaining in the saddle. It works until the slope reaches 10%. When the heart increases the rate of contractions — it’s time to get up.
However, when the grade gets steeper, say more than 25%, then pedaling while in the saddle becomes an impossible task. Some riders believe that to keep the front wheel on the ground, they should stay in the saddle, saying that it is easier to control its release. There is information that standing up can increase the efficiency of uphill pedaling by 25%. So they say.
However, if the cyclist is overweight, standing up may not be as effective. Having a low center of gravity can help with the overall power to weight ratio.
Either way, try different options and see what works best for you. Most amateurs (non-professionals) will find that their uphills are mixed.
7. Use different muscles
Steep and long climbs inevitably cause a burning sensation in the legs — this is the production of lactic acid, a product released in the muscles during intense exercise. The burning will start to slow you down. To avoid further slowdown and a complete stop, it is enough to change the landing in the saddle, thereby changing the working muscle group.
You can also try using the muscles in your feet and toes to help with pedaling. You can try the pedals not only to push down, but also to pull up. This allows you to include fresh muscles in the work and give rest to the main ones.
8. Change of posture
Spinning with straight arms and a bent back is less effective than with bent arms and a straight back. This ensures an underestimation of the center of gravity and full inclusion in the work of the main muscles. Make sure your chest is open with a flat back and your lungs will fill and ventilate better.
9. Accelerate before the hill
If there is a hill ahead, you can use the flat or downhill to gain speed. Even if you are going faster than your comfortable speed, try not to apply the brakes (for your safety always use them!). When the ascent begins, the previously gained speed will help to drive part of the hill by inertia with minimal energy consumption.
Make sure the gear is in the right gear beforehand, as coasting uphill won’t last forever. When the speed threshold is reached, for which the gear is pre-selected, just start pedaling.
The gear is selected in such a way that during the lifting process there are as few shifts as possible. After all, competent switching provides for a short-term removal of the load from the pedals, which means that an intensive deceleration will occur. We don’t need it. Therefore, consider this moment when approaching the hill.
10. Optimal trajectory
If there is a sharp turn on the ascent, it is important to try to approach it at the flattest point. Another solution is the outer turning radius. The distance on the inside edge of the turn may seem shorter, but the end result will only be a steeper climb.
11. Stay focused
Instead of daydreaming about falling and not pedaling anymore, imagine yourself at the top of a hill. Keep thinking about how you will feel when you get there. Focus, breathe efficiently and keep pedaling. Also, tell yourself that you can do it. You’ll get to the top if you believe you can.
The psychological component can play an important role. Good “iron” and good physical shape can be useless if the mood for “winning” is absent.
12. More practice
The more climbs you do, the better you get. Find a range of hills, from long and gentle to short and steep, and try them all. Repeatable minute loads are useful for increasing power and aerobic capacity. Then, when you do the classic climb, you will be in great shape.
In addition to uphill tips, we have articles on other topics that can also affect the speed and efficiency of moving uphill:
Choosing a sunscreen for cycling — yes, it may seem absurd, but the general feeling of comfort also affects the results.
Road or MTB clipless pedals — which one is better? — and that also has an impact.
Handlebar grip on a road bike — well, there’s no need to explain.
How to protect your legs while riding a bicycle — a very important article.
Running on a treadmill? As Tony Martin prepares for Paris — Roubaix — the name speaks for itself.
Basic cyclist training — no comment.
Cycling training now and 50 years ago — very interesting.
How to achieve goals in endurance training?
Full name
Borik Vladimir
Passionate cyclist since 2014. He could not stand it when the bike made extraneous sounds in motion, which made him go over everything, re-grease and renew it many times. He likes to delve into the subtleties, therefore, numerous bulkheads of his bike later turned into a job as a bike mechanic. I went from Shimano Acera to Comance Tomahawk through SLX to XTR to Specialized S Works, and then just switched to a budget road bike on Campagnolo Xenon 10 equipment. Kuyalnik 2019 bike marathon (MTB) behind-year, where Light took 5th place on the route. Currently remains an active bicycle user and continues to deepen his knowledge in this area.
Bicycles in GTA 5: how to ride, controls, tricks
Bicycle is a convenient and compact vehicle that first appeared in the Grand Theft Auto series in the San Andreas game, and subsequently successfully moved into the fifth part. If you are interested in what models are in the game, how to ride a bike in GTA 5, how to jump on a bike and perform other tricks, read our article and find out everything!
In GTA San Andreas, the bikes were very unfinished and «raw». What is at least worth the fact that they could not be destroyed. Not a single weapon in the game caused them the slightest damage, which, however, did not prevent the driver of this vehicle from dying if he was shot at while he was riding a bike. There was also another funny glitch: the bike exploded if the player managed to turn it upside down (although this was very difficult to do).
In GTA 5, the bikes came highly modified. Now they are not «immortal» and can be completely destroyed as a result of a collision or from the action of firearms. They have improved physics of movement, there are many new and varied models. Bicycles are ideal for a leisurely exploration of the game world, for country walks and trips to remote areas of the map and mountains.
Very pleased with the variety of technical characteristics of different models: one will have a higher maximum speed, but worse acceleration and brakes, on the other — on the contrary. A small disappointment relatively large is that you can’t listen to the radio on them, even in GTA Online, where you can buy headphones.
How to ride a bike in GTA 5
Riding a bike in GTA 5 is not that difficult, but beginners may have some problems. You can get on a two-wheeler using the same key that you use to get into a car or any other vehicle. Basic control is carried out by the classic W-A-S-D keys. There is no reverse gear, of course, so you have to roll backwards with your feet. While everything is simple and clear.
How to speed up on a bike
Problems start when a player wants to speed up on a bike. You can press hard on the «W» key, but this will not help anything: the speed will be constant. The trick is that in order to accelerate, you need to hold down the Caps Lock key. At the same time, you will not be able to accelerate all the time, because the endurance scale will quickly run out, after which your character will fall off the bike.
How to jump on a bike in GTA 5
Bike jumping is a special trick that can be performed in GTA 5. On the computer, use the front brake — the «Q» key and the spacebar to perform jumps. On the Play Station, jumping is done using the «R1» button. Most importantly, remember that you can only jump on a bike if you use BMX or Fixter! In addition to jumping on bicycles, traditional motorcycle tricks are also available — riding on the rear wheel and «stoppy» (braking the front wheel, in which the rear wheel comes off the ground).
Great in GTA 5
Consider in detail all the bike models present in the game.
1. BMX
The main advantage of the BMX is its fantastic maneuverability. And the small size and short wheelbase allow you to make incredible jumps in height and distance! The speed of this one is far from the highest, so it is not recommended to use it for racing or while escaping from the cops. It is also not advisable to use the BMX off-road, as it is easy to fall out of it and get injured.
Where can I find bikes? Most often, BMX can be taken from members of African-American gangs based in the Chamberlain Hills and Davis (Grove Street) areas. In addition, it can be found on the Vespucci beach in the skate park. The bike also often appears in the hills of Vinewood.
2. Cruiser
The Cruiser is the slowest and heaviest bike in the game. It’s so bulky that you can’t wheelie or jump on it. But this is offset by very good handling and ride comfort.
If you want to make a leisurely pleasure trip somewhere in the provincial areas of GTA 5 — feel free to sit on this model.
Where can I find a bicycle? The easiest option is on the Vespucci beach in a service that rents bicycles.
3. Endurex Race Bike
The Endurex is a typical sports bike. Its aerodynamic performance is ideal for racing. But, unfortunately, high speed is achieved at the cost of comfort and handling, which are seriously affected by this model. Interestingly, in the case of this bike, we again encounter the humor of the developers, who apparently named it after the well-known condom manufacturer (Durex).
4. Fixter
Fixter is another sports bike. Its design is a little unusual for this class of bicycles: there is only one gear. As a result of this, acceleration suffers quite a lot, but the maximum speed is at a high level. This could be put up with, but the developers also awarded Fixter with terrible brakes. The only thing that helps out is that on this model, like on BMX, you can make jumps.
Where can I get a bike? You can get it by completing the mission «Rage (#5)» from a series of missions from strangers and freaks. In this mission, you need to kill 20 hipsters in Mirror Park as Trevor. Big is worth it, isn’t it? 🙂
5. Scorcher
The Scorcher is a true mountain bike with great handling and grip to take you through the roughest terrain with confidence. Its speed is not the most outstanding (although who would demand that from a mountain bike?), but the acceleration is one of the best in the game.
You can find it in the Chiliad mountain reserve, and in the Paleto forest. He can sometimes be found near the residence of Michael de Santa.
6. Tri-Cycles Race Bike
Tri-Cycles Race Bike is another sports bike in the world of GTA 5. Its main features are a shortened wheelbase, a lightweight frame and an inverted steering wheel. Not surprisingly, this is one of the fastest bikes in the game. The bike is available exclusively during the mission «Triathlon», you will not find it anywhere else in the game. But everything is for sale. The Tri-Cycles Race Bike is no exception — the cost of which in GTA 5 is $10,000.
7. Whippet Race Bike
9The 0002 Whippet-Race Bike is another sporty street bike. It has a standard set — a shortened wheelbase, a lightweight carbon frame, an inverted handlebar. All in the name of speed and agility. Available in green, white and black. One of the fastest bikes in the game.
Where can I find a bicycle? It can sometimes be seen outside Michael’s mansion when Jimmy rides it home. In addition, you can meet on highway 68.
Now you know everything about bikes in GTA 5! We recommend that you look at a similar article about motorcycles, there is where to accelerate 🙂
How to quickly rise uphill on a bicycle
Content
- Save the pace
- Hold in the saddle
- SHOUND GOD
- Make the Clutch more
- 9099 902 standing hill
- Climb a longer radius
- Learn to breathe properly
- Exercise regularly
An experienced cyclist understands that it is impossible to ride all the time only on a flat smooth road. Quite often, there are steep climbs on the way, which must be overcome and preferably with minimal energy consumption.
There are several techniques for climbing a mountain correctly and saving energy for the next trip.
Keep up the pace
The speed must be calculated so that when lifting, the driving power does not increase by more than 10%. There is no need to rush after the one who rides faster and increase the speed at the beginning of the ascent, then by the end there will be no strength left and you may even need to get off the bike. It is important to find your comfortable pace. Smooth running throughout the journey saves energy.
Stay in the saddle
Try to overcome obstacles while seated. In order to make lifting easier during the movement of the body, tilt slightly forward while shifting back along the saddle. With each rotation of the pedals, pull the handlebars towards you from the same side from which you press the pedal.
Downshift
In order not to waste energy and not bring yourself to exhaustion, you need to downshift. Set the speed so that the cadence is 70-90 spins. While pedaling more often, it will be easier than pulling the bike at higher speeds, and we will maintain both pace and energy.
Increase traction
When driving up steep hills, rear wheel spin may occur. To avoid this, the weight of the body must be shifted back, thus, the grip on the ground will become greater and the movement will be easier.
Correct cassette selection
An experienced cyclist knows that there are various obstacles on the way, so it is important to foresee them all. Check how many teeth are on the largest sprocket. It is better if there are 28 of them. If there are fewer of them, then this may not be enough for you when lifting, i.e. driving will not become easier even when downshifting.
Using clipless pedals
While driving, you not only press down on the pedal, but also pull it out of the lower position, thus making a circular rotation. To overcome a steep obstacle, this will be most relevant when any effort plays an important role.
Lock the suspension fork
Most modern bicycles allow you to lock the suspension fork even when moving. This will save energy by not wasting it on compressing the front shock absorber while driving.
Finish the hill while standing
If the hill is very steep and there is not much left to the end, then in order to overcome it you can get up and drive on your feet. To avoid frequent pedaling and wasting energy, you need to increase the gear before this maneuver. The speed of movement will become higher due to the rotation of the pedals with the whole body. While driving, you do not need to roll over from side to side, so you waste your energy, try to move the bike from side to side.
Climb in a longer radius
Although the path will be longer, you will spend less energy if you move a little along the hill avoiding very steep places.
Learn to breathe correctly
Confused breathing is very disturbing and does not allow you to complete the maneuver, and a large amount of energy is expended. Therefore, it is important that breathing is kept even. Try to breathe in time with the movement of the connecting rods. While driving, inhale for a full rotation of the pedals with your left or right foot. The best option is when one breath is taken in two full rotations.
Exercise regularly
As in any other activity, regularity is important. Constant training will teach you how to use your energy correctly, how to quickly and correctly lay a route. Only a hardy and experienced athlete will be able to quickly overcome a very steep hill with maximum conservation of strength.
There are quite different obstacles on the roads, and if one of them is a steep hill, then experience, endurance and the right technique will help you quickly overcome it.
Choose your route in such a way as to avoid the most steep slopes. Try to avoid pushing into traffic, keep pace so that when entering a hill, the power of movement does not increase by more than 10%.
Learn to change gears correctly. Big gear is only suitable for straight road. To climb a mountain without losing speed and strength, downshift, but avoid pedaling and losing balance.
When the traffic is very difficult and downshifting does not help, start driving from side to side, making zigzags.
Breathe properly, so you supply the body with enough oxygen.
Cycling styles
We welcome cyclists of all ages!
In this most interesting section of our site you will find articles about bicycles carefully collected and
written by us. They reflect all the most necessary technical knowledge about bicycle technology,
advice from professionals from the world of cycling, interesting facts and many other entertaining things.
If you are a beginner and do not yet understand complex terms or can not catch technical subtleties, then
our experts will always assist you in choosing a bike or explain this or that article —
just leave a comment.
Our collection of articles about bicycles and everything related to them is constantly updated and
is added, and we strive to ensure that you have no questions left. But if they do
arise — do not hesitate to ask, you will always be answered!
All
Top ten most read articles
Brands, manufacturers
Cycling clothes and shoes
Bicycle trips
Bicycle and safety
Bicycle and city
Bicycle and health
Bicycle and sex
Bicycle and creativity
Bicycle equipment
Bicycle accessories
Bicycle parts (bike parts)
Bicycle personalities
Cycling
Bicycle tuning
Bicycle selection
Mountain bikes
Skiing
Children’s bicycles
Clothes, shoes and accessories for winter skiing
Preparation of winter equipment
pokatushki
Buying a bike
Various
Bicycle repair and maintenance
scooters
Sledges and snow scooters
Bicycle assembly
slopes
Snowboard
Snowboard and ski for children
Test reviews
cycling technique
Alpine skiing technique
snowboarding technique
Electric bikes
electric scooters
English-Russian Dictionary
cycling terms
Dictionary of a cyclist
- Brands, manufacturers
- Cycling clothes and shoes
- Bicycle trips
- Bicycle and safety
- Bicycle and city
- Bicycle and health
- Bicycle and sex
- Bicycle and creativity
- Bicycle equipment
- Bicycle accessories
- Bicycle parts (bike parts)
- Bicycle personalities
- Cycling
- Bicycle tuning
- Bicycle selection
- Mountain bikes
- Skiing
- Children’s bicycles
- Clothes, shoes and accessories for winter skiing
- Preparation of winter equipment
- pokatushki
- Buying a bike
- Various
- Bicycle repair and maintenance
- scooters
- Sledges and snow scooters
- Bicycle assembly
- slopes
- Snowboard
- Snowboard and ski for children
- Test reviews
- cycling technique
- Alpine skiing technique
- snowboarding technique
- Electric bikes
- electric scooters
BMX Glossary
BMX Glossary
Checking if the bike is ready to ride
Things to check on the bike before riding
Bicycle Shifter Adjustment Quick Guide to
Bicycle Shifter Adjustment
Bike speed
Speed records. What determines the average speed in real conditions and how to increase it
Problems with bicycle pedals
We diagnose and fix ourselves
Winter cycling FAQ
10 tips to help you get comfortable in winter cycling.
How to shift gears on a bike?
The article is devoted to switching gears on a bicycle. Tips, recommendations.
Tips for a beginner
What separates a beginner from a real pro?
Winter cycling
Features of winter cycling. Tips and tricks from experienced cyclists
Cycling styles
A short article about cycling styles
About pedaling technique on a bicycle
Or how to pedal correctly
The main directions of cycling in St. Petersburg
Directions of cycling, types of cycling, types of cycling
BMX: styles and directions. — blog.slopestyle
In its half-century history, BMX has evolved into a sport of cycling that surprises with its diversity. Many styles and directions of this extreme discipline: we will tell you more.
BMX – Introduced in the 1970s, this form of cycling was originally nothing more than fun for kids who organized amateur competitions on motocross tracks. Bike MX, Bike Moto-X, Bike Moto eXtreme — there are many options for how the abbreviation stands for, and they all have a reference to motocross. And despite the large number of different styles and directions in which BMX skating developed over the next 50 years, the “cross” roots were not forgotten. So, what directions exist in BMX? Let’s try to figure it out.
BMX-Racing
Racing and more racing is where BMX started. A BMX racing track strongly resembles a motocross track in its configuration — here you can find elements such as departures and landings with different configurations, waves, counterslopes. Usually, the track begins with a starting gate located on a hill and setting the initial speed necessary for the racer to complete the entire track. Further, all the skill is required from the rider, the essence of which is the ability to overcome the terrain of the track, increase speed and, of course, fight with rivals: up to eight participants in the race can be on the track at the same time.
A BMX bike is quite different from its freestyle counterparts. First of all, a racing BMX is based on a lightweight aluminum or even carbon frame, you can often find a carbon fork, lightweight wheels and cranks. The geometry of a racing bike is notable for its long wheelbase, the purpose of which is to provide stability when traveling at high speed. International standards require a bicycle to have a rear brake and a saddle. There is a separate category BMX Cruiser — it allows the use of larger diameter wheels, up to 26 inches, traditionally, 24-inch wheels are installed on cruisers.
In today’s sports regulations, there are many variants of BMX racing, including the traditional group knockout race, relay race, individual start, and so on. Despite the need for a track, BMX racing has many fans, there are a large number of sports schools that have the necessary infrastructure at their disposal. Some of them offer the opportunity to try their hand at the track for everyone, when the track is free from competition and training. And it will certainly be interesting for any cyclist.
Freestyle
This term refers to extreme BMX disciplines that are not related to racing: street, dirt, park, vert and flat. The competitive part here is not expressed so strongly, freestyle disciplines are, first of all, a way to have a good time, learn new bike controls and translate them into extreme stunt riding. Freestyle disciplines mean competitions in the contest format, where the skills of the participants are evaluated by independent experts. Since 2020, BMX freestyle has been included in the program of the Olympic Games, making its debut in the park discipline at the Tokyo Games.
Street
Street — as the name implies, skiing on city streets, where elements of the urban terrain and infrastructure are used as obstacles: stairs, parapets, railings, various inclined structures, and so on. And starting from the first, inept «bunny hop», the street rider goes a long way in improving the skill of controlling a bicycle and controlling his body. The result is a dynamic, extremely difficult and, at times, dangerous ride, accompanied by jumping with spins, sliding along the edges and railings on pegs, manuals, fakes and other spectacular tricks.
The main advantage of street skating is that you only need a street, a bike and a desire to get started. The Internet will help you find many educational articles and videos that explain in detail the intricacies of performing a particular trick.
Park
Urban street culture includes many kinds of extreme sports, among which skateboarding has a strong place. And it is in skate parks that many BMX riders have found their place. The figures of a typical skate park are great for BMX riding: various radii, fan boxes, rails — all this becomes the basis for tricks and a way to have a great time. The presence of figures allows you to add tricks performed in the air to skating. Well, if there is an indoor skate park nearby, this is an opportunity to continue riding BMX with the onset of winter.
Most indoor skate parks feature a foam pit — a great way to practice difficult tricks and greatly reduce the risk of injury from a bad landing.
Vert
Vert — riding in a ramp, the feature of which is a vertical takeoff, performing a trick and landing on the same plane of the ramp from which the takeoff was made: a mandatory element of riding in a ramp is a 180-degree turn in the air. A ramp can be found in most skate parks, ranging from a large ramp where you can perform complex tricks with spins in the air, or a mini-ramp with a slightly different geometry, where the emphasis shifts to tricks using the edges and tops of the ramp.
Another type of park skating, standing at the junction of park and vert, is the pool, a special design, which is a concrete «pool», equipped with smooth radii along the edges, allowing you to ride long sets with a lot of tricks. And yes, initially the riders used real “dry” pools for riding on the abandoned outskirts of the city. If you are lucky enough to find something like this within your reach, consider yourself very lucky as a rider!
Dörth
But what if there is no infrastructure nearby? Of course, make it yourself!
Dirt — riding a dirt spot, which is a series of dirt jumps, ideally configured to allow a series of jumps to be made without the need for additional acceleration. Each of the Dirt Ski Jumps has a take off and a landing that minimizes the shock loads of a properly executed jump and allows you to keep your speed to overcome the next ski jump. A well-built rhythm section can include dozens of consecutive springboards. Usually, it all starts with a small earthen «bump» with no gap between departure and landing, created by a company of fellow cyclists. As skills grow, site configuration changes, jumps get bigger, new elements and paths are added — as long as cyclists are interested in riding and progressing, and local authorities do not show excessive interest in the spot.
Dirt jumping doesn’t offer tricks related to slips, so it’s rare to see pegs on a dirt bike ?
But the amplitude and speed characteristic of dirt jumping often exceed the speed of the park, the same applies to tricks — the height of the reach and the number of elements, performed within one jump, more. Dirt finds its fans where there are not many people, instead of a concrete jungle — a secret clearing in the forest, and the desire to build and maintain the site is as strong as the desire to ride.
Dirt jumping is a separate type of big air, a really big jump, usually standing outside the series, with the ability to accelerate well before jumping. Truly impressive tricks and their combinations are possible on bigair, and it is within the framework of bigair that we can see the performance of any trick for the first time in world history.
Flat
Flat is perhaps the most “calm” of all BMX disciplines, at first glance, having more to do with gymnastic art than with extreme skating. Flatland — performing tricks on a flat area, the complexity of which is limited only by the cyclist’s imagination. There are few jumps and slides, but a huge amount of elements related to balance and using different parts of the bike to complete the trick.
On a “flat” bike, you can almost always see 4 pegs used as points of support for the legs when performing a trick, however, like the handlebar, frame, saddle, fork, wheels: any position of the rider on the bike is possible for flat riding, including even those that initially seem impossible by definition.
Pump
New in recent years, the pump track is certainly as popular with BMX riders as it is with mountain bike fans. A specially created track with a hard surface that allows you to develop high speed without the need to pedal, and, if necessary, use its elements for jumping. Pump track riding is closely related to unloading the bike when moving “uphill” — easing pressure on the handlebars and front wheel, and, accordingly, loading — shifting the weight forward when moving down, from the bend of the track or in the counter slope.
If done right, the bike starts to accelerate noticeably, enough to overcome some of the kinks in the trail with the right jump radius. Pump track riding is a great way to keep yourself fit and learn how to ride your bike at speed.
… and finally all together? Why not?
Going to the skate park through the city blocks — manual on the streets, degrees from the parapet and grinds on the railings, pump today, pool tomorrow, and the day after tomorrow a dirt spot contest. A mini-ramp in the evening in the nearest yard, with flat chips and taps on the edges, season after season, and maybe at the end waiting for the podium of the national championship, a place in the Olympic team and gold? Or maybe just fun years spent in an accessible and exciting world, whose name is BMX!
And of course, as always, a little advertising: want a new BMX bike right now?
We are waiting for you in our online store!
BMX ATOM, versatile and modern bikes for those who have grown out of toys and want to ride a real high-level or even pro-level BMX bike.
We are talking about the level, what is the secret? This is the topic for our next story. What is the difference between a budget, “toy” bike and another one that is ready to become the key to rapid progress and pleasure from riding? Be sure to tell us, stay with us!
Share
BMX :: Russian Cycling Federation
BMX
cycling appeared in the early 70s. 20th century California
motocross was very popular in the USA. Children and teenagers wished for anything
also began to participate in motocross, so they took their bikes, dressed
into motocross gear and competed on self-built
tracks similar to motocross tracks.
International
The BMX Federation (I.BMX.F) was founded in April 1981, and the official
world championships have been held since 1982, almost 10 years earlier than the first championship
mountain bike world. In 1993, the International BMX Federation was fully accepted
to the UCI. BMX Supercross has been included in the Olympic Games since 2008.
Competitions
are held on special tracks and bicycles with 20-26 inch wheels.
Race — Cruiser
Race rules identical
race — «Classic». The same track, only it is allowed to use bicycles with
wheels up to 26 inches.
Relay
Relay
consists of 4 stages. 4 athletes start the race (3 men + 1 woman). Racers
Each team will start in the same uniform. The race starts with qualifying
time trial races. Teams with 1st to 4th place advance to the final.
4 teams start in the final. The rider of each team must drive a lap (his own
stage) and pass the baton to your partner.
Race for a while ( Time TRIAL
is fixed in the race.
route time. The track is passed by each rider one by one. racer wins
showing the best time of passage of the route.
BMX FREESTYLE
Participant performance
competition is judged on the complexity, originality and accuracy of performance
various acrobatic figures performed in the flight phase. Competitions can be held as
overcoming specially constructed obstacles, and on the ramp.
Park
athletes compete on specially created artificial tracks
(skate parks). Obstacles, as a rule, consist of edges, departures, railings,
trapeziums, springboards located in a certain sequence.
Ramp or Wörth
The discipline in which the athlete
rides in a U-shaped ramp about 4 meters high. The athlete rolls down
the top edge of the ramp, picks up speed and flies high from the other edge of the ramp,
in flight performing various tricks.
Street
urban environment, where as
obstacles, trees, railings, walls, containers are used — everything that can
meet on the street. The discipline in which the competitor overcomes
natural obstacles and makes various jumps, trying to tear off both
wheels off the ground without the aid of a springboard or ramp.