Is it possible to insert an external drive that connects to the computer using a USB cable while the computer is turned on and running? – AnswersAll
Table of Contents
Is it possible to insert an external drive that connects to the computer using a USB cable while the computer is turned on and running?
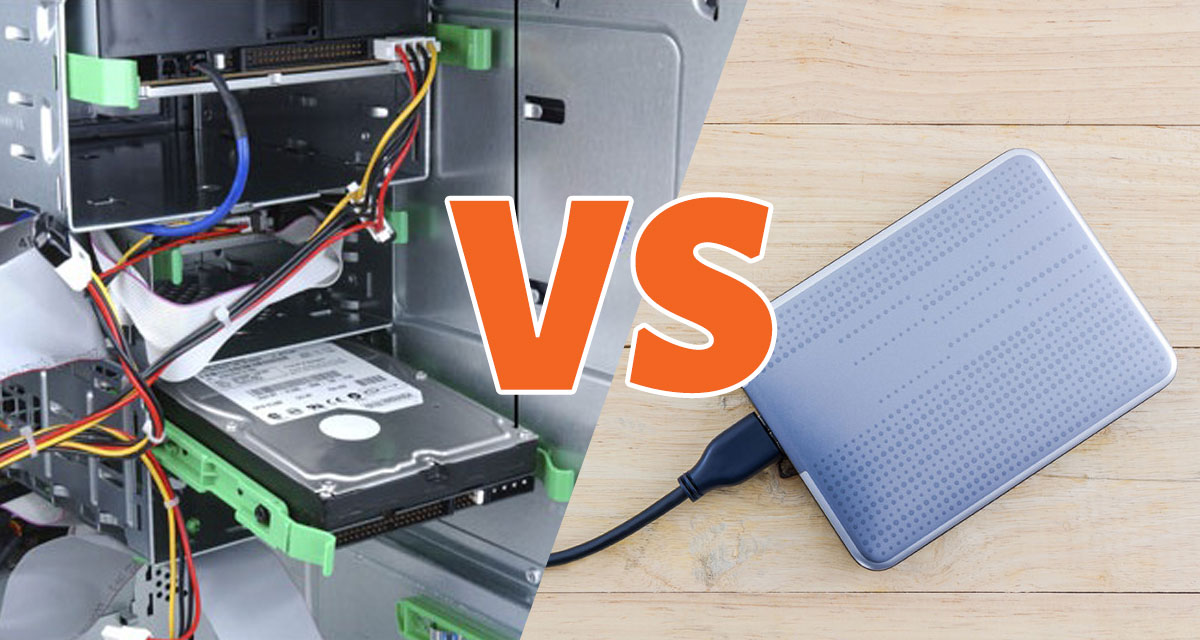
It is safe to plug an external hard drive in via USB at any time, Its setup as plug and play. you are fine. The only time you would not be is in the case of plugging it directly into the sata, Essentially hard wiring it into the computer.
Is it possible to insert an external drive that connects?
You’re not inserting an external drive the same way you would an internal drive. External drives are designed with the ability to be connected while the computer is running.
Can I add an external hard drive to my laptop?
One of the most common thingies to add to a laptop is a USB storage device, such as a flash memory card reader or USB flash drive. Or, you can attach a real external hard drive or CD-ROM to your laptop’s USB port, if those devices are USB-happy and properly powered.
Can you take a hard drive and plug it in and run in on another computer?
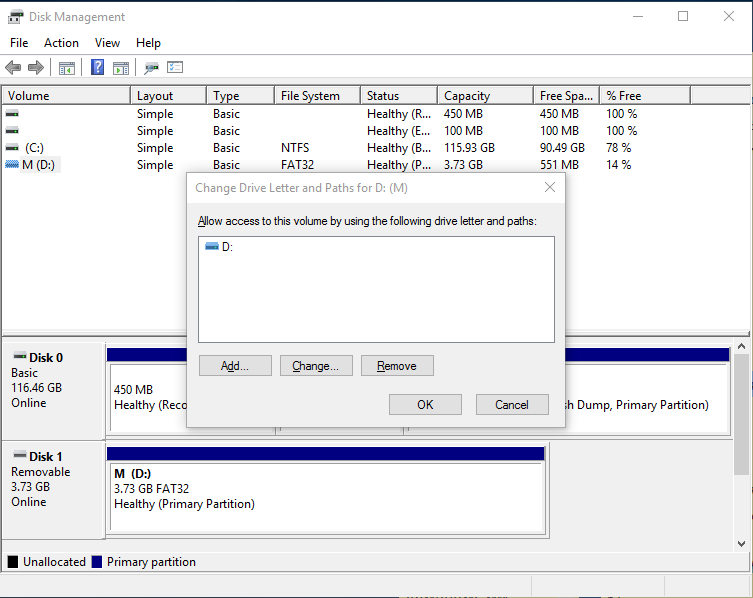
Yeah, that’ll work. You’ll need a SATA data cable, and you’ll need to locate an available SATA power cable in the working computer. Plug the drive in, boot the computer, et voila, your drive should be there. If not, open Disk Manager, locate the new disk, and partition and format it for use.
Can you connect a hard drive while computer is on?
Can I plug in a hard drive while the computer is on? Yes, you can plug in a hard drive while the computer is on. If you’re plugging in an internal drive then never do that, this can result in either motherboard damage or the hard disk damage. Technically you can because the SATA Hard Drives are hot-swappable.
Are hard drives plug and play?
Plug and Play describes hard drives that can be recognized by an operating system and for which the operating system already has a copy of the “driver”.
How do I connect an old hard drive to my laptop?
Connecting the old hard drive to the new computer
- You can use a USB hard drive enclosure, which is a special “box”-like device that you slide the old drive into.
- You can also use a USB hard drive adapter, which is a cable-like device, connecting to the hard drive on one end and to a USB in the new computer on the other.
How can I add more GB to my laptop?
How To Buy More Storage On Laptop
- Upgrade Your Hard Drive.
- Choose an external drive.
- Replace Your current HDD (hard disk drive) with an SSD (solid state drive)
- Upload files to a Cloud storage.
- Get a Pendrive.
- Use a disk cleanup program to get rid of unnecessary files.
What happens if I put my hard drive in another computer?
If you mount it as a second drive, then the computer would see it as a 2nd hard drive. Your data/files should be readable by the new computer. if you replaced the new computer’s hard drive with your old harddrive, you will need to re-install a Operating System.
Can I plug in a SATA cable while the computer is on?
Yes, you can plug in a hard drive while the computer is on. If you’re plugging in an internal drive then never do that, this can result in either motherboard damage or the hard disk damage. Technically you can because the SATA Hard Drives are hot-swappable.
Can I plug in SSD while computer is on?
Yes, but only if the SATA controller supports hot swap and that feature is enabled in the bios. When it’s all setup, all of your drives will act like a “USB device”, Eject it from the eject USB device list.
Can you unplug SATA drive while computer is on?
If external via USB, yes you can plug/unplug while the computer is turned on. However, before unplugging you should see the Safely Remove Hardware icon in the task manager, and stop the external hard drive prior to unplugging.
Why isn’t my hard drive showing up on my PC?
If your new harddisk is not detected by or Disk Manager, it could be because of a driver issue, connection issue, or faulty BIOS settings. These can be fixed. Connection issues can be from a faulty USB port, or a damaged cable. Incorrect BIOS settings may cause the new hard drive to be disabled.
How do I make my external hard drive plug and play?
Connect the USB cable to the PC, and allow the drive to come on. If it has a power switch, turn it on. Plug and play the hard drive. Once you plug it in and turn it on, your Windows machine should recognize that you added new hardware and let you “plug and play” it.
What is a plug in hard drive?
Know What’s On Your External Hard Drive External hard drives are simple: you plug them in, they appear on your computer, and you can simply click and drag your files onto them to copy the files onto the hard drive.
Can you remove a HDD while computer is on?
In some cases, the drive is intended to be removed while powered. The SATA power and data connectors are designed to be safe for plug/unplug under power. So are USB, Firewire, Thunderbolt, and eSATA. So electrically, you’re pretty safe these days pulling a drive out.
Can you use an old hard drive on a new PC?
Simply download and install them until all hardware devices are installed in the Device Manager. If you have made it this far, congratulations! You have successfully used your old hard drive with your new motherboard and everything is up and running just fine.
Was passiert, wenn ich meine externe Festplatte zum ersten Mal anschließe?
Das erwartet Sie beim erstmaligen Anschließen einer externen Festplatte der Marke Seagate, Samsung oder Maxtor an Ihren Windows- oder Mac-Computer.
Wenn Sie Ihre externe USB- oder Thunderbolt-Festplatte an einen Windows- oder Mac-Computer anschließen und einschalten, geschieht Folgendes:
Windows:
1. Die Festplatte erscheint als ein Laufwerksbuchstabe in Arbeitsplatz / Diesem PC (z. B. als Laufwerk E: oder F oder anderem Buchstaben) innerhalb
ca. 30 Sekunden nach dem Anschließen und Einschalten der Festplatte.
2. Oft wird das Fenster Auto Play innerhalb von 30 Sekunden angezeigt.
Hinweis : Wenn die Festplatte unter Windows 8/10 angeschlossen ist, öffnet sich der Ordner der Festplate automatisch.
3. Klicken Sie auf „Ordner öffnen, um Dateien mit Windows-Explorer anzuzeigen“, um die Festplatte zu öffnen oder klicken Sie auf den
Laufwerkbuchstaben im Computer.
4. Sie können dann Daten erst einmal per Kopieren und Einfügen, oder drag-&-drop in die Festplatte eingeben.
5. Die Festplatte ist nun einsatzbereit.Verwenden Sie sie manuell und/oderstarten/installieren Sie die mit Ihrer Festplatte gelieferte Software.
Kopieren und Einfügen einer Datei/eines Ordners unter Windows:
1. Navigieren Sie zu der Datei, die Sie kopieren möchten. Beispielsweise „Eigene Dateien“.
2. Suchen Sie die Datei oder den Ordner, die/den Sie kopieren möchten, und klicken Sie mit der rechten Maustaste darauf.
3. Ein Dropdown-Menü wird angezeigt. Wählen Sie Kopieren.
Hinweis: Die Datei bzw. der Ordner wird nun kopiert und im Kurzzeitspeicher des Computers aufbewahrt.
4. Öffnen Sie den Speicherort zum Speichern der Kopie. Beispielsweise Ihre externe Festplatte von Seagate.
5. Im Fenster wird daraufhin der Inhalt der externen Festplatte angezeigt.
6. Alternativ können Sie mit der rechten Maustaste in einen leeren Bereich innerhalb des Fensters klicken, damit ein Dropdown-Menü geöffnet wird.
7. Wählen Sie Einfügen.
8. Die Datei bzw. der Ordner wird im Fenster angezeigt. Sie bzw. er wurde kopiert.
9. Die Aufgabe ist nun beendet! Dies wird als „Kopieren-und-Einfügen“-Aktion bezeichnet.
Hinweis: Beim Kopieren und Einfügen von Dateien können Sie außerdem die Tastenkürzel Strg + Cund Strg + Einfügen verwenden. Diese Funktion steht für Dateien und/oder Ordner zur Verfügung.
Ziehen und Ablegen von Dateien/Ordnern unter Windows:
1. Öffnen Sie zunächst die Datenquelle, von der Sie die Datei ziehen möchten, und lassen Sie das Fenster geöffnet.
2. Öffnen Sie nun das Ziel, wo Sie die Datei ablegen möchten, und lassen Sie das Fenster geöffnet.
Hinweis: Beim Öffnen der beiden Fenster nebeneinander können Sie eines zunm anderen ziehen und dort ablegen.
3. Sie haben jetzt zwei Fenster. Eines ist die Quelle, das andere ist das Ziel.
4. Klicken Sie auf das Dokument, das Sie verschieben möchten, und halten Sie die Maustaste gedrückt. Es wird aufleuchten und ein Schattenbild
bewegt sich mit Ihrem Mauszeiger.
5. Ziehen Sie die Maus so, dass das Schattenbild über dem Ziel schwebt.
6. Lassen Sie die Maustaste los. Die Datei wird nun automatisch kopiert.
7. Die Aufgabe ist nun beendet! Dies wird als „Drag-and-Drop“-Aktion bezeichnet.
MacOS:
Wichtig! Stellen Sie sicher, dass die Festplatte für den Mac formatiert ist bzw. dass der erforderliche Treiber auf Ihrem Computer installiert ist. Als Faustregel gilt: Festplatten mit dem Zusatz „für Mac“ im Namen sind bereits für die Verwendung mit einem Mac formatiert.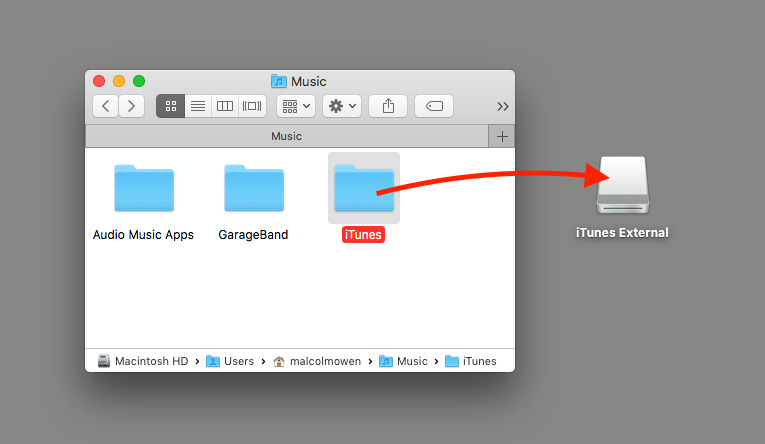 Beispiele: Tragbare Plus Slim Backup Festplatte für den Mac. Andere Festplattenreihen sind vielseitig und können sowohl mit einem Mac als auch mit einem PC verwendet werden. Beispiel: Die Desktop-Festplatte Backup Plus , Backup Plus Slim tragbare Festplatte. Auf diesen Festplatten ist ein kleiner Treiber vorinstalliert, den Sie für eine reibungslose Verwendung mit dem Mac installieren müssen. Suchen Sie auf diesen Festplatten nach der Datei MacInstaller.dmg und installieren Sie diese auf Ihrem Computer. Auf diese Weise können Sie problemlos Daten auf die Festplatte übertragen.
Unter Mac OS wird eine kompatible Seagate- oder Maxtor-Festplatte ca. 30 Sekunden, nachdem sie angeschlossen und eingeschaltet wurde, als neues Symbol auf dem Schreibtisch angezeigt. Folgendes sollte passieren, wenn Sie die Festplatte über USB oder Thunderbolt angeschlossen und eingeschaltet haben :
1. Die Festplatte wird ca. 30 Sekunden nach dem Anschließen und Einschalten auf dem Schreibtisch des Mac angezeigt.
2. Das Festplattensymbol repräsentiert Ihre externe Festplatte.
3. Mit einem Doppelklick auf das Symbol können Sie ein Fenster öffnen, in dem der Inhalt der Festplatte angezeigt wird.
4. Sie können die Daten dann einfach auf die Festplatte kopieren-und-Einfügen bzw. drag-&-drop .
5. Die Festplatte ist nun einsatzbereit. Verwenden Sie sie manuellund/oder installieren Sie die mitgelieferte mit MacOS kompatible Software, um die
Software-Funktionen zu nutzen.
Zum Kopieren und Einfügen in eine Datei/einen Ordner unter MacOS :
1. Öffnen Sie ein Finder-Fenster und navigieren Sie zu den Daten, die Sie kopieren möchten.
2. Klicken Sie mit der rechten Maustaste auf die Datei bzw. den Ordner, die/den Sie in kopieren möchten, und wählen Sie Kopieren des “Namens der
ausgewählten Datei/des ausgewählten Ordners.
3. Öffnen Sie das Ziel. Z.B. Externe-Festplatte von Seagate. Klicken Sie mit der rechten Maustaste in einen leeren Bereich der Festplatte und wählen
Sie Objekt einfügen. Ihre Datei bzw. Ihr Ordner wird nun auf das Ziel kopiert.
Hinweis: Zum Kopieren und Einfügen von Dateien können Sie auch mit dem Mac Tastaturbefehle Befehl + C (Kopieren) und die Befehlstaste + V (Einfügen verwenden.
Beim Ziehen und Ablegen einer Datei/eines Ordners unter MacOS:
1. Öffnen Sie ein Finder-Fenster und navigieren Sie zu dem Speicherort, an dem die Daten liegen, die Sie per Drag-&-Drop verschieben möchten.
2. Navigieren Sie zu dem Speicherort, zu dem Sie die Datei/den Ordner verschieben möchten. Wenn Sie zum Beispiel bestimmte Dokumente kopieren
möchten, würden Sie im Finder die Favoriten und dann Dokumente aufrufen.
3. Klicken Sie mit der linken Maustaste auf die Festplatte/den Ordner, die/den Sie auf Ihre Festplatte verschieben möchten, und halten Sie die Maustaste
gedrückt. Halten Sie die Maustaste weiter gedrückt und bewegen Sie die Maus so, dass der Cursor auf die Seagate-Festplatte zeigt. Lassen Sie die
Maustaste los, damit die Datei/der Ordner auf die Festplatte verschoben wird.
Hinweis: Wenn Sie die Schaltfläche gedrückt halten und sich der Cursor über der Seagate-Festplatte befindet, öffnet sich das Fenster der Festplatte nach wenigen Sekunden. Diese Methode eignet sich gut, wenn Sie die Datei/den Ordner in einen bestimmten, bereits vorhandenen Ordner auf der Festplatte verschieben möchten.
Hinweis: Wir weisen darauf hin, dass die Software nicht erforderlich ist, um auf der Festplatte Daten zu speichern. Die Software wird für die erweiterten Funktionen der Festplatte benötigt, nicht aber für die reine Datenspeicherung bzw. den Datenabruf.
How to Use an External Hard Drive in Windows 10
How to use an external hard drive? In this article, you can know how to add an external drive to your computer. In addition, you are offered the way to manage, use and maintain an external hard drive. MiniTool Partition Wizard is a good tool to help you to manage the drive.
What Is an External Hard Drive
An external hard drive is a portable storage device that can be attached to a computer wirelessly,or through a USB FireWire connection. It becomes more and more popular in computer users for the following benefits:
- It is portable. An external hard drive can be connected to almost all computers because they have a USB port. Therefore, you can easily pick up your external hard drive, take it out and connect it to another computer.
- It comes with a high storage capacity. An external hard drive can store much larger data than a USB flash drive. It helps a lot if you are found of videos or audios, whichtake up a large amount of disk space. In addition, you can use it to store lots of photos, entire programs, and more on it.
- It is a safe Backup Device. To avoid data loss, you can use an external hard drive to back up your files and programs. After system crashes, you can easily connect the external hard drive to another computer so that you can recover important data.
- It is easy to be upgraded. If your external hard drive is running out of storage space for your backup files, you can easily replace it with a bigger one.
- It can prevent your computer from getting clogged up with downloads and large files. You could transfer large files from your computer to an external hard driveto improve
How to Add an External Hard Drive to Your Computer
If you get a new external hard drive, you need to add it to your computer before you can use it. Here is how to do it.
Step 1: Plug one end of the external hard drive’s cable (usually the larger end) into the USB port on the housing to see whether it works.
Tip: There are three types of USB port: USB-A, USB-B and USB-C. If the cable shipped with the external hard drive is not matched with the USB port on your computer, you can solve it by buying a USB adapter, for example, a USB-C to USB-A adapter.
Step 2: Plug the other end of the cable into your external hard drive.
Step 3: Now you need to format the external hard drive.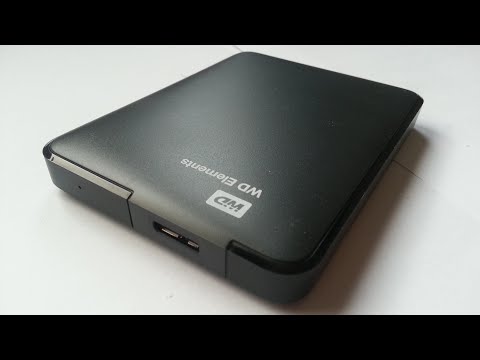
- Double click This PC.
- Right-click your external hard drive and choose Format…from menu.
- Uncheck Quick Formatand select a file system. Then click Start.
Tip: Unchecking Quick Format means that you choose Full Format, which will scan the drive for bad sectors while formatting. Click quick format vs. full format to know more.
After formatting the external hard drive, you should partition the drive reasonably for better management. As for partitioning tool, you can choose freeware MiniTool Partition Wizard.
How to Use an External Hard Drive in Windows 10
Extra Storage Device
It has been mentioned that an external hard drive has many benefits. The basic one is to use it as an extra storage device, especially when you need to free up disk space.
You can transfer files to an external hard drive after you connect it to your computer. Here is a tutorial on how to use an external hard drive in Windows 10.
Step 1: Press Win + E to open File Explorer.
Step 2: Select the folders or files you want to move and press Ctrl + X to cut them.
Step 3: Click your external hard drive from the left action panel to access the external hard drive and press Ctrl + V to paste the folders and files.
Data Backup Device
Do you know your data is in danger? If you don’t have more than one backup solution, plenty of critical information includes photos, music, videos, financial and official documents could be lost when your computer dies due to hardware failure, natural disaster, system crashes or viruses attacks.
Clearly, the more copies you have, the less risk of data loss you face. Thus, just create as many copies as you entail. In other words, you’d better protect the original data with two backups.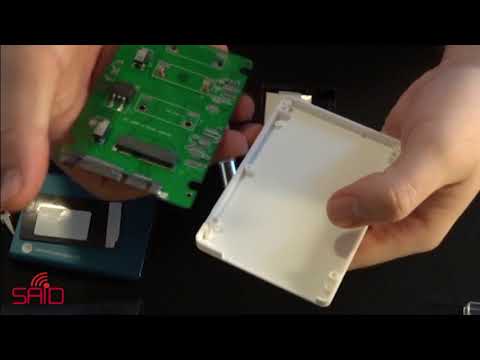
Usually, cloud backup can be a good choice,such as Google Cloud Storage, Microsoft Onedrive, etc.
However, they are not the best solutions.They may cost you much. Some cloud services such as iCloud and IDrive just offer you a storage capacity about 5 GB for free, and most cloud services need you to pay for month. What’s more, it will be troublesome if you decide to shift among these services.
In addition, it may take much time to download everything from a cloud-based backup service if you want to manage large files or large quantities of files.
On the other hand, data stored in a cloud service is possible to be attacked by a hack. So, you can store your backup in an external hard drive, which is portable and safer. Some external devices come with security features like fingerprint recognition, which prevents other people from gaining access to the stored data.
With MiniTool Partition Wizard,a free backup tool, you can easily back up your partitions or the whole disk to your external hard drive. Here is how to use an external hard drive for backup.
Step 1: Click the following button to download and install the tool.
Free Download
Tip: If you need to back up the system disk, you need to upgrade to MiniTool Partition Wizard Pro Edition.
Step 2: Make a backup.
- To copy disk, just right-click the disk you want to back up and choose Copy from menu.
- To copy partition, you can click the Copy Partition Wizard from action panel and choose the partition you want to back up.
- Then follow the instructions to finish the copy
Tip: Please make sure there is no important data in the external hard drive because the disk coping process will erase all the data on the destination disk.
Create a Windows To Go Workplace
Windows To Go is a feature in Windows 10 that allows you to boot and run Windows from USB flash drives or external hard disk drives so that you can take it to anywhere.
Note: You need to pay attention that the Windows To Go feature is only available in Windows 8/8.1/10 Enterprise, Education versions.
To create a portable Windows, you need to prepare a device with requirements as follows:
- With 32 GB capacity at least
- With USB 2.0 and faster USB connections.
With an external hard drive, you can easily achieve it. Here is how to do it.
Step 1: Connect your external hard drive to the computer.
Step 2: Search for Windows To Go in Windows and click it from the results.
Step 3: Choose your external hard drive to create a Windows To Go workplace and follow the guide to complete the process.
Then you can connect the external hard drive to another computer and boot Windows from the external drive when you go out.
How to Use an External Hard Drive for Longer
You may be aware that an external hard drive is necessary for you.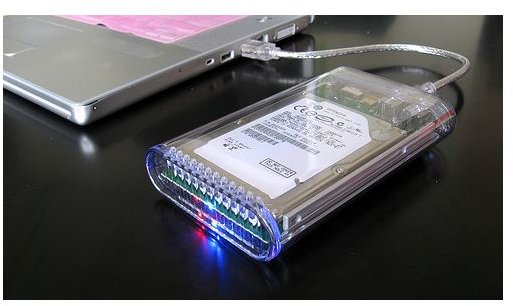 However, it is easy to be broken if you don’t maintain it in the right way. To avoid decreasing the life of it, you can read these tips on how to use an external hard drive for longer.
- To protect your external hard drive, you’d better place it on a stable, flat and hard surface. Considering that the hard disk is a mechanical device, it can be damaged by vibrations. And you should also be careful to prevent it from falling off the table.
- You need to make sure that it will not be banged around or treated roughly. Since the external hard drive is a portable device, you should treat it carelessly when you take it out.
- You have to avoid getting your hard drive wet or exposing it to liquid.
- Do not place your external hard drive in a restrictive area where there is no air flow. Similar to the internal hard disk in your computer, the external hard drive also gets hot when it works too long.
 To avoid overheating, which can damage the disk, you need to place it in an open area to dissipate the buildup of heat.
 - Check error before you transfer files to an external hard drive. It can fix disk errors and ensure that you are starting with a well-functioning drive.To do that, you can use the error checking tool in Windows.
- Always eject the drive before you unplug it from your computer. It ensures data still stored in the cache memory will be removed, which prevents existing data on the disk from being damaged.
- The best way to protect your data in the external hard drive is to back up it as much as possible. Hard drive failure may happen to your external hard drive.To ensure the security of your files, you’d better prepare a second external drive to back up it.
Save Lost Data from an External Hard Drive
Similar to internal hard drivers, an external hard drive may also lose data due to various reasons, such as mistaken deletion or hard drive failure when you manage it.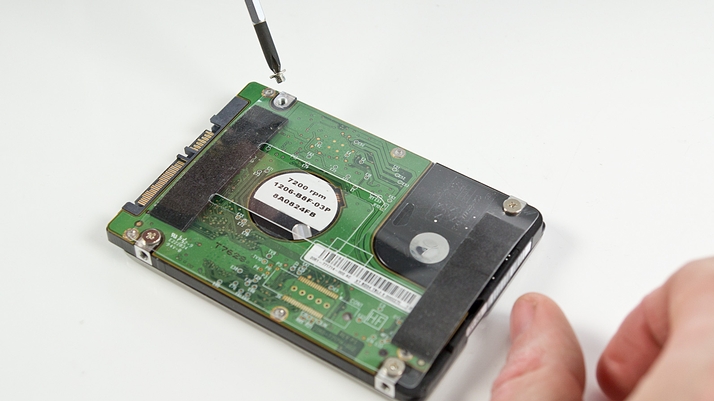
If you have a backup for the data in the external hard drive, you can restore your data with the backup.
If you unfortunately find that your files or programs stored in the external hard drive is lost and you have no backup for the drive, you need to stop using it right now and try to recover files from the external drive with a third-party software as soon as possible.
MiniTool Partition Wizard is powerful in recovering deleted files and data from formatted or virus attacked disk. It is worth trying.
Buy Now
Step 1: Launch MiniTool Partition Wizard.
Step 2: Click Data Recovery from the tool bar and select your external hard drive in This PC. And then click Scan.
Step 3: Now you just need to check the files you want to recover and then click Save to place the recovered files into a safe position.
Tip: Make sure that you save recovered files in another disk to avoid a secondary data loss.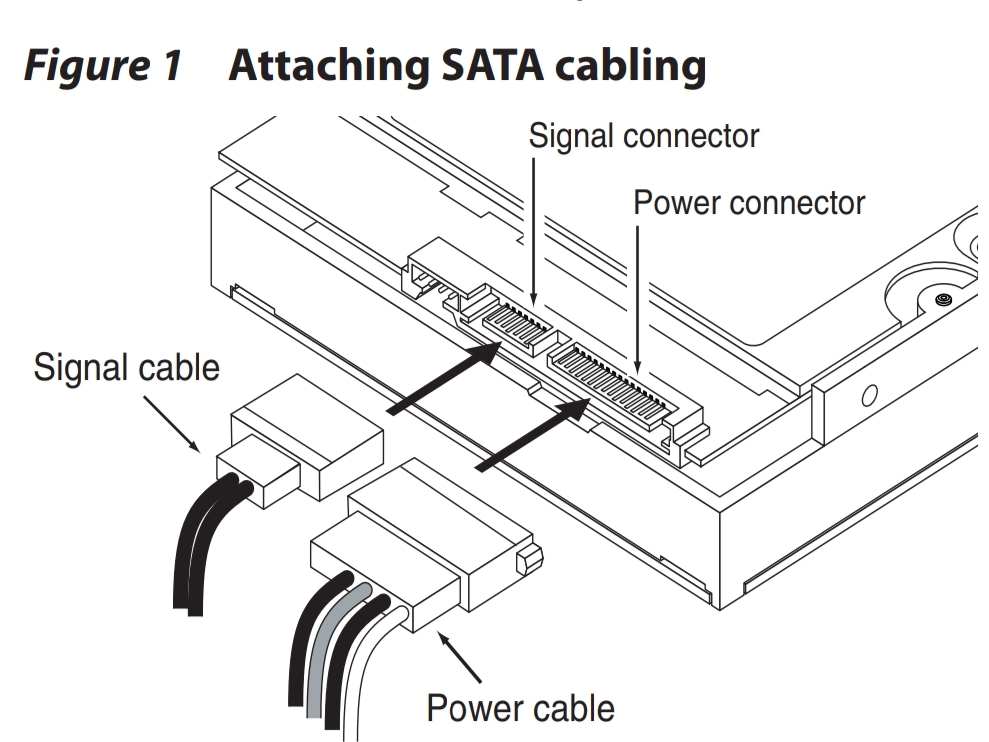
If it is the first time to recover files from an external drive, you may be a little confused. To know more details, you can read the following article: The Full Guide to SSD File Recovery on Windows 10/8/7/XP.
Here is an article about how to use an external drive. It enables me to free up the storage space of my computer and I can go out with my files. I’d like to share it with you!Click to Tweet
You can benefit a lot from an external hard drive. With the high storage capacity, you can store a huge number of videos, photos and programs, and it is a proper device for data backup.
This article helps you to know how to add an external hard drive to your computer, how to use an external hard drive in Windows 10, and how to maintain it to use it longer.
If you still have any questions about the external hard drive, you can contact [email protected] or post it in the comment section below.
Do you want to try it now?
How to Use an External Hard Drive FAQ
What does an external hard drive do?
An external hard drive, which can be connected to a computer through a USB or wirelessly, is a portable storage device. It’s usually used to serve as extra storage or back up computers.
What are the advantages of an external hard drive?
- It has large storage capacity.
- It’s portable so that you can take it anywhere.
- It’s a safe backup device.
- It can be used for a long time.
How do I download a program to an external hard drive?
- Plug the external hard drive into the computer.
- Press Win + E to open File Explorer.
- Navigate to your program setup file and double-click it.
- Follow the onscreen instructions to install the program, and when you are asked where you want to save the program, choose on location on your external hard drive.
What do I do when my external hard drive is not detected?
The reasons for external hard drive not recognized or not showing up could be various. If you are facing the problem, you can try the 10 solutions mentioned in the following article: 10 Cases: External Hard Drive Not Showing up & Best Fixes.
How to Setup and Use an External Hard Drive
At the beginning of this month, I received a frantic phone call from a long time friend who teaches ninth grade English. She had just been given the news that she would have to start teaching from home. Her school district gave out Zoom accounts and external hard drives to some of the teachers in order to have them transfer their lesson plans from their school computers to the personal devices they have at home, and sent them on their way.
My friend never had to use an external hard drive before since she saved everything to the computer she used at work or on to a Google Drive account. She was nervous about using it incorrectly, breaking it, or even just finding it on her computer.
This is a reality for thousands of teachers and employees who are being asked to learn new skills at home without the aid of onsite IT help. If you’re one of many folks who are suddenly asking “what is this thing?” and “how will it be helpful to me?” and “I hope I don’t break it”—all while trying to schedule online lesson plans, big meetings, or just trying to continue your connection with your students—you’re not alone! Lots of folks are dealing with this, and we’re here to help with a guide for setting up and protecting your new hard drive.
When you first start using an external hard drive, you might be annoyed by the need to learn something new, or you may simply ignore it. But we love hard drives (obviously) and will include some information below regarding the benefits they can bring to your table: extra space on your computer for new files and applications, portability, and more!
A Guide to Setting Up Your First External Hard Drive
During this COVID-19 pandemic, many of us have found ourselves in situations where we are handed external hard drives to keep our files safe. We hope these tips will help you understand how to best utilize your external hard drive and protect your data.
Getting Started
While it might seem like a no brainer, the first step for setting up your hard drive is to plug it into your computer. An external hard drive typically has one or two cords, usually one for the computer which transfers the data, and another that may also go into your computer or an electric plug to power the hard drive. Small, external, portable hard drives usually need only one cable for both data and power.
Know What’s On Your External Hard Drive
Store only what’s needed. External hard drives are simple: you plug them in, they appear on your computer, and you can simply click and drag your files onto them to copy the files onto the hard drive. But it’s important to monitor what’s on your external hard drive. You can do this by periodically checking your drive to make sure your files are up to date and still needed.
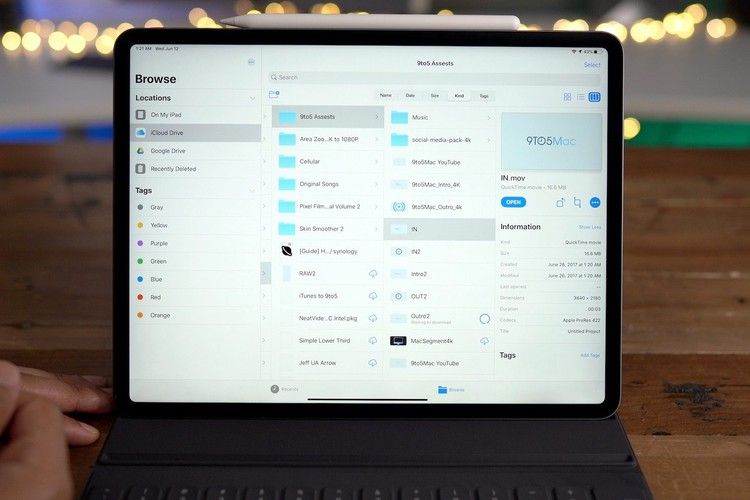
To find where a connected external drive is located on your Mac, try opening Finder. You can do this either by clicking the default Finder icon at the bottom left end of your Dock, or by pressing Command + Space bar, and searching in Finder, or by pressing Shift + Command + C.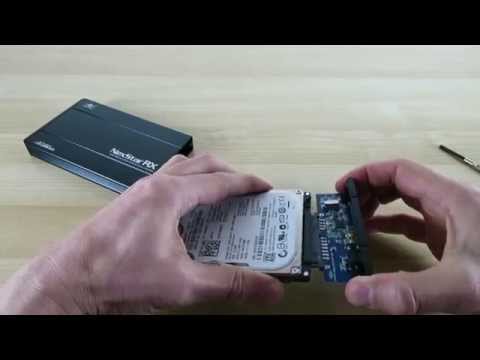 Once Finder is open, you should see your drives listed either immediately or in the left-hand navigation column under “Locations.” From here, you can click on specific drives to view their contents.
For a Windows computer, you may see variations depending on the version of Windows you are using. In general, you will find your drives listed in File Explorer by clicking on Computer or This PC in the left-hand navigation bar. If you are unsure on how to open File Explorer, try looking for it in your Start Menu. You can also try clicking on your desktop and pressing Windows Key + E together. Once you have located the drives, you should be able to click on specific drives to view their contents.
Delete Duplicates
Another important thing to remember when reviewing the files on your external hard drive is to delete duplicates. Occasionally we will create a copy of a project or create a final edit of a video and have multiple saved versions of the same file. Deleting the duplicates you do not need can help your drive run faster and free up space for more files. You can manually check your files for duplications or use an application that will find and delete duplicate files on your drive.
Learn How to Clean Your Drive
To keep an external hard drive clean you must clean both the hard drive itself as well as the area around the actual computer. Most important is to keep your drive and surrounding areas free of dust. Keeping the airflow in your device free of dust or other debris makes it less likely to overheat. If you’ve already run your hard drive in a dusty environment, compressed air is the best cleaning tool for remedying your situation.
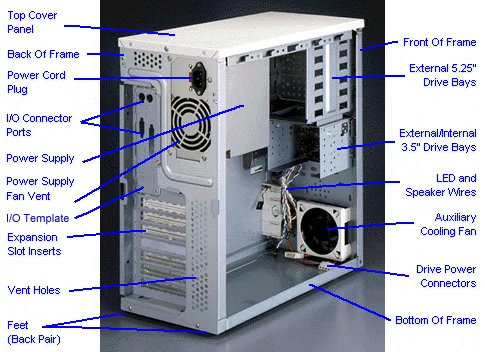
To know where to blow the compressed air you should look for the fan vent, check where the USB ports are, and find other spots on the external hard drive that could collect dust over time.
Finally, it’s important to keep the area around your external hard drive uncluttered to allow for maximum airflow. Be sure to move anything around your drive that may be blocking its airflow like books, papers, etc.
3-2-1 Backup
While storing information in the cloud has become second nature to most, there’s still nothing like having everything saved on a physical device. A 3-2-1 backup strategy means having at least three total copies of your data, two of which are located locally but on different types of media (like an external hard drive), and at least one copy that is offsite. So, if you have your files on your computer and your hard drive (which you should store separately from your computer when not in use), you need one other copy stored separately from your house. That’s where the cloud comes in.
There are numerous cloud backup services that will service your computer and your attached drives. We’re partial to our own, of course, and, with Backblaze’s Yearly and Forever Version History features, you can back up your external hard drive easily without having to worry about plugging it in every 30 days.
Keep Your Operating System Up to Date
Your operating system (OS) is the interface of the computer that your external hard drive connects to. We have all hit “remind me later” on an update dialog from our computer at some point in our lives, but updating your OS will ensure that your computer is secure, that your system can run better, and that hard drives are able to properly connect to your files. Updating your OS can vary depending on what kind of computer you have. The best place to look for how to update your OS is in your system’s preferences.
Depending on the age of your computer, however, you should reach out to your local IT person before updating. Some older computers are not able to run, or run very poorly on newer systems.
Prepare for a Drive Failure
Don’t wait until it’s too late. The average hard drive manufacturer’s warranty is only three to five years, and budget hard drives can be even less. This number does not take into consideration physical damage, make or model, or conditions that they are stored in.
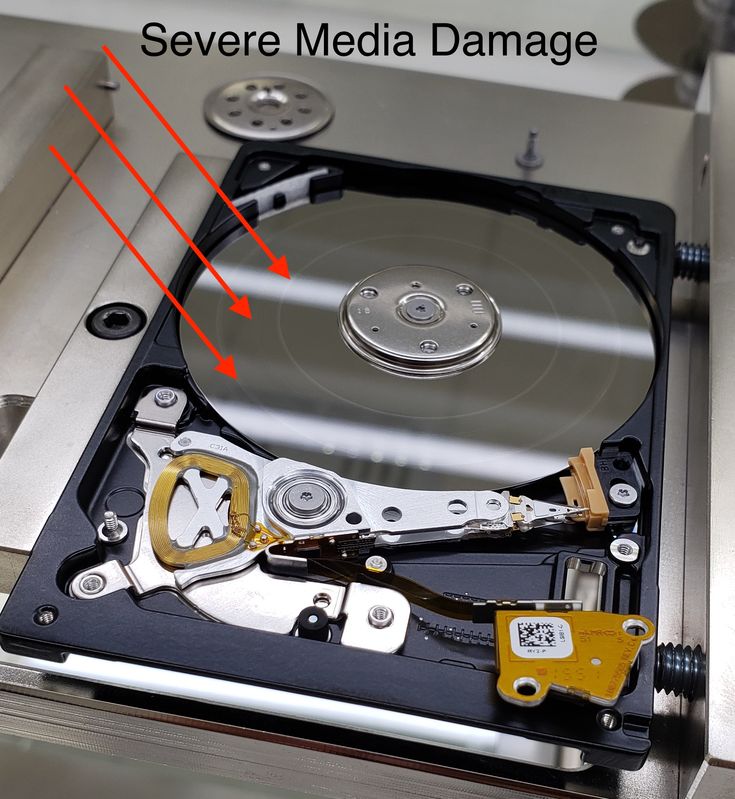
When using an external hard drive, you have to prepare for the day that it fails. There are several different ways you can monitor your external hard drive’s health. When it’s near its end, you’ll see or hear the signs like strange clicking or screeching noises, slower performance, and encountering lots of errors when trying to open folders on the drive. You can manually check the status of your drives on your computer.
For a Windows computer, you’ll use a simple command prompt that will tell your computer where to look and what to check. Just right-click the Start menu on your computer, select Run, and type “cmd” or type “cmd” into the search bar. In the Command Prompt window that opens, copy and paste “wmic diskdrive get model,status” without the quotation marks and hit enter. This command will run and it will return “Pred Fail” if your drive is not performing, or “OK” if the drive is performing well.
For a Mac computer, you can monitor the status of your external hard drive by opening Disk Utility by going to Applications and then Utilities. Next, you will click on the drive you would like to test to see how it’s performing. Once you click the drive you would like to check on in the top right corner, click on First Aid. If your drive is performing well, you’ll be able to scroll until you find where it says the volume appears to be OK. If it is not performing well, this process will automatically notify you of any problems like file corruption, an external device not working properly, or that your computer won’t start up. Disk Utility will not detect or repair all problems that a disk may have, but it can give you a general picture.
There are tools or apps you can download to monitor your external hard drive’s health on a Mac using S.M.A.R.T (Self-Monitoring, Analysis, and Reporting Technology) diagnostics. One tool that does a good job is an app called DriveDx, which costs $20 (but you can test it out with a free trial first). DriveDx will help you continuously monitor your drive with a menu bar item that you can pull down and check the status of your drive.
In Conclusion…
Starting out with an external hard drive is exactly like starting out with any piece of technology you might own. The more you educate yourself on the ins and outs of taking care of it, the better it will run for you, hopefully. But if something bad were to happen, you should always have a backup plan (we suggest Backblaze, but you probably already know that) to protect your new piece of equipment.
Are you a hard drive expert? Are there any tips you would like to share with beginners? Be sure to share them in the comments below.
Move your files to a new Windows PC using an external storage device
Windows 11 Windows 10 More…Less
If you’re making the move to a new PC, you can bring your files with you using an external storage device such as a USB drive, SD card, or external hard drive. First, you’ll copy your files onto your drive, then you’ll transfer them to your new PC.
Note: For info on how to move files to a new PC without needing a storage device, see Move files to a new Windows PC using OneDrive. OneDrive can securely store your files, so they’re backed up and protected in the cloud and accessible from any device—including your new PC.
To move files from a Windows 11 PC using an external storage device, follow these instructions.
Back up files from your current PC to an external storage device
-
Connect your external storage device to your current Windows 11 PC.
-
On the taskbar, select File Explorer .
-
Locate the files you wish to copy, or the folders where those files are stored.
-
Once you have files and folders highlighted, select and hold (or right-click) the folders, then select Show more options > Send to. Select your external storage device name from the list of options.
-
Your files and folders will begin copying to your drive. You may need to repeat steps 3 – 5 if you have files stored in multiple locations. Make sure to also move files from locations like your Documents, Desktop, Downloads, Favorites, Music, Podcasts, Pictures, and Videos folders.
Verify your files are correct and remove the storage device
After you have copied or moved your files onto an external storage device, you can verify they’re in the right location by browsing the external drive.
Then you’ll need to safely remove the drive to ensure no files are lost or corrupted. To remove the device, select Eject before you disconnect the drive from your PC.
Once you have moved your files onto your external storage device, you’ll be able to transfer them onto your new Windows 11 PC.
Transfer your files to your new PC
-
Connect your external storage device to your new Windows 11 PC.
-
Select File Explorer from your task bar.
-
On the left guide bar, select This PC.
-
Locate the external drive and double-click its corresponding icon.
-
Locate the folder where your files are saved, and then double-click that folder’s icon.
-
Once you select a file, you will see Cut and Copy in the toolbar. Select either to cut or copy the selected file(s).
To paste a file, navigate to a location where you want to paste the file, and then select the Paste icon in the toolbar.
-
Your files will begin to transfer to your Windows 11 PC. Note that this may take time depending on the number and size of the files you transfer.

-
After the files are copied, you can navigate to their new location to make sure the files were successfully transferred.
Back up files from your current PC to an external storage device
-
Connect your external storage device to your current Windows 8.1 or Windows 10 PC.
-
On the taskbar, select File Explorer .
-
To copy multiple files, hold CTRL as you select additional files or folders.
-
Once you have files and folders highlighted, make sure you’re in the Home tab, then select Organize > Copy to, and select your external storage device name from the list of options.
-
Your files and folders will begin copying to your drive. You may need to repeat steps 3 – 5 if you have files stored in multiple locations.
 Make sure to also move files from locations like your Documents, Desktop, Downloads, Favorites, Music, Podcasts, Pictures, and Videos folders.
Verify your files are correct and remove the storage device
After you have copied or moved your files onto an external storage device, you can verify they’re in the right location by browsing the external drive.
Then you’ll need to safely remove the drive to ensure no files are lost or corrupted. To remove the device, select Eject before you disconnect the drive from your PC.
Once you have moved your files onto your external storage device, you’ll be able to transfer them onto your new Windows 10 PC.
Transfer your files to your new PC
-
Select File Explorer from your task bar.
-
On the left guide bar, select This PC.
-
Locate the external drive and double-click its corresponding icon.
-
Locate the folder where your files are saved, and then double-click that folder’s icon.
-
To select all the files in this location, select the Home tab in the top left and then Select all. All the files in this folder will now be highlighted. To copy only one file, select it by clicking on it once.
-
Select the Home tab in the top left, select Copy to, and then select the folder you’d like the files copied to: Documents, Music, Pictures, or Videos. You can also choose a custom location by selecting Choose location….
-
Your files will begin to transfer to your Windows 10 PC.
 Note that this may take time depending on the number and size of the files you transfer.
 -
After the files are copied, you can navigate to their new location to make sure the files were successfully copied over.
Connect your external storage device to your new Windows 10 PC.
Move files off a Windows 7 PC with an external storage device
Windows 7 More…Less
You can use an external storage device such as a USB drive, SD card, or external hard drive to help you move all your favorite files off a Windows 7 PC and onto a Windows 10 PC. Here’s how to copy your files onto an external storage device and move them to a new PC.
Copy your files on Windows 7 to an external storage device
Note: Copying files from one location to another will not remove the files from their original locations.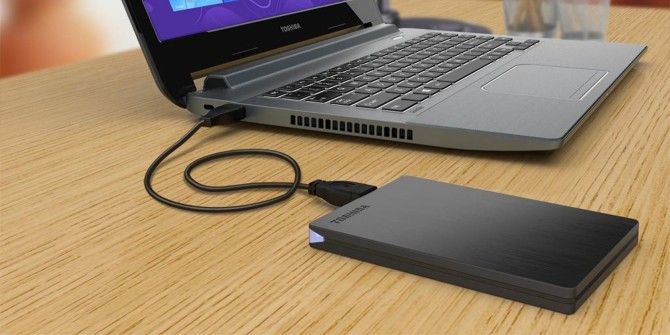
-
Connect your external storage device to your Windows 7 PC.
-
Select the Start button > Computer.
-
Locate the files you wish to copy, or the folders where your files are stored.
-
Select the file you wish to copy, but do not open it. If you’d like to copy multiple files, hold down the CTRL button as you select additional files. You can also select folders, and this will select all the files that are stored within them.
-
All files you selected should now be highlighted. At the top of the window, select Organize > Copy to copy the files to memory.
-
Now, go to the external drive location by clicking on the corresponding letter of the drive.
-
Once the drive is highlighted, select Organize > Paste. This will copy the files you selected earlier onto the drive.
Note that you may need to repeat steps 3-7 multiple times if you have files stored in multiple locations.
Verify your files are correct and remove the storage device
After you have copied or moved your files onto an external storage device, you can verify they’re in the right location by browsing the external drive.
Then you’ll need to safely remove the drive to ensure no files are lost or corrupted. To remove the device, select Eject before you disconnect the drive from your PC.
Once you have moved your files onto your external storage device, you’ll be able to transfer them onto your new Windows 10 PC.
For another option to transfer files, see Move files off a Windows 7 PC with OneDrive.
Copy your files to Windows 10 from an external storage device
-
Connect your external storage device to your Windows 10 PC.
-
Select File Explorer from your task bar.
-
On the left guide bar, select This PC.
-
Locate the external drive and double-click its corresponding icon.
-
Locate the folder where your files are located, and then double-click that folder’s icon.
-
To select all the files in this location, select Home in the top left and then Select all. All the files in this folder will now be highlighted. To copy only one file, select it by clicking on it once.
-
How to connect an external hard drive to PS3
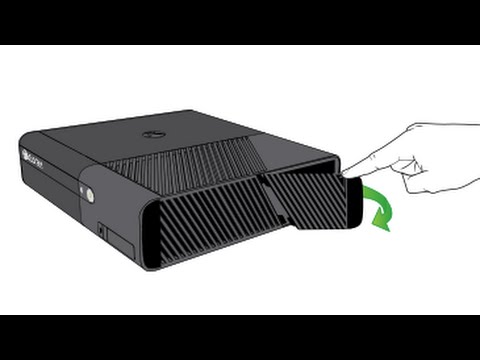
The Sony PlayStation 3 has been one of the top positions in the popularity ratings of gaming devices for many years. Even after the release of the PlayStation 4, its position has not been shaken much, especially among experienced players who know the capabilities of their equipment like their own five fingers. However, if you don’t consider yourself too experienced but keep using the PS3 because you can’t afford the newer version or you’re just used to it and don’t want to change what works great, sooner or later you’re bound to find that The console’s hard drive is running out of space.

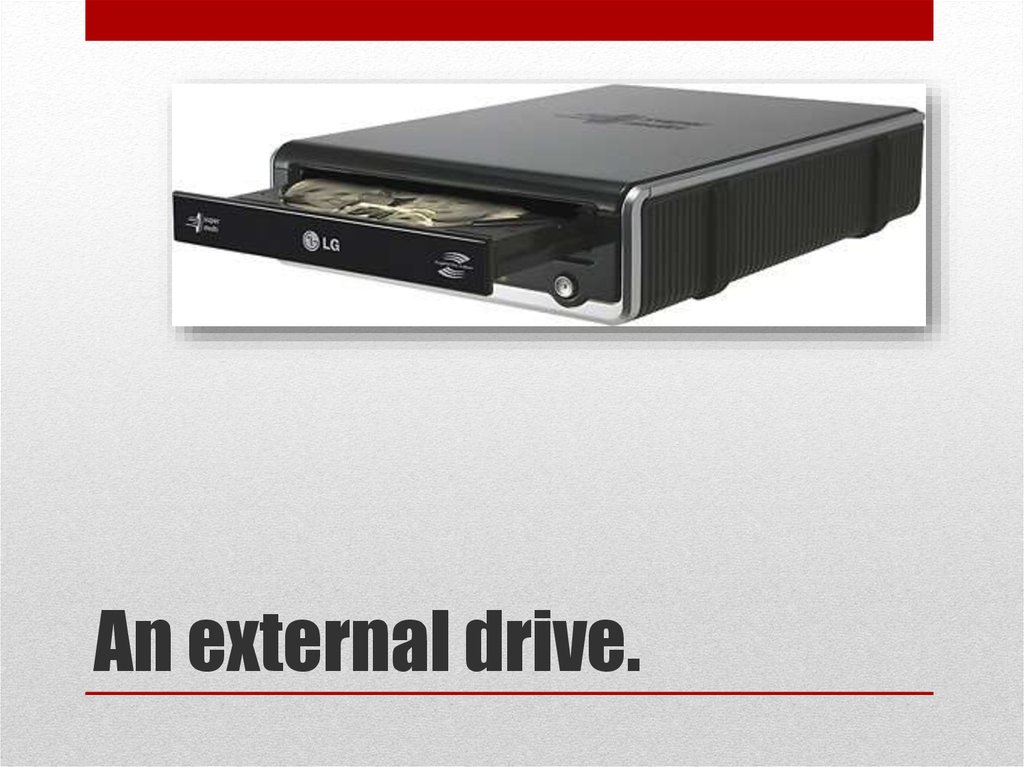
An external HDD can be connected to the PS3 game station.
Even if a significant part of your games is recorded on optical discs, it is much more efficient to copy it to a hard drive for a comfortable game and higher speed. And if you buy digital copies, then the place will run out pretty quickly, since the full volume of one game can reach several tens of gigabytes.
One of the most effective ways to increase the amount of available memory is to connect an external hard drive. In order for it to be correctly defined and function correctly, several conditions must be met. We will talk about how to install an external hard drive on PS3 most correctly, as well as what criteria it should meet, in today’s article.
What you can use an external hard drive in PS3
The built-in hard drive in PS3 can vary from 20 to 500 gigabytes. The most popular volume is 60-120. Is it a lot or a little? As mentioned above, the minimum size of games reaches 5-8 gigabytes, and some of the most advanced ones can take up to 20-30 GB of free memory.
 Calculate for yourself how many games can have enough space on the drive. In addition, many owners of the set-top box also use it as a media center, watching high-quality videos and listening to music. The volume of one movie in HD quality can also reach 10 gigabytes and more.
 An external hard drive, in turn, can be several terabytes in size, and it costs significantly less than a set-top box with a large amount of memory. Yes, the manufacturer has provided the opportunity to replace the built-in hard drive with a more capacious one, but for this you need to choose the right accessory, make backups and install the equipment correctly, so if you do not have the necessary knowledge, you will have to contact the service center.
An external hard drive is connected via a USB connector and does not require any intervention in the firmware and equipment of the set-top box. You will only need to format the disk in FAT32 format, as well as create several partitions to display all files correctly.
 What criteria should an external hard drive meet? What to look for when buying? We’ll discuss this in the next section.
 What criteria should an external drive for PS3 meet?
There are no special criteria as such. But still, certain points should be taken into account.
- Volume. The maximum storage capacity directly depends on the features of the FAT32 file system format. The maximum possible supported volume is no more than 2 terabytes. If there is more, then you simply cannot format it correctly, as a result of which it will not function correctly. In any case, even two terabytes is incomparably better than several tens of gigabytes. In addition, today there are not so many models with an even larger volume.
- Technology. External hard drives can use both conventional HDD technology with a magnetic disk and a read head, as well as a modern SSD that does not contain any rotating parts. The speed of work also varies significantly. HDD is much slower than SSD.
- Type of USB used. On the market you can find models that work with both traditional USB 2.0 and modern 3.0 and higher. The latest models are significantly more expensive, but there is no urgent need to buy them. The PS3 has two or four USB 2.0 ports, depending on the model, so you won’t experience any of the speed benefits. The only case where it makes sense to pay attention is if your computer has a high-speed USB 3.0 connector.
- Food. The higher the volume of the hard drive, the more power it needs. Since the USB port on the PS3 console has limited power, it may not be enough to run a large disk. In this case, you may need to connect it to two ports at the same time. But then another problem will arise — where to plug the joystick, if in most modifications there are only two of them? Therefore, we recommend that you choose an externally powered device.
Format external drive for use with PS3
Having decided on the choice of disk, you need to format it correctly.
 How can I do that? Since you can format media with a maximum capacity of 32 gigabytes using standard Windows tools in the FAT32 file system format, you will have to use specialized software. We recommend setting your choice to Acronis Disk Director.
 The program is paid, but the developer provides a trial period without any limitation in functionality. Since you will only need to format the hard disk once, you can use the trial version of the program. We will not go into details and technical capabilities of Acronis, but will pay attention only to the functions you need.
So let’s get started.
- Connect an external hard drive to the computer’s USB port. If external power is used, connect to the mains as well.
- Download Acronis Disk Director from the official website. Now double click on the installation file and install the program.
- Run the program and wait until all connected hard drives are detected.
- Right-click on the name of the external hard drive and select «Format».
 By default, your device is formatted in NTFS. Therefore, select the FAT32 format and click the start procedure button.
 - Please wait until the end. Be patient as the process can take up to several hours.
- After formatting is complete, open a blank disk using Windows Explorer. Now you need to create several folders that reflect the structure of the Sony PlayStation 3 file system. At a minimum, you need to create the following directories:
- MUSIC — for storing music files;
- PICTURE — for saving photos;
- VIDEO — for storing movies;
- GAMES — for installing games;
- PS3 with EXPORT, SAVEDATA and THEME subfolders — for creating and storing backup copies of user data.
- Now you can disconnect the external hard drive from the computer. How to connect it to the console? Simply plug the cable into the console’s USB port and turn on the drive. When recording and saving files, they will all automatically be placed in the correct folder that you previously created.
 If you do everything correctly, then the installed external drive will be detected as a USB drive.
Conclusion
Connecting an external hard drive to the Sony PlayStation 3 is quite easy if you format it in the correct format. We hope that thanks to our instructions you did not have any difficulties. We invite you to leave your questions and wishes in the comments.
How to connect an external hard drive to a TV
Many modern TV models allow you to connect external portable storage devices, so users are increasingly asking how to connect a hard drive to a TV. It would seem that this is quite simple to do: connect the drive with information to the TV via a standard USB cable. But, using this type of connection, the information available on the HDD is not always correctly reproduced on the TV screen. Consider alternative connection options.
Contents
- 1 Benefits of connecting a hard drive to a TV
- 2 Can any HDD be connected to a TV
- 3 Connecting via USB
- 4 Connecting via an adapter
9002 if the TV does not see an external HDD
- No need to keep a lot of boxes of DVDs. All digital information can be recorded and stored on an external drive. At any time, viewing it is available on the big screen TV.
- A hard drive for a TV is an indispensable thing when recording video from on-air channels . The built-in memory of the TV is often not enough to save a large amount of information, and the size of a USB flash drive, which can also be connected to the TV, is not always enough.
 Modern HDDs have great potential in terms of available memory sizes.
 - In some cases, an external hard drive is the only way to view media content on the big screen. Not all devices have a suitable connector for an HDMI cable, and it is not always available, while a USB cable is included with this type of portable storage device.
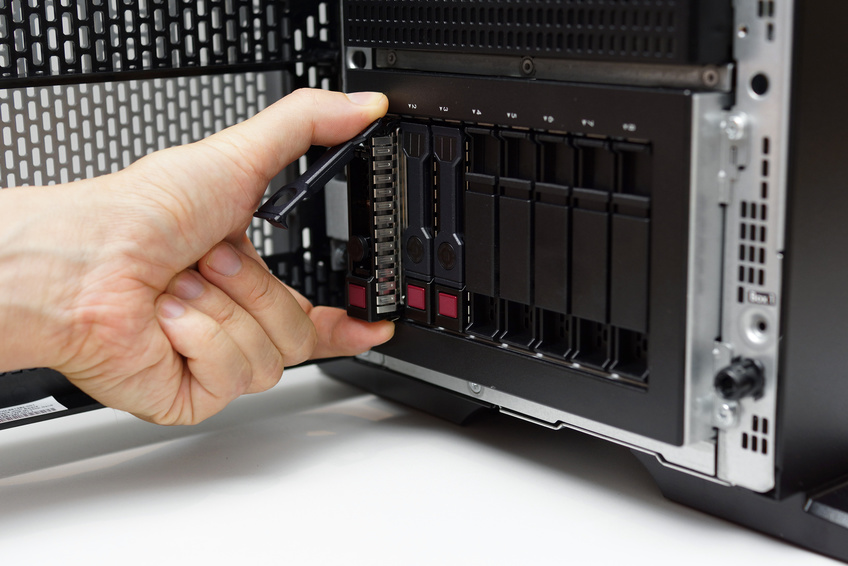
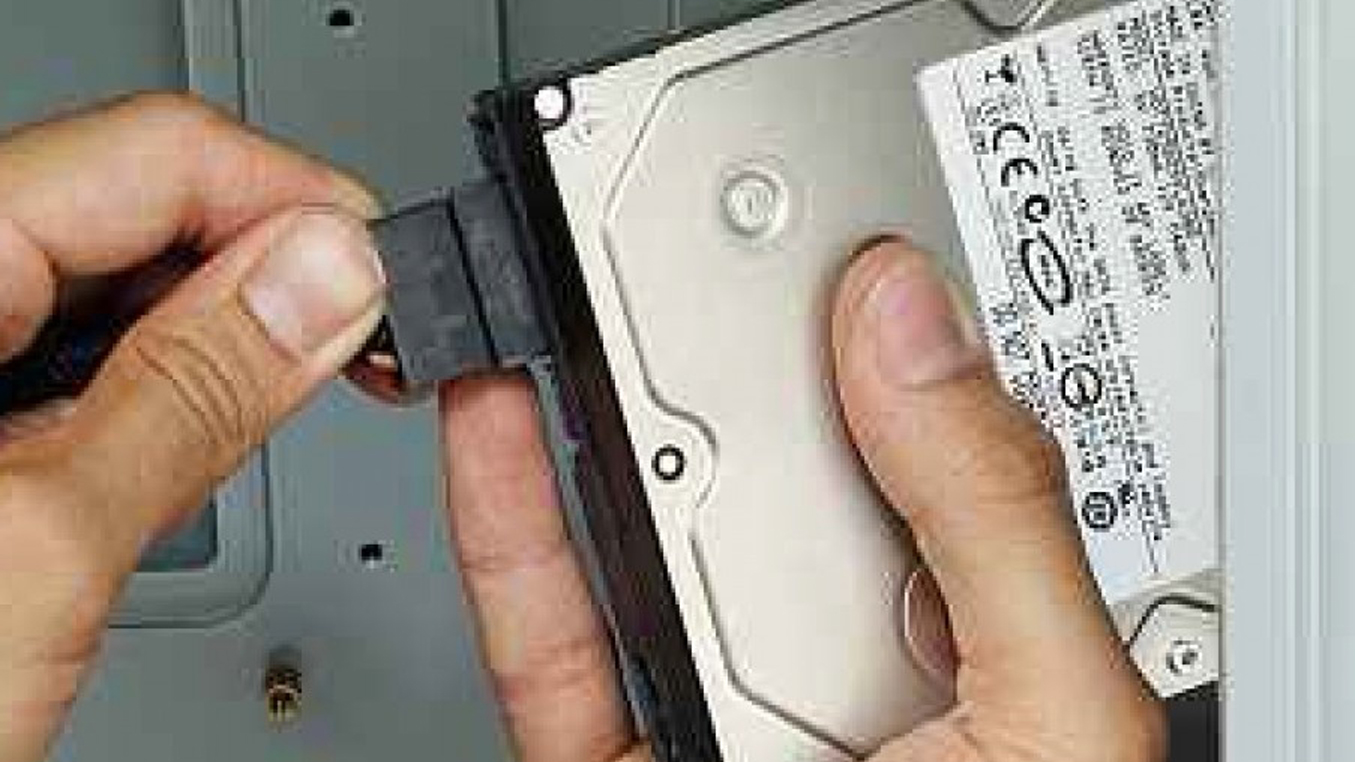
- External. This is a stand-alone device that does not require additional power, it will receive energy during operation from the TV. Their kit already includes a USB cable, through which the disk is connected to the TV.
External hard drive
- Internal. This is an information storage device that is intended for use as part of component system units or laptops. But SATA can also connect to modern TVs. To do this, the user will need to purchase the adapter with the USB adapter. In some cases, models with a large amount of information (more than 2 TB) will require an additional power supply.
 It can be a direct connection to a power outlet or an additional USB connector.
 - The cable supplied with the drive is inserted into the appropriate slot on the drive.
- Behind the TV you need to find a USB connector. Depending on the model, they can be of different types, so is better to use USB 3.0. It is indicated by the corresponding inscription and has a blue «tongue» inside.
- As a rule, after connecting, a notification about a new device will appear on the screen with a suggestion to switch to it. If this does not happen, then using the remote control you need to select the signal source — the USB connector.
- After selecting the signal source, the root folder of the drive will open, all that remains is to find the desired file using the remote control and launch it for viewing.
- To connect an external HDD larger than 2 TB, use cable with additional power supply (2 USB plugs) or external power box (USB cable + power supply).
- Regardless of the connection option used (cable with adapter or case), the further steps are the same as for connecting an external HDD: the cord is inserted into the TV’s USB connector.
- TV will automatically detect the connected device and notify you of this, or you will need to specify the signal source with the button on the remote control.
- Since an external hard drive is often connected to the TV after being used in a PC, it may not be immediately recognized by the device. In this situation, it is worth to format it , but all data will be deleted — they must first be saved.
- Use optional USB -plug (usually red), if available. The device may not be getting enough power.
- Check that the drive is connected correctly.
- Verify that the equipment is working. In this case, you can connect an external hard drive to your computer, and insert any other device with the information it contains (flash drive, smartphone, tablet) into the USB connector on the TV.
- Format the HDD in systems FAT 32 or NTFS (in this case, all information contained on it will be deleted).
- Go to the settings menu on the PS4 home screen.
- Scroll down to the «Devices» menu.
- Select «USB storage».
- Select an external hard drive, then click Format as External Storage.
- Access the settings menu from your PS4’s home screen.
- Scroll down to the «Memory» menu.
- Select a boot location — system memory or an external hard drive.
- Click the «Options» button and select «Application Install Location» to set the desired download location — either «System Storage» or «External Storage».
- Access the settings menu from the home screen of your PS4.
- Scroll down to the «Memory» menu.
- Select System Storage, then Applications.
- Click the Options button and select Move to External Storage.
- Select the games and applications you want to move by ticking them. You can select as many games and applications as you like, as long as there is enough free space on the external hard drive to store them.
- Select «Move», then click «OK» to start the transfer.
- When your external hard drive is connected, games and apps will appear normally on your PS4 home screen. The games you have recently played will be displayed at the beginning.
- If you want to use an external hard drive with another PS4, for example if you want to play games hosted on a friend’s console, connect the device as normal and then sign in to your PSN account on the new PS4.
- If an external hard drive is not connected, the games you played on it will be listed on the home screen or in the library — however, they will show a «!» symbol next to them, indicating that they are not available to play until the device is connected again.
- In what cases it may be needed
- Connecting a portable hard drive
- How to connect a hard drive from a computer to a TV
- What to do if the hard drive does not connect
- More detailed video review
- Video lesson: why TV does not see the hard drive and how to fix it
- User comments
- Why store a huge number of movie discs that probably take up a lot of space or even a separate cabinet? After all, it’s easier to keep them on a small drive, which can be connected to a TV at any time. It is very convenient to record the movie or video you need from your computer to HDD in a few clicks, and then watch it on the big screen in excellent quality.
- Another reason is the online recording of the broadcast. The TV has a small amount of built-in memory, and often there is not enough of it to record a football match or your favorite program, so you have to connect additional devices.
 The drive can accommodate a huge amount of files and will solve this problem once and for all.
 - And the last, third reason — it is not always possible to connect a computer to a TV via an HDMI cable, and in this case, the HDD acts as the only way to view media files. That is, you can simply plug in a large hard drive instead of a cable and watch series or movies pre-loaded on it. It will help you out even in the most difficult situation.
- USB cable damage;
- Damaged or dirty TV input;
- Presence of bad sectors and other errors on the HDD itself;
-
Welcome!
-
-
Menu bar
-
Spotlight
-
Control point
-
Siri
-
Notification Center
-
Desktop
-
Dock
-
Finder
-
-
-
Internet connection
-
Website Browsing
-
Volume control
-
Taking a screenshot or screen recording
-
Viewing and editing files with Quick View
-
Quick note writing
-
Set up Screen Time for yourself
-
Setting focus to focus on the task
-
Edit photos and videos in the Photos app
-
Using the «What’s in the picture?» with photos
-
Get directions in the Maps app
-
Create a recording in the Recorder application
-
Using trackpad and mouse gestures
-
Using the Touch Bar
-
Using Touch ID
-
Using keyboard shortcuts
-
macOS update
-
-
-
Embedded Applications
-
Opening apps
-
Working with application windows
-
Using applications in full screen mode
-
Using Applications in Split View
-
Download apps from the Mac App Store
-
Installing and reinstalling apps from the Mac App Store
-
Installing and uninstalling other applications
-
-
-
Changing system settings
-
Change desktop picture
-
Using splash screens
-
Adding an email account and other accounts
-
Using shortcuts to automate tasks
-
Create a Memoji in the Messages app
-
Change the picture that represents you or other people in apps
-
Changing the system language
-
Improved screen visibility
-
-
-
Creating and working with documents
-
Opening Documents
-
Using dictation
-
Adding notes to files
-
Combining files into one PDF file
-
Printing Documents
-
Organize your desktop with stacks
-
Grouping files into folders
-
Adding tags to files and folders
-
Sending emails
-
Using the Online Text feature to interact with text on a photo
-
File backup
-
File recovery
-
-
-
Create an Apple ID
-
Manage your Apple ID settings
-
What is iCloud?
-
What is iCloud+?
-
Set up iCloud on Mac
-
Store files in iCloud Drive
-
Sharing files with iCloud File Sharing
-
iCloud storage management
-
Using iCloud Photos
-
-
-
What is Family Sharing?
-
Setting up Family Sharing
-
Adding Users on Mac
-
Set up Screen Time for your child
-
Sharing shopping with family members
-
Making a FaceTime call
-
Using SharePlay to Share Viewing and Listening
-
Sending text messages
-
Share your calendar with family members
-
View content shared with you
-
View the locations of friends and family
-
Multiplayer games with friends
-
-
-
Using Continuity to Work with Multiple Apple Devices
-
Stream audio and video via AirPlay
-
Using keyboard and mouse or trackpad to control multiple devices
-
Using iPad as a Second Display
-
Transfer tasks between devices
-
Insert photos and scanned documents from iPhone or iPad
-
Insert sketches from iPhone or iPad
-
Copy and paste using multiple devices
-
Use your Apple Watch to unlock your Mac
-
Make and receive calls on Mac
-
Transfer files between devices using AirDrop
-
Sync music, books and more between devices
-
-
-
Music playback
-
Listening to podcasts
-
Watching movies and TV shows
-
Reading and listening to books
-
Reading the news
-
Stock price tracking
-
-
-
Subscribing to Apple Music
-
Subscribing to Apple TV+
-
Subscribing to Apple Arcade
-
Subscribe to Apple News+
-
Subscribe to podcasts and channels
-
Subscription management in the App Store
-
View family subscriptions to Apple services
-
-
-
Manage cookies and other website data in Safari
-
Using Private Browsing Mode in Safari
-
View privacy reports in Safari
-
About passwords
-
Reset your Mac login password
-
Create and autofill strong passwords
-
Securing your Apple ID
-
Set up security for your Mac
-
Protecting privacy in Mail
-
Maintaining privacy
-
Pay with Apple Pay in Safari
-
Use Sign in with Apple for apps and websites
-
Protecting your Mac from malware
-
Camera access control
-
Search for a missing device
-
-
-
Getting started with accessibility features
-
Vision
-
Hearing
-
Motor skills and coordination
-
Main
-
-
-
Change screen brightness
-
Connecting a wireless keyboard, mouse, or trackpad
-
Connecting other wireless devices
-
Connecting a monitor, TV or projector
-
Adding a Printer
-
Using the built-in camera
-
Using AirPods with Mac
-
Save Energy on Mac
-
Storage optimization
-
Burning CDs and DVDs
-
Home accessories management
-
Starting Windows on a Mac
-
-
Resources for Mac
-
Resources for Apple Devices
-
Copyright
-
Connect your device to your Mac using the cable that came with your device, then view the contents of the connected device in the Finder.
If the connector on the cable does not fit your Mac, use an adapter. See the documentation that came with your device.
-
Make sure your Mac is connected to an external storage device (such as a USB cable or a network).
-
Click the Finder icon in the Dock to open the Finder window. Then do one of the following to transfer files.
-
Move files to a storage device. Select one or more files on your desktop or in a folder, then drag them to your storage device in the Places list in the Finder sidebar.
-
Move files from a storage device. Select a storage device from the Locations list in the Finder sidebar, then drag files to the desired location on your Mac.
-
-
Authenticate as administrator. Depending on how you access the file, you may be prompted to log in as an administrator.
-
Change the sharing and permission settings for the file. See Set up file sharing on Mac for instructions.
Advantages of connecting a hard drive to TV
Modern TVs are increasingly acting as multimedia centers, which, as a rule, is associated with the storage of large amounts of information. It can be not only movies and programs, but also games and other media content. If you don’t use an external drive for your TV, here are 3 reasons to get one.
Can any HDD be connected to a TV
Today there are two types of such drives.
Internal hard drive
USB connection
Any modern TV has numerous connectors in its arsenal, including USB. The easiest way to connect an HDD is to use a USB cable. This is a universal method for any external drive.
Connection instructions:
USB connection
Keep in mind that built-in TV players do not always understand all modern formats, so some songs or videos may not start.
Connection via an adapter
If you connect an internal hard drive with a SATA connector to the TV, you will need a special adapter: SATA-USB . It can be made simply in cable format or as an external housing. The second option is preferable, since the internal drive becomes external — with an external box it is convenient to carry and store.
SATA-USB adapter in the form of a box
Features for connecting an external HDD.
Connection via third-party devices
In some situations, it is not possible to connect via the TV’s USB connector — it is broken, or all ports are busy. In this situation, you can use other devices: PC, game console, DVD player, smart set-top box or receiver.
Depending on the type of device, the optimal connection to the TV is selected. Ideally, this is HDMI , but you can stop at tulips. The appropriate signal source must be specified on the TV. The drive is connected to the selected device via a USB connector — files are managed through this device.
HDMI cable
What to do if the TV does not see the external HDD
Switching between two devices is not always successful. In the case when the drive is connected to the TV, but the synchronization window does not appear on the screen, or when you try to open it, a message appears that there are no connected devices, such actions should be taken.
It doesn’t matter which device is connected to the TV, external hard drive or internal, the cable connection scheme, synchronization and opening are the same. Watching your favorite movies stored on HDD will be more enjoyable with good sound. To realize this nuance, you can connect various speaker systems to the TV. So, you can choose a soundbar, connect a home theater or even simple speakers from a music center. It all depends on your budget and how high-quality sound you need.
How to download and store PS4 games and apps on an external hard drive – PlayStation
Blog
Share on Twitter (opens in a new window)
Share VKontakte (opens in a new window)
The PS4 system software update to version 4.50 introduces a new ability to download and store games and applications on an external hard drive. An external hard drive is very easy to set up and use with a PS4 or PS4 Pro, and this guide can help you sort out all the possible issues.
Minimum requirements for a hard drive
Before you buy a new storage device or use an existing one, remember that it must meet the minimum requirements for use with your PS4:
Connection method: USB 3. 0
0
Capacity memory : 250 GB (min.) — 8 TB (max.)
Please note that not all external drives may be compatible with your system.
Format external hard drive
Most storage devices are formatted (usually NTFS/ExFAT/MAC). To prepare your device for use with PS4, you need to format it to a custom type:
You will see a series of warnings that formatting the device will erase all previously installed data, so make sure there is nothing on the device that you don’t want to lose before clicking OK.
It’s also important to note that after formatting an external hard drive to the PS4 specific format, you can only use it for PS4 games and apps — you won’t be able to put documents, pictures, and other types of content on it until you format it again.
When formatting is complete, you will see a message confirming that it was successful, and a small green indicator will appear next to the device name, indicating that the device has been activated as a primary storage device.
Download content to external hard drive/internal storage
Once formatted, your external hard drive will be set as the default boot location as long as it remains connected to the system.
If you want to make your PS4’s internal storage your download destination again (and then reselect your external hard drive), it’s also very easy to do:
Transferring games and apps to an external hard drive
If you want to organize the games and apps that are already installed on your PS4, you can easily transfer them to an external storage device:
Removing an External Hard Drive
Important: Do not remove your USB storage device when the PS4 is turned on.
To remove an external hard drive, open the quick menu by holding down the PS button on the controller, then select Stop Using External Storage. After that, you will see a message that it is safe to remove the device from the USB port.
Anything else?
That’s it — you no longer have to worry about which games to delete when new hits appear on the PlayStation Store. There is enough space on an external hard drive up to 8 TB for even the most avid prize hunter. Enjoy!
Connecting an external hard drive to a TV — Detailed instructions
Today, almost all modern TV models allow you to connect hard drives or flash drives using USB ports. Thanks to this, TV has evolved from a simple box into a multifunctional media device that can be used for a variety of purposes. Let’s figure out how to connect an external hard drive to a TV, and what features and benefits this can give us.
Contents of the article
In what cases it may be needed
Connecting a portable hard drive
External hard drives are incredibly easy to use, they do not require special knowledge and extra gestures. They simply connect to the TV via USB using a special cable. Moreover, HDDs do not need a separate power supply, as they receive the necessary energy from the device to which they are connected.
Every TV has several USB ports, which are usually located on the rear panel. To connect the drive, you need to find one of them labeled «HDD IN».
LG was taken in the example, but if you have a TV from another brand, such as Rolsen, Philips, LG, Sony or Samsung, the connection scheme will be similar.
It is through him that the hard drive is connected to the TV. Just connect the cable, after which you will see a message on the screen that the hard drive has been successfully connected and is ready to go. After that, select the hard drive using the remote control and open the necessary file.
USB 3.0 compatible drives are recommended. They are the fastest to date, which will make using your device as comfortable as possible. The difference in speed is especially noticeable with large amounts of data.
But if you connect the media to an old Samsung TV with USB 2.0 support, then it will work with 2.0 technology, even though your hard drive supports more modern technology. Therefore, consider this factor when choosing and buying a drive.
How to connect a hard drive from a computer to a TV
Initially, the SATA interface was created exclusively for internal use in system units and laptops, and is completely unsuitable for external use.
Despite this, today there are a number of special adapters to the USB connector, using which you can connect a regular internal computer hard drive to a TV.
For hard drives larger than 2 TB, think about a separate power supply when using them. When buying an adapter, pay attention to whether it supports the ability to recharge the drive by plugging the cord into a power outlet or through another USB connector.
What to do if the hard drive is not connected
The main reasons here may be:
In the first case, it is enough to replace the cable to solve the problem.
In the remaining two cases, diagnostics and professional repair at a service center are required.
Now you know that any hard drive can be used with a TV. And if someone asks if it is possible to connect a removable hard drive to a TV, you will definitely answer “YES!” And you can do it yourself.
A more detailed video review
youtu.be/c1lF70gmme4
Video tutorial: why the TV does not see the hard drive and how to fix it
Connecting to a Mac computer and using other storage devices
Search this guide
macOS User Guide
External hard drives, flash drives, USB drives, flash memory cards, and other devices such as an iPod can be connected to a Mac using a Thunderbolt, USB, or USB-C cable, or wirelessly using Bluetooth.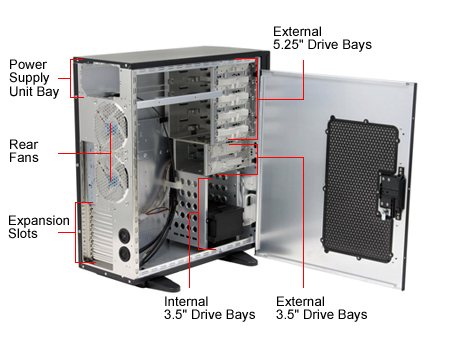
In addition, storage devices (such as external hard drives) can be accessed on the network. Optionally, you can insert flash memory cards from your camera or other device into your Mac’s SDXC card slot. If your Mac does not have a memory card slot, you can access data on a flash memory card using a connected card reader.
After you connect a storage device, you can move files between your Mac and the storage device.
If your Mac has a USB-C port, see Use USB-C cables with your Mac.
Connecting a storage device
Move files to or from an external storage device
Get rights to view or work with files on the storage device
If you are a Mac administrator, do one of the following:
If you’re not the administrator of your Mac, ask your administrator to give you access to the files you need.