How to Lube Switches on Your Mechanical Keyboard
(Image credit: Tom’s Hardware)
One of the big draws of mechanical keyboards is the sound. That resonant, thocky, clacky rhythm can only come from the movement of plastic against plastic, and it’s one of the big things separating mechanical keyboards from their membrane-centric brethren. Compared to a cheap keyboard, the sound of just about any mech is heavenly.
But maybe you’re not so satisfied anymore. Perhaps you’ve started to notice other sounds—the pinging of little springs, or a scratching scrape-y sort of plastic sound that you don’t enjoy. Or maybe you caught your favorite streamer with a new custom mechanical keyboard that sounds absolutely stunning. How can yours measure up? Is there a way to make it sound better, or is it time to just buy a new board?
There is a way: you can lubricate your switches. Lubing switches is one of the most common and immediately effective aftermarket modifications done by mechanical keyboard enthusiasts, and it’s easy to see why: the process can make your switches sound better, deepening and clearing up those clacks and thocks; it can make them feel better, too, getting rid of any internal scratchiness and making the whole typing experience that much smoother. Lubing can also make the best gaming keyboards even better.
In case you’ve not seen this before, though, here’s an example. First, here’s a quick video of me typing on some stock, unlubed Cherry MX Red switches:
And now here’s another video, on the same keyboard, except now those Reds are lubed with Krytox 205g0 lube (and the springs with Krytox 105):
Lubing switches is delicate work, but it’s not hard to learn, and the rewards are huge. In this tutorial, we’ll walk you through it. My biggest recommendation, though, is to approach this with an experimental spirit, testing out switches as you work, seeing how they sound and feel. The right way to lube switches is, ultimately, the way that feels best to you.
What You’ll Need to Lube Switches
- Switch Opener (I strongly recommend a metal one, the plastic and 3D-printed ones just aren’t stable enough in my testing)
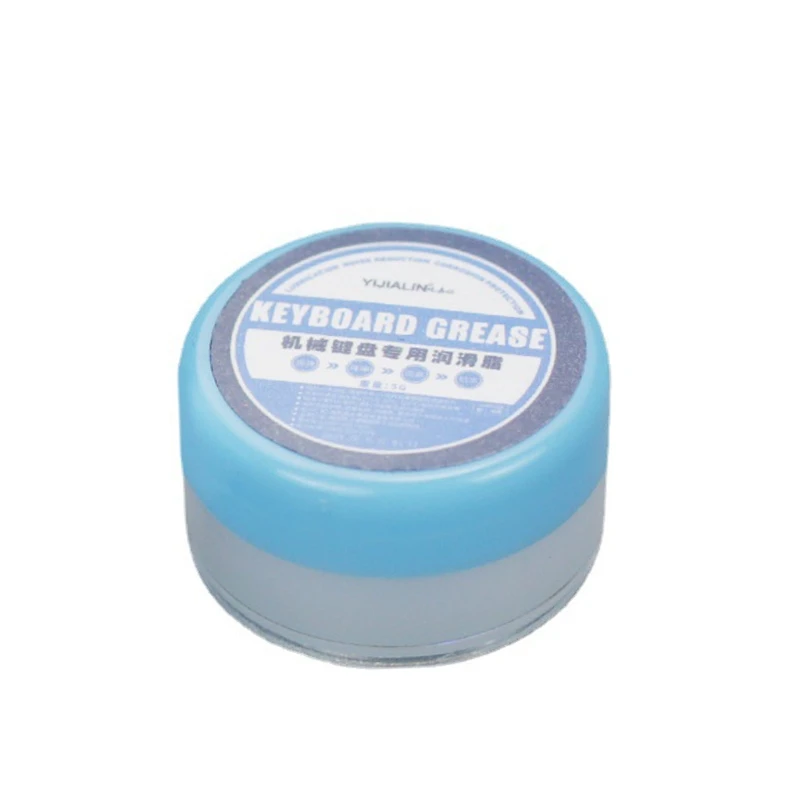
- Switch lube (The standard recommendation is Krytox 205g0 for linear switches and Tribosys 3203 for tactile, with some Krytox 105 grease for springs)
- Switches
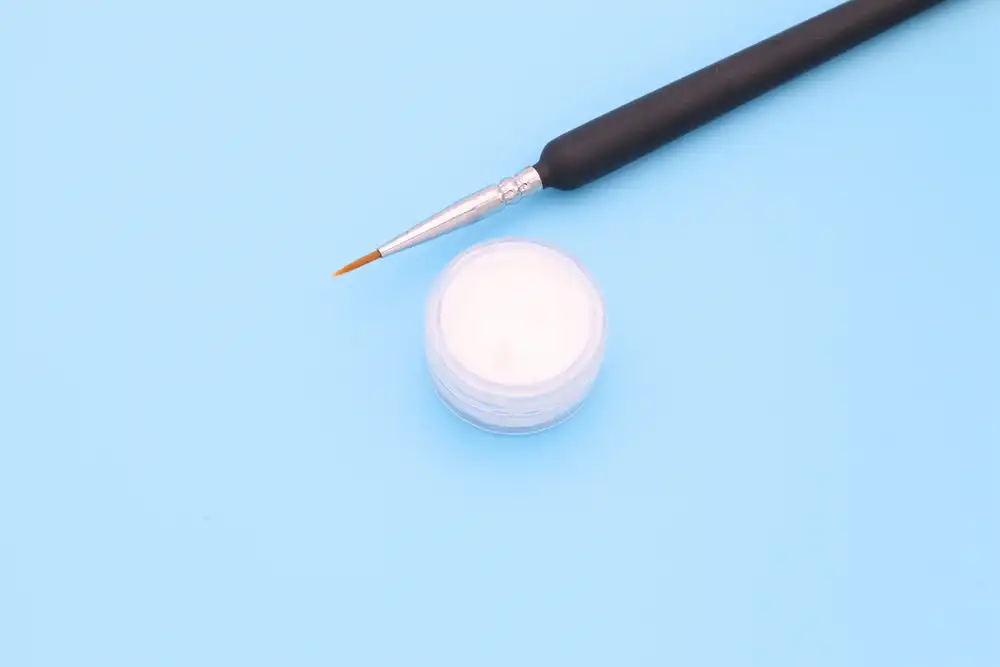
- Small paint brush , preferentially 0 or 00 brush size
- Plastic baggy
- Jeweler’s Tool
- Lube Station (these are optional, but handy)
Steps
1. Remove your switches from the keyboard. If you have a hot-swappable keyboard like the Hexgears Impulse, you can pull the switches out with a simple puller. Otherwise, you’ll need to desolder your switches. Or, if you’re feeling ambitious, you can desolder your switches from a more traditional soldered mechanical keyboard. If you need a soldering iron, we have a great list of the best soldering irons for you to choose from.
Either way, these need to be loose switches—you could technically try to open up and lube switches while they’re installed in the keyboard, but you run the risk of breaking a lot of things.
Image 1 of 2
(Image credit: Tom’s Hardware)(Image credit: Tom’s Hardware)
2. Take the switches apart. To do this, grab your trusty switch opener. Now, if you look at your switches, you’ll notice tabs slotted into the sides of the switch, from the top housing into the bottom. On Cherry-style switches, these are two tabs, like a fork; on Kailh’s switches, they’re two big thick tabs that cover the entire sides of the bottom housing. And if you look at your switch opener, it should have two interior surfaces, corresponding to each style—one with two tabs facing upward, and one with four.
Place the switch, right-side up, on the switch opener on the corresponding part, lining the tabs up with the tabs on the switch opener. Then, just press down on the stem and the top housing. This should press the tabs against the switch opener, causing the switch to pop open. It shouldn’t take a massive amount of force, but you might have to push a bit. Then, just pull the top of the switch housing off, and separate out all the components—the stem, the spring, the top housing, and the bottom housing. If you have a lubing station, put them in their corresponding spots.
Note that this probably should not be done with clicky switches, as lubing clicky switches tends to remove their, well, click. But linears and tactiles will work just fine.
Image 1 of 3
(Image credit: Tom’s Hardware)(Image credit: Tom’s Hardware)(Image credit: Tom’s Hardware)
3. Lube the springs. I always like to do this first, because the process with springs is different than with the rest of the switch. There are two ways to lube springs: the painstaking way or the simple way. The painstaking way is to take your paint brush, lightly dip it into your lube of choice, and brush lube on your spring until it has a light, shiny coat.
Or, you can bag lube them. This is my strong personal preference, as the results are good without being horribly tedious. To do this, place all the springs in a small plastic baggie. Then drip in a few drops of Krytox 105 grease, maybe 5 drops per 10-20 springs in my experience, though you can experiment to see what works for you. As with all lubing, the goal is to have a very light coating as even as possible.
Now, close the baggie most of the way. When it’s mostly closed, blow into the opening, inflating the bag. Then close it up and shake it vigorously until all the springs are coated, 1-2 minutes. After that, you can empty the bag and place them in your lube station, or a bowl, or wherever you want.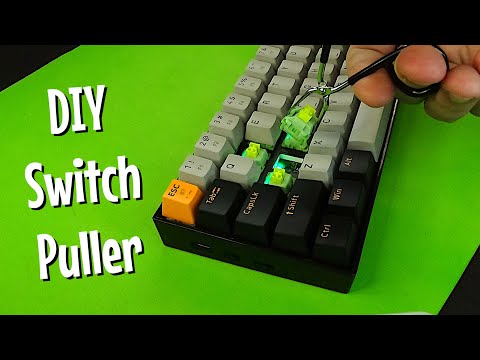 Often, you’ll have to untangle the springs, which you can do by gently turning them until they come apart, the way you take a key off a keychain.
Image 1 of 2
(Image credit: Tom’s Hardware)(Image credit: Tom’s Hardware)
4. Lube the bottom housing. Once the springs are lubed, it’s time to get to the rest of the switches. You can do this in any order you want, but I prefer to start with the bottom housing. To do this, dip the tip of the brush gently in your lube — Krytox 205g0 for linears and Trybosis 3203 for tactiles is my go-to— and then wipe away the excess on the rim of the container. You want a light sheen of lube—if you can see the white globs of lube on there, you probably have too much.
Now, brush one end of your brush along one of the interior sliders on the sides. Then, brush the other side on the other slider. Brush on each slider one or two more times, until the coating seems even — which means you’ll barely be able to see it. Always start with less lube than you think you might need, as you’ll be amazed what a little bit can do.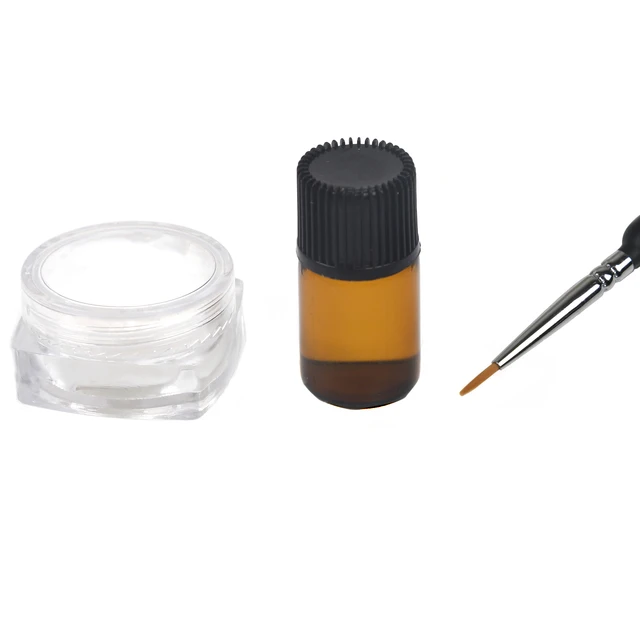 And it’s a lot easier to add more lube than to clean it off.
Finally, take what’s left on your brush — without dipping again — and swirl it around the reset of the plastic interior of the bottom housing, avoiding the metal leaf spring. I usually do this just once, as it’s not the most necessary place to lube carefully.
(Image credit: Tom’s Hardware)
5. Lube the stem. Now, you want to set the bottom housing aside, in your lube station if you have it. Take the switch’s stem, holding the cross-shaped part with your jewelry tool if you have it. Then, get some more lube on your brush, the same way you did last time. Apply a gentle coating and wipe off the excess.
When that’s done, it’s time to lube the stem. Gently brush lube on the flat face of the stem, smoothing it out like you did before. Then use the same side of the brush to lube one of the slider sides. After that, you need to lube the face with the stem’s legs.
These legs are what comes into contact with the switch’s leaf mechanism, actuating it.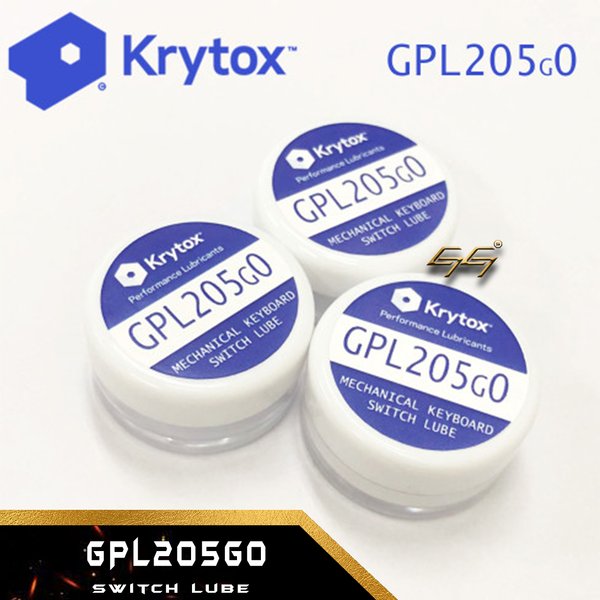 On a linear switch, these legs are smooth. On a tactile switch, they have bumps on them which provide the switch’s tactility. This means that, on a linear switch, you do want to lube the legs; on tactile switches, you absolutely don’t want to lube the legs, as doing so will reduce or outright eliminate the tactility.
So, on a linear switch, gently brush lube on the legs and the flat space between them, brushing a couple more times to smooth the lube out. On a tactile, just lube that flat space, or avoid lubing that side of the stem entirely. Like all of this, it’s up to preference. After that, use the remaining lube on the remaining slider side.
You can also, after this, run the brush over the pole at the base of the stem.
Image 1 of 2
(Image credit: Tom’s Hardware)(Image credit: Tom’s Hardware)
6. Lube the top housing, if you want. Some people recommend lubing the interior of the top housing to reduce any plasticky sound or feeling you might get from the stem or leaf spring rubbing against the top housing. But in my experience, this is a pretty negligible problem and I usually don’t bother.
If you do want to bother, do the same thing you’ve been doing — gently coat the brush with lube, remove the excess, and put a light clear sheen of lube on the plastic.
7. Reassemble your switches. Congrats, you did it! Time to put those babies back together. Take the bottom housing, put the spring in its place, then put the stem in the spring, with the legs facing toward the leaf spring. Finally, snap the top housing back into place — the side with the writing on it usually goes over the leaf spring.
8. Put your switches back in your keyboard. Send those switches home, either by snapping them into a hot swappable or soldering them in if not.
Now your switches should have a smoother feel and a different sound. Enjoy.
Get instant access to breaking news, in-depth reviews and helpful tips.
Contact me with news and offers from other Future brandsReceive email from us on behalf of our trusted partners or sponsors
Topics
Keyboards
How to Lube Switches: A Complete Guide
Lubing your mechanical keyboard switches is a right of passage into the mechanical keyboard hobby.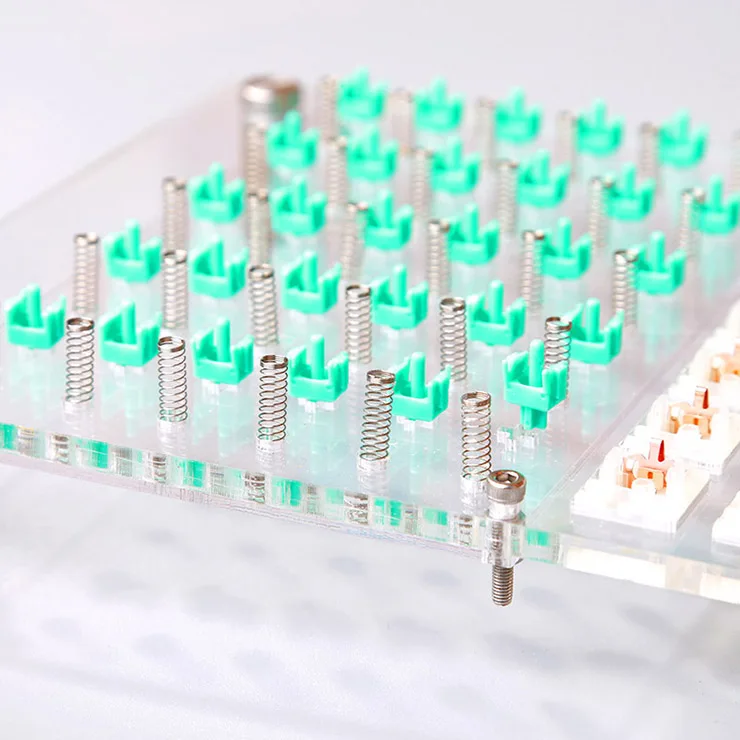 The question is, are you ready to bring to bring your keyboard to the next level? If so, it’s time to bust out the lube. Let’s get started.
Why Lube Your Switches?
- Improved Acoustics
- Smoother Actuation
- Less Rattle
- Less Scratchiness
- Reduced Tactile Bump
- Fun & Therapeutic
Although it can be a time-intensive activity, lubing your switches improves your keyboard in so many different ways. If you want the best-sounding, smoothest feeling, and highest-quality board, lubing your switches is the way to go.
You can listen to a sound clip here of a keyboard before lubing and after lubing.
The Tools Required
You will need 6 tools to get the job done effectively. We’ll go over each one below.
1. Lubricant
Picking out the best lube is hardest part. We have a full write up here on the best lube. If you don’t feel like reading another post, here is a quick crash course. There are three main switch types: tactile, linear, and clicky. The type of switch you have will determine which type of lube is required.
Best Lube for Tactile switches:
A lube that’s thinner or with a lower viscosity is best for tactile switches. We recommend the Krytox 105 if this is your first time. If you want to dampen the tactility more, Krytox 205G will work too.
Best Lube for Linear Switches:
A lube that’s thicker or with a higher viscosity is best for linear switches. We recommend the Krytox 205G if this is your first time.
Best Lube for Clicky switches:
In general, it’s recommended to not lube clicky switches. Lubing clicky switches can result in accidently converting your switch to a quieter tactile sound. Also, it may produce inconsistent sound between each switch. It’s best to not lube clicky switches.
2. Small Brush
You’ll need a small brush to apply the lube precisely to the switches. We recommend a #2 or 5mm sized paint brush (affiliate) to apply the lubricant.
3. Switch Opener or Flathead Screwdriver
To lube the switches, you’ll need to open them up first. The easiest way is getting a switch opener, but if you have a small flathead screwdriver laying around, that will work too.
4. Soldering Tools or Switch Puller
To remove and attach your switches to your keyboard, you’ll need to solder/de-solder them from the PCB. A hot-swappable keyboard is best for easy switch removal since there is no soldering required, all you will need is a switch puller.
5. Tweezers
Tweezers will really help with picking up the small components and keep you from getting grease on your fingers.
6. Clean Workspace Area
You’ll need a small workstation where you can lube the switches without making a mess. I usually clean off my desk and lay down some newspaper or paper towels to keep everything from getting greasy.
The Switch Components
Each switch is composed of four different components: the stem, spring, bottom housing, and top housing.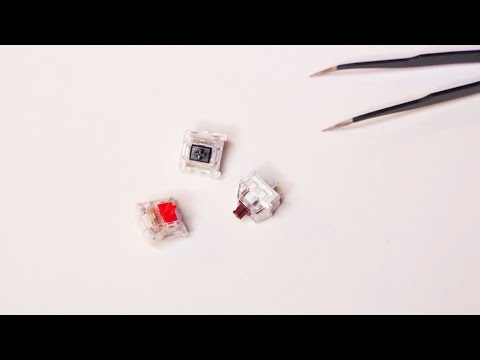 You can refer to the image above, so you have an idea what we mean when we throw these words around.
How to Lube Your Switches: The Steps
The 9 easy-to follow steps for lubing your mechanical keyboard switches.
1. Remove the Switches from your Keyboard
Unless you’ve ordered your switches in a separate bag, you’ll need to remove the switches from your keyboard. You’ll need to take off your keycaps and pull apart your keyboard and then de-solder the switches from the PCB. This can be quite difficult to do, so we linked a guide here. Always make sure to shut off your keyboard first.
If you have a hot-swappable keyboard, you simply take off the keycaps and remove the switches with a switch puller. This is the fastest way to remove switches, so a hot-swappable keyboard can save you a ton of time.
2. Pull Apart the Switch
Now that the switch is removed from the keyboard, it’s time to pull the switch apart (we have a full guide here). The easiest way is with a switch puller, a specialized tool you can find online or order from a 3d print shop. We typically just use a small flathead screwdriver.
You want to work your way around the switch loosening the 4 clips that hold the upper housing and lower housing together. This can be a little difficult at first, but once you get a hang of it, it can be pretty quick. The toughest part is making sure the switch doesn’t snap back together once you’ve loosened one of the clips. It’s best to stick your fingernail between the upper and lower housing after you’ve loosened a clip.
3. Lube the Lower Housing
You will need to be a little careful lubing the lower housing. It’s best to avoid lubing the metal leaf if possible as it can damage your switch. We recommend lubing the inside floor of the switch, the part where the stem rails hit, and the inside/outside of the cylinder.
4. Lube the Spring
There are two main ways to lube the spring:
1) Apply lube to the entire spring with a brush.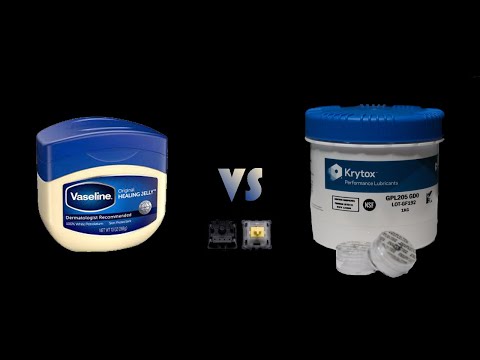 Best for your first time.
2) Take the springs out of all the switches and lube them in a single bag. Best for lubing big batches of springs at once.
Once you’re done lubing the spring, you can set it on the lower housing while you lube the stem and upper housing. This will help avoid making a mess and getting lube all over your workstation.
5. Lube the Stem
Lubing the stem is relatively straightforward, you just need to be careful with the legs. I would only recommend lubing the legs if you have a linear switch. You can lube the legs on a tactile switch, but it will reduce the tactile bump so it’s not recommended.
Regardless of the switch type, you should lube the rails and the cylindrical area where the spring contacts the stem.
If you want to go one step further, you can also apply lube to the other outside area of the stem, but it doesn’t improve the smoothness as much.
6. Lube the Upper Housing
Lubing the upper housing is super easy. Simply lube the sections where the rails of the stem come in contact with the upper housing. You can ignore the rest of the upper housing.
7. Put Switch Back Together
Congratulations, you’ve lubed everything! Now it’s time to put all of the components back together. The most important part is being extremely careful with the metal leaf. Simply line all of the components up again and snap the switch together.
Test to make sure the switch actuates properly and nothing feels wonky. If it does not work right, pull the switch apart again and reassemble.
8. Install Switches into Keyboard
Now that the switches are lubed, it’s time to install them back into your keyboard. If you have a hot swap keyboard, simply press them into the sockets and you should be good to go. If not, you’ll need to resolder them to the PCB.
9. Plug in Keyboard and Test!
The final step is to plug the keyboard back in and test to make sure the switches work.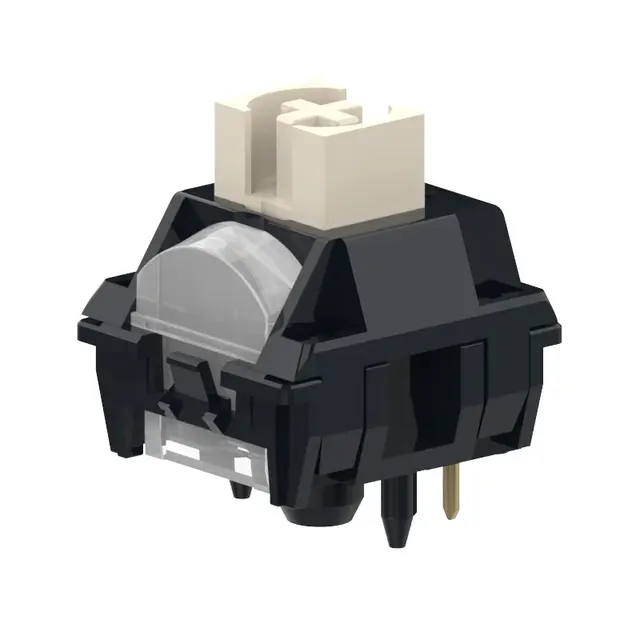 We like to use this free online tester. Make sure to test the keyboard before putting the whole thing back together. It sucks to put the whole keyboard together and then have to go back and remove the keycaps and disassemble the whole case.
If a key doesn’t work, it’s most likely the switches weren’t soldered correctly or they didn’t enter the sockets right. If that’s not the issue, it’s possible the metal leaf inside the switches is damaged, in which case you’ll most likely need a new switch.
Should You Lube your Switches?
In general, if you have the time and the equipment, we recommend that everybody lubes their switches. There are certain switch types where it doesn’t make sense to lube, but for the most part, it’s highly recommended. The benefits are easily noticable, and once you go lubed, you never go back.
Switch Actuation Type
There are several factors to consider when deciding if you should lube your switches or not. The first thing to look at is the switch actuation type, clicky, linear, or tactile.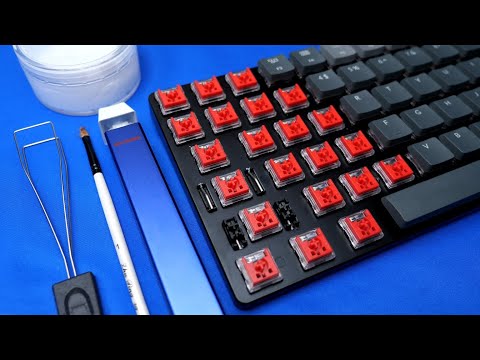
If you have a clicky switch, we don’t recommend lubing the switch. You may accidentally convert your clicky switch to tactile, and if you’re not super careful during the lubing process, you may accidently have uneven clicking and sound noises afterwards.
If you really want to lube your clicky switches, we recommend using a super thin lube and applying a thin coat to avoid ruining the switch. Lubing a clicky switch is definitely for the more advanced keyboard enthusiast.
Tactile switches can benefit from lubing, but we recommend using a thin lube for your first time. A thicker lube can work too, but it may remove a lot of the tactile bump. Less is more when it comes to lubing a tactile switch.
Linear switches, in my opinion, benefit 100% of the time from lubing. Since linear switches already actuate in smooth and consistent way, the lube removes a lot of the friction and scratchiness. The sound also improves since most the rattling sound will disappear.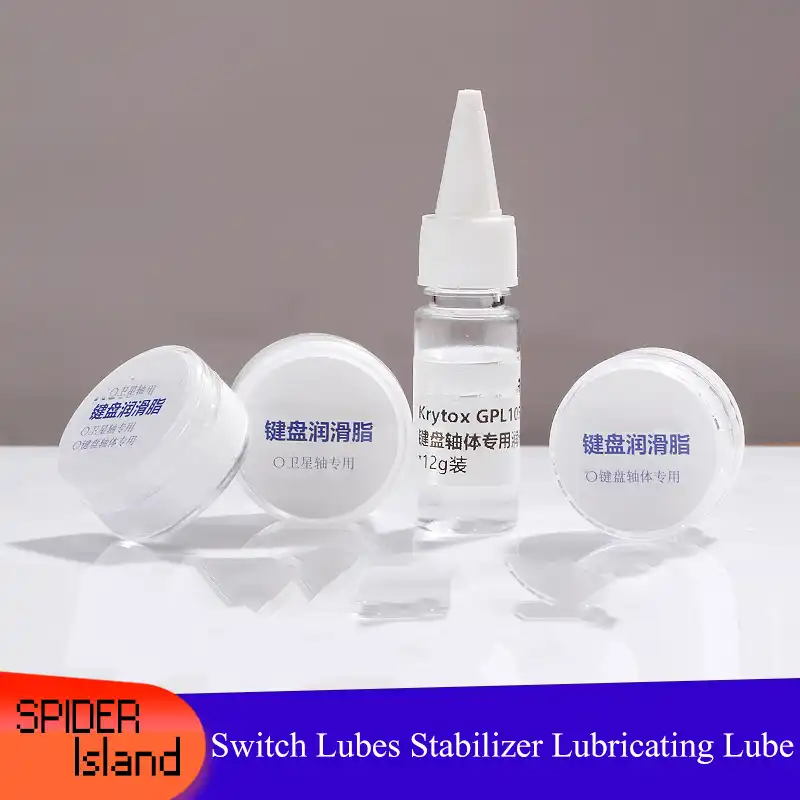
Avoid Lubing Certain Switch Brands
Certain switch brands make it very difficult or impossible to take apart and lube. The main brand to avoid is Kailh BOX Switches. The switch housings are designed a different way so you can’t simply unclip them. In addition, the BOX switches will leak if you lube them, so it has a chance of damaging your keyboard. If you want lubed switches, stay away from Kailh BOX switches.
Sound & Feel Improvements
If your switches feel extra scratchy or sound rattly, lubing them will improve both the sound and feel instantly. There is a reason why lubing your switches is such a common practice in the mechanical keyboard community. If you want to improve your keyboard, lubing is one the highest impact mods you can do.
Can You Get Switches Pre-Lubed?
If you don’t want to go through the lengthy process of lubing the switches yourself, it is possible to order switches pre-lubed. You can find sellers of pre-lubed switches on /r/mechmarket, just be very careful not to get scammed by a seller as the mechmarket is basically the wild west.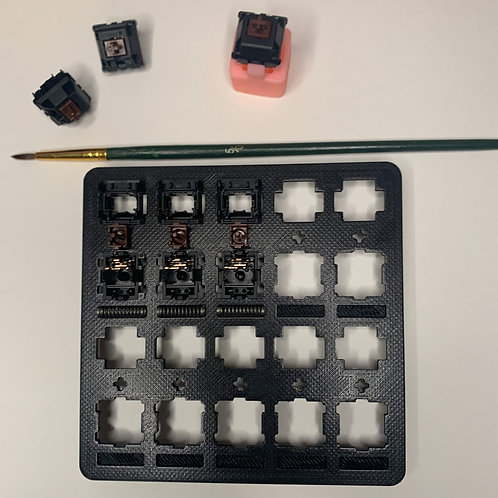 You can do research on the sellers to make sure they are legit before committing to a big purchase.
Can You Lube Switches Without Desoldering?
For many people, desoldering the switches is not feasible, you may not have the proper soldering equipment on hand or the space to do it. You can lube your keyboard switches without desoldering but it’s not as effective. We’ll link our full guide on how to lube without desoldering here.
The methods can be messy, so you’ll need lots of isopropyl alcohol on hand to clean up, and it’s not as effective as taking the switch apart and lubing that way. But it’s definitely recommended for those who don’t have soldering equipement on hand.
Conclusion
Lubing your switches is an awesome way to upgrade your keyboard and take it to the next level. We went over the equipment and steps we recommend to effectively lube your switches and get the much-improved sound and feel. If you have the ability and time to do it, we recommend everybody lube their switches, the improvement is very noticeable, and you will not want to go back to non-lubed switches.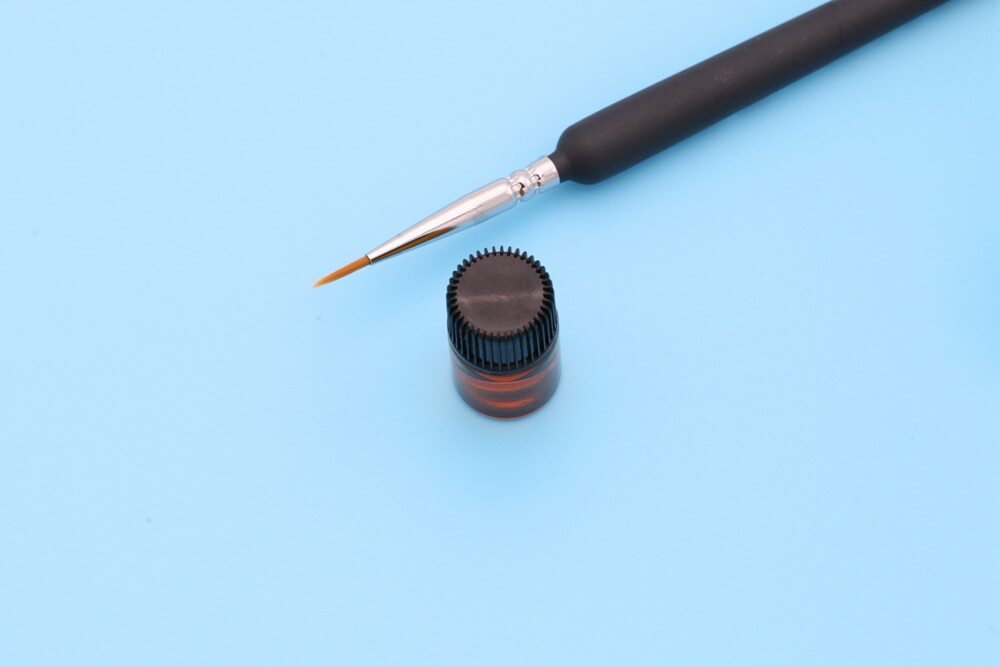
Happy Typing!
About Lubricants for Mechanical Keyboards — Geekboards
Why do you need lubrication?
In the process of immersing yourself in the world of keyboards, sooner or later you come across such a modification as «keyboard lubrication». Naturally, questions arise at first:
- How?
- Why?
- What is this krytox of yours?
- Why does the keyboard, which costs as much as a salary in the Ivanovo region, also need to be lubricated?
Let’s start with the last one. The keyboard has mechanisms that consist of plastic, springs, metal brackets and contacts. Based on this, the operation of the device takes place with a whole range of clanging, ringing, clattering and other pleasant sounds. There are two such mechanisms in the keyboard — stabilizers and switches. First of all, the lubricant removes precisely these parasitic sounds. Great video from WildCat that really shows the difference: