Cooler Master’s MasterCase Pro 6 reviewed
Cooler Master’s MasterCase Pro 6 interested me from my first glance. Its simple and professional design made it easy to picture this ATX mid-tower case sitting on my desk.
The case’s angular front panel sets the tone for the MasterCase Pro 6’s overall look: hard straight lines and large, smooth stretches of plastic. Lightly pulling out on the top and the bottom of the panel will offset the panel from the body by about .4” or 9 mm, opening up vents at the front of the case. An additional light pull on the top of the panel will disconnect four magnets and allow the front to pivot out for access to two 5.25” bays, or allow owners to lift the panel off the body completely.
Once the front panel is removed, the MasterCase’s front dust filter can be removed by pulling out on the bottom edge of its frame. Removing the filter exposes the case’s two pre-installed 140-mm fans and an LED accent strip that lights up the bottom of the front panel. This LED strip is powered with its own SATA connector, and Cooler Master offers versions of the case with red or blue accent lighting. If you don’t need the 5.25” bays for your build, you can also add an additional 120-mm or 140-mm fan at the top of the case using an included bracket. The pre-installed fans can be removed to support a 240-mm or 280-mm radiator, as well.
The MasterCase’s front ports sit underneath a flip-up cover. This door uses a magnetic strip to keep it closed. Two USB 3.0 ports, a 3.5 mm headphone jack, a 3.5 mm microphone jack, a hard-drive activity light, power and reset switches hide under this panel.
Lightly pull up on the front and back of the top panel, and it’ll pop up to open the case’s top vent. Pull up even farther, and four magnets will disengage so you can remove the panel from the body of the case. Removing the panel provides access to the top mounting plate for 120-mm or 140-mm fans, or 240-mm or 280-mm radiators.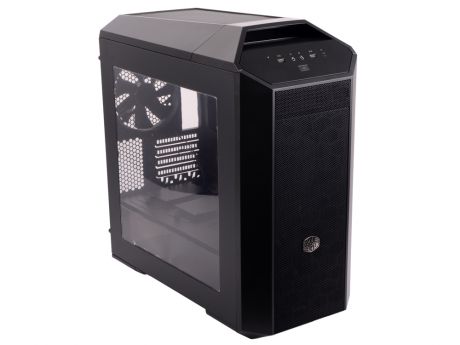 To make installation of those fans or radiators easier, builders can remove that bracket using four captive thumbscrews. If you’re installing a radiator on the top panel, be aware that its length can’t exceed 11.7” (297 mm) overall.
Spinning the case around to the rear panel, we’re met with a plastic bezel attached with two magnets. The rear of the case features a standard ATX layout with an I/O cutout, seven expansion slots, a pre-installed 140-mm fan with a three-pin connector, and plenty of mesh for extra airflow. It also features a metal face plate for a PSU mounting point for an easily installed unit. A light tug removes the plastic bezel to provide access to the four thumb screws attaching the side panels to the body of the case. The left side panel of the case features a large plastic window with a tinted, removable section that shields the power supply and bottom mounted hard drive bays from view. The right side of the case uses a plain, solid metal panel.
On the bottom of the case, there is an easily removable dust filter and two full-width feet with rubber pads to reduce vibration transfer to one’s floor or desk. The dust filter slides out from the rear of the case, which some might find inconvenient with a system inside. In part, that’s because the hefty steel construction of the MasterCase Pro 6 ends up weighing about 26 pounds, or 11.7 kg.
Here are the MasterCase Pro 6’s key specifications in convenient tabular form:
| Cooler Master MasterCase Pro 6 | |
| Type | ATX mid-tower |
| Dimensions (W x H x D) | 9.3″ x 21.4″ x 21.6″ (235 x 548 x 544 mm) |
| Supported motherboards | Mini-ITX, microATX, ATX |
3. 5″ drive mounts 5″ drive mounts |
5 2.5″/3.5″ combo bays |
| 2.5″ drive mounts | 2 dedicated |
| 5.25″ drive bays | 2 |
| Fan mounts | 3 120-mm or 140-mm front fans
2 120-mm or 140-mm top fans 1 120-mm or 140-mm rear fan |
| Radiator mounts | Front radiators up to 240 mm or 280 mm long
Top radiators up to 240 mm or 280 mm long 1 120-mm or 140-mm rear radiator |
| Included fans | 2x 140-mm front fans
1x 140-mm rear fan |
| Front panel I/O | 2x USB 3.0
Headphone Microphone |
Max.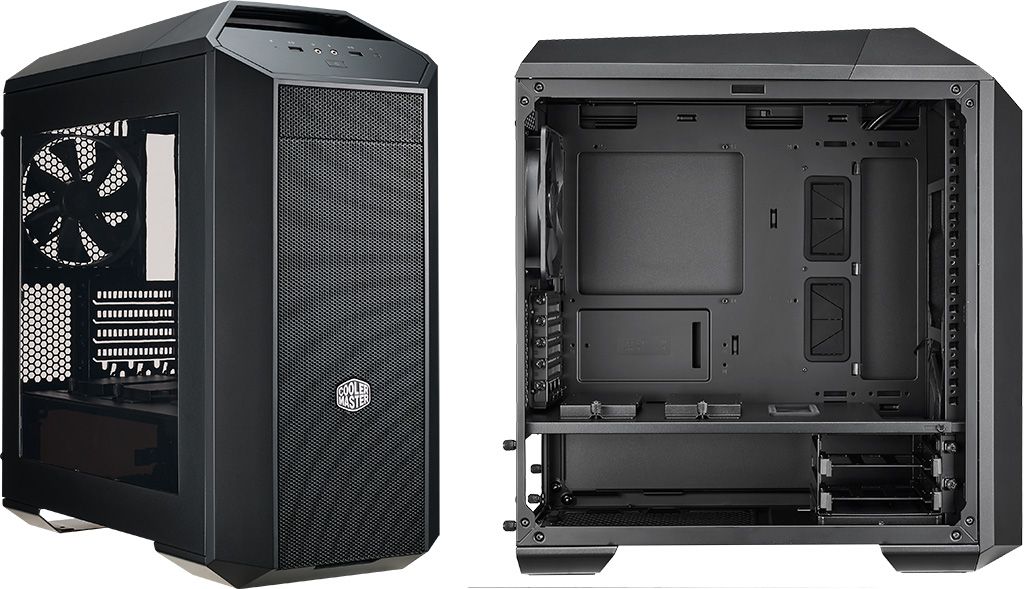 graphics card length graphics card length |
16.22″ (412 mm) without hard drive cages
11.7″ (296 mm) with hard drive cages |
| Max. CPU cooler height | 7.48″ (190 mm) |
The MasterCase Pro 6 goes for $159.99 on Newegg right now, in line with Cooler Master’s other high-end MasterCases. In absolute terms, though, $160 is a lot for a case these days. Let’s dive inside and see whether the Pro 6 lives up to its lofty price tag.
Popping in
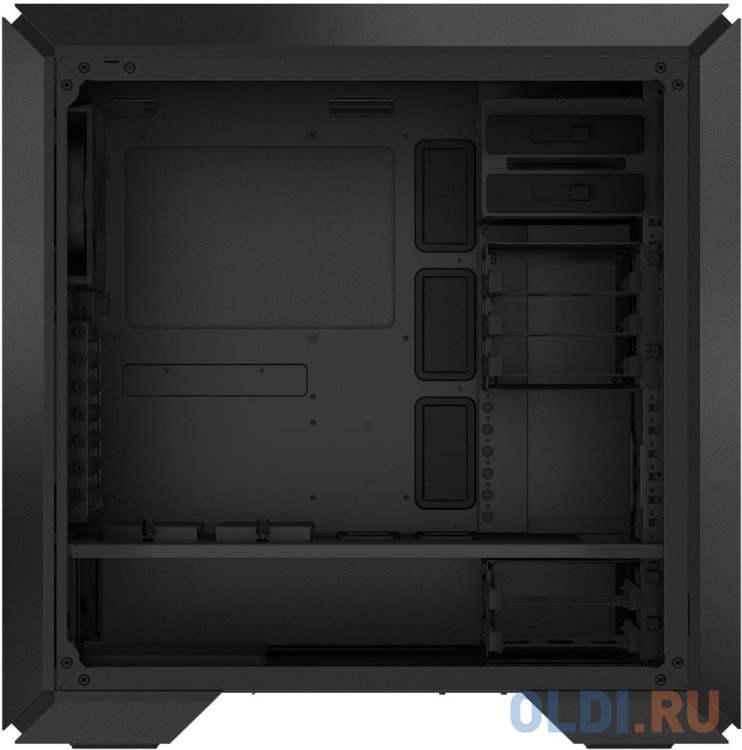
The interior of the MasterCase Pro 6 is divided into two chambers. The bottom chamber is where the PSU mounts, and it also holds a removable tray that can hold two 2.5” or 3.5” drives. Cooler Master recommends that PSU length not exceed 7.9”, or 200 mm. The bottom drive tray can be repositioned or removed by loosening three thumbscrews.
The divider between the top and bottom chambers has two grommeted cable holes for clean cable management. Two metal trays for SSDs mount to this divider in the main chamber, and they can be moved to the back of the motherboard tray, as well. The main chamber provides another three 2.5” or 3.5” drive bays through tool-free sleds mounted in a dedicated cage.
Both the 5.25” bays and 3.5” drive cage can be repositioned or removed using Cooler Master’s FreeForm modular system. Even with the drive bays installed, the case has enough room for graphics cards as long as 11.7” (296 mm), and it can hold cards as long as 16.2” (412 mm) if the drive cage is removed entirely. This case can support ATX, Micro-ATX, and Mini-ITX motherboards with a maximum CPU cooler height of 190mm.
After the left side panel was removed for the first time, I noticed a decent gap in between the thumbscrew and its respective hole, about .375”. The panel doesn’t quite seem to be square with the rest of the case. I also noticed a missing screw in the plastic window on the left side of the case. Other TR case writers have noticed similar fit-and-finish issues with MasterCases in the past, and it’s a little disconcerting that CM still hasn’t nailed down these problems. This is a $160 case, so it should be free of these minor issues.
The build
I found all of the MasterCase’s thumbscrews to be too tight from the factory, so I needed a screwdriver to loosen them. That wasn’t that big of a deal, but it was mildly annoying for a system that’s ostensibly tool-free. A stubby screwdriver will be needed to remove the bottom 3.5” drive cage. That being said, there is plenty of room in between the PSU and the drive cage, The thumbscrews are all captive in the modular components they hold in place. That sounds great in theory, but I found that the screws bind up in their brackets quite often.
The modular 3.5” drive cage is nice, as you can move the cage up or down on the peg area at the front of the case—all the way up, even, if you remove the 5.25” cage.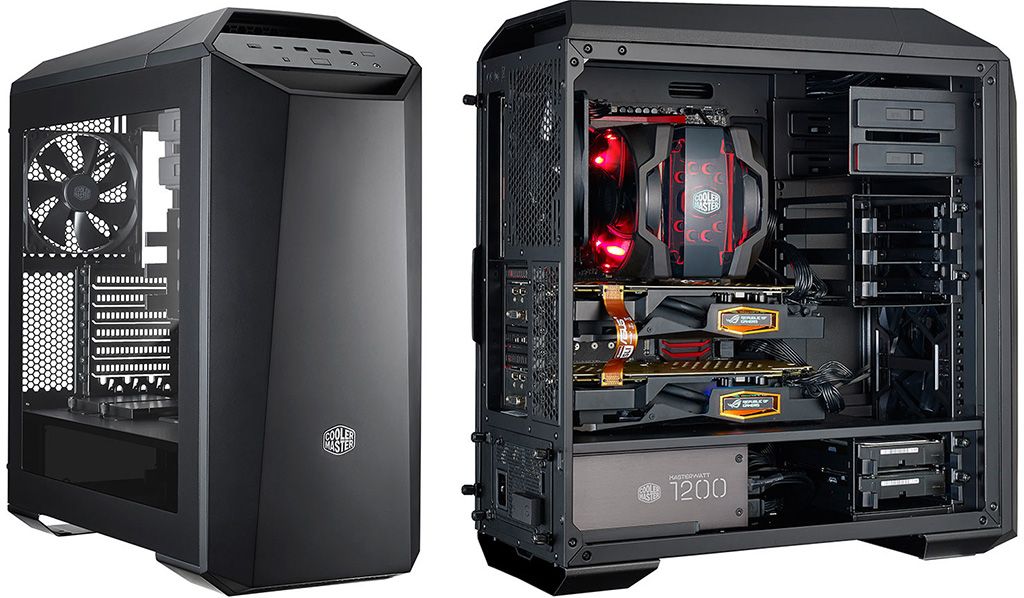 I had enough room for the graphics card prior to removing or adjusting the cage. Cooler Master’s modular system means builders can install more drive cages down the line for extra capacity, should they need it.
Installing the standoffs for my ATX motherboard was an easy task, thanks to the imprinted labels next to each hole and a quick look at the included instructions. The motherboard was easy to slide in and had plenty of clearance. The built-in wiring easily reached the headers on my motherboard, except for that of the front two fans. Only one of the fans had lengthy enough wiring to reach the motherboard headers.
Cooler Master did provide adapters to connect the fans to four-pin Molex plugs on the PSU, but a three-pin extension or two would have been preferable. Otherwise, I had no problems routing my cables and keeping them organized.
To finish off the build, I grabbed Cooler Master’s MasterLiquid 120mm liquid cooler and tried mounting it in a push-pull configuration on the radiator mount on the top of the case. Because of the tight clearances between the top bracket and motherboard, though, there was only room for one fan on the radiator. There was no way to add the “pull” fan on the other side, as it ran into the motherboard. Ultimately, I opted to replace the rear 140-mm fan with the liquid-cooling radiator instead.
While I was building the system, I found the rear plastic bezel to be a small hassle to remove every time I needed to open the side panel, as it covered the thumbscrews and all the cables plugged into the back of the computer. The hinged front plastic panel looks good, but I feel like having to swing it away to gain access to the 5.25” bays could be frustrating if you need access to those bays a lot. Once it’s built and running, though, this case does look good.
Our testing methods
Here are the specifications of our test system:
| Processor | Intel Core i7-6700K |
| Motherboard | ASRock Z170 Extreme7+ |
| Memory | 16GB (2x8GB) G.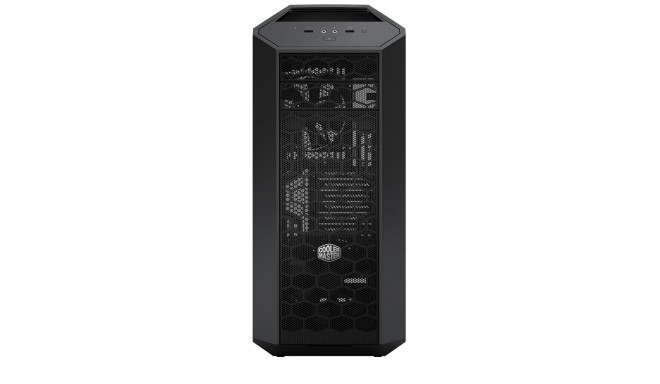 Skill Trident Z DDR4-3000 Skill Trident Z DDR4-3000 |
| Graphics card | Sapphire Radeon R9 380X |
| Storage | OCZ Vector 180 480GB SSD
WD Black 1TB HDD |
| Power supply | Cooler Master V550 |
| CPU cooler | Cooler Master MasterLiquid 120 |
| OS | Windows 10 Pro |
Our thanks to Intel, ASRock, G.Skill, Gigabyte, Kingston, WD, and Cooler Master for their contributions to our test system. Our thanks to Cooler Master for providing the case we’re testing today, as well.
Our case-testing cycle consists of the following phases:
- 10 minutes idling at the Windows 10 desktop
- 10 minutes running the Prime95 CPU torture test
- 10 minutes running the Prime95 CPU torture test and the Unigine Heaven GPU torture test
- 10 minutes idling at the Windows 10 desktop
Cooling performance
Here are the results of our cooling tests, plotted over time:
And here are some minimum and maximum temperatures from each testing phase:
Let’s talk temps. Testing temperatures at idle with and without the vents open showed little difference. In fact, the vents seemed to make cooling performance slightly worse overall. I tested the case twice to ensure this data was not a fluke. When idling, it seems to be warmer with the vents open. Under full load, this case succeeded on keeping the components below any dangerous or damaging levels.
Our load tests show how opening the vents strangely increase temperatures, but only slightly. The difference in performance between opening the vents and closing them would probably go unnoticed unless you run a temperature log like we do. Although the idea behind the vents is interesting, they ultimately don’t have a meaningful effect on performance with our setup.
Noise levels
With my test system at idle, the noise emitting from the case was acceptable with the vents open as well as closed. At full load, i was still in my comfort range. The vents being open or closed, didn’t seem to make much of a difference in the sound levels I perceived at any point through the tests. I would describe the noise character of the case as a smooth hum at idle as well as under load. When the fans kick into high gear under load, you can hear the increased noise levels, but I didn’t feel it was prominent enough to annoy or distract the user. The MasterCase Pro 6 should serve well as a quiet host for a gaming rig.
Conclusions
Above all, Cooler Master’s MasterCase Pro 6 is about clean and simple design. I like the mixture of gaming- and business-friendly style this case offers, and its solid steel construction is reassuringly hefty for its $160 price tag.
The pop-out top and front vents on this MasterCase are an interesting idea for giving the builder more control over cooling and noise, but the system doesn’t deliver the results you would expect from less-obstructed airflow. Instead, we found that popping out the top and front panels actually makes performance slightly worse. Leaving the panels closed both lets the case cool better and maintains its clean lines.
My impression of the MasterCase Pro 6 was marred a bit by some oversights and minor annoyances. For example, the fan cables for the two included 140-mm fans were too short to easily reach our test motherboard’s fan headers. The left-side panel was strangely out of square on our review unit, and a missing screw from that panel suggests either shipping damage or poor quality control could be to blame. Either way, these issues shouldn’t make their way into a $160 case.
Those minor annoyances aside, the MasterCase Pro 6 is a flexible and easy-to-use enclosure. I found the FreeForm system’s modular abilities useful, and its component parts are easy to move around once you loosen the thumb screws for the first time. Cooler Master now offers a wide range of accessories to change up the functionality and style of the case, as well.
The MasterCase Pro 6 carries a $30 premium over the similarly-outfitted but more open MasterCase Pro 5. Given the functional similarity of this case to the Pro 5, you’ll need to really like the look of the Pro 6-specific top and front panels to make the step up worth it. Presuming its design clicks for you, though, the Pro 6 backs up its unique looks with a tried-and-true modular design and fine performance.
Cooler Master MasterCase Pro 6 Review
Ryan Leiserowitz
May 8, 2017
Cases, Hardware, Reviews & Articles
Leave a comment
Introduction
In a sea of gaming PC cases, there are very few that pull the sleek, minimalistic look that many have come to love. I think for me it all started back with the Voodoo Omen that I really started to like cases that were simple, yet did an amazing job housing a powerful system. It seems like some at Cooler Master have the same affinity for a simple design integrated with some forward thinking internal design options. Cooler Master’s FreeForm™ modular system is aimed at giving users a new level of flexibility when building their systems. We will see just what the MasterCase has to offer in this review.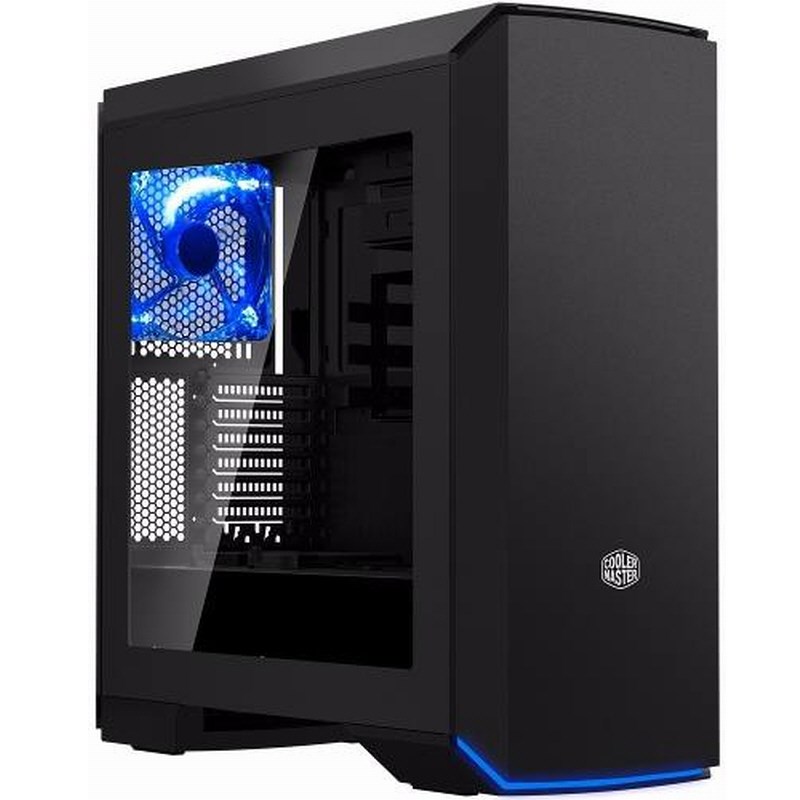
Main Features
These are the main features of the MasterCase Pro 6 that Cooler Master is trying to highlight in their materials for the case:
- FreeForm™ Modular System – Easily customize, adjust, and upgrade your case, inside and out. The majority of the case is modular and really makes it great to not have items you don’t need from cluttering up your case.
- Subtle and Sleek – Smooth, flush panels and a large side window will complement softer and more refined home, gaming and office setups. The design really will make this case much less obnoxious in your home than a lot of the other gaming case designs.
- Discreet Air Vents: Thin vents on four corners the of the case provide ventilation and a soft LED glow is integrated at the bottom of the front panel. Pop the top and front panels up slightly for even more cooling options. These panels sure work well making the case look great while giving the case a slightly more interesting look when popped out.
- Flush I/O – USB and audio ports are hidden by a cover that blends seamlessly with the top panel. Clip-and-Click Panel – Our unique panel for drive cage adjustment comes straight from our FreeForm™ technology. This helps to really stealth the case and really pull the look together.
- Versatile Liquid Cooling – Water cooling bracket allows 297mm radiator space on top or shift the bottom HDD cage for front installation. The top bracket makes for installing a radiator a much easier and simplified process.
- Layout Freedom: Create an internal layout that follows your personality and preferences with a highly adjustable frame and easily removable parts. Rearrange the case to suit your needs and excess cages can be removed easily.
- Dual Partition Chamber – a partition panel isolates the power supply and cables for clean management. The inclusion of a tinted panel on the window gives you an option to hide this area giving you a much cleaner look.

- Slip-and-Clip SSDs – Two pockets with four mounting positions – behind the motherboard tray and on top of the partition. Installing 2.5″ SSDs or HDDs fast and in a way that looks great.
MasterCase Pro 6 Specifications
Specifications from Cooler Master on the MasterCase Pro 6 models.
The Case
The windowed side panel comes with a protective sheet on the window straight out of the box. Also, you can see that the rear shroud from the side makes it look uniform with the front.
The Flush I/O is another feature of the case and it is a cover for the front(top) I/O. It is firmly held in place when closed with magnets and the hinge is a nice rubber flap that allows you to flip it back like this.
The front panel latches with hooks on the bottom so that you can access the top so if you have a disc drive you can load it easily.
The panels attach to these spring-loaded magnets that hook up with screws in the panels. They have two positions, closed and open, which you will see further down.
The removable tray makes it a breeze to attach the 240mm radiator of our AIO water cooler. I was able to remove the assembly and attach the fans to the radiator and bracket first. After that, I just screwed it back in place and attached the block to the CPU. This by far was the easiest install of a radiator I have ever done.
The interior of the case is spacious and the drive trays are all removable; there are thumbscrews throughout the case. I did find that they were usually a bit too tight at the start so you may need to use a screwdriver to loosen them at first.
The rear fan is either a blue or red 140mm LED fan depending on what model you choose to get. As you can see, the rear of the case is made for getting as much airflow as possible.
Here we can see through the mesh to the dual front 140mm fans (non-LED) and there is room for 3x 140mm fans if you choose not to use any external drive bays. The fans are very quiet while running at full speed and provide more than enough airflow to keep the system nice and cool
The handle looking part is definitely not to be used as a handle as it is far too weak and is there for making it look nice, as well as ventilation with those panels that will be over it.
The bottom air filter is easily removed from the rear and will be handy in helping to keep your PSU clean and hair free if you have pets.
The Build
The build process, in this case, was very easy and with all the cable routing options I was able to make everything look relatively nice. Being able to remove the drive bays sure makes it look much nicer, and the 2.5″ drive trays really make for the SSDs to be nicely displayed. I will recommend that if using these you probably want to go for power extensions over the cable from the PSU so you can hide the cables easier.
The side window has a dark strip that covers the PSU chamber and really makes the build look nice and clean when viewed from the side. This was a happy surprise as I was spending a bit of time trying to make the lower half look nice. This is a picture of the panels “closed”, as you can see that they are close to the case and in the next picture they are in the “open” position.
Here we see that the front and top panels are in the open position and can give the case a bit of a different look.Hopefully, it is also providing a bit more room for the air to flow.
The plate for the PSU comes off so users can slide in the PSU onto these rubber dampened slide rails. I found it much easier to not try to attach the bracket to the PSU and install it but rather install the PSU and then the bracket after it is already in.
CONCLUSION
This is by far the best case I have built a PC in so far, and I really am in love with the minimalistic and sleek looks of this case, which we found to be very pleasing. I really enjoyed how I was able to easily install the radiator via the top bracket that really made it go much faster than I expected. The materials used in the case seemed to be very good quality, and the finish on the exterior pieces didn’t pick up fingerprints too easily. The overall fit and finish are very good, though like I mentioned earlier, the thumb screws need to be loosened up with a screwdriver first.
Overall, this is an excellent choice for someone who is wanting a quiet case that has plenty of cooling options for their high-performance parts. The configuration options for this case are quite vast and Cooler Master has some extra accessories for the MasterCase series to truly make it your own. This would be an ideal case to get a bit more adventurous with modding if you are looking to try your hand at it.
I really think that a version of this case without a window would appeal to many people including myself, so I will have my fingers crossed for that version. With this case, I think it would be much more appealing with a tempered glass window standard instead of it being an accessory. I personally am really looking forward to seeing how it looks with the vertical GPU holder to put it on display. This is a really great offering and that could be addressed with new models.
The MSRP on the Cooler Master MasterCase Pro is $175, though we have yet to see what actual retail pricing will be.
For being a beautiful case with a modular-centric design focus and being a pleasure to work with the Master Case has easily earned it’s Golden Bear Award.
| Cooler Master MasterCase Pro 6 Pros |
Cooler Master MasterCase Pro 6 Cons |
|
|
Tags Case Cooler Master FreeForm LED MasterCase modular PC
Previous Corsair Glaive RGB Gaming Mouse Review
Next Daily Roundup: 2017-05-08
Check Also
One advantage a stationary computer has over a laptop is that you can usually keep …
Valve is an interesting company that seems to try to be a lot of things at the same time.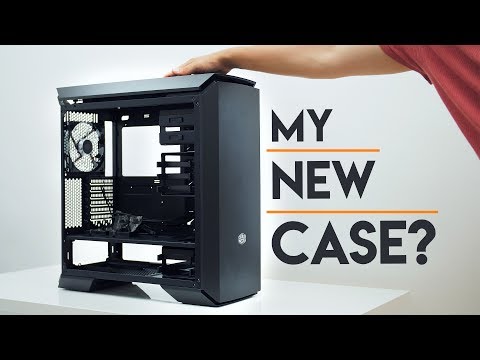 Games company, software hub/store and hardware company. Valve is all of these.
When it comes to hardware the company has had mixed success. I think many of us remember the Steam Machines. These compact computers running SteamOS, a Linux based OS, were supposed to make Windows PC’s obsolete for gaming. They didn’t succeed. Valve also released a specific controller, the Steam Controller, which also did not exactly set the world on fire.
In hindsight though both these products have paved the way for the product I am testing today, the Steam Deck, Valves attempt to compete with the Nintendo Switch in the handheld market.
Cooler Master MasterCase Pro 6 Review
Written by
Matthew Lambert
February 15, 2017 | 13:53
Tags: #atx #mid-tower
Companies: #cooler-master
1 — Cooler Master MasterCase Pro 6 Review2 — Cooler Master MasterCase Pro 6 Review — Interior3 — Cooler Master MasterCase Pro 6 Review — Cooling Performance4 — Cooler Master MasterCase Pro 6 Review — Performance Analysis and Conclusion
Cooler Master MasterCase Pro 6 Review
Manufacturer: Cooler Master
UK price (as reviewed):£132.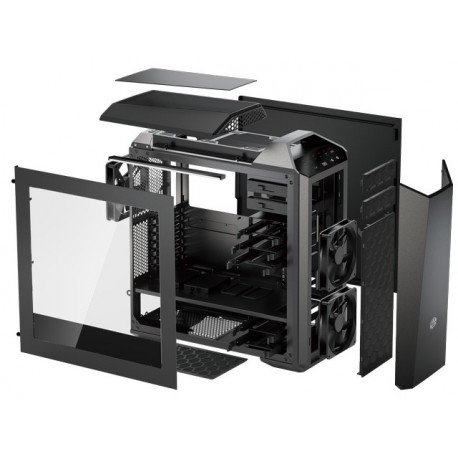 29 (inc VAT)
US price (as reviewed): Currently unavailable
Cooler Master’s MasterCase series seems to be growing quite rapidly. The newest release, the MasterCase Pro 6, is part of the company’s ATX lineup along with all the various MasterCase 5 editions and is built around the same frame as those cases. However, you are not able to upgrade any of the 5-series cases to the Pro 6 in the way that you can move from a MasterCase 5 to a Pro 5 or Maker 5 simply by buying the right accessories, at least for now, as the 5-series cases would need some external modifications to be compatible with the new panels Cooler Master is using here. That said, the company has confirmed that future 5-series chassis will have these modifications applied, but it has not given a release window for these revised editions. This is also the first and currently only announced case in the 6-series (i.e. no MasterCase 6 or MasterCase Maker 6 so far). It is not completely divorced from Cooler Master’s modular approach to cases, however, as it is compatible with a range of accessories designed for the 5-series, including the tempered glass side panel and all the internal ones.
Click to enlarge
If you’re completely lost by this point, fear not, as from here on in we’ll be looking at this case as a standalone product; we just thought it important to contextualise it amongst the growing MasterCase family of cases and accessories.
The MasterCase Pro 6 is Cooler Master’s attempt at creating a high-end case that doesn’t also come with a traditional gamer look. The smooth outer panels do make for a rather refined and toned down aesthetic, although there’s still a large window and red LEDs on the rear fan and in the bottom-front corner (a blue LED version is also available), so whether or not it’s truly a grown up chassis or suitable for office use is for you to decide.
Click to enlarge
The chassis is very solid, but we were still hoping for a little more from it in terms of build quality. It still uses plastic on the roof and front panel, for example, whereas aluminium (or at least an outer aluminium coating) would have been nicer to see given the price tag.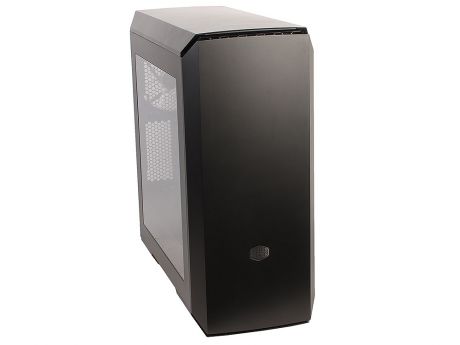 The chassis stands on thick rubber feet, and a full-size carry bag is supplied for transportation, as the smooth panels mean Cooler Master has had to forgo any form of a handle.
Even the I/O panel is hidden in order to maintain the smooth panels. A small tab at the front of the roof lifts out the way whenever you want to use the buttons or ports here, and there are no extra features beyond the usual USB and audio connectivity.
Click to enlarge — The MasterCase Pro 6 with its front and roof panels popped (left) and removed (right)
Solid panels like those here often result in a lack of airflow, but Cooler Master has a couple of ways to combat this. Discreet air vents are positioned in all four corners of the case, so it always has at least some means of airflow. You can also increase the ventilation by “popping” the top and front panels outwards; they’re held in place magnetically, and a small tug on either one will lift the panel a few centimetres away from the case.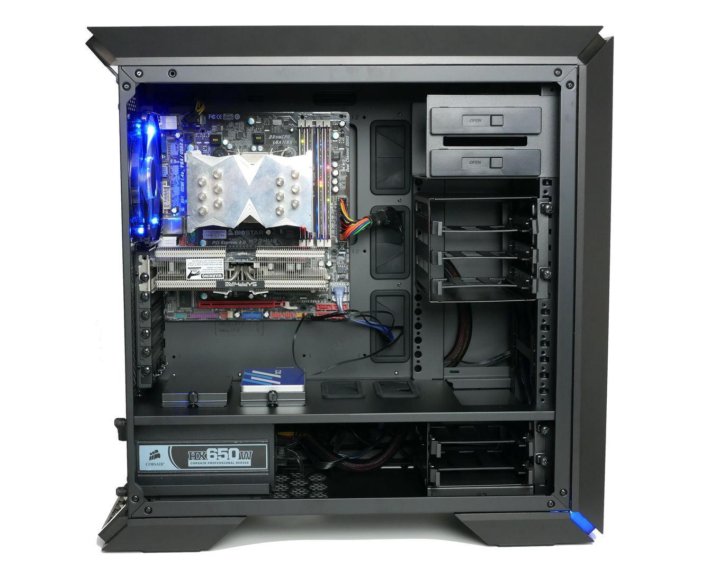 Pulling more firmly releases the panels entirely for access to the fan mounts, and it’s easy to replace the panels once you’re finished – the mechanism is really well designed. Airflow is actually generated by a pair of 140mm front intake fans and a single 140mm rear exhaust.
Click to enlarge
With the front panel removed, we see a large dust filter guarding the front fans and a couple of 5.25in drive bay covers. These are an odd choice for a case with a solid front panel; we imagine they’re something of a hangover from the core chassis this case is based on and can’t see many people using them. The front filter is well designed, clipping in and out of place easily. Meanwhile, removing the roof panel reveals Cooler Master’s fan/radiator bracket secured to the roof with thumbscrews.
Click to enlarge
A quick look around back reveals a couple of noteworthy features.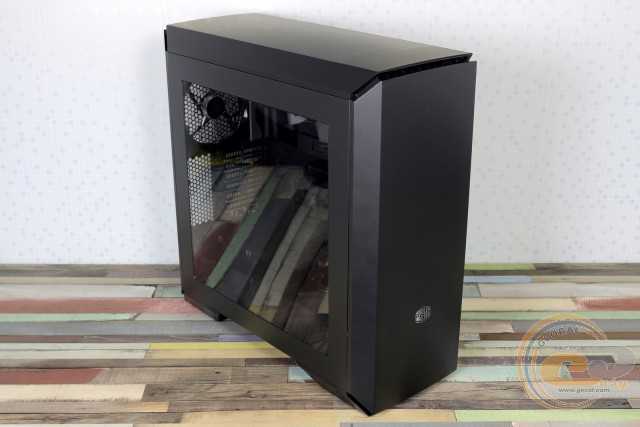 First is the standard PSU dust filter, which again deserves praise for its mechanism – it’s very easy to remove, clean, and replace without having to lift or tilt the case. There’s also an external cable management shroud, although we’re less enamoured by this. The plastic is thin, and consequently it feels cheap. It also blocks access to the PSU filter and the side panel thumbscrews, and honestly we just don’t think it’s that necessary. Still, it’s easy to remove and forget about if you agree.
Specifications
- Dimensions (mm) 235 x 544 x 548 (W x D x H)
- Material Steel, plastic
- Available colours Dark metallic grey (with red LEDs or blue LEDs)
- Weight 11.74kg
- Front panel Power, reset, 2 x USB 3.0, stereo, microphone
- Drive bays 2 x external 5.25in, 5 x 3.5in/2.5in, 2 x 2.5in
- Form factor(s) ATX, micro-ATX, mini-ITX
- Cooling 2 x 140mm/120mm front fan mounts or 3 x 140mm/120mm front fan mounts without ODD cage (2 x 140mm fans included), 1 x 140mm/120mm rear fan mount (1 x 140mm fan included), 2 x 140mm/120mm roof fan mounts (fans not included)
- CPU cooler clearance 190mm
- Maximum graphics card length 296mm (412mm without HDD cage)
- Extras Removable dust filters, front LEDs, FreeForm modular system
1 — Cooler Master MasterCase Pro 6 Review2 — Cooler Master MasterCase Pro 6 Review — Interior3 — Cooler Master MasterCase Pro 6 Review — Cooling Performance4 — Cooler Master MasterCase Pro 6 Review — Performance Analysis and Conclusion
Cooler Master MasterCase Pro 6 Review (Page 4 of 4)
Page 4 — Installation and Conclusion
The computer building process was extremely enjoyable with the MasterCase Pro 6.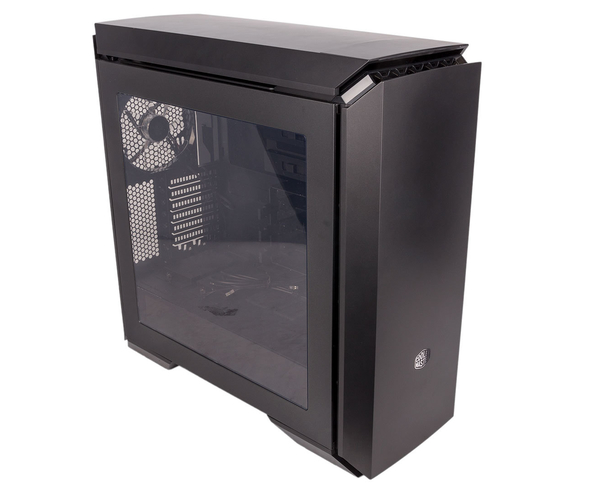 It was really easy to work with, since everything was laid out in an organized manner. I first installed the power supply into the PSU chamber. The power supply used for this computer is the SilverStone Nightjar NJ520 520W, which features a fanless design. The pre-installed two 140mm fans in the case provide enough airflow for the PSU. For CPU cooling, a Scythe Mugen 5 cooler was mounted on my Gigabyte GA-h270-D3HP motherboard. The position of the motherboard tray opening of the MasterCase Pro 6 matches perfectly for the CPU position, therefore the heatsink can be installed without any trouble. If you like water coolers such as the NZXT Kraken X52, it can be mounted on the top panel.
Installation of the SSD was fairly easy. First, I just unscrewed the SSD tray using my bare hand to get it detached from the chassis. Then, the OCZ Trion 150 480GB was screwed onto the tray. As the final step, putting the SSD tray back in was also very easy. The thumbscrew could easily secure it into position. The rest of the installation process was really smooth. Since I did not have tons of 3.5″ drives, the HDD brackets became very roomy. The cable management Velcro straps on the motherboard tray were very handy. All the cables can be fitted into the Velcro straps in my case. The MasterCase Pro 6 is quite friendly to users that may not have a ton of experience in computer building.
After everything has been installed properly, it is time to press the power switch. As you can see from the above photo, the included LED fan and the ambient light are blue. As for the LED strip, it is not from Cooler Master, but rather SilverStone, and it will be introduced in a future review. Since the MasterCase Pro 6 has a windowed side panel, it will not make any sense to not use interior lighting inside, as you can see in our photo above. If you do not like blue, you can buy a red edition from Cooler Master as well.
I am the kind of person who really cares about the noise level of my computer. In this build, I had three fans running in the case. As it turned out, my computer was really quiet, thanks in part to the sound insulation material applied to the case and the high quality fans. On the scale of 0 to 10, where 0 is totally silent and 10 is a jet taking off, I would rate my system at 3.5/10 regarding noise emissions. If you want to further bring down the noise level, fans with rubberized pads such as the Cooler Master MasterFan Pro series can be used.
——————————————
Coming back to the question I have proposed in the introduction of this review, how do I evaluate the uniqueness, practicality, and elegance of the MasterCase Pro 6? My short answer is they are all well-evaluated. The building process was generally smooth, and cable management was especially straightforward thanks to the large gap between the motherboard tray and the side panel. After a few days of using the computer I built out of the MasterCase Pro 6, I found myself really enjoying its unique design.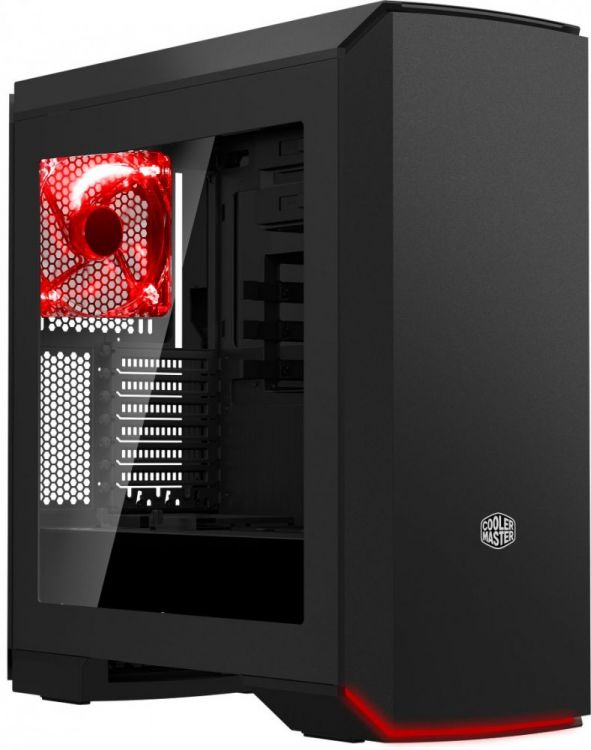 All in all, the design of the MasterCase Pro 6 inherits the clean and smooth design principles of the MasterCase 5. Thanks to the poppable front and top cover panels and the removable back cover, everything that may negatively affect the cleanness of the case is well hidden under those cover panels. Meanwhile, the poppable feature supplies great additional ventilation. The interior design of MasterCase Pro 6 is also pretty good. All of the components you need for building a computer can be nicely accommodated and kept cool. Tons of modular features are also provided for easy computer case upgrading. The paint job quality of the interior is great. However, the MasterCase Pro 6 still has room to improve. Here, I have two suggestions. One suggestion is to retain the MasterCase 5’s handles in the MasterCase Pro 6, or at least make them available as FreeForm accessories, which would be helpful when moving such heavy case. The other suggestion is to provide an optional translucent front cover panel, such that the LED fans can be used on the front panel of MasterCase Pro 6.
 To conclude this review, I would like to say the MasterCase Pro 6 is definitely worth considering if you need a clean and modular mid-tower with wide variety of FreeForm accessory choices. The MSRP of the MasterCase Pro 6 is $175 USD. I would not say it is a bargain, especially with all the plastic that has been used, but think about the high potential to further upgrade the case through FreeForm accessories, you can save a lot by just improving your computer case instead of buying new ones.
Cooler Master provided this product to APH Networks for the purpose of evaluation.
APH:Renewal Award | APH Review Focus Summary:
8/10 means Definitely a very good product with drawbacks that are not likely going to matter to the end user.
7/10 means Great product with many advantages and certain insignificant drawbacks; but should be considered before purchasing.
— Final APH Numeric Rating is 7.7/10
Please note that the APH Numeric Rating system is based off our proprietary guidelines in the Review Focus, and should not be compared to other sites.
The MasterCase Pro 6 is an excellent case if you need a clean and modular mid-tower with wide variety of FreeForm accessory choices.
Do you have any comments or questions about the MasterCase Pro 6? Drop by our Forums. Registration is free, and it only takes a minute!
Page Index
1. Introduction, Packaging, Specifications
2. Physical Look — Outside
3. Physical Look — Inside
4. Installation and Conclusion
Cooler Master MasterCase Pro 6 Review
A Closer Look at the Cooler Master MasterCase Pro 6 »
Despite the higher number in the name, the MasterCase Pro 6 sits behind the MasterCase Maker 5t since the Maker line is Cooler Master’s current flagship model with the MasterCase right in the middle and the MasterBox bringing up the rear. The MasterCase Pro 6 however, brings some new features to the table that were not in the MasterCase Pro 5, namely a magnetic top cover and front door panel that is a lot flatter but is more conducively flexible to airflow than previous model designs without an immediately obvious peppering of ventilation holes on its surface. Continuing their “Make it Yours” ethos, Cooler Master’s MasterCase Pro 6 has an ingenious way of using magnets to move these panels into place while making it easy to move and remove for modification purposes.
Cooler Master has put much thought on the MasterCase Pro 6 packaging as it can be conveniently brought out of the box with its cloth cover bag. Users simply need to pull it out via the bag handles. Inside the bag, the case itself is covered in more foam covering in the form of foam pads on each side and a foam sheet wrap. The pads are tied in place so as not to come off at all during handling. This is probably the most comprehensively packed cases I have seen and I have reviewed hundreds of cases over the years.
While the documentation sheet is right on top of the foam package as the user opens the box, the accessories are tucked inside the case itself in one of the drive trays. These accessory pieces are inside a cardboard box unlike the MasterCase Maker 5t which has a magnetic metal housing for its accessories.
Each pack contains the following:
Advertisement
- 1x side-panel lock bracket
- 1x #6 32*5 screw for lock bracket
- 4x #6 32-29 screw for front fans
- 1x stand-off socket adapter
- 7x motherboard tray stand-off
- 5x #6 32*10 HDD cage screws
- 2x #6 32*6 HDD cage screws
- 15x #6 32*5 PSU/Fan Cage/Motherboard screws
- 10x cable management zip ties
- 4x M3*5 ODD screws
- 1x fan cage bracket
- 8x Ø5*10 top fan screws
- 20x M3*4 2.5” SSD screws
- 3x 3-pin to 4-pin cable adapters
- 2x Velcro cable management strap
- 4x m3*6 screws for fan controller bracket
- 4x Ø3*6 screws for fan controller bracket
- 4x Ø3*7 screws for fan controller bracket
- 2x 5.25” bridging connector for fan controller bracket
Other accessories pre-installed inside the case:
- 3x 140mm 3-pin fan
- 1x CM StormGuard theft-prevention security tool
Specifications
| Product Name | MasterCase Pro 6 | |
| Model Number | Blue LED version: MCY-C6P2-KW5N Red LED version: MCY-C6P2-KW5N-01 |
|
| Available Color | Dark metallic grey exterior with black interior | |
| Materials | Steel body, Plastic panels | |
| Dimensions (LxWxH) | 544 x 235 x 548 mm | |
| Net Weight | 11.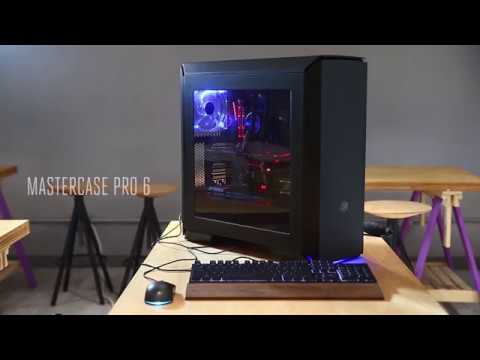 74kg 74kg |
|
| Motherboard Support | ATX, Micro-ATX, Mini-ITX | |
| Expansion Slots | 7 | |
| Drive Bays | 5.25″ | 2 |
| 3.5″ | 5 | |
| 2.5″ | 2 | |
| I/O Panel | USB 3.0 x 2 Audio In & Out |
|
| Pre-installed Fan(s) | Front | 140mm x 2 |
| Rear | 140mm x 1 (blue/red LED fan) | |
| Fan Support | Front | 120/140mm x 3 |
| Rear | 120/140mm x 1 | |
| Top | 120/140mm x 2 | |
| Liquid Cooling Support | Front | 120mm / 280mm |
| Rear | 120mm / 140mm | |
| Top | 240mm / 280mm (maximum 297mm radiator length) | |
| Clearance | CPU Cooler | 190mm / 7.48″ |
| PSU | 200mm / 7. 87″ 87″ |
|
| Graphics Card | 296mm / 11.7″ (with 3.5″ HDD cage) 412mm / 16.22″ (w/o 3.5″ HDD cage) |
|
| Cable Routing | Behind Motherboard Tray | 25-35mm |
| Dust Filters | Front, bottom | |
| Power Supply | Bottom mount, ATX | |
| Extra features | Side Window Panel Front bottom Blue or Red LED Strip x 1 |
|
A Closer Look at the Cooler Master MasterCase Pro 6 »
1 2 3 4Next page
Related Articles
Cooler Master MasterCase Pro 6 Review
Introduction
At CES last month, Cooler Master unveiled to the world its line-up of cases for 2017, with the star of the show no doubt being the MasterCase Pro 6. A release date of around late March at the earliest was mooted, but that date has been fast-tracked…and we have one in the flesh, right here to test.
The MasterCase 5 series was critically acclaimed for its huge range of customisation options thanks to its FreeForm Modular System feature, allowing the user to tweak the case with a wealth of optional parts that could be located in numerous locations throughout the chassis.
With the launch of the MasterCase Pro 6, Cooler Master are promising that many of the FreeForm accessories already on the market are compatible, and therefore any previous purchases won’t go to waste and can be slotted straight into the Pro 6.
Specifications
| Product Name | MasterCase Pro 6 | |
| Model Number | Blue LED version: MCY-C6P2-KW5N Red LED version: MCY-C6P2-KW5N-01 |
|
| Available Color | Dark metallic grey exterior with black interior | |
| Materials | Steel body, Plastic panels | |
| Dimensions (LxWxH) | 544 x 235 x 548mm | |
| Net Weight | 11.74 Kg | |
| Motherboard Support | ATX, Micro-ATX, Mini-ITX | |
| Expansion Slots | 7 | |
| Drive Bays | 5. 25″ 25″ |
2 |
| Combo 3.5″ / 2.5″ | 5 | |
| SSD | 2 | |
| Electronics | I/O Panel | USB 3.0 x 2 Audio in / out |
| Pre-installed Fan(s) | Front | 140mm x 2 |
| Rear | 140mm Blue / Red LED Fan x 1 | |
| Fan Support | Front | 120mm x 3 / 140mm x 3 |
| Rear | 120mm x 1 / 140mm x 1 | |
| Top | 120mm x 2 / 140mm x 2 | |
| Liquid Cooling Support | Front | 240 / 280mm |
| Rear | 120 / 140mm | |
| Top | 240mm / 280mm (max. 297mm radiator length) | |
| Clearance | CPU Cooler | 190mm / 7.48″ |
| PSU | 200mm / 7.87″ | |
| Graphics Card | 412mm / 16.22″ (without 3.5″ HDD cage) 296mm / 11.7″ (with 3.5″ HDD cage) |
|
| Cable Routing | Behind Motherboard Tray | 25mm – 35mm |
| Dust Filters | Front, bottom | |
| Power Supply | Bottom mount, ATX | |
| Extra features | Side Window Panel Front bottom Blue or Red LED Strip x 1 |
|
Closer Look – Exterior
Right from the off, the Cooler Master MasterCase Pro 6 promises to be something a little different. A full-colour outer box again protects the chassis, which is a nice change from the usual bland, brown cardboard with black text. Upon opening the box, we see that the unusual approach continues, and removing the chassis is achieved by lifting the whole unit out with the help of a huge canvas bag. Inside this, the MasterCase Pro 6 is clad in very substantial gray polystyrene, and then in a further bag.
At first glance, the Pro 6 is a little more reserved in appearance than its predecessor. Gone is the angular approach to the roof and front I/O panel, and we are greeted with something a lot sleeker in appearance.
Dominating the front side of the Pro 6 is a huge acrylic side panel, which I have to be honest and say was a little bit of a let-down, as I had heard that the Pro 6 would ship with tempered glass as standard. However, the window is huge, and features the darker glazed lower portion, as per the Pro 5, so I’m assuming it’s the same panel.
The front panel is completely free of any detail, save for an embossed Cooler Master badge affixed towards the base. The sleek, angular dimensions do give the MasterCase Pro 6 a very dominating look though I have to say, and I really like its clean lines. The rear side panel is even more sparse of features and is just a solid steel surface.
Around the back, we find the usual rear access features, but the MasterCase Pro 6 features a removable magnetic cover, helping to hide away the cables from the rear I/O whilst also adding to the cases symmetrical look.
Further enhancing the Pro 6 sleek look is the roof panel. Again, it appears to be devoid of any features, with the front I/O panel hidden away behind a magnetically latched flap. Once lifted, access is gained to an illuminated power button, audio & mic jacks positioned centrally, flanked by twin USB 3.0 ports, and finally, HDD led and reset button at the outer edges. All fairly standard, but for a premium case I would have expected four USB ports if I’m being honest.
Flipping the case over to take a look at the underside is no mean feat, as the MasterCase Pro 6 weighs in at 11. 6 kilos, and due to its dimensions, it’s not easy to man handle.
Looking at the underside we can see that the whole case is lifted off the ground with the help of two huge feet, which span the whole width of the case. Wedged under the rear foot is a fairly substantial PSU filter, which is removed backward from the rear of the case.
Closer Look – Interior
Removing the front and roof panels is a two stage process. Thanks to spring loaded, magnetic mounts, each of these panels can be raised up, in order to increase airflow if your system is getting toasty. Whilst this may well increase noise leakage from the system, this is an ingenious feature. Once in the raised position, the panels then pop off from the magnetic mounting points.
The front panel swings forward on extended hooks to the base of the panel, prior to full removal. This allows access to the two 5.25” drive bays located at the front.
Upon full removal of the front panel, we gain access to the front dust filter, and behind this the two 140mm fans that come pre-installed.
Removing the side panels is also blissfully straight forward. Remove the captive thumb screws at the rear (all cases should have this feature), and the side panel slides effortlessly backward a couple of inches. Thanks to the rails the side panels sit on, they open slightly but stay in place before you lift them out. This works the same as on the MasterCase 5, and I’m glad that Cooler Master hasn’t changed this feature, as it just worked perfectly fine as it is.
With the side panel removed, we get our first look at the interior main chamber. To the right-hand side, you get a dual 5.25” drive bay cage and a tool-less HDD caddy with space for 3 drives. In the basement, we can see a further HDD caddy for a further two 3.5” hard drives. To the left we have a 140mm pre-installed LED exhaust fan, and two SSD mounts sitting on top of the PSU chamber divider.
Spinning the MasterCase Pro 6 around to take a look at the rear of the motherboard tray, and I have high hopes for some excellent cable management when it’s time for the build. The rear is extremely uncluttered, with the front I/O cables sat within a deep channel and retained by pre-installed cable ties. With the bottom drive caddy pushed all the way to the front of the chassis, the amount of space available for the PSU looks cavernous.
Removing the roof panel is identical as the front panel, as it’s held using the same spring-loaded, magnetic catches. Once removed, we have access to the pre-installed fan/radiator mounting bracket that sits above the main chassis frame. This bracket is available as an optional extra, so it’s nice to see that you get this included in the price of the MasterCase Pro 6. Held in place with thumbscrews, the mount just lifts off when installing your fans and/or radiator.
With all the outer panels removed, it’s clear to see that the possibilities for customisation are endless! Throughout the skeleton of the MasterCase Pro 6, there are various thumb screw mounting points, allowing you to re-locate the modules included, or even adding more to suit your requirements.
Closer Look – The Build
- CPU – Intel Core i7 6700k
- Motherboard – Asus ROG Maximus VIII Hero Alpha
- Cooler – Fractal Design Kelvin S24 CPU Water Cooler
- GPU – Asus ROG Radeon RX460 Strix
- RAM – Crucial Ballistix Elite 16GB DDR4 3000MHz
- SSD – Crucial MX300 525GB
- PSU – BeQuiet Dark Power Pro 11 1000w
Not that I had any doubts anyway, but the Cooler Master MasterCase Pro 6 was an absolute dream to build in. For the purposes of this test build, I decided to remove the optical drive and hard drive caddies that were pre-installed into the main chamber. This replicates how I would set up the interior of my rig, as I prefer the wide open expanse of the main chamber, rather than clutter it with cages I would have no use for.
Fitting the all-in-one CPU cooler into the roof mounted bracket couldn’t have been simpler, as I could just remove it whilst I screwed down the motherboard, then re-fit it afterwards.
The space afforded to you in the basement for the excess PSU cables is extremely generous, and even without taking any real time to make the cable look tidy, they all tucked inside without any issue. In fact, the same applies to the cables management behind the motherboard. Every access point just seemed to be in a perfect position when routing the cables through to the front side, and thanks to the deep channel, fixing the cables in a neat fashion was child’s play.
The SSD brackets that come situated in the main chamber, on top of the PSU divider, can also be re-located around the back of the motherboard tray if you so wish. However, I decided to leave them where they were, as the access points for the SATA cables were again perfectly positioned, and gave a very tidy look.
The glow from the front mounted LED strip at the base of the MasterCase Pro 6 is quite subtle once all the panels were re-fitted, and the same can be said for the LED’s on the exhaust fan also.
The final act of the build was to re-fit the windowed side panel, and proceed to peel off the protective cover from the acrylic side window, which never tires of being perhaps the most satisfying element of the whole project!
Given my job of reviewing a number of PC cases on a regular basis, I can be forgiven for taking some of these test builds for granted. Stepping back and taking a look at the finished MasterCase Pro 6 though, this isn’t one of those occasions…it is an extremely good looking system.
The dimensions of the case are pretty substantial, and it is one of the larger mid-tower cases, but the clean lines and symmetry of design means that it still looks striking, without it being too overbearing.
Conclusion
Let’s get the awards sorted straight away, shall we? It gets the Play3r Platinum Award, as well as the Design Award.
It’s built to a really high standard, using good quality materials, and the level of design that’s gone into it to make it so modular is second to none. To top it off, it looks stunning too. The fact that you can add & remove so many modules to make your MasterCase Pro 6 perfectly bespoke to your needs is quite frankly, genius!
It’s true that the MasterCase Pro 6 shares a lot of the design elements with the Pro 5. If you already have the Pro 5, there’s nothing additionally ground breaking that would probably entice you to upgrade to this…but the Pro 6 looks better, and if you wanted to get into the MasterCase series before, but have yet to buy, then go for the Pro 6.
It also doesn’t cost the earth either. At the time of writing this review, Cooler Master advised that the RRP will be £139.99 here in the UK. Whilst I agree that is still a big chunk of cash, there are quite frankly inferior cases that cost more than that. For what you get bundled already with the Pro 6, at that price I think Cooler Master have a real winner on their hands.
The only downside is that the panels are quite easy to mark up. Whilst the majority of the fingerprints & smudges from handling cleaned off eventually, there is a mark that just won’t budge.
The bright lights of the photography rig do extenuate this to a certain extent, and it will be interesting to see how the MasterCase Pro 6 stands the test of time when in use over an extended period…. but I will find out! That’s because I am so impressed with Cooler Master’s latest offering, that this is going to be the new home of my everyday system.
The exterior look of the MasterCase Pro 6 will be enough for most buyers to pull the trigger on purchasing this, but the flexibility it also offers due to its FreeForm Modular System means you can adapt it whenever your needs change…and that’s the whole point here. Cooler Master was aiming for this… a case where one-size really can fit all, whatever the needs of the buyer. What more could you want?
Well…actually…I want the tempered glass side panel!
Massive thanks to Cooler Master for sending the MasterCase Pro 6 in for review.
-
Performance
-
Design
-
Value
Summary
Pros:
– FreeForm Modular System offers unrivaled flexibility
– New subtle & sleek design looks fantastic
– Adaptive air vents
– High-quality materials
Cons:
– Only 2 front USB headers
– Side panel marked up easily
Sending
User Review
0
(0 votes)
Error 404 — This page does not exist
Unfortunately, the requested page does not exist,
or it has been moved.
The program you need may have a new version.
Use the search form or catalog search.
Home
Featured Products
-
Monitor ACER V206HQLA 19.5-inch black
Rating:
7 796 ₽
More
The Acer V206HQLAb has impressive color reproduction. Dynamic Contrast 100 00
-
yubico Yubikey 5 NFC access control device
Rating:
7,000 RUB
More
YubiKey 5 is a series of compact USB security keys for multi-factor authentication. Two-factor authentication (2FA) adds an extra layer…
-
Home antivirus Antivirus Kaspersky Internet Security
Rating:
1 800 ₽
Choose a license
Kaspersky Internet Security for All Devices is the best solution for protecting any device on Windows, Android and Mac OS platforms from new and known malware threats, fraud and network attacks, including spam.
-
Email clients The Bat!
Rating:
2 400 ₽Benefit 1 680 ₽
from 720 ₽
Choose a license
The Bat! allows you to work with an unlimited number of mailboxes, process and store an unlimited number of letters. The main tasks of the mail program are: maintaining the confidentiality of correspondence, convenience and saving time when working with mail. Two versions of The Bat! are available: Professional and Home.
-
Design KOMPAS-3D v21 Home
Rating:
1 490 ₽
Choose a license
KOMPAS-3D v21 Home is a modeling system for creating three-dimensional models and drawings, which is convenient to use for both learning and creativity.
-
Home antivirus Antivirus Kaspersky Total Security
Rating:
1 999 ₽
Choose a license
Kaspersky Total Security for All Devices is a solution for maximum protection of data stored electronically on Windows, Mac OS X, Android and iOS devices.
-
Home antivirus Dr.Web Security Space. License renewal
Rating:
1 510 ₽
Choose a license
Renewing the license for Dr.Web Security Space is now easy! To purchase a renewal license, you do not need a license agreement form and a previous key file.
The verification will be performed automatically after registration of the renewal serial number you purchased.
-
Microsoft Office Microsoft 365 Family Subscription
Rating:
9 500 ₽Benefit 3 000 ₽
6 501 ₽
Choose a license
Up to 6 users
12 month subscription
Premium Office apps for PC, Mac and mobile
Cloud storage OneDrive 1TB
Extended Security
Applications: Word, Excel, PowerPoint, Outlook and OneNote -
Other office software Master PDF Editor
Rating:
from 2 100 ₽
Choose a license
A complete PDF document editor that includes the functions of creating and editing PDF documents; a complete set of content editing tools; tools for viewing and creating comments, including the function of joint commenting; the ability to fill and create interactive forms.
-
Microsoft Office Microsoft 365 Personal Subscription
Rating:
7 900 ₽Benefit 3 000 ₽
4 900 ₽
Choose a license
1 user
12 month subscription
Premium Office apps for PC, Mac and mobile
Cloud storage OneDrive 1TB
Extended Security
Applications: Word, Excel, PowerPoint, Outlook and OneNote -
Home antivirus Kaspersky Anti-Virus
Rating:
1 320 ₽
Choose a license
Kaspersky Anti-Virus is a solution for basic computer protection against the main types of Internet threats.
-
System setup Kerish Doctor 2022
Rating:
789 ₽Benefit 399 ₽
from 390 ₽
Choose a license
Complete solution for computer care. The application prevents Windows crashes in real time, fixes system registry errors, cleans the system of digital «garbage» and increases its performance.
-
System setup Advanced SystemCare PRO
Rating:
3 200 ₽Benefit 2 400 ₽
800 RUB
Choose a license
Universal, simple and easy to use program for comprehensive computer maintenance.
In one click, it speeds up your computer and boot, cleans your system and registry, fixes all PC problems, speeds up your Internet connection and improves overall performance. Protection of personal data, protection against spyware and adware and much more.
-
Access Control RoboForm
Rating:
from 2 150 ₽
Choose a license
Password Manager and Web Form Filler that fully automates password entry and form filling.
-
Home antivirus Dr.Web Security Space antivirus to protect your home computer
Rating:
from 1 290 ₽
Choose a license
Dr.
Web Security Space 12 — maximum protection for Dr.Web for Windows, Android, macOS, Linux. Provides reliable armor for network access, protecting the system from viruses, rootkits, mail worms, hacking tools, spam, phishing, infected web pages.
-
Information protection Kaspersky Internet Security for Android
Rating:
from 499 ₽
Choose a license
Every day you make calls, send SMS, surf the web and interact on social networks. A smartphone knows so much about you — it contains your whole life. Internet Security protection is now available for Android devices! The program is optimized to work on smartphones and tablets so that the user can get all the benefits of the Internet without experiencing security problems and without feeling the impact of the program on the operation of the device.
-
Information security CryptoPro CSP
Rating:
from 2 700 ₽
Choose a license
CryptoPro CSP has a FAPSI certificate, which gives the right to use it to generate encryption keys and electronic digital signature, encrypt and imitate protection of data, as well as to ensure the integrity and authenticity of confidential information.
-
Other Utilities Driver Booster Pro
Rating:
3 200 ₽Benefit 2 400 ₽
800 RUB
Choose a license
The utility scans and automatically detects outdated drivers, downloads and installs updates with one click.
The program is specially designed to tweak drivers for better gaming performance.
-
System setup Reg Organizer 9.0
Rating:
650 RUB
Choose a license
Multifunctional system registry manager for Windows 7/8/10, which allows you to most effectively and comprehensively approach the issue of editing and maintaining the registry.
-
Text and speech recognition ContentReader PDF 15 Standard
Rating:
5 388 ₽Benefit 2 155 ₽
from 3 233 ₽
Choose a license
ABBYY FineReader PDF 15 is a multifunctional intellectual editor for solving any tasks with PDF and paper documents.
The program allows office workers to work with PDF as simply and conveniently as with the usual text documents — regardless of the source, size and method of creating a file.
Special offers
-
from 1 September to 30 September
Autumn sale of equipmentGo
The autumn sale of equipment has started in the Allsoft online store!
Left
4of the day
-
from August 5 to September 30
We give Dr.Web anti-virus when buying equipmentGo
When paying for any order for electronics, you will receive Dr.Web antivirus as a gift.
Left
4of the day
-
since March 11,
Russian software for workGo
We have selected programs that meet modern technical requirements and are available for purchase in Russia.
-
from 13 September to 30 September
Forward to knowledge! 40% discount on ABBYY software!Go
Autumn is a great time to discover something new. Already decided what you want to learn? For example, improve your knowledge of English, German or Spanish. Or improve your PDF proficiency: easily edit multi-page paragraphs in documents, compare versions of text in different formats, beautifully design flyers and assemble presentations.
Left
4of the day
See all »
Cooler Master MasterCase Maker 5t:
Describing the Cooler Master MasterCase 5 in the middle of last year, which features an unusual modular design, we also talked about the MasterCase Maker 5 model, which was not described on the manufacturer’s official resource at that time.
Quite a bit of time passed, and at the end of 2016 the company introduced not only the Maker 5, but also its modification — the Cooler Master MasterCase Maker 5t (MCZ-C5M2T-RW5N), which we will now take a closer look at.
MasterCase Maker 5 and 5t continue to develop the modular concept: the case is not seen as a set design once and for all, but as a combination of a base and accessories that a potential buyer can equip it with at their discretion. Among the additions, a whole range of external and internal parts is expected, allowing the assembler to create a case with an interior and exterior that best suits his ideas about what is necessary and sufficient for a particular computer at the moment.
Naturally, these elements may not be any, but only from those offered by the manufacturer. There is a list of such accessories, and for the Maker 5t it is the longest, you can buy them in the manufacturer’s own online store and, probably, on third-party online trading platforms like Amazon or eBay. True, for Russian consumers, this purchase option will not always be optimal: the case is bought in a regular store today, while the add-ons ordered abroad will not be delivered tomorrow (and not the fact that they are safe and sound), and all this time to finish assembling the planned computer fail.
Information in the Russian section of the site is not translated from English — on the page dedicated to Maker 5t, Russian words are only in the navigation elements. It could be assumed that the reason for this is the novelty of the model, but we see the same thing on any of the pages dedicated to the MasterCase and MasterBox series, and not only them. And we have been celebrating this situation for more than a year now.
The manual attached to the corpus can be called multilingual, at least purely formally: there are at least words in it, it mainly consists of pictures (albeit small, but quite legible), but the table of contents is still translated into many languages, including Russian.
The brochure, which can be downloaded from the site, is also in English, so we will still give in Russian a list of the main features of the case in the form in which they are presented by the manufacturer:
- upgrade it later,
- tempered glass sidewalls,
- panel with four USB 3.
0 ports, fan speed control and LED strip light control,
- Bracket for secure mounting of massive and bulky graphics cards,
- Top handle for easy and safe carrying,
- Magnetic front and top panels,
- Combination of metallic red and black in the design,
- Space for six 140 -mm fans,
- sound-absorbing front and top covers,
- original front cover provides access to devices in 5″ bays with front panel access,
- CBO flexible heatsink placement system,
- insulated power supply bay,
- four-way SSD storage with convenient Slip-and-Clip mounting system.
How all this is implemented in practice, we will describe below.
The Maker 5t is delivered in a box made of quality cardboard with multi-color design, including images of the body and inscriptions in different languages (including Russian), explaining the main features of the model. True, in the Russian translation, the case is for some reason “called” the system unit, although the Russian consumer is used to putting a completely different meaning into this concept.
The box is very large for cases with such a declared standard size, and heavy — according to the manufacturer, the gross weight is 15.3 kg, and our scales showed almost a kilogram more: 16.2 kg. The hand grip slots on the sides make it easier to carry, but due to the weight and size, carrying a packed case is still not very fun. Cooler Master MasterCase Maker 5t scarlet, but more muted, closer to raspberry) evokes thoughts of logs smoldering in the fireplace. This impression is even more enhanced when the red backlight is turned on, which is provided by a piece of LED strip, designed as an elongated flat lamp with a magnetic strip at the base, thanks to which the backlight can be placed in different places of the internal volume of the case or removed altogether if the owner considers it unnecessary.
On the exterior, the smooth planes of the glass sidewalls are adjacent to the complex relief of the top panel, and the broken lines, concentrated at the top, are combined with simpler trapezoids that form the front cover. With all this, the appearance of the case is sufficiently balanced so as not to cause a feeling of rejection or protest either in terms of color or in terms of the compatibility of the geometry of individual parts.
Probably, this is the rare case when designers managed to please both lovers of the unusual and connoisseurs of simpler classic shapes and colors.
Perhaps the only remark: the side covers protrude beyond the side edges of the front and top panels by about the thickness of the glass — it was still better to make it flush. Although here it must be said: a very uniform abutment is ensured, there are no noticeable distortions or gaps.
Now for the details. The front part seems to be solid, but this impression is created due to either an unusual lid or a door — a convex panel with hinges at the bottom, thanks to which it can lean forward at an angle of about 25 °. This was done not for ventilation purposes, but to provide access to devices in five-inch slots: in the folded state, there is enough space to extend the DVD drive tray.
When closed, the door is held in place by magnets that are not overly strong — you don’t have to apply much force when tilting, but provide a secure fixation. That’s just no shock absorbers are provided, and the closing panel makes a knock, not very loud, but noticeable.
The hinged panel is also fixed, but not by magnets, but by the hinge design. It can also be removed completely.
The front plane of the case, hidden behind this panel, is almost entirely covered by a ventilation grill, which continues on the 5-inch slot covers. The upper face of the hinged lid is made open, and there are holes on its lower end; All this is designed to provide air flow.
The control panel is located on the bevelled transition between the front and top covers. Various organs on it are arranged in two horizontal rows, the top one consists of four USB 3.0 ports, surrounded by two buttons — the left one controls the built-in LED backlight, the right one controls the fans.
Bottom row (from right to left): two audio jacks, a large rectangular Power button and a small square Reset button. The free play of the buttons is small, and Power can be accidentally pressed, and Reset is much more difficult due to the size.
Available on the panel and LED indication. To be precise, there is only one indicator, when it is turned on, it highlights the Power button, and the rest should rather be called illuminated characters. So, each of the USB ports is marked “3.0” at the top, the left button in the same row is marked with a “sun”, and the right one with a tiny image of a fan and the letters L and H. But all this becomes noticeable only when the power is on.
But we could not find the disk activity indicator: when power is applied to the “HDD LED” connector of the internal cable, nothing happens, the corresponding LED is also not visible under the removed decorative trim, and we did not completely disassemble the control panel assembly — this is rather laborious operation. Either this indicator was conceived, but not soldered, or they were not going to install it, they just used a standard cable, with a connector for HDD LED.
Unfortunately, the surface of the panel is glossy, and therefore instantly covered with fingerprints, especially near the buttons. The situation with the glass side walls is no better in this regard, with only one difference: nevertheless, they are rarely taken by hand. The rest of the outer surfaces are matte.
Above the panel there is a niche open only in front, where you can put some small items such as an external SSD / HDD connected to one of the USB ports.
A little about the standard interior lighting: we have already mentioned an elongated lamp with a red LED strip, freely moveable and fixed with a magnet. The button on the control panel allows you to completely turn off the backlight and turn it on in one of two modes: a constant glow or a slow change in brightness from maximum to minimum and back.
In the upper part of the housing, the first thing that catches the eye is the carrying handle. This is not an innovation: we saw such a solution five years ago in the Cooler Master CM Storm Trooper case. The longitudinal orientation of the handle will allow you to carry the computer with one hand, in the manner of a suitcase, and the strength is quite sufficient: the handle itself is metal (with a rubber pad for convenience), and it is attached not to plastic, but to the metal parts of the chassis.
The handle is removable, but this is a purely technological possibility associated with the installation of elements of the cooling system on the top panel: the handle is structurally connected to a red cover of complex shape, framing the opening from below for gripping with a hand, and this cover cannot be installed without a handle — an ugly cavity will remain.
The top panel itself, made of plastic, also has a complex geometry, but it can be removed easily, since it is attached with magnets. In its rear part there is a hatch in the form of a trapezoid, under the cover of which ventilation holes are hidden, covered with a decorative grille.
There is some discrepancy with noise-absorbing materials: the above list of declared features mentioned their presence on the front and top covers, but we found a layer of sponge rubber only on the inner surface of the folding front panel, nothing like that on top.
Full glass side walls, visibly tinted. They are fastened in an unusual way — located at the upper edge of the lock with a cylindrical key.
Inside the case is divided into two parts: the smaller lower one is designed to install the power supply, closer to the front wall there is a double rack for disk drives of both sizes.
The top section is entirely reserved for the motherboard, installed components and elements of the cooling and ventilation system. There are also seats for 2.5-inch drives.
However, the motherboard size is limited by the ATX format. But for video adapters and other expansion cards (there can be up to seven of them in total), the scope is full: according to our measurements, their length can reach 410 mm — if, of course, there are such long samples.
There is also plenty of space for CPU coolers, the manufacturer claims a maximum height of 190 mm, and our measurement showed 208 mm from the base of the motherboard to the opposite side wall.
Despite the fact that in modern cases there is an increasing rejection of five-inch slots, the MasterCase Maker 5t has two such slots, both with access to the front panel. But for 3.5-inch devices, such an output is not provided.
In addition to the already mentioned instructions, the set includes a rich set of fasteners, sorted into bags, ten disposable and two reusable ties with an adhesive platform for fixing, a pair of keys to the locks of the side covers, several brackets for installing accessories and an adapter from a Phillips screwdriver to a hex. True, the speaker for the motherboard, which some other Cooler Master cases were equipped with, is missing in this case.
But the main thing: all this is packed in a tin box with an insert that forms convenient compartments for storing small items from the kit. The box is very neat, its bottom is even pasted over with a rubber-like material so that it does not rumble when it comes into contact with the surface of a table or shelf. In general, lovers of various kinds of small but pleasant bonuses will be pleased, especially since there is another “gift” — a lint-free napkin for cleaning surfaces.
Construction
Dimensions Cooler Master MasterCase Maker 5t — 242(W) × 574(H) × 544(D) mm including protrusions; a lot for a case declared as a miditower. And the weight is more than decent: 13.4 kg net, a significant contribution to it is made by all-glass side walls 4 mm thick. The steel used in the construction has a thickness of 0.7-0.8 mm, as a result, both the chassis as a whole and the individual elements turned out to be quite rigid.
Legs — trapezoid from a wide metal strip, located transversely in front and behind. From below they are equipped with rubber shock-absorbing stickers.
There are four regular places for drives: two universal ones in a rack located in front of the lower volume of the chassis, and two more removable container-trays for 2.5-inch SSD / HDD, which can be placed on the upper part of the partition that separates the bay for the unit power from the rest of the chassis, or behind the motherboard base.
The rack, by the way, is movable, it can be installed in the upper volume, and at different heights, including instead of the five-inch compartment, which is made removable.
But, of course, the number of disks can be increased if desired. The easiest and cheapest way is to use a 5.25″ bay that can accommodate a couple more 3.5″ drives. You only need inexpensive adapter adapters, which are quite simple to buy.
More expensive both in terms of finances and time, the path is associated with the very modularity of the design. Additional double racks (€12.95) or very similar triple racks (€14.95) can be ordered. There will be three doubles in the upper volume of the chassis (with a five-inch bay installed), it’s harder to say about triples, since we didn’t have any, but probably two can fit — in total, plus six more drives of any of the two dimensions.
2.5″ trays (€4.95) are also available, and two more can be installed.
Taking into account all of the above, there are 14 places — this number of disks will be enough for any computer configuration, except perhaps the most exotic ones.
The bracket mentioned above for additional fastening of massive and overall video cards is removable, and it will have to be removed when installing disk racks on the lower and upper places of the upper volume.
Ventilation system
The number of places for fans is quite reasonable: up to three 120/140 mm in front, two more of the same at the top and one in the back. As standard, the case is equipped with three 140 mm fans (1200 rpm, 24 dBA, 55 CFM), arranged according to the standard scheme: two forcing on the front plane of the chassis and one exhaust on the rear.
They are controlled by a controller located on the right, behind the motherboard substrate, and covered with a translucent cover. Moreover, the controller is designed to connect six fans, that is, exactly the number that can be placed in the case; connectors are standard three-pin. The button displayed on the control panel of the case allows you to select one of two rotation speeds, designated L (ow) and H (high).
The backlight control circuit connected to the second external button is located on the same board. You can connect not only the included lamp on the LED strip, but also three additional ones of the same type — there are four output two-pin connectors. Among the accessories, such lamps are listed, the price is €9.95, but also in red. But with power through the SATA connector, the backlight can also be purchased in white, green or blue (€ 19.95, 2 pcs in a package), but you won’t be able to control them using a regular Maker 5t controller.
Of course, instead of fans, you can also put radiators for liquid cooling systems: at the top and in front — with a dimension of 120/140/240/280 mm, at the back — 120/140 mm. It says so in the specification, and for the top cover, the maximum length of the radiator is 297 mm. But in general, on the front plane, the opening for such components has a maximum height of 415 mm, that is, almost the entire height of the chassis — the five-inch compartment is removed, and in the horizontal partition there is a cutout 145 wide and 9 deep8 mm.
There are some tricks when installing additional fans or heatsinks. So, if you need to install a fan at the top in front, you will have to install a bracket from the kit (you can remove the five-inch bay, but not necessarily). To access the mounting locations on the upper plane of the chassis, you will have to remove the cover, the handle and the frame under them, on which the fans or CBO radiators are mounted.
Not deprived of housing and filters. The most convenient in terms of maintenance is located at the installation site of the power supply and protects the holes in the bottom of the chassis: this is a plastic frame with a nylon mesh, which is removed from the outside by moving backwards and fastened with a latch.
There is a front filter made of the same mesh, but it will not be so convenient to maintain it: the mesh, together with a decorative metal grill, is attached to a large frame inserted into the front panel and held by snaps.
At the top, the situation is as follows: there are three areas with ventilation holes. Since fans are usually installed here as exhaust fans, so as not to interfere, but to help the natural movement of warm air, the filters should prevent dust from entering the computer when the power is off. That is, the area located in the rear end of the top cover simply does not need a filter.
There are a number of slots in the red trim that frames the bottom opening of the carrying handle. They are not protected by a filter, from the inside there is only a metal mesh with rather large cells that can prevent the fall of small objects, but not dust particles. But, by and large, the total area of the slots is small, and it is unlikely that much dust will penetrate through it.
Finally, the third area — trapezoidal, in the back of the removable top cover — in the absence of top fans is closed by a hatch. But even if it is removed, the opening will remain closed with a decorative metal grill, under which there is also a nylon mesh. But it will have to be serviced along with the lid.
Additional holes include perforated areas above the rear fan and next to expansion slot covers, as well as slots in the covers themselves. There are no holes for CBO tubes in the rear wall.
Assembly of the system unit
Since the side covers are unusual — all-glass, their fastening is non-standard. We have already talked about the upper locks, and at the bottom there is a “protrusion + groove” combination, which makes it possible to safely tilt the cover to an angle of up to about 20–25 °, after which it can be removed. The groove is located in the side of the bottom of the chassis, and the ledge is on a metal plate attached to the glass. There is a similar overlay in the upper part of the glass sidewall, its protrusion limits movement in the upper direction.
In general, everything turns out quite conveniently, you just need to be careful — after all, we are dealing with glass, and not to lose the keys to the locks. Naturally, each of the two keys included in the kit fits both locks, and the covers themselves are the same, you don’t have to remember which one is left and which is right.
The power supply is mounted on the rear wall using an adapter frame. The PSU is attached to the frame with Phillips-head screws, and the frame to the case is fastened with captive knurled screws. Inside the case, there are guides that help you place the PSU correctly, and besides, they are equipped with rubber stickers to reduce vibrations that occur when the unit’s fan is running.
The presence of a horizontal baffle inside the case determines the only possible way to install the power supply — with the fan down: the distance from the PSU cover to the baffle is only 2-3 mm, and its fan will simply be closed by a baffle, which is solid in this area.
Holes for fixing disk racks, standard and additional, are made in two places: in a vertical bar located on the left near the front of the chassis, and in a vertical row at the base of the system board. The racks are fixed diagonally: to the bar — with two thumbscrews, to the base of the board — with protrusions with cylindrical rubber seals.
Keep in mind that when installing the rack in the upper part, under the five-inch bay, only 296 mm will remain for video cards, and this may not be enough for all modern video adapter models.
Additional mounting bracket for massive graphics cards, attaches in two places to holes in the base of the system board. It has two shelves on which video adapters can rest. The shelves can move in height and are fixed on a rod, the design of which allows you to correctly install them also horizontally: closer to the front panel or further from it.
However, this bracket will prevent installation of disk racks in some positions and will not allow you to use the entire available height for additional racks, then you will have to choose between securely fixing video cards and the location of the rack or racks.
The seat for a disk rack in the lower volume of the case is equipped with an additional stand, the meaning of which is not only to increase the strength of the fastening (although it also has: there are no fixing holes on the right for this position — the motherboard substrate ends at the level of the partition), used design provides the ability to move the rack deep into the case to one of two additional positions, freeing up space in front for installing a CBO radiator. The stand on the right has protrusions that fit into the grooves of the bottom, and on the left it is fixed with a knurled screw. If it moves from its original place, then the stand can no longer be attached to the front vertical bar, and you will have to fix it on the stand with screws for which holes are provided.
The disc sled is secured in the rack with latches that are integrated with projecting handles that allow the sled to be pulled out of the rack. It cannot be said that such a fixation turns out to be very flimsy, but the sled with the disk in the rack dangles noticeably, and there is no additional screw fastening. Of course, the side wall will prevent them from falling out completely, but the presence of a carrying handle on the case still implies that the computer will be carried more or less regularly, and I would like to have the possibility of a more secure fastening, even at the expense of the efficiency of extraction.
You can orient the drives with connectors in any direction, but if you want to hide the cables behind the motherboard base as much as possible, then it is better that the connectors are oriented to the right.
As usual, the 3.5″ sled drives are mounted with side pins fitted with rubber cushions, while the 2.5″ drives are mounted with screws from the bottom. For both, SATA cables with connectors of any shape, L-shaped or straight, can be used.
Naturally, there will be no heat removal from the drive case to the metal of the chassis, but there are large windows in the walls of the rack and in the bottom plane of the basket, providing access for air flow from the front fan (if, of course, it is installed in the appropriate place) .
The 2.5-inch trays are secured to the baffle or system board backing with a tab that engages in a slot on one side and a thumbscrew on the other. The drive is fixed on the container with screws from the bottom, only cables with straight connectors are suitable for connection.
Optical drives in a five-inch bay are fixed with a standard latch on the left, there are slots on the right for additional fixation with a screw. This compartment itself is fixed with pairs of screws on both sides.
In our case, only two stands for the motherboard were installed, the rest will have to be installed independently, for convenience there is an adapter for a hexagon for a Phillips screwdriver.
The base of the motherboard has a large rectangular cutout in the processor area, which will allow you to install or remove some types of coolers without removing the motherboard itself.
The I/O port opening and 5.25″ device area on the front panel do not have plugs to break out, and the slots for expansion cards are covered with reusable plugs secured with thumb screws.
One of the plugs has an unusual configuration: it has a series of slots through which cables leading to peripherals can be routed to protect them from accidental tugs and, to some extent, from unauthorized removal — in order to carry away a wired keyboard that is secured in this way or mouse, you will have to open the case and remove this plug.
External chassis connectors connect with shielded cables with solid connectors, audio is HD Audio only, and USB 3. 0 ports connect to internal motherboard connectors.
Part of the wires and cables can be hidden behind the substrate, for which it has several holes, the largest of which are closed with rubber plugs with split petals. The standard cables coming from the control panel are laid in the groove of the motherboard substrate and fixed with Velcro ties, and for other wires and cables during assembly, you can use the ties from the kit.
The front panel is attached with three flat latches on each side, no wires interfere with its complete removal.
The edges of the metal structures, the edges of the holes and the glass sides are neat, which minimizes the risk of injury to hands during assembly.
Noise level measurement
Noise level measurement is carried out according to our method using the Oktava 110A-Eco sound level meter in a soundproof room with a typical noise level of 20 dBA. During the measurement, all electrical appliances in the room are turned off.
An autonomous controlled converter was used to regulate the supply voltage of the fans.
The performance of the chassis cooling system varies widely depending on the supply voltage of the fans. Subjectively, this parameter makes it possible to estimate the noise level, which is in the range from 24.5 to 42 dBA with the decorative panel removed and the supply voltage from 5 to 12 V.
in the near field. In the typical voltage regulation range of 7-11 V, noise varies from low (25 dBA) to medium (33.5 dBA) levels relative to typical daytime residential values.
If the case is further away from the user and placed, for example, on the floor under the table, the noise can be characterized as minimally noticeable when the fans are running at minimum speed, and when working at maximum speed, as reduced for a living space during the daytime.
Noise attenuation from a source inside the case when measured from the front panel is relatively high for solid wall solutions.
|
Key combination |
Description |
|---|---|
|
Ctrl+S |
Save case. |
|
F1 |
Open help. |
|
Ctrl+M |
Display metadata. |
|
Delete |
Delete the selected task or sub-process. |
Case settings panel
The case is configured using the settings panel (Fig. 3). To open the case settings panel, click the button or double-click on the case designer toolbar.
Fig. 3 — Case settings panel
Title — the name of the case, entered in the upper part of the settings panel or in the field above the case designer toolbar. This field is required.
Section — system section for which the case is applied. The value in the Section field cannot be changed after the case is saved. This field is required.
Stage column — A column that is used to indicate stages. Selection from the reference columns of the section for which the case is configured. Required field.
Description — a field for entering additional information about the case.
Code – internal system name of the process used by the system for identification. By default, the code is generated automatically, but can be edited. The name is indicated in Latin without using spaces or special characters. Required field.
Case start condition — field, by value of which the case start is determined. Corresponds to the field By which column should the case launch condition be configured? on the section cases page.
Package — the name of the package in which the case is included.
Active — the field is not editable. The flag indicates that the case is active and is used in the selected section. The attribute can be set on the section cases page using the Enable button.
accelerated product activation by 2.5 times in SaaS
Unicom’s revenue directly depends on the activity of webmasters who work on the platform. The marketing team was looking for ways to activate more users after registration, and incentivize webmasters to make their first post faster. For these tasks, Unicom chose and connected Carrot quest.
Results after launching our tools:
Client
Unicom is a CPA network of affiliate programs of banks, microfinance institutions, insurance and law firms. 200+ financial advertisers in Russia and Kazakhstan: VTB, Tinkoff, Alfa-Bank, Sovcombank, Rosbank, Vostochny Bank, Raiffeisenbank, Home Credit Bank, SKB Bank and others.
The company operates in the b2c and b2b segments. In the case, we consider the b2b direction.
Traffic: 7000 (52% mobile; 48% desktop)
Target segment: b2b
Number of new registrations per month: 600
SEO, online advertising channels:
Integrations: CRM, WhatsApp, VKontakte and Telegram
The task is to activate users faster after registration
The Unicom customer path looks like this:
- The user registers on the site.
- In the personal account, the webmaster has access to current offers from banks and financial organizations.
- The publisher places ads with referral links from partners on third-party sites. Applications are sent to financial organizations through these links.
- For each completed transaction that came to the bank from advertising, the webmaster receives payment, and Unicom receives its share in the form of a commission.
The company’s revenue directly depends on how actively publishers place offers. Applications from referral links are a key Unicom metric.
Client tasks for Carrot quest tools:
- onboard new users;
- quickly inform about new offers;
- build up an active user base;
- reduce the time from the moment of registration to the first referral transition and application;
- reactivate users;
- increase Retention Rate, keep users in the product.
Solution — launched the Carrot quest chatbot for user onboarding
Imagine: a person has registered in the product, but has not understood it. Most likely, the user will make a couple of attempts to learn, but will soon lose interest and go into the status of «sleeping» clients. This can be avoided by training new users right away.
Unicom set up a chatbot for onboarding in the webmaster’s personal account. The main task of the bot is to convert registered users into placing the first referral link.
Steps of the learning chatbot:
- Welcomes the webmaster in the personal account after authorization. Qualifies the user.
- Sends cases and detailed instructions for tools, creatives for advertising.
- Tells about bonuses that a webmaster will receive from working with Unicom.
The bot automatically welcomes a new user to the personal account
In addition to the onboarding itself, this script helps to involve the user in interaction with the platform and reduces the time from registration to product activation.
Thanks to the Carrot quest chatbot, a new Unicom user:
- automatically engages in dialogue and knows where to get the information they need;
- get a step-by-step guide and ready-made materials in the chat widget: you only need to read and apply in your work;
- sets up Unicom tools faster, places referral links and increases the company’s revenue.
Step 1: Chatbot engages and qualifies the user
As soon as a person enters their personal account after registration, the chatbot greets them and asks if the user has experience of earning money in CPA networks. The bot also finds out in which related areas the user worked.
The information is written to the client properties. Based on these characteristics, the Unicom team can segment the database and customize trigger messages for a specific type of user.
Scenario fragment of the training chatbot
Step 2: Chatbot — webmaster assistant on platform
Depending on the user experience and the traffic sources that the webmaster works with, the chatbot sends:
- successful cases;
- ready-made advertising banners;
- detailed instructions for setting up and running the tools;
- introductory article about affiliate programs.
Scenario fragment: Chatbot sends materials to webmasters depending on their experience and goals
When a user receives hints and ready-made tools, they start working with the service faster. In the case of Unicom, it starts making money on its own and brings in the company’s revenue.
Step 3: chatbot talks about bonuses for the webmaster
Unicom has a webmaster grading system: depending on the number of applications that came from offers, the webmaster receives bonuses. Self-employed and individual entrepreneurs have separate advantages.
UniShop is also available for all webmasters, where you can exchange bonus points for valuable gifts.
When the user has qualified and received materials for work, the chatbot talks about the advantages of the platform.
Scenario fragment: Chatbot talks about webmaster bonuses
Learning chatbot results
Unicom tracks tickets and their sources in a self-written CRM system. To evaluate the effectiveness of the chatbot, the client compared the data for April and May 2022 with the same period without the chatbot. So Unicom found out that:
- 1580 users contacted the learning chatbot;
- 33% increase in the conversion of new users to the first application through a referral link.
Chatbots talk about new offers and benefits
Unicom also launches bots with new offers from financial companies. This attracts the attention of the webmaster and helps to quickly inform about current promotions.
Chatbot with an offer from Unicom’s partner bank
Unicom also talks about other important information with the help of chatbots. For example, about the benefits for self-employed webmasters.
Chatbot with benefits for the self-employed
Idea: implement Carrot quest on webmaster showcases
Using Unicom tools, webmasters can create their own offer showcases. A showcase is a separate page on which a webmaster places several offers from financial institutions at once.
People go to the storefront via a direct link, choose a suitable offer and follow it to the bank’s website.
In order for webmasters to better convert traffic into leads and applications, Unicom recommends that they use our service. For example, launch chat bots and pop-ups.
We are pleased with the results Carrot quest brings us. Therefore, we came up with the idea to introduce the service to the showcases of webmasters so that they earn more and, as a result, increase the revenue of our company.
We are currently actively promoting Carrot quest among Unicom users. For example, we offer webmasters to get 50% cashback from the cost of one month of subscription to Carrot quest using a special promotional code.
We assume that by purchasing a tariff and installing Carrot quest on their storefront, webmasters will increase the conversion of clicks on referral links. Now we are collecting data to confirm our hypothesis.
Alexander Burkhansky
Unicom CRM Lead
What other Carrot quest tools are used by the Unicom team
In addition to chatbots, the Unicom team has launched other Carrot quest tools. With the help of them, the company:
- informs webmasters about new offers;
- continues onboarding;
- motivates webmasters to post offers faster on sites;
- brings sleeping users back to the product.
Chat in the personal account of the webmaster
A Unicom product requires certain skills, at any stage of work a person may have a question. Rapid communication with customers keeps more users in the product. To do this, Unicom has integrated the Carrot quest online chat into their customer support system.
The chat is integrated with Unicom messengers and social networks, so webmasters can choose which channel to ask a question in. This is also convenient for the support team: operators work with all requests in a single window, they do not have to switch between tabs. Thanks to the integration, the support team does not lose questions and quickly responds to the user.
According to Carrotquest internal analytics, the Unicom team tracks:
- the number of conversations in the chat;
- operator response time;
- daily workload of operators.
Pop-ups in the webmaster’s personal account
Unicom regularly launches pop-ups with new offers from financial companies. Service messages, reminders and tips on using the platform are also sent by the client in the form of pop-ups.
Trigger messages in chat
Unicom has set up trigger messages in the chat: they tell the webmaster about individual offers from partners. Unlike pop-ups, these messages appear in a chat widget. Some users respond better to this type of communication.
Trigger email chains
Tools that work with the user directly on the platform are a good move. But they cannot «reach out» to those who left the site. Such users are perfectly retained by email newsletters. Unicom launches trigger chains for different scenarios:
- Welcome letters;
- new user onboarding;
- base reactivation;
- food chains.
Overall results across all instruments
The Unicom team monitors communication performance using data from Carrot quest and a self-written CRM system. Comparing two periods when the instruments were active and a similar period before the launch, Unicom analyzes the dynamics of applications and user revenue.