PassMark MemTest86 — Memory Diagnostic Tool
PassMark MemTest86 — Memory Diagnostic Tool — Technical Information
What’s New in MemTest86 for the UEFI platform (Version 5 and later)?
MemTest86 supports booting from the newer UEFI platform. When booting from UEFI, MemTest86 has access to additional services not available in BIOS including:
- Native 64-bit support
- Addition of 2 new memory tests to take advantage of 64bit data and SIMD instructions.
- Speed improvements of between 10% and 30%+. Especially for tests, #5, #8 & #9. This is the result more moving to native 64bit code, removing the PAE paging hack, switching compilers and using faster random number generation algorithms.
- No longer requires the use of the PAE workaround to access more than 4GB of memory.
(PAE = Physical Address Extension)
- Improved multi-threading support, where supported by the underlying UEFI system.
- Option to disable CPU caching for all or individual tests
- Graphical interface with mouse input, where supported by the underlying UEFI system. On older systems a keyboard is still required.
- Improved USB keyboard support. The keyboard now works on systems that fail to emulate IO Port 64/60 correctly. So Mac USB keyboards are now supported.
-
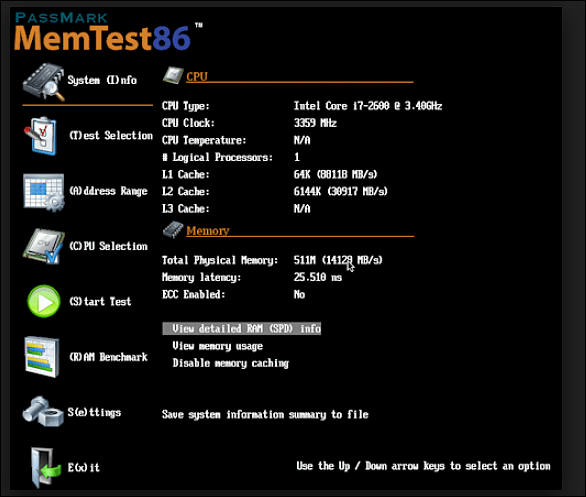
Reporting of detailed RAM SPD information. Timings, clock speeds, vendor names and much more.
- Support for DDR5 RAM (and associated hardware), including retrieval and reporting of DDR5-specific SPD details
- Support for extended memory profiles, such as Extreme Memory Profile (XMP) and Enhanced Performance Profiles (EPP).
-
ECC RAM support (limited hardware support, ongoing development)
- Detection of ECC support in both the RAM and memory controller
- Polling for ECC errors
- Injection of ECC errors for test purposes. (limited hardware only)
- Support for logging and report generation. In all prior MemTest86 releases, there was no disk or network support.
- Support for network PXE boot for scalable, diskless deployment to multiple targets
- Having a configuration file to allow settings to be pre-defined without the need for keyboard input. This can help with automation.
- Secure Boot signed by Microsoft for ensuring software integrity
- See the What’s New page for a complete list of changes.

See the feature comparison page for a summary of the differences between the various editions of MemTest86.
MemTest86 can boot from a USB flash drive or, with Linux systems, by the boot loader
(for example, LILO or Grub). Any Windows, Linux or Mac system may be used to create the
USB flash drive. Once a MemTest86 boot disk has been created, it may be used on
any x86 (PC/Mac) or ARM computer.
MemTest86 (Site Edition) supports network (PXE) boot for scalable deployment to multiple client machines in the LAN network.
In this configuration, no disks are required; only a PXE Server and PXE boot enabled clients are required to support network boot.
Copyright © 2021 PassMark® Software
Using MemTest86 | Puget Systems
Table of Contents
Why you need this article
System Memory is usually the most stable component in a computer build but sometimes failing sticks can cause errors, crashes or issues with applications.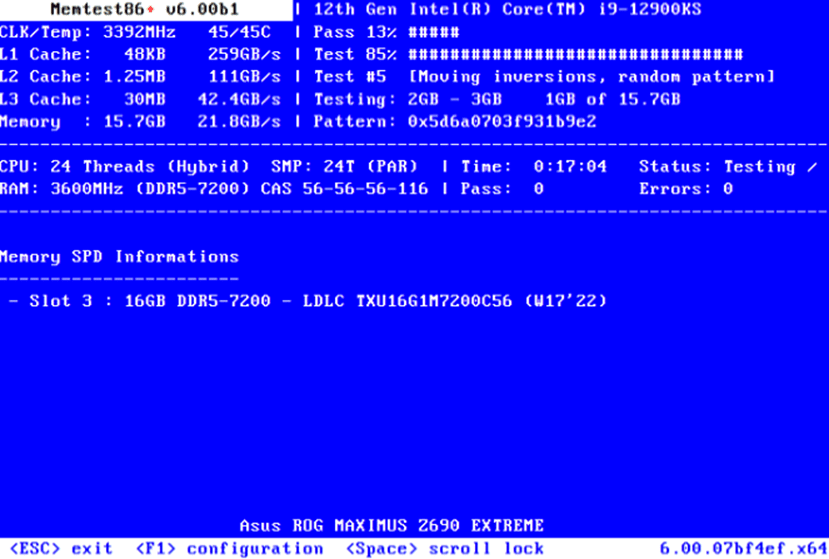 You can run the Windows Memory Diagnostic (bottom) which occasionally will identify a memory error, but the PassMark MemTest86 software is far more effective and robust. This guide will walk you through each tools purpose, how to initiate them, and then what to learn from the outputs.
While the Windows Memory Diagnostic is a relatively new tool, it’s very easy to run and is occasionally successful. MemTest86 on the other hand has been around for over a decade and if there is a problem with the memory, it absolutely WILL identify it.
PassMark MemTest86
The best download location we have found is directly from the PassMark website:
PassMark MemTest86
Image for creating bootable USB drive is the one we will select for this guide
1. Download the folder then extract, within the download you will find an imageUSB executable so we will utilize that to create the bootable USB. Launch the application and select the USB device from the list of options then click Write to UFD
2. Once it finishes, leave the USB device plugged in, reboot the system, and boot from the USB (F8 for most Puget computers)
Once booted, MemTest86 actually automatically starts to run after a few seconds and will run four passes before finishing
Leave all settings as default and let the tests run (usually overnight). You should see a screen like this:
We recommend allowing MemTest86 to run a full scan regardless of how long it takes. On systems with more than 64gb of RAM it can take more than an overnight stint, but it’s worth it to let MemTest86 run as many passes as it needs. If you need, you can hit the ESC key to exit early and reboot the machine into Windows (remove the USB).
Windows Memory Diagnostic
Modern versions of Windows have a built-in tool to help diagnose memory issues and will even run automatically when errors are detected though that’s rare. Instead, running the tool manually is usually required but thankfully that’s a very simple process.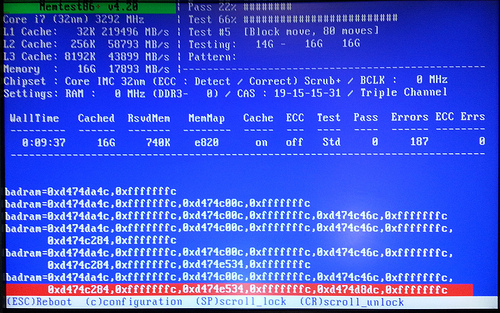
1. Select the Start icon in the bottom left
2. Type Windows Memory Diagnostic then select the first option
3. In the prompt, select Restart now and check for problems (recommended)
Your system will reboot and the Windows Memory Diagnostic tool will automatically start to scan your memory for errors
The Windows Memory Diagnostic does not take as long as MemTest86 and while occasionally it will identify a problem, it’s not as effective as MemTest86. Once the test completes, Windows will continue to start and a pop-up will eventually appear showing the results.
Conclusion
Memory errors can cause a litany of problems, many of which can be challenging to diagnose, using memory testing capabilities provides a simple, intuitive, automated, and thorough diagnostic that often identifies memory issues. While the Windows built-in memory diagnostic can be helpful, we recommend using MemTest86 if at all possible as it’s far more powerful.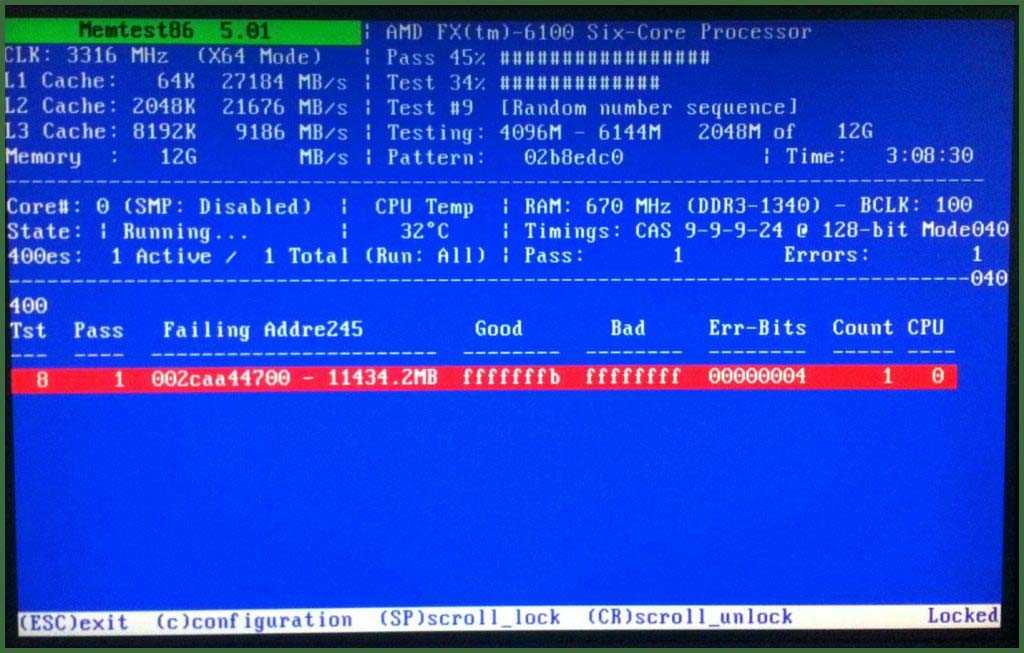 If errors are detected, reseating the memory (removing and reinstalling) can sometimes correct the errors, but most of the time a replacement stick of memory is needed. Reach out to your Puget Systems Technical Support for help identifying which stick or if you need help replacing the culprit memory.
Need help with your Puget Systems PC?
If something is wrong with your Puget Systems PC. We are readily accessible, and our support team comes from a wide range of technological backgrounds to better assist you!
Contact Puget Systems Support
Looking for more support guides?
If you are looking for a solution to a problem you are having with your PC, we also have a number of other support guides that may be able to assist you with other issues.
Puget Systems Online Help Guides
Tags: 10, How-to Guide, Memory, Memory Diagnostics, Memtest86+, Microsoft, Performance, Troubleshooting, USB, utilities, Windows 10
0006
The MemTest86+ program is designed to test RAM.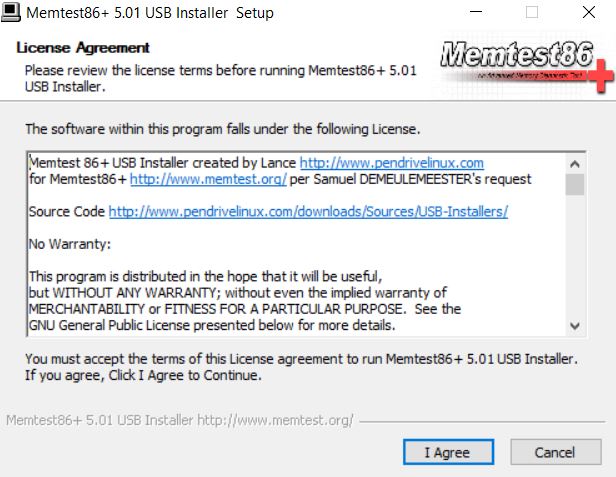 The verification takes place automatically or manually. To work with the program, you need to create a boot disk or USB flash drive. What we will do now.
Download the latest version of MemTest86+
Creating a boot disk with MemTest86+ in Windows
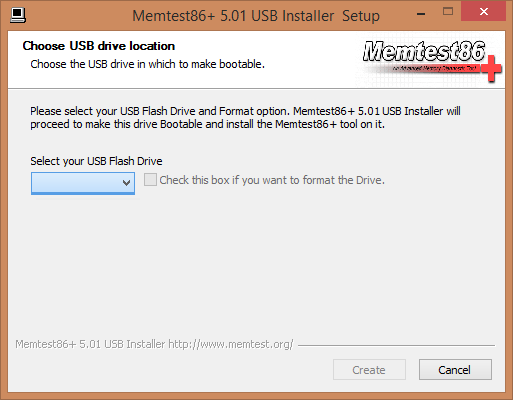
Go to the manufacturer’s official website (There is also an instruction for MemTest86+, though in English) and download the installation file of the program. Then, we need to insert a CD into the drive or a USB flash drive into the USB connector.
Starting. On the screen you will see a program window for creating a bootloader. We choose where to upload information and «Write» . All data on the flash drive will be lost. In addition, there will be some changes in it, as a result of which its volume may decrease. How to fix this I will describe below.
Start of testing
The program supports booting from UEFI and BIOS systems. To start testing RAM in MemTest86+, when you restart the computer, set the BIOS to boot from a USB flash drive (It should be the first in the list).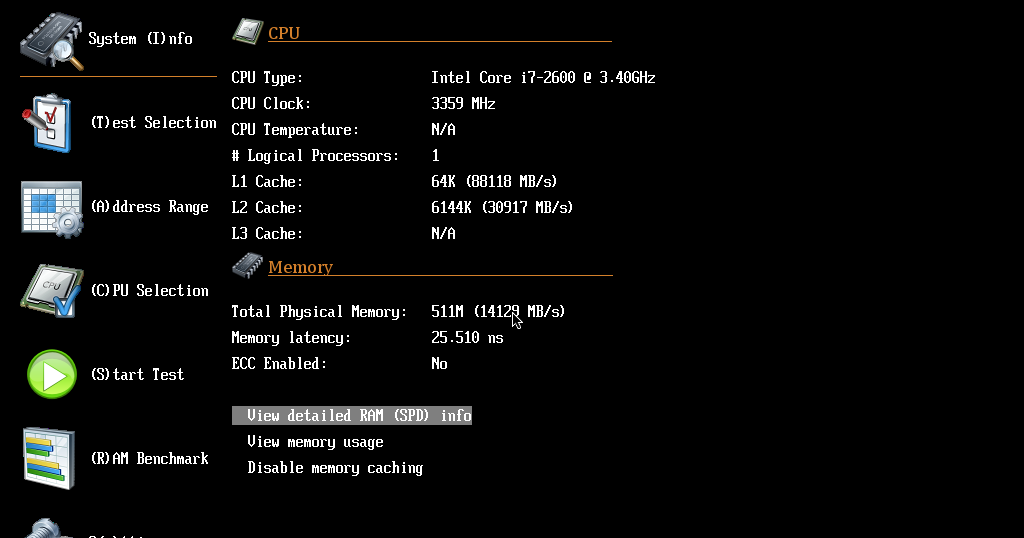
This can be done using the keys «F12, F11, F9» , it all depends on your system configuration. You can also press the key «ESC» during the power-on process, a small list will open in which you can set the boot priority.
Setting up MemTest86+
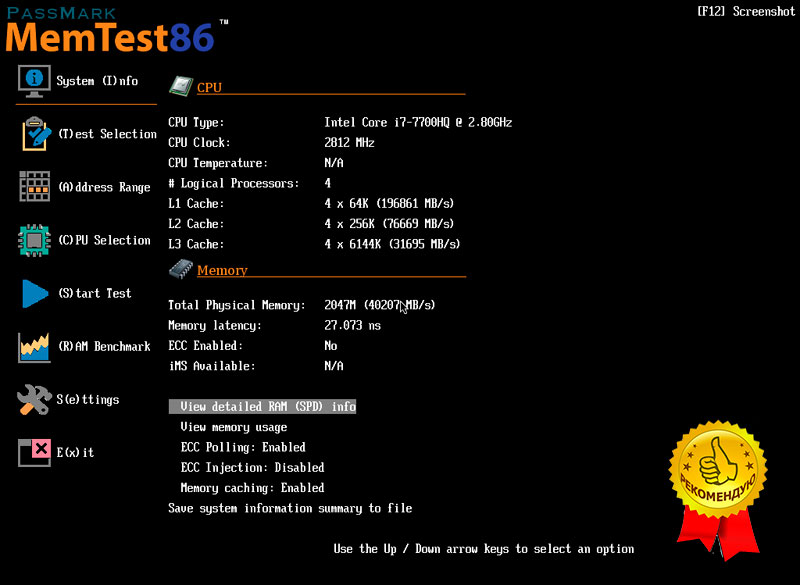
If you have purchased the full version of MemTest86+, then after launching it, a splash screen will appear in the form of a 10-second countdown timer. After this time has elapsed, MemTest86+ automatically runs memory tests with default settings. Pressing keys or moving the mouse should stop the timer. The main menu allows the user to configure options such as tests to execute, the range of addresses to test, and which processor to use.
In the trial version, after downloading the program, you will need to press «1» . After that, the memory test will begin.
MemTest86+ Main Menu
The main menu has the following structure:

In order to start a manual scan, you need to select the tests with which the system will be scanned. You can do this in graphical mode in field «Test Selection» . Or in the test window by pressing the key «C» to select additional options.
If nothing has been configured, testing will be carried out according to the specified algorithm. The memory will be checked by all tests, and if errors occur, the scan will continue until the user stops the process. If there are no errors, the corresponding entry will appear on the screen and the check will stop.
Description of Individual Tests
MemTest86+ performs a series of numbered tests to check for errors.
Test 0 — address bits are checked in all memory bars.
Test 1 — more advanced version «Test 0» . It can catch any errors not previously caught. Executed sequentially from each processor.
Test 2 — tests the memory hardware in fast mode. Testing occurs in parallel using all processors.
Test 3 — tests the memory hardware in fast mode. Uses 8-bit algorithm.
Test 4 — also uses an 8-bit algorithm, only scans in more depth and detects the slightest errors.
Test 5 — scans memory circuits. This test is especially effective at finding subtle bugs.
Test 6 — detects errors «data sensitive errors» .
Test 7 — finds memory errors during the write process.
Test 8 — scans for cache errors.
Test 9 is a detailed test that checks the cache memory.
Test 10 — 3 hour test. First, it scans and remembers the memory addresses, and after 1-1.5 hours it checks if there have been any changes.
Test 11 — Scans for cache errors using native 64-bit instructions.
Test 12 — Scans for cache errors using native 128-bit instructions.
Test 13 — Scans the system in detail for global memory problems.
MemTest86+ terminology
«TSTLIST» is a list of tests to run the test sequence. They are displayed hardly and are separated by a comma.
«NUMPASS» is the number of repetitions of the test execution sequence. This must be a number greater than 0.
«ADDRLIMLO» is the lower limit of the address range to check.
«ADDRLIMHI» is the upper limit of the address range to check.
«CPUSEL» — CPU selection.
«ECCPOLL and ECCINJECT» — Indicates the presence of ECC errors.
«MEMCACHE» — used for memory caching.
«PASS1FULL» — indicates that the first pass will use a reduced test to quickly detect obvious errors.
«ADDR2CHBITS, ADDR2SLBITS, ADDR2CSBITS» is a list of memory address bit positions.
«LANG» — indicates the language.
«REPORTNUMERRS» is the number of the last error to be output to the report file. This number must be less than 5000.
«REPORTNUMWARN» is the number of recent warnings to display in the report file.
«MINSPDS» is the minimum amount of RAM.
«HAMMERPAT» — defines a 32-bit data pattern for test «Hammer (Test 13)» . If this parameter is not set, random data models are used.
«HAMMERMODE» — indicates the choice of hammer in Test 13 .
«DISABLEMP» Specifies whether to disable multiprocessor support. This can be used as a workaround for some of the UEFI firmwares that have problems running MemTest86+.
Test Results
After the test is completed, the test result will be displayed.
Lowest Error Address:
Highest Error Address:
Bits in Error Mask:
Bits in Error:
Max Contiguous Errors:
ECC Correctable Errors:
Test Errors:
The user can save the results as reports in the HTML file .
Execution Time
The time it takes to complete a MemTest86+ pass is highly dependent on processor speed, speed, and memory size. Usually, one pass is enough to identify all but the most obscure errors. For complete confidence, it is recommended to make several runs.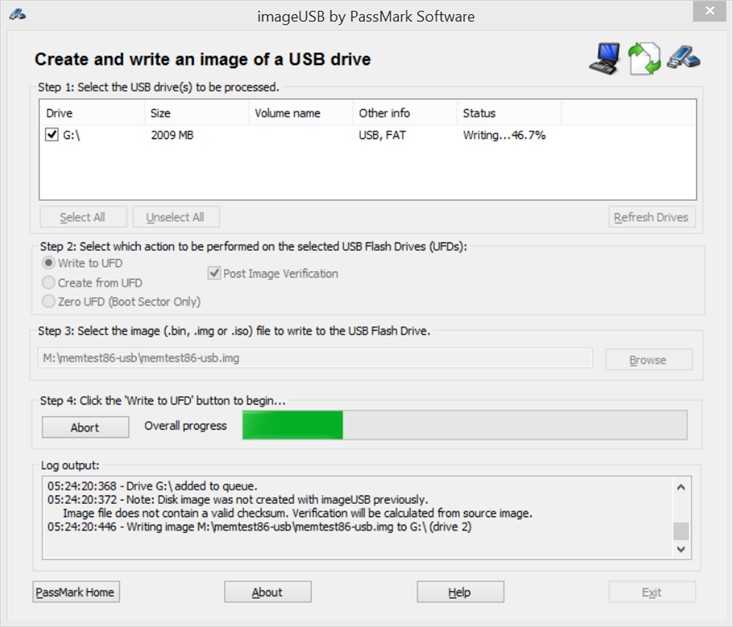
Restore disk space on a flash drive
After using the program on a flash drive, users note that the drive has decreased in volume. It really is. My storage is 8 GB. flash drives decreased to 45 MB.
To fix this problem, you need to go to «Control Panel-Administrative Tools-Computer Management-Disk Management» . We look at what we have with a flash drive.
Then go to the command line. To do this, in the search field, enter the command «cmd» . On the command line, write «diskpart» .
Now we move on to finding the right drive. To do this, enter the command «List disk» . By volume, we determine the desired one and enter “select disk = 1” (in my case) into the dialog box.
Next, enter «clean» . The main thing here is not to make a mistake with the choice.
Again we go to «Disk Management» and we see that the entire area of \u200b\u200bthe flash drive has become unallocated.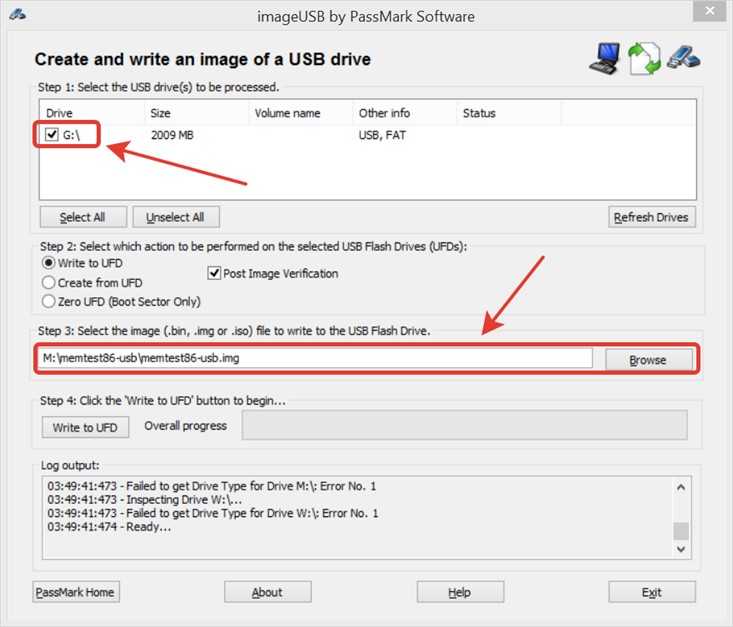
Create a new volume. To do this, right-click on the area of \u200b\u200bthe flash drive and select «Create a new volume» . A special wizard will open. Here we need to click everywhere «Next» .
At the final stage, the flash drive is being formatted. You can check.
Video lesson:
After testing the MemTest86+ program, I was satisfied. This is a really powerful tool that allows you to test your RAM in a variety of ways. However, in the absence of the full version, only the automatic check function is available, but in most cases it is enough to detect most problems with RAM.
RAM diagnostics. How to use MemTest86+.
We need to burn the Memtest86 utility to a DVD disc or USB flash drive or create a bootable USB flash drive that includes this program.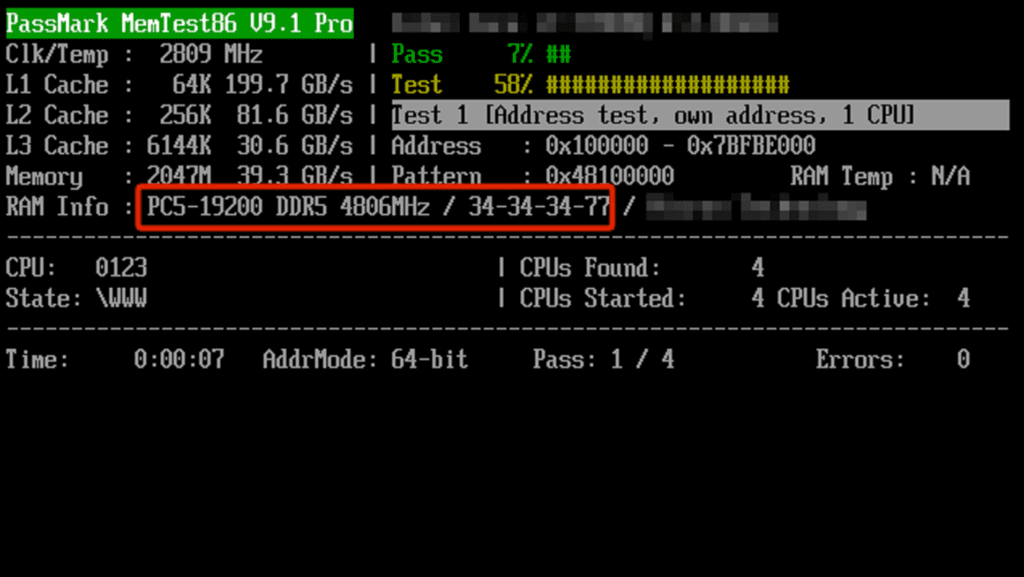 We read the article «How to create a multiboot flash drive», follow the step-by-step instructions. After the bootable USB flash drive is created, we boot from it, usually for this I use the “hot keys” F8, F12, F11, Esc + the key responsible for fast loading, depending on the model of the mat. boards on a computer / laptop. After loading we see the window:
We go into additional utilities and select Memtest86. If everything went well, we see the following picture:
After starting, the program will check your RAM endlessly until you stop it with the ESC key. You can check both all memory modules at once, and one at a time. When checking all memory modules, the program will not tell you which errors, so if there are errors, it is better to check one module at a time. To check, it is better to do several cycles. And for maximum effect, it is better to check at night. Field Pass means the number of cycles done. If you have errors in memory (Column Error), you will see the following:
It is impossible to fix RAM if there are errors in the program.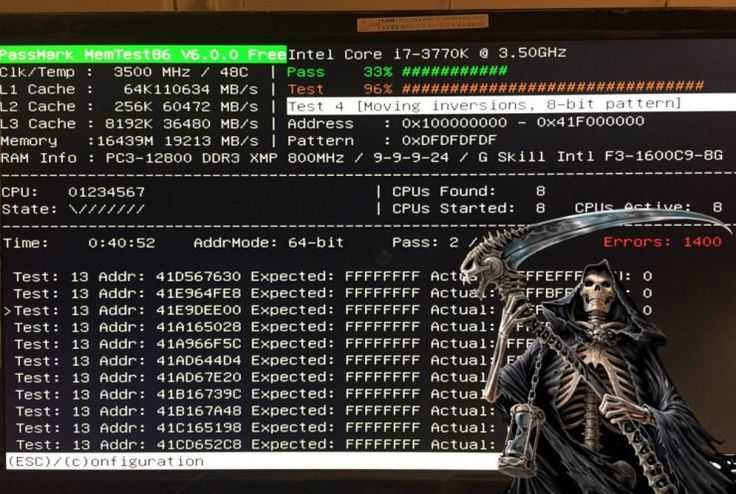 It’s not like erasing bad sectors on a hard drive. I recommend this:
The most common is the failure of the RAM module. We test one module at a time. First, we put this module in the slot for RAM No. 1.
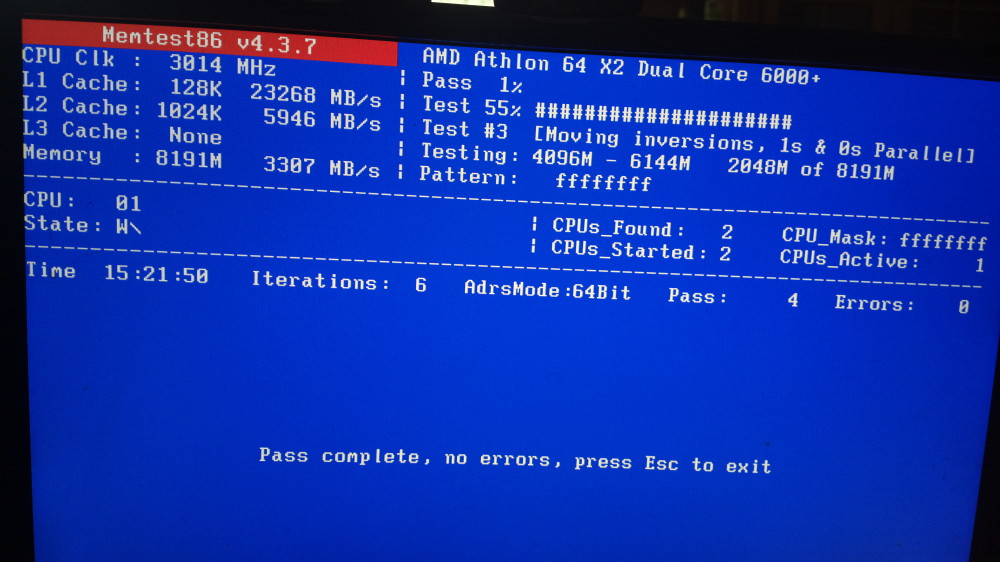
Testing, looking at the result. If there are errors, as shown in Fig. above (where it is highlighted in red in the Memtest program), then we put this module in the slot for RAM No. 2. We test, we look at the result. If nothing has changed, then the module is defective and must be replaced. We change or put another memory module, we test it. If the memory module is OK, at the end of the test we see the following:
It happens that the RAM slot on the mat is faulty. board. In this case, we connect the module to another free slot, then we consider the feasibility of operating the computer in this configuration with a faulty RAM slot, the feasibility of replacing the motherboard, or maybe everything will suit you, and the amount of memory will be enough for you.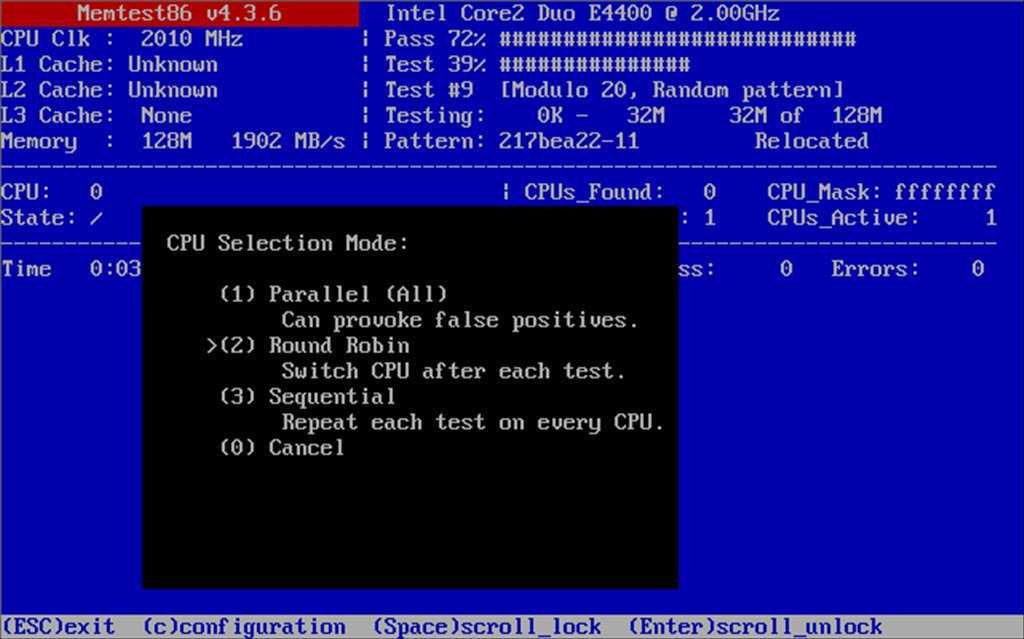
Program — 9 tests:
Test 0 — [Address test, walking ones, no cache] — check for subtle and hardware errors.
Test 3 — [ Moving Inversions , 8 Bit Pat ] — Like the previous test, only the algorithm is used in 8 TEMI 20 different methods.
Test 4 — [Moving inversions, random pattern ] — Detect data sensitive errors. There are 60 different methods in this test.
Test 5 — [Block move, 64 moves] — Search for problems in RAM circuits.
Test 6 — [Moving inversions, 32 bit pat] — The longest test to detect data sensitive errors.
Test 7 — [ Random number sequence ] — Check for errors in memory writes.