MSI MS-16P6 16-inch — Core i5-8300H — 8GB 1000GB NVIDIA GeForce GTX 1050 Ti AZERTY — French
About us
Help
- My account
- My orders
Student Discount
Good deals
Smartphones
MacBook
AirPods
Tablets
iPhone
iPad
Apple Watch
iMac
iPhone 11
iPhone 12
iPhone XR
iPhone SE (2020)
Accessories
iPhone X
iPhone 12 Pro Max
iPhone 12 Pro
iPhone 11 Pro Max
iPhone 11 Pro
iPhone 13
Samsung Smartphones
5G Phones
MacBook Pro
MacBook Air
Laptops
Computers and Laptops
Cameras and Lenses
Headphones and Earphones
iPad Air
iPad Mini
iPad Pro
Gift guide
Out of stock
1 — 3
- Current
- Current
? This model is popular!
Everything you ever wanted to know about the MSI MS-16P6 16-inch — Core i5-8300H — 8GB 1000GB NVIDIA GeForce GTX 1050 Ti AZERTY — French
MSI MS-16P6 16-inch — Core i5-8300H — 8GB 1000GB NVIDIA GeForce GTX 1050Ti AZERTY — French
Our partners are electronics experts who test and verify that each product is 100% functional before it leaves the factory. This is the reason you benefit from a minimum 1-Year warranty with the purchase of a refurbished device at Back Market.
MSI MS-16P6 16-inch — Core i5-8300H — 8GB 1000GB NVIDIA GeForce GTX 1050 Ti AZERTY — French
- Colour :
Black - Screen size (in) :
16 - Storage :
1000 GB - SSD storage capacity (GB) :
0 - Storage type :
HDD - Memory :
8 GB - Model :
MS-16P6 - Processor speed :
2.3 GHz - Processor brand :
Intel - Graphics card :
NVIDIA GeForce GTX 1050 Ti - OS :
Windows 10 - Touchscreen :
No - Resolution :
1920 x 1080 - Network :
Ethernet - Bluetooth :
Yes - Webcam :
Yes - Microphone :
Yes - Backlit Keyboard :
Yes - Numeric keypad :
Yes - Ethernet :
Yes - Wi-Fi :
Yes - Year of Release :
2018 - Processor :
Core i5-8300H - Keyboard Language & Type :
AZERTY — French - Main colour :
Black - Series :
Autre - Brand :
MSI - Weight :
2400 g
Welcome to Back Market
The best prices for high-quality renewed goods by refurbishers we’ve checked and vetted.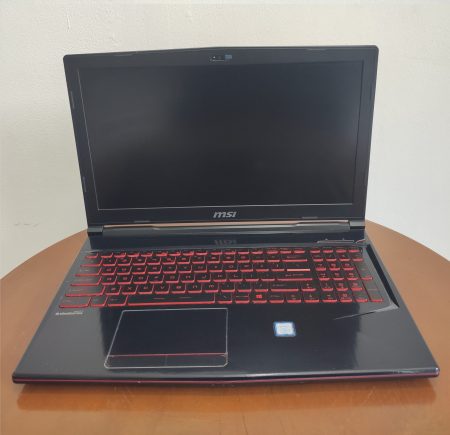 We don’t mind if you
Google us
.
Get to know us
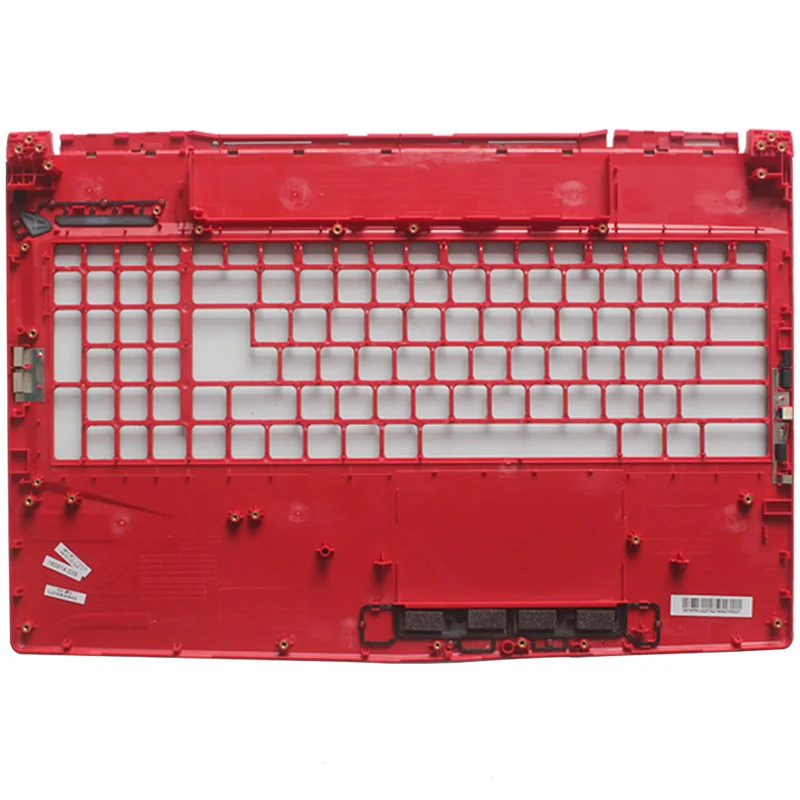
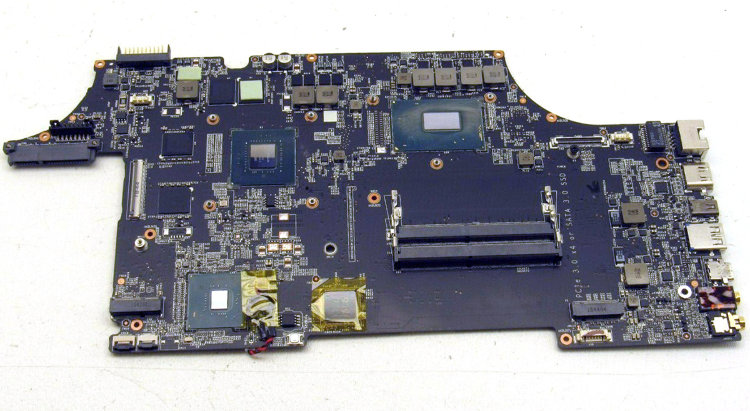
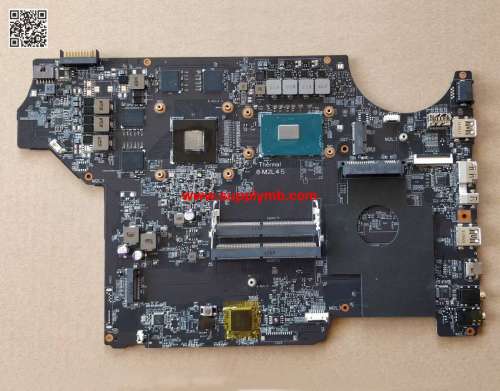
MSI GP63, GL63 (MS-16P6) Skin Cut Template Vector
Skip to navigationSkip to content
-
Description
-
Reviews
-
Seller Info
-
More Products
-
Product Enquiry
Downloadable MSI GP63, GL63 (MS-16P6) skin cut template for vinyl cutting on various cutter. maximum coverage provided, buttons are easily accessible. The Cut ensures Smooth and easy skin application, especially at rounded corners.
our cut files are precisely designed and tested on the original device using popular vinyl materials.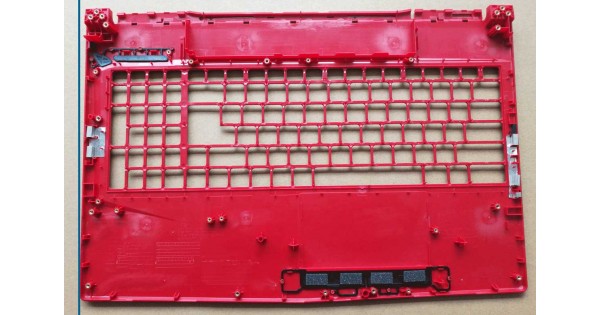
— ZIP File —
Compatibility ….
Available
— CDR
— SVG
— DXF
— PNG
— PLT
— EPS
— txt File Formats
Compatible with all popular vinyl Plotters/Cutter ( Cricut, Silhouette Cameo, Graphtec, Roland, Summa)
if you have any question please Contact Us.
Category: MSI Laptop
Only logged in customers who have purchased this product may leave a review.
Seller Information
-
Store Name:
mobvec
-
Vendor:
mobvec
-
Address:
United Kingdom (UK)
- No ratings found yet!
-
MacBook Laptop
MacBook Pro (13-inch, 2009, 2010, 2011, 2012) A1278 Skin Cut Template Vector
Rated 0 out of 5
(0)
Downloadable MacBook Pro (13-inch, 2009, 2010, 2011, 2012) A1278 Skin vector Template
— ZIP File —…
Available
— CDR– SVG– DXF–PNG–PLT–EPS– txt File Formats
Compatible with all popular vinyl Plotters/Cutter ( Cricut, Silhouette Cameo, Graphtec, Roland, Summa)SKU: n/a
Product Enquiry
What is VectorGI ?
VectorGI is a global online marketplace, where people come together to make, sell, buy and collect Digital unique items. We’re also a community pushing for positive change for small businesses, people, and the planet.
CATAGORY
Subscibe Email
My Account
Copyright © 2021 VectorGi Digital Market. All rights reserved.
Subscibe Email
My Account
CATAGORY
What is VectorGI ?
VectorGI is a global online marketplace, where people come together to make, sell, buy and collect Digital unique items. We’re also a community pushing for positive change for small businesses, people, and the planet.
Copyright © 2021 VectorGi Digital Market. All rights reserved.
Disabling Windows 10 Driver Signature Verification
In this guide, there are three ways to disable driver signature verification in Windows 10: one of them works once when the system boots, the other two disable driver signature verification permanently, but not always.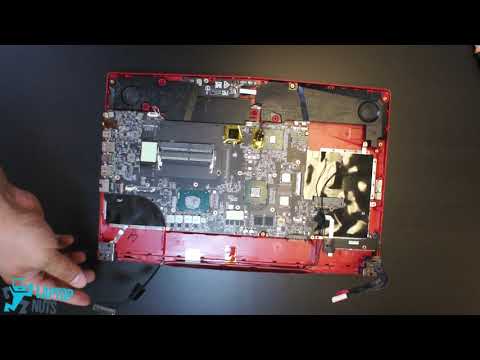 This can be useful in cases where the driver fails to install and the OS reports that the 3rd party INF does not contain signing information or other signing issues causing the device installation to fail.
I hope you know why you needed to disable this feature, because such changes to Windows 10 settings can increase the vulnerability of the system to malware. Perhaps there are other ways to install your device driver (or other driver) without disabling digital signature verification, and if there is such a way, it is better to use it. If you want to get serious about the issue, then you can also digitally sign the driver yourself (not for beginners).
Disabling driver signature verification using boot options
The first method that disables digital signature verification once, at system reboot and until the next reboot, is to use Windows 10 boot options.
- — «Update and security» — «Recovery». Then, in the «Special Boot Options» section, click «Restart Now».
- After the reboot, go to the following path: «Troubleshooting» (or «Diagnostics») — «Advanced Options» — «Boot Options» and click the «Restart» button.
- After the reboot, a menu will appear to select the options that will be used this time in Windows 10.
- To disable driver digital signature verification, select the appropriate item by pressing 7 or F7 (or Fn+F7 on some laptops).
Done, after restarting Windows 10 will start with driver signature verification disabled and you will be able to install your driver without digital signature.
Video instructions for disabling digital signature verification of drivers
Usually, even after a reboot in normal mode, the device installed in this way continues to work, but in some cases the driver crashes and you have to repeat the procedure. Hence the frequent question of how to disable Windows 10 digital signature verification permanently. Unfortunately, this is not always possible (but you can sign the driver yourself, as mentioned at the beginning of the instructions), however, the usual method for permanently disabling is described below.
Command line
This method should disable driver digital signature verification permanently — using the command line to edit boot options. Method limitations: you either need to have a computer with a BIOS, or if you have a UEFI, you need to disable Secure Boot (this is required). Unfortunately, in the latest versions of Windows 10, this usually does not work, but you can try.
The steps are as follows — run the Windows 10 command prompt as an administrator (How to run a command prompt as an administrator). At the command prompt, enter the following two commands in order:
- bcdedit.exe -set loadoptions DISABLE_INTEGRITY_CHECKS
- bcdedit.
 exe -set TESTSIGNING ON
After both commands are completed, close the command prompt and restart your computer. Verification of digital signatures will be disabled, with only one caveat: in the lower right corner you will see a notification that Windows 10 is running in test mode (to remove the inscription and re-enable verification, enter bcdedit.exe -set TESTSIGNING OFF in the command line) .
And another option to disable signature verification using bcdedit, which, according to some reviews, works better (verification does not turn on automatically again the next time Windows 10 boots):
- ).
- Open a command prompt as an administrator and type the following command (by pressing Enter after it).
- bcdedit.exe /set NOINTEGRITYCHECKS ON
- Restart Windows 10 normally.
In the future, if you want to turn on the check again, do it in the same way, but instead of on in the command, use off .