MSI Afterburner Not Detecting GPU On Windows 11/10
If you’re not seeing your GPU in MSI Afterburner, chances are you might be using a buggy or outdated graphics driver. In fact, for your rig to function properly, you should always make sure you have all the drivers up to date.
Many users complain of experiencing problems with MSI Afterburner not detecting graphics cards on Windows 10 or 11.
If you’re a gamer or video editor, then having the latest GPU drivers is crucial for ensuring optimal performance and stability in your favorite applications. But when your GPU isn’t properly detected by MSI Afterburner, it can be a frustrating experience.
Luckily, there are several potential solutions that can help resolve the issue so that you can get back to gaming or editing without any problems.
In this guide, we’ll show you a few different methods that you can try to get MSI Afterburner to detect your GPU on Windows 10 or Windows 11.
TL: DR
- MSI Afterburner is a popular GPU monitoring and overclocking tool.
- MSI Afterburner is the most used graphics card software.
- Many users complain of experiencing problems with MSI Afterburner not detecting graphics cards on Windows 10 or 11.
- The Afterburner not detecting GPU issues can occur because of several reasons: improper network connection, of misconfigured settings, outdated Graphics Drivers, Vanguard anti-cheat programs, corrupted software, and interfering applications.
- You can fix the issue with different methods:
- Check the connection and cable
- Disable low-level IO driver
- Update your Graphis Drivers
- Do you have Vanguard anticheat?
- Troubleshoot in Clean Boot
- Reinstall MSI Afterburner
- In this article, we walk you through how to fix the MSI Afterburner Not Detecting GPU on Windows 11 and Windows 10
What is MSI Afterburner?
MSI Afterburner is a popular GPU monitoring and overclocking tool, offering many features and customization options for both beginner and advanced users.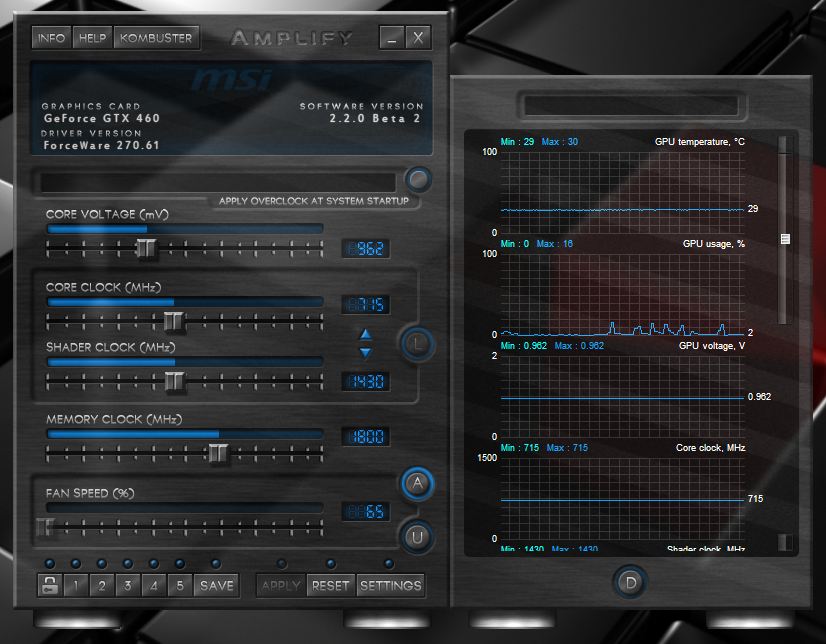
It allows you to easily monitor your GPU performance metrics in real-time: including clock speed, temperature, fan speed, and much more. And with built-in support for powerful overclocking tools like NVIDIA’s «GPU Boost» technology and AMD’s «PowerTune», it gives you control over your PC’s graphics hardware.
But despite its popularity and wide range of features, overclocking apps can sometimes have problems detecting GPUs on some systems.
Why is my GPU not detected?
There are various reasons why your GPU drivers are not detected. It can be because of improper connection. You have either not connected your display to the right port, or your connecting cable has malfunctioned. It can be because of misconfigured settings.
Other reasons include outdated Graphics Drivers, Vanguard anti-cheat programs, corrupted software, and interfering applications. We will talk about everything in detail and see what should be done to resolve the issue.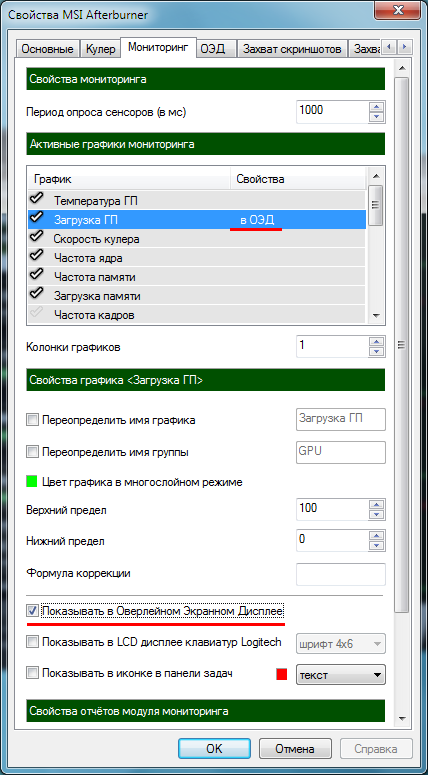
If you’re experiencing issues with MSI Afterburner not recognizing your GPU on Windows 10 or Windows 11, then don’t worry — you’re not alone.
Try These Fixes
You can try a few things without a lot of effort. Continue on until it’s the only thing that works. If you’re having trouble getting MSI Afterburner to detect your graphics card on Windows 10 or 11, there are a few things you can try:
- Make sure that your graphics card is properly installed in your PC
- Update your graphics card drivers to the latest version
- Uninstall and reinstall MSI Afterburner
- Check your device’s compatibility
- Clean boot your system
- Temporarily close programs that may interfere
- Contact MSI customer support for further assistance
As one of the most popular overclocking and monitoring tools available, it’s no surprise that many PC gamers rely on overclocking to get the most out of their hardware on Windows systems.
However, some users have reported issues with the software not working properly on Windows 10 or 11.
If the issue persists or you don’t know how to perform the solutions above, check our step-by-step guide below for a more detailed walkthrough!
How To Fix MSI Afterburner Not Detecting GPU on Windows 10/11
Method 1. Clean Boot Your System
A clean boot is a way to start Windows with a minimal set of startup programs and services. This will help you determine if any third-party programs or services are interfering with Afterburner’s ability to detect your GPU.
To clean boot your system, follow these steps:
- Press the Windows + R keys on your keyboard to bring up the Run utility in a new window.
- Type in “msconfig” without the quotation marks and press the Enter key on your keyboard. This will launch the System Configuration window.

- Switch over to the Services tab. Make sure that you check the Hide all Microsoft services box. This is going to ensure that you only see third-party services.
- After hiding all system services, click the Disable all button to disable every third-party service on your device.
- Click the Apply button and restart your PC. When you boot next, your system will only initiate essential services.
- Restart your computer. You’ll be in a clean boot state with only official Microsoft services running.
If this didn’t seem the work, make sure to try the next method below!
Method 2. Update Graphics Drivers
The first thing you’ll want to do is uninstall your existing graphics drivers and then reinstall them from scratch. This will ensure that all of the files and settings are correctly configured for MSI Afterburner, and it may fix any corrupted files that could be causing the issue.
How To Automatically Update Display Drivers on Windows
Windows update has a feature that allows you to automatically update outdated drivers. This can help you quickly find and get some of your components up-to-date without having to individually check for new versions.
- To access the Start menu, click the Windows symbol in the lower-left corner of your screen, and then choose Settings. Alternatively, press Windows + I to bring up the menu.
- Select the Update & Security tile from the drop-down menu. The majority of your Windows Update settings can be found here.
- Go to the Windows Update section, and then click on the View optional updates link if it’s available.
- Expand the Driver Updates section to see which components need to be updated right now. Simply check the boxes next to the drivers you want to update, then click the Download and Install button.
- Allow Windows to download and update your outdated drivers before restarting your machine.
How To Manually Update Drivers on Windows
Use the steps below to manually update a driver that may be out of date. Keep in mind that only legitimate sites should be used to download drivers! Some fraudulent websites may try to trick you into downloading malware-infected files.
- To access the needed utility, press the Windows + X keys on your keyboard and choose Device Manager from the context menu.
- Select Update driver from the context menu after right-clicking on the graphics card you wish to update.
- Choose how you want to update. You may either let Windows find a driver for you automatically or manually seek a fresh driver file on your machine.
Method 3. Uninstall Vanguard (If Applicable)
If you have the anti-cheat program Vanguard installed on your PC, then it’s likely that this is causing the issue with MSI Afterburner not finding your graphics card.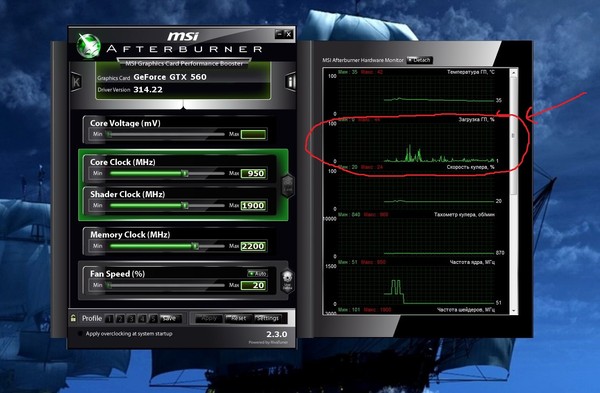
Vanguard is known to interfere with a variety of other programs and can cause all sorts of problems, so it’s always best to uninstall it if you don’t need it.
- Click on the Start menu in your taskbar.
- Select Settings, indicated by a gear. Alternatively, you can use the Windows + I keyboard shortcut to reach this application quicker.
- Click on the Apps tile.
- Switch to Apps & features from the left-side panel. You should see a list of applications currently installed on your PC that are detectable by Windows.
- Select the Vanguard application by clicking on it once. Now, you can click on the Uninstall button.
- Click the Uninstall button again to confirm your choice and open the helper wizard. This will open up in a new window.
- If prompted by the UAC (User Account Control), click Yes to allow the uninstaller to make changes on your device.
 If your account doesn’t have permissions, learn how to convert a local account into an administrator.
 - Follow the on-screen instructions provided by the developer. In some cases, you have the option to save configuration files on your device in case you plan to reinstall the same application in the future.
- Wait for the uninstallation to complete. This might take several minutes depending on the application you’re removing and your device. When done, restart your computer and see if the problem was solved.
Method 4. Check Your Cables
If you’re still having trouble getting the app to detect your GPU, then the next thing you’ll want to do is check all of your cables and connections.
Make sure that everything is properly plugged in and seated, and try restarting your PC to see if that solves the problem. Double-check the dedicated GPU port as well.
You can also take your graphics card and put it into a different computer.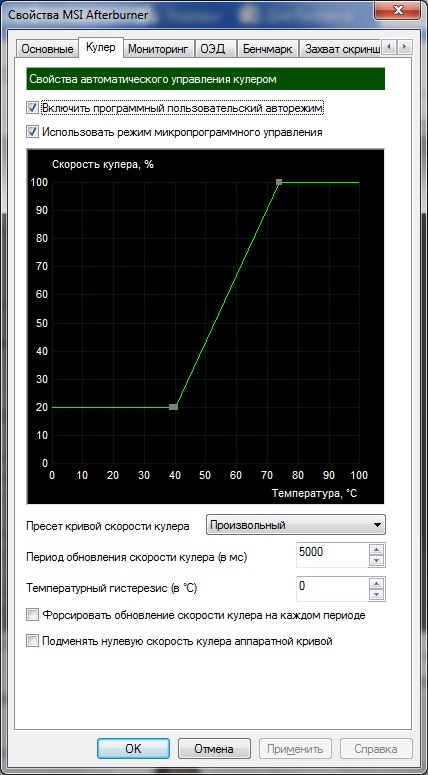 If the app is able to detect the graphics card on another computer but not your own, then you may have a bad PCI-E slot, misconfigured settings on Windows, or another hardware issue like a damaged connecting cable.
Method 5. Disable Low-Level IO Driver
If you’re using an AMD graphics card, then you can try disabling low-level IO driver access. This is a known issue with some AMD drivers and can cause problems with a variety of programs.
- Open MSI Afterburner.
- To access the Settings, click on the gear icon.
- Under Compatibility properties, clear the checkbox for Enable low-level IO driver.
- Click Apply. Finally, click OK to store the modifications.
Method 6. Reinstall the Latest Version
If you’ve tried all of the methods above and still can’t get the software to detect your GPU, then the issue might be with the software itself.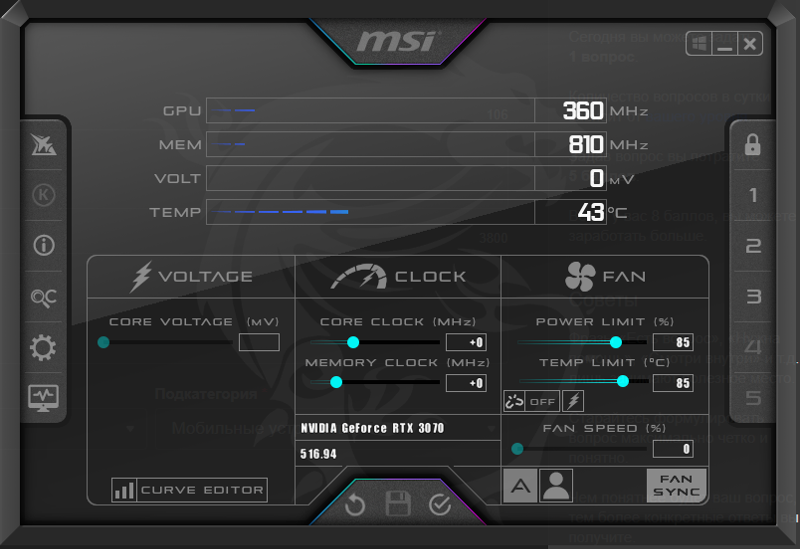 In this case, you’ll need to uninstall and reinstall it to see if that fixes the problem.
Download the latest version of the software from the official website, and follow the instructions in the installer to update your program.
Final Thoughts
We hope these solutions helped you fix the problem with Afterburner not detecting GPU. If you have any questions, feel free to leave us a message! We’re always available to help!
If you have any questions left unanswered or problems not addressed, please feel free to reach out — our team of experts would love to help! You can also check our Blog for more great articles like this one or our Help Center for a wealth of information on how to troubleshoot various issues.
One More Thing
Sign up for our newsletter and get early access to our blog posts, promotions, and discount codes.
Recommended Articles
» How to Optimize Windows 10 for Gaming
» How To Fix the NVIDIA Control Panel Not Opening on Windows
» How to Disable Hardware Acceleration on Windows 10
Feel free to reach out with questions or requests you’d like us to cover.
MSI Afterburner Not Detecting GPU On Windows 11/10 —
By Zainab Falak May 6, 2022
3 minutes read
Zainab is a certified Python Data Analytics Professional.
There have been several reports by Windows users that their MSI Afterburner is not detecting GPU on Windows systems. We had a look into the issue and discovered that your device might not be able to detect your GPU due to the following reasons:
MSI Afterburner Not Detecting GPU
- Unstable internet connection – If your internet connection is not working properly, the services depending on it will fail to function like they are supposed to, causing issues like the one at hand.
- Faulty connection cables – there is also a chance that your connecting cable is faulty or you have not connected your display to the right port.
- Outdated Graphics Card driver – your operating system and programs use your graphics card driver to access your computer’s graphics hardware.
 If this driver is outdated or corrupt, your operating system will be unable to detect relevant hardware.
 - Third-party antivirus – your antivirus program might be interfering with the legitimate processes of the operating system, preventing it from detecting the GPU.
Now that we know about the potential causes, let’s have a look at some effective troubleshooting methods that helped users fix the issue.
Check Your Cables
As we mentioned earlier, your connecting cable might be faulty, causing the issue at hand. The best way to check if your cable is working fine is by using it on another device. Also, if you are using an external display, ensure it is connected to the dedicated GPU port instead of the integrated one.
If the cable and ports are working fine, move down to the next method below.
Disable Low-Level IO Driver
Another fix that worked for several users by disabling the low-level IO driver from MSI AB’s properties. If you are facing an issue due to misconfigured settings, this method should do the trick for you.
- Launch MSI Afterburner.
- Click on the gear icon to access the Settings.
MSI Afterburner Settings - Head over to the General tab and under Compatibility properties, uncheck the box for Enable low-level IO driver.
- Click Apply and then OK to save the changes.
Uninstall and Reinstall Graphics Drivers
You should make sure you have the latest graphic card drivers installed. If you have already installed the drivers, it is best to reinstall them (probably a clean installation) and see if it resolves the issue.
However, note that It is important to turn off your antivirus software before installing the drivers. Some security software can interfere with the installation process, which is why it is best to disable them before proceeding. To do so, right-click the icon for your anti-virus software and select Disable.
Uninstall Vanguard (If Applicable)
According to several reports, the issue at hand in most of the cases was being caused by the Volarent’s Vanguard anti-cheat program. Apparently, this program interferes with the processes of MSI AB.
To check if Vanguard is causing the issue, try disabling the app. If the error is resolved by doing so, go ahead and uninstall the application via Windows Settings. Here is how you can do that:
- Press Windows + I keys simultaneously on your keyboard to open Windows Settings.
- Inside the Settings window, click on Apps.
- Select Apps & features from the left pane and locate the targeted application in the right side of the window.
- Click on it and select the Uninstall button.
Uninstall Riot Vanguard - Then, follow the on-screen instructions to complete the uninstallation process.
Troubleshoot in a Clean Boot State
Using Clean Boot State can be helpful for diagnosing and troubleshooting advanced Windows problems. If the fixes mentioned above didn’t resolve your issue, try starting Windows in Safe Mode and repeating the action that caused the error. If the issue does not appear in Safe Mode, then perform a Clean Boot.
Here is how you can perform a clean Boot on Windows:
- Press Windows + R keys on your keyboard to open a Run dialogue box.
- In the text field of the dialogue box, type msconfig and hit Enter.
Opening up System Configuration - Now click on Normal startup and go to Services tab.
- Check the box against Hide all Microsoft services and then click on the Disable all button.
Hide all Microsoft services - Hit Apply and then OK.

- Finally, restart your PC and check if the issue persists.
Reinstall Afterburner’s Latest Version
In the event that MSI Afterburner isn’t working properly on your computer, you may want to uninstall the current version proceed with the latest version. Updates typically involve several bug fixes and security updates and thus might help you with the issue.
Here is what you need to do:
- Go to the Start menu and search for Control Panel.
- Under the Programs section of the Control Panel, select View as – Category and click Uninstall a program to get started.
- Locate MSI Afterburner tool in Control Panel and right-click on it. Select Uninstall.
Uninstall MSI Afterburner - Once the uninstaller has completed the process, click Finish and restart your computer to see if errors persist.
- Once done, visit this website, download the installation file, and try installing MSI Afterburner again to verify that it is working properly.
Solved: MSI Afterburner Can’t Change Fan Speed/ Greyed Out
The fan speed setting of the MSI afterburner is grayed out and I can’t change it. Is there a way to enable the feature?
- M. Mateen
MSI Afterburner can’t change fan speed? Is the fan speed locked or greyed out? Or you can’t control fan speed because Afterburner is not working at all?
We have worked out a lot to give you the best solution to fix MSI Afterburner can’t change the fan speed problem.
Millions of users download MSI Afterburner to overclock their gaming PC. It let you adjust the hardware settings to run a stress test.
Among others, this tool is the best fan control software for Windows 10 PC. Currently millions of users are using this tool to overclock their PC. This tool also lets you check CPU and GPU temperature on a PC. Custom fan curve is its most popular feature that enables users to change or control the fan speed of CPU and GPU.
Lately, many gigabytes 2070 Windforce, Gigabyte Rtx 2080, or R9 295×2 users are complaining that MSI Afterburner is greyed out and can’t change the fan speed.
UPDATE YOUR DRIVER
in Windows 11, 10 and 7
Use Driver Easy to update all the missing & outdated device drivers on PC for free.
Free Download
Problem: Can’t change fan speed in MSI Afterburner…
I wanted to test the fans in my GPU, but for some reason, the fan control is greyed out. I tried googling this but didn’t find an answer on any other topic. In the settings, there is nothing to enable the fan control speed. Does anyone know how to do this? I’ve noticed that other people have the fan curve tab to set the fan speed according to the temperature, I don’t have that either.
Why can’t I change anything on MSI Afterburner?
How to solve MSI afterburner can’t change fan speed/greyed out
Apply the below-mentioned solutions to find the best fix if the MSI Afterburner Fan speed is locked, greyed out, or you can’t adjust the fan speed.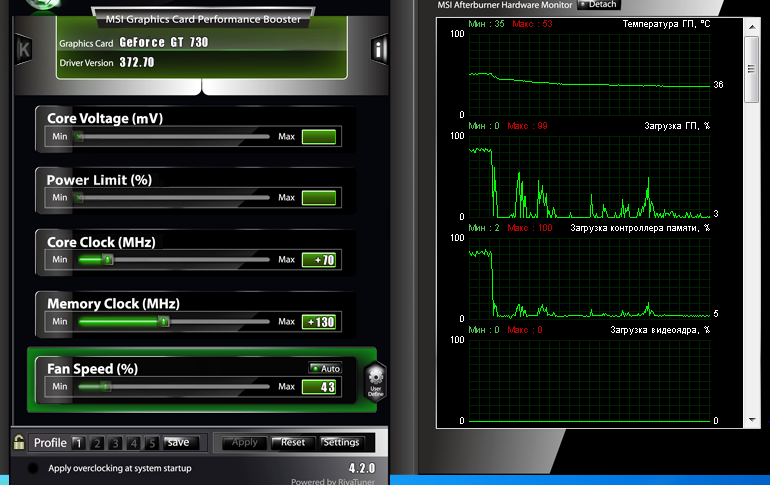
1. MSI Afterburner Fan Greyed Out
Most users start changing the fame speed after installing this tool without even knowing how to unlock fan speed in MSI Afterburner. They will see greyed-out fan settings, follow these steps to unlock fan speed. To do that;
- Open MSI Afterburner
- Click settings
- Click the Fan tab.
- Check the box “Enable user-defined software automatic fan control.”
- Set the fan curve however you like. The custom fan curve isn’t too bad.
- Click Ok and restart it.
- It will unlock the fan speed slider, make sure that the ‘Auto‘ option is disabled
Now you should see the fan speed section highlighted in green if you’re using the classic skin. That means user fan control is on. You can turn it on and off by clicking the “User Define” button on the right side of the Fan Speed box.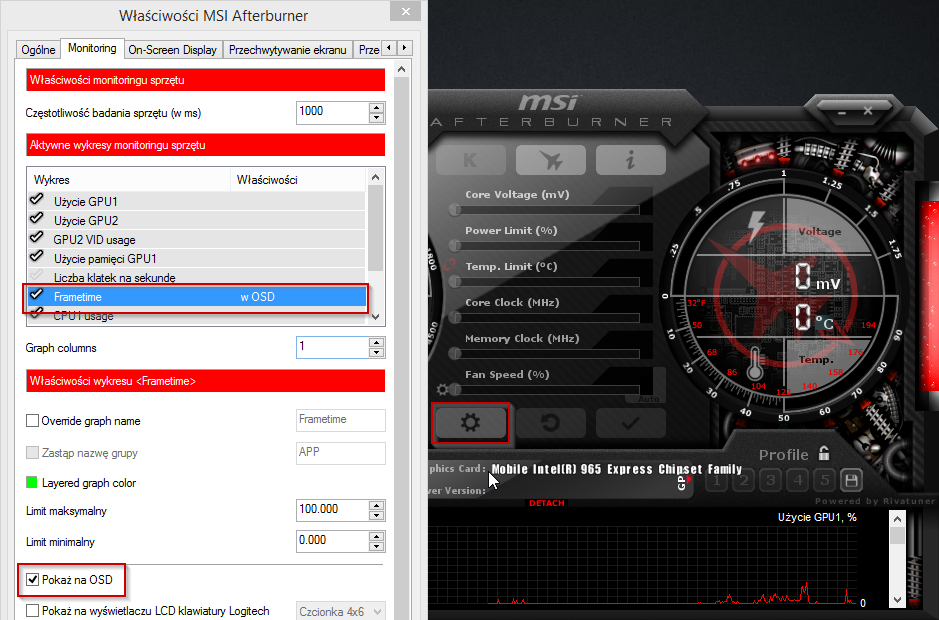
Read Also: Fixed: SpeedFan Not Working on Windows 10
2. Afterburner Fan Speed is Greyed Out in NVIDIA 20x Series GPU
If you have NVIDIA 20 series GPU then your fan settings will still be missing. The old MSI afterburner’s fan option won’t work on the NVIDIA 20x series GPU. For that, you need to download the MSI Afterburner Beta Version from their official site.
This will enable you to have access to fan control and create a fan curve. All other aspects remain the same.
3. Uninstall GPU Drivers Manually and Reinstall
If MSI Afterburner not changing fan speed or it’s not working at all, then try to reinstall GPU drivers. Use Device Manager to clean uninstall and reinstall on Windows 10 PC. Follow these instructions:
- Press Windows logo key + R and type devmgmt.msc. Now hit enter.
- Double-click on Display Adapters to expand it.
- Right-click on your GPU name and select Uninstall device.

- Visit your GPU manufacturer’s site, then download and install the latest driver available.
Sometimes your GPU drivers can interfere with your settings, especially when you switch from one manufacturer to another. Doing a clean install of the latest drivers for your new card will often fix most of your problems.
You can also download Driver Easy which is the best tool to update and delete the graphics drivers from your Windows 10 and Windows 11 PC.
4. Reinstall MSI Afterburner to Control GPU Fan Speed
Sometimes updates or changes to your system, or corrupted files can cause your software to break. Reinstalling MSI Afterburner can fix many issues, so git it a try.
- Press Windows key + I to open settings
- Click on Apps, here you will see a list of all installed software
- Click on MSI Afterburner to Uninstall it.
- Download the setup from their official site and reinstall the software.

5. Download Alternate Tool to Change the Fan Speed
If the above-mentioned solutions don’t fix MSI Afterburner can’t change the fan speed on the laptop of the PC. Then you need to download an alternate tool. There are plenty of free best fan speed controller programs for Windows 10 and 7 to manually change CPU and GPU fan speed.
- SpeedFan
- Corsair Link 4
- Argus Monitor
- EasyTune 5
- EVGA Precision X1
How to fix MSI Afterburner No Fan Tab Problem
No fan tab issue in MSI afterburner arises when you are using the standard version. Download Afterburner’s Beta version and you are good to go.
If you still can’t see the fan tab there is a chance that you are using this software on a laptop on devices having mobile GPU.
This is how we fixed MSI Afterburner can’t change fan speed/greyed out the problem on Windows 10 PC.
FAQ – MSI Afterburner Fan Speed Not Working
Why Can’t I Change my Fan Speed in MSI Afterburner?
You can’t change fan speed because it’s disabled. You need to Enable fan speed using the settings menu. In settings, click on the Fan tab. Check the box “Enable user-defined software automatic fan control“. Set the fan curve and then click Ok. It will highlight the fan speed section. Now use the User Define button to turn on/off fan speed.
Why MSI Afterburner Locked Fan Speed on Laptop?
Most laptop manufacturer has locked the fan speed settings. So there is no way to unlock it. The reason is simple laptops are compact so they tend to overheat a lot. But on the high-end graphic laptop, there’s a manual button to set the fan speed to normal, medium, or high. Alternatively, you should download SpeedFan for your Laptop.
Solve MSI Afterburner Fan Curve not Working
If the custom fan curve not working and you can’t change fan speed as per your instructions.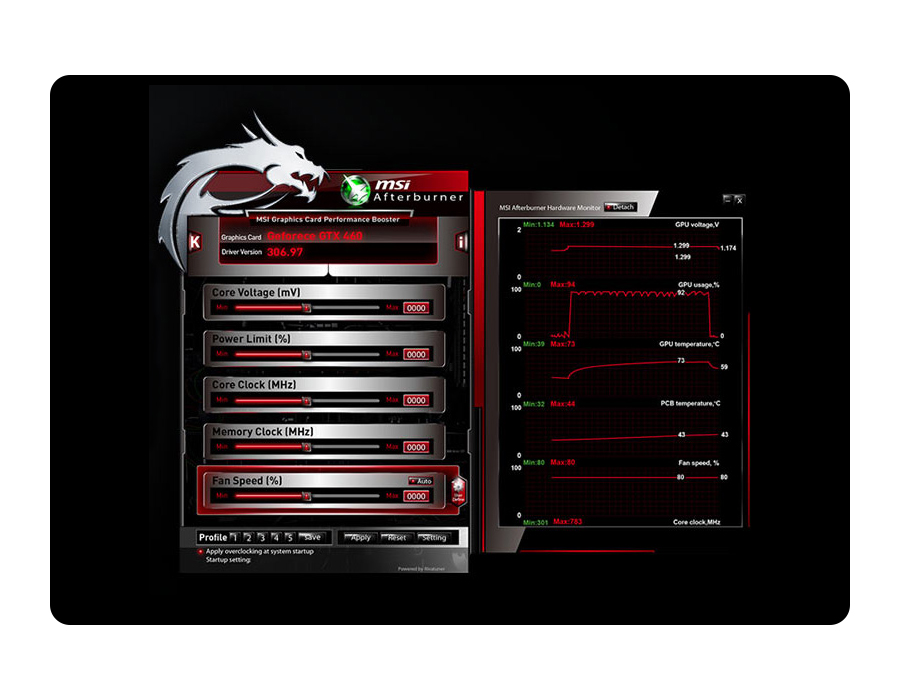 Then uninstall another fan control software that you might have. Also, don’t set the fan speed to Auto instead select User Defined.
What is Fan Sync MSI Afterburner?
Fan Synchronize allows you to switch between synchronous and asynchronous fan control modes. When fan sync in MSI Afterburner is enabled the fan speed automatically resonates with the internal heat. When Fan Sync is disabled you can select and adjust each fan speed independently by making a custom fan curve.
How to Fix MSI Afterburner Power Limit Greyed Out?
Sometimes MSI afterburner grey out the values for voltage, Temp, Core clock, memory clock, etc. You can fix the power limit problem if you change the theme or run the applications or game then you can see the power limit and other values. Download the latest beta version of Afterburner or update the graphics card driver.
How to Increase GPU Fan Speed Using the MSI Afterburner?
To increase GPU fan speed you need to set up a custom fan curve. Open Afterburner, use the fan speed slider. Click on the little gear icon and select User Define. It will open a graph with fan speed % and temperature. Dial the curve into just how you want it to behave under different temps.
Share your love
How to Fix MSI Afterburner Not Detecting GPU on Windows 11
Worried about MSI Afterburner not detecting GPU on Windows 11 and want to fix it?
MSI Afterburner is a graphics card software usually preferred by gamers who like to monitor the performance stats during a heavy performance. However, as seamless as it may be, it can sometimes run into a few problems on Windows systems.
One of the most reported issues regarding the case is MSI Afterburner not detecting GPU on Windows 11. This results in all functions graying out, rendering the program inoperational.
The reasons behind it may vary for different users. But the most common ones include poor internet connection, faulty connection cables or not connecting your display to the correct port. Outdated graphics card, corrupted software, Vanguard anti-cheat programs, third-party antivirus programs, etc. may also be the cause.
But don’t worry as we have a fix for all your problems. Read on to find out!
1. Check Your Connection and Cable.
Before we move forward to a bit of technical fixes, first ensure that all your cables are in good condition. Check if they are working fine by connecting them to a different device. If needed, replace them immediately.
Moreover, you need to verify that you have the correct display port. When using an external monitor, hook it up to the dedicated GPU. If you connect it to the integrated graphics instead, your GPU will not appear in MSI Afterburner as it would not be detected as display.
2. Disable Low-Level IO Driver.
According to some users, the MSI Afterburner fails to detect the GPU due to misconfigured settings. In that case, disabling the low-level IO driver has seemingly fixed the problem. It can be done from the MSI AB’s properties.
Follow the steps below to do so:
- Begin by launching the MSI Afterburner.
- From the left pane, click on the Gear icon to access settings.
- Now, go to the General tab to open properties.
- Under Compatibility properties, uncheck the box next to Enable low-level IO driver.
- Lastly, click on Apply then on OK to save these changes.
- Restart your PC afterward.
If the issue persists, move to the following method.
3. Disable NVIDIA and Steam Overlay.
NVIDIA or Steam Overlay is often the main cause behind MSI Afterburner not detecting GPU on Windows 11.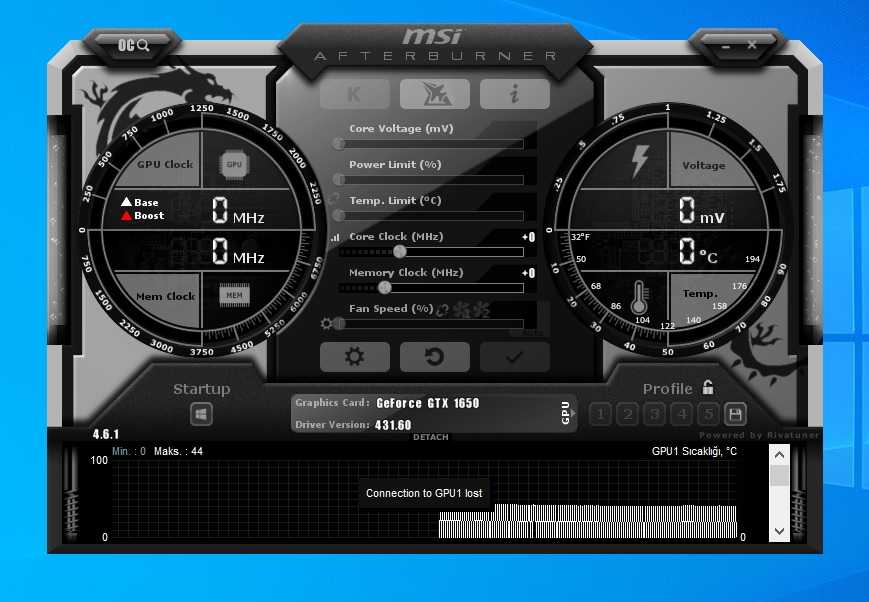 It hinders the overlay of Afterburner from performing optimally. In that case, you can fix the issue by disabling Steam or NVIDIA Overlay.
Here’s how to disable NVIDIA Overlay on your computer:
- In the Windows search bar, type ‘geforce experience’ and click Open.
- Next, click on the Gear icon present at the top-right corner of your screen to open settings.
- In the General tab, toggle off In-Game Overlay.
- Also, disable the toggle for the Share option.
To disable the Steam Overlay, follow these steps:
- To start, press Windows key + S to open the search menu.
- Type ‘steam’ in the relative field.
- Click on Open from the right pane.
- Next, go to the Library tab and locate the game you’re having trouble with.
 Then, right-click on it and choose Properties.
- Finally, go to the General tab and uncheck the box next to Enable the Steam Overlay while in-game.
Overlaying of any program, in fact, may affect the performance of MSI Afterburner. Hopefully, this method would have been successful in fixing the issue. If not, simply continue reading.
4. Disable/Uninstall Vanguard.
For most users, the problem arises due to the Valorant Vanguard anti-cheat program interfering with the MSI Afterburner. However, since it is not a confirmed cause, we recommend you first Disable Vanguard on your system. This can be done from the icon located in the system tray.
If the issue gets resolved, uninstalling the program should be your next step. Here’s how to do it:
- Firstly, press the Windows key + i from your keyboard. Alternatively, you may click on the Start button and choose Settings.

- When the window opens, click on Apps from the right pane.
- Then, go to Apps & features.
- Now, you may either utilize the Search apps field under App list or scroll through the list to find Vanguard.
- Once located, click on the three vertical dots and select Uninstall.
- Again click on the Uninstall button for confirmation.
- Once the User Account Control box appears on your screen, choose Yes.
- Finally, restart your computer to check if the MSI Afterburner works now.
5. Update Graphics Drivers.
Outdated GPU may also result in MSI Afterburner not detecting GPU on Windows 11 either due to compatibility issues or bugs. Such errors can be eliminated upon updating drivers to their latest version.
You can manually update the Graphics driver by going to the manufacturer’s website and installing the latest driver from there. Alternatively, you may use the automatic updates featured by Windows to make the task easier for yourself.
Here’s how:
- Press Windows key + S and type ‘device manager’ in the Search bar. Then click Open from the right pane.
- When the window opens, click on the drop-down arrow next to Display adapters.
- Next, right-click on the driver you wish to update and choose Update driver.
- Finally, choose Search automatically for drivers and follow the on-screen instructions.
Restart your computer when the driver is successfully updated before opening MSI Afterburner. Then, check if the issue has been resolved.
6. Check For Windows Update.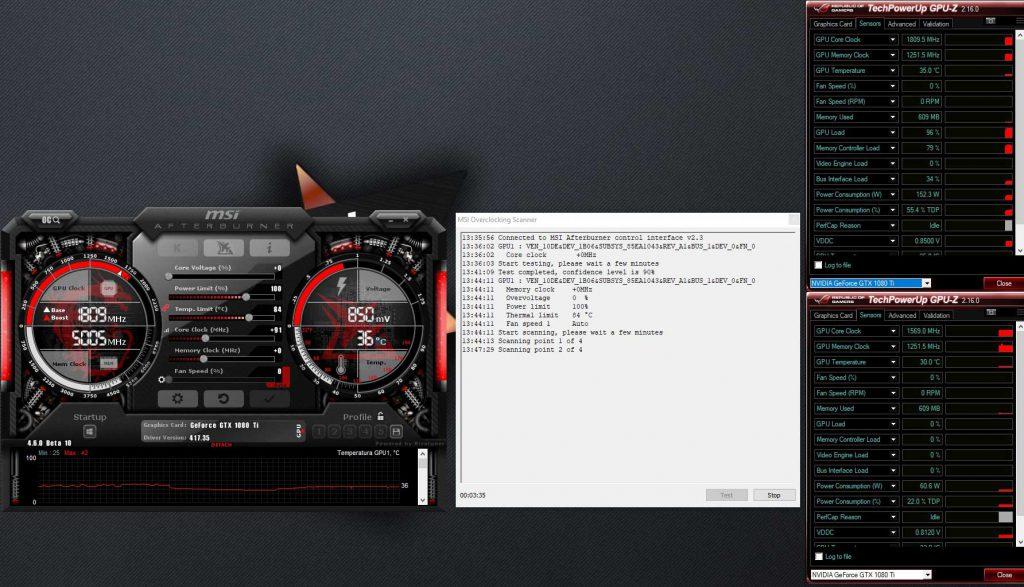
Windows updates usually contain fixes for issues frequently reported by users. It also eliminates software compatibility issues. For this reason, it’s advisable to always keep your system up to date.
Here are the steps you need to follow:
- To begin, press the Windows key + i on your keyboard.
- From the settings, choose Update & Security.
- In the Windows Update tab, click on the Check for updates button.
Windows will then start downloading and installing the available version unless it states that you’re up to date.
7. Troubleshoot in Clean Boot.
Apart from Vanguard, there are multiple other applications that interfere with the working of MSI Afterburner. Therefore, it becomes essential to perform a Clean Boot on your PC. By following this method, you’ll be able to shorten the list of possible culprits.
To do so, follow these simple steps:
- First, press the Windows key + R on your keyboard, type ‘msconfig’ in the field, and click on OK.
- When a new window pops up, go to the Services tab.
- Then, check the box next to Hide all Microsoft services.
- Also, uncheck the services other than those from your hardware manufacturers. These may include Realtek, AMD, Intel, Logitech, NVIDIA, etc.
- Finally, click on OK.
- Next, press Ctrl, Shift, Esc simultaneously to launch Task Manager.
- From there, click on the Startup tab.
- Then, select one program at a time you suspect may be the culprit behind the GPU not being detected and click Disable.
- Lastly, restart your PC.
8. Reinstall the Latest Version of MSI Afterburner.
Similar to how Windows updates bring several fixes, the new MSI Afterburner version will do the same if the problem lies in the program. Reinstalling a new version will reset all settings and profiles and thus eliminate all bugs and errors in the system.
Follow the steps below to do so:
- Launch Control Panel on your computer.
- Next, choose Uninstall a program under Programs.
- Scroll down and locate MSI Afterburner. Right-click on it and select Uninstall.
- Once done, click on Finish and restart your PC.
- After that, download MSI Afterburner again.
Hopefully, this will bring your PC back in good condition, and MSI Afterburner will start detecting GPU again.
That was it! You’ve made it to the end of our guide on how to fix MSI Afterburner not detecting GPU on Windows 11. If you’re still confused about anything related to the topic, feel free to state it in the comment section below. We’ll be happy to assist you further.
If this guide helped you, please share it. ?
Join 50,000+ subscribers
Stay updated on the latest discounts, exclusive promos, and news articles from Saint.
How to Use MSI Afterburner [Quick & Easy Guide]
by Brent Hale
MSI Afterburner is easily the most popular graphics card utility software available. Afterburner comes with a ton of system tuning options and gives you versatility in tweaking and monitoring your system’s performance.
Below, we’ve provided a breakdown on how to use MSI Afterburner, as well as covered some important features and add-ons it comes with.
Table of Contents
1. Is MSI Afterburner Safe?
2. Where to Download Afterburner
3. Which GPUs Work with Afterburner
4. MSI Afterburner Features
5. How to Use MSI Afterburner
6. How to Overclock Your GPU
7. Fan Control Feature
8. Hardware Monitoring
9. MSI Afterburner Alternatives
Is MSI Afterburner Safe to Use?
If you have MSI Afterburner on your computer and you’re not sure how it got there, or if you’re on the fence on whether or not you should download it, you can rest easy… MSI Afterburner is completely safe to use. As mentioned above, it is a graphics card utility software designed by popular PC hardware manufacturer MSI.
It should be noted, though, that, according to pcgamesn.com, in early 2021, scammers setup a fake site that pretended to be the official MSI Afterburner download site. Those who fell victim to the fake site ended up downloading malware onto their computer instead. Fortunately, you can avoid this problem by ensuring that you download Afterburner directly from MSI’s website.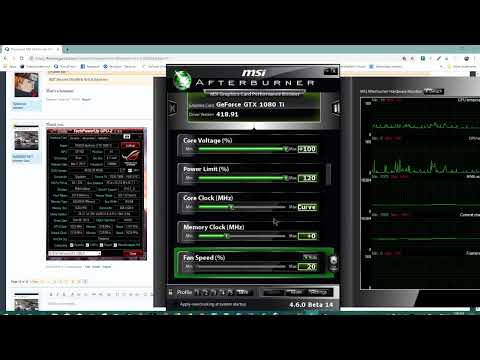 (See below.)
Where to Download MSI Afterburner
The best place to download MSI Afterburner is directly from MSI and, more specifically, from this link:
https://www.msi.com/Landing/afterburner/graphics-cards
Sites like techspot.com and guru3d.com offer safe downloads as well, but your best bet is to get the software directly from MSI.
The installation process is fairly straightforward: download the program, open it, and go through the install wizard.
One important note, during the installation, you will be asked if you want to install RivaTuner Statistics Server. It is recommended that you check the box and include RTSS in your download, as it will give Afterburner more functionality.
What GPUs Does MSI Afterburner Work With?
MSI Afterburner is compatible with both AMD and NVIDIA GPUs.
MSI Afterburner Features
MSI Afterburner offers three main features…
- GPU Overclocking
- Fan Control
- Hardware Monitoring
The program allows you to overclock your GPU directly from the software and allows you to modify your GPU’s core clock and memory clock speeds.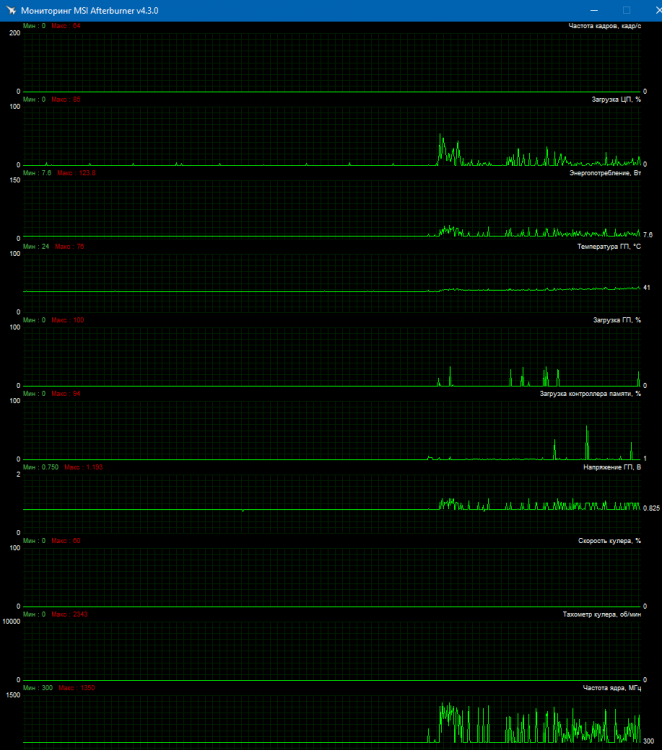
You can also manually control your GPU’s fan speed and set custom fan curves.
And, finally, MSI Afterburner can serve as a hardware monitoring program that allows you to see your current GPU and CPU usage and temperature, among other vital information about your system.
How to Use MSI Afterburner
The following sections will cover how to use different features on MSI Afterburner.
How to Overclock Your GPU With MSI Afterburner
Overclocking your GPU with MSI Afterburner is a fairly straightforward process, especially with MSI’s one-click overclocking feature, OC Scanner.
- With the software open, click on the settings icon.
- Make sure that ‘Unlock voltage control’ and ‘Unlock voltage monitoring’ are enabled by checking their corresponding boxes and applying the changes.
- Exit out of the settings menu.
- Find the OC scanner icon and click it. (In most versions it will have some combination of ‘OC’ and a maginifying glass/search icon on it.
 )
) - With the MSI Overclocking Scanner window open, click ‘Scan’.
- OC Scanner will now start running a series of tests that will determine the most stable overclock your GPU can handle. This process can take ~10-20 minutes to complete.
- Once the scan is complete, it is recommended that test the new settings to ensure that your system is stable by clicking ‘Test’. This process takes about ~5 minutes to complete.
After the process is finished, you will have a custom curve that will now control the speed and voltage at which your GPU operates under certain loads.
While OC Scanner is the easiest way to overclock your GPU with MSI Afterburner, it doesn’t overclock your GPU’s memory (or VRAM). To overclock your GPU’s memory, you can use the Memory Clock slider on the main page of the user interface.
And, instead of overclocking your GPU with OC Scanner, you can also use the Core Voltage, Core Clock, and Memory Clock sliders to overclock your GPU manually.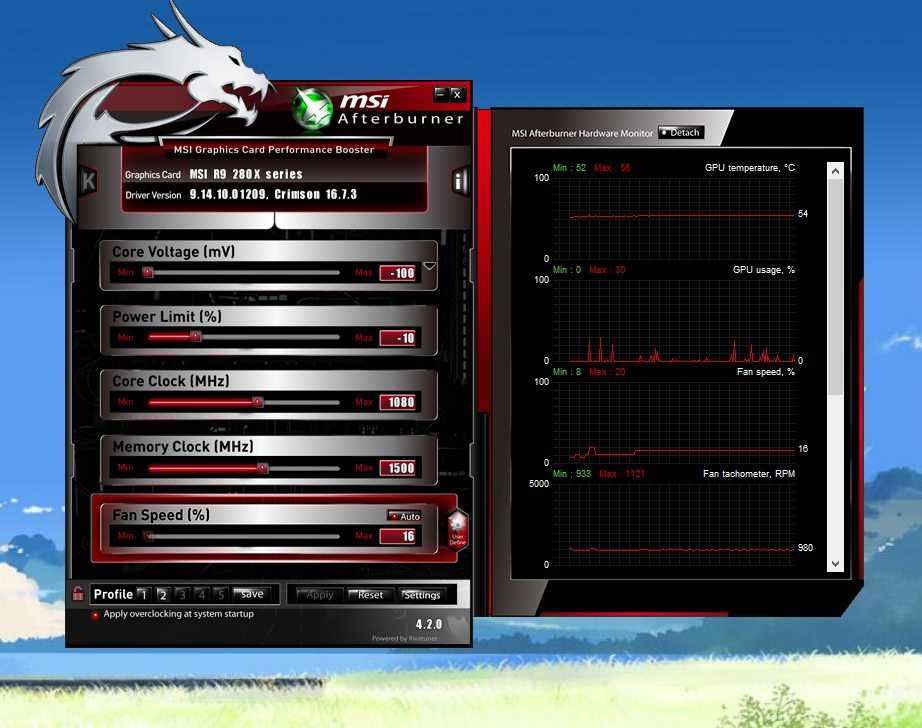 While there isn’t much risk of damaging your GPU by altering the sliders yourself, it can be a lengthier process finding the right settings for your system. It is recommended that you bump up the sliders slowly and test after each change to ensure system stability.
Reverting or Saving Changes
If you find that your GPU is having problems after overclocking it in MSI Afterburner you can use the ‘Reset’ button to go back to your GPU’s default settings.
And, if you’ve achieved a stable overclock, you can save your settings to a profile with the ‘Save’ button, so that you can easily overclock your GPU to a stable level in the future.
Fan Control
There are a couple of different ways you can change your GPU fan speed with MSI Afterburner’s fan control settings.
You can manually change the fan speed with Power Limit, Temp Limit, and Fan Speed sliders on the user interface.
You can also set a custom fan speed curve by clicking on the ‘User define’ icon and altering the fan curve to your desired settings.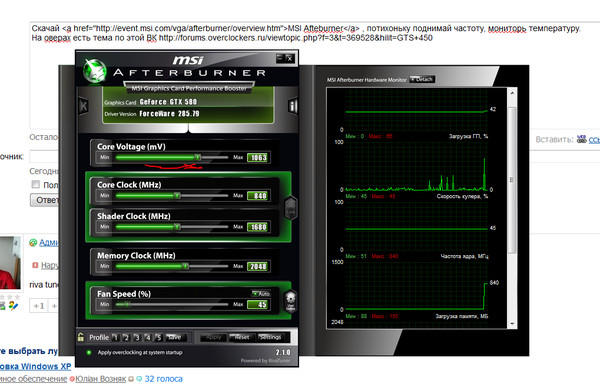
Hardware Monitoring
You can monitor your GPU’s clock speed, memory clock speed, voltage, and temperature directly from the MSI Afterburner interface.
You can also see a variety of other system information, like your CPU usage, GPU usage, CPU temperature, memory usage, memory clock speed, etc. by clicking on the ‘Detach’ icon and opening the MSI Afterburner hardware monitoring window.
MSI Afterburner Alternatives
While there aren’t many alternatives that will offer all of the features that MSI Afterburner comes with, there are a bunch of tools that can replicate the different individual features that Afterburner provides.
GPU Overclocking
- EVGA Precision
- ASUS GPU Tweak
- RivaTuner (on its own)
- NVIDIA Inspector
Fan Control
- FanControl
- Zotac Firestorm
- SpeedFan
Hardware Monitoring
- GPU-Z
- HWiNFO64
- Open Hardware Monitor
Can I Use MSI Afterburner With Non-MSI Cards?
Can MSI Afterburner be used with non-MSI cards? If so, how? Does it have MSI-exclusive features?
I’m looking to address these core questions and more on MSI Afterburner in this article, so by the end of it, you should have a fairly good idea of how to make the most of Afterburner with your specific PC setup.
Let’s get into it.
What is MSI Afterburner?
First, let’s start by establishing what MSI Afterburner actually is.
Source: MSI
MSI Afterburner is used for GPU control and GPU monitoring, including overclocking and performance benchmarking functionality.
Prominently, it’s also maintained by the GPU Manufacturer MSI, which leads to the question posed by the title of this article: can it be used with Non-MSI Graphics Cards?
Can MSI Afterburner Be Used With Non-MSI Graphics Cards?
Absolutely! MSI Afterburner works for just about any graphics card, not just MSI-made graphics cards.
Besides Afterburner, MSI has its own custom software solutions that are specific to its hardware (ie, Dragon Software). Afterburner can be used alongside MSI’s tools on MSI cards or just in general by people who want a great tool for monitoring and overclocking their GPUs.
What Is RivaTuner Statistics Server?
When installing MSI Afterburner, you will also be prompted to install RivaTuner Statistics Server.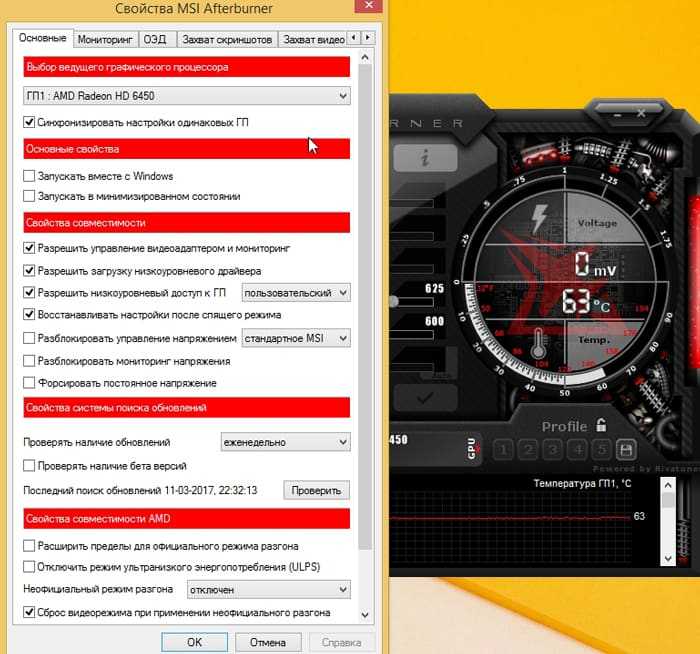
If you want to make the most of Afterburner’s built-in Benchmarking and Overlay functionalities, I recommend installing RivaTuner Statistics Server alongside Afterburner, as this will enable the full feature set of Afterburner to shine.
Besides Afterburner functionality, RivaTuner Statistics Server also serves fairly well in its own right as a tool to control and cap in-game Frames Per Second (FPS), or framerate. This function can be applied globally or on a per-application basis.
RivaTuner also offers something called Scanline Sync, which is basically meant to serve as an alternative hardware FreeSync/G-Sync by forcing all screen tearing to occur on a single, controlled scanline.
Does MSI Afterburner Have MSI-Exclusive Features?
Within MSI Afterburner, you may expect to find MSI-Exclusive features, but this isn’t necessarily the case.
Almost all of the core overclocking, cooling, and monitoring functionalities offered to MSI GPUs are offered to every GPU running MSI Afterburner.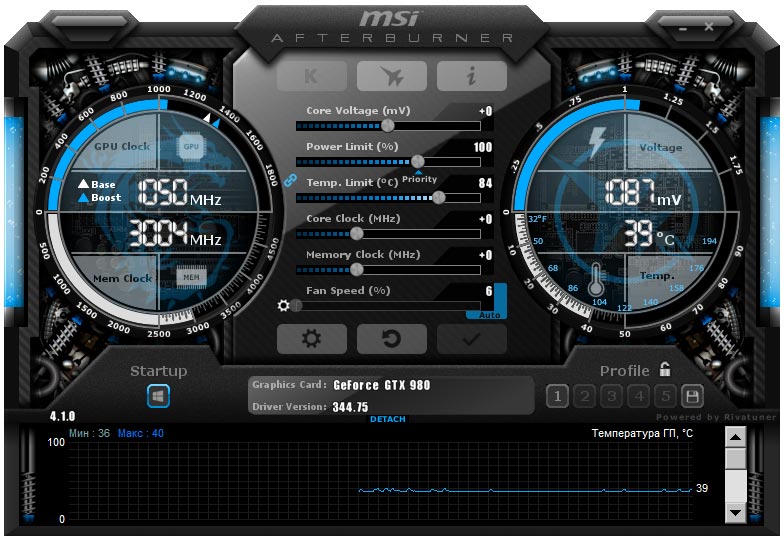
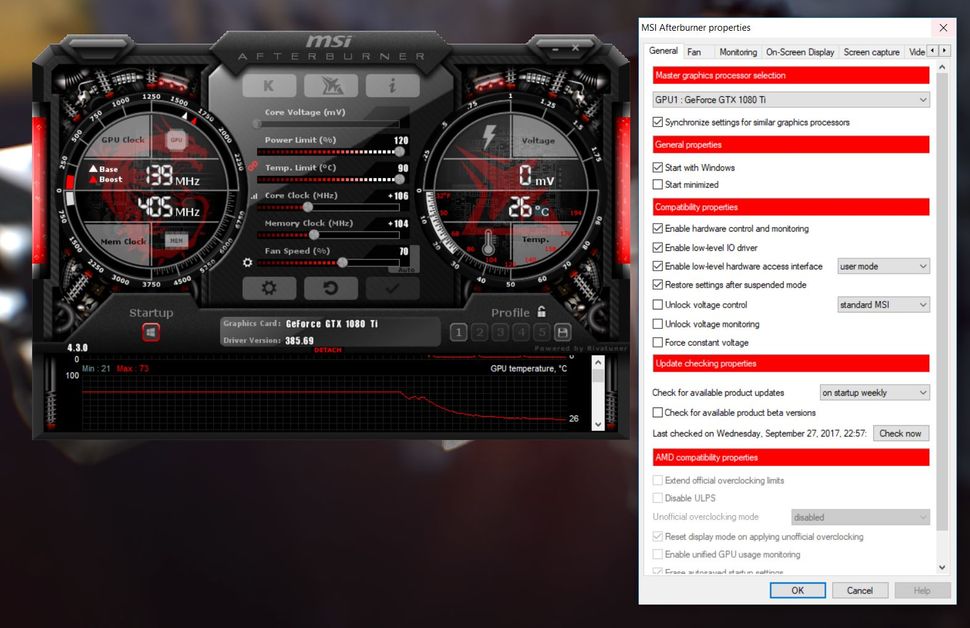
You won’t start noticing anything particularly MSI-specific until you dig into the deeper Settings, specifically voltage control:
As shown in the screenshot above, MSI Afterburner has an option for unlocking voltage control. This option includes a dropdown window with four different Voltage Control options, two of which are only functional on MSI-supported graphics cards.
The “Reference” option is for reference cards (also known as Founders Edition cards, more on that here) or partner cards that share that PCB design, whereas “Third Party” is community-supported for other designs.
Standard MSI Voltage Control and Extended MSI Voltage Control are both MSI GPU-specific options within MSI Afterburner but also the only MSI-specific options that I could actually find. Pretty much everything else is GPU brand-agnostic.
So to really answer the question, yes: MSI Afterburner can be used with non-MSI cards, and there aren’t any real compromises to doing so.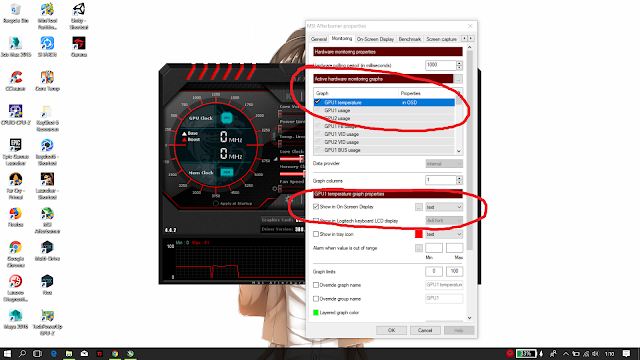
There may be some cases where you would want to use your GPU manufacturer’s tweaking software instead, but Afterburner is an industry-leading overclocking tool for very good reason.
Let’s get into how MSI Afterburner actually works now, starting with how to install it.
How To Install MSI Afterburner
Fortunately, the MSI Afterburner install process is pretty simple.
Head to MSI Afterburner’s landing page and click “Download Afterburner” to get a quick install of the latest version of Afterburner.
You’ll get an MSIAfterburnerSetup.zip file, which you’ll want to extract and open to get to your actual Setup executable.
Launch the executable, and proceed through it, selecting your language of choice and choosing whether or not to install the Riva Tuner Statistics Server (RTSS) with Afterburner.
I recommend installing RTSS alongside Afterburner to make the most of Afterburner’s monitoring and benchmarking features, but it isn’t strictly necessary for the overclocking or other GPU control functionalities.
Once you’ve gone through your basic install process, it’s time to actually use MSI Afterburner.
Launch it, and let’s get into the basics before we start wrapping up.
How To Use MSI Afterburner
Fortunately, MSI Afterburner will present itself and its controls to you pretty much right off of the bat.
MSI Afterburner Main Control Window
Without even leaving the main screen, you can make adjustments to your GPU’s Core Clock, Memory Clock, Power Limit, Temperature LImit, Fan Speed, and even Voltage.
You’ll also see a real-time reading of your current GPU Clocks and Temperatures up top.
On the right side, you’ll see dedicated Number buttons, which are toggles for their respective GPU profiles.
GPU profiles will save your GPU clocks, fan curves, or both depending on your settings. Be sure to use this functionality to make testing and saving different clock settings as easy as possible.
MSI Afterburner Monitoring Window
Clicking the monitor in the lower-left corner will also reveal the active monitoring window, screenshotted separately below but usually attached directly to the main window.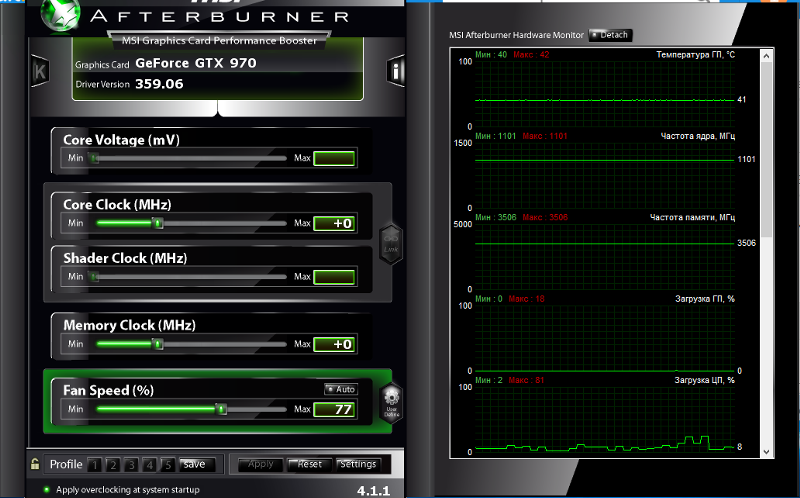
By default, this will list your basic GPU Temperature and GPU Usage, as well as a few other statistics. You can adjust the number of metrics for this window to track in the Properties Window— more on that in Settings to Check.
While Fan Speed, Temperature Limit, and Power Limit are all somewhat self-explanatory, GPU Core and GPU Memory Clocks may require a bit more explanation.
GPU Core Clock refers to the clock speed being maintained by your GPU’s processing cores, which has the greatest direct impact on graphics performance.
GPU Memory Clock refers to the clock speed being maintained by your GPU’s dedicated VRAM (Video Random Access Memory), usually something like GDDR6 or HBM2 memory.
This doesn’t always have an obvious direct impact on graphics performance by itself, but increasing it alongside GPU Core Clock seems to help stabilize performance for both metrics.
When adjusting GPU clocks and voltage, it’s very important to check for stability.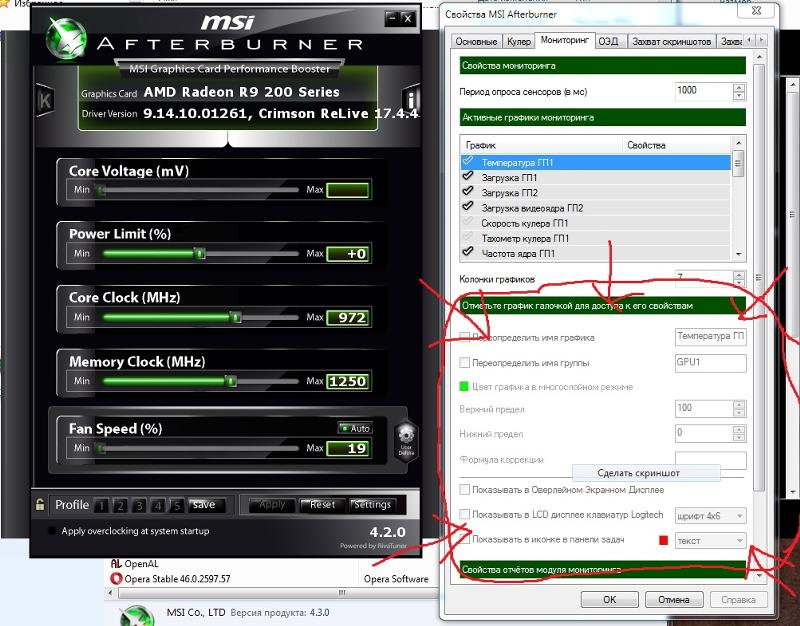
Overclockers and undervolters should always test with iterative bumps to core and clock speed using software like OCCT or Furmark alongside Afterburner’s Profile functionalities to easily make and revert changes.
Want a more detailed breakdown of GPU Core and GPU Memory Clocks? Head here for an extended guide!
Other Settings To Check In MSI Afterburner
Click the Gear Icon on the left side to open up your deeper Settings and Properties menus.
MSI Afterburner Settings
Most options are self-explanatory or explained with tooltips, but I’ll still breakdown each of the categories below:
MSI Afterburner Properties, General Settings Window
- General — Most general settings, including the aforementioned Voltage-related settings and settings controlling other basic functionality.
- Fan — Fan curve control window.
- Monitoring — Choose various monitoring settings, including what to track in the graph and in the On-Screen Display overlay, if it’s enabled.
- On-Screen Display — Configuration of the OSD Overlay, namely hotkey toggles for OSD-related functions…and framerate limiters, for some reason. Head to RTSS for more OSD options.
- Benchmark — Benchmark configuration settings.
- Screen capture — Screen capture settings.
- Video capture — Video capture settings— I wouldn’t generally use Afterburner for video capture, though.
- Profiles — Determine profile hotkeys, what settings are saved by profiles, etc.
- User Interface — Various interface tweaks and options, including skin selection. If you prefer the older MSI Afterburner interface or just want to try another look, this is where to go.
MSI Afterburner Properties, UI Settings Window
How To Use RivaTuner Statistics Server With MSI Afterburner
Once you’ve installed MSI Afterburner and RivaTuner Statistics Server, you can start using them together! By itself, RivaTuner Statistics Server can be used to apply global or per-game FPS caps, as well as a unique alternative to V-Sync and other -Sync technologies called Scanline Sync.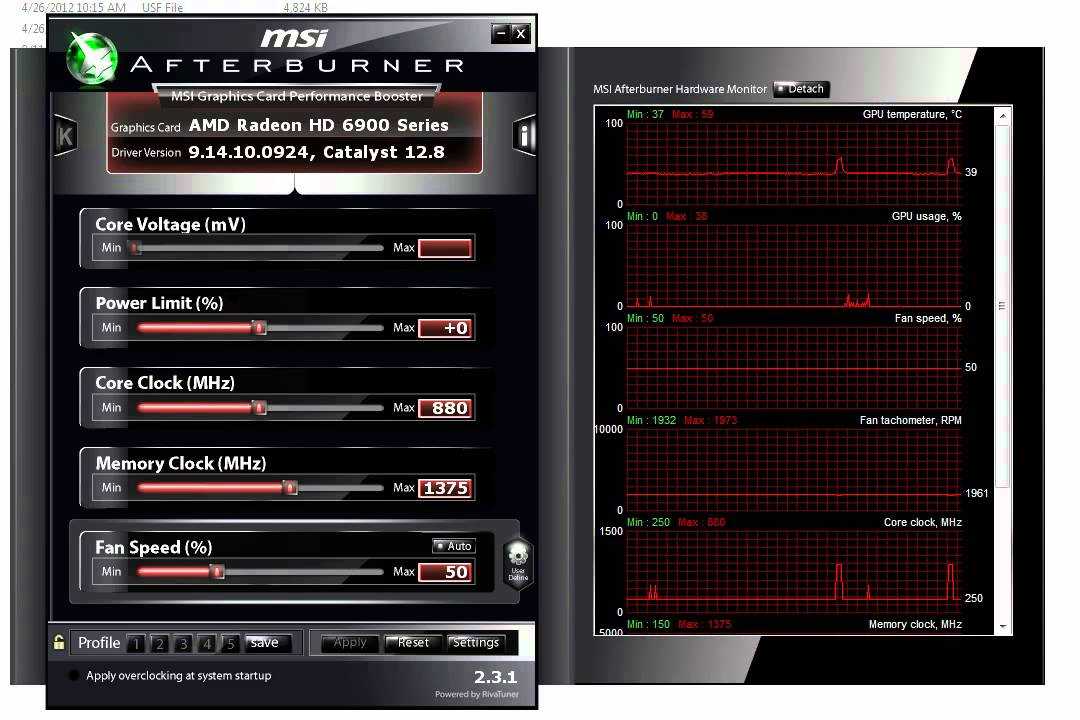
Either of these technologies serve as a direct method of controlling or improving the fluidity of whatever games you happen to be running under RivaTuner.
So, what purpose does RTSS serve when run alongside Afterburner?
Mainly to help manage the OSD (On-Screen Display) overlay that you might’ve noticed in MSI Afterburner’s options. In RTSS, you’ll see more options for tweaking your OSD, but you’re also now able to set these options globally or change them on a per-game basis.
MSI Afterburner’s Monitoring options tab is where you’ll want to go to change most of your OSD settings, especially relating to what metrics are actually shown in the OSD. RTSS by itself really only reports framerate. The OSD options you can change in RTSS are:
- OSD Support – Self-explanatory.
- OSD Rendering Mode – Vector or Raster 3D. Shouldn’t matter, but Raster recommended.
- OSD Coordinate Space – Shouldn’t matter.
 Use Framebuffer if Viewport doesn’t work.
 - OSD Shadow – Shadow beneath active OSD. Remove if you want a clearer image in game.
- OSD Fill – Fills OSD with background color.
- Show own statistics – Needed for all of your MSI Afterburner diagnostics to be shown in the OSD as well. Enable this!
- OSD Palette and Zoom – Self-explanatory. Zoom is a slider that you can use to adjust the relative size of your performance metrics.
OSD Preview and Adjust – At the bottom of RTSS’ window, you’ll observe a rectangle with a 60 in the top-left corner. This is actually a rough preview of your OSD, including all above settings. This is also where you can choose which of the four corners of your monitor your metrics will originate from, with top-left being the default. Click the corner you want in order to change this.
Follow-Up Questions
How Do You Lower GPU Temperatures?
The first and most obvious step since you’re on the Afterburner article is to recommend you disable your overclock if you have one running.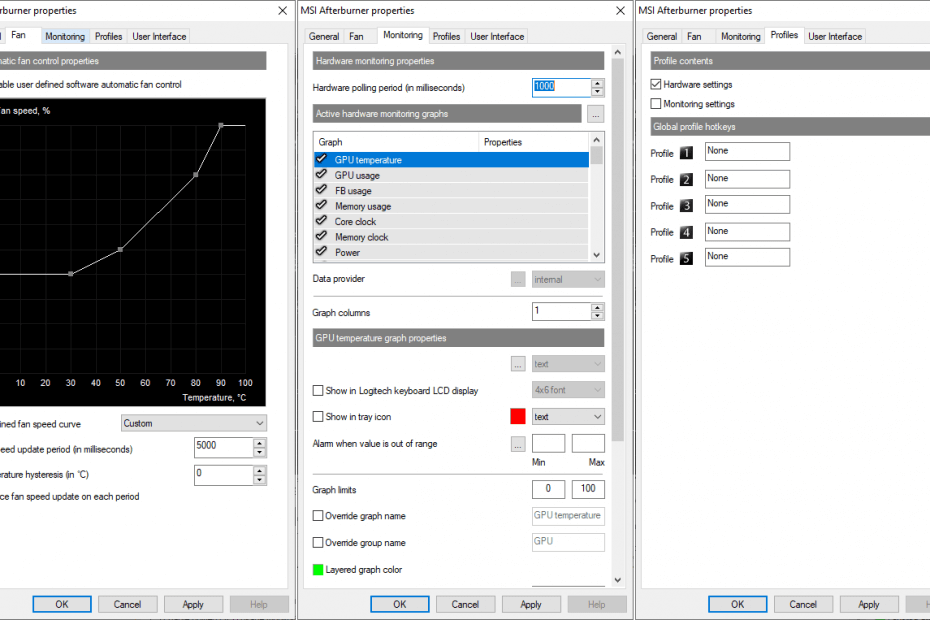
But that isn’t the only way to reduce your GPU temperatures, and ideally, you would still want to reduce the temperature that a stable GPU overclock runs at.
So, how can you do that?
I’ve written a more detailed guide to lowering GPU temperatures already, but the short version of my advice is to improve your case airflow, clean your GPU with compressed air, and even consider replacing your thermal paste if it’s been enough years since the initial GPU purchase.
All of these steps will help improve your GPU temperatures, even with an active overclock.
Can You Lower GPU Temperature In MSI Afterburner?
Yes, actually, and you don’t even need to touch your GPU core and GPU memory clocks.
The easiest way to do this is by simply making adjustments to your fan curve to improve your temperatures, albeit at the cost of louder GPU operation.
A more in-depth solution to reducing GPU temperatures in Afterburner can actually be found in the process of Undervolting, though.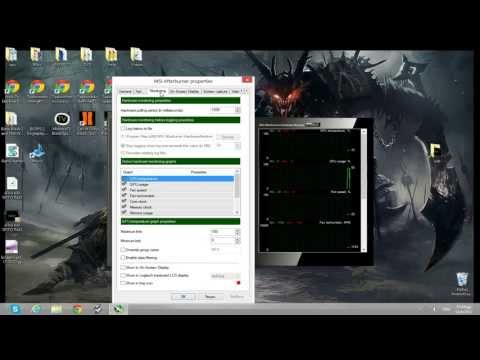
Undervolting is when you keep your GPU clocks the same, but find a safe, lower voltage to operate your GPU at while still achieving those clocks.
This will keep your performance about the same, potentially even improving its consistency, while also reducing power consumption and heat exhaust.
Undervolting will serve to slightly reduce GPU temperatures and usage across the board while still maintaining solid performance, but takes some tweaking in order to do properly.
That’s a bit out of the scale of this article, so I’ve embedded PCWorld’s Undervolting Guide below:
What GPU Brands Besides MSI Should I Be Looking At?
Since MSI Afterburner isn’t exclusive to MSI GPUs, you may be wondering what other GPU brands you should be looking at. Fortunately, I’ve written a detailed breakdown of what the best GPU brands are and what they’re known for in the market, so you can head there if you want a detailed breakdown.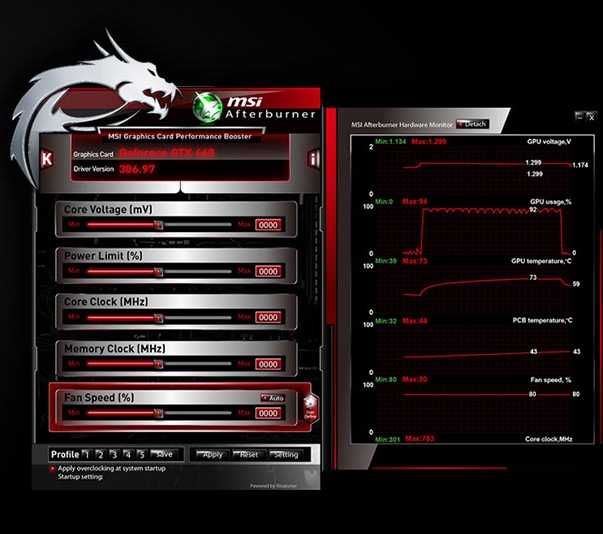
If you’re curious as to how MSI stands out among GPU brands, they’re actually pretty highly-favored in my book. MSI makes great GPUs for both Nvidia and AMD, usually budget-oriented but not afraid to flirt with high-end cooling designs, either. MSI doesn’t really make GPUs with unconventional or blower style cooler designs, though.
Why Should I Use Frame Rate Limit in RTSS?
Since MSI Afterburner and RivaTuner Statistics Server are both directly tied to GPU performance and performance metrics in general, you may have some lingering questions relating to RTSS’ Frame Rate Limit feature.
RTSS’ Frame Limit feature serves to limit framerate on a global or per-app basis according to your preference. If you set this to match your native refresh rate, it should ensure that you have a smooth, screen-tearing free experience in your games without introducing the lag caused by V-Sync. Add G-Sync or FreeSync support on top of a solid FPS cap (in-game or RTSS), and you’ll have a superbly smooth visual experience.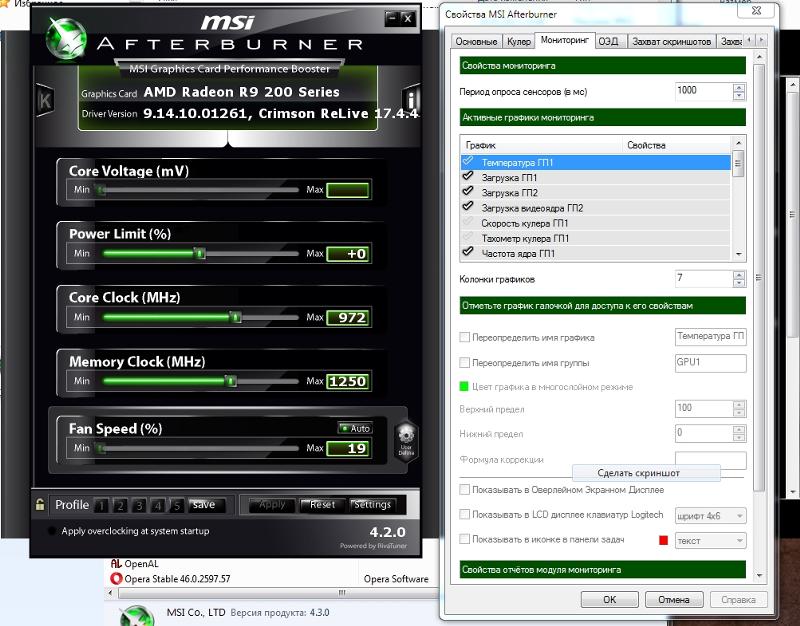
Click here for more on monitor refresh rates and response times in gaming.
Over to You
MSI Afterburner, despite its name, is still perfectly usable with other GPU brands.
I wrote this entire article and took all its screenshots with a Gigabyte GTX 1070, which I’ve used with Afterburner without issue for quite a while now. In the past I’ve also used Afterburner for other GPU overclocks, like my old GTX 760.
I hope this article helped give you a solid start to using Afterburner, with or without an MSI GPU. Leave a comment below or in the Forums and let me know: how is Afterburner treating you? What overclock or undervolt have you managed to achieve with it? I’d love to know!
Until then or until next time, have a good one. Until then, happy GPU tweaking, and don’t forget to install RTSS too!
CGDirector is Reader-supported. When you buy through our links, we may earn an affiliate commission.
0006
900SI Afterburner How to properly configure MSI Afterburner 9006
 Automatic overclocking
 Instructions for using MSI Afterburner
Sometimes after installing some games, it turns out that the video card does not have enough power. This is very frustrating for users, because the application will either need to be abandoned, or they will have to buy a new video adapter. In fact, there is another solution to the problem — using MSI Afterburner. This is a program that is designed to overclock a video card to full capacity. In addition to the main function, it also has additional ones, such as monitoring the system, capturing video and creating screenshots.
How to use MSI Afterburner
Before using the program, users need to be aware that the video card may be damaged if not done correctly. Therefore, you should strictly follow the instructions. Undesirable and automatic overclocking mode.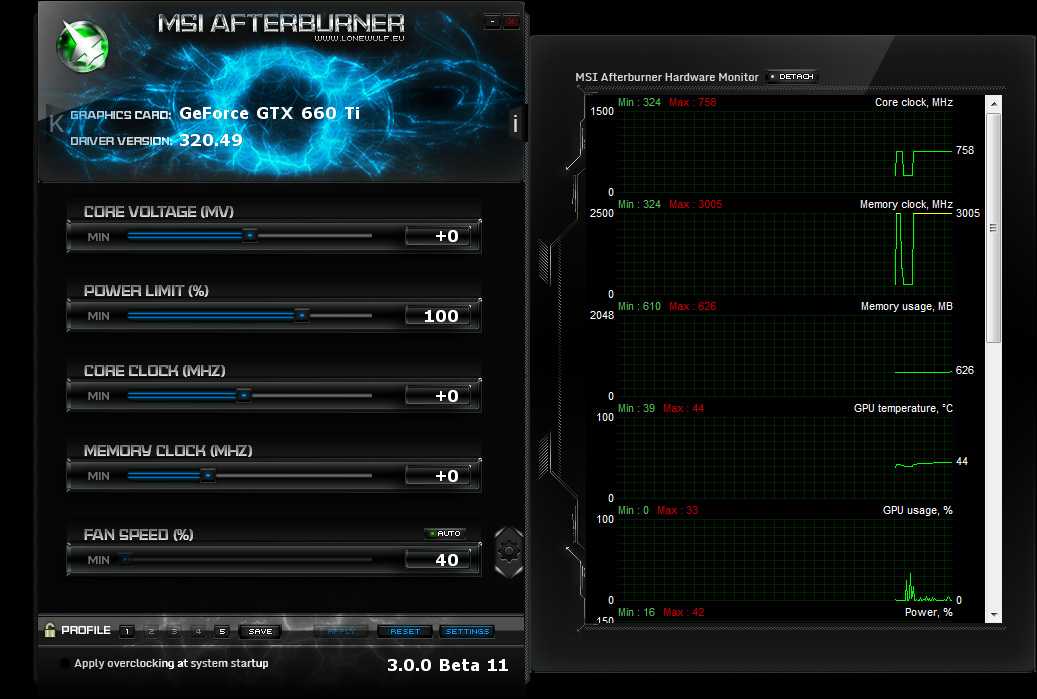
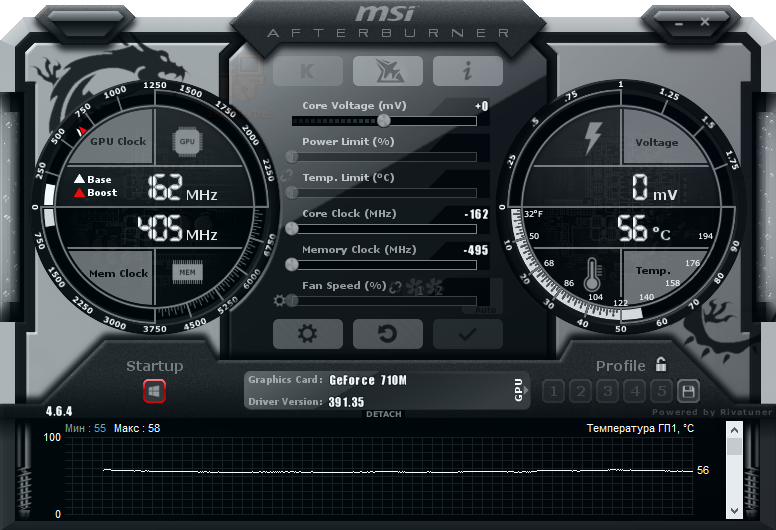
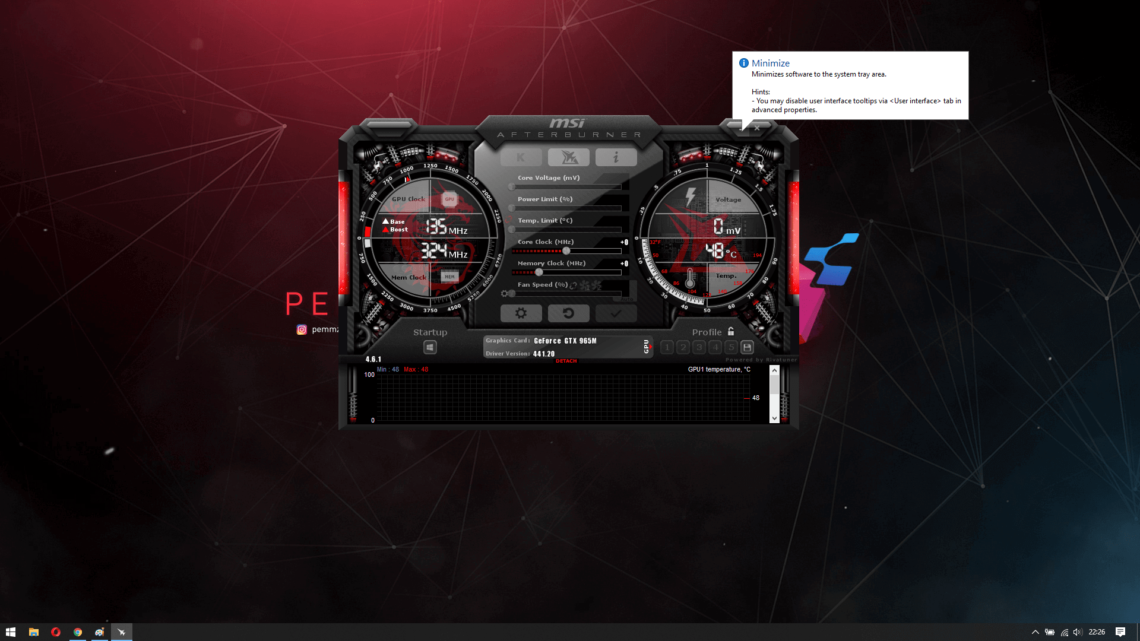
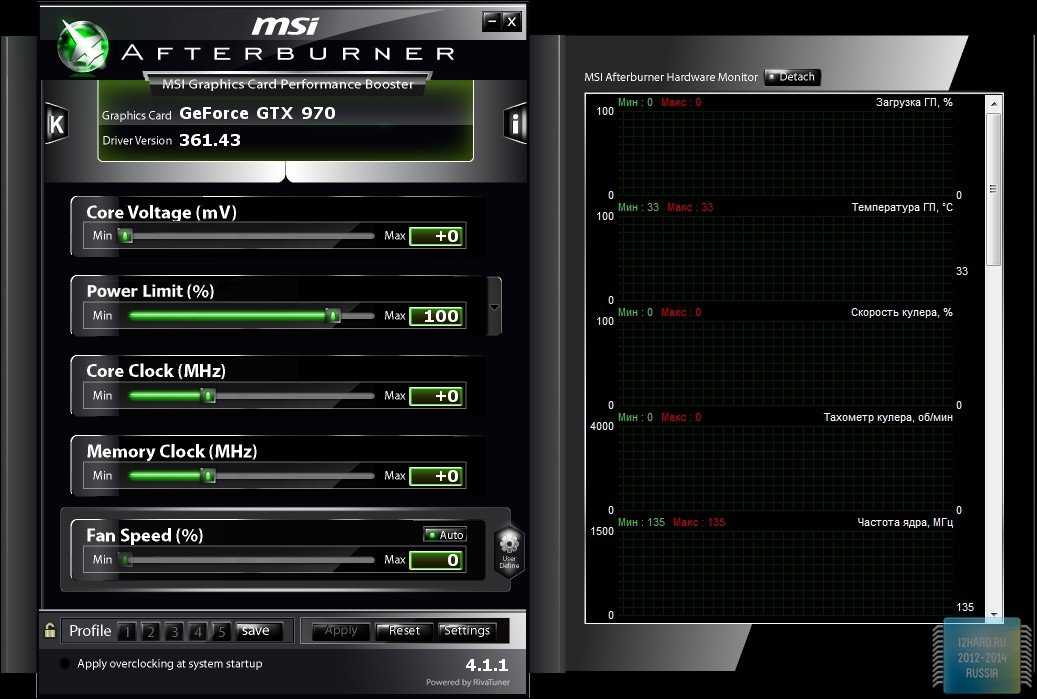
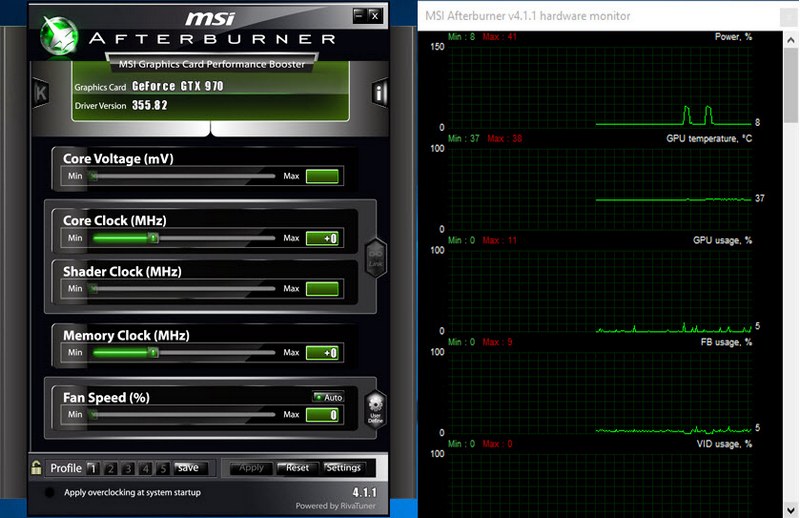
MSI Afterburner supports NVIDIA and AMD graphics cards. If you have a different manufacturer, which is unlikely, you will not be able to use the tool. You can see the name of your card at the bottom of the program (highlighted in yellow).
Launching and configuring the program
Launch MSI Afterburner via a shortcut that was created on the desktop. We need to set the initial settings, without which many actions in the program will not be available. We set all the checkboxes that are visible in the screenshot. If your computer has two video cards, then add a checkmark in the field «Synchronize settings of identical GPUs» . Then press «OK» .
On the screen we will see a notification that the program needs to be restarted. Press «Yes» . You do not need to do anything else, the program will be restarted automatically.
Core Voltage
By default, the Core Voltage slider is disabled.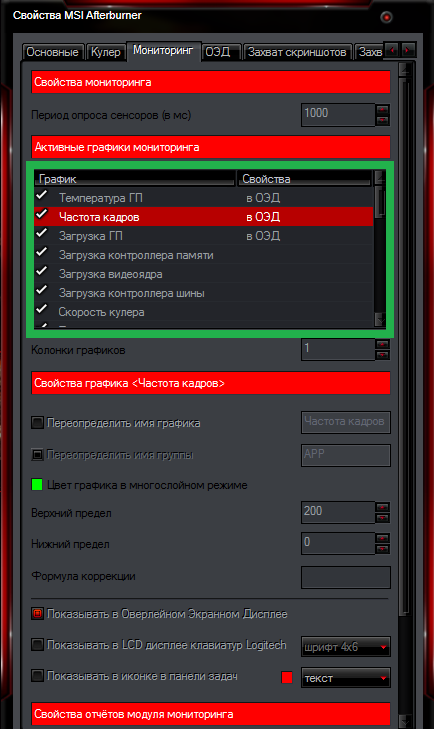 However, after we have set the basic settings (Tick in the voltage unlock box), it should start moving. If after restarting the program it is still not active, then this function is not supported by your video card model.
Core Clock and Memory Clock
The Core Clock slider adjusts the frequency of the video card. In order to start acceleration, you need to move it to the right. You should move the regulator little by little, with a step of no more than 50 MHz. During overclocking, it is important to prevent the device from overheating. If the temperature rises above 90 degrees Celsius, the video adapter may be damaged.
Next, we test our video card with a third-party program, for example, VideoTester. If everything is in order, you can repeat the procedure and move the regulator another 20-25 units. We do this until we see image defects on the screen. It is important to identify the upper limit of values here. When it is determined, we reduce the frequency of units by 20 for the disappearance of defects. We do the same with Memory Clock (Memory frequency).
To check the changes we made, we can play some game with high requirements for the video card. In order to monitor the performance of the adapter in the process, set up the monitoring mode.
Monitoring
Go to «Settings-Monitoring» . We select the required indicator from the list, for example, «Loading GP1» . At the bottom, check the box «Show in Overlay Screen Display» .
Next, we add the remaining indicators one by one, which we will monitor. Additionally, you can configure the display mode of the monitor and hotkeys. To do this, go to tab «OED» .
Cooler setup
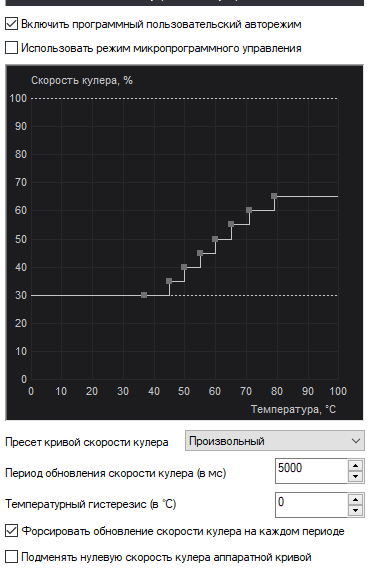
Note that this feature is not available on all computers. If you decide to overclock the video card in new models of a laptop or netbook, you simply will not see the cooler tabs there. Although it is generally not recommended to overclock the graphics adapter on portable devices.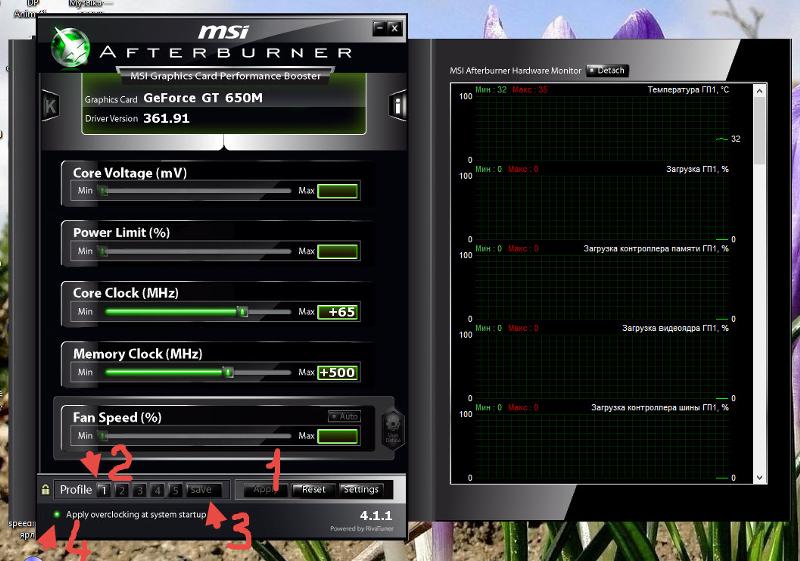
For those who have this section, check the box next to «Enable program user mode» . The information will be displayed in the form of a graph, which shows the temperature of the video card at the bottom, and the cooler speed in the left column, which can be changed manually by moving the squares. Although this is not recommended.
Saving settings
At the final stage of overclocking the video card, we must save the settings made. To do this, press the icon «Save» and select one of the 5 profiles. It is also necessary to use the button «Windows» to launch new settings at system startup.
Now go to section «Profiles» and select your profile there in the line « 3D» .
If necessary, you can save all 5 settings and load the appropriate one for each specific case. We will end on this.
Source
How to set up and use MSI Afterburner
MSI Afterburner is a powerful graphics card overclocking software.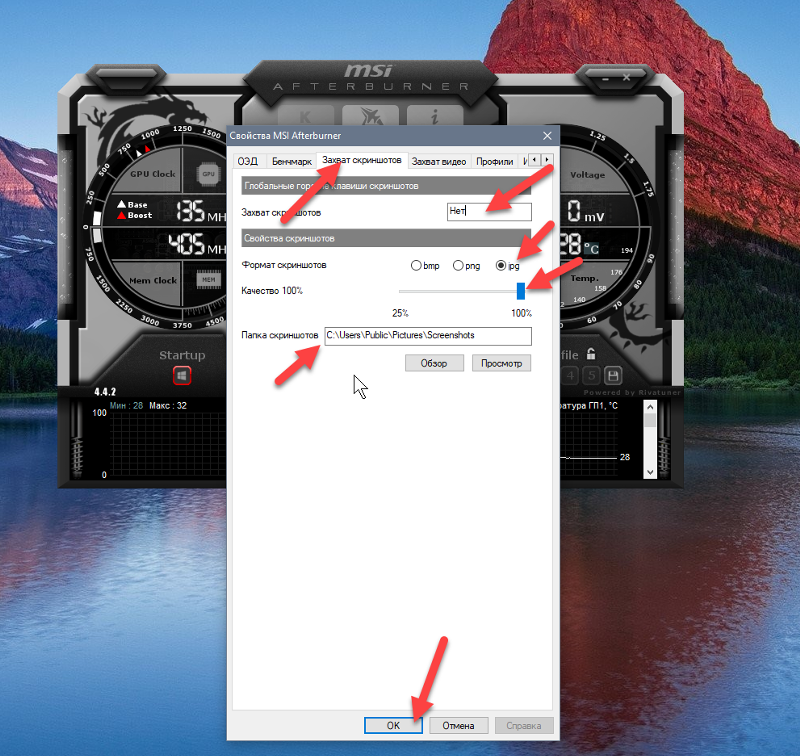 Also, with the help of this program, you can configure video card coolers, monitor system parameters and FPS in games, conduct tests, and capture screenshots and videos from the screen.
At the same time, MSI Afterburner has a lot of settings and not the easiest interface. Because of what, many users find it difficult to deal with it.
In this article, we will explain how to use MSI Afterburner. The article will discuss the process of installing, configuring and working with this program.
Installing MSI Afterburner
Installing MSI Afterburner is easy. You need to download the installation file from the MSI website, run it on your computer and follow the instructions.
At one of the installation steps, you will be prompted to select a list of components, including MSI Afterburner and RivaTuner Statistics Server. Here you need to leave all components enabled and continue with the installation.
After installing MSI Afterburner, the RivaTuner Statistics Server installation window will open.
This program must also be installed, otherwise some functions of MSI Afterburner will not be available.
MSI Afterburner interface
Let’s start our acquaintance with MSI Afterburner by analyzing its interface. Depending on the selected skin, it may look different, but the list of available settings is always the same. In this article, we will use a default skin called » Default MSI Afterburner v3 skin «, which looks like this:
If the MSI Afterburner interface looks different in your case, then you have a different skin. In order to change the skin to the standard one, you need to go to the settings (button with a gear).
Open the «Interface» tab, select «Default MSI Afterburner v3 skin» and apply the settings.
The main window of MSI Afterburner consists of two parts. On the left side there is a block with video card settings. The following options are available here:
On the right side of the MSI Afterburner window are graphs showing the current state of the graphics card.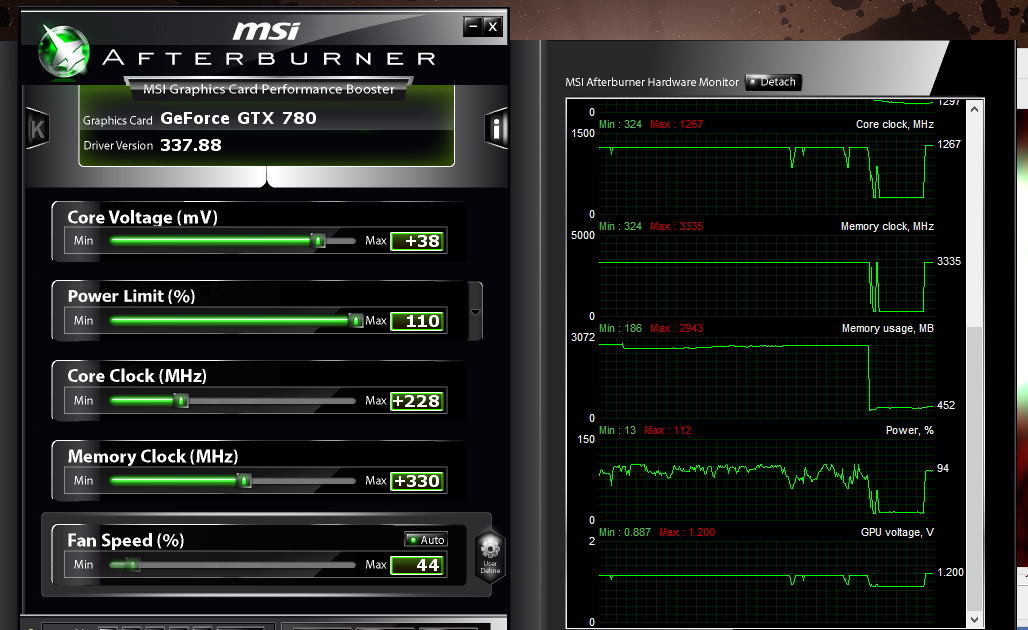 A variety of parameters can be displayed here, from the frequency and temperature of the GPU to the frame rate (FPS). The specific list of parameters displayed here depends on the program settings.
At the bottom of the window there are a number of buttons:
How to set up a video card in MSI Afterburner
Now let’s look at the process of setting up a video card, as well as applying and saving its parameters. For example, let’s try to lower the «Temp Limit» parameter (maximum GPU temperature) to 70 degrees.
To display the Temp Limit parameter, press the button next to the Power Limit parameter.
As a result, another parameter named «Temp Limit» will appear below the «Power Limit» parameter.
Now move the Temp Limit slider down to 70 degrees, then click on the Apply button to apply the selected settings.
All changes made have been applied. Similarly, you can change other parameters of the video card.
For more details on setting up a video card, see the article:
How to save video card settings to a profile in MSI Afterburner
After applying the settings, you can save them to a profile. This can be handy if you are overclocking a video card and testing it with different settings, or just want to switch between different operating modes.
To save the settings, you need to click on the «Save» button and select one of the 5 profiles.
After saving the settings to a profile, the button with this profile will become active.
Now, in order to load the old settings from a saved profile, you just need to click on the profile button and apply the changes with the Apply button.
As a result, the settings from the profile will be loaded and applied.
How to reset video card settings in MSI Afterburner
Resetting the settings is very simple, just click on the «Reset» button.
After that, all changes made by the user will be canceled and the video card will return to the standard settings.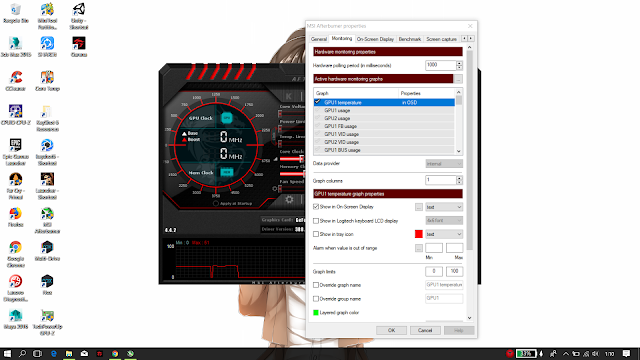
How to configure MSI Afterburner itself
In order to go to the settings of MSI Afterburner itself, you need to click on the “Settings” button or the gear button if you have a different skin.
As a result, a window with MSI Afterburner settings will appear with a lot of tabs.
Consider these tabs and the settings available there:
Cooler – video card cooler settings. Here you can configure the change in the speed of rotation of the cooler depending on the temperature of the graphics chip.
More details in the article:
Monitoring – system monitoring settings. Here you can specify what values MSI Afterburner will monitor, where they should be displayed and in what form.
Source
How to properly configure MSI Afterburner
MSI Afterburner is a multifunctional program for overclocking a video card. However, with incorrect settings, it may not work at full capacity and damage the device. How to set up MSI Afterburner correctly?
Configuring MSI Afterburner
Checking the graphics card model
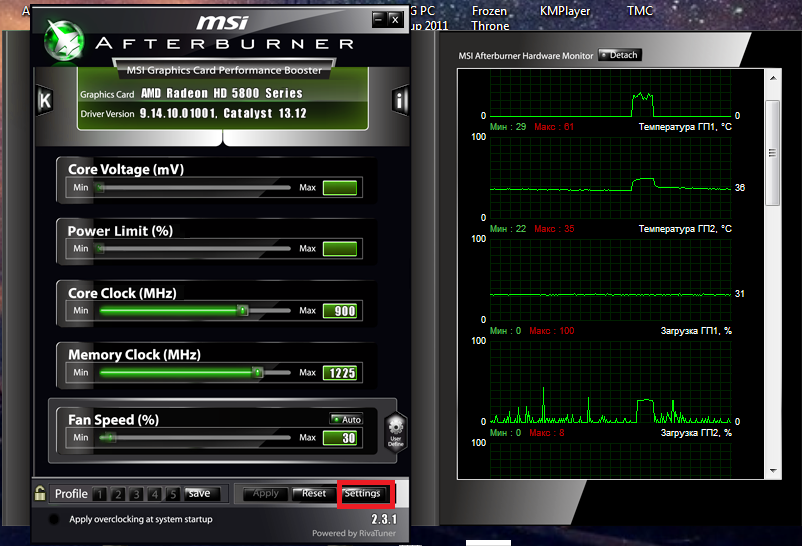
MSI Afterburner only works with AMD and NVIDIA graphics cards.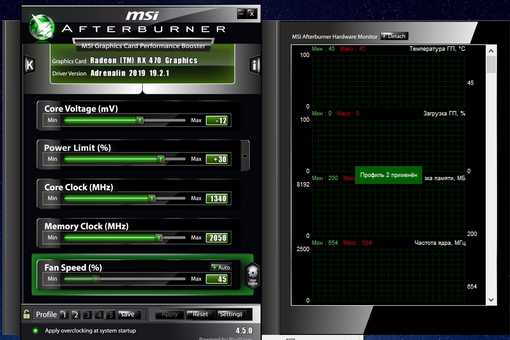 First of all, you need to determine whether your video card is supported by the program. To do this, go to «Device Manager» and in the tab «Video Adapters» look at the model name.
Basic settings
Open «Settings» by clicking the corresponding icon in the main program window.
The default tab is General . If there are two video cards on your computer, then check the box «Synchronize settings of identical GPUs» .
Be sure to check the box «Unlock voltage monitoring» . This will give you the option to use the Core Voltage slider which adjusts the voltage.
Also, check box «Run with Windows» . This option is required to start new settings along with the operating system. The program itself will run in the background.
Cooler settings
Cooler settings are available only in desktop computers, they allow you to change the fan speed depending on the operation of the video card.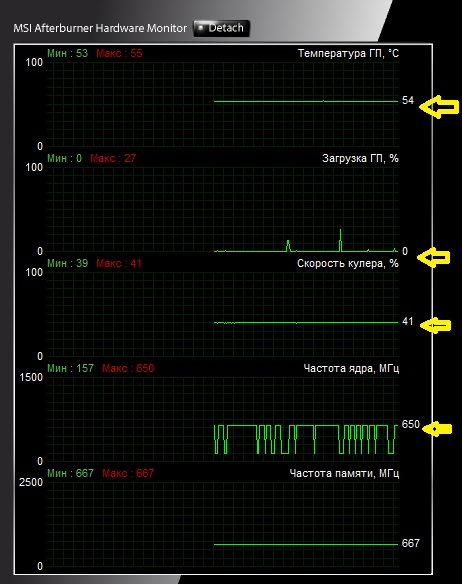 In the main window of tab «Cooler» we can see a graph in which everything is clearly shown. You can change the fan settings by dragging the squares.
Monitoring setup
Once you have started to change the video card parameters, the changes must be tested to avoid malfunction. This is done using any powerful game with high requirements for a video card. On the screen, text will be displayed from which you can see what is happening with the card at the moment.
In order to configure the monitor mode, you need to add the necessary parameters and check the box «Show in Overlay Screen Display» . Each parameter is added in turn.
ATS settings
In the EOS tab, you can set hot keys to work with the monitor and set additional text display settings, if desired.
If there is no such tab, then the program is installed incorrectly. MSI Afterburner comes with RivaTuner. They are closely related, so you need to reinstall MSI Afterburner without unchecking the installation of an additional program.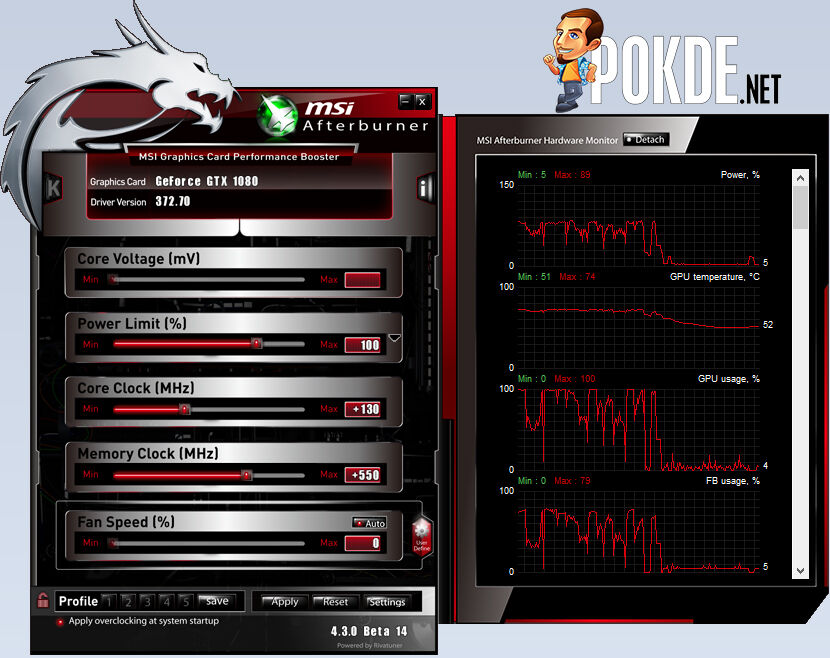
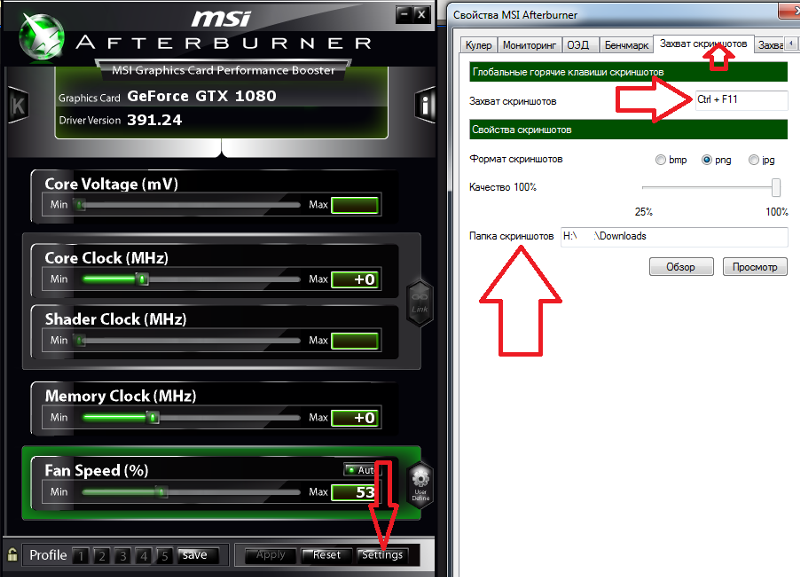
Screenshot capture setting
In order to use this additional function, you must assign a key to take a screenshot. Then choose the format and folder to save the images.
Video capture
In addition to images, the program allows you to record video. Just like in the previous case, you need to assign a hotkey to start the process.
By default, the optimal settings are set. If you wish, you can experiment.
Profiles
MSI Afterburner has the ability to save multiple settings profiles. In the main window, we save, for example, in profile 1. To do this, click on the icon «Unblock» , then «Save» and select «1» .
Go to settings, tab «Profiles» . Here we can set up a keyboard shortcut to call certain settings. And in the field «3D» we select our profile «1» .
Interface settings
For the user’s convenience, the program has several skin options. To configure them, go to the tab «Interface» . We select the appropriate option, which is immediately displayed at the bottom of the window.
In the same section, we can change the interface language, time format and measurement temperature.
As you can see, setting up MSI Afterburner is not at all difficult and anyone can do it. But trying to overclock a video card without special knowledge is highly undesirable. This may cause it to break.
Source
Complete setup of the MSI Afterburner program (MSI Afterburner)
Often there is a need to overclock the video card. This is done to improve system performance. Special programs are provided for users. For example, a great solution would be to download MSI Afterburner in Russian. This is software from a reliable developer that works stably and without interruption. But it’s not enough just to download, it is necessary that the program work out at 100%. Therefore, let’s look at what the MSI Afterburner setting implies.
MSI Capabilities Afterburner
The program is installed on PCs equipped with AMD or NVIDIA video cards. In addition, the operating system is also important, installation is only valid for Windows.
The program allows you to perform a lot of operations without any problems. For example, these include:
In addition, the program itself offers to change its interface, monitor switching between modes such as 2D and 3D. One of the big advantages is access to the recording of the best moments of the game, which, for example, is useful for creating videos and so on.
How to download MSI Afterburner
To download the program, you just need to visit our website and follow the direct link. As a result, you will have at your disposal an installer that will provide you with the ability to install software in a few clicks.
Please note! If you are offered to download MSI Afterburner torrent, then we do not recommend you to do so.
As practice shows, this is how a virus infects your device.
Installing Afterburner
As for the installation, everything is done in the standard way:
Pay attention! It is recommended to restart the PC in order for the system to correctly determine the operating parameters of the graphics adapter.
How to work with MSI Afterburner
You already know what MSI Afterburner does. Now there will be detailed information on how to make basic settings that will allow you to start comfortable work with the utility.
How to choose a comfortable design
Standard design is not the most convenient. Here are detailed instructions on how to set up MSI Afterburner to get a comfortable interface as a result:
Additional information! You can also select the format for temperature, time and display language.
Interface Disassembly
To give you an idea of what is displayed where, here is a detailed explanation of the key components:
What can be configured on the main screen
If you continue to look at the main screen, you should separately describe the frame with the sliders.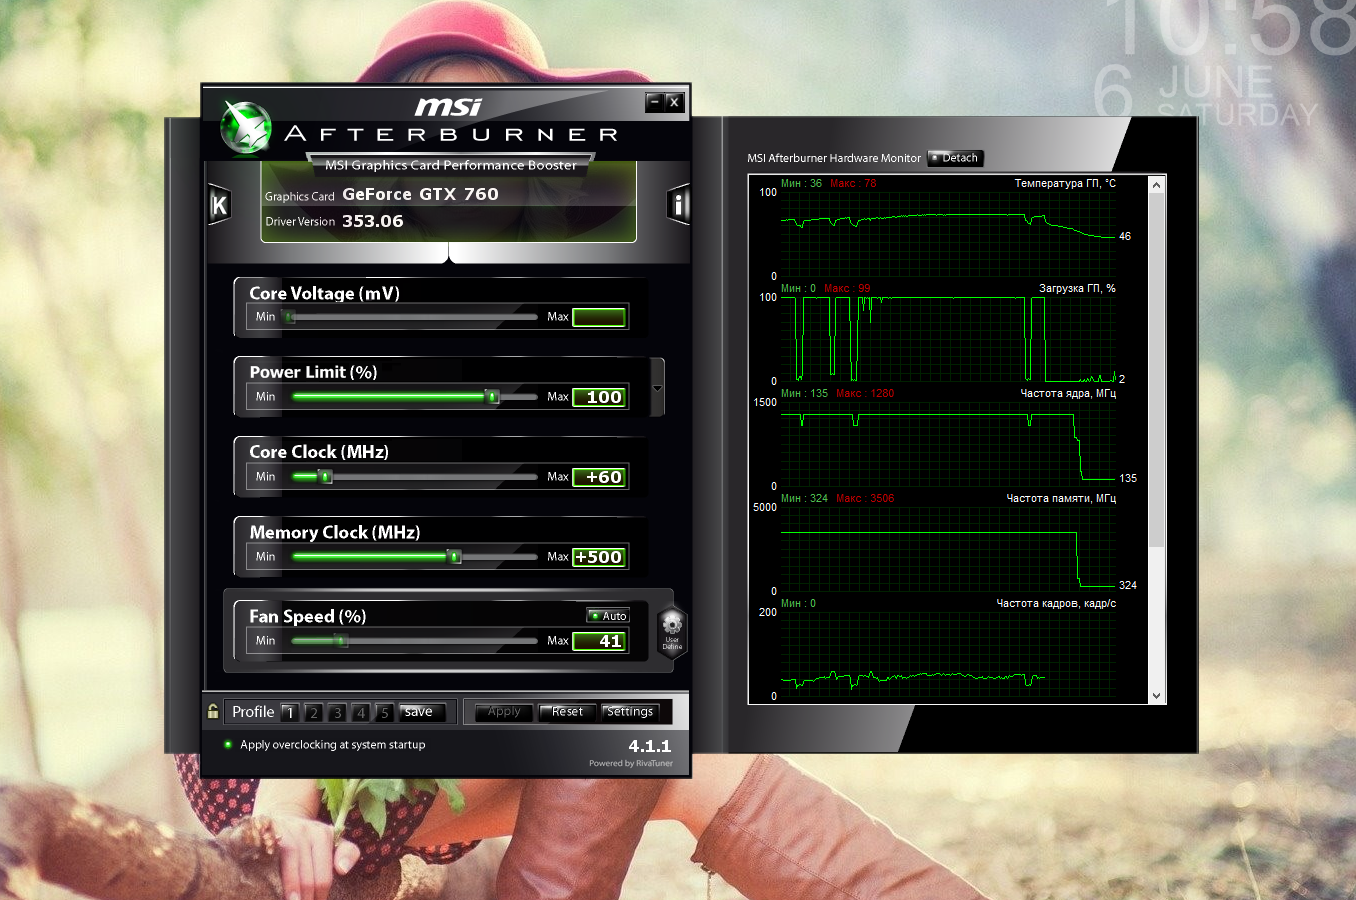 There you can adjust:
How to effectively cool the system
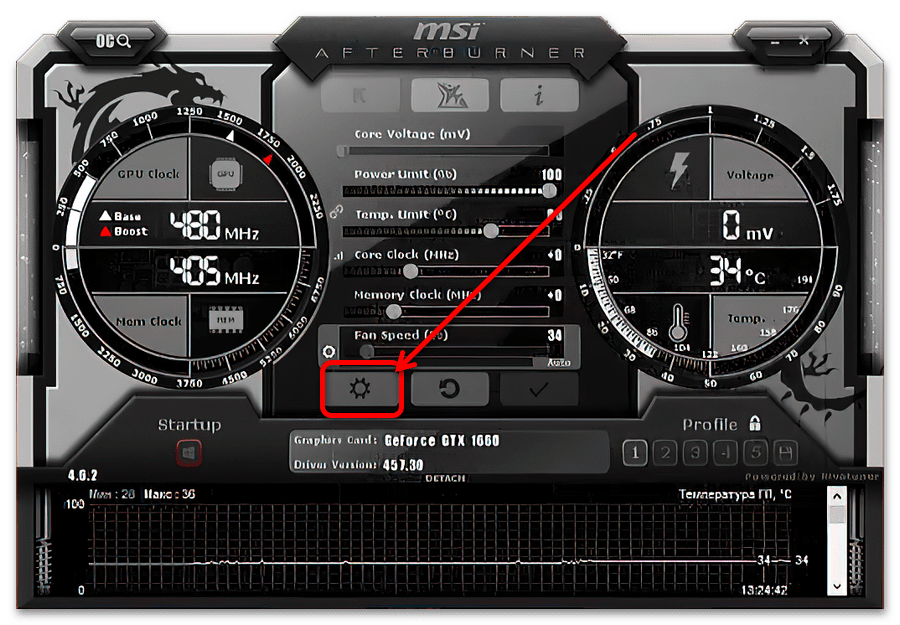
For example, how to adjust the processor temperature using MSI Afterburner? This action can be implemented by changing the cooling parameters.
To make changes to the MCAI Autoburner settings, click on the little gear next to the slider labeled «Fan Speed».
Please note! If you want the fan speed to automatically change depending on the temperature, press the «Auto» button.
As for the settings, in the «Cooler» section, specify the refresh rate of the parameter. Then you guarantee yourself the work of a PC, within which the system will be cooled efficiently and on time.
Game setup
One of the key parameters is the frequency of the core and video memory. The «Core Clock» slider is responsible for changing the CPU clock rate. The higher you set the parameter, the more information will be processed within one cycle.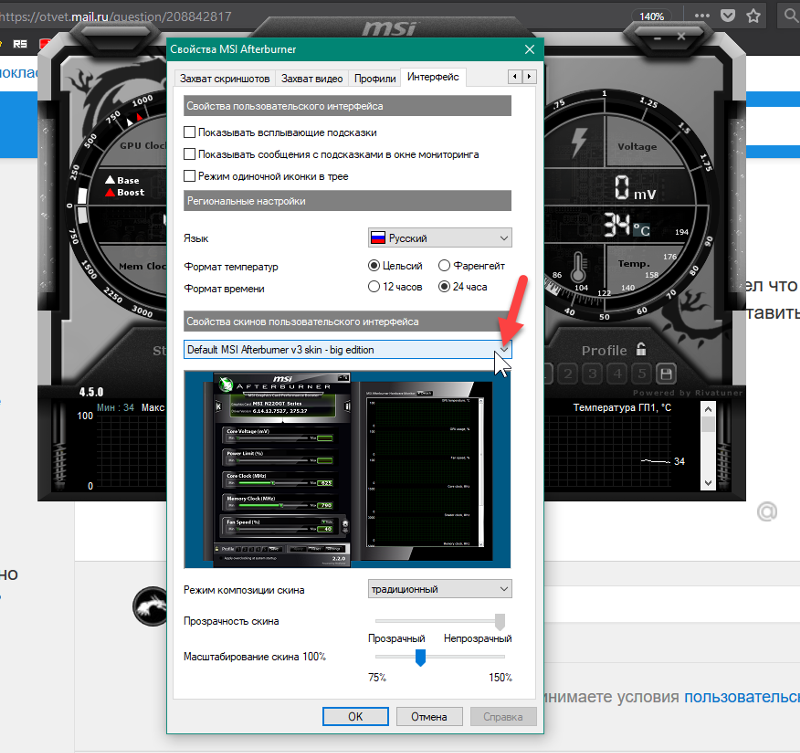
«Memory Clock» is a setting that programs the frequency of the video memory.
Please note! It is important to change the indicators gradually, just a couple of percent. Then test the system.
Now you know how to set up MSI Afterburner for the game. The main thing is to act deliberately so as not to harm the system.
Advantages of MCAI Afterburner
The program has many advantages, including:
Conclusion
MSI Afterburner is a state-of-the-art software that is regularly updated and pleases users with stable performance, as well as ease of use and high efficiency. I hope that I was able to explain to you what a full MSI Afterburner setup is and you understand everything.
Source
MSI Afterburner setup for monitoring, overclocking and cooler
In addition to GPU overclocking, there is also FPS monitoring, increase or decrease the speed of GPU fans, core voltage, temperature and power limit. And in the latest version of the program, a new «Scanner» function has appeared, which automatically detects the video card model and sets up stable overclocking parameters.
MSI Afterburner Features:
What you need to know?
Three important buttons:
Download MSI Afterburner
Go to the MSI official website and download Afterburner by clicking «DOWNLOAD AFTERBURNER», then unpack the archive and install the program by clicking «.exe».
1. Installing Kombustor in MSI Afterburner
Kombustor is not included in Afterburner by default and needs to be downloaded and installed separately. Go to geeks3d official website and download Kombustor and then install. Next, close the MSI Afterburner program if it was open and start it again.
These tests will help you test your overclocking settings without running games.
2.
 Automatic overclocking
Launch Afterburner and click on « Scaner » (magnifying glass and C icon), which will automatically detect the video card, test it and select the optimal overclocking parameters.
Note : You will be shown the optimal overclocking settings under “Scan succeeded. «. In my case, this is +117 MHz for Core Clock and +200 MHz for Memory Clock.
3. Manual overclocking
Running Kombustor in the background will help us here to track the improvements in the video card and the limit of its capabilities with all sorts of flickering, crashes, squares on the image and lags. I’ve seen +7 FPS gains when adding +65 MHz. My aisle was +179 MHz, because if more, then the test crashed and sometimes showed squares. This is due to cooling, since I have a GTX1660 Supre video card with one fan.
I have determined the optimal core clock Core Clock for my card, now we can add the memory clock « Memory clock «.
Recommendation : I advise you to wait at least 10 minutes for the test in Kombustor to see if there will be failures when adding overclocking options for the video card.
4. Displaying FPS and other parameters in the game
If you want parameters such as FPS, GPU load, GPU temperature, etc. to be displayed during the game, then click on the gear icon and go to the tab “ Monitoring «. Here you will be able to configure a specific parameter that will be displayed during the game, set it to show as text or graphics.
5. Adjusting the cooler rotation
If you are worried about the high temperatures of your video card at minimum load, you can increase the rotation of the cooler. Click « Settings » and go to the tab « Cooler «, then check the box « Enable software user auto mode «.
You will see a graph where you can manually set the cooler rotation speed at a certain temperature. For example, I set the cooler speed to 90% at 60°C.
Source
Video
updated the MSI AFTERBURner application: the design changed and added an energy consumption of the video card
How to disperse the video card on the laptop ? How to increase the FPS FPS in games How to raise FPS acceleration computers
How to disperse the video card and laptop processor?
Set the MSI AFTERBURNER — monitoring, FPS, Frametime, iron in over
MSI AFTERBURner: how to use, setting
Detailed installation and configuration MSI AFTERBURNER MOST CARECHTICAL, even launching
| Overclocking guide msi afterburner
Overclocking a video card using MSI Afterburner
MSI AFTERBURNER — HOW TO OVERCLOCK YOUR VIDEO CARD [Increase FPS]
Download the latest version of MSI Afterburner
Before starting to work with the program, users need to be aware that the video card may be damaged if not done correctly. Therefore, you should strictly follow the instructions.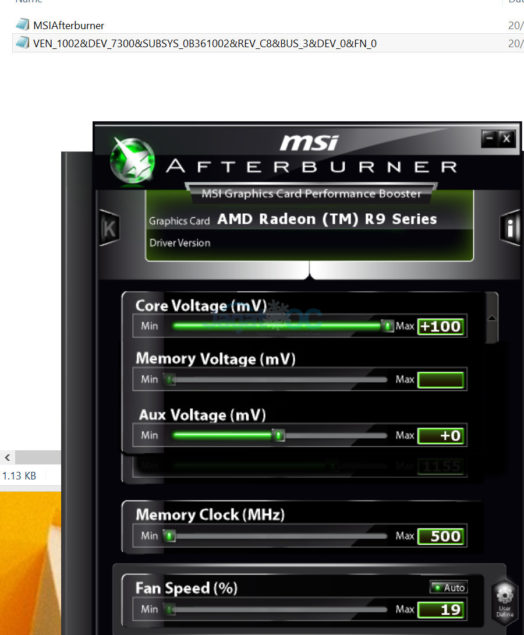 Undesirable and automatic overclocking mode.
MSI Afterburner supports NVIDIA and AMD graphics cards. If you have a different manufacturer, which is unlikely, you will not be able to use the tool. You can see the name of your card at the bottom of the program (highlighted in yellow).
Launching and configuring the program
Launch MSI Afterburner via a shortcut that was created on the desktop. We need to set the initial settings, without which many actions in the program will not be available. We set all the checkboxes that are visible in the screenshot. If your computer has two video cards, then add a checkmark in the field «Synchronize settings of identical GPUs» . Then press «OK» .
We will see a notification on the screen that the program needs to be restarted. Press «Yes» . You do not need to do anything else, the program will be restarted automatically.
Core Voltage
By default, the Core Voltage slider is disabled. However, after we have set the basic settings (Tick in the voltage unlock box), it should start moving. If after restarting the program it is still not active, then this function is not supported by your video card model.
Core Clock and Memory Clock
The Core Clock slider adjusts the frequency of the video card. In order to start acceleration, you need to move it to the right. You should move the regulator little by little, with a step of no more than 50 MHz. During overclocking, it is important to prevent the device from overheating. If the temperature rises above 90 degrees Celsius, the video adapter may be damaged.
Next, we test our video card with a third-party program, for example, VideoTester. If everything is in order, you can repeat the procedure and move the regulator another 20-25 units. We do this until we see image defects on the screen. It is important to identify the upper limit of values here. When it is determined, we reduce the frequency of units by 20 for the disappearance of defects.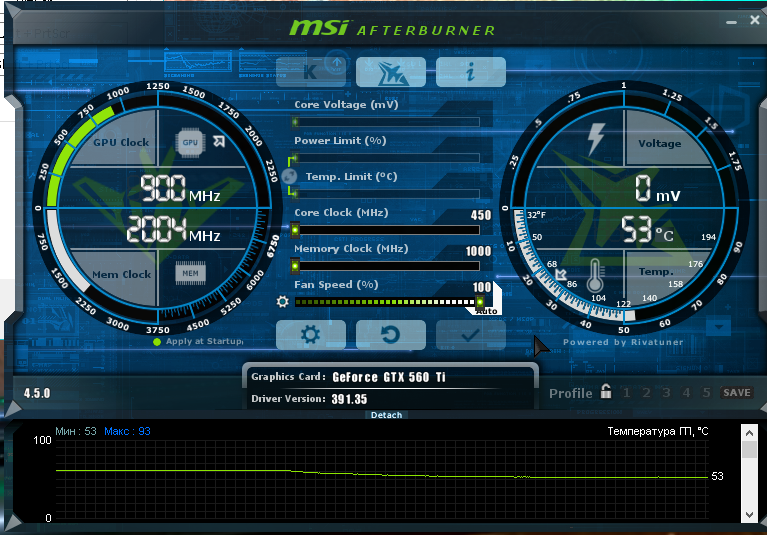 We do the same with Memory Clock (Memory frequency).
To check the changes we made, we can play some game with high requirements for the video card. In order to monitor the performance of the adapter in the process, set up the monitoring mode.
Monitoring
Go to «Settings-Monitoring» . We select the required indicator from the list, for example, «Loading GP1» . At the bottom, check the box «Show in Overlay Screen Display» .
Next, we add the remaining indicators one by one, which we will monitor. Additionally, you can configure the display mode of the monitor and hotkeys. To do this, go to the tab «OED» .
Cooler setup
Note that this feature is not available on all computers. If you decide to overclock the video card in new models of a laptop or netbook, you simply will not see the cooler tabs there. Although it is generally not recommended to overclock the graphics adapter on portable devices.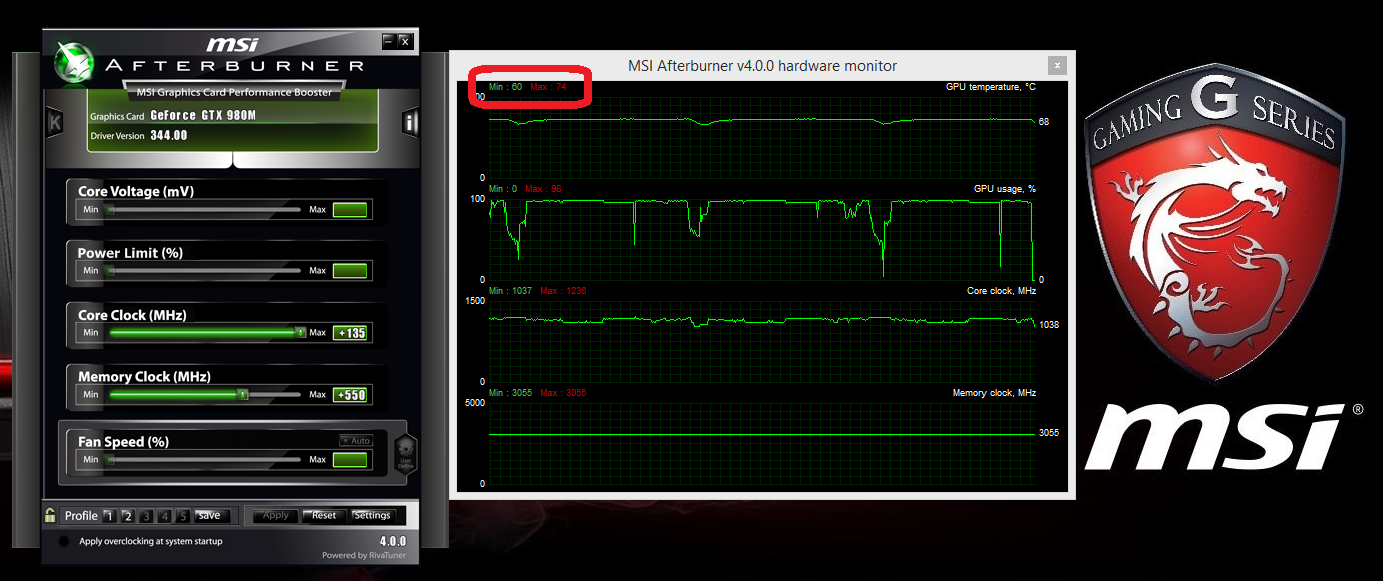
For those who have this section, check the box next to «Enable program user mode» . The information will be displayed in the form of a graph, which shows the temperature of the video card at the bottom, and the cooler speed in the left column, which can be changed manually by moving the squares. Although this is not recommended.
Saving settings
At the final stage of overclocking the video card, we must save the settings made. To do this, press the icon «Save» and select one of the 5 profiles. It is also necessary to use the button «Windows» to launch new settings at system startup.
Now go to section «Profiles» and select your profile there in the line « 3D» .
If necessary, you can save all 5 settings and load the appropriate one for each specific case. We will end on this.
How to use MSI AFTERBURNER: The Riding Instructions for the video card
- How to unlock the Core VOLTAGE
Msi Afterburner what is it? Msi Afterburner is a program for overclocking video cards (in memory and core), as well as for undervolting.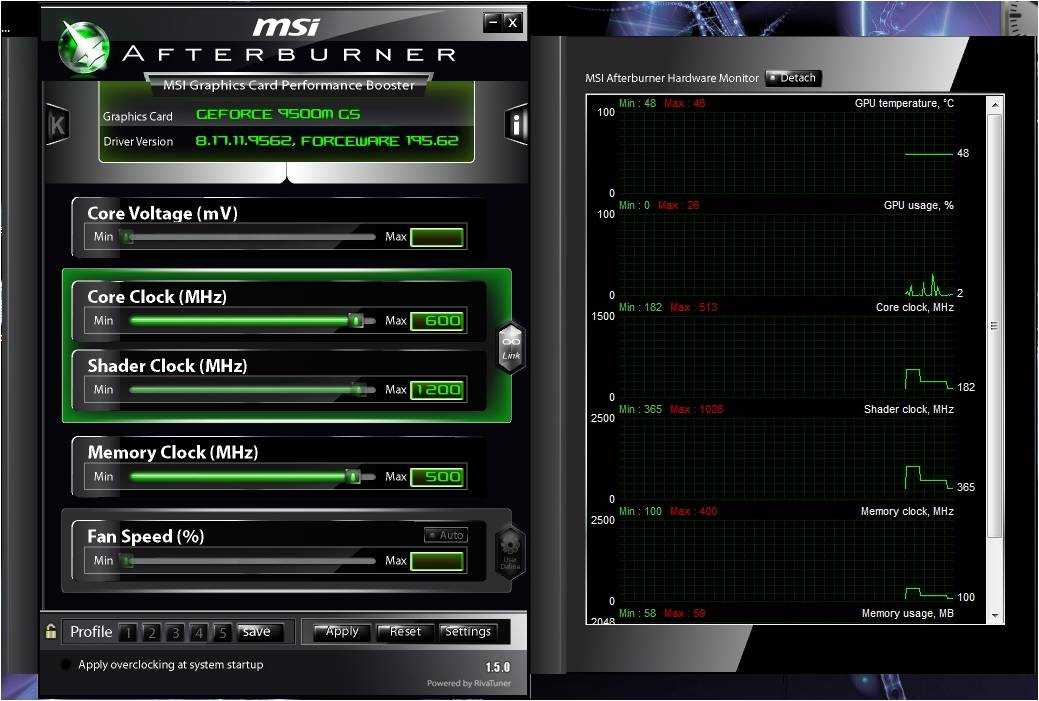 The program allows you to monitor the internal indicators of the card (monitoring temperature, voltage, fan speed and much more).
How to use
To use the program, you must first download, install and configure it. Let’s consider all these points.
First you need to download the program.
To do this, go to the official website of MSI Afterburner and scroll down to the download section:
How to install MSI Afterburner
.exe». Where to install is up to you, but it is advisable to use the standard system paths — C:\Program Files (x86)\MSI Afterburner — this is for Windows 10.
Click «next» everywhere.
Having reached the item «Select the program components to install» — uncheck the box «Riva Tuner Statistics Server».
After that, click «next» and wait for the installation to complete.
After installation, launch MSI Afterburner.
MSI Afterburner is very easy to use.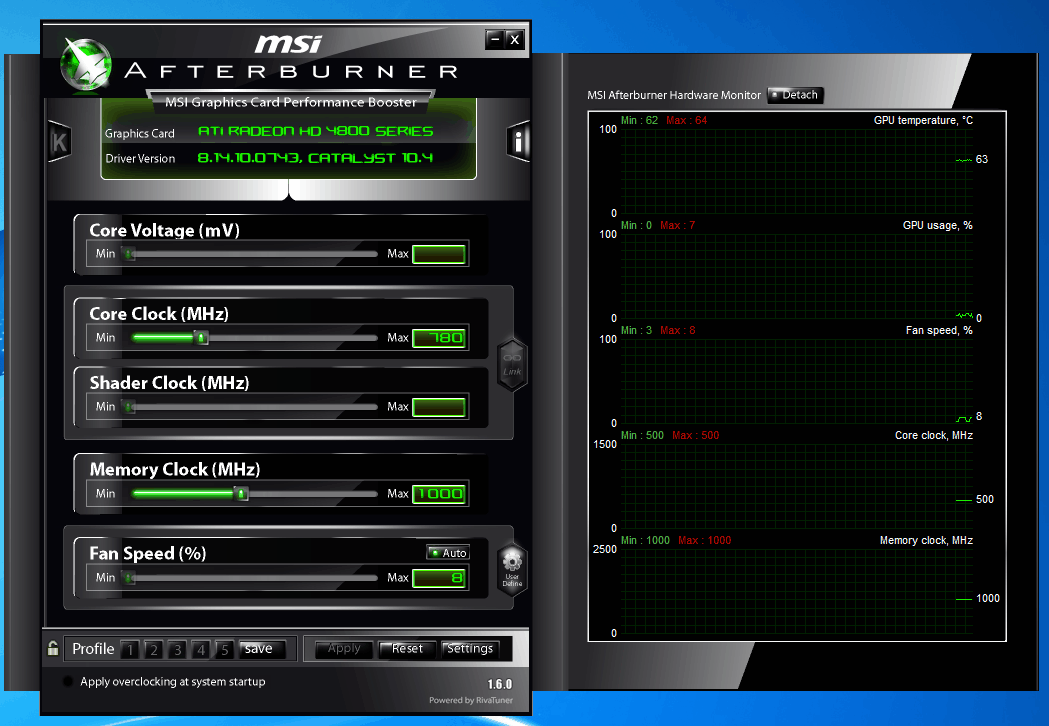 In order to understand how the program works, let’s study the parameters and what they are responsible for.
MSI Afterburner Setup
- Gpu Clock
is an indicator of the clock speed of the video card. If you have a multi-card farm, the selected video card will be displayed. - Core Voltage (mV)
— this slider is responsible for the power consumption of the video card, you can either overclock or lower this figure. The lower the Core Voltage, the lower the cost of electricity: lowering this indicator will save on electricity, and if you hit the “ceiling” in terms of power consumption, this function will reduce the current consumption of video cards, and will make it possible to install additional cards if you are a miner . - Power Limit
— is responsible for the power consumption of the card. With higher overclocking, that is, if you want to greatly overclock the video card, then the power consumption must be added, otherwise the card will not hold the frequencies and reset them to the factory ones. The indicator is often blocked. Below we will tell you how to unlock it.
 - Temp. Limit
— slider responsible for the critical temperature of the video card. If this indicator (set by you) is exceeded, the video card will reset the frequencies (go into throttling). - Core Clock (MHz)
— this is the overclocking of the frequency of the GPU (graphic processor) of the video card.This overclock is needed to increase the hashrate of your video card during mining or to improve performance (FPS) in games.
- Memory Clock (MHz)
— This is the overclocking of the video card memory. Usually this gives a small increase in games, but in mining the increase is noticeable.Especially in ethash algorithm.
- Fan Speed
– slider that controls the rotation speed of the video card fans. Where 100% is the maximum rotation speed and 0% is the minimum rotation speed. If Fan Speed is locked, then it must be unlocked by clicking on the word «Auto», which is located next. In the «Auto» mode, the fans will automatically set the percentage of the load, depending on the temperature of the GPU. But when mining in the “Auto” mode, this indicator will almost always be 100%, since the mining process itself heats up the video card a lot.
Fan Speed - if your video card gets very hot, we still do not recommend setting 100% speed, as this will exhaust the cooler resource faster (and this is one of the most common breakdowns).
- Button to open advanced settings
. - Video card core temperature.
If there are multiple graphics cards in the farm, the last selected graphics card and its temperature are displayed. - Start Up
— allows you to add msi afterburner to startup. If the icon is circled (in this case, red, but it can also be a different color, since you can install a different theme), then MSI Afterburner will automatically start when you turn on the computer (farm). - Profile
— These are indicators from one to five.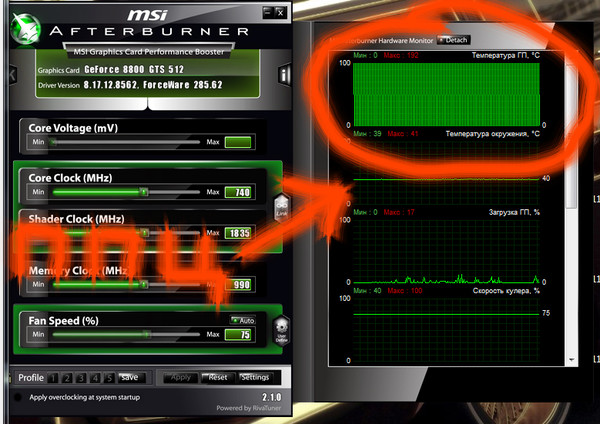 They are responsible for saving your configuration. That is, you can set the desired overclocking (memory, core), the desired fan speed, and so on, and save it to any number from 1 to 5. If the “Start Up” function is active, then when you reboot or turn on your farm, it will immediately apply all settings to the video cards you have specified.
When increasing the overclocking of the video card in memory and in the core, it is best to add 10 units each.
- Selected graphics card name
- Clicking on the word «GPU» will list all graphics cards. Choose each card in turn and set its overclocking and cooler rotation speed.
- Reset all overclock settings to factory settings.
You can also overclock video cards directly in the miners. See examples of overclocking:
How to overclock and reduce the voltage of cards in PhoenixMiner
How to overclock and reduce the voltage in Claymore Dual Miner 9Download and install the program However, you have long been warned.
We will use the most famous tool in this area, which, as already mentioned, we have previously mentioned in the articles. Then it was about the topic of how to change the fan speed of AMD Radeon video cards. As you understood from the title and subtitle, we will talk about MSI Afterburner.
The program is completely free, supports the Russian language and provides a complete set of tools for overclocking video cards. You can take it from this link or from the developer’s site.
Note: Before installing MSIA, as well as subsequent overclocking, it is actually recommended to update the drivers for your video card (you can get the latest version from the NVIDIA or AMD website).
Installation is extremely simple and I will not dwell on it (I will only say that installing Riva Tuner Statistic Server is not necessary, but it can be useful for advanced diagnostics and overclocking, which we will consider in the next part of the article).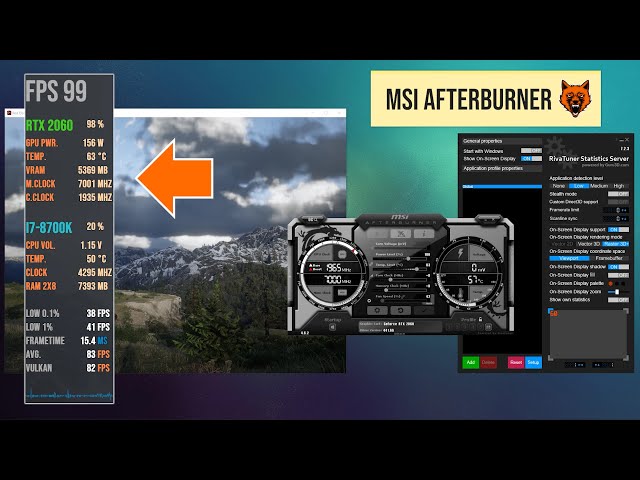
After installation, this same MSI Afterburner will be offered to run, which can, in general, be done from the very beginning, after closing everything valuable, open and not saved, because:
) restart the computer to correctly determine the initial settings (we are talking about the frequency of the memory and graphics processor of the video card, as well as a number of other parameters that could be changed at the level of the driver or third-party programs).
I recommend agreeing that the overclocking then went the most smoothly.
After rebooting the computer, in fact, run the program using the shortcut that appears on the desktop or in the Start menu.
How to Overclock Your Video Card
Overclocking MSI Afterburner follows standard overclocking and testing techniques to find the highest and most stable settings. Don’t forget to click the «Apply» button after any changes.
- First, set the Power Limit and Temp Limit sliders to maximum.
 With these settings, the graphics card will be more power efficient and will reach higher temperatures. The graphics card will never reach its upper limit unless a major hardware failure occurs, so don’t be surprised if the maximum temperature seems dangerously high. Card manufacturers define these parameters and therefore they are considered safe and there is no risk of damaging the graphics card.
 - Increase the core clock slider slightly. Each notch on the slider corresponds to one MHz above or below the stock clock speed, depending on whether you move it up or down. We recommend adding 20 to 30 MHz. Don’t forget to click «Apply» after increasing the clock speed.
- For each increment run Kombustor in the background and check for artifacts, screen flickering, black flashes or crashes. Take a couple of minutes to observe each change.
- As soon as you run into a constant amount of graphical issues, stop raising your clock speed. Don’t worry about unusual behavior; this is to be expected, and is the GPU’s way of telling us that it has reached its maximum power.
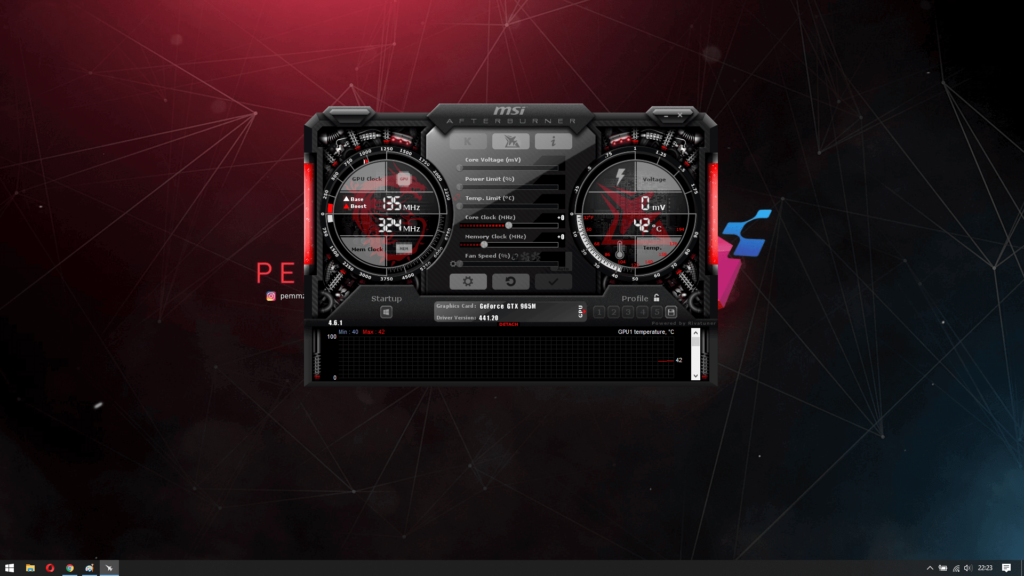 Crashes and black screens reset the graphics card driver, after which you can restore the clock speed in a few seconds.
 - Decrease the core clock in small increments of about 5 MHz until all artefacts/graphics issues disappear and Kombustor is stable. We also recommend testing any changes in the context of a demanding miner or game. Raise the settings to ultra to force the graphics card to work hard to see the changes more clearly. If you have problems, reduce the clock speed.
- Next, we will apply the same stress test to the memory clock, but with a larger step. We recommend 50 to 100 MHz.
- As soon as you run into persistent graphical issues in Kombustor, decrease the memory clock speed in small increments until you find a stable speed. Also test in game.
- Now we want to test the new core and memory clocks over a long period. Launch Kombustor and let it run for a good 10 minutes checking for artifacts and crashes. Reduce the speed in small increments until you get a stable combination of both.
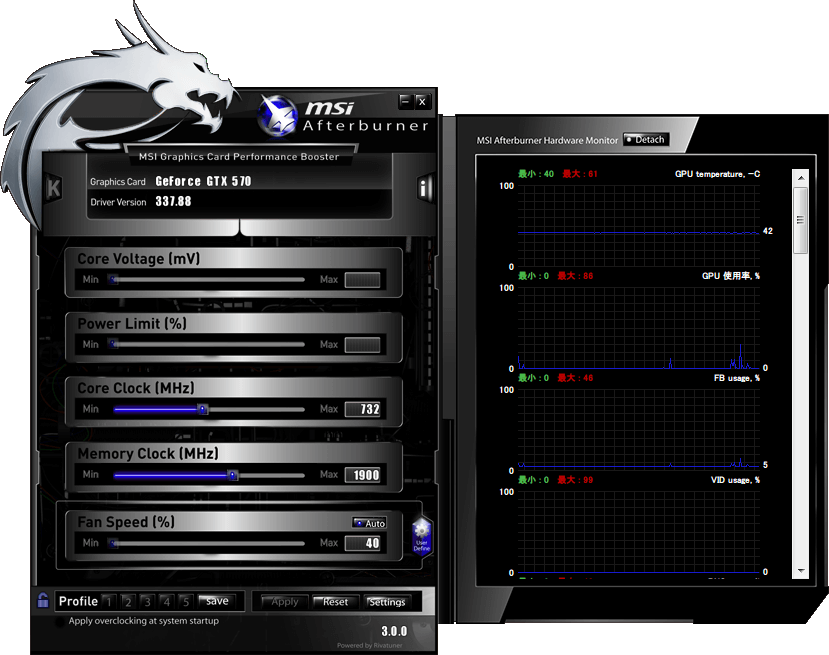
- When you’re happy with the overall stability, don’t forget to save your settings as a profile by clicking the floppy disk icon and then one of the profile buttons 1-5.
How to unlock the Core Voltage, Power Limit and Temp Limit sliders
An example of an inactive option:
options are «Unlock voltage control» and «Unlock voltage monitoring».
You can also unlock Core Voltage in *.cfg files for each video card separately by enabling the VDDC_Generic_Detection function.
Example:
[Settings]
VDDC_Generic_Detection=1
If there are no such lines, then you need to insert them into each configuration file yourself.
The Core Voltage slider is now active.
Also, don’t forget to check the «Unlock voltage control» and «Unlock voltage monitoring» checkboxes in the settings.
In case of problems
If something went wrong and the image disappeared altogether, distorted to the point of being impossible to reset, hung and / or something else:
- Try to restart or turn off the computer using the button on the case, usually when at startup, there is an auto-reset to standard values;
- If this did not help and failed profiles are automatically loaded at startup (although this usually does not happen without a special checkmark in the settings), then it will boot into Windows safe mode, removing the program from startup and / or deleting it there, after which it will boot in reverse mode .

In a nutshell, perhaps, somehow it is like this. On the sim, let’s move on to the afterword.
How to set up and use MSI Afterburner
The purpose of MSI Afterburner is to control the parameters of the video card, including its overclocking by increasing the frequency of the GPU. It can also control its power supply voltage and cooler. Of the additional functions, it is possible to take screenshots or record video from the screen. Such applications require careful handling and some knowledge. For example, modern games are quite demanding on the performance of the video card, and many people want to simply overclock their old video card instead of upgrading. Of course, increasing the frequencies will allow you to “squeeze” something else out of it, and the graphics will be displayed faster. But there is danger here. Ignorance of the processes of overclocking a video card, as well as the main processor, can lead to sad consequences. The most innocuous of them is the distortion of graphics and the appearance of many artifacts.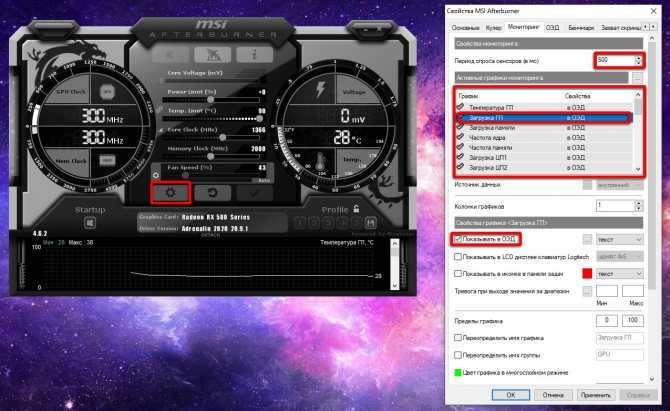 The hardest thing is the failure of the GPU. Yes, by increasing the frequency of its operation to unacceptable frequencies, you can simply burn it. Therefore, you need to handle such utilities with care, having previously familiarized yourself with the rules of overclocking. Then the benefits will be significant, and you won’t have to change the video card to a more powerful one for some time.
Installing MSI Afterburner
The installation process for MSI Afterburner is quite simple and straightforward. It must be downloaded from the official website (https://ru.msi.com/page/AFTERBURNER). The utility is free, so no functions are limited to it. The downloaded file needs to be launched, after which it will be prompted to select a language from the list — Russian is there. The next step is to accept the license agreement and select the components to be installed. The program consists of two parts — actually for overclocking the video card and the monitoring and statistics module.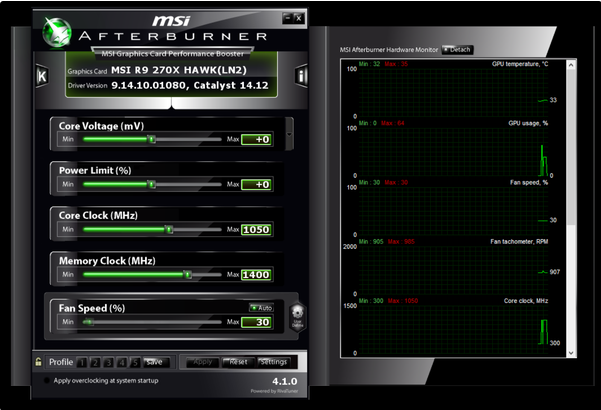 You need to select both parts and click the «Next» button. Then you need to choose in which folder to install the utility — you can leave it by default, and you will also be prompted to create a shortcut on the desktop. Although Afterburner will be installed in Russian, this program is not completely translated, but only its main sections. In some places that are not needed very often or not used at all, the inscriptions remained in English. This usually doesn’t create problems.
How to use MSI Afterburner
When you run the utility, a rather futuristic window with an interesting design appears. The cover — the appearance, by the way, can be changed in the future if this one seems inconvenient. Before you can use MSI Afterburner, you need the program to properly detect your video card. Its name and driver version are displayed in the central part of the window, at the bottom. There is also a button with a gear icon — these are settings, go there. There is a list of graphics cards in the «General» tab and the current one should be selected.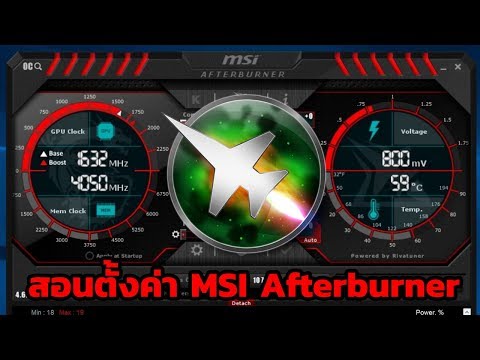 The rest of the settings can be left as default, but you need to pay attention to the item «Unlock voltage control» — you need to enable the checkbox. The fact is that when the frequency is increased, the voltage must be lowered for stability and in order to avoid overheating, and the program will be able to do this if this item is enabled.
If you want the new video card settings to start working when you turn on the computer, you can check the «Start with Windows» box. But it is better to do this after all the settings have been checked, and the video card will work stably. Otherwise, there is a situation when the system boots up, the image immediately deteriorates and you can only get to the settings when you boot in «Safe Mode». If the utility correctly identified the video card, you can try to manage it.
How to overclock a video card
Changing the processor and memory frequency is done using the sliders in the central part. The Core Clock slider is responsible for the core frequency, and the Memory Clock slider is for the frequency of the video card’s memory.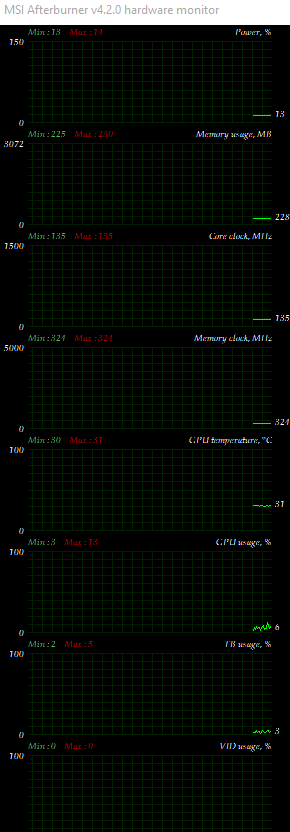 They can be moved by 10-20 MHz, and click the «Apply» button. It is not necessary to increase the frequency too much immediately. You can also lower this frequency if the video card is very hot. This will optimize its working mode. Performance will decrease slightly, but the processor will heat up less. For many games, a small drop in performance won’t make a difference. To test the operation of the video card with the new parameters, run some game that creates a heavy load on the video card, usually Crysis 3. At the same time, you do not need to turn off MSI Afterburner and monitor the performance of the video card and its temperature. If after a couple of hours of playing everything is normal, then the parameters can be left or even increased a little more.
Power consumption limit
In the program window there is a Power Limit slider — the power consumption limit of the GPU. This option does not work for everyone — only if the video adapter supports this feature. If there are several of them, then in order to properly configure MSI Afterburner, you need to enable synchronization on the “General” tab so that the settings apply to other existing video cards.
Temperature limit
The program has a Temp Limit slider, which is responsible for the temperature limit. If it is limited here, then when the limit is reached, the video adapter will reset the frequency and performance so as not to heat up above the set value. Setting this setting in MSI Afterburner is useful if the cooling system is not very good to prevent overheating. However, performance may be degraded.
Core clock
The Core Clock slider, as already mentioned, is responsible for the core clock. The performance of the video card depends on it and this is the main parameter that is responsible for it. It is not worth increasing it much immediately, as this will also lead to an increase in temperature. On older video cards, even the maximum increase in Core Clock may not give a noticeable increase in performance. The frequency can not only be increased, but also lowered if the cooling system cannot cope.
Memory Clock
The Memory Clock may not be adjustable on all video cards. If there is such an opportunity, then it is not worth increasing it immediately so that the memory does not overheat. This is also one of the most important characteristics that affects the number of FPS in the game, but you need to increase it gradually, controlling the behavior of the adapter under load.
Cooler Speed Fan Speed
This slider allows you to adjust the speed of the cooling fan — cooler, and is of great importance. If the speed is set too low, the GPU will get too hot, which is dangerous.![]() On the other hand, you don’t need to set the maximum speed either, since constant operation in this mode greatly reduces the resource of the cooler, and it will quickly fail. It is better to lower the core frequency a little so that overheating does not occur.
On the other hand, you don’t need to set the maximum speed either, since constant operation in this mode greatly reduces the resource of the cooler, and it will quickly fail. It is better to lower the core frequency a little so that overheating does not occur.
Settings profiles
MSI Afterburner allows you to save settings profiles. They can then be simply selected and applied. This is very convenient, as it allows you to optimally and quickly adjust the performance of the video card in a particular situation. You can, for example, create a profile for resource-intensive games and for normal work with office applications, and choose the right one when required.
Graphics adapter overclocking procedure in MSI Afterburner
Video card overclocking with MSI Afterburner is performed in stages. First you need to install some kind of benchmark — a test program that can create the maximum load. The FurMark test is often used. By adding a core frequency of 10-20 MHz, you need to run a benchmark and watch the performance increase, in particular FPS — the number of frames per second displayed. In this case, you need to control the temperature. If everything is in order and the processor does not overheat, the cooler does not buzz like an airplane, and the image is without defects, you can increase the frequency a little more.
Remember that any overclocking not only reduces the resource of the cooler, as it has to work more. The resource of the graphics adapter is also reduced, shortening its life. Therefore, overclocking is justified for old video cards, which are still time to change, and you can try to squeeze a little more out of them. For new and expensive ones, this can be an unnecessary risk, since the performance gain will be only a few percent.
How to enable in-game monitoring
Games run in full screen mode, making it difficult to play and monitor video system settings at the same time. But in MSI Afterburner, it is possible to enable the display of FPS and other data right in the game. To do this, go to the settings, and on the «Monitoring» tab, tick the items that need to be displayed — temperature and GPU load, memory load, frequencies, and so on. Then you need to enable the «Show in OED» item so that the information is displayed in the game, and save the settings with the «OK» button. Now in the game in the upper left corner all the selected information will be displayed and it will be possible to evaluate the performance changes before and after overclocking.
How to unlock Core Voltage
Managing the supply voltage is a very important step, as it can damage the video card. But sometimes it is required. By default, voltage control is disabled. To unlock it in the settings, just turn on the checkbox next to the «Unlock voltage control» item. Then the program itself will be able to select the optimal voltage at higher frequencies.
How to properly set up MSI Afterburner for games
MSI Afterburner is designed to overclock a video card. Its interface is extremely simple, so even a beginner can handle it. It is important to pay attention to the settings and do everything right. Otherwise, the video card will not work at full capacity or even deteriorate. The main details of installing, configuring and using MSI Afterburner are covered in the article.
Contents:
- Download and install MSI Afterburner
- MSI Afterburner Setup
- Video card model check
- Basic settings
- How to use MSI Afterburner in games
Download and install MSI Afterburner
MSI Afterburner allows the user to get the most out of the graphics card’s resources. But it is extremely important to download the program only from the official website of the developers, so as not to accidentally become the owner of a dangerous virus.
There are three versions of the program: for Windows, Android and MSI Afterburner Remote Server. Simply download the archive from the official website, upload it to a suitable folder and unzip it.
Installing MSI Afterburner is as follows:
- The user opens the installation folder and clicks the Setup.exe icon to run the setup file.
- Next, the program will automatically offer several installation components to choose from.
- When choosing installation components, they are guided by the goals of the user. For example, if the program is needed only for gaming purposes, you should uncheck the RiveTurner icon and click on the «Next» button.
This will start the installation process. It lasts only a few minutes, after which a corresponding shortcut will appear on the desktop and the user will be able to make individual adjustments to the program settings.
Configuring MSI Afterburner
MSI Afterburner’s interface is rich and allows you to customize the program. For most users, it is enough just to check the model of the video card and slightly adjust the basic settings.
Checking the video card model
It should be immediately clarified that MSI Afterburner only works with Nvidia and AMD video cards, so first of all you need to determine whether the video card installed on the PC is supported by this program.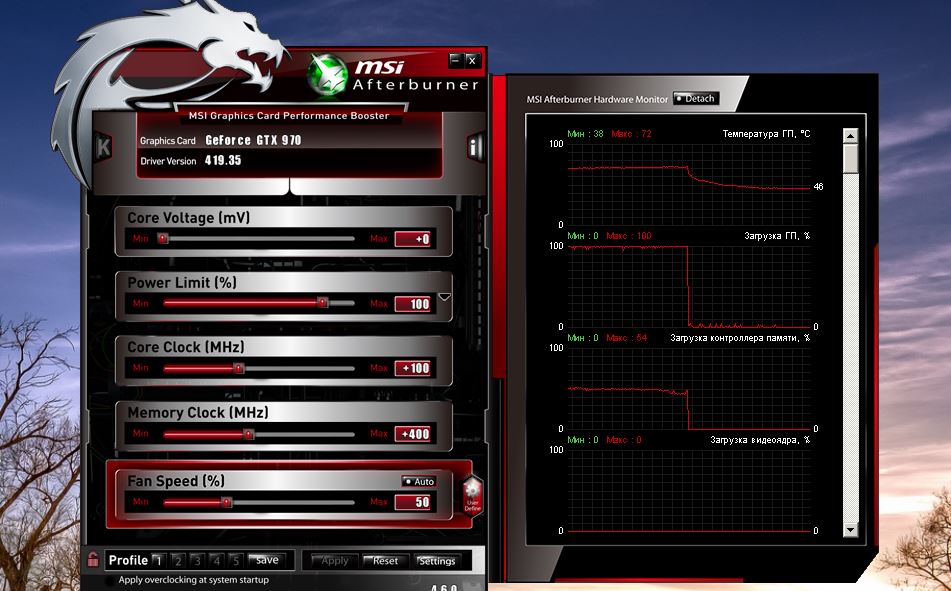
To do this, go to the «Device Manager» tab in the «Start» panel, select the «Display adapters» section and look at the model name. If the video card is compatible with the program, go to the main settings.
Basic settings
There is a settings menu in the main program window. To customize the software «for yourself», click on this icon and immediately get into the tab with the main settings. If two video cards are installed on the PC, first of all put a tick in front of the line «Synchronize settings of identical GPUs».
Other basic settings involve the following actions:
- Be sure to check the box next to the «Unlock voltage monitoring» line. This will allow the user to use the CoreVoltage slider to adjust the voltage.
- Also tick the «Run with Windows» box. This setting is necessary to run the program simultaneously with the operating system, although the software will run in the background.
- Cooler settings are also available for owners of desktop computers.
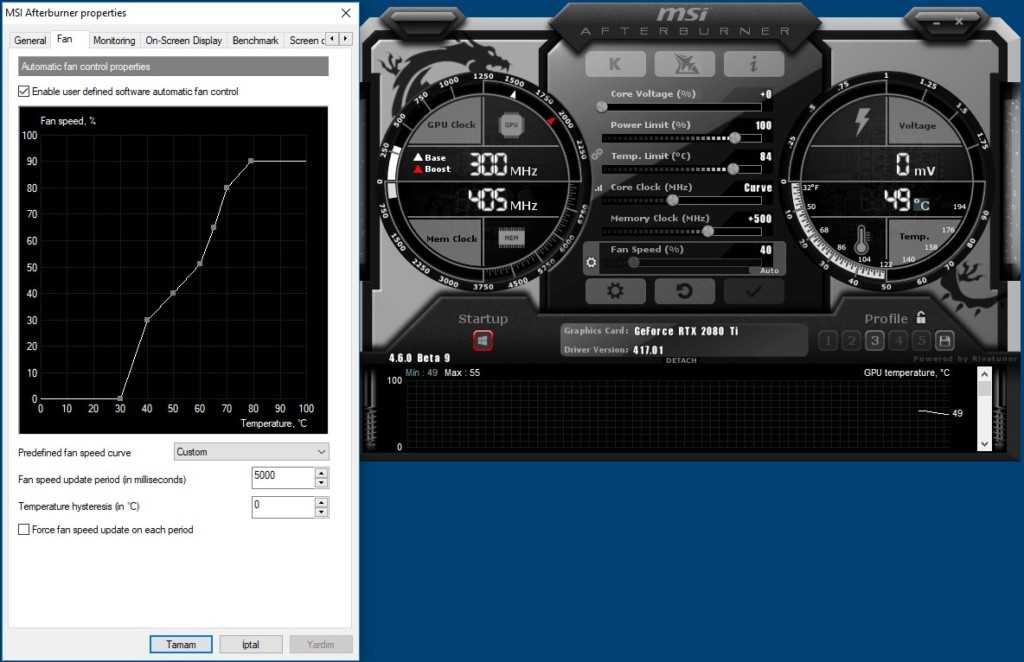 They allow you to adjust the intensity of the fans depending on the load on the video card. To make the necessary settings, go to the «Coolers» tab in the program settings menu.
To avoid possible malfunctions, all settings made must be tested. To do this, launch any resource-intensive game or application. Text will appear on the screen that will show what is happening with the video card.
In addition to basic settings, MSI Afterburner allows you to set hotkeys, capture images and videos, and save multiple user profiles in the settings menu.
How to use MSI Afterburner in games
Since the MSI Afterburner utility is primarily needed by gamers, it will not be superfluous to figure out how to use this software in games.
First of all, you need to set up hotkeys that will allow you to quickly activate or deactivate the display of selected information right during the gameplay.
To do this, go to the «OED» tab and click on the «Toggle visibility of the OED» tab and select a convenient keyboard shortcut.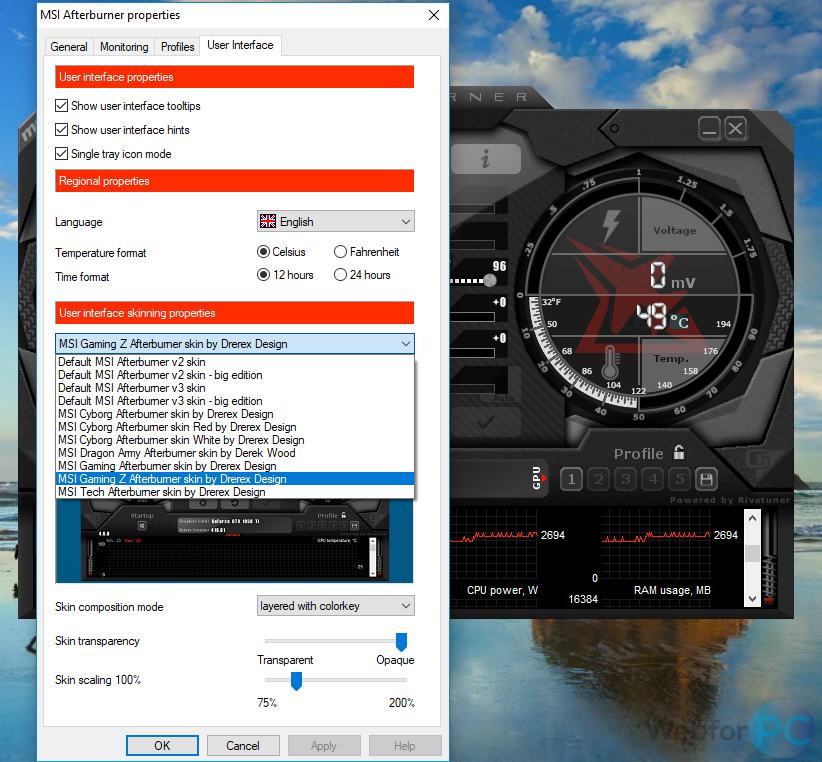 After that, just click on the «OK» button and start any game to check the correct operation of the specified hot keys. If everything was done correctly, pressing the hot keys on the screen should activate or deactivate the information selected by the user.
More tips and tricks for installing and configuring MSI Afterburner can be found in the video.
How to Overclock a Video Card with MSI Afterburner
Warning
The first thing to consider when overclocking a video card is its cooling. This is especially true for running the most advanced video games, which create an enormous load on the video processor. If you have a weak cooler on the video card, or if there are no cooling means at all, then think twice before overclocking the hardware. We also do not recommend overclocking video cards in laptops. Almost any service center specialist will confirm that the number of cases of burning video cards after overclocking is much higher for laptops than for stationary PCs with an average cooling system.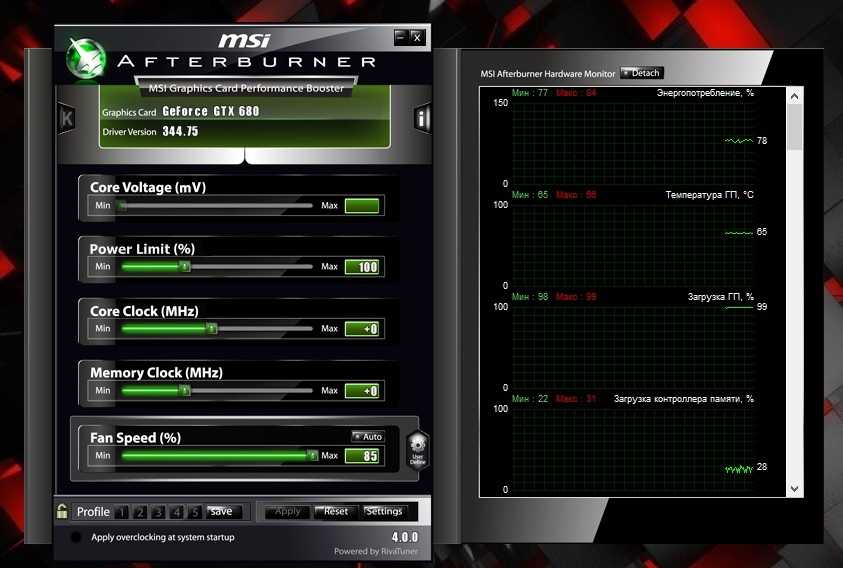 Plus, not all cards support overclocking.
In addition to the above, it is worth considering that not all games use video card resources to their fullest. For example, in StarCraft 2 the main load goes to the processor. And a significant increase cannot be obtained through overclocking the video card. Therefore, you should carefully study the features of the game (or program) for which you are going to overclock the card.
Experienced users try to overclock only old video cards with a good cooling system, when the problem of buying a new graphics processor is already brewing. Therefore, they will not be very sorry if their old card does not withstand the new load. Also, MSI Afterburner can be used to lower the parameters to reduce the average temperature of the video card and prolong its life.
Process
We will overclock using the MSI Afterburner utility. We do not need to enter the BIOS settings and change the voltage, as is done when overclocking the processor.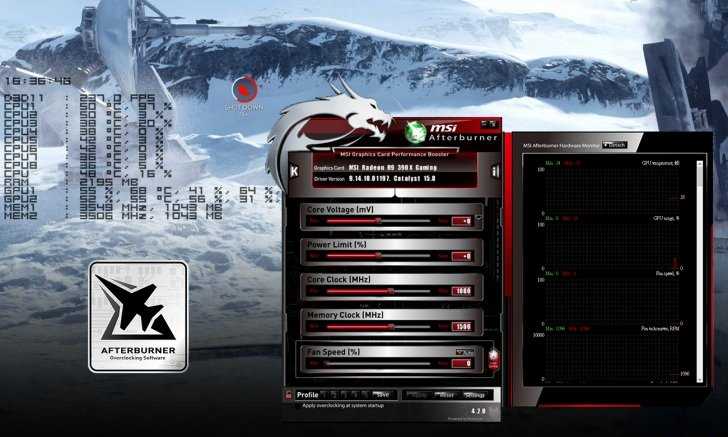 Everything is done by software. If you are new to the interface and settings of the utility, we recommend that you read the «How to use MSI Afterburner» manual.
The overclocking process itself looks like this: we gradually increase the load on the video card and see how it affects games. If we suddenly notice artifacts or unstable work, then we immediately return to the previous parameters.
Special programs (3DMark, FurMark, Video Card Stability Test and others) are also suitable as a testing tool. Plus, many gamers aim to achieve better graphics quality in the games they run on low or medium settings. Therefore, the performance gain can be monitored there as well. On average, it is 15-20%.
Let’s start overclocking.
Step 1: Settings
0107 Graphics Card is our graphics card. In this case, it’s an Nvidia GeForce GTX 550 Ti.
A little higher we will see a gear icon. This is the Settings menu, and next to it is a reset button.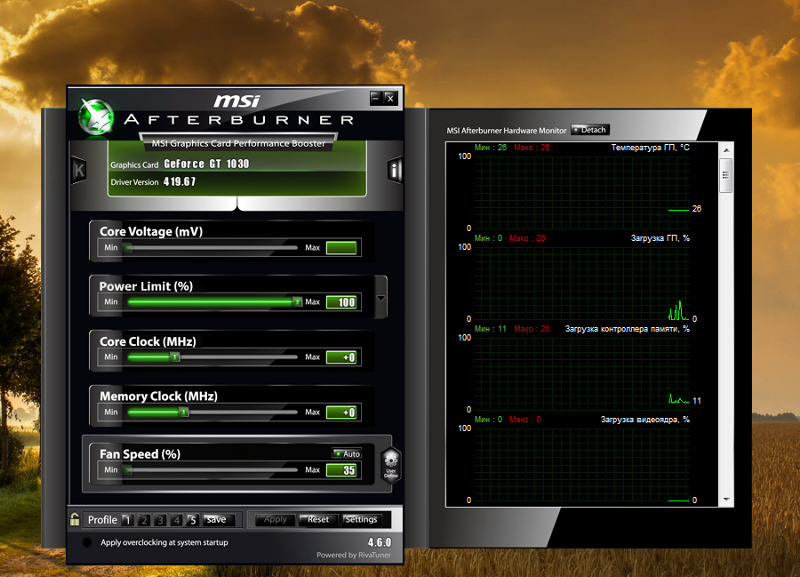 We go to the menu.
In the column «Select the leading GPU» (tab «Basic»), the video card for overclocking must be specified. If you have 2 video cards (discrete and regular), then the option «Synchronize settings of identical GPUs» must be enabled.
Next, check the box next to «Unlock voltage monitoring» in the «Compatibility properties» column in the same tab.
In the «Cooler» tab, set «Enable software user auto mode». Now we can set the relationship between the fan speed and the temperature of the video card.
By changing the position of the points on the graph, we set the temperature and speed of the cooler at this temperature. You should not set the speed to 100%, otherwise the cooler will become unusable.
Step 2. Sliders
We won’t touch voltage, power consumption and temperature.
Leave the value Fan Speed on Auto. In our case, 30%.
We need Core Clock (core clock) and Memory Clock (video memory clock).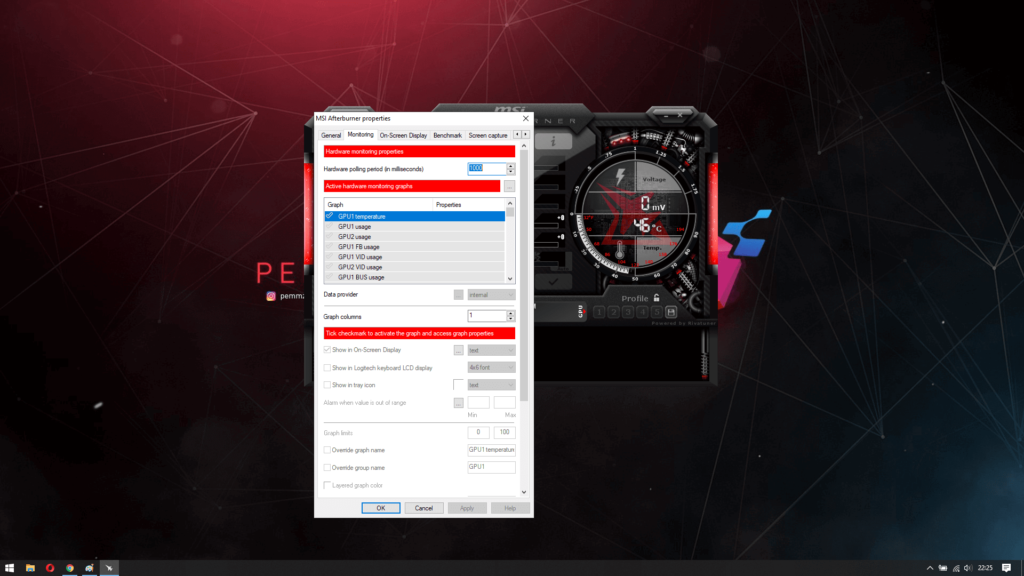 Their meanings vary depending on the video card model.
Move the slider of the Core Clock parameter to the right by 10-21 MHz and click the «Apply» button.
In the same way, move the Memory Clock slider by 10-20 MHz and click the «Apply» button.
As a result, at the first stage of the increase, we get the numbers 921 and 2072 MHz.
Step 3. Testing in games
Without closing MSI Afterburner, launch a powerful game in windowed mode. The concept of «powerful» here is relative. Of course, Crysis 2 or 3 is best, as there the load is more on the video card than on the processor. We play for 2-2.5 hours, while observing the temperature graph. If you do not notice any distortions (multi-colored flickering) or anomalies (red stripes on the sides of the screen), then you can move the sliders further by 10-20 MHz.
That is, the next stage of increase in our case will be 941 and 2092 MHz. After that, we run the game again for 2 hours and closely monitor the artifacts. We repeat the procedure again.
When you have reached the limit of your video card’s capabilities — screen distortions appear, then immediately close the game and lower the frequencies by 10 MHz. We check again. If the game is stable, then leave these parameters alone. If not, then reduce to the optimum state.
To monitor FPS (frames per second) in the game, we have the program RivaTuner Statistics Server , which is installed with MSI Afterburner. Run it (RTSS.exe) and set the value On opposite the option Show own statistics . Then in any game in the upper left corner FPS will be displayed in purple. You can read more about how to display all important graphics card parameters right in the game in the How to Use MSI Afterburner guide.
It’s hard to say at what stage the video card will get a real performance boost. But if already at the 2nd or 3rd increase the temperature has risen sharply, then it is better to stop the process. The video card will survive overclocking, but it may burn out during prolonged use at high temperatures. Therefore, it is very important to ensure high-quality cooling in advance. In no case do not allow the temperature to rise above 90 degrees!
Step 4. Stress test
If you don’t have powerful games at hand, you can use benchmarks and hardware tests. Download the MSI Kombuster utility from the MyDiv website, install and open it with MSI Afterburner («K» button) before overclocking.
During the test, FPS, temperature and total graphics card load will be displayed. Record this data. After the 1st stage of overclocking, we run this test again and observe the numbers. It should be said right away that in games the performance gain is displayed more clearly than in similar tests. Similar to testing in games, artifacts and distortions can also appear here. If you noticed such things even before overclocking, then this means that there are very serious problems with the video card.
If just one stress test is not enough for you, then you should open Kombuster via the executable file (C:\Program Files\MSI Kombustor 2.5\MSIKombustorDX11.exe). Above we will see the characteristics of our video card. GPU1 shows current temperature, load and power consumption. In the 3D Tests, GPU Burn-in, KMark (PhysX) and Settings tabs you will find a variety of tests using complex 3D objects.
Step 5: Save the configuration
So we decided to stop. In order for the current frequencies and speed of the cooler to always start when Windows starts, you need to press the button Startup . It will light up red.
Next, press the save profile button and select any of the 5 slots (see picture). In our case, this will be the 1st slot.
After that, go to the «Settings» menu → the «Profiles» tab. The 3D profile column should display our new parameters: core frequency (921), video memory frequency (2072) and cooler speed (Auto). Leave the 2D profile unchanged.
Step 6: Overclocking Issues
Some video cards may have a limited or even disabled overclocking option. You can fix this as follows: in the program folder (C:\Program File\MSI Afterburner) look for the file MSIAfterburner.cfg . Open it with notepad.
We look for the line UnofficialOverclockingEULA and write the sentence shown in the picture after the equal sign. That is, we agree to all the risks that will follow after the removal of the restriction, and also that MSI does not bear any responsibility for our actions.
Set UnofficialOverclockingMode to 1.
Please note that not all cards can unlock the overclocking limit or enable voltage and power consumption control without flashing. It also happens that overclocking is possible only on the old version of the drivers.
Some video cards can easily overclock the core frequency, but increasing the memory frequency causes serious problems.