How to Overclock Your Graphics Card
(Image credit: Tom’s Hardware)
Overclocking your graphics card can improve its performance by 5% to as much as 15% (or more), depending on the particular card model. Of course, as with any overclocking, care should be taken to avoid running your GPU at unsafe settings. But if you have one of the best graphics cards and you’re looking to eke out a bit more performance, we’ll discuss how we go about overclocking and determining «safe» settings.
Before overclocking, it’s important to get a baseline measurement of how your graphics card performs. You want to be able to see how much faster your PC runs after tuning, after all — if performance doesn’t improve, you’ll want to know. Check our guide on how to test graphics card performance, and you’ll also want to check your graphics card temperatures and clock speeds.
Once you have your baseline stock performance data, it’s time to start overclocking. There are a variety of utilities, but we’re going to focus on MSI Afterburner, which is one of the most popular and commonly used GPU overclocking tools. The same basic process can be used with other utilities, including EVGA Precision X1, Asus GPU Tweak , and other graphics card vendor utilities. It’s also possible to overclock AMD and Nvidia GPUs using the built-in utility in AMD’s drivers or Nvidia’s GeForce Experience, which we’ll cover below, but we’ll start with the universal approach to overclocking your GPU.
Overclocking With MSI Afterburner
(Image credit: Tom’s Hardware)
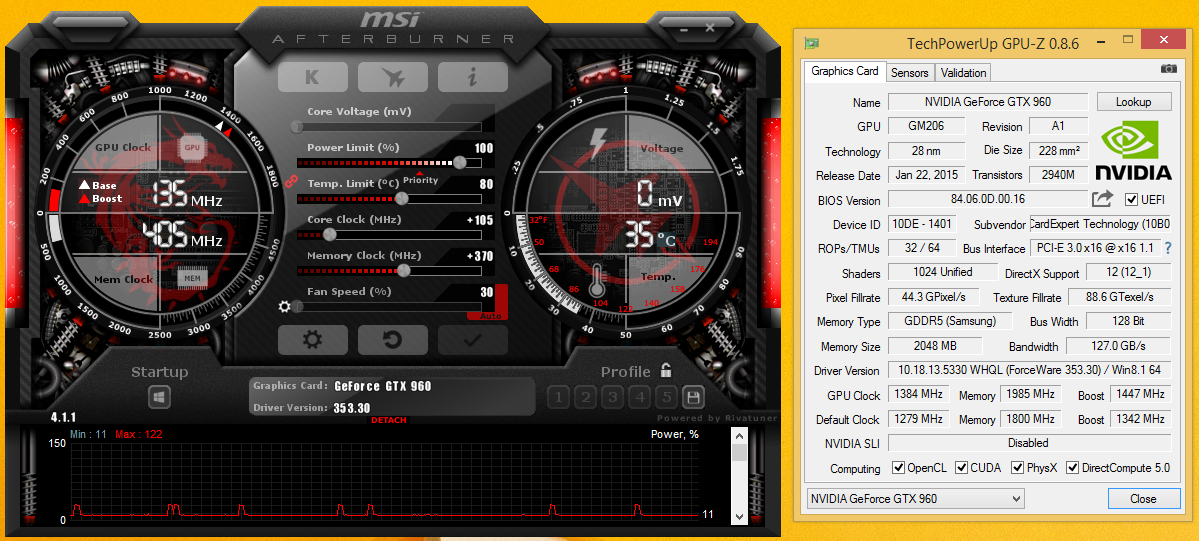
Here’s the main interface for MSI Afterburner, using the v3 skin. It shows sliders for core voltage, power limit, core clock, memory clock, and fan speed. By default, Afterburner locks out voltage adjustments. If you want to play with that, go into the settings and check the box for «Unlock voltage control.» You can try setting it to reference design, standard MSI, extended MSI, or third party — some cards will only allow voltage adjustments with the correct mode, and some might not allow it at all.
One option for overclocking is to use the automatic OC scanner tool. Press Ctrl+F, then click the OC Scanner button in the top-right corner and let it do its thing. This is supposed to make overclocking easier, but as with most auto-tuning utilities, your mileage may vary. We’ve had it crash, and we’ve had it generate unstable overclocks as well. It doesn’t do anything for memory clocks either, so you’ll likely end up going the manual route. The OC scanner can take 20 minutes to run, and most of the time, you can get a quick and easy overclock much faster on your own.
My approach is to fire up a graphically intense game or benchmark that will run in a window, then I run the game at 1920×1080 or 2560×1440 (depending on the GPU I’m using) and get to a spot where nothing is going to kill me. From there, I switch over to Afterburner and start trying some adjustments. Note that you’ll want a game or test that doesn’t stop rendering when you leave focus (so if it shows the menu when you Alt+Tab, that’s not going to work).
There are four primary points of interest when overclocking a graphics card: GPU core clock, memory clock, GPU voltage, and fan speed. (In some cases, you can also adjust memory voltage.) I start by finding the maximum «stable» core clock, then I find the maximum «stable» memory clock, and then I try to find a blend of the two that results in optimal performance.
Note that «stable» is in quotation marks because even if the initial testing seems to work fine, there will often be exceptions where some games or applications crash while others work. When that happens, you’ll have to go back to tune the settings and see if you can find some that allow the game to run properly. As you can probably guess, the more demanding the game (i.e., if it uses ray tracing and DLSS on an Nvidia GPU), the more likely it is to require additional fine tuning and lower clocks.
(Image credit: CD Projekt Red)
For this tutorial, we’ll use Cyberpunk 2077, running in a window at 2560×1440 with Ray Tracing-Ultra settings and DLSS Quality mode, to find a reasonable overclock for a GeForce RTX 3090 Founders Edition card. That ticks all the boxes for a demanding game that will likely push the GPU to its limits, and it also has a built-in benchmark that will let us see what happens to performance after tuning.
We started with a GPU core overclock. After loading the game and applying the appropriate settings, we maxed out the power limit and set the fan speed to 80% to ensure the GPU and memory stayed cool. Everything was fine so far, and we applied a 100 MHz offset to the GPU core. That worked okay, which is almost always the case — if you can’t get at least a 100 MHz core overclock, we probably wouldn’t worry about going any further with your particular graphics card.
With that initial performance boost in play, we then tried a 150 MHz core overclock… and Cyberpunk 2077 almost immediately crashed. We tried maxing out the core voltage after restarting the game, and it still crashed, which means a 150 MHz offset won’t work. We split the difference and dropped to 125 MHz, which also crashed. It appeared reasonably stable after maxing out the core voltage at +100, but that also crashed after several minutes.
Ultimately, +100 MHz on the GPU cores appears to be as far as we’re likely to get with this card, though do note that the increased power limit means we’re running quite a bit faster than at stock — GPU clocks hovered around 1755 MHz at stock, compared to 1905 MHz with our overclock. A big chunk of that comes thanks to the increased power limit, as even with a 0 MHz GPU overclock, we saw average clocks of 1875 MHz in our testing.
Next, we worked on a memory overclock. We dropped the GPU core clock back to +0 MHz but left the power limit at the maximum (114% on this card). There’s usually a fair amount of headroom, so we started with a +750 MHz offset on the GDDR6X memory. That gives an effective memory clock of 21Gbps, and after several minutes of running around in the game, we figured it was working fine. +1000 MHz (21.5Gbps) also appeared stable, as did +1250 MHz (22Gbps), but +1500MHz immediately crashed our system and forced a system restart. Did we mention overclocking can be a trial and error process?
After additional tinkering and testing, we combined the GPU and VRAM overclocks to end up with +100 MHz on the GPU core and +1000 MHz on the GDDR6X memory. Note that Nvidia’s RTX 30-series GPUs have «error detect and retry» on the memory, which can sometimes obscure borderline unstable overclocks, and we figured 21. 5Gbps was sufficiently fast.
GPU Overclocking Performance
What did the above do for performance? Here’s how the stock, GPU core only, VRAM only, and GPU plus VRAM overclocks fared at 4K RT-Ultra with DLSS Quality in the built-in Cyberpunk 2077 benchmark. We also tested a second game, Borderlands 3, at 4K and Badass settings with the same four GPU settings.
Image 1 of 2
(Image credit: Tom’s Hardware)
(Image credit: Tom’s Hardware)We’ll forgive you if that feels underwhelming. Ultimately, our maximum GPU overclock improved performance on the RTX 3090 by 8.6% in Borderlands 3 and 8.5% in Cyberpunk 2077. Most of those gains came from the GPU core overclock, which improved performance by 7.3% in Borderlands 3 and 7.5% in Cyberpunk 2077. Meanwhile, just overclocking the VRAM improved performance by 2.1% in BL3 and 6.0% in CP77.
Your actual gains can vary a lot, depending on your graphics card. For example, the RTX 3090 isn’t known for being memory bandwidth starved in most cases, but the reference model definitely runs into power limits at stock. That’s why the core overclock mattered more than the VRAM overclock. Still, the results we’ve shown above aren’t atypical for graphics card overclocking, and we usually see about a 5–10% improvement in performance.
AMD and Nvidia «Built-In» Overclocking
(Image credit: Tom’s Hardware)
You can use other tools to overclock your GPU, but if you don’t want to bother with MSI Afterburner, you should probably just use the built-in tools provided by AMD and Nvidia. Nvidia provides an auto-tuning tool and you can specify voltage and power limits, a temperature target, and a fan speed target. After that, you just leave it up to the drivers, which will overclock the GPU cores but not the VRAM.
(Image credit: Tom’s Hardware)
AMD’s overclocking tools built into Radeon Settings are far more useful. You can do everything you need, specifying voltages, clock speeds, fan speeds, memory speeds, and more. You can also ask the drivers to overclock the VRAM or the GPU — but not both. Alternatively, it can auto-undervolt the GPU, which reduces performance a bit but also tends to lower temperatures and power use. Basically, you don’t need a separate GPU overclocking utility, though we still generally find MSI Afterburner to be more familiar and easier to use.
One big benefit of AMD’s overclocking tools is that you can specify per-game OC profiles. Maybe one game isn’t as intense and you can push clocks higher, or maybe you have a game that just needs the extra oomph to provide a smoother gameplay experience. It can be as complex or as simple as you want to make it, though ultimately, it will often still come down to trial and error.
(Image credit: Jean Michel «Wizerty» Tisserand)
Should you overclock your graphics card? We could be cheeky and say that if you need to ask, you should probably just leave well enough alone. The reality is that AMD and Nvidia — and their graphics card partners — tend to bin the chips and push performance nearly to the limit. Overclocking also increases the power use and often the temperature of your graphics card, which can cause it to wear out sooner. But perhaps even worse than that is the fact that overclocking usually only improves performance by 5–10%.
That might be noticeable, to some people, without running a bunch of benchmarks. In practice, there’s usually not enough headroom that it’s worth the hassle. You can give the auto-tuning options in the AMD and Nvidia drivers a shot, and that will probably get you at least half of what you’d get with manual tuning. Plus, it’s a simple flip of a switch rather than something that requires a lot of trial and error.
As someone who has done a lot of overclocking over the years, I can say that one of the worst feelings is when you’re in the middle of a game and it suddenly crashes due to a formerly «stable» overclock. You’re then in the unenviable position of wondering if there’s a bug in the game, if your overclock pushed too far, or if there’s something else wrong with your PC. I’ve lost countless hours troubleshooting my PCs, and these days I just don’t find GPU overclocking to be particularly important.
You don’t have to agree with me, however; perhaps your particular hardware will deliver a bigger boost in performance after tuning. Just keep an eye on your GPU and VRAM temperatures, and don’t forget to give your PC a regular cleaning to keep it running smoothly. Also, don’t go into GPU overclocking expecting a 20% improvement or more in performance, because those days are far in the past — unless you use liquid nitrogen.
- MORE: Best Graphics Cards
- MORE: GPU Benchmarks and Hierarchy
- MORE: All Graphics Content
Jarred Walton is a senior editor at Tom’s Hardware focusing on everything GPU. He has been working as a tech journalist since 2004, writing for AnandTech, Maximum PC, and PC Gamer. From the first S3 Virge ‘3D decelerators’ to today’s GPUs, Jarred keeps up with all the latest graphics trends and is the one to ask about game performance.
Topics
Graphics
Overclocking
How to overclock your graphics card GPU
Although upgrading to a brand new graphics card is arguably the best way to improve your PC’s 3D rendering ability, you can eke out a little more performance from your existing card with overclocking. Much like a CPU, a graphics card contains chips that with the right tweaks can work harder and faster. That can mean better benchmark results and higher frames per second in your favorite games. Although still a little intimidating and certainly not friendly to your graphics card’s temperatures, learning how to overclock your GPU is easier today than it’s ever been. You just need the right tools, the right steps, and plenty of patience. Let us help show you how to overclock your graphics card GPU.
Contents
- Step 1: Get ready
- Step 2: Establish baselines
- Step 3: Slow and steady
- Step 4: Bring it all together
- What about voltage?
Further reading:
- Should you overclock your CPU?
- How to safely overclock your CPU
- How to overclock RAM
- How to overclock your monitor
A word of warning
Overclocking anything, be it your CPU, graphics card, or memory, has inherent risks.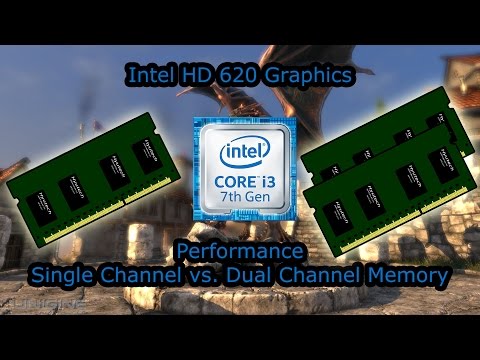 They are relatively low, but they are important to consider so that you’re well informed before starting. Overclocking anything involves the process of forcing it to perform at a faster rate than it was manufactured to do so. That means you are pushing it harder and by working faster, it will get hotter and it may become less stable. That could result in crashes in the short term and over the long term, could reduce the lifespan of your particular hardware.
There’s a chance that overclocking your hardware may void your warranty too. Many manufacturers allow it, as graphics cards will throttle up and down during general usage anyhow. However, serious tweaks like playing with voltages or flashing your graphics card’s BIOS are more likely to impact any warranty you have. The best bet is to double check with your manufacturer whether what you’re doing affects the warranty before beginning.
Although we will do our best to guide you along the path to a faster, more powerful graphics card, Digital Trends accepts no liability for any problems you run into with your hardware along the way.
Overclocking a graphics card is also only recommended for desktop PC users. Although in some cases you can overclock laptop GPUs — including Intel HD chips — it’s not usually recommended due to temperature concerns.
Step 1: Get ready
Before you can actually get started overclocking your GPU, you need to get everything ready. The first step, if you don’t know already, is figuring out which graphics card you have. To do so, you can take a look at the card itself, or the packaging if you still have it. If that doesn’t work, right-click your desktop and click either the Nvidia or AMD graphics settings link, followed by “My Rig” or “System,” respectively.
If you’d rather use a manufacturer agnostic solution, GPUZ can tell you everything you need to know about your graphics card.
Once you know exactly which graphics card you’re running, you should update to the latest graphics drivers. You can find those on Nvidia and AMD’s websites. Upgrading them will likely require a reboot, so make sure to come back to this guide when you’re done, or read on before continuing.
Before starting the overclocking proper, you’ll also want to download some useful tools to help you along. First, you’ll want to download the overclocking tool we’re going to be using for this guide: MSI Afterburner. Although AMD has its own Wattman alternative and there are several other popular third-party tools, Afterburner works for just about every graphics card and offers a full suite of features.
You’re also going to need a benchmark to test the stability of your new graphics card. A proven, lightweight benchmark is Unigine’s Valley. We also like Furmark for its built in temperature readout, but it’s more of a synthetic test. If you have any games with built in benchmarks you may want to have those installed and to hand, so that you can see what effect your new overclocks have on performance.
If you haven’t cleaned your PC in a long time, this is also a good time to do so, as any extra dust in your system can heavily contribute to GPU temperature spikes during overclocking. It’s not a mandatory step but is certainly advisable before you get started.
Step 2: Establish baselines
The next step in your overclocking journey is establishing baselines. You want to know your system’s standard clock speeds (for both the core and memory), as well as its standard operating temperatures (both idle and load) and its standard performance.
To find out those figures, close down any applications that are already running and startup MSI Afterburner. Although you can customize the look of Afterburner to how you see fit, to make sure we’re all on the same page about the location of different elements, locate the cog “Settings” button and click it. Use the top-tab navigation arrows and select “User Interface.” Then in the “User interface skinning properties” heading, use the drop down to select “Default MSI Afterburner v3 skin,” and click “OK.”
If you need to, use the temperature settings to convert readouts to Celsius or Fahrenheit depending on your preference.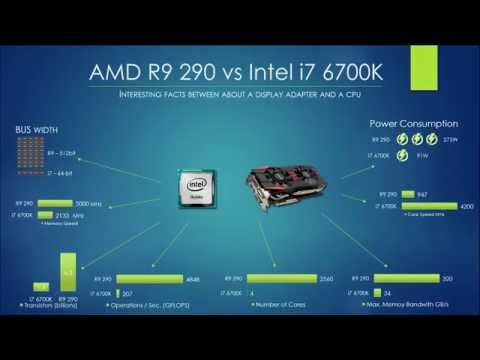
The graphs on the right-hand side will tell you most of what you need to know at this point. The top one is for your graphics card’s core temperature. It can run anywhere up to 176 degrees Fahrenheit without much difficulty, but anything beyond that gets dangerous for your hardware and can result in crashes or even damage, so it’s important to be aware of your GPU’s temperature at all times during overclocking and subsequent testing.
The other figures to be aware of are core clock and memory clock. Those are the figures that we’re going to be tweaking during overclocking. The “Min” numbers on those graphs are the idling speeds, while the “Max,” figures are the ones that your graphics card will typically use when it’s working hard at rendering a game or benchmark. That’s what we want to raise to improve performance.
The final number(s) to find out before we start overclocking for real, is an idea of your graphics card’s performance. Run the Valley benchmark you downloaded earlier using the “Extreme HD” preset, or with everything at maximum quality, fullscreen, and at “System” resolution.
Note: Press “F9” during the demo to begin the benchmark.
If you want to note down some additional performance numbers before beginning, you may also want to run Futuremark’s 3Dmark, or any modern game with its own built-in benchmarking utility, like Shadow of Mordor or Rise of the Tomb Raider.
Step 3: Slow and steady
Overclocking might be easier today than ever before, but that doesn’t mean you should rush into it headfirst. Overclocking is most successful when you take your time and take precautions along the way. Make sure that during your baseline benchmarking that Afterburner’s temperature graph doesn’t show any dangerous peaks. Anything over 176 degrees Fahrenheit would suggest your cooling isn’t strong enough for overclocking.
Also make sure that in the Afterburner window the “Apply overclocking as system startup,” box isn’t ticked. That forces your newly designated clock speeds to startup with Windows and you don’t want that until you have found a stable overclock.
If you have some temperature headroom, start up the Valley stress testing application again, but this time run it in “Windowed” mode. In the Afterburner window, raise the power limit to its maximum percentage — that lets your GPU draw as much power as it needs for the settings you put into it and avoids any automated throttling. It will not affect the voltage put through your chips.
Make sure Valley is running and return to the Afterburner window. Using either the slider or by typing in the number yourself, raise your clock speed by 10MHz. Once that’s done, reopen the Valley window and watch for any visual “artifacts.” These are visual signs that your graphics chip is working too hard and can manifest as tiny blocks of miscolored pixels, or large shard-like bands of color. If you don’t see any of those after a minute or two, return to the Afterburner window and repeat the process.
Repeat that time and again until you see artifacts, or until Valley itself crashes. If you push things too far, you may see a black screen as your graphics driver crashes or your entire system reboots. Don’t fret, you just went too far. Dial things back a couple of steps (20Mhz or so) and run Valley again. This time let it run through a couple of loops. If everything is stable you’ve found a safe maximum for your GPU.
Once you have found the limit for your core, note down that value, reset the clock to its default and perform the same process on the memory clock. This time you’re looking for artifacts that represent as solid blocks or blobs of color. Again, once you’ve reached the limit, roll back a couple of steps and perform a longer stability test. Once you’ve found your limit, note it down and reset everything.
Step 4: Bring it all together
Now that you have your individual maximums for both core and memory clocks, it’s time to combine them. It’s unlikely that you’ll be able to use the full maximum overclock for both at the same time, as both put additional stress on your graphics card, but it’s possible. Your best bet is to start at the bottom again though and raise both values together. Know what the maximum is and be ready for artifacts and crashes as you approach it. As before, once you find the limit, roll back a step or two and perform longer stability tests. You can then raise one or the other individually if you like, to see if either, in particular, was the cause of the stability issue.
Once you have your stable dual-maximum overclock for both core and memory, it’s time to perform some real stability testing. Let the Valley test run through several times in a row, play some games for a few hours — and keep a keen eye out for problems. If you encounter any, scale back the clocks a single step and start again.
Although this process can seem arduous, it’s the final big step in making sure your system can run at these clocks all day, everyday. Once you’ve found it, you can — if you like — use Afterburner to trigger these settings every time your PC boots up.
You now have a permanent GPU overclock. To find out how much of an improvement you’ve made, run all of your gaming benchmarks again and see what your new scores are compared to the old ones.
Hopefully, that boost should keep you gaming at your favorite resolution and detail settings for longer. At least until the GPU prices come down.
What about voltage?
One of the ways in which you can increase stability and viability of some core clocks is by increasing the voltage pushed through the chip, otherwise known as Core Voltage and abbreviated in Afterburner as “mV.” Increasing voltages is disabled in Afterburner by default as it has a much greater impact on your system than other settings. Increasing voltages can reduce the lifespan of your graphics card and even damage it irreparably if used irresponsibly. It can also lead to a large increase in the amount of power your graphics card draws, reducing the card — and by extension, your system’s — efficiency.
Although Afterburner has its own limits that are unlikely to allow you to stress your card too much, because every card is different, if you want to try out mV adjustment, do a quick Google search for your particular card to find a safe limit. You can enable voltage adjustments in the Afterburner settings menu.
With that said, use it much the same way you would frequency adjustments. Raise it in small amounts to see if it allows for a more stable overclock — or increased clocks. Watch your temperatures closely and if you encounter any problems, scale it back. Make sure to test for stability as you did with all previous changes.
Editors’ Recommendations
-
The best desktop computers for 2022: Dell, HP, Apple, and more
-
The best motherboards for Ryzen 7000 available right now
-
Lenovo leaks the world’s first gaming Chromebook — but there’s a catch
-
The best Mac games for 2022
-
The best mouse for Mac 2022
Step-by-Step Guide to Overclock Graphics card in Short Time
Last Updated on March 17, 2022
One thing that can transform your PC’s performance in multimedia tasks and gaming is the Graphics card’s (GPU) overclocking.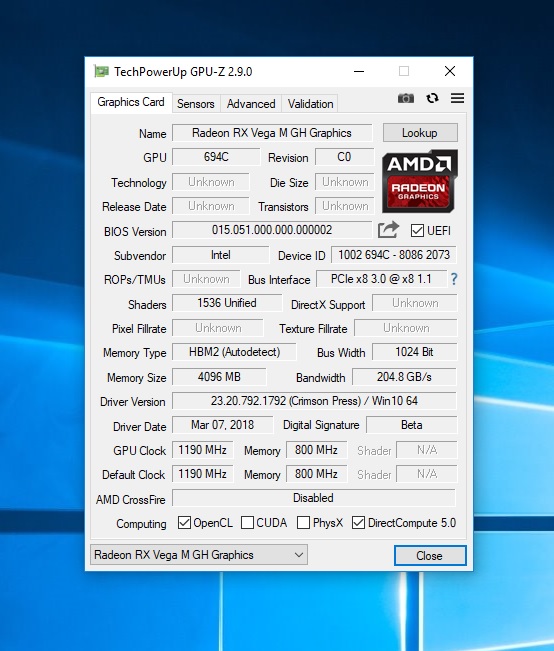 If the Central Processing Unit (CPU) is the brain of the computer, then GPU is the heart and soul. That means GPU is equally important.
Increasing your video card’s clock speed is an easy way to get the most out of your GPU. It helps you to achieve your target without spending money on the latest models from NVIDIA or AMD.
GPU overclocking is not different from CPU overclocking, although a more simple process.
What do you mean by GPU overclocking?
Tuning your graphics card is called overclocking. Every graphics card has a clock speed that is set by the manufacturer. And boosting that clock speed for better performance is overclocking.
Increasing the clock speed of your GPU helps achieve faster rendering. And this is the best dose for slow multimedia tasks and stuttering games.
What do you need for GPU overclocking?
You will need two things to overclock your GPU successfully. One is the overclocking tool, and the other one is the benchmarking tool.
- An overclocking tool is the first requirement. You can select any tool, but it is best to go with MSI Afterburner. It is simple to use, and its regular updates help it to include the latest GPUs.
- A benchmarking tool (UNIGINE Heaven) is required to stress test your video card. Before doing anything, it is necessary to ensure you are getting stable results while playing or working.
So, download and install both the software mentioned above.
- But along with these tools, you also need a monitoring program (GPU-Z). It will monitor the memory speed, clock speed, voltage, and temperature of your video card.
Before proceeding to overclock, never forget to clean your computer’s graphics card and update its driver and the Windows version.
Overclocking NVIDIA and AMD Graphics Cards
Step 1: First of all, open the MSI Afterburner software. It has an easy to use interface. On the left-hand side, you will find the core clock speed and memory clock speed. In the middle, there is a control panel, and on your right side, there are voltage and temperature of your GPU.
Step 2: Open your benchmarking tool (UNIGINE Heaven) that you have installed earlier to run a base test. Click on Run to enter into a 3D scene. Here, you will find some buttons at the top. Now click on Benchmark to begin the benchmarking process.
This process includes 26 different scenes and takes around 10 minutes or so. During this test, keep an eye on frames, temperature, graphics clock, and memory clock. You will find these stats on the top right-hand side of your computer screen.
It is necessary to focus on temperature during the test to get an idea of how much you can overclock your AMD or NVIDIA GPU. Also, you need to note down frames per second (FPS) and core for future references.
Step 3: Now, go back to MSI Afterburner and click on the Settings icon. A new window will emerge from there; click the General tab. Also, you need to tick Unlock Voltage control, Unlock Voltage Monitoring, and Force constant Voltage options.
After doing this, click ok; your system will restart automatically.
Step 4: After returning back, open both the overclocking and benchmarking tools to overclock your graphics card. Also, it is advisable to run GPU-Z for the verification of readings.
In the MSI Afterburner software, increase the temperature limit up to 85⁰c. You will notice an increase in the power limit (%) slider. After that, push the core voltage (%) slider all towards the right. Now, underneath the sliders, click the Check button to take effect.
Step 5: Raise the core clock by about 10 MHz and then open the UNIGINE Heaven software and click on the Benchmark button. Go through that same 10-minute test. You will surely see an increase in temperature during the test and a boost in the value of frames and score tests.
Step 6: Now add more numbers to the core clock speed, at least 30 to 40. Rerun the Heaven Benchmark, complete the whole process, and check if there are graphical glitches. If not, add more to the core clock slider. Once you experience glitches and bad colors in the stress test, lower the clock speed back to the previous last setting. This will be the optimal clock speed of your graphics card.
Step 7: After overclocking your GPU, click the Save icon in MSI Afterburner to save your settings.
In any case, if you need to go back to the previous setting, click the reset button.
You can repeat the steps mentioned above for your memory clock, but it is not always necessary because most new graphics cards have enough memory. So a boost in the memory clock won’t affect the performance much.
Overclocking Intel HD Graphics Card
There are two methods of overclocking Intel HD graphics card. One is by using BIOS, and the second one is by using Intel Extreme Tuning Utility software.
Using BIOS
Step 1: First of all, enter your system’s BIOS and press DEL or F10 or F2, depending on the system model or brand you have.
Step 2: Find the Advanced Frequency Settings or “Processor Graphics clock,” “GPU Boost,” or “Graphics Max Multiplier.”
Step 3: Now proceed to the Processor Graphics Clock and add 100 to your default graphics clock speed.
Step 4: Save your setting and exit the BIOS.
Step 5: Now, it is time to use a GPU stress tool (UNIGINE Heaven) for testing your overclocked frequency. Open the software and click Run and then click Benchmark to start the testing process. Make sure there are no glitches, lagging, and bad colors during the process. Also, you need an overclocking tool (MSI Afterburner) to monitor the temperature of your CPU.
Using Intel Extreme Tuning Utility
Step 1: First, download and install the Intel Extreme Tuning Utility software.
Step 2: Now, open the application and proceed to the Graphics Tuning Tab. A new window will show up in front of you, and from there, click, I Agree.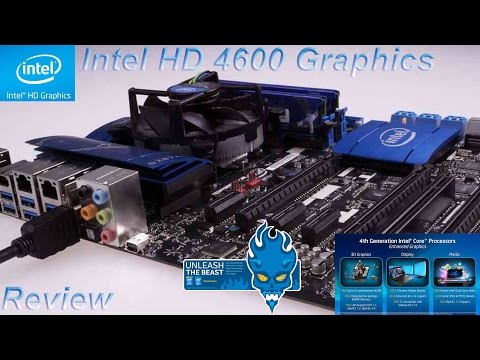
Step 3: Under Processor Graphics Overclocking, click on the Enable tab. Now, you need to push the Processor Graphics Ratio Limit by 1.0x and click Apply. It is suggested to increase only 1.0x per overclock.
Step 4: Click on the Stress Test tab to test the stability of your Intel graphics card. Tick the Graphics Stress Test checkbox set a timer for 5 minutes, and click on Start Testing.
You are also allowed to use UNIGINE Heaven to stress test your graphics card.
Step 5: If your system is showing stability and there are no errors, you can add another 100 to Processor Graphics Clock in BIOS and increase the Processor Graphics Ration Limit by 1.0x in the Intel Extreme Tuning Utility.
Step 6: Keep increasing the numbers until it fails the test. After failure, go to BIOS again and decrease the GPU clock by 50 and 0.5x in Intel Extreme Tuning Utility. Now, stress test again to check the stability.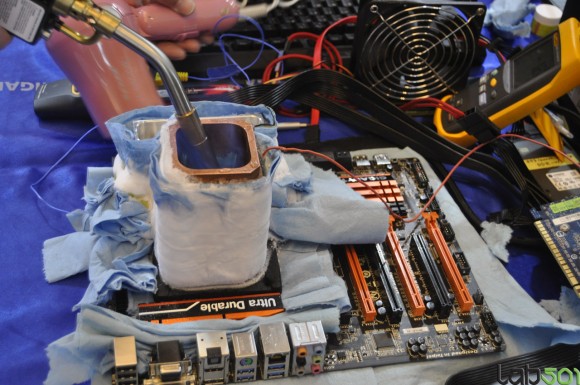
Intel Arc A380 overclock makes the GPU 60% faster in Doom Eternal
Skip to main content
TechRadar is supported by its audience. When you purchase through links on our site, we may earn an affiliate commission. Here’s why you can trust us.
(Image credit: Gunnir, Intel)
Audio player loading…
Intel’s first Arc Alchemist desktop graphics card was launched last month – but as you may recall, it’s still only on sale in China – and numerous reviews of the low-end model from manufacturer Gunnir are now cropping up, complete with disappointing conclusions on performance. However, one review gives us a possible explanation for what might be happening here.
These reviews of the Gunnir Arc A380 Photon have popped up in China (of course), Germany, and a couple of other countries including Russia, the latter being the one we’re interested in here.
Broadly speaking, the reviews (as flagged up by VideoCardz ) have not been pretty for Intel, with Igor’s Lab declaring the Gunnir card ‘not approved’ for example (with a score of 1/5, but note, there was considerable criticism leveled at Gunnir, the manufacturer itself and the quality of its card, as opposed to Intel which produces only the GPU).
However, as spotted by Hot Hardware , there is a brighter bit of news – sort of – here in that aforementioned Russian review, carried out by Pro Hi-Tech on YouTube . While the Gunnir A380 came out behind Nvidia’s GTX 1650 and disappointed with its overall performance, the reviewer observed that the graphics card only pulled just over 35W despite being equipped with an external power connector — indicating it could be chugging a lot more than this, as a GPU can get a modest amount of power directly from the motherboard, and only needs external power from the PSU if it’s a 75W+ model.
So, the reviewer decided to juice up the A380 and see the results, and while Arc GPUs don’t work with third-party overclocking utilities, luckily Intel has its own integrated overclocking feature built into the graphics driver itself (Arc Control Center).
The reviewer cranked the GPU performance boost to 55% while also upping the core voltage by 255 mV, which resulted in power usage rising from around 35W to 55W – and some major performance gains.
Some games did better than others under the new configuration, as will always be the case, but to give you an idea of the big difference that was witnessed for some titles, Doom Eternal benefited from a 60% boost. Yep – that’s huge. Other games still got a good deal of turbocharging, like God of War with a 40% performance increase.
So what’s going on here? Is Intel’s overclocking tool working some kind of sorcery to majorly up frame rates? Because with a typical overclocking scenario with existing AMD and Nvidia desktop graphics cards, gamers get small (yet still worthwhile) boosts, but nothing on this kind of scale.
The key here is that there’s a big difference between tinkering with the clock speeds of a graphics card to bump them up a bit, and ramping up the wattage to such an extent. Remember, this is a jump of 20W, and with the graphics card pottering along at 35W by default out of the box, it represents over a 55% boost in the power supplied. So suddenly those 40% to 60% jumps in performance in some games start to make a bit more sense…
The question then becomes – if this A380 GPU is apparently being run in a much lower power envelope than it could reach, why is that so?
Hot Hardware points out that in a chat with Intel Fellow Tom Petersen, he said that Team Blue’s clock speeds for Arc were pitched at lower levels, and were ‘worst case’ numbers, indicating a good deal more could be pushed for out of Alchemist GPUs – and the same could be true for the power limits. Intel may have set these low out of the gate to err on the side of caution and really ensure stability and reliability for the A380, particularly in these early cards, which are running with drivers that are still wonky.
And yes, going by the various reviews out there right now, the Arc driver is still very much a work in progress, and that’s putting it kindly (one reviewer remarked on encountering a ‘minefield’ of driver issues when evaluating the A380).
We theorized that the decision to release just in China to begin with was about dipping toes in the water with a desktop GPU that still had teething issues, and it seems this could be the case if these reviews are anything to go by. And rather than risk any reputational damage around the Arc A380 misfiring in this initial incarnation – and the possible perception that the Arc brand might disappoint when launched outside of Asia – Intel has been particularly cautious around power limits, thermals, and clocks.
That’s just us speculating, of course, but the good news is that if this is the case, the situation with drivers will improve given time, and so should the tuning applied to the graphics cards along with performance levels. (Whether the kind of jump in wattage seen here is palatable longer-term, we don’t know of course, and pushing that hard may not be wise – but it does seem like there’s a good amount of breathing room with the A380, at any rate).
This constrained power envelope would also theoretically explain why these early performance assessments make the A380 seem like a poor rival for the Nvidia GTX 1650 or AMD RX 6400 (the latter of which is not unlocked for overclocking) at the budget end of the GPU market.
Aside from the prospect of there being plenty of room for improvement, perhaps in terms of default power levels, and definitely with drivers, there’s also been some other positive news around desktop Arc GPUs recently, namely that they don’t support crypto-mining.
Today’s best graphics card deals
$39.95
View
$40.94
View
$47.94
View
Show More Deals
Darren is a freelancer writing news and features for TechRadar (and occasionally T3) across a broad range of computing topics including CPUs, GPUs, various other hardware, VPNs, antivirus and more. He has written about tech for the best part of three decades, and writes books in his spare time (his debut novel — ‘I Know What You Did Last Supper’ — was published by Hachette UK in 2013).
TechRadar is part of Future US Inc, an international media group and leading digital publisher. Visit our corporate site .
©
Future US, Inc. Full 7th Floor, 130 West 42nd Street,
New York,
NY 10036.
Can You Overclock Integrated Graphics? (Explained!)
Overclocking means better performance; therefore, users want to overclock their system’s components. But many users are worried about whether it is possible or not to overclock integrated graphics?
I researched Integrated graphics and their overclocking capability, and after doing a complete analysis, I am writing this article to inform you about everything regarding this.
So, Can You Overclock Integrated Graphics?
Yes! It’s possible to overclock integrated graphics, but expert gamers don’t recommend overclocking integrated graphics; it can damage your system’s components and void your warranty.
I know that the short answer doesn’t satisfy you; therefore, I have explained this in detail in the below section. So, keep reading this article till the end.
Table of Contents
Is Overclocking Integrated Graphics Safe?
Overclocking has become such a familiar term these days; overclocking is usually an action of increasing the component’s clock rate, running it at a higher speed than it was designed to run.
In simple terms, Overclocking boosts the performance of the components to provide better performance.
Now, straight dive into the point, is Overclocking safe for integrated graphics?
No! the integrated graphics are not suitable for overclocking, and experts don’t recommend overclocking the integrated graphics.
You have to realize that the integrated graphics are meant to be overclocked, and the primary purpose of the integrated graphics is to output graphics on your monitor. Most people want these Intel CPUs because they used for professional activities.
However, all the integrated graphics are not capable of overclocking. Intel does not recommend overclocking intel graphics frequencies; they only recommend overclocking the Intel “K” series processor-based integrated graphics.
Another thing you need to remember is that the integrated graphics are not cards like dedicated GPUs. The integrated graphics exist on the processor chip itself; therefore, these are not removable.
Now, if you forcefully overclock these Integrated graphics without a powerful cooling, it will increase the heat & probably your system will crash. In some instances, it might cause damage to the other system components and can void your warranty.
So, by looking at all of these factors, it’s apparent that Overclocking integrated graphics is possible but not safe at all.
Should You Overclock Integrated Graphics?
Overclocking is such a valuable feature for the users, and many gamers these days are overclocking their system’s components for better gaming performance.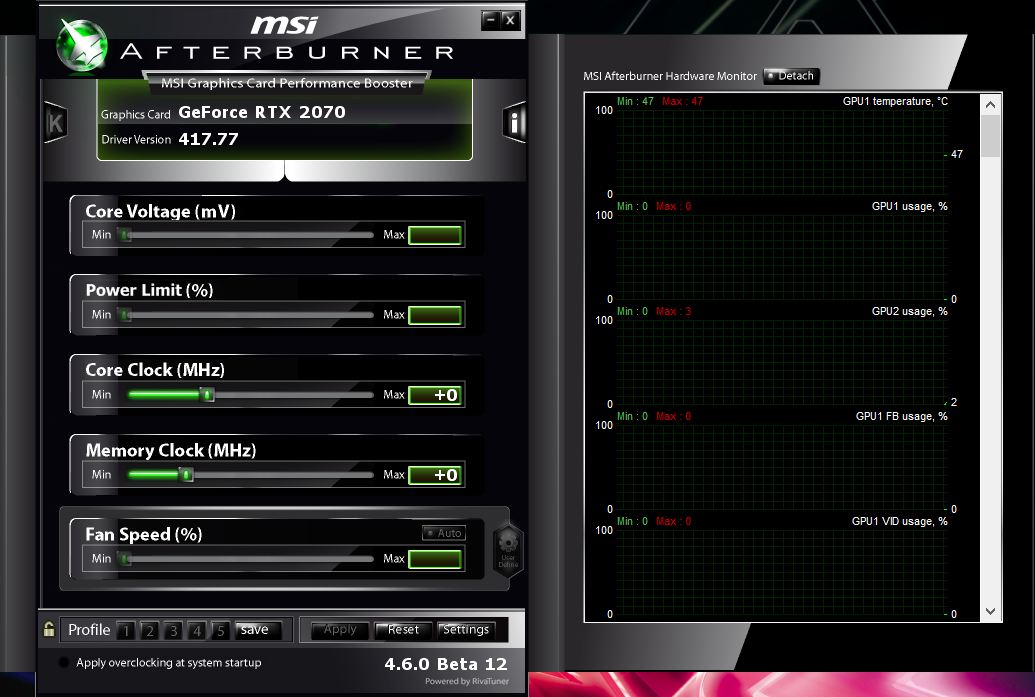 Still, it is also true that they use a dedicated graphics card.
Many users these days are playing games on integrated graphics; therefore, they want to know whether they should overclock the integrated graphics or not.
Generally, experts don’t recommend overclocking the integrated graphics, and Intel only allows the Intel “K” series processor-based integrated graphics for overclocking.
On the other hand, those users who play games on integrated graphics said that there is no reason you can’t overclock the integrated graphics a little. Still, they also recommend that you should need a powerful cooling solution.
So, overall whether you should overclock your integrated graphics or not entirely depends on your system’s capability.
If you have a powerful cooling, then a little bit of overclocking won’t be harmful. If your system doesn’t have proper cooling, you should avoid overclocking; otherwise, too much heat will generate, and it will end up damaging your system’s components.
Also Read: Is Graphics card necessary for Coding?
Will Overclocking Integrated Graphics Increase Performance?
Overclocking is the practice of increasing the clock rate of a computer to exceed that certified by the manufacturer. You can overclock both the components, your graphics card, and your CPU. In general overclocking increases the overall performance up to a specific limit.
Now, the point is whether overclocking integrated graphics helps better performance?
Overclocking integrated graphics doesn’t increase the performance because you will only get an extra 1-2 FPS.
But if your RAM is currently a single RAM module, adding the 2nd one will allow the motherboard to use the RAM in a double-channel mode that nearly doubles RAM bandwidth.
An added benefit is that more RAM means less swapping, which improves performance for the entire system. As a result, FPS can get significantly better by 25 to 30%.
So, if you want to increase the integrated graphics performance, there is no need to overclock it; instead, you can add a dual RAM.
Can You Overclock Integrated Graphics with MSI Afterburner?
No! for most instances, you cannot overclock Integrated graphics via MSI Afterburner; you can only overclock these Integrated graphics via the traditional BIOS method; otherwise, use the Ryzen Master utility.
But in some instances, you can notice some discrimination between Intel and AMD’s integrated graphics. Many users also said that it is possible to overclock an AMD’s integrated graphics because they are APU, not the CPU.
Now, let’s dive deeper into this,
Integrated graphics are a core set inside of the CPU. It uses CPU clock speed. To overclock Intel HD graphics, you need to overclock your Intel CPU. This can only be done with the “K” model CPUs. But this can only be done by using the traditional BIOS method; the MSI Afterburner software is not capable of doing so.
On the other hand, AMD’s APUs are different because they have their own dedicated chunk in the CPU with their own clock speed and processing instructions.
AMD APUs are based on their dedicated graphics architecture, making them more independent than Intel’s integrated graphics. With that comes many benefits like higher performance and working with software like MSI Afterburner.
Overall, it needs to be said that if you want to overclock your integrated graphics, then traditional BIOS is the most suitable method for you because if you are using an Intel processor/ Intel’s integrated graphics, then these cannot be overclocked by the MSI Afterburner software.
Also Read: Does AMD Ryzen have Integrated Graphics?
Can You Overclock Intel Integrated Graphics?
Yes! It’s definitely possible to Overclock the Intel Integrated graphics, but only fewer Intel processors that end with the letter “K,” and their integrated graphics support the Overclocking.
However, Intel doesn’t recommend overclocking graphics frequencies; they said that overclocking might cause damage and can void your warranty.
Now, let’s see some of the most familiar Intel Integrated graphics, whether these are capable of overclocking or not-
| Intel Integrated Graphics | Overclocking |
| Intel UHD 620 GRaphics | Yes! you can overclock 620 integrated graphics by downloading Intel Extreme Tuning Utility, but it’s very risky and not recommended. |
| Intel UHD 630 Graphics | Yes! it’s possible to overclock 630 graphics but it requires proper cooling and most of the time after overclocking you will get no performance. |
| Intel Iris Xe Graphics | No! you can’t overclock Iris Xe integrated graphics. |
| Intel HD 4600 Graphics | Yes! it’s possible to overclock HD 4600 graphics with proper cooling.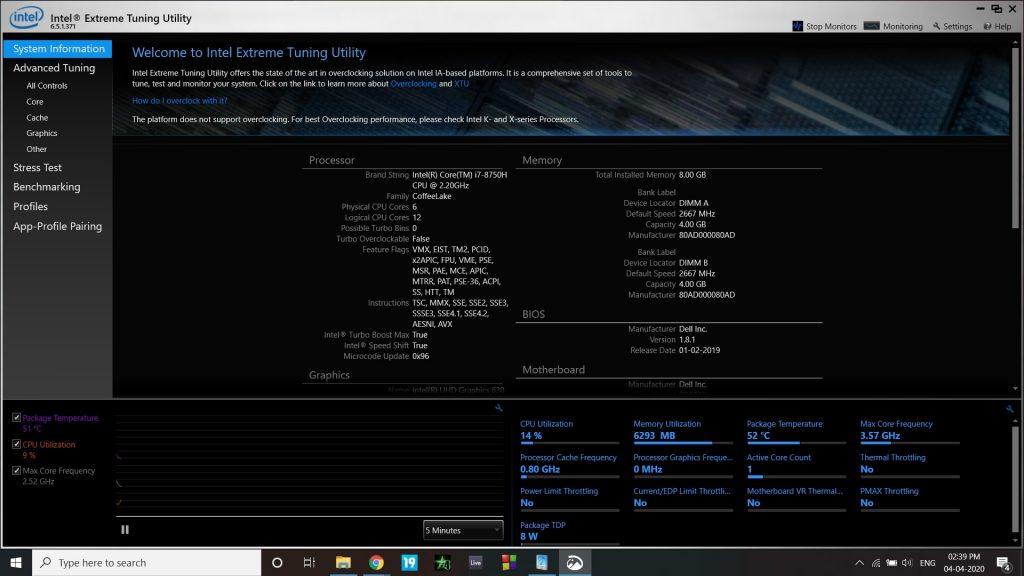 |
| Intel HD 4000 Graphics | No! most time you can’t overclock HD 4000 integrated graphics. |
| Intel HD 5500 Graphics | Yes! it’s definitely possible to overclock Intel 5500 graphics. |
As you can see in the table, the majority of the intel integrated graphics support overclocking, but Intel doesn’t recommend doing so. It can damage your system’s components.
Does AMD Integrated Graphics support Overclocking?
Yes! It is possible to overclock AMD’s integrated graphics, and you can overclock these integrated graphics with MSI afterburner or with Ryzen master. Moreover, you can also overclock AMD’s integrated graphics via the traditional BIOS method.
But before overclocking your AMD integrated graphics, you need to know that you need an excellent cooling solution.
If your graphics heated up too much, then avoid overclocking; otherwise, it will damage your system’s components like motherboards and CPU. In some instances, it can also catch up the fire; that’s why experts don’t recommend it overclocking integrated graphics.
Final Thoughts
After observing all the facts, it has to be said that it is possible to overclock integrated graphics, but for this, you need a powerful cooling solution inside your system.
At the same time, expert gamers don’t recommend overclocking integrated graphics they always prefer this for dedicated graphics.
I hope this article is helpful for you. If you want to know more about Integrated graphics, overclocking gaming, and other technology-related things, keep following this blog regularly.
Also Read
- Valorant on Integrated Graphics (11 Things you Need to Know)
- Do Intel CPUs have Integrated Graphics?
- Is Intel HD 520 Graphics good for Gaming?
- Is Intel HD Graphics 5500 Good for Gaming?
- Does Intel i9 have Integrated Graphics?
Pallab Mitra
Hii, My name is Pallab Mitra founder of this blog and here i share my knowledge about – hardwares, gaming, softwares, and other technical factors.
SkatterBencher #28: Intel UHD Graphics 750 Overclocked to 1750 MHz
Posted in Skatterbencher
We overclock the Intel UHD Graphics 750 integrated graphics up to 1750 MHz with the EK-QuantumX Delta TEC Evo and ASUS ROG Maximus XIII Hero.
You can overclock the Intel UHD Graphics with Xe architecture to 1.75GHz and get up to 60% higher performance in games. It’s really simple and straightforward.
Also, I just received the 2nd generation of EK’s Delta TEC and it’s quite a lot more powerful. I was even able to push my Core i9-11900K up to 5.9 GHz.
All that and more in this article. Let’s get started
Table of Contents
Intel UHD Graphics 750: Introduction
The Intel UHD Graphics 750 is the integrated graphics portion of the Intel Rocket Lake Core i9-11900K and launched back in November. It is part of the Intel Xe GPU architecture which ranges from the low power or Xe-LP to the high performance Xe-HPC. The latter includes the infamous Ponte Vecchio HPC/AI GPU.
Intel announced the Xe-LP products in August 2020 and listed three main avenues for the chip: Tiger Lake mobile graphics, a DG1 discrete card, and SG1 accelerator for data center.
Unfortunately, we neither have the time nor the scope to dig into what makes the Xe-LP different from its bigger brothers and predecessors. What is important to mention is that Rocket Lake is an architecture backported from Tiger Lake and as such also received the Intel Xe graphics treatment.
However, the backport from 10nm to 14nm comes at a performance cost. Whereas the Tiger Lake-U mobile processors feature integrated graphics with up to 96 execution units, the Intel UHD Graphics 750 integrated in the top-of-the-line Rocket Lake Core i9-11900K only features 32 execution units. With that in mind, Intel still suggests a 50% improvement over the Comet Lake integrated graphics.
Either way, the integrated graphics on desktop are one process node behind that of its mobile brethren and have a lot less horsepower. So, the performance is never going to be amazing.
Nevertheless, at SkatterBencher we are always looking to squeeze more performance out of our system and today that entails the IGP. In this video we will cover 3 overclocking strategies.
- First, we enable ASUS Multicore Enhancement, Intel Adaptive Boost Technology, and compare DDR4-3200 to our DDR4-4266 XMP
- Second, we overclock the integrated graphics to a modest 1.5GHz
- Lastly, we push the integrated graphics to 1.75GHz and overclock the 11900K CPU to 5.5GHz.
However, before we jump into the overclocking let us quickly go over the hardware and benchmarks we use in this video. You’ll see there’s quite a couple of new things we’re doing with this system.
Intel UHD Graphics 750: Platform Overview
Along with the Intel Core i9-11900K processor and its Intel UHD Graphics 750 integrated graphics, in this guide, we will be using the ASUS ROG Maximus XIII Hero motherboard, two pair of G.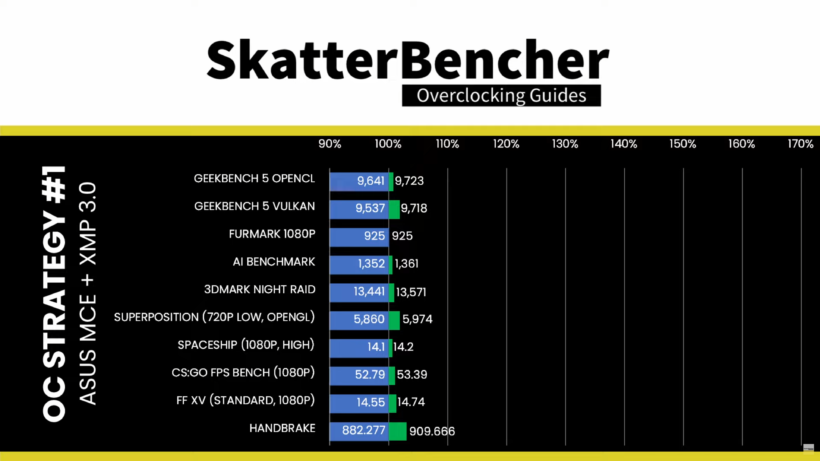 SKILL TridentZ DDR4-4266 8GB memory sticks, a 512GB M.2 NVMe SSD, a Seasonic Prime 850W Platinum power supply, the ElmorLabs Easy Fan Controller, the EK-QuantumX Delta TEC Evo, and EK-Quantum water cooling. All this is mounted on top of our favorite Open Benchtable.
The cost of the components should be around $4,140.
- Intel Core i9-11900K processor: $550
- EK-QuantumX Delta TEC Evo: $390
- EK-Quantum P360 water cooling kit: $550
- ASUS ROG Maximus XIII Hero motherboard: $470
- ASUS ROG Strix RTX 2080 TI graphics card: $1,500
- 2x G.SKILL TridentZ DDR4-4266 memory: $350
- AORUS RGB 512 GB M.2-2280 NVME: $110
- Seasonic Prime 850W Platinum power supply: $200
- ElmorLabs Easy Fan Controller: $20
- Open Benchtable: $200
There are two parts of the hardware I want to talk about a bit more in detail.
ElmorLabs Easy Fan Controller
First, the ElmorLabs Easy Fan Controller. I covered the use case of this fan controller in a separate article on this website, so I won’t bore you with the details. To keep it short and simple:
I attached an external temperature sensor from the water in the loop to the EFC. Then, I use the low/high setting to map the fan curve from 25 to 40 degrees water temperature. This is used for all overclocking strategies.
As I pointed out in my dedicated EFC video, the Delta TEC Evo introduces additional heat in the water loop because of the Peltier element. So, while using the EFC may look like a trivial part of the hardware system, it’s actually very important to ensure optimal operation of the EK-QuantumX Delta TEC Evo.
EK-QuantumX Delta TEC Evo
To regular visitors of this website, the EK-QuantumX Delta TEC is not new. I’ve used the Delta TEC in two previous videos: once to get a Core i9-10900K up to 6 GHz and once to get the Core i9-11900K up to 5.6GHz. That was with the 1st gen Delta TEC.
On August 13, EK released the 2nd generation of the Delta TEC: the appropriately named EK-QuantumX Delta TEC Evo. It promises compatibility with both 10th gen and 11th gen Intel CPUs for socket LGA1200. The new Delta TEC Evo is a, well, evolution on the original design as it incorporates much of the same technology but has a more powerful Peltier element.
The TEC plate is now soldered to the bottom of the water block that goes over the CPU. This improves the contact and transfer of cooling to the block and eventually the CPU. In addition, it also features a more powerful 275W TEC instead of the 200W of the first generation.
The Delta TEC Evo is still exclusively powered by the Intel Cryo Cooling Technology, a unique combination of hardware, software, and firmware designed to help unleash elite performance for gamers and overclockers.
In terms of installation and things to keep in mind, the Delta TEC Evo isn’t different from the Delta TEC. So, if you’re lucky enough the get ahold of one of the very limited units that are available, I suggest you check out the “Using all the overclocking knobs” video series on this channel to get a full picture on how to install and configure the Delta TEC Evo in your system.
To compare the cooling performance of the Delta TEC Evo against the Delta TEC, I picked 2 points of comparison:
- I use the OC Strategy #1 from SkatterBencher #25 to directly compare the Delta TEC with the Delta TEC Evo in Prime95 Small FFTs AVX and non-AVX when ASUS MCE and Intel ABT are enabled, and the package temperature threshold set to 85 degrees Celsius.
- In that same video I also shared a Prime95 Small FFTs non-AVX with just MCE and ABT enabled using the EK-Quantum Magnitude water block.
When comparing the first gen Delta TEC with the second gen Delta TEC, we find that:
- In Prime95 Small FFTs with AVX disabled our all-core frequency improves by almost 150MHz to 4874 MHz from 4736 MHz
- In Prime95 Small FFTs with AVX enabled our all-core frequency improves by almost 150MHz to 4413 MHz from 4262 MHz
Then we compare the 2nd gen Delta TEC to a regular high-performance water block like the EK-Quantum Magnitude in Prime95 Small FFTs with AVX disabled, leaving ABT and MCE enabled, and relying on Intel’s own thermal throttling mechanisms which kick in at 100 degrees Celsius.
We find that the Delta TEC is still trailing by about 200 MHz in average frequency, 4.9G versus 5.1G, as it hits the thermal throttling point of 100C. That said, the TEC handling an average CPU Package Power of 265W is still pretty impressive. The Magnitude holds the 11900K at 5.1 GHz with 285W average package power and 87 degrees Celsius. So, it’s getting pretty close!
One last note on the Delta TEC Evo: when running an all-core heavy multi-threaded workload like Prime95, the average CPU package power is 265W but the power from the wall is … 600W. That may sound really high, but it’s just the nature of Peltier cooling. An efficiency of 50% at such high loads is quite good for a Peltier.
In unregulated mode I also saw some improvement over to the 1st gen Delta TEC we used in SkatterBencher #25 with the 11900K.
When idling in the operating system, with the 1st gen Delta TEC I was not able to see negative temperatures and my maximum frequency was 5. 7GHz.
7GHz.
When idling in the operating system, with the 2nd gen Delta TEC Evo I reached subzero temperatures and could further increase the CPU frequency to 5.9 GHz. So, I could probably set up a Rocket Lake system that could boost to 5.7 or 5.8 GHz with the Delta TEC Evo.
So, let’s summarize in bullet points: 1st gen Delta TEC versus 2nd gen Delta TEC Evo
- Maximum CPU package power increased from 200W to 265W
- Roughly 150 MHz frequency improvement in all-core heavy workloads
- Roughly 200 MHz frequency improvement in light workloads
- Peltier efficiency of around or above 50%
Alright, let’s move on to the benchmark software.
Intel UHD Graphics 750: Benchmark Software
We use the following benchmark applications to measure performance and ensure system stability.
- Geekbench 5 (OpenCL, Vulkan) https://www.geekbench.com/
- Furmark https://geeks3d.com/furmark/
- AI-Benchmark https://ai-benchmark.
 com/
com/ - 3DMark Night Raid https://www.3dmark.com/
- CS:GO FPS Bench https://steamcommunity.com/sharedfiles/filedetails/?id=500334237
- Final Fantasy XV http://benchmark.finalfantasyxv.com/na/
- Handbrake https://handbrake.fr/
- Prime 95 https://www.mersenne.org/download/
There’s lots of new benchmarks in this list which may need some detailing how I set it up
AI Benchmark
Unless you’ve been living under a rock for the past couple of years, AI and deep learning are a pretty big deal these days. So, I wanted to include at least one benchmark test to see if overclocking the IGP could improve deep learning performance.
I came across AI Benchmark: https://pypi.org/project/ai-benchmark/.
AI Benchmark Alpha is an open-source python library for evaluating AI performance of various hardware platforms, including CPUs, GPUs and TPUs. The benchmark is relying on the TensorFlow machine learning library, and is providing a lightweight solution for assessing inference and training speed for key Deep Learning models.
Installing AI Benchmark turned out to be a bit more of a hassle than initially expected. First, it relies on the TensorFlow machine learning library. TensorFlow can be used with AVX-enabled CPUs or CUDA-enabled GPUs, neither of which describes our integrated graphics.
Then I came across TensorFlow-DirectML. TensorFlow-DirectML broadens the reach of TensorFlow beyond its traditional Graphics Processing Unit (GPU) support, by enabling high-performance training and inferencing of machine learning models on any Windows devices with a DirectX 12-capable GPU through DirectML, a hardware accelerated deep learning API on Windows.
While I am pretty software-illiterate, I was able to use the TensorFlow-DirectML package to get the benchmark to run on the integrated graphics. For those who want to also run it, I’ll quickly run you through the process.
- First, install Anaconda
- Then, run the Anaconda Prompt
- Create a new Python environment for the benchmark.
 Make sure to specify Python version 3.7 as only versions 3.5, 3.6, and 3.7 are supported by tensorflow-directml
- conda create -n aibench python=3.7
- Activate your newly created environment
- conda activate aibench
- Download and install the ai_benchmark package
- pip install ai_benchmark
- Download and install the tensorflow-directml package
- pip install tensorflow-directml
- Start python
- python
- Import the AI Benchmark package
- From ai_benchmark import AIBenchmark
- Specify AI Benchmark to run on the IGP
- Benchmark = AIBenchmark(use_CPU=None, verbose_level=3)
- Use_CPU=None will prevent the benchmark from running on the CPU
- Verbose_level=3 will provide us detailed information during the benchmark
- Benchmark = AIBenchmark(use_CPU=None, verbose_level=3)
- Start the benchmark
- Benchmark.run()
The benchmark itself takes about 20 minutes to run and outputs three scores: inference score, training score, and AI-Score. It’s the latter we use as performance measurement.
Do note that the AI Benchmark requires a substantial amount of memory. The integrated graphics does not have dedicated memory but rather shares the memory with the CPU. As you’ll see later in the video: when using 2 sticks of 8GB we ended up running out of memory and unable to complete the benchmark. So, I recommend a minimum of 32GB of system memory.
Also, you may run into an error called DXGI_ERROR_DEVICE_REMOVED while running the benchmark. This happens when there’s a timeout. Basically, the benchmark figures our integrated graphics gave up and went home. But our IGP didn’t give up … it’s just a bit slow.
To solve the issue, you can increase the timeout with the registry entry “TdrDelay”. This registry entry will extend the time a software application waits for the IGP. I use a value of 20 and this resolved my problem.
KeyPath: HKEY_LOCAL_MACHINE\System\CurrentControlSet\Control\GraphicsDrivers
KeyValue: TdrDelay
ValueType: REG_DWORD
ValueData: Number of seconds to delay.
The default value is 2 seconds.
Oh, and did I mention already the IGP is pretty slow?
As you’ll see later on, the IGP gets a score of about 1,000 points at stock. When running the AI Benchmark on our 8 Rocket Lake CPU cores using the regular TensorFlow library, we get a score of about 3,000 points. So 3x higher.
Handbrake
I included Handbrake in the benchmark suite to check if there’s any performance scaling when using Quick Sync. I followed the following guide: https://forum.handbrake.fr/viewtopic.php?f=9&t=40721
I used the Tears of Steel Full Movie 1920 pixels wide source, then check the average frames per seconds during encoding with the H.265 QSV 1080p preset.
Alright, let’s start the overclocking.
Intel UHD Graphics 750: Stock Performance
The first thing we must do before we start overclocking is check the system performance at default settings.
Please note that out of the box, the ASUS ROG Maximus XIII Hero enables ASUS MultiCore Enhancement which unleashes the Intel Turbo Boost 2. 0 limits. So, to check the performance at default settings you must
Go to the BIOS, then
- Go to the Extreme Tweaker menu
- Set ASUS MultiCore Enhancement to Disabled – Enforce All limits
Then save and exit the BIOS.
Here is the benchmark performance at stock:
- Geekbench 5 OpenCL: 7,517 points
- Geekbench 5 Vulkan: 7,283 points
- Furmark 1080P: 757 points
- AI-Benchmark: /
- 3DMark Night Raid: 9,740 marks
- CS:GO FPS Bench: 28.51 fps
- Final Fantasy XV: 11.15 fps
- Handbrake: 342.273 fps
There were some mentions that 4dimm performance is much better than 2dimm performance on Rocket Lake, so we tried that as well.
Here is the benchmark performance at stock with 4 dimms installed:
- Geekbench 5 OpenCL: 7,601 points (+1.12%)
- Geekbench 5 Vulkan: 7,305 points (+0.30%)
- Furmark 1080P: 757 points (+0.00%)
- AI-Benchmark: 1,064 points (+0.00%)
- 3DMark Night Raid: 9,753 marks (+0.
 13%)
13%) - CS:GO FPS Bench: 28.94 fps (+1.51%)
- Final Fantasy XV: 11.19 fps (+0.36%)
- Handbrake: 343.755 fps (+0.43%)
Overall, the difference falls within the margin of error. However, we are now able to finish the AI Benchmark so for the rest of the guide we’ll stick with 4 memory sticks of 8GB totaling 32GB of DDR4. Also, the relative performance improvements from our overclocking strategies references the 4dimm benchmark performance.
When running Furmark GPU Stress Test, the average GPU clock is 1300 MHz with 1.064 volts and an average memory clock of 1067 MHz. The average GPU temperature is 29 degrees Celsius, and the average GPU power is 12.14 watts.
Now, let us try our first real overclocking strategy.
However, before we get started make sure to locate the CMOS Clear button on the IO panel of your motherboard. In case your system fails to boot up after you configured your settings, pressing this button will force the system reset the BIOS settings. So, you can return to the BIOS easily and make the necessary adjustments.
OC Strategy #1: ABT + MCE + XMP
In our first overclocking strategy we simply unlock some of the performance constraints by enabling Intel ABT, Intel XMP, and ASUS MCE.
There are 3 main differences between the default configuration and this overclocking strategy.
First, Intel ABT allows the CPU to boost to 5.1 GHz when all cores are active whereas the default configuration only allows 5.1GHz for up to 4 active cores and up to 4.8GHz with 8 active cores.
Second, Intel XMP increases the memory frequency to DDR4-4266 up from the stock speed of DDR4-2133. Do note that this will also enable Gear 2 mode. So, for comparison purposes we also tested the performance at DDR4-3200 with Gear 1 mode.
Third, ASUS MCE unlocks the Turbo Boost parameters allowing for essentially unlimited time at the highest performance levels.
Upon entering the BIOS
- Go to the Extreme Tweaker menu
- Set AI Overclock Tuner to XMP I
- Set Intel Adaptive Boost Technology to Enabled
- Set Asus MultiCore Enhancement to Enabled – Remove All Limits
Then save and exit the BIOS.
We re-ran the benchmarks and checked the performance increase compared to the default operation.
With DDR4-3200 and Gear 1 mode:
- Geekbench 5 OpenCL: 7,733 points (+1.74%)
- Geekbench 5 Vulkan: 7,667 points (+4.96%)
- Furmark 1080P: 749 points (-1.06%)
- AI-Benchmark: 1,098 points (+3.20%)
- 3DMark Night Raid: 10,269 marks (+5.29%)
- CS:GO FPS Bench: 35.26 fps (+21.84%)
- Final Fantasy XV: 11.77 fps (+0.81%)
- Handbrake: 346.544 fps (+0.43%)
With DDR4-4266 XMP and Gear 2 mode:
- Geekbench 5 OpenCL: 7,788 points (+2,46%)
- Geekbench 5 Vulkan: 7,765 points (+6.30%)
- Furmark 1080P: 745 points (-1.59%)
- AI-Benchmark: 1,107 points (+4.04%)
- 3DMark Night Raid: 10,394 marks (+6.57%)
- CS:GO FPS Bench: 38.41 fps (+32.72%)
- Final Fantasy XV: 11.82 fps (+5.63%)
- Handbrake: 351.596 fps (+2.28%)
We see performance increases across the board with the most obvious one being CS:GO.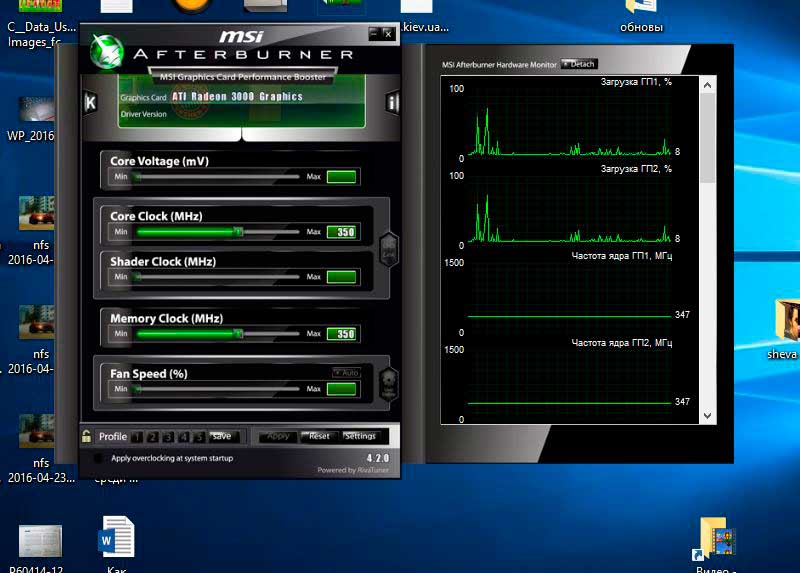 In CS:GO we get a performance uplift of more than 30% by increasing the system memory frequency. We also see that the XMP with Gear 2 provides slightly better performance than DDR4-3200 with Gear 1.
When running Furmark GPU Stress Test, the average GPU clock is 1300 MHz with 1.064 volts and an average memory clock of 2133 MHz. The average GPU temperature is 25 degrees Celsius, and the average GPU power is 12.63 watts.
OC Strategy #2: ABT + MCE + XMP + IGP 1500
In our second overclocking strategy we finally get around overclocking the integrated graphics. As it turns out, it’s really quite simple and straight-forward. So, let’s overcomplicate for our own entertainment.
Intel UHD Graphics 750: Architecture
As the term integrated graphics already reveals, the UHD Graphics 750 is integrated in the Rocket Lake CPU die. While it takes a sizeable chunk of the total die, about 21% of the die area, the majority of the chip is used to place the 8 Cypress Cove CPU Cores, its cache, and the Ring bus.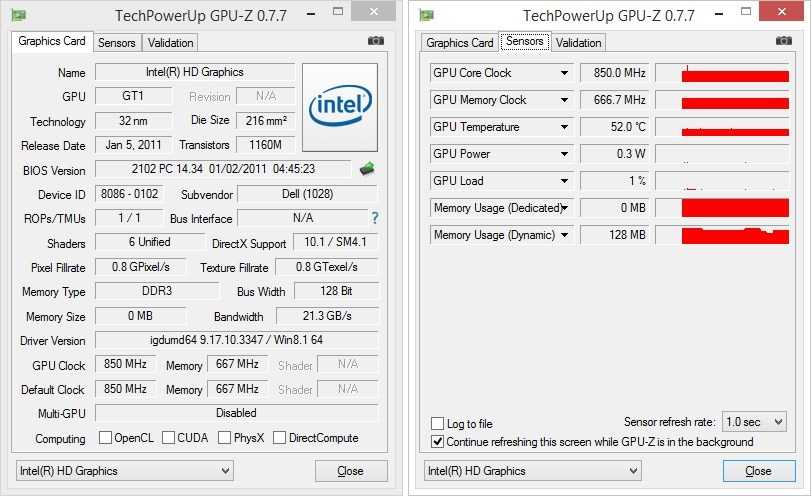
The design of the integrated graphics can be separated into three parts: the “slice”, the “unslice”, and the display block.
The slice is a cluster of sub-slices, each of which contains the elements of the actual graphics compute engine like the execution units. This is the part that powers your games and any compute tasks.
The unslice holds the elements with fixed-function geometry capabilities and fixed-function media capabilities. So, if you’re encoding or decoding a video, or simply watching Netflix, this part ensures proper video encoding. It also contains the connection to the ring bus via which the IGP can send and receive data from the system memory.
The display block contains support for the display outputs like HDMI or DisplayPort.
The slice part of the UHD Graphics 750 inside our Rocket Lake Core i9-11900K contains 2 sub-slices with each 16 execution units. That’s far less than the 6 sub-slices and 96 execution units present in the mobile Tiger Lake counterpart.
That’s the advantage of Tiger Lake being on a smaller process node thus allowing for higher transistor density. Whereas Rocket Lake is built using the 4th generation 14nm process (14nm+++), Tiger Lake comes in a 10nm SuperFin package which is the 3rd generation of Intel 10nm.
Intel UHD Graphics 750: Clocking
When it comes to the clocking, the IGP frequency is based on the base clock frequency or reference clock. At default, the BCLK is 100MHz, but the Rocket Lake PCH (chipset) supports fine grain BCLK overclocking between 95 MHz and 538 MHz. The base clock frequency is first halved, then multiplied by the Graphics Ratio to obtain the final operating frequency.
On Rocket Lake CPUs, the maximum Graphics Ratio Limit is 42. This is lower than on the previous generation Comet Lake where the maximum ratio limit was 60. So, the maximum frequency of a Rocket Lake IGP would be 100 MHz divided by 2 multiplied by 42 so 2100 MHz.
The Rocket Lake IGP supports the Graphics Dynamic Frequency feature. The Dynamic Frequency capability is designed to allow the processor to assess its own thermals, current, and power to come up with a dynamic upper limit on its frequency.
On processors with Graphics Overclocking capability, the integrated graphics cores have the ability to run at frequencies higher when operating conditions allow.
When Graphics Dynamic Frequency is enabled, the graphics cores could be running at any ratio in the inclusive range between the Maximum Dynamic Frequency (RP0) and the Graphics Base Frequency (RP1). In the case of our Core i9-11900K, the graphics base frequency is 350 MHz, and the default maximum dynamic frequency is 1300 MHz. When overclocking, we simply increase this maximum frequency to a higher value.
As mentioned, the graphics frequency is in part function of the available thermal, current, and power headroom. This is managed by the Turbo Boost 2.0 technology we are all too familiar with. Turbo Boost 2.0 will ensure available power budget is distributed among the CPU and Graphics cores depending on the workload. So, if you have a heavy graphics dependent workload and no CPU load, it will decrease the CPU frequency in favor of boosting the Graphics frequency higher.
Of course, knowing the power budget of the Graphics portion of the Rocket Lake CPU is only 15W, we don’t expect this power budgeting to have a great impact on our overall system performance.
One last thing we need to know about Rocket Lake integrated graphics overclocking is that unlike its predecessor architectures, having separate Slice and Unslice frequencies is not supported. So, when increasing the graphics ratio, we will increase both the Slice and Unslice frequency.
Do note that the display output is driven by a 24 MHz fixed clock frequency and is not affected by changing the BCLK frequency or the graphics ratio.
Intel UHD Graphics 750: Voltage
When it comes to providing an operating voltage to the graphics cores, the Rocket Lake processor has a dedicated voltage rail called GT Core Voltage. This voltage relates directly to the maximum frequency capability of the graphics cores. It is by default around 1.05V.
Configuring the voltage for the graphics cores is very similar to the CPU cores. Rocket Lake supports both adaptive and override voltages. When using Adaptive voltage mode, the graphics voltage will be reduced in idle whereas in Override voltage mode the voltage will remain constant.
Generally speaking, adaptive voltage mode is the primary choice when overclocking using air or water cooling, and override voltage mode is the primary choice when extreme overclocking.
In adaptive mode, the CPU will interpolate the required voltage for a given frequency between the base frequency and our set maximum frequency.
If our base frequency is 350 MHz at 0.4V and our maximum boost frequency is 1300 MHz at 1.05V, then the interpolated voltage for 1000 MHz will be somewhere between 0.4V and 1.05V. If the V/f curve is linear, that would be 0.86V
If we overclock our system to 1.75GHz and use an adaptive voltage offset of 350mV, the base frequency will be 350 MHz at 0. 75V and thPe maximum boost frequency will be 1750 MHz at 1.4V. The interpolated voltage for 1000 MHz will be somewhere between 0.75V and 1.4V. If the V/f curve is linear, that would be 1.21V.
When it comes to the maximum voltage, there’s a 1.52V upper limit by the SVID controller but no general recommendation on maximum voltage for real-world scenario.
So, now that we have overcomplicated integrated graphics overclocking let’s get started.
In our second strategy we increase the graphics ratio to 30, resulting in a 1.5GHz clock frequency, and use the adaptive voltage offset of 0.275mV to increase the GT Core Voltage.
Now let’s configure the system
- Go to the Extreme Tweaker menu
- Set AI Overclock Tuner to XMP I
- Set Intel Adaptive Boost Technology to Enabled
- Set Asus MultiCore Enhancement to Enabled – Remove All Limits
- Set Max. CPU Graphics Ratio to 30
- Set CPU Graphics Voltage to Offset Mode
- Set Offset Mode Sign to +
- Set CPU Graphics Voltage Offset to 0.
 275
275
Then save and exit the BIOS.
We re-ran the benchmarks and checked the performance increase compared to the default operation.
- Geekbench 5 OpenCL: 8,836 points (+16.25%)
- Geekbench 5 Vulkan: 8,873 points (+21.46%)
- Furmark 1080P: 864 points (+14.13%)
- AI-Benchmark: 1,264 points (+18.80%)
- 3DMark Night Raid: 11,464 marks (+17.54%)
- CS:GO FPS Bench: 42.08 fps (+45.40%)
- Final Fantasy XV: 13.12 fps (+17.25%)
- Handbrake: 371.572 fps (+8.09%)
We get a steady performance increase across the board. Compared to stock, the GPU frequency increased by 15% and the memory increased by 100%. The benchmark performance increase ranges from +8% in Handbrake to +45% in CS:GO.
When running Furmark GPU Stress Test, the average GPU clock is 1500 MHz with 1.333 volts and an average memory clock of 2133 MHz. The average GPU temperature is 30 degrees Celsius, and the average GPU power is 17.55 watts.
OC Strategy #3: ABT + MCE + XMP + IGP 1750 + OCTVB
In our third and final overclocking strategy we push the integrated graphics to its max and reach 1.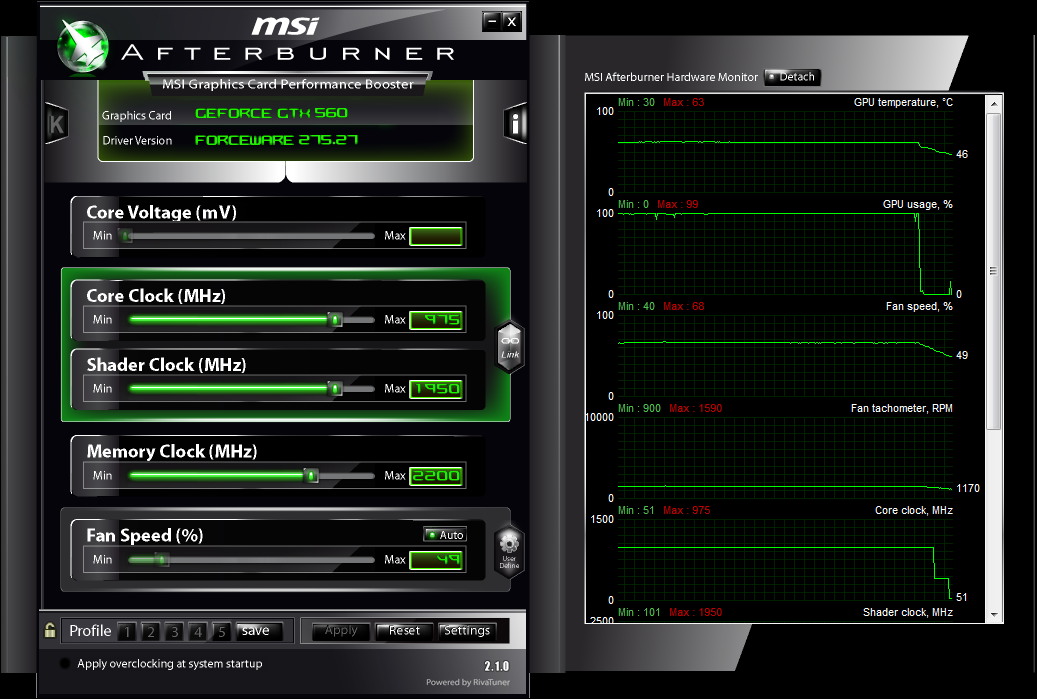 75GHz.
We also overclock our 8 Rocket Lake CPU cores using the same settings we used in SkatterBencher #25 OC Strategy #4. So, we manually tune the CPU ratios and use ASUS’ OCTVB +2 Boost Profile to get frequencies up to 5.5 GHz.
I also tried pushing the memory a little bit more with additional frequency or improved memory timings, but sadly I wasn’t able to get it quite stable. Using 4 memory sticks and relying on the system memory for the integrated graphics makes it a lot more difficult.
Upon entering the BIOS
- Go to the Extreme Tweaker menu
- Set AI Overclock Tuner to XMP I
- Set Intel Adaptive Boost Technology to Disabled
- Set Asus MultiCore Enhancement to Enabled – Remove All Limits
- Set CPU Core Ratio to By Core Usage
- Set 1-Core to 8-Core Ratio Limit to 55, 55, 54, 54, 54, 54, 54, 53.
- Enter the Specific Core submenu
- Set Core0 to Core 1 Specific Ratio Limit to 55, 53, 54, 54, 55, 54, 54, 54.
- Leave the Specific Core submenu
- Enter the Thermal Velocity Boost submenu
- Set Overclocking TVB to +2Boost Profile.
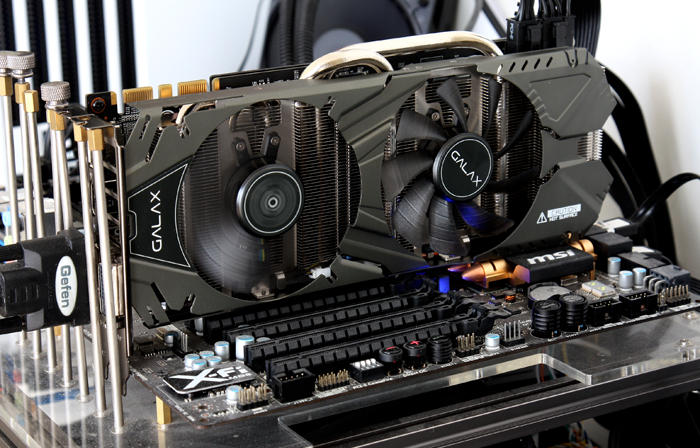
- Set Overclocking TVB to +2Boost Profile.
- Leave the Thermal Velocity Boost submenu
- Enter the V/F Point Offset submenu
- Set Offset Mode Sign 4 to minus
- Set V/F Point 4 Offset to 0.075
- Set Offset Mode Sign 5 to minus
- Set V/F Point 5 Offset to 0.035
- Set Offset Mode Sign 6 to minus
- Set V/F Point 6 Offset to 0.025
- Set Offset Mode Sign 8 to plus
- Set V/F Point 8 Offset to 0.050
- Leave the V/F Point Offset submenu
- Enter the AI Features submenu
- Set Package Temperature Threshold to 90
- Set Regulate Temperature Threshold to Enabled
- Leave the AI Features submenu
- Set Max. CPU Graphics Ratio to 35
- Set CPU Graphics Voltage to Offset Mode
- Set Offset Mode Sign to +
- Set CPU Graphics Voltage Offset to 0.350
Then save and exit the BIOS.
We re-ran the benchmarks and checked the performance increase compared to the default operation.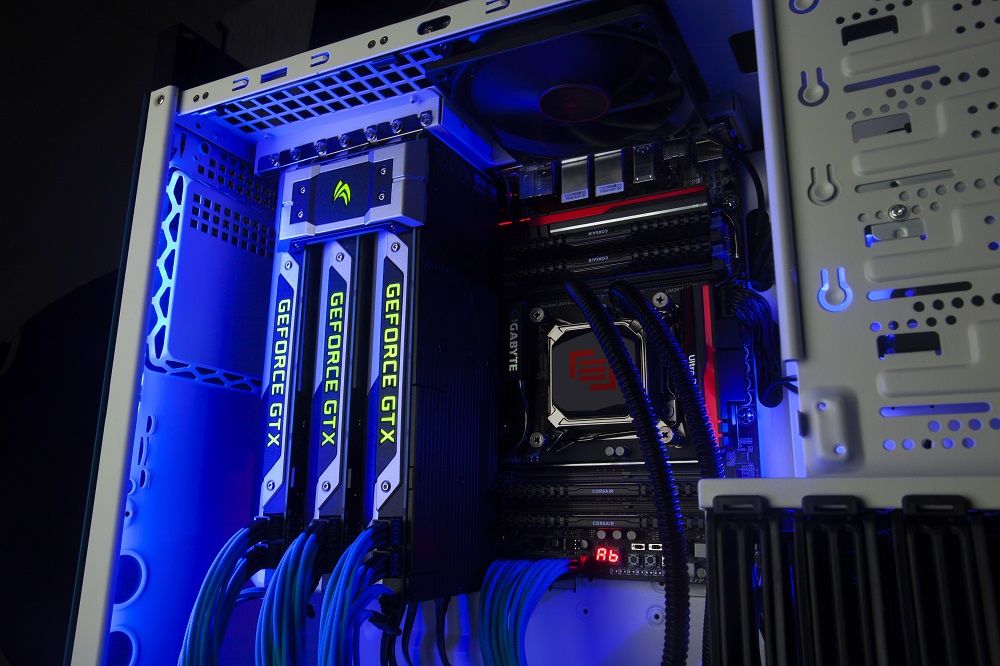
- Geekbench 5 OpenCL: 10,318 points (+35.75%)
- Geekbench 5 Vulkan: 10,118 points (+38.51%)
- Furmark 1080P: 1,005 points (+32.76%)
- AI-Benchmark: 1,446 points (+35.90%)
- 3DMark Night Raid: 12,779 marks (+31.03%)
- CS:GO FPS Bench: 46.44 fps (+60.47%)
- Final Fantasy XV: 14.90 fps (+33.15%)
- Handbrake: /
We see the best benchmark performance results across the board except for Handbrake where our IGP failed to complete the test. We found that 1.5GHz was in fact the highest stable frequency that could pass Handbrake, no matter the additional voltage.
Compared to stock, the GPU frequency increased by 35% and the memory increased by 100%. The benchmark performance increase ranges from +31% in 3DMark Night Raid to +60% in CS:GO.
When running Furmark GPU Stress Test, the average GPU clock is 1750 MHz with 1.398 volts and an average memory clock of 2133 MHz. The average GPU temperature is 36 degrees Celsius, and the average GPU power is 25. 19 watts.
Intel UHD Graphics 750: Conclusion
Alright, let us wrap this up.
My plan with this setup was two-fold.
First, I wanted to have a closer look at the second generation EK Delta TEC Evo as it features a higher performance Peltier element. Second, as I had not yet looked at overclocking the Rocket Lake integrated graphics, I figured I’d take the opportunity to check it out.
The second generation EK Delta TEC was certainly much more capable of handling overclocked Rocket Lake CPU cores. The improved Peltier provided me with better temperatures across the board. For example, with the 1st gen Delta TEC I couldn’t see negative temperatures when idling and unregulated mode enabled. With the 2nd generation, however, I very quickly saw minus 8.5 degrees Celsius.
In light workloads I was able to get this Core i9-11900K up to 5.9 GHz with the Delta TEC Evo, compared to only 5.7 GHz with the Delta TEC. That’s an increase of 200 MHz.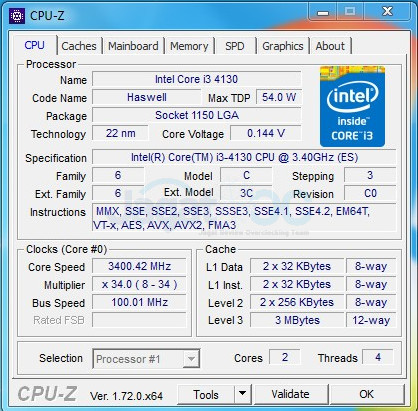 I’m not sure if I could dial in 5.9 GHz in a daily system, but 5.8 GHz should certainly be within the realms of possibility.
For heavy workloads like an all-core Prime95 Small FFTs with AVX enabled, I was able to increase the frequency by about 150 MHz from 4.26GHz to 4.41GHz with a maximum CPU temperature of 85 degrees Celsius. That is of course with ASUS’ package temperature threshold feature enabled.
In an unconstrained scenario like Prime95 Small FFTs with AVX disabled, Intel Adaptive Boost Technology enabled, and ASUS MultiCore Enhancement enabled, we find that the Delta TEC Evo is still trailing a traditional water block like the EK Magnitude. Whereas the Magnitude can run at the maximum frequency of 5.1 GHz and temperature of 87 degrees Celsius, the Delta TEC Evo stably throttles at 100 degrees Celsius to 4.9GHz. The main limiting factor is of course the 270W Peltier unable to handle a CPU Package Power of 285W.
Overall, the Delta TEC Evo is definitely a step up from the 1st gen Delta TEC and provides more frequency headroom in the more common and gaming workloads.
One last point I want to address with the Delta TEC is the common misunderstanding or misappreciation of this technology.
The argument I see made often is that because the Delta TEC fails to match regular water cooling performance in heavy multi-threaded workloads and because the Delta TEC consumes additional power to get higher frequencies in lighter workloads, therefore it’s not a good product.
But that’s like arguing the Core i9-11900K is not a good product because doesn’t match the Xeon W-3375 performance in Cinebench. And it’s 8 cores at peak frequency use more power. Like, yea. It’s just two different systems for two different use-cases. The 11900K will boost to higher frequencies, and the Xeon W-3375 will nail multi-threading. Just like the Delta TEC give you the opportunity for higher frequencies, while regular water cooling nails the multi-threaded performance. It’s not good or bad … it’s just a choice of how you spend your power budget: few cores, high frequency or many cores, full load.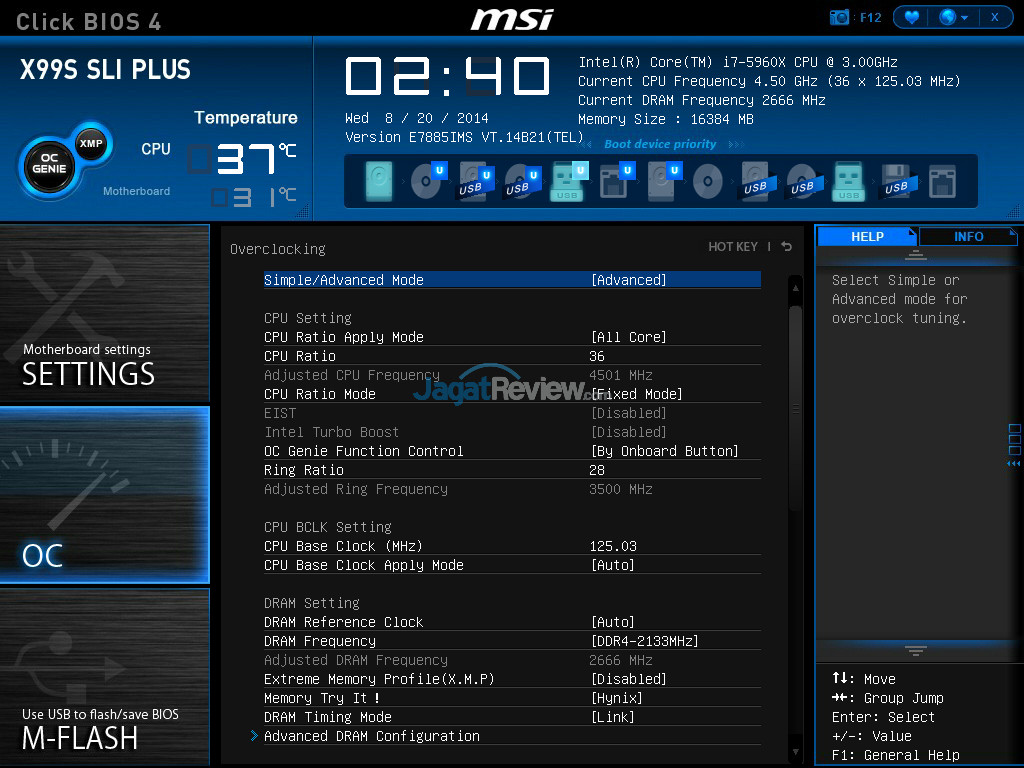
Overclocking the integrated graphics was … I don’t know, straight-forward?
We managed to increase the frequency by 35% from 1.3 GHz to 1.75GHz. The power consumption during the Furmark GPU Stress test doubled from about 12.5W to 25W.
The maximum performance increase of over 60% in CS:GO was the effect of not only overclocking the graphics cores but also the system memory.
If you’re running the integrated graphics, the main takeaway from this video should be:
- Definitely enable XMP for higher performance
- Overclocking the IGP is really simple and straight-forward and could give you another 15 to 35 percent performance increase
That is all for today. As per usual if you have any questions or comments, feel free to drop them in the comment section below. See you next time!
Liked it? Take a second to support Pieter on Patreon!
How to overclock the built-in video card Intel HD Graphics
Modern computer games and applications are so demanding on the characteristics of the video card that not every PC can «pull» them.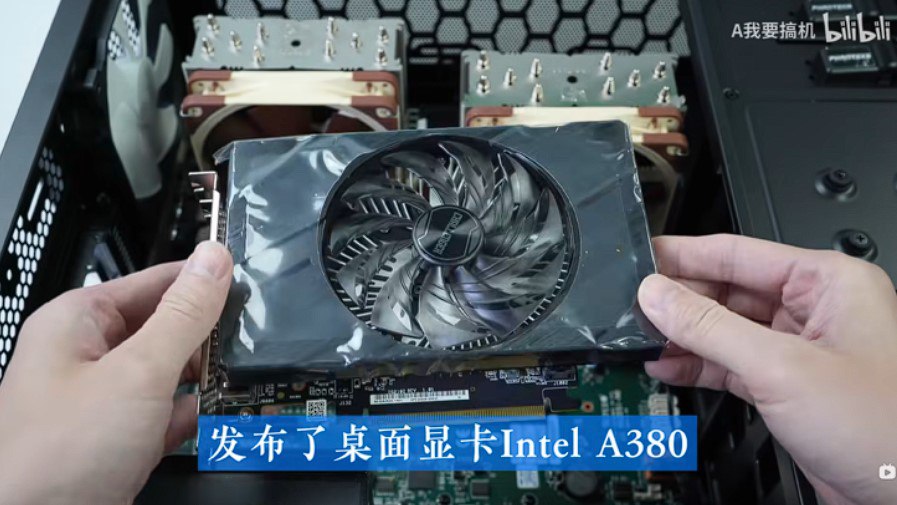 What can we say about laptops. After all, the graphics adapters of most laptops are noticeably inferior in performance to the video chips that are installed on the PC. As a result, even on a relatively recently purchased laptop, it is often impossible to launch fresh games or play them comfortably due to lags, freezes, etc. What should I do? Constantly update hardware? No, as it is quite costly. Alternatively, you can try to overclock the video card on your laptop.
What is the best way to overclock the video card on a laptop?
What is meant by overclocking a video card? Everything is simple. This is a performance improvement procedure. As a rule, it includes an increase in the frequencies at which the graphics core and memory operate. At the same time, it is recommended to use special utilities to overclock video cards. Currently the most popular are:
- GPU Tweak
- Afterburner
- ThunderMaster
- PowerStrip, etc.
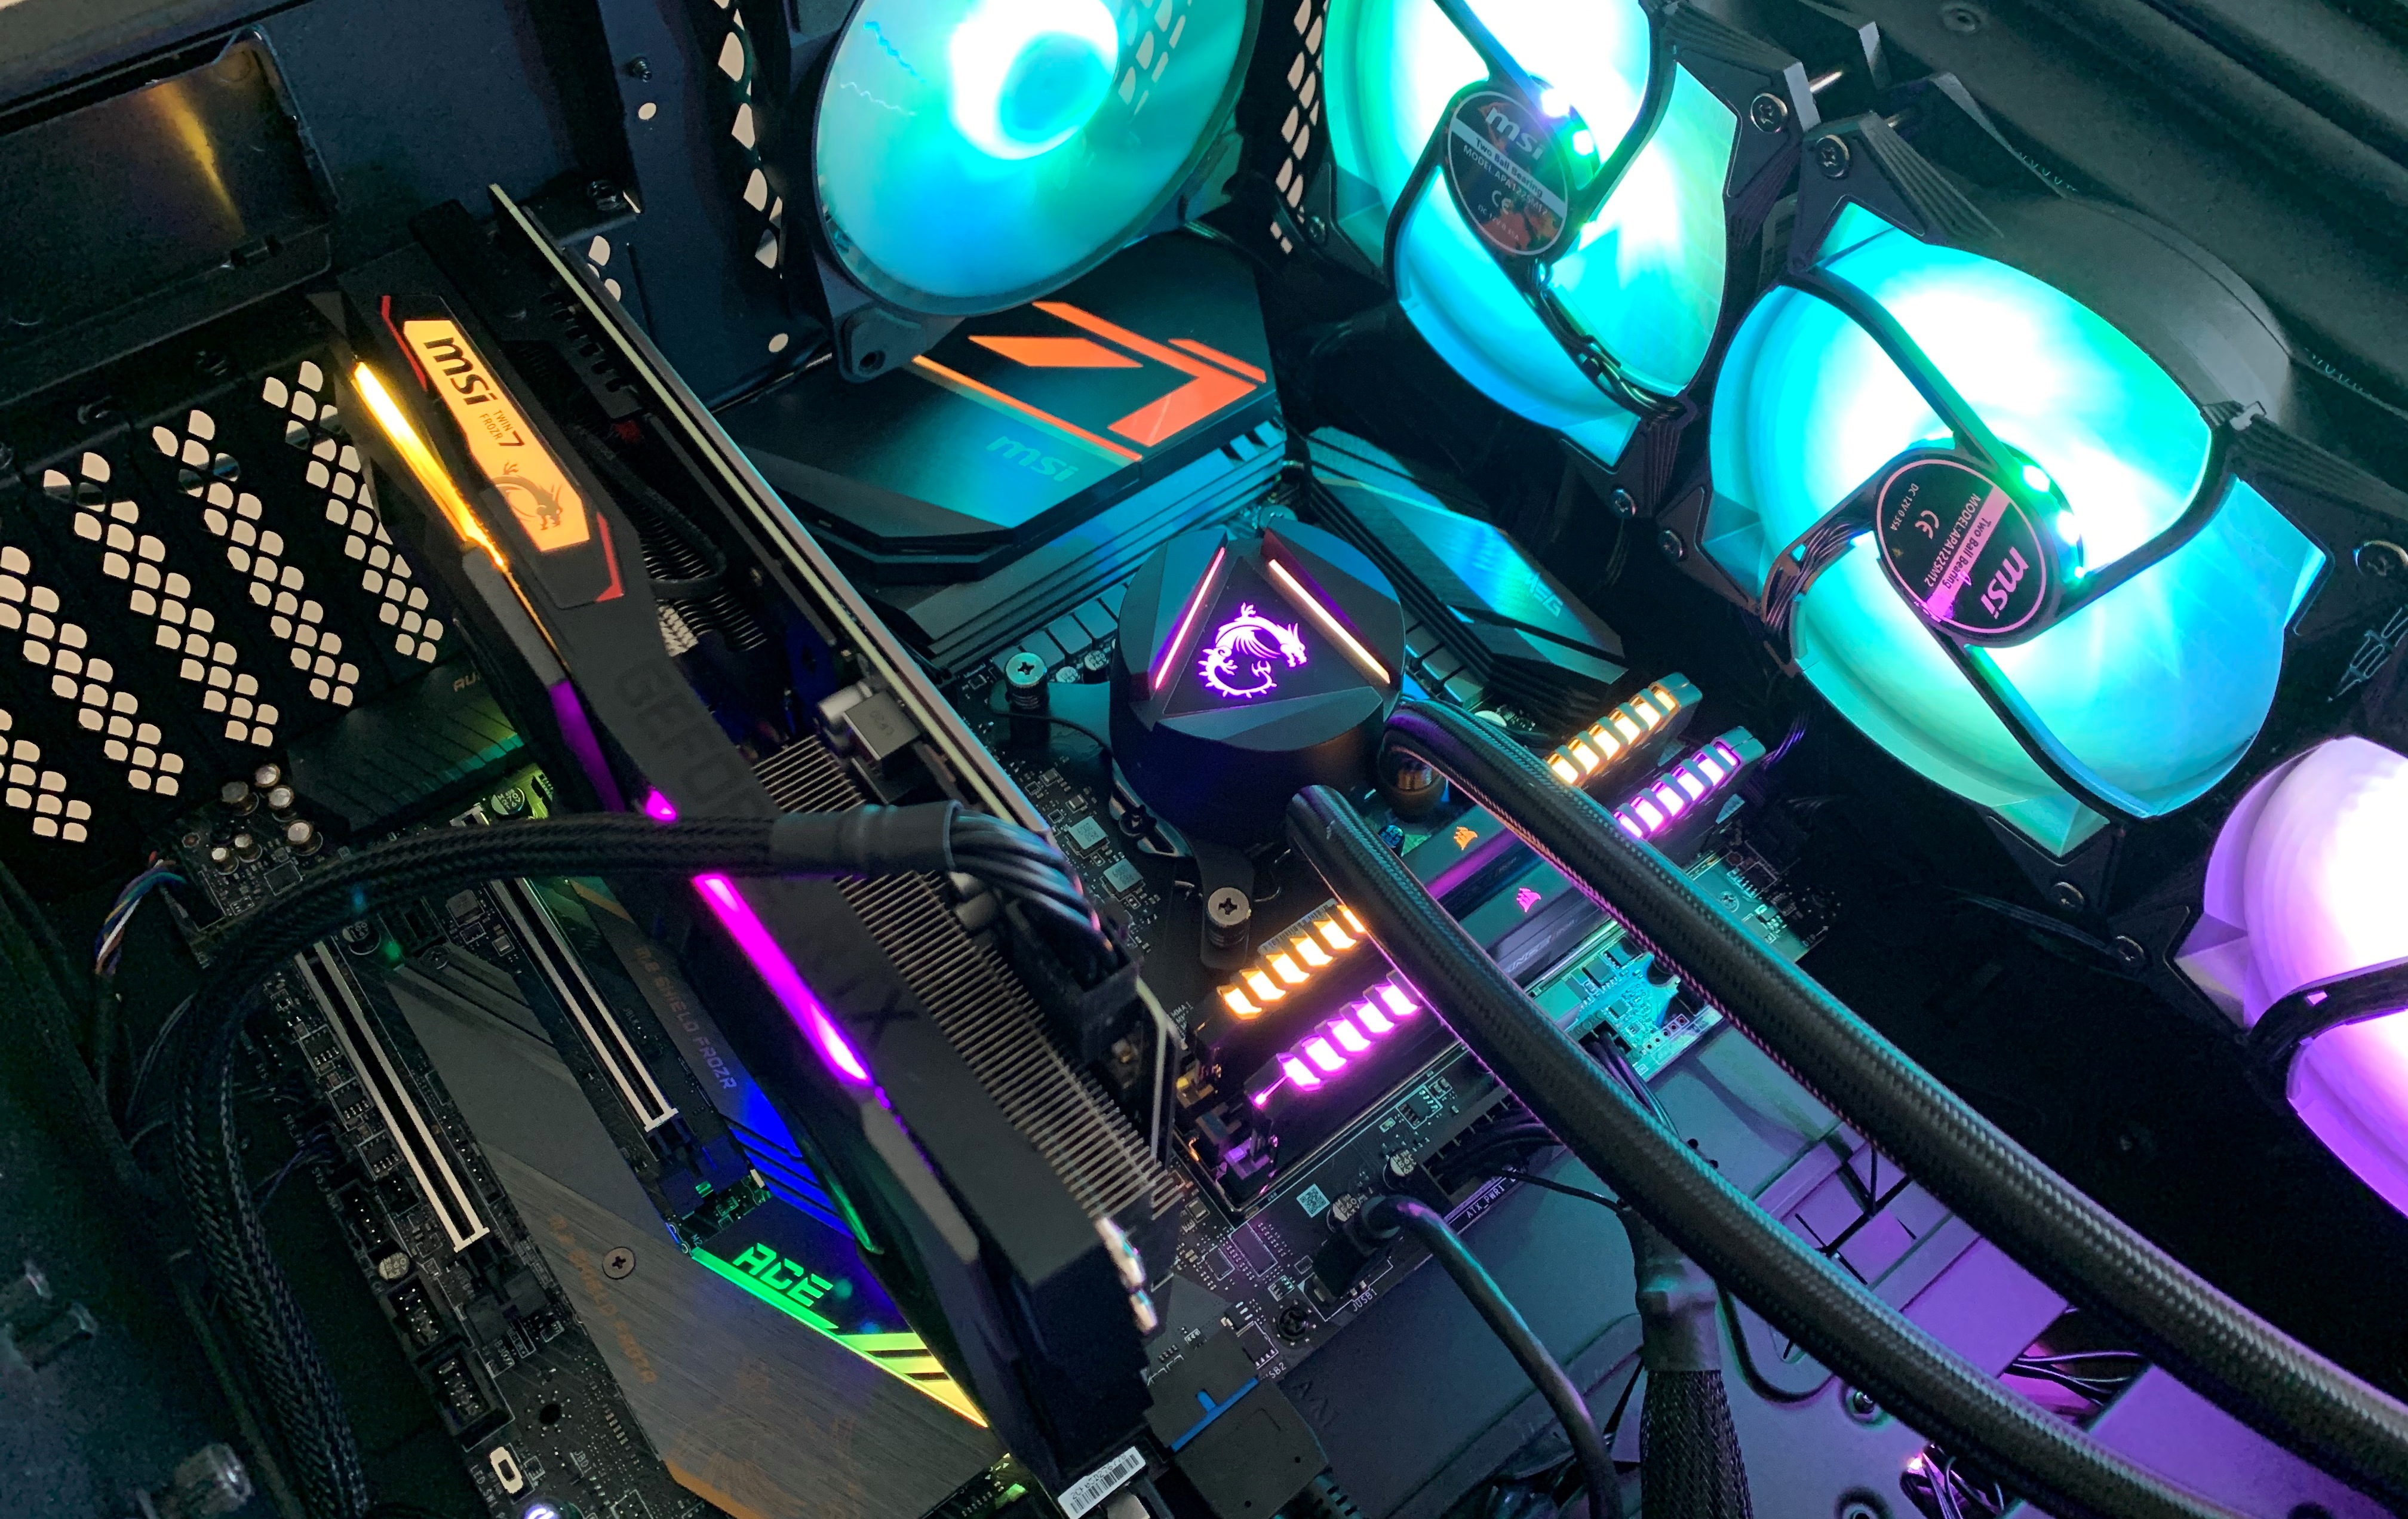
Do not forget to prepare the video card for overclocking in advance. What exactly needs to be done?
- Check the cooling system and make sure that the power supply is sufficient.
- Update the motherboard BIOS to the latest version.
- Download the latest graphics card software. It is desirable that this be the latest stable version of the drivers and DirectX.
For reference! Please note that overclocking an integrated video card (for example, the same Intel HD Graphics) is not always effective. Often the system simply does not accept new chip parameters. Also, often the built-in adapter has such low performance that overclocking does not bring any positive results.
Overclocking a laptop graphics card with MSI Afterburner
Many experienced users recommend a program called Afterburner. With its help, you can easily and easily overclock video cards from MSI, AMD, Nvidia, etc. You just have to adhere to the following scheme of actions:
- Load the Afterburner utility itself. You can from the official website of the developer or from a third-party resource. As you prefer.
- Install and run the program.
- For convenience, we change the interface language. To do this, open the “Settings” subsection (depending on the version, the transition button can either be signed or have a gear icon) and go to the “User Interface” tab. We choose our native language. If the menu is Russified, then we skip this item.
- In the «Settings» in the column «Select the leading graphics processor» we specify the video card for overclocking. At the same time, do not forget that many modern laptops (hp, acer, asus, lenovo, samsung, etc.) are equipped with two adapters at once — built-in and discrete (what is a discrete graphics card for a laptop — https://www.orgtech.info/chto -takoe-diskretnaya-videokarta-dlya-noutbuka/). Therefore, if there are two vidyuhi on your device, then activate the option «Synchronize settings of identical GPUs» by checking the box.
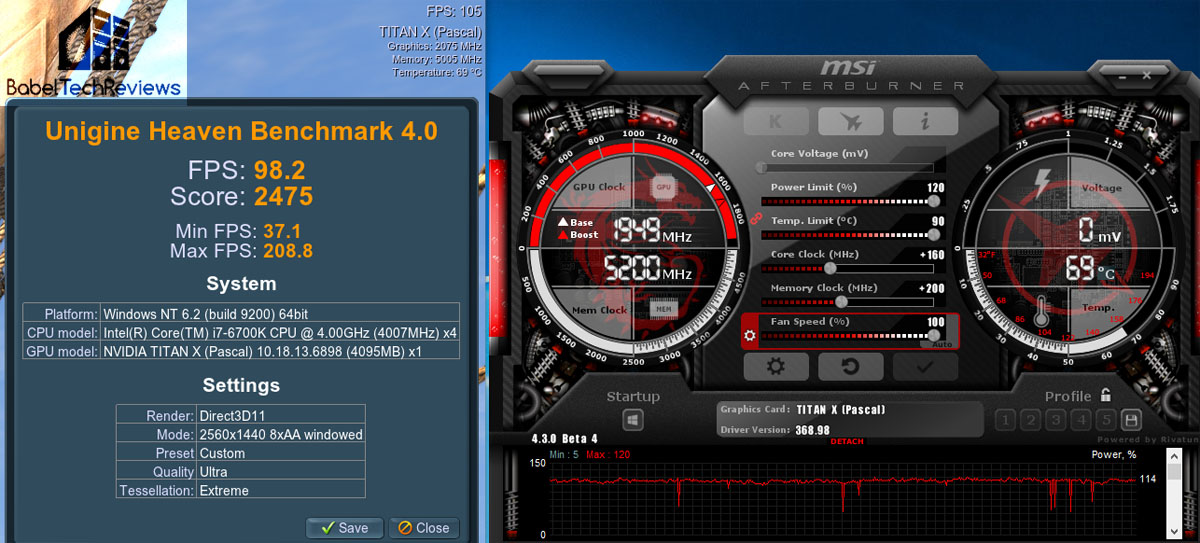
- Here, in the «Basic» tab, check the box next to «Unlock voltage monitoring». Go to the «Cooler» tab at the top of the window and activate «Enable Software Custom Auto Mode». This is necessary in order to independently set the desired cooler speed at a certain temperature of the video card. To do this, we use a special chart, where we simply move the points. Just do not set the fan speed to 100% — it may fail. Enough 85-90%.
- Close «Settings». We turn to the special «sliders» in the main menu of the application. Do not touch the Fan Speed item and leave the value on Auto. But the Core Clock parameter (core frequency) is increased by 10-20 MHz. Then click «Apply». It’s a button in the form of a checkmark icon. In some versions of Afterburner, it may be called «Apply».
- Now you need to increase the frequency of the video card memory. So we move the Memory Clock slider by 10-20 MHz. We click «Apply».
Naturally, you need to check if you managed to overclock the video cards.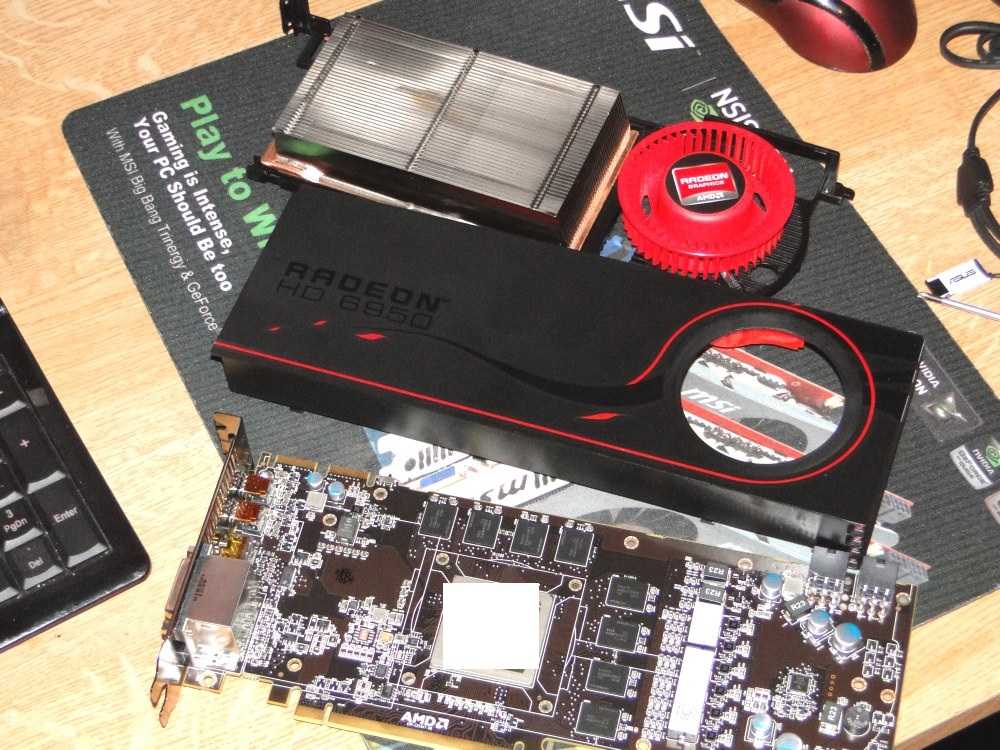 You can go into a powerful toy and “play” it for 1-1.5 hours. At the same time, periodically paying attention to the temperature of the graphics adapter. If it is kept within the normal range, there are no distortions (color flickering), anomalies in the form of stripes and dots on the screen, then again we move the sliders by 10-20 MHz.
And so we repeat the procedure. Until you push your graphics card to its limits. Then you need to return to Afterburner and reduce all the values that you changed by 10 MHz, save and exit.
At the same time, carefully monitor the temperature of the video chip! If it exceeded 90 degrees, then you cannot further overclock the graphics adapter! Even if there are no signs of throttling.
You can test the video card’s ability to operate at a given frequency not only by playing powerful games, but also by running the MSI Kombustor, 3DMark06 or FurMark utilities. In our opinion, the easiest way to use 3DMark06.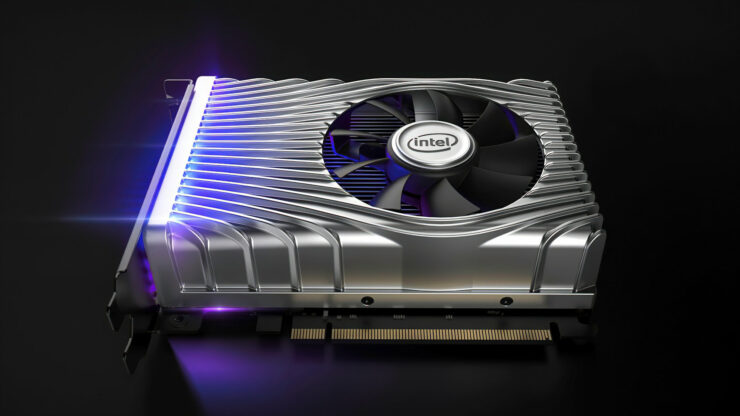 All you need is:
- We start the program.
- Click on the Run 3DMark button. We are waiting for the end of testing.
- If at this time the laptop display gave a blue screen, freezes or turns off, or various graphics defects appear (lines, squares, stripes, etc.), then the frequencies should be lowered.
- Did the test pass without distortion or freezes? Then again, using the Afterburner program, we increase the frequencies of the video card (core and graphics memory) by 10-20 MHz.
- After that, we again conduct a stress test through Run 3DMark. And so on until you «feel» the performance limit of the video card.
GPU-Z program: overclocking a video card safely and easily
The GPU-Z program is considered by most experts as the safest option for overclocking a video card. The whole process of using it is covered in a step-by-step guide.
Step #1. Preparing the computer
First you need to work with the hardware. To do this, the power supply is checked — it is necessary to clarify whether it has enough power to use the program for overclocking an AMD video card. If its power is not enough, you will first need to replace the power supply, and only then carry out all the necessary manipulations.
Next, you will need to select a balanced or maximum power mode. You cannot run the power saving mode, because then the overclocking software for the AMD video card will not work properly.
Step #2. The choice of software
The best program for working with a video card is GPU Z, which is why it will be taken as the basis. But there are a lot of software options that can be used for overclocking. GPU-Z provides the user with all the necessary information about the graphics card without having to go inside the PC to find it. It’s better to load both GPU-Z and Afterburner at the same time.
Step #3. Tests for overclocking a video card
To make the best test for overclocking a video card, you can use the same GPU-Z. This process is required in order to get the current values. They are specified in the program immediately after it is launched.
The picture shows the standard and current frequency (bottom and top, respectively).
Step #4. Raising the frequency
Next, we will use a program for overclocking an AMD video card: MSI Afterburner. To safely overclock the video card, use only the 2 presented sliders, marked in the picture.
For safe use, first press the RESET button. Useful in case the video card has already been overclocked before. If everything is fine, then 100 units are added to the Core Clock column (no more!). If the utility turns off, then you need to remove 10 units and try again.
Step #5. Checking and testing
Now you need to run the program again to check the GPU-Z video card, and check the values. If everything is done correctly, then checking the video card through GPU-Z will show a complete match in the lines indicated earlier.
Please note! GPU-Z is a free program, it is distributed by the developer in accordance with a free license. Therefore, it looks very suspicious if some site offers an activated or cracked version of the product. Without activation, this utility will work normally, as well as provide the user with full access to all functionality. But even in cases with paid programs, downloading cracked versions is very dangerous, as well as looking for activators.
Also, the video card analysis program helps to monitor the state of the PC component, return it to factory settings if the resources are worn out. In this case, further use of the card with overclocking will lead to its complete failure.
I hope this article helped you safely overclock your AMD Radeon graphics card and achieve the desired result.
What should I pay attention to?
Is overclocking (some people call it «overclocking») dangerous? Let’s just say that this procedure is really responsible, moderately complicated. However, if everything is done correctly, then you don’t have to worry that the video chip will burn out or fail. The main thing is to monitor the temperature of the video card. After all, in laptops it is often so close to the maximum allowable.
It is optimal that this indicator does not exceed 90 degrees. At the same time, for a number of modern gaming video cards, the operating temperature can even be 100 degrees. This is fine. Only if you have a video adapter and without loads heats up to such a state, then it’s better to forget about overclocking altogether!
In addition, you need to be especially careful with integrated chips. They mostly have a passive cooling system. That is, they are equipped with a heat pipe that is the same as the processor on the laptop. Or cooled by a single fan. As a result, during overclocking, such a video card heats up the CPU itself, which at a temperature of 90-95 ° C starts to go into throttling, resetting the operating frequencies. Naturally, in this case, the performance of the device suffers.
How to speed up the IntelHD graphics card, 10-15% performance improvement at least
I have an HP laptop with an integrated IntelHD graphics card (I think 4400). Is it possible to overclock it somehow? I play WOW and in some locations the FPS drops to 30, and it becomes uncomfortable to play.
Is it possible to speed up this video card to at least slightly increase its performance?
In general, integrated video cards are difficult to overclock, and overclocking them is a thankless task. But nevertheless, you can speed up the IntelHD video card! True, those who hope to speed up their laptop several times at once may not read further.
But in general, it is quite possible to increase performance by 10-20% by fine-tuning the video card driver and the game itself.
That’s about it, «a couple of» lines below.
Note!
If your video card is not IntelHD (or you have a second one in your system), I recommend the following similar articles:
How effective is overclocking a graphics card on a laptop?
How much power can be gained by overclocking a laptop graphics card? It’s hard to say exactly. Much depends on the video chip itself and its cooling system:
- Video cards from little-known Chinese manufacturers overclock the worst of all. If you manage to get an increase of 10%, then this is already good.
- It is also almost impossible to make improvements on the flagship models in the line. For example, Nvidia GeForce GTX 1080, Radeon R9Fury X, etc. On average, when overclocking such cards, you can reach a maximum of 5-10% increase in frequencies.
- The lowest and middle models of video cards in the line (AMD FX-8300, AMD FX-8350, Intel Core i5-6400, etc.) are best overclocked. They have a good potential for increasing frequencies. So many craftsmen improve their productivity by 40-50%.
As for integrated video cards, there is another way to improve their performance. For example, by increasing the amount of RAM. An additional RAM bar will allow you to avoid redistributing memory between the processor and the video card to the detriment of the latter.
Also, if the device has an integrated video card, you can try to overclock it through the BIOS settings of the motherboard. This is not difficult. Difficulties can arise only due to the fact that different laptops differ in their BIOS menu interface. Therefore, it is not always possible to find the necessary section the first time.
In addition, you can overclock not only the video card. But also other important components of the laptop. The same processor. This is done in different ways. For example, to overclock an hp laptop (many devices do this due to their slowness):
- We go into the BIOS menu.
- In the «Advanced» tab, we find an item called «Overclocking Mode» (in CPU Settings).
- Pay attention to the available overclocking options. They are usually reflected as a percentage or multiplier (4x, 5x). We choose one of them.
- Save and reboot the device.
How to reset the overclocking of the video card
If you used MSI Afterburner, then just press Reset — the utility will determine the initial values and reset the increased values to the standard ones.
There is a universal way for ATI video cards — the Catalyst Control Center utility, which is installed on the PC along with the drivers. Select the «Performance» tab, then — the AMD Overdrive option and click on the «Default» button. Nothing complicated.
To remove overclocking from nVidia, use the RivaTuner utility. After launching it, click on the arrow and move the mouse cursor over the icons that appear, we are interested in the “Low-level system settings” icon. We click on it, and then on the «Initial» button, confirm the operation and restart the computer.
So, we have considered an algorithm that allows you to squeeze the maximum out of your video card using safe overclocking. Of course, there are enough utilities that allow you to do the same — their functionality is approximately the same, the main differences are in the interface. We will be glad to see in the comments the experience of using other software, indicating the model of the graphics accelerator and the resulting performance increase.
How to overclock the built-in video card intel hd graphics
Characteristics
| Main characteristics | |
| Manufacturer | ASUS |
| Model | P5B-VM DO find similar motherboard |
| Equipment type | Desktop Motherboard |
| Purpose | Desktop PC |
| Chipset mat. Boards | Intel Q965 + ICH8DO |
| Processor socket | Socket LGA775 |
| Board format | microATX (244 x 244 mm) |
| Processor support | |
| Max. number of processors on the motherboard | 1 |
| Support for | Intel Pentium 4 5xx/6xx series, Celeron D, Pentium D 8xx/9xx, Pentium Extreme, Core 2 Duo, Core 2 Quadro, Core 2 Extreme |
| Support for | Prescott, Smithfield, Presler, Cedar Mill, Kentsfield, Conroe |
| Bus frequency | 533, 800, 1066 MHz |
| Hyper Threading Support | Yes |
| Memory support | |
| Supported memory type | DDR2 PC2-4200 (DDR533), PC2-5300 (DDR667), PC2-6400 (DDR800) ECC not supported |
| Number of DDR2 slots | 4 (modules must be installed in pairs to activate 2-channel mode) |
| Maximum supported memory standards | PC2-6400 (DDR2 800MHz), PC2-5300 (DDR2 667MHz), PC2-4200 (DDR2 533MHz) |
| Maximum RAM | 8 GB |
| Disc system | |
| RAID controller | Built into the chipset, it is possible to build RAID arrays of levels 0, 1, 10, 5 Matrix Raid from SATA devices |
| SATA II | 8 channels with the ability to connect 7 internal devices and 1 external (SATA On-the-Go).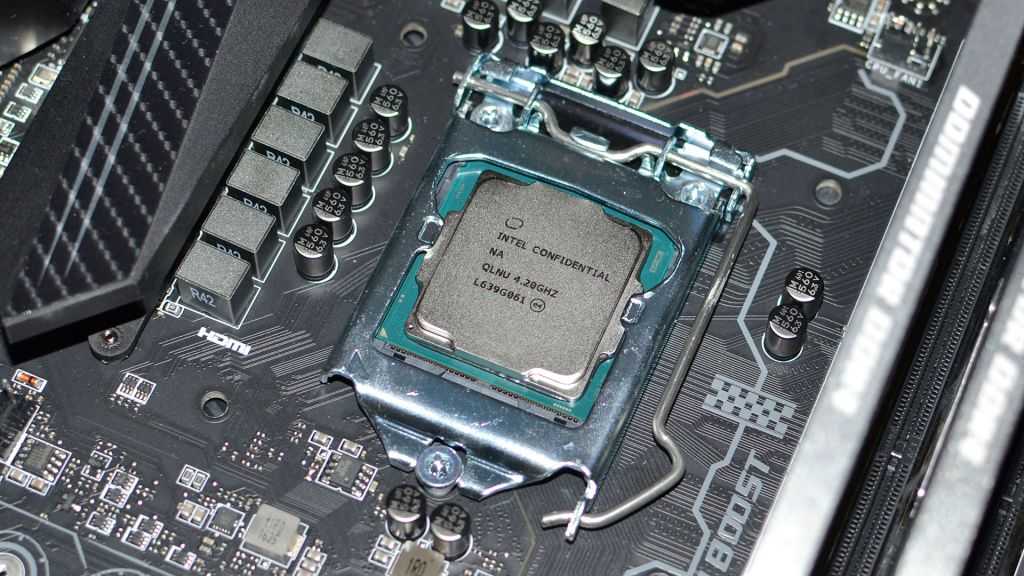 6 channels ICH8DO and 2 JMicron JMB363 6 channels ICH8DO and 2 JMicron JMB363 |
| UDMA/133 support | 1 channel with 2 devices connection (JMicron JMB363 controller) |
| UDMA/66 support | Yes |
| Communications | |
| Network | 1 Gbps Intel 82566DM Network Controller |
| Interface, connectors and outputs | |
| Rear USB connectors | 4x USB 2.0 |
| IEEE-1394 controller | Texas Instruments TSB43AB22 2 ports IEEE 1394a 100/200/400 Mbps (1 internal and 1 external) |
| Ports | 1x LPT, 1x ESATA ports |
| Keyboard/mouse | PS/2 keyboard + PS/2 mouse |
| Number of PCI Express 16x slots | 1 slot 16x |
| Number of PCI Express 4x slots | 1 slot 4x |
| Number of PCI slots | 2 slots |
| Integrated video card | |
| Video M/B | Intel GMA X3000 (stripped version without DX10 support and without hardware T&L) |
| Rear video connectors | 1x VGA monitor |
| Integrated sound card | |
| Sound | Analog Devices AD1988 8-channel HDA codec |
| Rear audio connectors | Line-in, Mic-in, Front-out, Rear-out, Surround-out, Sub/center-out |
| Cooling | |
| Cooling system noise reduction technologies | ASUS Advanced Q-Fan |
| Power supply | |
| Power Supply Requirements |
Only 24+4 pin power supplies are supported. compatible PSU compatible PSU |
| Other features | |
| BIOS | AMI BIOS, 16 Mbit |
| Other | Support for Intel vPro, Intel Active Management Technology |
| External sources of information | |
| Manufacturer hotline | (495) 231-19-99 — in Moscow; 8-800-100-27-87 — a free call from any region of Russia. Mon — Fri: 09:00 — 18:00 |
| Logistics | |
| Package dimensions (measured in NYX) | 27.4 x 26.7 x 7.2 cm |
| Gross weight (measured in NYX) | 1.22 kg |
Relevance of the adapter
Of course, the characteristics of the Intel GMA 3100 are very modest. Therefore, now computers based on it allow solving the most simple tasks. First of all, they include office packages. That is, such a laptop is great for processing text data or tables. Also, its speed allows you to launch a browser and view various Internet resources.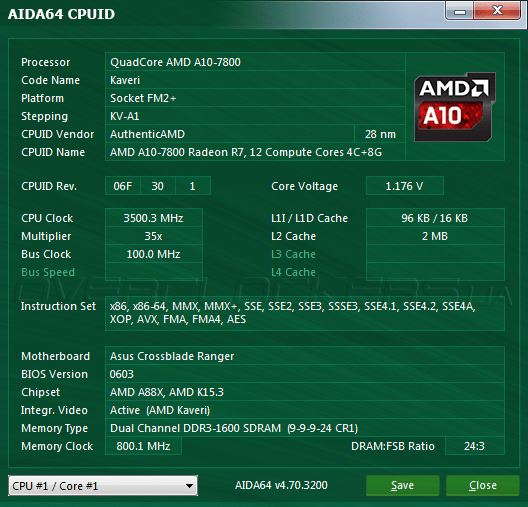 This list can include very, very old, demanding and new, entry-level toys. Both in the first and in the second case, the speed of the considered accelerator will be quite sufficient. But still this graphics adapter is very outdated. And it’s time for owners of such portable computers to think about buying a new mobile computing system.
Drivers
“Windows XP” and “Windows Vista” are the main operating systems for the Intel Graphics Media Accelerator 3150. Windows 7 and later system software also boast support for this video adapter. But only in this case they will have to be downloaded and installed separately. It should be noted that there are only 32-bit driver modifications. But this limitation comes from the side of the central processor of the computer system. As a rule, at the hardware level, it can only process information in 32 bits. Therefore, support for 64-bit versions of operating systems in this case is out of the question.
Device specialization
Characteristics The Intel GMA 3100 was classified as an entry-level device series.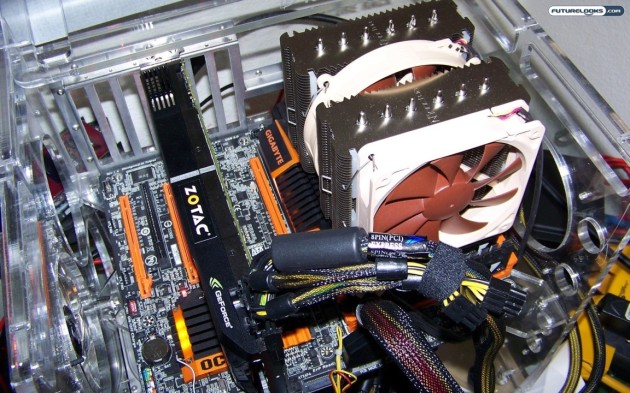 High speed and performance from the integrated accelerator is not expected initially. Therefore, playing with high image quality on such laptops will not work. But the usual and most common programs will function perfectly. The latter include text programs, office suites, accounting utilities, browsers and media players. These are the main cases of using portable personal computers based on such an accelerator.
How to overclock nVidia graphics card
After MSI Afterburner has been discussed in detail, we move on to the instructions for working with it.
Before we start reviewing the instructions, pay attention to a number of MSI Afterburner controls.
This slider only works if your graphics card supports this technology. The essence of the regulator is to set the maximum power output by the graphics adapter. For example, we can set it to 90%. What does it give? It’s simple — this is how we insure the chip from overheating and failure during overclocking.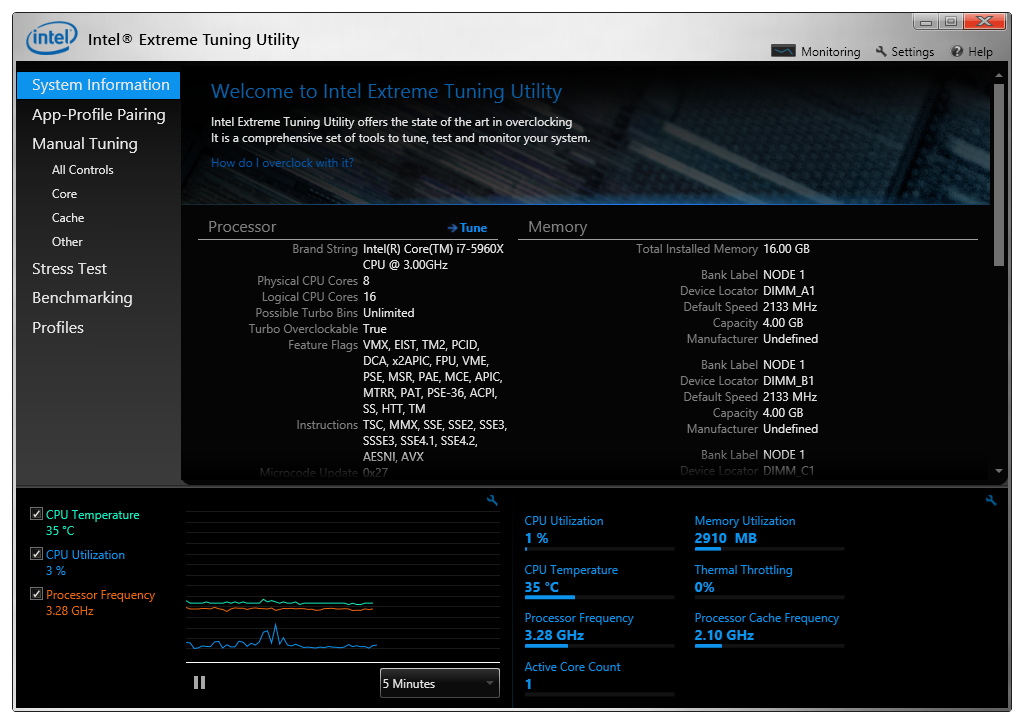
This slider only works if your graphics card supports this technology. The essence of the regulator is to set the maximum power output by the graphics adapter. For example, we can set it to 90%. What does it give? It’s simple — this is how we insure the chip from overheating and failure during overclocking.
This is a parameter that directly affects the overclock itself. How to work with it, we’ll talk a little lower.
The parameter sets the frequency of video memory, which, accordingly, affects its performance, leading to a systematic increase in FPS in the game.
One of the most important settings in MSI Afterburner. It is the intensity of the cooling system that affects the quality of acceleration. Set the slider so that the temperature on the adapter chip does not exceed the recommended values.
We can create several configurations for our video card and save each of them separately in its own profile. This can be useful, for example, for various applications or games.
Program settings are stored in the Windows user directory.
This function is sure to come in handy for every newcomer to overclocking a video card. If you have configured something wrong and do not know how to reset all settings to their original positions, just press the indicated button and enjoy the stock settings.
This softkey applies any changes made using the sliders. It must be pressed every time after we have changed something.
So, enough introductory information for us. Let’s proceed directly to overclocking:
Download and install the FurMark program. We will use it to test the stability of the video card and check the frame rate. Run the test on a non-overclocked adapter to see nominal performance.
Afterburner is translated as an afterburner, so be careful!
In our case, this is 68 FPS. We remember and move on to increasing productivity.
Approximately 10 units add the frequency of the graphics adapter.
Click the Apply Changes button.
We run the test again and see that the number of frames per second has increased by 1. Well, we continue to “play around” with the settings.
Add some more chip frequency and apply the changes.
Run a run in FurMark and see that the increase was already 4 FPS.
In the same way, we gradually add the memory frequency, in the end, achieving a combination that will achieve maximum performance, stability of the graphics adapter and the absence of any overheating.
So, you already know how to use Gigabyte Afterburner, but it has another useful feature. Right in the game, we can display a special overlay or counter that will display a number of useful parameters. It’s done like this:
Go to the program settings.
Switch to the «Monitoring» tab, then select the parameters that should be displayed, and activate the function marked with the number «2». Finally, click «OK».
We go into the game and see our indicators in its upper left corner.
By customizing the application, we can add many other options, including even frametime graphs.
Now you know how to enable in-game monitoring on MSI Afterburning.
By default, core voltage regulation is disabled and not active, and the sliders do not move. To fix this, go to the settings and in the «General» tab, check the box next to the marked item.
If the program does not save settings, try running it as an administrator.
Accelerator parameters
The mobile graphics card Intel Graphics Media Accelerator GMA X3100 is codenamed Crestline and is designed for use in economy class notebooks. This chip was manufactured using 90 nm technology and has an outdated layout today. That is, modern integrated video adapters are included in the CPU, and the video card is made as a separate microcircuit on the motherboard. This performance has an extremely negative effect on the performance of the graphics subsystem of a mobile computer.
The accelerator includes only 8 stream processors.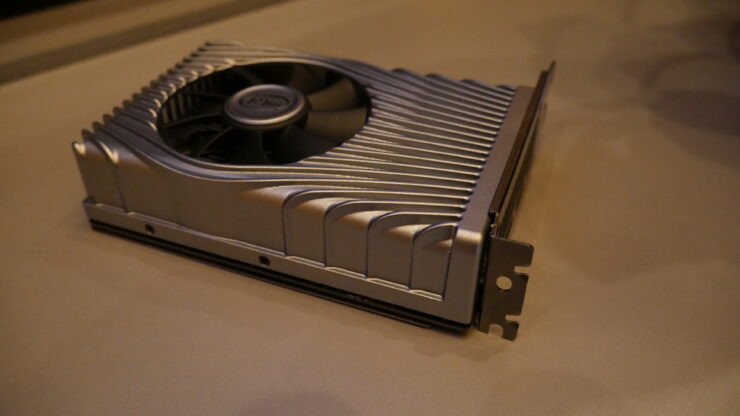 Each of them operates at a frequency of 500 MHz. The thermal package of the accelerator is limited to 13.5 watts. That is, it can function quite successfully with a passive cooling system in the form of an aluminum radiator. Therefore, high-speed operation from this adapter is certainly not to be expected. Energy efficiency was a priority in the development of this device, and they did an excellent job with this task. Also, due to this, the battery life of a portable computing system has increased.
Memory subsystem
The specifications of the Intel GMA 3100 focus on the fact that this device does not have a separate memory for storing processed information. For its needs, the accelerator reserves part of the system RAM
Personal computers with this adapter are equipped with DDR 2 modules, which most often operate at a clock frequency of 667 or 800 MHz. The video buffer size is set in the motherboard BIOS. But the maximum size of the used RAM is limited (384 MB). More RAM is not able to be addressed by this adapter. It should also be noted that this built-in accelerator was used on motherboards with an LGA775 socket, whose motherboards could address no more than 4 GB of RAM.
History of appearance
Computer specialists call the GMA900 video card of the same manufacturer the «progenitor» of the Intel Media Graphics Accelerator 3150 solution under consideration. It was also an integrated solution, but was used mainly as part of desktop computing systems. The difference in speed between them was about 20%. At the same time, the GMA3150 video card showed the best results. The main two concepts that contributed to the appearance of the video adapter in question are:
- Reducing the cost of the netbook through the use of an integrated graphics system. In this case, there were no requirements for the computer in terms of speed. All applications are not particularly demanding and the resources of the integrated video card are enough to compile them.

- The second important point is the minimization of energy consumption. On the other hand, this increases the autonomy of the mobile computing system.
The graphic solution in question boasts an ideal combination of these two characteristics, and this circumstance contributed to the fact that it could often be found in entry-level netbooks.
An example of a motherboard with this chipset
An example of a motherboard is a microATX model from Asus.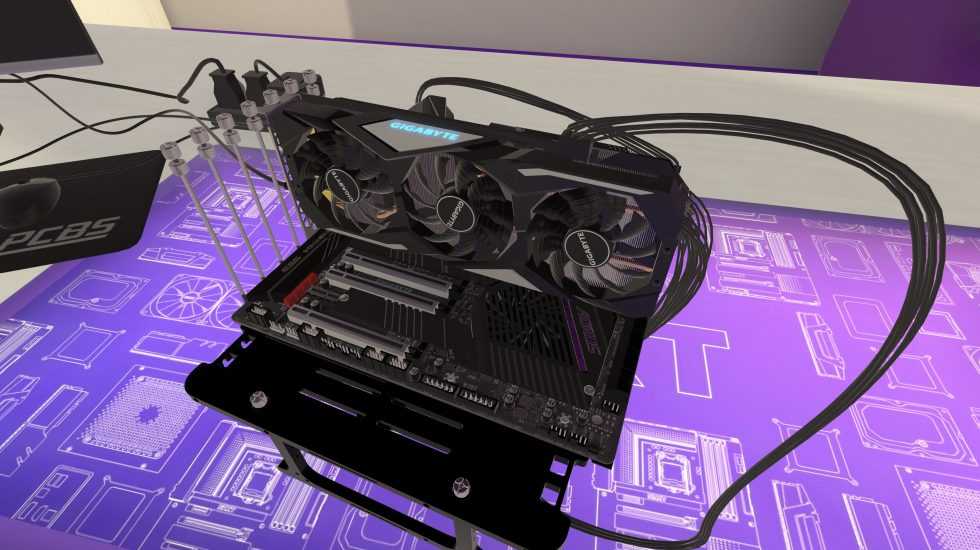 This device is capable of working with both dual-core processors and quad-core representatives of the Intel Core 2 and Quad Core series. The socket is on the P5KPL-AM 775 motherboard, which means that only 45nm processors are suitable.
The universal system bus operating at 800, 1066, 1333 and 1600 MHz can support DDR2 memory up to 1066 MHz in operation.
To unlock the full potential of the processors running on this motherboard, you can overclock the system bus to 1600 megahertz.
As you know, in order to work with applications that use three-dimensional graphics to be more productive, the motherboard has two slots for RAM. The motherboard can support dual-channel data rates up to 1066 megahertz, which will increase the speed of demanding applications.
The PCI architecture was improved to implement and play modern computer games at that time. Now this bus is called PCI Express. With four times the bandwidth, you can enjoy every second of 3D gaming.
Also in the motherboard, running on the G31 chipset, there is support for high-quality sound, additional BIOS settings from the manufacturer, a controller for system cooling that optimizes its operation.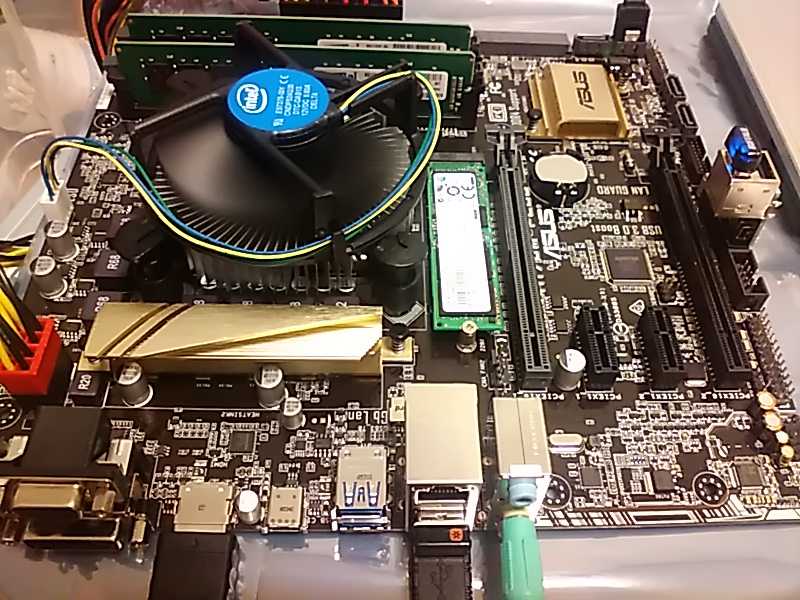
Features of the new Intel
Technically, the premiere of Iris Xe Max took place back in September 2020, when Intel showed its latest mobile processors from the Tiger Lake family. It almost does not differ from the video card built into them, having the same 96 computing units, but at the same time a slightly increased clock frequency — 1.65 GHz.
Intel Iris Xe Max
Iris Xe Max has its own 4 GB memory, but we are not talking about support for GDDR5 and even more so GDDR6 — only LPDDR4X, and these modules are used in smartphones, tablets and laptops as RAM . The bandwidth of these chips in this case is low — 68 GB / s.
Intel’s main rival, GeForce MX450
Intel manufactures its new card using a 10-nanometer process technology, the most modern for this company. Iris Xe Max has support for the PCI-E 4.0 interface, DirectX 12.1 libraries, as well as HDMI 2.0b and DisplayPort 1.4. The maximum supported resolution is 7680×4320 pixels at 60 frames per second.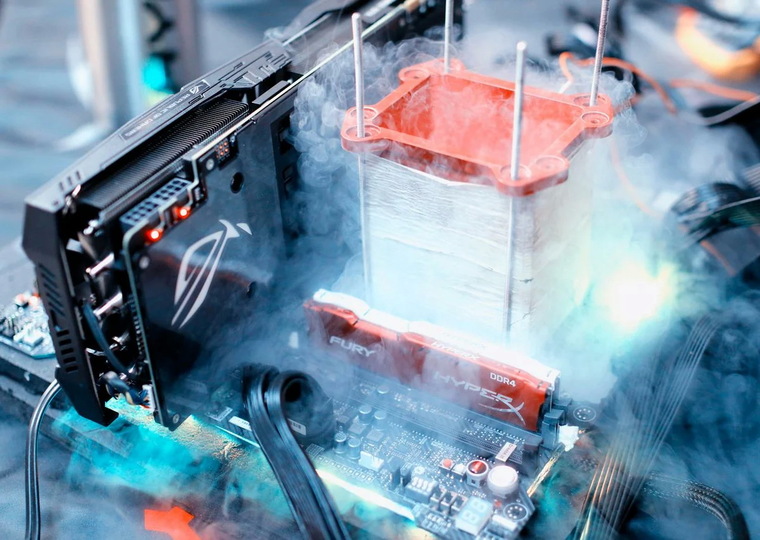
Composite AI: what is it and why is it needed?
Artificial intelligence
The first laptops to receive Iris Xe Max, along with the Acer Swift 3X, were the Asus VivoBook Flip TP470 and the Dell Inspiron 15 7000. Intel. That’s just in terms of characteristics, it will almost completely copy the mobile Iris Xe Max.
Memory subsystem
The specifications of the Intel GMA 3100 focus on the fact that this device does not have a separate memory for storing processed information. For its needs, the accelerator reserves part of the system RAM
Personal computers with this adapter are equipped with DDR 2 modules, which most often operate at a clock frequency of 667 or 800 MHz. The video buffer size is set in the motherboard BIOS. But the maximum size of the used RAM is limited (384 MB). More RAM is not able to be addressed by this adapter. It should also be noted that this built-in accelerator was used on motherboards with an LGA775 socket, whose motherboards could address no more than 4 GB of RAM.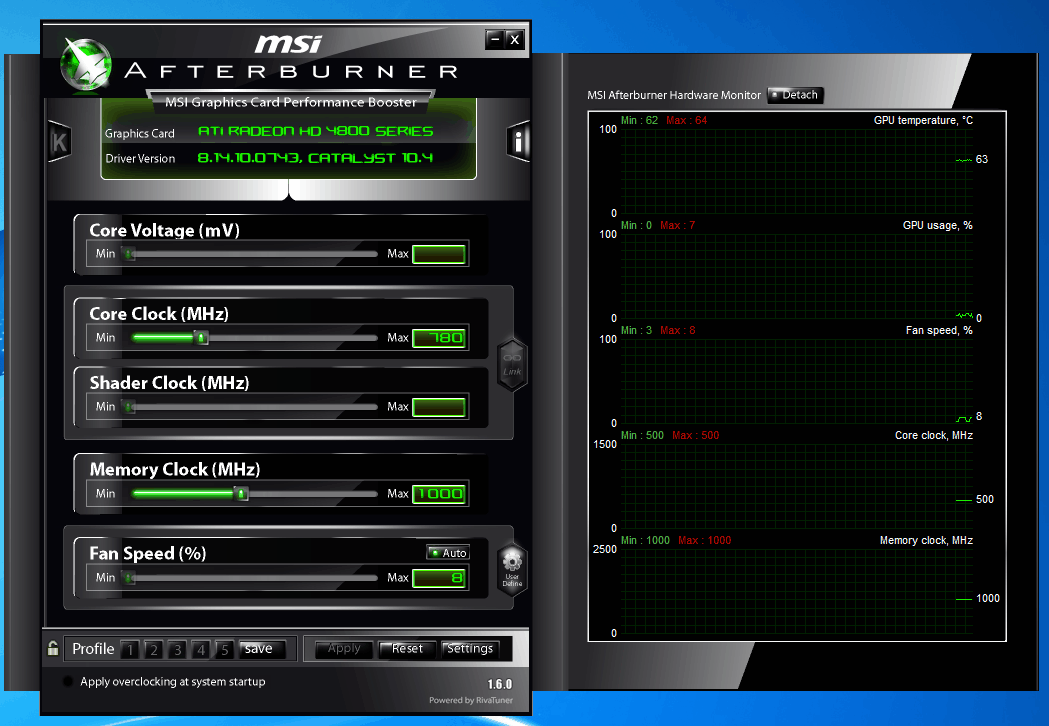
Specifications
The system bus of the G31 chipset called QPB 800 operates at 1066 MHz. This device is capable of supporting dual-channel data streaming up to 800 megahertz. The maximum amount of RAM is four gigabytes. The G31 chipset type is not designed to work with servers, so it is called pseudo-synchronous.
As for the integrated graphics adapter, the GMA 3100 provides good image quality and supports DirectX version 9.
The data transfer rate between the bridges is two gigabytes per second, that is, one gigabyte per second goes out in one direction.
The chipset is capable of supporting four SerialATA channels, which, according to the characteristics of the G31 chipset, means the ability to connect four hard drives that will operate in SATA 300 mode. give me a sec.
As far as power consumption is concerned, there is nothing to worry about, since motherboards based on the G31 chipset are budget and do not have advanced features.
Microsoft Windows performance reviews
GMA X3000 review
An April 2007 review by Tech Report found that the GMA X3000 had comparable performance to the . At the time of this review, the GMA X3000 was unable to run PC games Battlefield 2 and Oblivion . However, an ExtremeTech review found that games that are not as graphics intensive, such as The Sims 2 and Civilization IV , «look good» when a GMA X3000 is used to run them.
Reviews performed by The Tech Report, by ExtremeTech and Anandtech all concluded that AMD’s AMD 690G chipset was a better choice than the G965 based GMA X3000, especially when considering 3D gaming performance and price.
GMA X3500 review
In a December 2007 review by Register Hardware, author Leo Waldock argued that since the GMA X3500 cannot run any PC games that require DirectX 10, adding DirectX 10 support to the GMA X3500 was » inappropriate.» During the same review, the GMA X3500 was used to run Crysis and FEAR Extraction Point , where it could only display 4 and 14 fps respectively for each game. The review concluded that overall the X3500 made «minimal progress» over the GMA X3000.
GMA X4500 Review
In a review published in May 2008, the GMA X4500 showed superior game performance at the low end of a 1-year-old older graphics card in some CPU-evaluation benchmarks, while losing a fixed low level with a slower processor.
Solution layout
The graphical solution in question boasts of having an outdated layout. Modern such accelerators are integrated on one chip with the processor part of the computer system. But this adapter was a separate microcircuit, which was part of the system logic set. This approach significantly reduces the performance of a mobile computing system. Moreover, the difference can reach in some cases 20-25%. The key difference is the organization of the RAM subsystem. In modern systems, its controller is integrated into the CPU, and this increases the speed of this PC component. In this case, this microcontroller was part of the chipset’s northbridge, and this layout reduced performance.
Non-video game graphics card
Showing the Iris Xe discrete graphics card, Intel revealed its main specifications and indicated the release date as January 2021.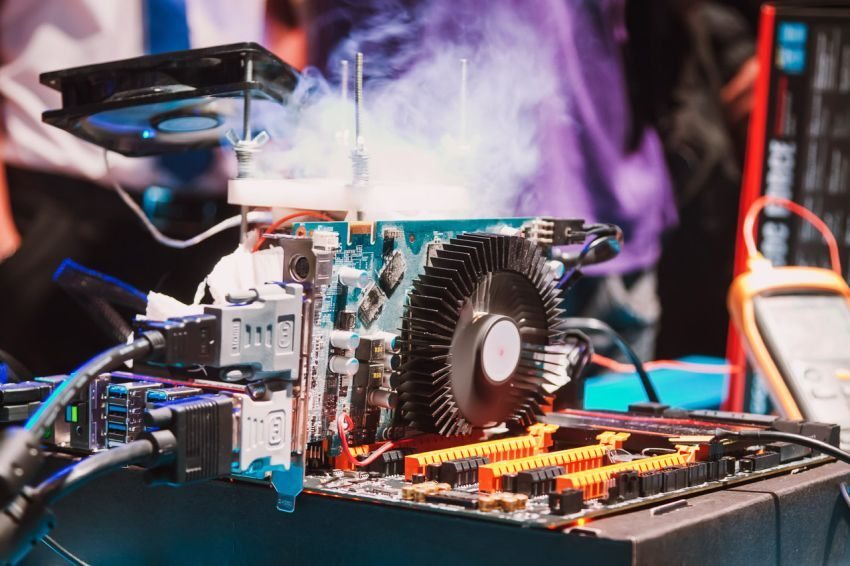 Compared to its closest competitors based on Nvidia and AMD chips, this is an entry-level card — may not be suitable for today’s top video games , in some cases yielding even to Iris Xe Max, its own mobile modification (Xe and Xe Max are two versions of the DG1 chip).
Asus Iris Xe with passive cooling
The Iris Xe is based on a 10nm GPU. It has 80 execution units vs 9Iris Xe Max has 6, and the number of stream processors is 640, while Iris Xe Max has 768. . The Iris Xe has 4 GB of memory, and this is not the standard for modern GDDR5 video cards or the more modern GDDR6 — this is LPDDR4X with a 128-bit bus.
Iris Xe capabilities (left) compared to Intel integrated solutions
For comparison, Asus has a DUAL-GTX1070-O8G video card in its assortment — one of the many modifications of accelerators based on the Nvidia GeForce GTX 1070. This is an entry-mid-level card ( by 2021 standards when Nvidia has 3000 series cards).
Asus DUAL-GTX1070-O8G
It is equipped with 8 GB of GDDR5 memory and a 256-bit bus, has an active cooling system and a GPU frequency from 1.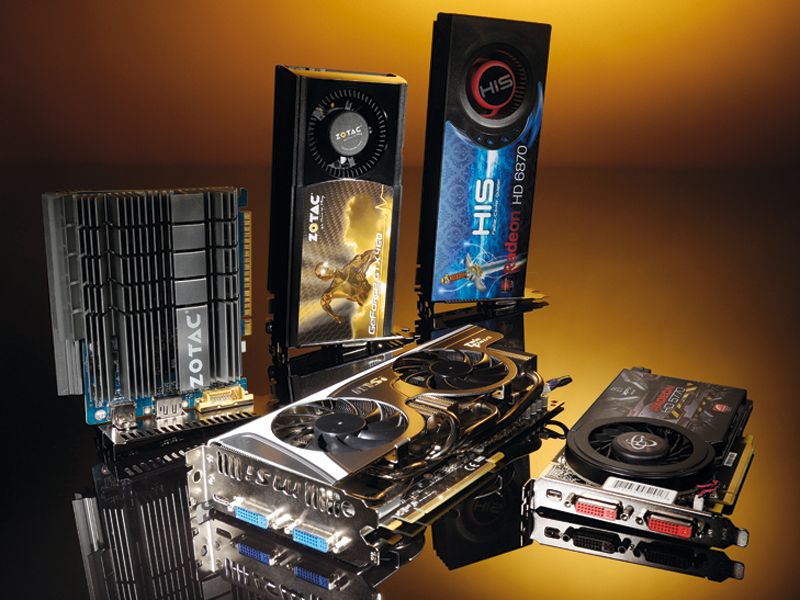 582 GHz in the base to 1.797 GHz with factory overclocking.
Results in games. Real performance
The accelerator shows very modest results in various tests. Moreover, both in gaming applications and in synthetic utilities. Nominally, it is designed to work in combination with the DirectX 10 API. But if Windows 10 is installed on such a computer, then its version will be 11.
All toys released before 2004 inclusive will run on such a graphics accelerator in good quality. The latter include, for example, HMM 3, Sunrise, Worms, or DooM 3.
In the 3D Mark 2006 test package, this adapter scores 431 points. It is inferior to such accelerators as NVidia’s Quadro NVS110M and ATI’s Radeon Xpress 1250. More modern integrated graphics adapters are many times faster in terms of the speed of this mobile video card.
Conclusion. Chipsets for the 10th generation of Intel — the choice has not become easier
Actually, the easiest choice is for those who cannot live without overclocking something.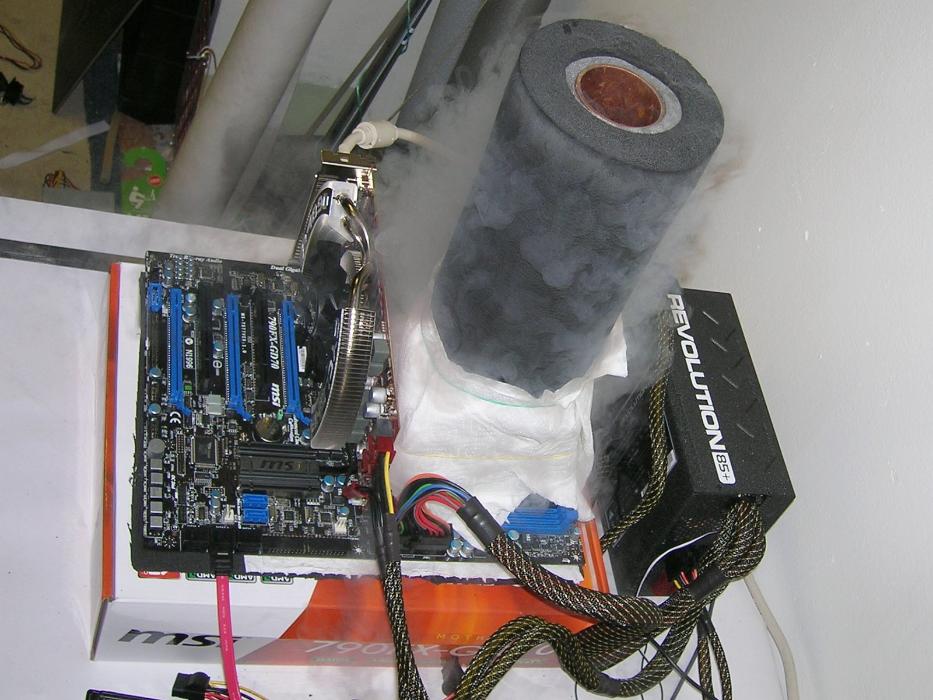 They have one option — the top-end Z490.
Everyone else has a dilemma, to stop at h570 or the capabilities of B460 will be enough. Moreover, it will be possible to save a little, look after a more expensive board, or let the difference, say, on a larger SSD or a cooler cooler
However, we will judge prices, savings and other things when there is a sufficient number of motherboards based on different chipsets for choosing and searching for alternatives and, what is important, the prices for them. Only then will it be possible to decide whether it makes sense to limit oneself in some way.
If we proceed from the specifications, then let me express my opinion. For me personally, the possibility of a wireless connection is not a significant argument. I still consider the good old twisted pair as a more reliable and stable way of network communication.
I also don’t see the need to spend money on more than one video card. Yes, and overclocking is not of particular interest to me. This leads to a dilemma, h570 or B460? I’m unlikely to use additional boards, but a pair of PCIe SSDs — why not? As well as one or two SATA drives. In theory, the younger h510 would probably be enough, but I think that excessive savings are also useless. Let there be some margin of opportunity. You never know…
Conclusion
In this review, the characteristics of the Intel GMA 3100 were considered and described in detail. Also, the test results of this adapter are shown, which show an extremely low level of its performance. In addition, it was introduced by the manufacturer in 2007. Since then, it has become very outdated. For the most basic software tasks, its speed is still sufficient. But resource-intensive and demanding programs on such hardware will not run. In addition, the degree of wear on such laptops is already significant. Therefore, it’s time to buy a new one instead of such a portable PC. And this is exactly what the owners of such laptops should already be thinking about.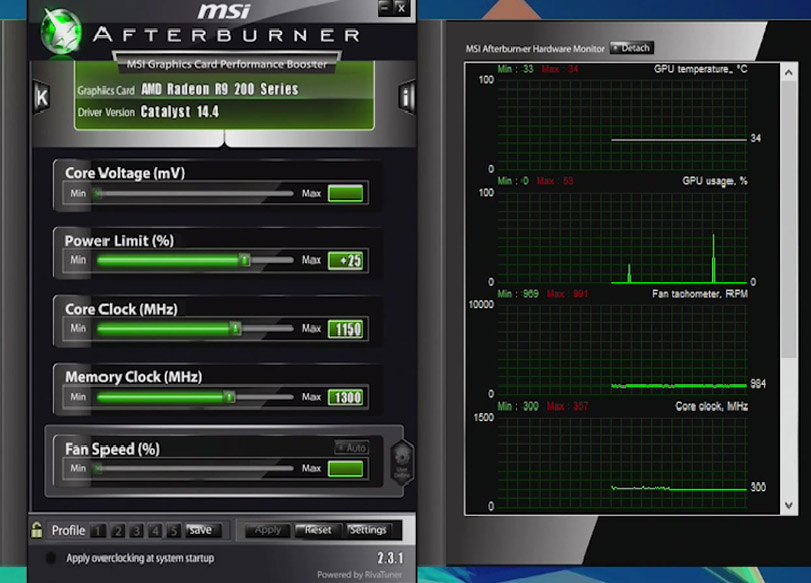
Best GPU overclocking apps to improve graphics performance
To improve performance, you can find a list of the best programs to overclock your CPU or GPU or even RAM. We have reviewed free Windows 10 overclocking software with its features and download links. So, if you are unfamiliar with the concept of overclocking and are worried that your Windows PC is running slower than before and you want to speed it up, you have landed on this goldmine. We are here to explain it all.
The best overclocking utility may vary from card to card. All in all, longer MSI Afterburner is a popular choice for GPU overclocking, it has many options. It works with Nvidia and AMD cards, has a powerful framework, GPU monitoring via RTSS, and allows you to tweak the big three: base voltage, base clocks, and memory clocks. However, this versatile tool has its drawbacks. Most of the items on our list are exclusive to Nvidia, AMD, or other vendors and allow you to do things that are not possible with other software. Afterburner lets you control the base overclock, but there are other options if you really want to get your hands dirty. We have compiled a list of the best GPU overclocking utilities for you.
Before we start
Make sure you get a Reliable PSU with enough power to overclock your GPU. And to avoid serious damage to the GPU, I recommend using a stress testing program like Unigine Heaven and only overclocking the GPU to 5% of the default.
Best overclocking app for graphics cards
1. AMD Wattman
for whom: Default option for AMD users
Wattman is what I personally use with my RX 580 and has many benefits. First, it is the official GPU overclocking tool included with the Radeon Control Panel. This means that you do not have to install anything additional: if you have an AMD card installed and the Wattman drivers are already there. You just have to right-click, click AMD Settings, then select the Gaming tab and you are there. The
The
Wattman gives you full control over base clock, memory clock, fan speed and voltage. The interface is done in a clean, contrasting color and is much better designed than the other options on this list. It just looks beautiful.
There are things in Wattman that you can’t do in other applications. First, the Wattman settings are the default settings for your GPU. This means that if you load a stable overclocking configuration into Wattman, it will load on the next boot. You don’t need to apply OC settings on every boot.
Second, you can control a very specific setting called memory timing. The other solutions here do not allow you to set the VRAM time (this is different from the VRAM clock). The best time can give you some free frames per second.
At the same time, Wattman is not without flaws: at times he can be unstable. And the only way to fix it is to wait for the AMD driver update to fix it. Sometimes AMD mysteriously pulls settings from Wattman and then puts them back again on the next driver update.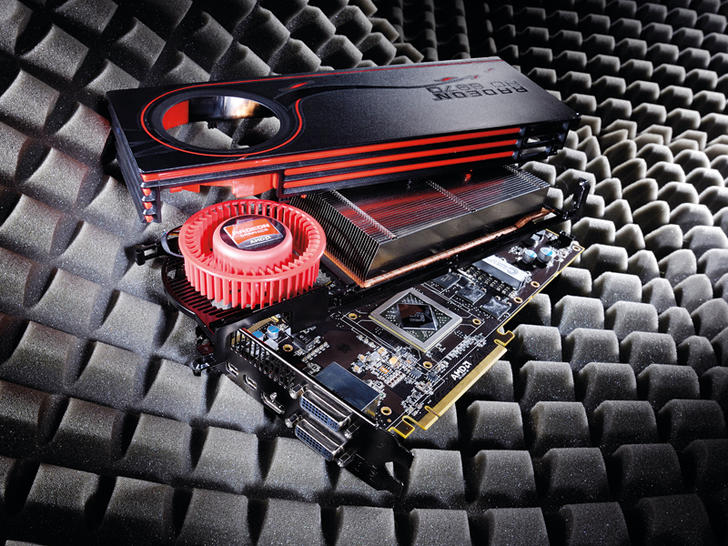 Another weakness is voltage control. Wattman allows you to adjust the voltage, but the maximum overvoltage is much lower than Trixxx or Afterburner.
Positive:
- Ready for a great experience: Most AMD users don’t need to install anything
- Excellent interface
- Accurate control of overvoltage, clock frequency and fan speed
Minus:
- Limited overvoltage regulation
- Radeon updates can cause it to become unstable
Download AMD Radeon Drivers (Wattman included)
2. Sapphire TriXX
for whom: Powerful AMD users who want to get the best performance out of their graphics cards
Wattman is a great option for casual users who are happy to run smoothly with moderate overclocking. However, as mentioned earlier, the main disadvantage is the limited overvoltage support. Heavy overclocking depends on increasing the core voltage. Indulgence is not as scary as it seems.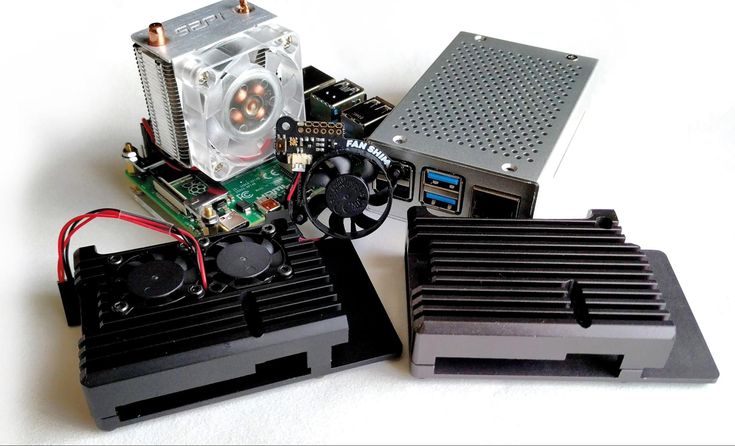
In most cases, adjusting the voltage will not void your warranty. However, cards that are too large can generate a lot of heat while consuming a huge amount of power. So this may not work for you unless you are temporarily running a powerful power supply. If you’re doing this and want to extract every drop of available GPU power, you might be disappointed by Wattman’s conservative voltage limits.
TriXX allows you to install more powerful GPUs. This means +100 mV and above. If your card is cool enough and you don’t mind overloading the power, TriXX is actually the only option available (below some very dangerous hackers) to power your card at such a high voltage that Afterburner maxes out at +100mV.
However, in most cases, if you don’t have a water block, you won’t have the proper cooling to take full advantage of the amazing features of the TriXX OC. Whenever I get a new AMD card, I find myself pushing the boundaries first with TriXX and then settling for a more viable long-term OC through Wattman. It also has its own set of restrictions. Most important is the lack of RTSS integration. This makes the GPU and framework monitoring tools far less powerful than the competition.
Positive:
- The upper force limit allows you to push the cards to the limit
Minus:
- Some cards are really stable at very high voltages.
- GPU and monitor solution
Download ThreeXX
3. EVGA Precision X1
for whom: Nvidia users who want a great one-click OC solution
EVGA Precision X1 only works on Nvidia cards, so if you like something from Team Red, you’re in luck. However, for users, the Nvidia Precision X1 offers enough features to make it our recommendation. Personally, I have used different versions of the EVGA Series Precision software for Nvidia cards that I have or have tested. The Precision X1’s OC scanner is a key feature. It solves one of the main problems associated with overclocking: users have to spend a lot of time manually testing hardware to find a stable OC.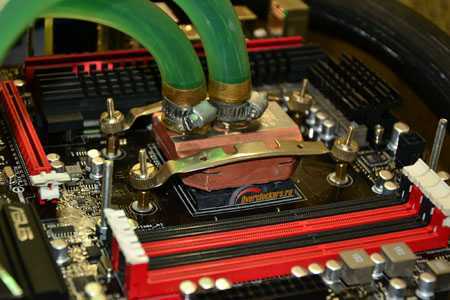
I spent all day setting up mood maps. The old reference RX 480 only focused on a certain voltage speed range on the watch, which I found after a few days of freaking out. The Precision X1 OC scanner eliminates this annoyance by automating the overclocking process. It tests a combination of time, speed, and voltage to determine a stable operating frequency for you.
OC Scanner won’t take your card to its absolute maximum, but it can get you as close as possible to your card’s full potential. RTSS integration here. This means you get a powerful set of in-game frame rate and GPU monitoring tools to keep track of in-game timers, voltages, and base clocks. The only real downside here is that the Precision X is limited to Nvidia cards.
Positive:
- OC test automates the overclocking process
- RTSS integration for monitoring large GPUs
Minus:
Exclusive to Nvidia
Download Accuracy X1
. The Intel HD line offers the worst GPU performance you can get.
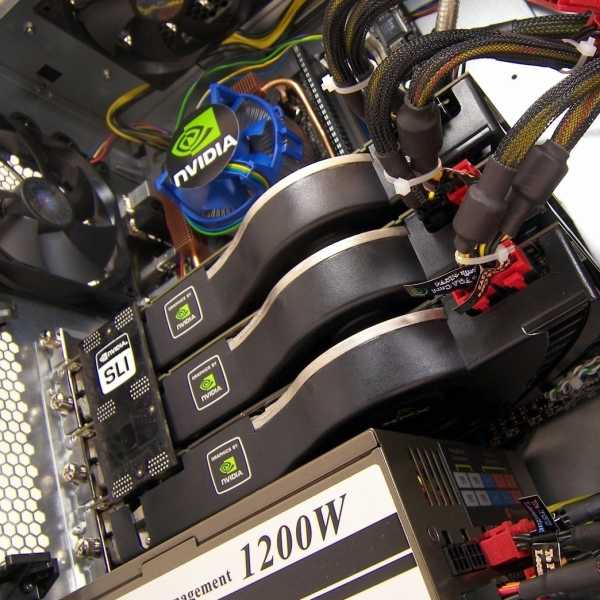 We only recommend playing with Intel HD Graphics if you have no other choice. And frankly, with the proliferation of cheap AMD APUs that pair decent graphics performance with the grunts of a Ryzen CPU, there’s little reason to play on an iGPU unless you’re stuck with your laptop or tablet. Now it’s a completely different scenario.
The My Smartron Tbook hybrid laptop is equipped with a Core M processor and an Intel HD 5500 iGPU. It’s not the most powerful GPU from Intel, but it’s enough to let you slip past my frame rates to play lighter 5500-gen games. Despite this, photo frames are often disappointing in the twenties: HD XNUMX just needs to be lifted a little to push things into the play area.
Unfortunately, most GPU overclockers on the market do not work with iGPUs. Install Precision XOC or TriXX and nothing will happen. Fortunately, Intel itself has developed an overclocking utility called XTU (Extreme Tuning Utility). The focus is on overclocking the processor. But it allows you to play with the clock speed and voltage of the GPU.
Be aware that Intel likes to block features in most of its SKUs. I found that while XTU didn’t actually let me unlock the iGPU, it did let me adjust the GPU voltages.
In thermal form factors and power constraints such as laptops and tablets, leveling can be just as effective as overclocking: you lower the voltage to allow the GPU to run at peak frequencies for longer. XTU is not a real alternative to GPU overclocking and it is very limited in terms of what you can do. But still, something is better than nothing, right?
Positive:
It gives Intel users some control over their iGPUs.
cons:
Very limited feature set
Some Intel chips can be more blocked than others
Download Intel XTU
final words
Each of these overclocking utilities has its strengths and weaknesses. It is also intended for a wide range of users. The Precision X1 is designed for Nvidia users who want easy automatic overclocking. Meanwhile, Wattman and TriXX are utilities aimed at AMD users. Wattman provides great functionality out of the box, but doesn’t let you achieve overclocking (presumably AMD doesn’t want you to fry Radeon silicon).
TriXX allows you to take steps forward, but has limited monitoring capabilities. Finally, Intel XTU is the last option for Intel users. It provides very limited GPU tuning functionality. However, under limited temperature conditions, a good undervoltage in the XTU can allow the iGPU to run at peak frequencies for much longer.
If you’ve spent all your money on a powerful GPU, you’ll want to try out these great free open source games while you wait to top up your wallet.
Source
3 ways to overclock a video card on a laptop? How to speed up
Perhaps every person wants to get the best performance from their laptop. This can be useful, for example, in modern games, the system requirements for which are getting higher and higher each time. Often, a device that until recently coped with absolutely any gaming product asks to lower the graphics settings or does not recommend the game for this laptop at all. Therefore, today I will tell you about 3 ways to properly overclock a video card on a laptop, without harming it.
Contents:
- Pitfalls of video card overclocking
- How much power will increase after overclocking?
- What needs to be done before overclocking?
- Overclocking a video card using Windows features
- Overclocking a video card using the BIOS
- Overclocking a video card using MSI Afterburner
- Conclusion
Pitfalls of overclocking a video card
and «cons». When overclocking a video card, it is important to pay attention to its temperature. It is better not to tempt fate if this indicator exceeds 90 degrees Celsius. However, some video cards are capable of operating at a temperature of 100 degrees. The main problem here is that at elevated temperatures, the video chip starts to lower the clock frequency, due to which the performance freezes at the same level.
How much power will increase after acceleration?
It is difficult to answer this question precisely, since everything is individual, but if we talk about the average, then this is from 5 to 15% of performance. Therefore, you should just take into account a few points that affect the potential overclocking of the video card and do not think that you will make a “powerful beast” from your “old man”.
- Video cards from little-known manufacturers are much less likely to overclock. The maximum increase in this case does not exceed 10%;
- Flagship graphics cards at the moment, like the Nvidia GeForce GTX 2080, are also unable to show a significant increase. The user will be able to achieve a performance increase of only 5-15%, and even then not always;
- Video cards from the middle price segment and released a few years ago are best overclocked.
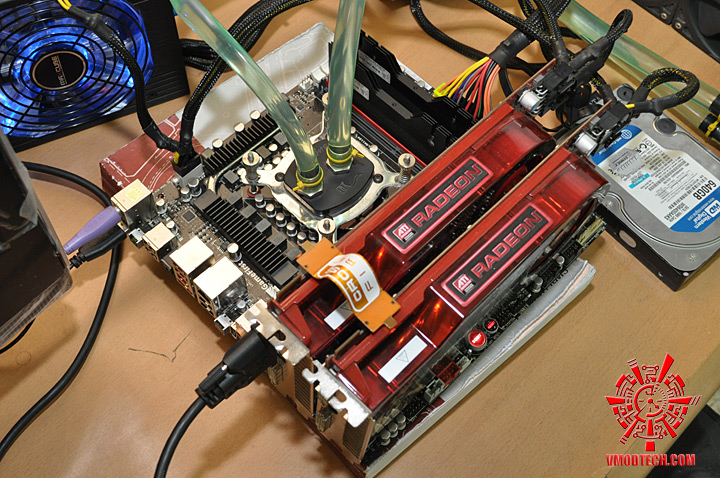 Here the growth rate can reach 30%, but this is rare, since it will be necessary to change the cooling system and thermal paste.
What should I do before overclocking?
Before you try to increase the performance of your graphics card, you need to take a few steps to optimize the performance of your notebook.
- Delete unnecessary files from the device memory;
- Turn off programs that you are not currently using;
- Update all drivers, especially graphics card software, to the latest version;
- Scan your laptop for viruses and remove them if necessary.
If you have performed all the indicated actions, then you can safely proceed directly to overclocking the video card.
Overclocking a video card using Windows features
This method is the simplest and safest, but its performance is not always able to fully satisfy the user. It is understandable, because here the performance of the video card is increased with the help of pre-installed system tools.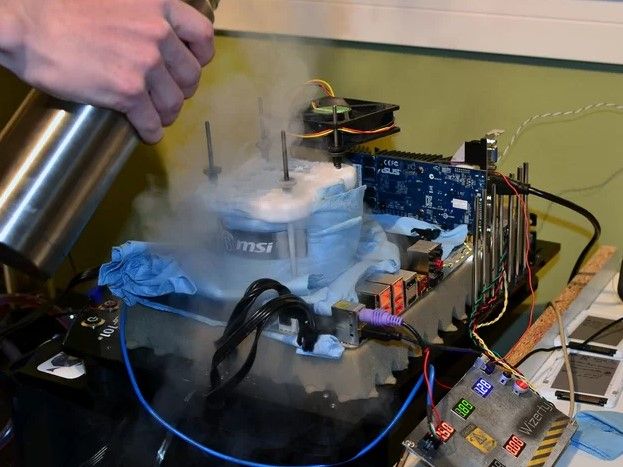 However, it is impossible to pass by it, and it is worth considering it as the main one.
- Open the Start menu;
- Go to the «System» section;
- Click on «Power and Sleep»;
- Select «Advanced Power Options»;
- Expand the Show Additional Schemas menu;
- In the window that appears, turn on the «High performance» mode by placing a marker in front of it.
This way you will increase the performance of your laptop, as well as the power of the video card. Now she should work to the fullest.
Overclocking a video card through the BIOS
If the method discussed above could not significantly increase the performance of the video card, then it is worth switching to other options. The main one is overclocking through the BIOS menu, but I’ll say right away that in many laptops there is simply no such possibility. It is disabled by the manufacturer from inept hands and those instructions that are below may simply not be in your BIOS.
- While turning on the laptop, press and hold Esc, F2, F6, F8, F12, Delete depending on the laptop manufacturer to enter the BIOS;
- Open the «Advanced» tab;
- In «CPU Settings» click on «Overclocking Mode»;
- Next, several overclocking options will be offered in percentage terms or as a multiplier. Choose the required indicator;
- Save changes by pressing F10;
- Reboot the laptop.
Overclocking a video card using MSI Afterburner
If the previous two options seemed difficult, or just the first one did not bring the proper result, and the second seems difficult, then you can use programs that are downloaded from the Internet. There are a large number of them, and we will consider the overclocking option using the MSI Afterburner utility. It is supported by the vast majority of users who are familiar with the topic of the material, and the program itself has a positive effect on the performance of almost all video cards. You just need to clearly follow our instructions or watch the video.
- Download and install the program;
- After starting the utility, you can change the language to Russian. To do this, in the «Settings» section, select the «User Interface» tab and activate your native language;
- In the «Settings» menu, specify the name of the video card you want to overclock in the «Select the leading graphics processor» column. If the laptop has two video cards (discrete and built-in), then check the box next to the option «Synchronize settings of identical GPUs»;
- In the «Basic» tab, check the box next to «Unlock voltage monitoring»;
- Next, activate the «Enable software user auto mode» item in the «Cooler» tab;
- Set the fan speed to 85-90%;
- Close the settings and pay attention to the main menu of the program;
- Increase the core parameters by 10-20 MHz in the «Core Clock» item by moving the slider to the right, and click the «Apply» button;
- Move the slider in the «Memory Clock» item also to 10-20 MHz and apply the settings;
- Close the program and check the graphics card performance of some powerful game.
 If the temperature does not rise above normal, then you can increase the clock speed by a few points.
Conclusion
Although overclocking a video card is not a very complicated process, it must be approached with due responsibility. If you decide to forcibly increase the performance of the video card, then be sure to monitor its temperature. Too high a rate can disable it for a short period of time or forever. Therefore, weigh all the pros and cons, and then decide whether the game is worth the candle.
Source: onlynotebook.ru
How to overclock a video card in a computer and laptop
For ordinary users, the issues of improving computer performance are not as relevant as for gamers or those who work professionally with graphics. Meanwhile, there are opportunities in this direction. We are talking about such an event as overclocking a video card — provided that it is not an integrated chip.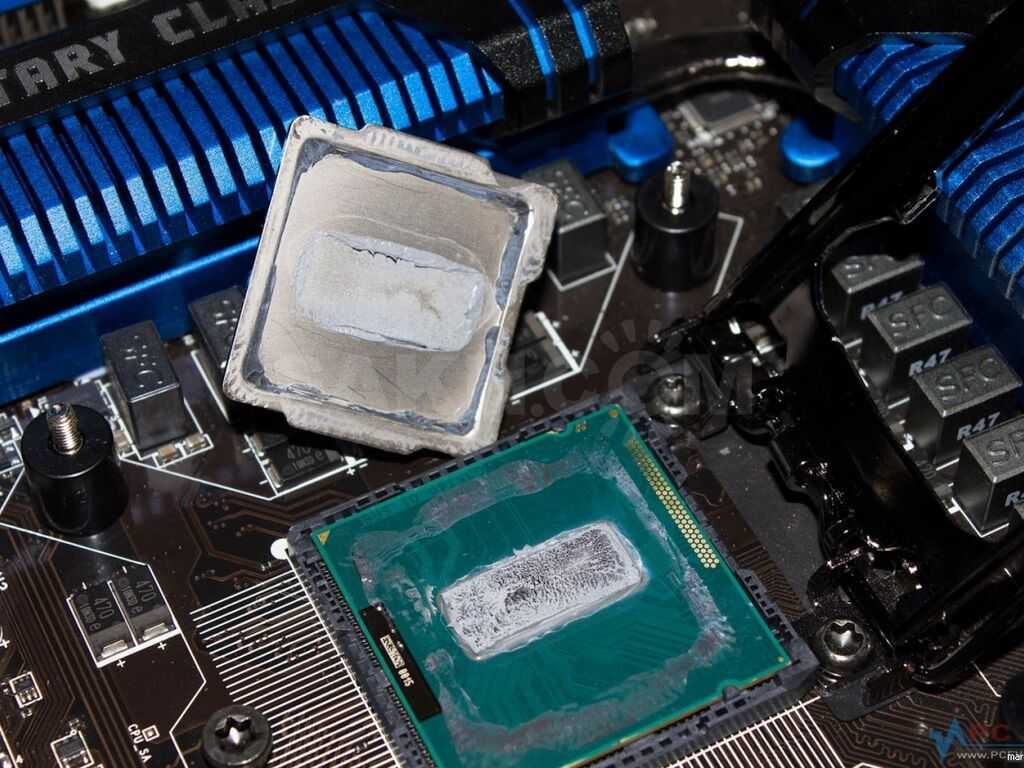 Indeed, the performance of the graphics subsystem directly depends on the characteristics of the video adapter, and to be more specific, on the operating frequency.
And manufacturers of such equipment have provided the possibility of increasing this parameter by producing products operating at the nominal frequency. That is, there is a margin of frequencies, in percentage terms it is relatively small, but in some cases this is quite enough. In any case, the factory frequencies are almost never set on the pedal of their capabilities.
What gives video card overclocking
Manufacturers try to adhere to a simple but logical marketing rule: each new line of video adapters has a minimum frequency that exceeds the maximum capabilities of the previous series. In other words, you won’t be able to overclock the GTX 1660 Ti to the performance levels of the RTX 2060 line at stock frequencies.
There are exceptions, but they are rare (a pair of Radeon RX 570/580 can be used as an example).
Overclocking is not always justified in practice. For example, owners of entry-level graphics adapters such as the GeForce GT 710 (as well as the analogue Radeon R5 230) in modern medium-loaded games will be able to get 12 frames / sec. After overclocking, this parameter will increase to a maximum of 15 frames, which will not allow you to get any noticeable improvement.
On the other hand, if your PC has an expensive video card like Radeon VII, in any case, you will get a very comfortable value for gameplay of 60 frames per second or more, even if you set the resolution to 4K. By increasing the frame rate by 10 frames, you will also not feel much difference, since there is nowhere to improve. So here, overclocking is actually useless and even harmful.
Gamers are guided by the following rule: if there is not enough FPS at 60 fps, overclocking will help, because this value is considered the limit of a comfortable gameplay.
IMPORTANT. Discussing why overclocking a video card, we will continue to talk exclusively about “safe overclocking”, which does not require manipulation of hardware. In other words, we will talk about programmatically changing the parameters of the graphics accelerator.
And now some theory. Overclocking a video card involves changing five main parameters that directly or indirectly affect graphics performance.
GPU clock
In principle, everything is clear with the Core Clock parameter — a higher frequency provides an increase in performance. In practice, the dependence is not quite linear, since with increasing frequency we are dealing with an increase in power consumption, which leads to large heat losses.
In addition, the increase in frequency is not carried out by a specific value in frames / second, but by one of the specific modifiers, which is the base frequency multiplication factor. The specific values of the modifiers are determined by the GPU Boost technology, while under load the practical value will be less than the theoretical one, since there is a dependence on the voltage, temperature and power consumption limit of the chip.
Power consumption limit
The Power Limit parameter is no less important than the Core Clock. The graphics card performs computational operations using a certain amount of electrical power, which must not exceed a certain threshold set at the BIOS level.
You need to understand that if the power consumption limit for a video card in the BIOS is 200 W, it will not be able to consume more than this value, even if advertising materials tell you otherwise. If the limit is exceeded during operation, the video adapter will automatically start to reduce the frequency so as not to go beyond the limit set by the software.
That is why the question of whether it is worth overclocking a video card does not always have a positive answer — only on the condition that you can increase the Power Limit value programmatically. This possibility is usually available (up to 50% of the number set in the BIOS), but in practice this value must be determined empirically, focusing on the actual power consumption in the overclocked state.
GPU voltage
The Core Voltage parameter directly affects the power consumption of the chip, but it also affects the possibility of increasing the frequency rating and the heating characteristic. Say, the Radeon RX 5700 in normal mode (1750 MHz) operates at a nominal voltage of 1.02 V, however, even with a value lowered to 0.98 V, you will not see any special problems in the operation of the graphics subsystem.
Having overclocked the card to 2100 MHz, you will have to increase the voltage to 1.19 V, otherwise you will not see stable operation.
The problem is that it is not always possible to increase the voltage programmatically.
Memory frequency
Another parameter that affects how many megahertz you can safely overclock the video adapter is Memory Clock.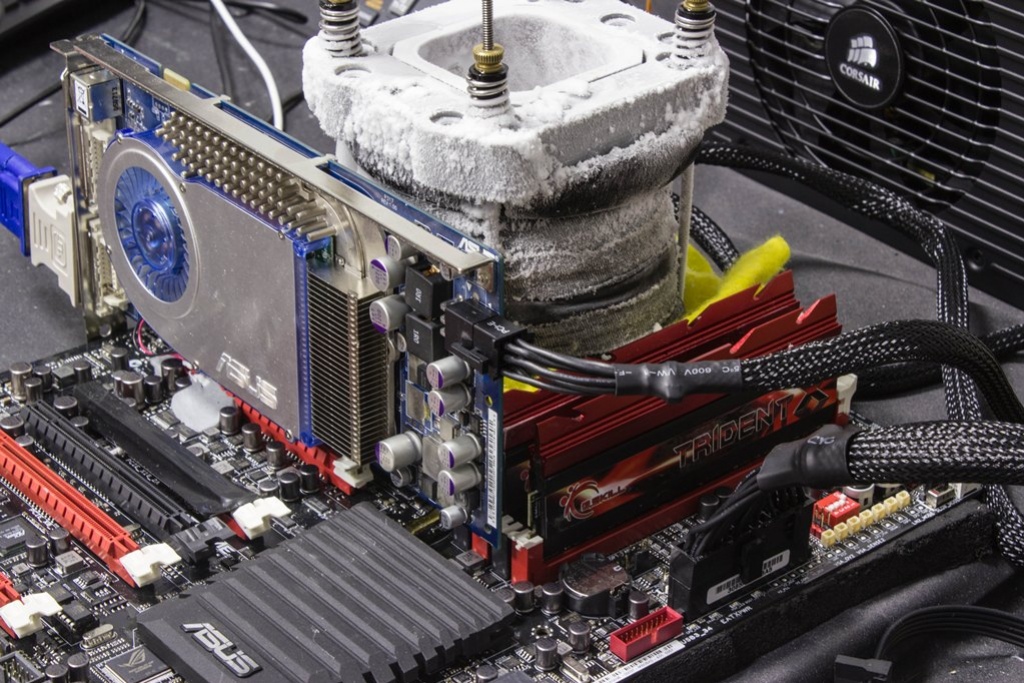 Multiplying factors applied to nominal values are also used here, but it is necessary to distinguish between effective (marketing, advertising) and real frequencies.
Say, for a GDDR5 memory chip, the effective frequency is four times higher than the real one (8000 MHz versus two thousand), and for GDDR6 memory, the coefficient is eight. That is, 14,000 MHz is indicated, the real frequency must be divided by 8. We get 1750 MHz.
Fan speed
We mentioned the parameters that indirectly affect the possibility of overclocking. Fan Speed is just such a feature. The fact is that by increasing the frequency, voltage and power consumption limit, you will not always be able to get the expected increase due to overheating of the chip. This means that overclocking your graphics card may require you to increase the fan speed to cool the card more effectively. A side effect of this step is an increase in noise levels.
What software is needed for overclocking
The main utility that is responsible for increasing graphics performance by overclocking a video card is MSI Afterburner. The program allows you to change the frequency of the core, memory, and manipulate the operating voltage (not for all models of cards). However, it is not recommended to use the last parameter for overclocking, since the graphics subsystem is usually designed to work with the nominal, standard voltage. With its increase, the consequences can be unpredictable.
We will also need a utility that will determine all the characteristics of your video adapter. We recommend GPU-Z: it will give you both the model name and the characteristics of the core and the nominal frequency. Among the parameters to be determined is the width of the memory bus, and in the Computing column you can see the technologies used in the adapter.
Before you start overclocking NVIDIA and AMD video cards, you should also download and install utilities that measure graphics performance (Heaven/Valley/Superposition Benchmark by Unigine). The latter program is good for relatively new video adapters. If your graphics accelerator is more than 5 years old, it is better to use the first two benchmarks. By the way, the use of such utilities also has a side effect, in addition to performance measurements: they allow you to “warm up” the adapter after overclocking in order to check its stability.
TIP. It is recommended to download all the necessary software from official sites — this will avoid the risk of installing «adapted» software, which at best may not work correctly, and at worst — infect your PC with malicious code.
How to test the performance of the graphics subsystem
First of all, run the GPU-Z utility to compare the readings of the Default Clock and Boost columns. If the nominal frequency of the graphics core differs from the current value measured in games, then we can conclude that overclocking took place at the factory, that is, you have little overclocking left.
Exactly the same technique should be used for pairwise estimation of GPU/Default Clock graphs, upper/lower memory. It also displays the initial and current values, which will be the same in the absence of factory overclocking.
If the latter is the case, we will try to reset it programmatically.
After comparing the map parameters, you should run a performance test for any resource-intensive game (the same Tomb Raider, or GTA 5). Our goal is the average frame rate, we remember this parameter, we will need it in the future when performing safe overclocking of the video card.
Now run any of the specified benchmarks. Without touching the settings of the utility, click the start (Run).
The program will give us a number of important indicators: the number of points scored, the FPS readings (min, max, average), the maximum recorded temperature of the chip. These characteristics are also worth recording.
Overclocking
So, let’s look at how to properly overclock a video card on a laptop or PC.
Launch MSI Afterburner. We are interested in three indicators, adjustable by sliders:
- Core Clock (GPU clock).
- Memory Clock.
- Power Limit.
Core Voltage, as mentioned earlier, it is better not to touch it. The features of the utility are such that the power consumption limit can be increased to the maximum, provided that there is a power supply unit with an appropriate power reserve. Increasing the frequency of video memory is a controversial parameter: on many modern card models this operation is practically useless. But the core is worth overclocking.
To insure against overclocking an overclocked chip, press the Reset button, after which you can move the Core Clock slider to the right (maximum 100 units). Click Apply and run the benchmark to compare performance. If you overdid it, the test utility will crash, and then we reduce the frequency by about ten units. Otherwise, try to increase the Core Clock again — by such iterations you will find the limit value for the stable operation of the overclocked card.
True, it’s better to test stability on real games, driving them for at least half an hour. If friezes and distortions were not observed, the core is overclocked in an optimal way, otherwise, reduce the frequency again. Watch the temperature of the chip, it should not exceed 80°C.
Now you can play with the video memory after resetting the core overclocking with the Reset button. The procedure is almost identical: we add about 300 MHz and then we iterate to increase / decrease the frequency, depending on the result.
Now we need to return the optimal core overclocking frequency and check the operation of the subsystem with two increased parameters. If the benchmark fails, reduce the memory frequency by 10 units until you achieve stable performance.
How to overclock the built-in video card
In most cases, such an operation is pointless due to the low performance of the integrated graphics subsystem, a small percentage increase in performance will simply be invisible. But if you really want to, use the GMABooster utility, the principle of which is similar to MSI Afterburner, but this program is focused specifically on Intel’s integrated graphics.
Measuring the performance gain
How to find out if the video card is optimally overclocked or not? Of course, with the help of the final performance test on a resource-intensive game, for example, GTA 5. We record the results and compare them with those that were obtained before overclocking.
An increase of 10% is considered a good indicator. When using air cooling, achieving a result of 20% is a great success, the average maximum is 15%. In these cases, in MSI Afterburner, press the Save button, then click on the number 1 and lock the lock located on the left. Thus, we ensure that overclocking can be activated with optimal values by pressing this particular figure.
If the performance increase amounted to several frames / second, it is better to press Reset so as not to load the system.
How to reset video card overclocking
If you used MSI Afterburner, just press Reset — the utility will determine the initial values and reset the increased values to the standard ones.
There is a universal way for ATI video cards — the Catalyst Control Center utility, which is installed on the PC along with the drivers. Select the «Performance» tab, then — the AMD Overdrive option and click on the «Default» button. Nothing complicated.
To remove overclocking from nVidia, use the RivaTuner utility. After launching it, click on the arrow and move the mouse cursor over the icons that appear, we are interested in the “Low-level system settings” icon. We click on it, and then on the «Initial» button, confirm the operation and restart the computer.
So, we have considered an algorithm that allows you to squeeze the maximum out of your video card using safe overclocking. Of course, there are enough utilities that allow you to do the same — their functionality is approximately the same, the main differences are in the interface. We will be glad to see in the comments the experience of using other software, indicating the model of the graphics accelerator and the resulting performance increase.
How to overclock the Intel Core i3, i5 and i7 processor in 2021
If the processor performance is not enough, then do not rush to think about upgrading. Perhaps your model can be overclocked by increasing the standard frequencies and improving performance. We will tell you more about overclocking Intel processors of the latest generations.
If you own an AMD processor, we also published a similar article on overclocking Ryzen.
Which Intel processor is suitable for overclocking
First you need to determine if overclocking is possible for your model. To find out, just look at the title. It should contain the following indices:
- «K» — indicates an unlocked multiplier. Examples are Core i7-10700K, Core i5-9600k.
- «KF» — models with an unlocked multiplier without a graphics core. An example is Core i5-9600KF.
- «X», «XE» — premium segment processors. Examples are Core i9-10940X, Core i9-10980XE.
If your processor name has any of these indices, then you can overclock.
Can another processor be overclocked? Technically, yes, but this may require specific motherboards, and Intel tries its best to prevent overclocking of processors that are not designed for this.
What you need to overclock Intel
The second important nuance is the appropriate motherboard. Firstly, to overclock Intel processors, you will need motherboards based on the Z chipset — Z390, Z470, Z590 and so on. The processor and the board must have an identical socket, but this is not a guarantee of complete compatibility. Be sure to go to the motherboard manufacturer’s website and check if your chosen processor is included in the supported list and what BIOS version it works with. You may need to update the firmware before overclocking.
Power consumption should also be related to the motherboard. For example, the Core i9-10900K consumes 125 W without overclocking, but with good overclocking, this figure increases several times — up to 300 W. The power circuits of budget motherboards may not be able to withstand. For overclocking Core i3, i5 and i7, Z370 / Z470 boards are suitable. For overclocking monsters like the Core i9, it’s better not to save money and use the Z390/Z490/Z590 boards. It is also recommended that the board has a minimum of six power phases for Core i9or i7.
Since the power consumption of the entire system will increase due to the processor, the power supply should have a margin of 100-150 watts. We recommend using a special calculator to calculate the power consumption. You can specify specific components in it, up to the number of fans in the case. This way you can accurately estimate the power consumption of the system.
And the last thing — cooling. The overclocked processor heats up much more, which means that even a standard cooler will not work to remove heat from the Core i5. You need to look for models from the high price segment, for example, Noctua Noctua NH-U14S or top coolers like Cooler Master MasterAir Maker 8, Noctua NH-D15.
All of these are massive coolers that require a spacious case and a motherboard with thick textolite.
Preparatory phase
To know how effective overclocking will be, it is necessary to perform preliminary tests. The following programs will come in handy here:
- AIDA 64 + HWMonitor .
In AIDA, you can run a stress test, and use the CPUID HWMonitor to view the operating temperature of the processor. This will be required in order to compare how hot the “stone” has become after overclocking.
- CPU-Z. The program has a built-in benchmark that tests the processor in single and multi-core mode. The result is a number.
- CineBench (R20 or others). A powerful CPU benchmark that renders a given scene. The result is in points, it can be compared with other processors.
- Computer games. Since most people overclock just for the sake of better gaming, it’s worth taking FPS measurements. Here it is better to use the built-in benchmarks. They are in the games Horizon: Zero Dawn, Deus Ex MD, Rise of Tomb Raider and others.
Write down all the results because you can calculate the performance gain from them.
How to overclock an Intel processor in BIOS
Let’s move on to the most important stage — overclocking. All manipulations must be performed in BIOS, so if you have any difficulties, it is recommended to upgrade to the latest version. The procedure is best performed from a USB flash drive by connecting the computer to the UPS. If electricity is lost during flashing, the motherboard may completely fail.
We will look at the UEFI BIOS option, since all modern motherboards have it. You can go to BIOS when you turn on the PC using the Delete or F11 button, but you can find the exact information in the technical description for the board itself.
Once you are in the menu, you need to go to the Extreme Tweaker tab. It is here that the main parameters regarding overclocking are located. Next, perform the following items:
- The AI Overclocker Tuner item should be changed from Auto to Manual. This will open the rest of the parameters needed to increase the frequency.
- The SVID Behavior parameter at the first stage can be left unchanged or set to Best Case Scenario.
It is responsible for the voltage of the controller, which provides interaction with the processor.
- In the CPU Core Ratio item, you need to set Sync All Cores so that overclocking concerns absolutely all cores.
- 1-Core Ratio Limit — this parameter is responsible for the multiplier. Where to start — you can add 200-300 MHz to the standard frequency. For example, if the processor is running at 4.5 GHz, then the multiplier should be set to 47-48.
- CPU SVID Support is responsible for the operation of the voltage regulator with the motherboard. Leave it at Auto or Enabled.
- CPU Core/Cache Current Limit Max — current limits for processors. As a rule, a reserve of 220 A is enough for even the most powerful Core i9.
- Min/Max CPU Cache Ratio – ring bus multiplier. It must be set 2-3 points lower than the core multiplier. For example, you set 1-Core Ratio Limit 47, then Cache Ratio should be set to 44-45.
- On the Internal CPU Power Management tab, you must set the value 4095 or 4096 (depending on the BIOS version) for the Long Duration Packet Power Limit and Short Duration Package Power Limit parameters.
This allows you to set limits on short-term power consumption. Set the Package Power Time Window to 127.
- Go back to the Extreme Tweaker tab. The CPU Core/Cache Voltage parameter can be set to 3 modes — adaptive, fixed and offset. For beginners, you can set the adaptive mode.
- Set adaptive mode via Additional Turbo Mode CPU Core Voltage parameter to 1.350V. Setting it higher is not safe and you can burn the processor.
- Offset Voltage can be set to 001V, but everything is individual here.
- Voltage (VCCIO) and System Agent Voltage (VCCSA) should be set depending on the RAM. For DDR4 from 2133 to 2800 MHz, this is 1.05-1.15V for both items.
- CPU Current Capability set to 140-150%.
Leave other parameters as they are. It remains only to save the changes and start the system. If the computer does not boot, it is necessary to reduce the frequencies (subtracting one from the multiplier) or lower the voltage on the core.
The next step is to test for stability. Use HWMonitor for temperature monitoring and Linx with AVX or Prime95 to run tests. If the tests pass without errors, and the processor does not heat up to critical temperatures, then you can increase the frequency. If errors appear in the tests at the selected frequency, then increase the operating voltage. However, remember that setting more than 1,400V is not recommended.
Your task is to achieve the maximum frequency at a voltage of up to 1.4V, when the processor passes all tests without errors. In the best cases, 10th and 9th generation processors can be overclocked to 5.5 GHz, but each model is different.
Beginners should start by changing the multiplier, increasing it by 100 MHz for each step. As soon as problems start with turning on or passing tests, you should start changing the voltage on the cores. Experts strongly do not recommend using any third-party overclocking software. All operations must be performed in the BIOS itself. In case of any problems, all changes can be easily reset by resetting the BIOS settings.
Once you find the optimal balance, run the tests you did at the beginning (CPU-Z, CineBench, PC games). So you can estimate the actual gain specifically for your model. If it turns out to be insignificant, and temperatures and power consumption increase significantly, it may be more profitable to remove overclocking.
What results can be achieved?
| Testing | Core i7-10700K stock | Core i7-10700K overclocked 5.1GHz |
| Blender 2.83 (lower is better) | 238, 1 p. | |
| V-Ray 4-1 (more is better) | 14193 points | 15317 points |
| Photoshop 2020 (less is better) | c.2 | 261.1 s. |
| Lightroom Classic (less is more) | 169.3 c. | 167.2 s. |
| x265 video encoding (more is better) | 13. |
14.14 FPS |
For professional activities, even such small improvements make sense.
Growth in games is even more modest and amounts to up to 5% — tests were performed at FullHD resolution (1920×1080):
Specifically for the Core i7-10700K, the increase is very modest, but for other models the results may be better. For example, overclocking the Core i5-9600k to 4.9 GHz gives an increase in FPS by 5-10 frames per second. You can also overclock individual Core i3 models. Few people know, but in the Intel line there are i3-7350K, i3-8350K and i3-9350K processors. Although these are far from gaming processors, when overclocked they can unleash the potential of video cards of the GTX 1070 and RTX 2060 level. By changing only the multiplier, it will not work to burn the processor, since it has built-in protection tools. The crystal can only be damaged by increasing voltages, so do not exceed the recommended values.