How To Fix The ‘Page Fault in Non-Paged Area’ Windows BSOD
(Image credit: Shutterstock)
As BSODs go, PAGE FAULT IN NONPAGED AREA is as close as Windows comes to saying “invalid memory reference.” To really understand what’s going on, one needs to understand paged memory, which divides addressable memory space up into a collection of 4K-sized memory pages. The OS can address a very large number of pages, where only some of those pages will actually be resident in RAM.
In most cases, when a program or the OS references a specific memory page, if it’s not resident in RAM, the page manager throws a “page fault” (page not present) status. Ultimately, this means the requested page gets read from the page file. To make room for something new if room is needed, an old memory page (one that hasn’t been accessed recently) will be swapped out to make room for the new page as it gets swapped in.
Certain pages that the OS uses frequently are “locked-in” to RAM. That is, they do not participate in memory paging and should always be present and available when requested. Windows refers to this memory allocation as the “Non-paged pool” and it appears as such in Task Manager, as shown below.
The non-paged pool on a PC with 32 GB of physical RAM is only 951 MB. Windows allocates only the barest minimum to this collection of “locked-in” memory pages. (Image credit: Tom’s Hardware)
The PAGE FAULT IN NONPAGED AREA BSOD signals a condition where the OS has requested a locked-in page, and gets a page fault instead. The reason why Microsoft handles this as a stop code and generates a BSOD is because this error is not supposed to occur, and it directly affects the operating system (only highly privileged, important memory pages get allocated into the non-paged pool).
What Causes PAGE FAULT IN NONPAGED AREA?
As described in the Microsoft Docs page for PAGE FAULT IN NONPAGED AREA, this particular stop code may follow after installation of what it calls “a faulty system service or faulty driver code.” By and large, system services come from Microsoft as part of OS releases, upgrades or updates.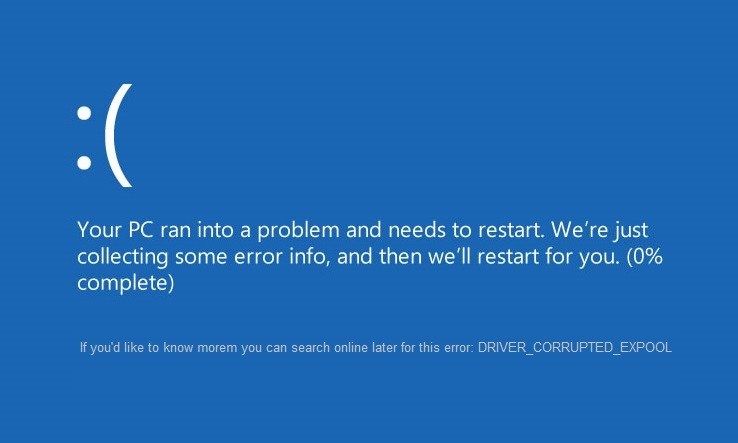 If they’re at fault, you’ll figure this out quickly because Microsoft will include this possibility in its “Known Issues” lists for such things. Likewise, there will be plenty of online traffic to report, document, and exclaim about such problems.
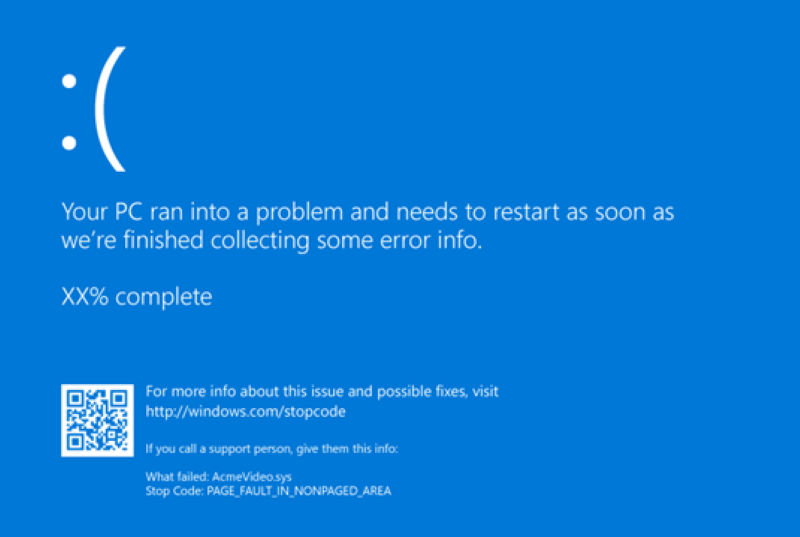
While bad Windows updates do happen from time to time, the PAGE FAULT IN NONPAGED AREA code is far more likely to come from a faulty driver. To see if the problem is caused by a driver, note the file listed on the BSOD (ex: nvlddmkm.sys) and consider whether you’ve recently updated a driver or installed a new device.
How to Fix PAGE FAULT IN NONPAGED AREA BSODs
When it comes to faulty system services, the best approach is to uninstall (or roll back from) the upgrade or update that caused the problem. If it came from a clean Windows install, it’s time to do another one, using a different (and known to be good and working) OS version instead. See our article on how to do a 30-minute repair reinstall of Windows.
If the problem comes from a driver, first check the device manufacturer’s website for a newer version of the driver. If so, download and install it. If not, try rolling back to a prior version. To roll back a driver:
1. Launch Device Manager. You can get there from the Windows + X menu.
(Image credit: Tom’s Hardware)
2. Right click on the device in question and select properties.
(Image credit: Tom’s Hardware)
3. Click the Roll Back Driver button.
(Image credit: Tom’s Hardware)
However, many devices won’t have the Roll Back Driver button enabled and, even then, it will only take you back one version. Otherwise, you’ll need to hunt for an older driver through the manufacturer’s site (or some reputable third-party source, such as the excellent French Station Drivers website).
Look for Disk Problems
Disk errors or specific problems with system files can also cause the PAGE FAULT IN NONPAGED AREA BSOD. In order to rule out or fix these issues:
1. Open a command prompt as administrator. You can get there by searching for cmd, right clicking and selecting Run as administrator.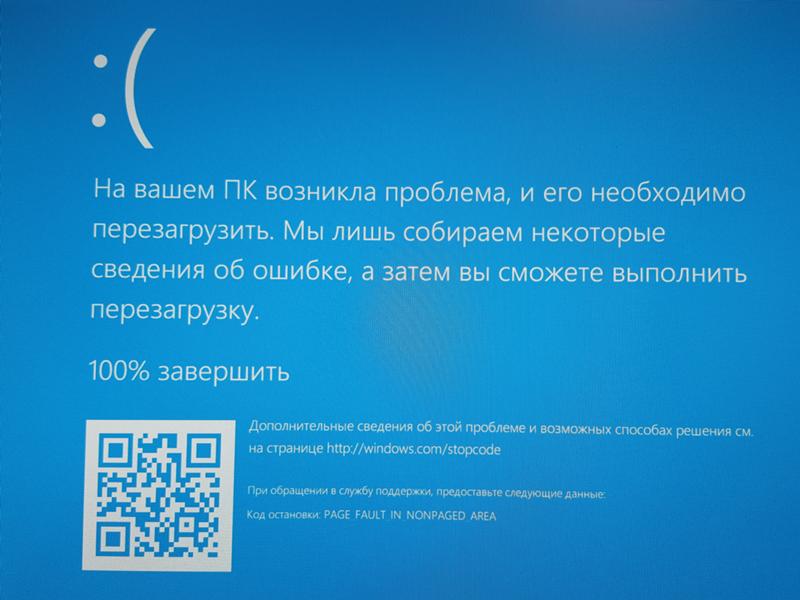
(Image credit: Tom’s Hardware)
2. Enter DISM /Online /Cleanup-image /Restorehealth to find and replace any damaged OS components.
(Image credit: Tom’s Hardware)
3. Enter SFC /scannow to check for damaged system files.
(Image credit: Tom’s Hardware)
These aren’t the most likely cause of a Page Fault in NonPaged Area BSOD, but they are quick and easy steps you can take which may solve the problem.
Memory Could Be a Cause of PAGE FAULT IN NONPAGED AREA BSODs
Other potential causes for the PAGE FAULT IN NONPAGED AREA BSOD include memory problems. This might mean issues with RAM, L1 or L2 cache on the CPU chip itself, or even video RAM on a graphics card. Finding such issues requires a process of elimination. It’s easiest to check RAM, and more difficult to check CPU cache and video RAM.
The free, open-source Memtest86+ utility is a good tool for checking PC RAM. I keep a bootable version of MemTest86+ on my Ventoy repair flash drive (it’s named mt531b.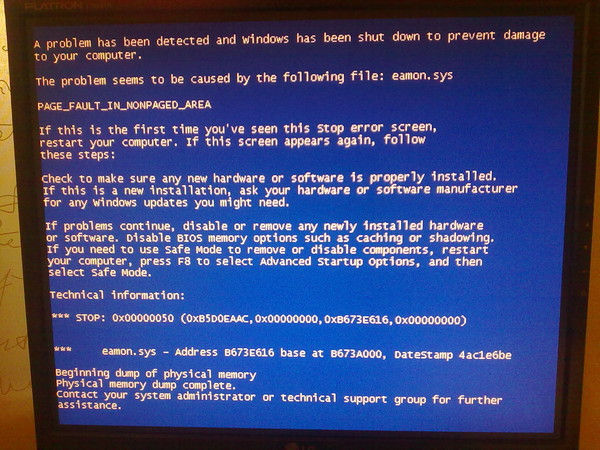 iso, to reflect the most current MemTest86+ version). Using the tool generally requires an overnight run, so I boot to the MemTest image just before I go to bed, and let it run all night so I can see what it’s doing (and finding).
Malaysian logger Raymond.cc offers an interesting list of 6 free programs to check your video card memory for errors. I’m not aware of any tools that check CPU cache per se, though I did find an interesting StackOverflow item that uses DotNet libraries to come close.
If memory problems are indeed present and none of the other techniques I’ve described lead to solutions, keep your eyes peeled for related stop codes. These can help point you more directly at potential causes and fixes:
- SYSTEM_SERVICE_EXCEPTION
- KMODE_EXCEPTION_NOT_HANDLED
- MEMORY_MANAGEMENT
- IRQL_NOT_LESS_OR_EQUAL
Ed Tittel is a long-time IT writer, researcher and consultant, and occasional contributor to Tom’s Hardware. A Windows Insider MVP since 2018, he likes to cover OS-related driver, troubleshooting, and security topics.
Topics
Windows
Operating Systems
How to Fix Windows 10 with a 30-Minute Repair Install
(Image credit: Shutterstock)
Whether you’re trying to fix a BSOD such as a IRQL_NOT_LESS_OR_EQUAL or a CRITICAL_PROCESS_DIED error, serious Windows 10 troubleshooting is like plunging down the rabbit hole in Alice in Wonderland. At some point you may feel like you’ve taken on more than you can handle, you’re in a strange place, and the ultimate outcome is far from certain. That’s why I always keep track of the time I spend on troubleshooting, with a definite exit strategy in mind. Should the weeds get too thick to hack through, or the circumstances become too vexing or dire, that exit strategy will work to solve most problems that require troubleshooting in the first place.
For me – and I would suggest for most readers – the natural time limit on Windows troubleshooting is half an hour (30 minutes).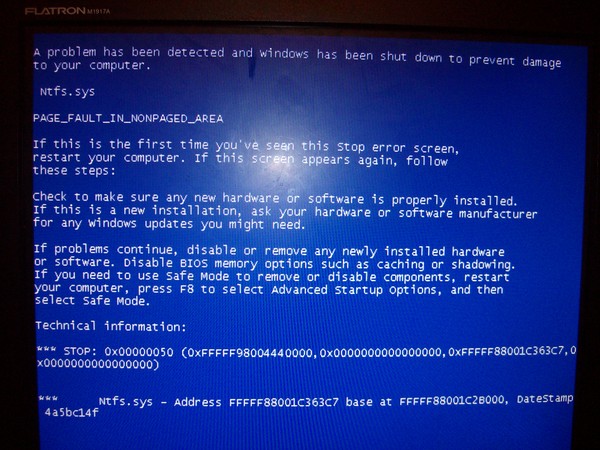 Why? That’s about how long it takes to perform a special-purpose operating system repair that shoots most forms of Windows trouble. Especially if your problem (or problems) are software-related, this repair is quite likely to fix them. Simply put, it replaces ALL of the OS files on a Windows 10 PC but leaves other files, installed applications, and most (but not all) settings and preferences alone.
The In-Place Upgrade Repair Install
It’s little-known and underappreciated, but one can install the same version of a Windows 10 OS onto an existing copy. This uses the Windows installation files in ISO format.
Creating a Windows Install ISO
There are several ways to get a Windows 10 install ISO, but the easiest comes directly from Microsoft’s download page.
1. Download the Media Creation Tool by navigating to Microsoft’s Download Windows 10 page and clicking the button labeled “Download tool now” under the “Create Windows 10 installation media” heading.
(Image credit: Tom’s Hardware)
The name of the software tool is MediaCreationTool.exe. I usually rename it to identify the version of Windows 10 it downloads. At any given point in time, the MCT grabs whatever version of Windows 10 is most current – right now that’s 21h2. So I renamed that file MediaCreationTool21h2.exe.
2. Launch the Media Creation Tool. It shows up in a window labeled “Windows 10 Setup” and makes you wait while it gets “a few things ready.”
3. Approve the license terms when prompted.
4. Select “Create installation media…”
(Image credit: Tom’s Hardware)
5. Select the language, Edition and Architecture (ex: 64-bit) when prompted.
6. Select ISO file when asked to choose the media you want to output to.
(Image credit: Tom’s Hardware)
By default this creates a file named Windows.iso; as before I name mine Windows21h2.iso so I can identify the version later on. This process takes a while. On my 2016 vintage i7 Skylake PC, it takes around 5 minutes to download and process the necessary data, and leave the ISO file behind in its designated storage location. After the download is complete, the MCT verifies the file structure (this is included in the 5-minute timeframe). When it’s complete it will show you the full path where the new ISO file now resides, like this:
(Image credit: Tom’s Hardware)
7. Click the “Finish” button and MCT will tidy up after itself and then close (this happens in less than 5 seconds on my PC: YMMV).
Performing the In-place Repair Upgrade Install
Established best practice dictates a bit of preparation before you start this operation. You’ll want to save any work, and close all open applications. If you have external storage devices attached to your PC, you’ll want to “safely remove them” so they can’t impact or interfere with repairs.
If your issues are related to the boot/system drive, many experts think it’s useful to disconnect or dismount all other internal storage devices as well. I’ve never bothered with this when performing this repair on most of my PCs, and it hasn’t affected the outcome as far as I can tell. But if you are dealing with boot or start-up issues, this could be helpful. You’ll need your mouse, monitor and keyboard, though, so please leave all of them attached as usual.
One more thing: before making major system changes (and this maneuver DEFINITELY counts as such) it’s always a good idea to make an image backup of your PC if you don’t have a recent copy. I make one every morning at 9:00 AM as a scheduled task in Macrium Reflect so I don’t usually do this (unless it’s late in the day). Be sure to have a bootable recovery disk handy that can restore your PC in case the OS drive goes south, and know how to use it for that purpose
1. Navigate to your newly-created ISO file in Explorer.
2. Right-click the file and select “Mount” from the resulting pop-up menu (if Mount does not appear, click Open, and then open with File Explorer). Either way, a new virtual device labeled “DVD drive” will appear in Explorer. It should look something like the item labeled DVD Drive (P:) ESD-ISO shown next.
(Image credit: Tom’s Hardware)
After all this effort, starting the in-place upgrade repair install is dead simple.
3. Double-click the setup-exe file on the mounted ISO.
This starts an upgrade to its local version of Windows. It will systematically replace every operating system file (and move the previous version to a Windows.old folder to which you can roll back if you like (Start ? Settings ? Update & Security ? Recovery ? Go back to the previous version of Windows 10/click the “Get Started” button).
(Image credit: Tom’s Hardware)
Notice that my PC was last updated more than 10 days ago, so it doesn’t have that option (but then, I have this morning’s image backup and my Rescue Media handy).
Once you fire off setup.exe, it’s just like all other Windows upgrades.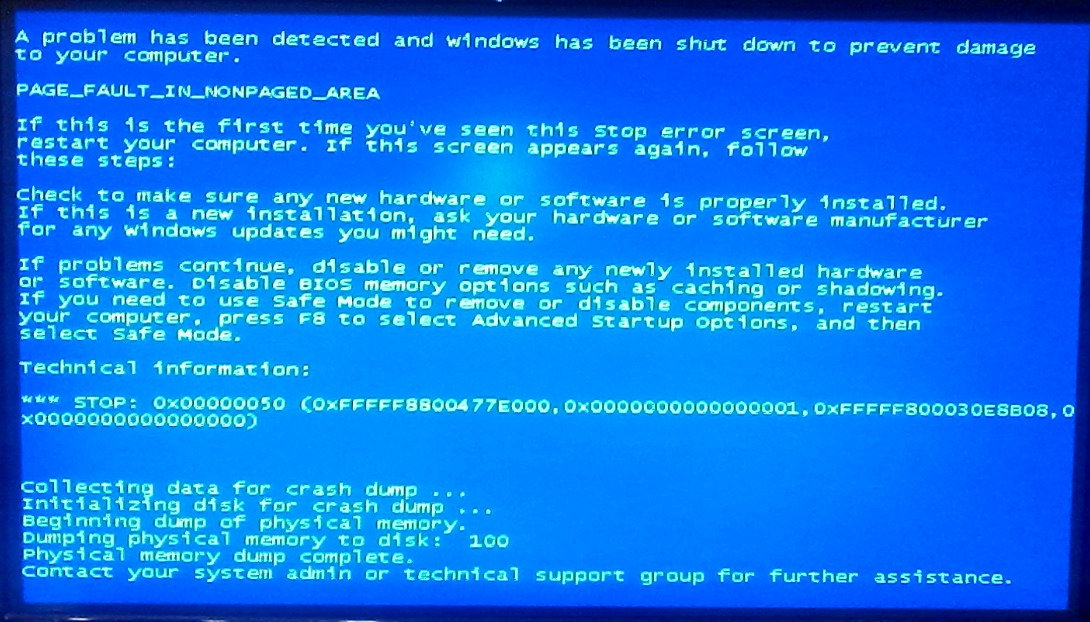 It starts off with downloading and manipulating a set of files for the new OS version, while the old OS keeps running. Then you’re asked to reboot your PC, after which a Windows Preinstallation Environment, aka WinPE, takes over to handle the rest of the install process, during which at least two more reboots will occur. Eventually, you’ll have a repaired OS at your disposal. Hopefully, the trouble you’ve been trying to shoot will also be cleared away, as if by magic.
What Can’t an In-Place Upgrade Repair Install Fix?
This process takes such a short amount of time to complete, I’ve made it a part of my standard troubleshooting sequence. Unless I’m troubleshooting hardware or device driver issues – which this repair may not fix if it’s driver related, and can’t fix if it’s hardware-caused – I’ve found this repair to be as close to a “silver bullet” for handling pesky or complex Windows problems as it ever gets. And because it doesn’t take too long to give it a try, you won’t be that far behind the curve even if it doesn’t work. My own experience is that this repair handles 90-plus percent of the problems I run into and can’t fix in less than half an hour. Hopefully, your experience will be the same!
Ed Tittel is a long-time IT writer, researcher and consultant, and occasional contributor to Tom’s Hardware. A Windows Insider MVP since 2018, he likes to cover OS-related driver, troubleshooting, and security topics.
How to Fix IRQL_NOT_LESS_OR_EQUAL Errors in Windows 10
(Image credit: Shutterstock)
One of the more common Windows stop codes is named IRQL_NOT_LESS_OR_EQUAL. This cryptic-seeming name refers to an Interruption ReQuest Line (IRQL) that PCs use to signal events in urgent need of attention or response. In fact, IRQL_NOT_LESS_OR_EQUAL (sometimes referred to as just “IRQL”) is typically a memory related error that occurs if a system process or a device driver seeks access to a memory address for which it lacks valid access rights. Memory allocations for processes usually have an upper bound address, so the “NOT_LESS_OR_EQUAL” part refers to an attempt to access an address outside (greater than) that boundary value.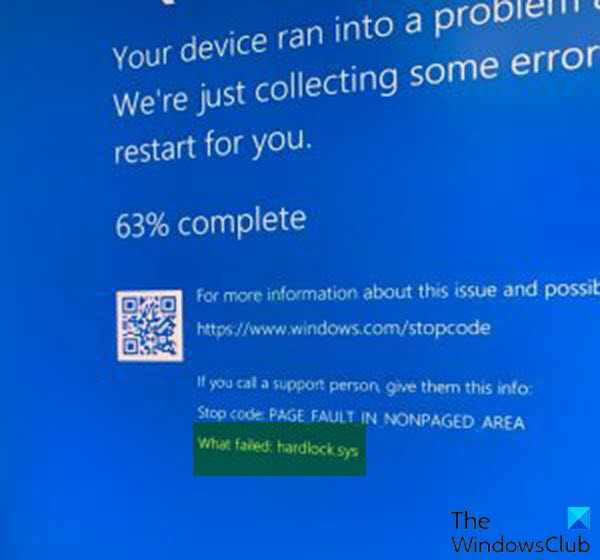
(Image credit: Tom’s Hardware)
What Happens When the IRQL_NOT_LESS_OR_EQUAL Error Occurs?
This error triggers an OS stop, which causes Windows to crash and triggers what’s often called a Blue Screen of Death, or BSOD. Windows displays a stop screen, while it’s collecting forensics data in the background. When that collection phase ends, the PC reboots by default (unless you’ve changed settings to instruct it to shut down instead). This BSOD is shown as the lead-in graphic for this story.
Most Common Causes for the IRQL_NOT_LESS_OR_EQUAL Error
When this error is triggered, there are numerous potential causes that may be worth investigating. Your best bet is to think about what on your PC has changed recently. The list of potential causes includes:
● Corrupt system files: These are best addressed using the DISM /Online /Cleanup-Image /CheckHealth command (run at an administrative command prompt or in an administrative PowerShell session). If this command finds anything to report, run DISM /Online /Cleanup-Image /RestoreHealth to clean things up. Next, run the system file checker until it reports nothing found or fixed (this sometimes takes 2 or 3 iterations) by typing SFC /SCANNOW. If it works, this will often fix the IRQL error as well.
(Image credit: Tom’s Hardware)
● Incompatible device drivers: if you’ve recently updated a driver, try rolling it back to the prior version. You can do this by opening the Device Manager (available when you hit Win + X), right clicking on the device in question, selecting Properties, navigating to the Driver tab and hitting the “Roll Back Driver” button. If the button is grayed out, you may have to uninstall the current driver and install the previous version manually.
(Image credit: Tom’s Hardware)
● Faulty hardware: if a device is malfunctioning or failing, you’ll usually see error reports in Reliability Monitor, which you run by typing perfmon /rel in the Run box, at a command prompt, or in PowerShell.
(Image credit: Tom’s Hardware)
The best thing you can do with a failing or malfunctioning device is to disconnect it from the PC (though for important devices – e.g. mouse, keyboard, disk drive, and so forth – you may also have to replace the ailing device with a known good working instance).
● Damaged or incomplete software installation: If you’ve recently installed an application or update, look in Reliability Monitor for installation failure messages (for updates and upgrades these will also appear in Update History). In such cases, your best bet is to uninstall the problem software and see if the problem goes away.
(Image credit: Tom’s Hardware)
Graphics Drivers Often Cause IRQL_NOT_LESS_OR_EQUAL Errors
I’ve seen the IRQL error on more than half-a-dozen occasions in my 6-plus years of working with Windows 10. In all but one instance, the cause was a buggy Nvidia GeForce graphics driver. In all of those cases, by rolling back to the preceding version, I stopped the IRQL error dead in its tracks.
That’s why I don’t remove duplicate Nvidia graphics drivers from my Windows PCs until the new one has run without problems for a couple of weeks. The excellent GitHub project DriverStore Explorer is great at performing such cleanups, when the time comes. Don’t be too quick to make such cleanups, and you’ll leave the rollback option open to yourself, should you need it.
Try a Clean Boot
If the preceding suggested repairs provide no relief from IRQL_NOT_LESS_OR_EQUAL errors, a Windows 10 clean boot should be your next step. A clean boot starts Windows 10 with the barest minimum set of drivers and startup programs. It seeks to eliminate possible causes of trouble that have been added to the startup environment over time.
To perform a clean boot:
1. Launch the msconfig System Configuration utility. You can get there by hitting WinKey+R and entering “msconfig.”
(Image credit: Tom’s Hardware)
2. Uncheck Load startup items in the General Tab under the Selective Startup setting.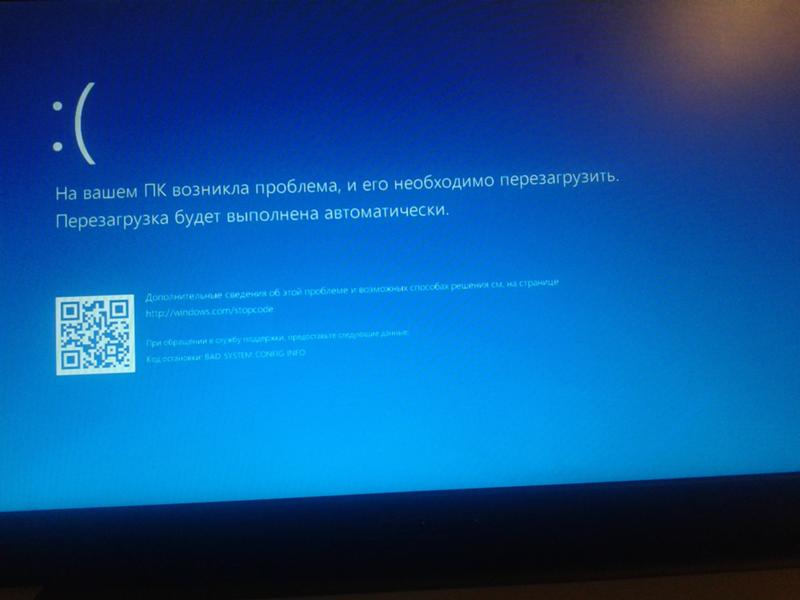 This disables all startup items currently present on this PC.
(Image credit: Tom’s Hardware)
3. Navigate to the Services tab, click the Hide all Microsoft services checkbox at lower left, then click “Disable all.” This disables all non-Microsoft (mostly OS) services on this PC. You can now click OK to close the window.
(Image credit: Tom’s Hardware)
(Image credit: Tom’s Hardware)
Your PC is now set up for a clean boot, so you’ll want to restart to try further troubleshooting. This may allow you to replace or reinstall otherwise problematic or reluctant drivers, applications, updates and so forth. When you’ve finished your troubleshooting, you must then go back and reverse all changes.
If you’ve already disabled some startup items in Task Manager, for example, you might want to make a screenshot to capture the list of disabled items before you disable those still active. That way you’ll know what to leave alone when you put things back the way they used to be.
Troubleshooting non-Windows Services
If your troubleshooting leads you to suspect non-Windows services are involved in the IRQL_NOT_LESS_OR_EQUAL error, you need to conduct a process of elimination to identify the culprit (or culprits). This means turning on 3rd-party services in groups. Shawn Brink at Tenforums.com recommends a binary search technique in his clean boot tutorial. This works pretty well, and helps you zero in quickly. I sometimes do things in groups by vendor (Chrome, Nvidia, Intel, and so forth) and that seems to work well, too.
See Who Else is GETTING IRQL_NOT_LESS_OR_EQUAL Errors
If you visit TenForums.com, BleepingComputer.com Answers.Microsoft.com or the Tom’s Hardware forums and search for IRQL_NOT_LESS_OR_EQUAL and you will see how often the error has been reported lately as there may be a new driver or update wreaking havoc. You will also get some very good ideas on how others have approached diagnosis of the underlying cause, and what fixes they’ve applied.
It’s especially helpful to read through fixes that claim success because these might work for you, too. On the other hand, unsuccessful fixes can be informative, too, because they tell you which repairs to try later rather than sooner (or not at all).
Ed Tittel is a long-time IT writer, researcher and consultant, and occasional contributor to Tom’s Hardware. A Windows Insider MVP since 2018, he likes to cover OS-related driver, troubleshooting, and security topics.
Topics
Windows
Operating Systems
How to Fix a SYSTEM_SERVICE_EXCEPTION BSOD in Windows
(Image credit: Tom’s Hardware)
If you get a Blue Screen of Death with the stop code SYSTEM_SERVICE_EXCEPTION, there could be many causes, though a bad driver is always a likely culprit. The usual bug check code that goes with a SYSTEM_SERVICE_EXCEPTION is 0x3B. Interestingly, the numeric code has numerous (7!) associations in the Microsoft Error Lookup Tool , so this one is best researched using the text-based stop code by itself, or in combination with the numeric code.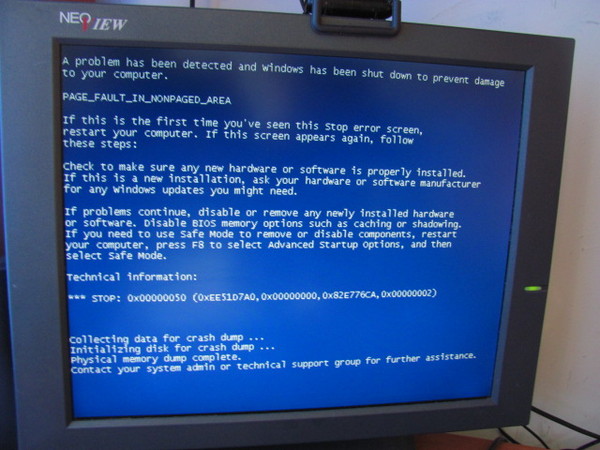 Microsoft’s bug check page for this error provides this explanation for its cause: “This indicates that an exception happened while executing a routine that transitions from non-privileged code to privileged code.”
File System Fix For SYSTEM_SERVICE_EXCEPTION
Microsoft also notes on the bug check page for SYSTEM_SERVICE_EXCEPTION that “If a driver that is responsible for the error can be identified, its name is printed on the blue screen…” Indeed, I’ve personally experienced this error with the Windows 10 NTFS file system driver (Ntfs.sys) identified as the culprit. This identification is a mixed blessing, because it does tell you some kind of file system error occurred. That said, one cannot and should not replace OS-level drivers for Windows as one might do for a device driver of some kind.
Such repairs are best left to the DISM and SFC commands. Thus, my first response to the SYSTEM_SERVICE_EXCEPTION stop code after a reboot would be to run these commands in an administrative Command Prompt or PowerShell session:
Dism /online /cleanup-image /restorehealth
SFC /scannow
The first command will find and replace any corrupted or missing files in the Windows Component Store (usually C:\Windows\WinSxS). The second command will examine all Windows system files (SFC stands for System File Checker, in fact) and replace any damaged or missing files it identifies. The afore-cited DISM command usually takes 3-5 minutes to complete, and the SFC command can take longer (especially if it makes any repairs). If SFC finds and fixes errors, repeat that same command until you get a clean bill of health in its final follow-up:
If SFC finds and fixes corrupt files, keep running the command until it reports “…did not find any integrity violations.” Here, it took only two tries to achieve that state. (Image credit: Tom’s Hardware)
Using the Driver Verifier Tool to Fix SYSTEM_SERVICE_EXCEPTION
Windows 10 and Windows 11 both include a built-in driver verification tool named verifier.exe. It resides in the C:\Windows\System32 folder (where Windows keeps many of its admin and repair tools). Drivers are indeed often involved in the SYSTEM_SERVICE_EXCEPTION error because they belong to the class of Windows code elements allowed to access protected system code (along with OS components themselves, of course).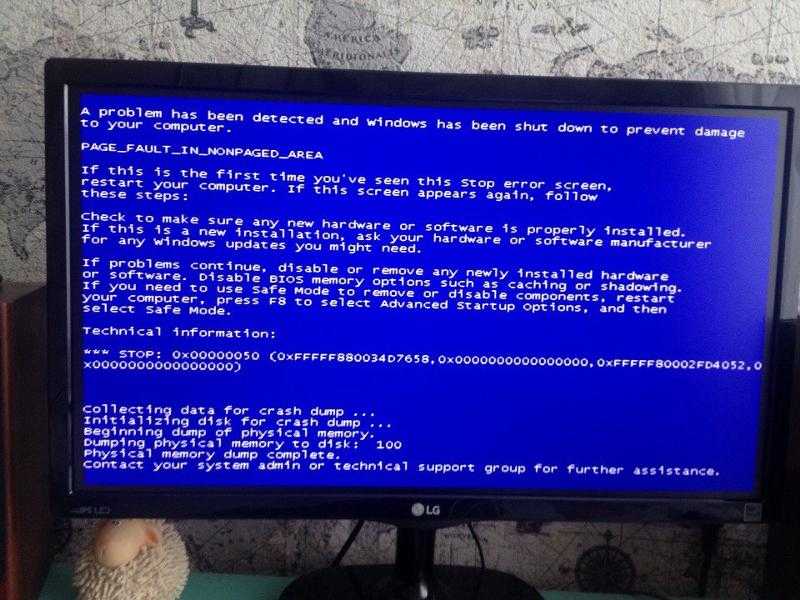 Pretty much any device driver can provoke this error, so it’s not uncommon to see it pop up when you install new hardware, or plug in some kind of removable storage device (usually through a USB or Thunderbolt port).
If the previous system repairs (DISM and SFC) don’t dispel the SYSTEM_SERVICE_EXCEPTION BSOD, the Windows Driver Verifier may be able to help you identify the culprit that’s causing this BSOD to occur. This tool comes with a warning: be sure to create a current image backup for your PC before using it, because the verifier checks all device drivers and intentionally causes a BSOD when it finds a driver that cannot be verified or is corrupt or damaged.
The information you seek should show up in the crash dump that gets written when a BSOD occurs. That crash dump will either occupy a file named memory.dmp or minidump.dmp. The former resides in the Windows root, usually C:\Windows. The latter resides in C:\Windows\Minidump. I wholeheartedly recommend using Nir Sofer’s BlueScreenView tool for viewing and inspecting crash dumps. It will happily target either of those crash dump files, and tell you what’s what.
Turning Driver Verifier On
1. Enter “verifier.exe” at an administrative Command Prompt or PowerShell This will open the Driver Verifier Manager program.
2. Click Next and leave the default setting, “Create standard settings” in place.
(Image credit: Tom’s Hardware)
3. Select “Automatically select all drivers installed on this computer.” If you’d rather focus on a list of drivers by name, click “Select driver names from a list” instead. Either way, click Next to continue.
(Image credit: Tom’s Hardware)
Unless you want to let your computer take hours testing possibly hundreds of drivers, I have some tips for narrowing this list down and picking suspect drivers from the list.
Tip A: Use DriverStore Explorer to Get Driver Names and Info
A free GitHub project called DriverStore Explorer offers a handy focused software tool for inspecting and managing Windows drivers. I used it on my test system to confirm it had over 200 drivers present, and to clean up enough of the old ones to bring that count down to a “mere” 195. This shows that selecting all drivers can involve a huge number of checks and take a great deal of time. Thus, I tend to concentrate on drivers by name using DriverStore Explorer and focus on drivers by category (e.g. Network adapters, Human Interface Devices, Display adapters, and so forth).
Tip B: Restrict Driver Checks to Suspect Categories or Items, When Possible
Let’s say I just switched from the Lenovo OEM video driver to the Intel DCH video driver on my test PC, after which the SYSTEM_SERVICE_EXCEPTION error started up. DriverStore Explorer tells me the name of that driver is iigd_dch.inf, so that’s the one I want to check for a close match in Driver Verifier Manager’s driver list. Usually igd is shorthand for “Intel graphics driver,” so I choose the item named igdkm64.sys.
(Image credit: Tom’s Hardware)
4. Click Finish to proceed through your checks. Next you’ll see a warning from Driver Verifier Manager that you must restart your PC to start running its driver checks.
5. Click OK, restart your PC, and you’re on your way! When the system reboots, it may take a little longer to get through the boot-up sequence, as Driver Verifier Manager does its thing. Be patient. As Driver Verifier Manager finds unsigned or suspect drivers it will cause BSODs.
6. Record any bluescreen messages that pop up (it’s handy to snap them with a smartphone), so you can investigate later.
Any BSODs will need subsequent investigation, and should prompt certain actions. In most cases, replacing or upgrading drivers identified in crash dumps after using Driver Verifier will set your system back to rights.
If you find yourself stuck in a boot loop (repeated BSODs that Driver Verifier is causing), you’ll need to boot into Safe Mode (insert link). Then you can access Driver Verifier (type verifier into the Command Prompt or PowerShell). Once you’re into the Driver Verifier Manager UI, choose “Delete existing settings,” then click Finish. After your next restart, your self-induced BSODs will stop.
(Image credit: Tom’s Hardware)
Beyond the Driver Verifier, It’s Last-Ditch Repairs
If you still can’t get out of the BSOD loop, you may need to take more drastic measures. Restore the OS image you created as a precautionary backup, and you will be back where you started. On the other hand, you could try a 30-minute repair reinstall of WIndows or, if that’s not enough, choose to reset Windows entirely which is the same as a clean install. The last two are obviously maneuvers of last resort.
Ed Tittel is a long-time IT writer, researcher and consultant, and occasional contributor to Tom’s Hardware. A Windows Insider MVP since 2018, he likes to cover OS-related driver, troubleshooting, and security topics.
Topics
Windows
Operating Systems
8 Powerful Methods to Fix PAGE FAULT IN NONPAGED AREA Error
Have you ever experienced PAGE FAULT IN NONPAGED AREA error? Do you know why it occurs and how to solve PAGE FAULT IN NONPAGED AREA? Read this article, you can figure out the reasons for the problem and then solve it.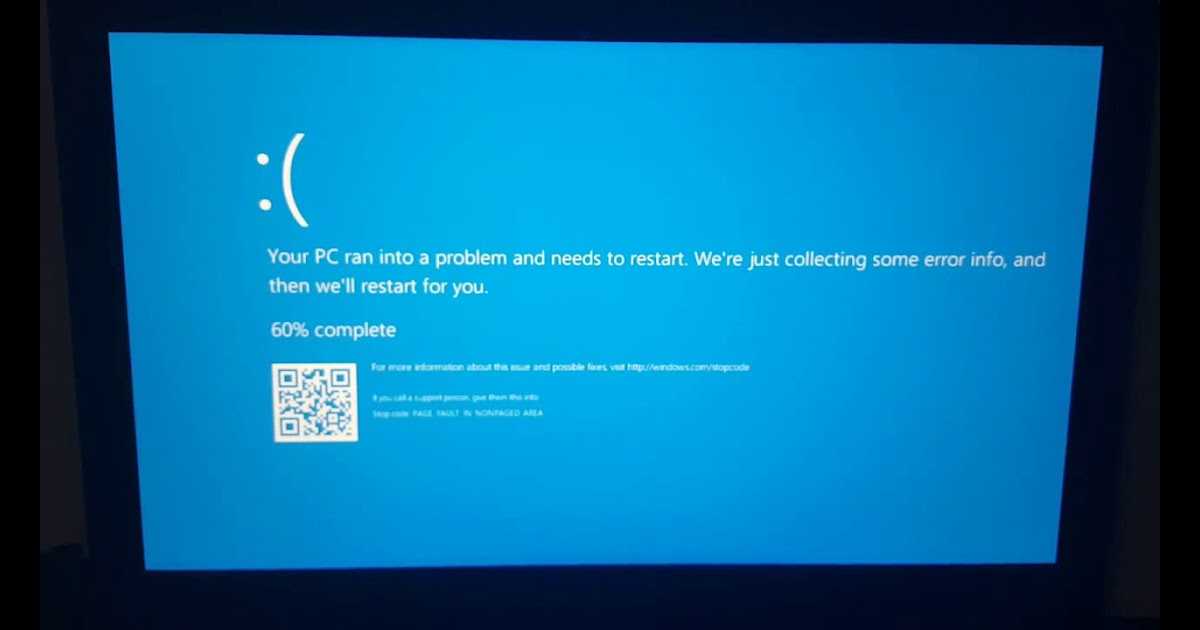
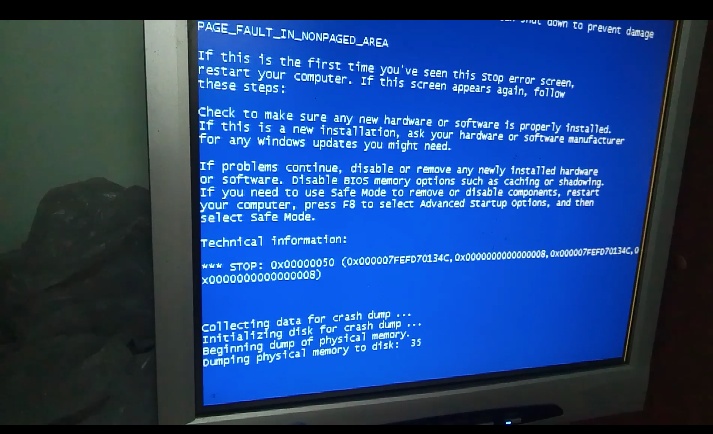
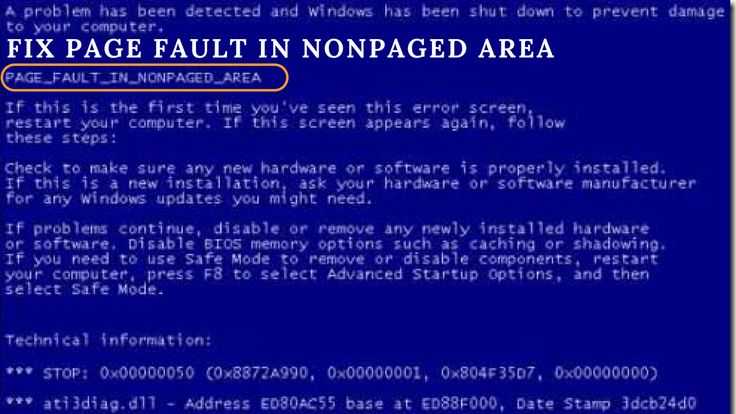
PAGE FAULT IN NONPAGED AREA is also called PAGE_FAULT_IN_NONPAGED_AREA error, and it has an error code 0x00000050, which can be called bug check 0x50. It will cause BSOD, which is pretty annoying.
The Reasons for PAGE FAULT IN NONPAGED AREA
What is NONPAGED AREA? As an area of memory, NONPAGED AREA concludes data that is very important to the operation of the system. The data is stored in RAM all the time because NONPAGED AREA always needs the data, and the data don’t need to exchange between RAM and page file.
Tip: If you lose important data due to PAGE FAULT IN NONPAGED AREA error, then you can use MiniTool software to recover lost data.
PAGE FAULT IN NONPAGED AREA is one of the Blue Screen of Death errors, and the occurrence of this error may be caused by several reasons. I will list some of the reasons below.
- The nonpaged area contains important data for system operation. This error occurs when Windows cannot find the data that should be stored in the nonpaged area.
- PAGE_FAULT_IN_NONPAGED_AREA error also occurs when the wrong system service or the wrong driver code is installed on the computer.
- 0x00000050 error can occur if there are faulty hardware or hardware problems on the computer (RAM is corrupted or there is a damaged sector on the hard disk).
- Antivirus software and corrupted NTFS volumes can also cause this error to occur.
After knowing what might cause PAGE FAULT IN NONPAGED AREA error, do you know how to fix it?
How to Fix PAGE FAULT IN NONPAGED AREA Error?
When PAGE FAULT IN NONPAGED AREA error occurs, the first thing you need to do is to restart your PC and log in, then you may find that everything goes well and this error does not occur again.
However, if the BSOD occurs again and again, then you should try the following methods.
In order to avoid the PAGE FAULT IN NONPAGED AREA error occurs while fixing this problem, you’d better enter safe mode in advance.
Quick Video Guide:
Free Download | Win Free Download | Mac
Solution 1: Check Your Disk For Errors
Sometimes, the Page Fault In Nonpaged Area can occur due to an error on your disk. In this case, the Windows Snap-in tool comes in handy to check the disk for errors. So, follow the below steps to learn how to do so:
Step 1: To commence that, enter «cmd» in the search box, then right-tap the «Command Prompt» and select «Run as administrator».
Step 2: Now, type the command: chkdsk C: /f /r (C is the letter of the disk where you store your OS) and hit Enter to continue.
Step 3: In a while, you can reboot your PC to see whether the error has been resolved.
Solution 2: Run Windows Memory Diagnostic Tool
To fix the Windows stop code page_fault_in_nonpaged_area error, you can also try running the Windows Memory Diagnostic tool. Below are the steps to help you learn how to use the Windows Memory Diagnostic Tool to fix the error:
Step 1: Enter «memory diagnostic» in the search bar and then tap on «Windows Memory Diagnostic» to continue with the process.
Step 2: Click on the «Restart now and check for problems (recommended)».
Step 3: Wait until the PC find the issues. Once the scan is complete, the system will show the detected problem on your screen.
If no problem is detected, then try out the following methods.
Solution 3: Close Fast Startup
Fast Startup reduces Windows startup time. However, this feature might cause numerous blue or black screen problems on your Windows PC. Therefore, turning off the Fast Startup feature can help you fix the startup problems, which include Page Fault In Nonpaged Area. You can try this method only when you can boot up your PC normally or you can boot into safe mode.
Below is the quick guide to boot into Safe Mode:
Step 1: Boot into «WinPE» via two consecutive failed attempts to start Windows/installed media.
Step 2: To boot into safe mode, go to «Troubleshoot»>» Advanced Options»>» Startup Settings».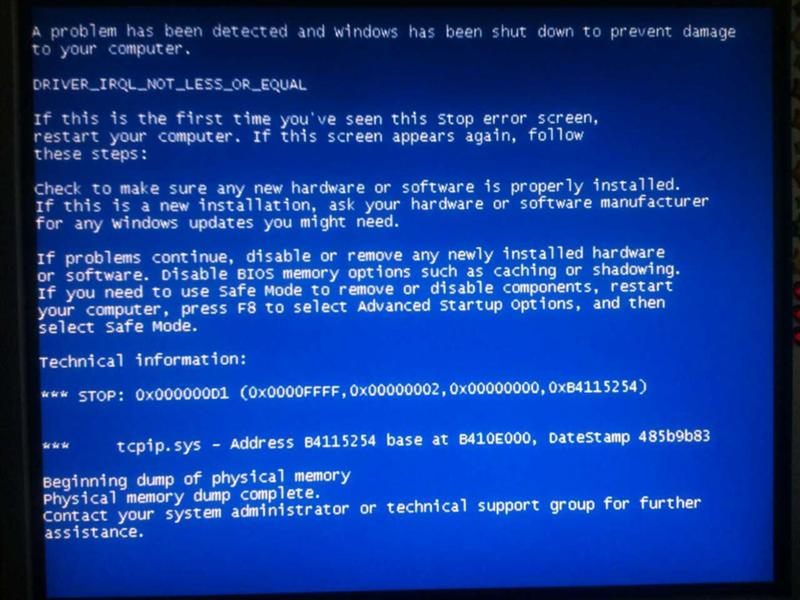 In a while, press the F5 to select the «Enable Safe Mode with Networking» option.
Now, you can turn off the Fast Startup feature by following the below steps:
Step 1: Tap the «Start» button and click the «Settings» icon.
Step 2: Select «System»>» Navigate to Power & Sleep». After then, tap «Additional Power Settings».
Step 3: Click «Choose what the power button does» at the upper left corner.
Step 4: Click «Change settings that are currently unavailable». After then, uncheck «Tap on fast startup» and click the «Save changes» button.
Solution 4: Increase Virtual Memory
To fix the Windows stop code page_fault_in_nonpaged_area error, you can try increasing the virtual memory. Below is how to increase virtual memory:
Step 1: First, you need to launch the setting window of the virtual memory.
- Open «File Explorer».
 Right-tap «This PC» and choose «Properties».
 - Choose «Advanced System Settings». In the «Performance» box Under Advanced Page of System Properties, click «Settings».
- Go to the «Advanced» page in the pop-up «Performance Options» window and click «Change» in the Virtual Memory box.
Step 2: Turn off automatic paging file size management.
- Uncheck «Automatically manage paging file size for all drives».
- Choose partition C and check «No paging file» and then click «Set» to save it.
- Click «Yes».
Step 3: Set an appropriate virtual memory on a non-system partition.
- Choose a non-system partition and then check ‘Custom Size».
- Set the same value in «Initial Size» and «Maximum Size» to avoid the system frequently requesting page files of different sizes.
- Click «Set»>» Ok» to save.
Solution 5: Update Device Drivers
If drivers have compatibility issues, then you could encounter Windows page fault in Nonpaged error. To fix the error, you can try updating device drivers. Of course, this method is applicable when your PC can boot normally or you can boot into Safe Mode.
Below is the quick guide on how to update device drives:
Step 1: To commence the process, press the «Windows + X» keys and choose «Device Manager».
Step 2: Expand the right directory to locate the culprit driver. After then, you need to right-tap the driver and select «Update Driver».
Step 3: Choose «Search automatically for updated driver software» in the pop-up window.
Solution 6: Disable Automatically Manage Paging File Size for All Drives
If you have tried the solution 4, then you already know how to disable automatically manage paging file size for all drives. It could be the case that virtual memory is causing the error on your Windows PC. And disabling the automatically manage paging file size for all drives could help you fix the problem.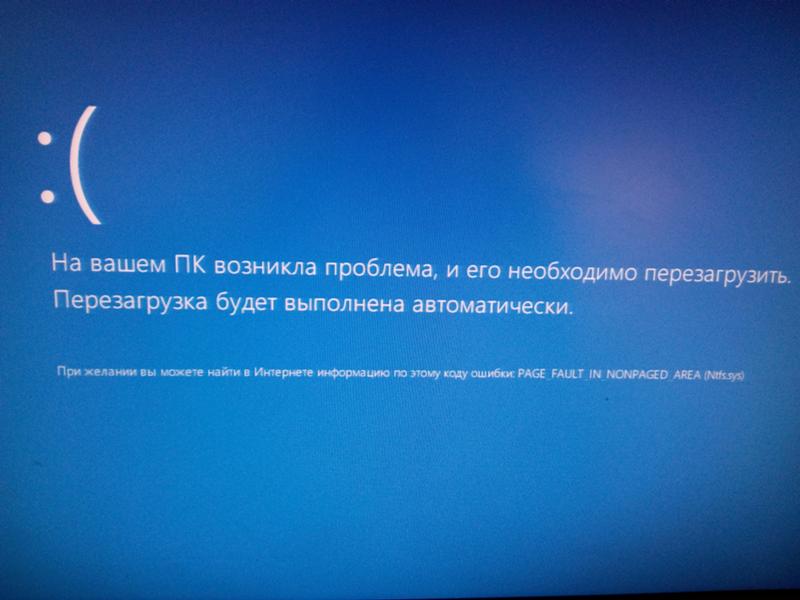 To learn how to do so, follow Step 1 & Step 2 of Solution 4.
Solution 7: Repair System Files
It could be the cause that Windows stop code page_fault_in_nonpaged_area error is due to damaged system files. If yes, then you can use built-in utility tools such as SFC (System File Checker) or DISM (Deployment Image Servicing and Management» to repair system files.
Below is how to repair corrupted system files:
Step 1: Open the command prompt on your computer. To do so, enter «cmd» in the search box, then right-tap the «Command Prompt» and select «Run as administrator».
Step 2: If you can’t, then try boot into WinRE and then launch Command Prompt. After then, type the command: sfc /scannow to run SFC scan.
Step 3: If the SFC scan doesn’t work for you, then try the following the command to use the DISM tool:
- exe /Online /Cleanup-image /Scanhealth
- exe /Online /Cleanup-image /Restorehealth
This will restore system files.
Solution 8: Reset this PC
If none of the above methods help you fix the error, then it’s time to reset your PC.
Step 1: Open the «Settings» page on the computer and then, click «Update & Security».
Step 2: Click «Recovery» and then, click «Get Started».
Step 3: Select whether to «Keep my files» or «Remove Everything» while resetting the PC.
Step 4: Follow the instructions to continue.
Part 3: How to recover unsaved or lost date due to page_fault_in_nonpaged_area error?
Have you ended up losing some important files due to stop code page_fault_in_nonpaged_area on your Windows 10 PC? No worries!! With the help of Recoverit Data Recovery, getting back unsaved or lost data on the computer is easier and quicker. You can use this powerful data recovery software to rescue any type of file — photos, videos, documents, etc.
Free Download | Win Free Download | Mac
As soon as you realize you lost your important data, get Recoverit Data Recovery on your computer and then follow the below steps to recover the lost files in three steps:
Step 1: Select a location
Open Recoverit Data Recovery on the computer and then select a target location that you want to scan for the lost data.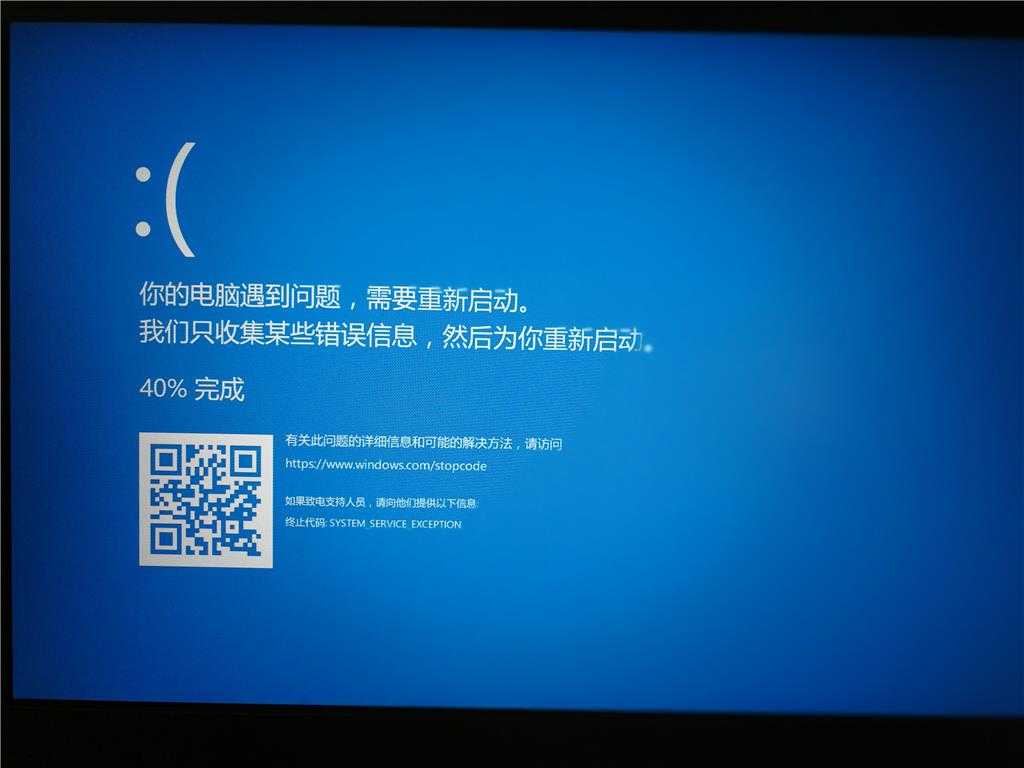 Then, hit the «Start» button to continue.
Step 2: Scan the location
Now, the software will initiate an all-round scan to scan the selected location for the missing, deleted, or unsaved files on the computer.
Step 3: Preview and recover data
After the scan completes, you can preview the recoverable files. Then, select the target files you want to recover and hit on the «Recover» button to get them back. And finally, you just need to select the location where you want to save the recovered data.
The Bottom Line
So, you now know how to fix Windows stop code page_fault_in_nonpaged_area error. As you can see that there are several solutions to help you fix the error, so no need to panic if you encounter the error. Just try the above methods one by one until the error is resolved. Of course, don’t forget to use Recoverit Data Recovery to rescue your lost or unsaved data with ease.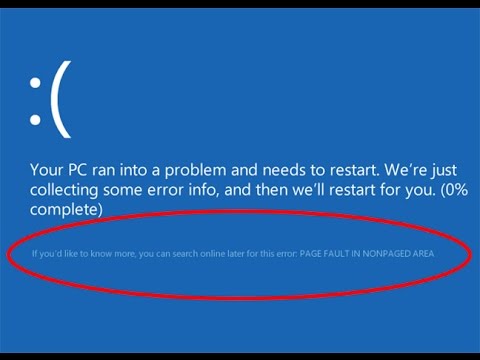
Free Download | Win Free Download | Mac
SOLVED: Windows 10 Page Error in Nonpaged Area Windows 10 Boot Loop (STOP 0x00000050)
Windows 10 BSOD Page Error in Nonpaged Area STOP 0x00000050 occurs when any hardware or software is not properly using PC memory that is normally reserved for operating system. This means that when Windows tries to access memory to perform a function to change something in the operating system, it detects that software or hardware is using that instead, causing a virtual crash. In this post, we discussed more about this BSOD error and 10 working solutions to get rid of it « PAGE_FAULT_IN_NONPAGED_AREA ‘ blue screen
Message content: —
What is a page fault in a nonpaged area?
Error PAGE_FAULT_IN_NONPAGED_AREA means that your computer requested a memory page to continue and that page was not available. As a result, Windows was unable to continue the processes and as a result, your computer will crash and display the blue screen of death.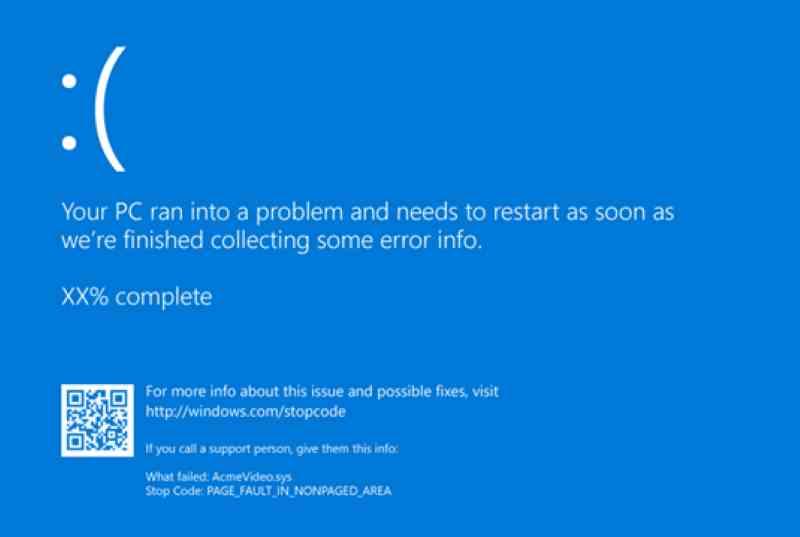
‘ Your computer has encountered a problem and needs to be restarted. We’re just collecting error information and then we’ll restart it. . (100% Completed) ‘
page error in nonpaged area Windows 10 boot loop
According to Microsoft , there are many reasons why this could happen, but most incidents involve updating drivers or installing new hardware that resides in memory normally used for basic OS functions. Antivirus is also notorious for causing these kinds of errors, such as RAM failure, corrupted NTFS volume, and more.
How to fix page error in nonpaged area windows 10
As usual page error in nonpaged area error may appear temporarily and Windows may resolve it automatically after a system restart. But if this problem appears frequently, it will be a big problem and needs to be fixed as soon as possible. If you see a Blue Screen of Death error, don’t worry, we have some tips on how to fix this error.
Check the stability of your computer in Safe Mode
Safe Mode is a built-in troubleshooting feature that disables unnecessary drivers and programs during the boot process. In Windows 10 Safe Mode, a minimal set of system files and device drivers are loaded into the operating system — just enough to load the Windows OS. Safe mode does not start startup programs, add-ons, etc.
For Windows 7, restart Windows, press F8 at startup, and select Safe Boot Mode.
Safe Mode For Windows 10 or Windows 8.1
Because of this blue screen If your system cannot start Read How to boot your computer in safe mode.
If the system starts, press Windows+R when the dialog box opens. Type «msconfig» and press Enter to open the system configuration settings.
On the Boot tab, select (Check) the Secure Boot option and click OK. and restart your computer. This will start your system in safe mode.
Change memory dump setting
Sometimes a memory issue can cause this error message to appear ‘ Your computer has experienced a problem and needs to restart page error in the nonpaged area of the window 10 BSOD error . Let’s change the memory settings to solve this problem.
Change memory dump setting
To change the memory dump setting in System Properties: Press Windows + R to load the Run dialog box. Now type « control sysdm.cpl ” And press Enter. Then go to the Advanced tab and click on Startup and Recovery Settings.
Here, uncheck «Automatic restart» in the «Write debug information» section. Select «Full Memory Dump» from the drop-down menu. And click «Apply» and «OK». A reboot may be required.
Restart your computer and you’re done.
Uninstall any recently installed applications
If the error started to appear immediately after installing an application or installing a new driver. Then there is a possibility that this new program may cause an error. for this you need to uninstall the program and then evaluate your system.
First, make sure you have administrator rights to make changes or remove any application.
To do this, follow the steps below.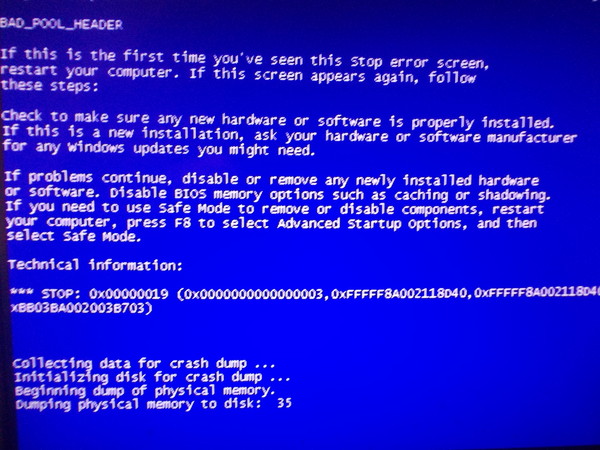 First, open Control Panel All Control Panel Items Programs and Features.
now select the newly installed application and click uninstall.
Restart windows and check. If you are still having a problem with your PC and need to restart Windows 10 blue screen issue, follow the next step.
Make sure your Windows has the latest updates
Make sure your Windows system has the latest service packs and other updates. Necessary patches and service packs are regularly released by Microsoft for their operating systems to fix the bug and other types of issues. These updates and patches are also used to resolve the BSOD problem. Make sure your hardware drivers are up to date: sometimes an outdated or corrupted system driver can generate a blue screen of death error. This error is directly related to the hardware or driver, so updating your system drivers may fix the cause of the STOP error.
To check for the latest updates for your system, type update in the Start menu and select Check for Updates.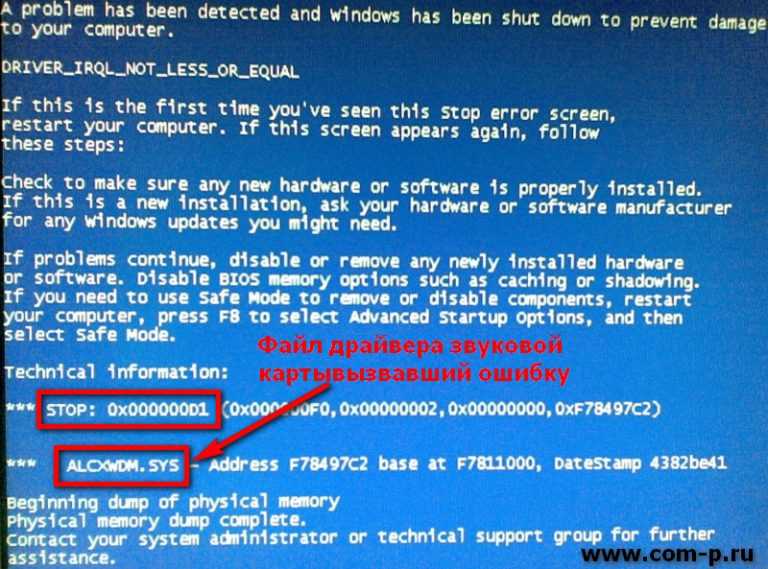 when the windows update screen opens, select «Check for Updates» or if any updates are available, download and install them.
Update/reinstall a corrupted or incompatible driver
The most common cause of many BSOD errors, including a page fault in the nonpaged area of Windows 10, is a corrupted or incompatible driver. An incompatibility is most likely if you recently upgraded your OS to Windows 10. Drivers can also get corrupted for no apparent reason.
To check if the error is caused by a failed drive, run an automatic driver update or manually update the drivers to the latest available versions. Install the latest drivers for any newly installed hardware. If no new hardware has been installed, make sure you have the latest drivers for the devices listed below.
- Video card
- Network card or router (if any)
- Any removable or external drive
To update the driver manually, follow these steps: Click the search box on the Start menu.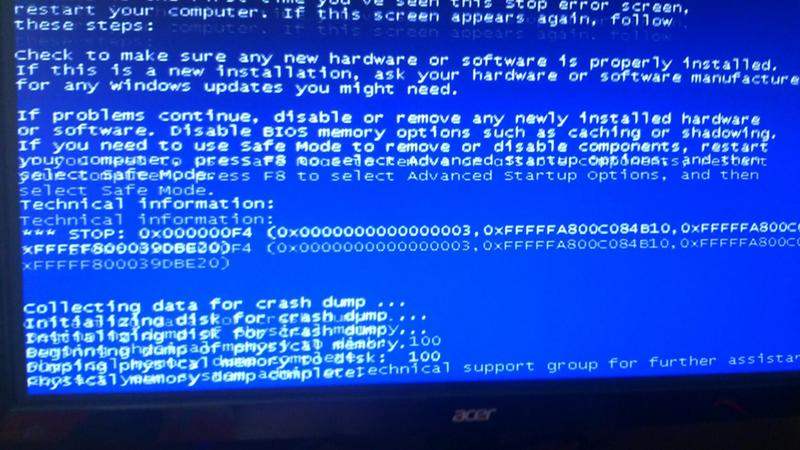 Type in the search box “ Device Manager ” and press the enter key. when «Device Manager» is open here, you will find all active devices. You just need to find the device marked in yellow.
Right-click «Device», select «Update Driver» and follow the instructions to get driver updates. if you don’t find any updates for the driver, you can uninstall it from here. Download the best driver for your specific device from the manufacturer’s website and install. Repeat these steps for all drivers you want to update.
Download the driver from the manufacturer’s website
Using Device Manager to update drivers is easy, but it may not be the best solution. According to users, Device Manager does not always download the latest drivers. Therefore, if you want to install the latest drivers, it is recommended that you download the required drivers manually. To do this, simply visit the hardware manufacturer’s website and download the latest drivers for your device.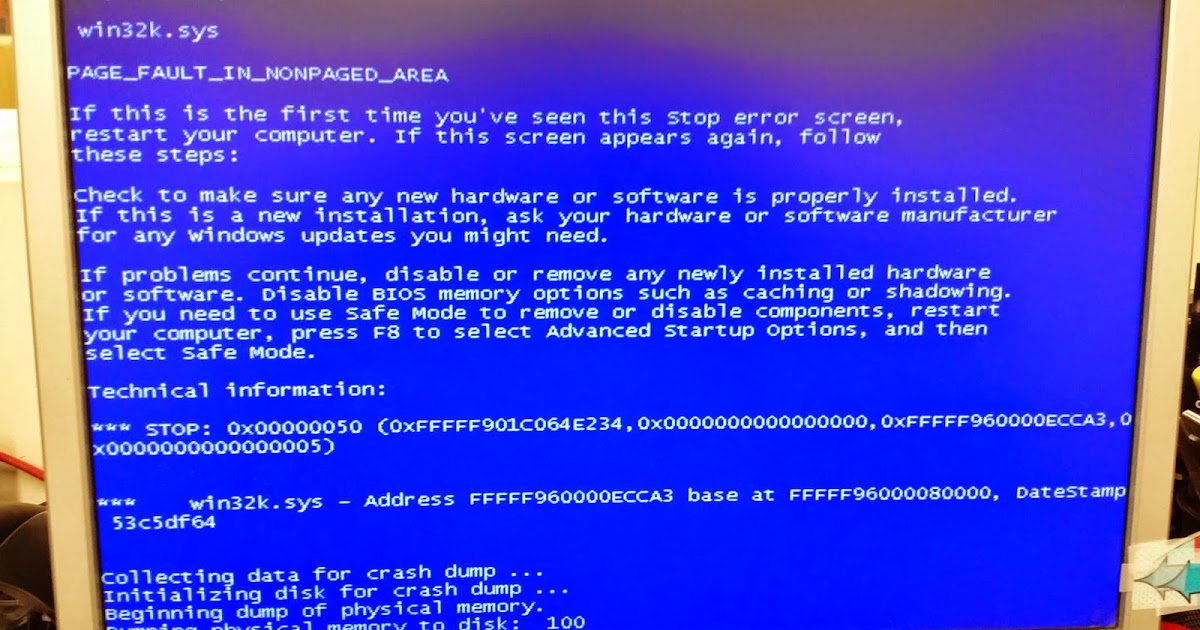 Users have reported issues with the Atheros wireless driver, so update that driver first and then move on to other drivers.
Repair corrupted system files with SFC Utility
After running the DISM command, if this problem persists, don’t worry, Windows has a built-in system file checker tool that we can use to scan the system for potentially corrupted files. This tool will detail and potentially repair any unexpected damage, returning the system to a good working condition.
To run the System File Checker, first open a command prompt. To do this, click Start, type Command Prompt or cmd in the search box, right-click Command Prompt, and select Run as administrator. If you are prompted for an administrator password or confirmation, enter the password or click Allow.
At the command prompt, type the following command, and then press ENTER:
sfc /scannow
sfc /scannow The command will scan all protected system files and replace the corrupted files with the cached copy that is located in the compressed folder in %WinDir %system32dllcache.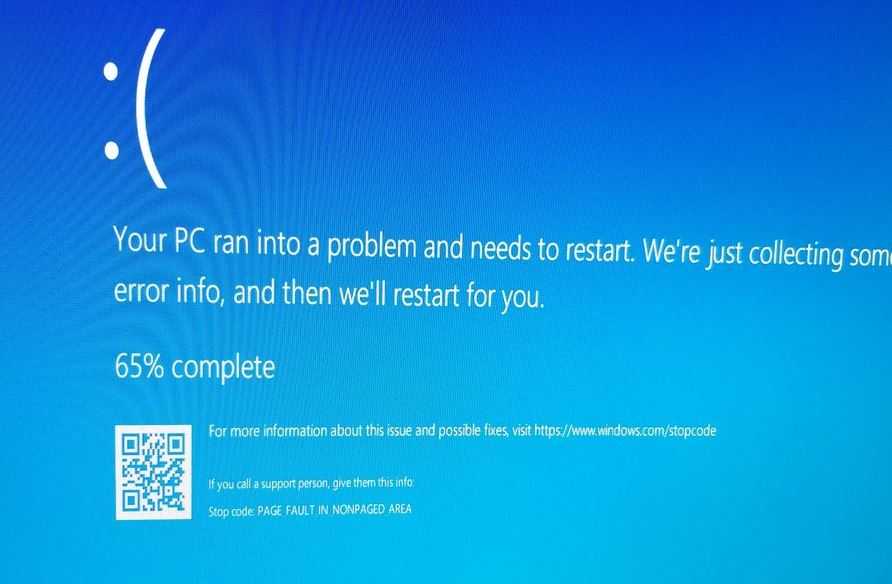
This command may take some time to complete. Do not close the command prompt window until the verification is 100% complete. Recommended: How to repair corrupted or corrupted Windows 10/8.1 9 system files0004
Removing, clearing and reinstalling RAM
Sometimes this error can occur in your RAM due to a power failure. To fix this error, simply remove your computer’s RAM, clear it, and reinsert it after a few seconds. You must ensure that all power cords are unplugged. You also need to remove the battery before attempting to remove the RAM. After that, restart your computer. You must properly check your computer. Hopefully this STOP 0x00000050 error has been fixed.
Use the memory diagnostic tool to fix memory errors
Sometimes corrupted RAM can cause this blue screen problem. So, to determine if this is the case, you need to check your RAM. This can be done by running Memory Diagnostic Tool. Open the Start menu, type «Windows Memory Diagnostic» and select the app of the same name.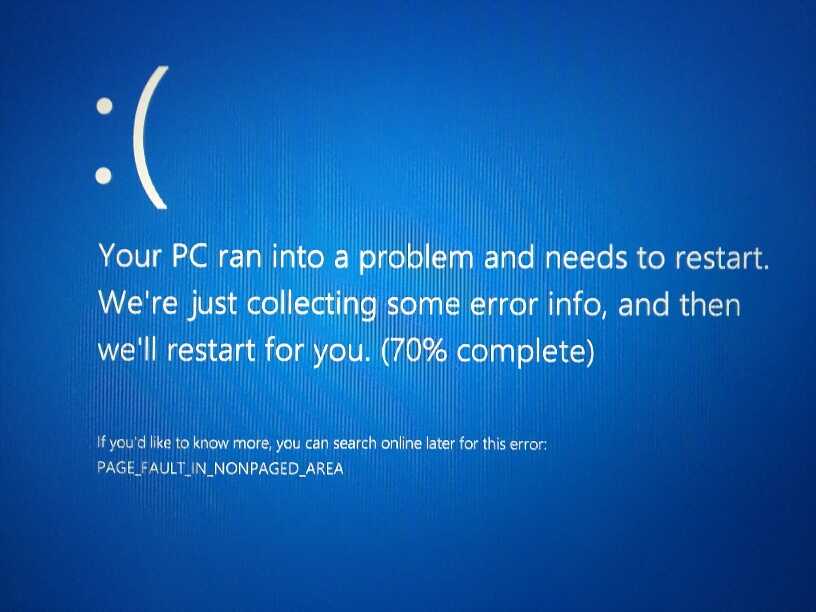 Now select «Restart now» and check for problems.
It will restart your computer and diagnose memory problems. Wait for the program to finish and if any error is found, it will be reported. If so, then it’s time to replace the failed memory module.
Scanning and checking the hard drive for errors
If the problem persists even after trying all of the above methods, the problem may be related to a malfunction of your hard drive, probably caused by bad sectors. To determine if the hard drive is damaged, you need to scan it. Press the keyboard shortcut Win + X and click Command Prompt (Admin). In the command prompt window, type chkdsk c: /f /r command and press the Enter key. Tip: CHKDSK is missing Check Disk, C: is the drive letter you want to check, /F means fix disk errors, and /R means recover information from bad sectors.
When the prompt «Would you like to schedule this volume to be checked the next time the system restarts?» appears.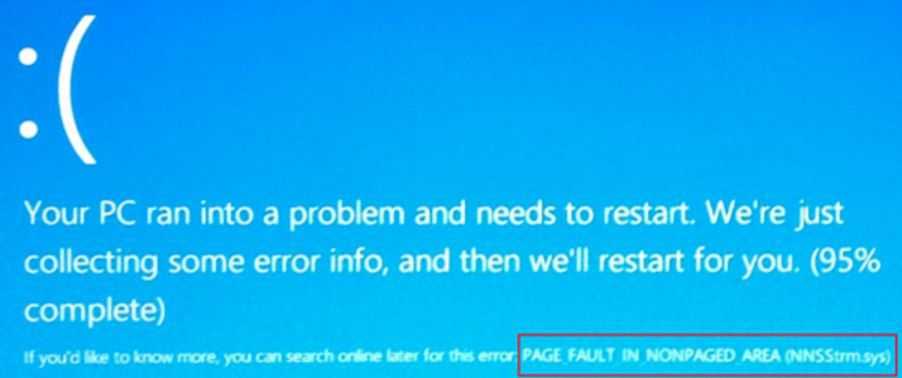 (Not really) «. Answer Yes to this question by pressing the Y key on your keyboard and pressing Enter. Restart your computer.
If you find an error by checking the hard drive and memory, try fixing them. There are many tools available on the Internet to optimize the system. You can use anyone if you trust this program.
Corrupted registry entries
To fix corrupted registry files, you must use a registry cleaner. There are many paid and free versions of the registry cleaner on the Internet. You can download any of them. You just need to click the Registry Cleaner button and this program will automatically find and repair the corrupted Registry.
Perform a System Restore
One of the most useful features of Windows is the restore point. If you have already created a restore point before when your computer was working normally. Then it’s time to use this restore point. Recovery points are very useful in situations like this. This method is only useful if you already have a restore point created in the past. When your computer was running smooth as butter. For those who already have a restore point, read How to perform a system restore in Windows 10, 8.1 and 7
This is one of the useful features that will help you return your computer to the moment when it was working normally. This is why you should always create a restore point on your Windows PC, it helps a lot. These are the most common troubleshooting tips to fix any Windows Blue Screen of Death error. Including page fault in nonpaged area Windows 10 Blue Screen error STOP 0x00000050.
Here are some best solutions to fix page error in nonpaged area of window 10 BSOD error, Windows 10 error page error in nonpaged area permanently. Do you have any questions or suggestions feel free to comment below.
How to fix a nonpaged space page error in Windows
Windows is a good and friendly operating system for most of us. But it has a lot of BSOD (Blue Screen Of Death) errors that can annoy you. Page Fault in Nonpaged Area is one of the most common BSOD errors in Windows.
When this error occurs, it will automatically shut down your computer and turn your screen background blue. Error messages with stop codes will appear on your computer display.
Sometimes you get a «Page Fault in Nonpaged Area» error on your computer, which can be resolved automatically. But if this error appears frequently, then your computer has a serious problem. You need to find out the cause of the problem and then fix it.
Programs for Windows, mobile applications, games — EVERYTHING is FREE, in our closed telegram channel — Subscribe 🙂
According to information from Microsoft, this error occurs when your computer requests a page from RAM or hard drive, but it was not available. Several antivirus or internet security can also cause this error.
Error message: Page Fault in Nonpaged Area / Page_Fault_In_Nonpaged_Area in Windows 7, 8.1, and Windows 10
A few weeks ago, a friend of mine encountered this error on his Windows 7 computer.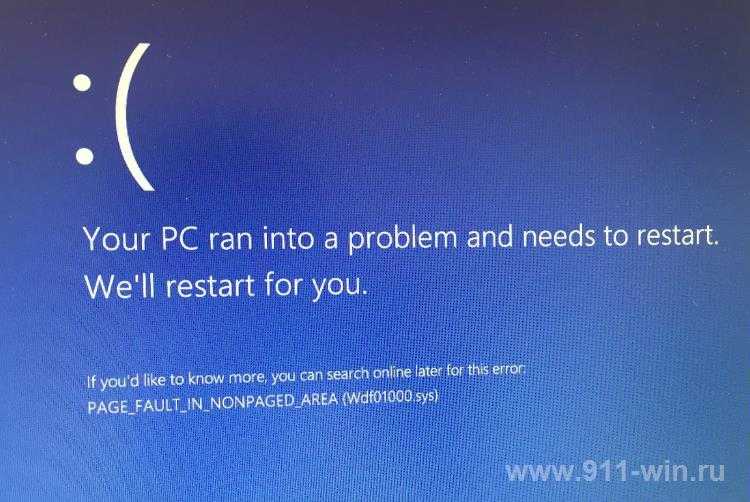 He searched the internet all day looking for a solution that would help him fix this error. He got this error five times on his computer and it happened randomly whether he was playing a game or online.
In helping him determine the cause of this error and fix it, I want to show you some good solutions that can help fix the «Page Fault in Nonpaged Area» error on your computer.
How do I fix a page fault in the nonpaged space area in Windows?
In this article, I will give you some solutions that you could use to fix this error and get rid of the problem.
Clear the Automatically manage paging file size for all drives check box
Sometimes virtual memory can cause this error on your computer. To fix this, you must disable «Virtual Memory» in the System Properties of your Windows OS.
First, right-click the My Computer icon on your desktop and select Properties. If you’re using Windows 8, 8.1, or Windows 10, it might have a different name, such as This PC.
On the left side, select Advanced System Settings.
Select the Advanced tab, and then click the Settings button under Performance.
In the Virtual Memory section, select the Advanced tab and click the Change button.
Uncheck «Automatically manage paging file size for all drives», then select «No paging file» and click OK.
Restart your computer for the changes to take effect.
This solution can help you fix the «Page_Fault_In_Nonpaged_Area» error on your computer. In most cases, this BSOD error will not appear again.
If this method does not resolve the issue and the error persists, continue to the next solution.
Also read: Fix IRQL_NOT_LESS_OR_EQUAL error on Windows.
Resolve a page fault in a nonpaged area using Windows System Restore
There are two ways to return your computer to a good configuration. With this method, your computer will automatically roll back to a previous working point before an error occurs.
To apply this method, restart your computer. Press and hold F8 on your keyboard until the Windows advanced options menu appears. Just select «Last Known Good Configuration» and press Enter ,
Then restart your computer again and press F12 (or maybe F2 or F10 ; try both of these if the F12 key doesn’t work). In the next step, disable «Memory Cache» and then «Save and Exit».
Then, after accessing your computer, press Windows + p and type «cmd.exe» to open the command prompt program. In the command line program window, enter:
CHKDSK C: / F / R
and press Enter ,
Your computer will automatically find any problem on your hard drive and then fix it.
Sometimes you need to restart your computer to process a command. Windows may also request administrative privilege to run the chkdsk command. Please run the command line program as an administrator.
If you can log into Windows, you can go to «Desktop», right click on «My Computer» and select «Properties».
In the next step, select «System Protection» and click «System Restore» to restore Windows. If you don’t know how to do it, visit here to see the detailed steps.
Also read: System_Thread_Exception_Not_Handled bug fixed.
Find and disable the faulty device and its driver
If you have recently installed or updated any driver prior to receiving this error, this may be the cause of this error. A driver is required to run all the hardware on your computer. But if the driver is corrupted or not compatible with the computer, it can cause this error.
To fix this, go to Control Panel and click Device Manager. Then look for any faulty driver there and uninstall it. If you recently installed or updated any driver, you should uninstall it to check if this is the cause or not.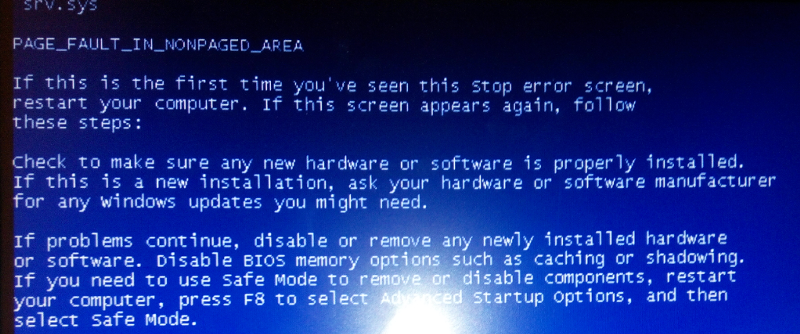
If your computer encounters the «Page_Fault_In_Nonpaged_Area» error due to a faulty driver, please go to the manufacturer’s official website, find the latest driver, and then download and install on your computer. If the problem occurs again after installing a new driver, contact the manufacturer and ask for a solution to solve this problem.
Also read: Fixed DPC_Watchdog_Violation error on Windows.
Repairing Corrupted Windows System Files
If any Windows system file is corrupted, it can lead to many errors, including several BSOD errors. To fix this problem, you must repair these corrupted system files in Windows.
First, open a command prompt with administrator rights (run as administrator). Then enter:
SFC / SCANNOW
and press Enter , Windows will automatically scan, verify and fix any corrupted files on your Windows computer.
Sometimes you will need to boot into «Safe Mode» to use the SFC command.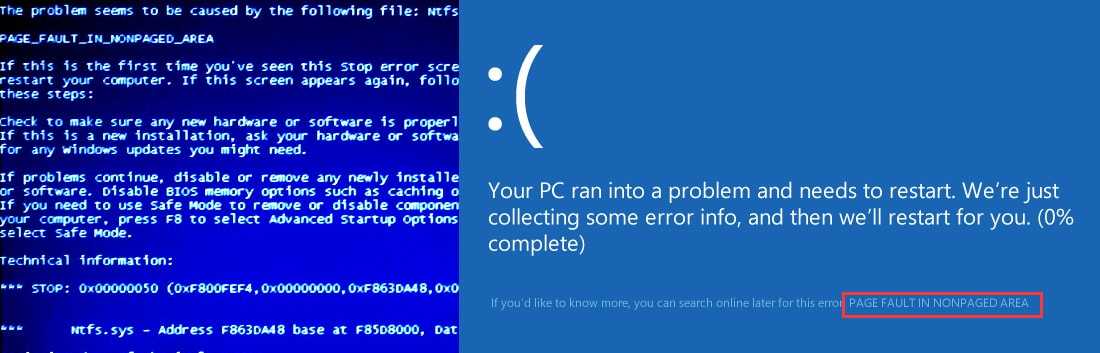 Just restart your computer, press and hold the F8 key and then select «Safe Mode with Command Prompt», type:
SFC /SCANNOW
and press Log in ,
Tip: According to several user reports, removing antivirus and Internet security programs or removing and reinserting RAM also helps fix the Page Fault in Nonpaged Area (or also known as Page_Fault_In_Nonpaged_Area) error. I would suggest that you try these methods if none of the above methods help you solve the problem.
If you have any questions regarding this article or need more help with this error, feel free to ask by leaving your comment below.
2.7 / 5 (17 votes)
Programs for Windows, mobile applications, games — EVERYTHING is FREE, in our closed telegram channel — Subscribe 🙂
worked on
client PC (client PC) , and I had to reboot it due to new application install (application install) . However, after rebooting, the computer would blue screen and display error PAGE_FAULT_IN_NONPAGED_AREA (PAGE_FAULT_IN_NONPAGED_AREA error) .
At first I thought it had something to do with the application I just installed, so I decided to restart the computer in Safe Mode (Safe Mode) and uninstall the application. It seems to have worked because BSOD disappeared (BSOD) , but only for a short time.
PAGE_FAULT_IN_NONPAGED_AREA
STOP: 0x00000050 (0xCD3DD628, 0x00000001, 0x804EFC9A, 0x00000000) (STOP: 0x00000050 (0xCD3DD628, 0x00000001, 0x804EFC9A, 0x00000000))
After a few more restarts, the message reappeared! After doing some research, I found that this error message (error message) basically means that Windows is trying to find a piece of data in memory and it cannot be found.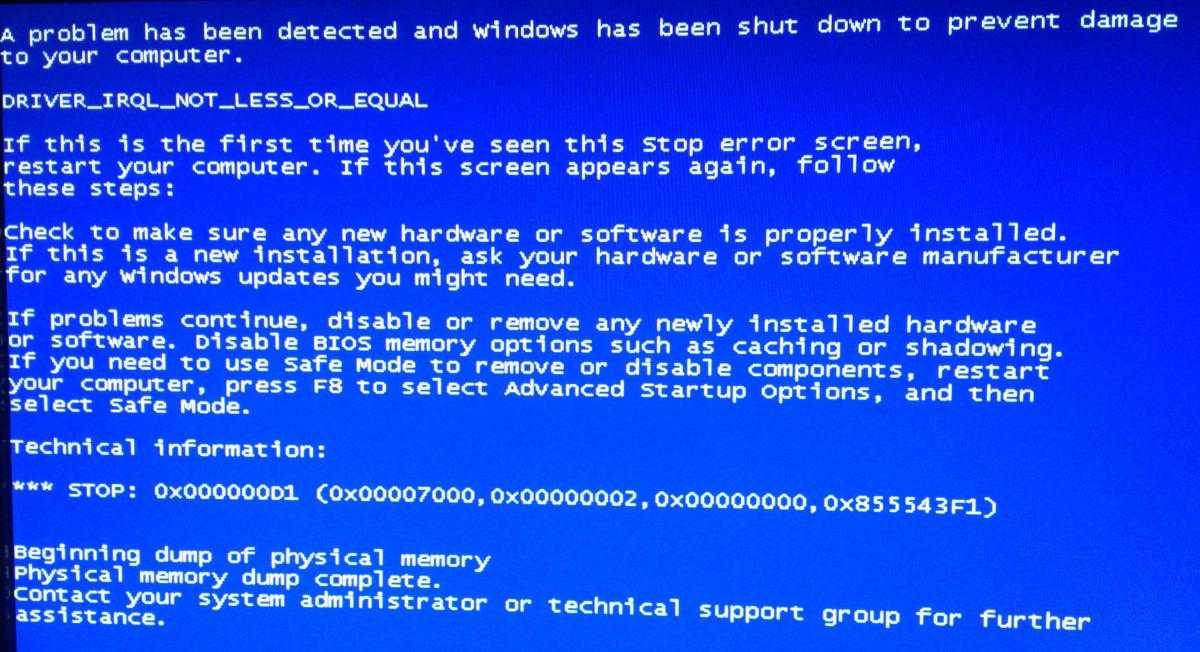
According to Microsoft , this error can be caused by Faulty hardware (faulty hardware) ( RAM (RAM) , hard drive), antivirus software, damaged NTFS volume (NTFS volume) or bad drivers. In this article, I will walk you through various solutions, some easier than others.
Please note that bad memory ( RAM (RAM) ) is the main cause of this error, but I don’t mention (t mention) this is much further just because it may require opening your computer and adding/removing RAM (RAM) . I guess most people would like to avoid this, so I listed the simpler solutions first for in case one (case one) of them worked.
Method 1 — Setting up the swap file
You can try a simple swap file trick first, which fixes the problem for some people. If the problem is not related to the hardware, then it is page file solution (page file solution) might just work.
First open control panel (Control Panel) and click System (System) . You can also right-click « Computer (Computer) » or «This PC (This PC) » and select «Properties (Properties) «.
Now click on the link « Advanced System Settings (Advanced System Settings) on the left.
In section «Performance (Performance) » press the button « Settings (Settings) «.
Click the Advanced (Advanced) tab, and then click the Change (Change) button under the Virtual Memory heading. (Virtual Memory)
Finally, we have achieved what we had to achieve.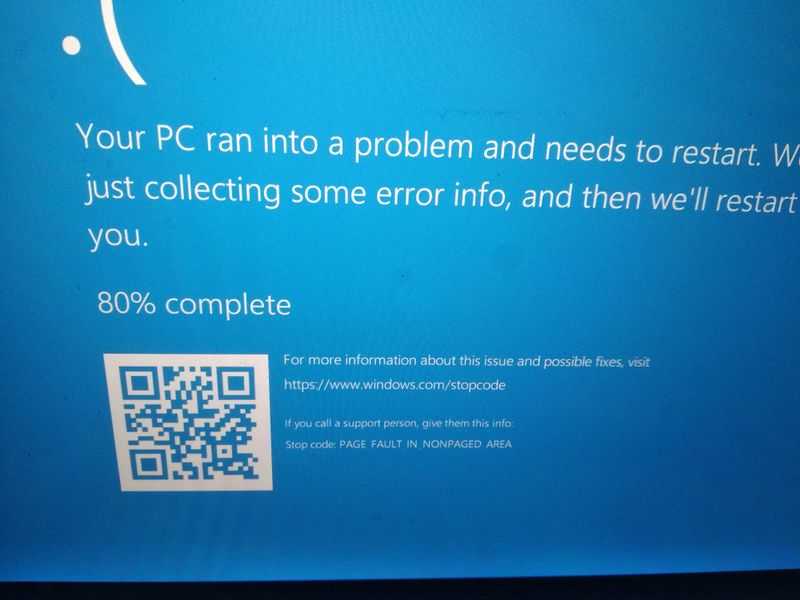 Uncheck Automatically manage paging file size for all drives and select No paging file (No paging file) .
Click OK (Click OK) several times to exit all dialog boxes, and then restart your computer. After you return, follow exactly the steps shown above again, but this times select Size, (time select) system managed, ( System managed size) and check the box Automatically manage paging file size for all drives ( Automatically manage paging file size for all drives) .
As I said before, this works for some people but not for others, so your mileage will vary. If you are still experiencing blue screens, keep reading.
Method 2 — check disk
This error can also occur if your hard drive is failing or has disk errors. One quick way to check your hard drive is to run the chkdsk command in Windows.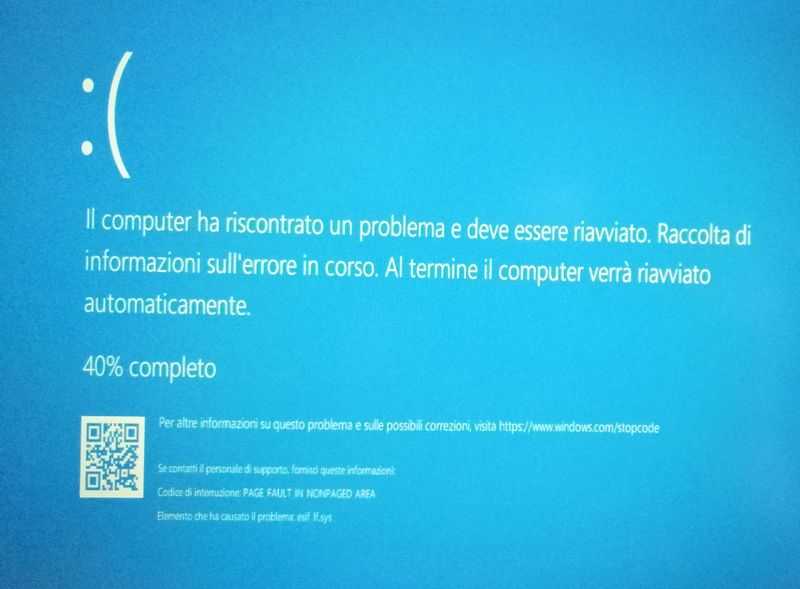
To do this, press Start and (Start and type) enter cmd . Right-click the top result and select Run as administrator (Run as Administrator) .
At the command prompt, enter the following command:
chkdsk /f
If you receive a message that the disk is locked and you want to schedule chkdsk to run the next time you restart, enter Y to confirm. Restart your computer and allow chkdsk to run, which can take a long time in Windows 7 and earlier. The process is much faster in Windows 8 and Windows 10 .
Method 3 — Bad driver
If you recently updated a driver for the hardware on your computer, it could be a faulty driver (faulty driver) causing the blue screen problem. Drivers are required for Windows , but sometimes the latest drivers can cause more problems than they fix.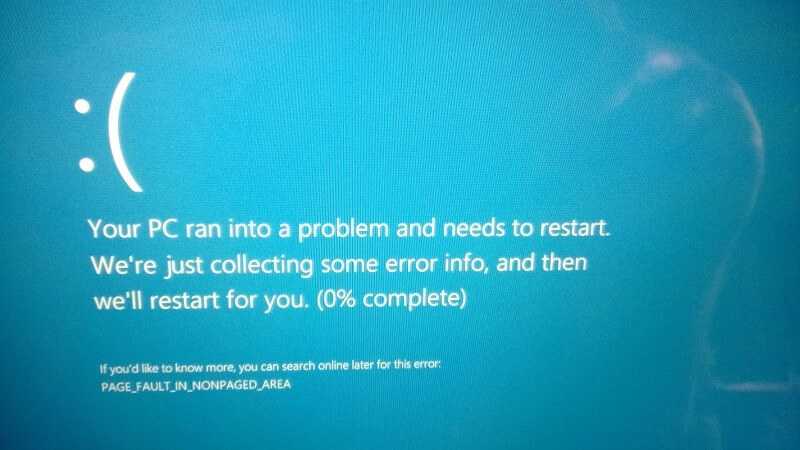
If you are using a third party to automatically update your PC drivers, it is probably a good idea to set up your software so that you can preview each driver that will be updated in advance.
In any case, you can try to solve this problem by clicking Start and typing (Start and typing) Device Manager (Device Manager) . Right-click on the device you updated the driver for and select Roll Back Driver (Roll Back Driver) . You can also select « Properties (Properties) » and then go to the tab « Driver» and click the button « (Driver) Roll Back Driver» (Roll Back Driver) .
If the button is disabled or you don’t see the option when you right-click on a device, this means that the current driver is the only driver ever installed for that device.
The last thing you can try is to click the « Uninstall (Uninstall) » button and restart your computer. Windows will automatically try to install the driver for the hardware on reboot Windows . If that doesn’t work, try the next method.
Method 4 — Last Known Good Configuration
In some cases, the problem is not only with the driver and requires the use of the « Last Known Good Configuration (Last Known Good Configuration) » feature in Windows.
This basically returns the old version of the whole Windows registry (Windows registry) which worked. Windows 7 and earlier, you just need to press the key F8 (F8 key) to open the Advanced Options screen (Advanced Options) at boot.
In Windows 8 and Windows 10 see my post on how to load the System Recovery Options screen because (System Recovery Options) the F8 key (F8 key) no longer works in these two operating systems.
In addition to trying «Last known (Known) » you should also try System Restore (System Restore) if «Last known (Known didn) » did not work. Read my previous post on how to perform system restore (system restore) .
Method 5 — Check RAM
As mentioned above, RAM (RAM) is usually the main culprit for this error. This usually means that RAM (RAM) has failed. Most computers have multiple (RAM) RAM chips installed, and sometimes you can fix the problem simply by removing the faulty chip and leaving the rest.
However, before you do that, read my post on how to check for bad memory on your computer. If you think the problem is memory related, visit the web — website (s website) of your computer manufacturer (computer manufacturer) and download the guide to update RAM (RAM) on your computer.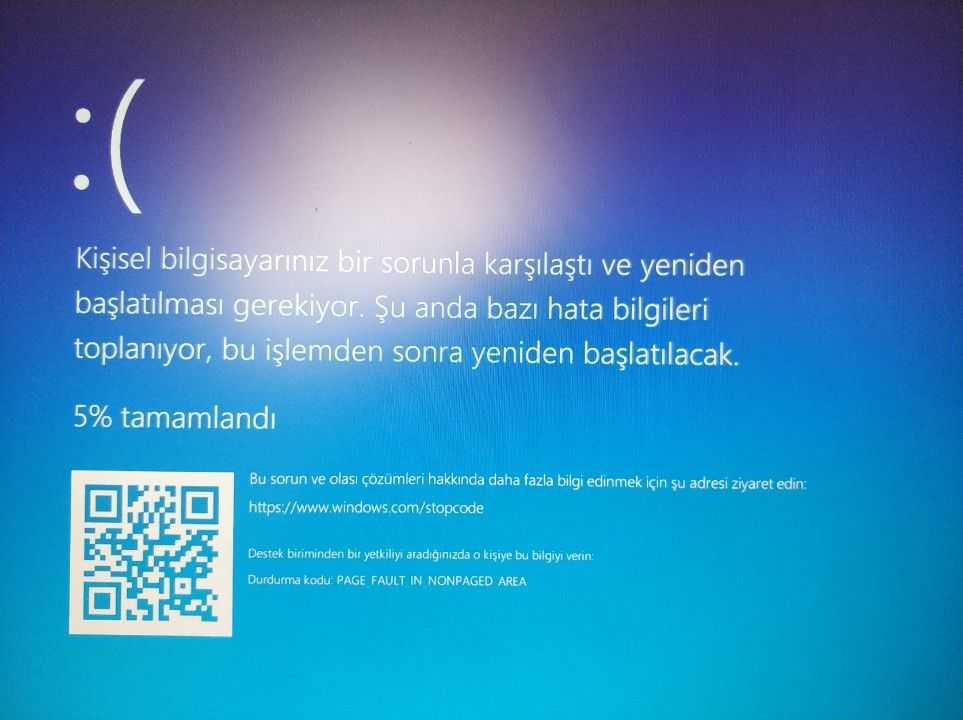
The manual usually tells you how to open the computer and where to find RAM (RAM) . If you have several (RAM chip) RAM chips, remove one of them and turn on the computer. If blue screen (blue screen) is gone, so you got a bad one. If not, switch and try again.
If you have only one RAM chip (RAM chip) , you need to purchase another RAM chip, (RAM chip) as you will not be able to start the computer without at least one RAM chips (RAM chip) .
Method 6 — Antivirus software
In some rare cases, your antivirus software may cause blue screen errors. I recommend completely uninstalling your antivirus program and then restarting your computer.
The chance of any software causing this error is pretty low, but it’s worth a try at this point, especially if you’re using an antivirus product from a lesser-known company.
Conclusion
If none of these methods fixed your problem, you may have a more serious problem with your computer. At this point, it’s probably a good idea to take your machine to a professional to have other hardware checked, such as the motherboard, processor (CPU) etc. If you have any questions feel free to comment. Enjoy!
Related posts
-
Fix Disney Plus Error Code 83
-
Fix Hulu Error Code RUNUNK13
-
Fix Disney+ Error Code 73
-
Fix Netflix Error Code F7701-1003
-
How to Fix Netflix Error Code NW-2-5
-
How to Fix Twitch Error 2000 in Google Chrome
-
Fix blank screen after changing computer display settings
-
How to repair and fix Winsock error in Windows
-
Fix «\computer is unavailable. You may not have permission to use this network resource.
 » How to enable Caps Lock on a Chromebook0749
 -
How to fix that the Microsoft Windows Search Indexer has stopped working and has been closed
-
How to fix a USB device not recognized by Windows
-
How to Detect Computer & Flat Email Monitoring or Spying Software
-
Panel9 Display Technology Demystified: TN, IPS, VA, OLED and more
-
LinkedIn’s «Open for Work» Feature: Should You Use It?
-
How to fix no sound on YouTube
-
How to fix Discord RTC Connecting Error
-
How to get Rid Yahoo Search in Chrome
How to fix «Page error in non-pageable area»
worked on the client recently PC and I had to restart it due to the installation of a new application. However, when restarting, the computer is displayed in blue and throws a PAGE_FAULT_IN_NONPAGED_AREA error.
At first I thought it had something to do with the application I just installed, so I decided to restart my computer in safe mode and uninstall the application. It seemed to work because the BSOD was gone, but only for a short time.
page_fault_in_nonpage_area
Stop: 0x00000050 (0xcd3dd628, 0x00000001, 0x804EFC9A, 0x000000)
000
9000 9000 9000 9000 9000 9000 9000 9000 9000 9000 9000 9000 9000. After doing some research, I found that this error message basically means that Windows is trying to find a piece of data in memory and it can’t be found.
Windows programs, mobile apps, games — EVERYTHING is FREE, in our closed telegram channel — Subscribe 🙂 bad drivers. In this article, I will walk you through various solutions, some easier than others.
Please note that bad memory (RAM) is the main cause of this error, but I won’t mention it much further just because it may require you to open your computer and add/remove memory chips. I guess most people would like to avoid this, so I listed the easier solutions first in case one of them worked.
Method 1 — Set up a swap file
First, you can try a simple swap file trick that solves the problem for some people. If the problem is not hardware related, then this swap file solution might just work.
First, open control panel and click on system . You can also right click on computer or This PC and select properties ,
Now click on the Advanced System Settings link on the left side.
Under view , click on settings button.
Click on the Advanced tab, and then click on the + Edit button under the Virtual Memory heading.
Finally, we have reached what we need. Uncheck Automatically manage paging file size for all drives box, and then select No paging file ,
Click OK a few times to exit all dialog boxes, and then restart your computer. Once back, follow the exact steps shown above, but this time select Managed system size and check Automatically manage paging file size for all drives box.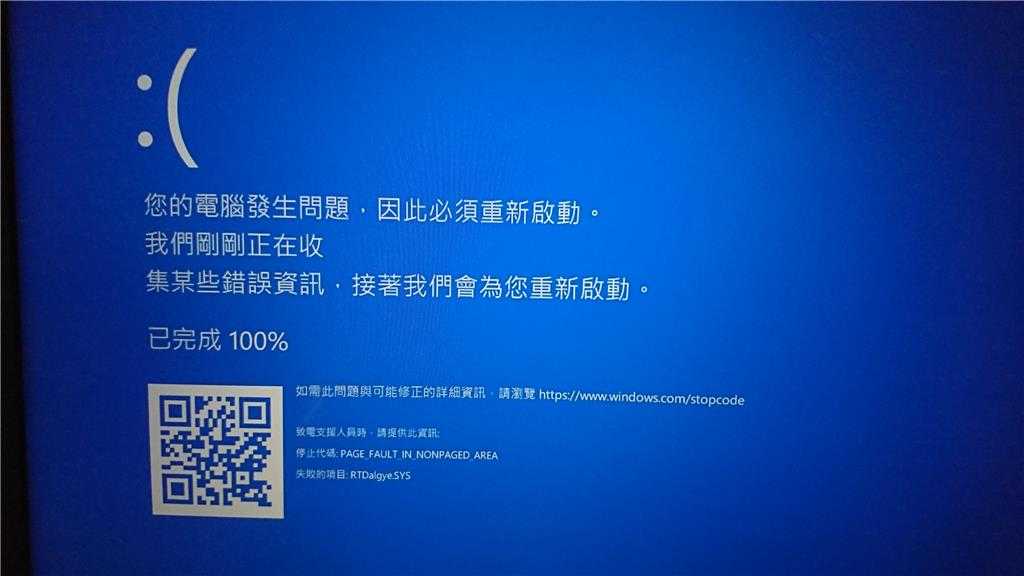
As I said earlier, this works for some people but not for others, so your mileage will vary. If you are still getting blue screens, keep reading.
Method 2 — Check Disk
This error can also occur if your hard drive is failing or has disk errors. One quick way to check your hard drive is to run the CHKDSK command in Windows.
To do this, click Start and type CMD , Right click on the top result and select Run as administrator ,
At the command prompt, type the following command:
chkdsk /f
If you get a message that the drive is locked and if you want to schedule a chkdsk on the next reboot, enter Y yes. Go ahead and restart your computer and allow chkdsk to run, which can take a long time on Windows 7 and earlier. The process is much faster in Windows 8 and Windows 10.
Method 3 — Bad Driver
If you recently updated a driver for some hardware on your computer, it could be a faulty driver causing the blue screen issue.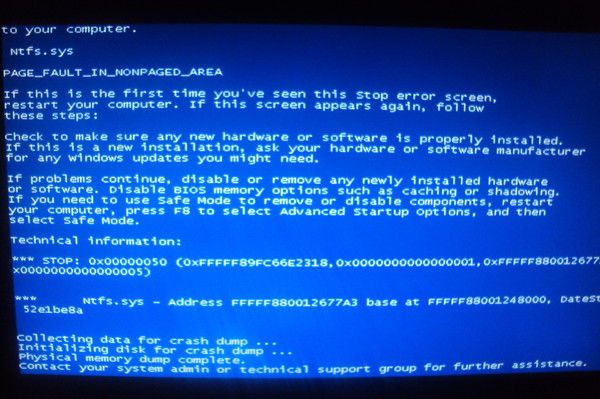 Drivers are essential for Windows, but sometimes the latest drivers can cause more problems than they fix.
If you are using third-party software to automatically update your PC drivers, you may want to set the software so that you can preview each driver that will be updated.
Anyway, you can try to solve this problem by clicking Start and typing Device Manager . Right click on the device you updated the driver for and select Roll Back Driver . You can also select Properties and then go to Driver tab and click Roll Back Driver button.
If the button is disabled or you don’t see the option when you right-click on a device, this means that the current driver is the only driver ever installed for that device.
The last thing you can try is to click Remove and restart your computer. Windows will automatically try to install the driver for the hardware when you restart Windows. If that didn’t work, try the next method.
Method 4 — Last Known Configuration
In some cases, the problem is more than just a driver and will require the use of the Last Known Good Configuration feature in Windows.
This basically reverts the old version of the entire Windows Registry that was working. In Windows 7 and earlier, just press the F8 key to bring up the Advanced Settings screen at startup.
On Windows 8 and Windows 10 see my post on how to download System Recovery Settings screen because the F8 key no longer works on these two operating systems.
In addition to trying the last known one, you should also try to restore the system if the last known one did not work. Check out my previous post on how to perform a system restore.
Method 5 — Check RAM
As mentioned above, RAM is usually the main culprit for this error. This usually means that the RAM has failed.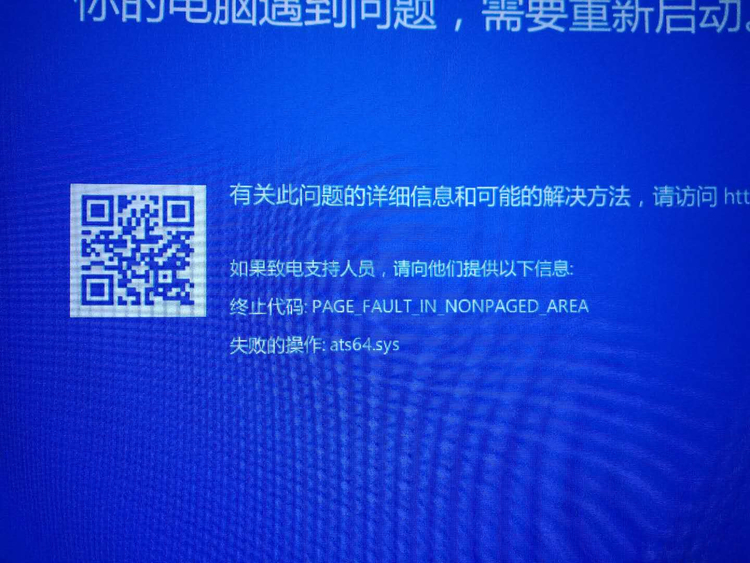 Most computers will have multiple RAM chips installed and you can fix the problem simply by removing the faulty chip and leaving the rest.
Before doing this, please read my post on how to check for bad memory on your PC. If you think there is a memory issue, visit your computer manufacturer’s website and download a guide to upgrade the RAM on your computer.
The manual usually tells you how to open your computer and where to find RAM. If you have more than one RAM chip, remove one of them and turn on the computer. If the blue screen disappears, then you took out a bad one. If not, switch and try again.
If you only have one RAM chip, you will need to purchase another RAM chip because you cannot start your computer without at least one RAM chip.
Method 6 — Antivirus software
In some rare cases, your antivirus software may cause blue screen errors. I recommend completely uninstalling your antivirus program and restarting your computer.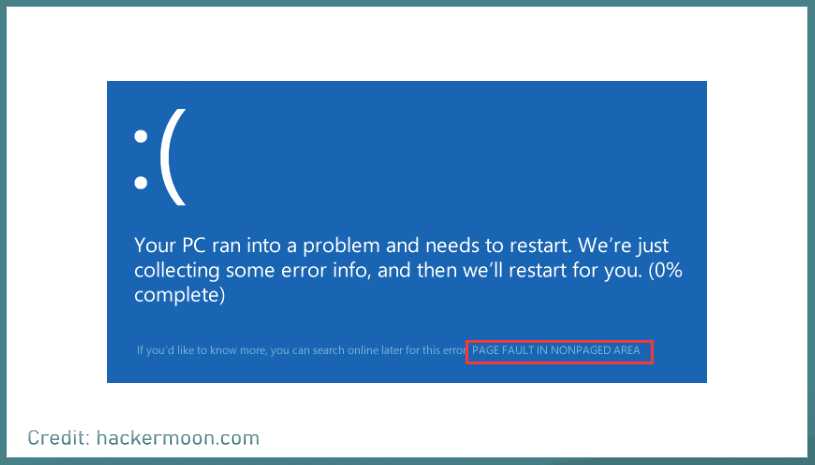
It’s very unlikely that any software will cause this error, but it’s worth a try at this point, especially if you’re using an antivirus product from a lesser-known company.
Output
If none of these methods fixed your problem, you may have a more serious problem with your computer. At this point, it’s probably a good idea to take your machine to a professional to have other hardware checked, such as the motherboard, processor, etc. If you have any questions, feel free to comment. Enjoy!
Programs for Windows, mobile applications, games — EVERYTHING is FREE, in our closed telegram channel — Subscribe 🙂
8 Powerful Methods to Fix Page Fault Nonpaged Area Error
Summary :
Have you ever encountered a PAGE FAULT IN NONPAGED AREA error? Do you know why this happens and how to resolve the PAGE ERROR IN THE UNINFECTED AREA? Read this article, you will be able to find out the causes of the problem and then solve it.
Quick Navigation:
PAGE FAULT IN NONPAGED AREA is also called PAGE_FAULT_IN_NONPAGED_AREA error and has error code 0x00000050 which can be called error checking 0x50. This will cause a BSOD, which is quite annoying.
Unoccupied area page fault causes
What is UNINFECTED ZONE? As a memory area, NONPAGED AREA contains data that is very important for the operation of the system. Data is permanently stored in RAM because the NONLOAD AREA always needs data, and there is no need to exchange data between RAM and the page file.
Tip: If you lose important data due to PAGE FAULT IN NONPAGED AREA error, you can use the MiniTool software to recover the lost data.
PAGE ERROR IN NON-INFECTED AREA is one of the blue screen of death errors, and the occurrence of this error can be caused by several reasons. Below I list some of the reasons.
- The nonpaged area contains critical data for system operation. This error occurs when Windows cannot find the data that should be stored in the nonpaged area.
- The PAGE_FAULT_IN_NONPAGED_AREA error also occurs when an incorrect system service or incorrect driver code is installed on the computer.
- Error 0x00000050 can occur if there is faulty hardware or hardware problems on the computer (damaged RAM or bad sector on the hard drive).
- Antivirus software and corrupted NTFS volumes can also cause this error.
Knowing what can cause the PAGE FAULT IN NONPAGED AREA error, do you know how to fix it?
How to fix PAGE FAULT IN NONPAGED AREA error?
When a PAGE FAULT IN NONPAGED AREA error occurs, the first thing you need to do is restart your computer and log in, then you may find that everything is going well and this error does not occur anymore.
However, if the BSOD occurs again and again, you should try the following methods.
To avoid the PAGE FAULT IN NONPAGED AREA error when troubleshooting this problem, you’d better enter Safe Mode beforehand.
Method 1: check the RAM
The reason for the PAGE FAULT IN NONPAGED AREA error on the computer may be that the RAM chip is not connected properly, or the slot is dusty, or the RAM card is damaged, so I suggest you check the RAM to see can this error be resolved.
- Shut down the computer completely and remove the side panel.
- Remove the battery and disconnect all power cords.
- Remove the RAM chip and check for dust. If so, remove the dust. If not, replace it with new RAM.
- Reconnect the RAM card and restart the computer to see if the PAGE FAULT IN NONPAGED AREA error still appears on the computer.
If your computer has multiple RAM modules, you need to find out which one is not working. If you have checked your computer, but the error still occurs, you can try the next method.
Method 2: Disable antivirus applications
Antivirus software can also cause PAGE FAULT IN NONPAGED AREA Windows 10 error on your computer. If you have recently installed antivirus software, you need to disable Windows Defender or third party antivirus software in order to resolve this error.
Here’s a way to disable Windows Defender.
open Settings > click Updates and Security > click Windows Security > click Virus and threat protection > click Manage settings under V irus and threat protection settings > disable Real-time protection .
However, if disabling antivirus software does not work, you should try the next method.
Method 3: Update device drivers
PAGE FAULT IN NONPAGED AREA is highly likely to occur if the driver is outdated, or the driver on the computer is incompatible with the operating system, or the driver may be corrupted. So, to fix this problem, you can either update the driver or uninstall the device.
Here’s how to update a driver or remove a device.
Step 1. Open Explorer and right click This PC continue.
Step 2: Select Manage to continue.
Step 3: Select Device Manager under System Tools option to continue.
Step 4. Right click the disk drive in Disk drive then select Update driver or Remove device .
After you have followed these instructions above, restart your computer to see if the error is resolved. If this still happens, try the next method.
Method 4: Disable automatic paging file size management for all drives
Sometimes virtual memory can cause problems for your computer, so you can disable virtual memory in the system properties of your operating system.
Now I will tell you how to turn off automatic swap file size management for all drives.
Step 1. Open Explorer and right click This PC , then click Properties to continue.
Step 2: Click Advanced System Settings in the left menu.
Step 3: press Settings… under Performance section about Advanced tab.
Step 4: press Edit… make changes to Advanced tab.
Step 5: uncheck Automatically manage paging file size for all drives first, then click Ok to finish.
Note: After making this change, you need to restart your computer.
After restarting your computer, you can check if the PAGE FAULT IN NONPAGED AREA error persists. If the error occurs again, try the next method to fix it.
Method 5: Run the Windows Memory Diagnostic Tool
To fix the PAGE FAULT IN NONPAGED AREA error, you can try running the Windows Memory Diagnostic Tool. Here is a way to run the Windows Memory Diagnostic Tool.
Step 1: Enter Memory Diagnostic in the search box and click Windows Memory Diagnostic to continue.
Step 2: Click Reboot now and check for problems (recommended) .
Note: Please note to save your tasks and close all windows before rebooting.
Then you just have to wait for the computer to detect problems for a certain period of time. After the search is completed, the computer will display the detected problem on the screen.
If no problem is found, try the next method.
Method 6: Check the disk
Sometimes a PAGE FAULT IN NONPAGED AREA error occurs due to an error on the disk, so you can use the Windows Snap-in tool to check and fix errors on the disk.
Now I will tell you how to do it.
Step 1: Type cmd in the search box next to Cortana, then right-click on the best match to select Run as administrator to continue.
Step 2: Press Enter after typing chkdsk C: / f / r . ( C is the letter of the drive where you store the operating system.)
Note: If there is a message that Chkdsk cannot run because the volume is being used by another process. Do you want to schedule this volume to be checked the next time the system restarts, then type and on the keyboard.
You then simply restart your computer to see if the PAGE FAULT IN NONPAGED AREA error is fixed.
Method 7: Run the Hardware Troubleshooter
Hardware errors can also cause a PAGE FAULT IN NONPAGED AREA error, so you might want to try running the troubleshooter to see if there is a problem with your hardware.
Here’s a way to run the Hardware Troubleshooter.
Step 1: press Settings from Start menu to continue.
Step 2: Click Update & Security on Settings page to continue.
Step 3: Click Troubleshoot and select Hardware and Devices in the right to continue.
Step 4: Click Run the troubleshooter to continue.
Step 5: Now just wait for the computer to detect problems. An error will be displayed if there is after the scanning process is completed. Then fix the problem.
However, if there is no problem on the display, then there is no problem with the hardware, then you may need to try the next method.
Method 8: Restart this computer
If all the methods above fail to fix the PAGE FAULT IN NONPAGED AREA error, you’d better restart your computer. Now I will tell you how to run Rest this PC.
Step 1: Click Update & Security on Settings page to continue.
Step 2: Click Restore and click Start on the right to continue.
Step 3. Choose whether Keep my files or Delete everything when you restart your PC.
Step 4: Follow the wizard to continue.
You can also choose to reinstall your operating system.
Helpful Suggestion
Since there are many problems while using the computer, you’d better backup your computer when you solve the problem or when the computer becomes normal. But how can you back up your data quickly and safely? Highly recommend trying MiniTool ShadowMaker — a piece of professional backup software.
Not only can you back up your operating system, disk and partition, files and folders, but you can also restore them when you need to use them. In addition, you can use it to sync files and folders to avoid data loss. Also, you can use Disk Clone feature to make a bootable external hard drive, and you can also use this feature to clone a dynamic disk, but only for a simple volume. you can click Media Creation Wizard under tools page to create bootable media, too.
Even better, you can use it for free for 30 days, so just download it and try it out.
Now I will show you how to use MiniTool ShadowMaker to back up your data step by step.
Step 1 Run MiniTool ShadowMaker first, then select Local or Remote to get the main interface by pressing Connect .
Note: Computers must be on the same LAN level and you will also need the other computer’s IP address if you want to control a remote computer.
Step 2: Click SET BACKUP on Main page if you have not performed backup tasks with this software, or go to Backup page directly. MiniTool ShadowMaker backs up the operating system and selects Default destination . But if you want to change the source and destination, just click Source and Destination .
Under Backup page which is very useful for you.
- Schedule: Automatic backup set is here to avoid data loss due to forgetting to backup when you use your computer.
- Schema: Control the space taken up by backup files by deleting the backup image file versions specified here.
- Parameters: Set some advanced options here, such as setting the encryption mode, shutting down after a successful backup, adding comments to the backup data, etc.
Step 3. After confirming the backup source and destination, click Backup now .
Tip: You can also click Backup Later , but you need to click Backup Now to restart the backup task on the Manage page.
After these steps, you can successfully back up your data.
When problems occur on your computer, you can also use MiniTool ShadowMaker to restore your operating system to another computer in just a few steps.
One of the common cases of the blue screen of death (BSOD) is STOP 0x00000050 and the error message PAGE_FAULT_IN_NONPAGED_AREA appears in all current versions of the OS: Windows 10, 8.1 and 8, Windows 7 and earlier.
In this case, the text of the error message may contain information about the file (and if it does not, then you can see this information in a memory dump using the BlueScreenView or WhoCrashed programs, we will talk about them later), which caused it, among the most common options — win32k .sys, atikmdag.sys, hal.dll, ntoskrnl.exe, ntfs.sys, wdfilter.sys, applecharger.sys, tm.sys, tcpip.sys and others.
This manual contains the most common variants of this problem and possible ways to fix the error. Also below is a list of official Microsoft fixes for specific cases of the STOP 0x00000050 error.
The cause of BSOD PAGE_FAULT_IN_NONPAGED_AREA (STOP 0x00000050, 0x50) usually has problems with driver files, faulty hardware (RAM, but not only, it can be peripheral devices), failures of Windows services, incorrect operation or incompatibility of programs ( often — antiviruses), as well as violation of the integrity of Windows components and errors of hard drives and SSDs. The essence of the problem is incorrect access to memory during system operation.
First steps to fix BSOD PAGE_FAULT_IN_NONPAGED_AREA
The first thing to do when a blue screen of death appears with a STOP 0x00000050 error is to remember what actions preceded the error (provided that it does not appear when installing Windows on a computer).
Note: if such an error appeared on a computer or laptop once and does not manifest itself anymore (that is, the blue screen of death does not constantly pop up), then perhaps the best solution would be to do nothing.
There may be the following typical options (we will discuss some of them in more detail below)
These are not all options, but they may help the user remember what was done before the error occurred, and possibly promptly fix it without further instructions. And now let’s talk about what specific actions can be useful in different cases.
Specific variants of the error and how to solve them
Now about some fairly common options when the STOP 0x00000050 error appears and what can work in these situations.
PAGE_FAULT_IN_NONPAGED_AREA blue screen on Windows 10 when starting or running uTorrent is a frequent occurrence lately. If uTorrent is set to autoload, then the error may appear when you start Windows 10. Usually, the reason is working with a firewall in a third-party antivirus. Possible solutions: try disabling the firewall, use BitTorrent as a torrent client.
Another nuance of Windows 10 that can cause the error in question is the enabled kernel isolation option. You can disable it by going to the Windows Defender Security Center (double-click on the defender icon in the notification area) — Device Security — Core Isolation Details — disable the memory integrity check option. If Windows 10 starts only in safe mode or the option does not change, then this method will not work, use the following method: run the command prompt as an administrator, and then enter the following command and restart the computer:
BSOD STOP 0x00000050 error indicating the AppleCharger. sys file — occurs on Gigabyte motherboards if proprietary On / Off Charge software was installed on an unsupported system. Just uninstall this program through the control panel.
If you encounter an error in Windows 7 and Windows 8 involving the files win32k.sys, hal.dll, ntfs.sys, ntoskrnl.exe, try the following first: disable the paging file and restart the computer. After that, for some time, check if the error manifests itself again. If not, try enabling the paging file again and reboot, the error may not appear again. Learn more about enabling and disabling: Windows paging file. Checking the hard drive for errors can also come in handy here.
tcpip.sys, tm.sys — the causes of the PAGE_FAULT_IN_NONPAGED_AREA error in Windows 10, 8 and Windows 7 with these files may be different, but there is one more likely option — a bridge between connections. Press the Win+R keys on your keyboard and type ncpa.cpl into the Run window. See if there are network bridges in the list of connections (see screenshot). Try removing it (assuming you know it’s not needed in your configuration). Also in this case, updating or rolling back the network card and Wi-Fi adapter drivers can help.
atikmdag.sys is one of the ATI Radeon driver files that can cause the described blue screen error. If the error appears after the computer wakes up from sleep, try disabling Windows Fast Startup. If the error is not related to this event, try a clean installation of the driver with a preliminary complete removal in the Display Driver Uninstaller (the example is described here, it will work for ATI and not only for 10 — Clean installation of the NVIDIA driver in Windows 10).
In cases where an error occurs when installing Windows on a computer or laptop, try removing one of the memory sticks (with the computer turned off) and start the installation again. Perhaps this time it will be successful. For cases when a blue screen appears when trying to upgrade Windows to a new version (from Windows 7 or 8 to Windows 10), a clean installation of the system from a disk or flash drive can help, see Installing Windows 10 from a flash drive.
For some motherboards (for example, MSIs are seen here), the error may appear when upgrading to a newer version of Windows. Try updating the BIOS from the official website of the manufacturer. See How to update BIOS.
Sometimes (if the error is caused by specific drivers in applications), clearing the temporary files folder can help fix the error C:\ Users\ Username\ AppData\ Local\ Temp\
a way to analyze the automatically generated memory dump and find out which driver caused the error is the free program WhoCrashed (official site — http://www.resplendence.com/whocrashed). After analysis, it will be possible to see the name of the driver in it in a form that is understandable to a novice user.
Then, using the device manager, you can try to roll back this driver to fix the error, or completely remove it and reinstall it from the official source.
Also on my site a separate solution for a separate manifestation of the problem is described — the blue screen of death BSOD nvlddmkm. sys, dxgkrnl.sys and dxgmss1.sys in Windows.
Another action that can be useful in many variations of the described Windows blue screen of death is the Windows RAM test. To get started — using the built-in RAM diagnostic utility, which can be found in Control Panel — Administrative Tools — Windows Memory Tester.
Fixes for the STOP 0x00000050 PAGE_FAULT_IN_NONPAGED_AREA error on the Microsoft website
There are also official hotfixes (fixes) for this error posted on the official Microsoft website for different versions of Windows. However, they are not universal, but apply to cases where the PAGE_FAULT_IN_NONPAGED_AREA error is caused by specific problems (explanations of these problems are provided on the corresponding pages).
To download the fix tool, click on the «Hotfix Download Available» button (next page may take a while), agree to the terms, download and run the fix.
Also on the official Microsoft website there are also their own descriptions for the blue screen error with the code 0x00000050 and some fixes:
the appearance of an error, which file reports a blue screen or programs for analyzing memory dumps (in addition to the mentioned WhoCrashed, the free program BlueScreenView can be useful here). You may be able to find a solution to the problem.
Maybe this will be interesting:
Why not subscribe?
Newsletter of new, sometimes interesting and useful materials from remontka.pro. No ads and free computer help for subscribers from the author. Other subscription methods (VK, Odnoklassniki, Telegram, Facebook, Twitter, Youtube, Yandex.Zen)
Thanks for the advice, I always read and use them. Just a couple of days ago, a friend had the same blue screen. I solved the problem using the memtest86+ 2.11 program. First he pulled out one bar and checked, then the other. There were 14 errors on one bar. Removed this bar and everything is OK. True memory is not enough now.
In general, although the error indicates problems with memory accesses, it rarely happens enough in the RAM itself, more often the drivers are the culprits.
Try to have time to perform a clean boot https://remontka.pro/clean-boot-windows/
or in safe mode (a quick way to get into it in 30 seconds is to press start — power button — hold Shift and press reboot. then diagnostics — boot options)
Some drivers are probably not working properly.
Hello! Please help me, because I have been suffering for three weeks with this error. Departs 3 minutes after launch. Swears on ntfs.sys and ntkrnlpa.exe. Doesn’t crash in safe mode. Swap turned off, checked the RAM and the screw with the surface, replaced the mother, memory and video, removed all unnecessary programs, turned off everything in startup. Presumably it appeared after Windows update 4014565 dated 04/14/17 but I can’t delete it in the safe — an error they say Some updates could not be deleted. And in the norms of loading, the process does not even have time to start. I tried dozens of articles about her, all in vain. Yes, and they haven’t answered comments there for a long time, only Dmitry often helps those who suffer. Thank you for your attention and hope for help!
Hello. It looks like a screw (or a file system on it), but you write that you checked. Any unusual backup services or the like are not worth it? Unfortunately, I can’t answer in more detail now (I’m on a trip almost without the Internet, so I would have googled on the topic myself).
Well, yes, the surface check did not see any errors. Can Victoria be allowed to torment him? Yes, there were no extra services there — these are village pensioners’ computer, there is only chrome and Skype, well, the grandson of the toys set. But I removed everything, checked for viruses with the last Baida. Now I’m downloading ERD, I’ll try to torment them more, in extreme cases I’ll rearrange Windows. And how would you google? I’m with the Internet. That’s just what he persuaded him to distribute to my computer from smart unlimited 8-10gbit
ntkrnlpa.exe + page fault in non paged area would google first of all, would pay attention to English-speaking forums.
Thank you very much! I will write about the result. Have a good trip and an easy road!
As a result, the screw with broken blocks was still to blame. Moreover, neither the Windows surface test, nor a couple of others found anything. I saw and cured only Paragon.
STOP 0x00000050 disappeared after removing one of the RAM sticks. apparently they were slightly different, so it gave out a blue screen
Good afternoon!
Help, please, rolled up updates and wib2k8 r2 stopped loading. Perhaps the driver has been updated, but it does not even allow you to enter safe mode, it crashes with a blue screen and swears at win32k.sys. I do a memtest’om check, but I still sin on the update. Can you give any advice?
and if you boot from the installation disk, then enter the recovery console and try recovery points (if any)?
Plus… I just googled in several places at once, that it is with error 50 with this file that deleting the font cache helps, namely files
c:\Windows\ System32\ FNTCACHE.DAT
c:\Windows\ ServiceProfiles\ LocalService\ AppData\ Local\ FontCache3.0.0.0.dat
c:\Windows\ ServiceProfiles\ LocalService\ AppData\ Local\ FontCache-System. dat
(you can also boot from a bootable flash drive, press Shift + F10, a command line will open and delete these files there or use some LiveCD)
I encountered the above problem for the first time on one of the working machines. The ntfs.sys file is listed in the error. It happened after an unscheduled «gen.cleaning» with a partial disassembly of the insides of the system unit. Immediately I began to sin on RAM (one DDR2 plank) — there was a lot of dust — maybe, I think, something got on the contact. Yes, personal experience suggested this is a likely cause. Repeated cleaning — did not help. I changed the slot, but not the channel — it did not help. Changed the RAM bar to exactly the same — did not help. He returned everything back, ceasing to sin on RAM. I changed the video card to the exact same one, cleaning the PCI-E slot and contacts, but it did not help. I repartitioned the HDD with full formatting using Windows — it did not help. I changed the HDD to another one, re-formatted the partitions with full formatting — it did not help. umm.
I plugged the RAM into another channel, I plugged the HDD into another SATA connector — I’m sitting waiting 🙂
I get this error when connecting to wi-fi, what should I do?
First, try installing the drivers on the Wi-Fi adapter (manually, from the official site, not in the device manager or through the driver pack). Also try temporarily disabling your antivirus, if any.
What to do if I can’t turn on the laptop, when I turn it on,
STOP gets out: 0x00000050 (0x0000000014EB2C60, 0x0000000000000001, 0xFFFFF80003E344F0, 0x0000000000000002).
Even safe mode doesn’t help. I remember that before the error, Windows 7 did the system setup.
Let’s say thanks to the small-soft ones for their correction, after which such an error. Moreover, this is not the first time I see this problem.
I have not yet found a solution, except for reinstallation, there was the last hope for a restore point, but it didn’t work out, an error occurred during the point rolling.
I see the comment you left on January 13th, which means that the update was tentatively completed on January 9-11, 2018. I started updating on Win 7 at 3 am, Windows is not a license, I downloaded it 2 years ago. I got this error, just like you. Do not enter safe mode, same error. In my case, it will not work to roll back, since I did not make backups.
Try any way you can to uninstall update KB4074598. Actual with a blue screen when there is almost no text, only the error number and parameters on 2 lines.
Crashes only when playing DotA pc Tested or worked for days in loads of SE no help
So maybe you have a problem with a copy of DotA?
Hello. I got this error all the time when opening a picture or turning on a video! And only then she began to constantly climb out, I no longer know how to get rid of her? I’ll write in more detail what is written there in the error .. Honestly, I’m not good at computers .. I removed the operative, changed places .. I didn’t even install any drivers through the site, I don’t know what he needs ..
Something with the video card or its drivers, judging by the description.
Hello! such a story happened. netbook 4good (everything is soldered inside), a small 10-inch device, the cheapest) I recently had to disassemble it to restore the screen attachment loops (torn off from the case). I had to disconnect the cable of the screen and the wires of the antenna of the network card. after the assembly began the following. wi-fi started dropping out. after updating the list of available networks. he disappeared altogether, as if he did not exist in principle.
tried to use the «reset network settings» function. there is something global going on with the restart of the computer. An error occurred during this diagnostic. in the end it came to that, I decided to restore the system. and crash again. eventually created a bootable flash drive to completely reinstall the system. everything goes smoothly until the reboot. after the reboot, the services start, the devices are prepared. and then a blue screen. the errors were different. for example: «driver power state failure», including this «NONPAGED_AREA». once on some error at the bottom it was written in small print «something there … rtwlan.sys».
installation occurs with preliminary formatting of the partition (where the system is installed). the rest (system and recovery partitions) remain.
seems to have told everything. If you can suggest me something, I will be very grateful.
Well, here are just such options for me:
1. something is not connected, especially regarding the wi-fi adapter
2. Wrong drivers for the wi-fi adapter or for the chipset and power management.
The first error indicates some problems with the power supply of the device, the second — about incorrect accesses to the memory of the wi-fi driver (rtwlan.sys)
thanks for the reply! only according to item 1. there was nothing special to connect. because it’s all on the same chart. only a cable from the monitor and wiring to the antenna (maybe because of it the drivers flew?) only if it is not completely stuck, which is unlikely.
a according to claim 2. the drivers themselves could not change, only if the files themselves were damaged. by the way, the last time it worked was in device manager. the bluetooth module was with an exclamation point.
in the end, what do you recommend? there is a bootable flash drive with the system, a folder with firewood and a crippled laptop) maybe try to install the system in a different way. I just can’t imagine the algorithm of actions yet.
thanks in advance!
First, download the wireless network driver (can be combined with the bluetooth driver) from the office. laptop site for your model (even if there is for a different version of win) and try to install.
has already been downloaded and is on the bootable flash drive. only how to install it if the system does not start? I tried to load it at the stage of choosing a partition where to install the OS. seems to have been installed. but to no avail. By the way, from all drivers from off. folders on this laptop, it was the driver for wlan that was installed. How to run it through the command line also did not find.
Win 8.1 Hotfix Patch
support.microsoft.com/ru-ru/help/4103724/windows-81-update-kb4103724
Found out that Yeset node was the culprit of my blue screen. I got an error while updating. I decided to completely demolish it, but I need to do it in safe mode, because I don’t have time in normal mode, the blue screen pops up. Please tell me how to solve this problem. Through the control panel does not allow.
Can’t get into safe mode too?
Hello, this is the second time I’m getting a blue screen with this error during the game, I can’t figure out what it is connected with and how to fix the problem.
Hello.
If a specific game, and not a licensed one, it is likely that this is a feature of the game itself (or its unlicensed version) and nothing much can be done about it.
Hello. I encountered this error, but the blue screen of death does not appear, but disappears (shuts down) from the explorer processes (explorer.exe), while there are no error notifications. The error window («Windows has recovered from an unexpected shutdown») appears when you switch to another account. With the help of BlueScreenView, I found out what was happening. Does anyone have any idea what is involved? P.S.: Windows 7, x32.
Hello. I also have 0x00000050 PAGE_FAULT_IN_NONPAGED_AREA, first the indicator on the system unit is on without blinking, then nothing can be done, neither open nor go anywhere, everything freezes, and then (not immediately) after half an hour or a few hours a blue screen pops up with this error and the computer reboots. I checked with S.M.A.R.T. hard disk, there are 2 points lit yellow, a lot of errors. But is it really so suddenly that he broke down and all this is happening because of him? System restore cannot be done, an error pops up, but there are no viruses. Change hard drive? Thanks in advance
Have you tried using BlueScreenView or similar to check which module is causing the crash? In theory, maybe not a disk.
What OS version? 10? If it is possible to make a bootable flash drive with it somewhere (even if you don’t have 10), do it, boot from the flash drive, then select the language, and then click “System Restore” at the bottom left. Try using restore points there.
Acer laptop immediately falls into the blue screen of ntfs.sys when loading, removed the disk, connected it to the computer and also crashes into the blue screen, is this the end of the disk?
Not fact. Perhaps the problem is only with the system, not with the disk. Try reinstalling the OS (when you plug the drive back into the laptop).
Hello, I have a blue screen due to the files ntoskrnl.exe and win32k.sys, the OS was W7 start, and now XP, I do not have a boot disk with XP. How to solve a problem?
Checked for integrity using the command line, found the disc with XP, then killed the Windows key, So, while there is no blue screen, I also have a netbook and heats up quickly, I try not to overheat more, maybe there were problems because of this .. Thank you. I’ll try to check the hard suit, still high temperatures, I checked with the help of Aida …
I share:
— suffered for almost 3 hours. from about half past nine to 11.
situation:
Win7-pro_64x, RAM=8Ge as a server machine, it has a 4096MB Ram disk (to speed up calculations, or even not managed per shift) with saving-loading the image. the image is saved on the screw. a regular HDD, either a Samsung or a Seagate — it doesn’t matter.
in the morning include — BSOD! error 50. well, back and forth, booting from a flash drive, etc. etc. it turned out: the image of the RAM disk is not readable, the file is faulty! and the date of its creation is not yesterday, damn it, but the day before yesterday! how!
Well, what can I say? turned off the machine before the creation-burning of the RAM disk image was completed. well, it’s clear, I need to go home, there are children, washing, cooking, washing dishes, sweeping, wiping the floors, laying down, laying down … RAM disk, unmounted the image, created an empty one in a new way, recorded a backup copy from a USB flash drive … now I need to figure it out in the settings in a new way, but I already forgot how I did (!) Saving-mounting the disk image and truncated.
happiness-health to all kind people and good luck.
u-da-chi.
What to do if stop error: 0x00000050. Appears immediately when windows 7 is loaded. There is no way to perform actions from the desktop. The blue screen appears after installing some windows 7 updates. Help me solve the problem, I’m tired of reinstalling. Some programs do not work without the latest OS updates. dilemma).
How does safe mode behave? It is possible that it will work. Most likely in some driver that comes with the update, the problem.
What to do already 16 error screen please help the antivirus kaspersky license started updating what it writes to me from an unknown source microsoft I accidentally clicked cancel the jump and away we go and these are repeated blue screens of death the last screen of death
(dump text)
Tell me what to do? I don’t have a recovery. Windows is loading.
Sounds like a problem with the AMD chipset driver. Try downloading and installing from the official website of the motherboard (if it’s a PC) or laptop (if it’s a laptop).
I was sitting with this blue screen for 3 hours. Windows just didn’t want to boot. I went into safe mode with network driver support, started to look what was wrong. I checked the RAM, downloaded blueScreenView, downloaded Registry Repair. It turned out that everything crashes because of the ntoskrnl.exe file. I learned everything about this file, but nothing helped, I wanted to demolish Windows. Then he remembered that he recently turned on the isolation of the core, there was nothing to do, there were no more options left. You can’t just turn it off from safe mode, and I remembered that there is a magic command line. I googled the command to disable kernel isolation, entered it, restarted the computer. The screens flickered and everything worked. Maybe I’m special, but this helped me. In short, do not climb and poke at something you do not know.
They write that this driver is a component of the Aladdin HASP software (I don’t know what it is).
On a blue screen, you are not prompted to enter advanced options? If there is such an opportunity, then there is also the ability to use the restore point and safe mode (In the boot options).
Hello, help with the iastore.sys error. I tried to boot in normal mode, it doesn’t work — endless loading or a blue screen, and in safe mode I can’t check the drivers (
Hello.
Are there no easy restore points? If the problem has recently appeared.
Help, I can’t do anything about this error. It doesn’t enter safe mode, I try to disable all processes, I don’t have time, I tested it from another disk and another Windows — the disk is normal. How to find out what the problem is. The conditions are as follows: the computer has 2 hard drives. On one stands one Winda, which works, on the second, another one that has fallen. Can I repair another from one Windows? Obviously, the problems are not in the hardware (I scanned the second disk, everything is fine) How can I find out with the help of another Windows that I need to press quickly in 30 seconds to fix the problem?
Hello.
If not in hardware, then either in drivers or in software (such as antiviruses, etc.