Building a Gaming PC for the First Time? This Guide Can Help.
Before you build a PC, you’re obviously going to need the right parts. That’s why we’re here.
Picking the right components for the build you need can be a daunting process at first, but once you dive in, you’ll see that it’s not only surprisingly simple, it’s a heck of a lot of fun. This guide is by no means meant to be exhaustive, it’s more a primer on what you’ll need to know to gather up the right parts, and start putting your dream build together.
We’ll mostly be focused on building a gaming PC here, but this guide should cover the basics for everything from a high-end work rig for professional applications to a simple media computer.
And if you’d rather buy a pre-built, rather than building your own, we have a guide for that too.
Alright, let’s get to it!
What Do You Need to Build a PC?
Processor (CPU)
The processor, or Central Processing Unit, is the brain of the PC. It’s what converts the instructions you provide into actions the computer can execute, and tells all the other parts of your build how to work together. If the CPU is the brain, the rest of the system is the body.
The CPU is probably the single most important component for any computer, and as you’d expect there are almost endless options at a variety of price ranges. The two primary manufacturers in the consumer PC space are Intel and AMD, and even within those brands, there are plenty of choices. For AMD you’ll most likely be looking at a third generation Ryzen, or Threadripper if you want high-end. Intel’s Core i designated CPUs are all solid choices, though you’ll probably want to consider a 12th Gen i5 or i7 if you’re looking to put together a serious gaming or streaming rig. If that isn’t enough oomph for you, then maybe a Core i9 is more your thing.
Motherboards
The motherboard is essentially a large circuit board that connects all the components that make up your PC, and allows communication between all the different hardware.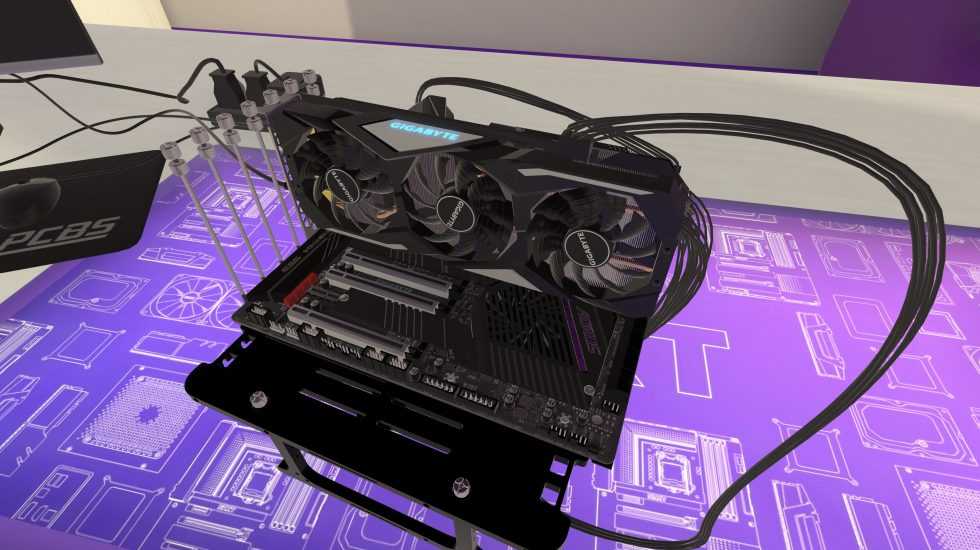 As with anything in PC building, there are options galore, from simple motherboards at the lower-end of the price spectrum all the way up to feature-rich boards with all sorts of bells and whistles.
The type of motherboard you need will largely depend on what CPU you purchased and what features you’re interested in. Not every CPU works with every motherboard, so you’ll want to make sure you get the right one. Features like CPU overclocking capabilities, lighting, and connectivity options are all factors to keep in mind when purchasing a motherboard.
Check out this full breakdown on how to choose a motherboard for all the info you’ll need to make an informed decision.
Video Card/Graphics Processing Unit (GPU)
The Graphics Processing Unit (GPU) will have the most impact on your gaming experience. The GPU is essentially what allows your computer to do the complex graphics calculations that allow your PC games to look so good. Though many CPUs have integrated graphics, a GPU is absolutely required if you want to have a modern PC gaming experience.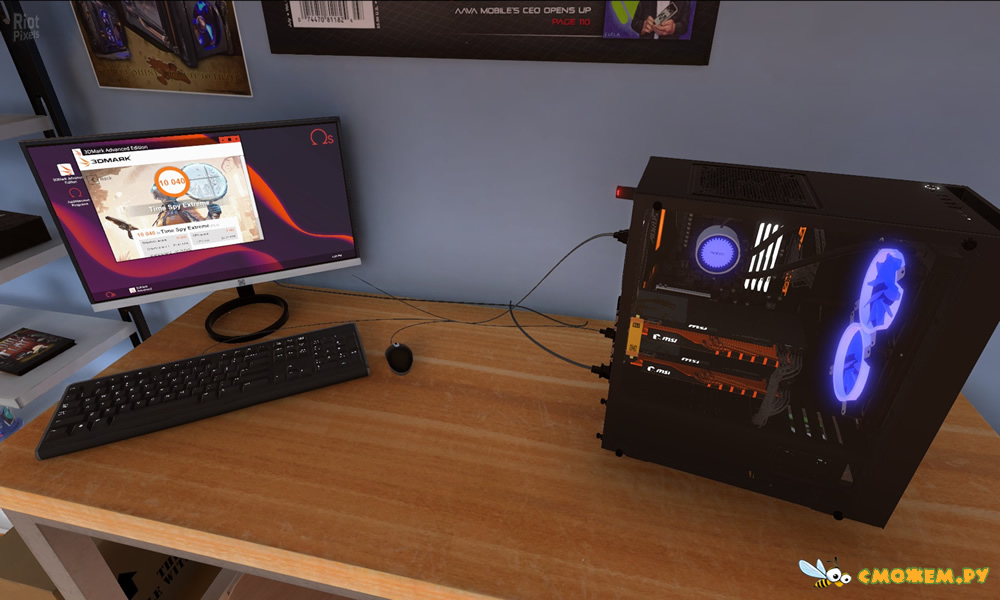
The two biggest players in the world of graphics cards are AMD and Nvidia. Depending on how much you want to invest, you can go with something on the lower-end of modern GPUs, like the GeForce RTX 3050 from Nvidia, or the Radeon RX 6500 from AMD. If you want a cutting-edge experience, Nvidia’s RTX 3090 Ti is the current king of consumer facing GPUs, with the Radeon RX 6900 XT from AMD not far behind.
If you’re looking for the best gaming experience, the GPU might be the priciest component you’ll buy, but you’re not going to want to skimp here, especially if you’re looking to get into gaming at higher resolutions and frame rates.
To learn more about what card will work best for your needs, check out our guide on how to choose a graphics card.
Memory/RAM
Random Access Memory (RAM) is essentially your PC’s short-term memory. It keeps data you use regularly easily accessible, so your PC doesn’t have to access a storage device every time you need to use that data.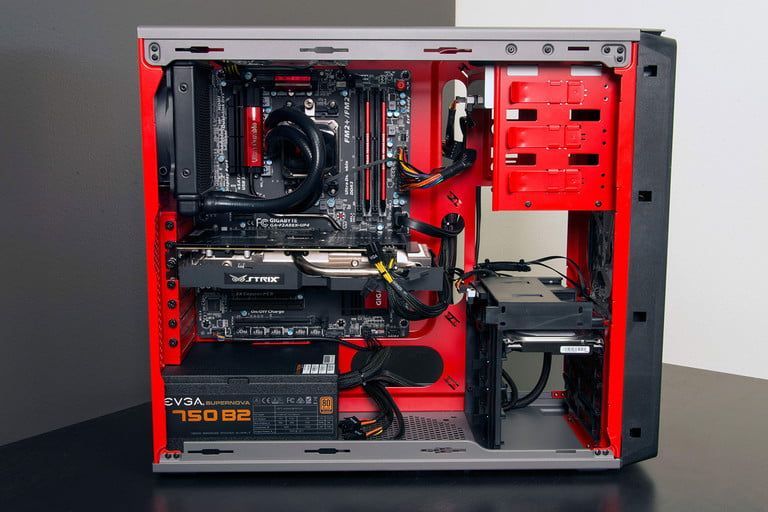 It’s different from your primary storage devices in that RAM resets when it doesn’t have power, which is why you still need larger storage drives for long term data storage.
When it comes to RAM, the more the merrier. You can’t really have too much RAM, but for practical purposes, most gaming systems will be fine with 16GB, or 32GB if you want to keep your PC viable for several years.
RAM varies widely in speed, size, and design, so check out our RAM guide for answers to any questions you might have when it comes to memory.
Storage
Storage is where your data is…well, stored, so your PC can access it. This includes files, games, your operating system, any data that you need to access will be kept on a storage drive. In the past, storage mostly consisted of hard disk drives (HDD), but now solid state drives (SSD) are more widely available. SSDs are significantly faster, quieter, and more durable, but also cost more per gigabyte.
The right storage solution will vary, though a common configuration is a smaller NVMe or SATA SSD for your operating system and most commonly used files, and a larger HDD for your larger files. You can also rely on external storage solutions, which have the advantage of being portable.
The Samsung 980 Pro M.2 SSD is one of the most popular solid state solutions, and the 3TB Seagate BarraCuda HDD will work great for larger installations and file storage.
If you want to learn more about all the different types of storage, check out our guide on choosing the right storage.
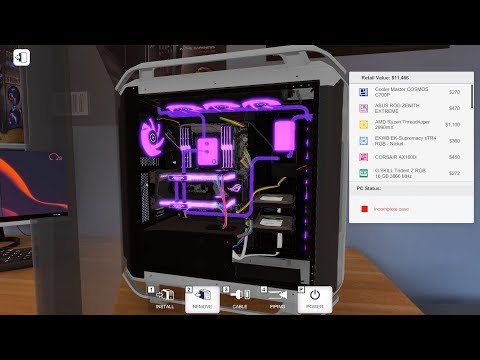
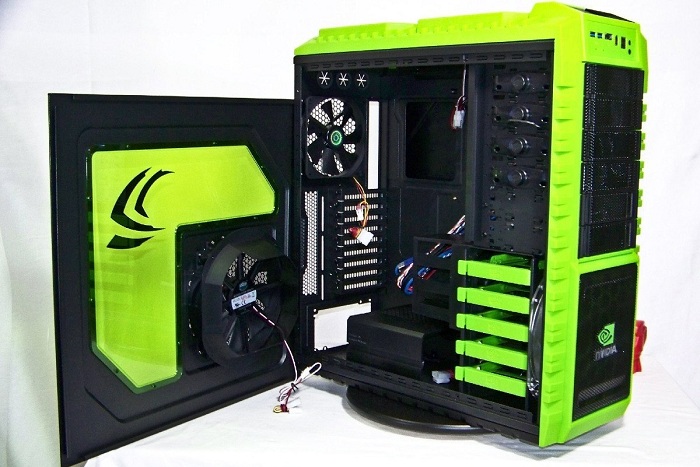
Cases
This is where all of your precious parts are going to live, and what most people think of when they imagine a PC. Cases are one of the most customizable parts of a PC, so you can get cases in just about every shape and size you can imagine. Though every case is different, they are all designed for roughly the same components, meaning they share similarities across brands and layouts. There’s always going to be a place to install the motherboard and power supply, for example, though the configurations of where everything is located may vary.
Unless you’re looking to build something small, or with advanced features like custom cooling loops, most cases will work just fine. Just find one that’s the right size, and looks the way you want it to, and you should be good to go.
Another important feature to consider when it comes to cases is cooling. Many cases will come with fans already installed, which can be useful, but if low temperatures are important to you, you’ll want to make sure there’s room for the cooling solution you need. A simple rule of thumb is that if you’re wanting to do a lot of custom work, the bigger the case, the better.
If you’re looking for a unique open air design, check out the Thermaltake P5. If you want lighting options, take a look at the Carbide Spec-Omega RGB from Corsair. For something simple, attractive, and reliable, keep the Rosewill Cullinan in mind. Or if you plan to go the custom watercooling route in the future, you can’t go wrong with the Lian Li O11 Dynamic.
Power Supply Unit (PSU)
As you probably guessed by the name, the Power Supply Unit (PSU) provides the power that allows your build to function. The PSU is often overlooked, because if you have a relatively simple build, any power supply will usually work. That said, it’s absolutely worth doing your research on efficiencies, wattage, and quality, especially if you’re putting together a more complex system. If you are using high-end video cards (or multiple video cards) or a custom cooling loop, you’ll definitely want to make sure you have a PSU with enough wattage.
A good reference is this power supply calculator, which allows you to see what kind of power requirements you’ll need based on your system.
If you’re looking for a beefy PSU for a super fancy system, you can go to the high-end of the spectrum like the Seasonic PRIME GS-1000 1000w If something simpler is more in line with what you need, the Rosewill HIVE 550S 550w power supply might be a good fit.
CPU Heatsink/Fan
Your CPU works incredibly hard, and that creates heat.
Keeping your CPU cool is critical to your system running properly, and though many CPUs come with a cooler, often times you’ll want something a little more powerful. These options can range from simple fans and heatsinks to elaborate liquid cooling solutions. For your first build, you’ll probably want either a fan based solution, or an All In One (AIO) liquid CPU cooler if you’re planning on overclocking your CPU. The process of installing these cooling solutions varies from product to product, but usually involve attaching it to your motherboard, and using thermal paste to make sure heat is dissipated properly from your CPU.
It sounds complicated, but it’s really not. Even the AIO liquid coolers are self-contained, and you don’t ever have to actually deal with the liquid inside. Simply make sure the cooler is compatible with your CPU and motherboard, and that you have enough room in your case. The rest is just a matter of following the included instructions.
One of the most popular entry-level air coolers is the Noctua NH-L9x65, perfect if you want a reasonably priced silent fan from one of the best PC cooling manufacturers on the planet. If you’re looking to get into AIO liquid coolers, check out the NZXT Kraken X73. Not only is it a great CPU cooler, it has some awesome lighting options as well.
Monitors
Now that you’ve picked out the parts for your build, it’s time to talk about everything else you’ll need for a quality gaming experience. Let’s start with a monitor. After all, a sweet gaming PC isn’t much good if you can’t see anything.
You can go with a simple, entry-level 1920×1080 monitor or TV if you want, but part of the fun of PC gaming is that you have more options. If you invested in a good system thus far, you might want to move up to higher resolutions, like 2540×1440, or even 3840×2160 (4K) for truly crystal clear images. You can also upgrade to a higher refresh rate like 144Hz or even 240Hz, which will make everything look significantly smoother. Depending on your GPU, you may want to invest in a monitor that supports either Nvidia’s G-Sync or AMD’s Freesync, as this will reduce screen tearing and further improve your gameplay experience.
All of these factors, including others like display size or aspect ratio, are going to increase cost. That said, there’s not much point in having a powerful PC if what you’re seeing doesn’t look great, so it’s probably worth the investment. For gaming however, it’s primarily about choosing a monitor with low input lag and fast pixel response times.
If you’re looking for a moderately priced entry-level gaming monitor, the curved Acer ED242QR has Freesync and a 144Hz refresh rate, a perfect match for an entry level to mid-range GPU. If you want to go super high-end, the Alienware 34 has just about everything you need for a luxurious gaming experience.
Mouse
A mouse is just a mouse right?
Nope. Like everything else we’ve been talking about, you can get a mouse that perfectly matches your style. If you’re a gamer, having mappable buttons might be important to you, as well as being able to adjust the DPI (essentially the speed of the cursor) on the fly. Maybe you want a wireless mouse, or an outside-the-box design.
The most important thing is probably comfort, so make sure you find a mouse that feels right. One of the most popular gaming mice (for good reason) is the Logitech G502 Hero, but there are lots of great mice out there from companies like Corsair, Razer, and plenty of others.
Check out our breakdown on how to find the right mouse for more info.
Computer Keyboards
Even with something as seemingly straightforward as a keyboard, there are a ton of options. Do you want the traditional feel of a membrane keyboard, or the precise tactile feedback of mechanical switches? Do you want wired or wireless? Do you need macro keys? How important is RGB lighting?
There’s a lot of great keyboards out there, so you can find exactly what works for you. One of the most popular mechanical keyboards is the Corsair K70 LUX. The Razer Huntsman Tournament Edition is a great entry-level mechanical board with Razer optical switches.
The best way to learn your own preference is by testing different keyboards, but this guide on how to choose the right keyboard is also a great place to start.
Operating System
The Operating System (OS) is the software that allows you to interact with your computer. Once it’s installed on your storage device (preferably a SSD,) you can then start installing all of your programs, games, and whatever else you’re going to use your computer for.
There are several operating systems to choose from, but by far the most popular for the average person is Microsoft Windows 11, due to its widespread use and straightforward user experience. While many still stick with Windows 10, it’s only a matter of time until Windows 11 eclipses its predecessor.
Linux is also popular, and has the added advantage of being free, though it also has a bit more of a learning curve.
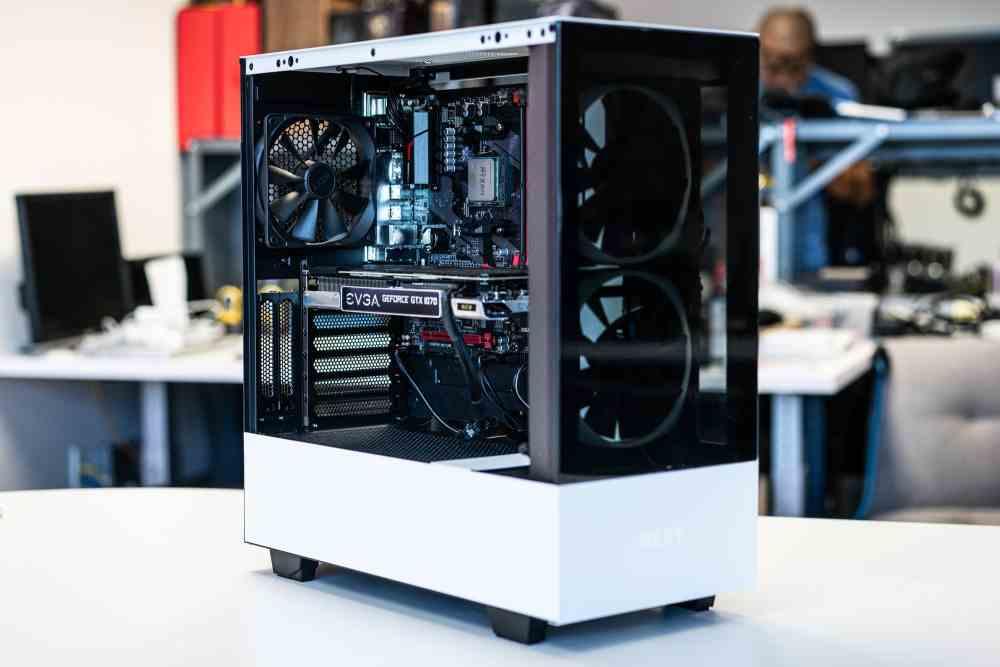
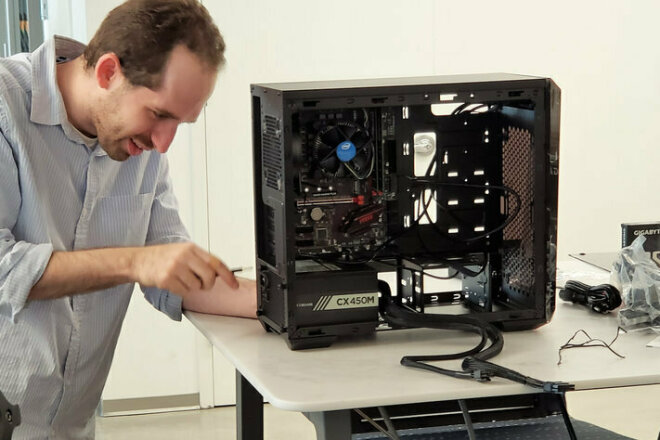
Putting Together Your PC
Once you have everything ready to go, it’s time to actually start building.
This is the part that many people find intimidating, but once you get started, you’ll see that these components are designed to be put together easily. As long as you’ve done your research and know everything is compatible, it really is like putting together a fancy Lego kit.
This video will walk you through the entire process:
Here are few more tips to keep in mind while you get started.
Installing Memory (RAM)
Memory is one of the more straightforward components to install. Start by pushing open the two tabs on either side of the RAM slot on the motherboard slot. Look to the memory guide to check that you’re installing with the right orientation. Once the RAM module is lined up with the slot, simply push down until you hear a click, then make sure the tabs are closed. Repeat those steps for any additional memory.
Depending on your case, it might be easier to do this before you install the motherboard into the case.
Installing the CPU
Most CPUs today don’t have pins, as the connector pins are usually located on the motherboard. This is great, because damaging the expensive CPU is much worse than the (usually) cheaper motherboard.
The process may vary slightly depending on the CPU and motherboard, but usually installation follows a similar pattern.
Start by unlocking the CPU bar. Then, open the CPU door, place the CPU in the right direction, (arrows marked on both will help you line it up), close the door, and lock the bar down. Mounting the heatsink is also dependent of your hardware, but it generally connects through the four holes closest to the CPU socket. Usually this is done through screws or locking/twisting plastic pins. Remember to use a sensible portion of thermal paste when mounting the heatsink; an amount roughly the size of a pea is a good reference.
Also, be sure to plug the CPU cooler into the motherboard so it will have the power it needs to function. The exact process should be clearly articulated in the instructions that come with your cooler.
Again, installing the CPU and CPU cooler is best done before the motherboard is placed in the case to keep things as simple as possible.
Preparing Your Case
The first step to getting your motherboard in your case is installing standoffs. Standoffs are small brass spacers that match up with the screw holes on your motherboard, and work to keep the metal on the motherboard from touching the metal in your case. Make sure to install them where screw holes are present in the case, and consult your case manual if it isn’t obvious where these holes are.
Your motherboard will come with a cover called an I/O shield. This cover should be placed over all the external connections that are visible from the outside of the case. Make sure you line it up properly and snap it on. It’s easy to forget this step, and it can be a pain to go back to install it, so do your best to remember the first time.
Installing the Motherboard
Remember, your motherboard is essentially a huge circuit board, which means it’s delicate.
It’s important to be careful as you line up the holes and add screws to all of the standoffs you placed inside your case. You want the motherboard to be secure and not loose, but you also don’t want to over-tighten the screws. If the board is bending at all, you’ve over-tightened.
You may need to push the motherboard slightly back towards the expansion slot cover before screwing it in, but as long as you line up all the screws, you should be good to go.
Install Everything Else
Once your motherboard is mounted, everything else is fairly straightforward. Use the video we shared above for more detail.
The GPU will live in the PCIe slot. Make sure you remove any expansion coverings, and be sure it clicks into place properly and is secured with screws once installed.
If you have an M.2 drive, carefully install it into the appropriate slot on your motherboard, and use the small screw to keep it secure. Again, do not over-tighten.
A good rule when installing components is to use a bit of force, but if you feel like something isn’t fitting, it’s good to double check that it’s in the correct place. This stuff is designed to fit together, so you shouldn’t have to push too hard.
Your video card, storage devices, and motherboard will all need power from the power supply.
The proper cables should be included with your PSU. If not, use the adapter provided with the video card box. Your hard drive or SSD will also need a power cable, as well as a SATA or data cable, unless you’re using an M.2 as described above. All of these cables should be included with your devices.
The right cable to use from the power supply to the components that need that power should be fairly obvious. Simply match the plug to the connection the component needs, and check any manuals if it isn’t super clear.
Installing fans will vary on your cooling setup, but again, it should be fairly clear what goes where. Simply match the cable to the input on your motherboard, and check your manual if you run into any issues.
Fire It Up
Once everything is wired up and looks the way you want it to, it’s time to plug in the power supply, hit that power button, and turn on your new computer. If everything is connected properly, you should see your motherboard’s BIOS screen.
The final step is to install your operating system of choice, and start using your new PC!
Error Messages
If everything didn’t come together on your first try, don’t panic, this happens to the best of us. It’s almost always an easy fix.
Luckily, your computer will often tell you what is wrong, whether in the BIOS menu, or via an error message from your motherboard. This is where research comes in handy, as any error you’re running into will be something someone else has probably encountered and resolved as well.
We put together a handy guide to five common PC problems and how to fix them, so take a look at that before you spend too much time researching.
Congratulations!
Whether this is your first PC, or your fiftieth, congrats on taking the time to learn how to put a PC together. There’s always more to learn, but if you’ve come this far, you’re well on your way to becoming a DIY master.
Have fun, and happy PC gaming!
Best cheap gaming PC deals today
Skip to main content
When you purchase through links on our site, we may earn an affiliate commission. Here’s how it works.
Gaming PC deals
(Image credit: Future)
$500 — $1,000: Entry-level machines
$1,000 — $2,000: The sweet spot
$2,000+: The luxury end
GPU hierarchy: How the graphics cards match up
The best cheap gaming PC is all about finding the PC deal that suits both your wallet and your gaming needs. Whether you’re after an entry-level rig that can deal with a 1080p load or a high-spec machine capable of 4K gaming and beyond, you want to get as much tech for your cash as possible.
And that’s where we come in, trawling through the systems on offer this week, to give you the best idea as to where you should be spending your money. It’s not an easy task, either, because PC gaming has become a supremely expensive hobby in recent years. Unless you know where to look…
We’re splitting our rigs into three distinct categories: Entry-level, Sweet spot, and Luxury. In the middle, the $1,000 — $2,000 mark is where you’ll find the widest range of possible systems, and arguably is where the best gaming PC deals of today are likely to exist. But at both ends of the price spectrum it’s important to know you’re getting the best gaming hardware for you money.
We use all our combined decades of technological PC gaming expertise to determine whether something is a good deal or not, and you can rest assured that we’ll only recommend the best gaming PC deals right here. If something’s super cheap doesn’t automatically make it worth the money, and likewise just because a system’s $2,500 doesn’t mean it can’t be great value.
Where are the best gaming PC deals?
- Amazon — Save hundreds of dollars on selected prebuilt PCs
- iBuypower — Fast shipping machines with up to $400 off
- Best Buy — RTX 3080 gaming desktops for under $3K
- Lenovo — Lenovo Legion gaming machines with up to $300 savings
- Newegg — Stellar savings on RTX 30-series gaming PCs
- Dell — Up to $750 saved on Alienware Aurora gaming PCs
- HP — Save over $500 on all-in-one PCs
- Corsair — Some ridiculous savings on compact gaming PCs
- NZXT — streaming-focussed gaming PCs with $100 off
Nvidia GeForce-powered gaming PCs
- Yeyian Katana X10 | Nvidia RTX 3060 Ti |
$1,399$1,082.99 - iBuyPower Gaming RDY SLHRG221 | Nvidia RTX 3070 |
$1,699$1,499 - Skytech Blaze 3.
 0 | Nvidia RTX 3080 |
 $2,399.99$1,799.99AMD Radeon-powered gaming PCs
- HP Pavilion | AMD RX 5500 | $559.99
- Skytech Shadow 3.0 | AMD RX 6600 | $849.99
- MSI Aegis | AMD RX 6700 XT |
$1,499$1,128.99
$500-$1,000
HP Pavilion | Ryzen 3 5300G | AMD RX 5500 | 8GB RAM | 512GB SSD | $559.99 at Amazon
Affordable gaming PCs are tough to find, and sometimes it is necessary to go back to older generations of hardware to hit a tight budget. But the 8-thread Ryzen chip still has something to offer, and the RX 5500 OEM GPU will deliver 1080p gaming performance around the same level as the current RX 6500 XT. For the money it will be a decent baseline to start from.
Skytech Shadow 3. 0 | Core i5 10400F | AMD RX 6600 | 16GB RAM | 500GB SSD | $849.99 at Amazon
If you’re going to go old-gen for any component I’d argue the CPU is the best place to do that if you’re able to pair it with a more modern graphics card. Here, the RX 6600 is a decent match for the old 12-thread 10400F CPU. It’s not quite as speedy a GPU as the RTX 3060, but
ABS Stratos Aqua | Core i5 12400F | Intel Arc A750 | 8GB RAM | 512GB SSD | $999.99 $869.99 at Newegg (save $130)
Yup, an all-Intel gaming PC and that actually includes a discrete Intel Arc A750 graphics card. In terms of gaming performance it can be a bit of a mixed bag with Arc frame rates right now, but with modern games there’s a good chance you’ll get beyond RTX 3060 performance. Especially if the next patch significantly increases Arc frame rates.
Skytech Shiva II | Core i5 12400F | Nvidia RTX 3060 12GB | 16GB RAM | 500GB PCIe SSD | $999.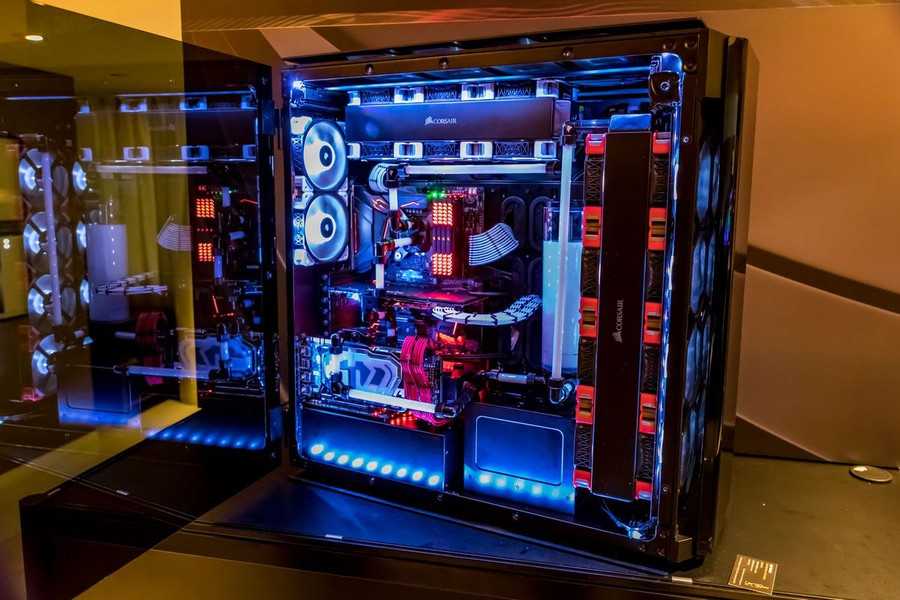 99 at Amazon
The 12-thread Intel Core i5 is still one of the best gaming CPUs around, and with the back up of a 500GB NVMe SSD and 16GB RAM the Skytech rig is a decent rig when specced out with the RTX 3060 card. The $1,000 price tag is probably the limit of what you’d want to pay for this config, though.
$1,000-$2,000
Yeyian Katana X10 | Core i5 11400F | Nvidia RTX 3060 Ti | 16GB RAM | 500GB SSD | $1,399 $1,082.99 at Newegg (save $316)
This is a great deal for a mid-tier gaming PC, especially when a lot of rigs around this price are delivering you an RTX 3060. The Core i5 is still a real solid CPU today, and that RTX 3060 Ti is probably the best mainstream GPU of Nvidia’s last generation of cards. You also get a full 16GB RAM and a 500GB NVMe SSD… which you’ll probably want to give a little more storage too down the line.
MSI Aegis | Ryzen 5 5600G | AMD RX 6700 XT | 16GB RAM | 500GB SSD | $1,499 $1,128.![]() 99 at Newegg (save $370)
99 at Newegg (save $370)
It’s tempting to ignore AMD GPUs when you’re looking for a new gaming PC, but the last generation of Radeon cards are better value than Nvidia right now. The RX 6700 XT here is as good, sometimes faster, than the RTX 3060 Ti it competes with. The rest of the spec on this MSI-built machine also backs it up, too.
iBuyPower Gaming RDY SLHRG221 | Ryzen 7 5700X | Nvidia RTX 3070 | 16GB RAM | 1TB SSD | $1,699 $1,499 at iBuyPower (save $200)
The RTX 3070 is still a genuinely good gaming GPU in 2023, and this is usually the sort of price that you’ll see RTX 3060 Ti-based machines sitting at. Alongside that is a great 16-thread CPU from the previous AMD generation, and a full 1TB SSD, too.
Skytech Blaze 3.0 | Ryzen 7 5800X | Nvidia RTX 3080 | 16GB RAM | 1TB SSD | $2,399. $1,799.99 at Newegg (save $600) /cdn.vox-cdn.com/uploads/chorus_asset/file/12793573/akrales_180824_2838_0138.jpg) 99
99
That’s a lot of money off at RTX 3080 gaming PC, and that still remains one of the best graphics cards of the past generation. At $1,800 that also makes it a good price, too, especially alongside a 1TB SSD and that speedy 16-thread AMD processor.
$2,000+
iBuyPower Gaming RDY NTBG205 | Core i9 13900KF | Nvidia RTX 4080 | 32GB RAM | 2TB SSD | $3,349 $3,099 at iBuyPower (save $250)
The RTX 4080 is a tough recommendation when it’s just a single point of upgrade, but as part of a full rig it makes for a monster gaming PC. This machine will ship in a couple of days, and comes with the most powerful gaming CPU around, 32GB RAM, and a full 2TB of SSD storage.
Graphics card hierarchy
The most important component for any gaming PC build is always going to be the graphics card. That will give you the best idea about how one machine matches up with another just in terms of raw gaming performance.
Below, we’ve listed the slew of GPUs we’ve had over the past couple of years listed in terms of their Time Spy Extreme index score as a way to put them in some sort of consistent hierarchy.
Click the button in the top right to enhance!
(Image credit: Future)
Should I build my own gaming PC or buy a prebuilt?
One of the biggest advantages to putting together your own budget gaming PC build is the ability to essentially choose every single component in the system. This allows you to take your time shopping around for deals and finding the perfect combination of parts to fit your budget and performance needs. The downside for most inexperienced builders is that this whole process can take some time and has the potential to cause quite a headache if something goes wrong. This is where prebuilt gaming PCs really shine.
When you pay the premium to configure or purchase a prebuilt PC you are paying for more than just the parts. You are paying for warranty service, support and the peace of mind that your system was put together by professionals. These are some of the things we value highly when considering the best budget gaming PCs. We also look at other unique selling points like design, upgradability and anything you wouldn’t be able to do when building it yourself.
Now that graphics cards are regularly available and the silicon shortage is starting to clear up, building your own PC is much easier than it was before. That said, a prebuilt rig is still a reliable way to get the exact graphics card you want.
For most users that don’t have the luxury to spend over $1000 on a prebuilt gaming PC, upgradability and performance per dollar are paramount. When we set out to choose our top choices for budget prebuilt gaming PCs, we took a look at almost every major manufacturer and system integrator to find the best combination of value, reliability, customer feedback, design and performance under $500 and under $1,000.
We still highly recommend the experience of building it yourself, but if you can’t do that then one of the systems above will have you gaming in short order.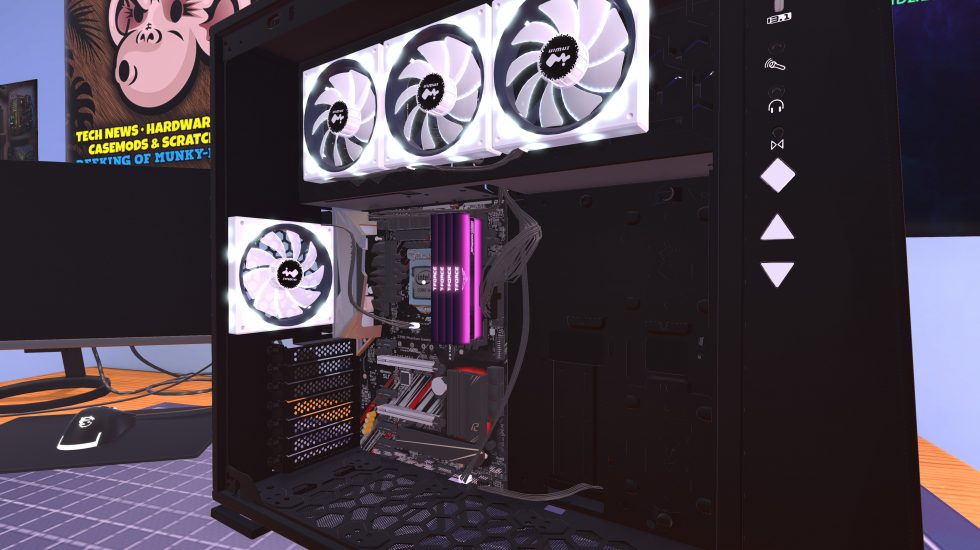
What is a decent price for a gaming PC
The $1,000 — $1,500 mark is probably around the sweet spot for a new gaming PC. That will get you a graphics card that can nail 1440p at solid frame rates as well as a really good supporting spec. That should mean a relatively sizeable NVMe SSD, around 500GB, as well as 16GB of speedy memory, and a modern CPU.
Is PC gaming better than console?
Unquestionably. In real terms, it’s more expensive in terms of hardware, but there is a games library stretching back decades that no other gaming platform can possibly match. Games are also regularly cheaper, or free, on PC, too.
The PC is also more capable of doing more things than a games console, too. Try browsing the web on your PlayStation and you’ll know what we mean. It can also be portable, in either laptop or Steam Deck style.
What PC is equivalent to a PS5?
We would suggest that the AMD RX 6700 GPU will deliver around the same level of raw graphics performance as Sony’s PS5. That’s an OEM part, so you’ll only find it in a prebuilt gaming PC, but it’s a 11.3 TFLOP GPU versus the 10.3 TFLOP of the PS5.
Those numbers aren’t wholly comparative, however, but you would also need an 8-core CPU, 16GB of memory (though the PS5’s is spread between GPU and system), and a 500GB+ SSD.
Today’s best gaming pc deals
Reduced Price
CyberpowerPC RTX 3060 Warrior Gaming PC
£1,141.20
£1,071.60
View Deal
See all prices
AVGPC Q-Box Series Gaming PC
£1,154.22
View Deal
See all prices
Reduced Price
RTX 3060 Ti PC
£1,449. 95
95
£1,339.95
View Deal
See all prices
RTX 3080 PC
£2,029.98
View Deal
See all prices
Corsair One a200
£3,861.92
View Deal
See all prices
Sign up to get the best content of the week, and great gaming deals, as picked by the editors.
Contact me with news and offers from other Future brandsReceive email from us on behalf of our trusted partners or sponsors
Dave has been gaming since the days of Zaxxon and Lady Bug on the Colecovision, and code books for the Commodore Vic 20 (Death Race 2000!).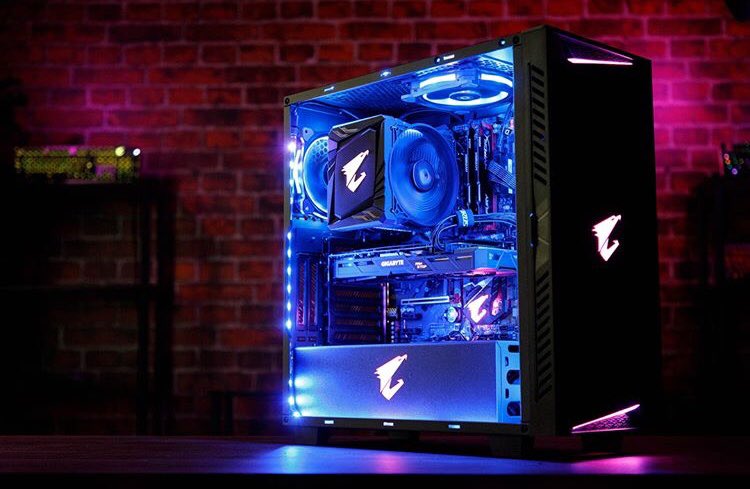 He built his first gaming PC at the tender age of 16, and finally finished bug-fixing the Cyrix-based system around a year later. When he dropped it out of the window. He first started writing for Official PlayStation Magazine and Xbox World many decades ago, then moved onto PC Format full-time, then PC Gamer, TechRadar, and T3 among others. Now he’s back, writing about the nightmarish graphics card market, CPUs with more cores than sense, gaming laptops hotter than the sun, and SSDs more capacious than a Cybertruck.
PC Gamer is part of Future plc, an international media group and leading digital publisher. Visit our corporate site .
©
Future Publishing Limited Quay House, The Ambury,
Bath
BA1 1UA. All rights reserved. England and Wales company registration number 2008885.
PC build recommendation (base 3080 12gb) updated 08/27/2022 – Hardware on DTF
12526
views
Post updated on 08/27/2022
First of all, many thanks to everyone who commented and gave advice. Despite the fact that there were many tips and many were diverse, I tried to get acquainted with all of them. For a person who got into the topic of PC assembly, the infa was useful. I can’t say that I understood and took into account everything, so I hope I won’t get comments: you are an idiot, you should have done it this way. But at least, I hope, I did not make fatal mistakes. nine0003
I have crossed the Rubicon. This means that I have purchased all the components. By the end of next week I will be able to put it all together.
At first I thought about what to do with the post, but decided not to delete the original message, perhaps someone will have the same context and the original post, comments on it and the final result will help something.
I throw off the entire list of components with the price for which I bought it. And the final amount of how much the PC cost according to the price list in August 2022 without buying components from Avito or from China.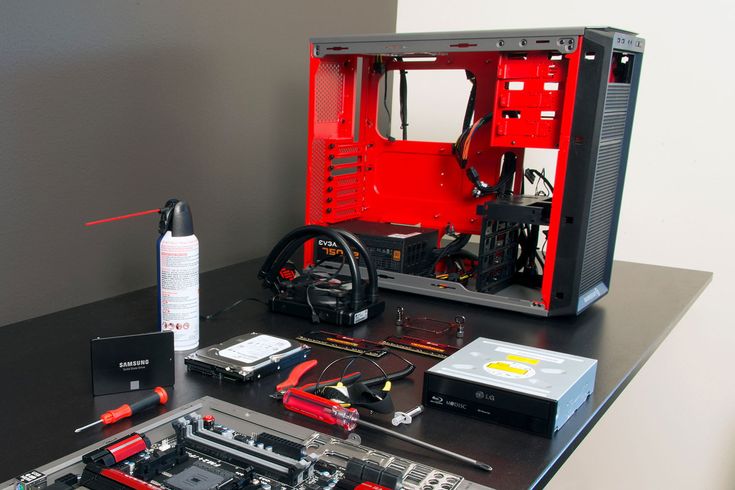 nine0003
Motherboard MSI MAG B660 TOMAHAWK WIFI (LGA 1700, Intel B660, 4xDDR5-4800MHz, 2xPCI-Ex16, 3xM.2, Standard-ATX) – 28000
Processor Intel Core i5-12600K BOX – 27003 9002 GIGABYTE RTX 3080 Gaming OC 12GB video card — 63 000
RAM KINGSTON FURY BEAST 32 GB (16 GB X 2) DDR5 4800 MHz CL38 — 14769
DEEPCOOL PQ850M power supply — 8727
SSD NV7000 1 SSD NV7000 1.
Deepcool AK400 processor cooler — 1917
Chassis — ATX Fractal Design PoP Air RGB White TG Chassis, Midi-Tower — 8950
Monitor — 27 Monitor LG 27UP850-W white (purchased for 41,000 earlier)
202 921 — Final price.
Only nice little things remain: monitor arm, dualsense, functional and pleasant mouse and keyboard (I’m used to Makovsky, but I want to try the mechanics).
Once again, thanks to everyone who took the time. And again I go into read-only mode.
_________________________
Main post
Hello everyone, I decided to ask a question about the assembly. I’m doing this for the first time in 15 years. For the last 10 years I have been working with Mac, but now there are practical tasks that are easier to solve on a good build.
I am not very familiar with the intricacies of assembly, selection of components, but in general I understand a little and, having determined my budget (up to 150k), I try to assemble a working machine.
Here I would like to list a set of components that I decided to buy, and ask for help and criticism. The main question is whether it will live. The second question is what can be improved and saved. nine0003
Based on the video card as the most expensive element — gigabyte rtx 3080 gaming oc 12gb. Already on hand (actually everything that is now). I took it for 63,000.
Processor — Intel Core i5-12600K. Looked, read the reviews, I think a good option.
Motherboard. The most difficult question for me. The budget for it is up to 20,000. So far I have looked — ASUS TUF GAMING B660M-PLUS WIFI D4. Seems to fit.
Power supply COUGAR GEX850 850W.
Kingston NV1 SSD 500 GB M.2 SNVS/500G
HDD 1 tb Toshiba 1 TB HDWL110UZSVA
RAM Kingston FURY Beast RGB 16 GB (8 GB x 2) DDR4 3600 MHz DIMM CL17
I want to collect all this in a Fractal Design Torrent nano White case. I looked at the technical characteristics and as far as I understood, both the video card and the motherboard from the list will fit into it. I really like the design and want a compact stylish unit. I can take his BU in perfect condition for 7000 + fan from the same company as a gift from the seller.
What are the tasks facing the assembly — the next 2-3 years, training a girl in Photoshop, Illustrator, After Effects with access to 2D animation, rendering and Frame by Frame animation, then something with the transition to 3D, blender + how it goes. For such tasks, as far as I understand, the car turns out to be overpriced, but I think a lot depends on a cool workplace and with a good car it will turn out more. nine0003
The second task is gaming, but light. There are Olegs, there is Series X, but there is a desire to extend an HDMI cable to a 4K TV and play spider or Stray with a PS5 gamepad.
This is where the questions actually arise:
- whether the PC will turn out to be stillborn
- whether he has a normal potential and the possibility of an upgrade (there will be money)
- What can be improved and finalized except for the processor (I think I won’t change it)
- Is it possible to assemble all this in a Fractal Design Torrent nano White case and whether it will suffocate there.
Thank you all in advance for your comments. Hopefully, with your help, things will turn out okay.
Assembling the system unit with your own hands in 10 steps
Is it scary to assemble the system unit yourself? Don’t worry. This guide explains everything step by step: it will help you to cope with the task in no time.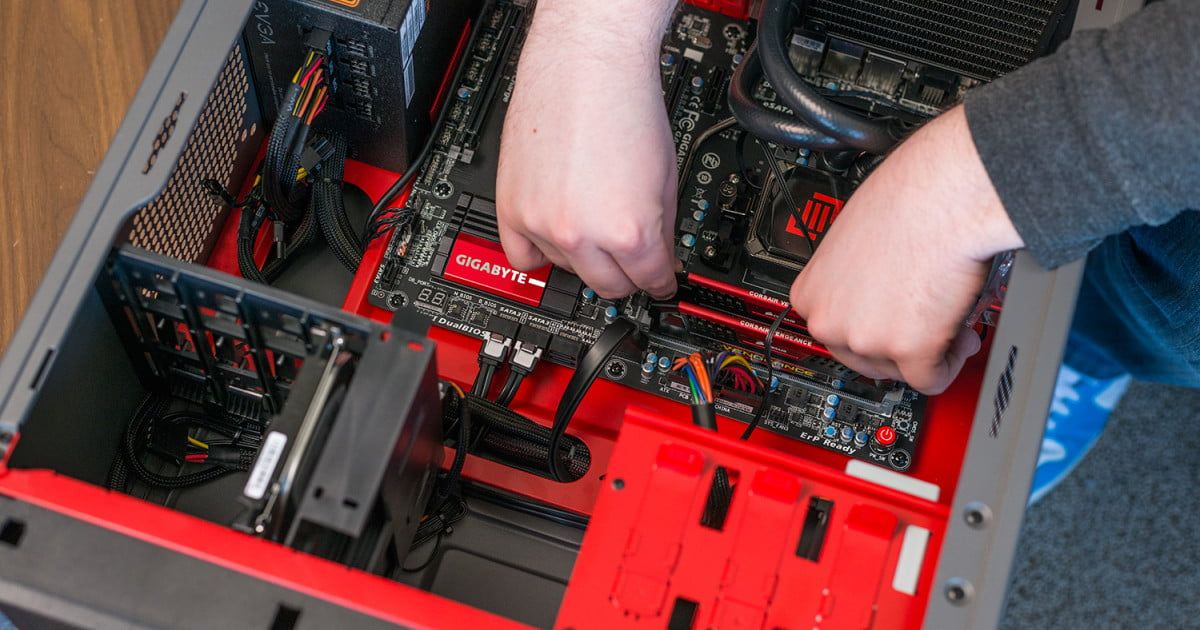
Advantages and disadvantages of self-assembly of the system unit
As a rule, the cost of a finished PC includes the work of an assembler. It also happens that the computer has stuffing elements that are necessary for one user, and for another — no need at all.
Two main advantages of self-assembly of a PC follow from this:
- the ability to create a computer that will contain only everything you need, specifically for your tasks;
- savings. nine0076
There are also a couple of minuses:
- an inexperienced user may not cope with the task on the first try and may even damage components;
- wasted time.
How to assemble the system unit yourself
In fact, the process of assembling a PC with your own hands is a simple matter. For a long time, computer hardware manufacturers have approved the Advanced Technology Extended standard, which the system components correspond to. This makes it possible to create a modular type design, based on personal needs, allows you to add and change the filling. It is only important that the components are compatible. nine0003
Checking the compatibility of components
The foundation of the entire PC is the motherboard (system) board. All parts of the assembly are connected to it. If the elements are incompatible, they simply won’t work.
What to consider:
- Socket — processor socket — for the motherboard and the CPU must be identical. It is indicated in the characteristics of both devices. It is also worth noting that the device manufacturer must be the same: it will not be possible to install an Intel CPU in an AMD “mother”, and vice versa. nine0076
Note : other accessories are not linked to the manufacturer. For example, an AMD RADEON video card is quite capable of working in tandem with Intel processors, just like NVidia video cards with some RYZEN. It is believed that the use of components from the same manufacturer gives the best results. But this does not mean at all that, having installed models of different brands, the user will not start the system without dancing with a tambourine and will not be able to work comfortably on it in the future. nine0136
- «Mother» and RAM — you need to install only those brackets that the board supports. It is also worth noting: if more than one RAM bar is installed, then identical modules must be installed: matching timings and frequencies are the key to normal computer performance.
- Motherboard and video card compatibility — relevant for gaming system units. Here you should pay attention to the number of pins (PIN) that are present in the GPU that need additional power. In modern models there are 6 or 8 pins. nine0076
- The number of PCI-E slots occupied by the GPU. In most cases, this is one slot, but there are quite powerful and large models that need two. For this reason, it is better to choose a motherboard with a margin. It also gives you the opportunity to upgrade.
- Chassis and board form factor. In the specifications, these data are always indicated. A small platform can be placed in a large case, but not vice versa.
- GPU dimensions.
 The maximum length of a video card that can be installed in the case is also indicated in the specifications. nine0076
- Cooling system. Boxed versions of processors are equipped with a cooler, however, fans are not included with OEM versions: they will have to be purchased separately. Here, too, it is worth considering compatibility with the motherboard, the dimensions of the case, because it also happens that a too large cooler can block access to the RAM slots.
- Storage connectors. There should be at least two of them on the board: so there will be a place for a hard drive and a solid state drive.
- The power of the power supply. The network has special calculators that help calculate the optimal indicator. However, it is better to take the option more powerful by 20-30%.
Now that everything is clear with the compatibility of the elements, it’s time to assemble the system unit. How to proceed further — in the full guide below.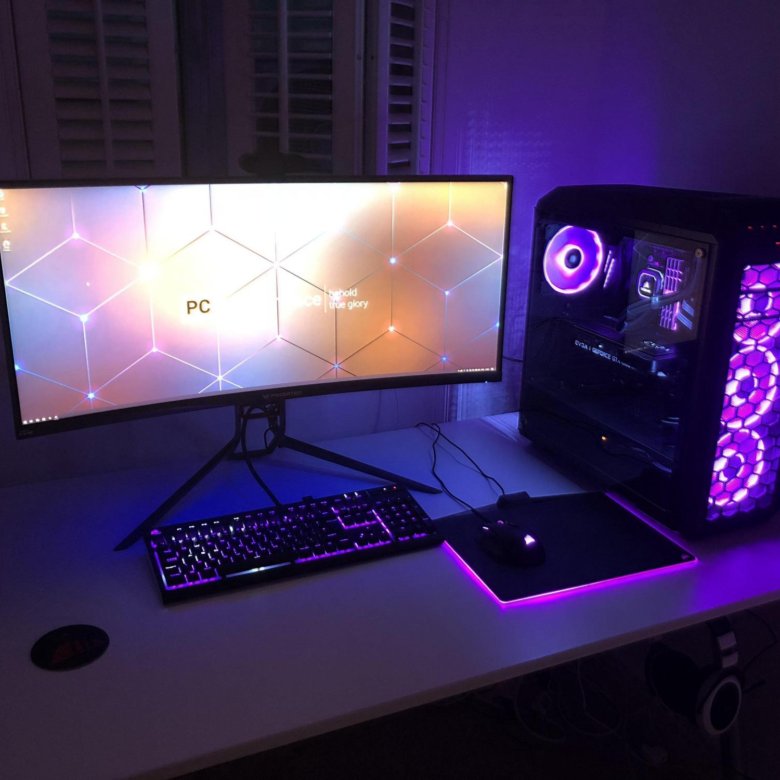
Important : Wear an anti-static wrist strap and/or protective gloves before starting any work to prevent damage to components by accidental electrical discharge. It is also worth making sure that none of the parts of the system unit was connected to electricity. nine0136
Read also: Which processor is better for gaming, AMD or INTEL — choose from 2 manufacturers Everything except screws is included. As you can see, the task is not difficult, the main thing is accuracy.
Not for nothing that form factors were mentioned above in the article. If the compactness of the assembly is not important, it is better to choose the largest motherboard: when it comes to wiring, and there are a lot of them, it is easier to do this with a large board. nine0003
Advice : Before you put the motherboard in the case, it is better to put the CPU and RAM in it first. So the user’s movements will not be limited.
Installing the power supply
Often in modern cases, the PSU installation compartment is located at the bottom, which improves ventilation efficiency. This must be taken into account so that when connecting the cable length is sufficient for system components located at a decent distance from the PSU. nine0003
RECOMMENDATION : modular power supplies like the Proton 1000W are convenient, in which all cables are disconnected. Thanks to this, wires with extra connectors can be simply removed.
Processor
Installing the CPU is also easy. But first you should remember: it is important not to try to press it into the motherboard. Excessive force may damage components beyond repair.
How to do it correctly:
- Remove the plug from the socket on the board.
- Find the arrow marks on the corner of the CPU and on the motherboard connector. These are the so-called keys.
- Pull back the fastener to expose the socket.
- Check whether the keys on both components match. If yes, it remains only to carefully insert the processor into the motherboard, close the connector and fix it with a lever.
Read more: Installing the processor on the motherboard: 3 steps
Cooling system
Installed on the CPU. But first you need to degrease the components and apply thermal paste — a substance to improve thermal conductivity. It is applied with a syringe and gently spread over the surface with a thin layer. Cardboard, thick paper or an old plastic card will come in handy here.
Regardless of the type of cooling and brand, the system is inserted into the CPU FAN connector, which is located on the board.
How to install a cooling system (CO) on an Intel CPU with your own hands
The coolers of this manufacturer are distinguished by a rather simple mounting method, implemented by four legs that snap into place. There are also identification marks in the form of keys, so everything is done easily.
- Find the connectors for the cooling feet on the motherboard.
- Insert the feet into the slots.
- Fix the cooler using the latches.
- Connect the wires to the power supply.
Advice : if the wire is too long, then it is worth fixing it somehow so that it does not get into the fan. nine0136
Self-installation of CO on the CPU from AMD
Here, too, everything is simple. The scheme is the same, the only difference is that the latches are implemented as hinges or levers:
- Find the connector on the motherboard;
- Supply CO;
- Put on the hinges or tighten the levers;
- Connect the device to power.
HDD and SSD
Available in 2.5” and 3.5” form factor. The former are suitable for both desktop and laptop builds. The second ones are only for system blocks. They are placed in special baskets in the case and are connected by SATA-type cables, which are connected from the board to the power supply. There are also solid-state media in M2 format, which are installed directly into the motherboard. They are good for thin and light laptops, compact desktop PCs. nine0003
Note : the optical drive, if needed, is placed in the system unit in the same way as the hard drive — in a special pocket.
Installing RAM
This is probably one of the easiest tasks in the build process. Each stick of RAM has a key. It excludes the possibility of an error: the user simply will not be able to put something wrong, the maximum is not to fully insert the bar.
Correct:
- Move the tabs on the sides of the connectors.
- Insert the operating bar straight and neatly into the slot.
An audible click indicates the completion of the installation. It means that the modules are inserted normally, and the latches have returned to their original position.
Interesting: How to increase the random access memory (RAM) of a laptop in 5 steps: tips and tricks
Video card
An integral part of most assemblies. It’s not only about games, but also about systems for complex graphic tasks. In addition, a discrete can be useful if the user has chosen a processor without a graphics chip. nine0003
Important : is usually installed last. The fact is that most discs are placed in the very first PCI Express x16 slot. But if the card needs several ports, acting according to this scheme, the user blocks access to the connector located below. Power cords are pre-output to connect this component.
Gamers: PC Gaming Graphics Cards: 5 Criteria to Choose
Motherboard Power Connection
After the user installs the PSU, it is necessary to bring out two main cables: 24-pin — to the motherboard and 8-pin — to the CPU.
RECOMMENDATION : It is a good idea to purchase a set of cable ties before assembling the PC. Using them, you can avoid inconvenience when connecting and organize everything inside the system unit so that nothing gets confused and looks neat. The aesthetic moment is especially important for those who decide to choose a case with a side window.
Connecting the front panel
If it is connected incorrectly or incompletely, you will not be able to turn on the computer. Making a mistake when assembling the system unit with your own hands will not give a block of contacts called the Front panel or F-Panel, located on the motherboard.
Most often, on the front panel of the case, like the Libra LG-01B, there are power and PC reset buttons. They also need to be connected to the board.
Inputs for headphones, monitor and other devices are also easy to connect. Everything is signed, so the main thing is to carefully read the inscriptions. nine0003
What to do if the system unit does not start
If the issue with the compatibility of components is resolved correctly, then the lack of reaction of the system unit to the inclusion is a sign that an error was made when connecting the components to the board.