How to Build a Raspberry Pi-Powered Digital Photo Frame
Skip to main content
When you purchase through links on our site, we may earn an affiliate commission. Here’s how it works.
(Image credit: Tom’s Hardware)
A digital photo frame is a small screen that can sit on your desk in your office or in your kitchen displaying your favorite pictures, changing at regular intervals. The first commercial digital photo frame was introduced in the 1990s shortly after the digital camera. Digital photo frames made a comeback in popularity during 2020, perhaps because people were staying at home more.
In this tutorial, we’ll turn our Raspberry Pi into a digital photo frame using MagicMirror and the GooglePhotos module. Please note, we will skip installation of the 2-way mirror in the original Magic Mirror project. Consider this project, “Magic Mirror, without the mirror.”
What You’ll Need
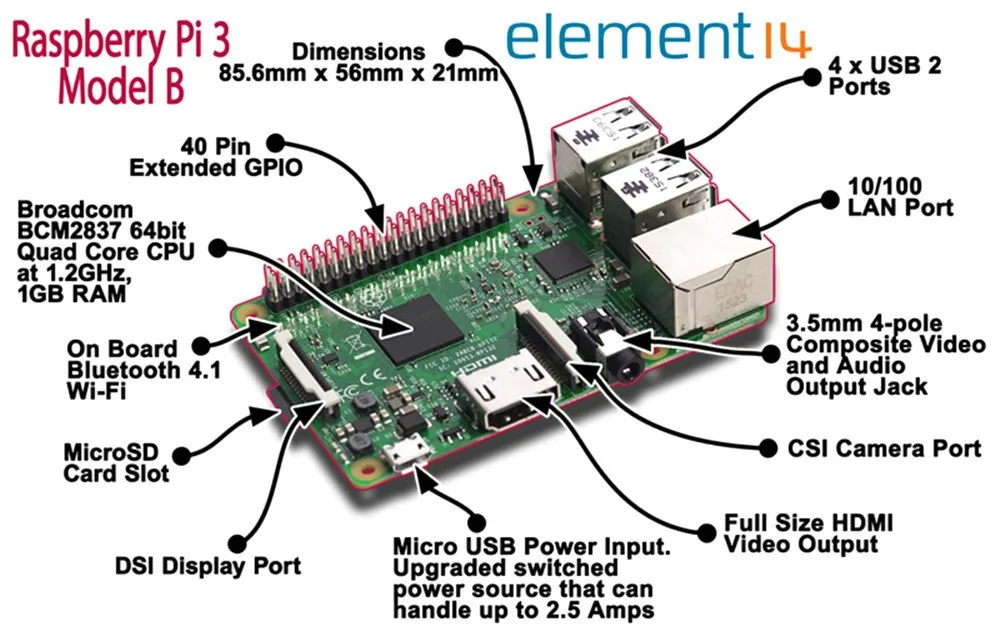
- Any Raspberry Pi 4 or Raspberry Pi 3B+ , or the new Raspberry Pi 400.
Raspberry Pi Zero W is not supported.
- 8 GB (or larger) microSD card (see best Raspberry Pi microSD cards) with a fresh install of Raspberry Pi OS with Desktop. Raspberry Pi Lite is not supported.
- Power supply/Keyboard/Mouse/Monitor/HDMI Cable (for your Raspberry Pi)
- HDMI monitor, 7” Raspberry Pi Touchscreen , or 3.5” or 5” TFT screen .
- Stand for your Touchscreen or TFT screen. Here’s one I 3D printed for this project.
- Your Gmail account.
Timing: Plan for a minimum of 1 hour to complete this project.
The majority of this tutorial is based on terminal commands. If you are not familiar with terminal commands on your Raspberry Pi, we highly recommend reviewing 25+ Linux Commands Raspberry Pi Users Need to Know first.
Setting up Your Google Photos Album
To get started with this project, you’ll need to set up a Google Photo Album. We suggest that you create a new Photo Album and add 5 to 10 photos. You can add more photos later. The more photos in your album, the longer your Raspberry Pi digital photo frame will take to load.
- On your preferred browsers on your existing laptop or desktop computer, navigate to https://photos.google.com/
- In the left menu column, click Albums.
- Click Create Album.
- Name your album something easy to remember. I recommend “MagicMirror” for your album name.
- Once you have created your album, add 5 to 10 photos to your MagicMirror photo album. You can drag and drop to upload new photos or select from your existing photos to add.
Basic Magic Mirror Install on Raspberry Pi
1. Connect your screen, mouse and keyboard to your Raspberry Pi.
2. Boot your Raspberry Pi. If you don’t already have a microSD card see our article on how to set up a Raspberry Pi for the first time or how to do a headless Raspberry Pi install.
3. Update Raspberry Pi OS. Open a terminal and enter:
sudo apt-get update && sudo apt-get upgrade
(Image credit: Tom’s Hardware)
4. Perform a basic installation of Magic Mirror on our Raspberry Pi with the instructions from the official Magic Mirror page. The commands should execute fairly quickly with npm install taking the longest depending on your Raspberry Pi model and internet speed. On a Raspberry Pi 4 with high speed internet, npm install took approximately 5 minutes to execute.
curl -sL https://deb.nodesource.com/setup_10.x | sudo -E bash -
sudo apt install -y nodejs
git clone https://github.com/MichMich/MagicMirror
cd MagicMirror
npm install
cp config/config.js.sample config/config.js
npm run start
(Image credit: Tom’s Hardware)
Your Raspberry Pi screen should now be filled with the default Magic Mirror screen.
(Image credit: Tom’s Hardware)
5. Hit Ctrl-M to minimize and return to the Pi desktop.
6. Press Ctrl-C to stop Magic Mirror. This step is necessary to install the module that will show our Google Photos.
(Image credit: Tom’s Hardware)
Google Photos Installation on Magic Mirror
1. In the Pi terminal, install the Google Photos module.
cd ~/MagicMirror/modules
git clone https://github.com/eouia/MMM-GooglePhotos.git
cd MMM-GooglePhotos
npm install
2. Open your Chromium browser and navigate to Google API Console. Login with your gmail account credentials. Full Link: https://console.developers.google.com/
3. Create a new project with a name of your choice. I named my project ‘MagicMirror123’.
4. Click ‘+ Create Credentials’ and select ‘OAuth client ID’.
(Image credit: Tom’s Hardware)
5. For Authorization Type, select ‘TVs and Limited Input devices’ from the dropdown menu
(Image credit: Tom’s Hardware)
6. Click ‘Create’ to create your OAuth client ID.
(Image credit: Tom’s Hardware)
7. Click ‘OK’ to return to the main Credentials page for your project.
(Image credit: Tom’s Hardware)
8. On the OAuth 2.0 Client ID you just created, click the down arrow to download your credentials.
(Image credit: Tom’s Hardware)
(Image credit: Tom’s Hardware)
9. Open your File Manager from your Raspberry Pi desktop, navigate to Downloads and rename the file you just downloaded from ‘client_secret-x.json’ to ‘credentials.json’.
(Image credit: Tom’s Hardware)
10. Move your newly renamed ‘credentials.json’ file to your MagicMirror/modules/MMM-GooglePhotos folder.
11. In your Terminal, run the following command to authenticate your Pi.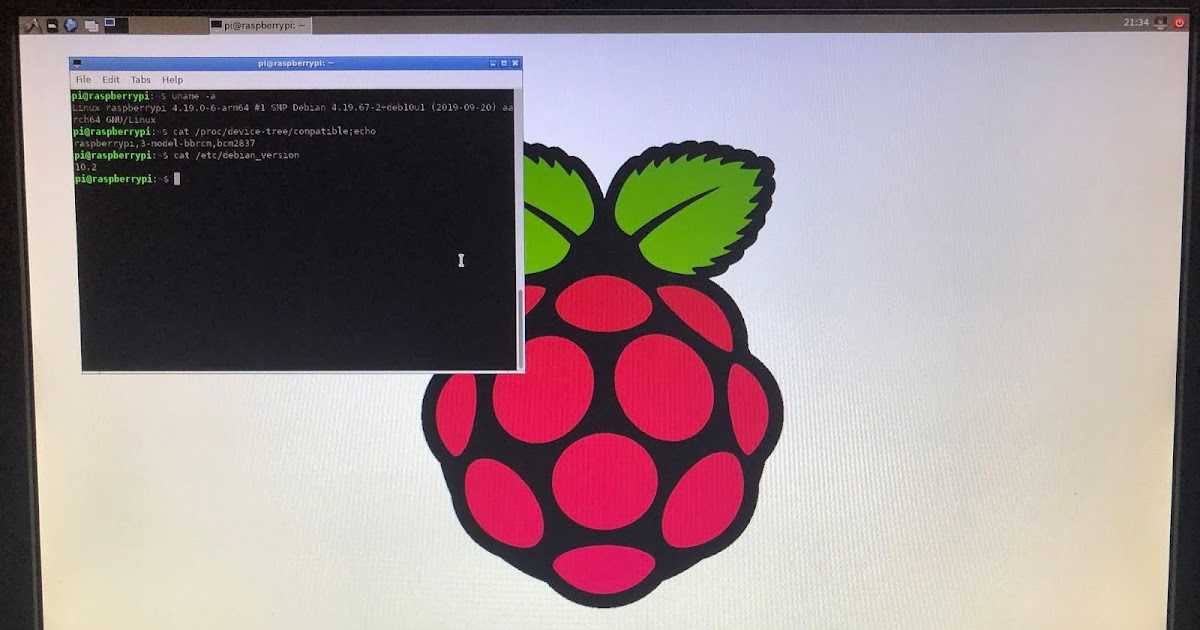
cd ~/MagicMirror/modules/MMM-GooglePhotos
node generate_token.js
12. Select your account when Google prompts you to authorize your device.
(Image credit: Tom’s Hardware)
13. Scroll down, click ‘Advanced’ and then ‘Go to MagicMirror (unsafe)’.
(Image credit: Tom’s Hardware)
(Image credit: Tom’s Hardware)
14. Grant MagicMirror permissions on the following screens by clicking ‘Allow’ for each prompt.
(Image credit: Tom’s Hardware)
(Image credit: Tom’s Hardware)
(Image credit: Tom’s Hardware)
15. Copy your Success code and paste it into your terminal. Press Enter.
(Image credit: Tom’s Hardware)
(Image credit: Tom’s Hardware)
16. Open your File Manager and navigate to /home/pi/MagicMirror/modules/MMM-GooglePhotos or type ‘ls’ in your Terminal (within the MMM-GooglePhotos directory) to view all files. If you see token.json as a file within this folder, you have successfully authorized your device to access your Google Photos.
(Image credit: Tom’s Hardware)
17. Open the config.js file for editing in the /home/pi/MagicMirror/config folder.
(Image credit: Tom’s Hardware)
18. In your config.js file, comment out all modules except for notifications by adding ‘/*’ before the Clock module and ‘*/’ after the Newsfeed module.
(Image credit: Tom’s Hardware)
(Image credit: Tom’s Hardware)
19. Add the code for MMM-GooglePhotos into the modules section of your config.js file.
{
  module: "MMM-GooglePhotos",
  position: "fullscreen_above",
  config: {
		albums: ["MagicMirror"], // Set your album name.
		updateInterval: 1000 * 60, // minimum 10 seconds.
		sort: "random", // "new", "old", "random"
		uploadAlbum: null, // Only album created by `create_uploadable_album.js`.
		condition: {
			fromDate: null, // Or "2018-03", RFC ... format available
			toDate: null, // Or "2019-12-25",
			minWidth: null, // Or 400
			maxWidth: null, // Or 8000
			minHeight: null, // Or 400
			maxHeight: null, // Or 8000
			minWHRatio: null,
			maxWHRatio: null,
		},
		showWidth: 800, // Set this to the resolution of your screen width
		showHeight: 480, // Set this to the resolution of your screen height
		timeFormat: "YYYY/MM/DD HH:mm", // Or `relative` can be used.
  }
},
condition: {
fromDate: null, // Or "2018-03", RFC ... format available
toDate: null, // Or "2019-12-25",
minWidth: null, // Or 400
maxWidth: null, // Or 8000
minHeight: null, // Or 400
maxHeight: null, // Or 8000
minWHRatio: null,
maxWHRatio: null,
},
showWidth: 800, // Set this to the resolution of your screen width
showHeight: 480, // Set this to the resolution of your screen height
timeFormat: "YYYY/MM/DD HH:mm", // Or `relative` can be used.
}
},
20. In the config section of MMM-GooglePhotos, enter the name of the album you created at the beginning of this project in the ‘albums’ parameter.
(Image credit: Tom’s Hardware)
21. Set the order in which you wish to view your photos in the ‘sort’ parameter.
- New = latest images will display first
- Old = images will display from oldest to newest
- Random = images will display in random order
22. Set the frequency to change the images in the ‘updateInterval’ parameter. The default is 60 seconds.
23. Set the resolution of the screen that you are using in the parameters ‘showWidth’ and ‘showHeight’. The default resolution for the 7” Raspberry Pi screen is 800 x 480.
(Image credit: Tom’s Hardware)
24. Save your changes in config.js.
25. In your terminal, run the command ‘npm run start’ to restart your Magic Mirror. There will be a 30 second or more delay while your Pi pulls images from your Google Photos album. Your Pi will need to stay connected to the internet to display your images.
(Image credit: Tom’s Hardware)
26. To stop Magic Mirror, press Ctrl-M followed by Ctrl-C in the terminal. You can continue to make adjustments in your config.js file until you are happy with the way that your images are displayed.
27. At this point, you can start adding more images to your Google Photos album. Your Raspberry Pi Magic Mirror digital photo frame should automatically update with any new images.
Launch Magic Mirror on Boot
If you reboot your Pi, you’ll need to enter the command ‘npm run start’ each time you want to start your digital photo frame. Let’s set our Raspberry Pi to display our digital photo frame on boot.
1. Install PM2 by running the following commands in your Raspberry Pi terminal. PM2 is a daemon process manager to keep your applications running continuously. In this project we will utilize PM2 to continuously run Magic Mirror for our digital photo frame.
sudo npm install -g pm2
pm2 startup
(Image credit: Tom’s Hardware)
2. Your terminal will provide the next command. Copy and paste the command into your terminal.
sudo env PATH=$PATH:/usr/bin /usr/lib/node_modules/pm2/bin/pm2 startup systemd -u pi --hp /home/pi
(Image credit: Tom’s Hardware)
(Image credit: Tom’s Hardware)
3. Create a shell script named mm.sh.
cd ~
nano mm.sh
(Image credit: Tom’s Hardware)
4. Within mm.sh enter the commands to start Magic Mirror.
cd ./MagicMirror
DISPLAY=:0 npm start
(Image credit: Tom’s Hardware)
5. Press Ctrl-X to exit, ‘y’ to Save mm.sh, and Enter to return to the Terminal.
(Image credit: Tom’s Hardware)
6. Make mm.sh an executable file with the chmod command.
chmod +x mm.sh
(Image credit: Tom’s Hardware)
7. Start your Magic Mirror with PM2.
pm2 start mm.sh
(Image credit: Tom’s Hardware)
Your Magic Mirror should automatically start running again. You can test your auto start functionality with a reboot now.
(Image credit: Tom’s Hardware)
Disable Screen Blanking
You may find that after setting up your automatic digital photo frame that your Raspberry Pi screen goes blank after 10 minutes. In this case, you can disable screen blanking.
1. Navigate to the Raspberry Pi Configuration menu.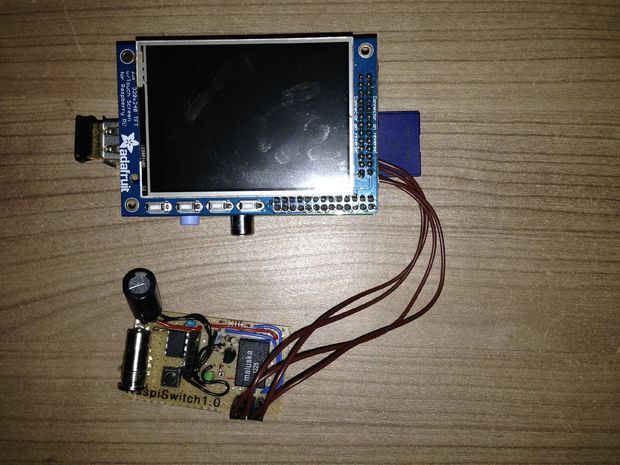 From your Raspberry Pi start menu, click ‘Preferences’ and select ‘Raspberry Pi Configuration’.
(Image credit: Tom’s Hardware)
2. Toggle Screen Blanking to Disable on the Display tab. Select the ‘Display’ tab. For ‘Screen Blanking’ select Disable. Click OK.
(Image credit: Tom’s Hardware)
3. Click Yes when you are prompted to Reboot.
Today’s best Raspberry Pi 4 deals
5 Amazon customer reviews
☆☆☆☆☆
$179.99
View
Get instant access to breaking news, in-depth reviews and helpful tips.
Contact me with news and offers from other Future brandsReceive email from us on behalf of our trusted partners or sponsors
Topics
Raspberry Pi
Tom’s Hardware is part of Future US Inc, an international media group and leading digital publisher. Visit our corporate site .
©
Future US, Inc. Full 7th Floor, 130 West 42nd Street,
New York,
NY 10036.
A Simple Raspberry Pi Photo Frame
The Raspberry Pi photo frame is a perfect setup for anyone who wants to display photos of their loved ones, memories or anything else might want to display.
This photo frame is a pretty straightforward project and shouldn’t take you too long to set up. You will need the full version of Raspbian installed as we make use of the graphical user interface (GUI).
I pretty much only cover the software side of things in this tutorial there are some pretty cool frame designs out there if you want to extend this further.
The digital photo frame we make is very basic and can be kept completely offline. Connecting to services such as Google Drive and Flickr will require a lot more work.
Equipment
The equipment that you will need for this digital photo frame is listed below.
Recommended
Optional
- Raspberry Pi Case
- USB Keyboard
- USB Mouse
Video
If you want to see a video on how to do this tutorial, then be sure to check out the one below.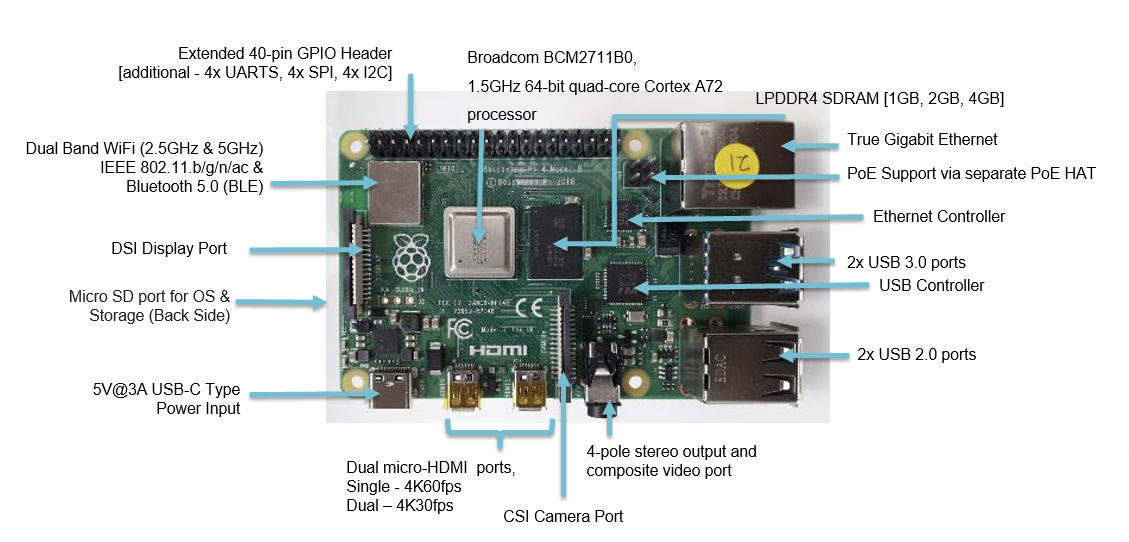
I go through everything you need to know about getting this project working.
Adblock blocking the video? Support us by subscribing to our ad-free service.
Hardware
For this project, I am just using the official Raspberry Pi touchscreen that I purchased earlier this year. However, you can use pretty much any screen that you can get your hands on. Just make sure you can hook it up to the Pi either over the DSI port, HDMI port or using a custom HAT.
If you’re looking for some 3D printable frames for either the official touch screen or just a spare screen you have, then Thingiverse has some pretty cool designs. You can find them over at Thingiverse.
Setting Up the Raspberry Pi Photo Frame Software
To get this all setup correctly we are going to need to do a bit of setup on the software side of things.
Firstly, we want to prevent the screen from going blank. It is a power saving setting on the Pi.
1. To turn off screen blanking, open up the lightdm.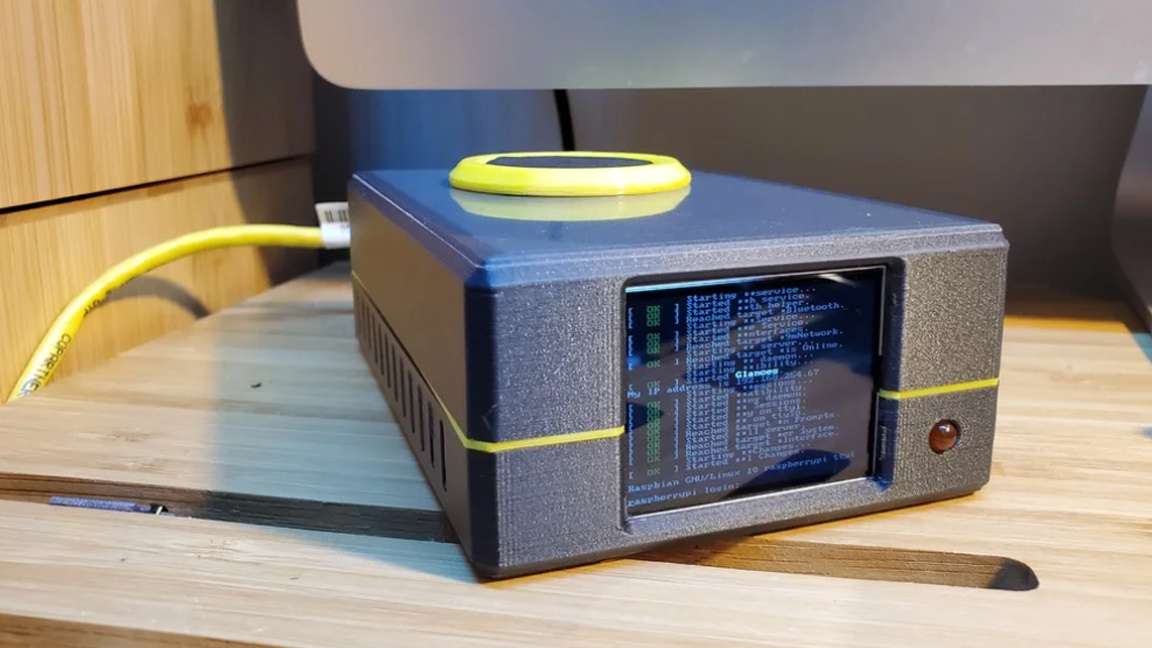 conf file in the nano text editor.
2. Now in here add the following line anywhere beneath the [SeatsDefaults] line.
3. Save & exit by pressing CTRL + X and then Y.
4. Now reboot the Pi, and the screen should no longer switch off after 10 minutes of inactivity. To reboot simply run the following:
If you want to be able to drag and drop your images onto the Pi, you may want to look at setting up a network attached storage. Will allow you to set up a folder that is available on your local network. If you’re in doing such a thing, then my guide on a Raspberry Pi Samba server will take you through all the necessary steps.
I also highly recommend that you setup SSH so you will have remote access when the slideshow is in action. There is no easy way to exit the slideshow unless you turn the device on and off and don’t have it automatically starting.
To set up our slideshow, we’re going to use the feh package. Feh is image viewer and cataloguer. It is a fast image viewer that doesn’t get bogged down with huge GUI dependencies. I chose this as it was the most lightweight package that worked without any huge complications.
1. To install the package, use the following line:
2. Now to test that it works enter the following line. Replace /media/NASHDD1/test with the directory that contains all your image.
3. Now we can use short tags to make this command a lot shorter. You can read more about all the flags you can use over at the feh manual page.
4. Now as you will notice this locks up the command line bar. To fix this, add the & after the command and the script/process will launch in the background.
5. So now let’s store this in a simple script file. This way you can add or change it later. To make the file enter the following command.
6. In here, enter the following lines.
7. Now that’s done you can test it by running the following command.
8. Finally, let’s have it start at boot. Now it is important that you have SSH enabled so you can access the Pi remotely as you will lose access to the GUI/Screen. So make sure you have done this before setting it to launch at boot up.
9. To do this open up the rc.local file by entering the following command.
10. Add the following before the exit 0 line in this folder.
11. If you ever need to kill the process as you may want to be able to access the desktop, simply enter the following line.
Conclusion
You should now have your very own slideshow of pictures going. If you end up with any troubles, then double check all the steps and look for any errors. If you’re still having trouble, then be sure to seek help in the comments section below.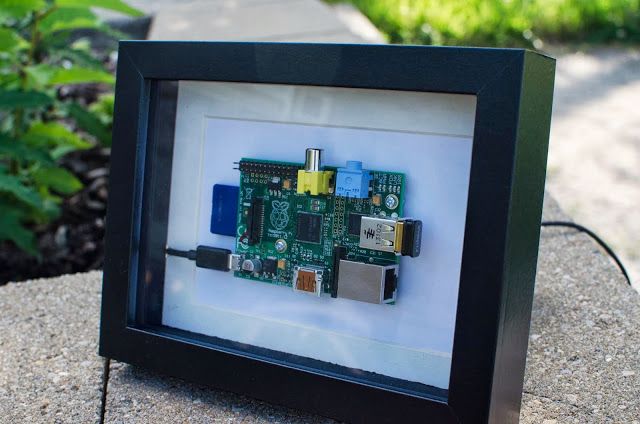
I hope you have been able to get your Raspberry Pi photo frame working correctly. If you have any trouble or have an extension that you would like to share, then be sure to leave a comment. As always if you like my stuff be sure to follow Pi My Life Up on any major social network.
Top 7 Raspberry Pi Picture Frame Projects • Okie Doki
You can do so much with your Raspberry Pi, from creating a media center to controlling a robot. One of the most popular projects is the display of photos in slideshow format. And because it’s so flexible, there are many ways to do it.
Illustrating the versatility of the Raspberry Pi, here are seven awesome digital photo frame designs you can try.
/r/earthporn sub-reddit is a great place to see some of the most amazing things the planet has to offer. meanwhile /r/ showerthoughts contains gems of wisdom. nine0003
Windows apps, mobile apps, games — EVERYTHING FOR FREE, in our private telegram channel — Subscribe 🙂
Reddit user tvm78 combined the two to create a frame that displays a beautiful scene juxtaposed with (potentially) insightful thoughts.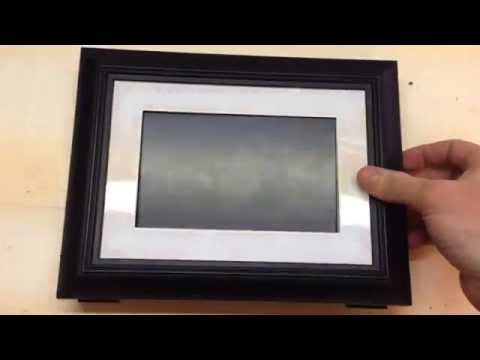 The result is a random inspirational poster.
Head to Reddit for information on how to create your own Python script. If you find the instructions a little off, we’ve organized them in our Raspberry Pi 9 inspirational photo frame tutorial.0015
We think you’ll agree that the result is pretty magical, but you can certainly think of a better combination.
Want to see amazing photos of your family, friends and places you’ve visited, as well as the latest weather reports?
Designed for Raspberry Pi 2 or later, this project turns your display into a weather station using the Weather Underground API. Although this is not a standard photo frame project, you can choose your own images for the background. nine0003
This is a useful project you can use to check the weather before you go.
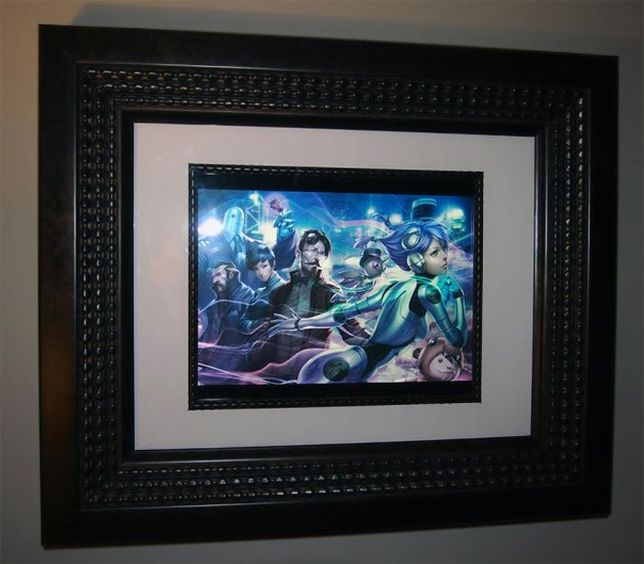
This Raspberry Pi photo frame is average in most cases, but has the advantage that it can be updated remotely. It pulls photos from a Google Drive folder so you can invite multiple people to select photos.
Created by Hackaday Reader Greg, this project also includes a wireless remote control to switch from photos to weather display. Instead of a Raspberry Pi screen, this build uses an old computer monitor, but you can use any suitable display. nine0003
Just make sure you have a compatible display adapter!
The digital photo frame looks great, but the always-on display can impact your energy bill. If you want to reduce the power consumption of your photo frame, why not add a motion detector?
This P Samuel Clay photo frame pulls images from Instagram and Flickr. It uses a motion detection script to turn on the screen only when someone is nearby. It uses an inexpensive IR sensor to detect movement and is easy enough to integrate into other frame designs. nine0003
Admittedly, the design shown here is rather peculiar. The project that hides the Raspberry Pi is probably preferable for most tastes. There’s a lot to think about if you like the idea of a Raspberry Pi photo frame with motion detection.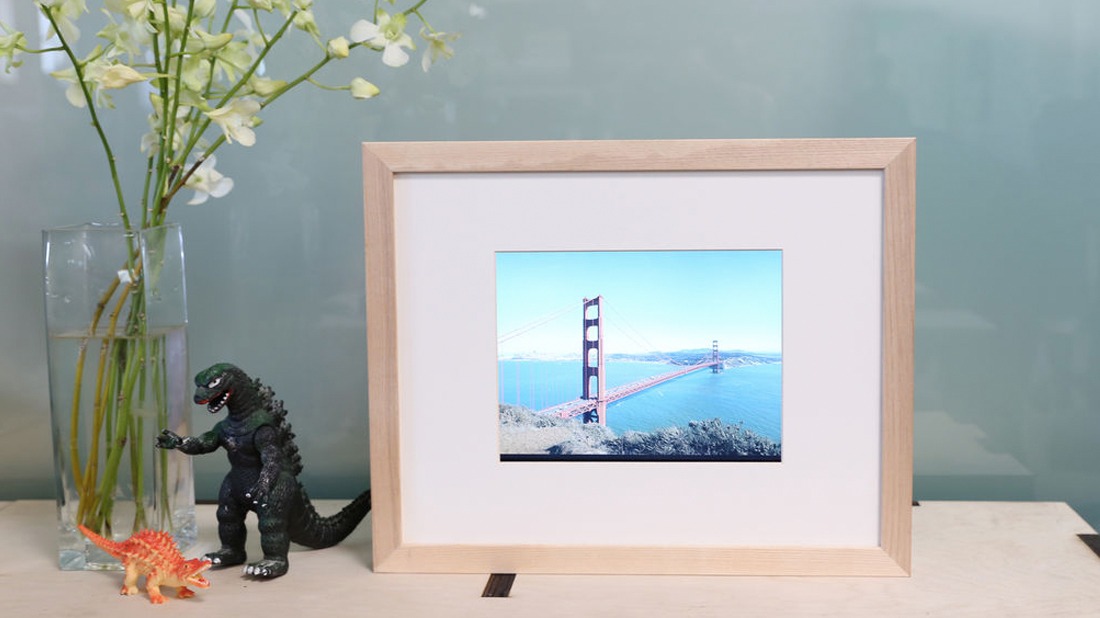
5. Display Cinemagraphs on Raspberry Pi with DynaFrame
Cinemagraphs are ideal for displaying on a digital photo frame. These are still photographs that show slight, repetitive movements — like moving photographs in the Harry Potter films. Cinemagraphs are similar, but with slightly more circling. nine0003
DynaFrame is an open source digital photography platform for the Raspberry Pi. It uses Python to display cinematics and graphs presented on a display of your choice.
In the demo video above, you will see how the project is implemented, where to get the software and how to display the images. Check the description of the video on the download link.
This is not an easy project, so it will take a long time to figure it out. If you want your build to look as impressive as it does on video, you’ll need a decent-sized display. Don’t you have anything big enough to pass? Recycle display from old laptop
or used eBay LCD TV or monitor source.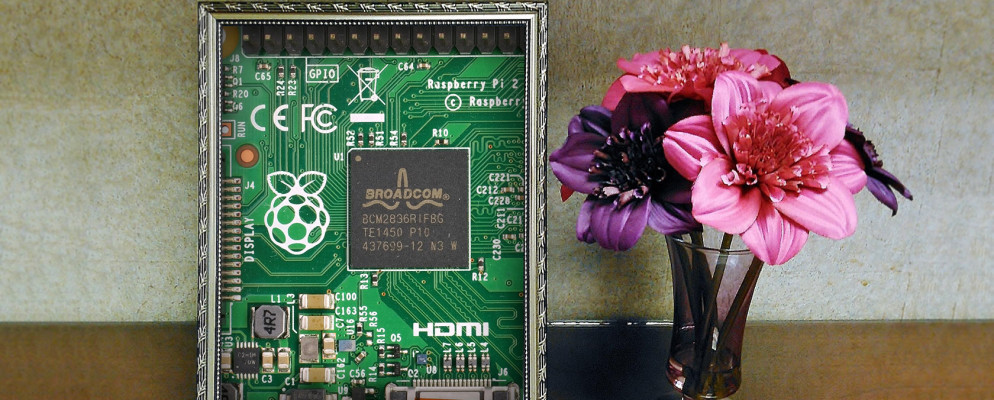
6. Raspberry Pi E-Ink Photo Frame
Most of these projects are based on a typical LCD. The advantage of the Raspberry Pi in such builds is that it can change the image easily. But what if you want to display a digital photo that wasn’t easy to change?
Response with e-ink display. YouTuber Hamed Taha demonstrates how it’s done with Raspberry Pi Zero WH and Waveshare’s Electronic Paper HAT,
The result is a pleasing black and white image. More importantly, you can disconnect the Pi from the display, resulting in even less power consumption.
Affected by e-ink? You probably saw that it is used on Amazon Kindle-if you want to know more, this is how E-INK
,
7. Raspberry Pi Photo Frame
Add Images to the Raspberry Pi Photo Frame. includes preloading photos on the SD card. In addition, photos will be available through the cloud or a network drive. But if that doesn’t suit you, there is an alternative. nine0003
With the Framen app and the framen.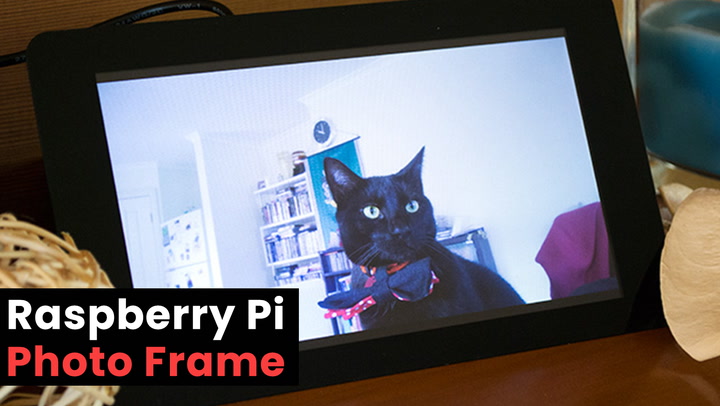 io website running on the Pi browser, you can remotely determine which images appear. Just sync them to your free Framen account from your phone, select the images and they will be displayed. Because it uses a browser to do this, programming the Pi to start up to display Framen images is very easy.
Of all the solutions on this list, Framen is probably the simplest, ideal if you plan on using the Pi for dual purpose. nine0003
Raspberry Pi Picture Frame Projects
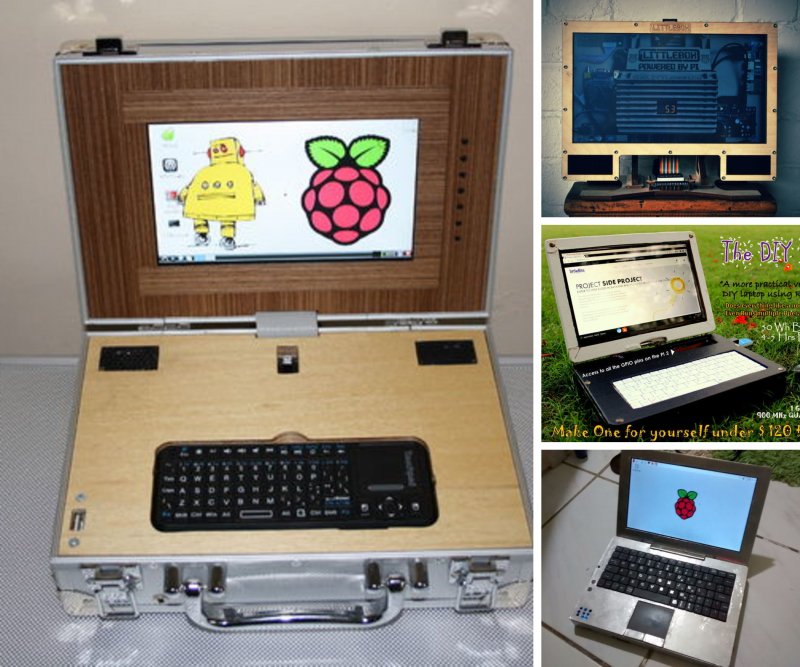
These projects are great for getting started with your own Raspberry-Pi based picture frame. At the very least, you can do without a $10 Pi Pi, an old laptop display, and a card frame.
While you’ll have to spend some money on a more polished Pi photo frame, the basics will get you started. Use them to prototype your project and fix bugs before updating your build with new components. nine0003
We showed you seven Raspberry Pi projects, which show you:
- Inspirational quotes and photos
- Photos and weather
- Rem remote photos
- Moving pictures
- displays filmmakers and carotographs
- .
 images
Find the one you like, read the details, and most importantly, explore your next Raspberry Pi project. The beauty of these projects is that they will work on almost any model — Raspberry Pi Zero, the original model, and Raspberry Pi 4.
If you want to go further, read our list of amazing applications Raspberry Pi
,
Programs for Windows, mobile applications, games — all free, in our closed telegram — subscribe 🙂
Enthusiast made a digital photo frame from Macintosh Classic II with electronic ink / Habr
daniilshat
Raspberry Pi Development *Old Hardware DIY or Do It Yourself
Developer Dave Luna presented a project for a photo frame in the case of a vintage Macintosh Classic II computer. The device is based on the Raspberry Pi, and the image is displayed on the display with electronic ink.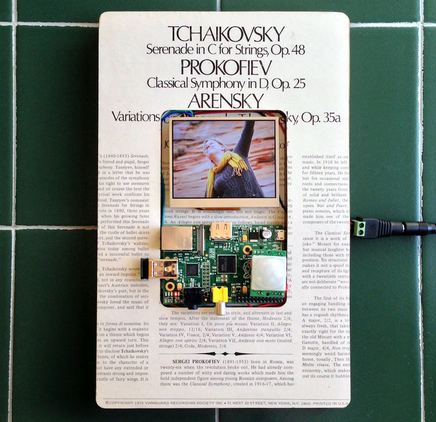
The project is based on an old Macintosh Classic II computer case without internal components. The image is displayed on a 9.7″ Waveshare E-Paper Display HAT. To display the images themselves, the developer used a Python library to interact with similar displays. nine0003
The Raspberry Pi microcomputer became the basis of the homemade gadget. The author also decided that it is necessary to turn on the device and switch modes from an authentic keyboard. Therefore, for these purposes, he purchased a set of Apple Adjustable Keyboard and Apple Desktop Bus Mouse. Both devices are first connected to the Arduino Micro, which handles clicks, and then to the Raspberry Pi. Also inside the case, the author placed a set of ordinary computer speakers that reproduce the classic sounds of the macOS interface. nine0003 Homemade device components
To create the desktop interface, the author took several screenshots in the System7.app online emulator, cropped them in the right way in Photoshop and recolored them in gray tones.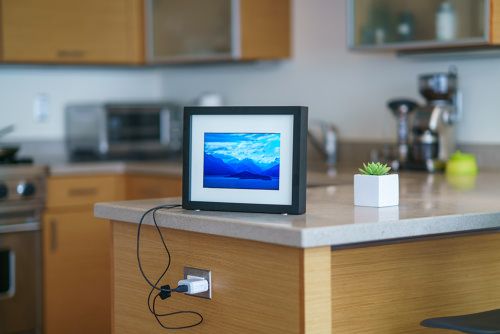 The desktop is always static, and dynamically generated photos and a clock are displayed on top of it.
Image display mode
To display an image, the developer decided not to use the standard Google Photos API. Instead, the capture of photos comes from the Chromecast, which has a mode for displaying images from the Google Photo Gallery. This helped save effort and not develop your own software to get photos from the library and show them. nine0003
To do all this, I wrote a Pseudo7 Python application that captures an image, draws a classic macOS-style frame, handles keystrokes, updates the display, and plays sound effects.
When turned on, the user sees a boot screen, at which point the system initializes all connected devices. Then a second desktop is created, on which the Chromecast is launched with a slideshow mode from the Google Photo gallery. Every two minutes a new photo appears on the desktop, and Pseudo7 captures the picture, converts it to the required format and displays it on the main e-ink display./cdn.vox-cdn.com/uploads/chorus_asset/file/24346396/FOR_DEVELOPERS_800x533.jpeg)