How to Set Up a Headless Raspberry Pi, No Monitor Needed
Skip to main content
Tom’s Hardware is supported by its audience. When you purchase through links on our site, we may earn an affiliate commission. Here’s why you can trust us.
Raspberry Pis are so convenient because they’re inexpensive and small, but connecting one to its own monitor, keyboard and mouse requires a lot more space and money. If you’re just trying to program on the Pi or use it to control electronics such as lights, motors and sensors, there’s no need to connect it to a display or input devices because you can control the system remotely, using a VNC or SSH client on your main computer. We call this screenless install a headless Raspberry Pi setup.
By default, the Raspberry Pi’s official operating system, Raspberry Pi OS (formerly known as Raspbian), installs with all forms of remote access disabled. But the good news is that you don’t need to connect to a monitor and keyboard in order to turn them on. By following the instructions below, you can create a headless Raspberry Pi that’s ready for remote access before you boot it up for the very first time. If you have a monitor and keyboard on hand, you can also see our guide on How to Set Up a Raspberry Pi for the First Time.
Installing Raspberry Pi OS on Your microSD card
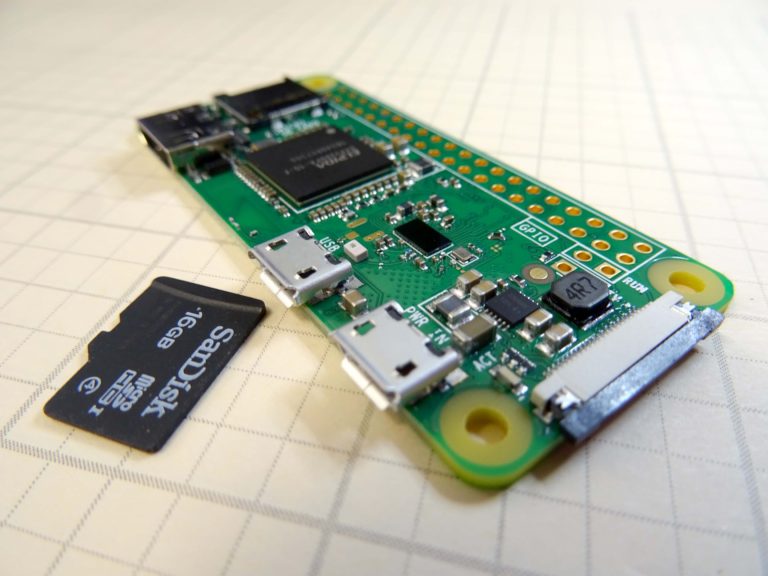
1. Insert a microSD card into your computer. Your card should be 8GB or larger (the lite version of Raspberry Pi OS will use less space). We have a list of the best microSD cards for Raspberry Pi to help you choose one that optimizes performance.
2. Download, install and run Raspberry Pi Imager .
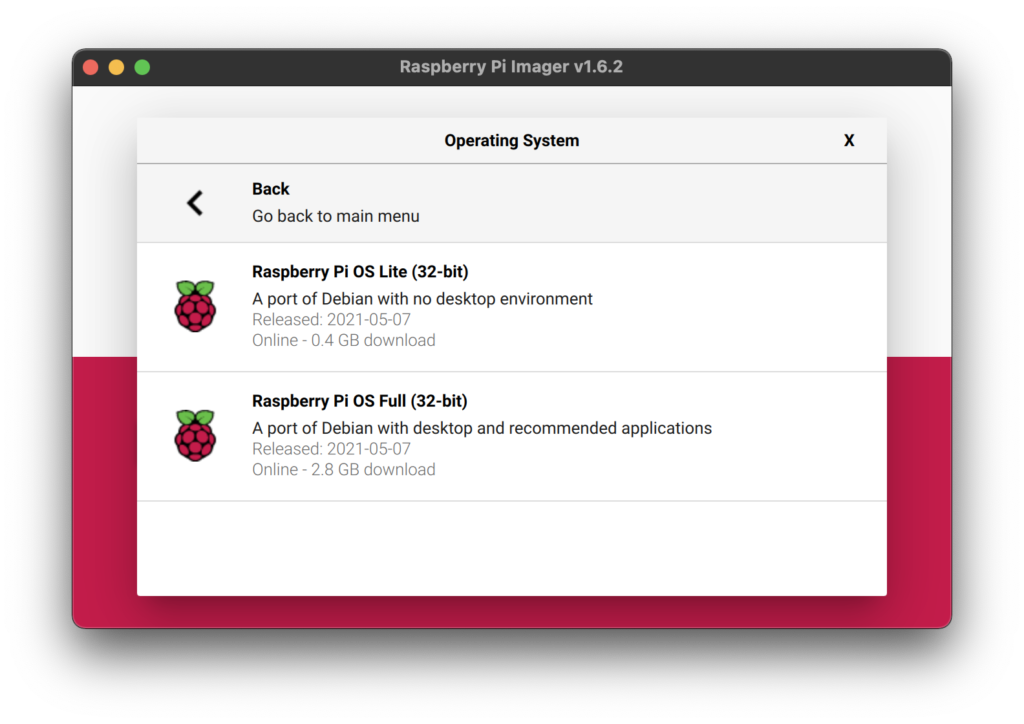
3. Click the Choose OS button. A menu appears.
(Image credit: Tom’s Hardware)
4. Select your OS. The best choice for most people is Raspberry Pi OS (32-bit). However, if you have a Pi 3 or 4, you can use the 64-bit version which is under «Pi OS (other).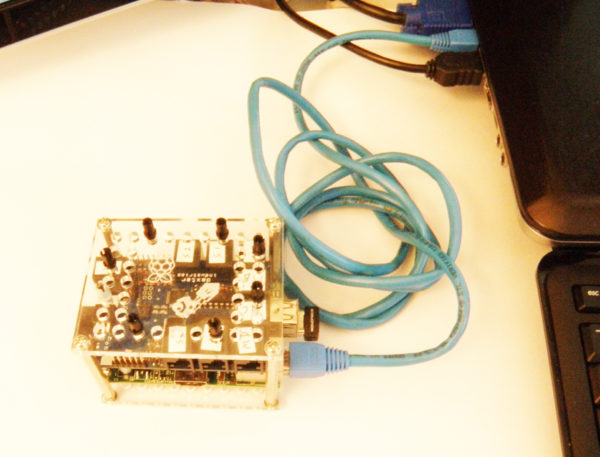 There are also other choices.
(Image credit: Tom’s Hardware)
5. Click Choose Storage and select your card from the menu.
(Image credit: Tom’s Hardware)
6. Click the settings button or hit CTRL + Shift + X to bring up the settings menu.
(Image credit: Tom’s Hardware)
A menu appears.
7. Toggle set hostname and change the hostname if you want your device to be named anything other than «raspberrypi.»
(Image credit: Tom’s Hardware)
8. Toggle enable SSH to on and select «User password authentication.»
(Image credit: Tom’s Hardware)
9. Set a username and password for your Pi. Note that if you use the password «raspberry» with username «pi,» you may get a warning message when you log in, recommending (but not forcing you) that you change the password.
(Image credit: Tom’s Hardware)
10. Set your Wi-Fi network’s SSID, password and country. Then click Save. The country usually defaults to «GB» (Great Britain) so, if you are in the U.S., you will have to scroll down a really long way to get the country code you need.
(Image credit: Tom’s Hardware)
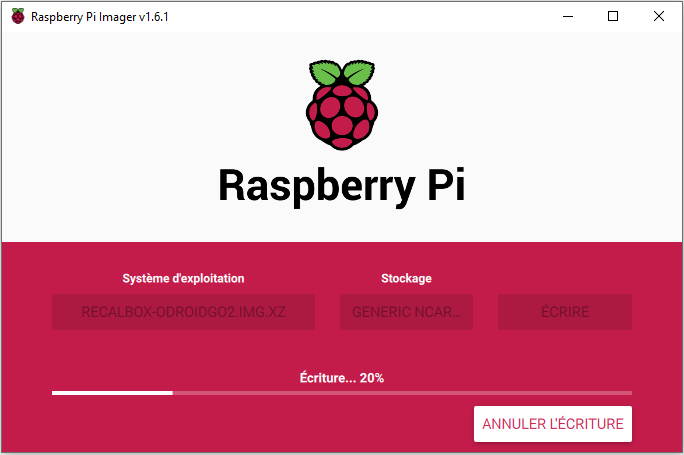
11. Click Write and click Yes if asked whether you are sure you want to continue.
(Image credit: Tom’s Hardware)
The system will now take a few minutes to download the OS and write it to your card.
(Image credit: Tom’s Hardware)
When it’s done, you can pop your card into a Raspberry Pi, boot it up, wait a few seconds for it to get onto the network and attempt to log in via SSH, provided that you’re using a Wi-Fi network and both the Pi and your client PC are connected to it.
Editing Wi-Fi on a Prewritten Card
Let’s say you already wrote a card, but forgot to enter the correct Wi-Fi credentials in Raspberry Pi Imager. Or perhaps you moved to a different Wi-Fi network. You can still change the Wi-Fi network, without attaching a screen and keyboard to the Pi.
To setup a Wi-Fi connection on your headless Raspberry Pi, open the microSD card on your PC. Then create a text file called wpa_supplicant.conf, and place it in the root directory of the microSD card. You will need the following text in the file.
country=US
ctrl_interface=DIR=/var/run/wpa_supplicant GROUP=netdev
update_config=1
network={
scan_ssid=1
ssid="your_wifi_ssid"
psk="your_wifi_password"
}
Change the country to «GB» for the UK or to another country code for a different country, and enter your actual SSID and password. Upon boot up, Raspberry Pi OS will log you into that network. However, if you’re on a public Wi-Fi network that requires you to click «Ok» on a splash page before you get Internet, this method won’t work.
Prefer to use Ethernet? If you plug your Raspberry Pi directly to a wired network, you should be able to access it by its name (raspberrypi or raspberrypi. local) without changing any other files.
Direct USB Connection (Pi Zero / Zero W Only)
My favorite way to connect is via a direct USB connection, plugging my Pi Zero W directly into a port on my PC. This method is great, because it works no matter where you are (even if there’s no available Wi-Fi), and it provides both power and a connection to your Pi, over a single cable. However, you can only do this on a Pi Zero or Zero W.
1. Open the file config.txt in the root directory of the micro SD card, and add the line dtoverlay=dwc2 to the very bottom of the file and save.
2. Open cmdline.txt and add the text modules-load=dwc2,g_ether after the word rootwait, and save the file. There are no linebreaks in this file.
3. Download and install Bonjour Print Services from apple.com (if you have Windows). It seems strange that you would need an Apple program to access a Pi from Windows, but this helps your PC see the Pi. Ignore the name; you’re not using this for printing.
4. Connect the micro USB cable to the port labeled «USB» on the Pi Zero. This will not work if you connect to the port labeled «PWR.» However, the «USB» port will also supply power to your Pi, so you don’t need to connect a dedicated power wire.
Direct Ethernet Connection
If your PC has a spare Ethernet port or you have an Ethernet-to-USB dongle, you can use a network cable to go directly from your Pi to your computer. Just make sure that you have Bonjour installed on your PC and SSH enabled on the Pi (see above). Then, you can just connect the two devices over Ethernet.
If you want the Raspberry Pi to get its Internet connection from your PC over the Ethernet port, you need to do the following in Windows 10 or 11:
1. Navigate to the Network Connections menu, which is part of the old-school Control Panel. You can get to this screen by going to Settings->Network & Internet->Wi-Fi and then clicking «Change Adapter Settings» on the right side of the screen. This works whether you are sharing an Internet connection that comes to your PC from Wi-Fi or from Ethernet.
2. Right-click on the adapter that’s connected to the Internet, and select properties.
3. Enable «Allow other network users to connect» on the «Sharing» tab.
4. Select the Ethernet port that is connected to the Raspberry Pi from the «Home networking connection» menu, and click Ok.
Connecting to Your Pi via SSH
After you have the Pi connected to your network or directly to your PC, you’ll need to establish an SSH connection.
1. Download and install Putty if you don’t already have it. Putty is the leading SSH client for Windows.
2. Enter the hostname (by default raspberrypi or raspberrypi.local ) as the address you wish to connect to in Putty, and click Open.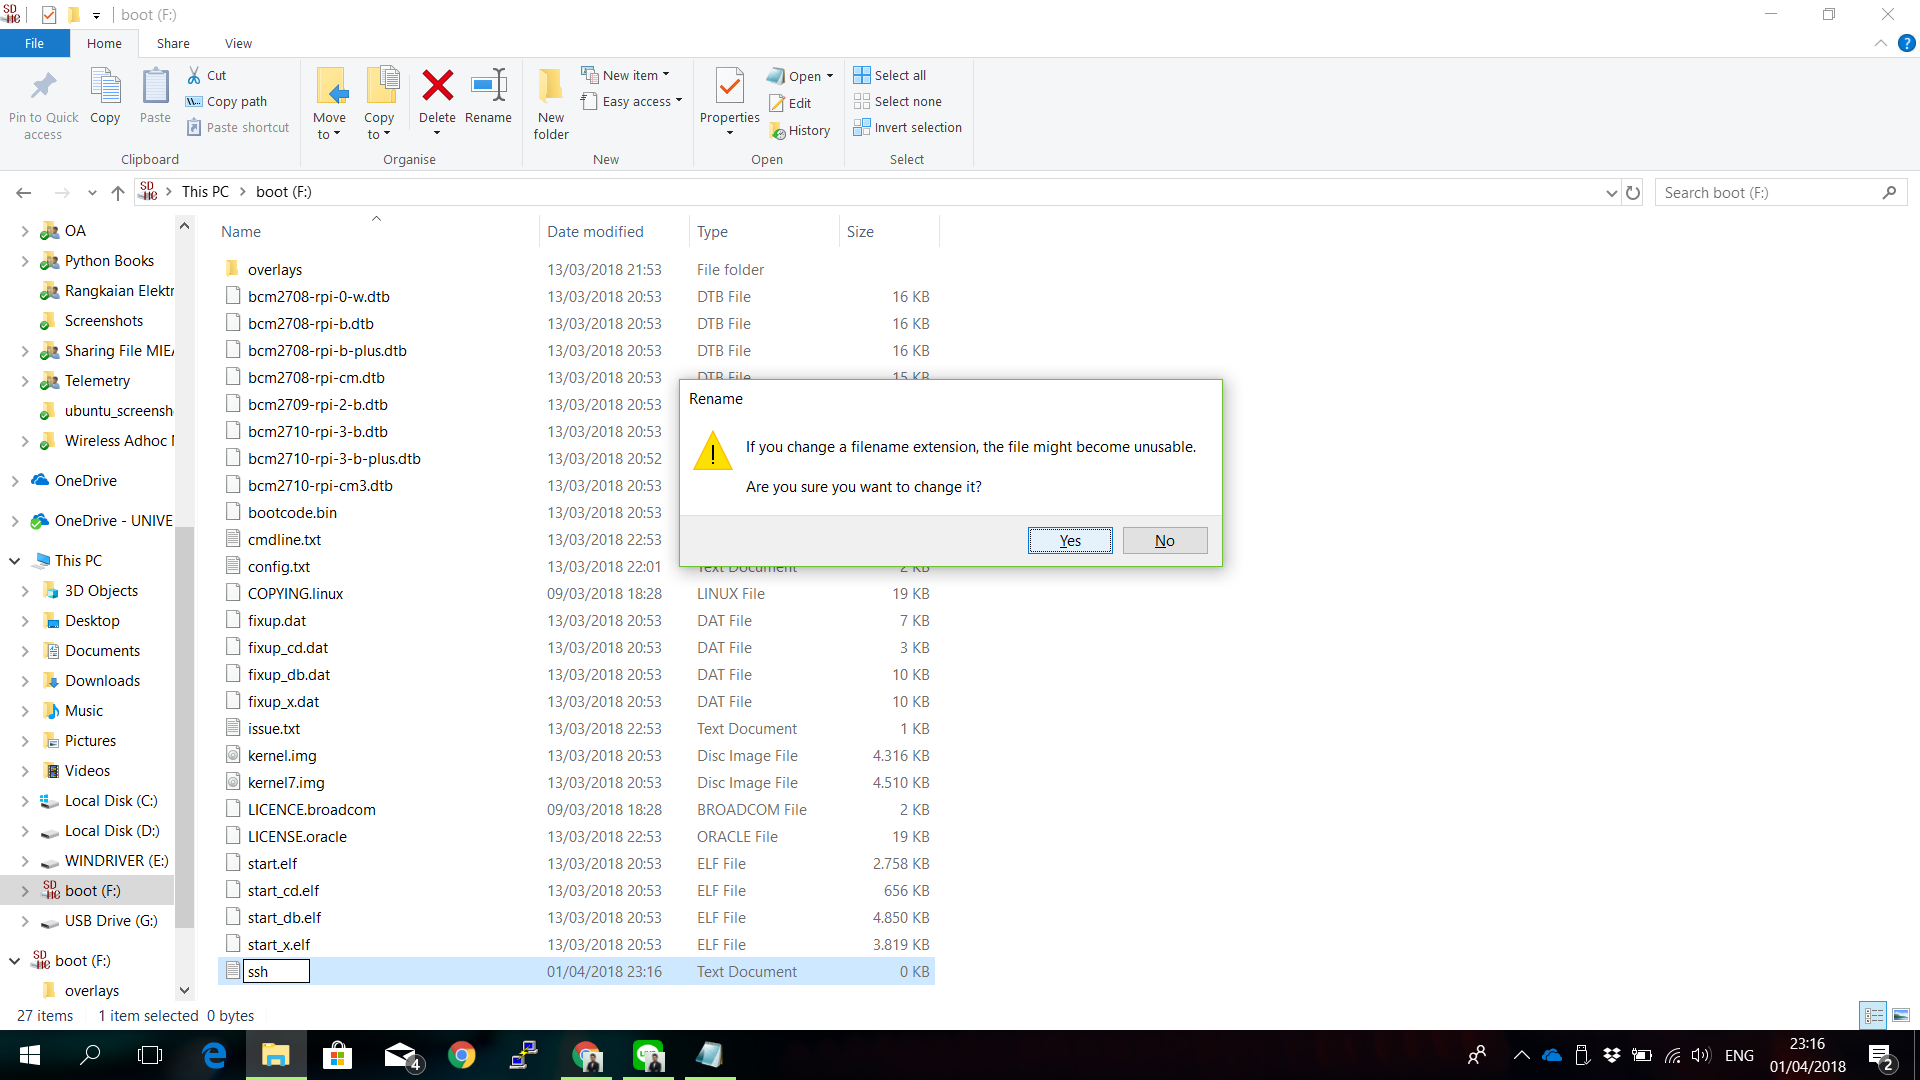 You usually need to add the .local if the Pi is directly connected to your PC via USB or Ethernet cable.
3. Click Ok if you get a security warning alert. It’s not a problem.
4. Enter your username and password.
Now you’re connected at the command prompt, but if you want to access the GUI, complete with a desktop and floating windows, you’ll need to enable VNC.
Enabling and Connecting over VNC
1. Enter sudo raspi-config at the command prompt.
A configuration app opens.
2. Select Interfacing Options (number 5 on the list)
3. Select VNC (number 3 on the menu)
4. Select Yes.
5. Hit Enter to acknowledge the VNC server is enabled.
6. Select Finish
On your PC:
1. Download, install and launch VNC Viewer.
2. Select New connection from the File menu.
3. Enter the host name (ex: raspberrypi.local) in the «VNC Server» field. If this does not work, try again without the .local in the name.
4. Click Ok.
5. Double-click on the connection icon to connect.
6. Click Ok if you are shown a security warning.
7. Enter the Pi’s username and password when prompted.
Your Raspberry Pi desktop will then appear in a window on your main computer’s desktop. You’ll be able to control everything from there.
Avram Piltch is Tom’s Hardware’s editor-in-chief. When he’s not playing with the latest gadgets at work or putting on VR helmets at trade shows, you’ll find him rooting his phone, taking apart his PC or coding plugins. With his technical knowledge and passion for testing, Avram developed many real-world benchmarks, including our laptop battery test.
Topics
Raspberry Pi
Systems
Tom’s Hardware is part of Future US Inc, an international media group and leading digital publisher. Visit our corporate site .
©
Future US, Inc. Full 7th Floor, 130 West 42nd Street,
New York,
NY 10036.
The Easiest Headless Raspberry Pi Setup | by Kevin Tang
(Image by author)
Ah, the Raspberry Pi — a small, affordable Linux computer that is loved by tinkerers and programmers alike. I’ve been playing around with Raspberry Pi’s for a while now, and in this article, I’ll do my best to boil down my experience and get you up and running with you a headless Raspberry Pi in a nifty way that I discovered recently.
Maybe it’s your first time using a Raspberry Pi or maybe you’re a veteran, but regardless, you will likely glean some tips that will make your headless Raspberry Pi setup a better experience.
The coolest thing about this method is that the usual problem of setting up a headless Raspberry Pi is solved in an elegant way: How do you connect to a headless Raspberry Pi to configure the Raspberry Pi’s network access when the Raspberry Pi has no yet been connected to the network?
Usually, we would have to manually add a wpa_supplicant. file with our fixed WiFi credentials into the boot drive of our microSD card. conf
conf
With this method, using some cool open-source Bluetooth technology and a smartphone app, we can dynamically configure our headless Raspberry Pi’s WiFi network. The benefit here is that it’s a nicer interface than manually editing some file, and it lets you switch your headless Raspberry Pi’s WiFi network on-the-fly and without having to pull out your microSD card again, in the case your Raspberry Pi loses connection to your current WiFi network.
You just need to be within Bluetooth range of the Raspberry Pi and you’ll be able to configure the Raspberry Pi’s network using the smartphone app.
First of all, what is a headless setup and why should I do it? In a traditional Raspberry Pi setup, you would need to have a monitor, keyboard, and mouse plugged into your device — it’s a bit clunky and inconvenient.
A headless setup is the Raspberry Pi minus the monitor, keyboard, and mouse. Running a headless setup lets us forego the extra peripherals and directly control the Raspberry Pi wirelessly from any other computer (my laptop for example).
The main advantage I see of the headless setup is convenience, but I have been in many situations where there are no extra peripherals laying around, and the headless setup is the only way to go (did someone say hackathons?)
Let’s get started. I have a Raspberry Pi 3, but any Raspberry Pi will work with this setup.
All we’ll need is the following to get setup.
- Raspberry Pi
- 4GB or greater microSD card
- Windows, Mac, or Linux computer
- Adapter(s) to plug in your microSD card into your computer
- iPhone or Android device
Adapter hell. (Image by author)
Once we’ve gathered our materials, we are halfway done.
Go onto your Windows, Mac, or Linux computer and download the latest BerryLan flavored Raspbian image. This is the standard Raspbian image with a preinstalled program called BerryLan which will help us get our Raspberry Pi connected to WiFi without having to mess around with configuration files.
BerryLan is open-source software which uses an app on our phone to communicate to our Raspberry Pi via Bluetooth and update the network configuration files for us.
Once it’s downloaded, unzip it somewhere for later.
Also on your Windows, Mac, or Linux computer, download Belena Etcher — we’ll use this to flash this image onto the microSD card. Once downloaded, install it and open it.
Plug in your microSD card and adapter setup into your computer.
Click Flash from file and select the image we downloaded.
Click Flash from file. (Image by author)Select the image we just downloaded for the Raspberry Pi. (Image by author)
Next click Select target and find and checkmark your microSD card.
Make sure you select the right storage device! It might be wise to remove any other external storage devices at this point so we don’t accidently erase anything accidently. This will erase your microSD card. (Image by author)
Once you click flash, Balena Etcher will begin to flash the image to your microSD card.
Click Flash! and wait for the image to finish flashing. This should take just a few minutes. (Image by author)We should see this screen when our flash is successful. (Image by author)
While we are waiting for this to finish, let’s pull out your iPhone or Android device and download the BerryLan app (App Store/Google Play).
BerryLan app downloaded on my iPhone. (Image by author)
By now, your image has hopefully finished flashing so we can pull out the microSD card (Balena Etcher safely ejects it for you) and insert it into the Raspberry Pi. Plug your Raspberry Pi into a power source and let it boot.
At this point, the Raspberry Pi cannot connect to the internet since it doesn’t know our WiFi credentials yet. In this BerryLan flavored Raspbian image, when our Raspberry Pi cannot connect to any WiFi sources, it will automatically begin listening for us to give it some WiFi credentials through our phone over Bluetooth.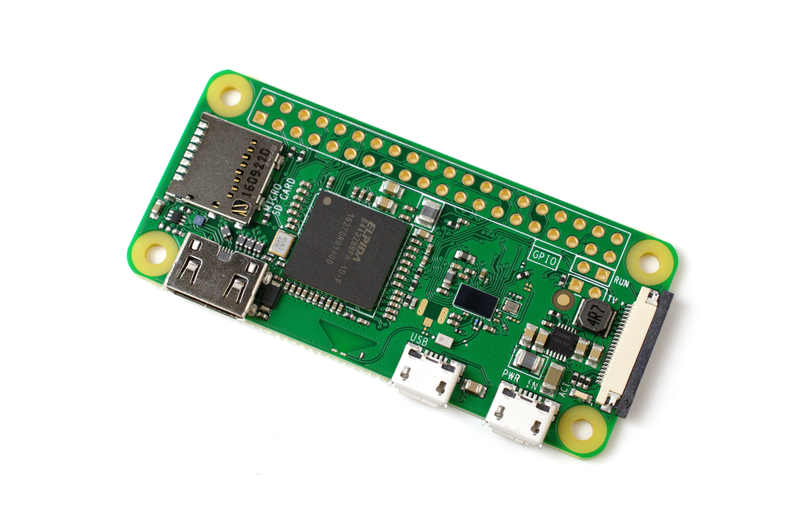
Open the BerryLan app and you should see that there is one Bluetooth device to connect to.
Select the only Bluetooth device listed. (Image by author)
Once we click the Bluetooth device, we will see a list of all WiFi sources that our Raspberry Pi can see. Log into your Wifi network.
Choose your WiFi network and touch OPEN ACCESS POINT to type in your Wifi network’s password in the next page. (Image by author)
Tada! Our Raspberry Pi should now be connected to our WiFi network. And BerryLan even gave us a handy private IP address to reference where we can access our Raspberry Pi remotely from any device on our WiFi network. Feel free to screenshot this page — we may need this private IP address.
The successfully connected page shows us our Raspberry Pi’s private IP! I can’t tell you how many times I’ve had to google how to find my Raspberry Pi’s private IP without being able to log into the Raspberry Pi. (Image by author)
At this stage, our headless setup is complete! Wasn’t that pretty painless? One last thing is to verify that we can SSH into our headless Raspberry Pi setup to actually control the thing. SSH stands for Secure SHell and lets us remotely control another device.
Depending on what platform your computer is using, open Windows PowerShell or a macOS/Linux command line and type the following:
ssh nymea@nymea
ssh nymea@<PRIVATE_IP_ADDRESS> (if the above command doesn’t work)
You’ll see a warning come up about the authenticity of the host — type in yes.
Then you’ll be prompted for your Raspberry Pi’s password, which in this image, by default is nymea.
You should be greeted with this login screen. You’re in! Go on, get started with that project now!
(Image by author)
P.S. Change your default Raspberry Pi password using the passwd command.
Guide to set up Headless mode
Raspberry Pi »
Headless Mode means system runs without any primary input and output such as keyboard or monitor. The system won’t use any desktop environment and therefore GUI applications cannot run. The headless mode is set from the installation step, and all settings are configured via files or terminals. Raspberry Pi OS has a lite version which is actually a headless OS.
Last update:
2022-06-04
Table of Content
Download OS Image
Official images for recommended operating systems are available to download from the Raspberry Pi website download page.
Headless Mode is usually used on the Raspberry Pi OS Lite version in which the graphical UI is not installed.
The release notes of OS are listed in each build version in here.
64-bit OS
From 2022 Feb, Raspberry Pi starts supporting 64-bit OS on Model 3, 4, 400, and Zero 2W.
Note that some third-party packages may not work on 64-bit OS.
Burn Image to an SD Card
OS usually comes in one image file which needs to be written (burned) to SD Card. The content of the image is extracted to the target SD Card, while still preserves partition table and some special attributes such as bootable flag.
Raspberry Pi Imager
Run the Raspberry Pi Imager, and select the Desktop version but without recommended software.
Press Ctrl + Shift + X to show the advanced menu, fill some settings as below:
- Hostname:
raspberrypior what you want - SSH: check the box and set a password
- WiFi (optional): if you want to use WiFi as the primary network, fill SSID and password
Raspberry Pi Imager
BalenaEtcher
The application BalenaEtcher is a very good image writer that will write the OS image to an SD Card. Download and install it, then run it. Just follow the guided steps:
- Select image — browse to the zip file downloaded above
- Select drive — it may find the SD Card drive automatically
- Click Flash
Etcher is writing the OS image
After copying the image to the target SD Card, File Explorer may have trouble seeing the content of that SD Card. A simple fix is to pull the SD Card out then plug it back. It should appear with a partition named boot.
Enable SSH
For security reasons, Secure Socket Shell (ssh) is no longer enabled by default. To enable it, place a blank text file called ssh no file extension in the root of the boot partition on the SD Card.
Add Wi-Fi Network
To add a wireless network which Pi will automatically connect to, create a text file called wpa_supplicant.conf and place that file in the root of the boot partition on SD Card too.
In below config file, the ssid field is the Wi-Fi Access Point name, and the psk field is the password of that Wi-Fi.
wpa_supplicant.conf
country=US
ctrl_interface=DIR=/var/run/wpa_supplicant GROUP=netdev
update_config=1
network={
    ssid="NETWORK-NAME"
    psk="NETWORK-PASSWORD"
}
See ISO 3166-1 country codes to fill into country field.
If the target network is a hidden one, an extra option in the wpa_supplicant.conf file, scan_ssid=1, may help connection.
Adding multiple wireless network configurations is allowed, with some extra fields to set the name and the priority (higher number gets connected first):
network={
    ssid="HomeOneSSID"
    psk="passwordOne"
    priority=1
    id_str="homeOne"
}
network={
    ssid="HomeTwoSSID"
    psk="passwordTwo"
    priority=2
    id_str="homeTwo"
}
Added ssh and wpa_supplicant.conf in the boot partition
For Pi Zero / Zero W, see the Direct USB connection section to skip setting a Wi-Fi network, as it will setup a virtual network over the USB connection.
Direct USB connection
Apply to Pi Zero / Zero W Only
On Pi Zero / Zero W only, it’s able to turn on USB OTG mode and the Pi will act as a USB slave with different modes: Serial, Ethernet, Mass storage device, etc.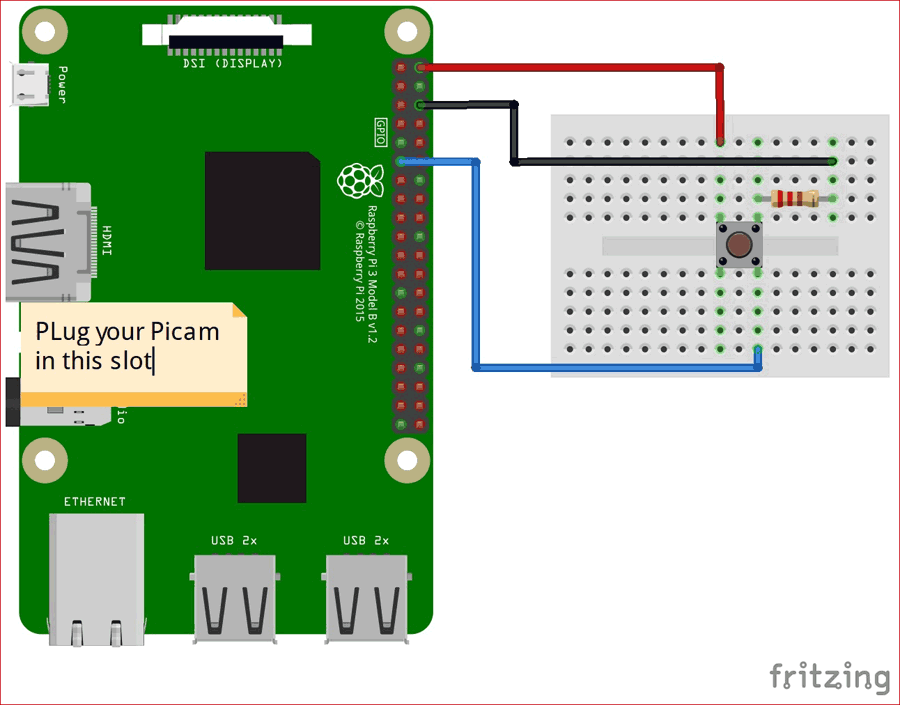 The research was published here and here.
This step will set up Pi in USB OTG Ethernet mode, so that when plugging Pi into computer by the Peripheral USB port, labelled __USB__, not PWR, there is virtual network will be created and Pi can be accessed over that network, and no need of an external Wi-Fi network is required. This method also helps to power Pi over the USB port.
-
Add
dtoverlay=dwc2on a new line in theconfig.txtfile. -
Open up the
cmdline.txtfile. Insertmodules-load=dwc2,g_etherafterrootwaitwith only one space between the textrootwaitand the new text!!!
Login to Pi
Power Pi up and wait for the power led gets stable. Use any Network Scanner to detect the IP of the Pi. A plugin on MobaXterm can be used too.
For the official Raspberry Pi OS, the default username is pi, with password raspberry, on the host raspberrypi.. If you change the hostname in Raspberry Pi Imager, make sure to use that new hostname, e.g. mypi.local. local
local
Bonjour is a service from Apple to discovery devices in a network using hostname. Install it and then Pi can be connected using its default hostname raspberrypi.local.
Scan for Pi’s IP
Review Network Settings
This command should list the network connection in the first line for wlan0:
iwconfig
This command should show info for wlan0:
ifconfig
This command should list the wlan0 network with details:
iwlist wlan0 scan
Connect to another Wi-Fi network
Open the wpa-supplicant configuration file in nano editor:
sudo nano /etc/wpa_supplicant/wpa_supplicant.conf
Go to the bottom of the file and add the following:
network={
    ssid="NETWORK-NAME"
    psk="NETWORK-PASSWORD"
}
Reconfigure the interface with:
wpa_cli -i wlan0 reconfigure
Verify whether it has successfully connected using ifconfig wlan0
Update system
(optional)
To get the latest version of Pi OS and its packages, please update the system by entering below commands:
sudo apt update && \
sudo apt upgrade -y
Expand File system
(optional)
To use all of available space on the SD Card, expand the file system by running:
sudo raspi-config
Select Advanced Options → Expand File system
Then reboot the system.
Serial Console
By default, the primary UART is assigned to the Linux console, and the secondary UART is connected to Bluetooth Module (on model having Bluetooth feature — Pi Zero W, Pi 3, and Pi 4).
Use raspi-config to disable the Linux serial console, then enable UART as a peripheral.
Remote access over VNC
If you want to access the GUI, complete with a desktop and floating windows, you’ll need to enable VNC. Note that the Lite OS does not have GUI installed by default, you have to install a Desktop Environment Manager first.
Enable VNC
To enable VNC server, it must be turned on though raspi-config.
Firstly, run:
sudo raspi-config
then select Interfacing Options, choose VNC, and select Yes.
Access over VNC
-
On the remote PC, install and launch VNC Viewer
-
Create a New Connection, and enter
raspberry.(or whatever you changed in the setup step) in the VNC Server field. local
localIf this does not work, try again with the name raspberrypi without .local
-
After adding new connection, run that session and fill in username and password to login
Headless Raspberry Pi 4 SSH WiFi Setup (64-Bit, Mac + Windows, 12 Steps) – desertbot.io
This article covers setting up a Raspberry Pi 4 Model B with a 64-bit operating system for headless SSH access over WiFi using a Mac or Windows 10.
Instructions for setting up with a 32-bit operating system can be found here: Headless Raspberry Pi 4 SSH WiFi Setup (Mac + Windows, 10 Steps).
Instructions for setting up a Pi Zero 2 W with a 64-bit operating system can be found here: Headless Raspberry Pi Zero 2 W SSH WiFi Setup (64-bit, Mac + Windows, 12 Steps)
Step 1. Download Raspberry Pi OS Bullseye Lite (64-bit)
These instructions were tested on Raspberry Pi OS (64-bit) Bullseye. You can download the latest image from here:
https://www.raspberrypi.org/software/operating-systems/
The most recent image used to test these instructions was the 64-bit lite Bullseye image (no desktop) kernel version 5.10 from January 28, 2022.
Step 2. Burn the Raspberry Pi OS image to the SD card
To burn an image to the SD card you can use Etcher.
- Browse to
https://www.balena.io/etcher/ - Download the version for your operating system
- Run the installer
To run Etcher put a blank mini SD card and adapter into your machine. No need to format it. You can use a new SD card right out of the package.
- Click Flash from file — browse to the zip file you downloaded for Raspberry Pi OS
- Click Select target — it may find the SDHC Card automatically, if not select it
- Click Flash! — you may be prompted for your password
After you flash (burn) the image, Finder (Mac) or File Explorer (Windows) may have trouble seeing it.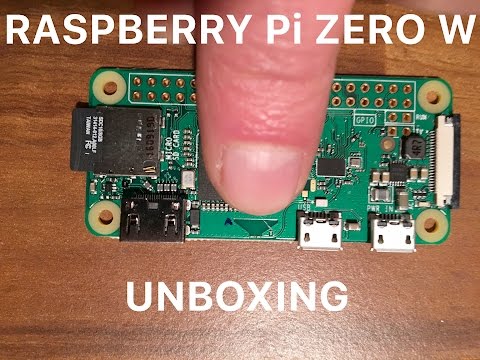 A simple fix is to pull the SD card out then plug it back in. On a Mac it should appear on the desktop with the name boot. On Windows it should appear in File Explorer with the name boot followed by a drive letter.
Step 3. Enable ssh to allow remote login
For security reasons, ssh is no longer enabled by default. To enable it you need to place an empty file named ssh (no extension) in the root of the boot disk.
Mac instructions (enable ssh)
Open up a terminal window and run this command:
touch /Volumes/boot/ssh
Windows instructions (ssh)
- Run Notepad
- In a new file put in one space and nothing more
- Click File / Save As …
- Be sure to set Save as type to All Files (so the file is NOT saved with a .txt extension)
- Call the file ssh and save it
- Close the file
If you are comfortable with the Windows command line you could try this instead (untested!):
- Open up a command line
- Switch to the drive and root where boot is located:
- Type:
type NUL >> ssh - Verify that file ssh was created
Step 4.
 Add your WiFi network info
Create a file in the root of boot called: wpa_supplicant.conf (instructions below). Then paste the following into it (adjusting for your ISO 3166 alpha-2 country code, network name and network password):
country=US
ctrl_interface=DIR=/var/run/wpa_supplicant GROUP=netdev
update_config=1
network={
    ssid="NETWORK-NAME"
    psk="NETWORK-PASSWORD"
}
Mac instructions (wifi settings)
Create a new empty file that will hold network info:
touch /Volumes/boot/wpa_supplicant.conf
Edit the file that you just created and paste the text above into it (adjusting for the name of your country code, network name and network password):
Windows instructions (wifi settings)
- Run Notepad
- Paste in the contents above (adjusting for the name of your country code, network name and network password)
- Click File / Save As .
 ..
.. - Be sure to set Save as type to All Files (so the file is NOT saved with a .txt extension)
- Call the file
wpa_supplicant.confand save it - Close the file
Step 5. Configure rfkill default
- In the boot root folder, edit cmdline.txt
- On a Mac you can find it here:
/Volumes/boot/cmdline.txt
- Append a space to the first line
- Append the following after the space on the same line:
systemd.restore_state=0 rfkill.default_state=1
- Save the file
Step 6. Verify 64-bit support
- In the root of the boot disk verify that config.txt contains this line and that it is not commented out:
arm_64bit=1
- On a Mac an easy way to do that is via cat and grep:
cat /Volumes/boot/config.txt | grep arm_64bit
Step 7.
 Eject the micro SD card
- Right-click on boot (on your desktop or File Explorer) and select the Eject option
- This is a «logical» eject — meaning it closes files and preps the SD card for removal — you still have to pull the card out yourself
Step 8. Boot the Raspberry Pi from the micro SD card
- Remove the mini-SD card from the adapter and plug it into the Raspberry Pi
- Raspberry Pi 4: Plug a USB-C power supply cable into the power port
- Pi Zero 2 W: Plug a micro-USB power supply cable into the power port
- Give the Pi plenty of time to boot up (it can take as much as 90 seconds — or more)
Step 9. Login remotely over WiFi
This part assumes that ssh is enabled for your image and that the default user is pi with a password of raspberry.
NOTE: Your machine must be on the same WiFi network that you configured the Pi for.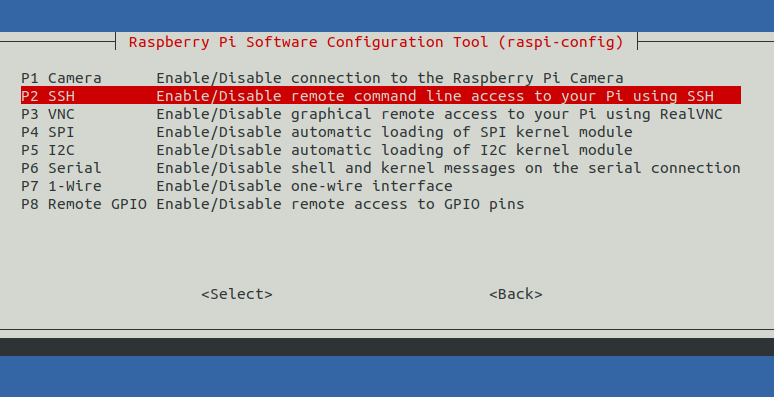
Mac instructions (login over wifi)
- Open up a terminal window
- Run the following commands:
ssh-keygen -R raspberrypi.local
ssh [email protected]
- Don’t worry if you get a host not found error for the first command — the idea is to clear out any previous references to raspberrypi.local
- If the pi won’t respond, press Ctrl-C and try the last command again
- If prompted with a warning just hit enter to accept the default (Yes)
- Type in the password — by default this is raspberry
Windows instructions (login over wifi)
Install Bonjour
You can find Raspberry Pi’s on your network using their hostname followed by .local (example: raspberrypi.local). But to do that in Windows you have to install the Bonjour service first.
If you have iTunes installed on Windows you probably don’t have to do this.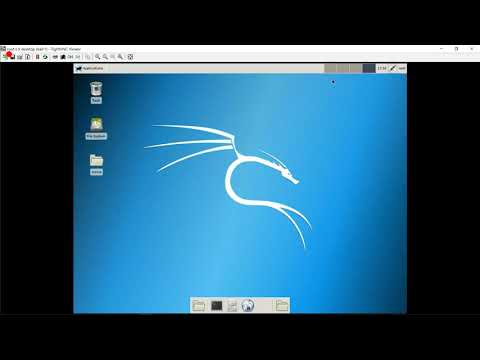 But if you don’t, browse to:
Download Bonjour Print Services for Windows v2.0.2
and run the installer.
Install Putty
If you already have Putty installed, skip to the next section.
- Browse to:
https://www.putty.org - Download the 64-bit MSI (Windows Installer)
- Open it to run the installer (if asked for permission, click Yes)
- Select: Add shortcut to PuTTY on the Desktop
Login over WiFi using Putty
This part assumes that ssh is enabled for your image and that the default user is pi with a password of raspberry.
- Launch Putty
- Set the Host Name (or IP address) field to raspberrypi.local
- By default the Port should be set to 22 and Connection type should be set to SSH
- Click Open
- If you see a Security Alert select Yes
- A new terminal window should appear prompting you for a user name
- The default user name is: pi
- The default password is: raspberry
Step 10.
 Change your hostname and password
Congratulations! You can now access your Raspberry Pi over wifi!
If you can’t connect, see the troubleshooting section near the end of this article. You may need to make some adjustments for your network.
Because your pi is now on the network, you should immediately change the hostname and password.
At the Pi command line type:
sudo raspi-config
Select the options for changing the hostname and password. On a new image, I would also recommend expanding the file system (now under the Advanced options). Once the changes are made, reboot.
Remember that once you reboot, you will need to use the new hostname to login over ssh. For example, if your new hostname is mypi you would connect like this on a Mac:
ssh [email protected]
On Windows you would need to change the host name in Putty to mypi.local.
Step 11. Get the latest updates
Once connected over WiFi, the next thing you should do is run some updates:
sudo apt-get update -y
sudo apt-get upgrade -y
Step 12.
 Keep the Pi from going to sleep
Run this command:
iwconfig
Under wlan0 you will see this line:
Power Management:on
Another way to view the power management option is with this command line:
/sbin/iw wlan0 get power_save
Which on a new system will probably return this:
Power save: on
You can turn that off using this line:
sudo /sbin/iw wlan0 set power_save off
But the problem is that when you reboot the setting will be lost.
So to make it permanent you need to do the following:
sudo nano /etc/rc.local
Above the line that says exit 0 insert the command and save the file:
/sbin/iw wlan0 set power_save off
To confirm that the setting is permanent, reboot (sudo reboot) and run iwconfig again.
Troubleshooting
Here are some helpful commands for debugging network and wifi issues on your Pi:
- This command should list your network in the first line for wlan0:
iwconfig - This command should show info for wlan0:
ifconfig - This command should list your network name:
iwlist wlan0 scan | grep ESSID - To edit or review your wifi settings, run this command:
sudo nano /etc/wpa_supplicant/wpa_supplicant.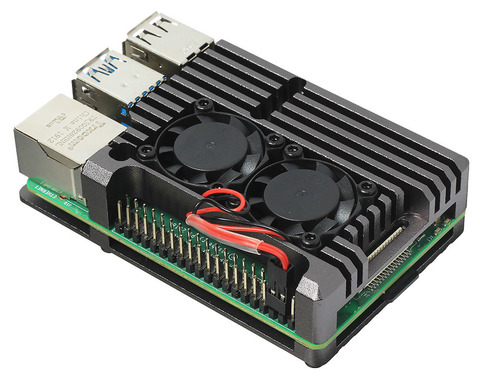 conf
conf - To load after editing the config file (may need to login again):
sudo wpa_cli -i wlan0 reconfigure - If you keep getting a message like this when remote login:
Warning: the ECDSA host key for 'mypi.local' differs from the key for the IP address 'SOME-IP-ADDRESS'
Offending key for mypi.local in /Users/mitch/.ssh/known_hosts:54
Then try this — replace mypi.local below with your host name:
ssh-keygen -R mypi.local
Related Articles
Here is a list of my related articles that you may find interesting:
- Raspberry Pi 4 Touchscreen Kiosk Setup (64-bit, Bullseye)
- Headless Raspberry Pi Zero 2 W SSH WiFi Setup (64-bit, Mac + Windows, 12 Steps)
- Raspberry Pi 4 Touchscreen Kiosk Setup
- Headless Raspberry Pi 4 External SSD Setup (Samsung T5) — my article on how to mount an external SSD using headless operations
- Headless Raspberry Pi 4 Lite Remote Desktop Upgrade — my article on how to upgrade a headless Raspberry Pi 4 lite image with a desktop and VNC server
- Headless Raspberry Pi 4 Remote Desktop VNC Setup (Mac + Windows) — in this article I show how to setup a Raspberry Pi remote desktop from scatch
- Headless Raspberry Pi 3 B+ SSH WiFi Setup (Mac + Windows) — my original article written for the Raspberry Pi 3 B+
- How to Run NodeJS on a Headless Raspberry Pi — my article on how to setup and run a NodeJS server
- Raspberry Pi Touchscreen Kiosk Setup — my article on how to use your Raspberry Pi to build a touchscreen kiosk
- ROS TurtleSim Beginner’s Guide (Mac) — if you are here because you’d like to get started with robotics, check out my ROS (Robot Operating System) beginner’s guide
- Headless Pi Zero W Wifi Setup (Windows) — my article on how to setup a headless Pi Zero W for Windows users
- Setup Pi Zero W Headless Wifi (Mac)- if you are Mac user with a Raspberry Pi Zero W, I have instructions for you too
- Raspberry Pi Resource Guide — checkout my resource guide for links to useful hardware
Where to buy
If you would like to use the same hardware that I used to test this article, here are some product links:
- CanaKit Raspberry Pi 4 Basic Kit (2GB) — Amazon affiliate link — the kit contains heat sinks and a USB-C power supply with a switch that is guaranteed to work with the RPI 4.
- CanaKit Raspberry Pi 4 Basic Kit — order direct from CanaKit
- Raspberry Pi 4 Model B 2019 Quad Core 64 Bit WiFi Bluetooth (2GB) — Amazon affiliate link
- Raspberry Pi 4 Computer Model B 4GB (Seeed — US/CN) — Seeed Studio product link
- Pimoroni Fan Shim for Raspberry PI — Amazon affiliate link — the Pi 4 runs hot
- Pastall Raspberry Pi 4 Aluminum Case, Pi4 Case with Fan and 4 pcs Heat-Sinks, Raspberry Pi 4B Case with Fan
References
- balenaEtcher [1] — a tool that handles burning the image to the micro SD card for you
- Pi4 64-bit raspbian kernel for testing — Focus on Pi4 [2]
— forum discussion
How to set up a headless Raspberry Pi on Windows 10 and Windows 11
Skip to main content
Windows Central is supported by its audience. When you purchase through links on our site, we may earn an affiliate commission. Here’s why you can trust us.
Raspberry Pi Zero
(Image credit: Windows Central)
The only limit to what you can do with a Raspberry Pi is your imagination, but even if your ambitions are a little more basic, there’s still lots of fun to be had. In many use cases, you’ll be looking at using a Raspberry Pi headless, that is to say without it being attached to a display. It’s also perfectly possible to set it up this way using your Windows 10 or Windows 11 PC. Here’s how.
Grabbing the software you need
Source: Windows Central (Image credit: Source: Windows Central)
Before you do anything, you’ll need both a copy of the OS for the Raspberry Pi and something to flash an image of it to the microSD card. Raspberry Pi has its own imager but for the purposes of this guide we’re using a third-party app called balenaEtcher since it has uses beyond just the Raspberry Pi and is a useful tool to have around.
Then you’ll need to go to the Raspberry Pi downloads page and grab a copy of the OS. We’re just going to use the standard Raspberry Pi OS for this guide, a customized version of Debian Linux built especially for the Raspberry Pi. There are various downloads available from the Raspberry Pi website, but for the purposes of what we’re trying to do here grab a copy of the «Lite» download.
You ideally want the Lite version for headless setup, especially on a Raspberry Pi Zero, as it’s a much lighter image with a smaller download footprint and importantly, no desktop UI. As we won’t be using it there’s no need to waste resources on it.
How to flash the Raspberry Pi OS image on Windows 10 and Windows 11
Source: Windows Central (Image credit: Source: Windows Central)
The first step is to flash your microSD card with the OS image for the Raspberry Pi.
- Locate the downloaded zip file of the Raspberry Pi OS Lite image.
- Extract the files and note the location of the extracted image.
- Load up balenaEtcher on your PC.
- Select Flash from file.
Source: Windows Central (Image credit: Source: Windows Central)
- Select your extracted Raspberry Pi OS image from step 2.
- Connect your microSD card to your PC.
- Click Select target.
- Choose your microSD card.
Source: Windows Central (Image credit: Source: Windows Central)
- Click Flash!
Source: Windows Central (Image credit: Source: Windows Central)
BalenaEtcher will now run through a short process that should only take a couple of minutes (depending on your hardware), and when you’re done leave it attached to your PC for the next step.
How to set up Wi-Fi and SSH access on your Raspberry Pi
Source: Windows Central (Image credit: Source: Windows Central)
The key to being able to set up a headless Raspberry Pi is being able to connect to it from your Windows PC. For that, you’ll need it to be on your local network, and while you could use Ethernet, on the Raspberry Pi Zero, in particular, this requires additional hardware and it’s really not necessary.
To connect the Raspberry Pi to your home network and allow remote access we need to ensure it has two things:
- Your Wi-Fi network SSID and password
- SSH
Both of these we’ll add from your PC.
- Ensure your Raspberry Pi OS microSD card is attached to your PC.
- Open File Explorer.
- Select the microSD card, it should be called boot.
- Within the root directory, right-click and select New then Text Document.
- Name this file ssh.
- Right-click and select Rename.
- Delete the .txt extension.
- When prompted to confirm, click yes.
Source: Windows Central (Image credit: Source: Windows Central)
It’s important to make sure the blank file has no file extension to function properly. You’ll know it has been successfully changed as the icon will now look like a blank piece of paper compared to one with lines on it.
Next, we’ll build a file containing your Wi-Fi network credentials.
- Ensure your Raspberry Pi OS microSD card is attached to your PC.
- Open File Explorer.
- Select the microSD card.
- Within the root directory, right-click and select New then Text Document.
- Rename this file to wpa_supplicant.conf ensuring that the .txt file extension has been replaced.
- When prompted to confirm, click yes.
- Right-click on the file and choose Open with ….
- Select Notepad or your own preferred text editor.
Once you have the wpa_supplicant.conf file open in a text editor, you’ll need to enter some code to tell your Raspberry Pi how to connect to your network. Set up your file like the image below.
Source: Windows Central (Image credit: Source: Windows Central)
Enter the name of your Wi-Fi network inside the ssid quotation marks and your network password inside the psk quotation marks. Then save the file. Also, ensure you change the country to the two-letter code for your location.
Then save the file and close Notepad.
How to set up the Raspberry Pi using SSH
Source: Windows Central (Image credit: Source: Windows Central)
There was a time that you’d have to install a third-party application such as PuTTY to use SSH on Windows, but that’s not the case anymore; you can simply do it through the terminal. PowerShell works just fine, but if you have WSL enabled you can also use the Linux terminal assuming you have SSH enabled in it. Ubuntu, for example, has it out of the box, but Debian does not.
For this, we’ll be using the standard Windows PowerShell. Before getting started make sure the boot microSD is inserted in the Raspberry Pi and that you power it on. You also need to find out the IP address on your network for the Raspberry Pi. There are many ways to do this, but the easiest is to just look in your router’s settings for connected devices and locate it there. If you’re only using one Raspberry Pi on your network, the default
pi@raspberrypi.local
can be used to connect, but this will fail as you add more devices, so it’s worth going with the IP address.
Then follow these steps.
- Open Windows PowerShell.
- Type
ssh pi@yourIPaddress.
Source: Windows Central (Image credit: Source: Windows Central)
- When prompted at the authenticity message, type yes and press enter.
Source: Windows Central (Image credit: Source: Windows Central)
- When prompted for a password enter raspberry.
Source: Windows Central (Image credit: Source: Windows Central)
- If you’re not taken into the Raspberry Pi terminal, repeat step 2 followed by step 4 again and it should work fine.
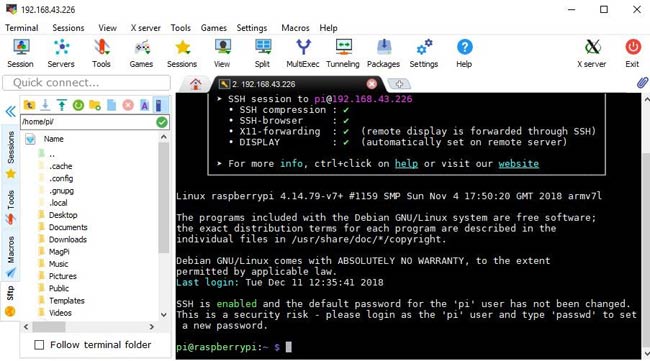
You should now be presented with a short welcome blurb from Linux having successfully connected to the Raspberry Pi. The prompt will also have changed from PowerShell to pi@raspberrypi.
The first thing to do is to change the default password from raspberry.
- In the terminal type
passwd.
Source: Windows Central (Image credit: Source: Windows Central)
- When asked for the current password enter raspberry.
- Choose a new password and press enter.
- Confirm the new password and press enter.
Source: Windows Central (Image credit: Source: Windows Central)
Assuming they match you’ll see a confirmation message that you successfully changed the password. This is now the password you’ll use when logging in to your Raspberry Pi over SSH.
The basic setup of the Raspberry Pi is now done, but there are a couple of basic commands to run first before you exit out of it. These are basic Linux commands that you’ll use quite often, but essentially it’ll ensure your Raspberry Pi is all up to date. Enter these two commands:
sudo apt update
sudo apt upgrade
Source: Windows Central (Image credit: Source: Windows Central)
The first run-through of these commands may take some time, especially on a Pi Zero. Then, once you’re done with your Raspberry Pi you can quit back to regular old Powershell simply by typing »’quit»’ into the terminal.
While you can use PowerShell or any installed WSL Linux distros to SSH into your Raspberry Pi, if you’re going to eventually handle multiple machines there are more elegant ways to handle and manage your connections. On Windows, there’s the old favorite, PuTTY as well as the popular and elegant cross-platform client, Termius .
And that’s all you need to know. By now you’ll have a fully functioning Raspberry Pi that you can interact with and get creative with all without the need for a display, mouse, and keyboard.
Our top equipment picks
These are the mandatory or core equipment selections. Optional or ancillary equipment will follow.
Tiny computer
Raspberry Pi Zero W
Teeny yet capable computer
The Raspberry Pi Zero W is still a fantastic and incredibly affordable way to dip your toe into the ecosystem or Linux in general.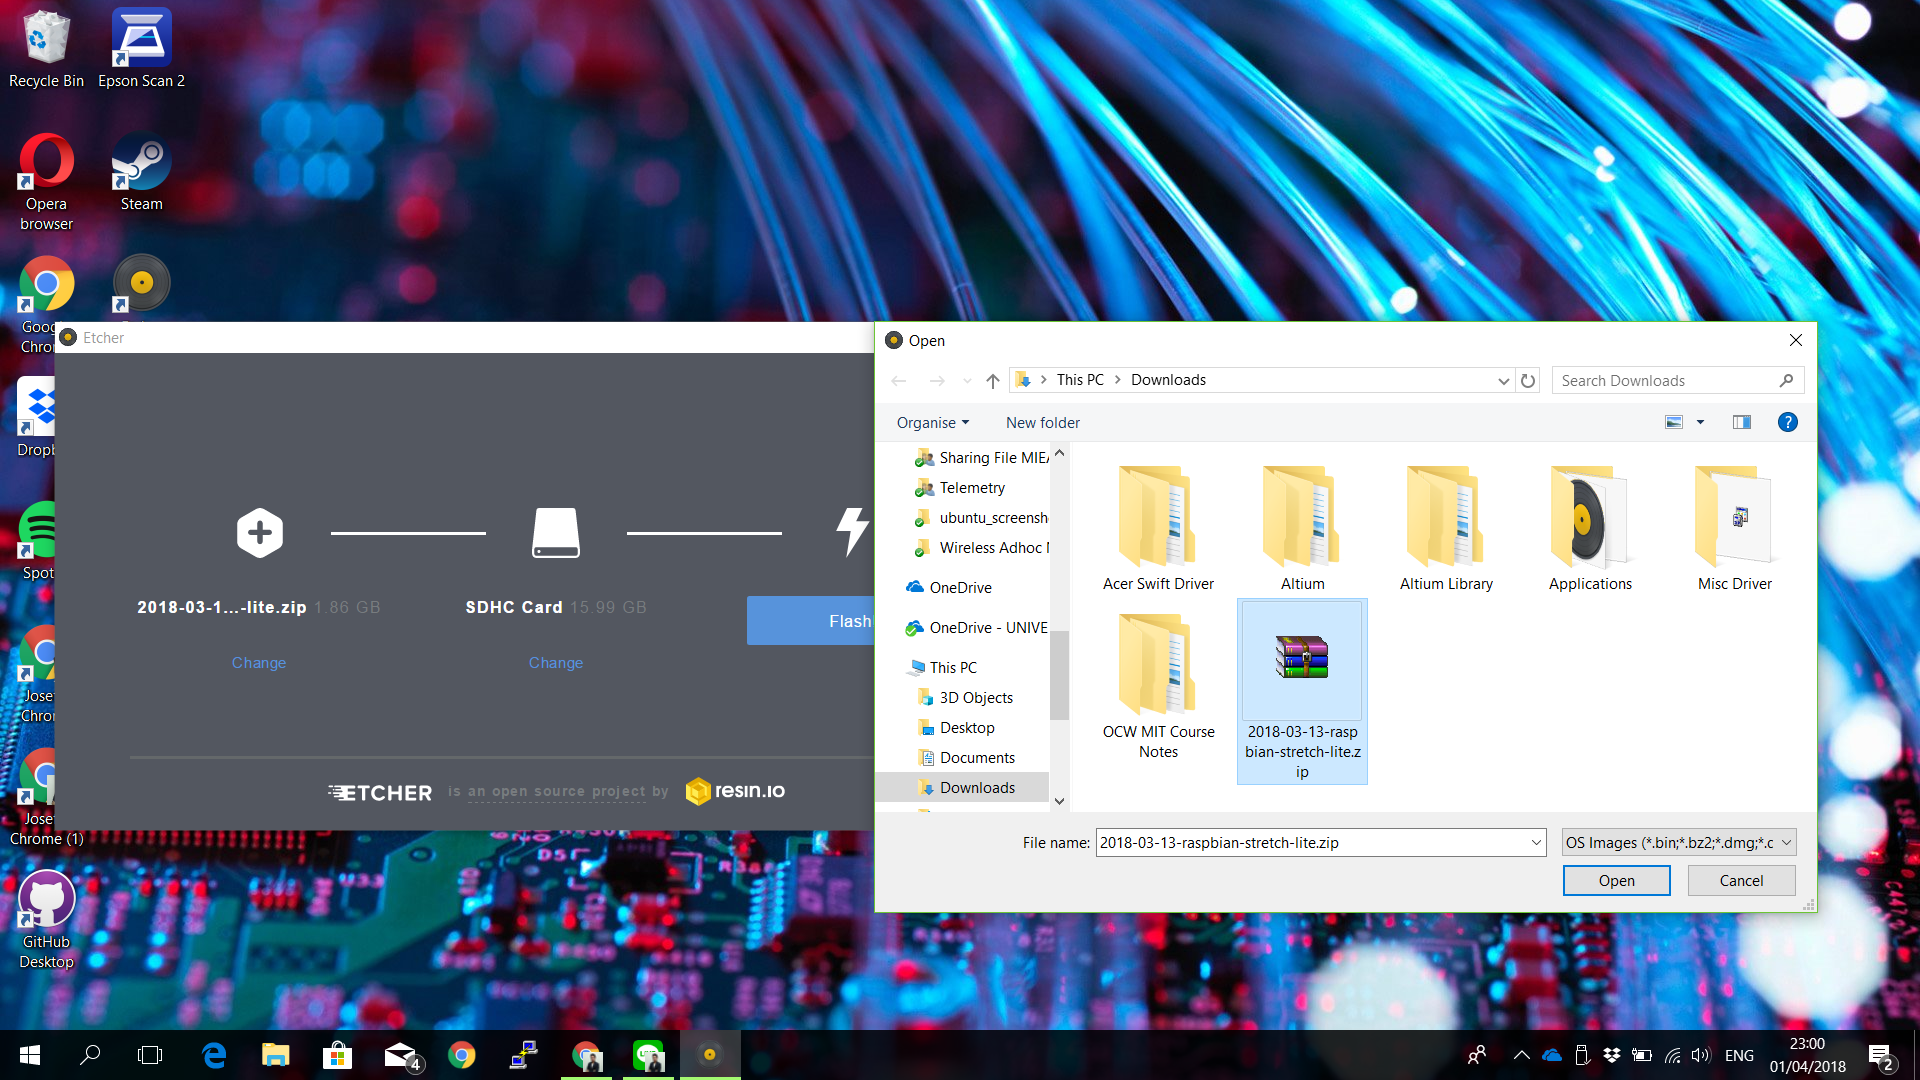
This process is the same whether you go for the Raspberry Pi Zero or the regular model, but the Pi Zero is a great way to dip your toe and start to learn about Raspberry Pi. If you’re new to things like SSH, terminal, or even just Linux in general, it’s such an affordable way to get started and learn some new skills, with the added bonus that the maker ecosystem is enormous. The only limit is your imagination.
Additional equipment
Setting up a Raspberry Pi is quick and cheap, but besides the actual board, you’ll need a couple of other essentials to make this headless setup happen.
Samsung Evo Select 32gb (Image credit: Samsung)
Samsung EVO Select 32GB microSD card ($8 at Amazon)
You don’t need a ton of storage on a Raspberry Pi, and even 32GB will go a fairly long way.
CanaKit Raspberry Pi power supply (Image credit: CanaKit)
CanaKit Raspberry Pi power supply ($10 at Amazon)
The Raspberry Pi gets its power over micro-USB, so if you’ve thrown out all your old phone chargers, grab this one as a dedicated unit.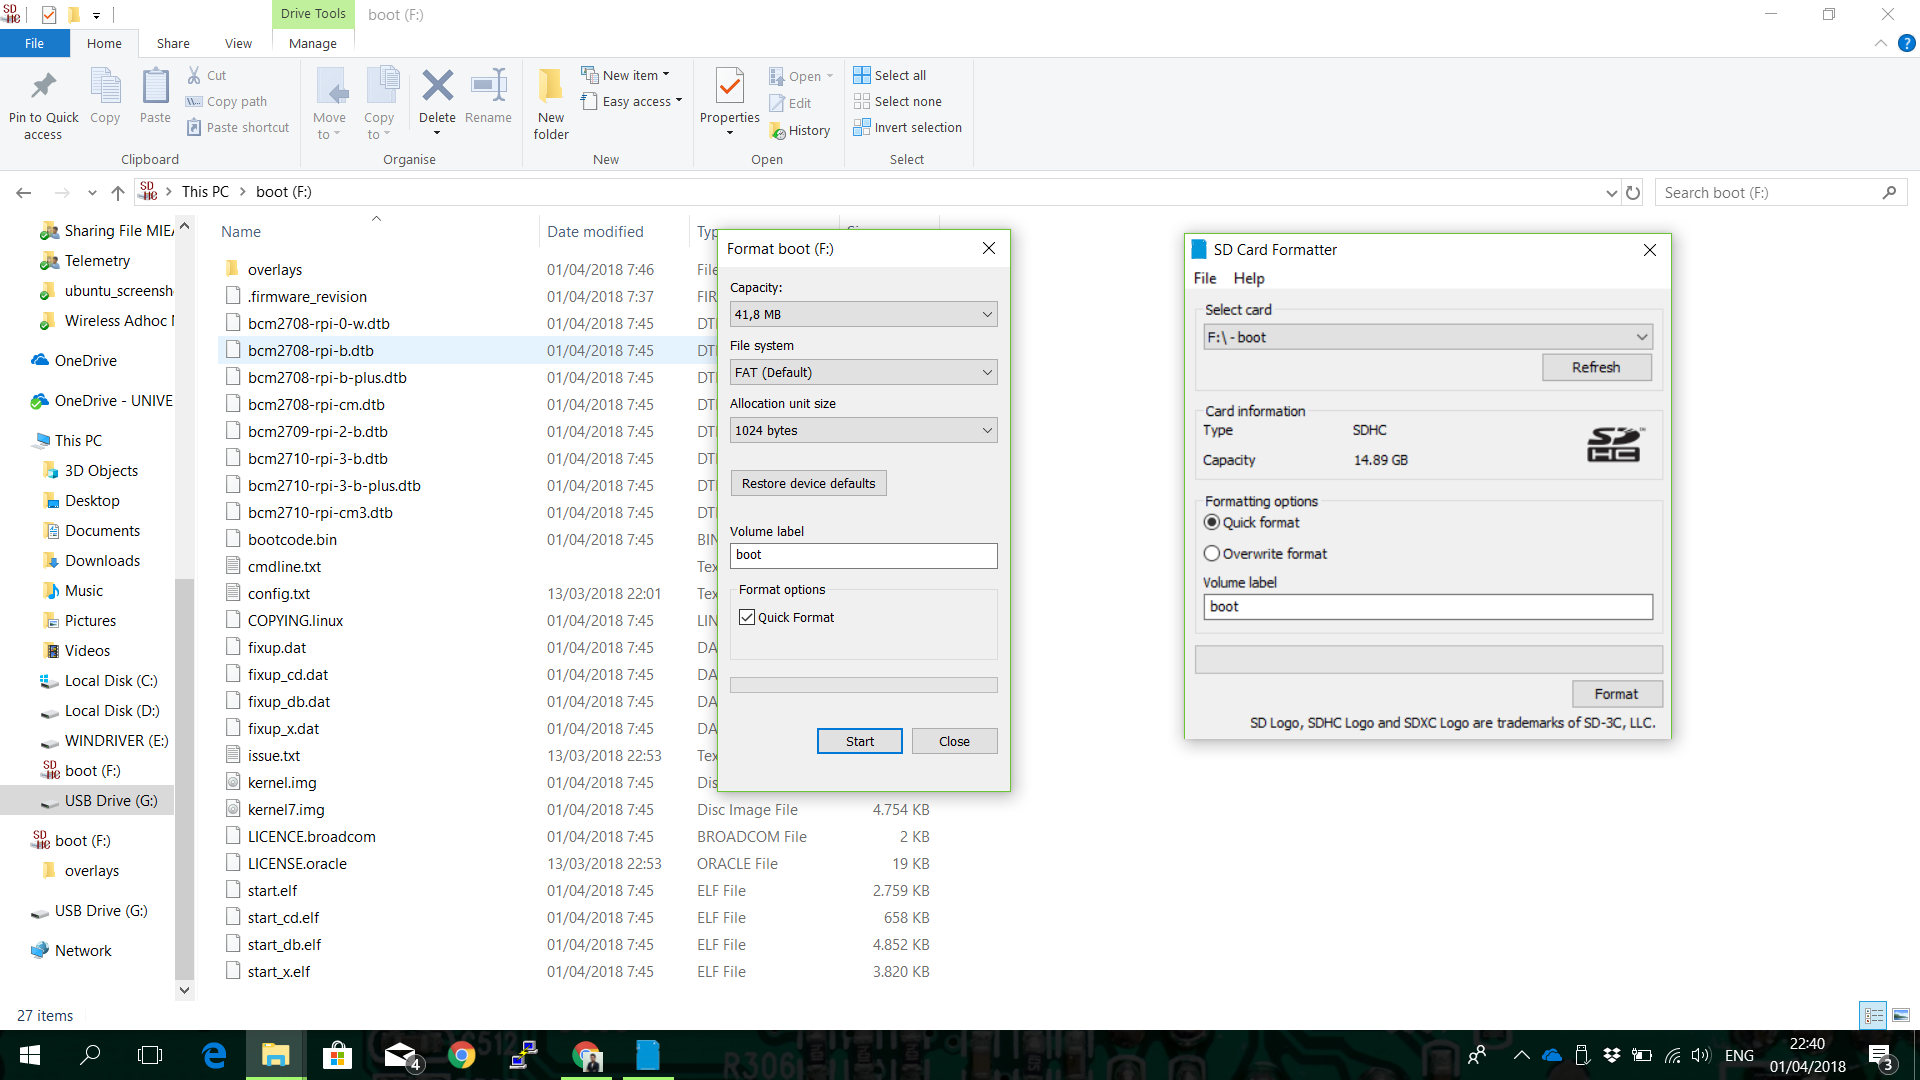
Richard Devine is an Editor at Windows Central. A former Project Manager and long-term tech addict, he joined Mobile Nations in 2011 and has been found on Android Central and iMore as well as Windows Central. Currently you’ll find him covering all manner of PC hardware and gaming, and you can follow him on Twitter and Instagram.
Windows Central Newsletter
Get the best of Windows Central in in your inbox, every day!
Thank you for signing up to Windows Central. You will receive a verification email shortly.
There was a problem. Please refresh the page and try again.
By submitting your information you agree to the Terms & Conditions and Privacy Policy and are aged 16 or over.
Windows Central is part of Future US Inc, an international media group and leading digital publisher. Visit our corporate site .
©
Future US, Inc. Full 7th Floor, 130 West 42nd Street,
New York,
NY 10036.
How to Setup Raspberry Pi 4 in Headless Mode
Last month, many of you have sent me questions about Rasberry Pi 4. How to setup without an extra Monitor or Keyboard. So for today’s tutorial, I will teach you how to set up a headless mode for raspberry pi 4.
What you will need
There are several models of Raspberry Pi that include the latest one which is Raspberry Pi 400. But for today, we’re going to you use the Raspberry Pi 4 Model B with 4GB RAM Starter Kit Pack.
The next thing you need to do is an internet connection and a laptop to flash the raspberry pi operating system into your microSD.
Starter Kit Includes:
- Raspberry Pi 4 Model B 4GB RAM
- Raspberry Pi Official USB-C Power Supply
- Micro HDMI to Standard HDMI 1m Cables
- 16GB Class10 microSD Card ( I bought a separate microSD 128GB Class10 Separately)
- Set of Heatsink
- Raspberry Pi 4 Case Black
Let’s Start Pare:
STEP 1: Flashing / Installing Raspberry Pi OS on your microSD Card
There are free tools that you can download to flash Raspberry Pi OS images to SD cards or usb drivers. Just pick one and we’re good to go.
-
BalenaEtcher (Windows / Mac / Linux) — Flash OS images to SD cards & USB drives, safely and easily. You can download it from this link https://www.balena.io/etcher
-
(Best Choice) Raspberry Pi Imager (Windows / Mac / Ubuntu) — Simpler way to image your microSD card with Raspbian. You can download it from this link https://www.raspberrypi.org/downloads/
STEP 2 — A: Using BalenaEtcher Application
-
Insert your microSD card into your computer, then open the BalenaEtcher app.
-
Download the Raspberry Pi OS from this link https://www.raspberrypi.org/downloads/raspberry-pi-os/
-
And choose from the lists below, As per this tutorial we’re using (Raspberry Pi OS (32-bit) with desktop and recommended software)
-
Once the OS was downloaded, open up the etcher applications and drag and drop your .iso file.
Drag and Drop the .
 iso file that you downloaded a while ago.
 -
Select Your microSD using the select target button as you can see below:
Double check the selected target microSD before clicking the flashing button.
-
After everything was selected properly, click the Flashing Button and it will start to install the operating system to your microSD in a minute.
-
Tadaaa!!!, It’s done. Make sure you see the Flash Complete screen like what we have below.
STEP 2 — B: Using Raspberry Pi Imager Application ( Best choice )
-
Insert your microSD card into your computer, then open the Raspberry Pi Imager application.
-
Click the «Choose OS» button and select Raspberry Pi OS (32-bit)
-
Choose the SD Card you want to use, make sure you double check the one that you selected.
-
Once everything is selected, click the «Write» button to start flashing the microSD
You may encounter, a notice before proceeding like this: «All existing data on your micoSD will be erased.
 «
« -
Tadaaa!!!, It’s done. It’s more simple using raspberry pi imager.
STEP 3: Enable SSH for Raspberry Pi 4 on Boot
-
Open your favorite terminal and go to your microSD folder. As for my microSD ill be using
cd /Volumes/boot -
Create an empty text file named
ssh(without file extension) inside the root directory of your microSD card. Once you boot-up your raspberry pi it will automatically enable SSH (Secure Socket Shell), which allow you to remotely access your raspberry pi command line from your Mac / Windows Computer using your favorite SSH terminal such as PuTTY for windowsType in your command line:
touch ssh
STEP 4: Enable a Headless Wi-Fi / Ethernet
-
Though you enable the SSH on boot, you need to connect your raspberry pi to your Wi-fi / Ethernet to give access to your network.
-
In this step, ill teach you on how to connect to your raspberry pi to your Wi-fi on boot-up.

-
Open up again your terminal, and create a file named «wpa_supplicant.conf» inside the root directory of your microSD.
-
Copy the following text inside your wpa_supplicant.conf
ctrl_interface=DIR=/var/run/wpa_supplicant GROUP=netdev update_config=1 country=PH network={ ssid="your_wifi_ssid" psk="wifi_password_here" key_mgt="WPA-PSK" } -
Change the country to your specification as for me, i’ll be using «PH», then enter your SSID and Password of your Wi-fi. Upon boot up, your device will connect to your Wi-fi network.
-
In case, you want to use Ethernet, just plug your raspberry Pi directly to your wired network, then you can access it by its name raspberrypi.local without any problem.
STEP 5: Everything is setup, Let’s Power up our Raspberry Pi 4.
-
First thing to do, is to find the IP address that was assigned to your raspberry pi 4 by your Wi-fi Network.
-
To do that, you need to use a tool which scan your network and determine which IP address use by different devices connected to your network.
-
For this tutorial because i’m using mac, ill be using «nmap» tool.
-
Open your terminal, and type the following code.
sudo nmap -sP 192.168.1.0/24
Once the network scanning is done, you should see your raspberry pi assigned IP Address, which in my case it’s
192.168.1.8 -
Login to your raspberry pi device using your ssh with the ip address assigned using the following code.
ssh [email protected]
By default settings, the password would be just raspberry
STEP 6: Connect using VNC
-
Now that you know how to
sshin your device, we are going to access the graphical user interface or the desktop mode of your Raspberry. We are going to use VNC Viewer.
-
You can download it from this link VNC Viewer
-
While you are connected to your raspberry pi terminal, let’s run the following commands.
#Restart VNC Server each time the system is booted using systemd:
sudo systemctl enable vncserver-x11-serviced.service
#Start VNC Server on a Linux system using systemd:
sudo systemctl start vncserver-x11-serviced.service
-
Open your vnc viewer and enter the IP address with the username and password of your raspberry pi.
-
After successfully login, you should see the desktop gui of your RPI4.
Voila!!!
I hope you enjoy our tutorial, Let me know incase you encounter any error I would love to answer that. Don’t forget to subscribe to my Youtube Channel at Let’s Code Pare Youtube Channel
Next Tutorial
In this article, we are going to solve the issue with regard to the target class that does not exist in laravel.
Solution for Target class [] does not exist in Laravel
Voila!!!
I hope you enjoy our tutorial, Let me know incase you encounter any error I would love to answer that. Don’t forget to subscribe to my Youtube Channel at Let’s Code Pare — Youtube Channel
Share Now
Want to get more ? tips like this one?
Subscribe to get notified for our new dev tutorials
Let’s Code Pare
Let’s Code Pare Youtube Channel
Installing a Raspberry Pi, a headless hacking platform running Kali Linux
Contents:
- Think like a hacker
- Attacking the Paspberry Pi
- Main components of an attack system
- Build considerations 9005 90 1. Download Kali Linux image to install on Raspberry Pi
- Step 2. Burn image to Micro SD card
- Step 3. Boot into Kali Linux
- Step 4. Update Kali Linux
- Step 5: Install an OpenSSH server
- Step 6: Create a custom MOTD
- Step 7: Test login via SSH
- Step 8: Configure Autologin for headless operations
- Check your build against this checklist
- Raspberry Pi : The Raspberry Pi 3 is the platform for these builds, coordinating and controlling all of its other components. Its low power consumption and highly flexible capabilities allow it to serve as a platform to run Linux-based operating systems other than Kali itself.
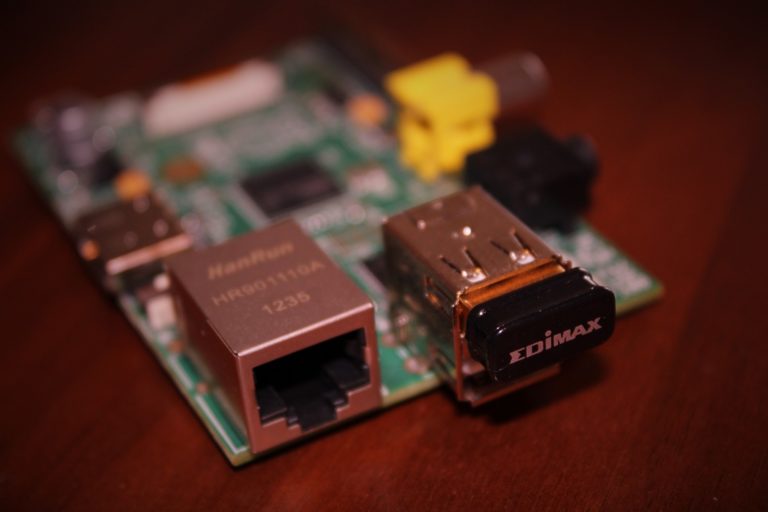
- Command and control (C2) wireless card : The purpose of the C2 wireless card is to automatically connect the Pi to an access point (AP — access point) in a phone or home network. This allows you to remotely control your Pi remotely and discreetly using SSH (Secure Shell) or VNC (Virtual Network Computing). Luckily for us, the Raspberry Pi 3 has a Wi-Fi card inside, but a Wi-Fi wireless adapter can also be added to the Raspberry Pi 2.0006
- Wireless Card : Our wireless card that we will use for the attack will be a Kali Linux compatible Wi-Fi adapter capable of packet injection. This will be our basis for the attack, which can be long-range, short-range, or directional, depending on the requirements of the attack.
 You can find a great guide to choosing a Wi-Fi hacking adapter here.
 - OS 9 memory cards0073 : The micro SD card houses the computer’s operating system and brain, which can be very finely tuned to work in any desired environment. By creating preconfigured cards, you can quickly change the configuration and features of your Raspberry Pi by simply replacing the card and its components.
- Computer : You will also need a normal computer in order to download the firmware to a micro SD card.
- Power Supply : The Raspberry Pi uses a standard Micro-USB power supply. Also, almost any Android smartphone charger or rechargeable battery will work fine to power the Pi. This allows several different battery configurations to be used for continuous reconnaissance or operations requiring continuous power.
- Ethernet cable (optional): An Ethernet cable allows you to bypass wireless authentication by communicating directly with local networks that you have physical access to.
 Specialized attacks such as PoisonTap can also use the Ethernet interface to infiltrate computers.
 - Bluetooth Keyboard (Optional): A Bluetooth keyboard is useful for interacting with our device if you have an HDMI connection.
- Case (optional): If you want to protect your Pi, you should consider getting a special case for it.
Raspberry The Pi is a bank card-sized computer that can hack Wi-Fi, laptops, clone key cards, and even an existing Wi-Fi network so that users can connect to the Pi as a result. It can jam Wi-Fi signals, track cell phones, listen to police radio scanners, broadcast an FM radio signal, and apparently even fire missiles at helicopters.
The key to this power is the huge community of developers who have already created thousands of different builds for the Kali Linux and Raspberry Pi platforms. For less money than a gas tank, the Raspberry Pi 3 gives you an inexpensive, flexible cyberweapon.
Of course, it’s important to hide hacks and avoid using systems that can unequivocally identify you, such as personal equipment. Not everyone has access to a supercomputer or gaming computer, but fortunately, this is not required at all in order to make a reliable platform for Kali Linux.
With over 10 million units sold, the Raspberry Pi can be bought by anyone with $35 to spare. This makes it difficult to determine who is behind a Raspberry Pi hack, as it looks like anything, like a government-sponsored attack or a hyperactive teenager in a computer science class.
Where to buy a Raspberry Pi?
The best option is to buy a device on Aliexpress.
Raspberry Pi 3 Model B+ basic package here, Raspberry Pi 3 Model B+ advanced package here.
See also Raspberry Pi 4 Model B. Basic package here, advanced package here.
Think like a hacker
The Raspberry Pi has several unique features that make it a powerful and easily accessible pentester tool. In particular, the Pi is cheap and its components cost as much as Lego sets. In addition, the Raspberry Pi is minimalistic — it is small, thin and easy to hide. With native support for the Kali Linux operating system, it is very flexible and able to manage a wide range of hacking tools from cloners to Wi-Fi hacking scripts. By replacing the SD card, adding or removing components such as a Wi-Fi adapter with packet injection support, the Raspberry Pi can be configured to work in any situation.
Paspberry Pi on the attack
The first thing to do is to get the right idea about the Raspberry Pi and its capabilities, so as not to deceive your expectations when choosing a Raspberry Pi as a platform for hacking.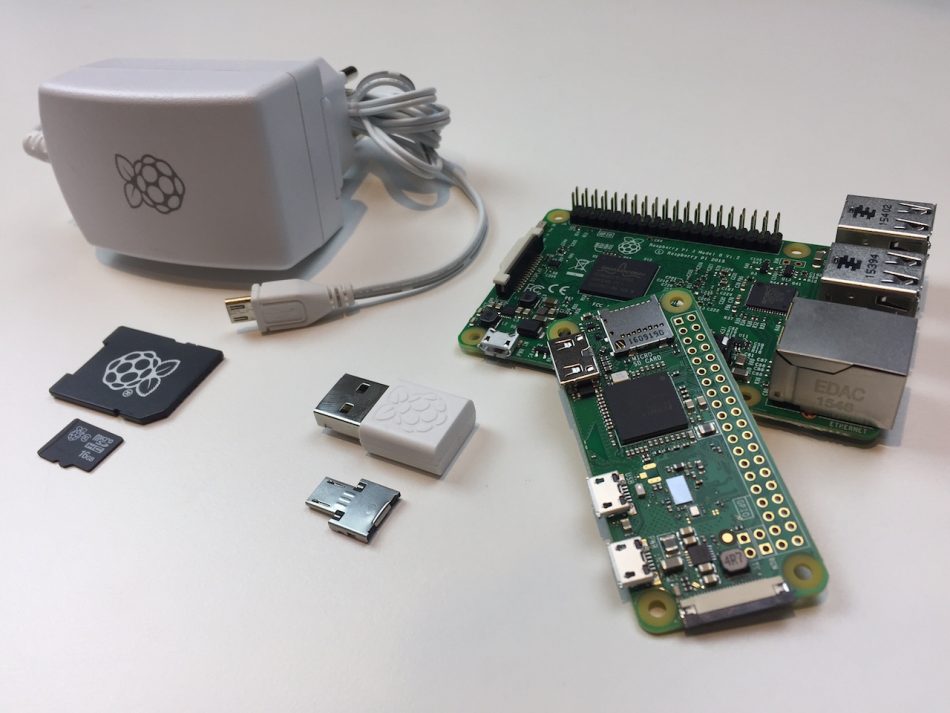 The Raspberry Pi is not a supercomputer, nor does it have huge processing power. It is not suitable for CPU-intensive tasks such as cracking WPA passwords for example, or for carrying out network attacks because the Internet connection is too slow to trick users. At the same time, the Raspberry Pi is great for working in many hostile environments. We simply offload these tasks to larger computers and use the Pi as a data collector.
In our experience, the Raspberry Pi performs exceptionally well as a Wi-Fi attack platform. Due to its small size and large library of Kali Linux-based hacking tools, it is ideal for reconnaissance and attacks on Wi-Fi networks. Our hack build of Kali Linux will focus on anonymous auditing of wired and wireless networks.
Main components of the attack system
Here are the main components needed to build our attack system based on Pi. If you’re just getting started, this Raspberry Pi Kit from CanaKit includes most of what you need to set up your Pi platform.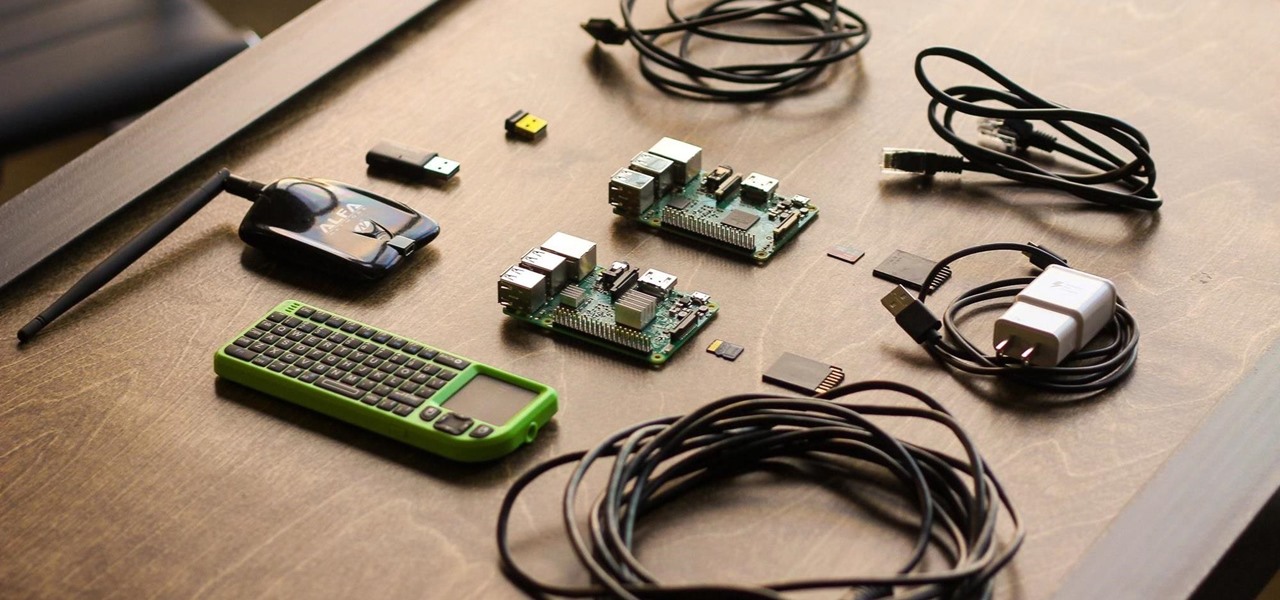
Build Considerations
In the process of planning this article, we considered two main modes in which we intended to control the Raspberry Pi. In an open configuration, the Raspberry Pi is connected to the monitor via an HDMI cable, and commands are entered via a wireless mouse and keyboard. In a tactical configuration, we will be using a laptop or smartphone to remotely access the Raspberry Pi via SSH. By connecting the Pi to our phone’s hotspot or other hotspot friendly device, we will be able to access the Raspberry Pi while still being able to use cellular data.
How to set it all up
In this guide, we’ll show you the steps to set up your Raspberry Pi 3 as your base hacking platform using Kali Linux.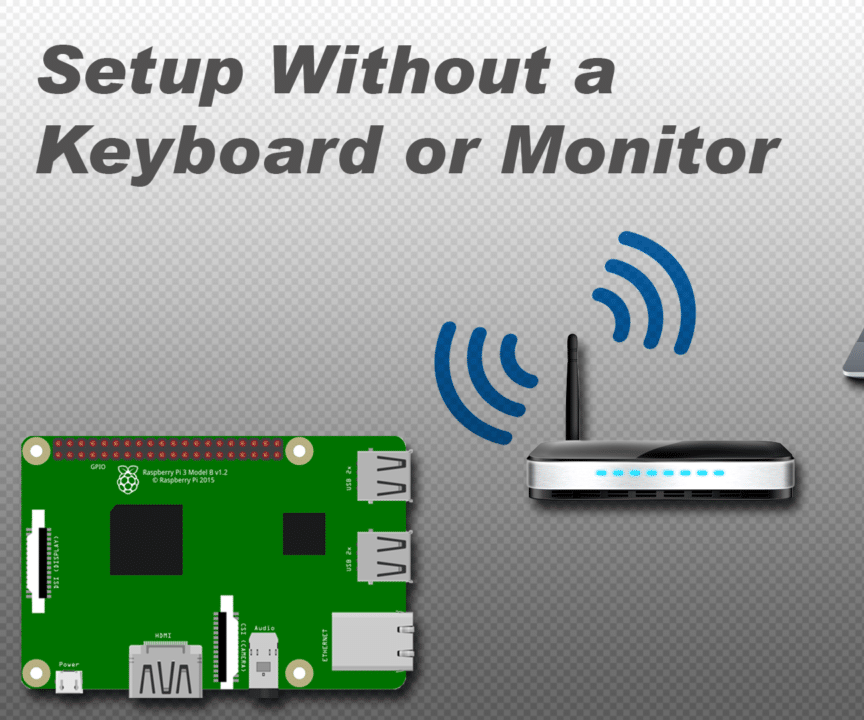 We’ll walk you through how to choose which build to install, how to burn a disk image to a micro SD card, and walk you through the steps you’ll need to take after you’ve set up your Pi for the first time. We’ll update Kali Linux to the latest version to get everything working correctly, change the default SSH keys, and take care of some obvious stuff like changing the admin password.
As a side note, there are many ways to set up Kali on a Raspberry Pi 3. Some use touchscreens, some prefer completely headless platforms (i.e. the device is accessed via network connections without a keyboard or display), others use an internal Wi-Fi card to create a hotspot to remotely control the Pi platform. When choosing this build, we ditched any configurations that involved power-hungry (in terms of power) and fragile touch screens or additional hardware, and installed a version optimized for our two scenarios.
Step 1: Download the Kali Linux Image for Raspberry Pi
Go to the Offensive Security website and download the latest Kali Linux image for Raspberry Pi. At the time of this writing, it was «RaspberryPi 2/3» in version 2.1.2.
Step 2. Burn the image to the Micro SD card
You can use ApplePiBaker for Mac or Etcher to burn the image from Kali to the SD card, but sometimes using them can lead to errors. To prevent this from happening, we will tell you how to do it through the terminal on Mac. If you are using Windows, then you can use Win32 Disk Imager to write the image to a flash drive.
On a Mac, before connecting the SD card, run the following command in the terminal:
df -h
This command will list all drives connected to your system. Insert the SD card and run this command again. Pay attention to the file system name of your SD card (this is the drive that was not in this list before). It should look like «/dev/disk2s1» and in the following steps you must be very careful not to confuse it with other drives, otherwise it may overwrite your hard drive.
We will now use the dd command to write the Kali image to our card. (Use «man dd» to read about the rest of the operands for dd)
First, let’s unmount the partition. To do this, use the following command, after replacing «X» with the correct disk number:
sudo diskutil unmount /dev/diskX
Now we are ready to burn the Kali image to the flash drive. In the console, write, but do not yet run, the command sudo dd bs=1m if= and specify the location of the Kali Linux image that we want to write to the card. You can drag the disk image onto the window to display the file path. After that, enter a space followed by of=/dev/rdisk and add the disk number we learned earlier to the end.
If there is an «s» after the first disk number (for example, rdisk2s1), do not include the «s» in the following number. That is, «rdisk2s1» should look like «rdisk2». And here’s what the whole command will look like:
sudo dd bs=1m if=path_to_image_with_Kali of=/dev/rdiskX
To start the burning process, press «Enter», and at the same time note that the dd command does not display any information on the screen about how things are going for her until something goes wrong or the recording process ends.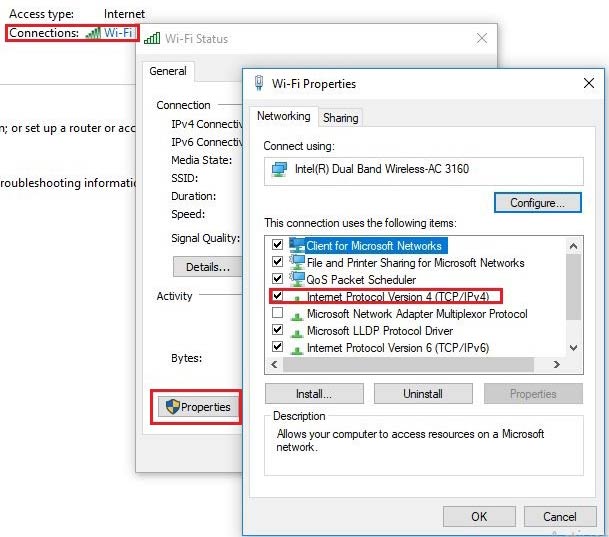 To view the progress while recording, you can press Ctrl+T. Wait for the recording to complete. You will know that a process has completed when you see the total number of bytes written while the process is running.
When the burning process is finished, it will look something like the screenshot below (if you press Ctrl+T several times during the recording).
Step 3: Boot into Kali Linux
When you’re done, your SD card will be ready to go! Plug it into your Pi, connect your Pi to HDMI, and connect your Bluetooth keyboard. Plug in the power supply and boot into Kali Linux. In order to get to the desktop, use the default login «root» and the password «toor».
The login process is a problem for offline management, and we will need to turn it off a bit later. This will allow us to connect our Pi and immediately connect to it remotely without using the screen.
Step 4: Upgrade Kali Linux
Kali Linux is a special flavor of Debian Linux for penetration testing that we love. It is compatible with some of the best and most advanced tools available for wireless hacking, and is flexible enough to support a large number of hacker builds. It is backed by Offensive Security and you will need to update to the latest version to make sure all the tools work properly.
Now is a good time to expand our setup to the full size of the partition. To do this, run the following command in the console:
resize2fs /dev/mmcblk0p2
In the upper right corner of the desktop, you will see a widget for connecting to the nearest wireless network. To update Kali, connect to your phone’s hotspot or other friendly hotspot. Run the update by typing the following commands in the terminal:
 apt-get update
 apt-get upgrade
 apt-get dist-upgrade
Your Kali is now up to date. You also need to change the password for the «root» user and come up with something more crypto-resistant than just «toor». To do this, enter the following command in the console:
passwd root
Enter the new password for your Kali Linux system.
Step 5. Install the OpenSSH server
In order to communicate with the Raspberry Pi from a computer or phone, we will need to log in. To do this, you can use SSH to connect to the Pi via any Wi-Fi connection that we share with it. SSH or Secure Shell is a network protocol that allows you to remotely run commands on a device. Practically, this means that in order to interact with the Pi, we do not need to connect the screen.
To install the openSSH server and update the runlevels, to start SSH on system boot, run the following commands in the console:
 apt-get install openssh-server
 update-rc.d -f ssh remove
 update-rc.d -f ssh defaults
The default SSH keys are a huge vulnerability because anyone can guess them. Let’s change them by running the following commands in the terminal:
 cd /etc/ssh/
 mkdir insecure_old
 mv ssh_host* insecure_old
 dpkg-reconfigure openssh-server
This will backup old SSH keys to another folder and generate new keys. Problem solved! Now let’s check that we are able to login as root by typing:
nano /etc/ssh/sshd_config
This will open your SSH configuration file. Change this line in it:
PermitRootLogin without-password
Instead of this line, enter the following:
PermitRootLogin yes
Press the key combination Ctrl + O to save the changes. If everything is set correctly in the file, then you do not need to change anything.
Excellent! Let’s restart the SSH service by typing in the console:
 sudo service ssh restart
 update-rc.d -f ssh enable 2 3 4 5
Finally, to check if we have SSH running, use the following command:
sudo service ssh status
something like the screenshot above.
Otherwise, start the SSH service by running the following command in the console:
sudo service ssh start
If you find that SSH is still not working, you can use the raspi-config utility as a workaround. It is designed to work with Jessie, but will work on Kali as well. To use it, first clone the GitHub repository, then to mount the boot partition type sudo mount /dev/mmcblk0p1 /boot , cd to that directory and run sudo bash raspi-config.
Step 6: Create a custom MOTD
Of course, the speed and power of your computer is directly related to how cool your message of the day (MOTD) is. This message will greet you on every successful login and is traditionally used in conjunction with ASCII art, just to spice up the gray hacker days a little.
Create your own message by typing:
nano /etc/motd
Delete all content and paste what you want to see every time you log in.
Save and exit nano by pressing Ctrl+O and then Ctrl+X.
Step 7. Test login via SSH
Now let’s try to login from your home computer or laptop. Connect your Pi to the same wireless network as your home or work computer. Then, on your Pi terminal, run the ifconfig command to find out your IP address.
ifconfig
In the comments, some people have mentioned an error at this point. If it appears to you, then try executing in the console:
sudo apt-get install net-tools to determine if you have the net-tools package installed on your system. Run ifconfig again and see if it works.
The screenshot above shows that our IP address is 10.11.1.144.
Then, in a terminal on your personal computer, enter:
ssh [email protected](your IP address)
You should then see your MOTD (message of the day) screen!
If this fails, you can try using the arp-scan utility on your Mac to list all available devices on the network, this will allow you to find your Pi’s IP address directly from your PC.
Step 8: Configuring Autologin for Headless Operations
Sometimes we want to log in with a non-root account. Let’s create a new user called WHT (or whatever name you prefer) with root permissions. To do this, run the following command in the terminal:
useradd -m WHT -G sudo -s /bin/bash
Change the password for the WHT user (or the one you created) to something more crypto-resistant than just » toor»:
passwd WHT
Great! Now let’s disable the user we logged in as before so that we can boot into Kali directly and have all our wireless cards automatically start up and connect to the network. This will allow us to use the remote control. Enter in the console:
nano /etc/lightdm/lightdm.conf
And remove the hash sign (#) before these lines:
 autologin-user=root
 autologin-user-timeout=0
Save the file and exit nano with Ctrl+O and Ctrl+X. Then type in console:
nano /etc/pam.d/lightdm-autologin
Here you will need to change the startup options on line 11:
 # Allow access without authentication
 auth required pam_succeed_if.so user != root quiet_success
 auth required pam_permit.so
Here’s to this:
 # Allow access without authentication
 ### auth required pam_succeed_if.so user != root quiet_success
 auth required pam_permit.so
Again, save the file (Ctrl+O) and exit (Ctrl+X), then enter the «reboot» command in the console to restart the Pi for testing.
Check your build against this checklist
To be ready to go, your device must meet the requirements of this checklist:
The device starts up, logs in without asking for a password, and starts SSH on boot, allowing remote access.
The device connects to the AP (access point) command to enable remote control (it does this by default every time immediately after the first connection).
Run the besside-ng script on the attacking antenna to test packet injection (this will be covered in a separate article).
The Pi can be turned off without damaging the data on the micro SD card (and boots normally after the device is turned off).
Raspberry Pi passed all tests? Then she’s ready to go. We are preparing a series of articles on the basics of Pi builds, so keep up with us, build your own computer running Kali Linux on Raspberry Pi.
The easiest way to set up a headless Raspberry Pi
A quick guide to setting up a headless Raspberry Pi on your smartphone.
Ah, the Raspberry Pi is a small and affordable Linux computer that is loved by DIYers and programmers alike. I’ve been playing with Raspberry Pi for a while now, and in this article, I’ll do my best to minimize my experience and teach you how to work with you headless Raspberry Pi in a neat way that I recently discovered.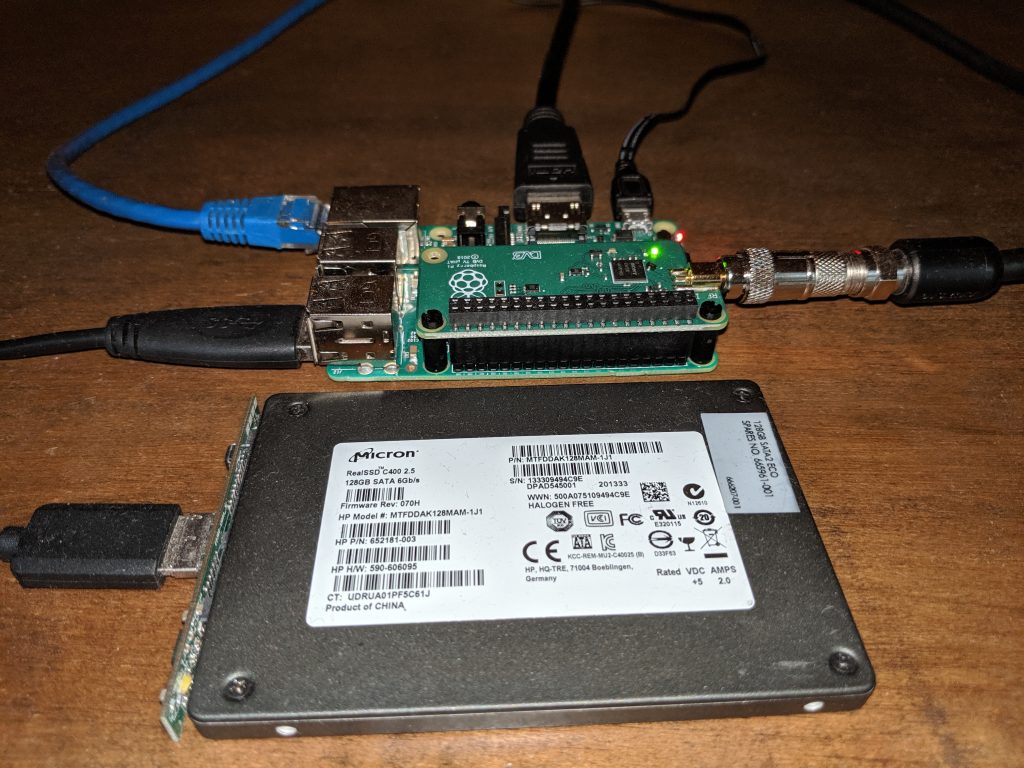 .
.
Maybe you’re using a Raspberry Pi for the first time, or maybe you’re a veteran, but you’ll probably pick up a few tips to make setting up a headless Raspberry Pi more convenient.
The coolest thing about this method is that the common problem of setting up a headless Raspberry Pi is solved elegantly: How do you connect to a headless Raspberry Pi to set up Raspberry Pi network access when the Raspberry Pi is not yet connected to a network?
We usually had to manually add the wpa_supplicant.conf fixed WiFi credential file to the boot disk of our microSD card.
With this method, using excellent open source Bluetooth technology and a smartphone app, we can dynamically set up a wireless Wi-Fi network on the Raspberry Pi. The advantage here is that it’s a nicer interface than manually editing any file, and it allows you to switch the headless Raspberry Pi’s Wi-Fi network on the fly and without having to pull out the microSD card again in case your Raspberry Pi loses connection.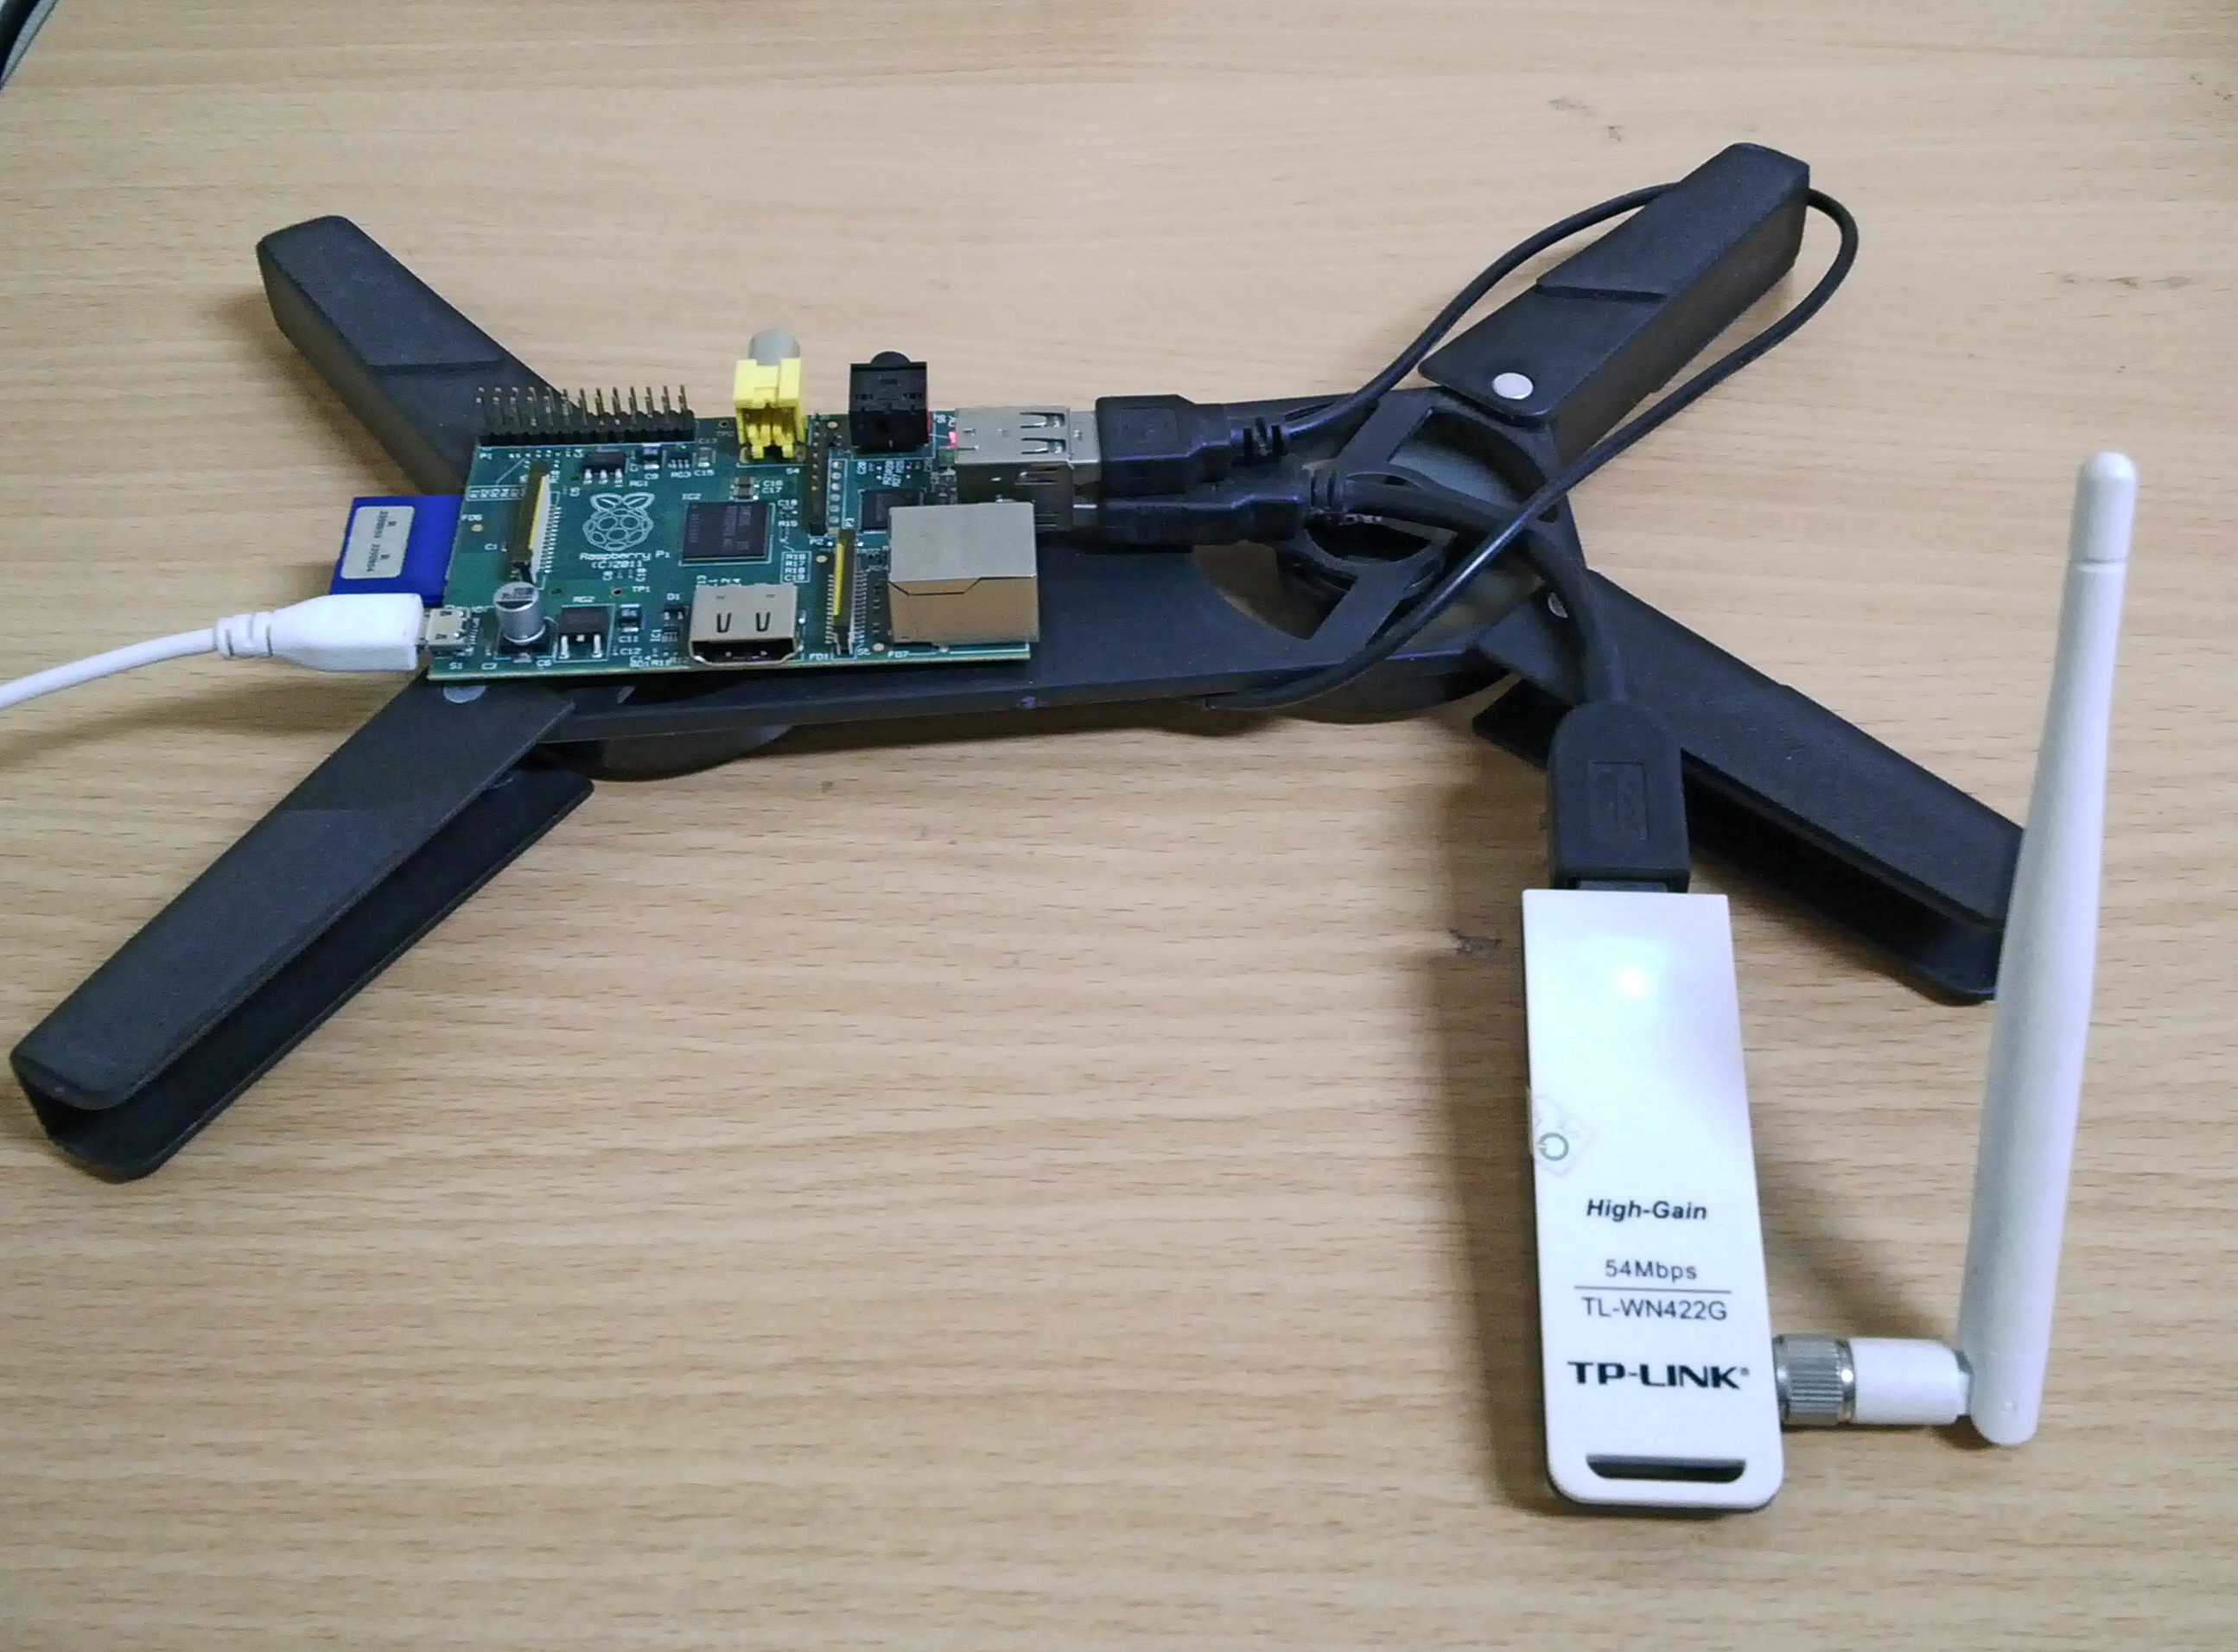 . to your current Wi-Fi network.
You just need to be within range of your Raspberry Pi’s Bluetooth and you can set up your Raspberry Pi’s network using the smartphone app.
First of all, what is headless installation and why should I do it? In a traditional Raspberry Pi setup, you’ll need to connect a monitor, keyboard, and mouse to the device — it’s a bit clumsy and inconvenient.
Headless rig is a Raspberry Pi without monitor, keyboard and mouse. Running a standalone setup allows us to forego additional peripherals and directly control the Raspberry Pi wirelessly from any other computer (like my laptop).
The main benefit I see in a headless setup is convenience, but I’ve been in many situations where there were no extra peripherals and a headless setup is the only way out (did anyone mention hackathons?)
Let’s start. I have a Raspberry Pi 3, but any Raspberry Pi will work with this setup.
All we need is the following to get started.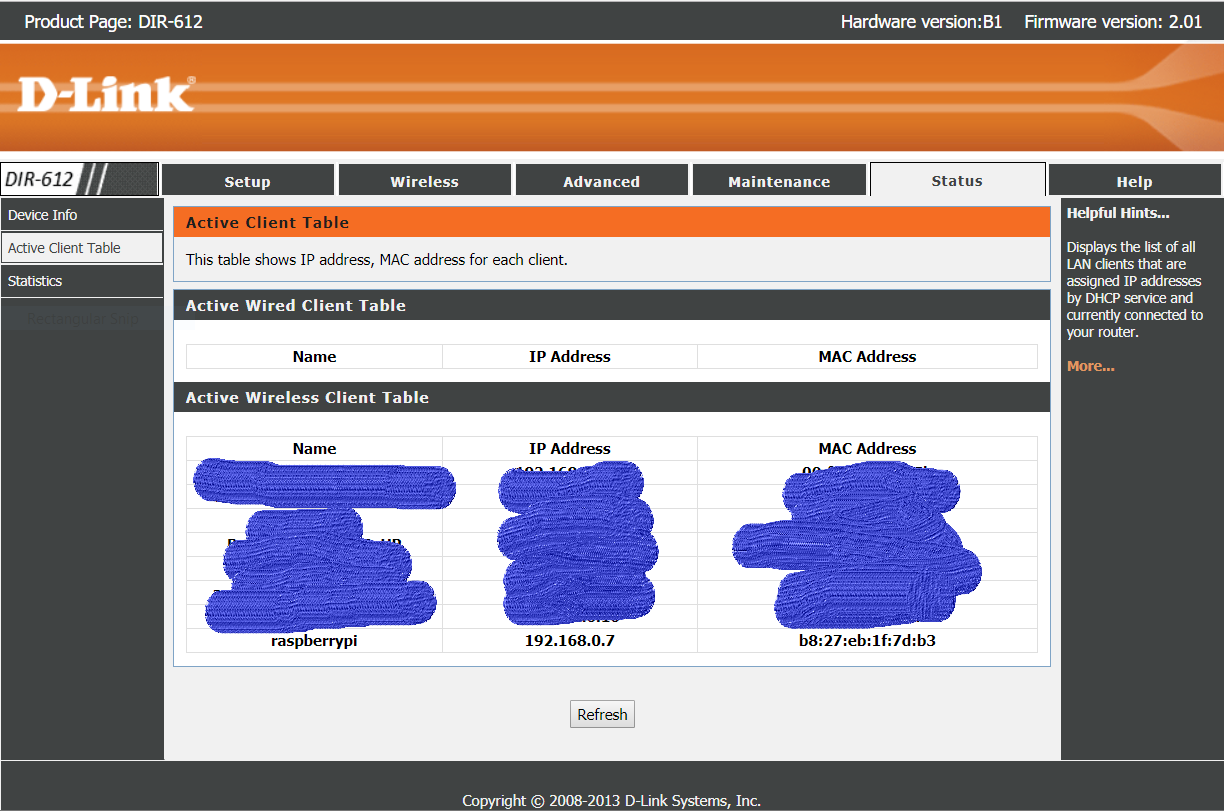
- Raspberry Pi
- 4 GB microSD card or more
- Computer running Windows, Mac or Linux
- Adapter(s) for connecting a microSD card to a computer
- iPhone or Android device
When we have collected all the materials, we are halfway there.
Log into your Windows, Mac or Linux computer and download the latest BerryLan flavored Raspbian image . This is a standard Raspbian image with BerryLan pre-installed, which will help us connect our Raspberry Pi to Wi-Fi without having to fiddle with configuration files.
BerryLan is open source software that uses an app on our phone to communicate with the Raspberry Pi via Bluetooth and update network configuration files for us.
After downloading, unzip somewhere for later.
Also on your Windows, Mac or Linux computer: download Belena Etcher — we will use this to write this image to a microSD card. Once downloaded, install it and open it.
Connect the microSD card and adapter to your computer.
Click Flash from file and select the downloaded image.
Then click Select target , find and mark your microSD card.
After you click flash, Balena Etcher will flash the image onto your microSD card.
While we’re waiting for this to end, let’s get your iPhone or Android device and download App BerryLan (App Store / Google Play).
By now, your image has hopefully finished flashing, so we can pull out the microSD card (Balena Etcher removes it safely for you) and pop it into the Raspberry Pi. Plug your Raspberry Pi into a power source and let it boot up.
The Raspberry Pi is currently unable to connect to the Internet because it does not yet know our Wi-Fi credentials. In this BerryLan flavored Raspbian image, when our Raspberry Pi is unable to connect to any Wi-Fi sources, it will automatically start listening for us to provide it with some Wi-Fi credentials through our phone via Bluetooth.
Open the BerryLan app and you should see that there is one Bluetooth device to connect to.
Once we click on a Bluetooth device, we will see a list of all Wi-Fi sources that our Raspberry Pi can see. Sign in to your Wi-Fi network.
Tada! Our Raspberry Pi should now be connected to our Wi-Fi network. And BerryLan even gave us a handy private IP address where we can access the Raspberry Pi remotely from any device on our Wi-Fi network. Feel free to take a screenshot of this page — we may need this private IP address.
This completes our headless installation! Wasn’t it painless? And the last thing to do is make sure we can SSH into our headless Raspberry Pi setup to really control this. SSH stands for Secure SHell and allows us to control another device remotely.
Depending on which platform your computer is using, open Windows PowerShell or a macOS/Linux command prompt and type the following:
ssh [email protected]
ssh [email protected] (if the above command does not work)
You will see a host authentication warning — enter yes .
You will then be prompted for your Raspberry Pi password, which is nymea by default in this image.
You should be greeted by this login screen. You’re in! Come on, start this project right now!
P.S. Change the default Raspberry Pi password with the command passwd .
How to Set Up a Headless Raspberry Pi in Windows 10 — Help & How To
Tiffany Garrett
Help And How To
Source: Windows Central
The only limit to what you can do with the Raspberry Pi is your imagination, but even if your ambitions are a little more simple, there’s still plenty of fun to be had. In many cases, you will be using your Raspberry Pi headless, i.e. without being connected to a display. It’s also entirely possible to set it up this way on a Windows 10 PC. Here’s how.
Products used in this guide
- Tiny computer: Raspberry Pi Zero W ($8 at Microcenter)
- Plenty of storage space: Samsung EVO Select 32GB microSD card ($8 at Amazon)
- Power on : CanaKit Raspberry Pi Power Supply ($10 at Amazon)
Go to:
- Get Software
- Flash OS
- Set up Wi-Fi and SSH
- Connect to your Raspberry Pi
Get the required software
Source: Windows Central