8 Alternatives to Sliding Glass Doors That Look & Work Much Better
Updated: | Categories: Exteriors, Interiors
Alternatives to sliding glass doors can not only spruce up your design but can add a lot more functionality, privacy, and enjoyment to your home.
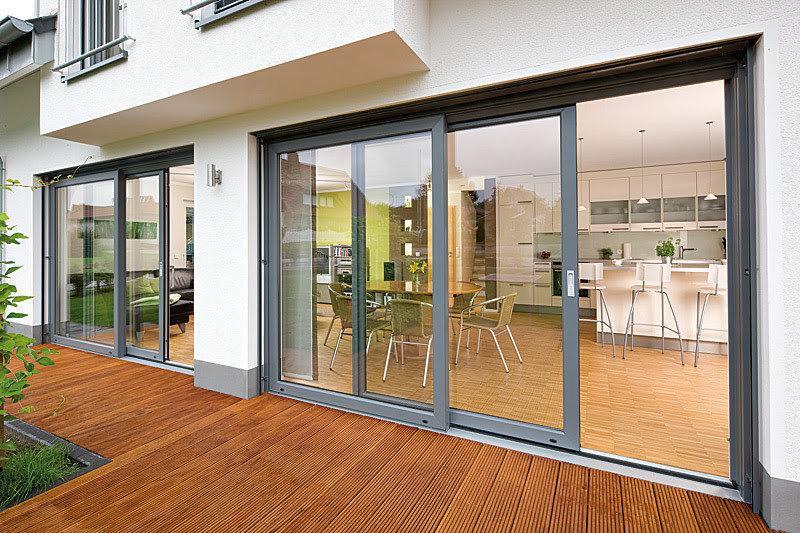
Sliding doors are commonly used as patio doors. They have two glass panels and a screen. What makes them popular is that they save space and give the house a nice look.
But they’re also expensive and need more maintenance than regular doors. They’re less durable and you can’t cut corners with them.
8 Alternatives to Sliding Glass Doors
So it’s time to look at some alternatives to sliding glass doors. And we’ve got some great ones here. Let’s do this…
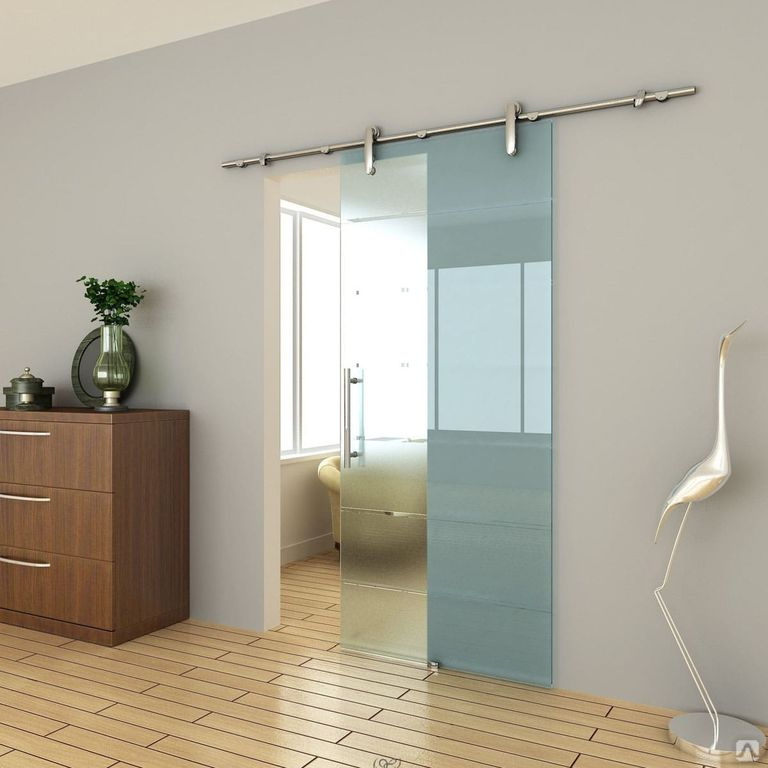
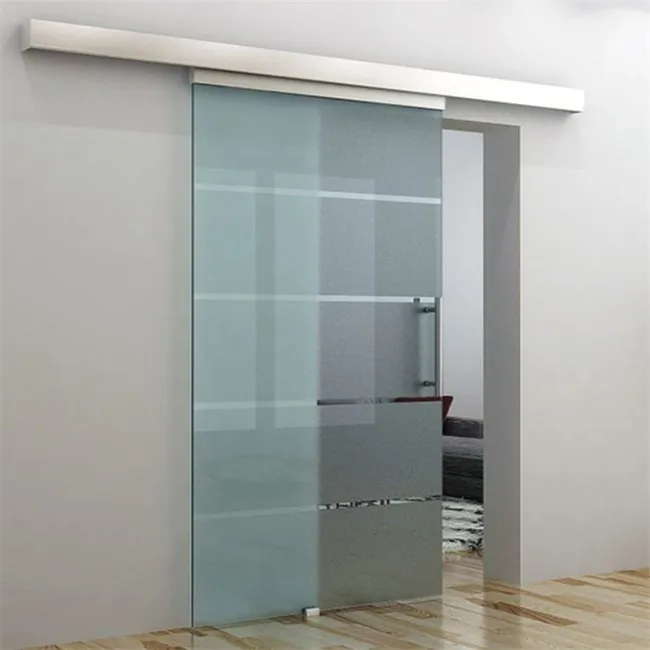
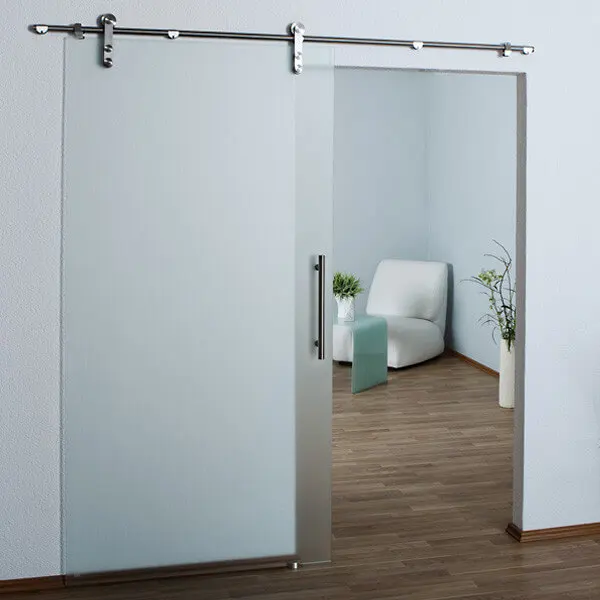
Shoji Sliding Doors
If you want to stick to the concept of sliding doors, here’s one. The shoji sliding doors give your house a great new look without having to change the mechanism of the frame and such. The way you operate the doors stays the same but it’s better and improved.
The name comes from Japanese architecture and shoji sliding doors were actually created to stick translucent paper onto bamboo doors. This technique has been adapted in different parts of the world and there are some Westernized interpretations of it that you might like.
You’re likely to find a wooden framework with frosted glass panes and a sheet of paper between the two plates. These doors are useful on hot summer days. You’ll have sunshade without curtains or blinds. They also provide privacy in crowded spaces.
Pivot Doors
Pivot doors are quite unique but they are also not overly popular because it’s difficult to install them. You must use money, time, and put in some effort to install pivot doors.
But they have a visually stunning look and those who have chosen pivot doors think they’re a great addition to the house. The name comes from the style of operation. You need to pivot and push it to the left or right.
The doors are not really cheap and it takes work, but they’re beautiful sliding glass door alternatives. So the cost isn’t very appealing to a lot of people. What works in their favor is their aesthetic appeal.
French Doors
Apart from sliding door alternatives, French doors are a very famous design for homes. They’re also very popular as patio doors. They are ornate and give a lush look to the house.
But at the same time, they can be simple, elegant and understated. However, they are quite expensive. So there’s that. Not all options to replace a sliding glass door are cheap but they’ll look and work so much better.
On the plus side, French doors are easy to get and replace should you encounter trouble or just want to redesign. But if you are going from sliding doors to French doors, you will need to get a little work done.
These doors open and shut on a hinge. So you need to add that to the door frame. That shouldn’t be a problem since installing French doors is actually quite simple. And there are professionals everywhere who can work on sliding glass door alternatives without trouble.
French doors provide good insulation. They usually come with double-glazed glass and are energy efficient. They keep the house warm in winter and cool in summer.
They are practical and great lookers. So it is worth spending money on. Because they are so popular, you’ll find them in a variety of designs to match the look and feel of your house.
Of the things that don’t work in their favor is the price. But they are high quality and the finished product will certainly put a smile on your face.
Center Swing Patio Doors
Center swing patio doors are for those of us who want something good looking but don’t want to spend a whole bunch of money on it. These doors are like French doors but you can keep one of them shut while the other is open.
It’s comfortable, practical, and has the aesthetic appeal of French doors and other alternatives to sliding doors if you want to entirely get away from that style.
The best thing about center swing patio doors is that they are affordable. It’s easy to buy and install them. They look good and function well too.
They’re durable and preferred as a patio door entrance. You can even add mesh sliding screens to these doors and get some fresh air while keeping the bugs out. It’s a great alternative for a sliding glass door.
But here is the one problem. Some folks don’t like being able to open only one door. And yes, sometimes it’s not practical either. But if you can make that work, these are a pretty great option. They’re better than figuring out how to secure a sliding glass door.
Folding & Accordion Doors
Accordion doors come in beautiful designs. They’re unique in the sense that you can push them to the sides of the frame and create space between the indoor and outdoor areas.
Folding or accordion doors are good especially for large spaces that open into the patio. But they don’t have to always be large. You can get smaller versions of these doors to match your needs, like the ones in closets.
They are popular because they can open up and allow you to move things in and out, especially if you are doing that with bags of groceries or setting up a picnic or moving furniture in and out. While they are not as fancy as some other options, they are pretty appealing visually compared to other sliding glass door alternatives.
These doors are practical and pretty. They are fun to install and you can start using them without any delay. But if you are chasing practicality, this is a good choice.
Glass Roll-Up Door
This is one of the most stylish glass doors out there if you are looking for an alternative for sliding glass doors. The design is modern, minimalist and it suits perfectly well if you have a big front to cover and want a really good design.
They’re fun to own but the installation isn’t easy. They look like garage doors and you can roll them upwards in the front into the frame. If you want to replace an existing sliding door, it will take some work. You will need to modify your frame a bit.
You’ll also have to create space for the door inside the walls. Installing a glass roll-up door is a little DIY home improvement project. So you’ll need to think about the money and time you need to put into it.
You’ll also need professional help to make it happen if you don’t have some experience already. So be prepared for that. This might not be a one-day job after all.
However, the mechanism of the door itself is pretty interesting. It provides the same level of comfort that a sliding door does. In fact, some customers have found it to be more useful in some ways.
With a roll-up door, you have all the space you need to move large items in and out of the house. It’s quite practical and has an impressive look and feel too. You’ll get a great view outside your house and it’s easy to operate.
The only thing to watch out for is the difficulty in installing it. You’ll need to make some changes around the house too and that might be a bummer.
Dutch Doors
You might not think of Dutch doors as patio doors but they actually work as a great alternative to sliding glass doors. If you are unfamiliar, Dutch doors split in the middle and the upper part can be opened separately.
They usually come as a single door and are used as side doors that lead you to a backyard or the garden. But you’ll also find them in the size of French doors which makes them great patio doors.
These doors are great for families with little children and maybe a couple of pets too. The design of these doors will help you keep them indoors.
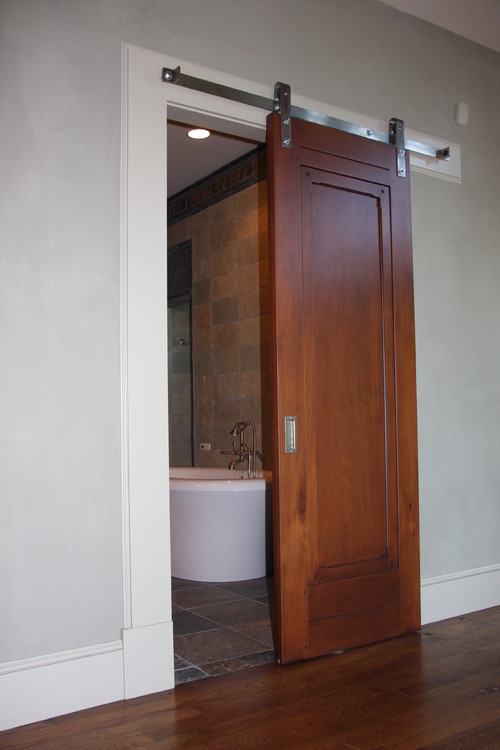
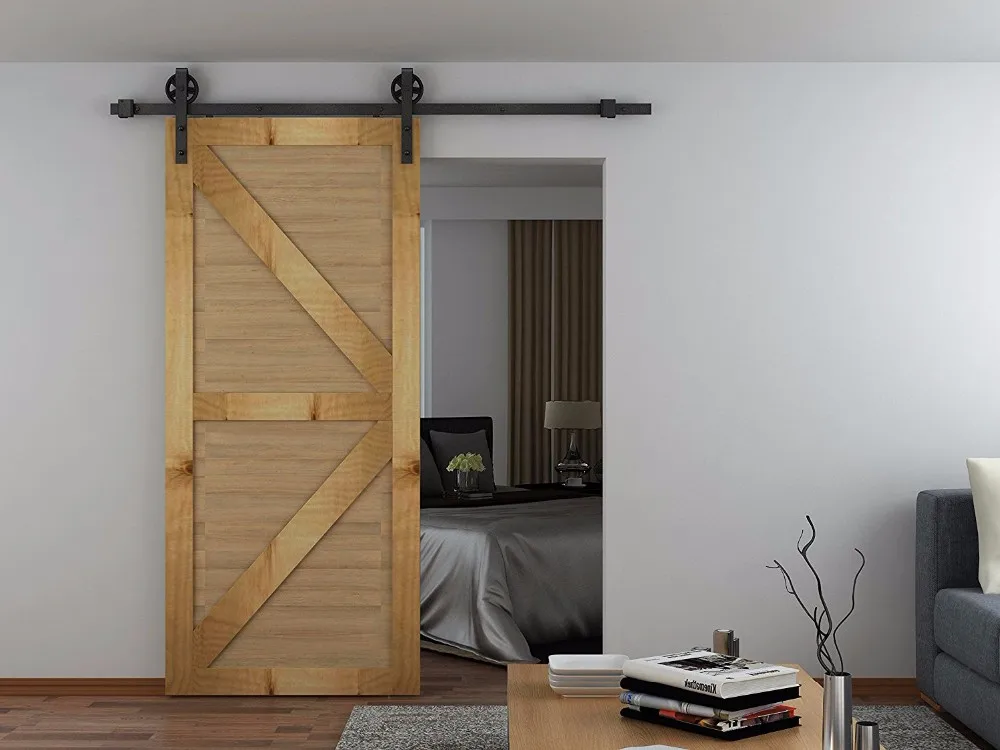
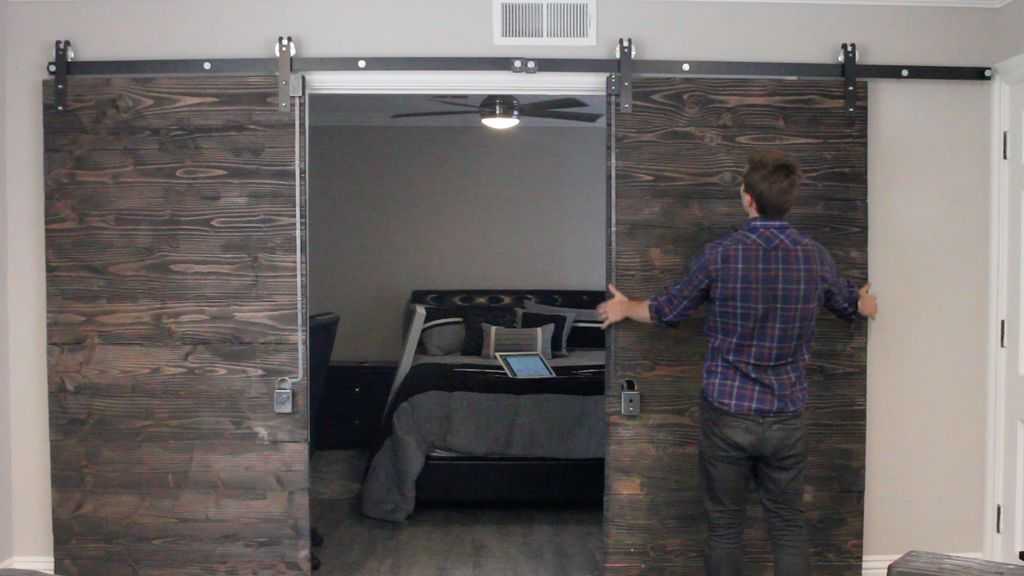
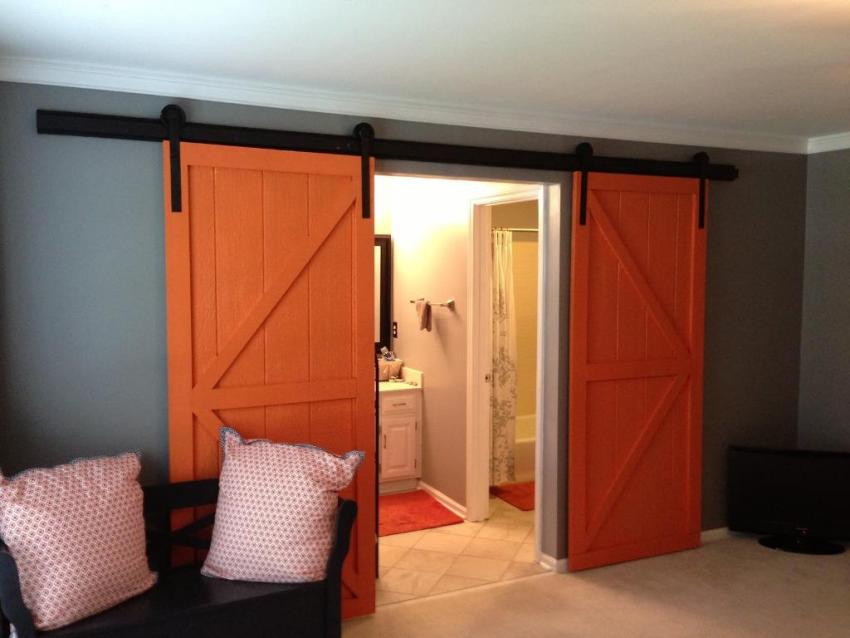
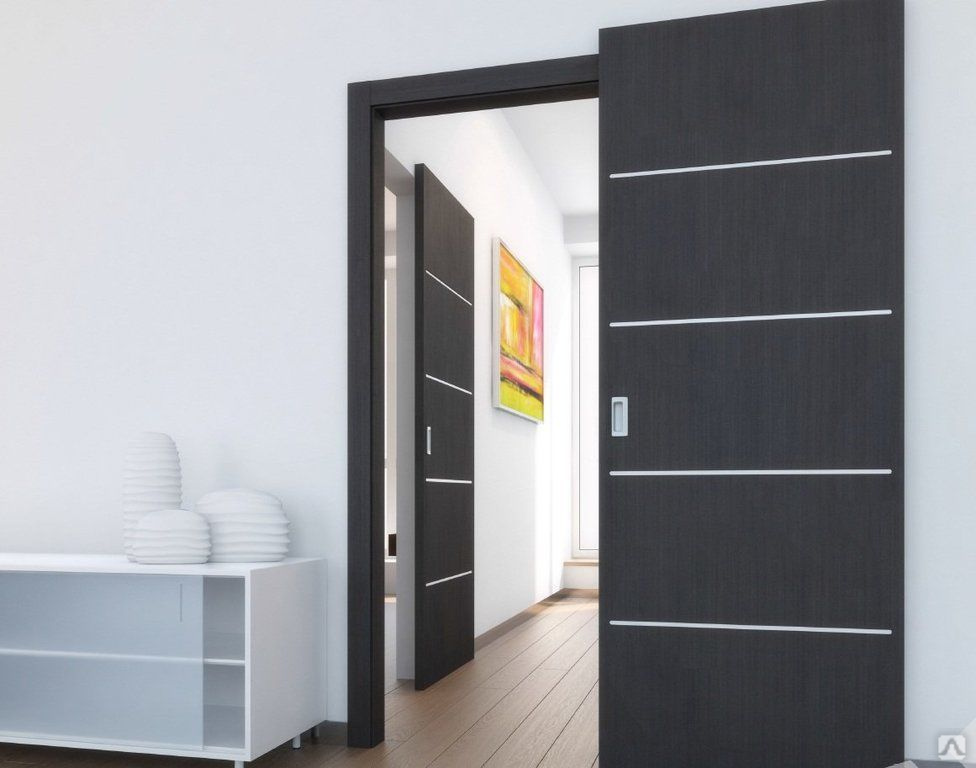
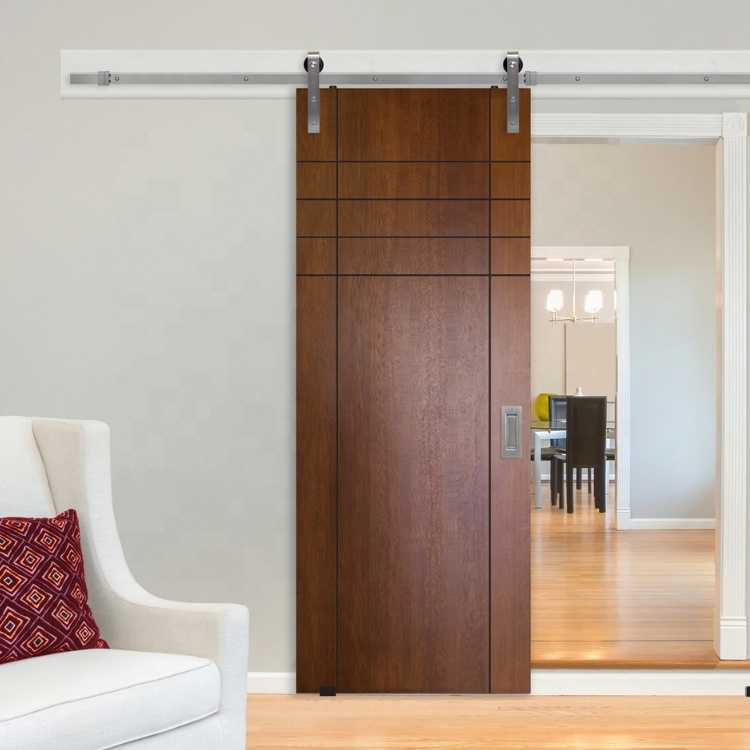
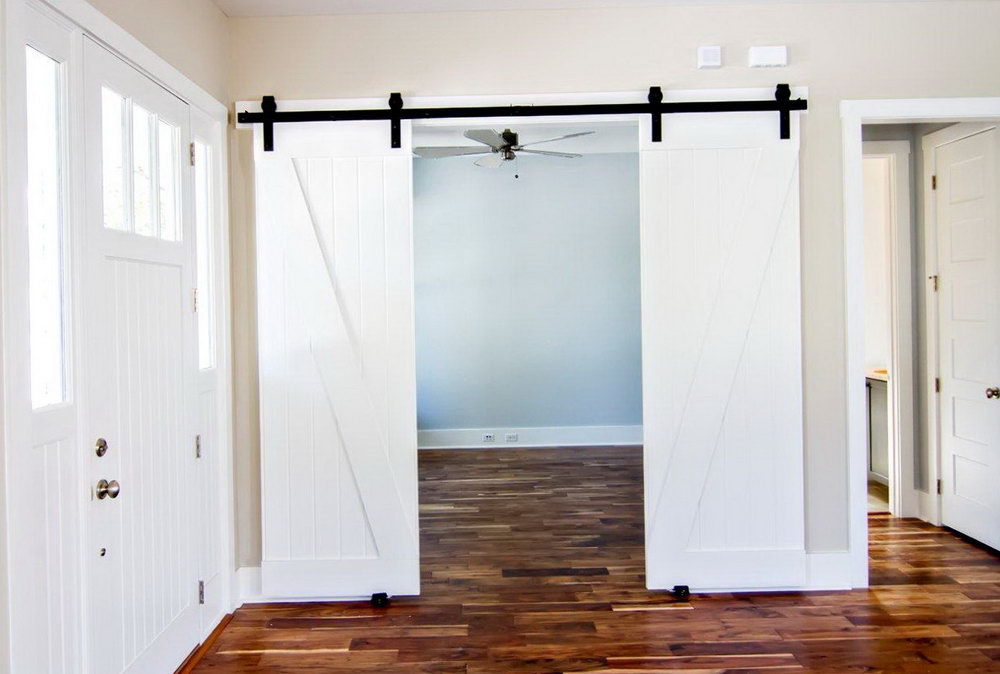
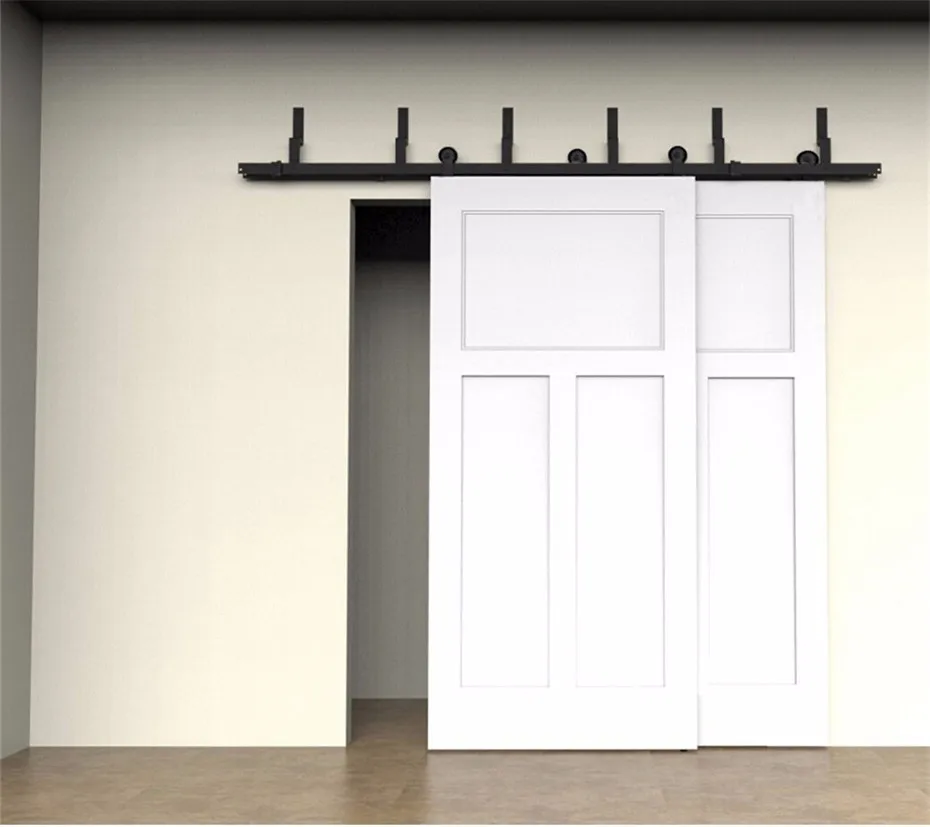
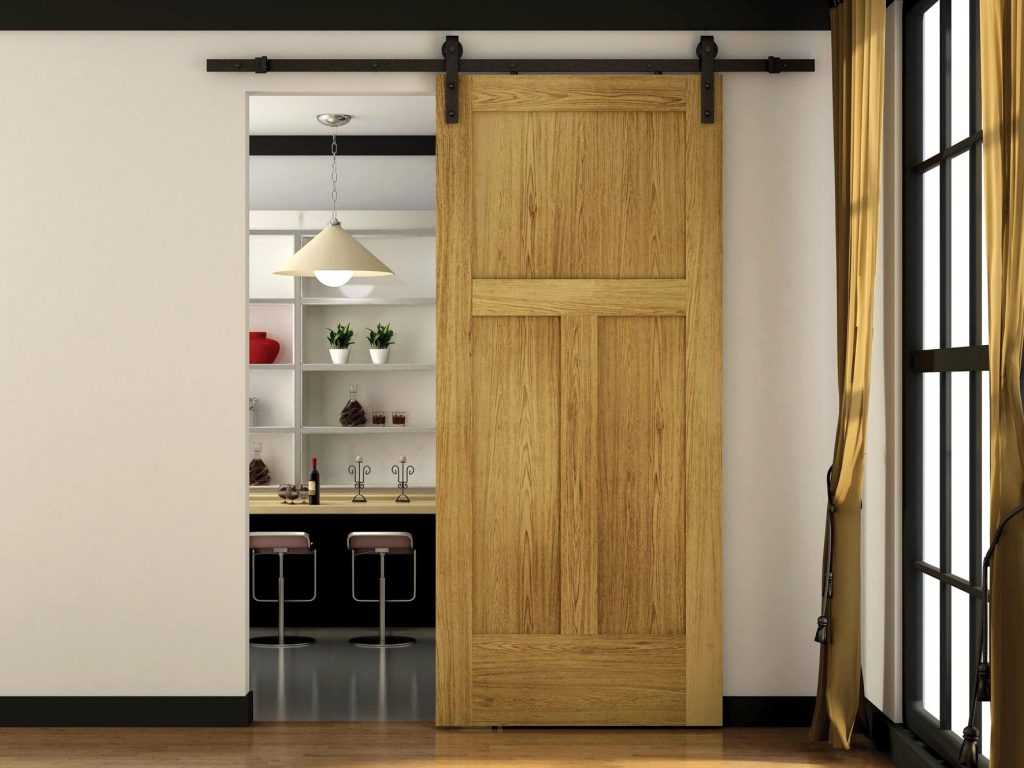
Sliding Barn Door
Barn doors are the last item on this list. Once again, you might not have thought of them as an alternative for sliding glass doors but they work. We are currently in the midst of a barn door revival culture.
So now is as good a time as any to think of them as fun alternatives, whether it is indoors for bathrooms and closets or outdoors leading to the patio. However, there is a downside.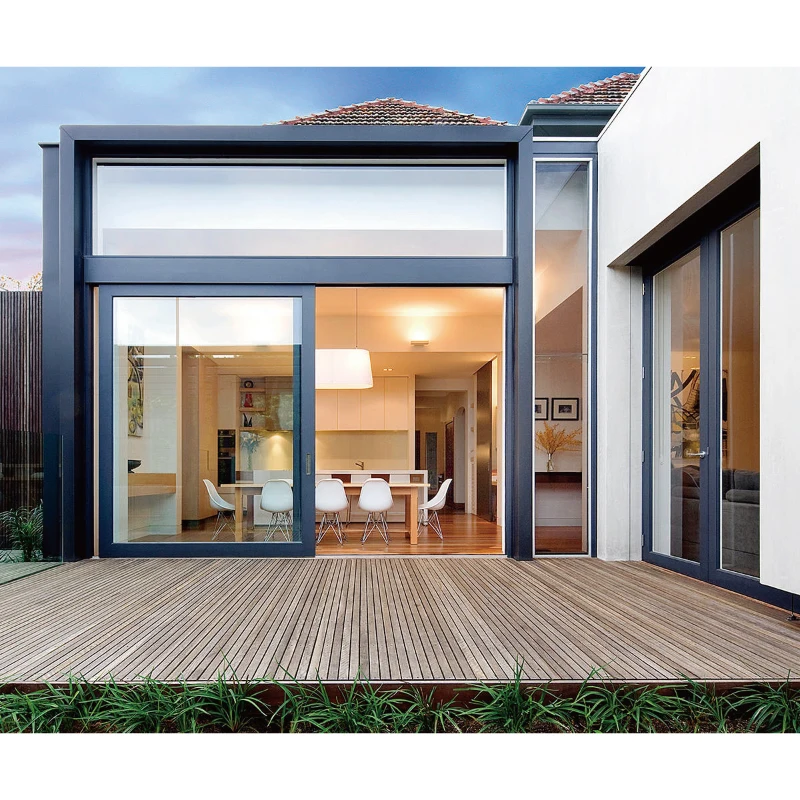
You’ll not get natural light like you would with the other options listed above. But you can make it work as a door for movie rooms or the bedroom where you want more privacy, and they look amazing.
Sliding Glass Door Alternatives Rock!
Replacing a door in the house can be as little or as much work as you want it to be. You must be able to answer the question: why do I want this change?
Once you know what you’re looking for, your options will considerably be narrowed down. Glass sliding doors have been around for a long time and for good reason.
But we must move on to doors with better designs, unique functionalities and made with eco-friendly materials that are hitting the market. And most of these alternatives to sliding glass doors achieve that.
You’ll Also Enjoy:
- 7 Alternatives to Glass Shower Doors: Better Design & Cleaning
- 35 Different Types of Drinking Glasses & Their Uses
- These Crown Molding Alternatives Save Money & Time & Look as Good
- 11 Types of Toilets to Fit Your Bathroom & Look Amazing
- How To Store Honey for Better Quality, Saving Money, & Helping Bees
Rick is a home design consultant and enthusiast, whose life is consumed by all things home and garden. Started as a hobby, Worst Room has grown into an information and inspiration wheelhouse for professionals and home owners alike. Rick serves as owner and editor for our many content contributors. Learn more about Rick & the Worst Room operation here.
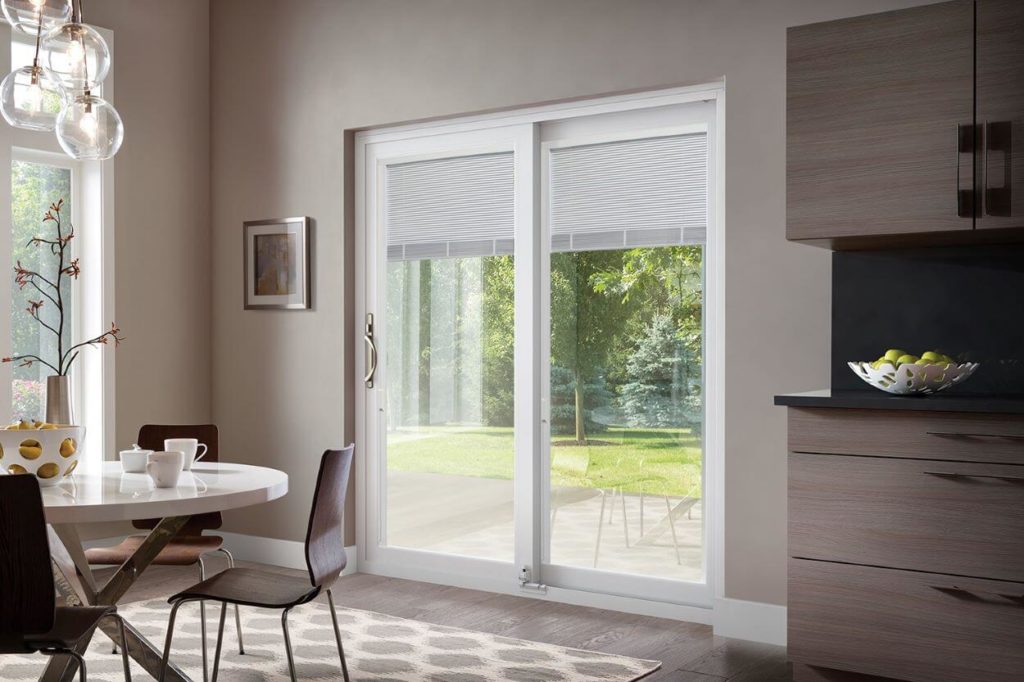
5 Alternative Ideas for Patio Door Replacement
The sliding glass door is a staple of homes of any style. Chances are, if you have a patio door, it’s a sliding glass door.
Sliding patio doors are a great use of space. They slide open within the door frame so you can place furniture, decor or a grill in front of the inoperable panel without blocking the flow of the room. And they don’t take up much wall space, making them a good fit for homes of all sizes.
When it comes time to replace a sliding door, many homeowners stick with what they know.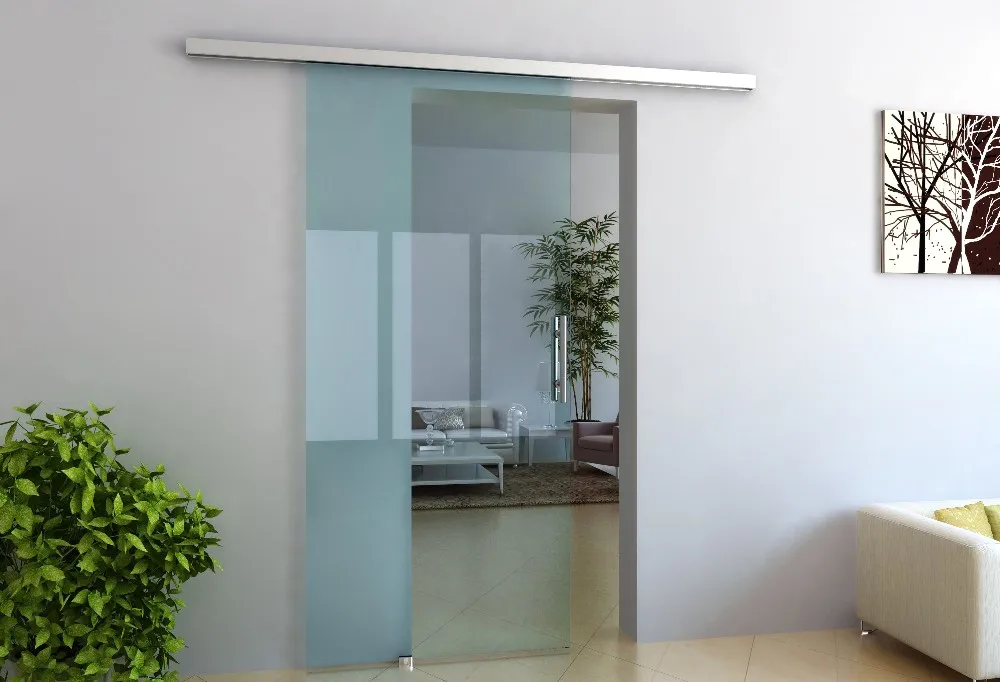 But there’s an array of other patio door options and configurations available.
3-Panel and 4-Panel Sliding Glass Doors
Two panels are the standard size for sliding glass doors for a reason — they take up the least amount of space. But you’d be surprised at the difference an extra panel or two makes. Upgrading to a 3-panel sliding glass door increases your natural light by 50 percent. A 4-panel sliding glass door creates an even wider opening.
With a 3-panel sliding patio door, the functionality remains the same — one panel slides open while the others remain fixed. You can choose whichever panel you want to operate — left, middle or right — to best fit the layout of your space. For 4-panel sliding glass doors, the middle two panels are operable and slide open over the outer panels, giving you double the space for foot traffic or just feeling the open air.
Swapping out an old sliding glass door for a new 3-panel or 4-panel model can be a great option for homes that lack the wall space for larger openings or need to conserve space on a small patio. You can even upgrade to multiple panels without ripping out your entire wall by choosing narrow glass panels.
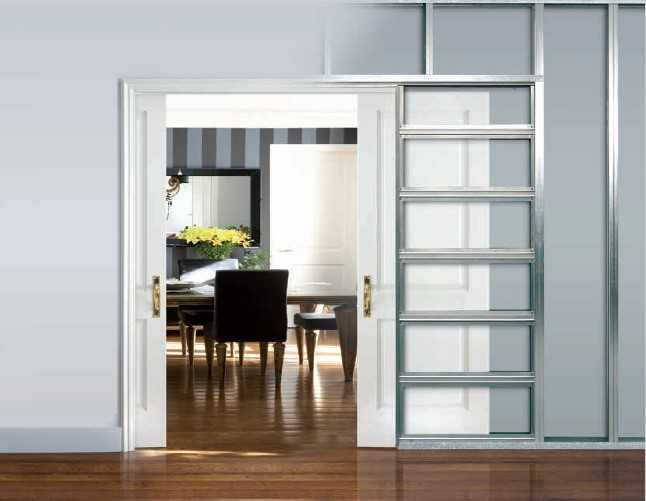
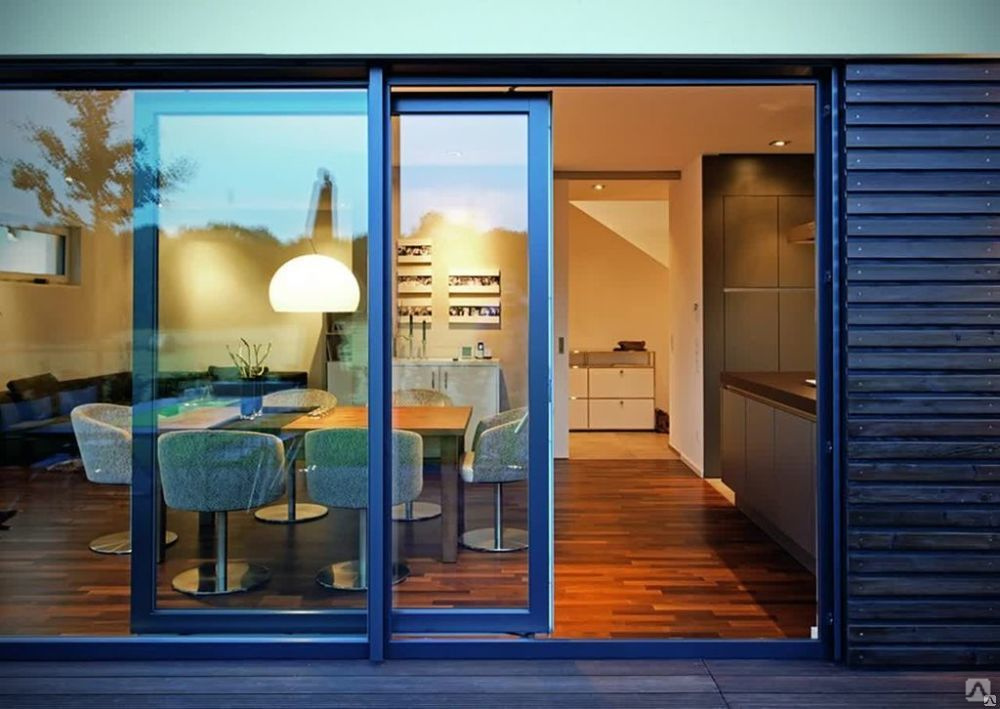
Exterior Pocket Doors
Pocket doors have been used on the interior of homes for centuries. They slide open and tuck right into the wall. They can blend in with the door frame, so you may not even know they are there.
On the patio, pocket sliding glass doors function the same way. But instead of a closed-off door, you get a beautiful glass wall that connects your home to the outdoors. Each panel of a multi-slide patio door glides open, stacking up as you create a wide opening so you can seamlessly blend your indoor and outdoor spaces. You can customize exterior pocket doors with anywhere from four to 10 panels to fit the size of your wall and patio. And if you don’t have the room to store the panels inside the wall, multi-slide patio door panels can also be stacked at the edge of the track outside the wall.
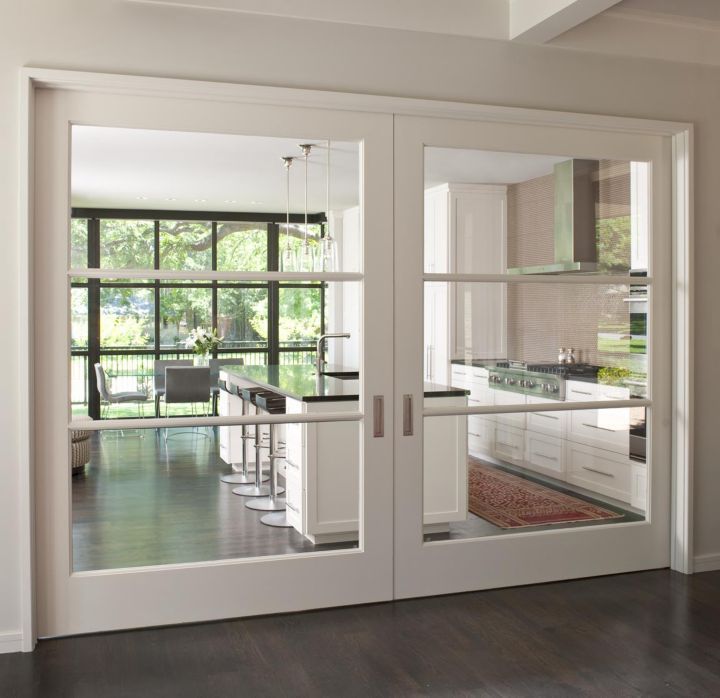
Exterior Double French Doors
Like pocket doors, French doors are a stylish feature on the inside of a home often seen in traditional architecture.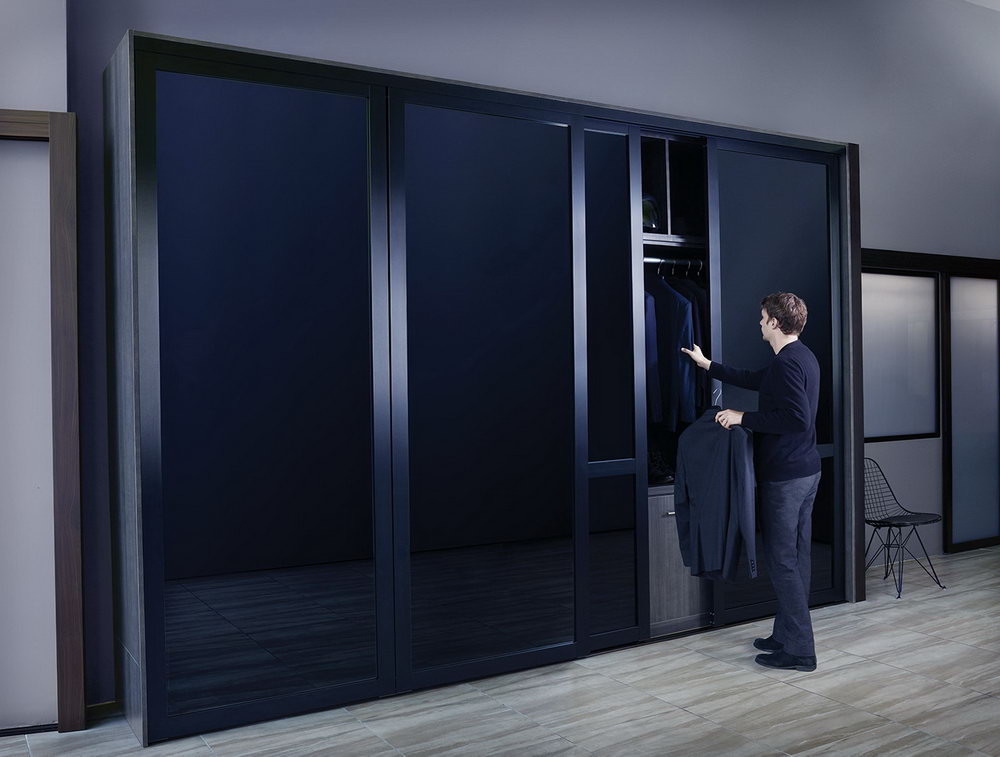 And they’re used on patios more than any other patio door type outside of sliding glass doors.
Exterior French doors are classic in terms of both style and functionality. They can improve the aesthetic in the same amount of space as an existing sliding door, making for a much less extensive patio door replacement project.
With double hinged French doors, you also get greater latitude to configure your patio door to your needs. You can choose narrow doors for tighter spaces, inswing to preserve patio space or outswing to save space on the inside. You also have options for functionality. You can have both French doors be operable or leave one panel fixed like a traditional sliding glass door.
Exterior Bifold Glass Doors
Bifold doors offer many of the same benefits as pocket doors. They are just as often used in movable glass walls to achieve a modern style and an ever-expandable living space. But instead of hiding away in pockets, exterior bifold doors fold up and out of the way at the edges of the patio door frame.![]()
Exterior folding doors offer a plethora of configuration opportunities. Customize the size and number of panels, where they open and meet and whether they create a straight, curved or angled glass wall.
Considerations for Patio Door Configurations
When choosing your sliding glass door replacement, the most important consideration is space. You should always start with an accurate measurement. In order to get a new patio door that fits your current opening, you must measure your current sliding door correctly. And if you’re looking to carve out space for more glass, you need to measure the rest of the wall too.
An in-home measurement by a window and door professional ensures you get the exact right size of patio door. It’s an especially good idea if you plan to make a switch from an old sliding glass door to a patio door with multiple panels or different functionality.
Once you have an accurate measurement or idea on the size of the patio door you want, measure the space directly in front of this area on the inside and outside of your home. Upgrading from a sliding glass door might disrupt your design or layout. You want to make sure you have the square footage for the patio door you desire. And you need to find out whether your furniture and decor can simply be moved a few feet or if you have to redecorate the space to better fit the new patio door.
Sliding glass doors may often come standard, but there’s no one-size-fits-all approach to designing your home. By exploring all the patio door options and configurations, you can find inspiration from a new style to build the indoor/outdoor entertainment space of your dreams.
How to Replace a Sliding Glass Door Yourself
How to Replace a Sliding Glass Door Yourself
Don’t let it slide when it’s time to replace that old sliding glass door
Photo: olesiabilkei / iStock / Getty Images Plus / Getty Images
Difficulty
Challenging
Only DIY if you know what you’re doing.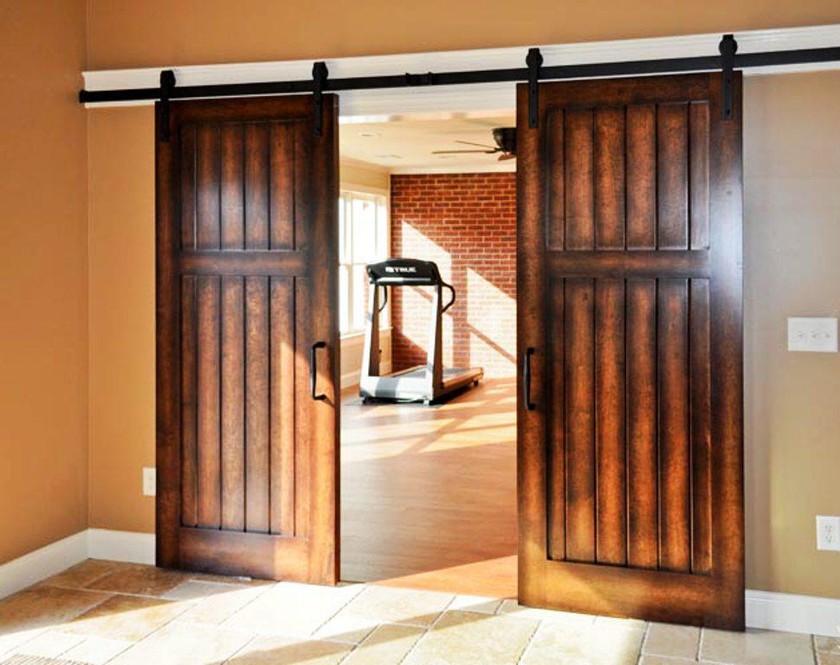
Time to complete
3 hours
$500–$1,000
You’ll spend a lot on supplies, but you may still save money by DIYing.
Need professional help with your project?
Get quotes from top-rated pros.
What you’ll need:
TOOLS
- Screwdriver
- Hammer
- Mallet
- Tape measure
- Four-foot level
- Power drill
- Nail gun
- Pry bar
- Reciprocating saw (optional)
- Table saw
- Work shoes
- Safety gloves
- Safety goggles
SUPPLIES
- New sliding door kit (includes hardware)
- Flexible flashing tape
- Waterproof silicone caulk
- Expanding foam or fiberglass insulation
- Wood shims
- Wood for new trim (optional)
Upgrading your sliding glass door does more than freshen up your patio—it can also provide better insulation and welcome more natural light indoors. Home DIYers with construction experience under their belts will feel the most comfortable with this complex project. If you’re removing a sliding glass door and replacing it with a new one of the same size, here’s how to take on the project.
Prepping to Replace a Sliding Glass Door
It’s important to feel comfortable working with saws and power drills and handling potentially old nails and framing for this DIY. For this reason, don’t skimp on the personal protective equipment (PPE) and follow all instruction manuals to a T.
Removing the door panels and lifting the new frame requires at least two people, so call on a helper for an extra hand.
One last caveat: if you’re replacing a sliding glass door in an older home or into a visibly rotting wooden frame, it’s important to call a professional door installer.
Purchase a Replacement Door
Begin by identifying your current sliding door. Find the model or serial number on the lower corner of the glass or inside one of the door panels along the frame.
If you can’t find the model number, note the brand of the door and break out the measuring tape. Measure the width of the door from frame to frame, staying inside the exterior trim. Measure the height all the way to the bottom of the threshold and to the upper trim.
Your sliding door will likely come in a standard size, such as 60 by 80 inches. If your current door is a custom size, call in a contractor for assistance with choosing and installing a sliding door.
Once you have the new door of your dreams, read the instruction manual from cover to cover. There will be specific instructions regarding the hardware included in the packet.
-
Remove the Stationary Panel
Begin by removing the fixed stationary panel of your old sliding door. Use a screwdriver to remove the stationary panel brackets, typically found at the top and bottom of the inside of the door. Tilt the door inwards—it may need a bit of a shake—and delicately remove the door with the help of a friend.
-
Remove the Sliding Panel
Photo: Toa55 / iStock / Getty Images Plus / Getty Images
The sliding panel should be a bit easier to remove.
 Use a screwdriver in the roller adjuster hole at the base of both sides of your door. Lower your door as close to the track as possible by turning the screws counterclockwise. This will provide extra wiggle room between the two tracks. Just like you did before, tilt the door off its track with a lift and a push and remove it with a friend.
 -
Disconnect Exterior Trim
The exterior trim encircles the interior and exterior door frame. Delicately pry it off, taking care not to damage your home’s siding or interior wall. If the trim is in good shape, save it for later in the project.
-
Loosen the Frame
Depending on the age of the frame, you should be able to loosen it from your home with a pry bar or a reciprocating saw. Remove any visible and easy-to-access nails from the frame as well. Note that this process does take a bit of strength and trial and error—as you will be cutting through sealant, nails, and shims.
-
Loosen the Threshold
Unscrew the threshold and place your pry bar under the sill plate to loosen the caulk.
 The threshold was likely heavily caulked to the base of your door, so you may need to tilt it back and forth to loosen it further.
 -
Remove the Old Frame
Using two sets of hands, tilt the frame toward the exterior of the house and disconnect it from the top, sides, and threshold. The whole frame should come out in one piece.
-
Check for Damages
Take this moment to reassess the rough opening of your door for wood rot. You may need to call a local contractor to replace or reseal the wood surrounding the frame during this phase. Also, double-check that the threshold and sides are level so you can prepare shims during installation if necessary.
-
Install Waterproof Flashing
Hardware stores sell rolls of waterproof flashing tape for windows and doors. Begin by covering the floor sill with tape and folding the tape over the edges to cover the whole sill. You may need flexible tape to get into the corners of the doorsill. Place the tape all the way around the rough opening, including the sides and top where the door frame will sit.
-
Caulk the Frame and Sill
Choose a waterproof silicone caulk for interior and exterior use. Make sure to follow your instructional manual closely here. Add a line—known as a bead—of caulk to the inside of the new door’s flange. The flange surrounds the door frame, so it mounts onto your wall. Next, add two lines of caulk to the sill itself.
-
Attach the Frame Along the Nail Flange
Photo: Jodi Jacobson / iStock / Getty Images Plus / Getty Images
With the help of your buddy, line up the door outside your home and tilt it into place so the base of the frame adheres to the caulk on the sill. The caulk of the flange should press into the sides and top of the rough opening as well.
Ask your helper to hold the door in place as you ensure your door is level and evenly upright—known as being «plumb.» Use your level to test the top of the door and the surface of the door itself to ensure it’s both upright and leveled out. If not, you’ll need to add shims under the sill or along the side of the frame before you secure the final screw.
Keep the shims and level in place as you screw into the precut holes on your frame. Trim the shims with your reciprocating saw so they’re flush with the house.
-
Install the Panel
Check your instruction manual for how to install the sliding and stationary door in the track. In most cases, this simply involves tipping each panel into place and screwing in the brackets and interior headstop—a strip of wood at the top of the frame that keeps the door from tipping out of its track.
-
Test the Door and Adjust
Test your door by sliding it back and forth and making sure it lines up with the locking mechanism. You’ll find a small, adjustable screw at the base of your door that heightens or lowers the roller adjusters.
-
Seal the Interior and Exterior
Photo: LSOphoto / iStock / Getty Images Plus / Getty Images
Seal up the interior and exterior seams between your door frame and the rough opening with a line of expanding foam insulation or a strip of foam insulation cut to the size of the opening.
 Close up the area with silicone caulk.
 Attach the old trim—or cut new pieces with your circular saw—to the interior and exterior of your door frame. Use a nail gun to secure the trim in place.
DIY Sliding Glass Door Replacement vs. Hiring a Pro
Sliding glass doors cost between $400 and $10,000, depending on the size, style, and brand. Labor to install the door will cost an extra $400 to $1,400, not including having a pro haul away the old door or finish additional repairs to your home.
While you can save money by installing a sliding door yourself, it’s not always the safest or most cost-effective option. An incorrect installation could leave you with an unlevel door, a door that lets in cool breezes, or even a sliding door that leaks.
Additional Questions
Can I just replace the sliding glass panel?
If the manufacturer still makes your sliding glass door panel, it’s easy to switch the sliding or stationary side with a new one. Otherwise, work with your manufacturer to find a corresponding model.
Can you change the glass on a sliding door?
Replacing the glass on your sliding door is a great way to save money if you’re trying to improve insulation or simply enhance the look of your doors. Keep in mind that this is only a viable option if the rest of the panel and the door frame are in good shape.
How do you remove sliding glass door panels?
Lower your door as much as possible by turning the roller adjuster screws counterclockwise—located at the base of your door in a covered hole. With more space between the track and door, lifting it off its track should be easier.
Need professional help with your project?
Get quotes from top-rated pros.
Recommended Articles
-
What Type of Door Goes Between Your House and Garage?
By Dawn M. Smith • August 6, 2021
-
DIY Home Projects for Your Entry, Laundry Room
By Jenna Harris • December 21, 2015
-
How Much Do Patio Door Replacements Cost?
By C.
 E. Larusso • September 29, 2021
How to Remove a Sliding Glass Door? (Step-By-Step Tutorial)
By WCMA NET
Is your sliding glass door leaky, drafty, or does it jam when you try to open or close it? Disassembling the door can give way for you to replace old rollers and tracks, remove debris from the tracks, or even install a new door if need be. Read on for instructions on how to remove a sliding glass door.
Here’s what you will need to get the job done:
- Screwdriver
- Reciprocating saw
- Flat prying bar
Materials
- Foam sheets
Step by Step Guide on how to remove sliding glass door
Follow these simple steps to remove a sliding glass door.
Step 1. Prepare the work area
Place foam sheets on the floor around the area where you will be working. This helps to protect the floor from potential scratches and can prop the glass door from breaking in case it is dropped on the floor.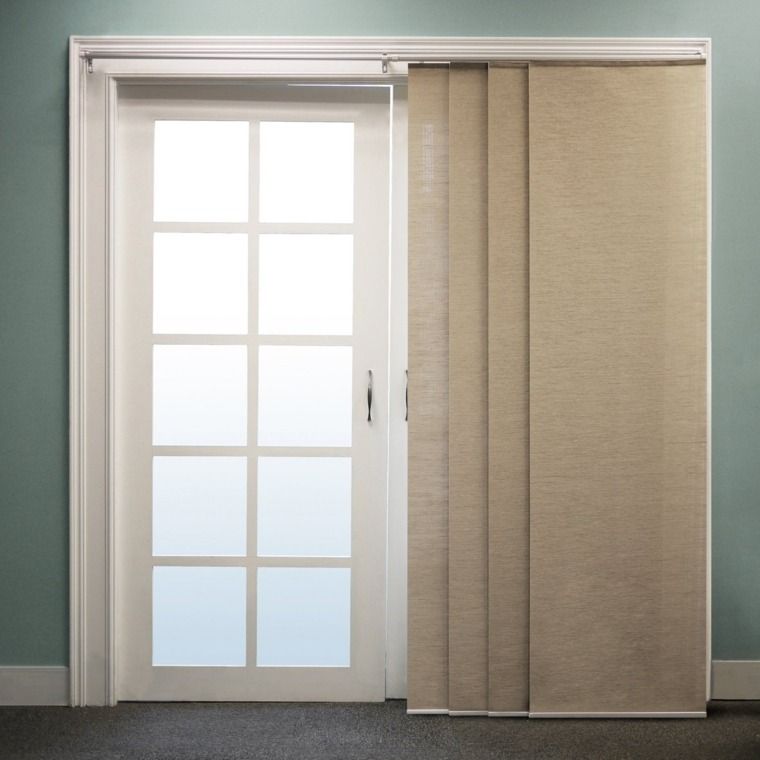 Be sure to remove any furniture, rugs, pots, and other items in the vicinity of the work area.
Step 2. Examine the sliding panel of the door
Patio glass doors typically have a sliding and a stationary panel. You will need to first remove the sliding part to make way for the unmovable portion of the door.
Most sliding doors have screws at the top and bottom along their edge on either side. These attach the door to the tracks. Examine the screws to determine the type of screwdriver you will need. In most cases, a standard flathead screwdriver gets the job done.
Step 3. Detach the door from its tracks
Regular sliding doors have tracks on which the door glides back and forth. Most also come with small but powerful rollers that enable the door to move effortlessly. Over time, the tracks can warp or collect dirt, or the rollers might break, making it difficult to open and close the door.
- Sometimes, all that is needed is to clean and lubricate the tracks to restore normal operations.
 In case of extensive damage, removing the entire door and replacing the tracks or rollers might be your best bet.
 - To detach the door from the tracks, spin the flathead screwdriver counterclockwise to loosen all the fasteners. Loosening the screws lowers the doors, lifts the rollers at the bottom, and makes it easy for you to lift the door from the tracks. Once you remove the upper and lower screws along the edge of the door, stand in front of the door and hold it on both sides.
- Lift and tip the door to release it from the lower tracks and pull it out gently. These types of doors might look light because they consist of glass and plastic or aluminum but they can easily weigh over fifty pounds. As such, it is a good idea to have someone help you safely lift the door and place it in an out of the way location.
Step 4. Get rid of the screen door
Some glass patio doors come with a removable protective screen. Once the sliding door is out, simply lift the screen door from the outside and pry out it from the tracks. If it is attached in place with screws, remove the screws first then lift the door out.
Step 5. Remove the stationary panel
The stationary panel is usually held in place by a stopper, which could be a block of wood, or aluminum or linoleum angled brackets along the top of the track. If you cannot immediately see the stopper, it is probably hidden under a sheathing attached to the door frame.
- Use a flat prying bar to remove the sheathing and expose the stopper. Unscrew and pop the stopper out to allow the stationary panel to slid along the track.
- Check if additional screws are still attaching the door to the frame and unscrew these. Slide the door to where the sliding panel was while prying the door from the tracks.
- Use a utility knife to get rid of any paint or debris stuck along the tracks. Finally, tip the door inward and lift to free it from the tracks.
Step 6. Remove the door frame
If you want to replace your sliding door with a new one, you will need to get rid of the old door frame for the new door to fit properly. Depending on how the frame was installed, expect to do some significant prying to free the frame from the door jamb.
- Using a reciprocating saw, cut through and along the top and sides to remove the shims, fasteners, and other sealings attaching the frame to the jamb. The bottom part will likely be attached to the floor with a sealant of sorts.
- With your partner’s help, tip the frame from the top while pulling it outside. Meanwhile, pry the frame until you release it from the floor. To dispose of the frame, cut it up into chunks and throw the pieces away.
Extended Tips
Removing a sliding door takes a little bit of time but with the right tools and technique, you should be able to complete the project successfully and save on removal costs. Here are some extra tips to help you minimize damage and make the most of your time:
Avoid forcing the door out
Shims, fasteners, and sealing can make detaching a door particularly difficult. Excessive pushing and prying increase the chances of breaking the glass pane, ruining the tracks, or damaging the door frame and surrounding skirting, which means extra repair costs.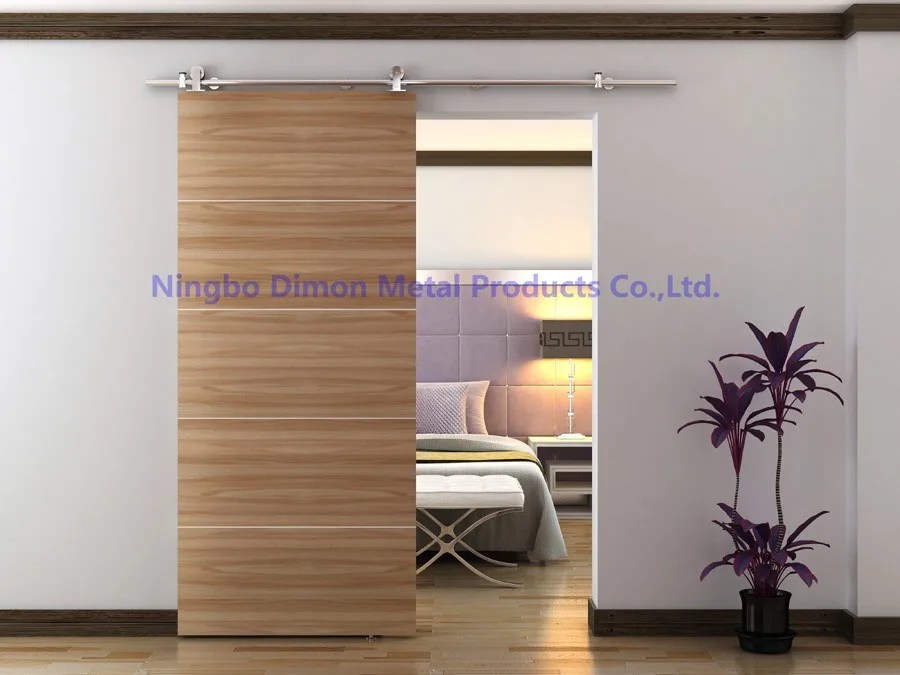
Try to remove all fasteners and to use appropriate tools such as a reciprocating saw to cut through sealing material to disassemble the door with minimal damage.
Use a center punch to avoid damaging the siding
Depending on the way the door was installed, the siding and frame might overlap, making it difficult to simply lift and pull the door. Drilling can help to separate the overlap without damaging the siding.
- A center punch is a handy tool when it comes to drilling holes accurately. Use this tool to punch an indentation along the overlap between the frame and siding and then use the drill to put a hole through and break the overlap without any damage.
- Repeat the process along the entire frame until it easily separates from the siding with minimum prying needed.
Measure before buying a new door
- If you plan to replace your old glass door with a new one, be sure to get the right measurement to buy a door that fits the opening left by the old one.
 It is best to measure after removing the frame. Place the tape measure from one side of the door jamb to the other when measuring the width and from the beam to the floor for lengthwise measurements.
 - When measuring the length, do so starting from the floor upon which the doorsill is installed up to the beam of the door. This ensures that the new door you buy is not too short for the opening.
Maintain sliding doors regularly
The average cost of replacing a sliding door is about $1,000. A little maintenance goes a long way in keeping your doors in top condition and helps you avoid costly repairs or replacements.
- Using a toothbrush, sweep any debris caught in between the tracks. Alternatively, you can use a small handheld vacuum to get the job done faster.
- Next, with the door pulled back, spray a silicone-based lubricant along the track to get the door to slide back and forth with ease. Silicone lubricants are super slippery (which is the desired effect) but they also do not gather too much dirt.
- We recommend vacuuming the door tracks every time you vacuum the room. Lubricate when you notice the door slowing down. In other instances, lubrication might not be enough as the problem could be faulty rollers that need replacing.
Enjoy Big Savings By Removing Your Glass Sliding Door Yourself
Whether you want to replace the door or fix some hardware, removing a sliding glass door requires patience, some DIY know-how, and of course the right equipment. For safety and ease of work, ask someone to help you with securing and freeing the door from its tracks.
Here’s a quick recap on how to detach your sliding glass door:
- Remove the screws at the top and bottom of the sliding panel. Tip the top of the window and lift it off the tracks.
- If you have a screen door, lift it and tilt it outward to free it from the rest of the door
- To remove the stationary door, locate and remove all fasteners that might be holding door the frame. Firmly, pry the door to release it from the frame, slide it along the track, and then lift to release from tracks.
Do you have any questions or comments? Leave them right below—we’d love to read them!
How To Convert Sliding Doors To French Doors
Are you tired of your out-of-date sliding doors? Maybe you’re tired of forcing your sliding doors to work properly? For these reasons and more, you are probably considering converting those ugly sliders into beautiful French doors. If so, then you’ve come to the right place! We’ve done all of the research and included instructions on converting your sliders to French doors.
Disclosure: We may get commissions for purchases made through links in this post.
Here are the steps on how to convert sliding doors to French doors—
- Purchase a French door that will fit into your existing opening.
- Remove the trim around the existing sliding doors carefully; it can be re-used.
- Remove screens, then glass door panels, then slider frame.
- Install the new French doors into the opening (follow manufacturer specifications).
- Re-install trim around doors.
So many people wonder if it’s possible to convert your old sliding glass doors to beautiful French doors. But is it possible? Is it expensive? How do you do it? The answers to these questions and more have been carefully researched for you right here in this post. Read on for detailed instructions on how to convert your sliders to French doors!
Steps to Convert your Sliding Doors to French Doors
First, measure the size of your current sliding door opening and buy a new set of French doors of the same size. Make sure they are sold complete on a pre-hung frame.
Tools Needed:
Top Row, Left to Right
- Caulking and caulking gun
- Hammer
- Level
- Square
- Sturdy work gloves
Bottom Row, Left to Right
- Wooden shims
- Safety Glasses
- Electric Drill (optional screwdrivers)
- Crowbar
- Safety razor/Putty knife
These common tools will help you convert your sliding doors to French doors.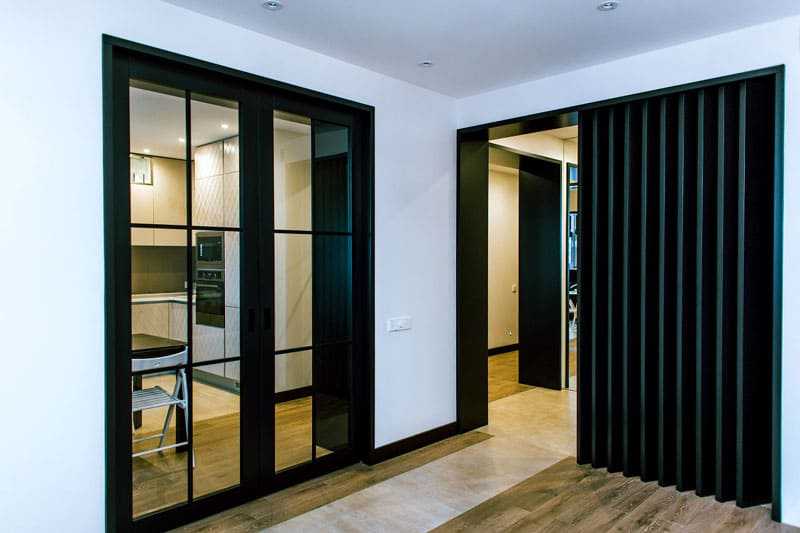
Removing the Doors
- Remove the trim from around the existing sliding doors.
- The trim is the framing around the door. Use a safety razor blade to cut and loosen the trim from the wall, then carefully use a pry-bar to detach and lift the trim off in one piece. A putty knife will help detach and cut as well.
- Lift up and pull out the screens, bottom first.
- You may need to loosen the screw at the top corner of the screen door to adjust the wheel height, thus allowing room for the screen to be lifted from the frame.
- Loosen the screw at the bottom of the moving sliding door (on the inside edge), then lift up and pull out the sliding glass door, bottom first.
- Loosen the screw at the base of the fixed glass door, and remove any screws holding it into place along the inside edges. Once it is loose, slide it to the opposite side, lift, and pull it out bottom first.
In this photo, a safety blade is used to cut the caulking and paint away from the trim.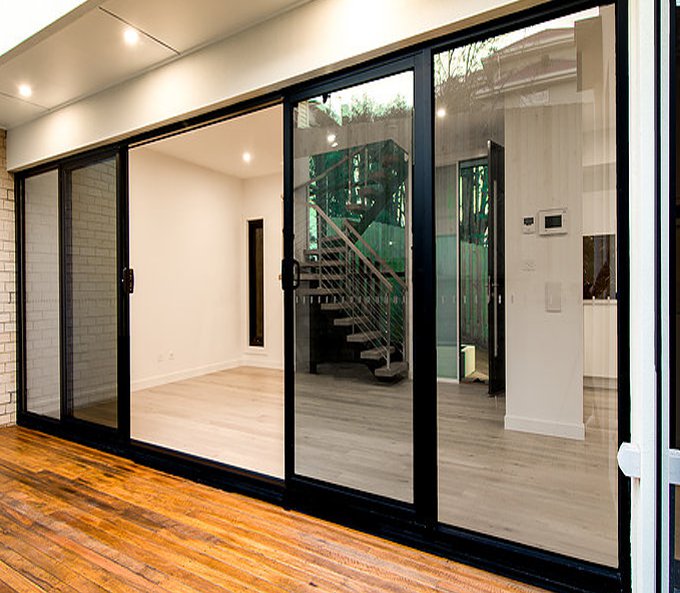
Here we see the trim being carefully removed in one piece to allow for re-use.
Removing the Frame
- Remove any screws from the inside of the frame; check along the entire frame inside and out.
- Detach any material that attaches the sliding door frame to the frame of the house. Flashing and siding may be carefully removed from around the frame area only.
- Insert a pry-bar all along the edges to check that the sliding door frame is completely detached from the house frame and walls.
- Begin pulling the frame out by the top; work slowly. If it sticks, check for and remove additional screws. The frame may also be glued into place, and you may need to exert force or loosen it with the pry bar to push it out.
For a complete walk-through of the removal process, take a look at this excellent video.
Installing the French Doors
- Follow the manufacturer’s instructions and specifications for insulation and installation.
- Once you have inserted the frame into the existing opening, use a square edge ruler and a level to verify that the frame is perfectly square and level.
- Use shims (thin wedges of wood) to lift and move the door into a square and level position.
- When the door is leveled and squared into the opening, cut off any pieces of the shims sticking out, and fasten it using the manufacturer’s directions.
You can find some links to tools and additional information on “How to Install French Doors in an Existing Opening.”
Replacing the Trim
- Replace any flashing and insulation around the door frame using your city’s building code specifications.
- Re-install your trim, install new trim around the edges of the new door, caulk around the edges for a clean look. This also prevents insects and weather intrusion.
Voila!
How much does it cost to replace a sliding door with French Doors?
The price of replacing a sliding door with a French door depends on many factors, but generally, you can expect to pay anywhere from $500 to $3000 just for the doors themselves.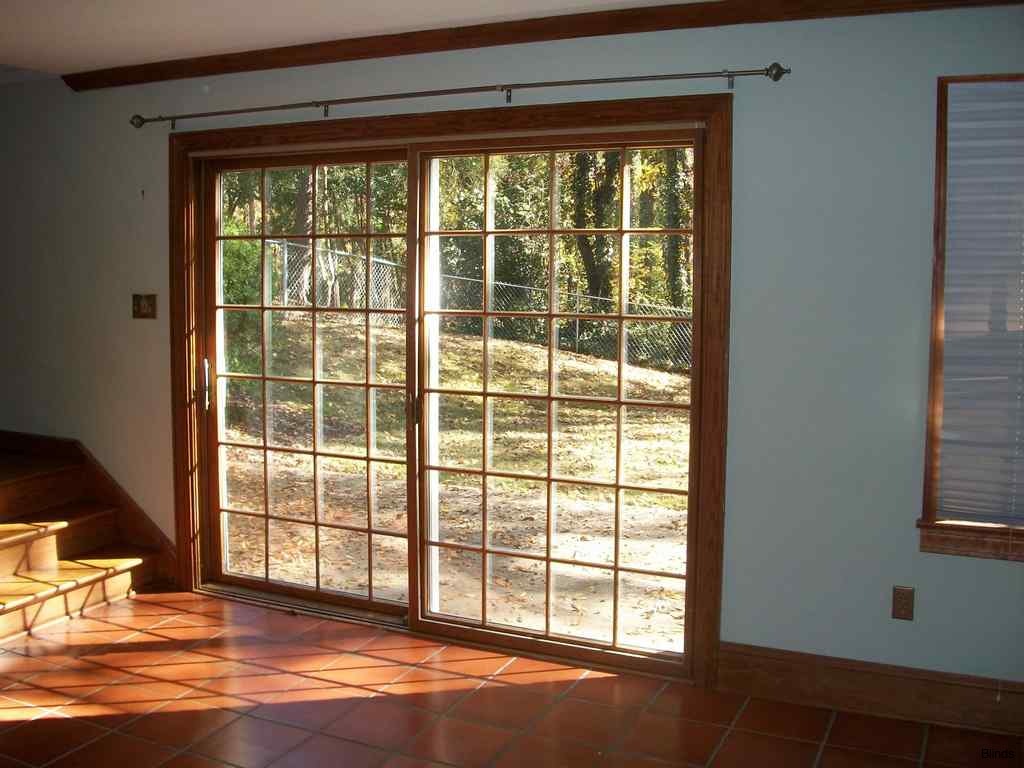
French doors installed by a professional can range from $2000 to $7000 depending on where you live, and the difficulty of the installation. Companies like Anderson Windows can even charge up to $16,000 to replace one sliding door with their specialty material French doors.
We’ve listed some of the things that affect the price here:
- Double-paned glass
- Sliding versus swinging versus folding French doors
- Integrated blinds
- Impact-resistant glass
- Three-point locking system
- Ease of access to installation
- Wood versus manufactured materials
Can French Doors Have Screens?
It seems like in every movie or photo where people open French doors; there are no screens! However, you can have screens on French doors. The screens are simply another set of doors on the opposite side and open in the opposite direction from the doors themselves.
Screens or no screens?
If you are installing French doors out to a patio or off a kitchen, you may envision them wide open as you enjoy the morning breeze with a cup of coffee.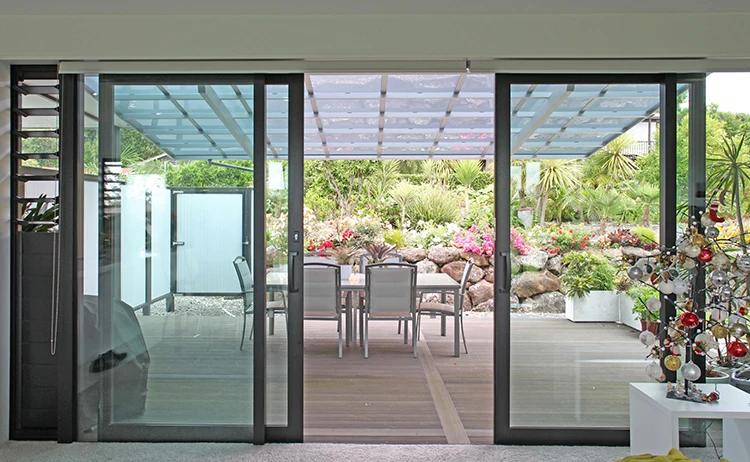 But you probably don’t want insects flying in and out. If this scenario sounds like what you want, then you need to consider French doors with screens.
If you want screens, you will need to calculate for more space for the screens to swing open and closed. French doors with screens will open inward, and the screens will open out. If this is not possible for your space, you can opt for sliding glass ‘faux’ French doors.
With ‘faux’ French doors, the doors are still sliders, but they have the look of French doors. The screen is then incorporated just like a sliding door screen.
Whatever option you choose, you can definitely have screen doors on your French doors.
A ‘faux’ French door look on a sliding door.
Do Both sides of French Doors open?
Both sides of French doors do open up completely. For convenience in entering and exiting, one door is latched at the top and bottom on the inside edge of the door. The latches allow you to keep one door attached to the frame, while the other door is like a standard door for casual use.
If you want to have both sides of the French doors open, open the first door, then unlatch the top and bottom of the second door to open it.
The top latch of the fixed side of the French Door; the bolt slides up via a hidden latch in the door.
Are French Doors Safer Than Sliding Doors?
French doors are neither more nor less safe than sliding doors. What makes a door safe is the strength of the materials from which the door is made and a sound installation.
Make sure that your door is made from solid wood or a specialty manufactured material made to resist force, weather, and age. Install the door frame securely to the frame of the house with the correct fasteners, and make sure the surrounding trim is securely attached.
Choose impact-resistant glass if you are installing a French door as your front door. You can also install something called a Three-point locking system. These are additional locks that are incorporated at the top and bottom of the doors and metal framing on the lock edge./dc707ed9d82acba.s.siteapi.org/img/b3d493d79f9e68d6a83a8ea109f39f5955f7c86d.jpg) They provide superior resistance to force.
They provide superior resistance to force.
Following these tips will all assure that your French doors keep you safe.
For more safety information, read Are French Doors Safe? [And How To Improve Their Security]
Final Thoughts…
Converting sliding doors into French doors really does update and beautify your home. If you choose to do it yourself, you can ask a handy friend to help. There are many options for French doors, so take some time to decide what your needs are before deciding what you want.
Whatever you choose, you’ll love the ease and look of French doors!
How Much Are Sliding Doors?
Typical Range:
$1,058
—
$3,351
Cost data is based on actual project costs as reported by 1,491 HomeAdvisor members.
Embed this data
How We Get This Data
.
.
.
.
.
.
.
.
.
.
.
.
.
.
.
.
.
.
.
.
.
.
.
.
.
.
.
.
.
.
- Homeowners use HomeAdvisor to find pros for home projects.
- When their projects are done, they fill out a short cost survey.
- We compile the data and report costs back to you.
Updated July 26, 2022
Reviewed by
Cati O’Keefe,
Expert Home Building & Sustainability Contributor.
Written by HomeAdvisor.
Installing a sliding glass door costs an average of $2,193, with prices ranging from around $1,050 for a single-glazed door to over $7,000 for a large, wood-framed door with double glazing, tinting, or other features, like shades or pet panels. Most projects will cost $1,058 and $3,351 for the cost of the materials and labor.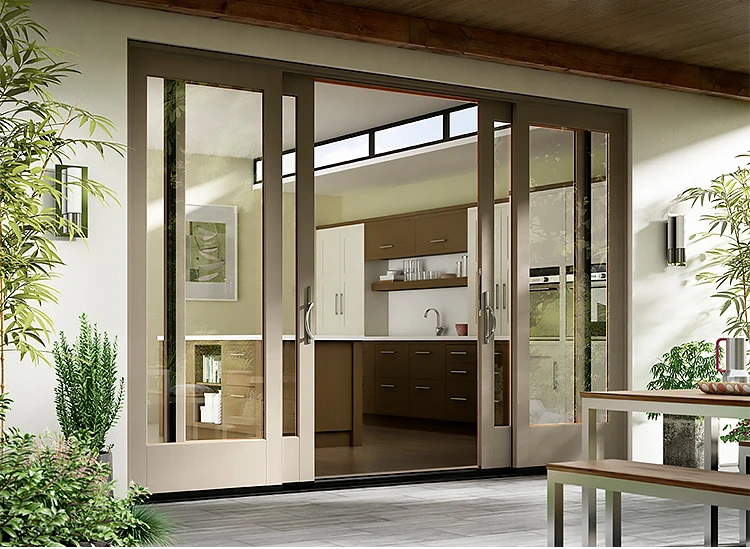
On This Page:
-
Sliding Glass Door Cost Calculator
-
Sliding Glass Door Prices
- Size
- Type
- Materials
- Features
-
Sliding Glass Door Installation Cost Factors
- Cut Wall for Door
- Remove Old Door
- Type of Door
-
DIY vs. Hiring Door Installers
-
Benefits of Window Tinting
-
FAQs
Sliding Glass Door Cost Calculator
Let’s calculate cost data for you.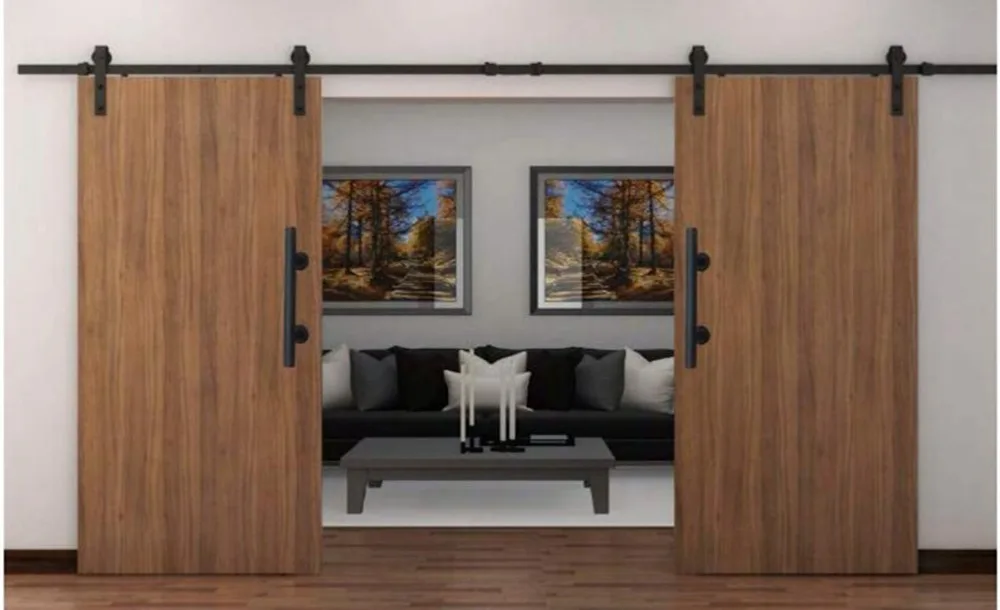 Where are you located?
Where are you located?
ZIP Code
| National Average | $2,193 |
| Typical Range |
$1,058 — $3,351 |
| Low End — High End |
$345 — $6,800 |
Cost data is based on actual project costs as reported by 1,491 HomeAdvisor members.
Sliding Glass Door Prices
Sliding glass door prices depend on the size and type of the door, as well as the door frame material and additional features, like blinds or shades or inserted pet doors for dogs and cats to easily roam inside and out.
Size
Sliding glass doors range from $400 for a smaller, 4-foot-wide door or around $2,500 for a 16-foot-wide door. The price tends to range from around $10 to $50 per square foot for the door and materials.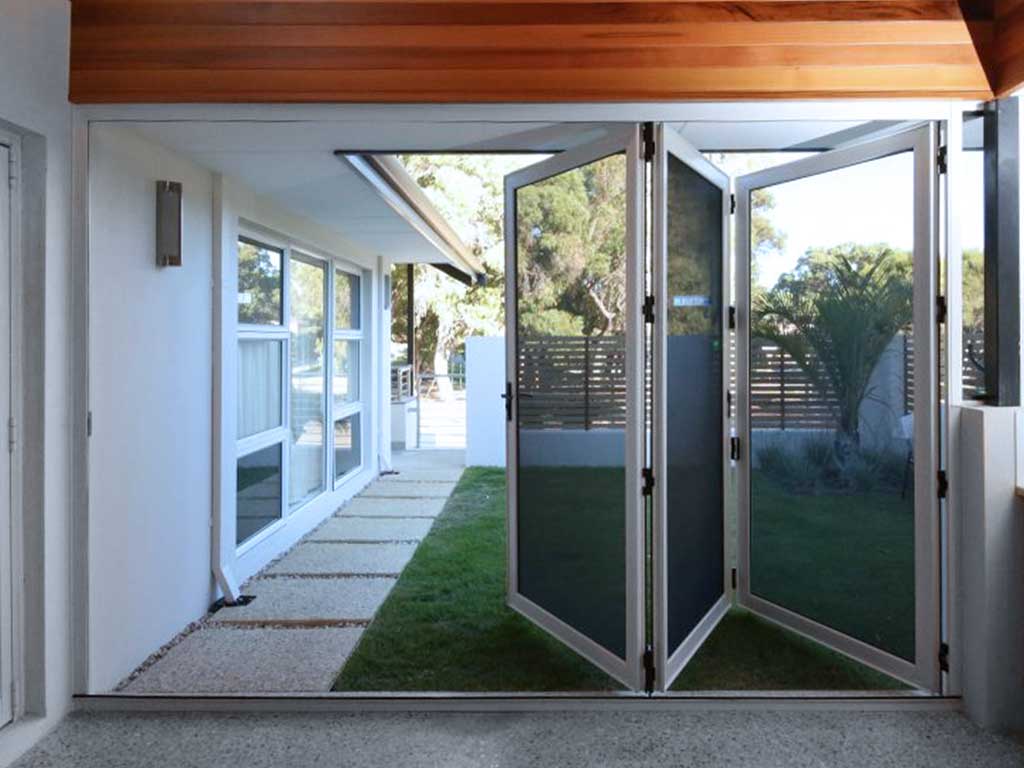
| Door Width | Cost |
|---|---|
| 4 feet | $400 – $1,400 |
| 6 feet | $600 – $1,500 |
| 8 feet | $700 – $1,600 |
| 10 feet | $950 – $1,900 |
| 12 feet | $950 – $2,000 |
| 14 feet | $950 – $2,500 |
| 16 feet | $1,300 – $3,500 |
Type
Specialty sliding glass doors cost $1,000 to $6,500. A smaller, automatic door starts at around $1,000. You’ll pay the most for double glazing or a six-panel design that spans up to 16 feet.
| Type | Cost |
|---|---|
| Automatic | $1,000 – $3,500 |
| Hurricane impact | $2,000 – $3,000 |
| Soundproof | $2,000 – $3,500 |
| Double-pane | $2,500 – $3,500 |
| 6-panel | $2,500 – $6,500 |
Materials
The door material can impact the cost, with wood and fiberglass being more expensive than materials like vinyl or composite.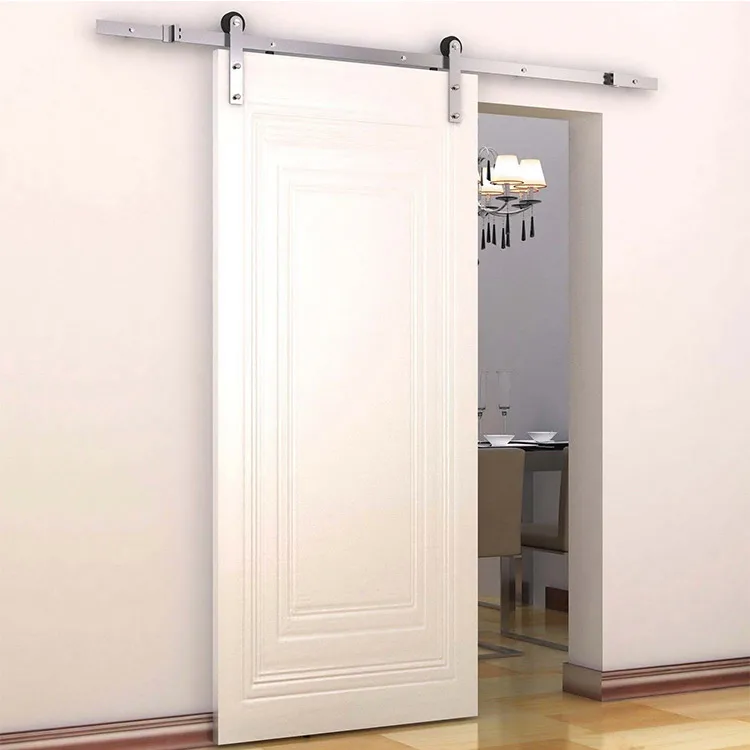
| Material | Price |
|---|---|
| Vinyl | $300 – $1,200 |
| Wood | $1,000 – $3,000 |
| Aluminum | $750 – $2,500 |
| Composite | $600 – $1,200 |
| Fiberglass | $1,500 – $2,500 |
Features
Added features, like smart locks, pet panels, grids, or retractable screens, can add $20 to $500 each to the final project cost.
-
Grids: An aesthetic addition to sliding glass doors, grids are usually included in the cost of the door you choose and increase the cost by about $50–$100.
-
Pet panels: Adding a pet door into the sliding glass door costs $150–$400 and makes it easier for pets to let themselves outside and back into the house.
-
Blinds or shades: Basic blinds or shades for sliding glass doors cost $20–$150, while built-in blinds can add $150–$400 to the cost.
-
Locks: If you want extra security, plan to pay $20–$100 more for an after-market lock or up to $700 for a smart lock.
-
Screens: Installing a screen costs $150–$500. Retractable screens, which run from $100–$400, are stored in a side channel of the door when not in use.
-
Insulation: Improved insulation inserts for sliding glass doors cost $300–$500, but can help reduce monthly utility bills.
Get Quotes From Local Pros
ZIP Code
Compare Quotes
Sliding Glass Door Installation Cost Factors
Door installation costs depend on the size and type of door as well as if you are replacing an existing door or inserting a sliding glass door into a wall without an existing opening.
Cut Wall for Door
Creating a new opening for a sliding glass door and adding framing costs $700 to $2,100, not including the cost of the new door.
Remove Old Door
Removing an old door before installing a new exterior door costs $100 to $250. Replacing an existing sliding glass door is typically less expensive than the cost to insert a new sliding glass door into a wall without an old door or other existing opening.
Size
Larger doors are more expensive to install, costing around $3,500 for a 16-foot door without any extra features compared to a smaller, 4-foot door that starts at around $400.
Type of Door
The type of door ranges from $400 for a two-panel door to over $6,500 for a six-panel door, and the type of glass can also impact the cost.
-
Low-E: This glass, which costs $100 to $500, boosts the energy efficiency of the door and helps block UV light.
-
Textured: Textured glass, which starts at around $500, helps improve privacy.
-
Impact-resistant: For glass that can withstand strong winds or hits from debris or playful and curious kids, the cost is $300–$500.
-
Soundproof: You can minimize the sounds of neighbors’ lawn mowers or local traffic with soundproof glass for an additional $1,200–$4,000.
-
Tempered: This type of glass costs around $1,000. Tempered glass is durable, like impact-resistant glass, but also snaps into larger pieces if broken.
-
Gas-filled: Gas-filled glass is designed for improved insulation and costs around $500.
DIY vs. Hiring Door Installers
The cost of labor to install a sliding glass door is about $70 to $100 per hour or $300 to $800 total. Large doors over 8 feet wide may cost $100 per linear foot. The process will take about 2 to 7 hours for two skilled professionals to install.
Given their size and weight, these doors aren’t usually a DIY job. A single panel weighs about 40 to 60 pounds, and you’ll need at least two people to do the work. A pro can ensure that it’s done properly, usually within a few hours. When you’re ready to search for sliding door installers near you, be sure to read reviews and get at least three quotes before you select a pro.
Talk to Sliding Glass Door Installers Near You
ZIP Code
Find Pros
Benefits of Window Tinting
Adding window tinting costs around $5 to $30 per square foot, but it can offer many benefits. Tinted sliding glass doors can improve privacy or even security. One of the biggest benefits is the added UV protection and heat absorption, making your interiors feel cooler even on the hottest, full-sun days. Plus, deflecting the harsh light can prevent the natural light from fading your furnishings or rugs.
| Window Tinting | Ceramic | Solar | Security | Smart Glass |
|---|---|---|---|---|
| Privacy | ✔ | ✔ | ✖ | ✔ |
| Heat absorption | ✔ | ✔ | ✖ | ✔ |
| UV protection | ✔ | ✔ | ✖ | ✔ |
| Maintain home furnishings | ✔ | ✔ | ✖ | ✔ |
| Prevent glare | ✔ | ✔ | ✖ | ✔ |
| Safety | ✖ | ✖ | ✔ | ✖ |
FAQs
How do you maintain a sliding glass door?
One of the most common ways to maintain a sliding glass door is to vacuum the sliding track regularly to prevent the doors from sticking.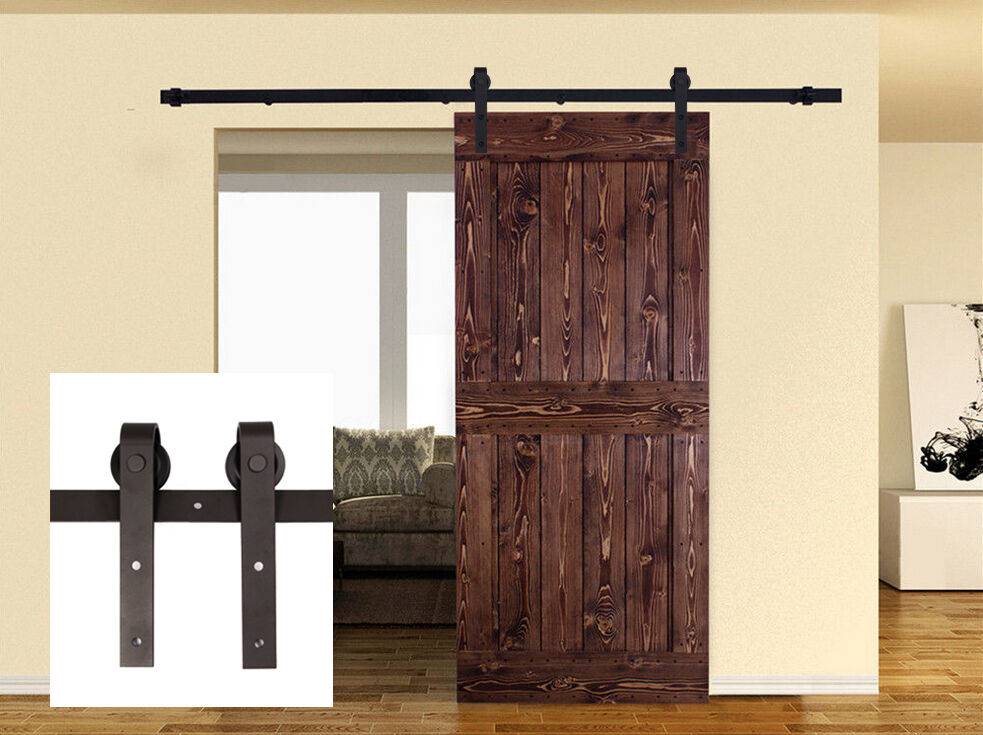 You may also need to apply lubricant to the door wheels or track to prevent squeaking.
How long does it take to install a sliding glass door?
A professional door installer can install or replace a sliding glass door within a few hours, although large doors may take up to 7 hours.
Can you replace just the sliding glass door?
You can replace a sliding glass door, but if you want to save money, choose one with the same specs as your existing sliding glass door. Otherwise, expect to pay more to retrofit the opening for a new glass door and to remove the old door.
Still Have Question About Sliding Glass Doors?
ZIP Code
Ask a Pro
Related Projects Costs
- Install a Door
- Install an Exterior Door
- How Much Does It Cost To Install A Storm Door?
- Install a Patio or Pathway
- Build A Covered Patio Enclosure
- Build a Deck
- Install an Interior Door
- Repair a Door
- Install a Garage Door
Find Pros Nearby
- Glass Door Installers Near You
- Local French Door Installers
- Local Sliding Glass Door Repair Pros
- Nearby Door Installation Pros
- Screen Door Companies Near You
- Sliding Glass Door Installers in Your Area
Photo: Robert Nicholas/OJO Images/Getty Images
Popular Categories
- Additions & Remodels
- Bathrooms
- Heating & Cooling
- Kitchens
- Landscape
- All Categories
Popular Projects
- Hire a Handyman
- Hire a Maid Service
- Install Landscaping
- Remodel a Bathroom
- Remodel a Kitchen
Featured Articles
- How Much Does it Cost to Install or Replace Kitchen Cabinets?
- How Much Does a Home Addition Cost?
- Install Countertops
- How Much Does it Cost to Install a Window?
- How Much Does It Cost to Clean Gutters?
Find Sliding Door Installers Near You
- Orlando, FL
- Phoenix, AZ
- Houston, TX
- Minneapolis, MN
- Denver, CO
- Fort Lauderdale, FL
- San Antonio, TX
- Las Vegas, NV
- Jacksonville, FL
- Dallas, TX
- Tampa, FL
- Chicago, IL
- San Diego, CA
- Miami, FL
- Tucson, AZ
- Sacramento, CA
- Los Angeles, CA
- Austin, TX
- Saint Paul, MN
- Charlotte, NC
- Portland, OR
- West Palm Beach, FL
- Indianapolis, IN
- Kansas City, MO
- Littleton, CO
- Aurora, CO
- Columbus, OH
- Philadelphia, PA
- Colorado Springs, CO
- Saint Petersburg, FL
- Virginia Beach, VA
- Scottsdale, AZ
- Mesa, AZ
- Seattle, WA
- Pittsburgh, PA
- Riverside, CA
- New York, NY
- Cleveland, OH
- Cincinnati, OH
- Grand Rapids, MI
Don’t see your city?
How to embed rollers in old and new doors?
I am glad to everyone who is now on my site.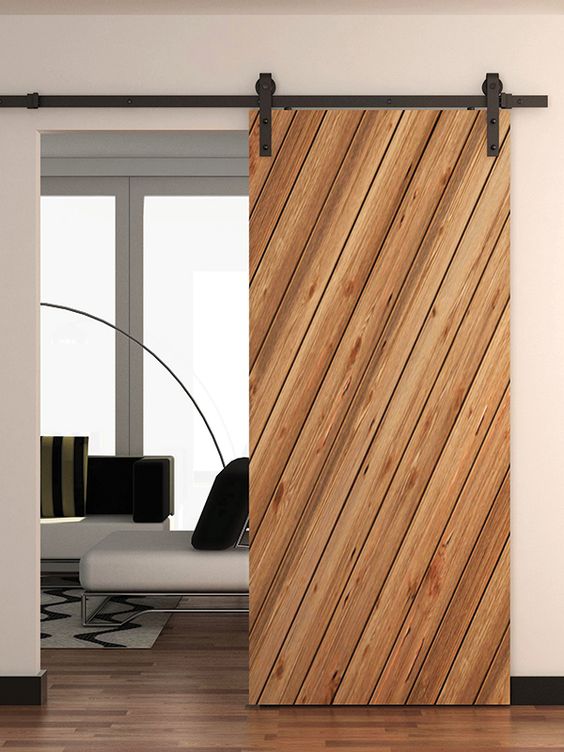 Today’s topic of this article will be devoted to the interior compartment door. In general, this topic will be very extensive, so I decided to break it into two parts so that it is not so tedious.
Typically, these doors are used in small apartments or just for added convenience. In general, there is and will be a demand for them. As you understood from the title of this article, we will try to convert ordinary doors to rollers. Once upon a time, and it was not so long ago (about 18 years ago), we ourselves made mechanisms and guides, both for closet compartment doors and for interior compartment doors. Hardware stores sometimes sold kits, but they were so bulky and not perfect that it was better to make them yourself. Now everything is different. Modern door technologies also do not stand still and much has already changed. You don’t have to invent anything. I went, bought and installed any system: from the simplest to the most complex, hanging or floor system.
So I’ll start from the simplest to more complex designs.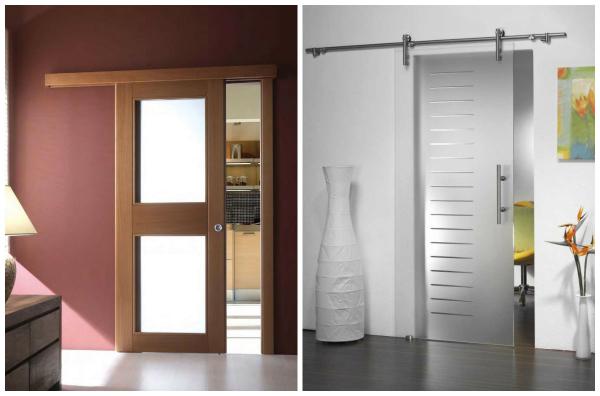
Please note that the suspension system is used for doors weighing up to 30 kg, and above 30 kg it is better to use a floor roller system. Verified.
The first that I would like to start with is the conversion of old hinged interior doors to compartment doors. More precisely, we will remake ordinary doors (2000 × 600 mm) into a dressing room, which we will remove from the awnings and put on a roller system. Since the old door turned out to be very heavy, we will use the floor structure of the roller system for it.
For work, we, of course, need a tool:
- Drill with a set of drills.
- Hacksaw for cutting duralumin rails.
In principle, it will also be possible to cut off the architraves with it. We will cover the upper guide with a platband.
- Level.
- Screwdriver.
Very few materials:
- Roller system — one set.
Guides (top and bottom).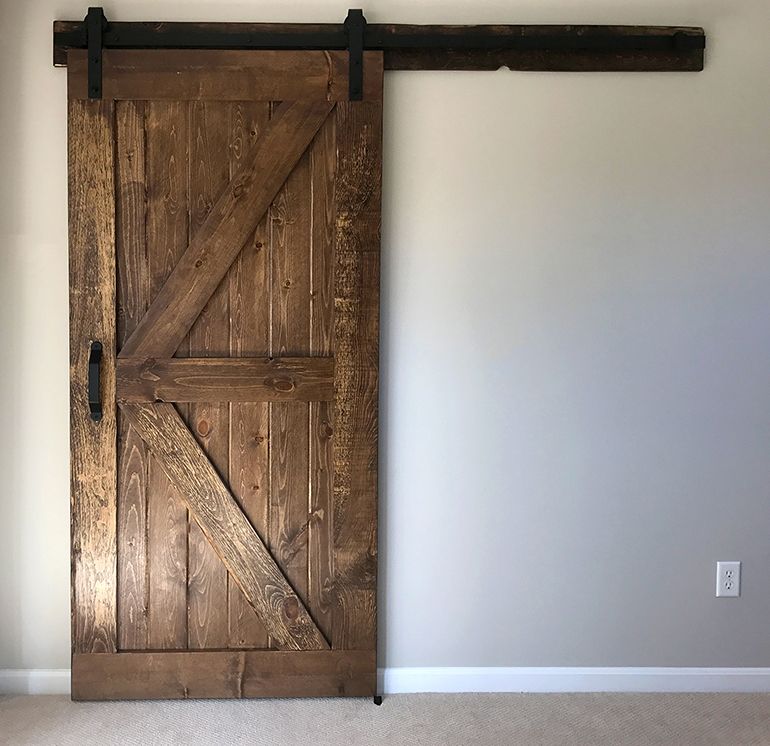
- Casing – 1 pc. The width is not less than 70mm, and the length is the size of the top rail.
- Fiberboard strips (2000×100×4 mm) — 3 pcs. They will be needed to refine the old box (loot).
- PVA glue and nails (1.5x20mm and 1.5x30mm).
- Lath from any type of wood (2000 × 20 × 10 mm) — 2 pcs.
- Lath from any kind of wood (605×20×10 mm) — 2 pcs.
- Wood screws (90×4 mm) — 3 pcs. For attaching the top rail to the wall.
- Self-tapping screws with a press washer (3.5 × 20 mm) — 4 pcs. For attaching the bottom rail.
- Door stop — 1 pc.
Let’s get to work.
✒Remove the door leaf from the hinges (canopies).
✒Unscrew the old awnings.
✒ We close up with pieces of fiberboard the places where the loops were. Then, before painting, you will need to putty the embedding points.
Please note that these pieces are best attached to PVA glue and carnations.
✒We cut the bottom rollers at a distance of 65 mm from the edge to the center of the wheel and fasten it with screws.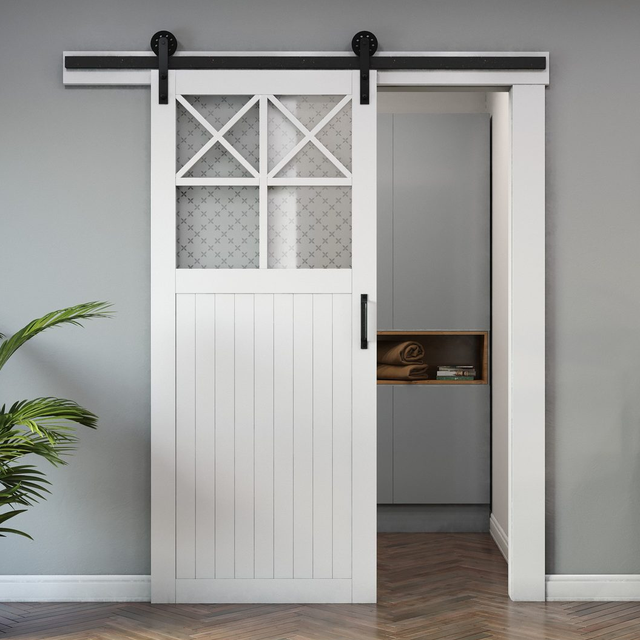
data-ad-client=»ca-pub-3518738935631683″
data-ad-slot=»6877683473″>
To do this, first drill with a hole saw ø50 mm. Drill carefully so as not to drill a through hole. After that, we chop off the tree with a chisel to the required depth of (15 mm).
✒Insert the roller and screw it on.
Important! The distance between the rollers should be as large as possible, because if the size is not respected, the door will simply swing and there will be no smooth running!
For example, in my case, a door leaf 600 mm wide minus two 65 mm each, we get 470 mm. This means that the distance between the rollers must be at least 470 mm for a 600 mm door; 570 mm for door 700 mm; 670 mm →800 mm and 770 mm →900 mm.
✒Fix the upper rollers. The distance between them is no longer so strict, but it is necessary to take into account the stopper (they are included) to stop the movement of the door leaf.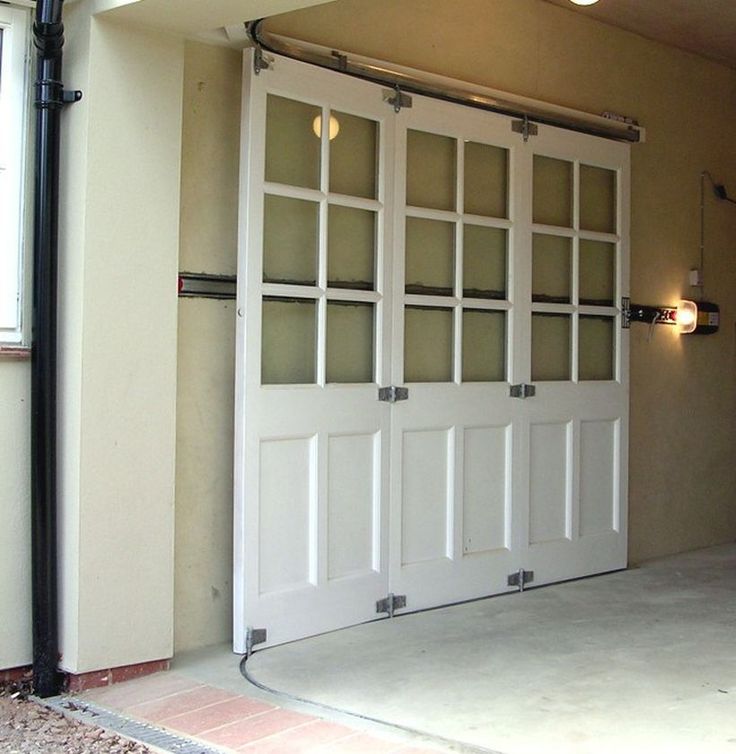
But I try not to use them, because they are plastic and therefore not durable. They break down quickly.
The size must be: not less than 15-20 mm from the top edge of the door to the base of the top rollers. The position of the stoppers is adjustable.
✒ Move the door handle to the other side. On this, we completed the alteration of doors for rollers. Let’s blunt to the alteration of the door frame (loot).
✒Dismantle the casing from the side of the room. We will not shoot inside, because there they will not interfere with anyone.
✒We remove the second halves from the canopies and close them up, as on the door.
✒ Align the fold (step) in the box where the door previously entered.
To do this:
- Use PVA glue and nails (1.5×30 mm) to attach the rails (2000×20×10 mm) on the left and right sides, as well as on the top and bottom.
- Cut and nail on the left and right strips of fiberboard (1985×100×4 mm), where 100 mm is the depth of the box.
 In my case, the box is a hundred.
If the box is one hundred and twenty, then 120 mm, respectively.
- Cut and nail at the top and bottom of a strip of fiberboard (585x100x4 mm).
✒Putty.
✒After drying, clean and paint at least twice.
✒We install the lower guide according to the level, after dismantling a fragment of the plinth on the floor, because it will not allow us to move the door tightly against the wall.
✒Installed by the level of the upper guide at a distance of 2040 mm from the floor, because the height of the canvas is 2000 mm and is fixed with screws (90 × 4 mm) to the wall in three places. In my case, the floors are wooden, so I just screwed the guide to it with self-tapping screws with a press washer (3.5 × 20 mm) in four places.
But before that, you need a little prepare the upper guide.
A rail must be attached to it from the inside with screws, the same length as the guide and a section of 30 × 40 mm. This is necessary in order to attach the upper guide to the wall and close everything with a casing for beauty.
✒ We install the doors in the same way as the glass in the bookshelves, namely, from the beginning we raise the door leaf up and then lower it onto the lower guide rail.
✒Put the door stop in the left end position, and in the right end position, i.e. open and closed position of the door, attach the rail.
Please note that you need to install the stopper so that the door handle does not hit the door frame (chute).
✒Cut off and nail the casing. Can be pre-painted. And then you can paint everything.
So we remade old doors and gave them a second life. They have served for 30 years and will serve for many more years.
The second way to remake interior doors on compartment doors.
If there is no need to leave the old door block, then we will change it for a door, which we will “put” on rollers.
And if you want, you can make such original shelves from old doors as in the photo.
or a sandbox for children if there are several doors. This method practically does not differ from the first, but a little time-consuming and more expensive in terms of money, because. materials are added:
- Casing 70 mm wide — 4.5 pcs.
- Extension strip 120 mm wide — 3 pcs.
Of these, two long ones (1980 × 120 × 10 mm) must be cut for the sides and two short ones (850 × 120 × 10 mm) for the top and bottom. We will need it to finish the doorway. - Self-adhesive in the color of the door — 200 mm². To close the roller housings.
- Screws (4×40 mm) and decorative plastic plugs for them — 18 pcs.
For fastening trim strips. - Rail section 30×40 mm, and the length must be the same as the length of the upper rail — 1 pc.
- Door leaf 900 mm wide, because opening width 850 mm — 1 pc.
Pay attention to the width of the door. The calculation of the door width directly depends on the width of the doorway and therefore should be as follows: 600 mm aperture → 700 mm door; 700 mm opening → 800 mm door; 800 mm aperture → 900 mm door.![]()
I have an opening of 850 mm, and a door of 900 mm is nothing terrible and within the permissible limits. The main thing is that the width of the opening is not more than 850 mm.
The principle of operation is the same as in the first version, with the exception of some operations:
✔The lower rollers must be cut using a router with a cylindrical cutter.
✔It is necessary to ennoble the doorway with the help of additional trims.
✔Cut at a 45° angle and nail the trim on the corridor side.
This part of the article is probably all. In the next part, I will continue, but we will already talk about more complex methods for installing doors on roller systems. So, subscribe to the news of the site and be the first to know about the release of a new article.
For any questions, please contact through the comments or in the «Contacts» section.
Share the received information in social networks. I will be very grateful.
To be continued.
Car sliding door replacement in service — AVTOkapitan
Contents:
- When a sliding door needs to be replaced
- Main difficulties in work
- Original or donor — which sliding door to choose
- Sliding door replacement technology and possible improvements
- How to remove a sliding 9017 door
- Preparing a new door for installation
- Installing sliding doors
- Replacing a sliding door with a swing door
When a sliding door needs to be replaced
From our experience with insurance companies, we can say that often there is no logic at all in assessing damage. I had to work with car owners who were given a verdict for replacement in the presence of minor damage to the paintwork and small dents. At the same time, we also encountered such a situation when a door with a broken geometry, metal creases, was strongly recommended to be restored.
Before deciding whether to repair or replace, it is necessary to conduct a thorough diagnosis and establish the true extent of the damage. In most cases, this will require partial disassembly, removal of the inner lining. Only after examining all surfaces and elements of the door, including hidden ones, can the estimated amount of repair work be determined.
There is a simple rule — the replacement of any body elements, including sliding doors, is carried out if it is impossible to restore the appearance and integrity of the structure technically or economically irrationally, when repairs are more expensive.
Based on established practice, we can say that sliding doors have to be replaced in the following cases:
- Significant dents, the area of which exceeds 40–50% of the surface.
- If the internal load-bearing structural elements that provide door rigidity are damaged.
- Violations of the geometry of the structure with weakening of the metal. With such damage, the door constantly leads and it is not possible to adjust the normal closing-opening.
- The presence of significant foci of corrosion, including completely rotten metal.
 Basically, the lower part and the area near the glasses suffer.
 - Broken metal, through holes, torn areas on the outside or inside.
- An old door that has been refurbished several times if the putty layer is already above standard metal thickness.
The presence of several dissimilar damages from this list guarantees that the door will have to be replaced. But in any case, the decision on the need to install a new door is taken only after a detailed diagnosis. We’ll provide you with estimated repair and replacement estimates so you can feel the difference yourself.
The main difficulties in operation
The sliding door is fixed with rollers that move along the guide rails. There are no special difficulties when you know the sequence of unscrewing the bolts and screws. The only thing to highlight:
- When dismantling and installing such doors, there is a high probability of damage to the paintwork of the machine in the adjacent areas.
- The door is quite massive, it will be problematic to keep it on the weight alone.
- Help will also be required when removing the rollers from the guides, in some cases they sit tightly and do not want to come out.
In addition, we note that most often separate parts from the old one are installed on a new door: glass, lock, rollers in good condition and a door card. This requires the ability to perform a complete disassembly of the door so as not to damage these parts.
The same problems can occur during reassembly and installation. But we repeat, for an experienced craftsman who knows all the design nuances, the installation and dismantling of the door is not a problem. It takes no more than half an hour to remove and install back the sliding structure, without taking into account the replacement of individual components.
Original or donor — which sliding door to choose
A question that worries almost every car owner. At this stage, you need to prioritize — what is more important, guaranteed quality or savings that can be obtained right now.
We work with various accessories. With regard to sliding doors, we can offer the following replacements for :
- New original designs made directly at the automaker’s factory or by third-party companies with which relevant contracts have been concluded. The option is not cheap, especially when it comes to foreign cars. But it is preferable because you get a really native door. The manufacturer guarantees that the dimensions correspond to the standard ones, the paintwork has as many layers, including protective ones, as it was at the factory. At the same time, the same priming-painting technology is observed. This option should be abandoned only if you are sure that the factory design is unsuccessful, and all the problems that have arisen lie precisely in this.
- New doors, similar in size and construction to the original, but from other manufacturers.
 Now you can find similar doors on most passenger cars. Production is mainly in the countries of the Asian region, but this should not be embarrassing, because many automakers are moving their production in this direction. That is, in most cases, such doors are an ordinary unaccounted for, a kind of additional income for enterprising Asians. Although, Russian manufacturers also make separate modifications of sliding doors. A cheaper option, the doors are delivered in a “paintable” condition, in some cases you will have to complete with fasteners, locks and other equipment.
 - Now you can find a sliding door for almost any car model at car yards. In terms of cost — this is the most profitable option, you can save 50% or more of the original price. But, choosing this option, it should be understood that any used body part contains defects. Somewhere the paint is swollen, in some place the rust has gone, in some places it will have to be straightened. In addition, you can only find a door with an exact color match for the most common paintwork.
 That is, before installing such an element, a number of additional works will have to be carried out, which somewhat smooths out the difference in price with other options. The main advantage of buying a donor is to reduce the waiting time, if the door is available, you won’t have to wait 2-3 weeks for delivery.
Each of the options has the right to life. We work with original components, and with replicas, and with doors from donor cars. Which one to put on yours is up to you.
Sliding door replacement technology and possible improvements
The technology itself does not contain any special secrets and nuances. The main thing is to know the design of the door and the features of a particular car. It is easy to remove, put on if you know where which fasteners are located. The main difficulties are associated with the implementation of related work. Assembly and disassembly, installation of glass and a lock, painting, adjustment of the opening mechanism — in most cases, when replacing, you will have to perform some of these works.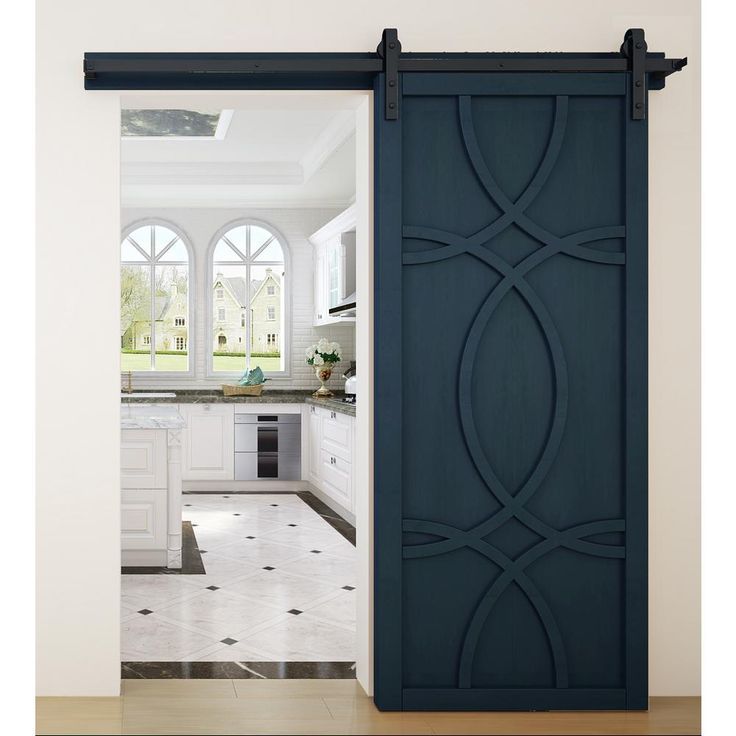
In addition, let’s pay attention to one more thing. Let’s not hide, individual sliding doors have a clearly weak design or limited functionality. Communicating with car owners, we celebrate such moments. Therefore, now we can offer several options for modernization. For each car, such a list is purely individual, but generally speaking, we will single out the following areas:
- Strengthening guides and rollers that extend the life of the opening mechanism.
- Installation of stronger external and internal handles. Often these parts are made of brittle silumin or polymer, so they often break. In some cases, we solve this problem.
- Installation of electric drive and door opening control systems.
- Reinforcement of the door frame with an increase in the rigidity of the entire structure.
- Additional noise insulation.
You can find out what useful things can be done with your car door directly from the service specialist.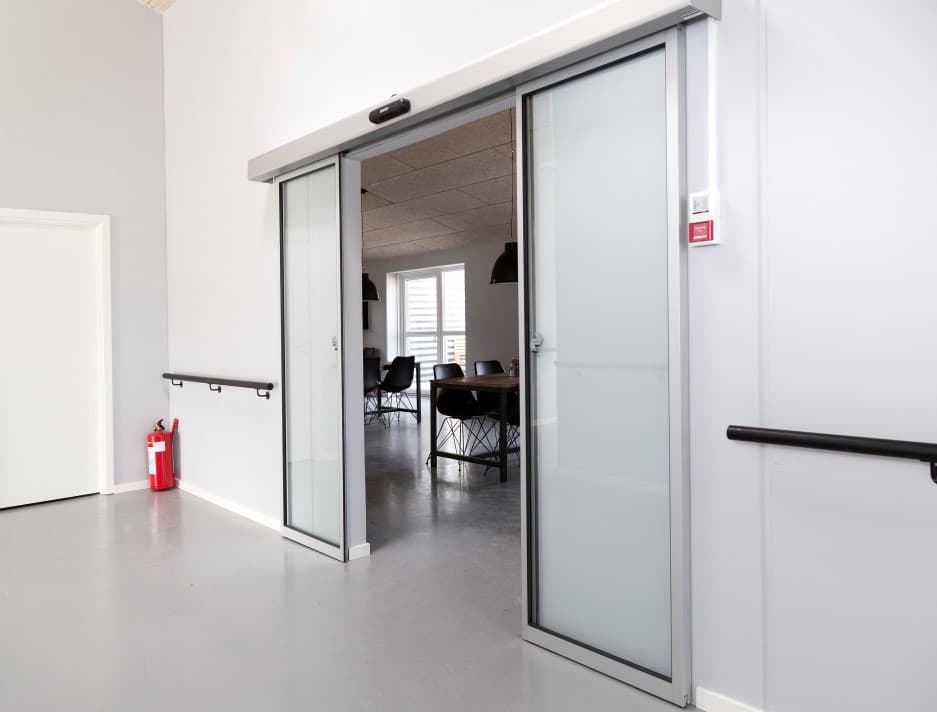
Preparing for dismantling
At this stage, we take measures to save the rest of the body and individual parts of the door that may be needed later. We will warn you right away that it is necessary to remove the door together, it is difficult to keep it on weight. It is because of this that most problems arise during dismantling.
We drive the car into the box. To avoid additional problems during dismantling, we clean the guides, trim if necessary. In some cases, for this reason, it is not possible to disengage the roller, and while holding the door suspended, it is inconvenient to eliminate such defects. Therefore, it is better to play it safe in advance.
It makes no sense to dismantle the door before dismantling, it is easier to do all this already in the removed state. The only thing we advise is that if it is necessary to guarantee the preservation of the door card (especially if it is not stock, but made to order), it is still better to remove it.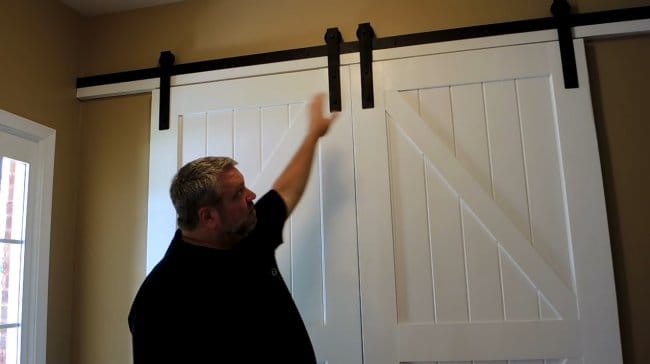 Very often, the skin is scratched and severely damaged by the middle guide when the roller is removed from it. It is easy to remove the card even in the fixed position of the door. Usually a dozen mounting clips are removed, in some cases door handles are removed.
How to remove the sliding door
Different machines have different fixing schemes. We do not provide instructions for independent work, for this you can find the appropriate manuals on the Internet. Just as an example, let’s take the process of dismantling a Mercedes Benz Vito sliding door:
- First of all, you need to remove the bar that covers the middle guide support located on the outside of the body. To do this, unscrew two screws from the ends of the bar. To remove the part, it is necessary to pull it towards you and up with a slight effort to separate the mounting clips.
- Unscrew the two fixing bolts to undock the lower rack with the roller. The door will not go anywhere, you can not worry.
- Unscrew the fastening of the upper rail from the cabin side. It is bolted to the roof with conventional screws.
- While holding the upper part of the door, remove the upper roller from the guide, slightly shifting it.
- Disconnect the lower support.
- Holding the door on both sides (we work with an assistant), remove the middle roller from the guide, moving the door leaf as usual when opening.
- Put the door on the floor.
Everything about everything takes no more than 5 minutes. After that, in a comfortable environment, you can remove everything you need from the old door.
Preparing a new door for installation
The list of preparatory work depends on which door you have chosen for installation. But painting will be needed in almost all cases. Even when purchasing a door from the official with painting by VIN code, there is no guarantee that it will not differ in color. After all, the paint on the main body by this time will lose its color, burn out under the sun’s rays.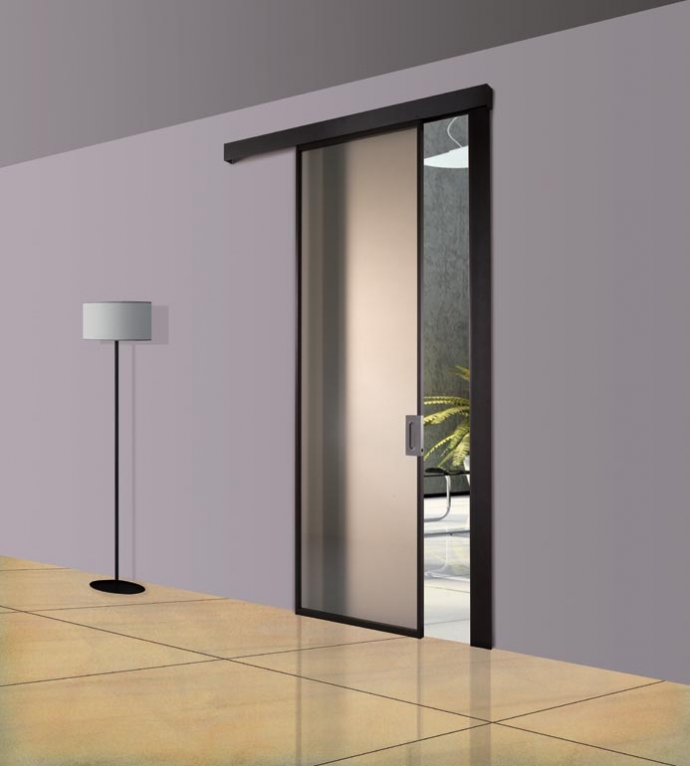 Therefore, we will consider a situation where preparation of a sliding door is required, which was purchased during disassembly. This option is the most common, although the most laborious:
- If the paintwork of the door is in good condition and only repainting in a new color is required (this is also possible for original doors), then the surface is matted, degreased, primed and painted according to the selected technology.
- If there are signs of rust or other damage, the existing coating is scraped off. Bare metal is coated with epoxy primer, preferably with zinc to protect against corrosion. Dents are puttied using polyester compounds. Most often, putty with fiberglass is used, universal and finishing.
- The surface is cleaned, blown with compressed air to remove dust, degreased and primed with a two-component acrylic primer. Then the standard body color paint.
- Please note that it is better to repaint doors from disassembly with the glass removed, this will protect the entire metal surface from corrosion.
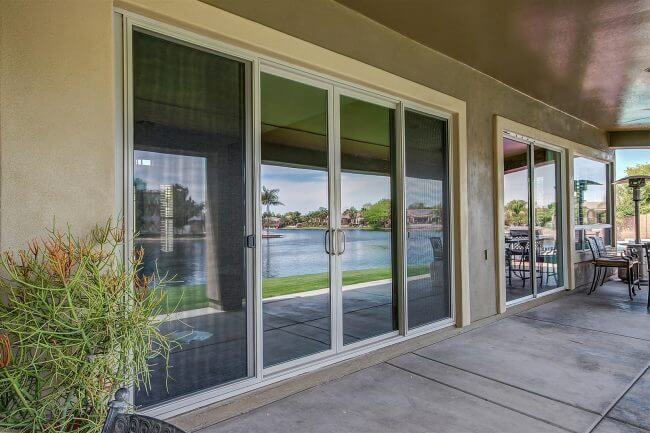
When painting replica doors similar to the original, pay attention to the quality of the primer. Many manufacturers cover products only with transport trains that cannot be painted over. If such soil comes off when wiping with a rag with a solvent, clean it down to metal. Further preparation is carried out according to the standard scheme.
After painting, seals are put on the door, all necessary equipment is installed, and noise is mounted. They are assembled completely, but without mounting the door card, which guarantees its safety during installation.
Sliding door assembly
Sliding door assembly is carried out in reverse order. We start the middle roller, the upper one, fasten the guide, connect the rod to the lower roller. All parts are cleaned and lubricated before installation. The installation itself takes no more than 10-15 minutes. The most interesting begins further. It’s about regulation.
For each machine there is a technological card indicating the dimensions of the door gaps with a tolerance of +/- 1 mm.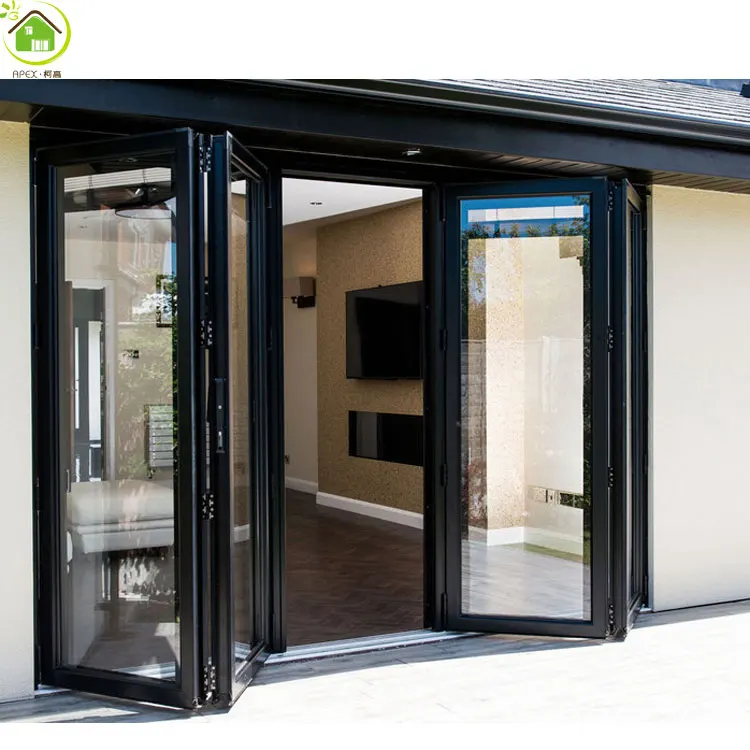 For example, for the same Vito, the dimensions are from 5 to 11 mm from different sides. During installation, they also look at the verticality and horizontality of the gaps, the door leaf should not be skewed. They also take into account the degree of pressing the door to the opening, the accuracy of the lock. All these parameters are controlled in the process of adjusting fasteners.
Let’s say right away that it is painstaking work and requires experience. Even a trained master can spend up to 2-3 hours on this stage. We will not describe the technology much, but we suggest that you familiarize yourself with what each adjustable object in the sliding door suspension system is responsible for:
- The position of the middle roller determines the amount of clearance in the front and rear of the doors.
- The gap between the roof and the rear corner of the door leaf is set by adjusting the lock. By shifting the staples up or down, the required size is achieved.
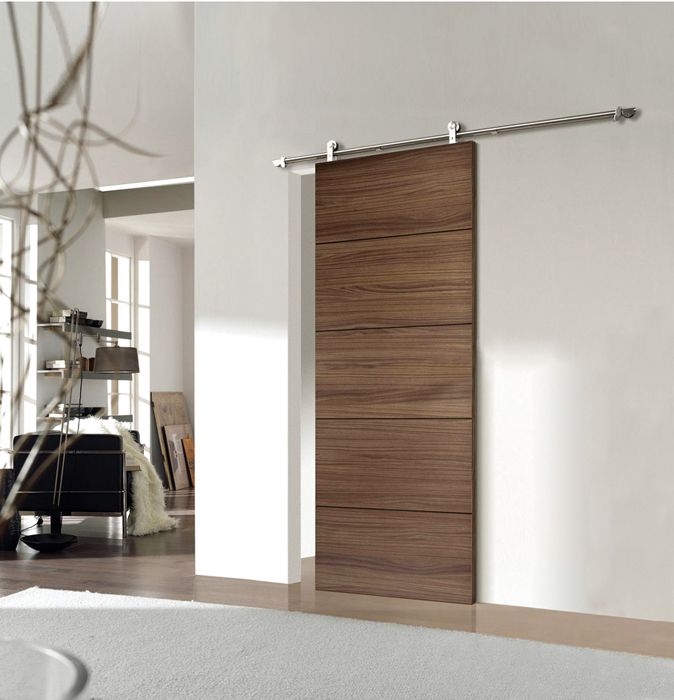
- The three screws on the bottom roller to the door allow the front to be raised or lowered. This adjusts the gap between the roof and the front of the canvas.
- Two mounting bolts on the same roller, but from the side of the interior floor, allow you to change the depth of entry of the door into the opening.
- By adjusting the position of the upper roller, the necessary pressure of the top of the door to the seals is set.
The operations for each of the fasteners will have to be repeated several times. At the same time, they constantly check the compliance of the gaps, the presence of distortions, the compliance of the stampings.
Replacing a sliding door with a swing door
Yes, in some cases we are also contacted about this. Despite the fact that the same door is used, such a repair falls under the category of replacement, because we change the door opening mechanism itself. Most often, such a request is made by owners of commercial vehicles, in which the load on sliding doors is an order of magnitude higher.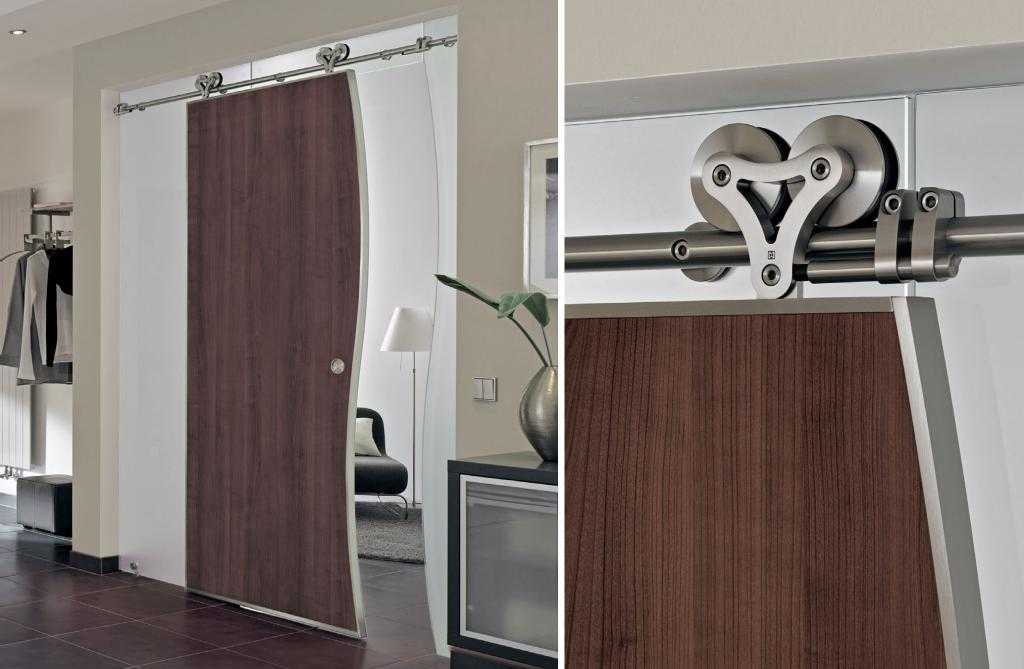
In this case, the work is carried out according to the following scheme:
- The inner lining of the door and the A-pillar is completely disassembled.
- Holes for attaching hanging loops are marked in the selected places on the rack.
- Taking into account the thinness of the body metal, the canopies will have to be fixed using special reinforcements. To install them, technological holes will have to be cut from the inside of the racks.
- Holes for reinforcements and doors are drilled at the same level. It is not necessary to dismantle the door leaf, such a hinge allows you to set the exact gaps. Guides and rollers are dismantled after hanging.
- First attach the hinges to the A-pillar. To do this, use bolts of appropriate length and diameter. Amplifiers are welded directly to the rack, the technological opening itself is also closed.
- Check the alignment of the upper and lower hinges. If necessary, the run-up is removed by straightening.

- The doors are fixed in the closed position, if necessary, the correspondence of the gaps is adjusted. Holes for the mounting holes of the hinges are drilled in place after the precise installation of the door leaf.
- Considering the size of the doors, the structure is strengthened by profiled pipes that connect the hinge reinforcements and the elements of the door’s load-bearing frame.
- After adjusting the lock, the doors and pillar are prepared and painted, the inner lining is mounted.
If you need such a non-standard solution, feel free to contact us, we will help.
It takes about 2-5 days to replace a sliding door, it all depends on the amount of additional work that will accompany the replacement. In any case, we will return the car to you with a working and adjusted door. If necessary, repeat the adjustment after a week’s run.
Please leave a request for replacement of a sliding door indicating the car model on the website in advance.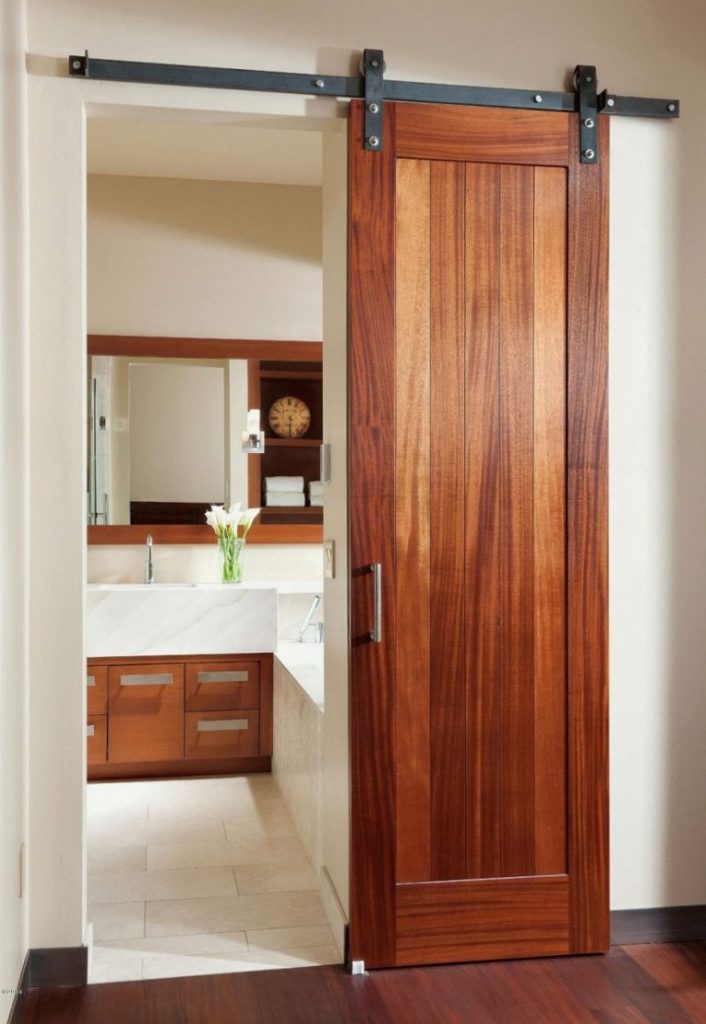 This will reduce the time of search and delivery of components and spare parts.
4 pluses, 1 minus, 6 myths and 8 opinions
Clear and with examples about the difference, functionality and benefits.
It would seem, what is the problem? What kind of doors do you like — these are the ones you need to choose. But everything is not so simple. Of course, you can choose any — but is it worth it?
Sliding doors are often found in the design projects we publish, and we at the editorial office like such solutions: they look beautiful and modern in interiors. But most importantly, these doors are like a lifesaver for small apartments or cramped spaces — their functionality is impressive.
This is most clearly seen in the diagram below: just think about it, saving 8 m², and only because of the right choice of doors!
However, I would like to know for sure why such doors are good and why not, are they easy to use and expensive to maintain? Therefore, we asked those who use them daily about this.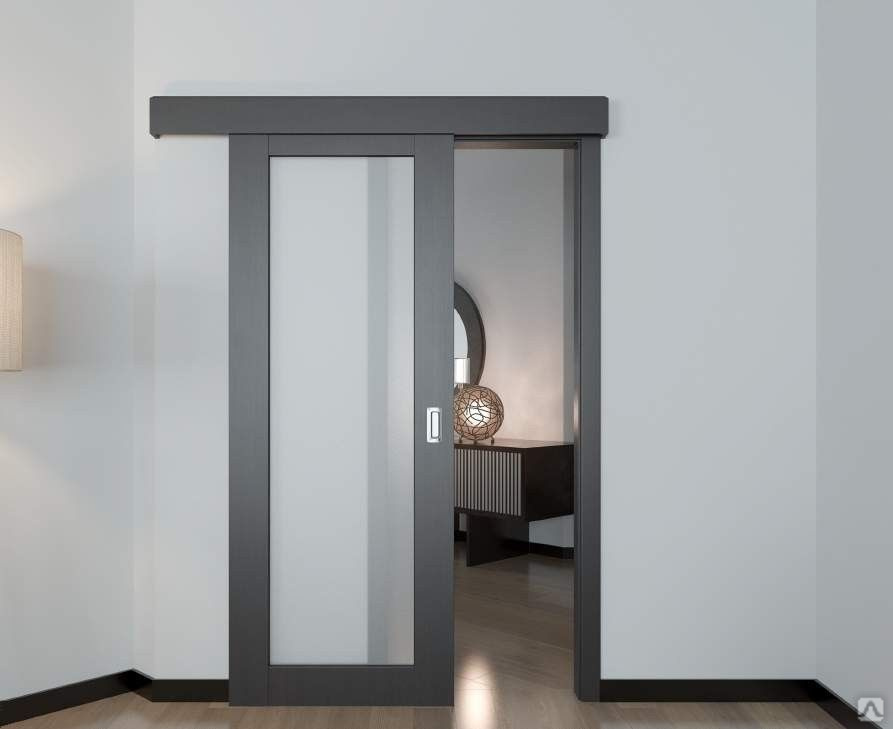
They also asked for comments from designers who choose such doors for their projects, and an expert from UNION, a company that has been manufacturing and installing sliding doors for more than 30 years, since 1990.
Evgeny Bobrov
EXPERT
Sales Director UNION
But first, let’s figure out how a sliding door differs from a swing door and a sliding partition?
Evgeny Bobrov: Of course, there are exceptions to any rule, but the main difference between sliding doors and swing doors is the absence of a box and the presence of a sliding mechanism. In all other respects — the dimensions of the canvas, its material — they are almost identical.
And partitions are a completely different story: these are special structures that are made exclusively according to the size of the customer, they can cover large spaces — up to 3.5 meters high, from 0.6 to 5-6 meters wide and more. Their main task is to zone the room and let in daylight. Therefore, partitions are usually made of glass.
Opinion 1
Nastya : in our apartment a sliding door leads to a bathroom. We chose it because of a very small entrance hall — with an ordinary door, it would not be possible to turn around there.
At first, the door guide was installed from below, and it was very inconvenient: dirt and dust clogged into the rail, and over time, the door movement ceased to be smooth. I had to replace the structure — install a door with an upper rail.
Everything is great now.
Design: Mikhail Novinsky, UNION sliding door
Sliding doors with a bottom rail are made only by manufacturers who do not worry about the quality of the door or their reputation.
Evgeny Bobrov: Nastya is absolutely right — sliding doors with a bottom rail are made only by manufacturers who don’t worry about the quality of the door or their reputation. Dust and dirt will definitely penetrate into the lower rail, the door will start to creak, it will run noisily, and in the end it may even jam. The bottom rail can only be used in closets, where no one walks.
At UNION, we use only reliable Italian top-mounted rails from the ECLISSE factory. There is nothing below, the floor covering does not deteriorate. And the ECLISSE mechanisms themselves are of very high quality: smooth and silent.
Zhenya Lykasova, J. Lykasova Design Studio: Of course, in the projects of our studio, we used sliding doors — this is a great solution when there is a question of opening multiple doors at the location, for example, a corridor or a hall.
Sliding doors avoid collision with other doors and save space greatly. And this, in turn, improves the ergonomics and comfort of the room.
Opinion 2
Anton : we have a laconic interior — white walls, white sliding doors to the ceiling. I like that they do not take up space, merge with space, and there is no need to worry that a small child will pinch his finger or close himself somewhere — the doors open and close easily.
Of the minuses — they are expensive and quite noisy, at night it will not work to quietly close the door behind you.
As for the noise when closing, I am categorical: a high-quality sliding door should not be noisy.
Evgeny Bobrov: in this case, the high price of a sliding door may be due to its size. The higher the door, the more expensive it is. And this applies to both swing doors and sliding doors. It is difficult to make a canvas high and at the same time maintain its geometry and strength.
Various components also add to the price of the door: for example, decorating it with platbands or extensions, equipment with a lock. But if we compare the basic configurations of sliding and swing doors, they will be almost identical in cost.
But as for the noise when closing, I am categorical: a high-quality sliding door should not be noisy. Manufacturers of fittings for sliding doors develop not just mechanisms, of which there are a million, but they achieve precisely noiselessness and ease of closing.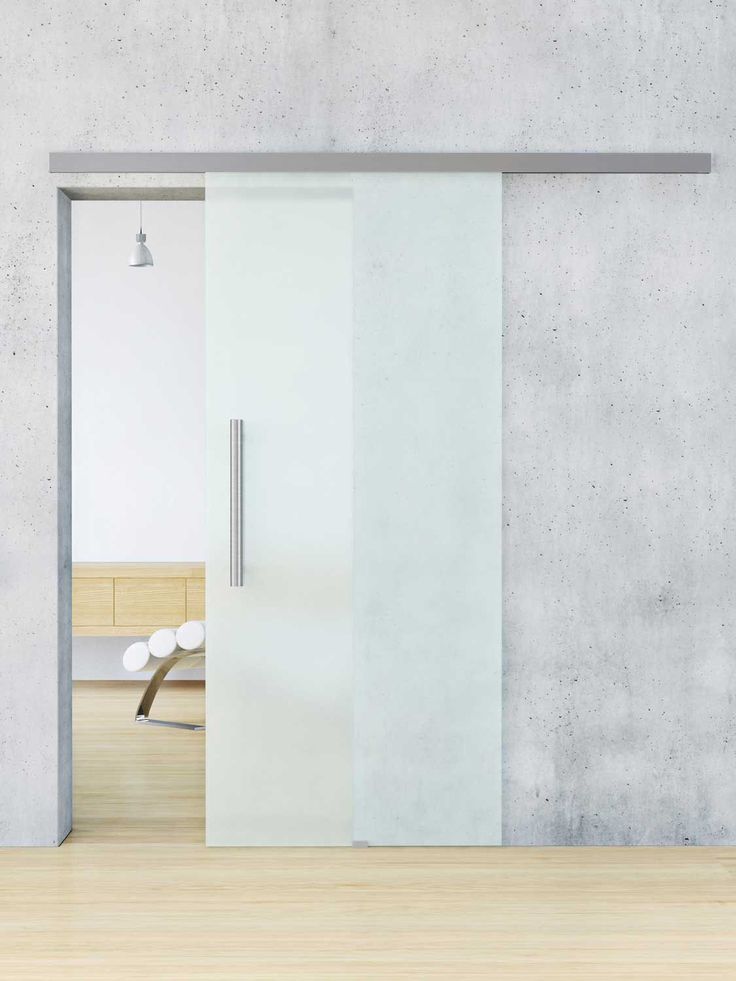 My advice is to choose leading manufacturers whose doors are absolutely quiet and smooth. Then there will be no discomfort.
Design: UNION, sliding door with concealed MAGIC 9 mechanism0005
Anton and Denis Yurov, Yurov Interiors: we quite often use MAGIC doors in our projects. With them, it turns out not only to save square meters in small apartments, but also to create wide doorways in places where the use of a conventional door would be simply impossible or at least inconvenient.
Opinion 3
Katya : I’ve been living with sliding doors for a year and a half and, in principle, I’m satisfied. However, before installing them, it is important to know that the wall must be of a certain thickness and must be prepared in advance. If your repair has already been completed, you will not be able to install sliding doors. And you also need to understand that sliding doors have lower sound insulation than swing doors.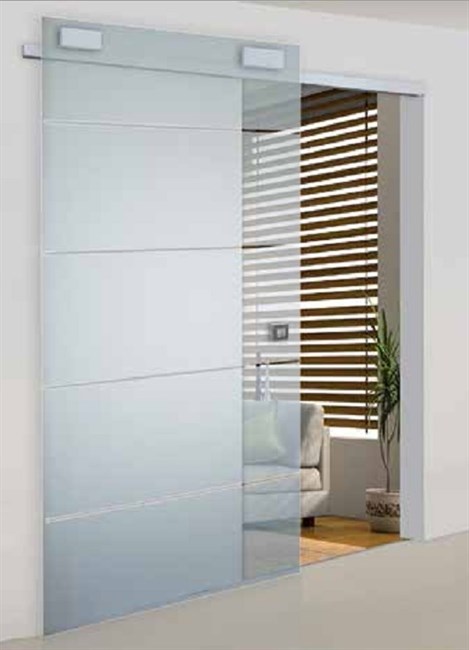
A sliding door along the wall, in principle, does not require any preparation for it — it can be any wall. The main thing is that it can withstand the weight of the door at the place where the mechanism is attached.
Evgeniy Bobrov : the fact that it will not work to install a sliding door after repair is not entirely true. There are different types of sliding doors — it all depends on which design you choose.
For example, a sliding door along a wall does not require any preparation — it can be any wall. The main thing is that it can withstand the weight of the door at the place where the mechanism is attached. If we are talking about a sliding door to a pencil case, then yes — you need to make a wider doorway, install a door pencil case, sew it together with the wall with drywall, then paint or wallpaper it.
Regarding soundproofing. If this is the simplest set of rail and leaf, then yes — the sound insulation of the sliding door will be lower.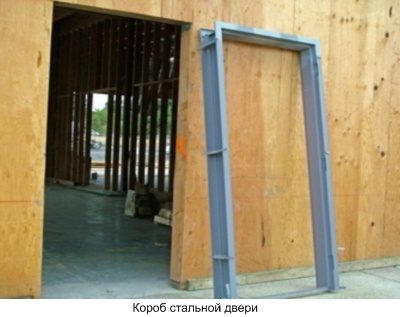 But if we use a sliding door with a framed opening, with a special feigned post with maximum sealing, the sound insulation, although not 100% identical to the sound insulation of a swing door, will still be quite good.
Design: UNION, sliding door — CRISTAL leaves, wall fixing
The sliding door can be made completely invisible!
Evgeny Bobrov: By the way, a sliding door can be made absolutely invisible! For example, make the canvas mirror, install it on a special invisible MAGIC rail, and leave the handle out. In appearance, it will be an ordinary mirror attached to the wall — no one will ever guess that there is a room behind it.
Opinion 4
Varya : sliding canister doors are much more convenient, look more aesthetic, close smoothly and quietly, and even save space in the apartment — especially if they are almost always open, like mine. True, the wall with the pencil case itself is useless, it will not work to hang a TV on it.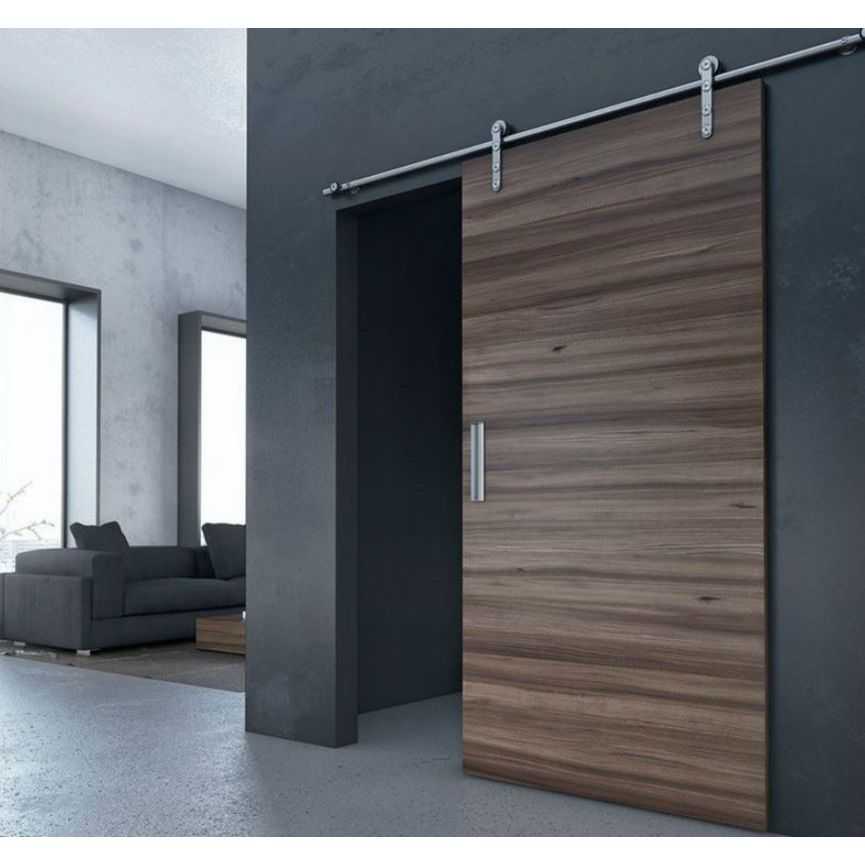 Or you will have to build an additional frame of foam blocks, and this is at least another 5 cm on each side.
When you have an apartment of 30 square meters and three doors in pencil cases, you save as much as three meters of space. This is very cool!
Evgeny Bobrov: In my opinion, the door to the pencil case is the most ideal design that can be installed in small apartments. When you need it, there is a door, when you don’t need it, it doesn’t interfere, and all the walls can be used to the maximum: put a wardrobe, sofa, ottoman, hang a picture.
If you need to hang a TV, it is enough to strengthen the pencil case with two-centimeter plywood and cover it with drywall. But, of course, you need to think about this at the stage of rough repairs.
There is a wide variety of canister designs. There is an ordinary pencil case — one sash goes into the wall. There are double-sided pencil cases, when one leaf goes into one wall, and the other into another. There are various mechanisms — you pull one sash, and the other one closes. There are with electric motors — the door opens with a button, with a remote control or with the help of a motion sensor.
There are even designs that solve the problem of very uncomfortable or tiny spaces: a pencil case can be placed between two rooms and both door panels can be led into it.
Pencil cases are a separate very interesting and functional topic. No wonder they are so loved and actively used by the Italians!
Design: Mikhail Novinsky, UNION sliding door
Mikhail Novinsky, MNdesign: the advantages of doors to the pencil case are obvious: they take up little space, which is important in narrow and limited spaces; besides, the door hides in the wall when it is open. However, it is important to remember that not all manufacturers have a well-developed design of such doors. In my projects, I often use UNION cabinet doors, of which I am completely sure.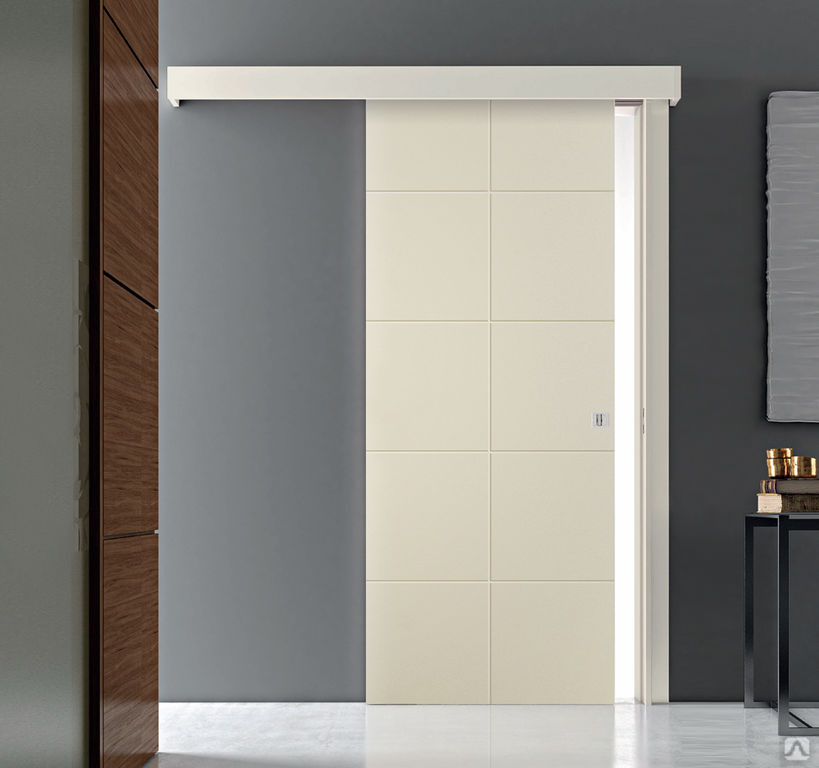
So, let’s summarize all the information received about sliding doors:
PLUSES
— save space,
— safe,
— do not slam shut from drafts,
— camouflage the premises.
MINUSES
— less sound insulation than swing doors.
MYTHS
— require more care
— noisy
— difficult to open,
— you need to prepare the wall in advance to install the door,
— you can’t hang a TV on the wall where the pencil case is,
— expensive.
Well, if you like sliding doors or there is simply no place in the apartment to install swing doors, choose them boldly. But buy from trusted manufacturers who guarantee not only the quality of the door leaf, but also the assembly quality of the entire mechanism and its operation during its service life.
We, for example, in the editorial office are delighted with sliding doors, and you?
Do-it-yourself sliding doors: installation, installation, manufacturing
In an effort to make the house more comfortable and cozy, the idea often comes up to replace ordinary swing doors with sliding doors (they are also called sliding, sliding, hanging).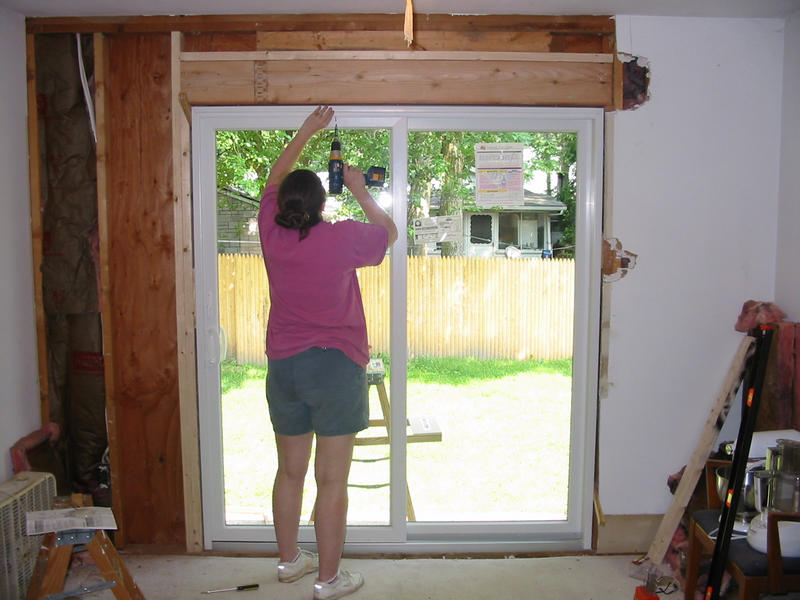 The good news is that you can install sliding doors with your own hands without any problems. The bad news is that a normal mechanism costs about the same as a quality canvas. Bribes in them is the fact that in the open state they almost do not «eat up» space. They either hide behind a wall (better but more difficult to implement) or move along it.
You can hang interior sliding doors yourself
All this is true, but there is a significant minus — a very low degree of sound insulation, especially in the variant of the compartment door. When the canvas just covers the opening. When installed in a pencil case (into a wall), the situation is slightly better, but the degree of sound insulation of a hinged door cannot be achieved even with this installation method. If all this does not scare you, you can study the systems, choose, and then install.
Article content
- 1 Systems of sliding doors
- 1.1 Suspension system on the upper rail
- 1.2 Reling shift doors
- 2 options for installation
- 3 Features and installation procedure
- 3.
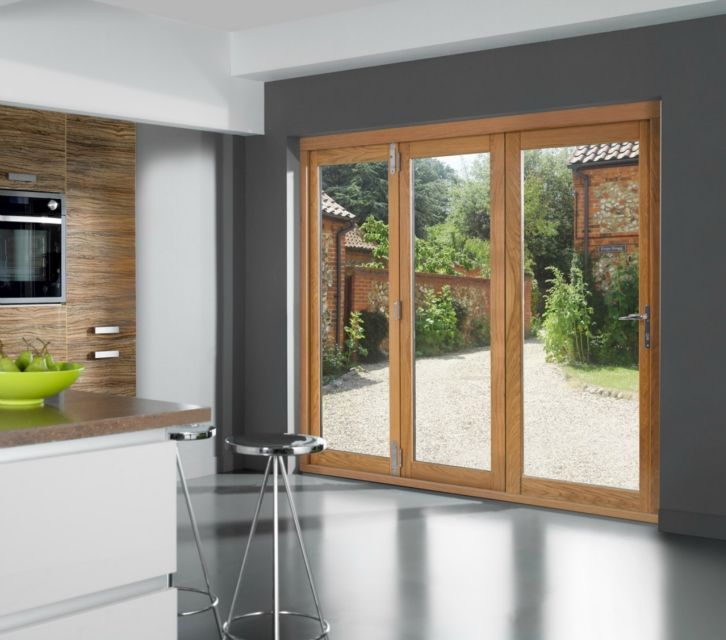 1 Independent installation of sliding interior doors-capacity
- . type (in case)
- 3.
- 4 Self-made sliding doors
Sliding door systems
There are two types of mechanisms: hanging and rail. Both are not ideal. Briefly about their advantages and disadvantages — below.
Top rail suspension system
The suspension system is a carrier beam to which is attached a U-shaped guide with inwardly bent legs. The rollers to which the door leaf is attached move along this guide. In technical terms, this is a hanging door on the top rail.
Basic arrangement of sliding interior doors on the upper rail
When installing such a door, the floor under the door remains smooth, only the lower roller is installed on the right and / or left in the doorway. It slides along the groove made in the bottom end of the canvas. It is necessary so that when moving it does not deviate vertically. This design is the easiest to install.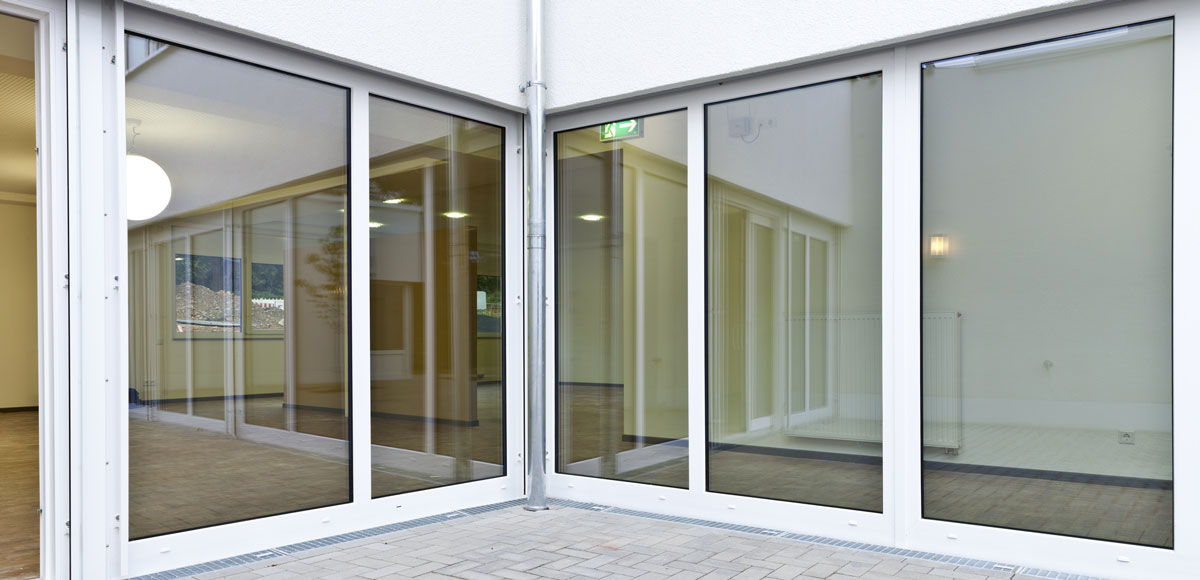 Installation is very simple and consists of several steps:
That’s it. Roller doors installed. But this system, in this form, as in the photo, has very low noise isolation characteristics. They are practically zero: the passage is simply blocked.
Rail sliding doors
This type of door has two rails: top and bottom. The rollers are also installed at the top and bottom. Thanks to this design, the system has a high degree of rigidity: it can be shaken, and this will not cause much damage.
Rail sliding doors
Minus rails in the floor is known: the difficulty of cleaning. Debris and dust constantly gets into the grooves, you have to monitor their cleanliness. This type of door is most often used in wardrobes, wardrobes. They are installed as interior doors if mobile children grow up in the family. Then safety is more important than the difficulties with cleaning.
Installation options
Regardless of the sliding door system, installation methods can be:
- Sliding doors.
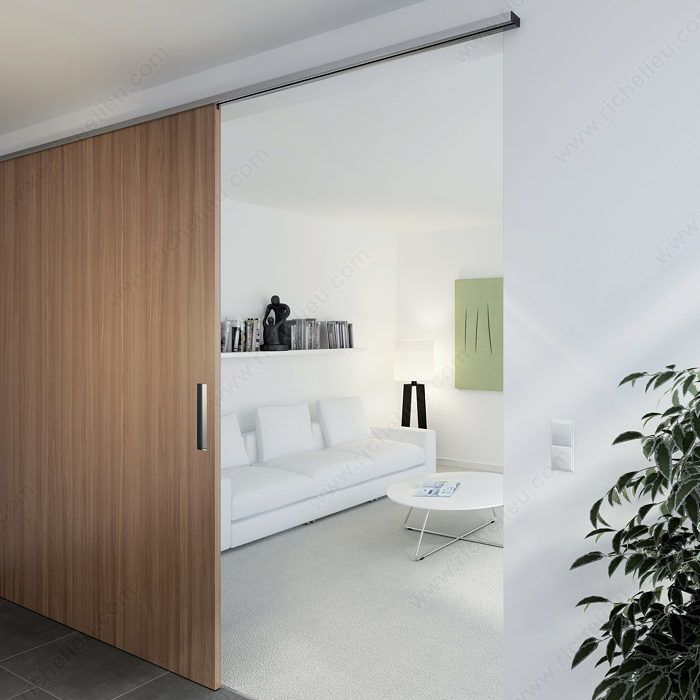 Guides are fixed on the wall along which the canvas rolls.
Sliding doors. Guide rail mounted on the wall above the right opening
- Cassette. A special niche is made in the wall in which the door leaf is hidden. They are also sometimes called! Retractable.
Cassette sliding interior door: the leaf is hidden in the wall niche
- Cascading. They consist of one fixed canvas and several movable ones. Movable, if necessary, move and hide behind a fixed part.
Cascading sliding doors: one leaf pulls the other
The simplest mounting option is compartment doors. They can be installed independently, and not only at the stage of repair, but also after it. It is only important that the opening is even, and the wall has a normal bearing capacity. The disadvantage of such a system is that you can’t put anything close to the wall in the place where the door rolls back. There is one more thing: very low sound insulation. It’s easy to explain: if you look from the end, there is a gap of several millimeters on the sides.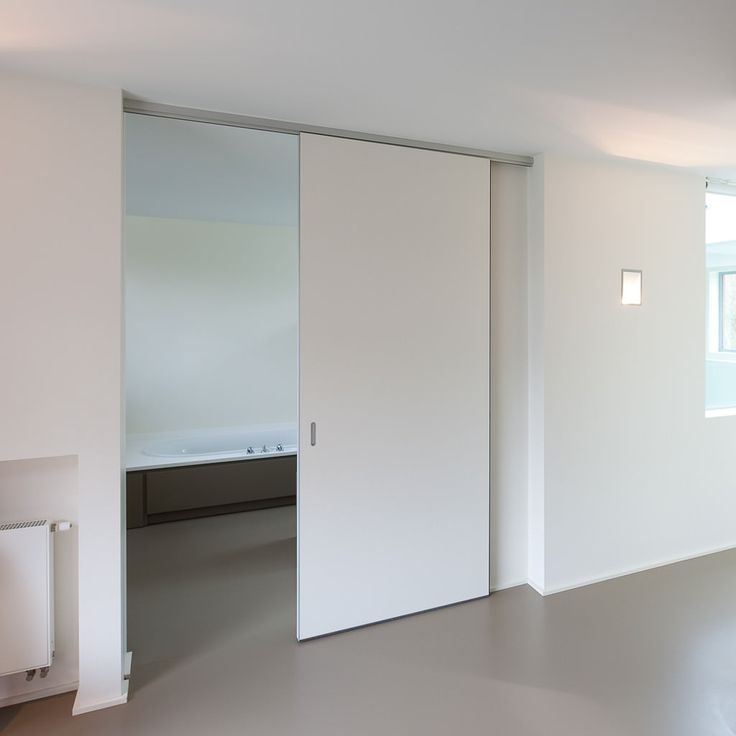 It is necessary so that the canvas does not “shuffle” along the wall. And all sounds perfectly penetrate through it, becoming only a little quieter.
Cassette doors are good because when open, the leaf is in a niche in the wall and does not interfere. The second plus is that seals can be installed around the perimeter of the opening, which give much higher sound insulation performance. The disadvantage of installing a sliding door in a niche is that it can only be done at the repair stage. The second drawback: to make a pencil case for sliding doors, they usually put a false wall, and this is stolen centimeters of area.
Features and installation procedure
You can install sliding doors with your own hands even without much experience. It is quite possible to do without installers. It will take a little time, and also — installation instructions.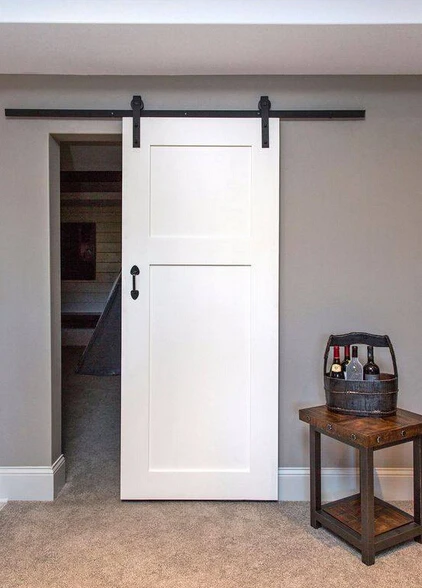 We will try to give a detailed description of the process with photo and video materials.
Self-installation of sliding interior sliding doors
Systems may differ slightly, but the general rules remain the same. There are a few requirements that must be met prior to installation:
- The opening must be even, otherwise you will have to take a canvas that covers all deviations with a margin.
- The bearing capacity of the sides of the doorway should be high, as should the wall above it.
- The opening must already be finished: plastered and painted, wallpapered or decorated with decorative panels.
Next, proceed to the assembly. You can attach videos first. Different manufacturers have their own recommendations. Some recommend retreating from the edge 1/6 of the width of the door leaf, in other systems they are attached immediately from the edge, and the mounting plates provide the indent. We install such a system: in it, roller platforms are installed immediately from the corner.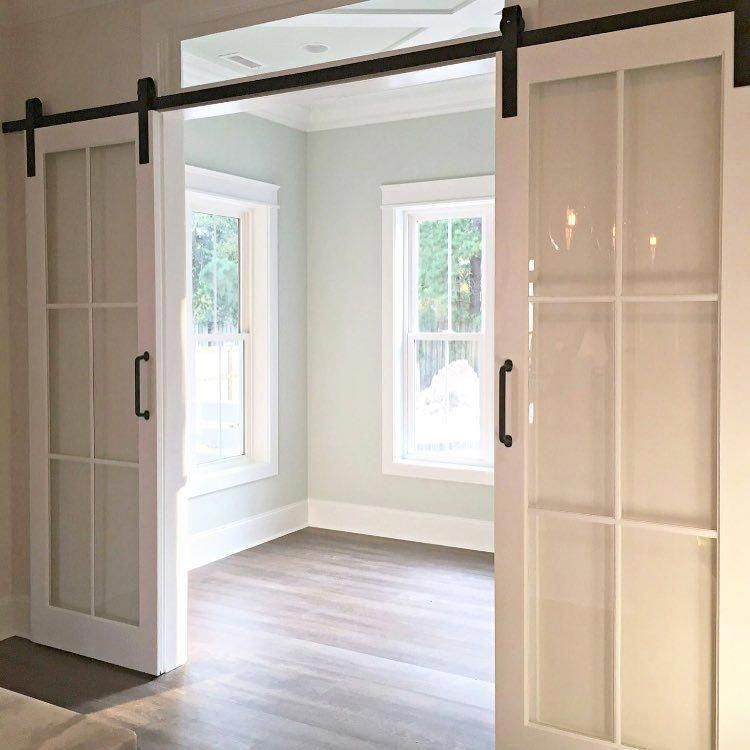
Marking the location of the rollers
We center them, measuring so that the distances are the same. Having exposed the plate, with a pencil or marker we outline the places for the fasteners. We drill holes in the marked places. The diameter of the drill is 1 mm smaller than the diameter of the self-tapping screw.
Fastening roller pads
We expose the plates, screw in the screws. The length of the fastener depends on the weight of the canvas, but not less than 70 mm. We twist them exactly perpendicularly, otherwise unnecessary stresses will arise.
Installing rollers
Roller supports are inserted into the installed plates. They are fixed with a cover on the side surface. Next, roller platforms are screwed onto the threaded pins.
Roller platforms are screwed onto pins
It is also convenient to install handles and locks before hanging. They need special, mortise. If you bought a ready-made kit, the required holes are available. If you have adapted an ordinary canvas, you will have to trace the outline with a pencil, and remove the excess with a chisel. After the handle or lock enters the recess, the attachment points are marked, holes are drilled under them and fittings are installed.
Installing the handle
Next, you can proceed with the installation of the guide. With mounted rollers, this will be easier: you know exactly at what height the bottom edge of the rail should be.
The most convenient way is to hang the sliding doors on a dry piece of wood. Its cross section is less than 50 * 70 mm, its length is twice the width of the door leaf + 5 cm. We cut off the guide of the same length.
We measure the length of the carrier and the mounting bar
Having set the guide along the bar, it is attached to the bar with self-tapping screws at least 8 cm long.
Attaching the guide to the beam
Now you can measure at what height to attach the beam. A guide with a bar is “rolled” on the door with installed rollers. So you can accurately note how high the doors turned out. We drill at least four holes in the side face of the beam for fastening to the wall.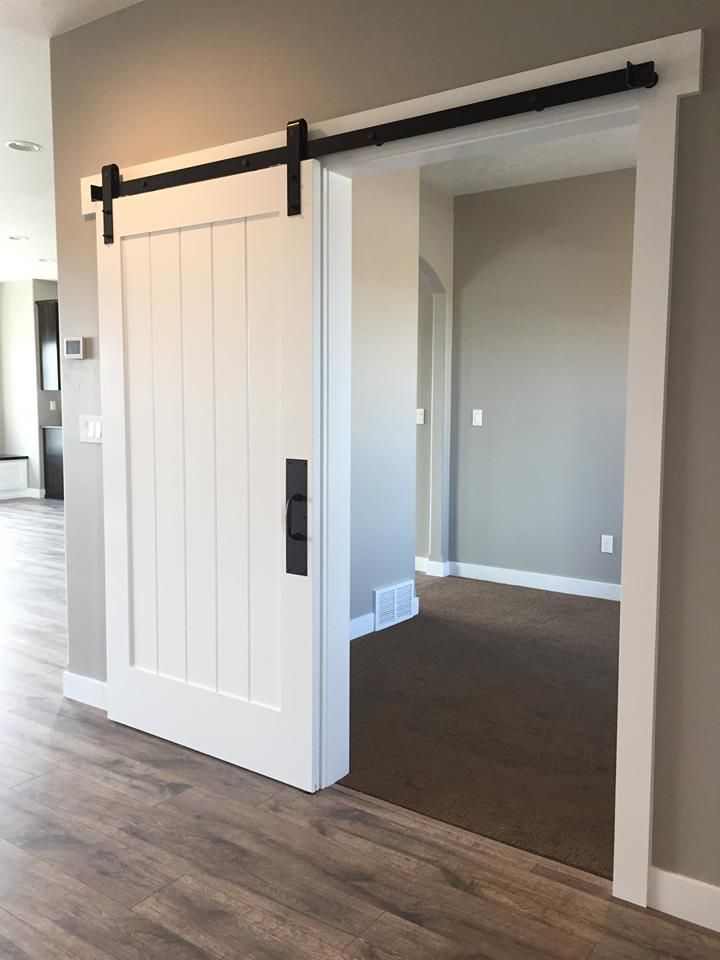
The guide with the bar is “rolled” on the rollers on the door
Add 7-10 mm to the mark obtained — the doors should hang, not shuffle on the floor. 7 mm is the minimum clearance that is sufficient if there are no floor coverings in the opening. If they are supposed (later lay laminate, carpet, linoleum, etc.), then the thickness of these coatings must also be taken into account.
We try on the doorway
To prevent the canvas from “walking” during installation, it is wedged with small wooden wedges. At least two stops are required — near both rollers.
Wedging the canvas
After attaching the beam to the wall and correcting its position with a level, mark its position with a pencil. If the wall allows, you can fasten it to the wall through, but take self-tapping screws with a length of at least 120 mm for this, or better, put it on anchor bolts.
If, for example, a concrete wall, dowels are required. To do this, you need to transfer the marks under the fasteners to the wall.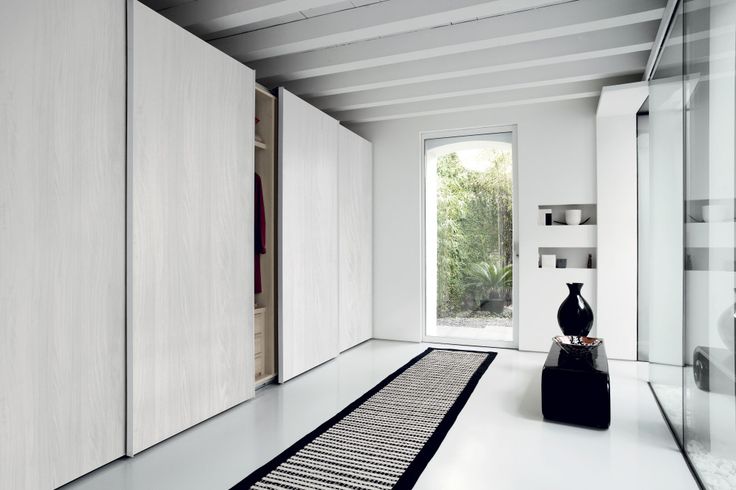 This can be done using a thin and long drill, the diameter of which is smaller than the drilled hole.
Transfer marks to the wall with a thin drill
An even simpler option: a long thin nail. It is inserted into the hole and a mark is made on the wall with a couple of blows. Further, the procedure is known: we drill holes for the plugs of the dowels, insert the plugs, if necessary, hammering them. Then we install the doors.
Fixing the sliding doors to the wall
Fix stoppers along the rail edges. They are brought in from the sides, the required location is established empirically (so that the canvas covers the opening completely in the closed state, and rolls back sufficiently when opened. They are fixed with clamping screws.
Installation of stoppers on sliding doors
After opening the doors, we install a flag roller on the floor. It goes into a groove sawn at the bottom of the canvas. It is necessary so that the doors do not deviate vertically.
Installation of flag roller
First, we insert it into the groove, mark the holes for the fasteners, drill, then fix it with short self-tapping screws (about 15-20 mm long).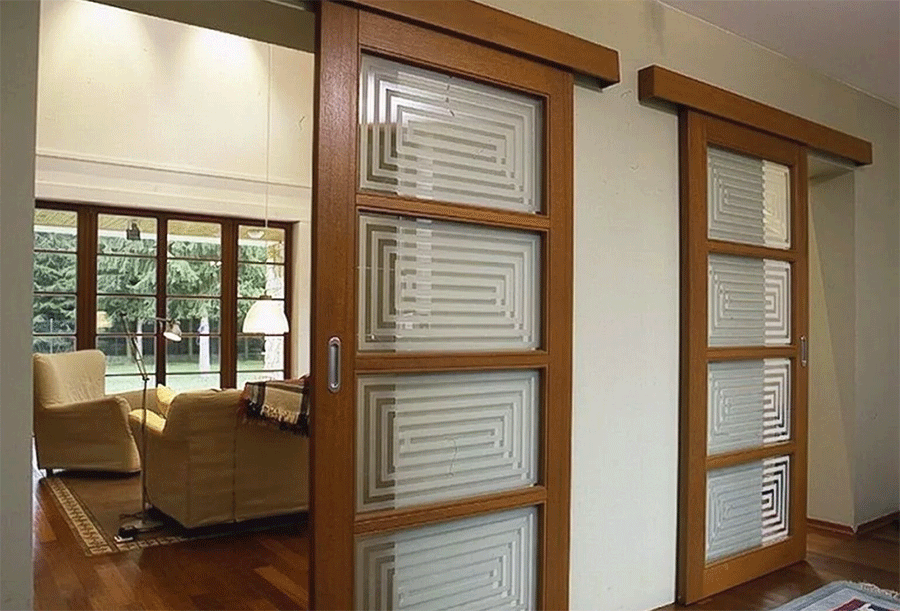
This is how the installed flag roller looks like with the doors open
On this, we can assume that the sliding doors have been installed. They are already fully functional. Remaining finishing work. The mounting bar with the guide is closed with a decorative trim matched to the tone of the door leaf. It can be nailed directly to the beam with finishing nails.
The trim can be nailed directly to the timber
Only when putting it in, make sure that the wheels are closed. So much more beautiful)) Now — that’s it, you installed the sliding doors with your own hands.
We mount cassette-type sliding doors (in a case)
The process of mounting the rail, hanging the door leaf almost one to one repeats those described above. There is no need only for finishing, and all other steps are necessary. Instead of mounting a decorative strip, a false wall is mounted at a distance of at least 10 cm from the wall.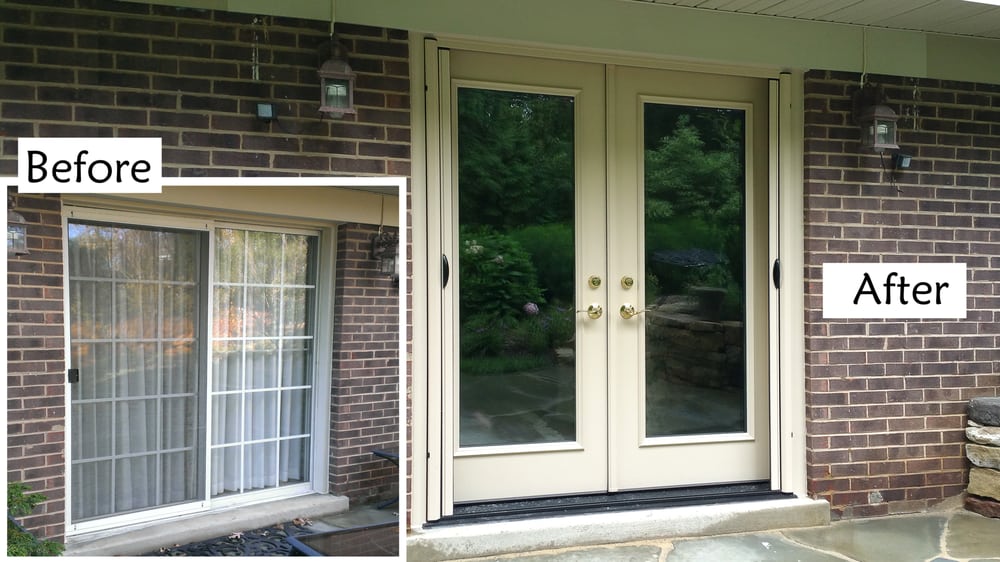 Usually it is made of plasterboard profiles, which are sheathed with wall plasterboard. But this is not important — you can use GVL or plywood, any other suitable material.
Where does the distance of 10 cm come from? The thickness of the door leaf and the gaps on both sides are 5 cm. A minimum of 5 cm is added to them for installing the profile. So it turns out 10 cm.
Since the main load will fall on the wall, the profile frame can not be reinforced. If such a wall does not seem very reliable to you, you can insert wooden bars inside, which you can fasten with self-tapping screws. This will make the structure very rigid.
The basic principles of calculating the case for a sliding door, as well as the marking features, the principles of preparing a doorway for installation, see the video.
Self-made sliding doors
Any door leaf can be installed on rollers and will work as a sliding door.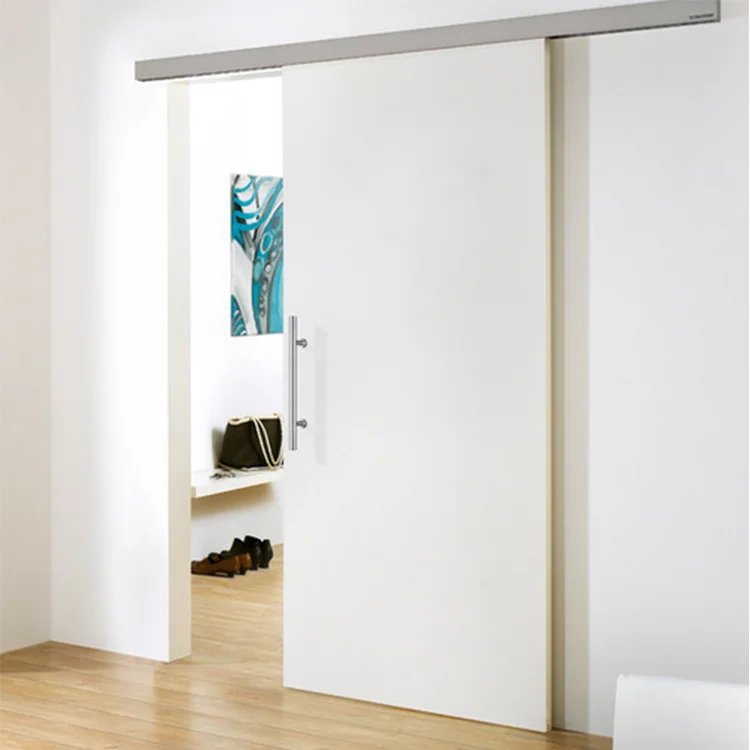 The guide and all other components — rollers (carrier and flag), stoppers, stops — can be bought. Hang on them at least a piece of plywood or a door assembled from several boards. That will be the easiest and cheapest option. But to make a mechanism on your own is already a more difficult task. One of the options for a sliding door mechanism made from improvised materials (from round pipes of different diameters) in the video. The system was supposed to be installed in a closet, but, judging by the design, it can easily withstand even an oak solid door.
Installation and installation of doors | price in St. Petersburg
Installation of a standard interior door
Installation of a standard interior door (simple lock)
3200 rub/piece
The desire to be alone with yourself is a standard desire that appears in any person.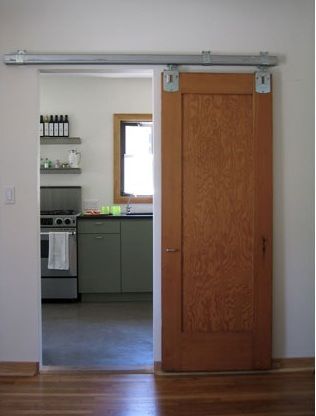 Interroom doors are installed in the bathroom, toilet, kitchen and living rooms, for any turnkey apartment renovation. Also, interior doors will be very relevant in offices, because installing an entrance door in an office is a waste of money. Interior doors, light but durable, they do not have special protective properties but help to hide from prying eyes.
The standard package of the interior door includes:
— door leaf, that is, the door itself that you will open and close.
— a door frame that is attached to the doorway and on which the door itself is hung.
— hinges with which the door is connected to the frame.
— handle for easy opening and closing.
— a simple lock with a standard cylinder.
— platbands that will hide the gaps and mounting foam between the door frame and the wall.
— additional board, which is necessary if the thickness of the walls is greater than the width of the door frame.
A standard interior door has one leaf and opens inward or outward.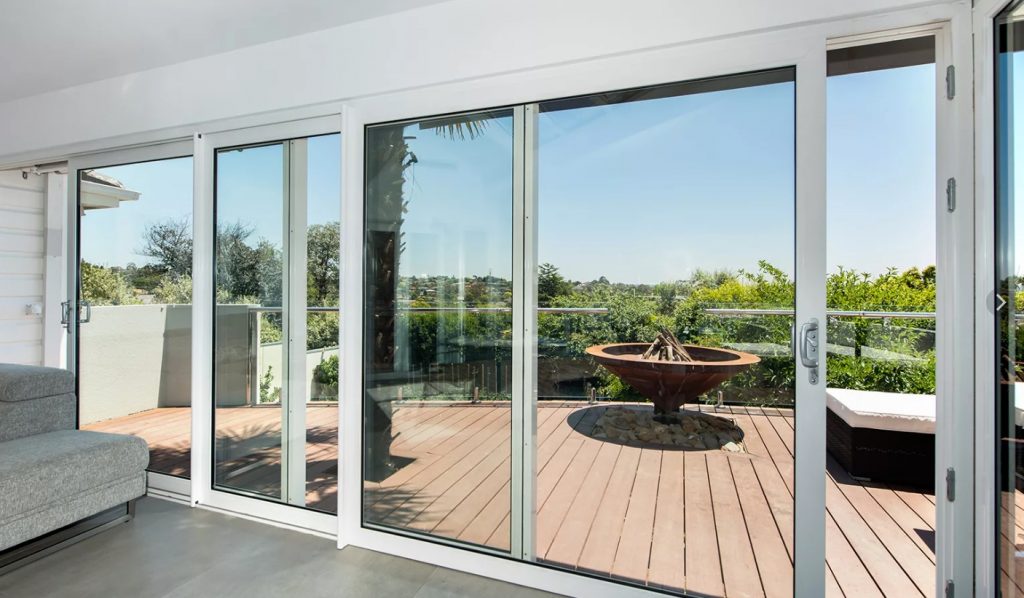
Installation of a hinged interior door
Installation of an interior swing door
3500 rub/piece
Swing double doors are not just functional doors that hide part of the space, but also a decorative element. They will suit both luxury apartments and modern high-tech lofts.
Hinged doors will look great in the living room, because it is usually the largest room in the apartment. They differ in appearance:
— deaf.
— glass.
— with inserts.
The principle of installing such a door is no different from any other: The frame is attached to the doorway. Hinges are installed on the frame and doors. Then the doors are put on the box, a handle and locks are installed on the door. Platbands are nailed or glued along the contour of the box to hide the gaps between the wall and the mounting foam. That’s it, your door is set. Of course, in theory everything is very simple, but in practice there can be many nuances.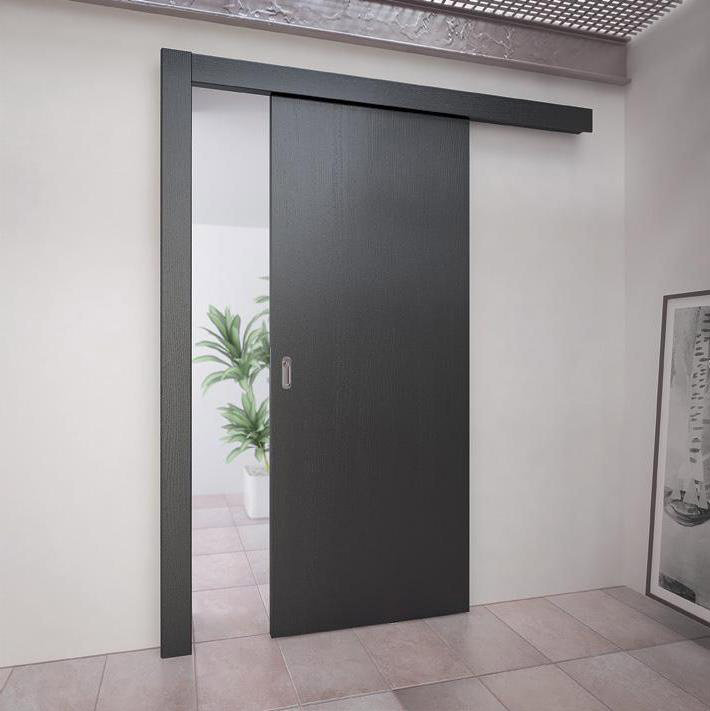 For example. for the installation of a double-leaf door, it is often necessary to widen the doorway.
Installation of interior sliding door
Installation of interior sliding door
From 3500 rub/piece
One of the most common types of external sliding doors are sliding doors. These are external interior doors that move along the walls along the rails. These doors are of two types:
— single leaf
— double leaf
Door material can be absolutely anything: glass, wood, plastic, MDF or metal. You yourself choose which door to put for yourself so that it fits perfectly into your interior. Interior sliding doors are very convenient. look stylish and concise. Such doors will suit any room in your apartment, whether it is a living compartment or a bathroom. Bi-fold sliding doors — best fit into the living room or bedroom. Single-leaf — suitable for small rooms, kitchens and bathrooms.
Installation of hidden interior sliding door
Installation of hidden interior sliding door
From 5000 rub/piece
A hidden interior door is a modern design solution for your apartment. When open, it hides in the doorway and does not create inconvenience. In addition, a closer can be mounted on it so that it opens and closes more smoothly.
Sliding interior doors are single and double. A hidden interior sliding door is a great alternative to bulky, hinged doors. Next to the doorway, you can safely place furniture and decor items without fear that they will be touched during opening.
In addition, the door hidden in the doorway is less prone to deformation, it does not sit on hinges that can sag and will last longer than a regular door.
Two methods are used to mount a hidden interior door:
1. A small opening is hollowed out in the wall in which the door leaf would fit.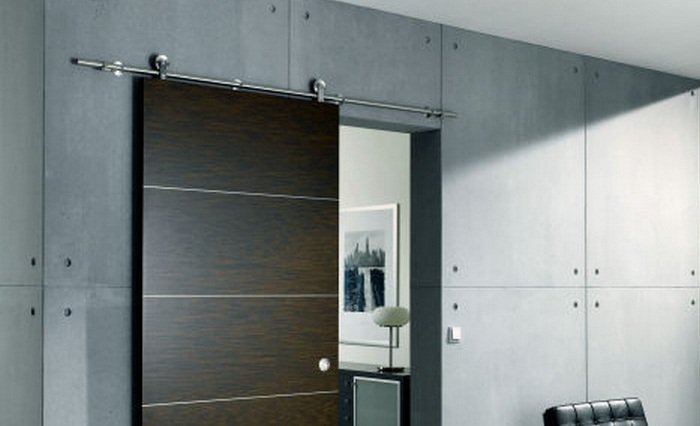 This method is very energy-consuming, and if the wall is load-bearing, then it requires special permission. In addition, it will be difficult to carefully break the wall. This is a long and painstaking work.
2. The second option is the manufacture of a special box in which the door leaf will be hidden. Doors move along guides that are hidden from view.
Mounting extensions to the door
Fitting extensions to the door
250 rub/linear meter
Extension strips are designed to expand the door frame and frame the doorway. Such slats are made from the same materials as the door leaf. Let’s say you bought a complete door, but the width of the frame is less than the width of the doorway. To close the rest of the doorway, additional boards are used. Dobors are sold in almost every hardware store, but often the craftsmen themselves, on the spot, make their lumber at hand.
During installation, the door frame is assembled first.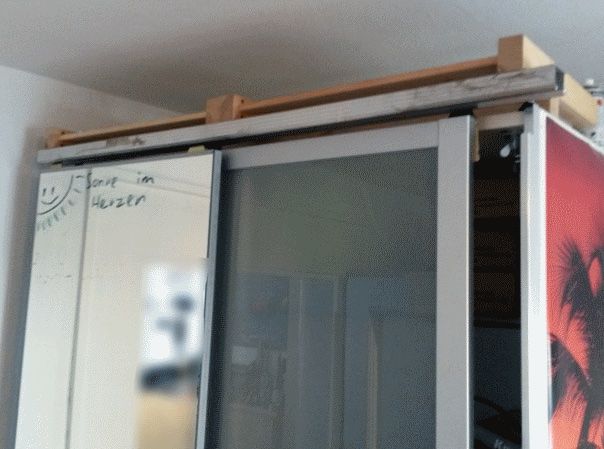 Then, with the help of mounting plates on self-tapping screws, extensions are planted on it and after that, the assembled structure is installed in the doorway. If you install additional boards after you have fixed the door frame, then a gap will appear between them and the frame.
Cleaning and painting interior door on both sides
Cleaning and painting interior door on both sides
It is not always necessary to buy a new one in order to update an interior door worn out by time. Often people resort to restoring an old door in order to save money, especially when the door is completely alive and its paint has only been rubbed or peeled off.
To restore the doors to their former appearance. you need to perform several manipulations:
— remove the door leaf from the hinges, freeing it from the box.
— remove the handle and lock from the door leaf.
— dismantle the box itself. It’s not scary if it crumbles, in any construction market you can buy a new one inexpensively.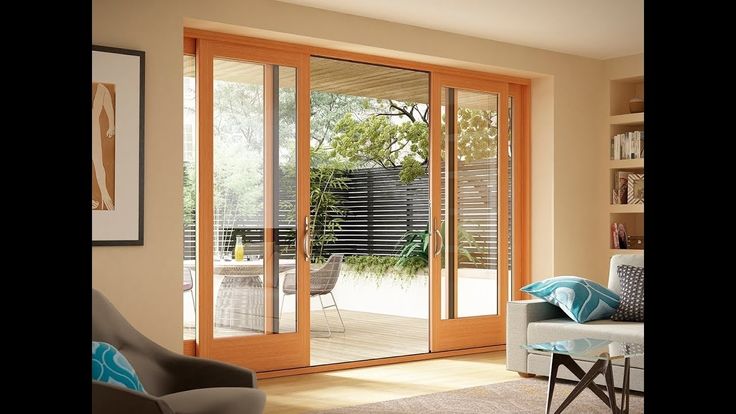
The next step is cleaning the interior door on both sides. to get rid of the old paintwork. Then the door is sanded with sandpaper. The same procedures are done with the box.
The final stage is painting the interior door and frame. Here you can already show your imagination and choose the paint to your taste and color.
Door frame undercut on both sides of the door
Door frame undercut on both sides of the door
1000 rub/set
Very often people are faced with the fact that when laying the floor covering, they cannot slip it under the door frame. This can be fraught with the fact that the coating will puff up, and you will gradually tear it off. To prevent this from happening, any floor covering must be adjusted to the door frame for a tighter fixation.
If the space between the frame and the covering is too small, it is necessary to cut the door frame on both sides of the door. During sawing, the thickness of the coating and the substrate is taken into account. For example, for a laminate — this thickness is 10-15 mm. You also need to consider how deep the coating will be recessed. The sawing of the door frame is carried out with a special saw, and in its absence, you can use a wood saw with fine teeth.
We provide repair of sliding compartment doors to our clients.
-
- 10077
- Coupe sliding door systems
Repair of sliding doors — compartment doors in St. Petersburg. Our website will help you quickly find a professional locksmith or team of coupe system repairers to perform any sliding door repair work.
Just place your request through the mail form, and in a few minutes you will receive a call from free masters ready to repair sliding doors.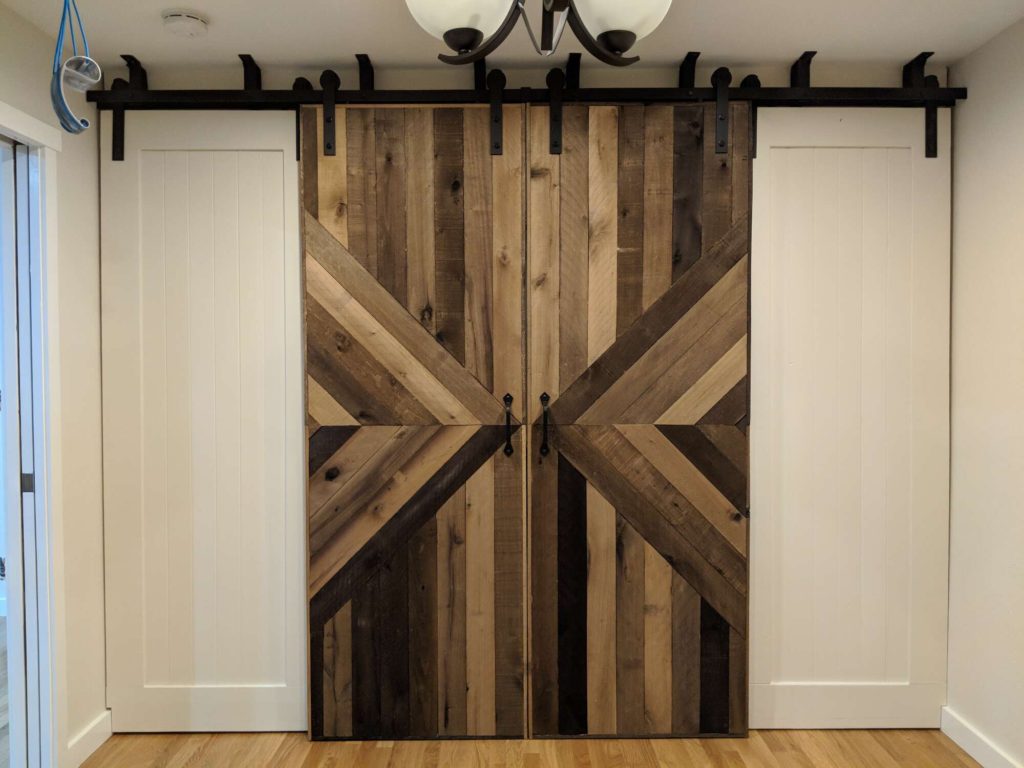 Or call number 980-36-42 and our experts will advise you on the cost of repairing compartment doors and the necessary components.
Leave an online request for sliding door repair now!
And get a professional repair of compartment doors by our masters.
-
Compare our prices for sliding door repair in Yandex or Google search and choose the best conditions..
-
Our company employs only specialists in the manufacture and repair of furniture.
-
Do not waste time communicating with intermediaries
Sliding doors (compartment doors) have recently been increasingly used in wardrobes and dressing rooms and apartments as interior doors. Sliding doors not only have a modern attractive appearance, but also allow you to significantly save space, which is often not enough in dressing rooms, offices, studio apartments or Khrushchev apartments. But since the designs of sliding doors are equipped with a mechanism, when it becomes clogged, during improper operation, or simply wears out and fails over time.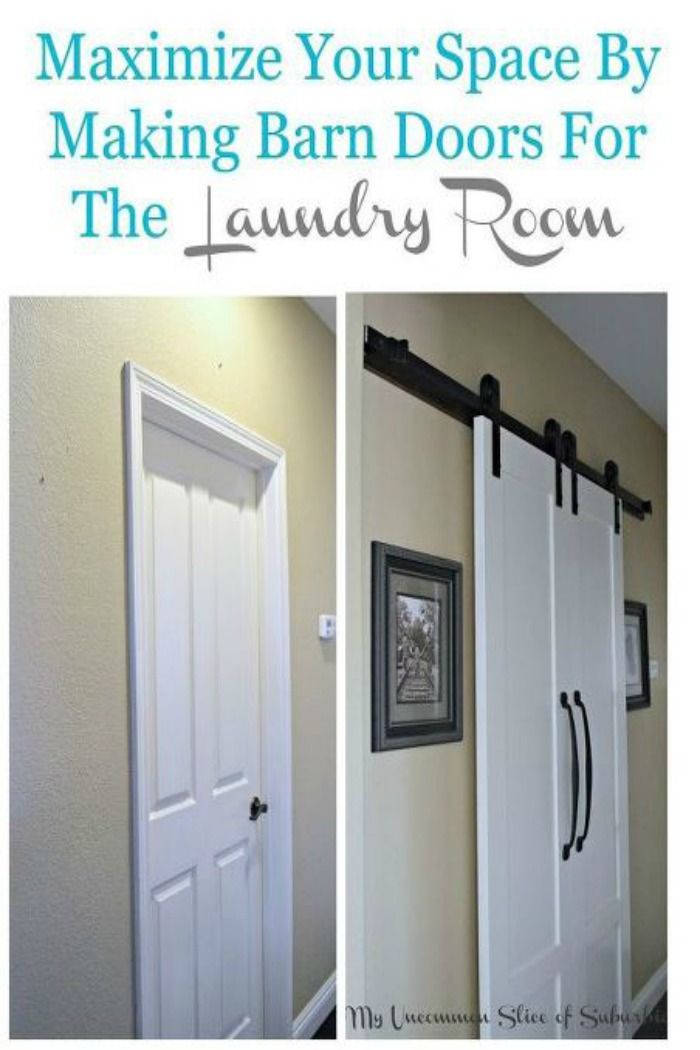 Most often, the compartment door mechanism becomes unusable due to incorrect manufacturing of sliding doors and their installation. The masters of our furniture factory repair sliding doors and replace mechanisms at a convenient time for customers. To be able to use the services of our masters, you need only fill out an application by calling , write a letter to or call us and wait for the necessary specialist to come to you. Precisely necessary, since some masters work on the repair and replacement of components, and others work on the replacement of broken mirrors and glass in the compartment doors.
Major problems with sliding door designs.
As a rule, repair of «suspended» sliding interior doors (compartment doors) is required in cases where the following breakdowns appear:
-
Doors began to close or open with difficulty
-
Top roller fasteners popped out of guides
-
The upper fastener or beam to which the guide is attached has become loose and the doors have sagged.
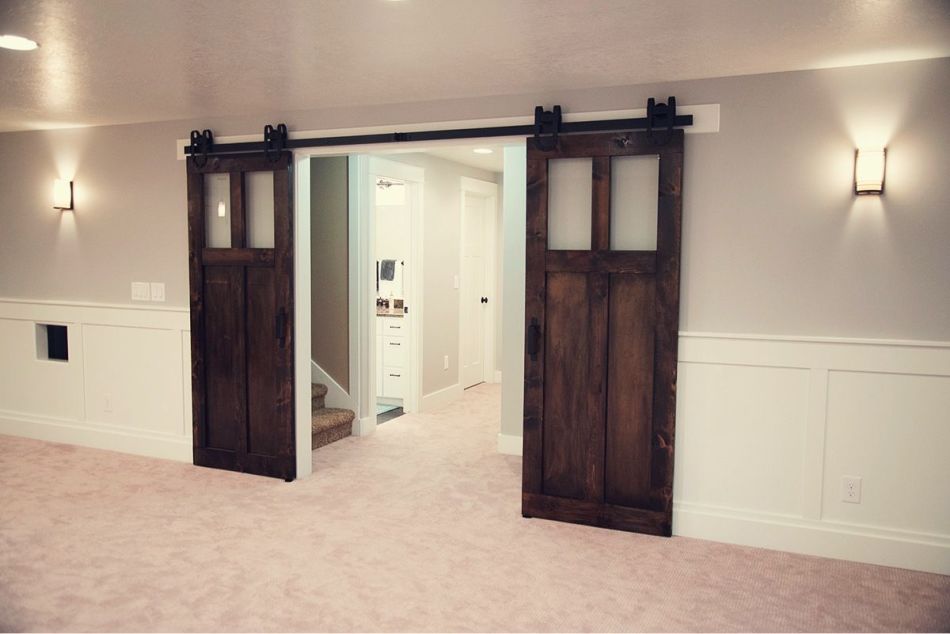
-
Fasteners come out of the ceiling and the doors are warped and sagged. (in case of incorrect installation of the rail to the ceiling, the assemblers used ordinary dowels instead of metal anchors)
-
Broken mirror or glass.
In cabinets with hanging doors:
In the event that the doors began to open poorly or jammed, it is necessary to clean the cabinet rails from accumulated dust or sharpen the base for attaching the rollers, which, when the rollers have worn off, begins to abut against the rail. Masters who repair sliding doors cope with such work simply and quickly, because a quick inspection immediately reveals a malfunction. In the variant with interior sliding doors, the usual adjustment is necessary, or if the door rollers are out of order, the system must be replaced.
If the compartment door rollers jumped out of the guide, the specialist will check whether there is a breakdown, if everything is fine, then carefully put them in place.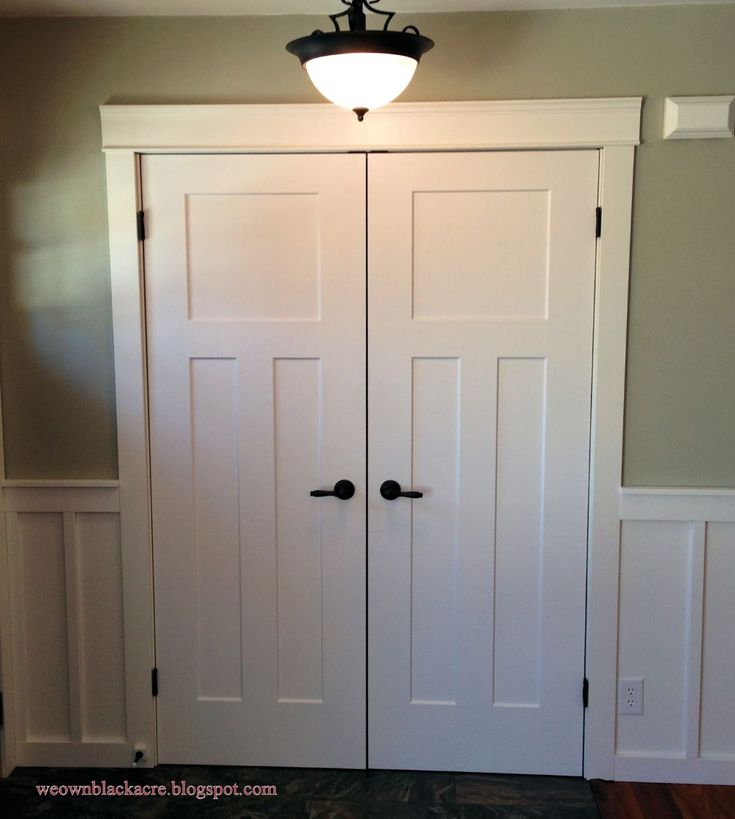 It is not worth pulling with the call of the master, since the pop-up rollers deform the guide during further operation and break themselves. As a result, you will also have to pay for the replacement of the guide with a new one. You should not try to remove the compartment doors from the guide yourself, this leads to a breakdown of the entire system — the guide bends, and the rollers are deformed. not a little.
Replacement of worn sliding door rollers.
Rollers on sliding doors wear out year after year. With the normal manufacture of compartment doors and their installation, high-quality systems work for 15-25 years without problems. Analog sliding door systems last 7-15 years. Not correctly assembled and installed doors (even with high-quality rollers) or cheap fake systems last from 2 to 5 years. In this case, the repair of sliding doors consists in replacing the rollers, and sometimes in a slight alteration of the doors. Similar work is done in this way:
In a simple version of the repair of doors with bottom support and hinged compartment doors:
-
First remove the doors from the rails
-
Old rollers are removed and replaced with the same new rollers
-
Finally, the doors are put back in place and adjusted
The second option when the system is outdated and such rollers do not exist in nature:
-
The doors are removed from the cabinet rails and, with a slight alteration of the fasteners, new mechanisms are installed
-
In hanging interior doors, it is most often necessary to change the height of the rail fasteners or the supporting beam to which the guide is attached, since modern interior sliding door hanging systems have an extended adjustment stroke, and the guide itself has a different height.
 In order not to spoil the doors by shortening them, which is also not always possible, the entire system is re-hung.
When the mechanic replaces the rollers or the system, he will definitely show you that the doors have begun to open or close normally. If you have any questions, or there are any problems, we advise you to immediately contact a specialist to fix them, so as not to call the wizard again. Since all our masters are specialists not only in the repair of sliding wardrobes. There are no problems with the repair of compartment doors, which is confirmed by a long-term guarantee for all our services.
Fixing or replacing the top rail of the hinged doors.
Often, the repair of sliding interior doors consists in replacing or fixing the top rail, which is either not correctly installed or loosens and sags over time, which leads to the impossibility of normal operation of the doors:
-
If the guide is bent, it is removed
-
Metal anchors are driven into the fixing holes in the ceiling
-
A guide is attached to them and is attached with the help of not self-tapping screws, as hackers do, but with the help of bolts.
 The guide is fastened with self-tapping screws only to the beam when the system is attached to the wall.
It is worth remembering that sliding door guides must be fixed in a clearly horizontal position of the plane. If there is even a slight unevenness in the plane, the rollers will quickly fail and after a short period of time will need to be replaced, which is fraught with additional material costs and the search for components or repairmen for compartment doors.
Remember that sliding interior doors or compartment doors in wardrobes need to be repaired as soon as problems occur, otherwise they may need to be completely replaced, and you should not repair the doors yourself. It is worth knowing that purchased cheap compartment doors in hardware stores have components and rollers corresponding to their cost. Even with in-line production of standard compartment door sizes, they cannot cost less than the purchase price of materials and components. If a compartment door with a mirror in an aluminum profile, for example, in Leroy Merlin costs less than three thousand, and normal materials and components cost from 4 to 6 thousand for this door in the purchase, then you should think about what it is made of and how long it will serve you.