Troubleshoot screen flickering in Windows
Screen flickering in Windows 11 is usually caused by a display driver issue or incompatible app. To determine whether a display driver or app is causing the problem, check to see if Task Manager flickers. Then, based on that information, you’ll need to update, rollback, or uninstall your display driver or update or uninstall the app.
For more, select any of the following headings, and it’ll open to show more info:
Press Ctrl + Alt + Delete to open Task Manager. If you don’t see Task Manager after pressing Ctrl + Alt + Delete, press Ctrl + Shift + Esc to open Task Manager.
-
If Task Manager flickers along with everything else on the screen, a display driver is probably causing the problem. In this scenario, see the Fix your display driver section.
-
If Task Manager doesn’t flicker while the rest of the screen is flickering, an incompatible app is probably causing the problem. In this scenario, see the Update or uninstall an incompatible app section.
Note: For help with a flickering or scrambled screen on a Surface Pro 4, see What to try if your Surface screen is distorted, is flickering, or has lines running through it.
If you’re having trouble seeing your screen properly, you may need to start your PC in safe mode to follow the steps below.
If Windows Update recently made updates to your device, roll back your display driver. Otherwise, try updating or uninstalling your display driver to fix the flickering or scrambling problem.
Roll back your display driver
-
In the search box on the taskbar, enter device manager, and then select it from the list of results.
-
Select the arrow to expand Display adapters.
-
Under Display adapters, right-click the adapter, then select Properties.
-
Select the Driver tab, and then select Roll Back Driver > Yes.

-
Restart your device.
Notes:
-
You must have administrator privileges to roll back or uninstall a device or driver package using Device Manager.
-
If the Roll Back Driver option is unavailable, Windows doesn’t have a previous driver to roll back to and won’t be able to complete this process.
Update your display driver
-
Select the arrow to expand Display adapters.
-
Under Display Adapters, right-click the adapter, then select Update.
In the search box on the taskbar, enter device manager, and then select it from the list of results.
Note: You may need to contact your PC or display adapter manufacturer to download the most recent driver for your system.
Uninstall your display driver
-
Select the arrow to expand Display adapters.
-
Under Display adapters, right-click the adapter, then select Properties.
-
Select the Delete the driver software for this device check box, and then select OK.
-
Update an app-
If the app came from Microsoft Store, check updates for apps from Microsoft Store.
-
If the app didn’t come from Microsoft Store, check the manufacturer’s site for updates.
Uninstall an appSome apps may not be compatible with Windows 11 and can cause a flickering or scrambled screen.
 Try uninstalling the app, here’s how:
-
Select the Start > Settings > Apps > Apps & features. It’ll take a moment for your apps to appear.
-
Scroll down the list and find the app you want to uninstall.
-
Select the app, and then select Uninstall > Uninstall. If you’re asked to confirm your choice, select Yes.
After you uninstall the first app, restart your device and check if the screen flickering or scrambled issue is resolved or not.
 If it’s not, uninstall each app one by one until the issue is resolved.
Reinstall an app-
Select the Microsoft Store from the start menu.
-
Select Library.
-
Select the app you want to reinstall, and then select Install.
If your app isn’t in Microsoft Store, reinstall it from the manufacturer’s site.
Screen flickering in Windows 10 is usually caused by a display driver issue or incompatible app.
 To determine whether a display driver or app is causing the problem, check to see if Task Manager flickers. Then, based on that information, you’ll need to update, rollback, or uninstall your display driver or update or uninstall the app.
For more, select any of the following headings, and it’ll open to show more info:
Press Ctrl + Alt + Delete to open Task Manager. If you don’t see Task Manager after pressing Ctrl + Alt + Delete, press Ctrl + Shift + Esc to open Task Manager.
-
If Task Manager flickers along with everything else on the screen, a display driver is probably causing the problem. In this scenario, see the Fix your display driver section.
-
If Windows Update recently made updates to your device, roll back your display driver. Otherwise, try updating or uninstalling your display driver to fix the flickering or scrambling problem.
Roll back your display driverIn the search box on the taskbar, type device manager, and then select it from the list of results.
-
Select the arrow to expand Display adapters.
-
Under Display adapters, right-click the adapter, then select Properties.
-
Select the Driver tab, and then select Roll Back Driver > Yes.
-
You must have administrator privileges to roll back or uninstall a device or driver package using Device Manager.
-
If the Roll Back Driver option is unavailable, Windows doesn’t have a previous driver to roll back to and won’t be able to complete this process.
Update your display driver-
Select the arrow to expand Display adapters.
-
Under Display Adapters, right-click the adapter, then select Update.
Note: You may need to contact your PC or display adapter manufacturer to download the most recent driver for your system.
Uninstall your display driver-
Select the arrow to expand Display adapters.
-
Under Display adapters, right-click the adapter, then select Properties.
-
Select the Delete the driver software for this device check box, and then select OK.
-
Update an app-
If the app came from Microsoft Store, check updates for apps from Microsoft Store.
-
If the app didn’t come from Microsoft Store, check the manufacturer’s site for updates.
Uninstall an app
Some apps may not be compatible with Windows 10 and can cause a flickering or scrambled screen.
 Try uninstalling the app, here’s how:
-
Select the Start button, then select Settings > Apps > Apps & features. It’ll take a moment for your apps to appear.
-
Scroll down the list and find the app you want to uninstall.
-
Select the app, and then select Uninstall > Uninstall. If you’re asked to confirm your choice, select Yes.
After you uninstall the first app, restart your device and check if the screen flickering or scrambled issue is resolved or not.
 If it’s not, uninstall each app one by one until the issue is resolved.
Reinstall an app-
Select the Microsoft Store icon on the taskbar.
-
Select More > My Library.
-
Select the app you want to reinstall, and then select Install.
If your app isn’t in Microsoft Store, reinstall it from the manufacturer’s site.
How to Fix Screen Flickering and Flashing on Windows 10 and 11
If your Windows 10 or Windows 11 screen is constantly flickering, it’s likely because you have a troublesome application installed or an unsuitable display driver.
 It’s time for you to resolve that annoying screen flash.
The problem often begins when upgrading to Windows 10/11 from a previous version of the operating system, but it can occur at any time. We’re going to show you various methods to fix a Windows 10 or Windows 11 flashing screen.
Perform This Screen Flickering Test First
First, you need to establish what might be causing the flickering screen. To do this, open Task Manager by pressing Ctrl + Shift + Esc simultaneously.
Alternatively, on Windows 10 you can right-click your taskbar and select Task Manager. You don’t actually need to use Task Manager, but you do need it open.
Now, watch your screen to see if Task Manager flickers. If it does, along with everything else on the screen, the problem is likely caused by your hardware or a faulty display driver. On the other hand, if everything except Task Manager flickers, the issue is likely due to an application.

If it’s the former, follow the instructions below in order. If it’s the latter, skip to step five. That said, if the advice there doesn’t work, check the advice in the other sections too.
1. Check Your Monitor and Cables
If you have a flashing screen, the first thing to rule out is the hardware. Check all the cable connections from the monitor to the computer—take them out and plug them back in to ensure the cables are secure.
If you have a spare monitor cable, try using it instead. Or buy a replacement online, since it’s an inexpensive purchase. Cables can degrade over time, or maybe a pet has had a sneaky chew. Either way, switch the cable and see if it stops screen flickering.
If you can, try a different monitor. If this resolves the problem, you know it’s your monitor that’s the issue. At that point, contact the manufacturer for support or to raise a warranty claim.
2. Set the Correct Refresh Rate
A monitor’s refresh rate is the speed at which the screen updates the image per second, measured in hertz (Hz).
 Basic monitors can usually only handle a 60Hz refresh rate, while more advanced ones—typically aimed at gamers—can go up to 360Hz.
It’s important that you set a suitable refresh rate for your monitor. Sometimes a monitor manufacturer will support an overclocked refresh rate, but this can cause screen flickering.
To adjust your refresh rate:
- Press Windows key + I to open Settings.
- Click System > Display.
- Click Advanced display settings (Windows 10) or Advanced display (Windows 11).
- Use the Refresh rate dropdown and incrementally select lower rates until the screen flashing stops. If the flashing continues, revert to your monitor’s recommended refresh rate.
3. Reset Your Display Driver
The screen flashing could be caused by your display driver. You might have an old driver or a faulty new one. Let’s make sure you are running the right version for your system.

Remove the Driver
First, boot Windows in safe mode:
- Press Windows key + I to open Settings.
- Select Update & Security > Recovery (Windows 10) or System > Recovery (Windows 11).
- Underneath Advanced start-up, click Restart now.
- When your system restarts, select Troubleshoot > Advanced options > Startup settings > Restart.
- Again, once restarted, select option five to launch your PC into Safe Mode with Networking.
Next, use Device Manager to uninstall the display driver:
- Press Windows key + X and click Device Manager.
- Double-click on Display adaptors to expand the category.
- Right-click your graphics card, click Uninstall device, check Delete the driver software for this device and then click OK.

- Restart your system again.
Alternatively, you can use third-party software Display Driver Uninstaller, which will completely wipe any traces of the driver from your system.
Install a New Driver
You now want to install the latest driver for your system. Windows Update will provide the driver it thinks is compatible with your system. To do this:
- Press Windows Key + I to open Settings.
- Click Update & Security (Windows 10) or Windows Update (Windows 11).
- Click Check for updates.
Alternatively, you can go to your graphics card manufacturer’s website (likely AMD, Nvidia, or Intel) and manually download the driver from there.
Download the driver, install it, and see if the screen flashing problem has ceased.
Roll Back to an Older Driver
If the problem continues, it might be that the newest driver hasn’t patched the problem.
 If the screen flickering occurred after a driver update, try rolling back to an older version.
Follow the steps above to uninstall the driver, then head to the old driver page for either AMD, NVIDIA, or Intel. This might be a bit of trial and error, but try selecting one released when your screen wasn’t flickering.
4. Reseat Your Graphics Card
If the problem isn’t with your display driver, it doesn’t mean your graphics card isn’t to blame. If your graphics card isn’t seated correctly in your motherboard, it can cause your monitor display to flicker on and off.
You can easily check this if your motherboard has inbuilt graphics. Remove the monitor cable from your graphics card and plug it into the motherboard’s display slot instead. If the flashing stops, you know the graphics card is the problem.
Power off your PC, unplug everything, open the case, and remove your graphics card from the motherboard. Then carefully reseat it, ensuring the card firmly clips into the motherboard.
 Of course, don’t do this if you’re not comfortable working inside a computer because you might make things worse.
If this doesn’t fix it, your graphics card might be faulty. Contact the manufacturer for support or to claim on the warranty.
5. Uninstall Problematic Applications
Some apps are incompatible with Windows 10/11 and can cause screen flickering. Think about whether you installed any new software before the screen flashing began or if an app recently updated. In the past, three problematic apps have been Norton Antivirus, iCloud, and IDT Audio.
Across all your applications, make sure you’re running the latest versions. Either update within the app itself or head to the respective official websites and download the most up-to-date release. Alternatively, check the developer’s support page for recently updated apps to see if screen flashing is known as a recent bug.
If this doesn’t work, uninstall the program. To do so:
- Press Windows Key + I to open Settings.

- Click Apps > Apps & features.
- Click Sort by and choose Installation date.
- Click the offending app and click Uninstall. You may need to restart your system for the changes to take full effect.
6. Create a New Windows User Profile
How do you stop your laptop or computer screen from flickering? Well, many Windows 10 and Windows 11 problems can often be solved by creating a new user profile. Screen flickering is one of them.
To create a new account:
- Press Windows Key + I to open Settings.
- Go to Accounts > Family & other users.
- Click Add someone else to this PC (Windows 10) or Add account (Windows 11) and follow the wizard.
Windows Screen Flickers… No More!
As with most Windows 10/11 issues, no one fix will work for everyone.
 Hopefully, one of the steps above has solved your Windows 10 or Windows 11 screen flashing problem.
If it is time for a new monitor, there are plenty of productive and fun things you can do with the old one. Otherwise, take it off for recycling so it can rest in monitor heaven.
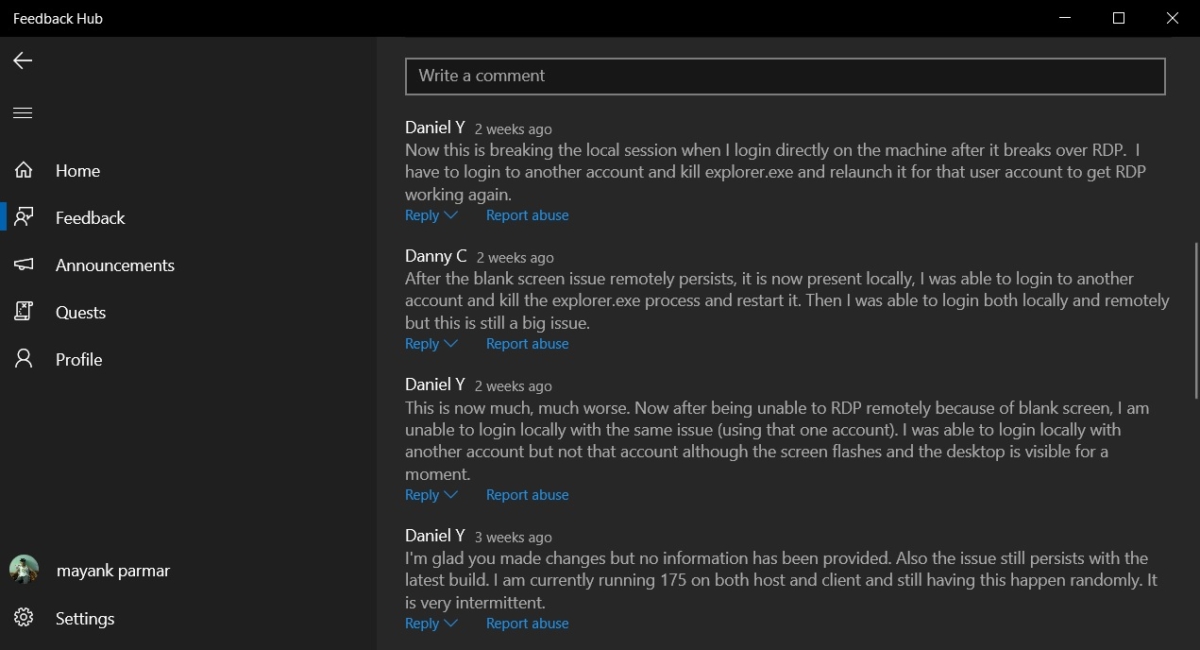
Second Monitor Keeps Flickering, Flashing or Going Black Randomly (Fix)
We have had an issue with one of our computers’ second monitor that keeps flickering and flashing randomly. To be precise, it goes black entirely and comes back on again repetitively (as if it goes to sleep and immediately wake up again) while the primary monitor works just fine. After trying all possible solutions, including switching to other monitors, fortunately, the issue is solved.
This guide will show you what we have tried to fix the second monitor keeps flickering and flashing issue. Though the solutions we shared in this post worked for us, we certainly can’t guarantee that it will work for everyone else.

Also see: Game Stuttering and Lag on Dual Monitor
The monitor flickering problem is very broad. Solutions are everywhere but usually only a few actually works, because it all depends on the symptoms and the actual cause of the problem. You just have to search for the solutions that describe the symptoms closest to your problem and try each one of them.
Symptom: Second monitor keeps flashing randomly
In our case, the primary monitor is a gaming 144hz monitor while the second monitor is an ordinary one that only has 60hz screen refresh rate. Whenever we use Chrome (or other active programs) on the primary monitor, anything else open on the other monitor would cause the second monitor to flash and flicker (as in going total black and then immediately showing pictures again) randomly every few seconds. Read: How to Change Screen Refresh Rate in Windows 11.
At first we thought it was due to driver issue or loose cable.
 We tried to update the monitor driver (which is something you should try first regardless if it works), checking and replacing the HDMI cable (or displayport), trying different resolutions, but to no avail. So, we went on to try the settings in the Nvidia Control Panel and found the solution.
How to fix second monitor keeps flashing and flickering issue
Method 1: Select and Rearrange displays in Nvidia Control Panel
Open Nvidia Control Panel from the Start menu in Windows 11 or 10, or by right-clicking the Nvidia Settings icon from the notification icons area in the taskbar. Then, select Nvidia Control Panel. If you don’t see NVIDIA Control Panel while you are sure you are using a NVIDIA GPU, update your graphics driver.
In the control panel, expand Display and select Set up multiple displays. Select and enable the displays you want to use. Then, drag the icons (usually appear as 1 and 2 where 1 is your primary monitor and 2 represents your second monitor) to whichever direction you want.
For example, in the screenshot below, my second monitor will be on the left of my primary monitor. Then, click on Apply. The random flickering or flashing should stop now.
It doesn’t matter if you have configured this before in the default Windows settings, the point is to configure this once again in the Nvidia Control Panel and it somehow solved the flashing issue for us.
Suggested Guide: How to Turn On G-Sync or FreeSync in Windows 11 for better gaming performance and experience
Method 2: Adjust desktop color settings option in Nvidia Control Panel
This is another method you can try to fix the flickering and flashing problem if your monitor is connected using HDMI but not via DisplayPort (you can’t see the option if you use displayport).
In Nvidia Control Panel, under Display, go to Adjust desktop color settings. Select the your primary monitor and at the bottom under the “Content type reported to the display” option, select Desktop programs.
 At the top, select your second monitor and also change the option to “Desktop programs” as well. Click on Apply. Restart your PC and see if the flashing issue is fixed.
Other recommended solutions to fix second monitor flickering and flashing issue:
Needless to say, you need to always make sure both your video driver and monitor driver are up to date. If you are using an Nvidia graphic card and you cannot find Nvidia Control Panel in your Windows, download and install your graphic driver again from Nvidia.com.
Check the screen refresh rate setting of the second monitor and see if it is set correctly. Right-click on your desktop > Select Display settings > Advanced display settings > Display adapter properties for Display 2 > Monitor tab > Screen refresh rate. If you are using a 60hz monitor, try to change the refresh rate to 60hz if it’s otherwise. Also, try to change it to 59hz and see if it works.

If your monitor offers other types of input port, try using another type of input port. For example, if you are using HDMI right now, try using DisplayPort or DVI if your monitor has the port.
Hopefully this will help you solve your second monitor flickering and flashing issue. If you have other solutions you may want to share with others, let us know in the comment section below.
Fix Screen Flickering While Gaming
Table of Contents_
- How Gamers Can Fix the Monitor Flickering Issue
- STEP 1 ALTER THE GRAPHICS CARD CONTROLLER
- STEP 2 INSTALL GRAPHICS CARD DRIVER
- STEP 3 CHANGE THE REFRESH RATE
- STEP 4 CHECK YOUR HDMI OR VGA CABLE
How do I fix a flickering monitor while gaming? You can adopt many solutions, from installing a new graphics card driver to changing your display’s refresh rate to even investing in a flicker-free monitor. It doesn’t matter what brand of gaming display you have in your setup; this issue can persist if you do not take care of it.
 Even if you have high-quality, professional monitors like Fortnite pros monitors, you can still run into flickering issues, but there are ways to resolve this issue.
KEY TAKEAWAYS:
- If your screen flickers, check if your display’s refresh rate is low. Even if you own the top-rated 4K gaming monitor on the market, sometimes the refresh rate may not be able to support the current game and needs to be adjusted.
- If you update your driver or download the latest version and your screen is still flickering, contact an expert technician to sort out the issue.
- The most common monitor technology that flickers is the LCD screen.
Ideally, the flickering of your monitor as you game seems to be more on LCD and IPS monitors. When you play 4K or 1080 games, the monitor exhibits a black display for a brief moment, and then it becomes normal. Although 1080p monitors are considered excellent for gaming, any flash can annoy and disrupt a competitive gaming tournament.
 This is the case if you have a 60Hz monitor that can flicker more when you try to game in full-screen mode. But you do not have to worry. Below, we are going to discuss how to fix it. If you have a Windows 10 monitor, we have a guide dedicated to resolving screen flickering on Windows 10.
STEP 1 ALTER THE GRAPHICS CARD CONTROLLER
If your gaming PC has a dedicated graphics card, you can fix this issue by altering your graphics card settings. Follow the instructions below:
NVIDIA
- Open NVIDIA Control panel
- Display
- Advanced Desktop color settings
- Desktop Programs
- Apply
For AMD graphics card users, you can follow similar steps and configure the correct settings.
STEP 2 INSTALL GRAPHICS CARD DRIVER
An outdated graphics card driver or the lack of installing the correct driver can be the root of the problem. In this case, you should update the existing one or install the latest driver.

Now, there are two ways to go about this process – manual and automatic. To simplify the process, you can use Driver Easy or Driver Booster. These two tools can help you update the drivers regularly.
STEP 3 CHANGE THE REFRESH RATE
Suppose the problem persists after sorting out the graphics card issue. In that case, you can tweak the refresh rate of your monitor through the display settings of your Windows 10. This process can fix the flickering problem. Follow the instructions below:
- Open settings in Windows 10
- Go to “Display.”
- Click “Advanced Display Settings.”
- Open Display Adapter Properties
- Change the refresh rate by increasing the value. It might save the problem.
STEP 4 CHECK YOUR HDMI OR VGA CABLE
When the HDMI cable is faulty, your monitor can blink. That is why it is essential to check the connection of the cable. Top-quality cables will also ensure that you have an acceptable input lag for gaming.
Although, compare whether HDMI or DVI or DisplayPort vs HDMI is best for gaming.
F.A.Q.S
What is causing my laptop to flicker?
Some of the causes include an aging laptop, loose internal cables, incompatible applications in new machines, or defective hardware. Also, consider checking your monitor warranty or computer insurance to seek professional help if no other method resolves the issue.
How can I stop my laptop from flickering?
You can start by updating your graphics card’s drivers, download the latest drivers from the manufacturer, disable Windows’ desktop manager, or have an expert sort it out.
Why is my game flickering all the time?
The reason might be that your screen has a low refresh rate. Try to increase it to higher than 75Hz. Alternatively, compare 100hz vs 144hz for gaming monitors with even better refresh rates
STAT: A refresh rate of 60Hz can produce a flickering effect on most monitors.
However, most gamers find that monitors with 70-90Hz refresh rates and above enable flicker-free viewing. (source)
REFERENCES:
- https://support.microsoft.com/en-us/windows/troubleshoot-screen-flickering-in-windows-10-47d5b0a7-89ea-1321-ec47-dc262675fc7b
- https://kb.iu.edu/d/adjt
- https://en.wikipedia.org/wiki/Flicker_(screen)r
- https://www.nvidia.com/en-us/geforce/forums/geforce-graphics-cards/5/266345/solved-flickering-screen-researched-for-days-tried/
- https://www.youtube.com/watch?v=WUkYh_Lp0dI&ab_channel=MJTube
Samsung TV Black Screen/Flashing — Ready To DIY
Samsung televisions are well-known products with a reputation for high-quality images. However, many TV owners report a flickering and flashing black screen, interrupting viewing. The problem might lie in hardware or software faults, which are relatively easy to fix.
If your Samsung TV has a black screen or is flashing, try to perform a factory reset.
However, it’s best to start with a Picture Test in the Settings menu to ensure that the TV is the underlying problem. Afterward, try changing the display settings of the device before resetting.
This article will discuss why some Samsung TVs suffer from black screens and flashing. We’ll explain how to fix these common issues and how to reboot your television.
Samsung TV Keep Flashing/Flickering Black
If your Samsung Smart TV is flickering, run a Picture Test to determine if your TV is causing the issue. The Picture Test shows a high-definition image that you can inspect for imperfections. If the screen continues to flash when the test image is on screen, proceed to the next phase of troubleshooting.
To view the test image, follow these steps:
- Ensure all cables are connected correctly.
- Push the Home button on your Samsung TV remote.
- Select the configuration menu.
- Scroll down to the tab labeled Support.
- Select Device Care.
The system will perform a brief search on your device.
- Pick Self Diagnosis from the bottom of the page.
- Select Picture Test from the menu bar.
If the flashing persists, turn off ambient light detection. This function automatically changes your television’s brightness level in response to the ambient light in the room. When the ambient light detector dims the screen, it can appear as if the TV is blinking.
To disable this function, follow these steps:
- On your remote, press the Home button.
- Navigate to the General tab.
- Choose Eco Solution.
- Press enter on the remote control to switch off ambient light detection.
You might also like the related article samsung tv won’t turn on.
Samsung TV Black Screen On and Off
When your Samsung TV has a black screen that appears intermittently, your settings may be the root cause. To begin solving this issue, disable the Contrast Enhancer. Navigate to the configuration menu and follow these steps:
- Choose the Photo tab using your remote.
- From the center menu, choose Expert Settings.
- Switch off the Contrast Enhancer.
Afterward, activate the Digital Clean View function. This feature eliminates image noise, preventing the TV from flickering black. To enable this function, follow these steps:
- Navigate to the configuration menu.
- Choose the Picture tab.
- Enter the Expert Settings.
- Switch off Digital Clean View by highlighting and pushing enter.
Samsung TV Black Screen With Sound
If you turn your TV on and hear audio but don’t see an image, there are three possible causes:
- A faulty connection
- A problem with the unit attached to the TV
- The television has hardware damages (this problem requires professional servicing by a technician)
First, double-check the cable connections to ensure they’re safe. After that, consider modifying the television’s broadcasting channel by following these steps:
Copywrite article owner is Readytodiy.
com for this article. This post was first published on 2021-05-27..
- On your remote, press the menu button.
- Choose Live TV.
- Select Channel List.
- Choose between terrestrial and cable.
If changing the broadcast channel doesn’t resolve the issue, you may want to contact Samsung’s customer service. However, if your television is wired to an external device, try one of the following troubleshooting techniques.
Rotate through the television’s available sources to confirm the number of impacted input sources. Following that, if you’re using an HDMI cable, run an HDMI cable inspection. To run the exam, do the following:
- Go to the Settings menu.
- Navigate to the Support menu.
- Choose Self Diagnosis.
- Pick Signal Details.
- Scroll down to the HDMI Cable Test section.
- Press Enter on your remote.
If the cable is deemed defective during the inspection, replace the communication cables between the television and the attached unit.
If no visible changes occur, call a repair expert.
Or, you can link an additional device to the same input to test if the issue is related to the connected unit. If the new device returns a picture, there’s a problem with the original device.
Samsung TV Black Screen With No Sound
Due to a connection issue, your Samsung Smart TV is likely to have a black screen and no audio. First, secure any loose links and adequately dispose of broken cables.
If that doesn’t resolve the issue, the problem may be triggered by faults with the external devices. To confirm this theory, click the Menu button on your remote. If the menu appears on your television’s display, the issue is with the connected unit.
Are you confident that the external sources are operating correctly? If you are, the television screen may be black because of outdated firmware. As a result, the firmware must be updated to resolve this problem. If you have access to your television’s home menu, you can update it using the following procedure:
- Navigate to Settings.
- Choose Support.
- Select Software Update from the menu.
- Press enter to update.
Your TV will begin downloading the latest firmware. Once the update is complete, your TV will immediately restart, and the black screen problem should no longer exist.
Samsung TV Black Screen Won’t Turn On
When your Samsung television displays a black screen and doesn’t come on, it’s most definitely due to a power problem. Try checking the wall socket and ensure that the voltage is correct for your TV. Check as well to see if your television turns on when you plug it into a different outlet.
If not, contact a repair technician. This issue could be a hardware malfunction, such as:
- Faulty driver board
- Defective LEDs
- Damaged capacitors
- Malfunctioning television screen
Additionally, if the warranty is still active, you can use it to replace the entire television.
Samsung TV Black Screen Won’t Turn Off
If the television doesn’t switch off when you use the remote or the power button, try unplugging it for thirty seconds.
Once reconnected, the TV should remain turned off. If it automatically turns on and doesn’t turn off, it’s best to call a repairer.
Or, you can post on the Samsung support forum; a technician will reach out to you to help.
Samsung TV Randomly Goes Black
Is the ambient light detection system disabled, but the TV continues to go dark unexpectedly? If so, it might be necessary to adjust the Motion Lighting feature to see if this improves the visual consistency.
The Motion Lighting feature changes the brightness in response to on-screen activity. When this function is activated, the screen will appear dark, but it’s actually incredibly dim.
To disable this function, open your configuration menu and navigate to Eco Solutions. Once there, use your remote to highlight Motion Lighting and press enter to deactivate it.
Samsung TV Black Screen Reset
If the previous troubleshooting steps were ineffective, consider factory resetting your Samsung TV. This approach is only applicable if you can navigate the Eden menu despite the black screen.
Additionally, you need access to a Samsung remote. A smartphone remote application cannot perform these steps.
To perform a factory reset on your device:
- Navigate to Settings.
- Choose General.
- Select Reset and then enter your PIN. Enter 0000 if you don’t have a pin.
- Choose OK.
If these measures don’t apply to your television, access the support menu. After that, choose Self Diagnosis to find the Reset option.
How To Fix a Samsung TV Black Screen
When your TV remains black, it may be that the energy-saving mode is enabled. Consider shutting it off to see whether that resolves the issue. To turn off the energy-saving mode, open the Settings menu.
Navigate to the Eco Solutions tab and choose Power Saving Mode. Then, use the arrows on your remote control to switch it off.
Related Articles
Samsung TV AirPlay Not Playing
Samsung TV Prime Video Not Working
Samsung TV Brightness Not Working, Flickering, Too High, or Too Low
Samsung TV Plus Not Working
ReadyToDiy is the owner of this article.
This post was published on 2021-05-27..
Samsung Soundbar Not Working (Won’t Connect to TV)
How to stop Mac screen from flickering
Why is my MacBook screen glitching?
Not everyone reported these problems, but there are certainly enough people experiencing this for it to get mentioned.
Screen glitching lines appear on retina and non-retina screens, with Mac users noting that it can affect them when using Terminal or when graphics are enabled or disabled. In some cases, it’s so bad that it makes looking at the screen impossible.
You may be wondering if Macbook screen glitching is a problem unique to older Macs. M1 Macs are powerful and can help handle even the most demanding tasks. Unfortunately, upgrading to a newer machine is not a solution for now. When working on M1 MacBook, you may encounter the same headache — screen lines flickering.
It seems that the issue stems from compatibility problems between the new operating system and the graphics processing unit.
On M1 Macs, this usually happens randomly, but it may be because of connecting to an external display or working with some software.
Subsequent macOS updates may have solved this problem, although a workaround or troubleshooting fix is often necessary even then. Hopefully, this problem will be eliminated in flagship M2 Macs that Apple announced at WWDC in June 2022.
For now, though, the problem prevails. So, let’s look at how to solve it and get Mac screens working smoothly without flickering.
There are several potential solutions to the MacBook screen glitching problem. In turn, it is worth trying each one, then seeing whether the screen flickering issue is still present or if one of the fixes has solved it, as each Mac may have a different reaction to this hardware and software interactivity challenge.
1. Restart your Mac
- Go to the Apple Menu > Restart.
- Or Shut Down, then give it a few minutes before starting it up again.
2. Update your macOS
- Go to the Mac App Store or Apple Menu > System Preferences.
- If a macOS update is available — which means you aren’t running the latest version (which could contain the automatic updates needed to solve this problem) — then a new macOS will be waiting for you to download it.
- Back up your data beforehand, either to an external hard drive, third-party cloud storage, or iCloud.
- Now follow the steps to update the macOS and once your Mac restarts, see whether the screen flickering issue is still present under the same conditions as before.
Assuming neither of the above solutions has solved this, you can try a few other things.
3. Run maintenance scripts
Not sure how to perform it? You can do that easily using a handy app — CleanMyMac X. It is an all-in-one Mac utility offering a variety of tools including those helping improve maintenance, freeing up RAM, and performing other tweaks to tackle the screen glitching problem.
Maintenance Scripts is a feature that fixes various system glitches and inconsistencies. After you utilize this service, your Mac should run a bit smoother. And, hopefully, Mac screen glitching will disappear.
To use the feature:
- Open the app.
- Go to the Maintenance module.
- Choose Run Maintenance Scripts.
- Click Run.
The free version of this app is available here.
Once complete, restart your Mac for good measure and see whether your MacBook screen flickering has stopped.
Implementing a combination of fixes, such as running maintenance scripts and switching it off and on again (or updating the macOS), should quickly solve this annoying problem.
4. Reset the PRAM (or NVRAM):
- Shut your Mac down (not reset, a full shut down).
- As soon as you start your Mac again, press the following keys for around 20 seconds: Option, Command, P, and R (simultaneously).
- Your Mac will restart with the PRAM (or NVRAM) reset, which should solve the problem.
If not, here are a couple more things worth trying.
It could be caused by caches or out-of-date system logs, and there are solutions for both of these.
5. Adjust Energy Saver settings
If you use MacBook Pro, MacBook screen blinking is sometimes caused by Energy Saver working improperly. If you enable «Automatic graphics switching» in Energy Saver, your Mac will alternate between 2 different graphics chips. But things often break.
Open your System Preferences > Battery.
Uncheck the box that says «Automatic graphic switching.»Note
This option is only available on MacBook Pro models that have two graphics systems.
Restart your computer and see if the MacBook screen flashing stopped.
6. Enter a Safe mode
Safe Mode disables a number of services and puts others in a low-key mode. This affects screen parameters as well. Try entering a Safe Mode to see if your screen graphics stabilized.
- Shut down your Mac completely.
- Hold down the Shift key and turn the Power on.
- Keep holding Shift until the Login Screen appears.
- This is the Safe Mode.
By now, you should see if your Mac screen glitching continues.
7. Disable True Tone (for 2018 Macs and newer)
The True Tone technology makes your screen colors look more natural. But sometimes, its color management goes off track.
- To disable True Tone, open your System Preferences.
- Click on Displays.
- Now, uncheck the True Tone box.
Has your MacBook screen blinking stopped?
Frequently Asked Questions
Why is my MacBook screen flashing?
This issue is sometimes software-related. Open your Activity Monitor and look for unknown processes going on. Also, you can use a hidden software detector in CleanMyMac X.
I’ve tried all these steps, but nothing worked.
One more idea to try is to change your screen resolution. Go to Displays in System Preferences and play around with Resolution settings.
Try switching off the default option that’s shown there.
If it’s a hardware issue, how can I fix it?
Maybe it’s the screen connector at the hinge of your MacBook that is off. In this case, you will have to take your Mac to the service. Apple has a free replacement program for this issue.
I hope your screen is acting calm and peaceful now. Thanks for reading.
Let’s figure out why the monitor screen flickers when the computer is running
The most common cause of computer monitor flickering is an incorrectly determined refresh rate. This parameter is changed manually. To go to the screen settings, call the context menu on the desktop. To do this, right-click on any empty area of the screen. In the menu that appears, select the last item — «Personalization».
Your Windows theme settings will open. In the lower left part of the window, find the link «Screen» and click on it.
Here you can change the size of the screen elements.
To access additional configuration items, click Customize Display Options.
Please note! You can also use the «Adjust Screen Resolution» link. Both of these items lead to the same menu.
This section sets the resolution — the number of horizontal and vertical dots that make up the image on the screen. To do this, select the desired value from the drop-down list. Opposite the optimal value for the connected monitor, “recommended” will be indicated in brackets. You can save these settings without closing the window by clicking the «Apply» button.
After that, click on the link «Advanced options», which is located on the right. A new window will open in which you can change the basic parameters of the video card and monitor.
The screen refresh rate is set on the Monitor tab in the window that opens. Select the maximum refresh rate available from the list. This parameter is responsible for how many times per second the image on the monitor will be updated.
If the frequency is too low or the value is not supported by the output device, the screen will flash.
It is better not to check the flag responsible for access to additional modes. If it is checked, uncheck it. The list of available frequencies will be updated, and you will be able to select the maximum of them.
Please note! It is not recommended to set a refresh rate that is not supported by the monitor itself. You can specify the recommended frequency in the instructions for the device or in its characteristics on the manufacturer’s website.
Outdated graphics card drivers
Computer monitor screen may flicker when incorrect or outdated graphics adapter drivers are installed. You can update this software on the «Adapter» tab. To do this, click the «Properties» button.
In the section that opens, go to the «Driver» tab and click «Update». Then use the built-in search wizard. If, after installation, the system notifies you to restart your computer, do so.
A reboot may be required for the software changes to take effect.
Problems with monitor drivers
In addition to the video card, an outdated program may be installed for the output device itself. The update is done in the same way. Close the graphics card properties window and return to the Monitor menu. After that, click «Properties» already in this section and select the «Driver» tab. Click on «Update».
The system prompts you to select one of two software search modes. If you select the first option (automatic search), the folders on your computer will be scanned, and if the monitor driver is not found, Windows will try to find the necessary software on the Internet. If you select the second option, the search will be performed only on the user’s computer, without access to the network. It is recommended to select the first option.
If your monitor came with a driver disc, insert it into your computer’s optical drive.
Wait until the search process is completed. It takes from a few seconds to 1-2 minutes.
Damaged cables or loose connection
Screen problems may be caused by a defective VGA, DVI, or HDMI cable that connects the monitor to the computer. To diagnose this problem, check the cord for damage. It must not be crushed or torn. Also check the network cable through which the device is connected to the outlet. Unstable contact with the electrical network causes the image to flash.
If possible, connect the computer with a different cable and check if the screen is flickering. If there are no problems when using a spare cable, they were associated with the cord. Replace it for correct operation of the device.
In addition, it is worth checking whether the cable connector is firmly inserted into the monitor and computer ports. Most VGA and DVI cables have screws that are used to screw the massive connector to special mounts on the device outputs.
The cable fixed in this way will not fall out, and the contact will not come off even if you often move the monitor.
Technical malfunctions of the monitor
Another reason why the screen may flicker when the computer is running is a breakdown of the monitor itself. The best solution in this case would be to take it to a service center. Image flickering may be caused by the burnout of one or more CCFL or LED lamps, which illuminate the matrix. Also, the built-in power supply may become unusable.
But you can also eliminate common minor malfunctions at home, using a soldering iron. The most common cause of hardware failure, due to which the image on the screen may flicker, is the failure of capacitors. A faulty capacitor is easily identified by its appearance. Normally, this part looks like a cylinder with a flat top face. If it is convex, the capacitor could lose its original properties, which is why the screen flashes.
If the capacitor breaks and electrolyte flows out of it, the part will not work normally and must be replaced.
The most common causes of such a breakdown are power surges and overheating. Because of them, the electrolyte inside the device boils, expands and breaks through the top cover.
Important! Do not repair the monitor yourself if the warranty period has not yet expired. Most devices have seals that will void the warranty if opened.
Such parts are attached to the board with two metal feet. To disconnect them, heat the junction with a soldering iron and pull it towards you. The capacitor parameters are always indicated on the case, according to which you can purchase a similar part on the radio market or in a specialized store.
Solder the purchased capacitor in place of the removed one, observing the original polarity. A contrast strip on the side of the part will help determine the «-«. It consists of broken lines and looks like road markings. Replacing capacitors at home will cost you several times cheaper than the same repair at a service center.
Therefore, if you have a soldering iron and minimal experience, it makes sense to try to produce it.
The image in the game flickers
If the screen flickers only in certain games or graphics programs, check the application settings. They are usually found in the «Video» or «Graphics» section. Set the minimum settings, turn off anti-aliasing and anisotropic filtering. Then launch the game and check if the screen is flashing. If the problem is fixed, gradually increase the settings to achieve a balance between performance and realistic graphics.
Pay special attention to the «V-Sync» parameter. Disabling it improves the performance of the game, but the image may flicker. It is recommended to enable this setting to avoid flashing horizontal bars during gameplay.
Important! When configuring some games, there is an item «Automatic configuration detection». Selecting it will set the optimal graphics settings for your system.
Video Tutorial: How to Remove Flicker from Your Monitor Screen
Share:
Fix Screen Flicker in Windows
Screen flickering in Windows 11 is usually caused by a problem with the screen driver or an incompatible application. To determine if a driver or application is causing the problem, check if the Task Manager is flickering. Then, based on this information, you will need to update, rollback or uninstall the driver, update or uninstall the application.
To learn more, select any of the following headings to display more information:
Press CTRL+ALT+DELETE to open Task Manager. If after pressing Ctrl + Alt + Delete the Task Manager is not displayed, press Ctrl + Shift + Esc to open the Task Manager.
-
If the task manager is flickering and other items on the screen are also flickering, the video driver may be causing the problem. In this case, see Troubleshooting video driver problems.
-
If the Task Manager does not flicker, but the rest of the screen flickers, an incompatible application may be causing the problem. In this case, see Update or remove an incompatible application.
Note: For help with a flickering or scrambling screen on your Surface Pro 4 screen, see this Surface Pro 4 What to do if your Surface screen is distorted, flickering, or has lines.
If you are having trouble viewing the screen, you may need to start your computer in Safe Mode and follow the steps below.
If updates have recently been installed on your device from Windows Update, roll back the video driver to a previous version. Alternatively, try updating or uninstalling your video driver to resolve a screen flickering or screen distortion issue.
Video driver rollback
-
In the search box on the taskbar, type device manager and select it from the list of results.
-
Click the arrow to expand the Video Adapters section.
-
Click the Driver tab and select Roll Back > Yes .
-
Restart the device.
Notes:
-
You must have administrator rights to rollback or uninstall a driver package through Device Manager.
-
If Rollback is not available, Windows does not have a previous version of the driver to revert to and you will not be able to complete this process.
Video driver update
-
In the search box on the taskbar, type device manager and select it from the list of results.
-
Click the arrow to expand the section Display adapters .
-
Under Video Adapters, right-click the adapter and select Update .
Note: To download the latest driver for your device, you may need to contact your computer or video adapter manufacturer.
Uninstall video driver
-
In the search box on the taskbar, type device manager and select it from the list of results.
-
Click the arrow to expand the Video Adapters section.
-
Under Video Adapters, right-click the adapter and select Properties.
-
Check the box Delete the driver software for this device and click the OK button .
-
Restart the device and Windows will try to install the driver again.
Note: If the Delete the driver software for this check box is not displayed, make sure you start your computer in safe mode.
Application update
-
If the app was purchased from the Microsoft Store, check for updates to the app from the Microsoft Store.
-
If the app was not obtained from the Microsoft Store, check the developer site for updates.
Removing an application
Some applications may not be compatible with Windows 11 and may cause screen flickering or scrambling. Try uninstalling the app by following these steps.
-
Select Start > Settings > Applications > Applications & . After a few minutes, installed applications will be displayed.
-
Scroll through the list and find the application you want to uninstall.
-
Select it, then click Delete > Delete .
If you are prompted to confirm your choice, select Yes .
After uninstalling the first application, restart the device and check if the screen is flickering or the image on the screen is distorted. If the problem persists, uninstall all applications one by one until the problem is fixed.
Reinstalling application
-
Select Microsoft Store Start Menu.
-
Select Library .
-
Select the application you want to reinstall, and then select Install .
If the app was not downloaded from the Microsoft Store, reinstall it from the developer’s site.
Screen flickering in Windows 10 is usually caused by incorrect video drivers or incompatible applications. To determine if a driver or application is causing the problem, check if the Task Manager is flickering. Then, based on this information, you will need to update, rollback or uninstall the driver, update or uninstall the application.
To learn more, select any of the following headings to display more information:
Press CTRL+ALT+DELETE to open Task Manager. If after pressing Ctrl + Alt + Delete the Task Manager is not displayed, press Ctrl + Shift + Esc to open the Task Manager.
-
If the task manager is flickering and other items on the screen are also flickering, the video driver may be causing the problem.
In this case, see Troubleshooting video driver problems.
-
If the Task Manager does not flicker, but the rest of the screen flickers, an incompatible application may be causing the problem. In this case, see Update or remove an incompatible application.
Note: For help with a flickering or scrambling screen on your Surface Pro 4 screen, see this Surface Pro 4 What to do if your Surface screen is distorted, flickering, or has lines.
If you are having trouble viewing the screen, you may need to start your computer in Safe Mode and follow the steps below.
If updates have recently been installed on your device from Windows Update, roll back the video driver to a previous version. Alternatively, try updating or uninstalling your video driver to resolve a screen flickering or screen distortion issue.
Video driver rollback
-
In the search box on the taskbar, type device manager , and then select it from the list of results.
-
Click the arrow to expand the Video Adapters section.
-
Under Video Adapters, right-click the adapter and select Properties.
-
Click the Driver tab and select Roll Back > Yes .
-
Restart the device.
Notes:
-
You must have administrator rights to rollback or uninstall a driver package through Device Manager.
-
If Rollback is not available, Windows does not have a previous version of the driver to revert to and you will not be able to complete this process.
Video driver update
In the search box on the taskbar, type device manager , and then select it from the list of results.
-
-
Click the arrow to expand the section Display adapters .
-
Under Video Adapters, right-click the adapter and select Update .
Note: To download the latest driver for your device, you may need to contact your computer or video adapter manufacturer.
Uninstall video driver
In the search box on the taskbar, type device manager , and then select it from the list of results.
-
-
Click the arrow to expand the Video Adapters section.
-
Under Video Adapters, right-click the adapter and select Properties.
-
Check the box Delete the driver software for this device and click the OK button .
-
If the app was purchased from the Microsoft Store, check for updates to the app from the Microsoft Store.
-
If the app was not obtained from the Microsoft Store, check the developer site for updates.
-
Click the Start button and then select Settings > Applications > Applications and Features . After a few minutes, installed applications will be displayed.
-
Scroll through the list and find the application you want to uninstall.
-
Select it, then click Remove > Remove . If you are prompted to confirm your choice, select Yes .
-
On the taskbar, select the Microsoft Store icon .
-
Select Learn more > My Library .
-
Select the application you want to reinstall, and then select Install .
- Reasons for phone screen flickering
- Screen damage
- Battery problems
- Software failure
- The problem of loops or other elements
- The problem with the video controller
- Secret codes
- Screen damage.
- Battery performance problems.
- Software failure.
- Breakage of cables or other elements.
- Video controller problem.
- Screen update.
- Window update.
- Hardware updates.
- Click the «Settings» of the phone.
- At the bottom we find the «Functions for Developers» tab.
- Select «Drawing».
- Click «Hardware Accelerated Rendering».
- In the window that opens, disable all the above functions.
- Click «Start» , right-click «Computer» , select «Manage» , «Device Manager» , double click on «Display Adapters» , right click on your graphics card and select «Update Driver» .
- Open the CPU cover by unscrewing the two screws.
- Then press lightly on both sides of the holders of the RAM board, and remove it. If your motherboard has 2 or 4 boards, install the bracket in a different slot.
- Incorrect screen frequency settings in the system;
- Software failure;
- Video card drivers that are incompatible with the current version of the operating system are installed;
- There is a problem with the display device (video card). Most often, the malfunction is associated with the burnout of the elements of the video card or its overheating;
- Faulty operation of the screen matrix backlight;
- Failures in the contact of the laptop matrix with computer elements, which is most often caused by damage to the cable.
- Go to the display settings, to do this, right-click on an empty spot on the desktop and select «Screen Settings»;
- Next, the settings window will open, in which you need to click «Advanced display settings»;
- A new window will open, in which, in the list of related options, select «Graphics adapter properties»;
- Next, the settings window will open, in which you need to go to the «Monitor» tab and adjust the screen refresh rate setting.
The optimal frequency may vary on different laptop models, so we recommend that you try to install all available frequency options in turn, each time checking whether the problem with screen flickering has been resolved.
- Clean the laptop from accumulated dust and replace the thermal paste on the graphics card chip;
- Place the computer on a cooling pad and avoid blocking the ventilation holes on it, for example, when placing the computer on a soft surface.
- Incorrect screen frequency settings in the system;
- Software failure;
- Video card drivers that are incompatible with the current version of the operating system are installed;
- There is a problem with the display device (video card).
Most often, the malfunction is associated with the burnout of the elements of the video card or its overheating;
- Faulty operation of the screen matrix backlight;
- Failures in the contact of the laptop matrix with computer elements, which is most often caused by damage to the cable.
- Go to the display settings, to do this, right-click on an empty spot on the desktop and select «Screen Settings»;
- Next, the settings window will open, in which you need to click «Advanced display settings»;
- A new window will open, in which, in the list of related options, select «Graphics adapter properties»;
- Next, the settings window will open, in which you need to go to the «Monitor» tab and adjust the screen refresh rate setting. The optimal frequency may vary on different laptop models, so we recommend that you try to install all available frequency options in turn, each time checking whether the problem with screen flickering has been resolved.
- Clean the laptop from accumulated dust and replace the thermal paste on the graphics card chip;
- Place the computer on a cooling pad and avoid blocking the ventilation holes on it, for example, when placing the computer on a soft surface.
- There is a problem with the graphics card that sends the image to the screen. The video card may fail due to overheating or for other reasons;
- screen matrix cable frayed as a result of wear, due to which the display power becomes unstable;
- Screen backlight issues causing the inverter to not work properly;
- An error in the display frequency settings or a broken video adapter driver.
- purchase a special laptop stand that prevents the ventilation holes from being blocked;
- avoid placing the device on uneven and soft surfaces;
- clean the cooling system of a portable computer from dust and dirt (on your own or in a service center) or improve it.
- LAPTOP
NOT
INCLUDED
- notebook
not
turns on
, indication
missing
, sounds
downloads
No…
- Possible
cause
malfunctions
maybe
hide
in the battery
batteries
.Try
get
from
laptop
battery
and turn on
him off
networks
. If a
notebook
turned on
and okay
works
, battery
laptop
came
into disrepair
, it’s time
buy
new
. If a
same
You
sure
that battery
must
work
, try
carefully
put
included
notebook
on the
side (carefully
with connector
food
!), «on the
live
«stick
battery
.Check
level
charging
. If a
Your laptop
for a long time
lay
out of employment
, such
procedure
maybe
reestablish
battery
and through
couple
hours
battery
recharge
. Then
«practice
«it (discharging-charging
) several
once until
he
not
restore
their
properties
. - Notebook
turns on
, there is
indication
(control
light bulbs
), but
no picture
and sounds
downloads
- If
you had experience
independent
installations
/delete
modules
memory
laptop
: disable
notebook
from
networks
, get
battery
. Extract
rulers
memory
and neat
clean up
contacts
from both
parties
rulers
stationery
eraser
. try
not
take
hands
per
contacts
and microcircuits
memory
. Install
memory
into a laptop
. When oxidized
contacts
such
procedure
maybe
help
. If a
same
you have several
modules
, available
also
exit
from
building
one
from
slats
, try
change
them
sequence
in slots
and/or insert
on
one
.Respectively
, if
out of order
one
from
slats
— have to
buy
new
on the
replacement
. If a
same
malfunction
lies
in mechanical
damage
most
slots
(one
from
slots
) — notebook
necessary
attributed
to the service
center
. - If
You
sure
that when turned on
laptop
activity
hard
disk
(as when downloading
operating room
systems
) really
no, on my own
eliminate
malfunction
laptop
You
not
you can
. Deliver
notebook
to the repair
workshop
. - Notebook
turns on
, there is
indication
, are heard
sounds
downloads
, but
no picture
on the
screen
- If
on the
face
all signs
work
laptop
(indication
, characteristic
sounds
work
hard
disk
, melody
downloads
Windows), however
, Images
no, possible
defects
: plume
matrices
departed
/damaged
; matrix
laptop
. take a closer look
to the monitor
take a closer look
: maybe
after all
there is
image
, but
its very
poorly
it is seen
(it’s like
not
highlighted
)?
If a
Yes
, you got
from
standing
lamp
illumination
matrices
or microchip
corresponding to
per
filing
voltage
on the
lamp
(inverter
).Try
to plug
to
laptop
external
monitor
: this is
will give
To you
possibility
work
on the
laptop
some
time
. - If
same
to plug
notebook
to the outside
monitor
not
succeed
, malfunction
lies
in the video chip
. For
eliminate
malfunctions
in any
case
necessary
attributed
notebook
in
service
center
. - Notebook
not
turns on
, flashing
bulb
- Notebook
turned off
and stopped
turn on
- Notebook
turns on
, but
image
on the
screen
too much
dark
- Notebook
flooded
liquid
- PROBLEMS
WITH CONNECTORS
FOOD
LAPTOP
- Plug
block
nutrition
strongly
warming up
(plug
external
block
nutrition
, docking
with connector
nutrition
laptop
) - Loose
connector
nutrition
laptop
- PROBLEMS
WITH KEYBOARD
/ BUTTONS
INCLUSIONS
/ CONTROLS
LAPTOP
- Does not work
keyboard
- Not
work
buttons
management
resources
laptop
- LAPTOP
«HANGING
«, STRONGLY
HEATING
- Notebook
«hangs
«, strongly
warming up
— cooler
(fan
cooling
) strongly
buzzing
/ works
constantly
- Notebook
strongly
slows down
, but
not
warming up
and fan
works
fine
- Notebook
infected
viruses
. Check
notebook
on the
Availability
viruses
. Here
there is
problem
: on the
infected
system
useless
put
antivirus
. Hard
disk
laptop
necessary
check
on the
third party
car
and do
it is possible
sometimes
only
in service
center
. Or
use
item 3
(below
) - Quantity
active
processes
in the operating room
system
with absence
launched
applications
must
to be
near
30 but
not
more
40.If
processes
more
50 is easy
maybe
to be
cause
slow
work
laptop
. If a
You
advanced
user
, try
put away
superfluous
processes
from
startup
. - If
operating room
system
works
more
of the year
, easier
save
all data
on the
external
storage device
(flash drive
, USB disk
, blank
) and reinstall
OS
from recovery disks
going
usually
in delivery
laptop
. Straightaway
after
formatting
and installations
OS
install
and customize
anti-virus
program
, only
after
copy
Your
data
back
on the
notebook
. Antivirus
automatically
will block
infected
virus
files
. If a
notebook
serviceable
, this procedure
definitely
will help
. - Helpful
know
, that when activated
mode
conservation
charging
battery
notebook
with absence
connections
to the network
automatically
lowers
frequency
processor
, which causes
more
slow
work
laptop
on the
accumulators
. - Slow
Work
laptop
also
maybe
to be
conditioned
wrong
setting
CMOS
laptop
.Try
reset
settings
CMOS
laptop
on the
Default
(on
default
). - stripes (vertical or horizontal, white and multi-colored) all over the monitor, in the middle, or just left/right;
- in different colors.
- clean the cooling system from accumulated dust and replace the thermal paste;
- buy a special laptop stand.
In the search box on the taskbar, enter device manager, and then select it from the list of results.
Uninstalling an application
Some applications may not be compatible with Windows 10 and may cause screen flickering or screen distortion. Try uninstalling the app by following these steps.
After uninstalling the first application, restart the device and check if the screen is flickering or the image on the screen is distorted. If the problem persists, uninstall all applications one by one until the problem is fixed.
Reinstalling the application
If the app was not downloaded from the Microsoft Store, reinstall it from the developer’s site.
The screen flickers (flickers) on your Android phone
Now let’s look at the reasons why the screen flickers (flickers) on your Android phone during work or play. The way to solve the problem directly depends on its cause.
This article applies to all brands that produce phones on Android 11/10/9/8: Samsung, HTC, Lenovo, LG, Sony, ZTE, Huawei, Meizu, Fly, Alcatel, Xiaomi, Nokia and others. We are not responsible for your actions.
Attention! You can ask your question to a specialist at the end of the article.
Contents
The reasons why the phone screen flickers
Despite the significant development of mobile technology, certain problems still appear in its work, for example, the screen flickers or jumps. Let’s look at the main causes of the problem:
Below in the article we will consider in detail each cause and ways to remove flicker.
Screen damage
If the screen flickers after the phone has come into contact with water or has been severely dropped, it may be damaged. With this problem, you should contact a qualified specialist at the service center. It is difficult to replace the screen on your own, because. you need to have special equipment.
Need help?
Don’t know how to solve a problem with your gadget and need expert advice? Alexey, a smartphone and tablet repairman at the service center, answers questions. Write to me »
There are situations when a problem appeared after a screen replacement. In this case, you also need to contact the service center for device diagnostics and troubleshooting.
Read Stripes or spots appear on the Android phone screen
Problems with the battery
Quite often, users discard all causes except mechanical damage to the gadget. In reality, flickering or stripes may appear due to a weak battery. The problem is related to the loss of power, especially when using the battery for several years.
This option can be easily checked. It is enough to connect the gadget to the charger and look at the screen while charging. If all the problems with the image have disappeared, then the reason is related to the battery power.
The solution is to use another battery. Insert a new battery into the gadget and check if the screen flickers. It is advisable to purchase a battery in specialized stores and check its originality.
Often, Chinese fakes break down a month after purchase. In some situations, a fake can lead to more serious damage to the gadget.
Read How to check the number of charge cycles of Android battery
Software failure
First, users are advised to check what brightness level is set on the device. If you use the automatic brightness mode, then the gadget will constantly adjust it.
The screen will dim every 2 to 4 seconds. If you constantly decrease or increase the brightness, then set the required parameter in the settings.
Enlarge
If the screen functions normally in quiet mode, and when you start pressing it, the device lights up in different colors, check some options. It is likely that the functions that show: 9 have been activated0003
Solving the problem:
Enlarge Enlarge
The phone may also flicker due to hidden software failures, OS contamination and virus activity. The user is advised to clean the phone, roll back the settings to factory settings and install antivirus software from Google Play.
If the above steps did not solve the problem, then reflash the gadget. If you have no experience with working with phone firmware, contact the service center.
The problem of loops or other elements
It is quite common that the screen flickers due to damage to the loop. Also, this reason should be considered with a strong overheating of the gadget.
If you have no experience in repairing phones or modern equipment, then contact the master. Touchscreen phones use fragile parts that can be damaged by unprofessional repairs. The longer you use a broken gadget, the more expensive the repair will become.
Problem with the video controller
Display of the image on the screen of the gadget is provided by the graphics subsystem. It consists of a processor, memory and «strapping». If any element on the chip breaks, then stripes, flicker, interference and other problems appear on the screen.
In this situation, it is also not recommended to carry out repairs yourself. Only professionals are able to repair the screen and not damage the video controller.
Secret codes
There are codes for the Android OS that allow you to test the device. They can be used to tune systems and identify problems, especially when the screen flickers during a call.
Enlarge
Android engineering menu — how to enter, functions and settings
In the screenshot above you can see the most useful codes.
AuthorMaster Nikolay
Engineer for the repair of mobile and computer equipment in a specialized service center, Moscow. Continuous experience since 2010.
Have questions? Ask in the comments to the article. I try to answer your email as soon as possible. Each case is individual and therefore it is very important that you describe your problem as much as possible and what model of device you have.
How to solve the computer monitor flickering problem
This publication will explain in detail what to do if the monitor button blinks and the screen flickers.
A monitor is a device used to display a user interface on a computer. If your monitor is causing flickering, flickering, or other problems, it can be distracting and make it difficult to use your computer. There are many issues that can cause your monitor to not work properly, and as such, there are several ways to troubleshoot monitor issues.
What should I do if my computer monitor flickers?
So, for sure, you will ask “Why is the monitor blinking?”, There are a lot of reasons for this problem, and the solution involves various methods, which you will learn about below.
Method one: Restart the computer and monitor
Turn off the computer and monitor, and unplug them from the power supply. Then turn the monitor back on and start the computer. A simple restart of electronic devices sometimes solves the problem of monitor screen flickering.
Method 2: Check the monitor cable connections
Make sure the power cable is securely plugged into the back of the monitor and into the power outlet. The monitor’s VGA interface cable must also be securely plugged into the processor’s video card connector.
Figure 1. Check the connection of the VGA cable to the monitor.
If this does not solve your problem, try the following methods.
Method 3: Replace the monitor cable
Replace the power cable and monitor VGA cable with different cables. If there are kinks, broken insulation, or damage to the cable, this can cause the monitor to display red, purple, and green colors, or flicker and flicker intermittently. Also, try plugging the monitor’s power cord into a different outlet.
Figure 2. Plug the monitor’s power cord into a different outlet.
Method 4: Verify that the monitor is working
Disconnect the monitor and connect it to another computer. If the monitor also flickers, this means that it has become unusable, or the power cable needs to be replaced. If there is no blinking, then the problem is with your computer.
Method 5: Remove problem software
Remove recently installed software. If the problem occurs after you install a new program, uninstall it from your computer. You can also read our article , which describes 3 methods for removing software from a computer.
Figure 3. Removing the software from the computer.
Method 6: Update video card drivers
If the installed video card drivers on your computer are out of date, you may experience problems with your monitor.
Figure 4. Click Update Drivers…
You can also find the driver to install on the graphics card manufacturer’s website. Below we will provide official sources for referencing video card drivers from various manufacturers:0757
What should I do if the monitor flickers and does not turn on?
Method 7: Removing and reinstalling the RAM board
This method helped in many cases, which were also related to the absence of an image on the monitor. The detailed steps are as follows:
Figure 5. Installed RAM cards on the motherboard and what they look like.
Figure 6 Remove the RAM stick and install it in another slot.
Method 8. Using another VGA slot on the computer motherboard
So, if none of the above methods helped you, then you can use this method. In the picture below you can see the presence of 2 connectors for connecting a VGA cable.
Try using them to connect a monitor, the monitor and the indicator button may stop flashing after that.
Figure 6. Use the first or second slot to connect a monitor.
Video: The computer turns on, but there is no image on the monitor and the monitor light blinks
Video: The computer screen blinks and goes out all the time
Why is the laptop screen flashing black
When interacting with a computer, the user receives most of the information through the monitor, and in the case of a laptop, through the screen. Between themselves, the screen matrices differ quite significantly: in resolution, picture refresh rate, color reproduction quality and other parameters. But they all have one task — to display information to the user so that he can comfortably perceive it. A serious problem that can prevent the consumption of information is screen flickering. It is practically impossible to work on a laptop with a flickering display or distorted colors on it. In this article, we will look at what to do if the screen flickers, and how the problem can be fixed without contacting a service center.
Why is the laptop screen flickering
The main feature of laptops is their portability. You can always take your computer with you, which increases the risk of damaging it at the hardware level. But problems with a flickering screen can also occur for software reasons.
Most often, the screen flickers due to the following problems:
Only some of the problems described above can be corrected at home. If, for example, the video card is faulty, you will have to contact the service center to repair or replace it.
What to do if the laptop screen flickers
Before you start troubleshooting and troubleshooting, you need to try to turn off the laptop. To do this, unplug your computer and remove the battery from the computer. Wait 3-4 minutes and reconnect the battery, then start the laptop. If this simple procedure did not help get rid of the problem, move on to other ways to fix the situation, described below.
Solving software problems
The easiest way is to solve possible software problems on your own, so it is recommended to start checking the settings and drivers to find the reason why the laptop screen is flickering. First, make sure that the screen refresh rate settings are set correctly in the operating system. You can check this as follows:
Please note: Also, sometimes a problem with screen flickering may occur due to an incorrectly selected screen resolution. Make sure that the settings are set to the optimal resolution for the matrix used in the laptop.
If the problem cannot be solved by changing the frequency and resolution of the screen, it is recommended to make sure that the video card drivers installed on the computer are up to date. Go to the official website of the developers of the graphics processor used on the laptop and download the latest drivers for the operating system installed on the computer. After that, go to the «Device Manager» and remove the current drivers for the video card, and then install the new ones and restart the computer.
Solving hardware problems
If you can’t get rid of laptop screen flickering programmatically, the problem is most likely related to the failure or malfunction of one or more components responsible for displaying images on the laptop screen.
The first step is to make sure that the video card installed in the laptop does not overheat during operation. To do this, you can use various programs that allow you to see the heating of the graphics accelerator during operation.
Please note: A clear symptom that the screen is flickering due to overheating of the video card is the absence of a problem when working “cold”, that is, immediately after turning on the computer.
If the screen is flickering due to overheating of the laptop graphics adapter, it is recommended to do the following:
Another common hardware reason why the screen flickers may be a bend in the cable responsible for displaying the image. You can make sure that the wire is not pinched if you disassemble the computer and visually assess the cable for damage and inspect its location.
Much more complex problems that can lead to laptop screen flickering are: problems with the matrix and burnout of elements of the motherboard or video card. If one of these problems occurs, you can get rid of the malfunction only by replacing components or with the help of specialists.
Please note: It is quite easy to verify that the ekrtan is flickering due to a faulty matrix. You need to connect your laptop to an external monitor or TV. If the image on it does not flicker, most likely the problem is in the matrix or in the cable.
When interacting with a computer, the user receives most of the information through the monitor, and in the case of a laptop — through the screen. Between themselves, the screen matrices differ quite significantly: in resolution, picture refresh rate, color reproduction quality and other parameters. But they all have one task — to display information to the user so that he can comfortably perceive it. A serious problem that can prevent the consumption of information is screen flickering. It is practically impossible to work on a laptop with a flickering display or distorted colors on it. In this article, we will look at what to do if the screen flickers, and how the problem can be fixed without contacting a service center.
Why is the laptop screen flickering
The main feature of laptops is their portability. You can always take your computer with you, which increases the risk of damaging it at the hardware level. But problems with a flickering screen can also occur for software reasons.
Most often, the screen flickers due to the following problems:
Only some of the problems described above can be corrected at home. If, for example, the video card is faulty, you will have to contact the service center to repair or replace it.
What to do if the laptop screen flickers
Before you start troubleshooting and troubleshooting, you need to try to turn off the laptop. To do this, unplug your computer and remove the battery from the computer. Wait 3-4 minutes and reconnect the battery, then start the laptop. If this simple procedure did not help get rid of the problem, move on to other ways to fix the situation, described below.
Solving software problems
The easiest way is to solve possible software problems on your own, so it is recommended to start checking the settings and drivers to find the reason why the laptop screen is flickering. First, make sure that the screen refresh rate settings are set correctly in the operating system. You can check this as follows:
Please note: Also, sometimes a problem with screen flickering may occur due to an incorrectly selected screen resolution. Make sure that the settings are set to the optimal resolution for the matrix used in the laptop.
If the problem cannot be solved by changing the frequency and resolution of the screen, it is recommended to make sure that the video card drivers installed on the computer are up to date. Go to the official website of the developers of the graphics processor used on the laptop and download the latest drivers for the operating system installed on the computer. After that, go to the «Device Manager» and remove the current drivers for the video card, and then install the new ones and restart the computer.
Solving hardware problems
If you can’t get rid of laptop screen flickering programmatically, the problem is most likely related to the failure or malfunction of one or more components responsible for displaying images on the laptop screen.
The first step is to make sure that the video card installed in the laptop does not overheat during operation. To do this, you can use various programs that allow you to see the heating of the graphics accelerator during operation.
Please note: A clear symptom that the screen is flickering due to overheating of the video card is the absence of a problem when working “cold”, that is, immediately after turning on the computer.
If the screen is flickering due to overheating of the laptop graphics adapter, it is recommended to do the following:
Another common hardware reason why the screen flickers may be a bend in the cable responsible for displaying the image. You can make sure that the wire is not pinched if you disassemble the computer and visually assess the cable for damage and inspect its location.
Much more complex problems that can lead to laptop screen flickering are: problems with the matrix and burnout of elements of the motherboard or video card. If one of these problems occurs, you can get rid of the malfunction only by replacing components or with the help of specialists.
Please note: It is quite easy to verify that the ekrtan is flickering due to a faulty sensor. You need to connect your laptop to an external monitor or TV. If the image on it does not flicker, most likely the problem is in the matrix or in the cable.
The appearance of such a problem, when the screen flickers on a laptop, often requires the owner or user of the equipment to contact the service.
However, in some cases, you can solve the problem on your own. The main thing in this case is to find out the reason why the LCD flickering appeared.
Because if you do not return the screen to working capacity, your eyes will quickly get tired, the image will blur, and it will be impossible to work with a laptop for more than 20-30 minutes in a row.
Possible causes of problems
The main cause of screen problems is that this part of a laptop computer is often not as reliable and of high quality as desktop PC monitors.
It is influenced by various factors, among which:
Fig. 1. Laptop screen flickering.
However, regardless of the cause that caused the problem, you can try to fix it in a relatively simple way.
Turn off the notebook first, then remove the battery. After that, the battery is installed back, and the laptop turns on.
Sometimes this helps to get rid of flickering, in other cases they switch to other options.
Error in settings
If the problem with the image on the laptop screen is due to an incorrect refresh rate, you can solve it in the following way:
1. Right-click on a free area of the Desktop;
2. Select the item to change the screen resolution;
3. In the window that opens, try first to change the resolution (by choosing the optimal one, you can find it in the documentation for the laptop or on the network, by the model name), and then, if this does not help, go to the additional parameters;
Fig. 2. Change the resolution and refresh rate of the display.
4. In the new form, go to the monitor tab;
5. Change the refresh rate.
Tip: It’s worth trying a few different frequencies. It is possible that on one of them the screen will work without flickering.
Another solution to the problem with incorrect settings is to reinstall the software.
This can be done through Device Manager by updating the display drivers.
Or boot the operating system from a disk (LiveCD or LiveDVD) — if in this case there is no flicker, then the problem was in the software, not in the hardware.
Continued blinking indicates that the problem is not related to the software.
Problems with the video card
Quite often, users who try to «overclock» the video card by increasing its frequency and power often encounter monitor flicker.
This is usually done by gamers who want to run resource-intensive games.
However, the result may be damage to the GPU due to overheating.
In this case, the display not only flickers, but sometimes does not even turn on.
However, overheating can cause a video card to fail not only due to overclocking, but also due to a faulty fan.
Fig. 3. A video card burned out from overheating.
Solve the problem of overheating of the GPU in the following way:
If these methods don’t work either, the problem is most likely not with the graphics card.
Or it requires more serious actions to eliminate — replacement of components, contacting the service for repair.
Solving hardware problems
A problem with the screen matrix is as common a cause of flicker as a damaged video card and faulty drivers.
You can make sure that it is the display that needs repair by trying to connect the laptop to a computer monitor or even to an LCD TV.
Fig. 4. Connecting a monitor to a laptop.
If the connection failed (due to the lack of a cable or an HDMI input on the laptop’s video card), you will have to contact the service.
The same should be done in cases where not only flickering, but also stripes appear on the screen. This means that either the matrix or the cable has failed.
You can’t solve the problem on your own. The only way is to install new parts.
It is possible that the video card will also have to be replaced — both failed and overclocked, if it led to problems with the image.
However, experts can best diagnose a breakdown and decide on a replacement — just like installing a new part.
Summing up
Notebook display flickering is a problem that can be both relatively simple and serious, requiring outside intervention.
But her decision will lead to the return of the ability to fully use the computer without tiring eyesight.
And the cost of repairs, in any case, will be less than the amount spent on the purchase of a new laptop.
Flashing laptop image — solution
Effective solutions for some laptop models.
Laptop black screen flashing. What to do if the laptop screen is flashing
When interacting with a computer, the user receives most of the information through the monitor, and in the case of a laptop, through the screen. Between themselves, the screen matrices differ quite significantly: in resolution, picture refresh rate, color reproduction quality and other parameters. But they all have one task — to display information to the user so that he can comfortably perceive it. A serious problem that can prevent the consumption of information is screen flickering. It is practically impossible to work on a laptop with a flickering display or distorted colors on it. In this article, we will look at what to do if the screen flickers, and how the problem can be fixed without contacting a service center.
Why is the laptop screen flickering
The main feature of laptops is their portability. You can always take your computer with you, which increases the risk of damaging it at the hardware level. But problems with a flickering screen can also occur for software reasons.
Screen flickering is most common due to the following problems:
Only a few of the problems described above can be fixed at home. If, for example, the video card is faulty, you will have to contact the service center to repair or replace it.
What to do if the laptop screen flickers
Before you start troubleshooting and troubleshooting, you need to try to turn off the laptop. To do this, unplug your computer and remove the battery from the computer. Wait 3-4 minutes and reconnect the battery, then start the laptop. If this simple procedure did not help get rid of the problem, move on to other ways to fix the situation, described below.
Solving software problems
The easiest way is to solve possible software problems on your own, so it is recommended to start checking the settings and drivers to find the reason why the laptop screen is flickering. First, make sure that the screen refresh rate settings are set correctly in the operating system. You can check this as follows:
Please note: Also, sometimes a problem with screen flickering may occur due to an incorrectly selected screen resolution. Make sure that the settings are set to the optimal resolution for the matrix used in the laptop.
If the problem cannot be solved by changing the frequency and resolution of the screen, it is recommended to make sure that the video card drivers installed on the computer are up to date. Go to the official website of the graphics processor used on the laptop and download the latest drivers for the operating system installed on the computer. After that, go to the «Device Manager» and remove the current drivers for the video card, and then install the new ones and restart the computer.
Solving hardware problems
If you can’t get rid of laptop screen flickering programmatically, the problem is most likely related to the failure or malfunction of one or more components responsible for displaying images on the laptop screen.
The first step is to make sure that the video card installed in the laptop does not overheat during operation. To do this, you can use various programs that allow you to see the heating of the graphics accelerator during operation.
Please note: A clear symptom that the screen is flickering due to overheating of the video card is the absence of a problem when working “cold”, that is, immediately after turning on the computer.
Another common hardware reason why the screen flickers may be a bend in the cable responsible for displaying the image. You can make sure that the wire is not pinched if you disassemble the computer and visually assess the cable for damage and inspect its location.
How to determine
«breakdown
» laptop
, reveal
reason
malfunctions
; Maybe
whether
fix
himself
or
necessary
repair
notebook
in service
center
; or WHAT TO DO
, IF
:
If
battery
here
«neither
what’s up» and a laptop
yet
not
turns on
, then
deliver
him to the repair
workshop
.
Notebook
not
turns on
at all
, none
«signs
life
» not
submits
, indicator
on the
ploque
nutrition
often
blinking
— System
management
food
laptop
has undergone
a short
closure
. Disable
notebook
from
networks
and deliver
to the repair
workshop
.
When trying
connections
any
external
devices
or
equipment
, notebook
turned off
and stopped
turn on
— came
into disrepair
southern
bridge
. Unfortunately
, this is one
from
most
serious
breakdowns
maternal
fees
. Most
cases
our service
center
maybe
help
with such
problem
.
On
laptop
broken
inverter
(chip
corresponding to
per
backlight
matrices
) or itself
lamp
illumination
. less often
happens
partially
come
into disrepair
video chip
, from which
stop
go
signals
on the
inverter
. Not
worry
, this is one
from
most
frequent
breakdowns
laptops
— liquidated
in short
terms
and safe
for laptop
.
Try
to plug
to the laptop
external
monitor
: this will give
you the opportunity
work
on the
laptop
some
time
.
Required
how can
quicker
switch off
notebook
, get
from
him
battery
. How can
quicker
take
notebook
in repair
. Not
try
dry
notebook
or include
— You
do
only
worse
!
Rather
Total
, bad
contact
connector
nutrition
laptop
in maternal
board
. It’s necessary
urgently
eliminate
: maybe
arise
closure
in connector
nutrition
, which will output
from
building
managers
microchips
.
Required
urgently
stop
work
and take
notebook
to the service
center
. Attempt
«one more time
» turn on
notebook
maybe
turn around
his loss
.
Buttons
keyboards
get stuck
, not
work
, when you press
displayed
another
symbol
/ several
symbols
and etc
.
1. Your laptop
has undergone
flooding
liquid
. Not
necessarily
recently
— such
symptoms
may
to begin
manifest
later
prolonged
time
.
If
flooded
recently
— hurry up
attributed
notebook
to the service
center
for repair
keyboards
laptop
. With good
specializations
and promptness
her
can
be on time
save
.
If
keyboard
flooded
for a long time
— can
no longer
hurry
, great
probability
what to recover
her
no longer
succeed
and you will have to
search
her
replacement
.
2. Keyboard
Your his
laptop
polluted
. In that
case
You need
attributed
Notebook
in sc
on the
purge
Not
work
buttons
management
fn
+ F1…..F12
, as well as
other
buttons
management
resources
laptop
(brightness
, contrast
, show
charge
battery
etc
.)
1. More often
Total
it happens
with laptops
«SONY» if
not
installed
driver
keyboards
. Just
reinstall
drivers
keyboards
, corresponding
per
functional
keys
— and they will start
work
.
2. If
same
You
sure
that all the necessary
drivers
installed
, carry
notebook
in sc
on the
diagnostics
.
To
turn on
notebook
, necessary
strongly
crush
on the
button
inclusion
. Button
launch
laptop
located
on the
microchip
(You
press
on the
decorative
key
inclusion
, which
, in your
turn
, clicks
on the
her) came
into disrepair
. Better
change
her
not
postponing
: regular
«indentation
» keys
inclusion
laptop
maybe
lead
to damage
microchips
.
Notebook
works
a short
time
, then
starts
«to brake
» / hangs
/turns off
Repeated
inclusion
or
impossible
, or
leads
to such
same
result
even faster
. laptop
required
cleaning
systems
cooling
. Recommended
not
delay
visit
to the service
center
, because
. overheat
maybe
negatively
affect
not
only
on the
himself
processor
, but
and on
surrounding
his chips
, which
deprived
systems
cooling
. Not
recommend
produce
purge
on one’s own
, because
. Problems
expect
everywhere
: different
length
screws
corps
laptop
, possibility
static
defeat
laptop
etc
.
Notebook
required
cleaning
systems
cooling
. Recommended
not
delay
visit
to the service
center
, because
. overheat
maybe
negatively
affect
not
only
on the
himself
processor
, but
and on
surrounding
his chips
, which
deprived
systems
cooling
. Not
recommend
produce
purge
on one’s own
, because
. Problems
expect
everywhere
: different
length
screws
corps
laptop
, possibility
static
defeat
laptop
etc
.
Can
to be
several
reasons
:
See also
:
Basic
kinds
works
by
repair
laptop
in progress
specialists
SC
«technical»:
Repair
and replacement
matrices
laptop
.
Recovery
data
from hard
disk
laptop
.
Replacement
keyboards
laptop
(including
. individual
keys
and touchpad
)
.
Repair
maternal
boards
laptops
.
Repair
graphics cards
laptops
.
Repair
southern
and northern
bridge
laptop
.
Repair
block
nutrition
laptop
.
Repair
drives
Notebook CD/DVD
.
Flashing
and withdrawal
password
with BIOS
.
Repair
laptops
with replacement
case
details
(including
. replacement
loops
mounts
, covers
)
.
Replacement
lamps
illumination
laptop
.
Repair
inverter
laptop
.
Setting
ON
, installation
drivers
. Installation
programs
for guard
from
viruses
.
Cleaning
and prevention
laptop
.
Modernization
laptop
.
Service
center
«MTechnic
«carries out
prevention
, diagnostics
,
replacement
accessories
and
repair
laptops
marks
: Acer, Asus, AUO
, Fujitsu, HP (Hewlett-Packard), Toshiba, Samsung, Philips, LG, Sharp, Torisan
, Sanyo
Sony
and others
manufacturers
.
Attention
: specialists
companies
«MTechnic
«carry out
installation
only
licensed
software
ensure
(SOFT disks
go over
into the property
client
)!
Territory
coverage
: repair
laptops
in Moscow
,
Repair
laptops
in Zelenograd
and Repair
laptops
in Moscow
areas
(MO
).
Additional
options
: free
courier
service
, legal
escort
, guarantee
.
Special
suggestions
: information
published
on the
page
site
, as well as
In chapter
» «.
Method
calculation
: cash
and cashless
(including
. WebMoney
and Yandex Money
).
Requisites
: contained
In chapter
» «>>
Laptops have LCD displays that are sensitive to many things.
LCDs are flawed and sometimes produce screen flicker, lines or dots.
These screens are sensitive to magnetic fields or electronic components near the computer.
The display may also flicker due to software problems such as video adapter, drivers, or hardware problems due to inverter failure.
What can be done? Turn off your computer. Disconnect all external devices. Turn over the computer. Remove the battery and reinsert. Turn on your laptop.
Reset the resolution and refresh rate by right-clicking on the desktop and selecting Screen Resolution.
The «Change the look of your display» dialog box appears. From the «Resolution» drop-down list, select the recommended resolution of your display.
Click the «Advanced Options» link in the lower right corner.
A dialog box will appear. Go to the «Monitor» tab. From the «Screen Refresh Rate» drop-down list, select «60 Hertz». Click OK.
Check your notebook environment. Move away from fluorescent lights, fans, cell phones, radios, and other electrical devices that can cause flicker.
Temporarily move electrical objects away from the computer to determine if they are producing this issue.
If the flickering stops, put back one point to determine what is causing the problem.
Connect an external monitor to the laptop to determine if the screen is also flickering or not.
If there is no flicker, then the problem is strictly with the laptop, indicating possible hardware failures. Contact the manufacturer to replace the LCD.
If the flickering continues, go to the next step. Reinstall the video driver.
To do this, log in with an administrator account. Then go to the start menu and right click on «Computer».
Select «Properties» from the drop-down list. In the left pane of the dialog box, select Device Manager.
Using Device Manager, double-click «video adapter». Double click on the graphics card, select the «Driver» tab and click «Uninstall».
Then restart your computer. Device Manager will reinstall the video driver.
Check if your monitor flicker remains. If not, go to the next step.
Go to the manufacturer’s website. Download and install the latest laptop video driver.
Reboot the laptop after installing the drivers. Continue to the next step if the monitor is still flickering.
Carefully open the display screen. If the flickering stops after opening it a certain distance, then the display inverter is faulty.
If flickering still exists, the LCD must be replaced.
Contact the computer manufacturer for more information and possible inverter replacement. Good luck.
Modern laptop PCs are equipped with LCD displays that are sensitive to many factors, including nearby electronic devices and magnetic fields. However, often the blinking or flickering of the laptop monitor screen is caused by software malfunctions, mechanical damage, and failure of individual hardware elements.
Laptop monitor screen flickers
This problem can be of different nature, and in certain cases the monitor screen on a laptop flickers as a result of incorrect settings. If the monitor blinks constantly during operation, it is worth trying to increase the number of hertz. The default on many models is 60 hertz, and it may not be enough to update the images displayed on the screen. You can correct the situation with the appropriate settings. When the screen flashes or twitches not always, but periodically, that is, while starting a game or watching a movie, the reason may be in the video card driver. In this case, you need to reinstall it.
And, finally, the laptop monitor may flash when turned on due to the failure of individual elements of the device: matrix cable, motherboard. In this case, you will not be able to solve the problem on your own — you need to seek help from a specialist.
What does the flickering nature of the laptop screen mean?
Also, the image may be blurry and unclear, or not at all.
It is practically impossible to determine the exact cause of the breakdown by the nature of the flicker, since if the motherboard, video card, and matrix cable malfunction, the symptoms can be similar, and therefore professional diagnostics cannot be dispensed with.
Reasons for laptop screen flickering
If you are looking for an answer to the question of why the laptop monitor screen flickers (flickers, twitches, blinks), the most common causes include overheating of the video chip.
The second most common reason is the failure of the matrix loop — if it is faulty, the power will be unstable. To check, you need to open and close the cover of the device several times: the flicker should appear and disappear.
A variety of interference on the monitor may also indicate that the matrix backlight is not working, the video card or the northbridge has become unusable.
What to do if the laptop screen is flickering
To try to eliminate the flickering of the laptop screen at home, it is worth trying to eliminate one of the most obvious probabilities — incorrect operation of the video card driver. This is relevant if image failures appear immediately after the operating system is loaded, but at the same time, the gadget works normally at the initial stage of launch. As noted above, you just need to reinstall the driver.
If you don’t have a boot disk, you can simply try setting a higher frequency and high color quality through the control panel.
You should also eliminate the possibility of video card overheating by taking certain measures to more effectively cool the gadget:
In some cases, a problem such as flashing (blinking) can only be corrected by repairing or replacing the motherboard, video adapter, and other hardware items. And if the laptop began to work incorrectly after the negative impact of moisture or mechanical damage (for example, a strong blow), it may be necessary to replace the monitor itself.
Of course, only specialists can determine the exact cause of the breakdown and determine the most effective way to eliminate it.
Laptop repair — screen flickering
If you need to repair or replace the video chip, cable or matrix backlight, video card, laptop motherboard to eliminate the flickering or flickering of the device screen, contact our . We work throughout the territory of Odessa: after submitting an application, the master will immediately go to your house, diagnose and promptly eliminate the cause of the breakdown within a maximum of 24 hours. Entrust the repair work to our specialists, and in the shortest possible time you will have at your disposal a device with a perfectly clear image.