Use a screen reader to record your screen with Xbox Game Bar
This article is for people with visual or cognitive impairments who use a screen reader program such as Microsoft’s Narrator, JAWS, or NVDA with Microsoft 365 products. This article is part of the Microsoft 365 screen reader support content set where you can find more accessibility information on our apps. For general help, visit Microsoft Support home.
Use the Xbox Game Bar with your keyboard and a screen reader to record a video clip of your favorite game or app, for example, if you find a usability issue with it and want to show the problem to the developer. We have tested it with Narrator and NVDA, but it might work with other screen readers as long as they follow common accessibility standards and techniques.
Notes:
-
New Microsoft 365 features are released gradually to Microsoft 365 subscribers, so your app might not have these features yet.
To learn how you can get new features faster, join the Office Insider program.
-
To learn more about screen readers, go to How screen readers work with Microsoft 365.
In this topic
-
Enable Xbox Game Bar -
Include system audio in the recording -
Press the Windows logo key+I to open Windows settings. The focus moves to the Find a setting search text field.
-
Type xbox, press the Down arrow key until you hear «Enable Xbox Game Bar,» and press Enter. With Narrator, you hear: «Open Xbox Game Bar using this button on a controller, Xbox button, toggle switch, off.» With NVDA, you hear: «Xbox button, toggle button, not pressed.»
-
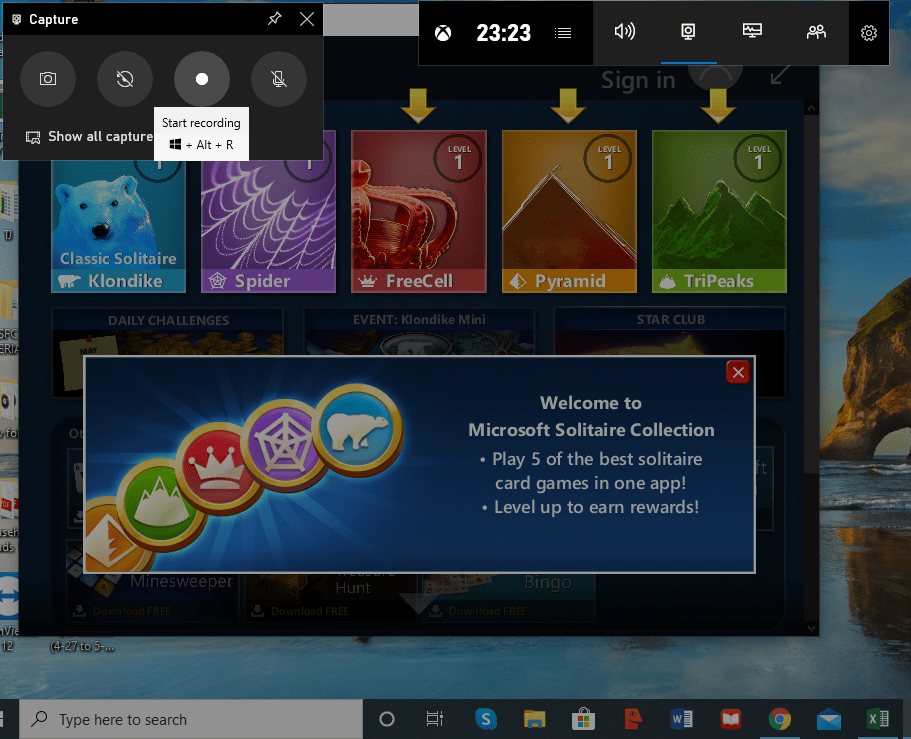
When you’ve enabled the Xbox Game Bar, press the Windows logo key+G to display the Xbox Game Bar controls.
-
Press the Tab key until you hear «Settings button,» and press Enter.
-
Press the Tab key until you hear: «All, game, enabled mic, apps, system, radio button.» You also hear if the All option is selected or not. With Narrator, you hear «Selected» or «Not selected.» With NVDA, you hear «Checked» or «Not checked.» If the option is not selected, press Spacebar to select it.
-
To hide the Xbox Game Bar controls, press the Windows logo key+G.
-
Go to the game or app you want to record.
-
Press the Windows logo key+Alt+R to start recording a clip. With Narrator, you hear: «Recording in progress.» With NVDA, there’s no audio cue.
-
To toggle the microphone on and off during the recording, press the Windows logo key+Alt+M. To display the Xbox Game Bar controls, press the Windows logo key+G. You hear: «Xbox Game Bar window.
 «
« -
Play the game or use the app until you have recorded what you wanted. To stop recording, press the Windows logo key+Alt+R. With Narrator, you hear: «Game clip recorded.» With NVDA, there’s no audio cue.
-
New Microsoft 365 features are released gradually to Microsoft 365 subscribers, so your app might not have these features yet. To learn how you can get new features faster, join the Office Insider program.
-
To learn more about screen readers, go to How screen readers work with Microsoft 365.
-
Enable Xbox Game Bar -
Record your screen -
Press the Windows logo key+I to open Windows Settings. The focus moves to the search field.
-
Type xbox, press the Down arrow key until you hear «Enable Xbox Game Bar,» and press Enter.
-
Press the Tab key until you hear: «Enable Xbox Game Bar for things like recording game clips, chatting with friends, and receiving game invites.» With Narrator, you next hear: «Toggle switch, Off.» With NVDA, you next hear: «Toggle button, not pressed.» Press Spacebar to enable the Xbox Game Bar.
-
When you’ve enabled the Xbox Game Bar, press the Windows logo key+G to display the Game Bar controls.
-
Press the Tab key until you reach the Settings button, and press Enter.
-
Press the Down arrow key until you hear: «Capturing.»
-
Press the Tab key until you hear «All radio button,» followed by «Selected» or «Not selected.» With NVDA, you hear «All radio button, Checked» or «Not checked.» If the option is not selected, press Spacebar to select it.
-
To hide the Game Bar controls, press the Windows logo key+G.
-
Go to the game or app you want to record.
-
Press the Windows logo key+Alt+R to start recording a clip. With Narrator, you hear: «Recording in progress.»
-
To toggle the microphone on and off during the recording, press the Windows logo key+Alt+M.
 To display the Game Bar controls, press the Windows logo key+G. You hear: «Xbox Game Bar window.»
 -
Play the game or use the app until you have recorded what you wanted, then press the Windows logo key+Alt+R to stop recording. With Narrator, you hear: «Game clip recorded.»
- Open QuickTime Player from the Applications folder, then choose File > New Screen Recording.
- If you see the above controls on the screen, follow these steps.
- If you see the Screen Recording window described below, follow these steps.
- Before you start recording, you can click the arrow next to the Record button to change the recording options.
- To record voice or other sound along with the screen image, select the desired microphone. To adjust the sound while recording, move the volume slider. If you hear an echo, turn down the volume or use headphones with a microphone.
- To display a black circle around the mouse cursor when clicked, select Show Mouse Clicks in Entry.

- To start recording, click the Record button, and then do one of the following:
- Click anywhere on the screen to record the entire screen.
- If you want to record only part of the screen, move the mouse cursor to highlight the desired area and click the «Start Recording» button inside the area.
- To stop recording, use the Stop button on the menu bar or the Command, Control, and Esc (Escape) keys.
- When you stop recording, QuickTime Player will automatically open the resulting video. You can play, edit the video or share it with your friends.
- The screenshot toolbar is available in macOS Mojave or later.
- Your Mac automatically saves recordings using the name «Screen Recording Date At Time .mov».
- To cancel recording, press the Esc key before pressing the record button.
- You can open screen recordings in QuickTime Player, iMovie, and other video editing and viewing applications.
- Some applications may not allow their windows to be recorded.
- Learn how to record screen on iPhone, iPad and iPod touch.
- Part 1: Best Screen Recorders for PC Games
- Filmora Screen Recorder
- Bandicam
- Movavi Screen Recorder
- Part 2: Best Open Source Screen Recorders for PC
- CamStudio
- VLC
- OBS
- Part 3: The easiest computer screen recording software
- Snagit
- Webinaria
- Tinytake
- Free Screen Video Recorder
- Part 4: How do I enable screen recording on my computer?
- No specific time set for video recording, you can record as long as you want
- Filmora Scrn can record voice along with Windows screen or webcam
- The inability to record screen on mobile devices is definitely a disadvantage of
- Records 4k ultra HD video
- Screen recording hardware accelerated
- The computer screen recorder has a smaller file size than other programs
- 24 hour record
- Bandicam does not support live broadcasts
- The free version has a watermark at the top of the video
- No built-in video editor, need a separate video editor to edit the recorded video.
- Multiple video format support
- Splits video and removes unwanted segments
- There is no way to download videos from the Internet or share them on social platforms using the interface.
- Completely free and easy to use
- An embedded instruction file is available in CamStudio.
- Can only be saved in AVI format converted to flash
- Either records microphone sound or speakers, cannot include both
- Completely free with no spyware, ads or user tracking
- VLC plays all discs, files, devices, streams and webcams in all formats.
- Highly configurable with advanced controls
- Without installing any codec pack, VLC supports 9 audio and video formats0018
- Video clips cannot be downloaded
- Glitches during 4K playback in VLC
- No hardware support
- Simple interface with many additional options
- Supports multiple sources such as audio and color
- Fast playback for laptop screen recording
- Abrupt start for beginners
- Built-in Snipping Tool for quick and easy screen capture
- Helps you create presets for visualizing an exact copy of a screenshot.
- Gives quick access to the toolbar
- Setting up e-mail while working with the program is quite complicated.
- There is no revert function that undoes all your edits to the saved video.
- Other than Google Drive, Snagit does not support other cloud storage services such as Box, Dropbox, and Microsoft OneDrive.
- As developers continue to fix bugs, this is open source software that is constantly being developed
- Completely free without the need for a license.
- You do not need to check product compatibility.
- Need to be an expert as you won’t get any support to solve your problems.
- Leaves no watermark after saving and loading
- 2 GB free storage on Tiny Take server
- Annotation tools are not yet available.

- Free of spyware and adware
- Saves time by offering multiple video file format support
- Software 100% Free
- When installing this screen recorder, you can not refuse to install third-party software
- No picture-in-picture recording option
- Open Windows 10 Game Bar : Open Windows Settings. Then select Gaming. Make sure the record game button is enabled. Then open game bar with default keyboard Win + G .
- Get access to Game Bar : A pop-up window will appear asking Do you want to open Game Bar ? Click Yes below.
- Start Screen Recording : You will now see the Windows 10 Game Bar. Click on the third icon to start recording. You can also record audio and webcam at the same time.
Record your screen
It’s simple to record a clip of what’s happening on your screen with the Xbox Game Bar. Make sure you have enabled Xbox Game Bar as explained in Enable Xbox Game Bar before you continue.
You can find the recorded video on your computer under Videos in a folder called Captures as an MP4 file. The file name contains the name of the game or app and the date and time of the recording.
Tip: If you want a screenshot of your game or app, press the Windows logo key+Alt+PrintScreen. With Narrator, you hear: «Screenshot saved.» With NVDA, there’s no audio cue. The image is saved to the Captures folder as a PNG file.
See also
Get to know Xbox Game Bar on Windows
Customize Xbox Game Bar on Windows devices
Set up your device to work with accessibility in Microsoft 365
Troubleshoot Xbox Game Bar on Windows
Use the Xbox Game Bar with your keyboard and a screen reader to record a video clip of your favorite game or app, for example, if you find a usability issue with it and want to show the problem to the developer. We have tested it with Narrator and NVDA, but it might work with other screen readers as long as they follow common accessibility standards and techniques.
Notes:
In this topic
Enable Xbox Game Bar
Include system audio in the recording
To make the most of your recording, make sure all computer sounds are included.
Record your screen
It’s simple to record a clip of what’s happening on your screen with the Xbox Game Bar. Make sure you have enabled Xbox Game Bar as explained in Enable Xbox Game Bar before you continue.
The video is saved under the Videos folder in a folder called Captures as an MP4 file. The file name contains the name of the game or app and the date and time of the recording.
Tip: If you want a screenshot of your game or app, press the Windows logo key+Alt+PrintScreen. With Narrator, you hear: «Screenshot saved.» The image is also saved under the Videos folder in a folder called Captures.
See also
Get to know Xbox Game Bar on Windows
Customize Xbox Game Bar on Windows devices
Set up your device to work with accessibility in Microsoft 365
Fix problems with Xbox Game Bar on Windows 10
Technical support for customers with disabilities
Microsoft wants to provide the best possible experience for all our customers. If you have a disability or questions related to accessibility, please contact the Microsoft Disability Answer Desk for technical assistance. The Disability Answer Desk support team is trained in using many popular assistive technologies and can offer assistance in English, Spanish, French, and American Sign Language. Please go to the Microsoft Disability Answer Desk site to find out the contact details for your region.
If you are a government, commercial, or enterprise user, please contact the enterprise Disability Answer Desk.
How to Record the Screen on Your Windows PC or Mac
Want to record the screen on your computer? Maybe you’re a professional who needs to capture your screen for a presentation at work, a software developer generating a how-to video, or just someone who wants to upload a helpful video clip to YouTube. Windows and macOS allow you to capture your screen activity thanks to built-in tools, though there are also many third-party screen-capture apps. Here’s how to get started.
Xbox Game Bar
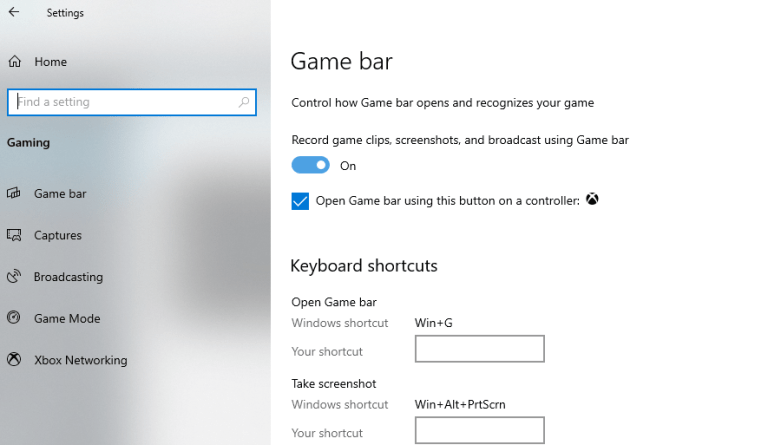
Built into Windows 10, Game Bar is designed to record games that you play directly on your PC or those you stream from an Xbox console. However, it can just as easily capture screen activity from other applications. To set this up, go to Settings > Gaming > Xbox Game Bar and turn on the Enable Xbox Game Bar switch.
Here, you can also change any of the keyboard shortcuts for opening the Game Bar, taking a screenshot, and recording a video. And if you connect an Xbox Controller to your PC, you can trigger the Game Bar by pressing the Xbox button on the controller(Opens in a new window).
You’ll be able to record activity in most applications and windows, except the Windows desktop, File Explorer, and certain Windows apps, such as Weather. Navigate to the screen you wish to record and press Win + G to open Game Bar. Several Game Bar widgets appear on the screen with controls for capturing screenshots, recording video and audio, and broadcasting your screen activity.
Click the Start Recording button or use the Win + Alt + R keyboard shortcut to capture your screen activity. Now perform whatever screen actions you want to capture. After you click on the screen, the Game Bar widgets vanish, replaced by a small floating bar in the upper-right corner of the screen through which you can control the recording.
To stop the recording, click the Recording button on the floating bar. Once the recording ends, a notification tells you that the game clip was recorded. Click the notification to view your video in the Game Bar. Click the Play button to play the video.
You can also access and play your video from its default location in File Explorer: C:\Users\[username]\Videos\Captures. Your videos will be stored here as an MP4 file, which can then be uploaded anywhere you like.
You can tweak the Game Bar if you go to Settings > Gaming > Captures. From here, you’re able to change the default file location for your videos, turn on background recording to capture activity after the fact, opt to record video along with your audio, and switch the frame rate between 30 and 60 frames per second.
In Game Bar itself, click the Settings icon to the right of the top bar. Browse the different categories under Settings to modify the shortcuts, change the theme, tweak the widgets, set up background recording, and record the audio with the video.
macOS Screenshot Tool
Your Mac comes with its own screen-recording feature on macOS Mojave and higher. Open the app or window you want to record and press Shift + Command + 5 to open the system’s screen-capture tool. From the bottom toolbar, you can opt to capture the entire screen, just the selected window, or a custom portion of the screen. For video, your options include recording the entire screen or a custom portion.
Click the Options button and you can choose where to save your recording and initiate a countdown timer to start the recording. Make sure to check the option to use your Mac’s microphone if you’re recording your own voice or external audio.
Click Record Entire Screen or Record Selected Portion to begin recording. A Recording button appears at the top of the screen on the menu bar. Click this button to stop recording, and a thumbnail of your recording will be added to your computer. Double-click the screen recording file to play it in your default video player.
You can also trigger the screen recording directly from QuickTime on a Mac. Open QuickTime Player and then click File > New Screen Recording. The first time you do this, you’ll be asked to open System Preferences to grant QuickTime Player permission to record your screen. Go into your settings and check the box to grant the proper permissions. Start the new recording through QuickTime again, and you can then use the Mac’s recording tool.
OBS Studio
The free OBS Studio(Opens in a new window) works with Windows, macOS, and Linux, and packs a lot of features into one program. Use the program’s floating control panel to start and stop your recording. Along the way, OBS Studio can record screen activity, your microphone, and computer audio. The program then saves the output as an MP4 file.
You can also stream your video live or turn to Studio Mode for adding cuts, fades, and other transitions to the video. The program offers an array of settings where you can change the format and other criteria for both the video and audio portions of the recording. OBS Studio looks intimidating at first, but you should be able to catch on and learn how to use it effectively.
Free Cam
Free Cam(Opens in a new window) is an extremely basic screen recorder for Windows users, but it remains capable for most needs. This program captures your screen activity and audio, then saves your recording as a WMV file. Simply click the New Recording button, then select which area of the screen you want to capture, anything from a single window or application to the entire screen.
Click the Record button to begin the capture, then press Esc when you’re done. Your recording appears in a preview window where you can edit it, save it as a video file, or upload it directly to YouTube.
If you need to record the screen on your smartphone, we have a guide for using the built-in recorder on iPhone and iPad. We can also help you choose the right app for Android devices.
How to Mirror Your iPhone Screen on a Computer
Apple Fan?
Sign up for our Weekly Apple Brief for the latest news, reviews, tips, and more delivered right to your inbox.
This newsletter may contain advertising, deals, or affiliate links. Subscribing to a newsletter indicates your consent to our Terms of Use and Privacy Policy. You may unsubscribe from the newsletters at any time.
Thanks for signing up!
Your subscription has been confirmed. Keep an eye on your inbox!
Sign up for other newsletters
How to record your Mac screen
Using the Screenshot feature or QuickTime Player, you can record a video of the entire screen or just a selected part of it.
Using the screenshot toolbar
To view the screenshot toolbar, press these three keys simultaneously: Shift, Command, and 5. Controls for recording the entire screen, recording a selected portion of the screen, or capturing screenshots:
Using QuickTime Player
More information
Publication date:
Thank you for your feedback.
10 Best Free Screen Recorders (2023)
Maria Matveeva
Feb 02, 2023• Proven Solutions
It is often difficult to explain to another person how to perform certain tasks on a computer. To solve this problem, people usually use screen recorder to take a screenshot on a PC (Windows or Mac) and clearly explain to users how to do something.
Using screen recording software on your computer will help you simplify the whole workflow, explain the steps in detail easily, and most importantly, the process can then be repeated many times, which makes it easier for a person to understand.
But you may be wondering what is the best screen recording software for computer?
In order to save you time in research and testing, we have included in a list of the top 10 screen recorders for Windows computers. Let’s look at each of them.
Part 1. Best Screen Recorders for PC Games
1. Filmora — Record whatever you want
The best, useful and easy-to-use computer screen recorder category is occupied by Filmora recorder. It is screen recorder and video editing tool. Filmora Scrn offers a professional level of video editing where you can join, trim, export and share files instantly.
With the simplest interface and free video recording functions, this computer screen recorder is very easy to use for Windows.
Benefits:
Disadvantages:
Download the free version to try it out and see if this program is right for you.
Download free
for Win 7 or newer (64 bits OS)
Safe download
Download free
for screen recording in 4K games
2.
 Bandicam
For screencast creators and professional gamers, Bandicam is one of the best Screen Recorder . This is a simple and lightweight software that has the ability to record high quality video from any window on your computer screen. Notably, Bandicam works well for recording games on your computer.
Advantages:
Disadvantages:
3. Movavi Screen Recorder — One Click Screen Capture
Great software, Movavi is one of the best gameplay recorder with amazing features like online sharing, computer screen capture, playback tools, video editing and much more. In addition to the computer screen, you can record a tab or mobile phone screen with this program. If you wish, you can record your playthrough and upload it to YouTube for sharing. With Movavi, you can easily do this.
Benefits:
Disadvantages:
Part 2 Best Open Source Screen Recorder for PC
1. CamStudio
An ideal screen recorder for Windows to create screencasts and quick demo videos, CamStudio has a number of features such as like automatic panning, the option to highlight the cursor during recording, sound recording and much more. The compact interface makes it easy to take screenshots as well as tutorial videos to share with other users around the world. Plus, you can even do record computer screen to DVD/CD using CamStudio, which is very practical.
Benefits:
Weaknesses:
2. VLC
Lightweight multimedia player, VLC computer screen recorder is an open source player and free multifunctional player. As an integration, you can record your computer screen, and VLC can play most audiovisual files, as well as Audio VCD, CD, DVD, and many other streaming protocols. Also, if you want to add some features that you would like in features for screen recording , then VLC, as an open source product, has a lot of leeway to let you customize your own features.
Benefits:
Weaknesses:
3. OBS
Freeware OBS is one of the best screen recorders for as it has the ability to record live PC games on the screen, or capture part or full screen from any window or webcam.
Benefits:
Disadvantages:
Part 3 Part 3 Easiest Computer Screen Recorder
1. Snagit
With some of the best image editing and video capture features, Snagit is a great Screen Recorder for PC . Whether it’s video clips, color values or image capture, a Direct X application, or any video that appears on the screen, Snagit offers a number of useful built-in tools. You can also add stamps, a new feature to screenshots that is extremely handy for creating tutorials.
Benefits:
Disadvantages:
2. Webinaria
With Webinaria you can record your actions on the computer screen to the webcam, as well as record speech for screencast and demonstration.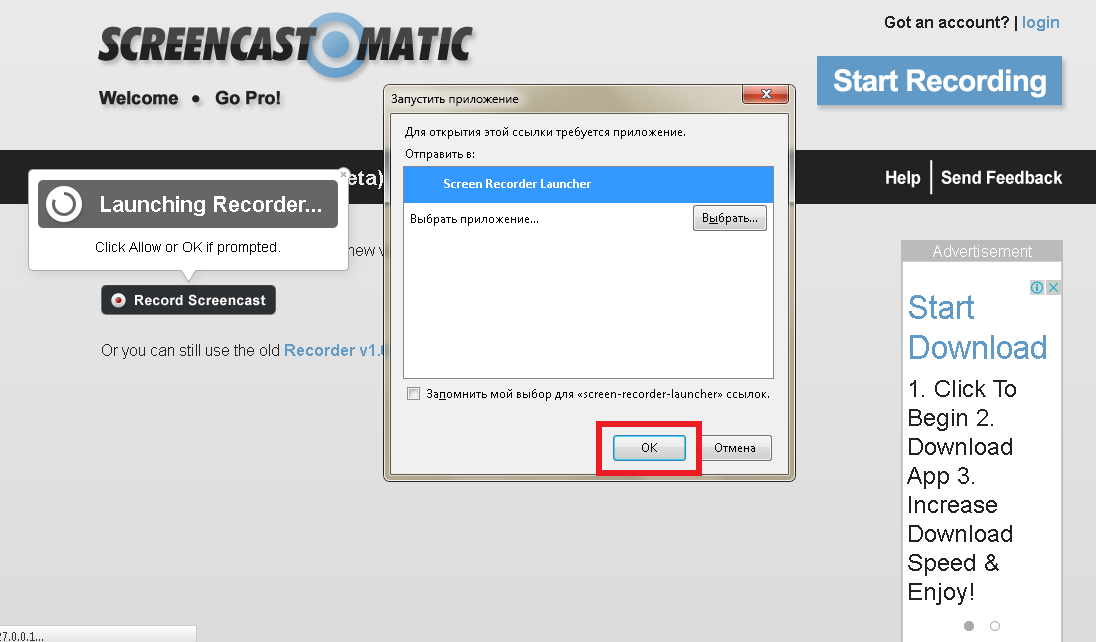 You can easily upload videos to the Internet by making screen recording free in flash format.
Benefits:
Disadvantages:
3. Tinytake
Tinytake, free video recording and screen capture software with sound, ideal for small projects. For detailed screen recording , this program is not suitable. You can record your desktop in full screen or customize a part and also integrate webcam recording.
Benefits:
Weaknesses:
4. Free Screen Video Recorder
Free Screen Video Recorder can help you to capture computer monitor. Whether it’s multiple open windows, menus, objects, or any other action on the screen, this Screen Recorder is a complete set of guides showing steps with graphics to help you create your videos.
Benefits:
Disadvantages:
Part 4: How do I enable screen recording on my computer?
If you are using Windows 11/10, you already have built-in screen recorder you can use is Windows 10 Game Bar. The program is free and convenient. Windows 10 Game Bar is easy to use for beginners, although it is designed for gamers. Following are the steps for screen recording .
The above are the basic steps for displaying a recording on a laptop. You can also stream videos to other platforms.
Recommended for quick selection: Best Screenshot Software for Audio/Video/Webcam Capture
Well, there is a large selection of screen recording software .