How to Flash the BIOS on an AMD GPU: A Comprehensive Guide
Graphics cards in modern gaming PCs are almost solely responsible for graphical rendering in 3D applications. Most of these applications thus demand a GPU that is capable of rendering the required assets with reasonable efficacy. Modern 3D applications like games have become more and more demanding in recent years so the graphics cards have also become faster to be able to handle these workloads. Since PC Gaming is on an all-time high, PC Hardware enthusiasts have also sprung up in considerable numbers, and they strive to get every last bit of performance from their hardware.
The AMD Radeon RX 5700 is a prime candidate for BIOS Flashing – Image : AMD
It is quite common among enthusiasts in the PC space to “overclock” their hardware, particularly the graphics card, to get better performance in their applications of choice, notably games. Overclocking is a quite simple, straightforward way to squeeze out more performance from your GPU with minimal risk. Most graphics cards have some headroom above their factory clock speeds, and the user can tinker with the card to get those extra megahertz.
But there’s only so much you can get out of overclocking using traditional methods. Yes, such overclocks do provide a decent gain over stock performance, but to go beyond that we have to turn to some… more creative methods. Enter, BIOS Flashing.
What is a Graphics Card BIOS?
A graphics card’s BIOS (also called VBIOS or VGA BIOS) is the firmware of the card, which contains all the necessary hardware settings for the card. It contains information about the clock speed, fan speed, voltages, and power delivery, etc. It also imposes the necessary limitations on voltage and power draw levels so that the card doesn’t malfunction and die with a careless overclock. These limitations are the reason why the Voltage offset is locked to a certain limit in tools like MSI Afterburner. With the help of BIOS Flashing, users can raise some of those limitations, thus allowing for higher overclocks and allowing more voltage to be fed to the core and the memory.
Reasons to flash the BIOS
BIOS Flashing is particularly helpful in extreme overclocking. Under normal circumstances, you should probably avoid tinkering with the BIOS of the card. But if you’re an enthusiast and you want to squeeze every last bit of performance from your graphics card, BIOS Flashing can help you. As we have established that the BIOS is the firmware of the card, a BIOS flash implies that you are overwriting the firmware with a new one, thus providing new values of core clock, memory clock, voltage limit, and power limit, etc. These values provide the necessary boost to the card’s overclocking potential.
Which cards are ideal for BIOS Flashing?
As you might have guessed, not a lot of cards will offer this much freedom to the end-user. Most of the cards can only be flashed to their own firmware, which is understandable. BIOS Flashing in these cards can only be used to fix a bricked BIOS and not for overclocking purposes as we want. There are some cards though, that have big potential for BIOS Flashing. Usually, the cards which use a cut-down version of the top GPU, offer the biggest improvements from this process. Both Nvidia and AMD’s lineups have cards like these, but in this guide, we will only focus on the AMD cards.
Graphics cards like the AMD Radeon RX Vega 56, and Radeon RX 5700 are very popular cards among enthusiasts for BIOS Flashing. The thing about these cards that makes them ideal for flashing, is that they have almost the exact same PCBs as their bigger brothers (the RX Vega 64 and RX 5700 XT respectively), bar the GPU core itself. Things like Compute Units (56 CUs in Vega 56, 64 CUs in Vega 64) can not be changed via flashing. The core clocks, memory clocks, and voltages however can be changed. This means that they are locked down in certain respects due to product segmentation, and thus offer a bigger headroom to the end-user. If you flash a Vega 64 BIOS on a Vega 56, or a 5700 XT BIOS on a 5700, it is possible to achieve the same core clocks and performance level as the higher tier GPU. This offers the biggest advantage to overclockers, and in-turn gives amazing value for the money if you’re willing to take the step.
Things to keep in mind before flashing
- Make sure you have a reasonably powerful PSU that is capable of handling the higher power draw. Ideally, you should have enough wattage to handle the card that you’re flashing to. For example, if you plan to flash the BIOS of a Vega 64 on a Vega 56, you should have a PSU capable of handling a Vega 56 (at least 750W).
- Make sure your case is well-ventilated and your temperatures are under control. BIOS Flashing increases power draw, and as we know more power equals more heat. If your temperatures are not comfortable as-is, you should probably avoid flashing and maybe consider undervolting your card instead. Learn how to optimize your case airflow by following this article.
- Make sure your particular graphics card has dual BIOS. Some high-end graphics cards and some reference models will offer a Dual BIOS implementation, which is operated by a BIOS switch.
 What this means is that the card has 2 firmwares, as opposed to the normal one. This can act as a safety net for you should you brick one BIOS. You can switch to the other BIOS and then the card is back to normal. This is not absolutely necessary, however, it is highly recommended.
 - Make sure your graphics card can be flashed to a higher-performing one. Research your particular card. Only flash if the gains are worth the effort.
- It is also advised that you monitor the card’s performance parameters after flashing. Sometimes flashed cards can behave erratically, and if you have the habit of constantly monitoring your card’s values, the problem can be quickly identified and fixed.
- Always save the backup BIOS in more than 1 location. The process to make the backup BIOS is shown in the guide.
Now that we have established a reasonable understanding of the process, let’s begin.
Disclaimer: A word of caution is necessary here. While flashing the BIOS, you are lifting some of the limits set by the manufacturer, and going beyond the manufacturer spec. If done wrong, it is possible to brick your graphics card. Only flash the BIOS if you are familiar with overclocking and the risks associated with it. All responsibility is assumed by the user.
Step-by-Step BIOS Flashing Guide for AMD
Here is a simple and easy step-by-step guide on how to flash the BIOS on your AMD Graphics card. In this guide, we will be using the AMD Radeon RX Vega 56 as an example, and flashing it with the RX Vega 64 BIOS. First, we have to download the required tools and files for the process.
Required Tools
- ATIFlash, the flashing tool for AMD Graphics cards
- TechPowerUp GPU-Z
- Backup file of the existing BIOS (Vega 56 BIOS in this case)
- The new target BIOS (Vega 64 BIOS here)
All the necessary tools and files for BIOS Flashing
ATiFlash (also called AMD VBFlash) is the tool of choice for this process when it comes to AMD Graphics Cards. The tool is simple and easy to use. It can be downloaded for free here. For Nvidia cards, the alternative is NVFlash.
GPU-Z is a fairly essential and helpful software when it comes to GPU Overclocking. Essentially it displays all the necessary information about the card in one convenient window. It can also be used to make a backup of your existing BIOS as explained later on in the guide. It can be downloaded here.
The backups for your existing BIOS are absolutely crucial since you might want to revert back to the original BIOS if your new one is not stable. GPU Z and ATiFlash both offer BIOS backup options.
The target BIOS file is the actual firmware file that you wish to flash to. As we are using a Vega 56 as an example, the target BIOS file will be the firmware of a Vega 64. Similarly, if we want to flash an RX 5700, the target file will be the BIOS of a 5700 XT. BIOS files can be downloaded from TechPowerUp’s BIOS database. It is absolutely necessary that you download the BIOS of the same vendor as your existing card. Since we have an XFX Radeon RX Vega 56, we will be downloading the XFX Radeon RX Vega 64 BIOS.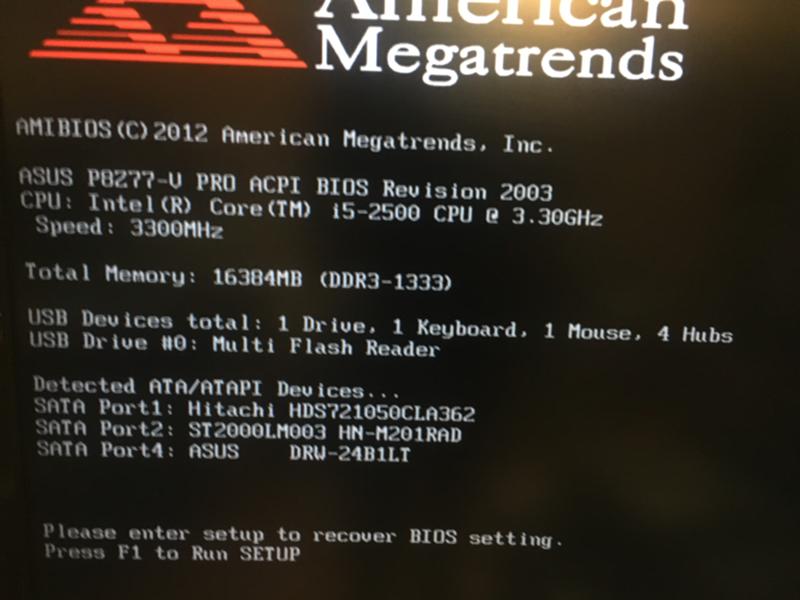 The GPU BIOS Database can be found here.
STEP 1: Open GPU-Z and make a backup
GPU-Z will display an array of information regarding your graphics card. We are not interested in all of it, but there are some things you should note. First, note the base and boost clocks of your GPU displayed near the bottom of the window. These values will change after a successful BIOS flash. Secondly, we need to make a backup of our existing BIOS here. Near the middle of the window, there is a section which displays BIOS Version. Next to it is a small arrow pointing towards the right. Click that arrow, and save the file somewhere on your computer. Ideally, you should make 2 backups and store them in different places.
How to make the backup of your BIOS in GPU-Z
An additional step in this section only applies to Radeon RX Vega users. Since the Vega architecture uses HBM2 memory instead of the conventional GDDR, the memory is supplied by different manufacturers which varies between cards. Near the bottom half of the window, you will see a section on Memory which will say HBM2 and alongside it displays the particular manufacturer of the memory. It is absolutely crucial that you only flash the BIOS on a Vega card if it has Samsung HBM2. Memory chips made by other manufacturers like Micron or Hynix do not provide successful flashes.
GPU-Z Window showing important information like BIOS Version, Memory Type and Base Clocks
If you are flashing with 5700 cards, you can skip the memory check since they all have conventional GDDR6 memory.
STEP 2: Extract and open ATiFlash as administrator
Open ATiFlash as Administrator
- Extract the downloaded ATiFlash compressed file.
- Open the file named “amdvbflashWin.exe” as administrator.
- The following window will be presented to you.
ATiFlash Window showing the current BIOS
On the right-hand side, you can see some of your system specs. On the left is a section labeled “ROM Details” which is the same as BIOS details. Here you can see the version of your current BIOS and some related information. This software also provides a second opportunity to backup your BIOS. Click the “Save” button and make a second backup of your existing BIOS just to be on the safe side.
STEP 3: Flash the BIOS with the downloaded target BIOS
This is the key step in which we finally swap the existing BIOS with the new one.
ATiFlash window showing the target BIOS
- Click “Load Image”
- Select the downloaded target BIOS (in this case the XFX Radeon RX Vega 64 BIOS)
- The software will show the BIOS details under the section “New VBIOS”
- Click “Program”
- Wait for the progress bar to finish.
- Restart your PC
After your PC boots back up you should be successfully flashed to a new BIOS.
What to do after flashing the BIOS?
Initially, your card wouldn’t perform any differently than it previously did. Was it all in vain? Not at all. What the process of flashing has done is that it has essentially eased some of the limitations that the previous firmware imposed. Now you have more flexibility as the end-user to manipulate your card’s parameters. Here are a few things to do after flashing your BIOS
-
Test higher overclocks:
Since the main purpose of BIOS flashing is to squeeze every last bit of performance from the card, you should test out new overclocks and try to find the best stable configuration for your graphics card. Be sure to maximize the power limit in Wattman or Afterburner, and also provide additional voltage through voltage offsets. You may need to increase your fan speed via a more aggressive fan curve, to keep temperatures in check. Following our comprehensive overclocking guide can prove very helpful in this regard.
-
Keep an eye on temperatures:
Remember, higher power draw equals more heat output. If your temperatures after flashing and overclocking are not comfortable according to your ambient temperatures, you should consider either undervolting the card or reverting back to the old BIOS.
 Ideally, you do not want your card breaking the 80 degrees Celsius mark, however, there is no danger of any damage to your card at that temperature. Cooler is better though since it allows the card to boost higher, thus aiding performance. If the card crosses 85 degrees Celsius during normal gaming, consider reverting back to the older BIOS.
 -
Stress-test your Graphics card:
After dialing in a suitable overclock, I would strongly suggest stress testing your graphics card in different scenarios. The worst thing for a gamer is to be in the heat of the battle and having your card crash you to the desktop or worse, your PC shutting down unexpectedly. Use a variety of benchmarks like 3DMark FireStrike, Unigine Superposition, Unigine Heaven, and Furmark. Furmark is specifically a torture test designed to make your card reach the absolute highest temperatures it can, so it can be useful in temperature testing. Unigine Suite and 3DMark Suite will provide the tests for your gaming stability.
 Keep an eye on max temperatures, but also for artifacts (blocks or batches of glitched pixels) which indicate a high memory clock. Be vary of crashes and dial back your OC if it is crashing regularly.
 -
Revert back to the old BIOS if……
1- Your temperatures are out of control
2- Your GPU keeps crashing in stress tests and/or in games
3- Your GPU keeps artifacting due to a high memory clock
4- Your PC keeps shutting down unexpectedly which means that the PSU cannot handle the higher power draw -
If everything is successful….
Enjoy that extra performance but stay vigilant. Form a habit of monitoring your GPU’s clocks, memory frequency, temperatures, power draw, and fan speed, etc. RivaTuner paired with MSI Afterburner is a huge help in this regard.
Uh-oh… my card is unstable. What do I do?
You should flash your card back to the original BIOS. It is really simple to do.
- Open ATiFlash
- Load up the “Backup Vega 56 BIOS” that you made and saved
- Click “Program”
- Restart your PC.

Your card should be flashed back to its stock firmware.
Final Words
BIOS Flashing is a really interesting and effective way to increase your card’s performance. For enthusiasts, it is just another way they can tinker with the hardware they have. Most extreme overclockers love to play around with custom vBIOS’ with extremely high power targets which help them break world records. For normal consumers, it is a tool that can be really effective in certain scenarios. It can help them squeeze the maximum performance out of their cards, thus maximizing the value for the money. If done properly, it is a completely safe and fun process with some free performance gains to boot!
How to flash a video card
How can you increase the hashrate of a video card or GPU rig? One option is to adjust the GPU settings that can affect the hashrate. This can be done by flashing the video card. Also, besides a faster mining speed, flashing can help to reduce power consumption, so that you will spend less on electricity bills (this is especially important if you are the owner of a large farm). This article will tell you how Hive OS flash video cards and improve their performance.
What is a GPU BIOS flash?
Reflashing the BIOS involves replacing the video card software with a different one. When done correctly, it can improve the mining performance of the graphics card. Remember to save your original BIOS before changing it, so that you can revert to your original BIOS if something goes wrong. It’s easy to flash a video card BIOS in Hive OS. Just follow the steps below and be aware of the risks involved.
Why should I flash VBIOS?
Flashing your graphics card may be beneficial on select models. These include increased hashrate and/or reduced power consumption.
For AMD Polaris Cards (RX 470-580), Navi 10 (RX 5600XT/5700/5700XT) you can modify the BIOS the way you want with tools like Polaris BIOS Editor or Red BIOS Editor. For other cards, on the other hand, this is not possible, so if you want to change BIOS, load some existing, official BIOS from some graphics card manufacturer, compatible with your GPU. Flashing the BIOS has a higher risk, so be very careful. Making a mistake sometimes may even lead to permanent damage to your graphics card.
GPU BIOS flash does not always have to be about uploading a different graphics card’s BIOS. Sometimes manufacturers may release newer, updated BIOS for a GPU years after the product launch.
How to flash the AMD cards in Hive OS
Step 1: log in to your Hive OS account.
Step 2: select the required farm, and the required worker, and then move to the Overclocking tab.
Step 3: click the Download VBIOS button.
Step 4: specify from which video card you want to download it.
Step 5: VBIOS will appear as a message. Be sure to save the original VBIOS from the cards in case you need to roll back.
Step 6: launch the Polaris BIOS Editor program (it is available in both paid and free versions).
Step 7: open VBIOS with the help of Polaris BIOS Editor. In the paid version, your screen will look something like this:
And here is the free version:
Step 8: click the One click timing patch button in the lower right corner. Then click Yes.
Step 9: save VBIOS.
Step 10: go back to the Overclocking tab and click the Flash VBIOS button:
Step 11: select the VBIOS file, select the card that you are going to flash and click the Flash VBIOS button.
That’s it!
How to flash the NVIDIA cards in Hive OS
To flash the NVIDIA cards you will need a newer VBIOS:
Step 1: log in to your Hive OS account.
Step 2: select the required farm, and the required worker, and then move to the Overclocking tab.
Step 3: click the Download VBIOS button.
Step 4: specify from which video card you want to download it.
Step 5: after VBIOS was downloaded, go back to Hive OS and move to the worker, which video card you want to flash.
Step 6: go back to the Overclocking tab and click the Flash VBIOS button:
Step 7: select the VBIOS file, select the card that you are going to flash, and click the Flash VBIOS button.
As an option, you can download a newer VBIOS here.
Attention! ALWAYS save the original VBIOS.
So now you know how to flash video cards. But remember that you need to do this very carefully, following the instructions described above. You are flashing video cards at your own risk!
In case you have any doubts or questions — get in touch with us. We are always ready to advise you on how to avoid problems when flashing.
Mine profitably with Hive OS!
FAQ
How to flash VBIOS?
Hive OS flash bios video card. How? Hive OS allows you to flash VBIOS of your video card in the user panel on your farm page. To easily change the VBIOS of your GPU in the Hive OS panel, download your current VBIOS in the Overclocking tab. Once you modify it (or find the desired VBIOS), click the Flash VBIOS button and select the VBIOS you want to upload.
What is VBIOS?
VBIOS (Video card BIOS) is a video card software, which initializes the video card at boot time and describes the set of instructions that the video card can execute. It handles core and memory clocking, fan speed, and voltage selection, among other things. It is stored in the graphics card’s memory, not on the user’s computer, unlike graphics drivers.
What is VBIOS flash?
VBIOS flash is the process of replacing the VBIOS of a graphics card. In cryptocurrency mining, this can lead to benefits such as increased hashrate and lower power consumption. Unfortunately, nowadays both NVIDIA and AMD digitally sign the VBIOS of their graphics cards, making it impossible to modify them. However, it is still often possible to change to another manufacturer’s VBIOS or, if available, to update the current one.
ATIFlash Windows 10 x64 [v3.31]: Download, Commands, DOS
ATI WinFlash: Download from the official site, how to modify gpu bios.
In this tutorial, you will learn how to set up and use ATIFlash v3.31 and newer.
Download for Windows / Linux
Download from TechPowerUp Download from SourceForge
What is ATIFlash?
ATIFlash — is a small utility used to flash BIOS on GPUs. Able to work only with ATI video cards. The utility supports absolutely all AMD Radeon video cards, including the well-known RX580, RX 6800XT and others. The application works under Windows as well as DOS and Linux.
AMD VBFlash was originally called Atiwinflash. However, after the release of version 2. 7.1, it was simply renamed Atiflash. The 274 version was already well known under this name.
Supported video cards:
RX 6900 XT, RX 6800 XT, RX 6700 XT, RX 5700, RX 5600, RX 5500. You can also flash the BIOS for all AMD Radeon RX Vega, RX 580, RX 480, and all older ATI cards.
Tool requirements
- ATIFlash, a tool for flashing AMD graphics cards.
- TechPowerUp GPU-Z.
- An existing BIOS backup file.
- New BIOS version.
How to Use ATIFlash?
Step 1 — Download the program
Download the program from the official TechPowerUp website. Or download the release from SourceForge. Select the software for the required operating system.
Step 2 — Make a BIOS backup
Extract the .zip archive and run amdvbflashWin.exe. Right-click and select «run as administrator.»
Click the «Save» button for the video card selected above.
A window for selecting a path for saving will open. Enter a name to save. For example
 original_bios.rom. Or save it as the name of your graphics card. For example: OnginBios.rom.
If saving the native BIOS is successful, you will see the inscription «ROM image saved to file». Click «Continue».
Step 3 — Flash the new BIOS
Run the program as administrator and click Load Image.
Make sure to select the correct BIOS and the video card you want to flash. Click Open. By the way, the PolarisBiosEditor program will help you choose the BIOS.
In the field Filename ou will see the full path to the new BIOS version. Click Program to start the firmware process.
Wait for the process to go through.
If successful, the program will inform you: Your VBIOS was programmed successfully:
Click OK. You should now do a reboot — You have to reboot this system before the changes take effect. Click «Yes».
Done.
Video Guide
subscribe
If you see error 43 after flashing, then you need to apply Atikmdag Patcher.
Let’s consider the second variant of DOS firmware.
The program also works from the command line and in DOS. You can use the .bat file or you can use the CMD.
This option is more complex, but more reliable because the command shell is less likely to crash than the graphical one.
How to flash through the command line (DOS)?
Step 1 — Download the software
Download the program from the official TechPowerUp website. Or download the release from SourceForge. Select the software for the required operating system.
Step 2 — Make a backup of the BIOS
Extract the .zip archive. Create two .bat files:
- BackupBios.
- FlashBIOS.
One will be used to create a backup, and the second for the firmware of the new version.
Run BackupBios.batt to keep the original BIOS. Here are the contents of this file:
@echo off cls echo Saving bios to BIOS_backup.rom... echo. AtiFlash -s 0 BIOS_backup.rom echo. pause
If you do not have this file, create it. Copy the text into notepad and give an .txt extension instead .bat
If the file does not start, then first run amdvbflash.exe as administrator.
Do this if you see a window like this: «Due to Microsoft Win8 Enhanced Security Features, this Application requires the user to be in Administrator mode. To Enable this mode, please right click the mouse on the application, then select «Run as Administrator».
Now start by BackupBios.batt double clicking on it. The folder will appear BIOS_backup.rom.
Step 3 — Flash the BIOS of the video card
Now start by FlashBIOS.bat double clicking on it. Here is the content of the file:
@echo off
cls
echo Flashing card 0 with BIOS.rom...
echo.
AtiFlash -p 0 -f BIOS.rom
echo.
pause
During startup, you will see the following window:
Inscriptions programmed and verified will inform you that everything is OK.
Now the utility will inform you "Restart System To Complete VBIOS Update" — we restart the PC.
BIOS flashing AMD cards with DOS
subscribe
Not working on windows 10
If the program doesn’t work or doesn’t see your graphics card, try the following steps.
- Download the new version of the program.
- Use Bootable DOS Drive Method.
Video: Bootable DOS Drive Method.
subscribe
The program may not work in 10k on a certain system assembly
In this case, use either an earlier version of the 10k build, or sew from Strelec WindowsPE.
It has long been known that GPU makers place certain blocks on performance. When it comes to gaming or mining, the performance indicator should be as close as possible to 100-110%.
Commands
Here we will highlight the most useful commands:
command format:
Atiflash [command] [parameter1] [parameter2] [parameter3] [command]
Observe all spaces. However, command brackets are NOT written).
Example:
Atiflash -i 1 -t
-
-i [Num]Display information of ATI adapters in the system. Display information of adapter [Num] if specified. -
-ai [Num]Display advanced information of ATI adapters on system. Display advanced information of adapter [Num] if specified. -
-biosfileinfo <File>Displays the Bios info in file<file> -
-p <Num> <File>Write BIOS image in file<file>to flash ROM in Adapter . -
-pa <File>Write BIOS image<file>to all appropriate adapters. -
-s <Num> <File> [Size]Save BIOS image from adapter to file «. First [Size] kbytes (except for Theater in bytes) of ROM content is saved if [Size] is specified. -
-cf <File> [Size] [Sum]Calculate 16-bit checksum for file<file>. Checksum for the first [Size] kbytes of the file is calculated if [Size] is specified.
 -
-cb <Num> [Size] [Sum]Calculate 16-bit BIOS image checksum for adapter<Num>. Checksum for the first [Size] kbytes of the ROM content is calculated if [Size] is specified. -
-cr [Size] [Sum]Calculate 16-bit ROM checksum for adapter and compare it to the [Sum] specified. This command is the same as *-cbif[Size]is specified. -
-t <Num>Test ROM access of adapter<Num>. -
-v <Num> <File>Compare ROM content of adapter<Num>to<file> -
-mi [ID]Modify SSID & SVID in BIOS image of adapter to . SSID & SVID in BIOS image of adapter is displayed if [ID] is not specified. -
-mbModify SSID, SVID, BIOS Pin Number, & Boot Message in BIOS image of adapter<Num>to values in .
Example:
ssid = 715B
svid = 1002
biospn = "113-xxxxxx-xx"
bootmsg = "ATI graphic board"
-pak <File> Package an executable for BIOS update according to the commands in <File>.
Example config file:
outfile = update.exe
banner = "Update v1.0"
infile = a123.bin
command = -pa -padevid=715B infile
-
-isr <Num> <Build Number> <Board Number>Set ISR number based on the given build and board number if not specified, print out ISR Number. -
-prod <Num> <12 digit serial number>Set PROD number based on the given serial number if not specified, print out SN Number. -
-checkprodsn <Num> <12 Digit Serial Number>Comparing the Prod SN based on existing prod sn saved in ROM.
Options
-
-fForce flashing regardless of security checkings (e.g. AsicID & BIOS file info check OR boot-up card).
-
-faForce flashing bypassing already-programmed check. -
-fmForce flashing bypassing BIOS memory config check. -
-fsForce flashing bypassing BIOS SSID check. -
-fpForce flashing bypassing BIOS P/N check. -
-sstUse SST25VFxxx flashing algorithm regardless of ROMID straps. -
-stUse ST M25Pxx flashing algorithm regardless of ROMID straps. -
-atmelUse AT25Fxxx flashing algorithm regardless of ROMID straps. -
-keepisrsnkeep the ISR Number on the adapter when flashing a new VBIOS. -
-keepprodsnkeep the Prod SN on the adapter when flashing a new VBIOS. -
-siiresetSpecifies the GPIO Pin to be used as the Reset when updating SiI1930 microcontroller firmware.
Example:
-siireset=7 <No Spaces>-
-siiuprogSpecifies the GPIO Pin to be used as the uprog when updating SiI1930 microcontroller firmware.
Example:
-
-siiuprog=14 <No Spaces>. -
-scansiiOverrides normal adapter detection to enable detecting SSI roms with/without TPI firmware. -
-log Logsoutput to atiflash.log, overrides existing file. -
-logappendLogs and appends output toatiflash.log. -
-ddc EnableDDC support. -
-padevid=<ID>Use with -pa command to update adapters of specific device ID. -
-passid=<ID>Use with -pa command to update adapters of specific SSID. -
-pasvid=<ID>Use with -pa command to update adapters of specific SVID. -
-pavbpn=<VBPN>Use with -pa command to update adapters of specific VBIOS PN.
-excl_memtrain_dtable When flashing on new VBIOS, a pre-determined memory training data table in the old VBIOS will not be overwritten.
-isr <adapter num> [build num] [board num] If build number and board number are specified, sets the ISR Number value in specified adapter. If only adapter is specified, the current ISR Number is displayed.
-checkpn <adapter num> <filename> Checks PN of the current product and compares it to external file.
*<Num> = adapter number,<File> = filename
*[Size] = data block size in KBytes, except for Theater Pro in Bytes
*Use command -i to see the adapter numbers in the system. *Theater Pro supports commands -i, p, s, cf, cr, t, v and options -f, -noremap.
Alternatives
- ATI Winflash
- Flashrom
- Radeon BIOS Editor (Due to the digital signature requirement on the latest AMD cards, RBE is no longer in active development and will not support the latest graphics cards.
Overview of program features
The utility is freely available free of charge. Supported on Windows XP and higher, up to the latest, tenth.
The utility has two modes of operation: through the command line (CMD) and the graphical shell (GUI). You can use any of the methods to update the BIOS. Before carrying out the procedure, be sure to download the BIOS of the required version for your device.
Do not turn off your computer while updating. Otherwise, a failure in the system will lead to the failure of the GPU. Also Atiflash DOS can keep the current firmware. If you run into problems with the new version of the software, it will help you roll back to the previous version.
The BIOS firmware should be changed for several reasons:
- To increase the performance of the video card.
- Change voltage parameters with power consumption.
- To set up a system for mining cryptocurrency.
The software copes with each of the tasks.
The subtleties of the firmware through the graphical shell
Note that this method is only suitable if there are three GPUs in the system. Not more. Otherwise, the utility is not able to show all subsequent ones. Therefore, in this situation, it is worth using the command line. More about this above.
The video card must not only be displayed in Device Manager, but also fully functional. Otherwise, the AMD driver has blocked the custom BIOS.
If you have several identical AMD video cards in your system , then you need to specify the flashing of all video adapters with the same BIOS. Use the file where the modified BIOS is located (for example, BOIS_mod.rom). The command will look like this:
atiflash.exe-pa BIOS_mod_480.rom.
If you have two different GPUs in your system: R9390 and RX 5700, then run the utility with the key –i. View a list of all displayed graphics adapters. Remember the number of the required video adapter. In the command line, write:
Atiflash.exe -video adapter number
Suppose it has parameter 1. Then the command looks like this:
atiflash.exe –p 1 BOIS-mod_480.rom
Troubleshooting
Error 0fl01.
Freezing of the GPU or system when flashing BIOS. When updating the BIOS of the video adapter, you must disable it using the “Device Manager”. Also try restarting your computer.
After completing the BIOS update and restarting the PC, the graphics processor is detected, but does not work. There are manufacturer’s drivers that block the operation of the video adapter with an unsigned BIOS.
If you see the inscription: not found adapter — check the correct operation of the video card in the Device Manager.
Old version
ATI Winflash (old)
Versions
- 2.74
- 2.93 — not available
- 2.77
- 2.84
- 2.87 — not available
Video: Solving the Subsystem ID Mismatch error when flashing the BIOS of a video card, RX 570 580 5700
subscribe
This video shows how to correctly and easily resolve the Subsystem ID Mismatch error when flashing the BIOS of an AMD based graphics card. There are other methods, more complicated and tricky, but using this method it will be possible to avoid bugs and further problems with the video card.
The subsystem mismatch error indicates the wrong choice of firmware or its size. Then it is worth copying the data through Polaris BIOS Editor to the desired file format.
This problem occurs when you try to flash the BIOS of a video card with a BIOS file from another video card or an incompatible BIOS chip model.
Video: Subsystem ID Mismatch solution is the simplest and most correct method.
subscribe
Downloads
4.17
3.31
3.20
3.04
3.79
Old versions:
2.93
2.84
2.74
2.71
Categories: tools
Updated:
11 minute read
Booting from a flash drive in BIOS and UEFI
When installing Windows from a flash drive, it becomes necessary to set the boot from a USB drive, which requires configuring the BIOS so that the computer boots from the desired media. This article will discuss how to boot from a USB flash drive into BIOS or UEFI on a computer or laptop.
This article provides examples for various BIOS/UEFI interface options and provides solutions to the most common problems that you may encounter when changing the boot order. The end also describes what to do if you cannot enter BIOS or UEFI software on modern PCs and laptops.
- Using Boot Menu
- Enter BIOS
- Change boot order in BIOS and UEFI to boot from USB
- Booting from a flash drive in older BIOS versions
- Booting from USB without entering BIOS
- What to do if you can’t open BIOS or Boot Menu
- Video instruction
Using the Boot Menu to boot from a flash drive
In most cases, booting from a flash drive into BIOS is required for some one-time task: installing Windows, checking the computer for viruses or restoring the system using LiveCD, resetting the Windows password . In all these cases, it is not necessary to change the BIOS or UEFI settings, just call the Boot Menu (boot menu) when you turn on the computer and select the USB flash drive as the boot device once.
For example, when installing Windows, you press the desired key to open the Boot Menu, select the connected USB drive with the system distribution kit, start the installation — configure, copy files, etc., and after the first reboot, the computer will boot itself, but already from the hard disk and will continue the installation process in the normal mode.
I wrote in great detail about entering this menu on laptops and computers of various brands in the article How to enter the Boot Menu (there is also a video instruction). Please note that the flash drive may not be displayed in the Boot Menu. Why this happens is detailed in the article What to do if BIOS / UEFI does not see a bootable USB flash drive in the Boot Menu.
How to get into the BIOS to select boot options
In different cases, in order to get into the BIOS setup utility, you need to perform essentially the same actions: immediately after turning on the computer, when the first black screen appears with information about the installed memory or the logo of the computer or motherboard manufacturer, press the desired button on the keyboard — the most common options are Delete and F2. If, when you shut down an already installed system and turn on your computer, you don’t have time to open the BIOS, use not “shutdown”, but the “Reboot” item and immediately, when the screen darkens, start repeatedly pressing the desired key.
Usually, this information is at the bottom or, in older BIOSes, at the top among the text of the initial screen: «Press Del to enter Setup», «Press F2 for Settings» and the like.
By pressing the right button at the right time (the sooner the better — this must be done before the operating system starts loading) you will be taken to the settings menu — BIOS Setup Utility (the name may be different, but the essence is the same — this is the BIOS / UEFI settings interface) . The appearance of this menu may vary, consider some of the most common options.
Changing the boot order in the UEFI BIOS to boot from USB
On modern motherboards, the BIOS interface, or more precisely, the UEFI software, as a rule, is more often graphical on PCs, but textual on laptops. In all cases, it is usually not difficult to figure out exactly how to boot from a USB flash drive. Below are some examples and by analogy, most likely, you can successfully change the boot order on your system.
As a rule, in order to boot from a flash drive, we need to perform the following steps (I describe in relation to the image above, which is one of the most common options, and further I will give other implementations of changing the boot order):
- Go to the Boot section in BIOS/UEFI. This can be done either with the keyboard arrows (right) or, in some cases, with the mouse. Sometimes boot options can be configured directly on the main BIOS screen.
- Depending on the specific BIOS, you will see either a list of boot devices (disks connected to the computer), or several Boot Option items with numbers.
- In the first case, you need to put your flash drive in the first place: to do this, select it and use the F5 key to move it up (Fn + F5 on some laptops).
 In the second case, select Boot Option 1, press Enter and select the bootable USB flash drive from the list.
 - Saving the settings: this can be done on the Exit tab, or, most often, by pressing the F10 key with the Save Settings and Exit Setup confirmation.
The most common problem when specifying a boot device in modern BIOS / UEFI is the lack of a bootable USB flash drive in the list of boot devices. Most often this happens if the boot type set in the BIOS (in the screenshot above — UEFI in the OS Type section) and the boot type supported by the flash drive do not match. For example, if you use a USB flash drive for Legacy mode for the above image, you would not be able to select it as the first boot device. For more information about the problem and methods for fixing it, see the article mentioned earlier about why the BIOS does not see the bootable USB flash drive.
Above was an example of one of the most typical BIOS (UEFI) options for today, but other implementations are possible.
- For example, on some Gigabyte motherboards, you will see a list of connected devices in the Boot Sequence item on the first screen and it will be enough to drag your flash drive to the first place with the mouse.
- Another implementation, also on Gigabyte: there is no Boot tab, you need to go to BIOS Features, and then go to Boot Option Priorities.
- An interesting approach on branded Intel motherboards: here you can configure the boot order directly on the main screen, separately for Legacy mode and UEFI mode (using the mouse), and in Adavnced Options you can get a more detailed idea of the available boot devices for each of the modes.
- The following is a relatively simple example of setting up a USB flash drive as the first boot device on Asus. Please note that here, in order to enable Legacy boot support, you need to enable the CSM (Compatibility Support Mode) option on the same Boot tab.
- Below is an example of how to boot from a flash drive on an HP laptop.
 Here in BIOS you need to go to System Configuration, and already there in Boot Options, where you can find (for some models) a separate list of boot devices for UEFI and Legacy mode. We set the flash drive to the first place using the F5 / F6 keys for the desired boot mode.
If you don’t find anything similar in your BIOS, carefully study the various BIOS / UEFI sections, such as BIOS Features, System Configuration, Advanced Configuration and try to find something related to Boot in these sections.
Configuring Boot from a Flash Drive in Old BIOS Versions
On older motherboards and laptops, there are some features of changing the boot order, especially when the user needs to configure boot from a USB drive. Let’s look at a few examples.
AMI BIOS
Not only in AMI BIOS, but also in some other BIOS versions of the same years, you may not find flash drives to select as a boot device, and existing items, such as USB-HDD, may not work. There is a solution for this situation.
Please note that in order to do all the described actions, the flash drive must be connected to the computer in advance, before entering the BIOS. In order to set boot from a flash drive in AMI BIOS:
- In the menu above, by pressing the right key, select the item «Boot» (Download), but do not go to Boot Device Priority.
- After that, select the item «Hard Disk Drives» (Hard drives) and in the menu that appears, press Enter on «1st Drive» (First disk). If there is no such item, see if there is an Integrated Peripherals section in the BIOS — sometimes the order of hard drives (separately from the boot order) can be configured there.
- In the list, select the name of the flash drive, it will be visible in the list of hard drives — in the second picture, for example, this is Kingmax USB 2.0 Flash Disk. Press Enter, then Esc.
- Next select «Boot device priority».
- Select «First boot device», press Enter.
- Specify a flash drive as the first boot device, it will be present here as a normal hard drive.

Upon completion, press Esc, in the menu at the top from the Boot item (Download), move to the Exit item (Exit) and select «Save changes and exit» (Save changes and exit) or «Exit saving changes» — to the request that you are sure If you want to save your changes, you will need to select Yes or type «Y» on the keyboard, then press Enter. After that, the computer will restart and start using the USB flash drive, disk or other device you selected for booting.
Booting from a flash drive to BIOS AWARD or Phoenix
In order to select a device to boot into the Award BIOS, in the main settings menu, select «Advanced BIOS Features» (advanced BIOS settings), then with the First Boot Device selected, press Enter.
A list of devices from which you can boot will appear — HDD-0, HDD-1, etc., CD-ROM, USB-HDD, and others. To boot from a flash drive, you need to install a USB-HDD or USB-Flash. To boot from a DVD or CD CD — CD-ROM. After that, we go up one level by pressing Esc, and select the menu item «Save & Exit Setup» (Save and exit). If the USB-HDD method didn’t work, try the approach shown in the previous method, but look for the order of the hard drives in the Integrated Peripherals section.
Configuring boot from external media in older versions of h3O BIOS
To boot from a flash drive into the Insydeh30 BIOS, which is found on many laptops, in the main menu, using the right key, you need to reach the «Boot» item (Download). Set the External Device Boot item to Enabled. Below, in the Boot Priority section, use the F5 and F6 keys to set the External Device to the first position. If you want to boot from DVD or CD, select Internal Optic Disc Drive (Internal optical drive).
Then go to Exit in the top menu and select Save and Exit Setup. The computer will restart from the correct media.
Booting from USB without entering BIOS (only for Windows 11, 10 and Windows 8.1 with UEFI) entering the BIOS settings. The method does not work on any system (the item discussed below may not be available even on UEFI systems), and the boot drive must be connected at the time of the steps.

In order to reboot using this method, while holding Shift, click on the «Restart» item in the shutdown menu in the Start menu or on the lock screen. The second method: go to settings — change computer settings (through the panel on the right in Windows 8 and 8.1), then open «Update and Recovery» — «Recovery» and click the «Restart» button in the «Advanced boot options» item.
On the Select Action screen that appears, select Use Device. USB device, network connection, or DVD.
On the next screen, you will see a list of devices you can boot from, which should include your flash drive. If suddenly it is not there, click «View other devices». Once selected, the computer will reboot from the USB drive you specified.
What to do if you can’t enter BIOS to boot from a flash drive
Due to the fact that modern operating systems use fast boot technologies, it may turn out that you simply cannot enter BIOS in order to change settings and boot from the desired device. In this case, I can offer two solutions.
The first is to enter the UEFI software (BIOS) using the special boot options for Windows 10 (see How to enter BIOS or UEFI Windows 10) or Windows 8 and 8.1. I described in detail how to do this here: How to enter BIOS in Windows 8.1 and 8
The second is to try disabling Windows fast boot, and then enter BIOS in the usual way, using the Del or F2 key. To disable fast boot, go to the control panel — power options. Select «What the power buttons do» from the list on the left.
And in the next window, uncheck «Turn on fast startup» — this should help in using the keys after turning on the computer. Read more: How to disable fast startup in Windows 10.
Video instruction
You can read how to create bootable installation flash drives here:
- Bootable Windows 11 flash drive
- Windows 10 bootable flash drive
- Windows 8 bootable flash drive
- Bootable flash drive Windows 7
- Windows XP bootable flash drive
As far as I can tell, I described all the typical and most common options: one of them should definitely help, provided that the boot drive itself is in order. If suddenly something does not work out — I’m waiting in the comments.
remontka.pro in Telegram | Other ways to subscribe
Support the author and the site
How to configure BIOS to boot from a USB flash drive
Share
0
What you need to know about booting from a flash drive in BIOS
When you start your computer, you can boot from various media. Usually from the internal hard drive or SSD where the operating system is installed. Flash drives, external drives, optical discs are less commonly used.
You may need to boot from a USB disk when installing the OS on a new computer, reinstalling the system after a crash, scanning and removing viruses, starting from a backup disk, and in other similar cases.
In order for the PC to know which disk to boot from, there is a boot order (boot priority). This is one of the BIOS or UEFI options that allows you to set the boot media priority in the desired sequence. If the computer fails to boot from the first disk in the boot list, it tries the second, third, and so on.
For a one-time boot from a flash drive, you can use the Boot Menu, and to set up permanent priorities, the Boot Device Priority menu is useful. The latter is slightly different between the text-based BIOS on older computers and UEFI, the successor to the GUI BIOS with mouse support. We will consider them separately.
For one-time cases, for example, when checking for viruses, it is more convenient not to change the boot order, but to select the desired drive through the Boot Menu at startup. So much faster and easier.
To get to this menu, connect a flash drive, restart the computer and immediately after turning it on, press the F12, F11 or Esc key — which one depends on the hardware manufacturer. Usually the combination is indicated on the screen, the main thing is to have time to read it. And in order not to miss the right moment, press the button several times until the menu opens.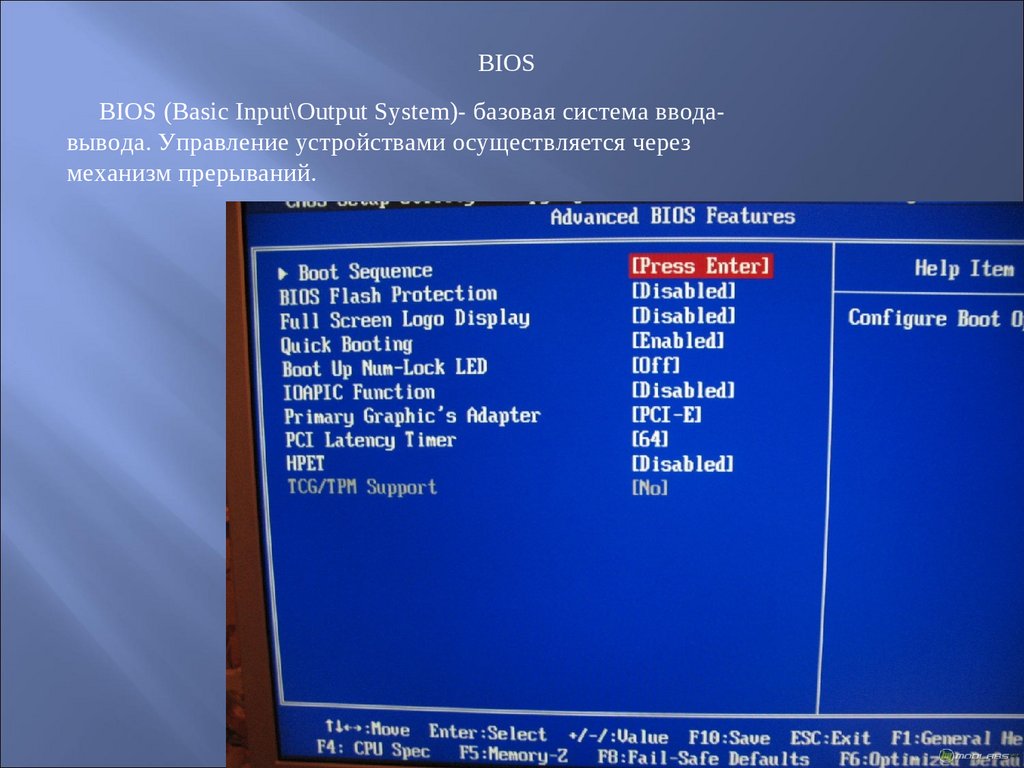
Image: Artyom Kozoriz / Lifehacker
Boot menu looks like a simple plate with a list of available boot disks, but its appearance may be different. Use the arrows to select USB Storage Device (it can be just the name of the drive instead) and press Enter. After that, the download from the flash drive will begin.
How to configure the BIOS to boot from a flash drive through the Boot Priority menu
Using this option, you can set a constant boot priority that the PC will adhere to. To do this, connect the drive, restart the computer, and quickly press the Delete or F2 key several times until the settings open. In rare cases, other buttons may be used, see the separate instructions for entering the BIOS for details.
Image: Artyom Kozoriz / Lifehacker
Switch to the Boot tab with the arrows on your keyboard, select the first item in the list and press Enter. Select the flash drive from the list and confirm with the Enter button. Press the F10 key to apply the assigned changes, and again Enter. The computer will restart and start booting from the USB drive.
The Boot menu is usually found on the main screen, but may be hidden inside Advanced BIOS Features or Advanced Settings in some software vendors.
How to configure UEFI BIOS to boot from a flash drive through the Boot Priority menu
On modern computers where UEFI is used instead of BIOS, the priority of boot drives is set in a similar way, even easier. The differences are minimal and are only in the interface.
Connect USB flash drive to PC and reboot. Quickly press the Delete or F2 key as soon as the screen lights up after turning it on. If these buttons do not work, look for the combination in our instructions for entering BIOS and UEFI.
Frame: Ramtech / YouTube
Locate the Boot Device Priority or Boot Priority section. As a rule, it is located on the main screen. Try simply dragging the name of the flash drive to the first place in the list with the mouse — this works in the software of many manufacturers. If you do not see such a section, switch to Advanced Mode or open the menu with additional settings (Advanced).
Frame: Ramtech / YouTube
Here, in the expert menu, switch to the Boot tab, click on the first item in the list of boot devices and select your USB drive. Press the F10 key and confirm the changes to restart the computer and boot from the flash drive.
Read also ???
- 4 reasons to update the BIOS on a PC and 2 reasons not to do it
- How to overclock the processor and not harm the computer
- How to reset the BIOS and revive the computer
- How to put a password on the BIOS to protect the computer
- What do BIOS signals mean
What is the name of the flash drive in BIOS
Content
- How to set the loading from a flash drive to BIOS
- Award
- Other versions
- Preparation of USB drive
- Creation of a boot flash drive
- How to run a flash drive
- Launch from a flash drive in Award
- How to install USB boot in AMI Bios
- How to put boot from USB in Phoenix-Award Bios
- How to boot Windows from a flash drive into EFI (UEFI) Bios
You have a bootable USB flash drive with the distribution of the operating system, and you want to do the installation yourself, but when you insert the USB drive into your computer, you find that it does not boot. This indicates the need to make the appropriate settings in the BIOS, because it is with it that the hardware configuration of the computer begins. It makes sense to figure out how to properly configure the OS to boot from this particular storage device.
How to set boot from a flash drive in BIOS
First, let’s figure out how to enter the BIOS in general. As you know, the BIOS is located on the motherboard, and on each computer it differs in version and manufacturer. Therefore, there is no single key to enter. The most commonly used are Delete , F2 , F8 or F1 . Read more about this in our article.
After entering the menu, all that remains is to make the appropriate settings. In different versions, its design is different, so let’s take a closer look at a few examples from popular manufacturers.
Award
There is nothing complicated in setting up booting from a flash drive in the Award BIOS. You need to carefully follow the simple instructions and everything will work out:
-
Immediately you get to the main menu, here you need to go to «Integrated Peripherals» .

Go to «Advanced BIOS Features» to further configure the startup priority.
Move again with the arrows and select item «Hard Disk Boot Priority» .
Using the appropriate buttons, put the connected USB flash drive to the very top of the list. Typically, USB devices are signed as «USB-HDD» , and opposite the media name.
In AMI BIOS, the setup process is slightly different, but it is still simple and does not require additional knowledge or skills from the user. You are required to do the following:
-
The main menu is divided into several tabs. First of all, you need to check the correct operation of the connected flash drive. To do this, go to «Advanced» .
Here select item «USB Configuration» .
Find line «USB Controller» here and check that status «Enabled» is set. Please note that on some computers, after «USB» , another «2.0» is written, this is the required connector, just a different version. Save the settings and exit to the main menu.
Go to tab «Boot» .
Select item «Hard Disk Drives» .
Use the arrows on your keyboard to navigate to the line «1st Drive» and select the required USB device from the pop-up menu.
Other versions
The algorithm for working with BIOS for other versions of motherboards is similar:
- Start the BIOS first.
- Then find the device menu.
- After that, enable item «Enable» on the USB controller;
- Select the name of your flash drive as the first item in the device startup order.

If the settings have been made but the media cannot be loaded, the possible causes are:
- The bootable flash drive was written incorrectly. When turning on the computer, the drive is being accessed (the cursor in the upper left part of the screen blinks) or error 9 appears0255 «NTLDR is missing» .
- Problems with the USB connector. In this case, plug your flash drive into a different socket.
- Incorrect BIOS settings. And the main reason is that the USB controller is disabled. In addition, in older BIOS versions, booting from flash drives is not provided. In such a situation, you should update the firmware (version) of your BIOS.
For more information on what to do if the BIOS refuses to see removable media, read our lesson on this topic.
You may have incorrectly configured the USB flash drive itself to install the operating system. Just in case, check all your actions according to our instructions.
And these instructions will be useful to you if you are recording an image not from Windows, but from another OS.
And do not forget to return the settings to their original state after you no longer need to log in from a bootable USB flash drive.
If the BIOS setup fails, simply go to 9 at system startup0255 «Boot Menu» . On almost all devices, different keys are responsible for this, so read the footnote at the bottom of the screen, it is usually indicated there. After opening the window, select the required device to boot. In our case, this is USB with a specific name.
We hope that our article helped you understand all the intricacies of setting up the BIOS to boot from a USB flash drive. Today we examined in detail the implementation of all the necessary actions on the BIOS of the two most popular manufacturers, and also left instructions for users who use computers with other BIOS versions installed on them.
Thank the author, share the article on social networks.
Most often, we remember the BIOS (Basic Input/Output System) only when we need to reinstall the operating system and we need to somehow set it to boot from a disk or flash drive. I often wrote about this in articles such as: Installing windows 7 on a new PC, Installing Windows XP from a USB flash drive, 4 ways to install Windows 7 from a USB flash drive. Creating a bootable flash drive, Installing Windows 8 on a computer, laptop or tablet, and others. Now I want to gather together and refer only to this article when necessary. This article will be useful for all BIOS versions and for different companies. A sort of single reference book
The first thing you need to know is that the BIOS is divided by manufacturer and version.
To change the boot method in the BIOS, you must first enter it.
You can, of course, find out what version and manufacturer of your BIOS is from the manual that comes with your computer.
You can also find out by looking at the line at the top on the black screen during boot (the manufacturer will be indicated there).
Well, then enter the BIOS, knowing which one you have.
Here is a small list of manufacturers and keyboard shortcuts for entering BIOS:
Also, at the bottom of the black screen, keys are written to enter the BIOS and to display a list that contains available devices for booting and so that you can boot from it. But about him at the end of the article.
As you can see, most often you need to press the key F2 or Del .
Now you need to put a USB flash drive or disk into the boot.
Let’s look at a few examples that differ by BIOS manufacturer.
Award Bios setup for booting from a flash drive or disk:
The main window is like this, in which we need the second item:
Note:

If you choose a flash drive, then, among other things, you also need to go to the «Hard Disk Boot Priority» item and move our flash drive to the very top using the «+» and «-» or «PageUp» and «PageDown» buttons:
Which translates to «Press any button to boot from CD or DVD.»
This means that if at this moment you do not press any button on the keyboard, the computer will continue to boot from the next device in the list.
Another variation of this bios:
How to choose what to boot into AMI BIOS
If you see such a screen when entering BIOS, then you have AMI BIOS :
To boot from a CD/DVD drive, you need to select «ATAPI CD-ROM» (or simply «CDROM») in this menu, there is no need to go to the previous menu «Hard Disk Drives».
Now we save the results with the «F10» button or go to the BIOS section «Exit» and select «Exit Saving Changes».
Another AMI BIOS , but everything is clear here:
Configuring Phoenix-Award Bios to boot from a flash drive
If you see this screen when entering BIOS, then you have a Phoenix-Award BIOS:
Configuring EFI (UEFI) Bios with a graphical interface for booting from a USB flash drive
Now you will not surprise anyone with this. Almost all new computers are supplied with a similar shell. You can read more about it in the article Why is UEFI better than a regular BIOS and what are the differences.
When loading, at the bottom of the screen there is a «Boot Priority» section, where you can use the mouse (drag and drop) to set the desired boot order.
You can also click on the «Exit/Advanced mode» button in the upper right corner and select Advanced mode in the window that appears.
How to boot from a flash drive or from a disk without entering BIOS
This is what I wrote about almost at the very beginning of the article.
This is when you need to press the key once and a window will appear with a choice of download. This method does not change the BIOS settings.
Usually Award BIOS prompts you to press «F9» to bring up the boot menu, and AMI asks you to press «F8». On laptops, this may be the «F12» key.
In general — look at the bottom line and look for items like «Press F8 for BBS POPUP» or «Press F9 to Select Booting Device after POST».
Why can’t I boot from a flash drive into the BIOS?
Possible causes:
-
Disabled USB controller in BIOS.
To check this in the Award BIOS, you need to go to the «Advanced Chipset Features» or «Integrated Peripherals» section.
We are looking for the option «USB Controller», it should be «Enabled»
Problems with front USB inputs, try other or rear ones.
 You need to check it on a working computer.
 Do not forget after you have done what you wanted (namely — why did you change the boot in the BIOS) — return the boot settings back so that the computer boots from the hard disk.
Users often need to boot their PC from third-party media. So, for example, in the case of reinstalling Windows, you need to boot from a USB flash drive in BIOS. The same need may arise if you need to roll back the system to a restore point.
USB stick preparation
In order for the system to boot from a USB flash drive, it is necessary to prepare the drive itself. The drive should be selected based on the size of the operating system. So, Windows 7 weighs 2.5 GB, and version 8 already weighs 4 GB. Naturally, the drive is worth buying a larger volume. If you already have an old flash drive at hand, then it must be formatted. Simply deleting the data will not solve the problem. The flash drive may contain viruses and system errors. Then writing the OS image will not work.
How to format a flash drive? We connect the device to the PC, open «My Computer». Right click on the icon and select «Format».
Specify the file system parameters (if you select any of the parameters, the flash drive will be compatible with Windows, but the maximum file size will be limited):
- 1. FAT32. On such a drive, it will not be possible to write files larger than 4 GB.
- 2. exFAT. On such a drive, you can store files of any size.
- 3. NTFS. Many devices will not see the drive.
In « Volume label » specify the name of the drive. We select the item « Quick Cleanup » and click « Start «. Next, you need to download the image of the licensed OS on the Microsoft website. Before downloading, you need to enter the serial key and select the system language.
Creating a bootable flash drive
To boot from a PC flash drive, you need to create a system image. Let’s see how to do it using the USB/DVD Download Tool.
- Download and run the application.
- The first step is to specify the path to the OS image.
- Next, select the drive.
- And press the button » Begin copying «.
After copying the image, you can start installing and changing the BIOS settings.
How to run a flash drive through BIOS — step by step instructions
Most often, in order to boot from a USB flash drive, you do not need to change the BIOS settings. It is enough to call the boot menu while turning on the computer and select the USB flash drive.
The problem for most users is to get into the BIOS system. Regardless of how the version is installed, to boot from a USB flash drive, you need:
- Insert the memory stick into the computer’s USB port. It is advisable to use the port located on the motherboard, i.
 e. from the back of the block.
 - Check. whether the usb controller is enabled.
- Start the PC by holding certain keys. A hint will be displayed on the screen when the system starts. For example, in the screenshot below, you need to hold DEL to open the BIOS.
- Go to the download section and select the flash drive in the list of devices.
- Save the changes made.
You can only use the arrow buttons to move through the menu items, and Enter to confirm your selection.
Run from a flash drive in Award Bios
This is what the Award Bios loading screen looks like:
Go to the section » Integrated Peripherals «. We go down to point « USB Controller «. Press « Enter «. In the new window, select » Enable «. In a similar way, we change » USB Controller 2.0 «.
Press « Esc » to exit to the main menu. Go to the « Advanced BIOS Features » section. We go down to the item » Hard Disk Boot Priority «. The screenshot below shows that the download is carried out from the hard drive.
How to boot from a flash drive in BIOS? Go to the line with the name of the flash drive (Patriot Memory) and drag it to the very top using the «9» key0399+«. Exit the menu by pressing » Esc «.
In the line « First Boot Device » press « Enter «. In the drop-down menu, select « USB-HDD » (or « USB-FDD «). The second device should be « Hard Disk «.
In order for the USB flash drive to be loaded after the restart, you need to save the changes. To do this, press « Esc » and in the message « Save & Exit Setup » select « Y «.
Installing a boot from a USB flash drive in AMI Bios
The screenshot below shows the AMI Bios startup screen.
We check the USB controller on the tab « Advanced » — « USB Configuration «.
Opposite « USB Function » and « USB 2.0 Controller » should be « Enabled «.
To change the parameter values, stand on the line, press « Enter «. From the list, select » Enabled «. Exit the menu by pressing » Esc «.
How to boot from a flash drive in BIOS? On the « Boot » tab, instead of « Hard Disk Drives » you need to select « Patriot Memory «.
To do this, we stand on the line and press « Enter » and in the window that appears, select our flash drive Patriot Memory .
Exit the section through « Esc «. Go to the section » Boot Device Priority «. Here, the first device should be a flash drive.
We close the BIOS, saving the changes.
After restarting, the PC will boot from the flash drive.
How to boot from a flash drive in Phoenix-Award Bios
The screenshot below shows the Phoenix-Award BIOS startup screen.
Checking the operation of the controller is carried out on the tab « Peripherals «. Opposite « USB Controller » and « USB 2.0 Controller » should be « Enabled «.
To change the parameter values, stand on the line, press » Enter «. From the list, select » Enabled «. Exit the menu by pressing » Esc «.
How to boot from a flash drive in BIOS? On the “ Advanced ” tab, opposite “ First Boot Device ”, set “ USB-HDD ”.
We exit the OS, saving the changes.
After restarting, the PC will boot from the flash drive.
How to boot Windows from a flash drive into EFI (UEFI) Bios
Notebooks with UEFI will not be able to quickly change settings. To run the flash drive through BIOS, you must disable this Secure Boot protocol. It blocks the system from booting from any third-party drive. Next, you will need to enable « compatibility mode with other OS «.