MSI Afterburner GPU Utility Gets A Long Overdue Update With These Upgraded Features
homeNews
MSI has launched the first new stable release of its popular Afterburner graphics card utility in years. The tool facilitates a host of graphics card tweaks, with the latest ‘4.6.5 stable’ version most notable for adding compatibility with the latest architecture GPUs from both AMD and NVIDIA. Yes, this update is long overdue, as enthusiasts have been toying with the GeForce RTX 40 and Radeon RX 7000 cards for several months.
Earlier this year, we reported on some of the reasons that MSI Afterburner hadn’t been updated at its usual pace through most of 2022. You can read the full story via the link, but as the software author summed up in a forum post, “war and politics are the reasons.” To provide a little more detail, Alexey «Unwinder» Nicolaychuk couldn’t get paid by MSI due to the disconnection of the Swift payment scheme from Russian banking. It didn’t help that MSI had been very slow to respond with regard to the payments issue – apparently spurred into action by rumors of the utility’s demise in the tech media.
Now we have the new MSI Afterburner 4.6.5 stable release at hand. It has been a long time since the last ‘stable’ release, with fans of the software having to put up with beta releases in the interim. In fact, the previous ‘stable’ release of Afterburner dates back to 2019.
Thanks to the long delay between releases, and Unwinder’s work ethic, there are many more additions to Afterburner than the important support for the GeForce RTX 40 and Radeon RX 7000 cards. Elsewhere in the release notes, we are pleased to see voltage controls for the newest GeForce RTX 3060 Ti cards, the addition of Intel Arc GPUs to hardware monitoring, and the preliminary support for Intel 13th Gen Core and AMD Ryzen 7000 processors.
Scope out the Guru3D hosting page for the full release notes or see below. We also checked MSI’s own Afterburner pages, but they hadn’t been updated at the time of writing (still offering v 4.6.5 Beta 4). For your safety, please remember not to grab MSI Afterburner from anywhere except for MSI direct or Guru3D.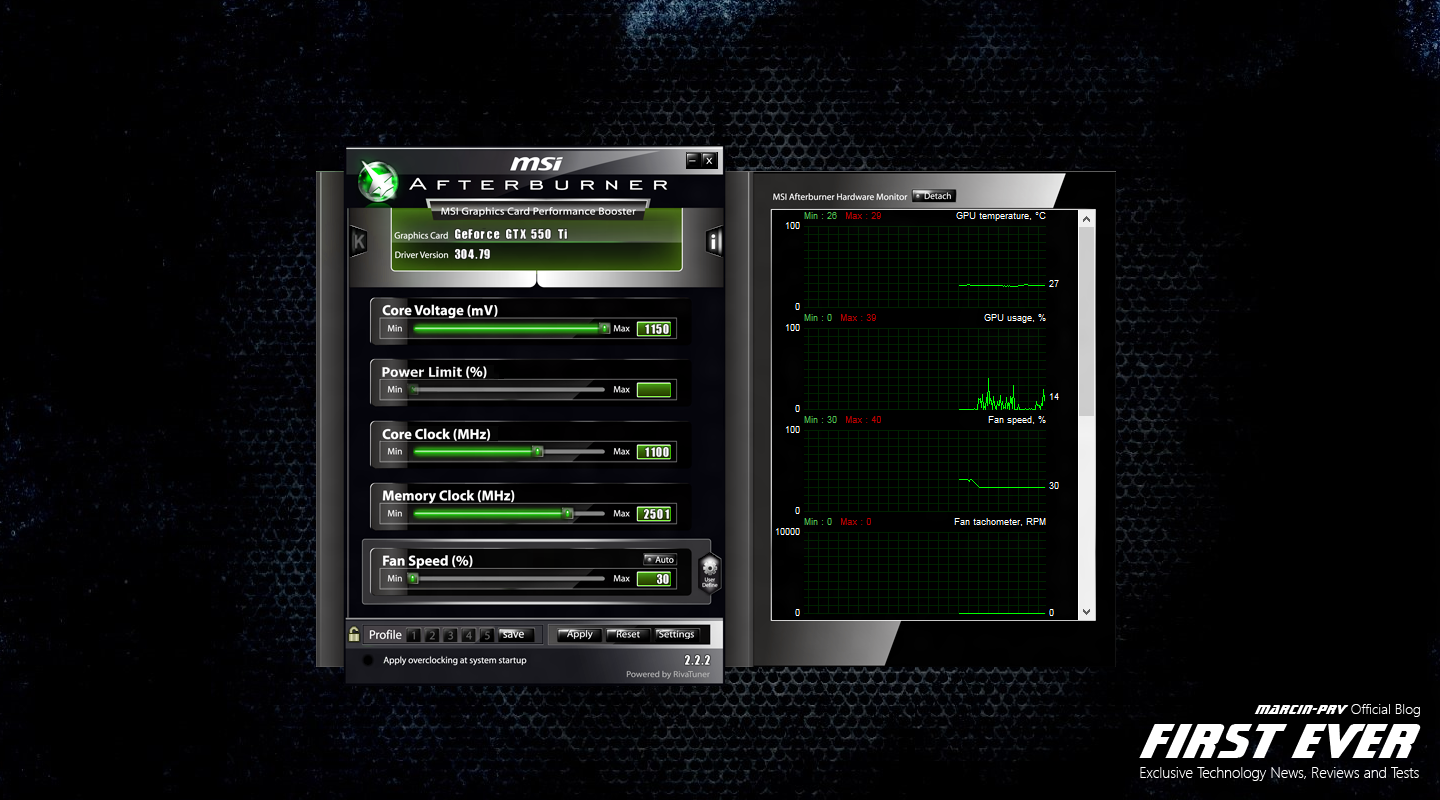
MSI Afterburner Version 4.6.5
- Added NVIDIA GeForce RTX 40×0 series graphics cards support
- Added voltage control support for GA103 and GDDR6x based versions of NVIDIA GeForce RTX 3060 Ti
- Added AMD RADEON RX 7900 series graphics cards support
- Added total board power monitoring support for AMD RADEON RX 7900 series graphics cards
- Added some future AMD and NVIDIA GPU PCI DeviceIDs to hardware database
- Added Intel Arc GPUs support to hardware monitoring module. Please take a note that Intel Arc GPUs overclocking and tuning is currently not supported due to Intel hardware control API support limitation to x64 applications only
- Added experimental support for Intel 13th generation CPUs
- Added experimental support for AMD Ryzen 7xxx CPUs
- CPU usage data sources in hardware monitoring module have been switched to alternate implementation based on NtQuerySystemInformation(SystemProcessorIdleInformation), because traditional legacy idle time reporting in NtQuerySystemInformation(SystemProcessorPerformanceInformation) is broken in current Windows 11 22h3 builds
- Added workaround for broken fixed fan speed programming API (Overdrive 5 compatible fallback path) for old Overdrive 7 GCN GPUs on 22.
 5.2 and newer AMD drivers
 - Added config file switch for disabling native reliability voltage control API on NVIDIA GeForce GTX 9×0 series graphics cards and forcing legacy P-state 2.0 voltage control API usage on such hardware. Power users may use this switch to bypass voltage control lock on NVIDIA Maxwell series graphics cards on release 515 and newer drivers families
- Improved correction formula parser with data format conversion, rounding and min/max functions support
- Added OCMailbox based bus clock frequency monitoring for Skylake and newer Intel CPUs. Unlike traditional legacy timestamp clock based bus clock frequency estimations, OCMailbox provides support for overclocked BCLK monitoring. Please take a note that access to OCMailbox is blocked by design of OS when HVCI is enabled
- Improved SMART.dll monitoring plugin. Added temperature monitoring support for NVMe devices, including the secondary controller temperature for some Samsung NVMe drives
- Default clock frequency limit of voltage/frequency curve editor window has been extended to 3.
 5GHz. Please take a note that you may still customize the limits via config file if necessary
 - Update server location changed to new URL inside update checking system. Old update server location reached EOL
RivaTuner Statistics Server has been upgraded to v7.3.4
- New version’s changes list is huge, it includes more than 100 compatibility enhancements, changes and new features. We continue improving OverlayEditor plugin and the most of the improvements are related to it, we strongly recommend you to try it if you still use legacy MSI Afterburner’s On-Screen Display output functionality
- New version also includes upgraded DesktopOverlayHost utility, which can be used to display overlay right on your Windows desktop or on small external display mounted inside PC case similar to AIDA64’s SensorPanel
How to (Safely) Overclock Your Graphics Card with MSI Afterburner
Most gamers are familiar with overclocking, even if they haven’t tried it themselves.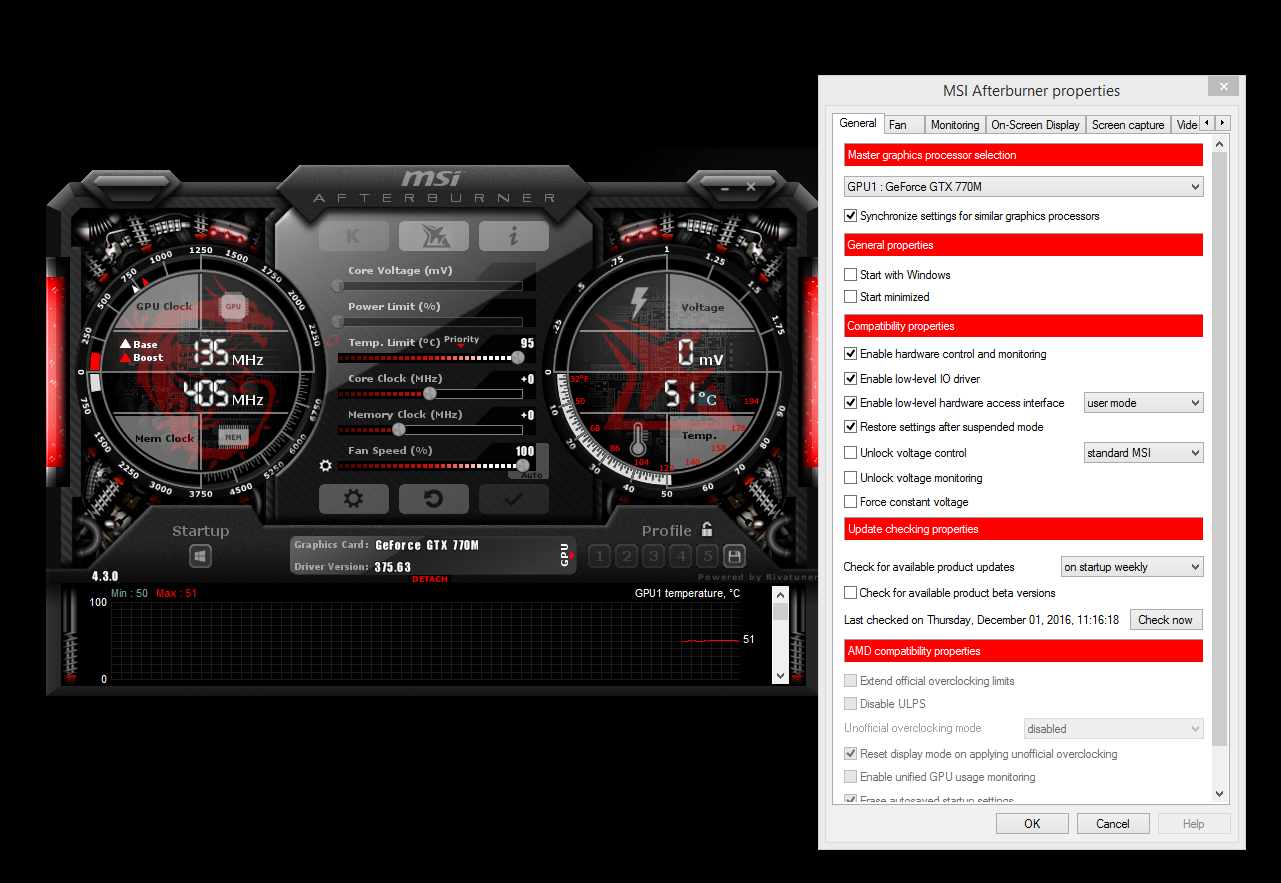 You can overclock your CPU to improve overall system performance or overclock your RAM to boost performance in multitasking and gaming sessions. Similarly, overclocking your graphics card is a nifty trick to extract additional performance without making hardware changes. Overclocking may seem like a daunting prospect if you’re new to it, so we created this basic guide on how to safely overclock your graphics card.
Good to know: having issues with your graphics card? Our guide on how to fix a faulty graphics card can help.
Content
- Is Overclocking Safe?
- How to Overclock Your GPU
- Set GPU Fan Curve for Silent Overclocking
- Frequently Asked Questions
Is Overclocking Safe?
Overclocking raises the clock speed (frequency) of any computer component to improve performance. In the case of a graphics card, this performance increase is seen in the form of increased frame rates while gaming.
The increase in clock frequency also requires an associated rise in the power limit of your graphics card.
Image source: Wikimedia Commons
Results will vary depending on how overclockable and powerful your GPU is. Therefore, you should research whether you can overclock your particular graphics card before going ahead and doing it.
Overclocking can also damage your GPU if not done correctly. Take extreme care not to overdo it. This guide will allow you to stay within the operational range of your GPU’s power and thermal limits while overclocking.
Note: The following guide is for Windows. If you run Linux and use an AMD GPU, follow this guide to overclock your graphics card.
How to Overclock Your GPU
Once you’ve checked whether your GPU can be safely overclocked, you can download the necessary tools. You’ll need the overclocking and hardware monitoring tool MSI Afterburner and the Unigine Heaven benchmarking tool. MSI Afterburner lets you overclock your GPU, monitor its temperature and voltage, and set custom fan curves. Unigine Heaven allows you to test the stability of your overclock.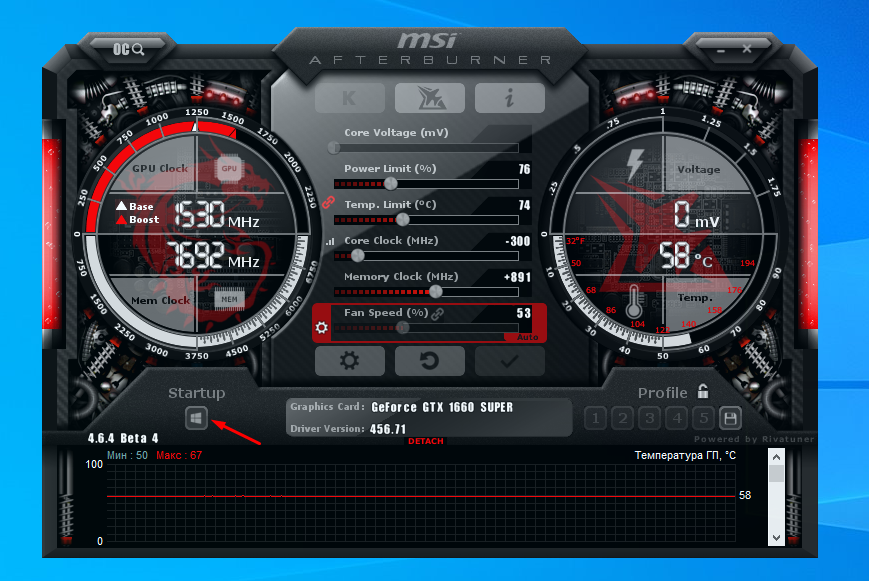
Follow the steps below to safely overclock your graphics card with MSI Afterburner:
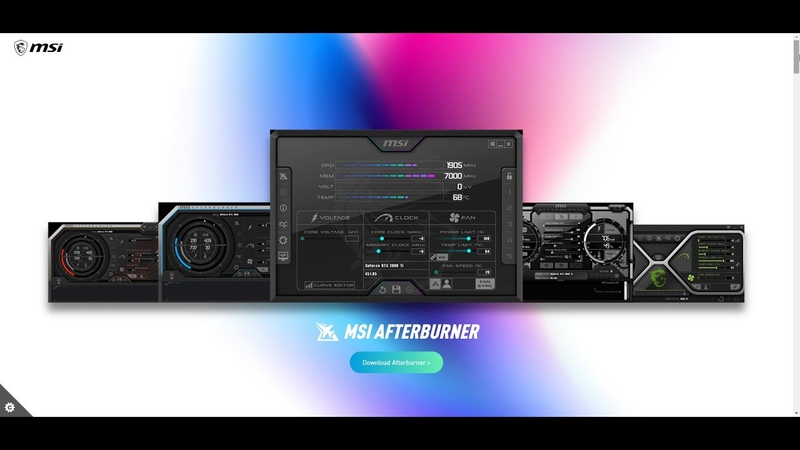
- Download MSI Afterburner. Make sure you’re using the link provided here instead of others from Google’s search results, as scammers have been known to dupe users with fake links that appear identical to MSI’s Afterburner page.
- Install and launch MSI Afterburner. On the main menu, you’ll see overclocking controls in the lower half and your GPU’s core readings in the upper half of the screen. The options on the left will let you access advanced settings.
- For this guide, you only need to focus on the “Core Clock” and “Memory Clock” sliders in the middle. You’re free to tweak both, but this is the difference between them:
- Core (GPU) Clock: Your GPU’s clock speed. Determines the bulk of the performance. High impact.
- Memory (VRAM) Clock: Your GPU memory’s clock speed. More effective on GPUs with low memory bandwidth.
 Low impact.
- Before increasing the core clock, check whether the “Power Limit” and “Temp Limit” sliders are unlocked for your graphics card. If they are, set “Power Limit” to “110%” and “Temp Limit” to “89%.” This is needed to allow more power and thermal headroom for your graphics card as we increase its core clock. If these sliders aren’t accessible for your GPU, you can proceed to the next step.
- The last step before you start tweaking your GPU’s frequency settings is to install Unigine Heaven. This is a graphical benchmark that lets you run simulations to determine the graphic performance of your system. We are using it to test how stable our overclock is and whether GPU can be run in that overclocked state in the long run.
- Launch Heaven and run a benchmark at stock settings to compare performance before and after overclocking. You can leave the default settings and click “RUN” at the bottom.

- Once the video starts playing, click “Benchmark” at the top. Otherwise, the software will keep the run going on a loop. Note the score at the end of the run.
- Switch to Afterburner and increase the core clock in 10 to 20 MHz increments. Use the box next to the “Core Clock” slider to enter the MHz increase directly. Don’t forget to click the checkmark button at the bottom after every change to apply it.
- Start a Heaven benchmark and observe the following:
- How much is the FPS improving?
- Is the temperature staying reasonable? (This varies between GPUs, but you don’t really want it going higher than 80C.)
- Are there graphical artifacts on the screen (glitching, flickering, strange colors)?
- If you don’t see extreme temperature or strange artifacts, you can increase the core clock by another 10 to 20MHz and perform the above checks again. Keep repeating this until you start getting issues (high GPU temperature, artifacts), then decrease the clock speed in tiny (1 to 2MHz) increments until you reach a stable balance between temperature and increased performance.
 You can also compare the Heaven benchmark score for your regular overclock and see how big of a jump you achieved compared to stock performance.
- Although Heaven’s benchmark run is a decent tool to check the stability of your overclock, you should leave it running on a loop for more than half an hour to see how your GPU copes over the long haul. You should also run demanding games to test your GPU in a real-world scenario, closely monitoring your GPU temperature simultaneously. Turn down that clock speed if it starts overheating, or you will experience constant stuttering or crashing.
- Once you’ve hit the sweet spot with your GPU clock, you can carry out the same process for your Memory Clock, increasing it until you start seeing adverse performance effects. Many people don’t report significant performance gains by increasing the memory clock, but you can experiment with it to see if you can extract additional FPS in your games.
- Once you’ve achieved stable GPU Clock and Memory Clock settings, you can save them in a profile by clicking any numbers on the right side of Afterburner’s main screen.
 Afterburner allows you to set up as many as five profiles.
Set GPU Fan Curve for Silent Overclocking
MSI Afterburner allows you to set custom fan curves if you aren’t satisfied with your GPU’s stock fan curve. Overclocking invariably makes your GPU fans run faster, increasing the noise and affecting your overall experience. You can try configuring a custom fan curve to remedy this, provided your fan curve allows enough cooling at higher temperatures to avoid damage to the GPU.
Image source: Unsplash
Refer to the MSI Afterburner section in our guide on Windows’s simplest fan control tools to learn how to configure your custom GPU fan curve.
Frequently Asked Questions
When is overclocking most recommended?
Modern graphics cards are more advanced and powerful than just a few years ago. Besides, many graphics cards are often factory-overclocked and run at higher than stock settings by default. The actual FPS improvement by overclocking modern cards is shrinking every year.
Therefore, overclocking is recommended for slightly older graphics cards, especially the ones with capable coolers. Also, if you’re getting under 60 FPS in games, overclocking your graphics card can help you push performance over the 60 FPS range for a smoother gaming experience.
What are the disadvantages of overclocking a graphics card?
Besides the potential to damage your graphics card, other disadvantages include higher thermals, more noise, increased power draw, and the need to invest in cooling fans or even liquid cooling solutions. This can sometimes shoot up your overall PC budget if you want to push your graphics card to its limits.
How hot is too hot for a GPU?
Although the exact temperature thresholds vary between different AIB models of the same GPU, it’s generally advised that running your GPU above 90C for too long can be harmful to its lifespan. Some premium graphics cards from reputable manufacturers use high-end cooling solutions to keep temperatures well below that range. If you’re keen on overclocking your graphics card, you should invest in at least a mid-range AIB model of the GPU of your choice. The cheapest graphics cards tend to compromise on components and aren’t suitable for aggressive overclocking.
Image credit: Unsplash. All screenshots by Tanveer Singh.
Tanveer Singh
Tanveer hunts far and wide for PC Hardware, Windows, and Gaming ideas to write about. An MBA in Marketing and the owner of a PC building business, he has written extensively on Technology, Gaming, and Marketing. When not scouring the web, he can be found binging on The Office, running for his life in GTFO, or wrecking karts in Smash Karts.
Subscribe to our newsletter!
Our latest tutorials delivered straight to your inbox
Sign up for all newsletters.
By signing up, you agree to our Privacy Policy and European users agree to the data transfer policy. We will not share your data and you can unsubscribe at any time.
- Tweet
After Msi Afterburner: How to Monitor Your CPU and GPU Temperature?
MSI Afterburner is one of the best CPU and GPU temperature monitoring software. We will show you all the details.
Don’t be fooled by the word «MSI» because that doesn’t mean it only works for branded products. MSI Afterburner is a program that is used to monitor CPU and GPU temperature , although it is more focused on the latter. We can do countless things, which we will talk about below. I advise you to feel comfortable because this information may interest you. Let’s start!
Content Index
MSI Afterburner: All in One
This is the complete program of because it has certain features that make it an adjective.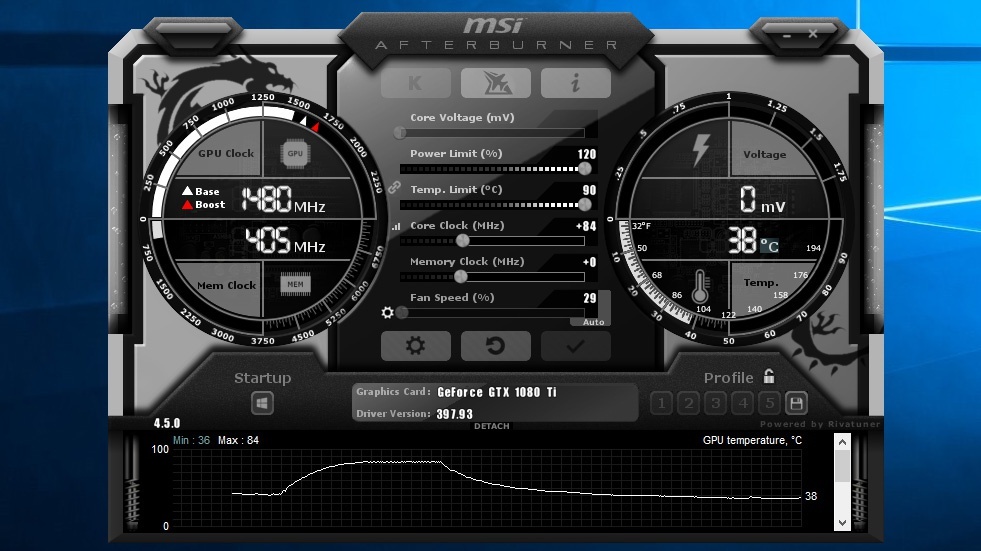 Perhaps it offers 3 main functions that make the public download this program:
- This allows you to overclock any graphics card. Regardless of manufacturer or model, we can «touch» or change values such as memory frequency, power limit, or core frequency. Monitors the temperature of the video card , as well as the temperature of the processor . However, it is more graphics card oriented as we will see later. Program fan speed . GPU fans allow heat to escape, making their speed very important at certain times. Utilities We have shortcuts to record what we see on the screen and we can customize absolutely everything; screenshots and test for performance testing.
You can download MSI Afterburner here .
With this short introduction, we will delve into each of the features of this great program.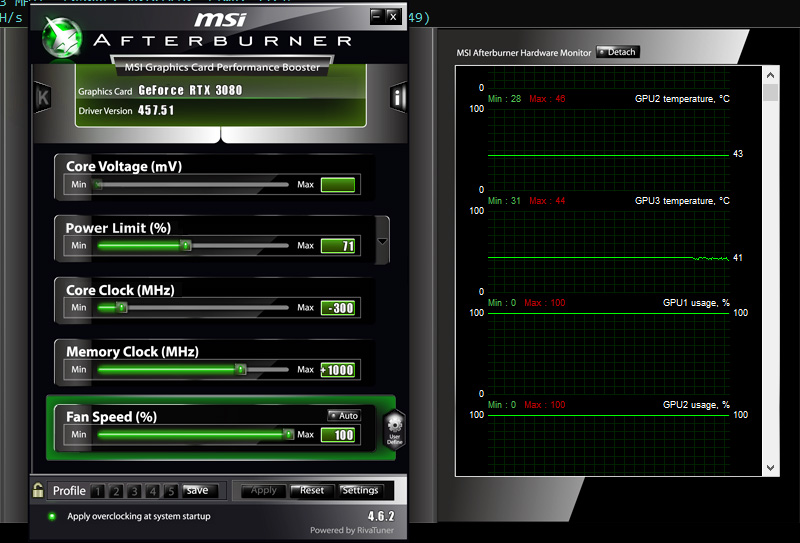
overclock
For this reason, the vast majority entered this input. This program is the most critical and community known for applying this technique to our graphics cards. I would like to draw your attention to warn you that this practice requires certain knowledge and you will do it on your own responsibility
We open the program and see the core values that we will play. Also say what is recommended to overclock if the GPU is preparing for it. As we can see in the image below, at central part we can change: power limit , temperature limit , « core clock «, « memory clock » and fan speed .
In section left we use memory clock and main clock . Section on the right shows voltage and temperature in graph .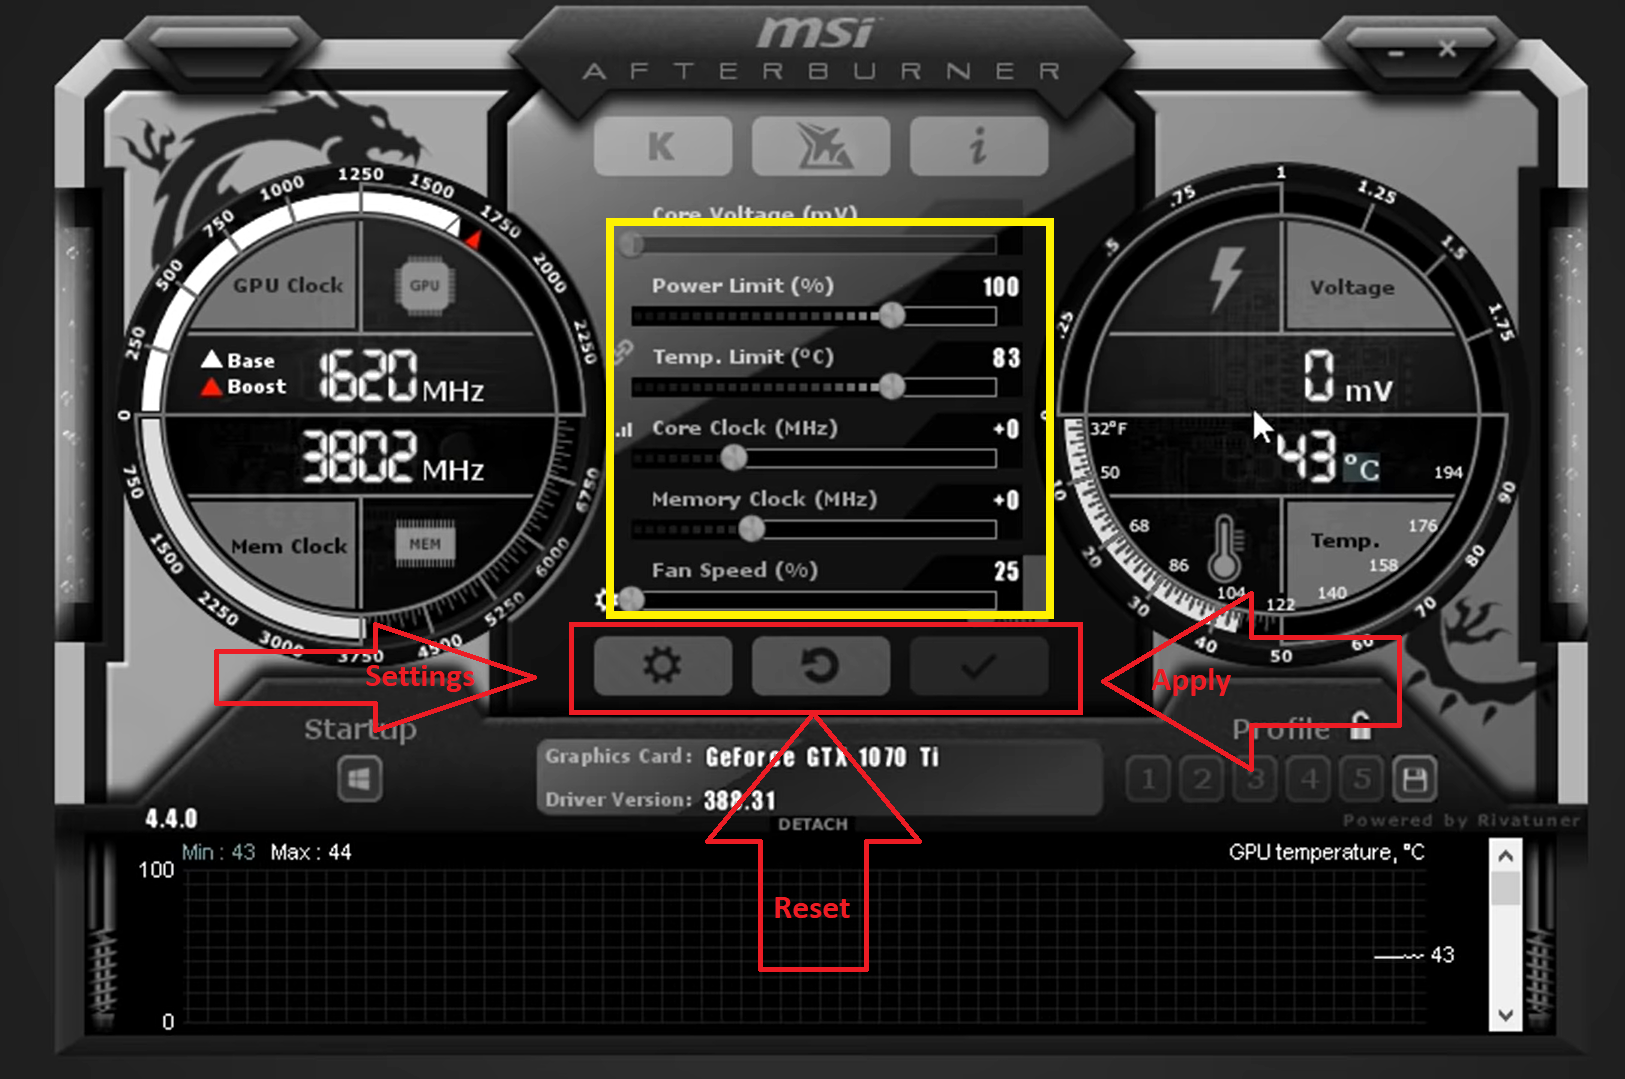 ending bottom , we have graph which works in real time and shows the temperature of video card .
We have all overclocking options as soon as we open the program. However, note the button « OC » in the upper left corner of . We have the ability to scan to see the potential of our GPU. This option will load our GPU at 100% and will last for about 10 minutes , although it may be longer.
I like this «OC» button because it allows us to make a recommended overclocking curve for our schedule. In fact, it allows us to test it to see how it works.
As for overclocking , I advise you to learn your own GPU , because every graphics card is a world. If you search on forums like Mediavida , Reddit, or the manufacturers themselves (MSI, Gigabyte, ASUS, EVGA, etc.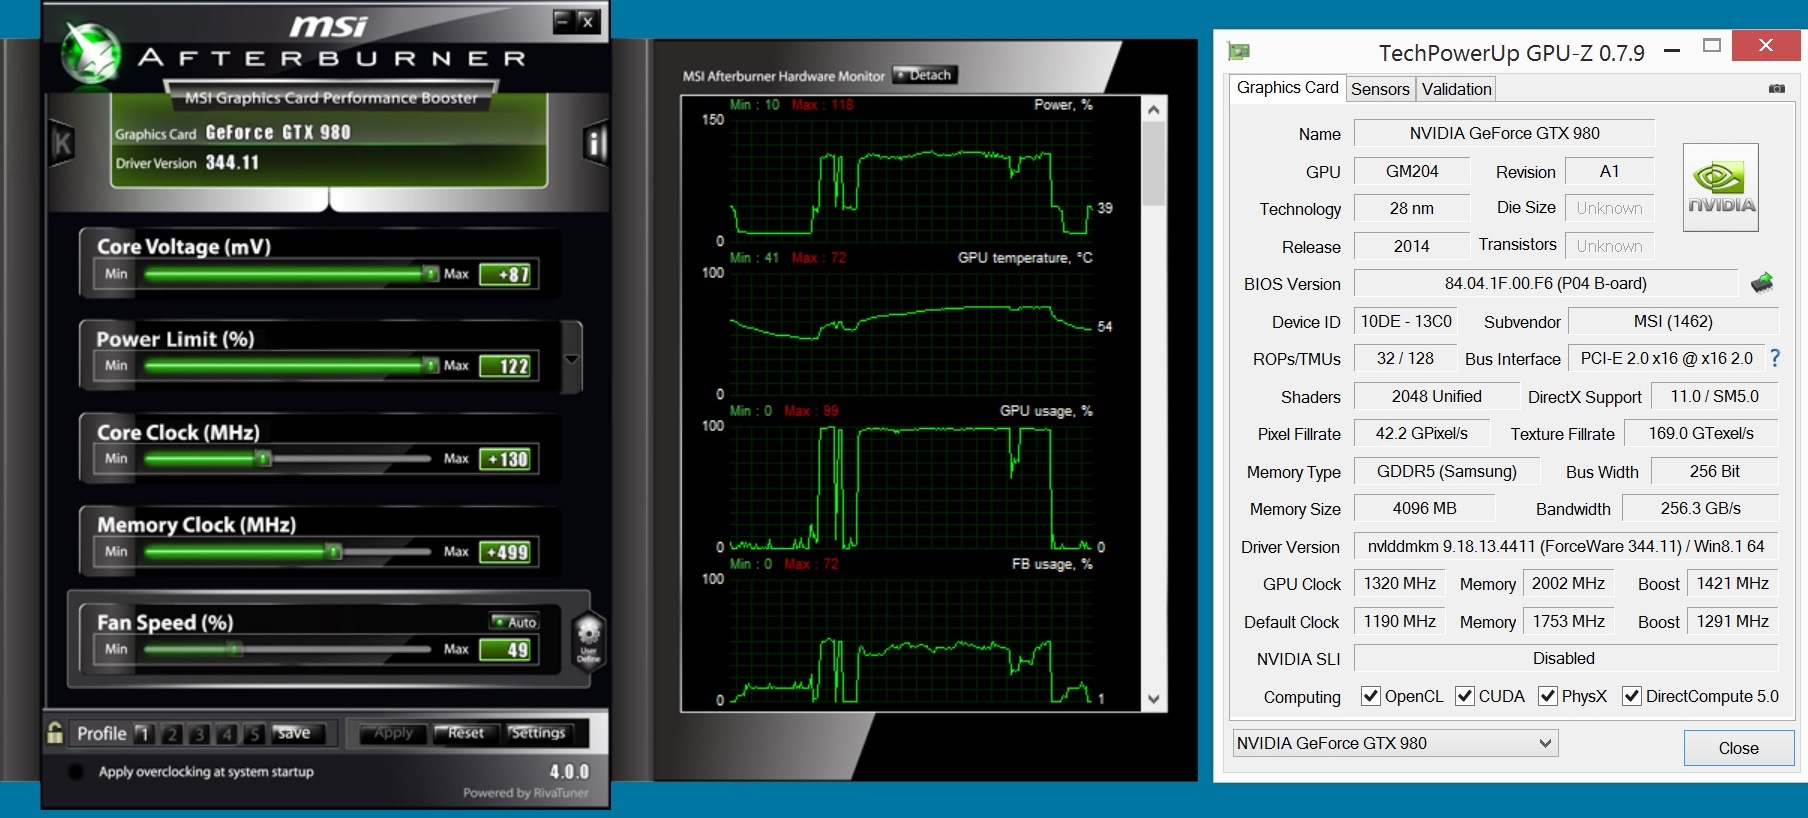 ), you will find manuals and many user experiences. Overclocking culture is trial and error, so I advise you to be very patient with this issue.
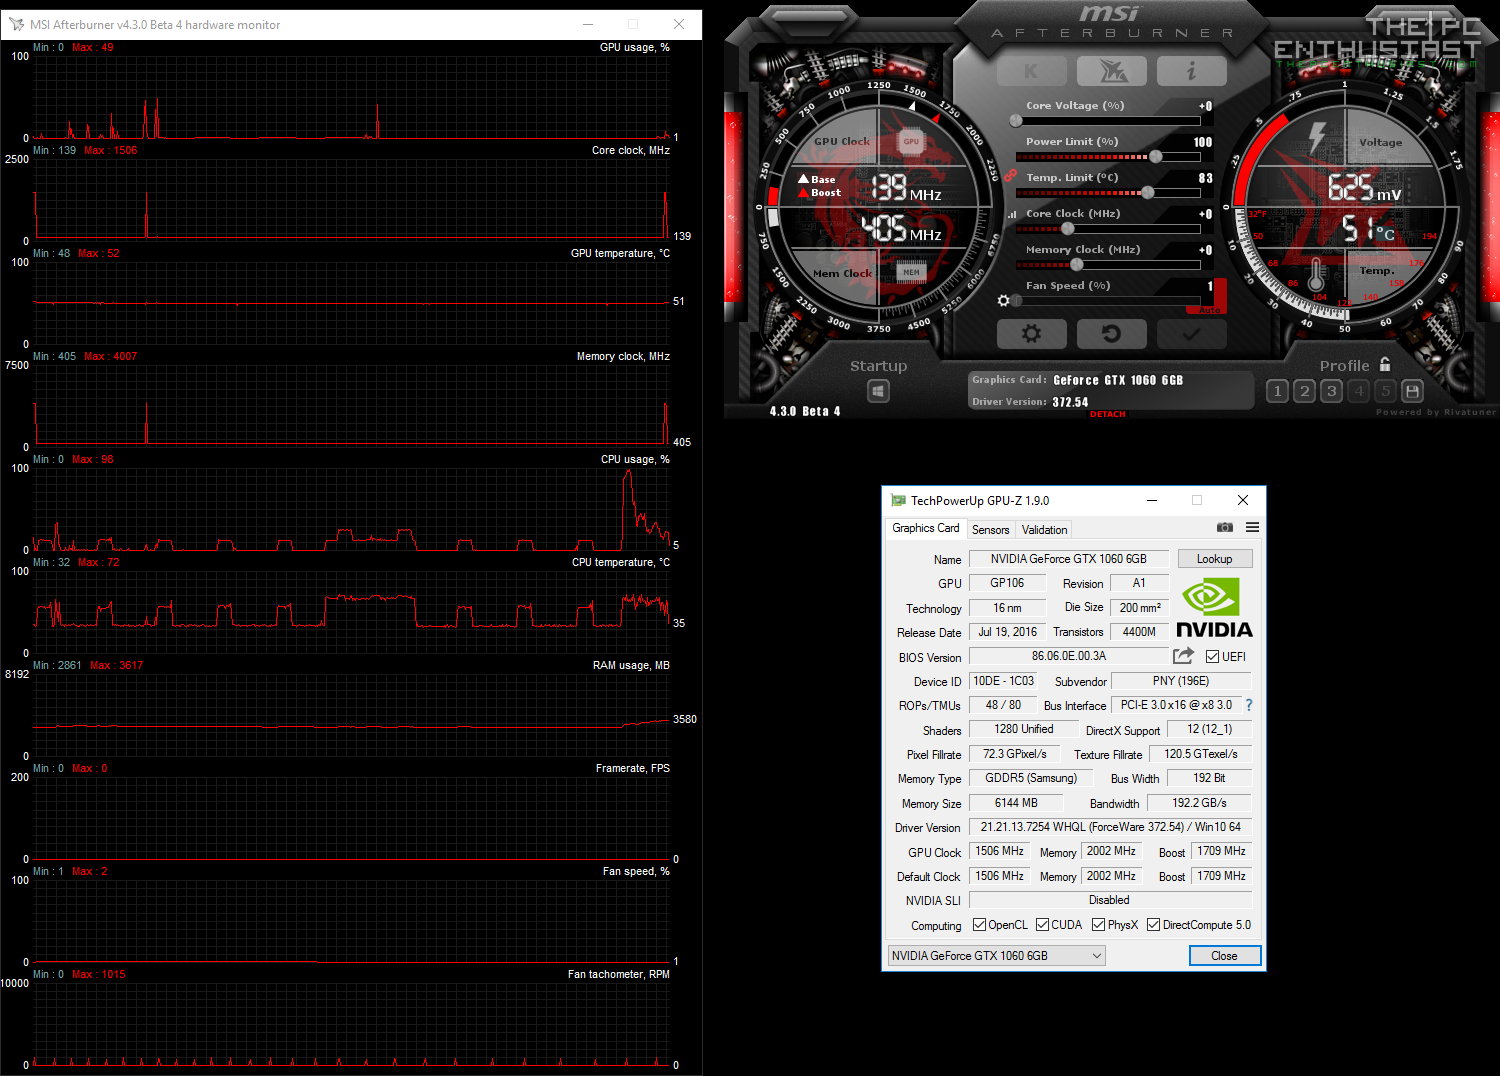
Video Card Monitor
In this section, we are not going to expand, because we have already said the most important thing: we can carefully monitor the temperature of our video card. It is true that we find programs like HWMonitor , which offer the same function and not only the graphics card, but all components.
In my opinion, having a real-time graph of that shows the temperature changes that occur in our GPU is very useful. In this way, we can make a more comprehensive monitoring of and find answers to the various violations that occur.
Having placed the fan curve programming section in this section, I find it very interesting. I’m going to show you how to do it visually.
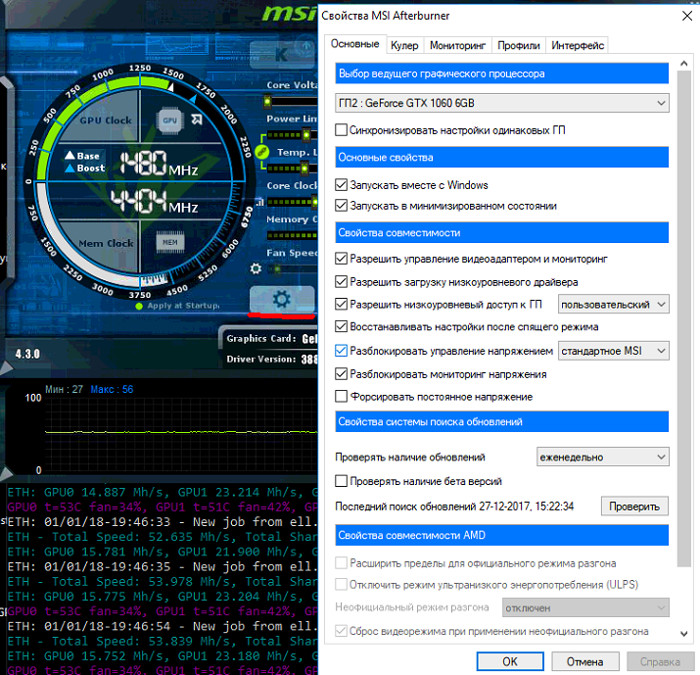
- We open the MSI Afterburner and transfer the engine to the center.
- Go to tab « Fan » and select « Enable user program for automatic control of fan «.
On Y axis we have fan speed ; at the x-axis temperature is . This is the curve I have and it’s very simple, there’s nothing special about it. For example, at 50º the fans will spin at 55% efficiency. The colder the GPU , the better is .
You can use user profiles to save several different configurations, depending on what you are going to do on your computer. Usually people keep IDLE profile, different Gaming, different Boost, etc. Personally, I don’t use them, but I find it an interesting feature.
Of course there are a lot of people who are obsessed with it and put it at 40º to go to 60% . Be careful with these settings because we might damage our graphics card. Think it’s silly to put fans on high performance at certain temperatures because they dissipate little to no heat, and you can check this by monitoring the temperature.
I tested and tracked my settings. My experience tells me that at high performance GPU (video games) the temperature rises to 50-60 degrees , although it depends on the specific model . In the same scenario, setting the fans to 60% or 80% gives the same result: preventing the GPU temperature from rising, keeping the degree constant.
From a certain point of view, it is useless to increase the performance of the fans, because we do not drop the temperature. So with I advise that the GPU fans run at their optimum speed of , at least the performance possible as long as the temperature is controlled.
However, for some of my fans the curve may be high. I am one of those who believe that prevention is better than cure, because I believe in Murphy’s law: if something goes wrong, it will go wrong.
Finally, let’s say that on tab « Monitoring » we can change some values related to monitoring . I leave this section for you to explore because, simply, they are options to see more temperature information or how to view them.
WE RECOMMEND YOU to have minesweeper again in Windows 10 and other classic games
utilities
To complete our analysis of MSI Afterburner, we’ll move on to the other tabs to see what options they offer us. On the one hand, we find tab « Benchmark » which allows us to write the results to a file « TXT » for further analysis. We have two custom keyboard shortcuts to «start recording» and «stop recording».
If we go to the Screenshot tab, we will see different options associated with screenshots or screenshots. We can choose between three output formats , the quality of the snapshots and where we want to save them.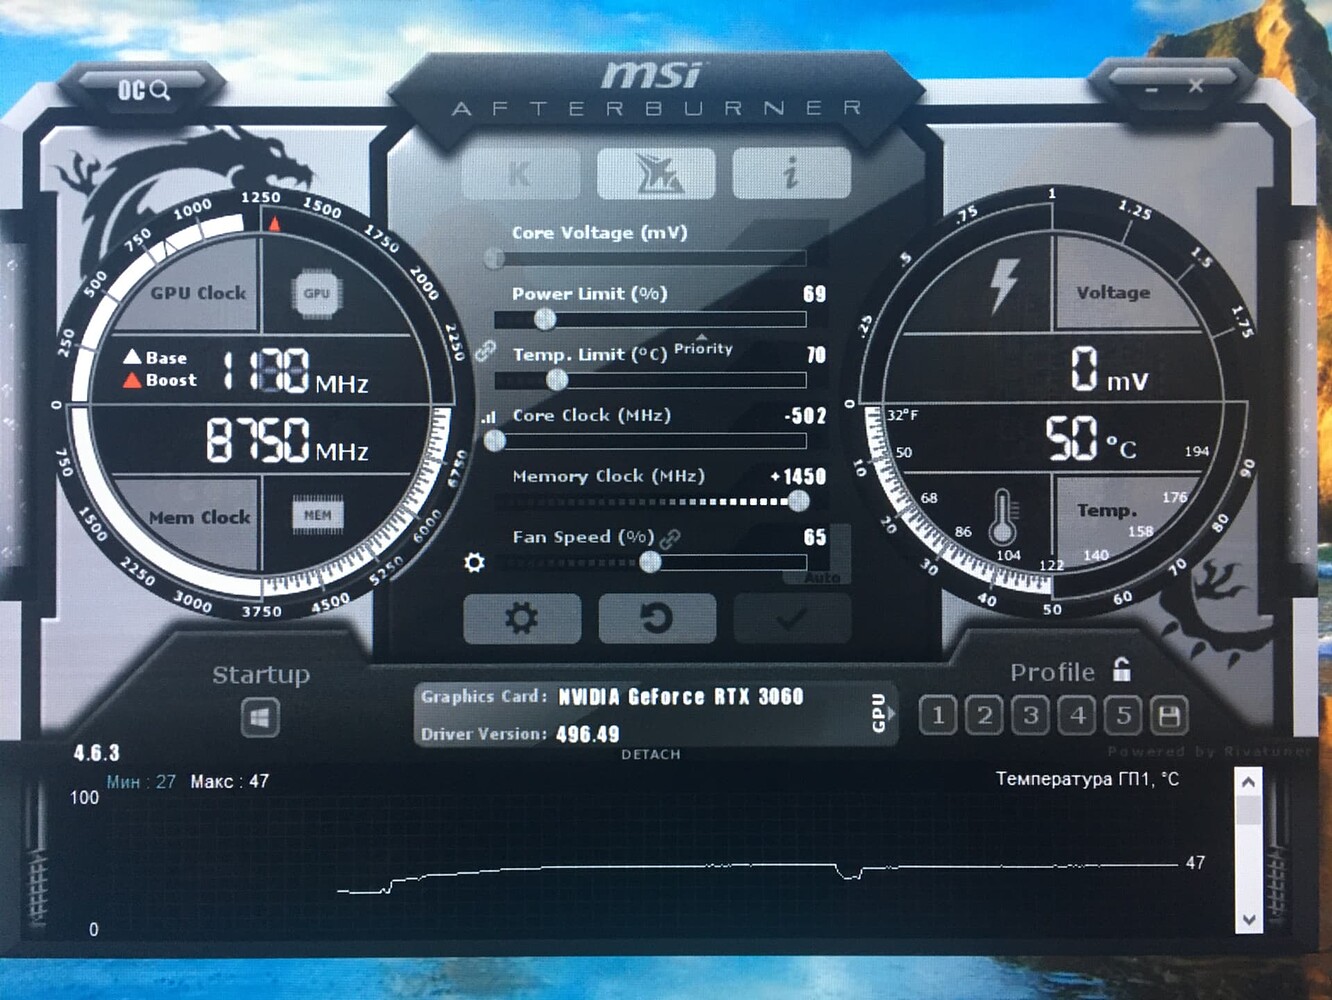
In addition, we can enjoy screen recordings to immortalize our best moments games. In this case, we can use endless options related to quality, comprehension, format, etc.0005
To finish, we find the two remaining tabs: « Profiles » and « User Interface «. In the profiles section, we can assign keyboard shortcuts to activate any profile . This is more than interesting, because we can be in the game and press some combination to activate a certain profile.
To complete this analysis, we have a user interface. We can customize time or temperature format , choose skin / skin / theme to see our MSI Afterburner in a certain way.
conclusions
To summarize this analysis, MSI Afterburner is a very complete program that offers monitoring, overclocking, fan programming and a number of other utilities.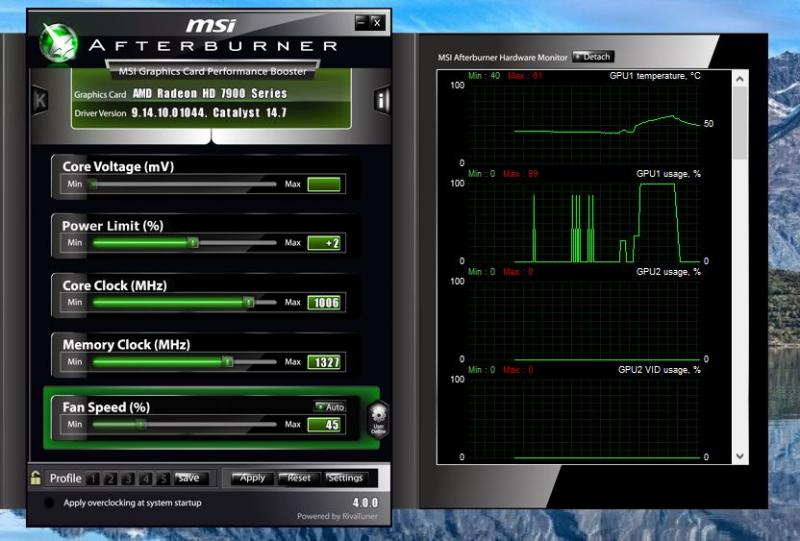
For me, this is the best GPU overclocking and fan programming on the market for it . I don’t like to rely on software Nvidia or AMD to adjust the graphics card fan performance curve. In my experience, I had an AMD R9 380X and the brand’s software wouldn’t let me change the fan curves to my liking.
As for overclocking , there is a division of opinion . We can do the same or better in Adrenalin 2020 or in Nvidia Geforce software. Similarly, it seems to me a very good feature that I want to highlight.
As for monitoring , we can find other programs that do the same, but let’s say that MSI Afterburner focuses more on GPUs. In fact, ‘s interface seems to be very compact and intuitive , which is not the case with others.
Finishing work with other functions , I like customizing the interface according to the needs of the user .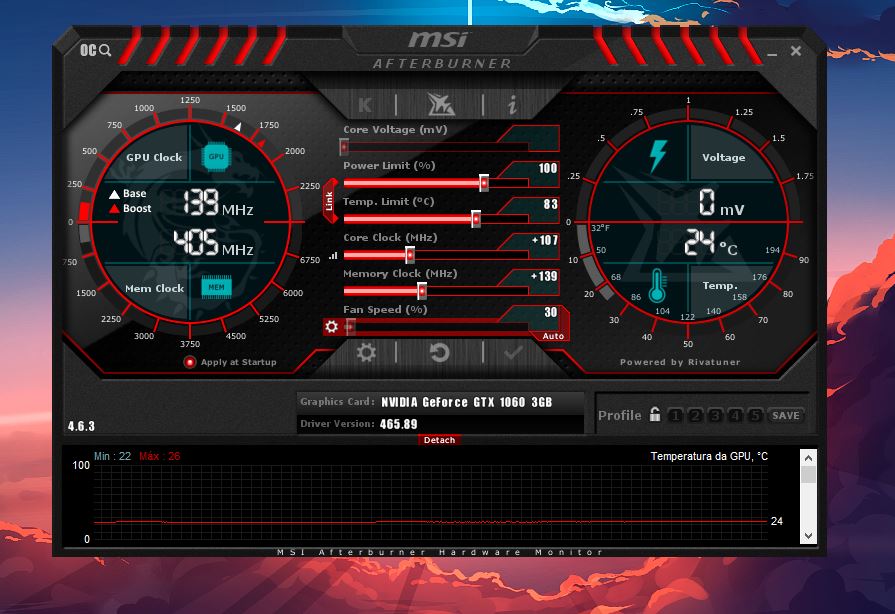 As for others, MSI has considered creating a program « all in one » so that users can opt out of specific programs for recording videos, taking screenshots or displaying information «in the game». In this sense, everything is fine, but did not really surprise me with .
All in all, this is a great program that I recommend to everyone, or at least you take it into account. I hope this analysis has been helpful to you and if you have any questions please contact us below. Not ashamed!
We recommend the best graphics cards on the market
Do you use MSI Afterburner? What do you think What is your experience?
How to use MSI Afterburner to overclock your graphics card
MSI Afterburner is a great tool that allows users to overclock their graphics cards in a Windows environment. It is one of the most popular GPU overclocking software. The capabilities of this tool go beyond overclocking, it can even be used to tweak fan curves, set power limits, reduce graphics card voltage, and more. All in all, this is a must-have app for all PC gamers as it gives users more control over their system.
MSI Afterburner is by no means new software and has been popular among PC users since 2009. Over time, developers have gained a lot of attention for this tool, and it now boasts a few useful features that it lacked initially. It is quite easy to use and PC gamers can easily boost their system performance with just a few clicks.
Disclaimer: Overclocking involves increasing the GPU clock speed beyond the factory settings. This may void the manufacturer’s warranty item. Hence, users should be aware of the potential risks before overclocking their graphics card.
Overclocking GPUs usually results in the biggest performance gain right after CPUs. Hence, they are an attractive piece of hardware that PC enthusiasts are looking to squeeze the best performance out of. Overclocking simply means that the user changes the default hardware configuration and pushes it beyond the factory settings to improve performance.
While this may result in increased performance, it is also worth noting that it may result in higher temperatures and higher power consumption. . Therefore, users must ensure proper cooling measures for their system before embarking on the overclocking process.
To overclock your GPU with MSI Afterburner, follow these steps:
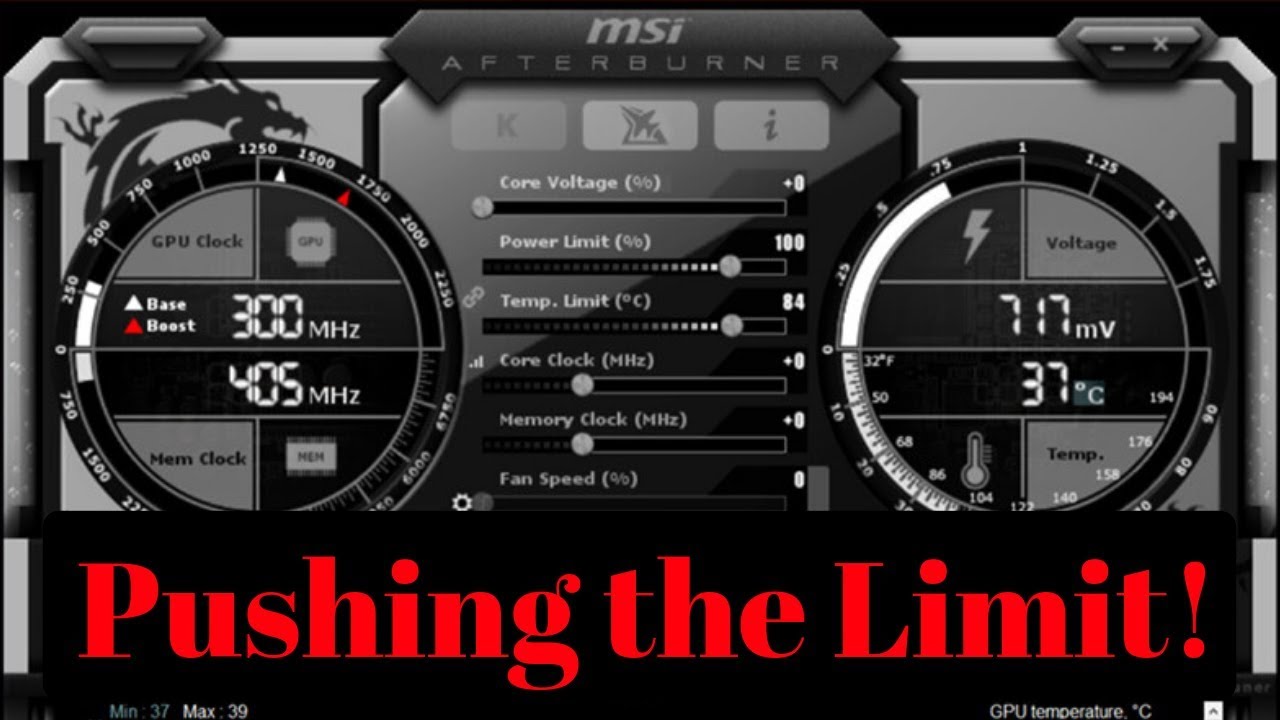
1) First start MSI Afterburner and set the power limit to maximum. This will allow your GPU to get more power and allow you to boost your clock speed.
2) Next, you will need to adjust the core and memory frequency sliders. This can be tricky, as no two GPUs will run consistently at the same clock speed, even if both cards are the same model or manufacturer.
It is recommended to start with +50 at core clock and +100 at memory clock to start.
3) Once this is done, click Apply. This will enable overclocking.
4) Now run a game (or GPU test tool) that is heavily loading the GPU and check for stability issues.