How To Use Rivatuner With MSI Afterburner – LiquidSky.com
If you want to use Rivatuner with MSI Afterburner, you’ll need to follow these steps: 1. Download and install Rivatuner. 2. Download and install MSI Afterburner. 3. Open Rivatuner. 4. Click on the “Profiles” tab. 5. Click on the “Add” button. 6. A new window will open. Click on the “Browse” button and navigate to the MSI Afterburner installation folder. 7. Select the “MSIAfterburner.exe” file and click on the “Open” button. 8. Click on the “OK” button. 9. Rivatuner will now create a profile for MSI Afterburner. 10. Close Rivatuner. 11. Open MSI Afterburner. 12. Click on the “Settings” button. 13. Click on the “Monitoring” tab. 14. Select the “Show in On-Screen Display” checkbox. 15. Select the “RivaTuner Statistics Server” checkbox. 16. 17. MSI Afterburner is now ready to use with Rivatuner.
Many overclocking programs have a feature called Rivatuner On Screen Display (OSD) that I like the most. This tool can be used to monitor graphics performance in a game or a fullscreen application. You can also use this to display fps like Fraps. OSD can monitor additional sensors in addition to the sensors it monitors. To display the sensors, you must have HWiNFO running in your Afterburner OSD. The Rivatuner Statistics Server Technology tool allows you to select color, size, and other parameters for the screen in the Process tray. In screenshots, I use a MJPG compression rate of 85%, and 1080p video takes oneGB per hour.
You will fail if you over-set the quality. This option should not be selected if you upload to Youtube only, unless you intend to use it for slow motion; otherwise, you should select it if your in-game frame rate exceeds 30 frames per second. You can increase the file size by 60 frames if you use 60 frames per second. You may also want to uncheck the box that says Show ON-Screen Display on captured screenshots and videos. If you don’t use the refresh rate of the monitor, the setting may be reduced to 59 or 60 if it doesn’t use v-sync.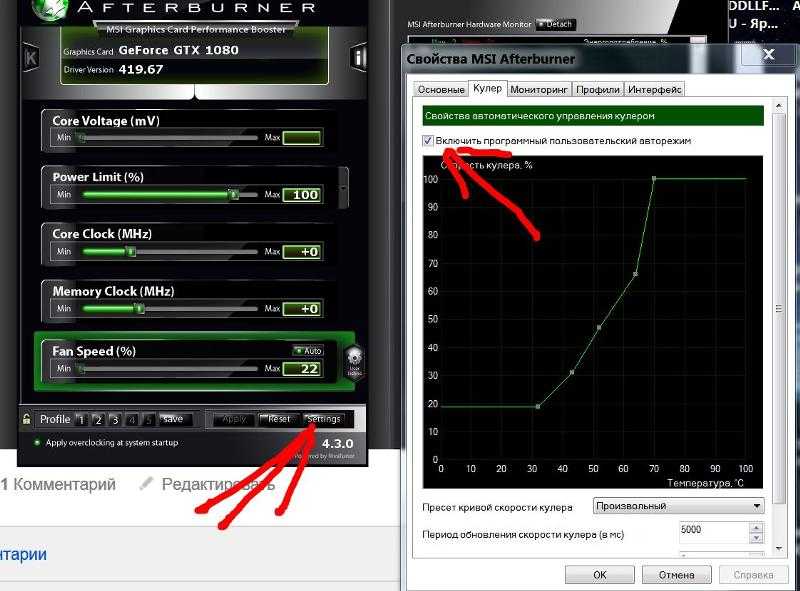
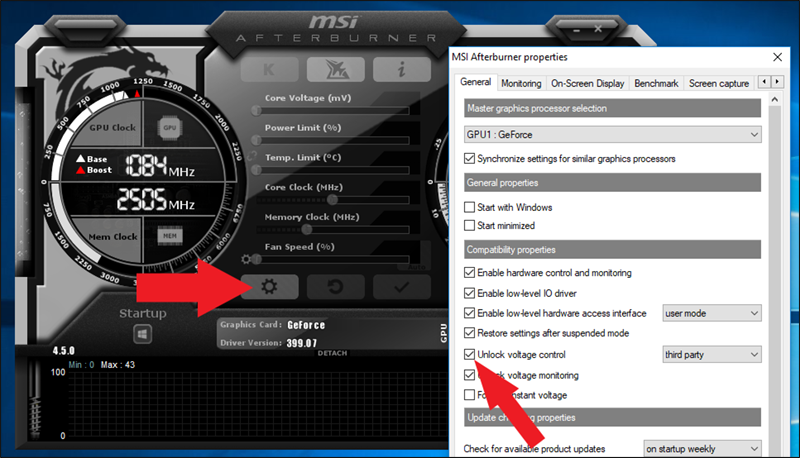
Your GPU will not be detected by the app if you have a setting that prevents it. Because of the low-level IO driver, the GPU is unable to be detected. If you need to resolve this problem, simply go to the settings and turn off the ground.
What Is Rivatuner Msi Afterburner?
Credit: YouTube
Rivatuner MSI Afterburner is a free and easy-to-use overclocking utility that enables users to quickly and easily adjust the clock speeds of their compatible MSI graphics cards. It also provides a host of other useful features, such as the ability to monitor the card’s temperature and voltages, as well as change the fan speed and voltage settings. Overall, Rivatuner MSI Afterburner is an essential tool for anyone looking to get the most out of their MSI graphics card.
How Do I Turn On Rivatuner?
Credit: www.gamingpcbuilder.com
In order to turn on Rivatuner, you will need to open the Rivatuner Statistics Server program. Once the program is open, you will need to click on the “Settings” tab. From here, you will need to click on the “General” tab. Under the “General” tab, you will need to find the “Enable low-level hardware access” option and check the box next to it. Once you have checked the box, you will need to click on the “OK” button.
Msi Afterburner Overlay
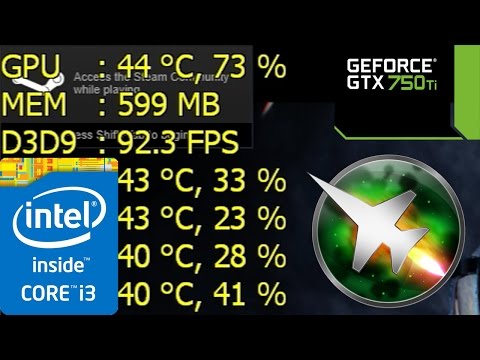
Msi Afterburner Overlay is a feature in the MSI Afterburner software that allows you to see real-time information about your graphics card and PC performance while playing games or running other applications. This information includes things like GPU and CPU usage, frame rate, temperature, and more. You can also use the overlay to record video or take screenshots of your gameplay.
Using MSi Afterburner, you can easily check the GPU, RAM, and even the speed of your graphics card, as well as other hardware parameters. Users who overclock the components on their computers will benefit greatly from this software.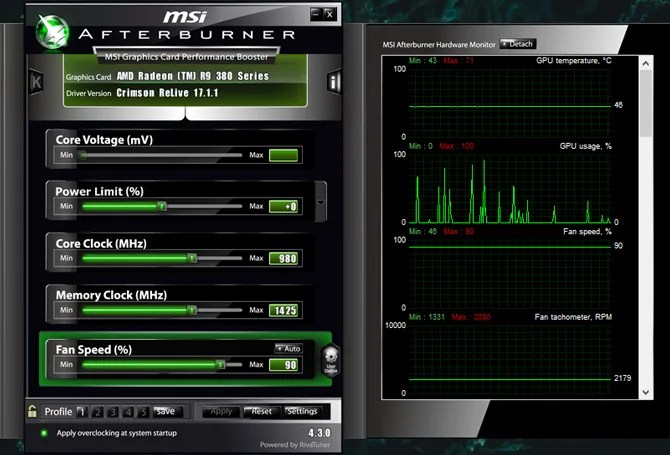 You will be able to customize the software to meet your specific needs as we go over all aspects of it. The name of the groups, values, and even the hardware of the parent can be changed using the MSI afterburner software. You can group parameters such as GPU usage, temperature, and speed into a single line with the help of Grouping. There is also an overlay that provides a performance graph. Although most users can customize the appearance of MSI afterburner’s overlay, a small percentage of them want to change the colors, size, and positioning of the overlay. It is possible to manually adjust this space using the MSI Afterburner software. Even while you are playing the game, you can enable or disable the overlay by pressing the hotkeys.
Does Afterburner Overlay Affect Performance?
I believe this to be true, according to my own experience. It consumes more CPU power in addition to increasing CPU consumption. fps is not particularly important, but it is 5%-10% in general. Changes will not be affected if you modify the setting while Afterburner is active.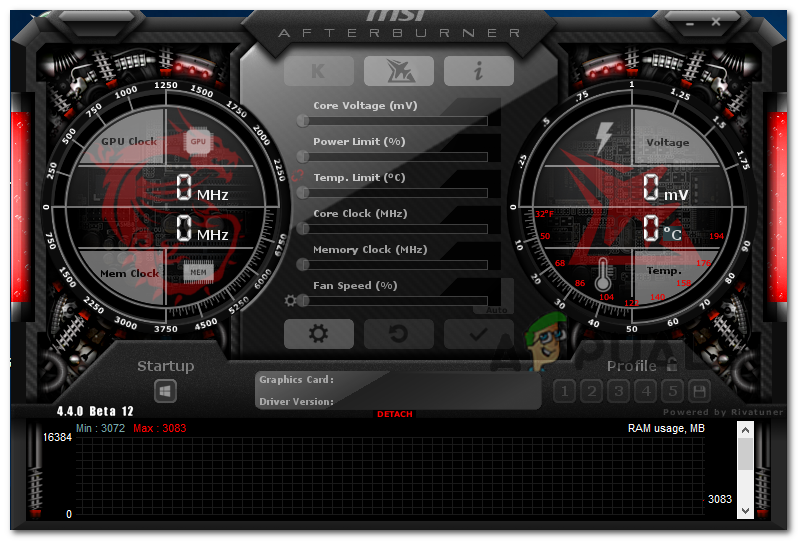
The Great Msi Afterburne
MSI Afterburner, an excellent tool for increasing game FPS, makes use of this feature. However, there is no evidence that it will slow down your computer. MSI Afterburner is known to increase the performance of some systems. It’s best to seek professional help if you’re experiencing any issues with your performance.
Msi Afterburner Properties
MSI Afterburner, a utility that works with all graphics cards, is available for download. These features include GPU clock settings, advanced fan speed settings, and voltage settings for the GPU.
MSI Afterburner is an application that can improve graphics card performance and monitor device information. The Overclocking Settings Hardware Monitor Advanced Properties settings can be used to automate the overclocking feature. Fan monitoring is done by the general public. You are able to use the on-screen display profiles user interface. As soon as you select this item, you will be able to see the GUP1 temperature in the upper left corner of the screen while playing 3D games or applications. This item can be displayed on a Logitech keyboard LCD display that displays GPU1 temperatures. After finishing your settings, click [OK] to apply them and close the MSI Afterburner window. Users can easily set their own password to the profile combination they want to use by selecting it from the drop-down menu.
Where Is Advanced Properties In Msi Afterburner?
To access the Advanced Properties Settings dialog box on the MSI Afterburner home page, click the [Setting] icon. Selecting the Master graphics processor from the drop-down list: Users can select the Master graphics processor to change the overclocking setting and monitor the hardware temperature and other parameters.
How Do I Control Msi Afterburner?
Select the Monitoring tab from the MSI Afterburner settings menu, then check the components you want to see on the OSD. After selecting them all, click the “Ctrl” key and select “Show in On-Screen Display” to begin the display. Go to the On-Screen Display tab and type in the hotkeys to turn off on-screen commands.
How Good Is Msi Afterburner?
The interface is excellent, and it is relatively simple to use. While you may have some prior experience, MSI Afterburner is an excellent tool for monitoring the GPU, CPU, and system temperature, among other things; you can’t overclock or overvolt the GPU with MSI Afterburner.
Categories Gaming Gear
About
Shirley
Covering the gaming world for the last 5 years. Playing mainly FPS such as CS:GO
[Solved] How to Fix Discord Overlay Not Working in 2023
Sharing is caring!
Do you want to Fix the Discord Overlay Not Working? Are you looking for a solution to fix the discord overlay without losing data? If yes then this article is for you. Many Destiny 2 players are also looking for discord overlay destiny 2, but end up with disappointment.
How to Fix discord overlay not working
Table of Contents
What is Discord Overlay
The Discord Overlay feature lets you use Discord’s messaging and voice chatting while playing a game.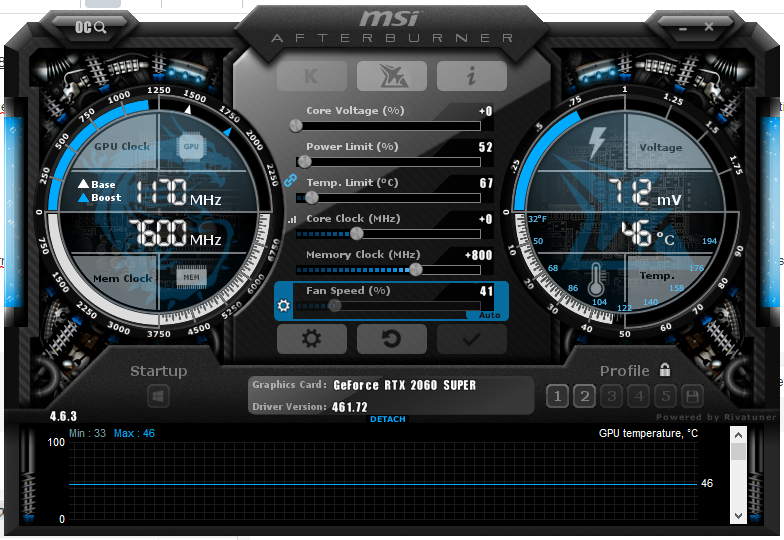 You can open and close it at any point. With its simple usage, it’s best to use it when you’re playing a game with other people, so you can chat and coordinate easily while you play.
For those who want to stream gameplay over Discord and manage it while you’re in-game, discord overlay is the go-to option due to its customizable nature. Users can use this with just the games they select and can have the overlay show up over their game. One can also set it to be completely invisible unless you open it up yourself.
How to Fix Discord Overlay not Working Error
How to use Discord Overlay
Here is one of the many ways in which you can use the discord overlay. One can stream their gameplay over Discord. If you are in a server channel, follow the following steps.
- Click on the computer icon in the bottom corner next to the title of your game.
- This will start streaming your game over the server to those who choose to watch.
- You can change the settings of the Discord overlay as well while you’re in-game.
- Once the overlay is opened, navigate to the gear icon to open the settings.
- You can change the same ones under the Overlay Settings in Discord’s main program.
Read: 10 Best Voice Changers for Discord in 2023
Best Discord Overlay Settings
- Open the Discord.
- Hit the User Settings on the left side of Discord, at the bottom.
- In User Settings, in the left pane, scroll down to pinpoint App Settings > Overlay.
- In Overlay settings, on the right corner, choose to Enable in-game Overlay.
- Now you will have switched on Discord Overlay, try enabling it for the specific game on Windows 10.
- In User Settings, on the left pane, find out Game Activity. And then click Add it to add the game to configure Overlay settings for it.
- Then browse to Add game to let it use Overlay.
- Turn on Overlay for the specific game and now you can play it with Overlay on as you wish.
Check: How to Fix Discord Screen Share Audio in 2023
Discord Overlay Not Working With MSI Afterburner
If you are facing this problem in your gaming pc then follow the following steps and you will fix it without losing any data.
- Close MSI Afterburner.
- Open Notepad (run as administrator)
- In Notepad: hit Open, type *.* and hit enter, then drill down to C:/Program Files (x86)/RivaTuner Statistics Server/Profiles and double click on Global.
- Press Ctrl+F, copypaste: InjectionDelay=1500 and hit enter,
- Make a new line underneath that and copypaste this into it: InjectionDelayTriggers=IGO64.dll,IGO32.dll,d3dcompiler_47.dll,DiscordHook.dll,DiscordHook64.dll,GameOverlayRenderer.dll,GameOverlayRenderer64.dll,steam_api64.dll,steam_api.dll,d3d9.dll,dxgi.dll,d3d9_smaa.dll,d3d11.dll,DiscordOverlay.dll,DiscordOverlay64.dll
- Save and exit, then reload MSI Afterburner.
Note: After these steps do restart your system and don’t forget to stay updated with the latest windows updates.
Why Discord Overlay Not Working?
Discord Overlay only works with games that it’s been specifically designed for. Some of these games include Minecraft, Fortnite, CSGO, WoW, DOTA 2, etc. Once you’re in a game, you have to activate the overlay with the specific hotkey. Go to your Discord Settings to find the hotkey.
Checkout: Discord Javascript Error in 2023 [100% Fix]
Solutions: Discord Overlay Not Working in 2023
Below you will find several ways on how to fix the Discord overlay not working issue. Since each configuration is different, here are different quick fixes that you can try.
| Methods to Fix Discord Overlay Not Working |
|---|
| Solution 1: Reboot your System |
| Solution 2: Run Discord as Administrator |
| Solution 3: Disable Discord Hardware Acceleration |
| Solution 4: Scale the Discord Overlay |
| Solution 5: Update Discord |
discord overlay not working
Solution 1: Reboot your System
In cases where the discord overlay is not showing up where it can’t open or does not for games, try this.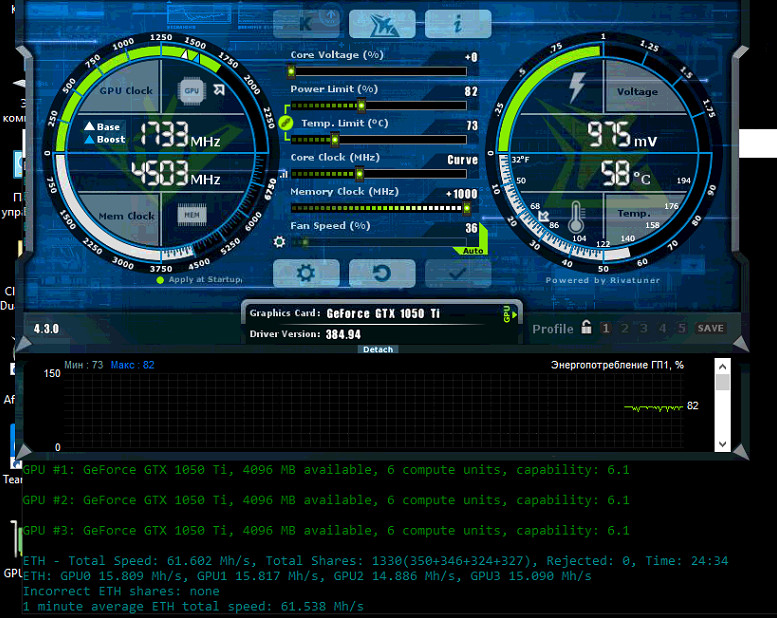
- Close all the running apps like WoW game, Discord, and any other.
- Then restart Windows 10. This will fix most errors for most users.
- Sign in again.
- Launch the game and Discord.
- Check if this time Discord Overlay runs in games.
- Check if it allows you to communicate with others in games.
Don’t Miss: Use Discord on PS4/PS5 in 2023
Solution 2: Run Discord as Administrator
In case you are unable to open Discord and Discord Overlay for games due to the application permission, or if in some games, it is required to run Discord with administrative privileges to use in-game discord on Windows 7, 8, 10. After doing the given below steps, every time you need to open Discord, it will be launched with administrative rights. Thus Discord Overlay not working Apex or PUBG will be removed.
discord overlay solutions
Here is what to do :
- Open properties of the discord by Right-clicking the Discord app from the Desktop and selecting the option Properties.
- Then, Tick the box of Run this program as administrator under the Compatibility tab,
- Click Apply and OK to save changes.
Solution 3: Disable Discord Hardware Acceleration
Hardware Acceleration in Discord feature uses GPU and sound card to create Discord run smoothly. But unfortunately, sometimes this feature leads to Discord Overlay not showing or not working.
In such a case, if you see the problem occurring after having turned on the Hardware Acceleration feature here is what to do. Try properly disabling Disable Discord Hardware Acceleration feature and check if the error still exists. Below are the steps that you have to follow first.
- Open Discord
- Go to Settings.
- Click the Appearance option on the left panel.
- Then turn off the toggle next to Hardware Acceleration.
- Restart your game and check if your Discord runs now.
Must Read: How To Get Every Discord Badge in 2023
Solution 4: Scale the Discord Overlay
Re-scaling the size of the discord app actually helps in fixing the issue of Discord Overlay not working in any game. It is highly recommended to try and change the size of the app to the recommended one or the original one if possible. To learn how to do so, follow these basic steps :
- Go to Start > Settings > System.
- Under Display, find out Scale and layout and make it 100% (Recommended).
- Boot your game and enable Overlay for it again.
- 4. You will notice Discord Overlay is showing and working in the proper size.
Recommended: How To Unban Someone On Discord in 2023
Solution 5: Update Discord
Updating Discord is ironically the last yet has proven to be the most straightforward way to solve the issue of Overlay not showing up in games. This helps to get rid of the problematic Discord app to remove the corruption. Users should uninstall and then download the updated Discord to enjoy the Discord Overlay function with the reinstalled Discord software.
- Navigate to Control Panel > Programs > Uninstall a program > Uninstall Discord.
- Reboot your PC to take effect if you are asked to do so.
- The instant you remove Discord, it is time to download the latest version of Discord from the official site.
- The newly downloaded Discord software will better improve the performance in-game overlay for PUBG, League of Legends, and WoW on Windows 10.
discord overlay
Frequently Asked Question
FAQ 1: Can you do discord overlay on iPhone?
Answer: No, unfortunately, we cannot do discord overlay on iPhone.
FAQ 2: How many games support Discord Overlay?
Answer: They’re more than about 518 games that support discord overlay including WarFrame, DayZ, Mindcraft, etc.
FAQ 3: Why is discord overlay not working in among us?
Answer: In case your Discord Overlay is not working, you should check if you have enabled the in-game overlay.
- Open Discord > Settings icon.
- Click Overlay, on the left panel.
- Make sure the toggle next to Enable in-game overlay is turned on.
- Click Games from the left panel.
- Check if you have turned on the in-game OVERLAY feature for the game you are playing, Under GAME ACTIVITY.
FAQ 4: How to discord overlay steam?
Answer: Launch any game and then press Shift + ` (or whatever key combo you set earlier) to bring up the in-game overlay menu. Click the pin icon to make a window appear even when you lower the in-game overlay menu. You can adjust the opacity of this window by clicking the Opacity icon and adjusting the slider.
FAQ 6: Discord overlay not working genshin impact?
Answer: Follow the solutions which are given down below to get fix discord overlay not working genshin impact.
This is all for How to Fix Discord Overlay Not Working in 2023. If you have any questions then do not hesitate to ask, you can use the comment section which is given down below for your questions.
How useful was this post?
Click on a star to rate it!
Average rating 0 / 5. Vote count: 0
No votes so far! Be the first to rate this post.
Sign Up for Our Newsletters
Get notified of the best deals on Gaming Accessories.
By checking this box, you confirm that you have read and are agreeing to our terms of use regarding the storage of the data submitted through this form.
Previous Article
Best Roblox Characters in 2023 [Girl & Boys]
Next Article
10 Best Minecraft Building Ideas in 2023 [You Must Try]
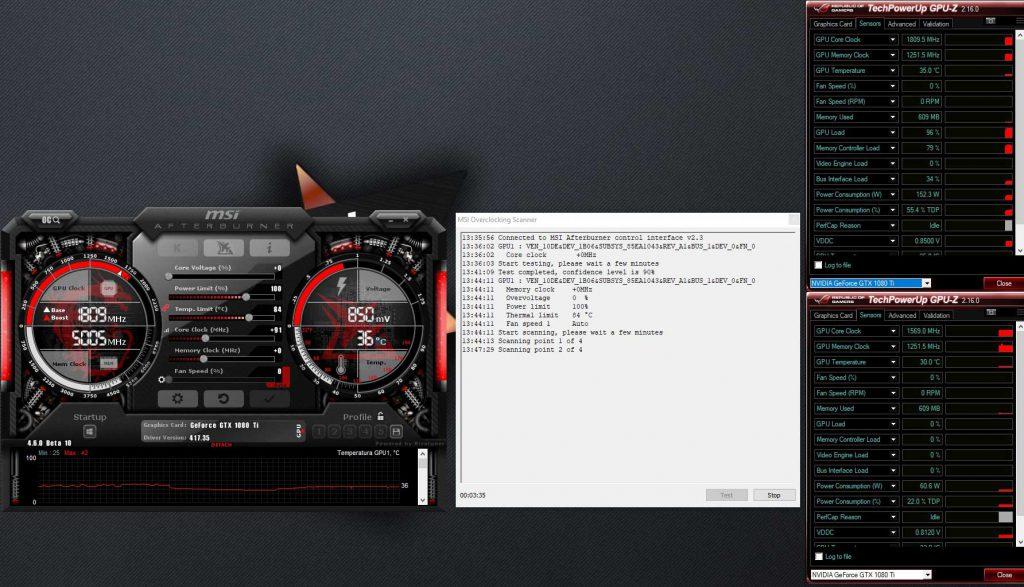
MSI AfterBurner — instructions for use.
MSI Afterburner is a fairly popular overclocking program for fine-tuning and monitoring a video card.
MSI Afterburner is a program created by Riva Tuner — Alexey Nikolaychuk aka Unwinder.
At first glance, MSI Afterburner seems like a very simple program, but this is just the first.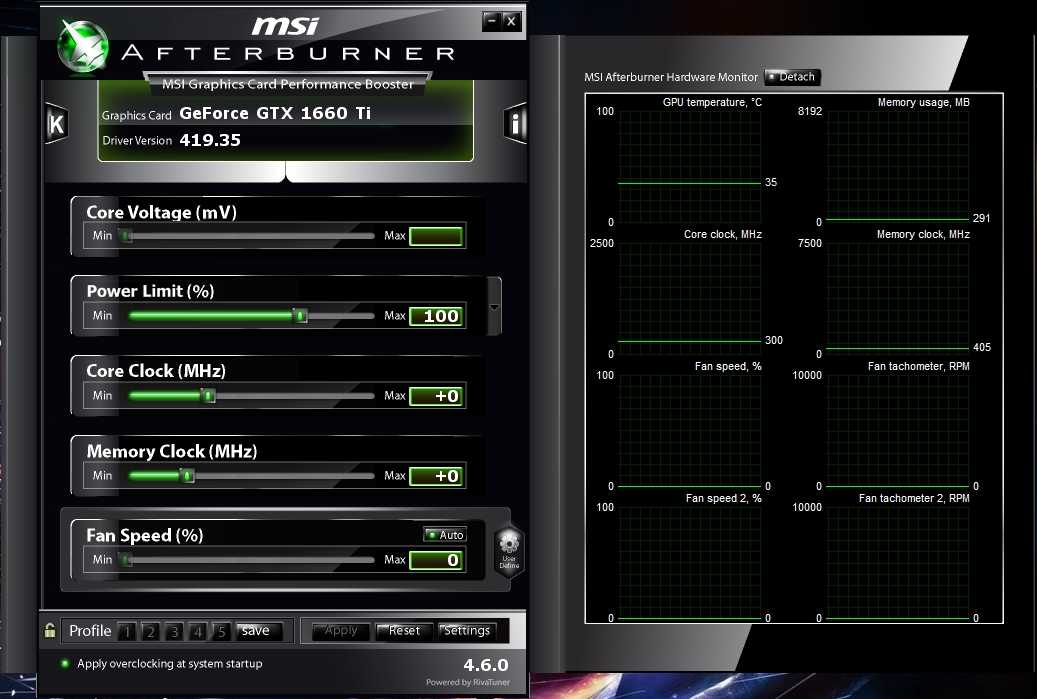 With a deeper acquaintance, the opinion about the program changes.
This note is made to facilitate the use of the program.
MSI Afterburner — instructions for use.
Part One: Installation
Download the program and install it. After installing it, you will have MSI Afterburner, and MSI afterburner on screen display server.
Part two: Initial setup.
1) Run Afterburner and go to the Settings menu:
2) scroll it all the way to the right and go to the User Interface menu. We change the language to Russian.
3) Disable hints if you don’t need them in the same menu:
4) Go to the first tab «Basic»:
Where:
a) Synchronization of settings with two GPUs — for those who have tandems SLI, Cross.
b) Booting from Windows. If you want the program to always boot from Windows, check the box
c) minimizing the program to the Tray — this is so that when the program is closed, it continues to work, but would be in the Tray.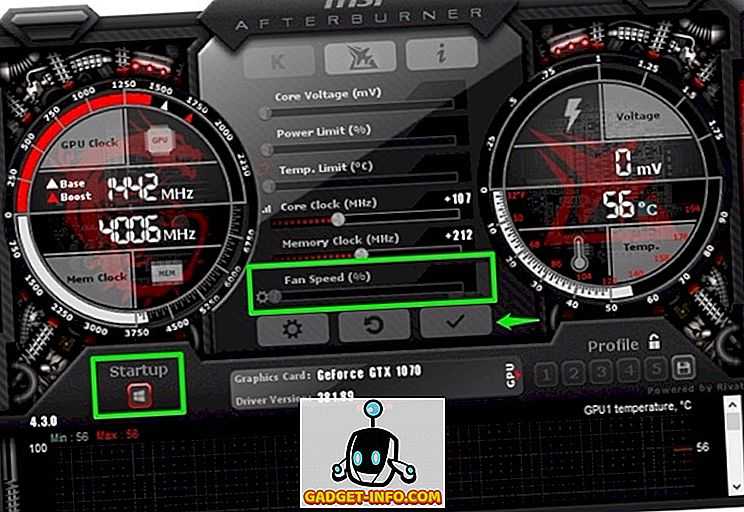
d) Unblocking voltage — WARNING! BE CAREFUL WITH VOLTAGE, excessive increase of it can cause GPU DEATH.
e) Enable voltage monitoring in the monitor window
f) Constant voltage boost — when this option is enabled, the voltage will not change in 2D and 3D modes.
5) After making the changes, do not forget to click OK.
6) Go to the Cooler tab — check the box in the menu to enable software user mode.
We study the graph and set the curve that suits you. It is advisable to stick a lot of transitions — it will turn out better to set up.
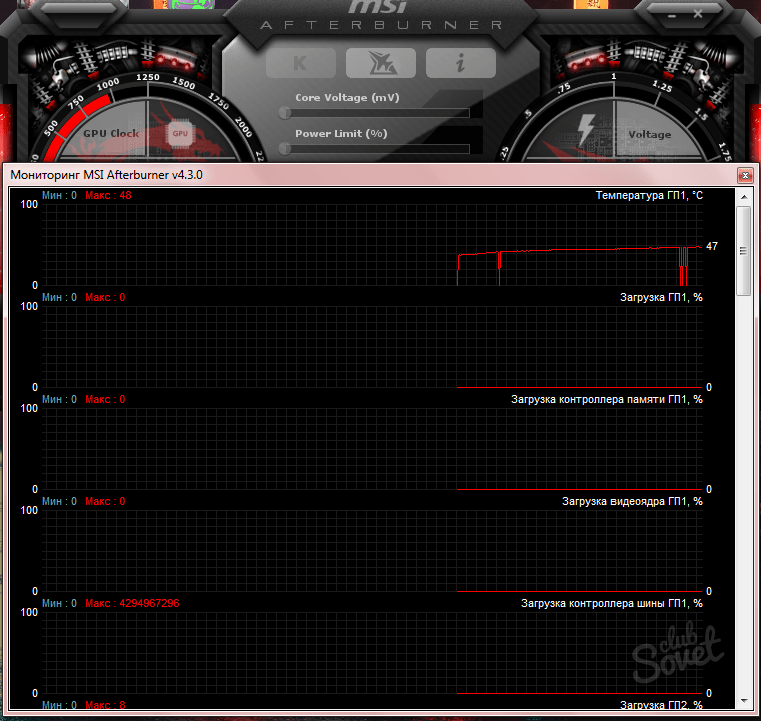
7) go to the Monitoring tab:
A) you can adjust the data reading period. The default is 1000ms.
B) Monitoring can be logged. This practically does not affect performance, so anyone who is interested can safely install it, indicating the place where it will be saved.
Setting active monitoring schedules:
A) Click the checkmarks next to the indicators you are interested in.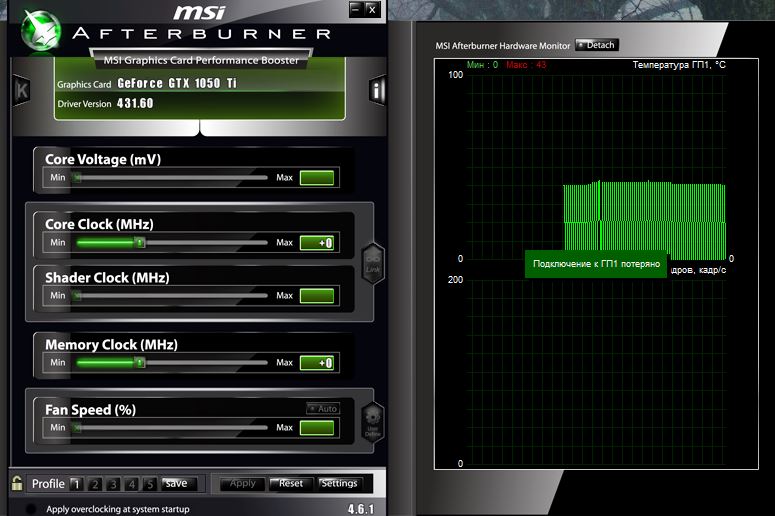
I advise everyone everywhere to be sure to check the box next to the “GPU loading” item
Monitoring this parameter will help you determine if the processor matches your graphics card. If the video card in the game is constantly underloaded (load 50 — 90%), it means that the processor either needs to be overclocked (if it is not already overclocked), or you need to change it to a more powerful one, or if the FPS suits you, you can unscrew the graphics settings.
B) so that everything that you have noted is reflected on the monitor during the game, click on the item you are interested in — for example, «GPU load», and at the bottom, check the box «show in overlay screen display»:
Thus, you can add the indicators you are interested in to the overlay. I advise you to add GPU loading there. It is very convenient to monitor the load of the GPU in games where you do not have enough processor. I think this figure will surprise many.
Next, to always display statistics, go to the program:
MSI afterburner on screen display server
This program is responsible for displaying monitoring metrics on the screen during application launch.
In order for the program to start itself, set ON opposite the Start with Windows inscription:
I also circled in white circles the items with which you can adjust the font size, color, and position on the screen.
This completes the real-time monitoring setup. Now your screen will display the parameters that you specified.
9) We go back to MSI Afterburner, in Settings, and go to the «OED» tab.
Everything in it is in Russian and I think everything is clear.
10) go to the «capture screenshots» tab Everything is simple in it too. Choose the place where they will be saved and the format.
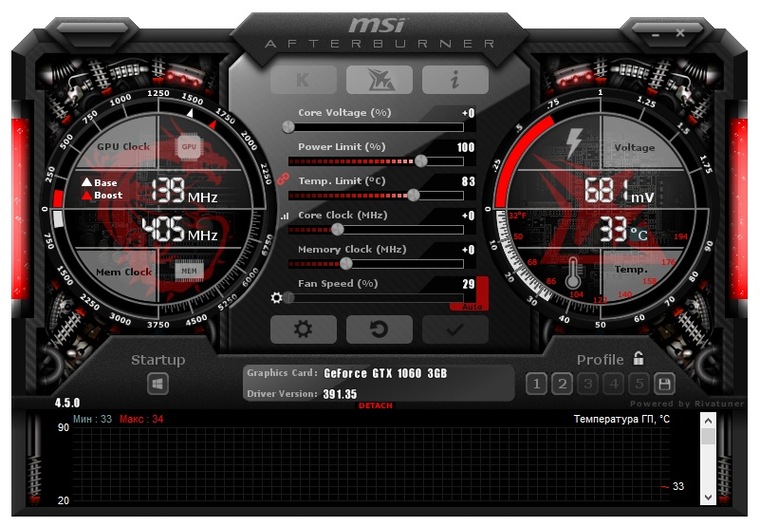
Part three: Cooler speed, overclocking, disabling shader and GPU frequency synchronization for Geforce:
Where:
1)ON/OFF frequency synchronization
2) In order for the graph that you drew for your cooler to work, you need to click on the User Define button in the MSI AB window (number 2 on the screen). And to control the speed of the cooler directly by setting the speed — in the FAN Speed window, press the AUTO button, then set the speed in percent on the scale.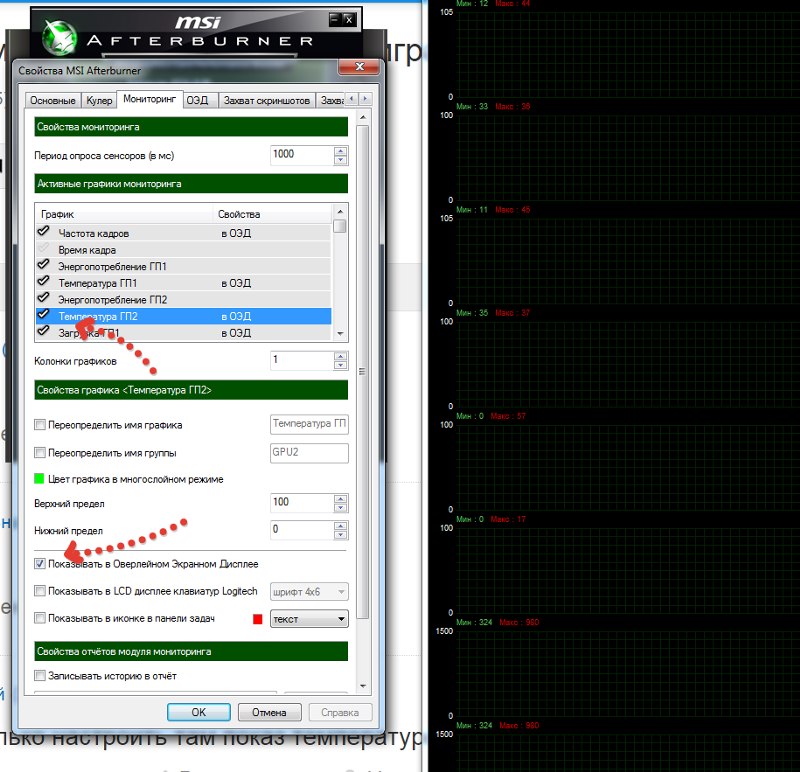
3) In order for overclocking to turn on after reboot, press the button marked in Figure 3
DO NOT FORGET to click Apply or OK when making changes
Part four: creating and applying overclocking profiles.
1) to create a profile, we need to set the desired frequencies.
2) Unlock saving profiles by pressing button 1
After pressing, the lock should open and the Save button should light up (marked 2 in the figure).
3) Press the SAVE button and save the profile to one of the five squares that will start flashing.
4) Create as many profiles as you need. And we click on the lock — so that no one gets in trouble
5) Go to the Settings menu and scroll to the «Profiles» tab. In it, we select a profile for 2D and 3D.
Press OK.
DO NOT FORGET to click Apply or OK when making changes.
I immediately apologize for the large screenshots, and I don’t have time to cut the crooked text.
I have described all the functions of MSI AB to the best of my ability and time. This manual should help novice overclockers and experienced comrades to use all the functions of this program.
I recommend everyone to display the GPU load in Overlay, because very often people on the forum ask if this or that processor is enough to unlock the potential of a video card.
PS:
1) Questions like: “up to what frequencies to drive the card, and what voltage to set?” ask in special forums IN THE CONFERENCE Overclockers.ru. I will not answer them.
2) I will not give consultations about MSI AB either, because everything is described in the instructions, you just need to read everything to the end.
3) The screenshots are on Radical.ru because I have very little space on my personal pages. More precisely, 1.5 mb.
4) monitor GPU load in real time — this gives a lot of information about games and what they lack.
5) Good luck to everyone using this simple but very functional utility.
Tomatoes and gingerbread here:
https://forums. overclockers.ru/viewtopic.php?p=7757826#p7757826
Subscribe to our channel in Yandex.Zen or telegram channel @overclockers_news — these are convenient ways to follow new materials on the site. With pictures, extended descriptions and no ads.
MSI Afterburner analogues — 6 similar programs and services to replace
-
43
-
CAM
Complete solution for monitoring your PC.
- Free
- Windows
- Android
- iPhone
CAM monitors and records all the necessary PC statistics, including CPU/GPU temperature, load over time, network speed, memory size, FPS and more.
-
27
-
RivaTuner
RivaTuner is a powerful program for tuning video adapters.
- Free
- Windows
RivaTuner is a complete and powerful tuning environment that provides everything you need to tune your NVIDIA GPU based display adapters.
-
9
-
EVGA PrecisionX 16
This software allows you to fine-tune your graphics card, including GPU clock offsets, memory clocks, and more.
- Free
- Windows
The future of EVGA PrecisionX 16, this software allows you to fine-tune your NVIDIA graphics card, including GPU clock offsets, memory clock offsets, fan speed, voltage, and more.
-
8
-
NVIDIA Inspector
Nvidia Inspector is a small and handy tool that displays hardware information for Nvidia.
- Free
- Windows
A tool to read all information from a video card from NVIDIA drivers and overclocking. Actually, this is a tool that allows you to detail dumps of NVIDIA video cards into the GPU to improve the Observer gadget.
-
6
-
AgaueEye
AgaueEye is a hardware monitor with gaming overlay (FPS) tools for Windows.
- Free
- Windows
AgaueEye is a free hardware monitor for Windows, you can see the status of your CPU/GPU/MB/HDD/RAM on desktop or overclock your GPU. AgaueEye also supports game overlay of popular games, so you can monitor the hardware status of games (over 3000 games supported) to check the performance.