ASRock Z390 Taichi ATX Motherboard Review — Tom’s Hardware
Tom’s Hardware Verdict
With good overall marks offsetting minuscule competitive setbacks, the Z390 Taichi is a capable home base for a new Core i9 CPU. But buyers sitting on the fence will should check if newer firmware improves efficiency and voltage issues.
Pros
- +
Great DRAM overclocking
- +
Adequate CPU overclocking
- +
Nice feature set for the price
Cons
- —
Mediocre CPU voltage leveling
- —
High energy use at full load
- —
Small performance deficit
Why you can trust Tom’s Hardware
Our expert reviewers spend hours testing and comparing products and services so you can choose the best for you. Find out more about how we test.
Today’s best ASRock Z390 Taichi deals
$199.99
View
No price information
Check Amazon
Layout & Features
Placing itself halfway between the feature sets and the prices of our two previously-reviewed Z390 boards, the $239 Z390 Taichi currently lives in a zone where its combination of dual Gigabit Ethernet and Wi-Fi could make it the value choice. Unfortunately, the early firmware holds it back just enough that we’re not ready to give it an award. Future buyers interested in this board’s features and price should check user reviews to determine if ASRock fixed its early firmware flaws.
Specifications
| Socket | LGA 1151 |
| Chipset | Intel Z390 |
| Form Factor | ATX |
| Voltage Regulator | 12 Phases |
| Video Ports | DisplayPort 1.2, HDMI 1.4 |
| USB Ports | 10Gbps: (1) Type-C, (3) Type A 5Gb/s: (4) Type A |
| Network Jacks | (2) Gigabit Ethernet, (2) Wi-Fi Antenna |
| Audio Jacks | (5) Analog, (1) Digital Out |
| Legacy Ports/Jacks | (1) PS/2 |
| Other Ports/Jack | CLR_CMOS Button |
| PCIe x16 | (3) v3.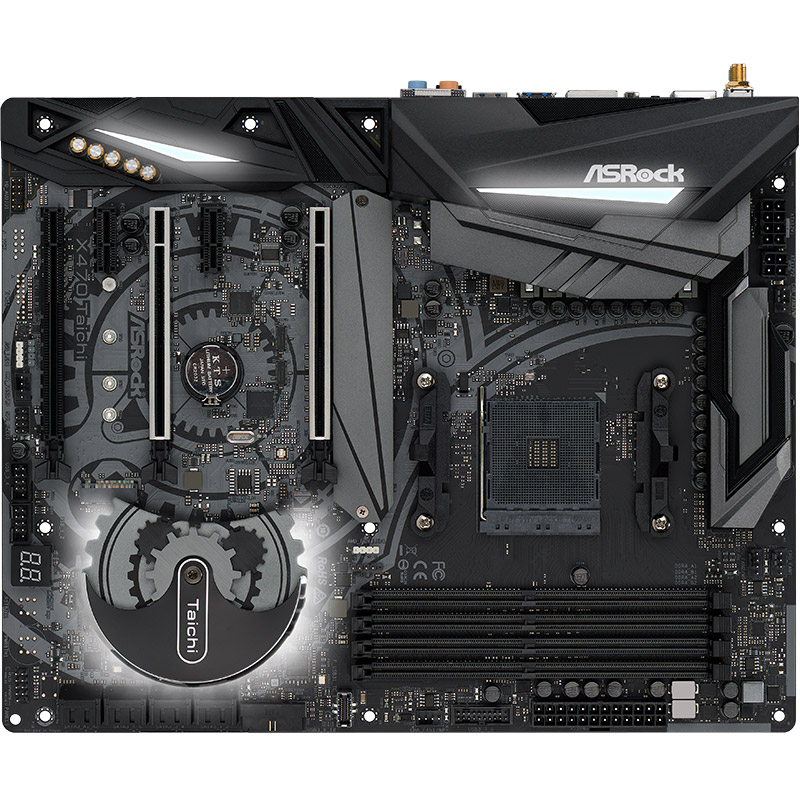 0/1, 4/5) 0/1, 4/5) |
| U.2 Ports | ✗ |
| SATA Ports | (8) 6Gb/s (Ports 0/1, 3, 4/5 shared w/M.2) |
| USB Headers | (1) 10Gb/s Type-C, (2) v3.0, (1.5) v2.0 |
| Fan Headers | (8) 4-Pin |
| Legacy Interfaces | ✗ |
| Other Interfaces | FP-Audio, D-LED, (2) RGB-LED, Thunderbolt AIC, TPM |
| Diagnostics Panel | Numeric |
| Internal Button/Switch | ✗ / ✗ |
| SATA Controllers | Integrated (0/1/5/10), ASM1061 PCIe |
| Ethernet Controllers | WGI211AT PCIe, WGI219V PHY |
| Wi-Fi / Bluetooth | Intel 3168 802.11ac (433mb/s) / BT 4.2 Combo |
| USB Controllers | ASM1074 Hub |
| HD Audio Codec | ALC1220 |
| DDL/DTS Connect | DTS Connect |
| Warranty | 3 Years |
Features & Layout
The Z390 Taichi might be a new board, but to call it a new design would be a stretch.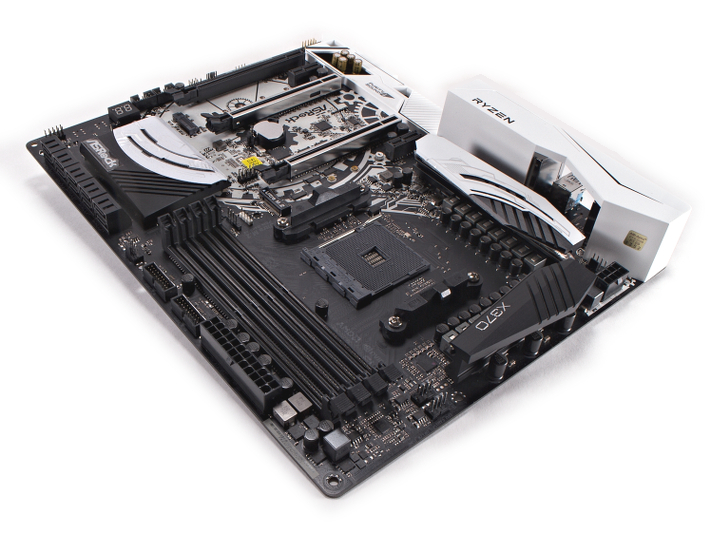 ASRock revised a few pathway routes to enable chipset-based USB 3.1 Gen2 (and eliminate the previous-generation Z370 Taichi’s third-party USB controllers). But the slots follow the same arrangement as the previous-gen model, as do most of the connectors. Both boards even had so-called “12-phase” voltage regulators, though the Z390 version uses TI 40-amp MOSFETs rather than the former board’s 30-amp parts. The heat sink covering those beefier transistors is also bigger, and the plastic shroud behind it gets its own RGB lighting this time around.
- ASRock Z390 Taichi at Newegg for $199.99
Our tests have shown that the fully-loaded Core i9-9900K pulls 50 percent more power than the Core i7-8700K, but it’s important to remember that much of that extra power comes from the CPU’s higher clock speed, and the higher voltage levels needed to support it. When we overclock both processors to their stability limits using the same core voltage, the 9900K pulls only 33 percent more power than the 8700K.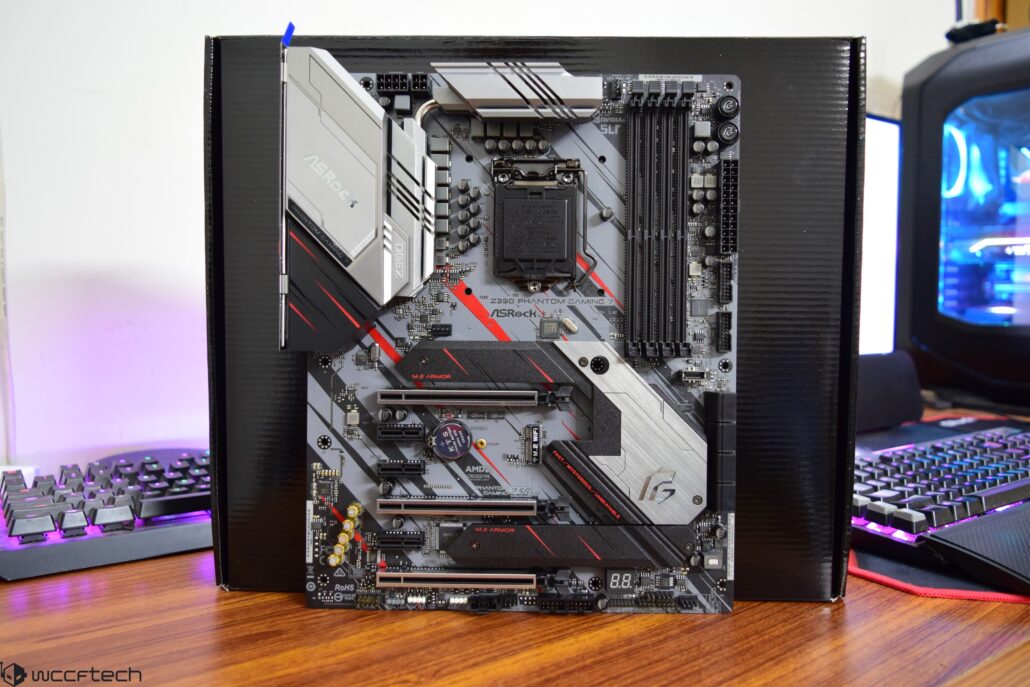 That makes sense because it has 33 percent more cores, and fortunately aligns with the new board’s 33 percent increase in amp capacity. The good news is that we’re reaching higher frequencies despite the extra cores, thanks to improvements built into Intel’s latest 14nm+++ lithography process.
We still see the same combination of three metal-reinforced x16-length and two open-ended PCIe x1 slots on this board. As with the Z370 Taichi, the top x1 slot remains shoved up against an M.2 storage slot, where the physical edge of any longer card inserted there will rest atop any drive mounted there. New for the Z390 Taichi, though, is that the second x1 slot’s opening points directly toward the battery, as if the firm doesn’t want anything longer than an x4 card inserted there.
But the reason ASRock moved the battery is a good one: Where the Z370 version had the second and third M.2 slots shoved end-to-end between the second and third x16 card slots, the Z390 model moves one of those M. 2 storage slots up to where the battery used to be. The result is a board that holds up to two 120mm and one 80mm SSD, where the previous version was limited to 80mm drives on all three slots.
The CLR_CMOS button, dual Gigabit Ethernet jacks, digital optical and five analog audio jacks remain, and are all driven by the same controllers as found on the previous Z370 Taichi. We still get DisplayPort 1.2 and HDMI 1.4b to tap into CPU-integrated graphics. We still get four Gen1 USB 3.1 ports. We still get the legacy 433Mb/s Wi-Fi standard, but it’s on a newer module on this board. The Z390 Taichi has two more USB 3.1 Gen2 ports on its I/O panel (totaling four, including one Type-C), and the Key-E Wi-Fi module now resides above the single PS/2 port. Small but noticeable changes blur the lines between whether the Z390 Taichi should be considered a new design or an alteration of its predecessor.
Looking for additional noteworthy changes from the Z370 Taichi, we found an extra 4-pin CPU power header next to the eight-pin version, one fan power connector has been moved from behind to below the rear voltage regulator heat sink. The Z390 Taichi has eight (rather than five) 4-pin fan headers, and that Z390 buyers get two RGB and one Addressable LED strip connector, compared to the old board’s single RGB header. ASRock also added a heat spreader to the Z390 Taichi’s third M.2 slot and rearranged its front-panel USB 3.0/3.1 header positions slightly. And the older model’s XMP-enable switch has been ditched here.
The eight forward-facing SATA ports remain and the ASM1061 controller that connects two of those ports persists. The sharing of HSIO pathways between ports and M.2 slots is unchanged: HSIO for SATA ports 0 and 3 are converted to PCIe for the upper M.2 slot, SATA ports 4 and 5 are treated the same way by the lower M.2 slot, and the middle M.2 slot only disable the SATA port 3 if using a SATA M.2 drive.
Where the former Z370 Taichi had a set of solder pads for a missing second connector, the Z390 Taichi placed its solo front-panel audio header. That moves it forward a little for easier cable management. Next to it are headers for an Addressable LED 3-pin cable, two standard RGB strips, a Thunderbolt add-in card, a fan, TPM, a four-pin (single-port) USB 2.0 half-header, a nine-pin (standard dual port) USB 2.0, beep-code speaker, an Intel-standard LED/button group, and another fan. As before, a Port 80 status code display resides slightly above the bottom row of front-panel headers.
The Z390 Taichi includes hardware and software manuals, a driver and application disc, an I/O shield, four SATA cables, Wi-Fi antennas, a high-bandwidth SLI bridge, and a foil-backed case badge.
MORE: Best Motherboards
MORE: How To Choose A Motherboard
MORE: All Motherboard Content
- 1
Current page:
Layout & Features
Next Page Software & Firmware
Thomas Soderstrom is a Senior Staff Editor at Tom’s Hardware US. He tests and reviews cases, cooling, memory and motherboards.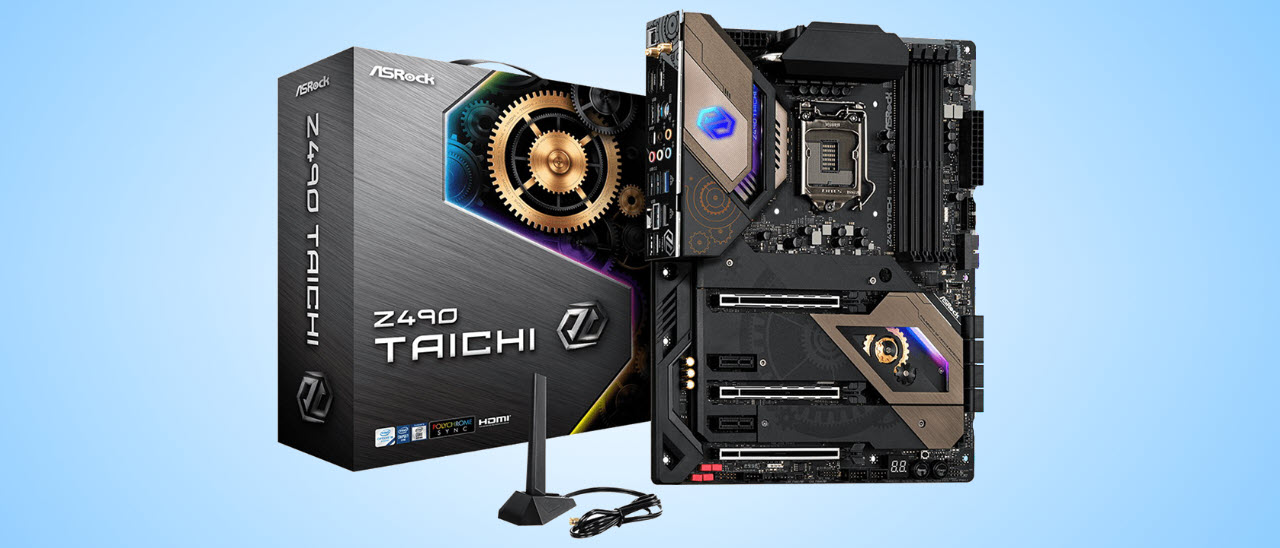
ASRock Z390 Taichi Motherboard Review Layout, Design and Features
1. ASRock Z390 Taichi Motherboard Review2. The technical data and benchmark results3. Layout, Design and Features4. BIOS and Overclocking5. PC power consumption6. Result and general impression
Quickly to the right hardware equipment …
ASRock Z390 Taichi Layout, Design and Features
ASRock Z390 Taichi RGB lighting
ASRock Z390 Taichi Equipment
ASRock Z390 Taichi Voltage Regulator and Heat Sink
ASRock Z390 Taichi Expansion cards
ASRock Z390 Taichi Memory
ASRock Z390 Taichi Hard disk drive connectors
ASRock Z390 Taichi USB and Firewire
ASRock Z390 Taichi Network
ASRock Z390 Taichi Sound
ASRock Z390 Taichi ATX back panel connectors
ASRock Z390 Taichi PC System
Layout, Design and Features …
Here you can see a 360 degree view of the ASRock Z390 Taichi ATX motherboard.
The black/light grey ASRock Z390 Taichi High Density Sapphire Black PCB board with the stylish gear elements as chipset cooler makes a cleanly finished impression again. The motherboard offers Premium 60A Power Chokes, Dual-Stack MOSFET (DSM), Nichicon 12K Black Caps Capacitors, 12 Power Phase Design and 7.1 HD Audio over the ALC1220.
The ASRock Z390 Taichi features a Dr. Debug 7-segment LED postcode display in the lower area and offers three fast Ultra M.2 slots for PCIe Gen3 x4 modules with up to 32 Gb/s connection. The following picture shows the PCIe 3.0 steel slots and the M.2 slots, whereby the lower M.2 socket is even equipped with a heat sink.
We tested the Z390 Taichi with a Crucial MX500 M.2 SSD 1TB SSD, as you can see here with the dismantled M.2 cooler very nice.
RGB Lighting …
RGB lighting has certainly already become a selling point for many and ASRock has done a lot for this as well. You can connect conventional 5050 RGB strips to the two white 4-pin 12V RGB headers as usual, for example to illuminate the enclosure. In addition, there is a grey Polychrome RGB connector, which supports individually addressable LEDs for addressable RGB strips via the WS2812B.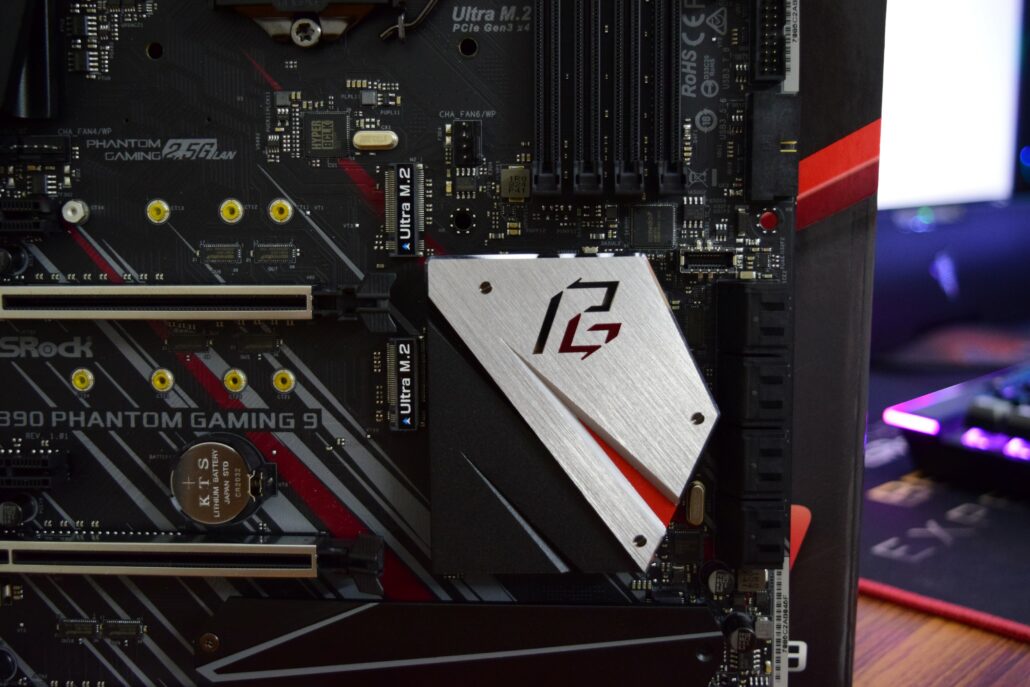
On the ASRock Z390 Taichi there are several RGB LEDs under the stylish chipset cooler, …
… on the audio area and in the I/O cover, which can be controlled as desired.
The RGB headers and the integrated RGB LEDs can be controlled via UEFI or via the supplied ASRock Polychrome RGB LED software. For example, you can select the colors in an RGB color selector and set whether the RGB headers should be controlled separately or together with the RGB lighting under the chipset cooler, the IO cover and the audio area. Of course you can also deactivate the lighting completely or use it for all connections at the same time.
You can select many effects in the ASRock RGB LED menu, for example whether the LEDs should light continuously, breathe, randomly or be controlled to music and with the addressable RGB connection you even get completely new RGB features like Spring, Meteor, Stack, Cram, Rainbow, etc…
A total of up to 100 addressable LEDs can be addressed individually.
So there are lots of great RGB effects that we presented in ASRock Polychrome RGB Software Video on our OCinside YouTube Channel.
ASRock Polychrome RGB Software Video
Watch this video on YouTube.
Let’s get back to the equipment. Here you can see the front USB 3.1 Gen2 type-C connector, two internal USB3.1 Gen1 connectors, some Nichicon capacitors and the 24-pin ATX power connector.
Voltage Regulator and Heat Sink …
The picture shows the side view of the mainboard with the large heat sink on the MOSFETs. More precisely, it’s two heat sinks connected with a heatpipe.
Here you can see again the two aluminium heatsinks which are placed on the voltage converters together with the heat conduction pad.
Under the heat sinks of the ASRock Z390 Taichi the so-called Smart Power Stage area is cooled.
Here you can see again the MOSFETs which are responsible for the power supply of the Intel Coffee Lake or Intel Coffee Lake Refresh CPU.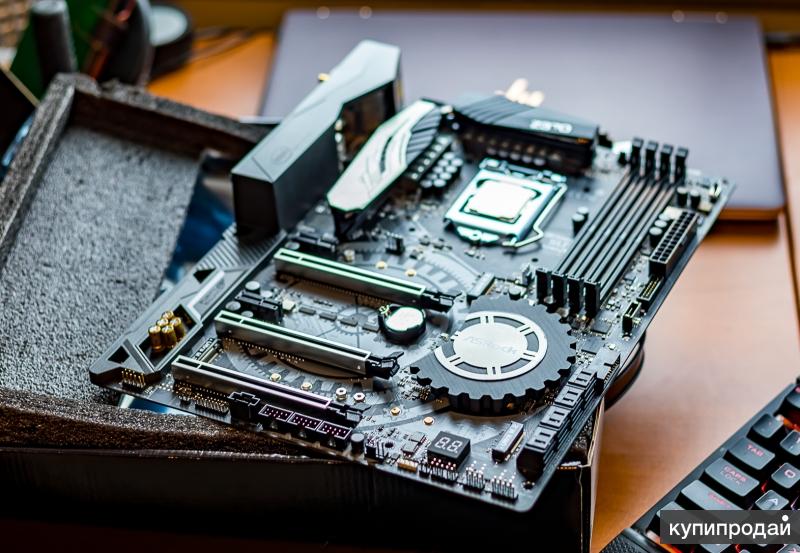
As in the recently tested ASRock Z390 uses 9 12 CSD 87350D MOSFETs or NexFETs as VRM on the 60A coils.
Equipment …
The ASRock Z390 Taichi has numerous features, such as the ASRock A-Tuning Tool, ASRock Instant Flash, ASRock Internet Flash, ASRock Easy RAID Installer, 12 Power Phase Design, IR Digi Power, RGB, Polychrome RGB and ASRock FAN-Tastic Tuning.
Expansion cards …
The motherboard offers three PCI Express 3.0 x16 slots for AMD CrossFireX or nVidia SLI as well as two PCI Express 3.0 x1 slots.
Memory …
The ASRock Z390 Taichi Board can be equipped with up to four DDR4 modules and can be upgraded up to a maximum of 64 GB RAM depending on the operating system used (see list). Here you can see a picture of the four DDR4 memory slots with Dual Channel Support:
The Intel LGA 1151v2 motherboard supports DDR4 memory modules and can be optimized in the BIOS for DDR4-2666 Quad Channel modules. The UEFI offers settings from DDR4-800 up to DDR4-8400.
Thanks to XMP support (Extreme Memory Profile), XMP memory modules are set correctly with a mouse click in the UEFI, but more about this later. Which exact RAM modules are officially supported, one should read before the purchase at ASRock on the memory support page.
Hard disk connectors …
The ASRock Z390 Taichi offers a total of eight angled SATA3 ports.
The SATA3 ports support RAID 0, RAID 1, RAID 5, RAID 10, NCQ, AHCI and the Hot Plug function in AHCI mode (AHCI stands for Advanced Host Controller Interface and should be selected for SSDs in UEFI). Thanks to UEFI BIOS, drives with more than 2TB can also be used for the installation of Windows 10 x64. The installation of the drivers ran without problems in Windows 10, so that the 64 bit Windows 10 installation was quickly done.
The RAID drivers can be installed via the Easy RAID Installer point in the UEFI. The drivers for Windows 10 are delivered on DVD and are also available for download on the ASRock Support page, whereby the Windows 10 installation is currently preferred.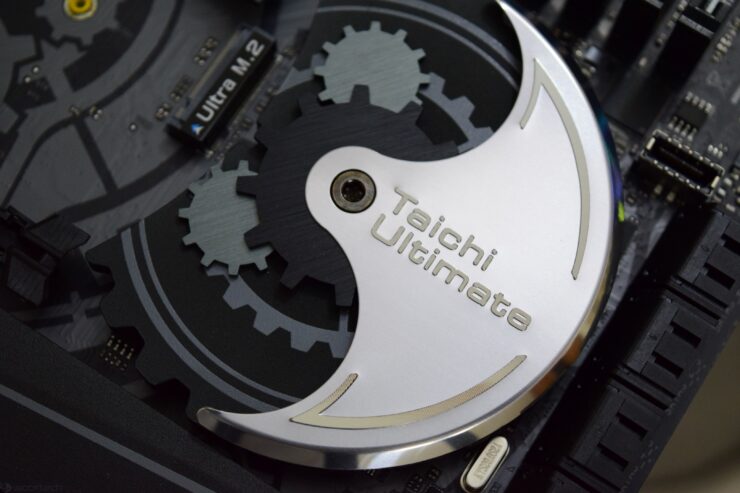
USB and Firewire …
The ASRock Z390 Taichi has four USB 3.0 ports (USB 3.1 Gen1) and altogether four USB 3.1 Gen2 ports on the ATX panel. On the picture you can see the USB 3.1 Gen2 Type-A below the LAN port on the right and the USB 3.1 Gen2 Type-C port which can be plugged in on both sides.
Internally two USB 2.0 ports for up to four optional USB ports and two USB 3.0 headers for up to four optional USB 3.0 ports (USB 3.1 Gen1) are available. The 20-pin header can be connected either to an optional USB3.0 front panel or to a housing with USB3.0 support. New is the front USB 3.1 Gen2 Type-C port, which allows you now 10 Gbps on the front panel case.
For Windows 7 there is currently no Intel Z390 support! You can install Microsoft Windows 7 without problems with the Intel Z390 chipset, but the USB ports do not work and there are no drivers for the internal GPU yet. We have tried our way through the tests with a PS/2 keyboard and tried different Windows 7 drivers, but without success.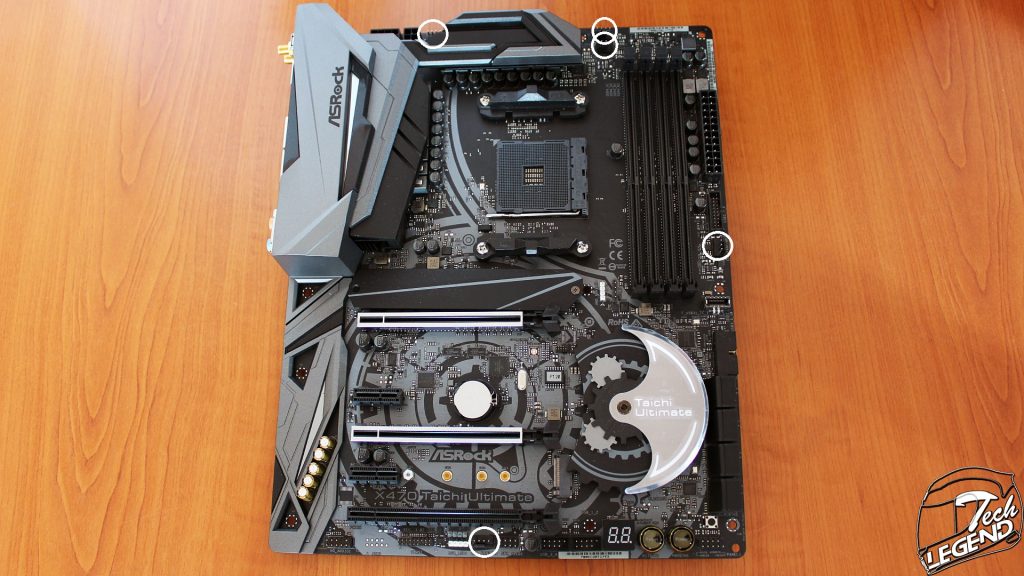 The problem is that the new Z390 chipset has native USB3.1 and USB2.0 support and older Windows 7 drivers no longer work for the USB controllers of the Intel Z390 PCH. Even if one should install Windows 10 nowadays anyway, the official Windows 7 support from Microsoft is actually only obsolete in January 2020. Whether and when there will be drivers for Windows 7 remains to be seen.
Network …
The ASRock Z390 Taichi features an Intel I219V and an I211AT, which provides two additional 10/100/1000 network ports on the ATX panel. The two Intel LAN ports are teaming capable, WoL capable, offer LAN cable detection, support energy efficient Ethernet according to the 802.3az standard, PXE and more.
In addition the Z390 Taichi also features the WLAN 2.4 GHz/5 GHz Dual Band IEEE 802.11a/b/g/n/ac with up to 433 Mbps transfer rate and Bluetooth 4.2.
Sound …
The ASRock Z390 Taichi motherboard also features the better Realtek ALC1220 Audio Codec with Content Protection, 120dB SNR DAC, TI NE5532 Premium Headset Amplifier and Purity 4 Sound, which supports 7.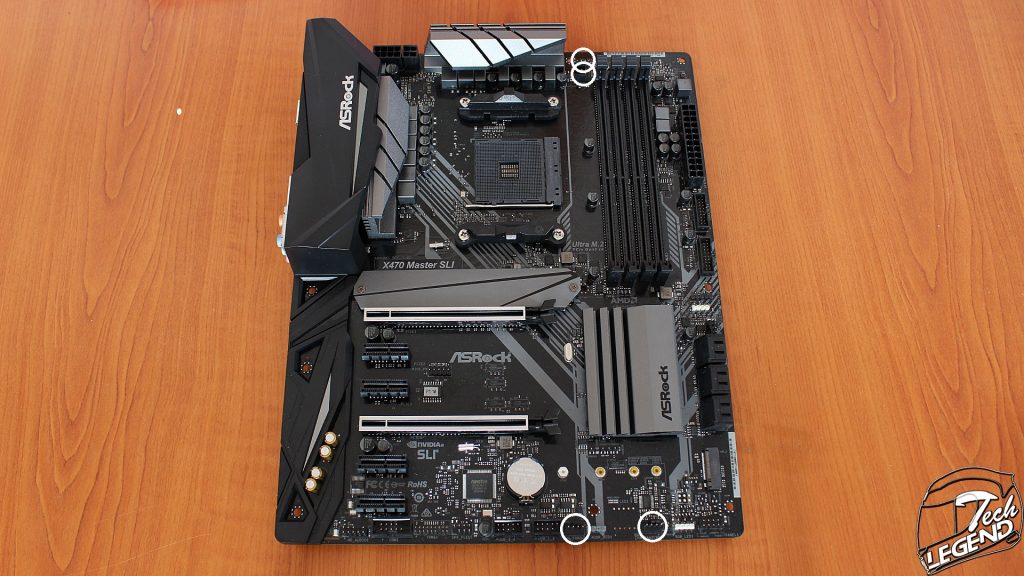 1 surround sound and outputs it analog via 5x 3.5mm jacks on the ATX panel or via the internal front panel audio connector. Furthermore there is an optical SPDIF digital output and Premium Blu-Ray support. This makes an additional sound card with digital outputs unnecessary for most users.
ATX Backpanel connections …
From left to right you can see the Clear CMOS button, two WiFi antenna connectors, 1x PS/2 connector for PS/2 keyboard or PS/2 mouse and 2x USB 3.1 Gen1 (USB 3.0), Displayport 1.2, HDMI, 2x USB 3.1 Gen1 (USB 3.0), RJ45 Gigabit LAN and 2x USB 3.1 Gen2, RJ45 Gigabit LAN and 1x USB 3.1 Gen2 Type-A and 1x USB 3.1 Gen2 Type-C, optical SPDIF output and 5x 3.5mm jacks for sound.
Test System …
Now we come to the Intel LGA 1151 v2 CPU socket. The 8th Gen socket and the 9th Gen socket look like the LGA1151 socket of the previous generation, but can no longer be equipped with Kaby Lake processors like the Intel Core i5-7600K! A new Intel Coffee Lake or Intel Coffee Lake Refresh processor has to be installed to work on the Intel Z390 board.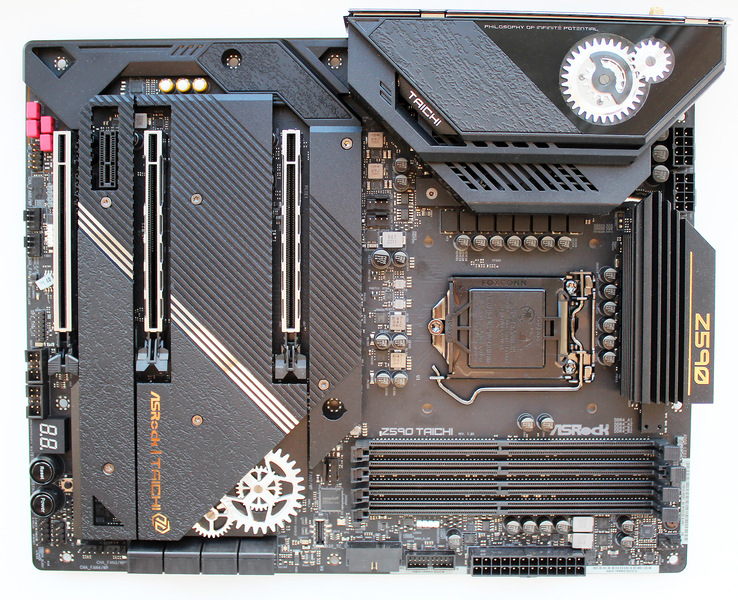 The socket is equipped with a lever that evenly presses the relatively small CPU onto the pins in the socket. As always during the installation, don’t touch the contacts or bend the contacts in the socket and don’t forget to mount the protective cap on the socket during storage or transport. If the pins are bent and the mainboard doesn’t work anymore, we help you with words and deeds in Intel Forum.
We have equipped the test system with an Intel Core i9-9900K CPU.
Intel LGA 1151 v2 CPUs do not support Quad Channel Mode, only Dual Channel Mode. So the two memory modules are used on the Intel Z390 motherboard to get Dual Channel support.
Here you can see again the two DDR4-2400 4GB modules from Crucial in the ASRock Z390 Taichi motherboard.
For tests with the new Intel LGA 1151-2 processors we use the Enermax ETS-T50 AXE DFP air cooler. Here you can see again the finished Intel LGA 1151 v2 test system from above with Enermax ETS-T50 AXE DFP cooler without graphics card for a better display of the illumination possibilities at the chipset, IO cover and audio area.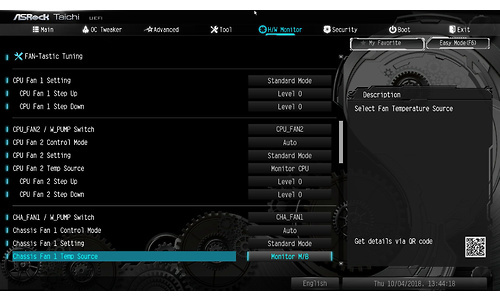
And here’s a view of the test system with the Icy Dock MB171SP-B Turbo Swap swap frame to quickly swap the HDD or SSD, in our case a Crucial 2.5″ SSD.
This is what the 8 cores (16 threads) of the Intel Core i9-9900K CPU look like in Windows 10 Task Manager at Prime95 full load.
As you can see on the thermal image of the ASRock Z390 Taichi PC under normal load, the heat dissipation of the voltage regulators and coils through the two heat sinks is very good.
Here you can see again a thermal image of the whole ASRock Z390 Taichi system at common load with the stylish gear elements as chipset cooler.
ASRock Z390 Taichi BIOS and Overclocking …
<< 1 2 3 4 5 6 >>
ASRock Z390 Taichi motherboard review based on the Intel Z390 chipset
Yes, that’s how this material begins in an unusual way. On the one hand, ASRock’s Taichi series of boards belongs to a relatively top segment, so the name of one of the popular types of martial arts is used, symbolizing the desire to win.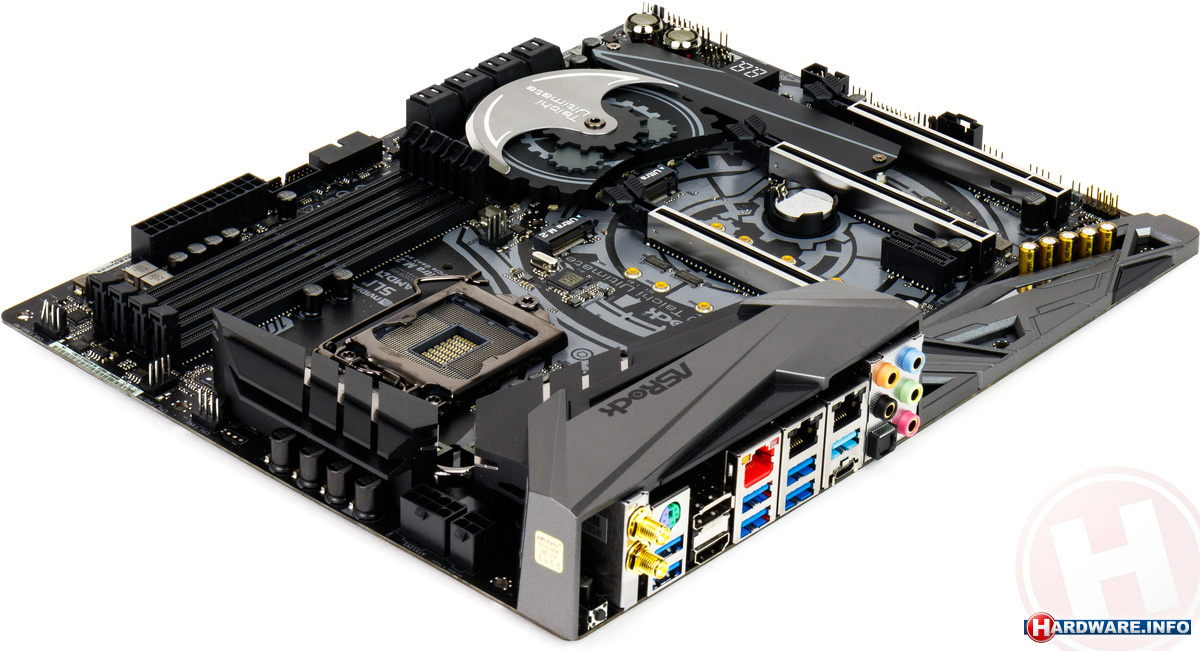 On the other hand, if a beautiful backlight is already implemented that can respond to music, then why not. The curved line on the box clearly alludes to the philosophy of «yin-yang», the unity of opposites. Yes, it seems that the product is not the top one, but it has all the attributes of this segment.
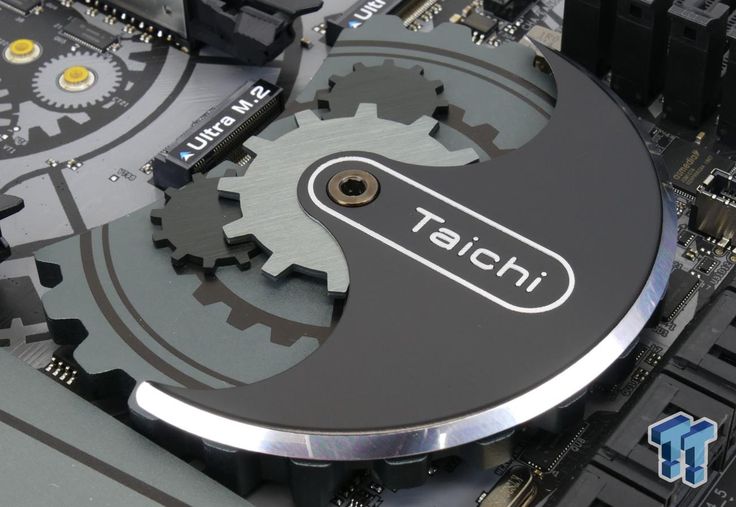
So we have ASRock and Taichi. Steel cold color, gears of the perpetual mechanism … Let’s see what kind of mechanism.
ASRock Z390 Taichi is a motherboard based on the recently released Intel Z390 chipset for the new 9th generation Intel Core processors (however, 8th generation too). The company has a slightly higher positioning Phantom line, and the most sophisticated delivery kits are there. And Taichi «takes» only functionality at a reasonable price.
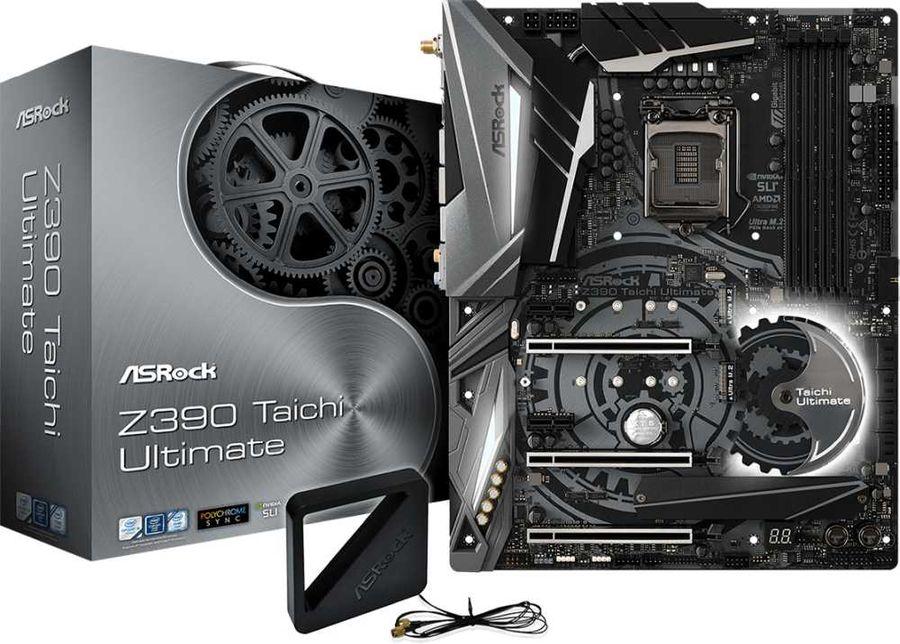
The board comes in a large box with a carrying handle, dressed in a glossy dust jacket, made in the same cool colors as the board itself.
Kit also common for mid-range motherboards, including multilingual user manual and CD.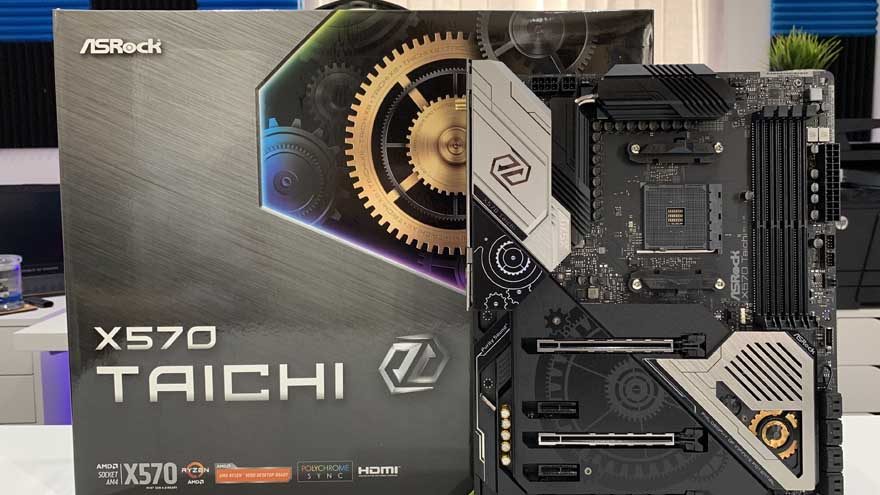 It is not very clear who needs these books now, when everything can be downloaded from the Internet — well, except that the new computer will be assembled from scratch in a spherical vacuum. Discs are generally absurd, because there are no CD / DVD drives in modern computers for a long time, and the software will have time to update 2-3 times before the board with the disc reaches the buyer: so you still have to go to the manufacturer’s website and download all the drivers and proprietary utilities. However, Windows 10 perfectly identified all the devices of this board, there was no need to look for drivers. Also included are traditional SATA cables, a “plug” on the back panel with connectors, three screws for attaching M.2 drives, antennas for a wireless network adapter and an Nvidia SLI bridge (an old model, it will no longer fit GeForce RTX 2xxx video cards ).
Form factor
ASRock Z390 Taichi motherboard is made in the ATX form factor, has dimensions of 305×245 mm and 10 mounting holes for installation in the case.
There are few elements on the reverse side, the sharp ends are cut off at all soldering points, so if you take the board in your hands, it is impossible to get hurt (I remember that in the old days when assembling computers, hands were bloodied not so much on the sharp edges of cheap Chinese cases, but on the soldering points on circulation of «mums»).
Specifications
Below will be a rather boring table, but it is mandatory: a number of readers determine the need or uselessness of a piece of hardware by examining the table of functional features.
| Processors supported | 8th and 9th generation Intel Core |
|---|---|
| Processor socket | LGA1151v2 |
| Chipset | Intel Z390 |
| Memory | 4 × DDR4, up to 64 GB, up to DDR4-4600 |
| Audio subsystem | 1 × Realtek ALC1220 + amplifier (OpAmp) Texas Instruments NE5532 |
| Network controllers | 1 × Intel i219V (Gigabit Ethernet) 1 × Intel i211-AT (Gigabit Ethernet) 1 × Intel Dual Band Wireless AC 3168NGW (Wi-Fi 2.  4/5 GHz (802.11a/b/g/n/ac ), Bluetooth 4.2) 4/5 GHz (802.11a/b/g/n/ac ), Bluetooth 4.2) |
| Expansion slots | 3 × PCI Express 3.0 x16 (x16, x8+x8 (SLI/CrossFire), x8+x4+x4 (CrossFire) modes) 2 × PCI Express 3.0 x1 |
| Drive Connectors | 6 × SATA 6Gb/s (Z390) 2 × SATA 6Gb/s (ASMedia ASM1061) 3 × M.2 (for 2 x 2242/2260/2280/22110 and 1 x 2242/2260/2280 ) |
| USB ports | 5 × USB 3.1 Gen2: 3 × Type-A and 1 × Type-C on the rear panel + 1 internal Type-C port (Z390) 4 × USB 3.1 Gen1: 4 ports on the rear panel (Z390) 4 × USB 3.1 Gen1: 2 internal headers, each with 2 ports (ASMedia ASM1074) 3 × USB 2.0: 2 internal connectors, one for 1, the other for 2 ports (Z390) |
| Rear connectors | 1 × USB 3.1 (Type-C) 3 × USB 3.1 (Type-A) 4 × USB 3.0 2 × RJ-45 1 × PS/2 , output) 1 × HDMI 1.4 1 × DisplayPort 1.2 2 antenna connectors 1 CMOS reset button |
| Other internal connectors | ATX 24-pin power connector 1 x 8-pin EPS12V power connector 1 x 4-pin ATX12V power connector 1 x M. 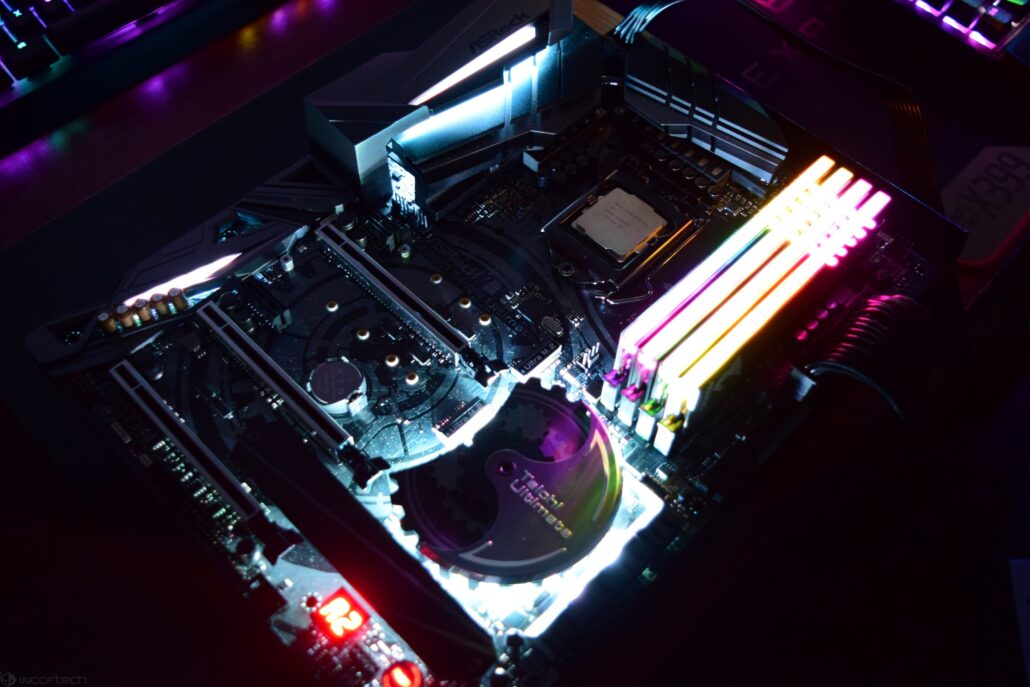 2 slot (E-key), occupied by wireless network adapter 2 slot (E-key), occupied by wireless network adapter 1 x USB 3.1 Type-C connector 2 x 4 x USB 3.0 ports 2 x 3 USB 2.0 headers 8 x 4-pin fans 1 x Thunderbolt AIC 1 x Addressable RGB 2 x non-addressable RGB 1 x Mode switch overclocking 1x TPM (Trusted Platform Module) connector |
| Form factor | ATX (305x245mm) |
| Average price |
ask prices |
| Retail offers |
ask price |
Main functionality: chipset, processor, memory
This board is not top-end (ASRock has more sophisticated options), but it has many peripheral controllers. Recall the scheme of the Intel Z39 chipset0 and its interaction with the processor.
The Z390 chipset supports up to 30 I/O lines (ports), of which up to 24 are assigned to PCI-E 3.0, there can be up to 6 SATA 6 Gb / s ports and a total of up to 14 USB 3.1 / 3. 0 / 2.0 ports.
The
ASRock Z390 Taichi, based on the Intel Z390 chipset, supports 8th and 9th generation Intel Core processors made for the socket (socket) LGA1151v2. Although there seems to be no physical differences from the old LGA1151, the new processors in LGA1151v1 will not work (something like “Ilyich’s light bulb”: if you tie a light bulb to the ceiling, it will look like a lamp, but will not shine).
The board has four DIMM slots for installing memory modules. The board supports unbuffered DDR4 (non-ECC) memory, and the maximum memory capacity is 64 GB (using 16 GB modules).
This is the end of the main functionality, because without a processor and memory, a motherboard is just a piece of textolite, and not a living component of a PC. Once upon a time, the base also included a video card, but almost all modern Intel processors have an integrated graphics core. However, without the periphery, the base will look like a person without arms and legs. Therefore, the next is the most interesting.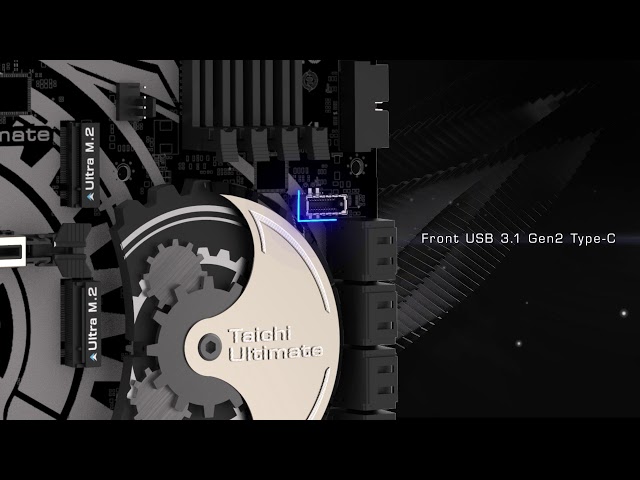
Peripheral functionality
Let’s start with the PCI-E slots.
The board has 5 slots: 3 PCI-E x16 (for video cards) and 2 PCI-E x1.
The processor has 16 PCI-E 3.0 lanes, they only go to PCI-E x16 slots. At the same time, it is impossible to fully connect all 3 “long” PCI-E slots with 16 lines, there is a deficit. This is how the distribution scheme looks like:
That is, only a single video card will fully receive 16 PCI-E lanes. If you try to depict a combination of three fingers… of three video cards (and today this is only relevant for AMD CrossFireX technology), then the first card will get 8 lines, and the other two — 4 each. Will it hit the overall performance a lot? No, not much. Apparently, this is why (and also because, in reality, the combination of several video cards in home computers is practically never found) manufacturers don’t “take a steam bath” on this score. Moreover, a “duet” of two video cards in SLI/CrossFire mode will get 8 lines per video card.
PCI-E x16 slots are «dressed» in metal cases, they also have additional soldering points — all this is designed to increase the service life of the slots, it’s no secret that modern powerful video cards can be very heavy, and only a couple of video cards are equipped with stand holders manufacturers. The distribution of PCI-E lines between the slots in the case of using more than one video card is handled by the ASM1480 multiplexers of the same ASMedia.
Now about drives.
The board has 8 Serial ATA 6 Gb/s connectors + 3 slots for drives in the M.2 form factor. (Another M.2 slot hidden under the cover of the rear panel connector block is occupied by the Wi-Fi/BT wireless controller.)
The chipset implements 6 SATA3 ports, an additional 2 ports are implemented through an additional ASMedia ASM1061 controller. With the current capacity of hard drives (and even SSDs), it’s hard to imagine a situation where 6 SATA chipset ports would not be enough.
There are also three M.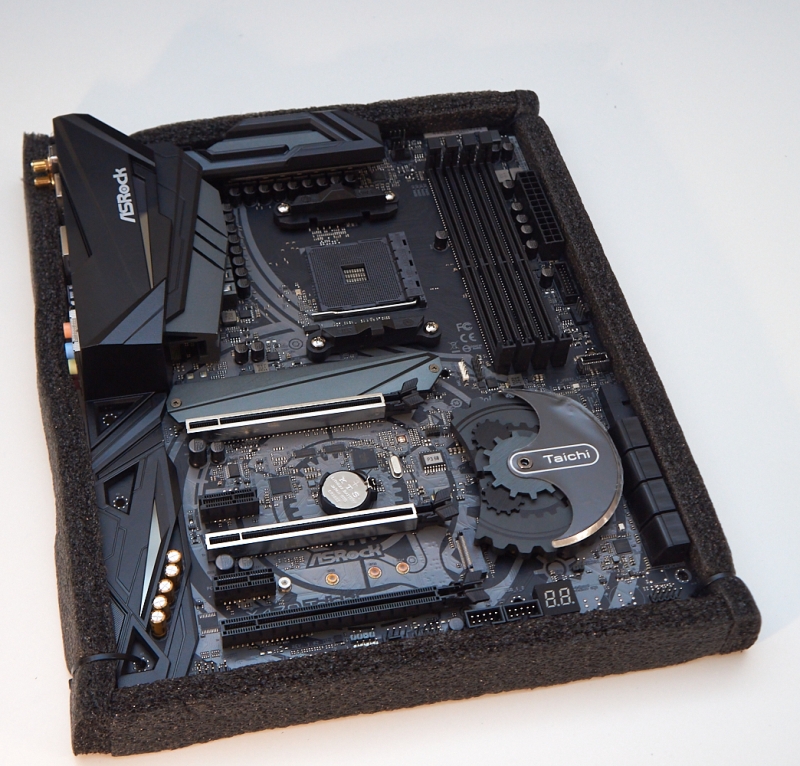 2 slots that support all modern types of drives in this form factor (with PCI-E and SATA interfaces). In the picture above, you can see that the M.2_1 slot is installed opposite the PCI-Ex1 slot, so you can install a module with a maximum size of 2280 there. The other two M.2 slots allow you to use longer modules with a size of 22110.
As usual, there aren’t enough HSIO ports in the chipset for everyone (even taking into account the installation of additional ASMedia controllers), so something has to share hardware resources with something. For this board, the M.2_1 slot (upper) shares lanes with SATA3_0 and SATA3_1 (the two rightmost in the picture above). That is, if something is connected to one of these three connectors, the other two will be cut down (they will not unsolder and fall out, but simply will not respond to the connection). Exactly the same picture with M.2_3 (slot at the bottom under the heatsink): it is combined with SATA3_4 and SATA3_5. But with M.2_2 (the slot is in the middle, below the first PCI-E x16), everything is a little simpler: if a drive with a SATA interface is inserted into it, then SATA3_3 will turn off, and if with a PCI-E interface, then SATA3_3 will continue to function, but SATA3_2 works always.
All M.2 slots provide a PCI-E 3.0 x4 chipset interface in addition to SATA, which should be enough for even the fastest drives. Of course, you can install Intel Optane Memory modules in any slot.
The bottom M.2 slot has its own heatsink.
When working, you need to feel each M.2 drive: if you get a burn, then it should be moved to the bottom slot. Joke.
In the photo above, you can see a board for displaying POST codes. If the memory modules are inserted incorrectly or the video card somehow crookedly enters, this diagnostic option may come in handy … If overclocking is the cause of the problems, there is a convenient CMOS clear button on the rear panel, as well as a second copy of UEFI (BIOS).
Now let’s take a look at the «communications with the world» ports, that is, USB.
As already mentioned, the Z390 is capable of implementing up to 14 USB ports of all types. What we have? 5 USB 3.1 Gen2 ports (that is, the fastest), of which 3 are regular Type-A on the rear panel, 1 is in the same place in the form of Type-C, plus one more internal Type-C (for connecting such a connector on the front panel of the case ). There are also 4 USB 3.1 Gen1 (USB 3.0) Type-A ports, implemented through the Z390, and they are brought to the rear panel (on both sides of the HDMI / DP connectors). And also due to Z390, 3 internal USB 2.0 ports are implemented. In the picture above, where the M.2 slot is without a heatsink, 2 connectors are clearly visible: one dual for 2 USB 2.0 ports and one single. Total 12 USB ports via Z390.
The manufacturer decided to implement 4 more internal USB 3.1 Gen1 ports, so I had to install an additional ASMedia ASM1074 controller. You can see them near the 24-pin power connector (2 connectors, each for 2 ports). All of these controllers communicate with the chipset via PCI-E x1.
On the back panel of the board, there was a place for two leads for Wi-Fi antennas and a PS / 2 port. An anachronism is not an anachronism, but sometimes the operating system cannot recognize USB devices, so a mouse and keyboard plugged into USB are not available, but PS / 2 peripherals always work (if, of course, you have it at hand).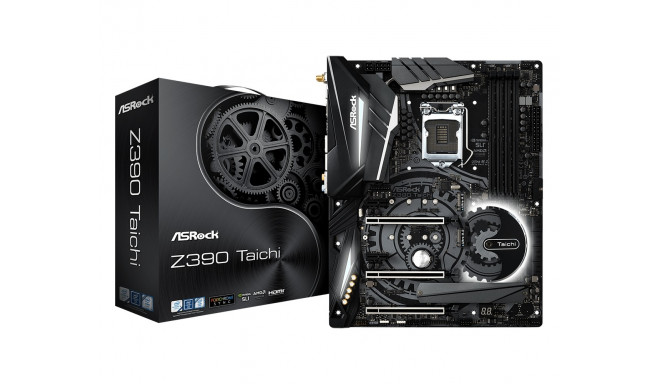 There are also HDMI 1.4 and DisplayPort 1.2 video outputs on the rear panel in case you want to use the integrated video core found in the vast majority of modern Intel processors.
Of course, we must also not forget about the two network controllers Intel GigaPHY i2119V and GigaLAN i211AT, whose RJ-45 connectors are also on the rear panel. The controllers are connected to the chipset via PCI-E x1 lines. Another line connected to the chipset is the M.2_4 (E-key) slot occupied by the Intel Wireless AC 3168NGW wireless network adapter.
To finish with the peripherals, we should also mention the 5-pin Thunderbolt AIC connector (for connecting a proprietary expansion card with the appropriate port), as well as a TPM connector (for connecting security systems)
The third unremarkable connector is intended for lovers of «fast» overclocking (just for those who want to «press a button and let it go…»).
Requires only the appropriate Turbo/Super/Puper/Cosmos/Nirvana and «Back home» buttons on the case.
It is also worth mentioning that the board has three connectors for connecting lighting devices (LED strips, etc.). Two of them are for connecting 12V/3A RGB strips (up to 36W), and one is for connecting Addressable LED (5V/3A, up to 15W). PC modding has long ceased to be an attribute of only very expensive computers.
Yes, and more connectors for connecting fans. There are a lot of them on the board — 8 pieces. CPU_FAN1 is for a regular CPU air cooler, and CPU_FAN2 is for monitoring the liquid CPU cooling system. CHA_FAN1-6 support any case cooling systems, including also liquid ones (for example, on a video card). Monitoring of these connectors, as well as the operation of the PS / 2 port, is provided by the Nuvoton I / O controller located on the back of the board.
Audio subsystem
Here, as usual, the ubiquitous and omnipotent Realtek ALC1220 audio codec runs the show. It provides sound output according to schemes up to 7.1, nothing new here. Accompanying it is the Texas Instruments NE5532 headphone amplifier. Declared support for headphones with an impedance of up to 600 ohms.
This is what the audio controller looks like framed by LEDs waiting for «frisky music».
Audio path placed on the corner of the board, does not intersect with other elements. According to the manufacturer, the left and right channels of the amplifier are separated into different layers of the printed circuit board. The audio path is equipped with Nichicon Fine Gold audio capacitors. In general, this is a standard audio subsystem by today’s standards, capable of satisfying the needs of most users who do not expect miracles from the sound on the motherboard. Of course, aesthetes should turn to the still living company Creative Labs for its solutions in the field of «improved sound» or even look towards individual audiophile products.
Power, cooling
There are 3 connectors for powering the board: in addition to the 24-pin ATX, there is one 8-pin EPS12V and one 4-pin ATX12V. The manual suggests connecting everything, but in practice, of course, everything works with one connected connector that supplies power to the processor converter, but if you plan to overclock and additional power manipulations, then it is better to connect all three connectors.
It is obvious that there are 14 power channels, 12 of them (10 + 2) are related to VCore and iGPU, and the remaining 2 are VCCIO and VCCSA. However, the installed PWM controller IR35201 (manufactured by Infineon) supports only 8 phases.
Therefore, the engineers decided to use 2 phases for the iGPU as is, and also use 5 phase doublers IR3598, installing them on the back of the PCB. In total, they provide 10 channels for Vcore. The sixth chip IR3598 is configured as a driver for GPU Voltage, so in fact the PWM controller operates in 5 + 2 phase mode. The other two channels VCCIO and VCCSA are controlled by the Richtek RT8120 controller. Used field effect transistors TI and Sinopower.
Memory module power supply is 2-phase, controlled by the uP1674 controller (uPI Semiconductor).
Now about cooling. All elements that need it are cooled only by radiators, there are no fans (this is excellent, because small fans usually start to make noise very quickly).
The chipset has a large rounded heatsink with the same gears, symbolizing, on the one hand, a well-oiled mechanism, and on the other, perpetual motion.
This heatsink is so large that it is more than enough to cool the Z390. A mysteriously shining backlight is organized under the edges of the radiator.
The power elements of the power converter have their own two heatsinks connected at an angle by a heat pipe.
The last element of this kit “cool the yin-yang and the processor will overclock” is the heatsink for the lower M.2 slot already mentioned above, equipped with a thermal interface: suddenly the SSD installed there overheats and starts throttling … Although it is hard to believe in this.
Above the audio subsystem and above the connector block of the rear panel there are plastic casings of the corresponding design (and backlit), there are no radiators.
Illumination
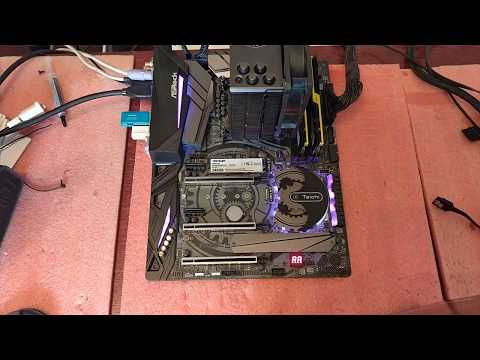
The fact that the board has a backlight should be obvious from the video at the beginning of the article. The LEDs are «scattered» over the textolite quite generously, in addition to the chipset, you can see the glow in the area of the audio subsystem and near the rear panel connectors.
Once again, it should be noted that in addition to the backlight of the board itself, the connection of RGB LED strips to three connectors is supported. The whole complex is managed through a utility, which (among others) we will consider in the next section. I must say that a number of manufacturers of modding cases with already built-in lighting “certify” support for programs from leading motherboard manufacturers, including ASRock.
Software for Windows
All software can be downloaded from the manufacturer’s website asrock.com. The main program — so to speak, the manager of all «software» — is ASRock AppShop, an application store (as it is now commonly called). It should be installed first.
AppShop can update all drivers, installed ASRock utilities, and motherboard BIOS firmware.
Apple gadget owners are advised to install the App Charger. Well, just to test 🙂
According to the manufacturer, this utility and its driver make it possible to enhance and even in sleep and hibernation modes maintain power to USB connectors for charging Apple smartphones and tablets, reducing charging time by 40%. It is not specified what the calculations were based on: they took as a basis the charging time from the same computer without this utility or the charging time from the native charger. Probably the first. It is also strange that for some reason this is only addressed to owners of Apple devices. We have not tried this app for Android gadgets.
Next is the program that controls the backlight.
Actually, here you can set the operation mode of the backlight on the board, as well as the RGB tapes connected to it. In particular, there is support for light music, which is demonstrated in the video at the beginning of the article.
Further — the main program for those who want to change the mode of operation of the motherboard, processor, memory.
The utility allows overclocking (raising frequencies, voltages, etc.) directly from Windows without diving into the BIOS setup program of the motherboard.
For the overclocking example, we used the top-end Intel Core i9-9900K, running at 3.6 GHz by default.
The same program allows you to configure the operation of all fans connected to the motherboard: start automatic tuning or set their operation mode manually.
Almost all modern motherboards (except perhaps the most budget ones) support Boost technology, when the processor frequency is automatically controlled using an unlocked multiplier (only on processors with the “K” suffix!), while the frequency can be raised much higher than nominal.
On this board, the Core i9-9900K easily «took» a frequency of 5 GHz, while nothing had to be changed or configured. But if you want to raise the overclocking bar even higher, you will need this program or you will have to manually dig into the BIOS settings. The above shows reaching a frequency of 5.2 GHz, however, without a forced increase in voltage, the system was unstable. Stable operation at 5.2 GHz (that is, with a multiplier of 52, but at the same time the processor cache multiplier could not be raised above 43) was obtained by increasing the voltage by 0.02 V. We could experiment further, but it’s time to finish the article.
In conclusion of the notes about overclocking, I would like to note that the heating of all components was within the normal limits, the chipset heatsink heated up to the same 50-60 degrees. Once again, we emphasize that we did not particularly deal with overclocking. Perhaps in the future, if readers ask, we will pay more attention to this.
BIOS settings and overclocking
All modern «mothers» do not have outdated BIOS, but UEFI (Unified Extensible Firmware Interface), which greatly expanded the possibilities of presetting motherboards. In fact, these are operating systems (with the prefix micro).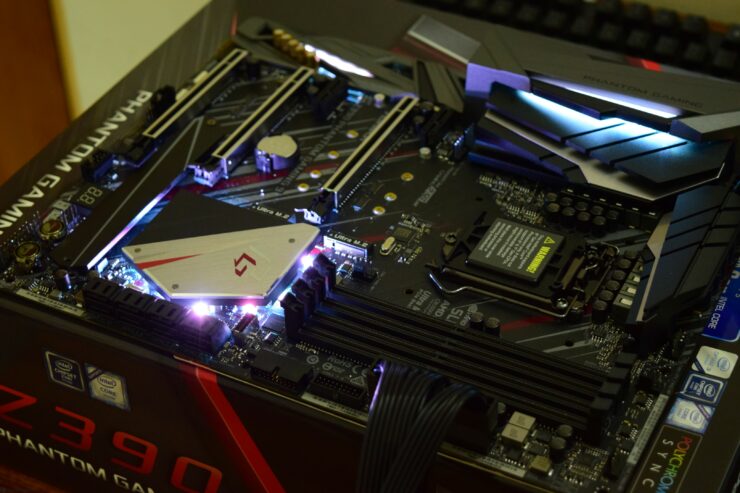 If the abbreviation BIOS is mentioned in the text of the article, then this is done only so that it is clear to all the «old men», because many cannot get used to UEFI. To enter the settings when the PC boots up, traditionally, you need to press the Del key.
The initial picture demonstrates the summary features and parameters of the processor, memory, fans, and peripherals.
When trying to turn on the Russian language, sometimes very funny wording appeared in the interface. It seems that some of the words were from the Belarusian language (but they definitely included Russian!).
If the overclocking settings offered by the A-Tuning utility are not enough for you, you can use the very fine and complex settings in UEFI Setup, since this board is also intended for overclockers.
Conclusions
In general, I liked the motherboard. Strict stylish design, aesthetically pleasing lighting, rich peripheral functionality. Fans of overclocking should also like this board.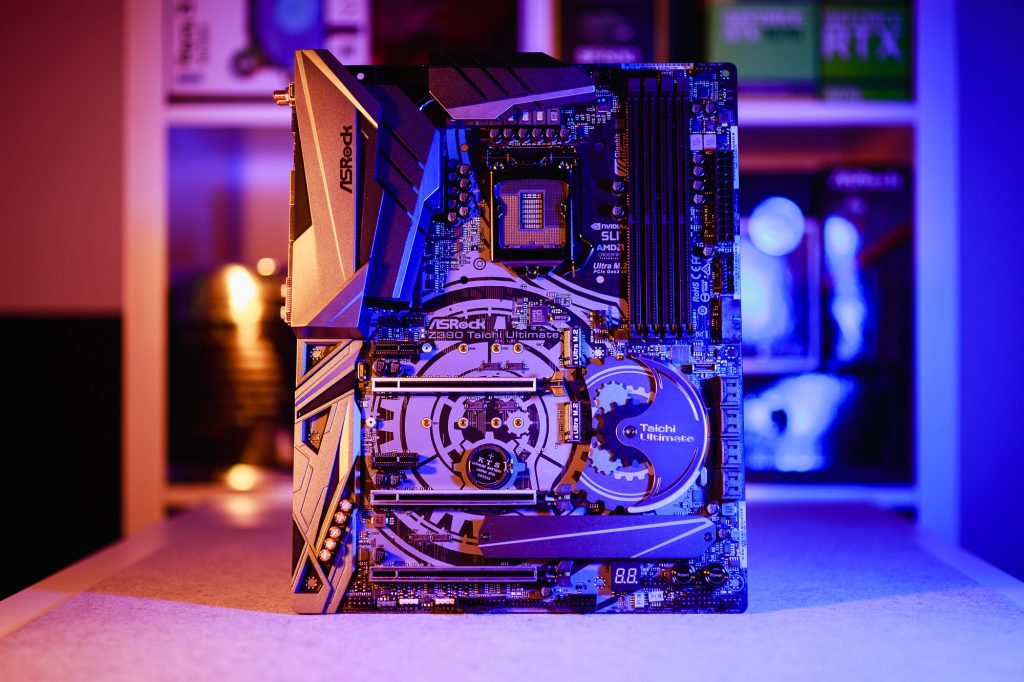 Is she dear? At the time of publication of the review, the board cost under 20 thousand. This seems to be a lot, but here both the top-end chipset and the top-end series. Compared to 40 thousand for similar solutions from Asus, MSI and Gigabyte, this is not so expensive. In addition, motherboards, as a rule, are rarely changed, and this one should last a long time, because it is made soundly and with high quality. The advantages of the wiring include the ability to freely place a massive powerful video card in the first PCI-E x16 slot, since there are no vertical slots nearby, and the drive in the M.2 slot can easily fit under it. The presence of a heatsink in one of the M.2 slots is also a small plus. It is gratifying to see a large space around the LGA1151 socket, which will allow you to mount a cooling system of any complexity and configuration. Support for all kinds of network interfaces (including two wired gigabit) is also a plus. Support from proprietary software is a very nice and useful bonus.
Actually, this is almost an analogue of the top solutions from competitors, but at a lower price. Yes, the equipment is rather poor, but in full accordance with the price positioning.
Is it worth practicing tai chi for health and longevity?
Iya Zorina
Author of Lifehacker, athlete, CCM
Share
0
What is tai chi
Tai chi (Chinese for «great limit», «cosmos») is a traditional Chinese practice that consists of flowing movements — forms flowing from one to another like a slow dance.
Forms have poetic names, often associated with animals or objects — «white crane flapping its wings», «horse urging», «playing the lute» — and are combined into continuous complexes.
In addition to movement, an important aspect of the practice is breath control and concentration on body position and state of mind. All together turns classes into a kind of meditation in motion.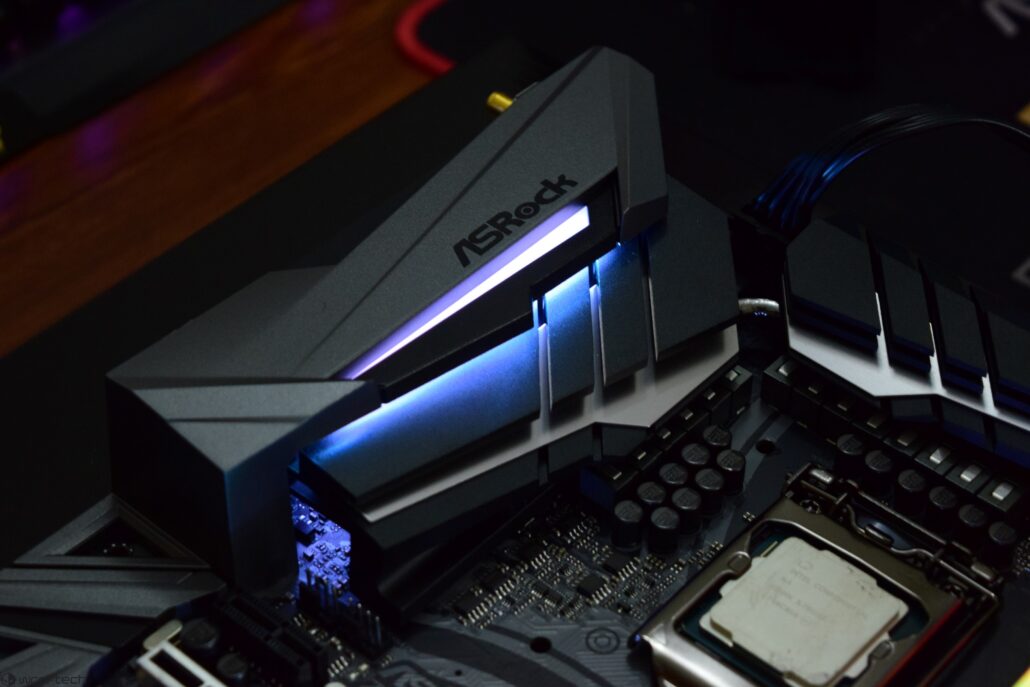
Initially, tai chi developed in China as a martial art — taijiquan («fist of the great limit»). However, throughout the world this practice has become known as gymnastics with a very gentle effect on the body.
Since most styles of tai chi do not involve sudden movements, force and shock loads, or extreme joint positions, the practice is often used as a system of exercises for people in old age, as well as during the period of recovery from diseases and injuries.
Why do tai chi
Most of the studies on tai chi have been conducted on people aged 60-80, as well as on patients with various diseases that reduce the quality of life. As a result, it turned out that for people weakened by age or illness, this gymnastics helps to improve their physical condition in several ways at once.
- Increased bone density . As people age, they begin to lose bone mass, which increases the risk of disease and injury. Tai chi helps stop bone breakdown and reduces fractures in the elderly.

- Better heart and lung health . Tai chi significantly lowers blood pressure and heart rate, increases heart rate variability and other indicators of cardiovascular health.
- Increased functionality . With minimal impact on the body, tai chi still increases muscle strength, flexibility and a sense of balance.
- Improving the sense of balance . The relationship between tai chi practice and the development of a sense of balance has been well documented: regular training improves the ability to maintain balance and almost halves the risk of falls. Gymnastics works especially well with low-intensity aerobic work like walking.
- Improving the quality of life and mental health . Due to the meditative component, tai chi helps fight stress, reduces anxiety and improves mood, increases self-esteem and self-confidence, and generally improves the quality of life for people recovering from a stroke and heart attack, oncology, arthritis and other diseases.

Who should try tai chi
Tai chi is a great choice if you:
- Crossing the 50 mark and looking for a safe way to increase your physical activity.
- Recovering from surgery or injury and are at a stage where you can start exercising.
- Are you looking for a way to increase physical activity, but at the same time you have not been involved in sports for a long time and you hate fitness in any of its manifestations.
- Want to reduce stress and anxiety, increase awareness and find harmony with yourself.
Tai chi is suitable for people of all ages and has virtually no contraindications. However, there are still conditions in which it is better to consult a doctor before classes:
- Pregnancy.
- Problems with joints and spine.
- Exacerbation of osteoporosis.
- Hernias.
Who shouldn’t try tai chi
Tai chi is not for you if you want to:
- Lose weight, increase muscle mass and develop endurance.
- Improve athletic performance in any sport.
- Learn self-defense techniques that will allow you to effectively defend yourself against opponents.
Soft gymnastics does not provide enough incentives to improve the fitness of healthy young people.
Which style of tai chi to choose
All styles of tai chi include soft and flowing forms that change continuously. However, there are some differences that may influence your choice.
Currently, there are several main branches of tai chi:
- Chen. This is the oldest style of tai chi and is most reminiscent of a martial art. In addition to soft and fluid movements, it also includes jumping, explosive elements, and kicks and punches. Unlike other types, Chen provides a cardio load and is more often practiced by young people.
- Jan. The most popular style, featuring sweeping stately movements. There are no jumps or hard hand and foot techniques, so the style is suitable for people of all ages and abilities.
- Wu (U). The second most popular style of tai chi. Includes deviations of the body from the center line. During flexion and extension of the body, the standing leg behind serves to maintain balance. Movements in Wu-style are less amplitude than in Yang forms.
- Sun. Includes a mix of tai chi styles and martial arts elements. The style is characterized by unique footwork and soft, circular hand movements.
For beginners, the Yang and Wu options are best — they are most often taught in Russian schools and fitness centers. These styles provide minimal stress to the muscles and joints. If you are looking for something more active, choose the Chen style: it will help increase leg strength, improve stretching and build endurance.
Tai Chi Essentials
This practice does not require special equipment or clothing. It is enough to find comfortable things that do not restrict movement. You can remove your shoes and go barefoot or find soft and non-slip sneakers with thin soles that do not restrict the foot.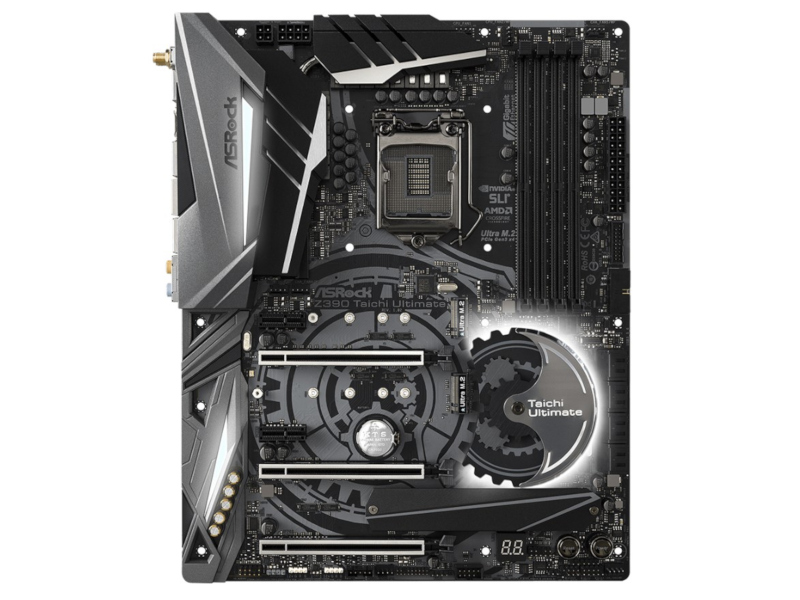
It is best to start your practice with a coach who will help you learn the forms and follow the correct execution and breathing. If there are no courses in your city or you want to master the practice alone, try studying with instructional videos.
How to practice tai chi at home
Tai chi forms of different styles may differ from each other in name or method of execution, but they all share the basic principles: smooth continuous movements, breath control and body position. As a rule, training begins with a warm-up, which helps to warm up the muscles and tune in to the lesson.
How to warm up
Head tilts
Stand with your feet shoulder-width apart, breathe deeply and naturally. Gently raise your arms in front of you to shoulder level, turn your palms towards you, bend your elbows and pull your chin in, stretching the back of your neck. Then turn your hands palms away from you, straighten and lower, while tilting your head.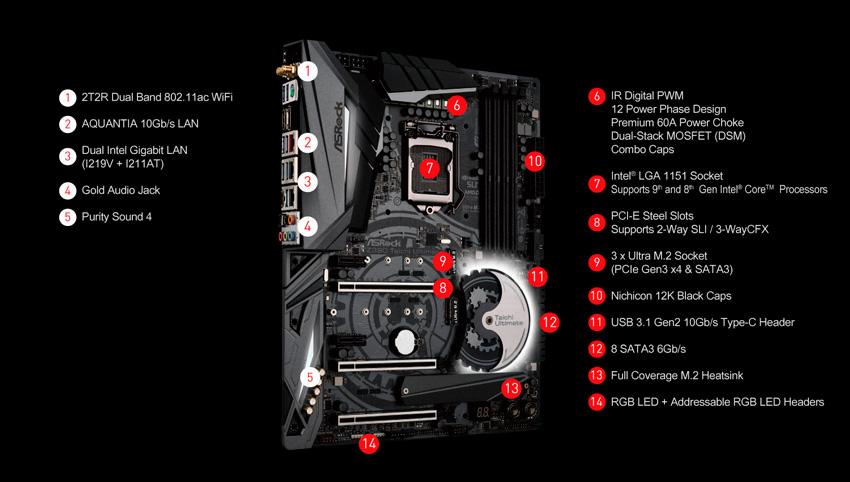 Repeat the movement three times.
Turns of the head
Raise your arms again, bend the left and turn the palm towards you, and lower the right and point the palm towards the floor. Then move your left hand to the left and turn your head with it, continuing to look at the palm. Return to a straight position, change hands and turn to the right. Perform three movements in each direction.
Shoulder Warm-up
Do three shoulder rotations forward and three back. With an inhalation, raise your hands in front of you to shoulder level, with an exhalation, turn them palms down, lower and bend your knees slightly. Repeat the movement three times.
Back Stretch
Raise your arms in front of you as if holding a large beach ball. Place the left one on top, just below the level of the collarbones, and turn the palm down. Hold the right hand at the level of the stomach with the palm up. From this position, move your right hand up, turning it with your palm towards the ceiling, and lower your left hand, pointing your palm towards the floor.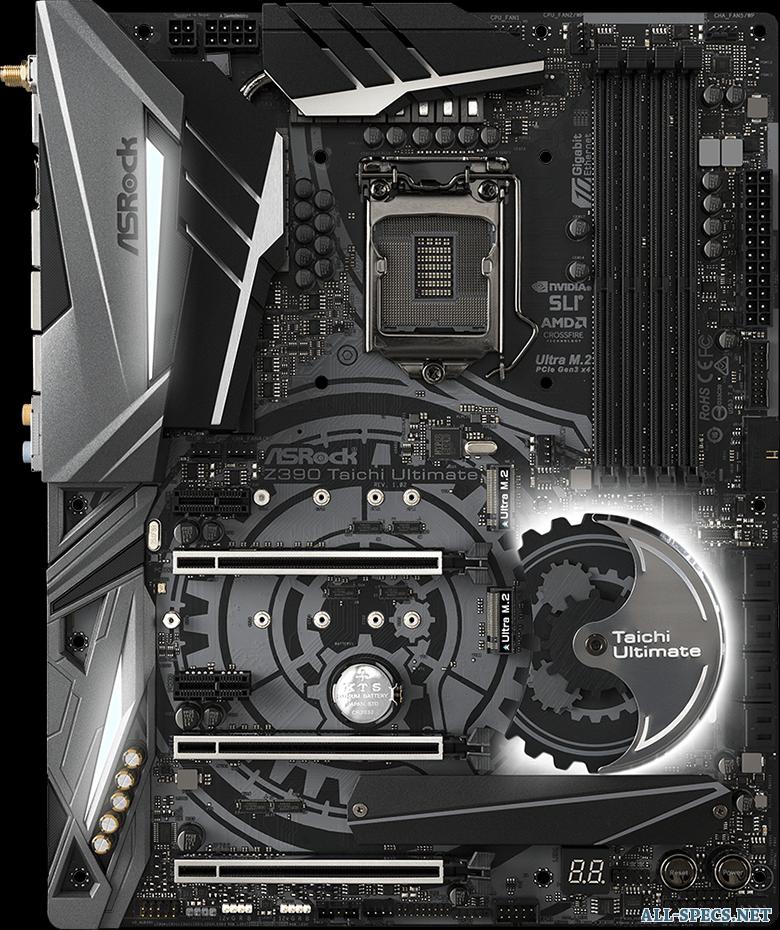
Then again assume the position as if holding a ball in your hands, only now the right palm is on top and the left palm is on the bottom. Repeat the movement: raise your left hand up with your palm to the ceiling, and lower your right hand, as if pushing the floor.
Repeat the chain of motions two more times on each side. Bend your knees slightly as you return your arms to the ball-hold position, as you move your arms up and down, straighten your knees and stretch your back.
Body Turns
Leave your hands in a ball hold position with your left hand on top. Gently bend your knees and turn your torso to the left. In a circular motion, switch hands and turn your body to the right side. Continue changing hands and turning your body left and right. Repeat three times on each side.
Hip Stretch
Slowly raise your arms to shoulder height with palms down, then bend your knees and lower your arms. Bring your left foot forward and place it on your heel.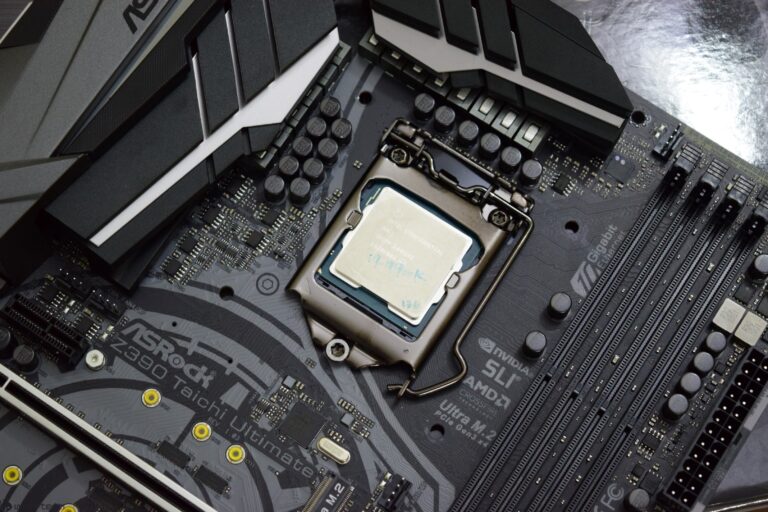 Bring your arms back for balance. Then move your hip back and place your foot on your toe while raising your arms in front of you. Alternate leg forward and backward. Repeat this exercise three times with each leg.
Lateral Stretch
Shift your weight onto your right foot and gently bend your knee. Raise your right hand to shoulder level and turn it with the palm away from you. Imagine that you are leaning your forearm and palm against a wall. Keep your left hand under your right elbow.
Stretch your left leg out to the side and place it on your toes. Then put your left foot on the whole foot, transfer your body weight to it and move your hands to the left side, and put your right foot on the toe — now you are leaning on the wall to your left. Repeat three times on each side.
Knee warm-up
Clench your fists and keep them at hip level. Shift your body weight onto your right leg, bend your knee slightly, bring your left knee forward and straighten your leg.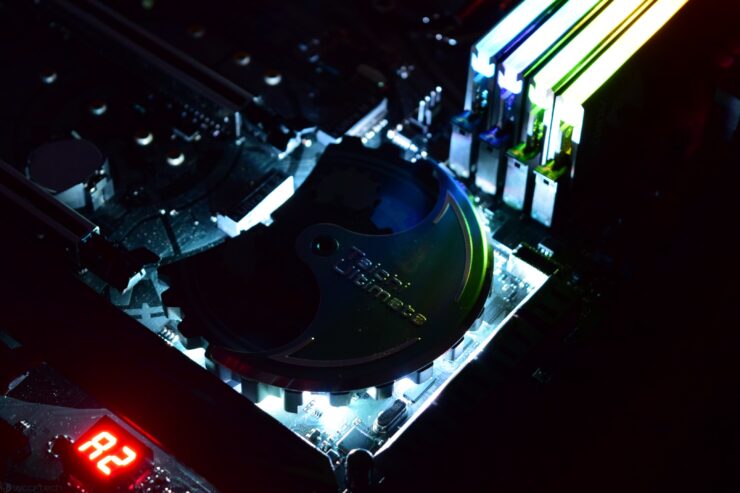 At the same time as you take out your leg, raise your right hand and perform a smooth kick. Bring your hand back to your hip and your leg back to the floor, and repeat the movement on the other side. Do three times each.
Step forward
Stand with your feet shoulder-width apart, bend your knees slightly and step forward with your left foot. Straighten your left knee, place your foot on the floor, and keep your body weight on your right leg.
Then bend the left leg and transfer the weight of the body to it, while striking forward with the right arm. Swing back, again returning body weight to the back standing leg, lower your arm and return your legs to a position shoulder-width apart. Repeat the same on the other side. Do three times on each side.
Ankle warm-up
Place your hands on your hips, bend your knees and shift your weight onto your right leg. Straighten the left forward and slightly to the side. Keeping your body weight on your back foot, alternately touch the floor with your heel and toe. Perform three times with each leg. Then do the same movement, only alternately touching the floor with the outer and inner sides of the foot.
How to do forms
The main part of tai chi training is learning and repeating complexes consisting of a different number of forms.
Below is a small set of eight forms from tai chi instructor Harry Smith. In the video, Smith reveals that he often uses this moveset for beginners. The complex does not contain complex elements and is carried out in one direction, which facilitates perception and orientation in space.
Preparation
Stand with your feet shoulder-width apart, while inhaling, raise your arms up through your sides and lower them in front of your body, palms down. Repeat two times.
Start
Raise your arms in front of your body with your palms down to shoulder height, then lower them gently while gently bending your knees.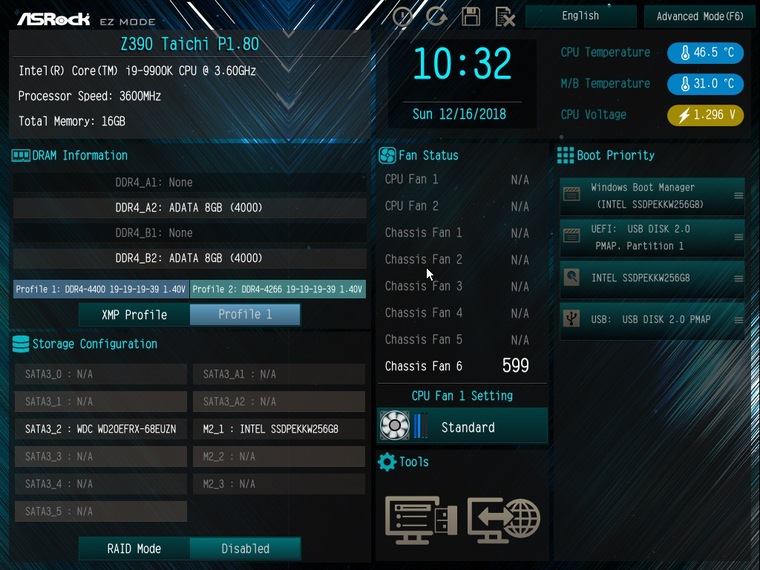 Repeat two times.
Playing the guitar
Turn your torso to the left, transferring your weight to your left leg, and spread your arms out to the sides, palms down.
Extend the right arm in front of the body, as if pointing the open palm to the corner, straighten the right leg and place it on the heel. Move your left hand forward and leave it in front of the body at the level of the diaphragm. Take a step forward, transferring your body weight to your right foot. At the same time, move both hands forward and slowly lower them down.
Turn the body to the right and repeat the same on the other side: now the weight of the body remains on the right leg, the left straightens and is placed on the heel, and the left hand points the direction.
Stop in this position and move on to the next form.
Step back to drive the monkey away
Gently bend your knees and step back from your left foot while extending your right arm in front of your body, palm forward. Describe a full circle with your left hand, following it with your eyes, and then raise it to the level of your head. Place your right foot next to your left on your toes.
Now step back with your right foot, changing the position of your hands. Bring your left hand forward, and with your right hand, describe a full circle from the bottom up, looking through your palm.
Make two more such backward movements. Then step back from your right foot, put your left foot on the toe next to it, and fold your hands, as in a warm-up: leave the right one at the top with the palm on the floor, the left one at the bottom with the palm up, as if holding a large sphere in front of the body.
Wild Horse Mane Stroke
Take a step to the side with your left foot and transfer your body weight to it, straighten your right foot. Simultaneously with this smooth sliding movement, raise your left hand with your palm up and move it to the side, and lower your right hand with your palm down.
Move your hands smoothly, as if petting a wild animal that could run away at any moment. Bring your right foot to your left, and fold your arms again in front of your body, as if holding a sphere. Perform the same movement on the other side, stepping on the right foot.
Single whip
Stretch your arms forward. Fold the fingers of the right hand into a pinch and bend the wrist, leave the left palm open. Take a step to the side with your left foot and transfer your body weight to it. Turn the body to the left, move the left hand to the position in front of the chest, gently bend at the elbow and turn the palm forward. Leave your right hand aside with folded fingers.
Place your right foot on top of your left foot, bring your right hand in a circular motion from below, and squeeze the fingers of your left into a pinch.
Repeat on the other side: step off the right foot, turning the body to the right, bring the right hand in front of the body with the palm away from you, and leave the left hand to the side with the fingers gathered and the wrist bent.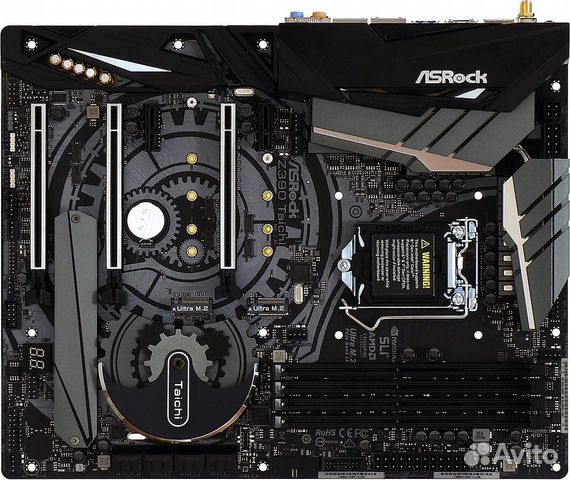 Then turn the body straight, and spread both arms to the sides to shoulder level.
Arms Crossed
Lower your arms down through your sides, and then cross them in front of your body and lift them up with your palms towards you to shoulder level. Stretch your arms in front of you with your palms down, bend your elbows slightly and lower them with a gentle stroking motion.
Closing
Bring your left foot to your right and let your arms rest freely at your sides.
Where to get tai chi training
You can learn several forms and routines from YouTube videos. Below we have put together a playlist of free tai chi lessons and demonstrations.
There are also several applications with tai chi lessons, in which the masters show forms and complexes in detail.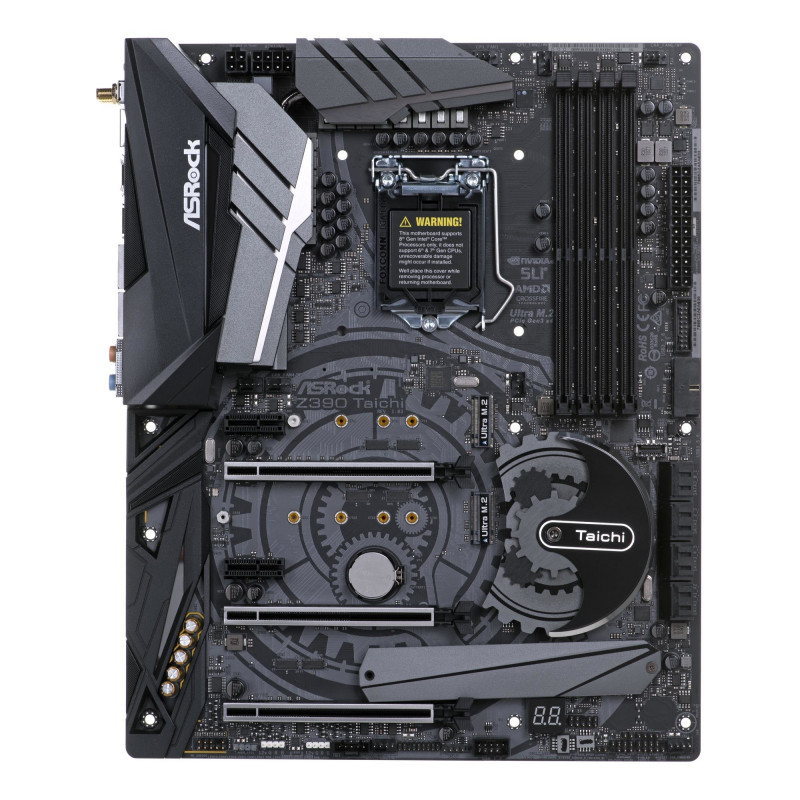
Download
Price: Free
Download
Price: Free
Download
Price: Free
Download
Price: Free
Download
Price: Free (Paul Lam) is a physical therapist and tai chi instructor.
How often and for how long to practice tai chi
Gentle tai chi practice does not tire the muscles and nervous system much, so it does not require a long recovery. You can practice every day without taking the rest days that are required for more intense workouts.
When it comes to training time, go by how you feel. 30-40 minutes will be enough to get started. In the future, you will be able to increase the time of classes and work as much as necessary to perform the tai chi complexes and skills development of your choice.
Watch your condition, concentrate on the movements and have fun.