Review: ASUS A7V motherboard
Review date: 24 July 2000.Last modified
03-Dec-2011.
The A7V
Sturmpanzerwagen certainly looked imposing, but it had many shortcomings which
rendered it a relatively ineffective weapon. Its primary armament…
What?
Oh.
Yes, of course. Ahem.
The ASUS A7V is not a tank. It’s a Socket 462 motherboard for
current-model Advanced Micro Devices Duron and «Thunderbird» Athlon CPUs. It
ought to retail for less than $AU400. And, if you want to buy one (or a computer that
contains one), there’s some stuff you need to know.
The Athlon is AMD’s answer to the Intel Pentium III; it’s cheaper,
and faster, and retail buyers can actually get hold of high-speed Athlons, whereas most of
Intel’s faster P-IIIs still get soaked up by big Original Equipment Manufacturers (OEMs).
The Duron, which I talk about in detail here,
is the lightweight version of the Thunderbird Athlon. It’s got less cache memory, runs
from a lower voltage and delivers less performance at a given clock speed. It’s competing
with the Intel Celeron, which is a similarly cut-down version of the Pentium II (for
slower Celerons) and III (for Celerons from the 533A upwards).
But the Duron’s quite close to Athlon performance. The Celeron’s
further behind the performance of a P-III. And Durons are quite a bit cheaper than
Celerons. Which means, for new system buyers or upgraders, a Duron is quite an attractive
option. Many older Pentium II motherboards can accept a Celeron with little to no mucking
about, but if you haven’t got such a motherboard and so have to buying a new board anyway,
the Duron’s an obvious winner.
There’s another section of the CPU market that’s really interested
in the Duron, and motherboards like the A7V, though.
Overclockers.
Running CPUs faster than their rated speed is a popular pastime.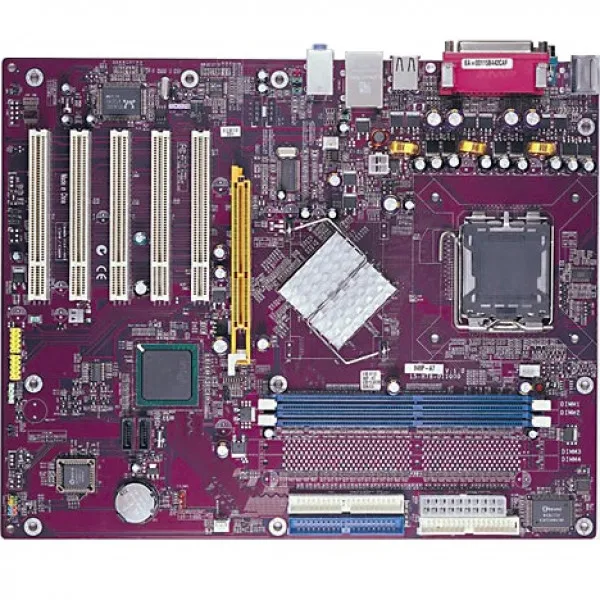
Done properly, it can give you a lot more power with no loss of reliability. Done
improperly, it can give you a seriously flaky computer, but it’s very unlikely to fry
anything, so there’s no harm in doing it as long as the machine you’re tweaking isn’t used
for anything important. All you need is a motherboard that lets you configure the CPU
however you like, rather than just leave it at stock speed.
People overclocked a lot of the older Celerons — the 300MHz Celerons
were quite likely to run for years on end at 450MHz, without even increasing the core
voltage setting. And people also overclock P-IIs, P-IIIs and the pre-Thunderbird Athlons
with varying degrees of success.
The Duron initially looked like an ideal candidate for overclocking,
because everybody thought it wasn’t going to have a multiplier lock.
The speed of a CPU is a set multiple of its Front Side Bus (FSB),
which is how fast the CPU communicates with the motherboard chipset. All Intel CPUs these
days have a «locked multiplier»; they always run at some fixed multiple of the
FSB, and to change the CPU speed you have to change the FSB. This is inelegant, because
winding up the FSB on most motherboards also winds up the clock speed of various other
components that may or may not then behave themselves properly. Changing the multiplier,
and leaving the FSB alone, is a much better way to overclock.
Even if you’d sooner paint yourself blue and run across a football
field naked than spend time souping up your PC, it pays to know this stuff. Because end
users aren’t the only overclockers out there. Disreputable PC and component dealers
sometimes overclock processors too, then sell them as if they were the faster model. So
it’s a good idea to know how it all works.
Overclock swindles
The problem with making a CPU’s multiplier setting readily
changeable is that a CPU with its multiplier bumped up looks, from the point of view of
someone using the computer, just like a CPU that’s really and truly meant to run at that
speed. Except it isn’t. Dodgy dealers used to do this sort of thing all the time.
Multiplier locking stopped them, because a lot of earlier motherboards didn’t let you
change the FSB, and FSB-overclocked CPUs generally end up running at oddball speeds that
even less observant customers are likely to notice. If an overclocked CPU works, of
course, then a buyer’s no worse off for having been fooled. But overclocked CPUs often
need more cooling, and they’re never going to be more reliable than they are at
stock speed. Many sneakily overclocked CPUs were, and are, flaky.
AMD have suffered this problem before. Recently, there was a rash,
particularly here in Australia, of «remarked» Slot A Athlon CPUs. They’d been
carefully opened, had a bit of crafty soldering done on the circuit board, and had their
identification data reprinted. On close examination it wasn’t too hard to spot the fakes,
but they still breezed right by quite a few innocent retailers and made their way into
hapless consumers’ PCs.
AMD would rather not have these problems again, thank you
very much, so they’ve made the Duron harder to fool with.
Here’s a 600MHz Duron. Yours for about $AU215, retail, delivered.
In the USA, you can find them for less than $US100, delivered. The area in the red box is
the part that overclockers need to know about.
Here’s that part, magnified. The little golden links you see here,
specifically the four «L1» links, are what determine whether the CPU’s
multiplier locked or not. The total length of these teeny links, including the pads at
each end, is maybe 0.6mm — little more than a fortieth of an inch.
If the links are intact, as they are here, then you’ve got an
unlocked CPU. All you need is a motherboard with multiplier-setting abilities, and you can
fiddle with the multiplier to your heart’s content. Of which more in a moment.
If the L1 links are cut, though — like the two middle L3 links on
this CPU, and the two end L4 links — the Duron’s locked.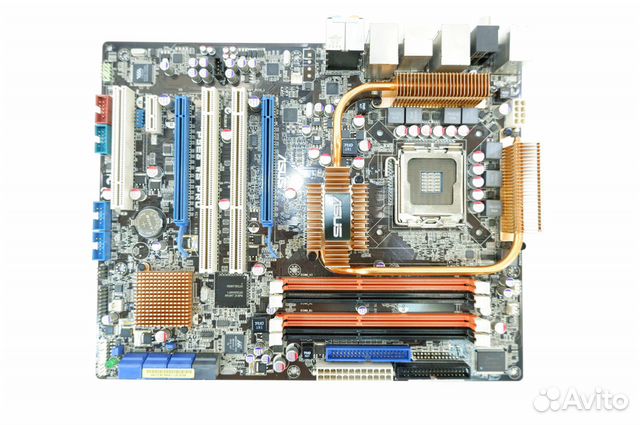 The cut links look vaguely
scorched because the cutting’s done with a laser, at the factory.
Current retail Durons are all meant to be locked.
But I don’t speak from experience, because here in Australia at
least, retail AMD processors seem to make their way into computer shops about as often as
do invisible pink unicorns.
I can’t be completely sure, of course. On account of the pink
unicorns being invisible, and all. But I’m pretty certain.
‘Round these parts, everyone just buys OEM processors, which come
from the factory in an anti-static tray without standard CPU coolers, boxes or manuals.
Or, so far at least, clock locking. Huzzah.
Locked processors can be turned into unlocked ones by simply
bridging the cut links with something appropriately conductive. You can get conductive-ink
pens from specialist electronics suppliers, for instance, or use tiny dabs of
aluminium-filled conductive epoxy, applied with a pin.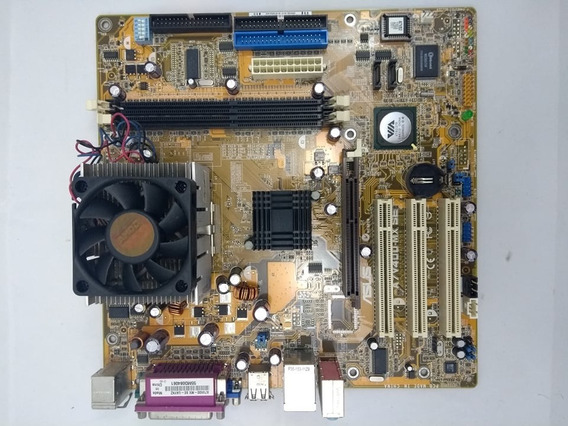
If you’ve got an unlocked processor, or you just don’t want to
overclock, then there’s no reason to fiddle with the little bridges. But because it’s
impossible for all but the most amazingly professional CPU remarkers to invisibly tamper
with the bridges, they give you an easy way to see if a suspiciously cheap Duron system
isn’t what it’s meant to be. Just take the CPU cooler off the processor and have a look.
Tiny the bridges may be, but any fiddling with them is perfectly visible to the naked eye.
As clock locking strategies go, the little-bridges system isn’t a
very effective one — it’s easily defeated. But it does seem to strike a good balance
between anything-goes completely unlocked processors and internal locking, such as Intel
uses. You absolutely can not change the multiplier of any locked Intel processor. Well,
maybe you can if you’ve got some very serious micromachining gear, but it’s well beyond
the reach of professional chip-tamperers, let alone amateurs.
AMD’s approach, on the other hand, should stop all but the most
audacious CPU remarkers, but isn’t a huge problem for amateur overclockers.
Unless, of course, you don’t have a motherboard that lets you change
the multiplier. This A7V is almost such a motherboard.
A7V features
The A7V’s a well-specified Duron board. It’s got five PCI slots, no
old ISA slots, three standard SDRAM slots, and one not-too-useful Audio-Modem Riser (AMR)
slot.
There’s on-board audio — you can see the three connectors for
internal sound sources here — and an AGP Pro slot, for the (rare) AGP cards that use this
extended connector for power. Plain AGP cards work fine in AGP Pro slots, but you can’t
use an AGP Pro card in an old-style slot.
There are two IDE controllers on board, each with the usual two
connectors, each of which can take the usual two drives. The first controller’s a standard
ATA-66 unit; the second one uses a Promise ATA-100 controller chip, so you can plug in the
latest, fastest, hundred-megabyte-per-second IDE drives and have them work at full speed.
In practice, the simple fact that you can easily connect up to eight
cheap IDE drives to the A7V is much more important than the high speed IDE standards it
supports. For desktop computer purposes, the extra bandwidth of ATA-66 isn’t going to make
any significant difference to anything, and ATA-100 is complete overkill — current hard
drives can’t half-saturate the bandwidth of ATA-66, let alone ATA-100.
But it doesn’t hurt to have it; ATA-100 is completely backwards
compatible, and the A7V should work with any old hard drive, as well as the new shiny
ones.
Between the processor socket and the rear ports, the A7V has this
secondary board with the capacitors, chokes and regulators used to keep the CPU power
supply smooth. This is an excellent approach to the power-regulation problem; other Duron
motherboards like the Micro-Star International K7T Pro I review here
have a forest of caps around the CPU socket, which can make it tricky to attach a CPU
cooler.
The main motherboard chip sits, as usual, under this green heatsink.
And, as usual, not a molecule of thermal transfer compound is there in the space between
the heatsink and the chip. Which means the chip won’t actually be very well cooled.
Overclockers planning to wind up the FSB should, therefore, pop off the heatsink and add a
smear of thermal transfer grease to the top of the chip to fill the air gap.
Enough of the boring stuff. On to the overclocking info.
Little switches
Here’s a detail shot of the A7V, between the IDE drive connectors
and the RAM slots. The pale blue thing with the four white sliders on it is a block of
Dual Inline Package (DIP) switches, which let you manually set the Front Side Bus (FSB)
speed to 100, 103, 105 or 110MHz. Like every «overclockers’ motherboard» for
some time now, the A7V lets you set rather more options in software, by holding Delete
during startup to access the system BIOS configuration utility. But if for some reason you
don’t want to do that, the hardware switches are there.
See the blank space to the right of the DIP switch block? Those 12
solder pads can accept another six switch block, which you can use to set the
multiplier, provided you’ve got an unlocked processor.
A bit of fiddling with my multimeter revealed that all of the top
pads are connected to ground, but what the connections for the bottom pads are is more
than I can be bothered figuring out.
ASUS are, at this moment, cranking out the manuals for the later A7V
versions, which’ll have switches in this location and mention of their settings in the
documentation.
If you’ve got an original model A7V, like this one, and are vaguely
handy with a soldering iron, you should only need to download the new manual. The 12 pads
are plain solder-through holes to the other side of the circuit board, so you shouldn’t
need godlike soldering abilities to retrofit a switch block, but there are a couple of
nearby ICs missing on the switchless version of the board, too.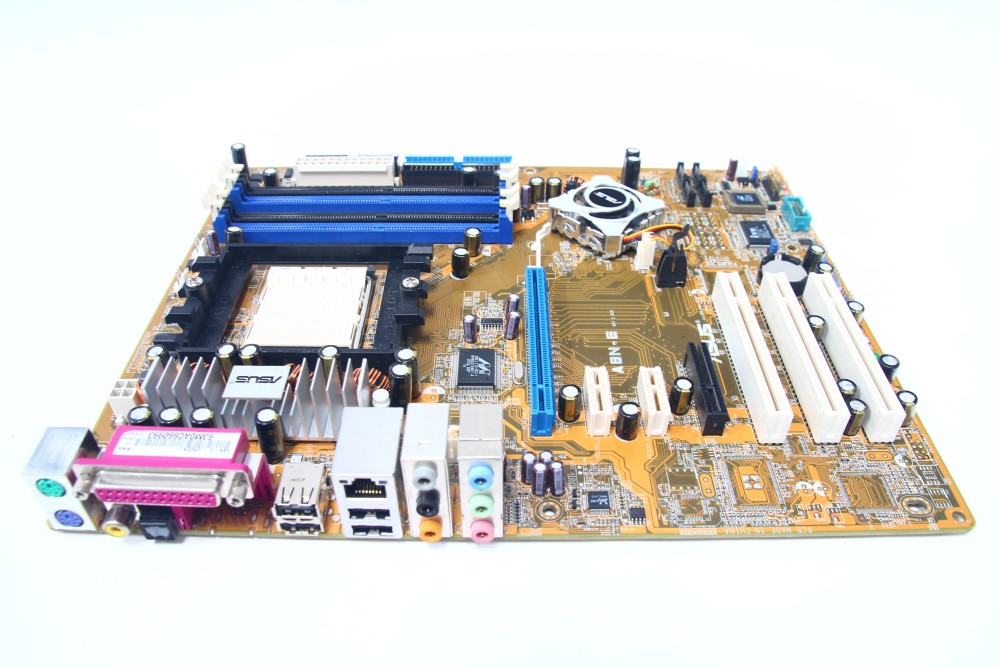 You can get the switches
from most decent electronics suppliers, and in a pinch you could just use wire links to
make the settings, but those ICs are probably important, too.
Without any idea of what the settings are meant to be, I was
seized by a stunning lack of desire to fool around for hours trying to figure them out.
It’s possible to add multiplier-setting abilities to any Duron
motherboard, if you’re… very, very enthusiastic. With the help of Tweakers.net’s
comprehensive article on the subject here (the original Dutch
version is here), the
rather more cryptic pages here
and here, not to
mention other guides like this one
and the older one at Anandtech here
and the more recent one at Overclockers.com here,
an intrepid hacker should be able to run any Duron, at any speed its core can support, on
any Socket A motherboard. Including this one; never mind the missing gear. You can just
treat it like a completely non-overclock-friendly board.
But, to be perfectly frank, stuff that for a game of soldiers. I’ll
wait for a motherboard with switches as standard, thanks.
Future production runs of the A7V (at least, if places like this are to be
believed) will have the switches, but may not have the built in sound. Losing the sound
gear ought to make the boards cheaper, but it’ll make a whole system built on an A7V more
expensive, because you’ll have to use a separate sound card.
Overall
There have been a few reports of successful, stable 50% multiplier
overclocks of 600MHz Durons — goosing the standard 6X multiplier to 9X. The Duron, like
the Athlon, doubles the system FSB speed to get its CPU-to-chipset speed, so the standard
100MHz FSB setting adds up to a 200MHz CPU bus speed, and it really runs at only a
3X multiplier to get 600MHz. But in order to avoid confusing people with multiplier
increments of 0. 25, Athlon and Duron systems always express the CPU speed as a multiple of
the slower FSB setting. A 600MHz Celeron runs from a 66MHz, un-doubled FSB, and so has an
outrageous 9X multiplier.
Even at 600MHz, a Duron is more than enough CPU for most people. At
900MHz — or only 800; if you can tweak the multiplier, you get a lot of flexibility — this
is a very serious processor for the money.
The Duron’s a lot closer to «full» Athlon performance, at
the same clock speed, than the «Coppermine 128» Pentium III-based Celerons are
to full P-III performance. Durons benchmark only about 10 to 15% slower than equivalently
clocked Athlons for most desktop tasks, including games.
So, at 900MHz, a Duron should beat a 750MHz Athlon.
Since Athlons generally perform better than P-IIIs, that overclocked
Duron will roughly equal a P-III at 800 or 850MHz.
A 600MHz Duron will cost you $AU215. Let’s be pessimistic, and
assume that an A7V will cost you $AU400 (it’ll probably be a bit cheaper). A 750MHz
Athlon is $AU450. Motherboards to match cost $AU250 to $350-odd.
An 800MHz P-III, if you can find one (they’re still pretty darn rare
in the retail channel), will cost you $AU700 or so. An 850MHz one will set you back
$AU1000. So even if you don’t have to buy a replacement motherboard (and you may have to,
if your old board can’t handle the bus speed or core voltage requirements of current
P-IIIs), you’re not going to save money over even the Athlon solution, let alone the Duron
one.
Of course, this assumes that you’re interested in overclocking, and
that you’re actually going to manage to wind up a 600MHz Duron to 900MHz, and that you’re
not going to be able to get significant overclock gains out of either the Athlon or the
P-III. With bus speed tweaking, you’ve got a decent chance of getting 10 to 20% more speed
out of either of the more expensive processors, on a decent motherboard.
You can change the multiplier of Slot A Athlons, too, but only by
soldering or using a little after-market overclock card that plugs into a connector on the
processor circuit board; to get at it you have to pop the processor cartridge open. It’s
not a job for the squeamish, and the overclock cards cost money.
So, in the final analysis, the Duron looks like a great choice, no
matter what you want to do with your shiny new processor. And normal people who buy
their computers built should like it as well, of course; system builders pay less for
their CPUs than do retail buyers, but the comparative pricing’s much the same.
That said, though, system buyers should keep an eye out for bunco
artists with a conductive-ink pen in their top pocket.
If you’ve decided on a Duron (or a Socket A Athlon, for that
matter), and you don’t want to overclock, the first-production-run A7V looks like an
excellent motherboard. Plenty of expandability, good layout, quality manufacture, decent
documentation. If you want to soup your CPU up, though, and soldering doesn’t turn your
crank, you should hang back until you can get the version with the extra DIP switches.
The «overclocker’s special» version of the
A7V showed up sooner than I expected! Read all about the adjustable-multiplier version of
this board right here!
Asus A7V
The Asus A7V was the first Socket-A
motherboard we were able to get a hold of and test. But now others,
such as the Abit KT7-RAID, are out as well, so I decided to take a look at
both boards, starting with the A7V. The Asus A7V is a Socket-A
format (socket 462) motherboard, made for AMD «Thunderbird»-type Athlon processors,
and the new AMD Duron processor. The A7V is a full-sized ATX motherboard, so
make sure the case you are using will take a full-size board.
Introduction: The A7V is a well made board with an unusual addition not found on
many motherboards. It’s got an additional power board mounted at
right angles to the mainboard, which you can see in the picture below.
When I review motherboards, I don’t spend
much time doing benchmarks, because the benchmarks between motherboards
are usually very close. I’m much more interested in things like
layout of components, selection of features, ease of installation and
setup, and especially stability.
The layout of the board is acceptable, but
as with most Socket-A motherboards, the placement of components near the
catches for the heat sink clips makes attachment of the heat sink a risky endeavor.
One slip with a pliers while trying to hook the spring clip on the catch,
and you could gouge the motherboard surface. Having components in the
way makes getting to the clips difficult. It’s an arrangement we
think needs reworking.
Also, the placement of DIMM sockets and the
additional power board near the CPU socket means that you may have
problems attaching large heat sink and fan units, such as the Golden Orb.
There is plenty of room to the left and right of the socket, but the
catches for the heat sink are above and below the socket, where components
get in the way.
Features:
The Asus A7V has some nice features, including ATA-100 support with the
new Promise controller chip. It also sports an AGP-Pro slot. Here’s what Asus has to say about the A7V:
| Supports
AMD ThunderbirdTM / DuronTM 550MHz ~ 1GHz CPU.  |
3x DIMM
support for 1.5GB PC133/PC100/VCM133 SDRAM. |
||
| New PCI
v2.2 and USB v1.1 standards |
Ultra
DMA/100 and DMA/66 support |
||
| 5 x PCI and
1 x AMR |
Up to 7 USB
Ports max. |
||
| 200MHz
Front Side Bus |
Stepless
Frequency Selection |
||
| PC Health
Monitoring |
The inclusion of PCI 2. 2 and USB 1.1 standards is nice.
The A7V motherboard is based on VIA’s new KT133
chipset, which supports Thunderbird and Duron processors in the Socket-A
format. The board has the 5 PCI plus 1 audio modem riser
configuration of peripheral slots, rather than the preferred 6 PCI slot
layout. The board does have an AGP-Pro socket though, which will be
helpful for folks thinking about an AGP Pro card for their system. And while the A7V
has 4 built-in fan connectors, none of them is located near the bottom of
the board for the front case fan.
The worst design feature on the A7V is the
«Clear CMOS» jumper. The reason it is so bad, is that
there is no jumper! There are just two solder joints on the board,
and you need to find a U-shaped piece of metal which you can use to short
out those two solder joints. It’s not only a pain, it is difficult and downright
irritating. Overclockers want an easy and quick method of clearing the
CMOS, if necessary, and don’t want to hunt around for a bent piece of metal
(I used tweezers).
Setup and Testing: I
tested the A7V (revision 1.02) with an Athlon 800MHz processor and 128MB
of PC-133 SDRAM. I used an Asus V7100 32MB MX video card with
Detonator-2 version 5.30 drivers, and 3D Mark 2000 version 1.1 for
stability testing.
Except for the potential risk when clamping the
heat sink clips, installation was easy. On first bootup, I was very
surprised by the length of time required for the system to boot. At first,
I thought there might be a problem, but it eventually booted normally.
While booting off of an ATA66 drive with Windows
98SE installed, and without
any ATA100 drives attached, the cold boot time varied between 2 minutes 20 seconds and
2 minutes 40 seconds! This is the longest boot time we have ever
recorded for an IDE motherboard.
The Promise controller looked for ATA100
drives for several seconds, so I attached an ATA/100 drive to one
controller. This cut the boot time by about 30 seconds, but the boot
time still remained in the 2 minute range. Just to be sure it wasn’t
a bad board, I tried a second A7V board, which exhibited the same slow
boot behavior. In comparison, an Abit
KT7-RAID motherboard with the same CPU and hard drive only took about 50 to 60 seconds to
boot. I will do a comparison of the Promise ATA/100 controller on
Asus boards with the ATA/100 controller from HighPoint on Abit boards in
another review.
Shutdown times were another story
altogether. The average Win98SE shutdown time for the A7V was a very
respectable 3 seconds. However, fast shutdown times on new systems
can actually be a problem. There is a known bug in both Win98 SE and Win
ME on computers running at 933MHz or faster.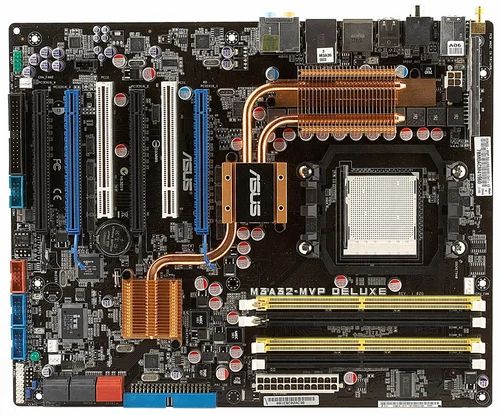 For more information on the
Windows shutdown bug, go here.
The graph below shows the Direct 3D
performance with several popular GeForce cards on the A7V. I used
the Detonator-2 5.30 drivers, and 3D Mark 2000. The scores are for a
Hercules 3D Prophet-1 32MB DDR card, an Asus V7100 32MB MX card, and an
Asus V7100 16MB MX card.
Bus Overclocking:
Overclocking the A7V is easy due to the jumper-less design, and the board is quite stable at overclocked
speeds. A nice addition to Asus boards is the so-called V I/O jumper,
which regulates the power level to the peripheral slots. This can be
helpful when overclocking the AGP slot, for example. But on the A7V,
when I moved the jumper from it’s normal position at 3.56 volts, to 3.69
volts, the voltage warning alarm sounded on rebooting. This alarm can be
disabled in the BIOS, but the warning alarm should have been pre-set above
3. 7 volts to avoid this problem.
I began overclocking the T-bird 800
processor with the core voltage set to 1.6 volts (default). I
increased the bus frequency in the BIOS in steps, to see how far it would
overclock before failing. The graph below shows how the testing
went.
The system failed at 113MHz, and
failed again at 113MHz with the core voltage boosted to 1.7 volts. At
111MHz on the bus (888MHz total processor speed), the system ran 3D Mark
2K continuously for hours at the default core voltage. The A7V also
overclocked a Duron 650 to 111MHz (722MHz total) with complete stability
at the default core voltage (1.5v). Getting Athlons and Durons to
run stably at 111MHz is about as good as you can expect.
Multiplier Overclocking:
Asus outdid themselves when they decided to add the ability to change the
CPU multiplier setting on the A7V. We had been worried that bus
overclocking would be all we could get with the new T-Birds and Durons.
But Asus added the ability to change the multiplier right on the
motherboard. The only problem is, they did not put the options in
the BIOS setup. So you need to do all the settings for overclocking
with the DIP switches on the board. While this is quite inconvenient
compared with Softmenu III on the KT7-RAID board, at least the option for
multiplier overclocking is there. We were able to run the 800MHz
T-bird at 9.5x 100 = 950MHz at 1.7volts on the core. We also were
able to run the Duron 650 at 800MHz, with a core voltage of 1.65v.
Summary:
As motherboards go, the A7V is a well rounded product. There are a
few design goof-ups in my opinion, but overall, the A7V is a good socket-A
motherboard. It compares acceptably with high-profile boards like
the Abit KT7-RAID motherboard, but falls slightly short of that
mark. The lack of IDE RAID capabilities, despite the inclusion of
the Promise ATA-100 controller, is a shortcoming. The long boot time can
be frustrating while setting up a system, where frequent reboots are
necessary. The lack of a convenient way of clearing the CMOS can be
frustrating if you are overclocking the system.
The good points include a solid, stable
platform for overclocking Thunderbird and Duron processors, good ATA/100
support, an AGP Pro socket, jumperless setup, and support for up to 7 USB
ports. The A7V boards I tested overclocked both T-bird and Duron processors to just
as high a level as the Abit KT7-RAID, which means that stability is
excellent. However, there are only a few features on the A7V that are not present
on the KT7-RAID from Abit: for example, the AGP Pro slot. The KT7-RAID has
a standard AGP slot. So if RAID capabilities are not important to you, but
an AGP-Pro slot is, the A7V may be the T-bird/Duron motherboard for you.
If you think you might want to try a RAID array, go for the KT7 from Abit.
Pros:
|
Cons:
Price:
Rating, : 4.
Availability:
|
 3
3
Copyright September 28th, 2000
Review: ASUS A7V — Mainboard
Asus A7V
As AMD slowly shift their processor
packages from Slot A over to Socket A, a new crop of compatible motherboards
have started to emerge. The Socket A package follows the latest trend in
processor designs, with the CPU core exposed on the top of the chip, thus
allowing a heat sink plate to fit flush against the core. This design is
essential for newer and faster generations of chips that generate a lot of heat,
and this has proved to be the best way to get rid of it.
To complement this new design, a rash of new
motherboards have appeared on the market with the latest offering from Asus
appearing to be the most appealing. The Asus was one of the first Socket A
motherboards to be released, and appears to have many advantages over its
rivals.
The A7V is the only Socket a motherboard in
Asus’ range, but if experiences with its previous motherboards are anything to
go by, the A7V will sure be a winner. There seem to be three revisions of this
board in existence, one with Onboard Audio, one with Multiplier Dip-Switches and
one with both of these features. The latter is very rear, but the one with
Multiplier Dip-Switches is the most interesting, as it allows limitless
overclocking potential when used with a willing CPU. The version that I tested
is revision 1.01, which has no onboard audio but does have the dipswitches.
Specs
|
Chipset
|
|
||||||||
|
Memory
|
|
||||||||
|
I/O
|
|
||||||||
|
Tweaking
|
|
||||||||
|
Other
|
|
 5GB Max)
The Asus A7V is based on VIA’s
latest high performance chipset, the KT133. It comprises the VT8363 North Bridge
and the VT82C686A South Bridge chips. This chipset was designed especially for
AMD’s latest Duron and Thunderbird Athlon processors. It has a vast array of
special high-end features that complement the Socket A processor. Among these
features is AGPx4 support enabling it to be used in high-end graphical work or
intensive gaming with the latest Nvidia GeForce equipped graphics cards. Other
features include support for PC133 and PC100 SDRam, as well as ATA66 support for
IDE disk transfers at up to 66mb/s.
Also included in the chipset is support for
NEC’s latest Ram technology, known as Virtual Channel SDRam (VCRam). This is a
new type of memory based on the SDRam format which delivers up to 15% extra
bandwidth at the same bus speed. The KT133 supports AC’97 compliant 3D audio
that is implemented on some revisions of the A7V motherboard and MC’97
compliant Modem support for use with an AMR compliant modem.
The A7V adds on to the KT133’s
feature set by adding support for 1.5GB of either PC133 or VC133 (Virtual
Channel) Ram. Also included on the board is a Promise PDC20265
UltraDMA/100 controller that along with the UltraDMA/66 already provided by the
KT133 chipset allows for up to 8 Simultaneous IDE devices. The UltraDMA/100
controller allows the connection of the latest breed of high end desktop HDD’s
that have a peak transfer rate of 100mb/s which could prove to be a viable low
cost alternative to a SCSI disk system.
An AGP Pro Slot is included to take
advantage of the AGPx4 support included with the KT133 chipset. AGP Pro is
normally found on workstation class graphics adapters, but the slot also support
AGPx4 found on the latest high-end gaming graphics adaptors. Also on the board
is support for up to 7 USB ports that is provided on a small hub that sits in a
card bay.
The board has 5 PCI lots that are PCI spec
2.2 compliant, a single AMR slot for either Audio boards or a Modem riser, and
as said above a AGP Pro slot. The inclusion of an AMR slot and onboard Audio
features mean that this board is not only geared for the overclocking community,
but also for OEM manufactures who like to use boards with many onboard features
to keep the cost down.
The most interesting feature on the
A7V is its various dipswitches that control Multiplier adjustment and front side
bus adjustment. On automatic settings, the BIOS can control these settings and
to a degree can be used for changing the FSB and voltage input, but greater
accuracy is achieved by using dipswitches and jumpers.
Voltage selection is adjusted by using a
series of four jumpers close to the CPU. The FSB and Multiplier adjustments are
made using dipswitches by the UltraDMA/66 channels. The Multiplier cannot be
changed when under the control of the BIOS.
The ability to overclock a chip this way is
not documented in the Asus manual but is shown on the Asus website. This implies
that the idea was a late one, and is further backed up by the fact that there
are many revisions of this board, the original with Audio being without the
necessary switches.
To overclock a Socket A processor, the
multiplier bridges must be unlocked, and this can be done using the pencil
trick, or, it is possible to purchase specially unlocked processors, which have
been made multiplier free. Without
an unlocked processor, only the FSB can be altered to gain extra speed. AMD are
also selling some chips that are multiplier locked and some that are unlocked,
so it is possible to purchase an unlocked processor from a non specialist
overclocking establishment, but there is a chance that the processor you may buy
might be a locked one.
The FSB can be increased in 1mhz increments
in the 100 – 133mhz range. The KT133 chipset has the ability to provide
dividers for the AGP and PCI busses even when the FSB is increased to 133 to
keep the peripherals within acceptable speeds. With a processor which is
unlocked and the ability to change the multiplier, increasing the FSB becomes a
much less desirable, as the processor can be overclocked and still be kept
inside its rated FSB. This way maximum system stability is achieved and a
processor can be overclocked at the same time.
The voltage range on the A7V is between
1.10v and 1.85v, which is strange because the default voltage for the Duron and
Thinderbirds are 1.65v, so anything lower won’t be used, therefore only a
small range of voltage increases can be applied to the processor. A mod has been
done where the voltage range has been shifted upwards to about 2.50v, which
should prove more than adequate for all but the most extreme overclocker with
liquid nitrogen cooling. Even with the processor running at 1.85v, a massive
amount of heat is generated, as the Duron and Thunderbirds create a large amount
of heat even at default voltages. Therefore a standard heat sink and fan combo
will be insufficient for overclocking.
The larger board size means that all
necessary connections are nicely laid out and in well thought of locations. On
of the biggest advantage to extreme Overclockers is the presence of a riser
board next to the positioning of the Socket A. It holds all of the necessary
voltage regulating capacitors that create a stable voltage for the chip. Being
on a riser board means that a large heat sink or other cooling devices can be
fitted onto the board without fear of lack of space. Asus has recognised the
needs of the most extreme Overclockers by including drilled holes on the PCB
where heavy duty cooling equipment can be physically bolted onto the board in
safe locations. There are four drilled holes, one in each corner of the Socket
A.
The Northbridge chip has a heat sink on for
passive cooling, presumably to make the board more stable. Reference pictures on
the box indicate that there were no heat sinks present originally; they must
have been added after concerns were raised possibly after stability testing
proved the chipset to generate a lot of heat.
The BIOS on board the A7V supports PnP and
ACPI like all other new BIOS chip revisions do these days, but includes Symbios®
SCSI BIOS as the BIOS treats the UltraDMA/100 controller as a SCSI device to
enable booting from a drive connected to these channels.
Other useful inclusions are Wake-On-LAN and
Wake-On-Ring which are useful in an office environment but not so much for the
PC enthusiast. It also supports Chassis Intrusion via a special switch, which is
sold separately.
My A7V from Overclockers UK (www.overclockers.co.uk)
arrived in a very large yellow box. The first thing you realise is the sheer
size of this beast; it’s a full ATX board so it won’t fit into any small
cases. The next thing I checked was to see if it was the Dipswitch version,
which it was, so a lot of overclocking was in order.
The CPU of my choice was the AMD Duron
650mhz Processor, which is in a Socket A package. I had read a lot of reviews
before parting with my hard earned cash, and the 650 seemed to offer the best
overclocking potential.
Both these together resulted in a very
promising combo that could prove to be excellent value for money. The chosen
Heat sink/Fan combination was the Alpha PEP66u unit, world renowned for its
superior heat dissipation properties. Unfortunately this heat sink is not
approved by AMD, as it has been know to crush the cores of several chips, as the
core material is very fragile, thus resulting in an unusable chip. Great care
was used to attach the heat sink unit onto the motherboard, which I did outside
the case for safety. I used a small drop of heat transfer compound to aid the
heat sink in its duties.
Being a Full ATX motherboard meant that
there were many mounting points on the board, all of which seemed to be in the
incorrect places for my full tower case. A little bit of case modding later
resulted in correct placing of riser supports to mount the motherboard on.
With the board in place and Heat sink / fan
combo attached, I realised that I had forgotten to install the CPU temperature
probe. So out came the motherboard and off came the Heat sink / fan (which on
the PEP66u is a very long process as a cage is fitted over Heat sink to mount
the fan) and I placed the temp probe on the processor very near to the core.
Back on went the Heat sink / fan and I installed the motherboard back into the
case. I connected up the connectors for HDD, Power LED, Reset, Power Switch and
speaker, making sure to get the orientation right.
I installed my Video Card and Sound Card,
and connected my various drives up to the UltraDMA/66 channels to start with,
and then made sure that all was connected properly. Turned it on at auto detect
settings for the processor and the BIOS correctly identified my Duron a 650mhz
version, and I proceeded to start the BIOS setup.
Test Setup System:-
Asus A7V Rev 1.01 Bios Rev 1004a
AMD Duron 650mhz Specially Unlocked
192mb PC 100 SDRam
30.7gb IBM GXP75 UltraDMA/100
Leadtek Winfast GeForce 2MX 32mb
Benchmarking Utilities:-
MadOnion.com 3Dmark2000
SiSoft Sandra Standard Version
2000.7.6.49
With a specially unlocked processor
at my disposal, I was able to tweak the settings to gain every extra Mhz from
the chip. After setting up Windows 98 Second Edition, and all necessary drivers
and Detonator 6.18 drivers for my GeForce 2MX graphics card, I was able to
benchmark the system using 3Dmark2000 and SiSoft Sandra. The default FSB for the
Duron is 100mhz, and I used a 6.5x Multiplier in orders to get the 650mhz
default speed.
Below are the Sandra CPU/FPU scores
at 650mhz
CPU Dryhstone 1866 Mips
FPU Whetstone 884 Mflops
Below is the Sandra Multimedia
Benchmark Scores at 650mhz
Integer MMX 2217 it/s
Floating Point 3D-Now MMX Enhanced
3056 it/s
Below is the Memory Benchmark at
100mhz FSB 650mhz Duron
ALU 349Mb/s
FPU 380Mb/s
Below is the UltraDMA/100 Drive
Benchmark with a IBM GXP75 HDD
Drive Index 24732
As you can see, the most impressive
set of benchmarks here are the UltraDMA/100 drive results, which show a clear
advantage over using this type of drive over a UltraDMA/66 drive. Memory
benchmarks are to expected as the memory is only running at 100mhz and its
Generic memory as well.
After a lot of tweaking, I managed to get
the CPU running stable at 927Mhz, which is what its set at now as I type this
review. Its set to 103 FSB and 9x Multiplier. With a higher FSB the memory
benchmarks are expected to be higher, as well as the CPU and MMX benchmarks
results.
Below are the Sandra CPU/FPU scores
at 927mhz
CPU Dryhstone 2640 Mips
FPU Whetstone 1250 Mflops
Below is the Sandra Multimedia
Benchmark Scores at 927mhz
Integer MMX 3135 it/s
Floating Point 3D-Now MMX Enhanced
4327 it/s
Below is the Memory Benchmark at
103mhz FSB 927mhz Duron
ALU 366Mb/s
FPU 405Mb/s
The advantages of an overclocked PC
are apparent here as the speed of 927 is only a whisker slower that an Athlon
1Ghz and on par with a 1Ghz Pentium 3 Processor.
For only £80 pounds it is possible to buy a
processor which is capable of performance well in excess of its cost, and a non
overclocked processor of similar performance would set you back at least £400.
I achieved similar 3Dmark2000 scores as the
test relies heavily on the graphics sub-system to perform well than it does on
CPU speed.
Here is my Benchmark at 650Mhz:-
and below that 927Mhz:-
As you can see there is not a lot of
difference in it.
The A7V is a very competent
motherboard, with a host of impressive features. It proved to be very stable in
testing and also in day-to-day usage. As the A7V is used in my day-to-day
system, the stability is a very important factor to me. Being able to run at
927Mhz for hours on end is what this board has allowed me to do, and combined
with one of the easiest upgradeable boards in terms of being able to buy an AGP
Pro Graphics adapter and extra UltraDMA/100 drives in the future ensures that
this board will continue to reside in my computer for a long time.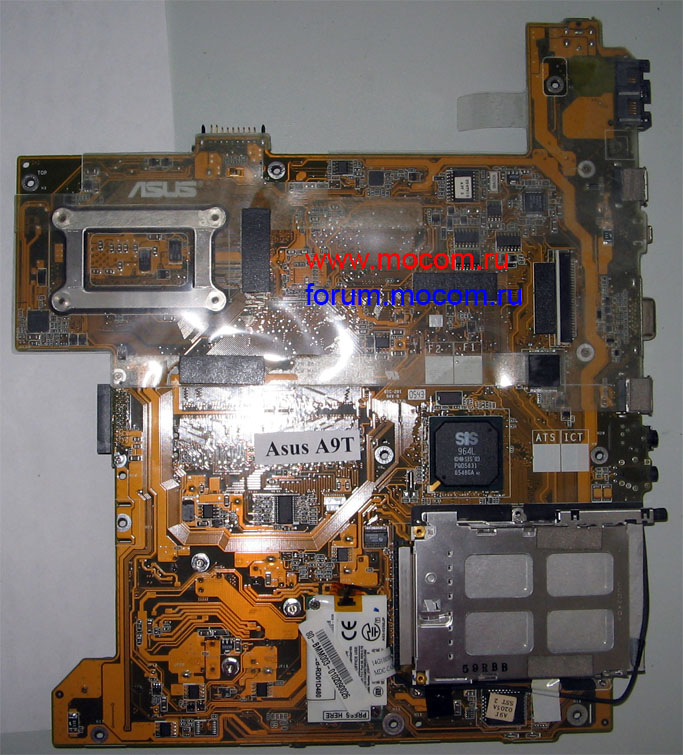
Buying a motherboard made by a manufacturer
like Asus is also a plus as new BIOS updates will always be available, unlike
many smaller PC component companies, and its wide use in the overclocking
community ensures support is available from all levels.
The A7V is definitely the motherboard to get
if you have an Unlocked Duron or Thunderbird Athlon processors as it will allow
you to get maximum performance from your hardware. Even without an Unlocked
processor, the A7V still continues to shine with its extra features that make it
suitable for a high-end system.
Pros:-
The excellent overclocking potential
The stability it gave during benchmarking and
still does
AGP Pro slot and UltraDMA/100 channels
Ability to
connect up to 8 IDE devices
Cons:-
Relitavley
high price compared to other Socket A motherboards
Multiplier
Adjustment not possible through BIOS
Large Size
might be a problem for smaller cases.
Overall:-
5 out of 5
Motherboard ASUS A7V | Tim Computers
A7V is the first ASUS motherboard for AMD Athlon and Duron processors with Socket A and one of the first such motherboards on the market at all. The appearance of this board was a consequence of AMD’s transition from processor socket Slot A to socket A. processor core, which made the cartridge unnecessary and allowed us to return to the good old «socket» connector.
With a high degree of certainty, we can predict that the new AMD processors for Socket A — Athlon and Duron will be increasingly popular, because they have a number of very interesting features, and it is possible that they will be a better purchase compared to Intel processors. Let’s compare Intel and AMD processors in more detail, because only if you are interested in the latter, it makes sense for you to read this article to the end. Those who do not need to «agitate for Soviet power» can go directly to the «Specification» section.
Now the market is symmetrical. Intel and AMD each have two families of processors aimed at the lower and middle price ranges. Intel has Celeron and Pentium III processors, while AMD has Duron and Athlon. It is curious that both Intel and AMD use the same processor core in both processor families: Intel uses Coppermine, and AMD uses Thunderbird. Moreover, the performance of Coppermine and Thunderbird is about the same. How so? Processors of different price ranges have the same core, the same or close operating frequency, and their price is twice as different? (For example, the price of Intel Pentium III and Celeron 600Mhz, or AMD Athlon 700MHz and Duron 650MHz.) affects the overall performance of processors. The characteristics of the processors are summarized in the following table.
| Manufacturer: | Intel | AMD | ||
| Processor: | Pentium III | Celeron | Athlon | Duron |
| Core | Coppermine | Coppermine | Thunderbird | Spitfire (Thunderbird) |
| First level cache | 32Kb | 32Kb | 128Kb | 128Kb |
| Second level cache | 256Kb | 128Kb | 256Kb | 64Kb |
| «Effective» cache size |
256Kb | 128Kb | 384Kb | 192Kb |
| Cache size | 256 bit | 256 bit | 64 bit | 64 bit |
| System bus frequency | 100/133MHz | 66MHz | 200MHz | 200MHz |
| Frequency range: | 600MHz — 1GHz | 566MHz — 667MHz | 700MHz — 1GHz | 600MHz — 700MHz |
In all processors under consideration, the cache memory operates at the core frequency. However, in AMD processors, the cache memory operation algorithm is such that it does not require storing a copy of the contents of the first level cache in the second level cache, so the total effective cache size for Athlon processors is 384Kb (128+256), and for Duron — 192Kb (128 + 64). The Pentium III and Celeron have a different cache algorithm: a copy of the contents of the first level cache must be stored in the second level cache, so the total «working» cache size for Pentium III is only 256Kb, and for Celeron — 128Kb. That is, according to this indicator, AMD processors are ahead. On the other hand, Intel processors have a cache bus width (256 bits) 4 times larger than that of AMD (64 bits).
All these differences in cache organization provide a performance advantage of several percent, depending on the type of tasks. Those who want to study the issue of comparative performance of the processors under consideration in more detail, we send
here.
A much more significant performance difference between Intel and AMD processors is the system bus frequency. For AMD Athlon and Duron processors, as can be seen from the table, it is 200MHz, for Pentium III the frequency is 100 or 133MHz, and for Celeron only 66MHz. And if for the Pentium III the system bus frequency is still sufficient to not have a noticeable effect on performance, then for Celeron such a slow bus is a real drag. The Celeron simply cannot develop its full power, being forced to sit idle waiting for the system bus to be ready to transmit data. In this case, as a rule, the memory is also idle, which in asynchronous chipsets can operate at a frequency of 100 or 133MHz. Because of this fact, Celeron’s performance is about 30% lower than other processors considered here (provided, of course, that the operating frequency of the processor itself is the same). You can learn more about the question of the dependence of performance on bus frequency for various applications and see specific numbers here.
So, summing up the consideration of the comparative performance of AMD and Intel processors, we can conclude that at the same operating frequency, AMD Athlon processors demonstrate at least no worse performance compared to Intel Pentium III processors (in fact, even better, even evidence here). As for AMD Duron processors, their advantage over their counterparts Intel Celeron is overwhelming.
If we also take into account the fact that AMD processors are significantly — by 20% on average — cheaper, then even staunch Intel apologists have something to think about.
Thus, the image of the traditional market leader and the stable stereotype of Intel’s superiority, firmly planted in the minds of many members of the computer community, are now on the side of Intel, and the best price / performance ratio is really on the side of AMD. And if you have awakened interest in AMD processors, let’s finally move on to the subject of this article. So, first, the specification of the A7V motherboard.
Specification
- Supported processors:
- AMD Socket A Athlon Thunderbird 700MHz — 1GHz+
- AMD Socket A Duron Spitfire 600 — 700MHz+
- Processor socket: Socket A
- Chipset: VIA VT8363 (KT133), VIA 82C686A
- System bus: 200MHz FSB (100MHz DDR)
- Memory: 3 x 168-pin DIMM, 8Mb — 1.
 5Gb PC133/100 SDRAM or VC133 VCM
 - Expansion slots:
- 32-bit AGP port with AGP Pro/4X support
- five 32-bit PCI ports
- one AMR port for modem, sound or network card
- ID:
- 2 Ultra DMA/100 ports (optional Promise controller)
- 2 ports Ultra DMA/66/33 (IDE chipset controller)
- support for CD/DVD, CD-R/RW, ZIP/LS-120
- Built-in audio::
- AC’97 compatible 3D audio controller based on Crystal 4299 Audio Codec
- BIOS-level support for Sound Blaster, MPU 401 emulation, and FM synthesis for compatibility with DOS applications
- Rear ports:
- PS/2-keyboard
- PS/2 mouse
- 2 x USB
- 1 parallel (ECP, EPP)
- 2 in series
- Game/Midi, Line-Out, Line-In, Mic
- Additional sockets on connection board:
- ASUS iPanel
- infrared receiver and transmitter
- three controlled fans: CPU, power supply and chassis, and one more unmanaged
- three connectors for connecting 5 additional USB ports
- built-in microphone and built-in speakers
- housing integrity sensor
- audio inputs for CD, Video, AUX and Modem
- BIOS: Award 2Mb Flash PnP BIOS, JumperFree
- Special features:
- restart after power failure
- «JumperFree» technology, which allows you to set the system bus and memory frequencies, as well as the processor core voltage from the BIOS
- technology «Suspend to RAM» — the minimum power consumption mode, which turns off all devices except system memory
- «Stepless Frequency Selection» technology — the ability to set the bus frequency in 1MHz steps
- «CPU Throttle» technology, which allows to bypass the multiplier built into the CPU (this feature is not implemented on all boards)
- turning on the computer from the modem, network adapter, keyboard
- Standards: PCI 2.
 2, USB 1.1
 - Completeness:
- board
- instruction manual
- Driver CD
- 1 UDMA-66/100 IDE cable
- 1 IDE cable standard
- 1 floppy cable
- kit for installing three additional USB connectors
- CPU temperature sensor
- Dimensions: ATX, 24.5cm x 30.5cm
Features
In principle, the main functionality of the A7V board repeats its predecessor — the K7V board, since it is based on the same VIA KX133 chipset, or rather, based on its KT133 modification for the Socket A processor socket. 200MHz system bus is supported (in fact, the bus is clocked at a frequency of 100MHz, but data is transmitted on both edges of the signal, so the «effective» frequency is twice as high), PC133 memory (which is very important in theory, since the 200MHz system bus has, compared to PC100 memory, double the bandwidth), an AGP Pro/4X standard AGP port and an Ulta ATA/66 standard IDE interface, which no one needs to convince anyone of the need now, since hard drives with sequential data reading speeds exceeding 33Mb per second have already appeared.
However, the A7V board also has a number of features that will surely arouse increased interest.
The main highlight of this board is, of course, the presence of a new Socket A processor socket for the new AMD Athlon and Duron processors. We can say that the appearance of these processors in our market was largely held back by the lack of boards with this processor socket. An intermediate solution to the problem by using Slot A / Sosket A adapters, as it was and is with Intel, is still impossible due to the fact that the manufacture of such adapters seems to be still an overwhelming task for the computer industry. Oh well, now we have a board with Socket A.
The second, in our opinion, very serious advantage of the new board is the presence of an additional Ultra ATA/100 controller, which allows you to connect up to eight (!) IDE devices to the board at the same time. We’ll talk about this in more detail a little later, but here we note that the popularity of another CUBX motherboard with an additional Ultra ATA/66 controller confirms the demand for such a technical solution.
Other advantages of the A7V include the presence of five additional USB ports (connectors for three of them are included in the package), built-in sound with very good compatibility (even old DOS games will work) and such a nice little thing as CPU temperature sensor, which is very handy, since AMD processors do not have a built-in temperature sensor.
Now let’s talk about things that are unlikely to be useful to an ordinary user, but will make an overclocker’s heart beat joyfully. Firstly, the board allows you to set the system bus frequency in 1MHz increments, however, overclocking AMD processors via the bus is quite difficult, since the bus already operates at a frequency of 200MHz, and increasing this frequency sharply reduces system stability. Nevertheless, we managed to raise the bus frequency by 10% without any tricks. But these are still flowers. The main surprise is that the board initially provided for the ability to change the processor multiplier, which promises overclockers an exciting pastime. Unfortunately, according to information from ASUS, not all boards will support this feature, and the boards that we currently have for sale lack this option.
Update 6/9/2000: All A7V boards currently have this feature, it’s called CPU Trottle. Another thing is that now AMD blocks the processor multiplier, but this will not stop a knowledgeable person…
Configuration
The board allows two configuration modes — using DIP switches on the board or via BIOS SETUP. The choice of the mode is carried out by a special jumper. By default, the second mode is set — using the BIOS. In this mode, system parameters such as system bus frequency, memory frequency, processor voltage can be determined automatically by the board or set «manually». The system bus frequency can be set between 90MHz to 145MHz, and in the «actual» range from 100 to 120MHz it can be changed almost everywhere in 1MHz increments. The memory frequency can be set either equal to the FSB frequency or one third higher. You can also manually set the processor supply voltage in the range from 1.10 to 1.85V in 0.05V increments.
The same parameters can be changed using DIP switches and jumpers on the board, but with less flexibility.
In addition, the board provides jumpers to adjust the voltage supplied to the chipset, memory and PCI bus, which can be useful for overclockers, as well as jumpers to turn off the onboard audio, which will be required if you use a PCI sound card.
In conclusion of the conversation about configuring the system, it is useful to recall that all experiments with non-standard settings for frequencies and voltages will certainly not benefit your computer, moreover, the responsibility for the possible negative consequences of such experiments will fall entirely on you.
Disk subsystem
The A7V disk subsystem consists of an integrated Ultra ATA/66 IDE controller and an additional Promise Ultra ATA/100 controller.
Up to four IDE devices can be connected to the Ulta ATA/66 controller, these can be either hard drives or CD-ROM, DVD-ROM, CD-R, CD-RW, ZIP, LS-120, MO.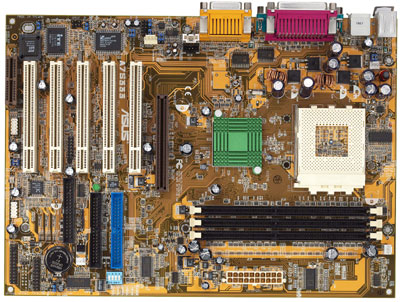 Any of these devices can be set to be bootable. For example, if you need a configuration with several operating systems, you can place them on different disks and, if necessary, boot one or another OS, simply by assigning the corresponding disk in the BIOS to be bootable. It does not matter to which channel the disk is connected and whether it is «Master» or «Slave».
Naturally, in order for ATA/66 devices to work in this mode, an 80-wire cable is required. Drivers to support this mode under Windows NT and Windows 98 are available on the CD that comes with the board.
Optional Promise Ultra ATA/100 controller supports data transfer over the first and second IDE channels at speeds up to 100Mb per second. It can connect up to four Ultra ATA/100 devices using the same 80-conductor cable (one included). Unlike the ATA/66 controller, only the device connected as «Master» to the first IDE channel can be bootable here. In order for the operating system to boot from this particular device, you need to enable the «Onboard ATA device First» option in the BIOS SETUP section «Advanced / PCI Configuration» (this is important if the system also has a SCSI adapter), and then in the » Boot» set as the first boot device «SCSI/Onboard ATA Boot Device».
Although the documentation for the board says that only Ultra ATA/100 devices can be connected to this controller, in fact, the controller is also compatible with ATA/66/33 devices, so you can connect any hard drive and even a CD-ROM to it, however, it’s more reasonable to connect low-speed devices in the system to the integrated ATA/66 controller, and only high-speed drives to «hang» on ATA/100.
Installing Windows 98 on the A7V platform
Consider the case when the operating system will be installed on a hard drive connected as «Master» to the first IDE channel of the Promise Ultra ATA/100 controller. If at the same time there are other hard drives in the system, they should be disconnected during the installation, otherwise the installer will try to install Windows on a drive connected to the chipset’s built-in IDE controller, since it is «master» for it.
The rest of the installation proceeds as usual. After the installer completes, install the onboard audio adapter driver from the motherboard CD. There is no need to install the chipset driver and the built-in «VIA Bus Master» IDE controller, because Windows 98SE «knows» this chipset.
Driver installation for the Promise Ultra ATA/100 controller is done «manually» through system properties. The driver can be downloaded here. After installing it and rebooting, Ultra ATA/100 mode is enabled automatically.
Installing Windows NT
If Windows NT is installed on an Ultra ATA/100 drive connected to the Promise controller, then you must install NT from floppy disks. During the installation process, after the CD-ROM is found in the system, you need to indicate that there is an additional controller and install the Promise controller driver from the floppy disk (you can get it here).
If there are no installation floppy disks and you are too lazy to make them, then the computer can be «deceived» by temporarily connecting the hard disk to the IDE controller of the chipset, installing NT and adding the Promise driver to the SCSI devices of the control panel. Then you need to turn off the computer, connect the disk back to Promise and boot Windows, and the driver will be activated automatically.
After installing Windows NT, install the Service Pack, the VIA Bus Master driver for the IDE chipset controller, and the onboard audio adapter driver. Both drivers are on the A7V board CD and are installed automatically from the main menu.
Where to connect additional USB ports?
The board supports seven USB ports in total, two of which are routed to the rear panel. Three connectors (two paired and single) for connecting the remaining five ports are located on the board. The supplied 3-port USB dongle must be connected to a single USB3A connector and to any pair of connectors (USB3 or USBPORT).
Interrupt distribution
Although there are two additional devices on the board that require interrupt allocation for operation — a sound adapter and a Promise IDE controller, nevertheless, the BIOS distributes interrupts rather «economically». If all system devices are turned on, with the exception of Legacy Audio (which is unlikely to be needed), then the picture is as follows:
| Interrupt | Device |
| IRQ3 | COM2 |
| IRQ4 | COM1 |
| IRQ5 | Available |
| IRQ7 | LPT1 |
| IRQ9 | two USB and Audio controllers |
| IRQ10 | Promise controller |
| IRQ11 | VGA adapter |
| IRQ12 | PS/2 mouse |
When adding a PCI card, for example, a network adapter, it should logically receive a free interrupt — IRQ5, but this does not happen.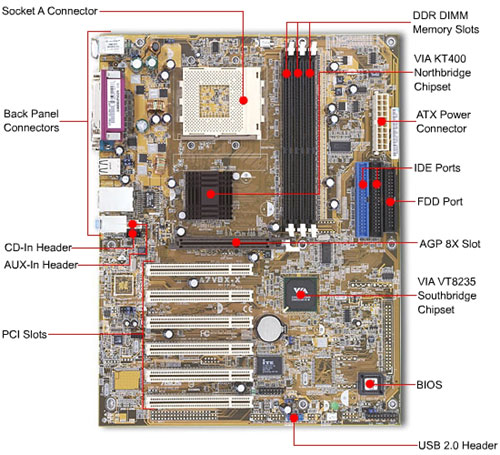 The fact is that all PCI slots on the board share interrupts with system devices according to the following table:
| Slot | Which device shares interrupt |
Default interrupt |
| PCI 1 | VGA | IRQ11 |
| PCI 2 | Promise controller | IRQ10 |
| PCI 3 | on-board Audio | IRQ9 |
| PCI 4/5 | USB | IRQ9 |
Two conclusions follow from this circumstance.
First: It is not possible to assign a unique interrupt to an add-in card without disabling a device on the card that uses the same interrupt as the slot in which the card is inserted.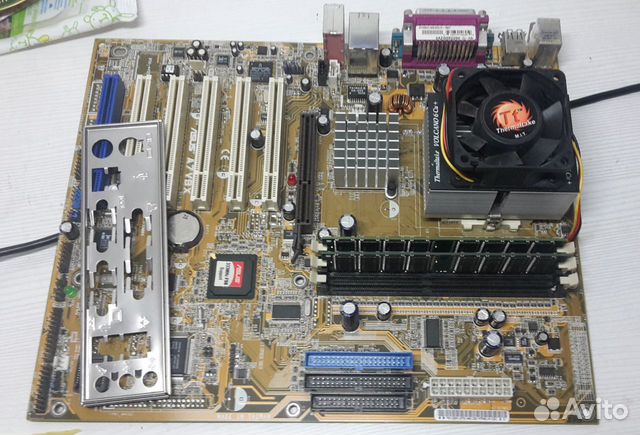
Second: by manually setting the interrupt numbers for the PCI slots in the BIOS, you can change the interrupts assigned to the corresponding system devices. For example, if you set an IRQ5 interrupt for the PCI3 slot in the BIOS even if there are no expansion cards, the system will assign this interrupt to the integrated sound adapter.
References
A7V board information on the ASUS website
TIM Computers Lab
August 2, 2000 ASUS motherboard A0903 | KV.BY
You are here
Home
»
Archive of the newspaper
»
2000
«
No. 38
»
Maternal board A7V
We continue the description of the boards, in
which can be «harnessed» Duron.
The most «fancy» for Socket A
of those that we have been able to find in
Minsk, — A7V manufactured by Asustek. So,
what can she boast of?
Chipset VIA KT 133 (northbridge)
VT8363, «southern» VT82C686A). Support
Socket A processors (Duron and new
Athlon) up to 1 GHz.
Naturally, the proprietary EV6 FSB bus,
operating at a frequency of 100 MHz
both fronts. Three DIMM slots
(Support SDRAM PC-100, PC-133 and VC133 VCM
(NEC’s Virtual Channel Memory)) —
maximum memory 1.5
gigabyte. Memory bus frequency
set via BIOS (equal to
FSB or 4/3 FSB). Further,
form factor — full ATX,
hence 5 PCI slots, 1 AMR and 1 AGP.
With AGP, the bells and whistles begin — because
how is it actually AGP Pro 4x with
support for Fast Writes. But since AGP Pro
cards in the near future
expected, extra space in the connector
stuffed with a stub until better times.
The second «twist» concerns
hard drives — in addition to the chipset
standard EIDE controller (UDMA/66),
the board has a separate
Promise UDMA/100 controller (PDC20265 chip,
four channels) — a thing for sure
useful, but yet, again, not
in demand. Absolutely
gigantic number of USB ports — up to
7 pieces. All power management
placed on a separate board
installed perpendicular
basic. Integrated
AC’9 audio codec7, but on board, with
which I worked, it was not. Hardware
Monitor is built on the proprietary ASUS chip and
has a standard gentleman’s
feature set — speed
fans, main voltage
and thermal sensors (board, processor).
The sensor is located under the processor
at a good distance, so
the information provided by them may not
quite fit
reality (indications
sensors A7V and GA-7ZM — tight
petal adjacent to the «stone»
— diverged from me on average by 7-10
degrees). Concerning
performance, then the difference in Q3 with that
same 7ZM was about 1 FPS — deep in
within the measurement error.
Now let’s move on to the BIOS. BIOS here AWARD,
find out the truth in a new version
its hard. Design «skewed»
under the classic menu structure with
bookmarks and submenus. Generally
comfortable, but until you get used to it,
look for the right things (the same Hardware Montor,
e. g.) tiresome. Otherwise
BIOS is good: lots of settings, powerful
timing management (and even
currents) memory, detailed settings
for AGP and PCI, good choice
boot devices. Another one
useful feature — reservation
IRQ, DMA channel and UMB blocks for
Legacy devices. There is support for Symbios
SCSI devices. Incidentally, in the last
BIOS versions finally added
disabling Promise’s
UDMA/100 controller.
But the most pleasant feature of the board is
possibility to adjust the bus frequency
FSB (90-146 MHz in 1 MHz steps), voltages
processor power supply (1.1-1.85 V, in steps
0.05 V) and (attention!) coefficient
multiplications (5-12.5). First two
settings are available in the BIOS (JumperFree mode)
and duplicated on the board
dip switches (which is much
more comfortable than jumpers). Odds
can only be changed with Dip’ami from the board.
By the way, if the car hung in
boot process, in BIOS
standard
FSB and memory frequency parameters (100/100) —
very handy if
experiment with overclocking.
Of course, this chance I
could not miss. Unfortunately, a bummer
did not keep you waiting — multiplier y
my Duron was blocked.
Bus acceleration in systems on
based on EV6 is ineffective — initial
a frequency of 100 MHz and work on both
fronts (DDR) are not allowed to turn around —
stability drops sharply. Tire without
special problems rises to 111
MHz (and works stably for
several hours), but already at 115 everything
hangs tightly and immediately. So out
Duron 600 can be obtained this way
sacramental Duron 666 only.
his «tricks»
quality and price is more suitable
for serious computers based on
newer Athlons with a Thunderbird core than for
economical Duron. And for the rest,
very good pay.
Konstantin
AFANASIEV,
[email protected]
ASUS A7V motherboard was
provided for testing
firm «SV-Trading».
Printable version
Number:
No. 38 of 2000
Category:
Hardware
Did you notice an error? Select it with the mouse and press Ctrl+Enter!
-
Handsome for everyone.
 Review of the smartphone HONOR 70
 -
Poster of IT events in October
-
Managing organization instead of a full-time director: pros and cons
-
Secret Router Features You’ll Need
-
Choosing the best Android apps for drawing
-
A new step in the development of video surveillance systems — Ophthalmos 5.2 AI service from BelHard
Drivers for Asus A7V-M | FlyDrivers.Ru
0506
Asus A7V-M motherboard audio drivers. Choose the one that suits you and download it for free.
| Version | Update | Operating system | Description | |
|---|---|---|---|---|
| 1.40a | 09/15/2015 | Windows NT | VIA Audio Driver for A7V-M |
Download 94. |
| 1.11c | 09/15/2015 | MS-DOS | VIIA VT82C686A/B Audio controller driver for Dos. |
Download 218.49 Kb |
| 1.20A | 09/15/2015 | MS-DOS | VIA Audio Driver 1.20A for DOS |
Download 219.15 Kb |
| 1.11c | 09/15/2015 | Linux | VIA VT82C686A/B Audio controller driver for Linux. |
Download 141.32 Kb |
| 1.40a | 09/15/2015 | Linux | VIA Audio Driver 1.40a for Linux |
Download 310.61 Kb |
| 1.20A | 09/15/2015 | OS/2 | VIA Audio Driver 1.20A for OS2 |
Download 109.34 Kb |
| 1.40a | 09/15/2015 | Windows 98SE | VIA Audio Driver 1.40a—Audio VxD Drivers for Windows 98SE |
Download 31. |
| 1.40a | 09/15/2015 | Windows 95 / 98 | VIA Audio Driver 1.40a—Audio VxD Drivers for Windows 95/98 |
Download 91.10 Kb |
| 1.40a | 09/15/2015 | Windows ME | VIA Audio Driver 1.40a—Audio VxD Drivers for Windows ME |
Download 31.09 Kb |
| 1.11c | 09/15/2015 | Windows NT 4.x | VIA VT82C686A/B Audio controller driver for WinNT 4.0. VIA VT82C686A/B Audio controller driver for WinNT 4.0 . |
Download 5.36 Mb |
| 1.40a | 09/15/2015 | Windows NT 4.x | VIA Audio Driver 1.40a for Windows NT 4.0 |
Download 94.10 Kb |
| 1.11c | 09/15/2015 | Windows 95 / 98 / ME / 2000 | VIA VT82C686A/B Audio controller driver for Win9x/ME/2000. VIA VT82C686A/B Audio controller driver for Win9x, WinME, Win2000, |
Download 3. |
| 1.40a | 09/15/2015 | Windows 2000 | VIA Audio Driver 1.40a for Windows 2000 |
Download 29.72 Kb |
| 1.40a | 09/15/2015 | Windows XP | VIA Audio Driver 1.40a for Windows XP |
Download 31.09 Kb |
 10 Kb
10 Kb  09 Kb
09 Kb  01 Mb
01 Mb Modem driver
Driver for configuring modem functions on Asus A7V-M. Choose the one that suits you and download it for free.
| Version | Update | Operating system | Description | |
|---|---|---|---|---|
| 09/15/2015 | Windows NT | ASUS AMR driver for A7V-M |
Download 2.02 Mb |
|
| 09/15/2015 | Windows 98 | ASUS AMR driver for A7V-M |
Download 2.07 Mb |
|
| 09/15/2015 | Windows 2000 | ASUS AMR driver for A7V-M |
Download 1. |
|
| 09/15/2015 | Windows ME | ASUS AMR driver for Windows ME |
Download 842.48 Kb |
 94 Mb
94 Mb 4 in 1 Drivers
| Version | Update | Operating system | Description | |
|---|---|---|---|---|
| 4.37V | 09/15/2015 | Windows 95 / 98 / ME / NT 4.x / 2000 | VIA 4 in 1 Drivers 4.37V for Win 95/98/2K/ME/NT4.0 AGP Driver. INF Driver. IRQ Routing Driver. Windows 2000 drivers setup files. Windows 95/98 drivers setup files. Windows ME drivers setup files. Windows NT 4.0 drivers setup files. |
Download 1004.69 Kb |
Network driver
Driver for network setup on Asus A7V-M. Choose the one that suits you and download it for free.
| Version | Update | Operating system | Description | |
|---|---|---|---|---|
5. 376.0523.2000 376.0523.2000 |
09/15/2015 | Windows 95 / 98 / ME / NT 4.x / 2000 | Realtek RTL8139C PCI Fast Ethernet NIC Driver V5.376.0523.2000 for Windows 95/98/ME/2K/NT4.0 For A7V-M with LAN and without LAN Realtek RTL8139C PCI Fast Ethernet NIC Driver V5.376.0523.2000 for Windows 95/98/ME/2K/NT4.0 |
Download 157.25 Kb |
Didn’t find the right type of driver for your Asus A7V-M motherboard?
Is there a driver that supports the operating system you need in the list?
We will help you!
Request file search
It is highly recommended to always use the latest Asus A7V-M driver
versions available. Remember to check our website for updates from time to time.
Asus A7V133 motherboard drivers7GRYPHON Z97 ARMOR EDITIONH81-AH81-GAMERH81-PLUSH81I-PLUSH81M-AH81M-A/BRH81M-CH81M-C/BRH81M-CSH81M-CS/BRH81M-DH81M-D PLUSH81M-EH81M-F PLUSH81M-HQH81M-KH81M-K/BRH81M-K/ /TWH81M-PH81M-P PLUSH81M-P-SIH81M-PLUSH81M-RH81M-V PLUSH81M-V3H81M2H81M3H81TH87-PLUSH87-PROH87I-PLUSH87M-EH87M-PLUSH87M-PROH97-PLUSH97-PROH97-PRO GAMERH97I-PLUSH97M-EH97M-PLUSJ1800I-AJ1800I-CJ1800I- C/BRJ1800M-AJ1900I-CJ1900M-AK7MK7M-RMK7VK7V-RMK7V-TK8NK8N-EK8N-E DeluxeK8N-VMK8N4-EK8N4-E DELUXEK8S-MXK8VK8V DeluxeK8V-MXL1N64-SLI WSL1N64-SLI AWS/BM2A-MVPM2A-MXM2A HDMI4 AMM2A74-AM SEM2NM2N 1394M2N DHM2N-CM DVIM2N-EM2N-E SLIM2N-MXM2N-MX SEM2N-MX SE PLUSM2N-MX/DVI2M2N-PLUS SLI Vista EditionM2N-SLIM2N-SLI DeluxeM2N-VM DHM2N-VM DVIM2N-VM HDMIM2N-VM SEM2N-XM2N-X PLUSM2N -XEM2N/TeleSkyM2N32 WS ProfessionalM2N32-SLI DeluxeM2N32-SLI Premium VISTA EditionM2N4-SLIM2N68M2N68 PLUSM2N68 SEM2N68-AMM2N68-AM PLUSM2N68-AM PLUS/ION/SIM2N68-AM SEM2N68-AM SE2M2N68-CMM2N68-VMM2N8-VMXM2NBP-VM CSMM2NPV-MXM2NPV-VMM2R32- MVPM2S-XM2VM2V-MXM2V-MX SEM2V-TVMM2V-XM3AM3A-H/HDMIM3A32-MVP DELUXEM3A32-MVP DELUXE/WIFI-APM3A76-CMM3A78M3A78 ProM3A78-CMM3A78-EHM3A78-EMM3A78-EMH HDMIM3A78-TM3A79-T DeluxeM3N WSM3N-H HDMIM3N-HD HDMIM3N-HT DELUXEM3N72-DM3N72-T DeluxeM3N78M3N78 ProM3N78 SEM3N78-AMM3N78-CMM3N78-EHM3N78-EMM3N78-EMH HDMIM3N78-VMM4A76T-M LEM4A77M4A77DM4A77TM4A77T SIM4A77T/USB3M4A77TDM4A77TD PROM4A77TD PRO/U3S6M4A78M4A78 PLUSM4A78 ProM4A78-EM4A78-E SEM4A78 -EMM4A78-VM IN/SIM4A785-MM4A785D-M PROM4A785G HTPCM4A785G HTPC/RCM4A785T-MM4A785TD-M EVOM4A785TD-V EVOM4A785TD-V EVO/U3S6M4A78L-MM4A78L-M LEM4A78LTM4A78LT LEM4A78LT PLUSM4A78LT-MM4A78LT-M LEM4A78LT-M LXM4A78LT-M PLUSM4A79 DeluxeM4A79T Deluxe/U3S6M4A79XTD EVO/USB3M4A87TM4A87T PLUSM4A87TDM4A87TD EVOM4A87TD/USB3M4A88T-I DELUXEM4A88T-MM4A88T-M LEM4A88T-M/USB3M4A88T-V EVOM4A88T-V EVO/USB3M4A88TD-MM4A88TD-M EVO/USB3M4A88TD-M/USB3M4A88TD-V EVOM4A88TD-V EVO/USB3M4A89GTD PROM4A89GTD PRO/USB3M4A89TD PROM4A89TD PRO/USB3M4N68TM4N68T LE V2M4N68T PROM4N68T V2M4N68T-MM4N68T-M LEM4N68T-M LE V2M4N68T-M V2M4N72-EM4N75TDM4N78M4N78 ProM4N78 SEM4N78 SE/95W/ROEM/SIM4N78-AMM4N78-AM V2M4N78-VMM4N82 DeluxeM4N98TD EVOM5A78LM5A78L LEM5A78L-M LEM5A78L-M LE/USB3M5A78L-M LXM5A78L-M LX PLUSM5A78L-M LX V2M5A78L-M LX/BRM5A78L-M LX3M5A78L-M LX3 PLUSM5A78L-M PLUSM5A78L-M/USB3M5A78L/USB3M5A87M95A88-MM5A88-M EVOM5A88-M7M5A97 EVOM5A97 LEM5A97 PLUSM5A97 PROM5A97/SIM5A99FX PROM5A99X EVO VMN3050I-CN3050M-EN3150I-CN3150M-EP2B-D2P2B-DSP2B-LP2B-LSP2B-NP2B-SP2B-VMP2B98-XVP2E-NP2E-VMP2L-NP2L97-DSP2L97-SP2L97AP2VP2Z-VMP3B-1394P3C-DP3C-EP3C-LP3C-LSP3C-SP3C2000P3WP3W- EP4BP4B-EP4B-FXP4B-LSP4B-LXP4B-MP4B-MXP4B266P4B266-CP4B266-EP4B266-MP4B266-SEP4B533P4B533-EP4B533-MP4B533-VP4B533-VMP4B533-XP4BGL-MXP4BGL-MX/533P4BGL-VMP4BGV-MXP4BP-MXP4C800P4C800 DeluxeP4C800-E DeluxeP4GE-MXP4GE- VP4GE-VMP4P800P4P800 DeluxeP4P800 SEP4P800-E DeluxeP4P800-MXP4P800-VMP4P800-XP4P800SP4P800S SEP4P800S-E DeluxeP4P800S-XP4PEP4PE-BPP4PE-XP4PE-X/SEP4PE-X/TEP4PE2-XP4S133P4S133-VMP4S333P4S333-FXP4S333-MP4S333-VFP4S333-VMP4S533P4S533-EP4S533-MXP4S533-VMP4S533 -XP4S800P4S800-MXP4S800-MX SEP4S800-XP4S800DP4S800D-E DeluxeP4S800D-XP4S8XP4S8X-MXP4S 8X-XP4SEP4SP-MXP4TP4T-CMP4T-EP4T-EMP4T-FP4T-MP4V8X-MXP4V8X-XP5BP5B DeluxeP5B-VMP5B-VM DOP5B-VM SEP5EP5E DeluxeP5E WS ProfessionalP5E-V HDMIP5E-VM DOP5E-VM DO/NAP5E-VM HDMIP5E-VM SEP5E3P5E3 DELEP5E3 /DDR3 1333 2GP5E3 DELUXE/WiFi-APP5E3 Premium/[email protected]P5E3 ProP5E3 WS ProfessionalP5E64 WS EVOLUTIONP5E64 WS ProfessionalP5G41-MP5G41-M EVOP5G41-M LEP5G41-M LXP5G41-M LX2P5G41-M LX4/GBP5G241 M SIP5G41-M SI/DVIP5G41-M SI/VGAP5G41C-MP5G41C-M LXP5G41T-MP5G41T-M LEP5G41T-M LXP5G41T-M LX PLUSP5G41T-M LX V2P5G41T-M LX2P5G41T-M LX2/BRP5G41T-M LX41/TGB-M LX41/TGB-M LX41/TGB-M LX41/TGB-M GB/LPTP5G41T-M LX3P5G41T-M LX3 PLUSP5G41T-M SIP5G41T-M/USB3P5G41TD-M PROP5GCP5GC-MRP5GC-MXP5GC-VMP5GC-VM ProP5GD1P5GD1 ProP5GD1-VMP5GD2P5GD2 DeluxeP5GD2 PremiumP5GD2 ProP5GD2-XP5GDC DeluxeP5GDC ProP5GDC-V DeluxeP5GPLP5GPL-XP5GPL-X SEP5GV-MXP5KP5K Deluxe /WiFi-APP5K Premium/WiFi-APP5K ProP5K SEP5K SE/EPUP5K WSP5K WS ProP5K-EP5K-E/WiFi-APP5K-VP5K-VMP5K/EPUP5K3 DeluxeP5K3 Premium/WiFi-APP5K64 WSP5KCP5KPLP5KPL IN/ SIP5KPL-AM/BRP5KPL-AM/PSP5KPL-CP5KPL-C/1600P5KPL-CMP5KPL-CM/1600P5KPL-EP5KPL -IP5KPL-VMP5KPL-VM/1394/SIP5KPL/1600P5KPL/EPUP5KRP5L 1394P5L-MXP5L-MX/IPATP5L-VM 1394P5LD2P5LD2 DeluxeP5LD2 SEP5LD2-C/IPATP5LD2-VP5LD2-VMP5LD2-VM DHP5LD2-VM SEP5LD2-XP5LD2-X/1333P5LD2-X/GBLP5N32-E SLIP5N32-E SLI PlusP5N32 -SLI DeluxeP5N32-SLI PremiumP5N32-SLI SE DeluxeP5N64 WS ProfessionalP5N72-T PremiumP5ND2P5ND2 SEP5ND2-SLIP5ND2-SLI DeluxeP5P43T-SIP5P800-VMP5PE-VMP5PL2P5PL2-EP5PL2/CP5QP5Q DeluxeP5Q PremiumP5Q PROP5Q PRO TURBOP5Q SEP5Q SE PLUSP5Q SE/RP5Q SE2P5Q TURBOP5Q WSP5Q-EP5Q-E/ WiFi-APP5Q-EMP5Q-EM DOP5Q-VMP5Q-VM DOP5Q3P5Q3 Deluxe/WiFi-AP @nP5QCP5QD TurboP5QLP5QL PROP5QL SEP5QL-CMP5QL-EP5QL-E PLUSP5QL-EMP5QL-I/SIP5QL-VM DOP5QL-VM EPPLUP5QL/EPUP5QLD PROP5QPL-5QPL-5QPL-5QPL VMP5QPL-VM EPUP5S-BP5S-MX SEP5S-VMP5S800-VMP5SD2-AP5SD2-VMP5SD2-XP5SD2-X SEP5V-VM DHP5V-VM SE DHP5V-VM UltraP5V-X SEP5V800-MXP5VD1-XP5VD2-MXP5VD2-MX SEP5VD2-VMP5VD2-VM SEP5VD2-VMP5VD2-VM XP5VDC-MXP5VDC-MX V2. 0P5VDC-XP5WP5W DH DeluxeP5W64 WS ProfessionalP5WD2P5WD2 PremiumP5WD2-E PremiumP5WDG2 WS ProfessionalP5WDG2-WSP6TP6T DeluxeP6T Deluxe V2P6T SE P6T WS ProfessionalP6T6 WS RevolutionP6T7 WS SuperComputerP6TD DeluxeP6X58-E WSP6X58D PremiumP6X58D-EP7F7-E WS SupercomputerP7H55P7H55-MP7H55-M LEP7H55-M LXP7H55-M PLUSP7H55-M PROP7H55-M SIP7H55-M/BRP7H55-M/DVIP7H55-M/USB3P7H55-VP7H55/ USB3P7H55D-M EVOP7H55D-M PROP7H57D-V EVOP7P55 LXP7P55 LX/JOOYON/SIP7P55 WS SUPERCOMPUTERP7P55-MP7P55-M/TPMP7P55DP7P55D DeluxeP7P55D EVOP7P55D LEP7P55D PremiumP7P55D PROP7P55D-EP7P55D-E DeluxeP7P55D-E EVOP7P55D-E LXP7P55D-E PremiumP7P55D-E PROP7P55D-E/HFP7Q57 -M DOP8H61P8H61 EVOP8H67P8H67-IP8H67-I DeluxeP8H67-I PROP8H67-MP8H67-M EVOP8H67-M LEP8H67-M LXP8H67-M PROP8H67-M2/SIP8H67-M2/TPM/SIP8H67-VP8Z77 WSP8Z77-I DELUXEP8Z77-I DELUXE/WDP8Z77-MP8Z77- M PROP8Z77-VP8Z77-V DELUXEP8Z77-V LEP8Z77-V LE PLUSP8Z77-V LKP8Z77-V LK2P8Z77-V LXP8Z77-V PREMIUMP8Z77-V PROP8Z77-V PRO/THUNDERBOLTRampage II ExtremeRampage II GeneRampage III Black EditionRampage III ExtremeRampage III FormulaRampage III FormulaRampage III FormulaRampage III FormulaRampage III0003
04/18/2009
HDMI cables for modder
Modders, that is, those who are happy to modify the appearance of their PCs, use a lot of unusual materials and components to create unique computers.