ASUS PB278Q Review (2016) by Monitornerds
by Eli Nolan Leave a Comment
ASUS PB278Q Review
- Overall
Find Best Price
Summary:
The ASUS PB278Q is a beautiful 1440p gaming monitor that suits the gamer who values image quality over response time and smoothness. We imagine the gamer playing RPG games or single player adventure/action games such as Assassins Creed or Skyrim (or games within that genre), where the surroundings and the color accuracy provides the most value to the gaming experience. However, the PB278Q will, of course, be able to play online shooting games like Counter-Strike for the average gamer but the more serious online shooting gamers would probably notice a lag as the response time, and refresh rate is slow compared to the TN panel based monitors. Nonetheless, the PB278Q looks good, performs great image quality and has a recommended resolution for gaming of any kind. Perfect for console gaming with its 60 Hz refresh rate, image quality and the two 3W speakers hidden instead of showing on the sides, or the audio line out on the monitor for your headphones.
Full Review of ASUS PB278Q
As opposed to normal ASUS monitors within the category of ‘normal’ monitors, thereby meaning the monitors that are not a part of the gaming series of a particular manufacture, the PB278Q comes with a beautiful matte black design which looks great on the desk and suits the price tag. The stand is fully adjustable with height, swivel, tilt and even pivot for portrait viewing should that fit your needs. What is also quite convenient is the cable manager on the back of the stand which helps with the cables not being in the way and contributes to the smoothness of its design. In the package, you also get all the cables necessary for the inputs including HDMI, DVI, VGA and DisplayPort cables. There is an audio line out for your headphones as well on the monitor besides the 3W speakers which are hidden.
The panel of the PB278Q is described as IPS, but it is a PLS panel which is Samsung’s equivalent of an IPS panel. It supports the full sRGB color gamut spectrum and thus operates as an IPS panel. It gives you the superb color productivity and the color accuracy of an IPS panel, which provides the image quality that RPG and similar gaming enthusiasts so dearly value. When it comes to gaming, the capabilities of the PB278Q will be just perfect for games like The Witcher, Assassins Creed, The Elder Scrolls and similar. Be aware that when we suggest games for the monitor we are not excluding other games we are merely suggesting what games would work perfect, thereby not saying that games like Counter-Strike are not playable. But if you want a monitor that focuses on these types of games you may want to prioritize the faster TN panel based monitors to get you lead in responsiveness. Like the last comment, we want to clarify our rating, which was because of some bleeding noticed on the upper right and lower right corners during black display. Nothing to worry about really, but it doesn’t add to the rating as well as the price since the monitor is about two years old (from release date).
All specs:
| Refresh Rate | 60 Hz |
| Response Time | 5ms |
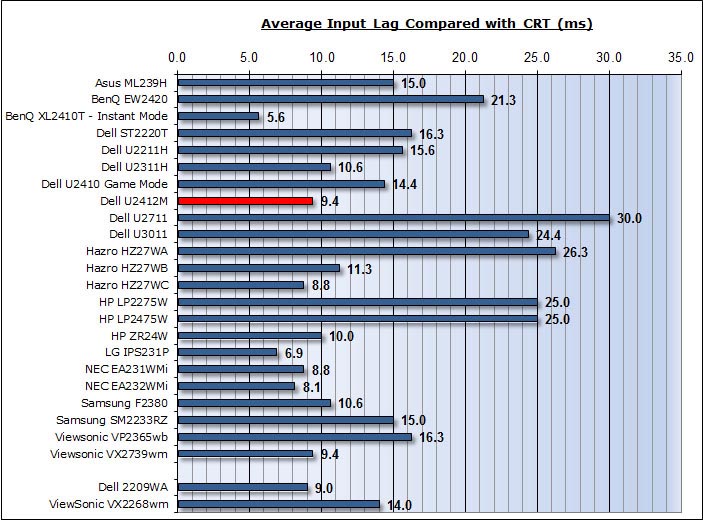
| Input Lag Time | 11ms |
| Size | 27” |
| Aspect Ratio | 16:9 |
| Static Contrast Ratio | 1000:1 |
| Dynamic Contrast Ratio | 80,000,000:1 |
| Resolution | 2560 x 1440 (WQHD) |
| Panel Type | IPS (PLS) |
| Adaptive Sync | No |
| Brightness | 300cd/cm2 |
| Blue Light Reduction | Yes |
| Anti-Glare | Yes |
| Anti-Reflection | No |
| Backlight | W-LED |
| Speakers | No |
| Color | Matte Black |
| Ports | 1x HDMI 1. 4, 1x DisplayPort 1.2, 1x D-Sub (VGA), 1x Dual-Link DVI-D, 1x PC Audio Input 3.5mm, 1x Headphone Jack 4, 1x DisplayPort 1.2, 1x D-Sub (VGA), 1x Dual-Link DVI-D, 1x PC Audio Input 3.5mm, 1x Headphone Jack |
| Viewing Angle | 178/178 Degrees |
| Adjustability | Height, pivot, swivel, tilt |
| Brand-Specific Features | ASUS QuickFit Virtual Scale, ASUS Smart Contrast Ratio (ASCR), ASUS Splendid Video Intelligence Technology, ASUS Splendid Video Preset Mode, HDCP, LED PLS Technology, Trace Free Technology, Zero Bright Dot |
| Additional Features | HDCP Support |
Find Best Price
You may also like:
Filed Under: Monitor, Reviews Tagged With: 1440p, asus, IPS
Reader Interactions
PB278Q |Monitors|ASUS Global
-
Overview
-
Tech Specs
-
Review
-
Support
Precision to the Finest Detail:
Professional 27” 16:9 2560 x 1440 WQHD LED-backlit Monitor
- Impeccable lifelike visuals with 27” 16:9 2560 x 1440 with 100% sRGB
178° wide-viewing angle - Extensive connectivity with native WQHD content support with HDMI,
DisplayPort, and Dual-link DVI - ASUS-exclusive QuickFit Virtual Scale and Splendid Video Intelligence Technology for true ‘what you see is what you get’
- Ergonomic
tilt, swivel, pivot, and height adjustment plus smart cable management
Compare
Concept to Creation
Precision to the Finest Detail
Envision bigger with 2560 x 1440 WQHD, packing four times the pixel density of 720p!
New premium 16:9 wide-format PB278Q LED displays with 178° wide viewing angle panel for better productivity, opening extra multitasking space to fit more windows and projects on-screen.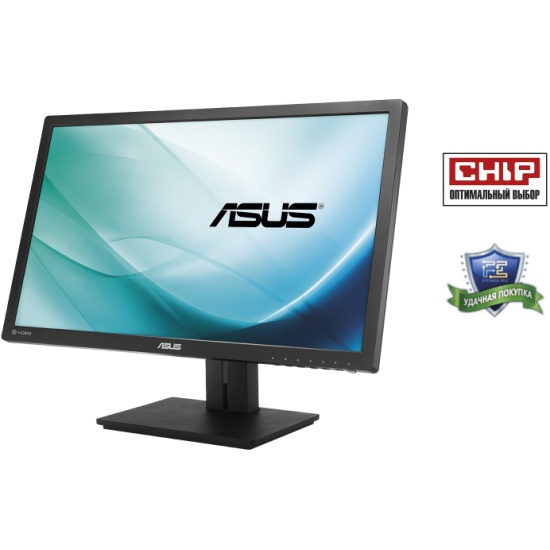 ASUS exclusive Splendid Video Intelligence Technology, QuickFit Virtual Scale, and 100% sRGB fidelity ensure reality-defining color and image accuracy, giving you true “what you imagine is what you create” power. HDMI, DisplayPort, and dual-link DVI support WQHD natively, accentuated by room-dominating audio via twin 3W speakers. To help you stay naturally focused, ergonomic design includes tilt, swivel, pivot, and height adjustment, plus streamlined cabling that keeps clutter off your desktop.
True-to-life Visuals
See Better and Wider
The PB278Q WQHD monitor provides 109 pixels per inch (PPI), resulting in high quality 2560 x 1440 visuals – equaling four times the resolution of standard 720p sets. It allows users to view greater image detail and do more with an onscreen footprint larger than that of standard displays.
The screen’s 109PPI density means there are 109 RGB matrices within one inch. Generally, the more pixels a display has, the more lighting (or power) those pixels require to achieve the best visuals. However, with advanced LED backlighting on the PB278Q, power and energy savings are no longer compromised, while better visuals are assured.
Made for Work and Play
The ASUS PB278Q provides an ultra-wide 178° viewing angle on both horizontal and vertical planes, thereby minimizing onscreen color shift even when viewed from extreme angles. With its WQHD display, you enjoy 77% more desktop space than a full HD screen to spread out your windows and palettes. It is also about 25% sharper than a generic 27” full HD display, delivering ultra-smooth visuals thanks to 5ms (GTG) response time. This ensures you get lag-free experiences in movies and gaming, with the latter looking more vivid, with all in-game details shown in true color. The ASUS PB278Q is undoubtedly your best choice for work and play.
Extensive Connectivity
Native WQHD Content Support
The PB278Q features a host of connectivity options that include HDMI, DisplayPort, and dual-link DVI for native WQHD, plus D-sub for full HD 1080p content transmission. The HDMI port also supports MHL which allows you to use the MHL with HDMI connection to view content from your mobile device on the PB278Q while simultaneously charging the mobile device. Twin built-in 3W speakers provide quality audio for a completely immersive home theater experience.
*Better yet, ASUS bundles all cables in the box: DisplayPort, HDMI, dual-link DVI, and D-sub are all there!
*While the PB278Q supports up to 2560 x 1440 WQHD resolutions including DVI-dual link, HDMI and
DisplayPort, some graphics cards only support up to 1920 x 1200 resolution content transmission via HDMI.
Please check with your local distributor or retailer on the hardware limitations of your laptop or desktop.”
QuickFit Virtual Scale for true what you see is what you get
ASUS includes its exclusive QuickFit Virtual Scale feature with the PB278Q, allowing you to preview photos and documents on-screen in their actual size prior to printing. It can be activated via a monitor hotkey, and serves as a highly useful guide to accurately view and edit photos in their native size.
- Document: A4, letter
- Photo: 8”x10”, 5”x7”, 4”x6”, 3”x5”, 2”x2”
- Grid: Alignment
Supporting Formats:
ASUS ROG GLADIUS II gaming mouse review
Every manufacturer wants to call the best product their own. It has always been that way, including when it comes to gaming peripherals. But when it comes to gaming mice, ASUS has already proven that you know what’s important. After his rodent Gladius was able to score against us, a successor appeared. In today’s test, you can find out if this product can convince like its predecessor, or even surpass it.
Main
Not too frisky, but still pleasant to look at, ergonomic, reliable and extraordinary accessory. Thanks to these characteristics, the sword tip of ASUS with the name Gladius was able to convince two years ago and was even named by us as «Perfection for gamers called.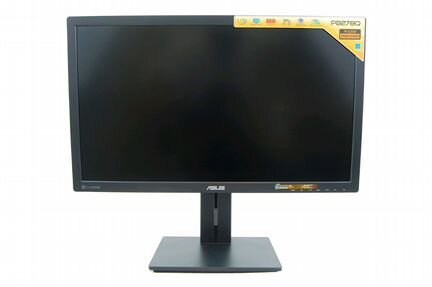 »
»
equips the ROG Gladius II with floor lights, fully customizable RGB lighting, an extra button and more switches, and once again competes for the best gaming hardware.But is the Series 2 worth buying? information about the value for money Gladius II
Bookmark
- How-To & Guide:
- G.Skill Ripjaws MX 780
- Titanwolf Gauntlet: Laser Mouse with Avago Sensor and Omron Button
- Gekkot’s Epic Gear
- ASUS RoG Gladius — perfection for gamers
- Zowie FK2 in
Gaming Mice Explained
test
Test Candidate Brief:
Key Data and Scope of Delivery
In the age of the Internet, of course, many manufacturers reduce the scope of delivery to zero. Here ASUS works a little differently. The kit, in addition to the instructions, includes a fabric mouse case, interchangeable switches, two cables of different lengths, and even a small ROG sticker made of plastic and metal.
A manual provided by ASUS provides information about the system requirements, package contents, and specifications of the mouse on a double page. You’ll also get a quick switch guide in 23 languages! Last but not least, there is also a website listed where you can download the latest software to have access to all the features of the mouse. This of course comes through the official page from ASUS.
| Specifications | ASUS Gladius II |
| Mouse type | Optical mouse with LED technology |
| application | Games / right handed |
| sensor | PixArt PMV 3360 |
| Maximum sample rate | to 12.000 dpi |
| Sampling rate preset | 1.600/400 dpi |
| Maximum USB polling rate | 1.000 Hz |
| Preset USB polling rate | 1.000 Hz |
| Home button | Omron D2FC-FK |
| Total keys | 6 |
| Dimensions (length / height / width) | 126 x 45 x 67 mm |
| Weight without cable | 110 g |
| cable length | 2 meters |
| Features | Detachable cable |
| lighting | |
| gold-plated USB contacts | |
| Basic buttons in sockets | |
| Lieferumfang | second USB cable (1 m long) |
| 2 additional main buttons Omron D2F-01 | |
| Mouse pocket | |
| RoG sticker | |
| multilingual manual | |
| Price Comparison (as of 22/04/17 Mar 17) | from 90 euros |
| Amazon/Casking | Euro 78 / Euro 90 |
The new model from ASUS uses standard Omron D2F-01 buttons, which are described as having a lifespan of more than 50 million clicks — as opposed to the 20 million click Omron D2FC-F-7N, which is in the gladius. 2015 installed. The sensor power is also doubled. The PixArt PMW 3360 maintains a maximum speed of 12.000 dpi, although very few players are in motion with more than 1.600 dpi. Only 400 and 400 dpi are preset, between which you can switch as usual with the middle button.
However, what is new is the third side button, which is described as a «sniper button» and allows the player to switch to a lower dpi level while the button is pressed.
Another feature that the Gladius II has taken over from its predecessor is that the alternative cable is only one meter long instead of two and can be conveniently changed so that you don’t drown in tangled cables at LAN parties, for example. In addition, the rodent is equipped with the usual side buttons, mouse click wheel and two rubberized side surfaces. The mouse wheel, logo on the back, and the bottom bar of the mouse are glowing red at the factory, but can be customized via software in the full RGB color spectrum.
Everything else, such as setting the polling rate, assigning keys, or creating macros, is only possible if you have access to the software.
Impressions
The ASUS rodent is not symmetrical and therefore only suitable for right-handers. To do this, you naturally try to make them ergonomic. Whether this succeeds, of course, also depends on the size of the user’s hand. The Gladius II is a medium to large size mouse that also fits these hands perfectly. Visually, the manufacturer remained in matt black, only the side and middle buttons were polished to a shine. Rubberized sides and an unusually illuminated underside complete the picture, so the gaming mouse makes a noble impression — at least as long as it doesn’t get dirty.
All buttons are located as usual on gaming mice. The mouse wheel is located at the top and also feels good in terms of feedback and grip, which is also due to the rubberized surface.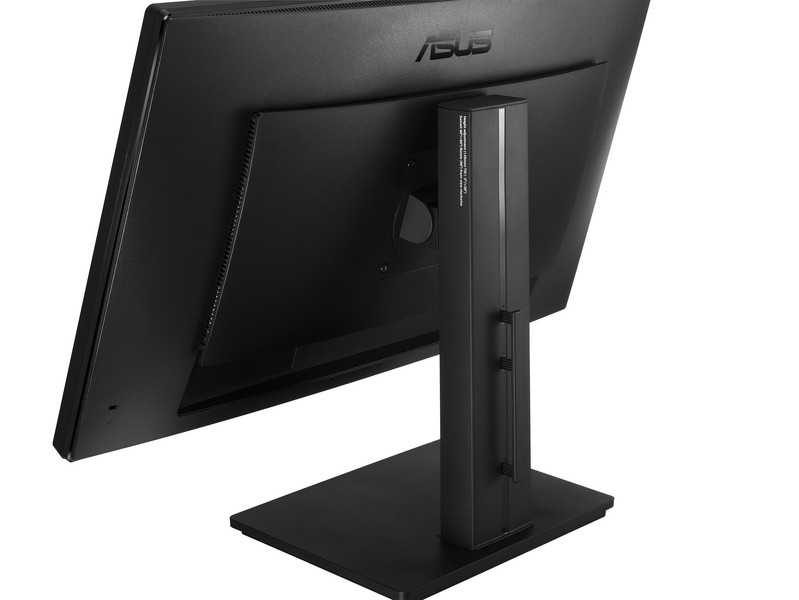 Both side buttons are located correctly and are easily distinguishable. At first, the sniper button looks like it could be a nuisance, but in practice it doesn’t, at least not for using a rodent in the palm or claws. However, depending on the position of the hand, it can be annoying when gripped with a finger. The button is easily accessible regardless of the handle type.
Speaking of the type of capture. Thanks to the extra long main button, the Gladius II, like its predecessor, fits perfectly on any type of handle and offers maximum comfort to players with not too small hands.
The interchangeable buttons are, of course, a feature of the Gladius models. It also works here, just like the previous model, and without the hassle of the instructions. However, there is a useful innovation: instead of unscrewing the screws under the mouse legs, they can now be reached by removing small rubber caps from the underside of the rodent. This saves separate mouse feet and eliminates the risk of using them at some point.
Practical use
commissioning
After inserting the gold-plated USB plug into the USB 2.0 port and waiting a few seconds, the rodent is ready to work — here, as usual, the standard Windows driver is used.
As already mentioned, the preset levels of 1.600 and 400 dpi are in the lower range, the factory backlight is red. The polling rate is already set to 1.000 Hz. In this case, the software must withstand everything else. We, of course, have the latest version downloaded from the manufacturer’s website and also tested.
Georadar software
Armory
The software at first glance is no different from its predecessor, which is also good. Because the Gladius II series is also high definition.
On the left, three profiles can be edited separately, only one can be loaded at a time. The rodent is then displayed on the right side of the Buttons tab, top or side. This is done for clarity. Here you can assign each button as you wish or assign it differently. And there are many options. You can choose not only mouse actions, but you can also put keyboard and multimedia functions, macros, and even Windows shortcuts on individual buttons if you want.
Unsurprisingly, ASUS also includes its own macro manager. With this, keyboard and mouse commands can be recorded until the Stop button is pressed, and then edited individually. Once created, macros can be saved locally and assigned to a mouse.
The second tab is called Performance. In addition to the settings for the two dpi levels, there are also tricks such as detecting an angle that allows the rodent to move in a straight line, acceleration and deceleration, key response time, and of course the polling rate. The last two factory settings are set to 1.000 Hz and 12 milliseconds.
By the way: to check your settings, you need to save them on the Gladius itself each time.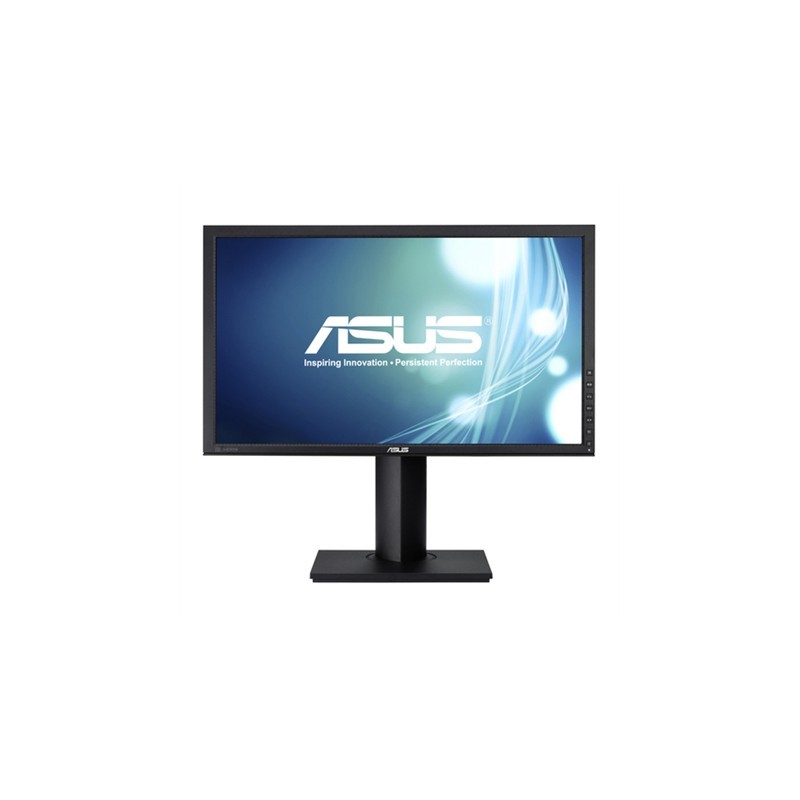 Although it’s fast, a preview feature such as the F60 Ozone Exon would be nice. But this is certainly whining at the highest level.
Next up is the Light tab, which offers many color options for rodents. First of all, you can switch between uniform or split lighting. In the latter case, colors and brightness can be adjusted separately in four steps for the scroll wheel, logo and bottom of the Gladius II. If you edit the settings in all areas, color tricks will also appear. For example, you can «breathe» the mouse into deep red, or let it glow across the entire color spectrum.
The last tab «Calibration» was a weak point in the predecessor: here you can accurately calibrate the rodent to the surface used, for better performance — ideally. Ironically, the software often failed to recognize the ASUS Whetstone mouse pad. This issue has now been resolved with the ability to select ASUS pads with preset surfaces.
In addition, everything works as usual, and the tear-off distance can also be adjusted in three steps.
Office use
Even if it was designed primarily for the gaming sector, the Gladius II is also a good office companion. The mouse adapts well to the average hand, the scroll wheel provides nice feedback, and the buttons don’t feel too complicated in practice — more on that later.
In addition, the rubberized sides provide a comfortable grip, and the side buttons on the left are easy to use and just as easy to see. Thanks to its color customization options, the Gladius II can also be used comfortably for night work. A diverse rodent that ASUS offers here!
Pressure point
The following table shows the pressure point we have determined. We just worked with small weights to determine this relatively accurately. However, we don’t want to be limited to the exact gram, since we’re talking about a single sample (tolerances may also exist here — for material and switches), but the position of the fingers can also make a significant difference.
| Mouse | Pressure point (in grams) |
| ASUS ROG Gladius | 31 g |
| ASUS ROG Gladius II | 40 g |
| Funk MS 3 | 49 g |
G. Skill Ripjaws MX 780 Skill Ripjaws MX 780 |
51 g |
| Logitech Anywhere MX | 56 g |
| Mad Catz RATM | 38 g |
| Microsoft MS 5000 Bluetooth | 57 g |
| Ozone exon F60 | 57 g |
| Ozone Neon 3K | 47 g |
| QPad 5K games | 27 g |
| Titan Wolf Gauntlets | 45 g |
| Sharkoon FireGlider | 42 g |
| Zowie FK2 | 49 g |
At 40g, the ASUS ROG Gladius II already has significant actuation pressure on the scale. However, as mentioned in the previous chapter, we cannot consider the pressure point annoying in our long-term practice test. On the contrary: when working on a computer, whether surfing the Internet or pressing buttons in games, the pressure point seems to be balanced — not too high or too low.
Lautstärke
We have previously presented measurements by volume. Today we separate from this, as value is simply secondary, unless special circumstances are specified in the test. The measured values in the previous test field were between 22 and 29 dB(A). In the future, we will consider this moment only in the case of absolute emissions, that is, those devices on which the click point seems subjectively very loud.
Surface suitability
Due to the different methods that modern mice use (optically with LEDs or optically with a laser), we also test usage on different surfaces. Basically, a gaming mouse manufacturer assumes that their mouse works on a gaming mat, but there are some differences here as well.
Particularly smooth surfaces of gaming mouse pads are often referred to as speed surfaces, while slightly rougher, more structured surfaces are known as precision surfaces. Also, there are users who don’t use mouse pads at all and just use a blank desktop. The latest gaming mouse manufacturers are not considered a target group.
Our test track therefore includes well-known gaming mouse pads that are also used by eSports players. However, we also use the two cheaper options and this remains a typical test on a plain wood countertop.
During the test, we select two to three levels of dpi, and then move the character 360 degrees around its own axis in the game on different parts of the test surface.
If drops, jerks, etc. occur at the pre-selected resolution, we will of course try to fix the problem by calibrating the mouse (if supported by the device or software). We then also test other dpi levels. If errors or anomalies persist, we flag them in the table below.
| Metro | picture | Verhalten | rating |
| GB MP-8000 | no problem | + | |
| MSI Just Game Twin Frozr | no problem | + | |
| Razer Goliath Office | no problem | + | |
| Razer Goliathus Speed | no problem | + | |
| Roccat Taito | no problem | + | |
| SteelSeries QcK + | no problem | + | |
| Zoe G-SR | no problem | + |
| Rating options: ++ [very good] / + [good] / o [satisfactory] / — [very bad] / — [bad] |
And here the edge of the sword passes with honor. At the factory, the Gladius II had no problems on any of the surfaces used. The special «calibration» feature that ASUS offers in its Armory software also ensured that there were no crashes. Even on his own Whetstone tampon.
Also, we couldn’t find any improvement with the calibration — how could we? The rodent cannot behave better; «right».
Paint Test: Jitter and Ripple
To further test whether the mouse really works as intended, we turned to the paint test. Here, using the Paint program, lines and shapes are drawn with different dpi levels. Based on the behavior of the mouse pointer and the drawn result, you can get information about whether the mouse is moving properly.
«Pulsation and trembling» is translated into German as «ripples and jolts». Fortunately, this is rarely the case with current gaming mice, which can be caused by various factors. On the one hand, ripple and jitter can result from the implementation of sampling rates (dpi levels), on the other hand, they can also be related to input latencies — the latter can usually be caused by errors during sampling. The mentioned «unlikely» does not mean that it no longer exists in practice — Siehe hierarchs.
However, here we were in for a surprise. In a positive way. In the presented test, the Gladius Mark II had to work with 500, 6.000 dpi and the required 12.000 dpi. Even at the first stage it was possible to draw beautiful smooth lines, but at the last stage it really became interesting. At a dizzying 12,000 dpi, although they were almost never used in practice, the rodent performed outstandingly and could still be used with ease. Most competitors in the gaming sector do worse at 6,000 dpi.
dpi levels
The abbreviation dpi stands for dots per inch, which is how many pixels per inch (inch) the mouse sensor scans. One inch is equivalent to 25.4 mm. Based on this information, by simply calculating your own screen width (display width in pixels), you can check the dpi levels with a commercially available tape measure.
Let’s take the following example for calculation:
Your own monitor offers a resolution of 2.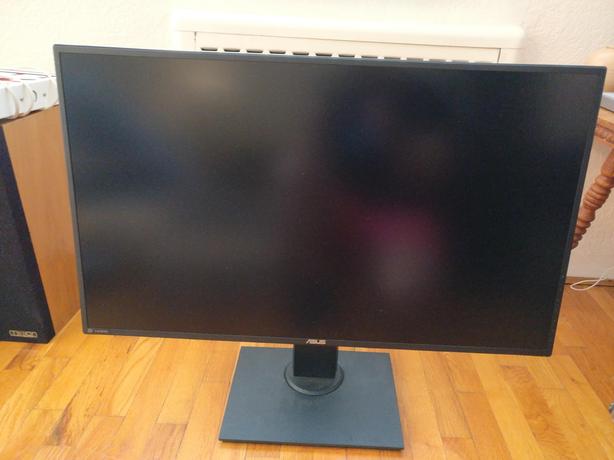 560 x 1.440 pixels. The first value of this operator is the width of the screen in pixels, the second is the height.
For example, a mouse offers a resolution level of 800 dpi, so the sensor must be able to read 800 pixels at a distance of 25.4 mm (1 inch). This results in the following distances that the mouse must travel at the appropriate dpi level:
- 800 dpi
2.560 pixels / 800 dpi = 3.2 inches = 81.28 mm - 1.600 dpi
2.560 pixels / 1.600 dpi = 1.6 inches = 40.64 mm - 3.200 dpi
2.560 pixels / 3.200 dpi = 0.8 inch = 20.32 mm - 6.400 dpi
2.560 pixels / 6.400 dpi = 0.4 inch = 10.15 mm
At a resolution level of 6.400 dpi, the mouse pointer should reach the right edge of the screen from the left edge of the screen, moving the mouse only one centimeter on the mouse pad. On the other hand, at 800 dpi it’s a round 81 mm, that is 8.1 cm!
This immediately explains why low-sensitivity gamers like to use large, wide mousepads, because at low dpi levels the mouse has to move significantly more distances to reach the desired target than at high dpi levels. .
.
At the same time, this explains why some gaming mice have the ability to switch between dpi levels by simply pressing a separate button. Because when I’m in a very fast 4,000dpi game, but I’m running into a sniper scene, for example, that requires the highest level of precision, I like to switch back to a lower dpi level, like 800dpi. The basic claim that higher dpi levels are less accurate is mostly correct, but should not lead to the assumption that the mouse is less accurate — it ultimately depends mostly on the person using the mouse.
Nothing out of the ordinary here either. We were able to more or less fine-tune the preset dpi levels with the ruler — so there were no errors.
Lift-off distance
Lift-off distance is the distance between the sensor and the ground from which the sensor can no longer scan. This lift-off distance is an important consideration, especially for gamers with low flair, as they play at low dpi and have to travel long distances on the mousepad with the mouse. As a result, in games of this type, you always have to lift the mouse and level it on the mat. If the tear-off distance is too large, the mouse pointer jumps to the most impossible places on the screen, and it must be carefully aligned.
We also test for this moment by simply using different pads that we place under the front and rear mouse feet, and then we check the height at which the mouse pointer is no longer responsive. Our goal is not to find this distance to the millimeter, but rather whether the manufacturer will keep its promises in this regard.
The default tear-off distance is 1 mm. It’s minimum. If you really want to increase this value, this can be done using the «Calibration» tab in the Armory program. The lifting distance can be adjusted up to 3mm, no longer needed.
Input Delay / Input Delay
Of course, the input device also has certain input delays. This circumstance can be encountered very quickly, especially with wireless mice, of course.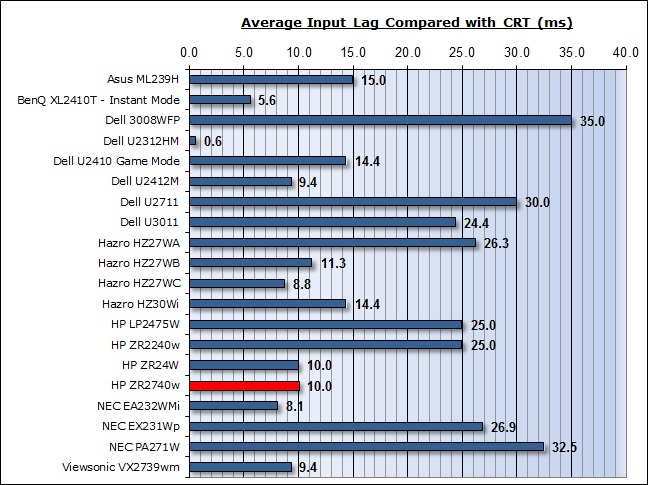 This guild does not apply to all representatives. But typical wireless mice designed for office use suffer the most.
Response delays can also be related to monitor refresh rates. This is why 120Hz and 144Hz devices, among other things, are so popular with gamers, because they really contribute to faster response times. One possibility to test this input lag is a reaction time test which can be done online. Findet human test.
We use this exact test with a gaming monitor. ASUS PB278Q at 144 Hz and 2.560 x 1.440 pixels. It is not our job to achieve the best possible reaction time by trying to best «guess» the color change from red to green. We also run the test ten times instead of the planned five rounds to reach the average. Because a somewhat unfortunate early click (presumed click) counterfeits the drug very quickly.
The average Sharkoon Fireglider is a good example of our description of an intended click. Below are two launches that the tester clearly clicked not by eye, but by touch, and they were significantly less than 200 ms, so the result is unfortunately falsified. We have three pictures for comparison. Sharkoon Fireglider on one side, Zowie FK2 and ASUS Gladius on the other.
The successor should now work and in our test it showed a result of 259 ms. Which may seem bad at first glance, but as described depends on the day and can always be slightly different. Ultimately, we are in an area where 50ms changes will be recognized by professionals at best. In any case, we cannot find any shortcomings in the reaction speed of rodents compared to competitors.
Games
The games we have chosen to test try to meet the broad testing needs of the sector by taking into account different points. The title of the Devil May Cry action is so complex that you can’t do without macros. If it gets to the point very quickly, this is Titanfall of our choice. It’s not uncommon for you to be a fast BioShock Infinite mouse wheel here and there. Things move slowly in the popular RPG Skyrim, but the mouse wheel often accompanies you and, of course, there are scenes where precision is required. In this case, experienced gamers should lean more towards the Quake Live genre — it doesn’t get any faster.
Once again about Gladius II. Even after weeks of playing with the rodent, it does its job reliably in all situations and responds to our inputs and macros as expected. In our opinion, only the sniper button is a nice addition that also works as described, but is overkill for us.
Enotus Mouse Tester
Der The Enotus Mouse Tester is a piece of software often found in the scene that wants to provide information about some areas of use. Of course, it requires some practice in handling, but then it gives relatively correct information about the set dpi level and the USB polling rate.
Since the software is several years old, no longer supported, and documentation from the author is also missing, other test scripts remain a black hole to speculate about. We do not know what factors are included in the test for accuracy or smoothness (the latter does not always work, and especially at very high dpi levels, there is often a bad rating).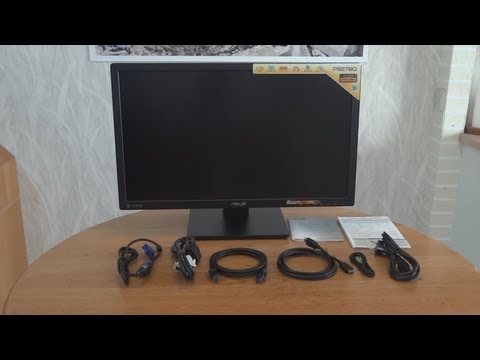 The relatively good reliability of the first two tests creates some confidence in the scene, so we record the results and show them below.
We were even able to get a good accuracy value for Gladius here, even if it remains a mystery to us why this works with Gladius II and not with many other test candidates.
Conclusion
| Criterien | ASUS ROG Gladius II |
| Manual / documentation | + |
| Machining | + |
| Left handed | — |
| touch teaching | + |
| Ergonomics | + |
| Function set | + |
| additional functions | + |
| Usage: Office | + |
| Usage: games | + |
| Surface suitability | + |
| Georadar software | + |
| Lieferumfang | + |
| Price | + |
Grading options: ++ [very good] / + [good] / o [satisfactory] / — [very bad] / — [poor]
| Manufacturer’s product page | Price: approx. 78 euros. 78 euros. |
Take an all-around successful gamer’s mouse with an unusual feature set and good software, add RGB lighting and a few small upgrades, all for an extra cost of about 10 euros compared to the previous model. ASUS recipe was used here and it works very well.
From about 76 euros on Amazon you get a gaming mouse that really leaves nothing to be desired — from the package to the software and modification options. Gladius II looks great with floor lighting and can outperform its predecessor. This is also achieved in the area of software and reliability, albeit minimally. The new sensor, as our test showed, is convincing, and the pressure on the buttons is slightly higher.
In short: a worthy successor that is definitely in the high-end segment, but by no means too expensive. Only one question remains: do you need optimizations as a player or rather on the predecessor of the retreat, which is now clearly better. Unfortunately, we cannot help with this issue.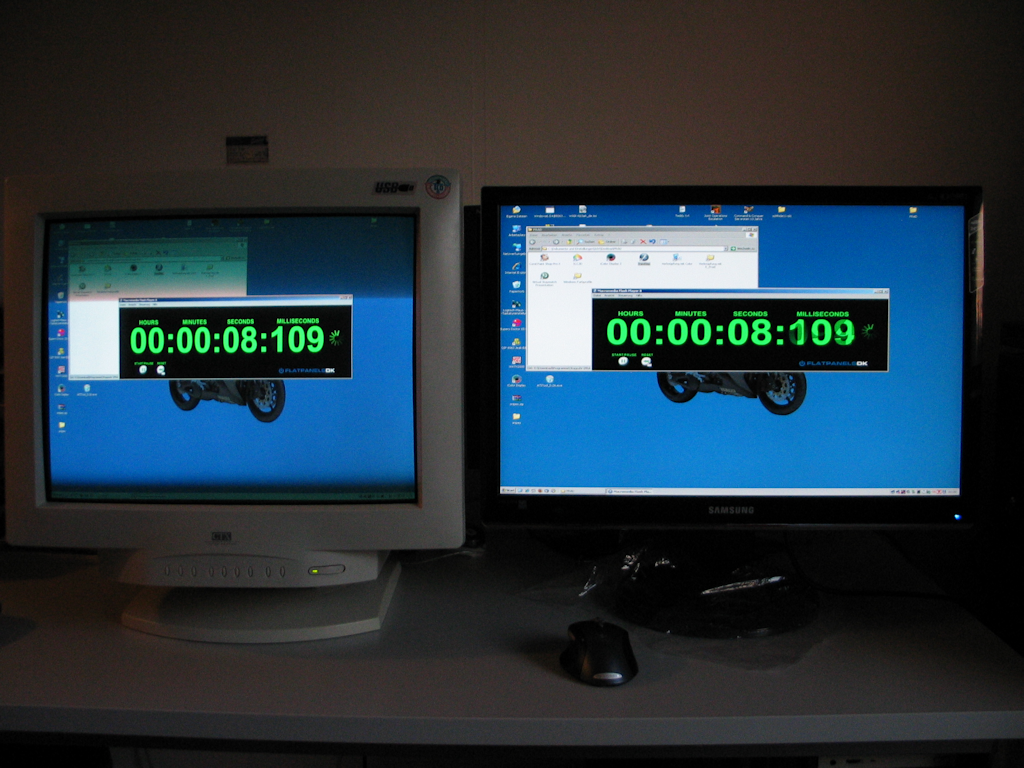 The fact is that, in our opinion, Gladius II is «perfection for the 2.0 gamer.»
With today’s performance, ASUS ROG Gladius II definitely won an Editor’s Choice Award!
Addendum to article
Test environment
Software:
- Windows 1064 9020, including all updates
- Integrated Intel Chipset Driver Windows 10
- DirectX 9.0c (June 2010 Update)
- Audio driver (integrated in Windows 10)
Windows USB drivers are of course used for mouse drivers. For keyboard or mouse manufacturer software, we use the latest available version from the device manufacturer unless otherwise noted or explained in the article.
Equipment:
Test System
The most important components:
- Processor: Intel Core i7-4770K (HT4U test / Amazon / Caseking)
- Motherboard: MSI Z97 Gaming 7 (Amazon / Caseking)
- Main memory: 16 GB DDR3-1600 Kingston Gray (Amazon / Caseking)
- Video card: ASUS GeForce GTX 980 STRIX (HT4U test / Amazon / Caseking)
- Case: Corsair Graphite 760T (HT4U test / Amazon / Caseking)
Let’s be clear, the system shown can’t really be categorized as low cost, and if you only want to replace the CPU components, main memory, graphics card, and motherboard, you’ll unfortunately have to pay between 800 and 900 euros.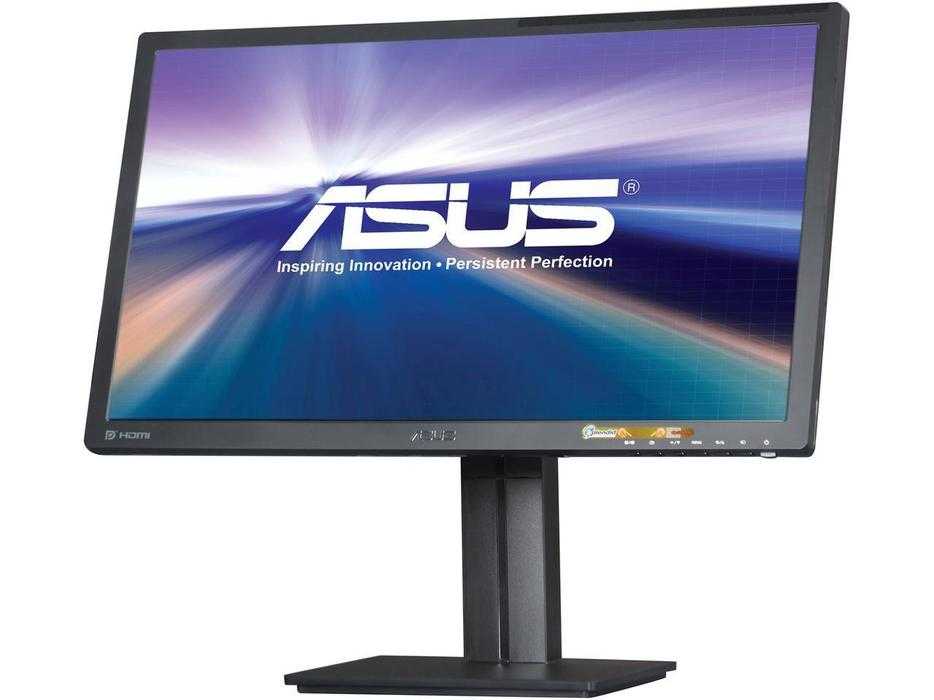 With this, however, you are ready for anything that can happen — except for the special case of «shit is programmed»!
The storage media is a 3 terabyte Seagate Hard Drive to use. The system’s bootable media (and game base) is based on a 1 terabyte solid-state drive. Samsung 840 EVO.
Influence of Specter, Meltdown and Foreshadow protection on Linux 4.19 performance / Sudo Null IT News
One of the most frequently asked questions lately is how protection against Meltdown/Spectre, and now also L1TF/Foreshadow, affects Linux performance. Start of Linux 4.19 kernel developmentthis month added fuel to the fire not only for x86_64, but also for POWER/s390/ARM. To get a general idea of the impact of patches on performance, I tested three Intel Xeon systems and two AMD EPYC systems, as well as a virtual machine on each side, to evaluate the performance of the default Linux 4.19 kernel with and without the appropriate patches.
All machines were running Linux kernel 4. 19-rc1, released over the weekend. On Intel, relevant patches include page table isolation (PTI/KPTI) for Meltdown and various Specter patches against speculative command execution, including clearing the __user pointer, using retpoline via IBPB IBRS_FW, patching the Speculative Store Bypass vulnerability via prctl and seccomp, and also PTE inversion and conditional cache flush in virtual machines — this is for L1TF / Foreshadow.
By default, the Linux kernel does not provide «full» protection against vulnerabilities by disabling Intel HT/SMT support, so be aware of this if you are using virtual machines and are allowing untrusted code or users access to the VM. If you choose Full Protection and disable SMT, the performance impact is much more noticeable due to the halving of the number of available streams. Cloud service providers seem to just set up schedulers so that SMT flows don’t go through users. This avoids the obvious huge cost of disabling Hyper Threading. So for now we are only comparing stock/default kernel protection.
AMD EPYC is only protected by default for the relevant vulnerabilities that affect them: clearing the __user pointer for Specter V1, AMD Retpoline IBPB for Specter V2, and disabling Speculative Store Bypass (SSBD) for Specter V4.
After testing all configurations on the stock Linux 4.19-rc1 kernel, the tests were repeated using various runtime protection switches. All systems tested with Ubuntu 18.04.1 LTS x86_64 with Linux 4.19 kernel-rc1 via Ubuntu Mainline Kernel PPA, latest microcode/BIOS, GCC 7.3 and EXT4 file system.
Tested system configurations:
- Intel Xeon E3-1280 v5 Skylake on MSI Z170A SLI PLUS motherboard, 16GB DDR4 and 256GB Toshiba RD400 NVMe SSD.
- Intel Xeon E5-2687W v3 Haswell on MSI X299 SLI PLUS motherboard, 32GB DDR4 and 80GB Intel 530 SATA 3.0 SSD.
- Two Intel Xeon Gold 6138 in Tyan 1U rack with 96 GB RAM and Samsung 970 EVO NVMe SSD 256 GB.
- KVM virtual machine on the above two-socket Xeon Gold server.
 This VM was the only active process on the machine and was configured to access 80% of CPU cores/threads (64 threads), 48 GB of RAM, and a 118 GB virtual disk. During testing, protection against vulnerabilities was disabled both on the host and in the VM.
 - AMD EPYC 7601 on Tyan 2U server with 128GB RAM and 280GB Intel Optane 900p NVMe SSD.
- KVM virtual machine on the above AMD EPYC 7601 server. It has access to 80% CPU cores/threads (52 threads), 48 GB RAM and a 120 GB virtual disk.
- AMD EPYC 7551 server on Gigabyte MZ31-AR0 motherboard with 32GB RAM and Samsung 960 EVO 256GB NVMe SSD.
Obviously, the configurations of the machines are different and they are not intended to be compared with each other, namely, to check whether protection against processor vulnerabilities is enabled or disabled on the Linux 4.19 kernel. Therefore, for clarity, all data is normalized by the performance of each system. All tests from the Phoronix Test Suite.
Tests selected for this article are related to Specter/Meltdown, i.e. heavy I/O or kernel interactions. The load is simply on the CPU and does not depend much on the processor cache.
The CompileBench profile is probably the easiest way to show the impact of Specter/Meltdown. On the Linux 4.19 kernel, when protection is activated, Intel processors show a performance decrease of 7-16%, and AMD processors — by 3-4%.
The situation is similar in the subtests with reading the compiled tree. Intel processors have a performance decrease of 14-15%, AMD — by 4-5%.
In real life tasks like compiling the Linux kernel, the difference in performance will be around 2%.
The Hackbench kernel scheduler benchmark also suffers from protection activation. In Intel processors, performance is reduced by about 20%, except for Xeon Gold. On AMD EPYC systems, there is not much difference.
The PostgreSQL database server is one of the real world applications that suffered a performance degradation after the CPUs were protected.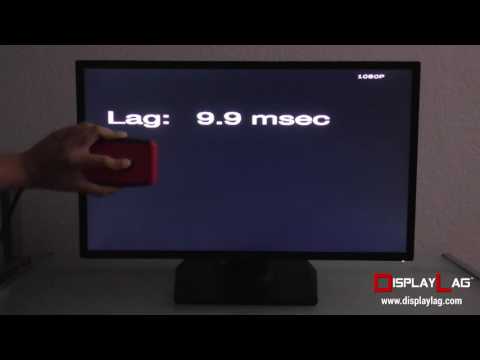 In this particular test, the difference for Intel processors was 5-8%, and for EPYC — 1%.
Another real program with performance degradation due to Specter/Meltdown is the GIMP graphics editor. The difference for Intel is 5-10%, for AMD — 0-2%.
Redis slows down by 11% on Intel Skylake E3 v5 system, and by 5-7% on other Intel processors, on AMD EPYC systems the difference is 1-5%.
The Nginx web server on tested Xeon systems on the Linux 4.19 kernel showed a performance difference of up to 20%, and on AMD EPYC — from 1-2% to 6%.
Similarly, the Apache web server with a default installation is much slower after protection is activated on Intel processors and practically unchanged on AMD processors.
In the OSBench file creation speed test, an Intel Xeon system slows down by 13-16%, while EPYC systems slow down by 6-9%.
In the test for creating threads, there is also a noticeable difference between Intel and AMD processors.