BIOS 115-D000PI20-100 for Asus RX 470 4GB ?
EDW4032BABG
BIOS information
Core bios information and date
Parameter
Value
Product Name
67DFHB.15.50.0.0.AS25
Device ID
67DF
BIOS Version
015.050.000.000.000000
BIOS SSID
04B0
BIOS SVID
1043
BIOS Date
08/28/16
BIOS overview
Different identification and signature information of the BIOS
Parameter
Dec
Hex
Vendor ID
4098
0x1002
Device ID
26591
0x67df
Subsystem ID
1200
Subsystem Vendor ID
4163
0x1043
Firmware Signature
1297044545
0x4d4f5441
PowerPlay
Structure of the PowerPlay table
Parameter
Dec
Hex
Max GPU Freq. MHz * 100
200000
0x30d40
Max Memory Freq. MHz * 100
210000
0x33450
Power Control Limit Value in percent
25
PowerTune
Structure of the PowerTune table
Parameter
Dec
Hex
TDP Watts
85
TDC Ampers
83
Max Power Limit Watts
95
Max Temp. Celsius
90
Shutdown Temp. Celsius
94
Hotspot Temp. Celsius
105
Fans
Structure of the Fan table
Parameter
Dec
Hex
Min Temp. C * 100
4000
Med Temp. C * 100
6500
0x1964
High Temp. C * 100
8500
0x2134
Max Temp. C * 100
10900
0x2a94
Min PWM % * 100
2000
Med PWM % * 100
4000
High PWM % * 100
6000
0x1770
Max PWM Percent
100
Max RPM
1730
Sensitivity
4836
0x12e4
Acoustic Limit MHz * 100
70000
0x11170
Clocks
SCLK (enginge clock) and MCLK (memory clock) entries
Engine
Frequency
Voltage
300 Mhz
800 mV
483 Mhz
65282 mV
778 Mhz
65283 mV
1056 Mhz
65284 mV
1113 Mhz
65285 mV
1167 Mhz
65286 mV
1212 Mhz
65287 mV
1250 Mhz
65288 mV
Memory
Frequency
Voltage
300 MHz
1000 mV
1650 MHz
1000 mV
VRAM Timings
Table with VRAM memory timings straps and values
ID
MHz
Timing strap
AMD Memory Tweak values
0 — 200 MHz
0999000000000000022aa1c0060881107c0540b078f82c00000204100150014209a8840a1000004c0030105070c0a100c
—TRCDW 0 —TRCDWA 3 —TRCDR 2 —TRCDRA 3 —TRRD 1 —TRC 7 —TRP_WRA 15 —TRP_RDA 2 —TRP 2 —TRFC 12 —PA2RDATA 0 —PA2WDATA 0 —TFAW 0 —TCRCRL 1 —TCRCWL 1 —TFAW32 2 —ACTRD 3 —ACTWR 1 —RASMACTRD 5 —RASMACTWR 7 —RAS2RAS 12 —RP 10 —WRPLUSRP 16 —BUS_TURN 12
0 — 400 MHz
1999000000000000022aa1c006094120fd0540c0815449101002041001d0314209a8880a2000004c006010a0f190e160d
—TRCDW 0 —TRCDWA 3 —TRCDR 5 —TRCDRA 5 —TRRD 1 —TRC 15 —TRP_WRA 21 —TRP_RDA 4 —TRP 5 —TRFC 25 —PA2RDATA 0 —PA2WDATA 0 —TFAW 0 —TCRCRL 1 —TCRCWL 1 —TFAW32 2 —ACTRD 6 —ACTWR 1 —RASMACTRD 10 RASM—ACTWR 15 —RAS2RAS 25 —RP 14 —WRPLUSRP 22 —BUS_TURN 13
0 — 800 MHz
2999000000000000022aa1c00a5ac351f10550e0c21c73203004482003d0914202a8900a5000004c00c06141a33182210
—TRCDW 5 —TRCDWA 5 —TRCDR 11 —TRCDRA 11 —TRRD 3 —TRC 31 —TRP_WRA 33 —TRP_RDA 7 —TRP 11 —TRFC 51 —PA2RDATA 0 —PA2WDATA 0 —TFAW 4 —TCRCRL 2 —TCRCWL 2 —TFAW32 4 —ACTRD 12 —ACTWR 6 —RASMACTRD 20 —RASMACTWR 26 —RAS2RAS 51 —RP 24 —WRPLUSRP 34 —BUS_TURN 16
0 — 1000 MHz
3777000000000000022aa1c002939572750550d0fa68803040068c200540c1420aa8900a6000004c00f0a191e401e2712
—TRCDW 9 —TRCDWA 9 —TRCDR 14 —TRCDRA 14 —TRRD 5 —TRC 39 —TRP_WRA 38 —TRP_RDA 8 T—RP 14 —TRFC 64 —PA2RDATA 0 —PA2WDATA 0 —TFAW 8 —TCRCRL 3 —TCRCWL 2 —TFAW32 6 —ACTRD 15 —ACTWR 10 —RASMACTRD 25 —RASMACTWR 30 —RAS2RAS 64 —RP 30 —WRPLUSRP 39 —BUS_TURN 18
0 — 1250 MHz
4777000000000000022aa1c00ad49593270550e12ad8a14050068c300640f1420ba8980a7000004c0130e202551242e13
—TRCDW 13 —TRCDWA 13 —TRCDR 18 —TRCDRA 18 —TRRD 5 —TRC 50 —TRP_WRA 45 —TRP_RDA 10 —TRP 18 —TRFC 81 —PA2RDATA 0 —PA2WDATA 0 —TFAW 8 —TCRCRL 3 —TCRCWL 3 —TFAW32 6 —ACTRD 19 —ACTWR 14 RASM—ACTRD 32 —RASMACTWR 37 —RAS2RAS 81 —RP 36 —WRPLUSRP 46 —BUS_TURN 19
0 — 1375 MHz
5777000000000000022aa1c00ef516a3790550f14b20b9505006ae40074021420ca89c0a8020004c01510232859283315
—TRCDW 15 —TRCDWA 15 —TRCDR 20 —TRCDRA 20 —TRRD 6 —TRC 55 —TRP_WRA 50 —TRP_RDA 11 —TRP 20 —TRFC 89 —PA2RDATA 0 —PA2WDATA 0 —TFAW 10 —TCRCRL 3 —TCRCWL 4 —TFAW32 7 —ACTRD 21 —ACTWR 16 RASM—ACTRD 35 —RASMACTWR 40 —RAS2RAS 89 —RP 40 —WRPLUSRP 51 —BUS_TURN 21
0 — 1425 MHz
6777000000000000022aa1c0010d66a3990550f14344cc505006ae40074031420ca8900a9020004c0161124295c293515
—TRCDW 16 —TRCDWA 16 —TRCDR 21 —TRCDRA 21 —TRRD 6 —TRC 57 —TRP_WRA 52 —TRP_RDA 12 —TRP 21 —TRFC 92 —PA2RDATA 0 —PA2WDATA 0 —TFAW 10 —TCRCRL 3 —TCRCWL 4 —TFAW32 7 —ACTRD 22 —ACTWR 17 RASM—ACTRD 36 —RASMACTWR 41 —RAS2RAS 92 —RP 41 —WRPLUSRP 53 —BUS_TURN 21
0 — 1500 MHz
7777000000000000022aa1c00315a6b3ca0550f15b68c1506006ae4007c041420ca8980a9020004c01712262b612b3715
—TRCDW 17 —TRCDWA 17 —TRCDR 22 —TRCDRA 22 —TRRD 6 —TRC 60 —TRP_WRA 54 —TRP_RDA 12 —TRP 22 —TRFC 97 —PA2RDATA 0 —PA2WDATA 0 —TFAW 10 —TCRCRL 3 —TCRCWL 4 —TFAW32 7 —ACTRD 23 —ACTWR 18 RASM—ACTRD 38 —RASMACTWR 43 —RAS2RAS 97 —RP 43 —WRPLUSRP 55 —BUS_TURN 21
0 — 1625 MHz
8777000000000000022aa1c0073627c41b0551016ba0d9606006c060104061420ea8940aa030004c01914292e692e3b16
—TRCDW 19 —TRCDWA 19 —TRCDR 24 —TRCDRA 24 —TRRD 7 —TRC 65 —TRP_WRA 58 —TRP_RDA 13 —TRP 24 —TRFC 105 —PA2RDATA 0 —PA2WDATA 0 —TFAW 12 —TCRCRL 3 —TCRCWL 6 —TFAW32 8 —ACTRD 25 —ACTWR 20 —RASMACTRD 41 —RASMACTWR 46 —RAS2RAS 105 —RP 46 —WRPLUSRP 59 —BUS_TURN 22
0 — 1750 MHz
9777000000000000022aa1c00b56a7d46c0551017be8e1607006c07010c081420fa8900ab030004c01b162c3171313f17
—TRCDW 21 —TRCDWA 21 —TRCDR 26 —TRCDRA 26 —TRRD 7 —TRC 70 —TRP_WRA 62 —TRP_RDA 14 —TRP 26 —TRFC 113 —PA2RDATA 0 —PA2WDATA 0 —TFAW 12 —TCRCRL 3 —TCRCWL 7 —TFAW32 8 —ACTRD 27 —ACTWR 22 —RASMACTRD 44 —RASMACTWR 49 —RAS2RAS 113 —RP 49 —WRPLUSRP 63 —BUS_TURN 23
0 — 2000 MHz
10999000000000000022aa1c0018f77e4fd055121946501708006c07011d0c1420fa8980ac030004c01e19323781364718
—TRCDW 24 —TRCDWA 24 —TRCDR 29 —TRCDRA 29 —TRRD 7 —TRC 79 —TRP_WRA 6 —TRP_RDA 16 —TRP 29 —TRFC 129 —PA2RDATA 0 —PA2WDATA 0 —TFAW 12 —TCRCRL 3 —TCRCWL 7 —TFAW32 8 —ACTRD 30 —ACTWR 25 —RASMACTRD 50 —RASMACTWR 55 —RAS2RAS 129 —RP 54 —WRPLUSRP 71 —BUS_TURN 24
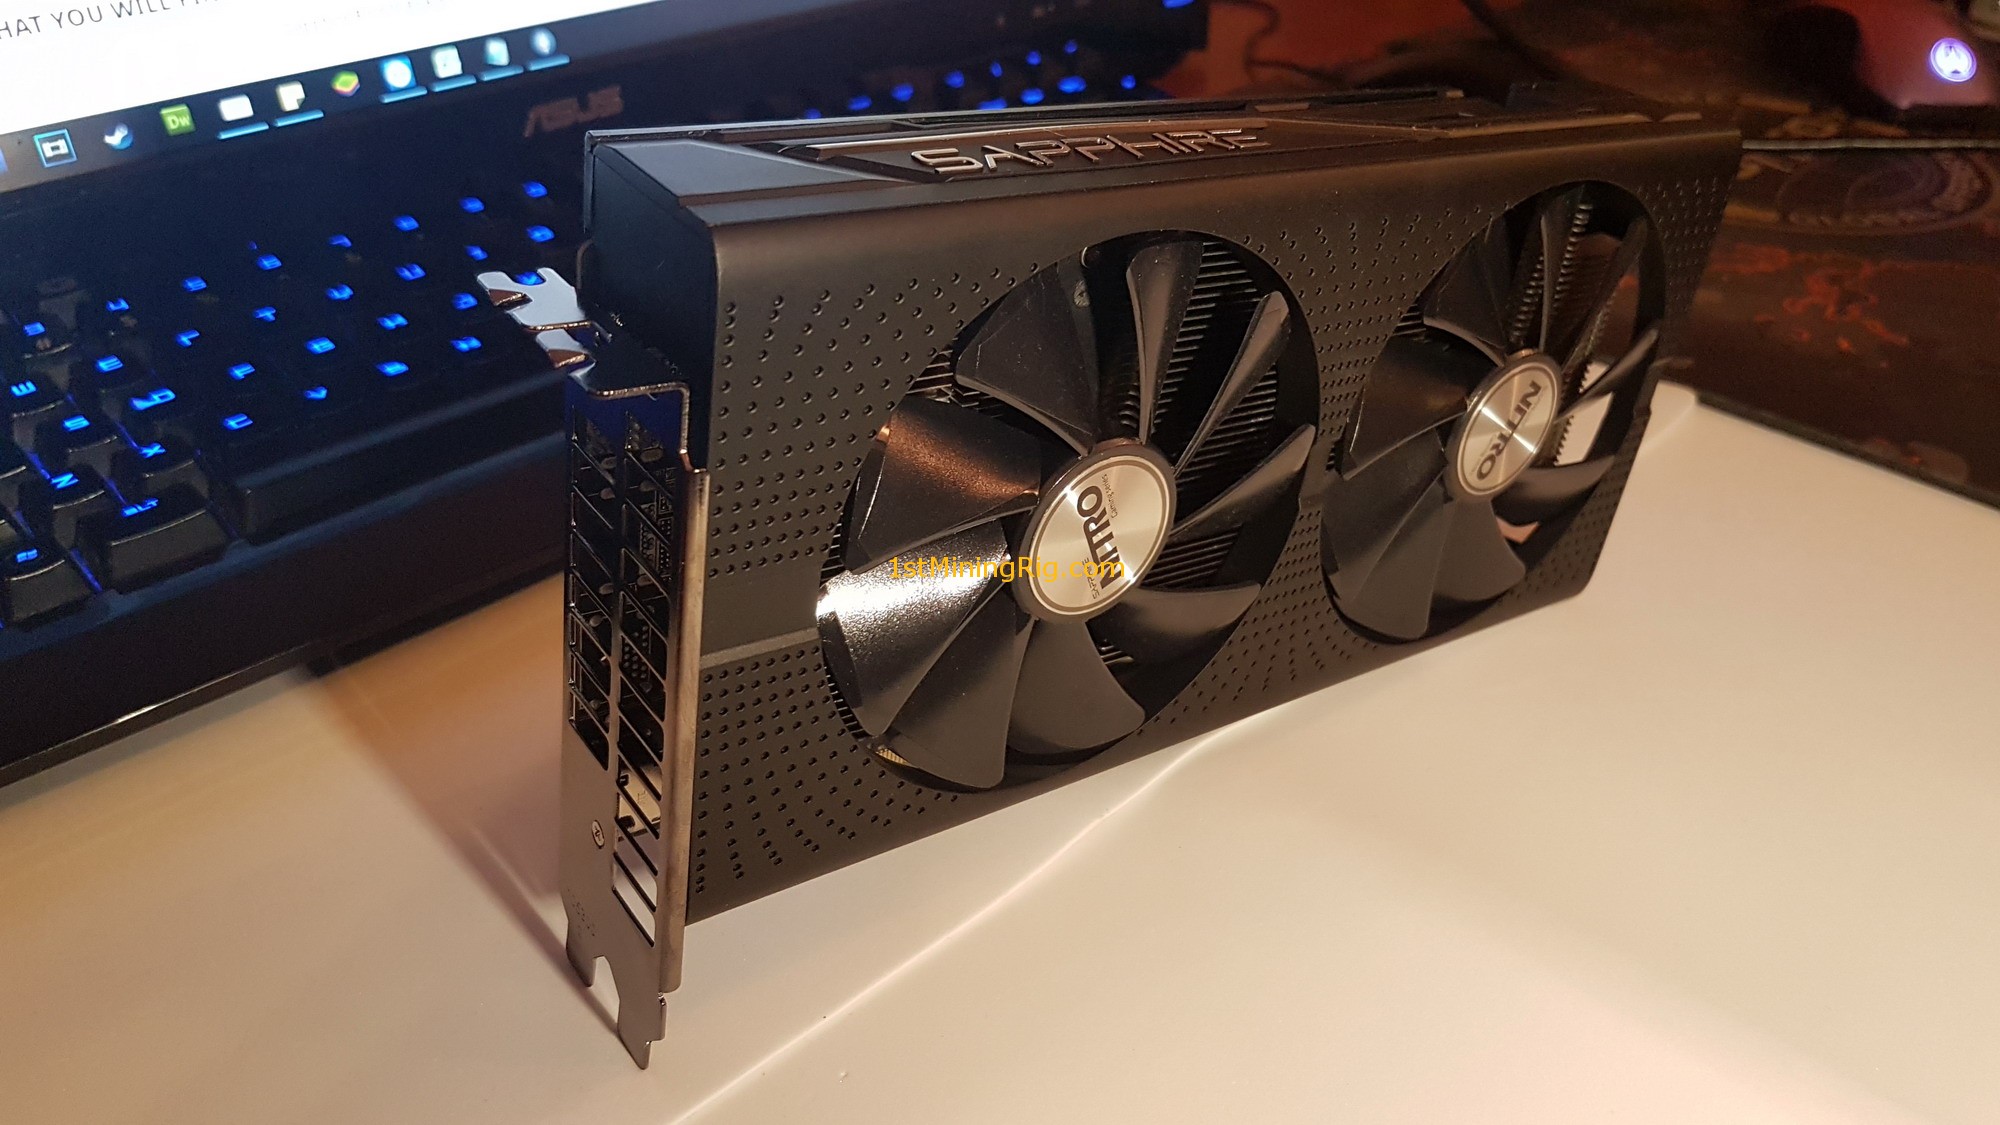
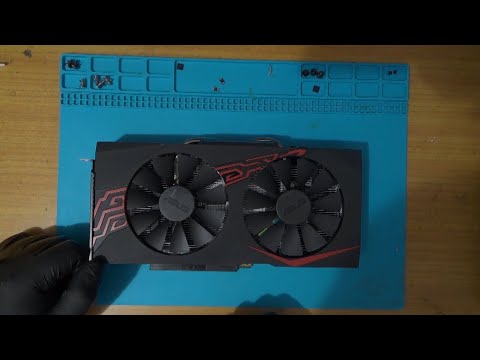
ASUS Radeon RX470 Mining Bios mod do 31MH/s ETH | Wrocław
Witam.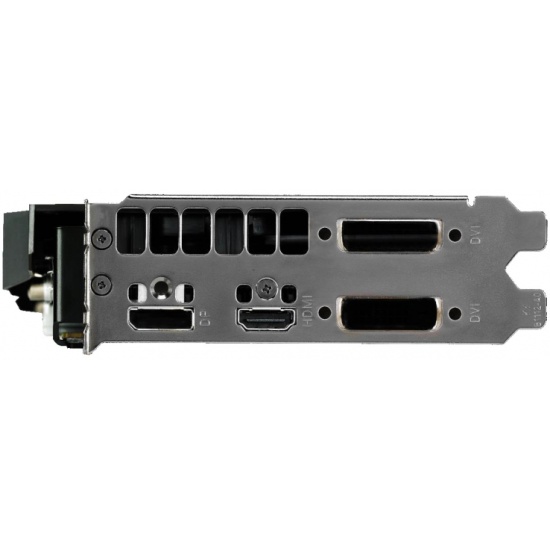 Na sprzedaż mam używane, w pełni sprawne karty ASUS Radeon RX470 Mining 4GB.
Karty nie naprawiane, nie rozbierane. Oryginalne plomby nie naruszone. Brak oryginalnych opakowań bo ich nigdy nie było. Kupiłem nowe w workach.
Karty dedykowane do wydobywania kryptowalut, lecz doskonale sprawdzą się również w komputerze do gier.
Zaleta karty miningowej: Długa żywotność, rozsądna cena
Wada karty miningowej: brak lub mniejsza liczba złączy monitora. W tym przypadku tylko jedno złącze DVI.
Sprzedawane karty mają zmodyfikowany Bios w celu optymalizacji wydobycia Ethereum. Na życzenie mogę jednak wgrać spowrotem fabryczny bios albo bios zoptymalizowany do dual minigu (ostatniego nie polecam ze względu na duży stres karty i znikome korzyści ekonomiczne).
Dzięki wgranej modyfikacji, wyciągają przy odpowiednich ustawieniach do 31 MH/s (ethereum, calymore, single mining). Tych wyników jednak nie gwarantuję, bo zależą od sprzętu i różnych ustawień. Można jednak sprawdzić w internecie i sam mogę też to udowodnić przed sprzedażą.
W porównaniu z fabrycznym biosem (18-20MH/s) jest to przepaść. W tym miejscu dodam że najlepsze efekty modyfikowania biosu są możliwe właśnie u radeonów z pamięciami hynix. Niniejszy model karty jest produkowany z różnymi pamięciami. Często sprzedawcy nawet tego nie podają, natomiast karty na tej aukcji wszystkie są z najlepszymi pamięciami Hynix.
Chętnie odpowiem na dodatkowe pytania.
Pozdrawiam serdecznie,
Piotr
NA koniec trochę propagandy o karcie ze strony producenta:
https://www.asus.com/pl/Graphics-Cards/MINING-RX470-4G/
ASUS Mining RX 470 to karta zaprojektowana do miningu monet, która jest wyposażona w komponenty o najwyższej efektywności i zapewnia maksymalną wydajność tworzenia hashów, przy minimalnych kosztach
Wentylatory z podwójnym łożyskiem kulkowym pracują bardziej płynnie dzięki redukcji tarcia, co zapewnia wyposażonym w nie kartom 2x dłuższą żywotność i wyższą wydajność chłodzenia.
Wentylatory z certyfikatem IP5X oferują ochronę przed kurzem i dłuższą żywotność.
Branżowa technologia Auto-Extreme i materiał Super Alloy Power II, zapewniają najwyższą jakość i najwyższą niezawodność.
GPU TWEAK II pozwali Ci zmodyfikować taktowanie GPU, taktowanie pamięci oraz napięcie, dla uzyskania najlepszych wyników tworzenia hashów.
Nieustanny mining monet
Karta graficzna ASUS Mining RX 470 została zaprojektowana z myślą o najwyższej wytrzymałości, dzięki czemu możliwy jest nieustanny mining przez 24 godziny na dobę. Dzięki dołączonemu oprogramowaniu GPU Tweak II, które umożliwia łatwe dostrojenie prędkości taktowania zegara oraz napięcia, karta ASUS Mining RX 470 oferuje najważniejsze funkcje sprzętowe oraz oprogramowanie wymagane przez górników krypto-waluty dla osiągnięcia wymarzonego zysku. Dlatego te nowe karty są idealnym wyborem dla osób składających systemy do miningu, przy najlepszym możliwym stosunku kosztów do wydajności.
Porty wejścia/wyjścia
1 x Bezpośrednia obsługa DVI-D
TRWAŁOŚĆ NON STOP
Wentylatory z podwójnym łożyskiem kulkowym 0dB
Typowy dla wentylatorów z łożyskami tulejowymi problem wysychania oleju nie dotyczy wentylatora z dwoma łożyskami kulkowymi na karcie ASUS Mining RX 470, toteż ma ona 2-krotnie dłuższą trwałość. Przy zmniejszonym tarciu działa też płynniej, jeszcze bardziej poprawiając żywotność karty i skuteczność chłodzenia.
Odporność na kurz potwierdzona certyfikatem IP5X
Dłuższa żywotność wentylatorów
Wentylatory zastosowane w kartach graficznych Mining RX 470 są certyfikowane w ramach International Protection Marking (stopnia ochrony) na poziomie IP5X w zakresie odporności na kurz, co zwiększa ich niezawodność i wydłuża ich żywotność. Ten rygorystyczny proces certyfikacji gwarantuje, że karty graficzne Mining RX 470 oferują optymalną wydajność wentylatorów, nawet w trudnych warunkach.
Technologia AUTO-EXTREME
z Super Alloy Power II
Karty graficzne ASUS są teraz produkowane w technologii AUTO-EXTREME, pierwszym w branży w 100% automatycznym procesie produkcji; zostały również wyposażone w komponenty Super Alloy Power II, które zwiększają wydajność,zmniejszają utratę mocy, zapewniają cichsze działanie komponentów przy pełnym obciążeniu, a także osiągają niskie temperatury, zapewniając niezrównaną jakość i niezawodność.
GPU Tweak II
Podrasuj sprzęt zgodnie ze swoimi upodobaniami
Wzbogacony o nowy i intuicyjny nowe interfejs procesor GPU Tweak II sprawia, że przetaktowanie jest łatwiejsze i bardziej wizualne niż kiedykolwiek. Jednocześnie zachowano opcje zaawansowane dla doświadczonych maniaków przetaktowania. Za pomocą jednego kliknięcia, nowa funkcja Gaming Booster maksymalizuje wydajność systemu poprzez usunięcie zbędnych procesów i automatyczne przypisanie wszelkich dostępnych zasobów.
Gaming Booster
Podnieś wydajność jednym kliknięciem
Efekty wizualne:
Zwiększ wydajność wyłączając efekty wizualne systemu Windows.
Usługi systemowe:
Automatyczne lub ręczne wyłączenie usług lub procesów systemu Windows.
Defragmentacja pamięci:
Przeorganizuj i uwolnij pamięć systemową bez zamykania żadnych procesów.
Çözüldü: RX 470 Mining Edition sürücü yükleme
Bu konu çözüldü olarak işaretlenmiştir. Çözülmediğini düşünüyorsanız konuyu rapor edebilirsiniz.
ibrahimhoke
Hectopat
-
-
#1
Siteden sürücüyü kurduğumda «No AMD Graphics driver is installed or the AMD driver is not functioning properly» hatası alıyorum.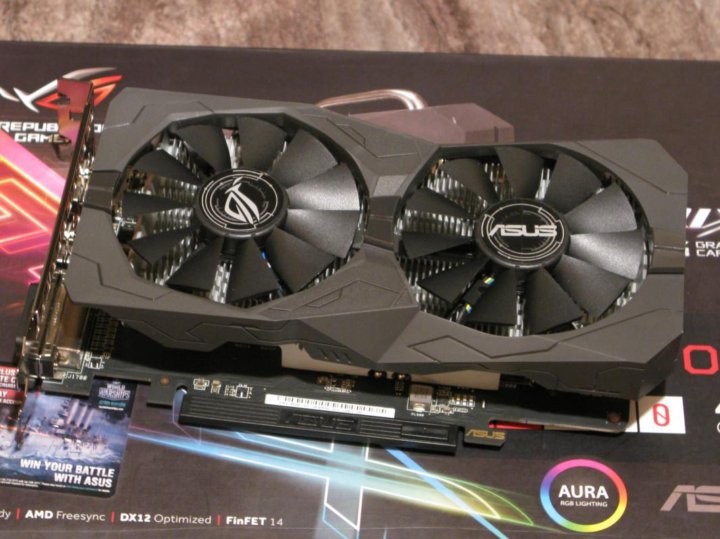 Birkaç kere sürücüyü DDU ile silip tekrar denedim, olmadı. Bilgisayara format attım yine düzelmedi. Kart mining Edition olduğu için sanırım. Çözümü nedir? Orijinal BIOS yüklemem mi gerekiyor? Öyleyse nasıl yapacağım?
MSI 970 Gaming Anakart.
MSI RX 470 4 GB Mining Edition Ekran Kartı.
DDR3 12 GB 1600MHz RAM.
Thermaltake Litepower 450W PSU.
-
LayThese
Öncelikle belirteyim bu işlem garantisi olan kart için değildir. Geri dönülemez sorunlara yol açabilir ve kartı kullanılamaz hale getirebilir. İlk önce bunlara hazırlıklı olup olmadığınızı düşünün.
Hazırlıklıysanız şu dosyayı indirin:
https://nl1-dl.techpowerup.com/files/zzKiBcE27fWDdhu8lpmzpg/1611933030/atiflash_293.zip
İlgili dosyayı indirdikten sonra RAR’dan çıkarıp indirdiğiniz BIOS dosyasını çıkardığınız klasöre atın.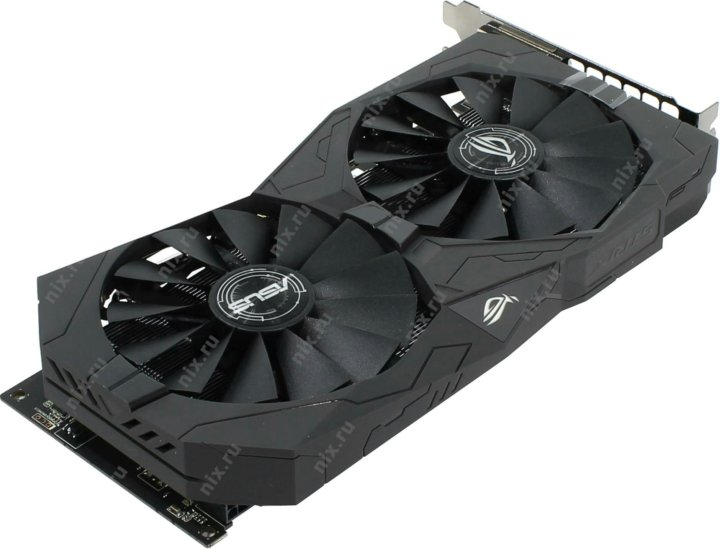
Ardından programı yönetici olarak başlatıp Save butonu yardımıyla kartınızın hali hazırda çalışan BIOS’unu yedekleyin.
Yedekleme bittikten sonra Load Image dediği butona basıp indirdiğiniz BIOS dosyasını kartınıza flash’layıp yeniden başlatın.
Yeniden başlattığınızda görüntü geldiyse ve bozulma yoksa sorun yok demektir.
Eğer gelmediyse karta ya hasar vermişsinizidir ya da BIOS kartınızla uyumlu değildir.
Tarihe göre sırala
Puana göre sırala
Baş-ül Adam
Hectopat
-
-
#2
Orjinal BIOS’unu AtiFlash ile yazdırıp kullanabilirsiniz. Riskli bir iş haberiniz olsun.
Artı
0
Eksi
ibrahimhoke
Hectopat
-
-
#3
Baş-ül Adam dedi:
Orjinal BIOS’unu AtiFlash ile yazdırıp kullanabilirsiniz.
Riskli bir iş haberiniz olsun.
Genişletmek için tıkla…
Sorun çözülür mü? Yapılışını ayrıntılı anlatan bir konu veya video var mıdır?
@LayThese Hocam siz bu konuda bilgilisiniz sanırsam, yardımcı olursanız sevinirim.
Artı
0
Eksi
Baş-ül Adam
Hectopat
-
-
#4
ibrahimhoke dedi:
Sorun çözülür mü? Yapılışını ayrıntılı anlatan bir konu veya video var mıdır?
@LayThese Hocam siz bu konuda bilgilisiniz sanırsam, yardımcı olursanız sevinirim.

Genişletmek için tıkla…
Artı
0
Eksi
hknbrspzr
Hectopat
-
-
#5
GPU-Z indirip ekran görüntüsünü atın. Yanlış VRAM tipine ait BIOS’u indirirseniz ekran kartı çöp olabilir.
Artı
0
Eksi
ibrahimhoke
Hectopat
-
-
#6
hknbrspzr dedi:
GPU-Z indirip ekran görüntüsünü atın.
Yanlış VRAM tipine ait BIOS’u indirirseniz ekran kartı çöp olabilir.
Genişletmek için tıkla…
@hknbrspzr attım hocam.
Artı
0
Eksi
LayThese
Kilopat
-
-
#7
Artı
0
Eksi
ibrahimhoke
Hectopat
-
-
#8
LayThese dedi:
Genişletmek için tıkla.
..
Hocam bu işlemi nasıl gerçekleştireceğim? Hiçbir bilgim yok bu konuda. Şimdiden çok teşekkür ederim.
Artı
0
Eksi
LayThese
Kilopat
-
-
#9
Öncelikle belirteyim bu işlem garantisi olan kart için değildir. Geri dönülemez sorunlara yol açabilir ve kartı kullanılamaz hale getirebilir. İlk önce bunlara hazırlıklı olup olmadığınızı düşünün.
Hazırlıklıysanız şu dosyayı indirin:
https://nl1-dl.techpowerup.com/files/zzKiBcE27fWDdhu8lpmzpg/1611933030/atiflash_293.zip
İlgili dosyayı indirdikten sonra RAR’dan çıkarıp indirdiğiniz BIOS dosyasını çıkardığınız klasöre atın.
Ardından programı yönetici olarak başlatıp Save butonu yardımıyla kartınızın hali hazırda çalışan BIOS’unu yedekleyin.
Yedekleme bittikten sonra Load Image dediği butona basıp indirdiğiniz BIOS dosyasını kartınıza flash’layıp yeniden başlatın.
Yeniden başlattığınızda görüntü geldiyse ve bozulma yoksa sorun yok demektir.
Eğer gelmediyse karta ya hasar vermişsinizidir ya da BIOS kartınızla uyumlu değildir.
Artı
0
Eksi
Çözüm
ibrahimhoke
Hectopat
-
-
#10
LayThese dedi:
Öncelikle belirteyim bu işlem garantisi olan kart için değildir.
Geri dönülemez sorunlara yol açabilir ve kartı kullanılamaz hale getirebilir. İlk önce bunlara hazırlıklı olup olmadığınızı düşünün.
Hazırlıklıysanız şu dosyayı indirin:
https://nl1-dl.techpowerup.com/files/zzKiBcE27fWDdhu8lpmzpg/1611933030/atiflash_293.zip
İlgili dosyayı indirdikten sonra RAR’dan çıkarıp indirdiğiniz BIOS dosyasını çıkardığınız klasöre atın.
Ardından programı yönetici olarak başlatıp Save butonu yardımıyla kartınızın hali hazırda çalışan BIOS’unu yedekleyin.
Yedekleme bittikten sonra Load Image dediği butona basıp indirdiğiniz BIOS dosyasını kartınıza flash’layıp yeniden başlatın.
Yeniden başlattığınızda görüntü geldiyse ve bozulma yoksa sorun yok demektir.
Eğer gelmediyse karta ya hasar vermişsinizidir ya da BIOS kartınızla uyumlu değildir.
Genişletmek için tıkla…
Çok teşekkürler. Akşam deneyeceğim, umarım hasar vermem. Bu arada BIOS kartımla uyumlu değil diyelim, kurduktan sonra geri dönüşü var mı?
Artı
0
Eksi
RX 470 Mining Edition standart BIOS yükleme
- babacan96
- Aygıt Sürücüleri
- Mesaj
- 0
- Görüntüleme
- 2B
babacan96
RX 470 sürücü yükleme hatası
- mertkynrpnr
- Aygıt Sürücüleri
- Mesaj
- 2
- Görüntüleme
- 93
mertkynrpnr
Sapphire RX 470 sürücü yüklenemiyor
- Erg1507
- Aygıt Sürücüleri
- Mesaj
- 2
- Görüntüleme
- 478
Zikzeus
AMD RX 470 sürücü kurulumunda «hata 206» sorunu
- Mertkarasu
- Aygıt Sürücüleri
- Mesaj
- 1
- Görüntüleme
- 3B
fenerlisosyalmemuru
RX 470 4 GB Adrenalin olmayan sürücü nereden indirilir?
- Kaanokz
- Aygıt Sürücüleri
- Mesaj
- 4
- Görüntüleme
- 221
Kaanokz
Paylaş:
Facebook
Twitter
Reddit
Pinterest
Tumblr
WhatsApp
E-posta
Paylaş
Link
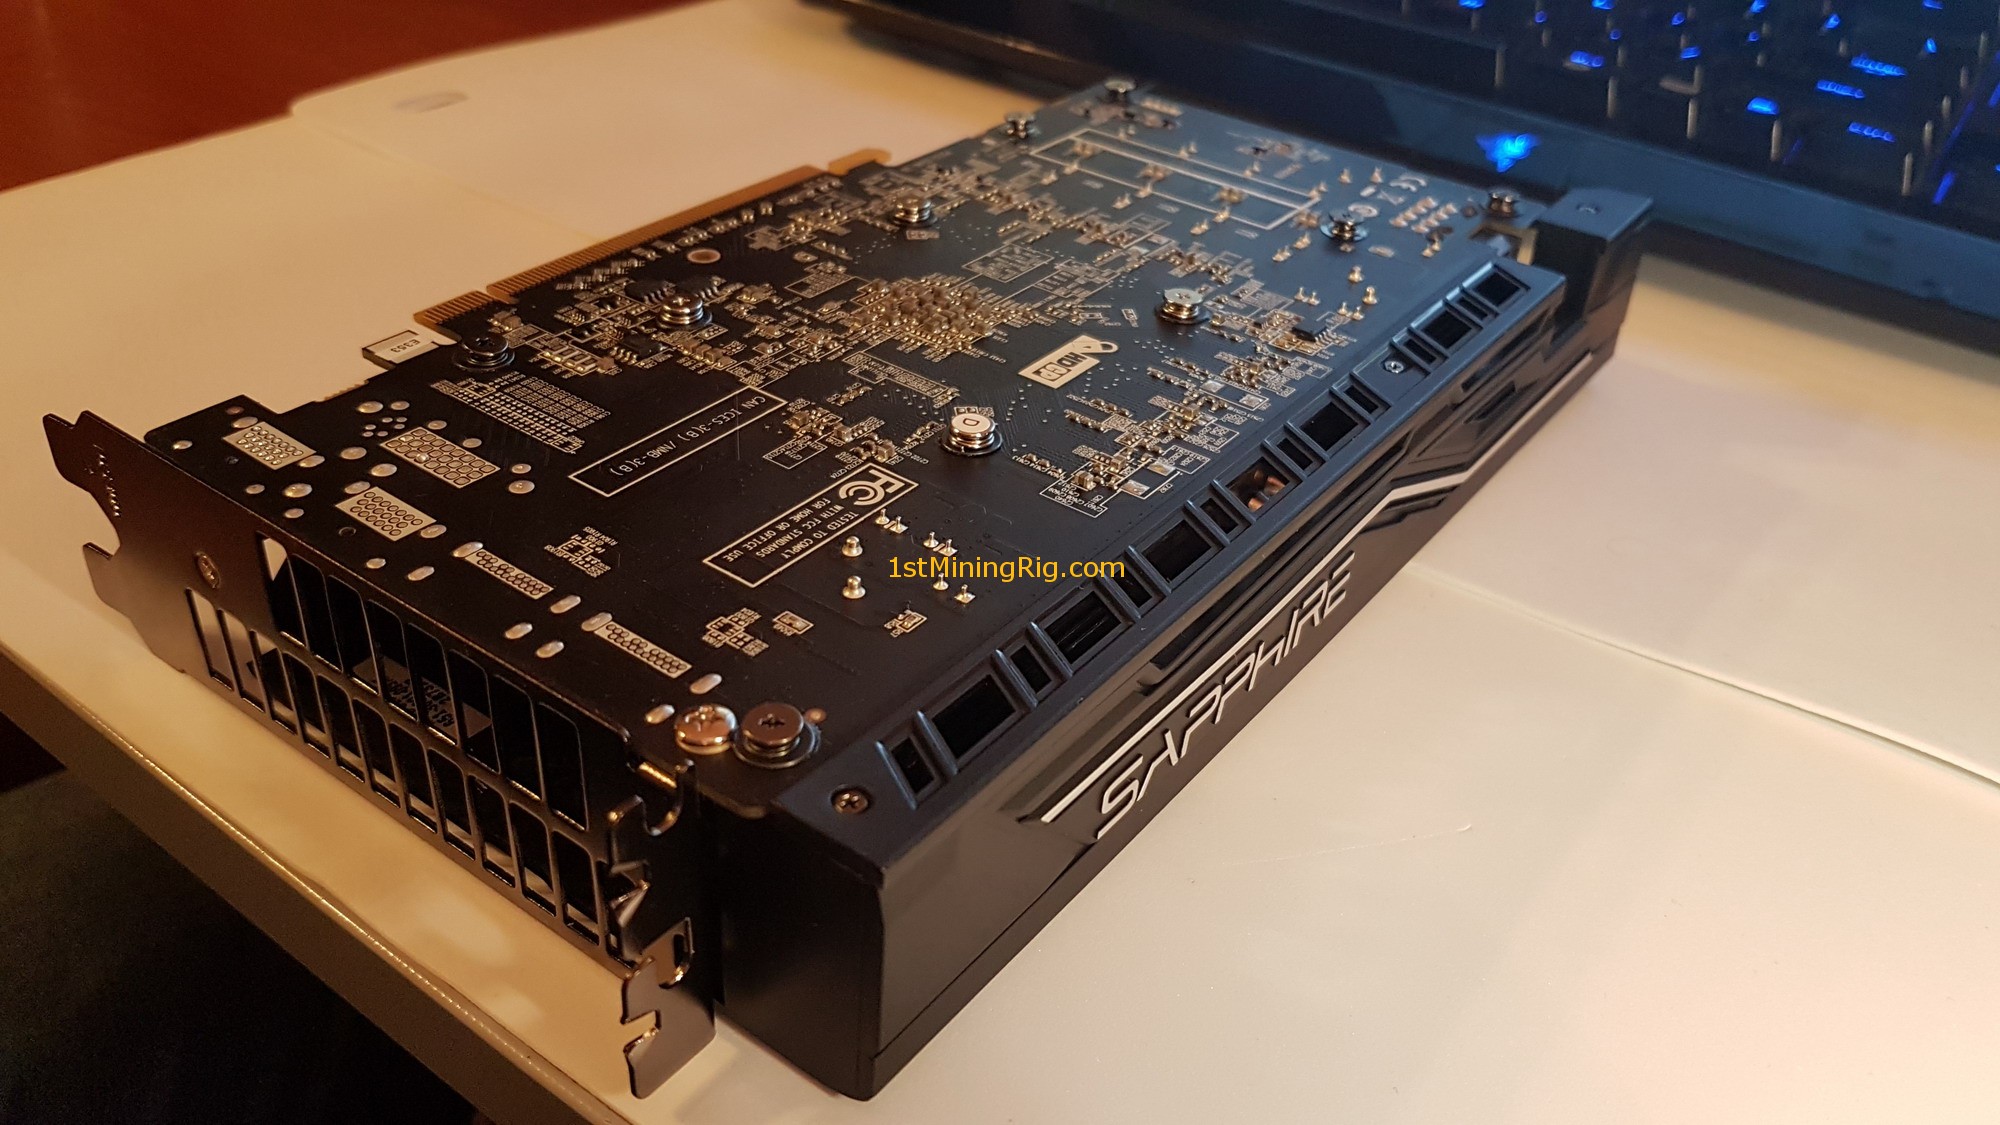
Best BIOS ROM for Sapphire RX 470 8GB Mining Edition with Samsung Memory 29 — 30 MH/s
CV. | September 30, 2017 | BIOS, GPUs, How to, Mining Hardware, Tutorials | 113 Comments
Hello and welcome to my tutorial on how to make a Sapphire RX 470 8GB Mining Edition (ME) hash 29 – 30 MH/s. I have reviewed the card some time ago – you can click here to know more about the specs, pricing and other aspects of the card.
This is my first BIOS and mining performance test of a mining edition GPU.
I’m really excited about this guide because I have found the exact steps on how to make the card hash properly and I will be sharing all of them with you right now.
If you liked this guide, you might also be interested in my 570 8GB mining edition GPU one. I will be posting it soon, so stay tuned.
What You Will Find In This Guide
Do you have trouble configuring your Sapphire RX 470 8GB ME? Do you feel depressed because your card fails to hash properly? Are you considering selling it because it simply refuses to work? I know how you feel. Luckily enough, I have discovered the needed steps to make my Sapphire hash normally. It took me a lot of research and trial and error; I have made this tutorial so you don’t have to reinvent the wheel.
The trick is to find the right BIOS version and spice it up with the right clocks. I have managed to make hash properly each of my four Sapphire RX 470 8GB ME. Hashrate is stable so far, as well as power consumption.
Follow
youtube
Before we start with the guide, I’d want to mention that Sapphire RX 470 8GB ME have some sort of design issue that makes them hard to set up for mining. Since other people are apparently facing the same exact problems, I’ve thought that I’d start this guide with some troubleshooting.
If you are like me, you will encounter one or more of the following bugs along the way. Therefore, I thought it would be a good idea to inform you on the potential problems you might face and provide you with the adequate solutions.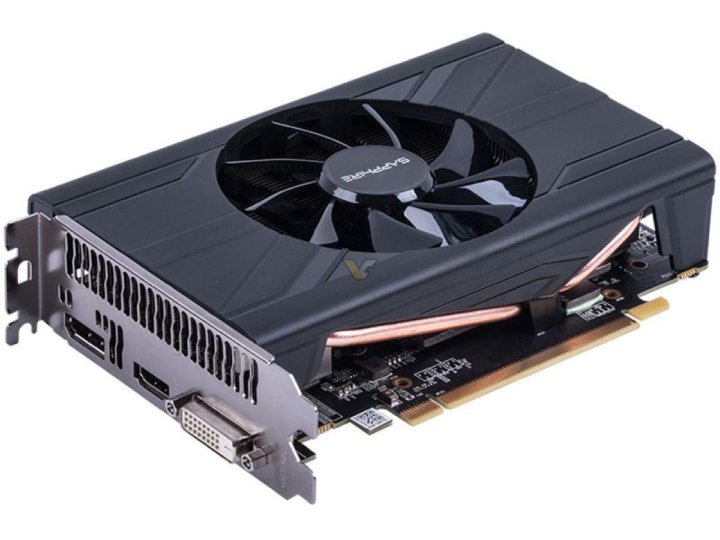
Note: The Sapphire RX 470 8GB Mining Edition I am using have Samsung memory – this bios wont work with Hynix memory chip manufacturer.
Problems and Fixes
I will update this list with more problems and solutions soon.
- GPU not recognized by atiflash
- Uninstall drivers with latest version of DDU in safe mode.
- Install latest mining edition drivers
- Download latest Atiflash 2.77 and try again
- Also try to backup via CMD and apply the patch
- Exclamation mark in device manager after rig reboot
- Apply the patch and restart
- Flashing BIOS error message
- If you get that while trying to flash the bios via atiflash gui, try again via CMD with –f –p
- If you still get the same error message switch BIOS jumpers to the other side and try again (you can do it without restarting the rig)
- Empty Backup BIOS – 0 KB BIOS Size
- For some reason, the silent BIOS version that was saved by atiflash resulted in a 0 KB file.
 I was able to backup it with GPUz and getting a full-sized back-up with a size of 256 KB. You can also try to backup via CMD using –s command (I missed that)
- For some reason, the silent BIOS version that was saved by atiflash resulted in a 0 KB file.
- Claymore no AMD or CUDA GPU detected
- Apply the patch and restart the rig
Software and Tools used for this tutorial
- Drivers Official AMD Mining Drivers
- Atiflash 2.77 https://www.techpowerup.com/download/ati-atiflash/
- Latest Claymore Miner https://mega.nz/#F!O4YA2JgD!n2b4iSHQDruEsYUvTQP5_w
- ATImdag Patcher https://www.monitortests.com/atikmdag-patcher-1.4.5.zip
- Display Driver Uninstaller http://www.guru3d.com/files-details/display-driver-uninstaller-download.html
- MSI Afterburner BETA http://forums.guru3d.com/showpost.php?p=5459908&postcount=637
Tutorial Contents
- 1 Problems and Fixes
- 2 Software and Tools used for this tutorial
- 2.
 1 The BIOS
 - 2.2 Stock BIOS Hashrate Performance
- 2.3 How to Make the Rig Work without the GPU Display Adapter
- 2.4 Flashing the BIOS
- 2.5 My results with this BIOS ROM
- 2.
The BIOS
As you already know, the card offers 4 BIOS versions to choose from (Quad UEFI BIOS). Here is how this works, according to the manufacturer:
- BIOS #1 (default mode) has the maximum performance
- BIOS #2 is called ‘Efficiency’ and in theory it should make the GPU consume less power and consequently output lower hashrate
- BIOS #3 and #4 another two BIOS set like the efficiency one.
I have tried all of them and I wasn’t able to get more than 27 MH/s. In fact, there were times I was getting only 23 MH/s. Yeah, I know… you can express your condolences in the comment section. Fun fact is that power consumption always remains the same, no matter which one of the four BIOSes you choose.
Stock BIOS Hashrate Performance
- BIOS #1: 27 Mh/s (download)
- BIOS #2: 24 Mh/s (download)
- BIOS #3: 27 Mh/s (download)
- BIOS #4: Error :/ (download)
How to Make the Rig Work without the GPU Display Adapter
Mining edition GPUs come with no display adapters to reduce costs. In on order to have an image on your monitor, you’ll have to connect an HDMI cable directly to the motherboard. Then, you’ll have to do a couple BIOS modifications and you’re set. Let’s review the steps in detail:
(In my case, I am using an AsRock H81 PRO BTC R2.0)
- Access Motherboard BIOS
- Go to Advanced tab, then Chipset Configuration
- On Primary Graphics Adapter choose “Onboard”
- Save changes and exit
- Now you are able to have display via the motherboard.
 The thing is that if you open MSI Afterburner, you will notice that “Core Voltage (mV)” is frozen and cannot be changed. Here’s what you do to fix that:
 - First make sure MSI Afterburner is closed; go to “Device manager”, dropdown Display Adapters, right click on “Microsoft Basic Display Adapter” and disable it. Now, start MSI Afterburner; if you still see the voltage frozen then you probably forgot to unlock it in the settings. Simply go to Settings -> General tab and check “Unlock Voltage Control” and “Unlock Voltage Monitoring” boxes.
- That’s it; now let’s move on to the next steps
Flashing the BIOS
Since this card has two BIOS switches with 4 BIOS versions, I had to test each of them to achieve the best results. If you try each of the versions on default settings, you will not achieve more than 28 MH/s. You can test it on your own if you want to.
This is why we have to flash it to achieve better results. Important Note: I have modded the Efficiency Setting BIOS. This means that before flashing it you will have to toggle both bios switches down and restart the rig
1 Back Up the BIOS
Before flashing the new BIOS, I recommend you to back up the original one first.
- If you don’t know how to do it follow point 2 from my previous tutorial: click here
2 Download Modded BIOS for Sapphire RX 470 8GB Mining Edition
V1: https://mega.nz/#!ghpiTCJT!5ZBEA-qEDhNlW2Mb-irZ-6OcCOZZCbTl-NY7CjzDGOw
V2: https://mega.nz/#!hhh0XKoR!klV0tzoAPCtcYR0011taY2iDxYtUTljyi7hIMDjsyTY
3 Flashing
VERY IMPORTANT: Always extract ATIflash to C:/atiflash folder and place the ROM file that needs to be flashed in the same directory
If you need help, follow point 5 from my previous tutorial or check the following video: click here
I hope everything is clear from the video firmware bios video card amd. If you have questions, ask in the comments.
Now I’ll post screenshots in case the video doesn’t load. And so, after opening the BIOS in Polaris BIOS Editor.
Press One CLICK TIMING PATCH, and then save the firmware by pressing SAVE AS. This is an automatic selection of timings, a new feature from the Polaris BIOS Editor program. If your timings suddenly do not fit, for example, video cards will be slower to mine, then you will have to select the timings manually. You still need to watch the video though.
And so, after saving the timings, run ATIWinflash (.exe) again as an administrator.
And so, I think everything is clear. Select the card (blue arrow), then select our firmware where you saved it (red arrow). Next, click Program and wait, the computer may hang a little, but while the card is being programmed, nothing needs to be done. Then a window will fly out that the video card is flashed. All amd radeon video card bios firmware for mining is finished. After that, we restart the computer.
But you will most likely have problems. After flashing:
Doesn’t see the video card
Error 43
drivers are not installed
Don’t panic, this is easily solved by installing the patch — download Atikmdag patcher 1.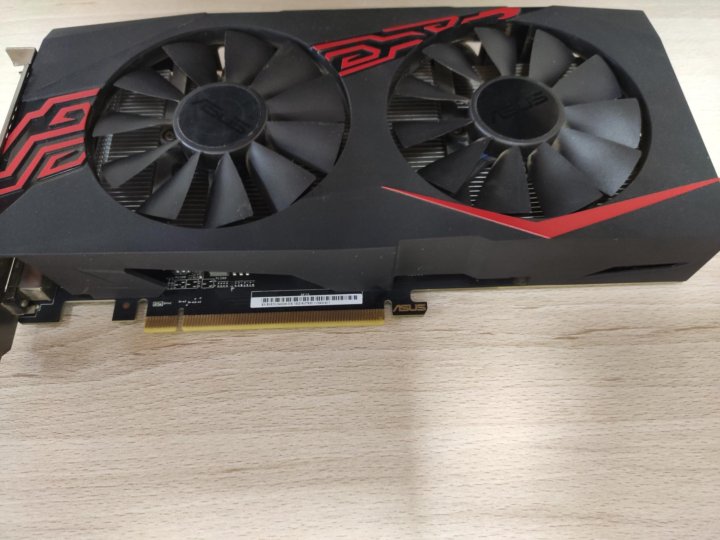 4.6. Downloaded, unzipped. Launched and clicked Yes. After patching, reboot. And voila, everything works.
After flashing, we see the following results (under overclocking).
This is a stitched rx 580 nitro + from sapphire. Timings since 1500.
Overclocking:
If your speed after the firmware has not increased much, you need to install either block chain or DAG fix drivers. But more on that in an article later. It seems to be everything.
I also advise you to read.
Mining rx 570 msi
Mining r9 390 asus
Mining Monero
Thank you all for your attention. Bye.
I also wanted to add that the bios firmware of the nvidia video card is not needed for mining! She won’t give anything.
How to flash BIOS on AMD Radeon RX 400/500 for Ethereum mining
What are the advantages of firmware
AMD Radeon RX 470/480/570/580/590 video cards at stock settings give out 22-24Mh/s when mining Ethereum.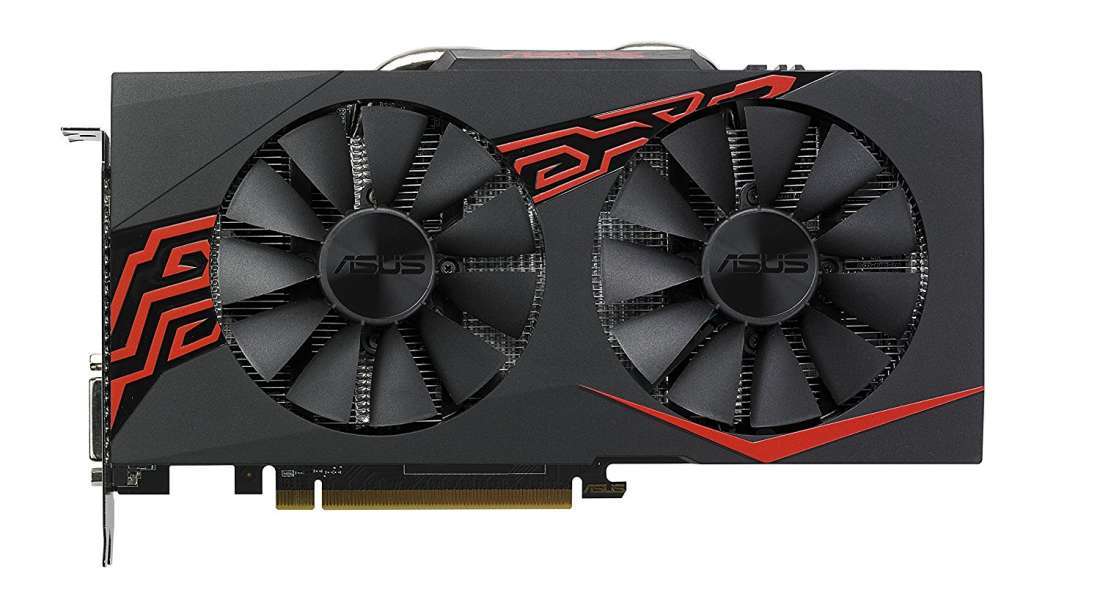 You can squeeze out 29-31Mh / s if you change the video memory timings. There is only one way to lower the timings on AMD cards — by modifying and flashing the BIOS of the video card.
Why lower timings?
RAM and video memory have two important indicators:
- Memory frequency indicates the speed of its operation. The higher the frequency, the faster data moves from the GPU to the memory chip and vice versa.
- Timings , they are also delays, determine how long the memory chip will search for the desired cell inside itself for writing or reading.
Imagine yourself driving a Ferrari, which at the moment accelerates to frequency 250 km/h. There is no point in such speeds if you are constantly standing at traffic lights timing .
Memory performance can be increased in three ways:
- Raise the frequency;
- Lower timings;
- Raise frequency + lower timings.

Which graphics cards can use this method?
Theoretically, on any. But on most video cards, this will have to be done manually, so in this article we will only consider the AMD Radeon RX400 and RX500 line, that is, RX460, 470, 480, 550, 560, 570, 580, 59 video cards0. For these video cards, there is a handy Polaris Bios Editor program that shows all the values in a convenient form and automatically selects the necessary timings.
Be aware of the risks before changing video memory timings. Be sure to test the video card for stability after flashing. When in doubt, limit yourself to memory overclocking.
We want to do a lot of things to make mining Ethereum easier and more profitable. The procedure may seem complicated, but following our instructions everything will go smoothly. You need to:
- Install the latest driver from AMD, everything in it is optimized for mining;
- Enable calculation mode. (go to the driver control panel and enable)
- Apply the atikmdag-patcher patch so that the driver does not swear at non-original bios;
- Find out the manufacturer of the video memory and make a copy of the original BIOS via GPU-Z;
- Modify bios via Polaris Bios Editor;
- Flash modified BIOS via AtiWinFlash;
- Enjoy big income!
For AMD Radeon RX4xx and RX5xx video cards, the procedure is the same. Flashing the timings increases the hashrate on all algorithms that depend on the speed of video memory, for example, on DaggerHashimoto and CryptoNight.
For example, we took MSI’s Radeon RX480 8Gb from the GamingX line with memory chips manufactured by Samsung and will measure its performance on Ethereum. Without overclocking and without flashing it turns out 24Mh / s.
Install the correct driver
Install the latest AMD driver and enable compute mode (go to driver control panel and enable). This is how you optimize video cards for mining, and get more stability and a high hash rate.
Restart your computer after installing the driver.
Apply patch
Run atikmdag-patcher.exe to disable the BIOS checksum check in the driver. If this is not done, the driver will not be able to recognize your video card.
Need to patch driver
Back up the original BIOS
Launch GPU-Z and do two things:
- Find out the manufacturer of the video memory.
 This information is useful if your card’s BIOS contains settings for different manufacturers.
 - Make a copy of the original BIOS: click on the arrow, select «Save to file …» in the drop-down menu and save the file to a convenient location, for example, to the desktop.
Find out memory manufacturer and backup bios via gpu-z
Save this file in a safe place! With it, you can always return the original BIOS.
Modify the BIOS
Open Polaris Bios Editor. In the upper left corner, click on «OPEN BIOS» and select your file that you just saved.
The program allows you to change the frequencies, voltages, heat pack and temperature limits of the video card, as well as edit the video memory timings.
Looking at timings in Polaris Bios Editor
In the lower right area, column «Timing Strap» displays the timings for each frequency — long combinations of letters and numbers. Each frequency has its own values. You can change them in one of three ways:
- Press the ONE CLICK TIMING PATCH button. The application will automatically select the necessary timings. We recommend this method for beginners.
- Copy timing from frequency below and apply it to frequency above. For example, take the timing from 1500MHz and set it to 1625MHz, 1750MHz, 2000MHz.
- Search the Internet for a specific value that works best for your memory. The most dangerous way. There is a risk that your card will refuse to work with such timings.
Save the modified BIOS to a separate file after changing the timings.
Do not overwrite the original BIOS by mistake! Save the file side by side as a copy.
Flash a new BIOS
Run AtiWinFlash with administrator rights.
Flashing video via AtiWinFlash
- Select the required video card if you have several.
- Click on «Load Image» to select a new BIOS.
- The «Program» button will flash a new file into the BIOS of your video card.
Be sure to restart your computer after flashing.
Congratulations! You did it!
If something went wrong…
Flash the BIOS back to the original one if you notice unstable computer operation or visual artifacts.
What to do if the video card does not display a picture after flashing?
Don’t panic. You need a second video card, built into the processor or motherboard is suitable. Install both cards in the computer, connect the monitor to the working card. According to the instructions above, flash the original BIOS into the faulty card using AtiWinFlash.
What should I do if AtiWinFlash does not see the card after flashing?
Take the video card to the nearest service center and ask them to flash the BIOS with a programmer. Don’t forget to bring your flash drive with the original BIOS!
What if the driver does not detect the card?
Run atikmdag-patcher. exe again
Test: VRAM optimization can increase mining performance by 30 percent cannot be considered fully developed. Unlike modern graphics cards based on NVIDIA GPUs, AMD graphics cards allow you to optimize VRAM latency in the BIOS. We did not touch on this topic in the original review, which we would like to correct now.
But first, let’s talk about the current state of GPU mining for cryptocurrencies. Almost all cryptocurrencies have lost about 60% of their value over the past six months. At the same time, exchange rates have more or less stabilized. Daily and monthly fluctuations have been greatly reduced. As we have repeatedly noted, one can argue for a long time about what the future holds for cryptocurrencies. But they are unlikely to completely disappear. Still, blockchain technology has good prospects. And cryptocurrencies are just one of the areas of application. So we are waiting for large-scale changes in other areas of activity.
In any case, due to the price of electricity and hardware, mining has become far from being as profitable as it used to be. But manufacturers still continue to produce the corresponding hardware components, which was clearly visible at the same Computex exhibition. Video card manufacturers, for example, produce specialized models for mining. They are GPUs with PCB memory and no video outputs. In the case of PC Partner or Sapphire, even models with two GPUs were presented. But they are based on the Radeon RX 470, that is, on the old Ellesmere GPUs. In addition, the PCI Express Bridge is not used due to cost, GPUs are connected via the PCI Express x2 interface, one line each.
VRAM latencies
Memory speed has a significant impact on GPU mining performance. And this is true for both AMD GPU and NVIDIA GPU video cards. At the first stage of optimization, we changed the frequencies of the GPU and memory, and also measured the power consumption. We were able to significantly reduce energy consumption while maintaining the same level of performance, resulting in a significant increase in efficiency.
But clock speed is not the only factor that affects VRAM performance. The delays familiar from DDR memory on motherboards also affect. In addition to clock frequencies, delays are indicated here, for example, 18-19-19-39-1T, of which there are actually several dozen.
The same goes for the GDDR5 memory of video cards. Manufacturers record information about delays in strap profiles. VRAM on modern video cards is made by manufacturers such as Elpida (now owned by Micron), Sk Hynix, Micron, or Samsung. Depending on the manufacturer or type of chips, delays may vary.
The delays and frequencies stored in the BIOS are interdependent. The higher the frequency, the less aggressive the delays are usually. For optimal performance, you need to find the right combination of clock speeds and latencies. It hardly makes sense to optimize only the frequency or only the delays.
There are three options:
1. Edit the BIOS to set optimized strap values.
2. Use ready-made straps for GPU and memory combinations from certain manufacturers, which are enough to «copy» into the BIOS.
3. Flash a fully optimized BIOS for the video card. BIOS versions for popular video cards can be found on the Internet in the forums.
Before you start optimization, you should find out what kind of memory is used on the video card. We, for example, used the GPU-Z utility, which reported on the Samsung memory chips used. With GPU-Z, you can write the BIOS to a file using the arrow icon below the AMD Radeon logo. This BIOS can be optimized, and then flashed back to the video card. For firmware, you can use, for example, the ATIWinFlash utility.
Here you can choose the most convenient way: use the ready-made optimized BIOS for your video card, or optimize the BIOS yourself. We chose the second option.
We have opened a BIOS file in the Polaris BIOS Editor.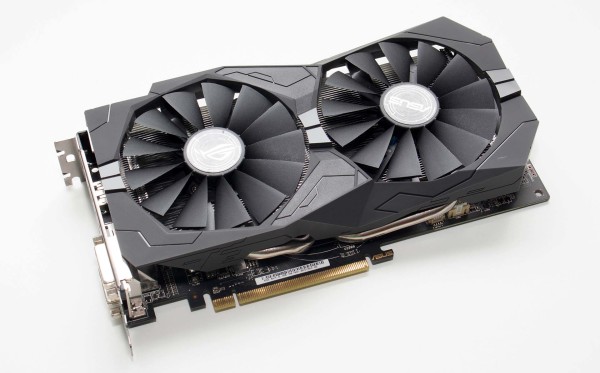 The problem is that you can find different versions of the editor on the Web, and the most popular version 1.6.7 can be infected with a virus or other malicious code. We have provided a screenshot of version 1.4.1, which does not display all values correctly, but allows you to modify delays. You can see a table in the lower right corner. The table on the left shows information about the memory clock speed, on the right — delays. In the second illustration, you can see delays in different straps.
It is necessary to change delays only at the highest clock frequencies, since for mining the video card will work on them. Here typical levels can be 1.750, 2.000 or 2.250 MHz — it all depends on the chosen final clock frequencies.
Different BIOS versions may have optimized strap profiles for the respective memory manufacturers. And with Polaris BIOS Editor, you can easily fill in the appropriate profile fields. And the SRBPolaris editor will allow you to edit strap profiles manually.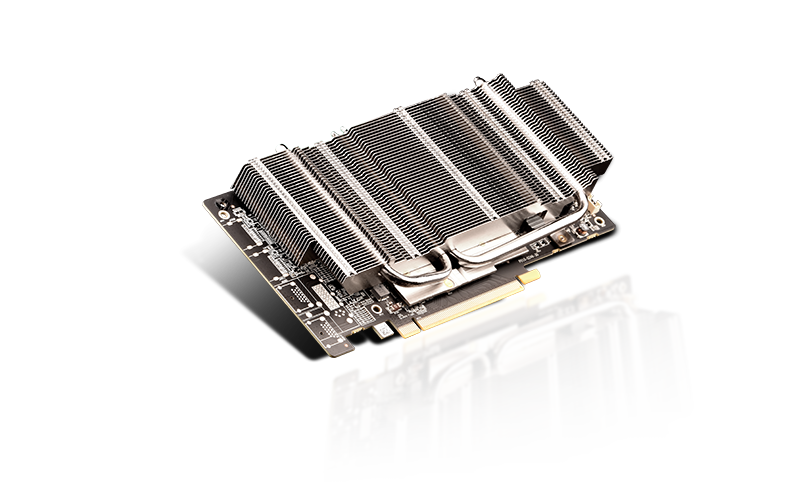 The Strap Editor allows you to transfer individual values to the final strap profile.
Each HEX value in strap corresponds to a specific memory latency. We will not dive deep into this topic as it is quite complex. As in the case of RAM delays.
There are several approaches to make dealing with delays easier. Sometimes it makes sense to copy the delay values for a frequency such as 2.000 MHz from the 1.750 MHz profile. At lower frequencies, the delays are usually set more aggressively, but more often than not, they will work at higher frequencies. In this case, you do not have to understand the individual delay values.
As we noted above, in the forums you can find ready-made strap profiles for memory clock speeds. You can also find a table in which the delays are compared directly. There are users who have tested absolutely all delays to evaluate their impact on mining — to get the most out of the video card.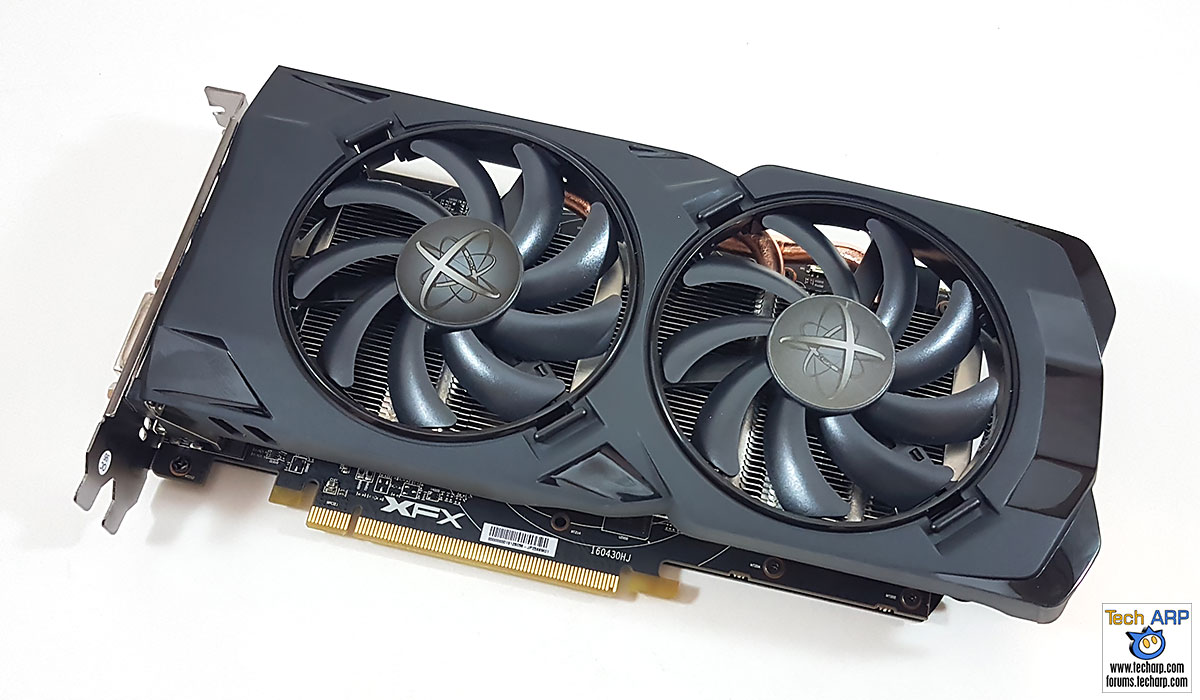 All this takes a huge amount of time, and simply transferring the results to other memory chips will not work, the tests must be carried out again and again. In addition, the graphics card must remain stable when running 24/7.
Compute performance after latency optimization
We re-tested the performance and efficiency of Sapphire Nitro Radeon RX 470 8G D5 Mining Edition and Pulse Radeon RX 580 8GD5 with optimized VRAM latency.
The following modes work properly for video cards:
- Sapphire Pulse Radeon RX 580 8GD5: 900 MHz GPU / 1.800 MHz GDDR5
- Sapphire Nitro Radeon RX 470 8G D5 Mining Edition: 1.000 MHz GPU / 2.000 MHz GDDR5
After switching to the adapted BIOS, we were able to squeeze out higher clock speeds, which we used in the tests:
Sapphire Pulse Radeon RX 580 8GD5 : 1.120 MHz GPU / 2.050 MHz GDDR5
Sapphire Nitro Radeon RX 470 8G D5 Mining Edition: 1. 120 MHz GPU / 2.050 MHz GDDR5
mining Sapphire.
Ethereum mining
Claymore 11.6
MH/s
Bigger is better
Due to the lower delays, the performance has increased significantly. Even without increasing the frequency of the GPU and memory, we were able to get a performance increase of 25-30%. Increasing clock frequencies also provided a further boost in speed.
Ethereum Mining
energy consumption
W
less is better
Power consumption was not affected by delay changes, at least within the margin of error. But the increase in clock frequencies has led to a slight increase in power consumption.
Ethereum Mining
Efficiency
Watts per MH/s
less is better
Since changing delays does not affect power consumption, efficiency is greatly improved due to the gain in hashing performance. Higher clock speeds result in reduced efficiency, but it is still significantly better than in non-optimized mode.
Conclusion
In our first video card optimization review, we didn’t touch on VRAM latency optimization. Nevertheless, it requires additional efforts from users in addition to adjusting 3-4 parameters in the overclocking utility. But this topic should not be ignored. The results are very impressive, they can be transferred to other video cards with AMD GPUs — including the Radeon RX 470/480 and Radeon RX 570/580, not only for mining ether on the Ethereum network, but also for Monero and some other alt-coins . Each cryptocurrency can have its own optimized frequencies and delays. Here, of course, there is scope for finding optimal values. Even units of percent play a significant role in mining. Thanks to the transition to optimized delays, we managed to get an increase of 25-30%, which cannot be simply ignored.
Here, again, we should raise the topic of video cards optimized for mining. This optimization is connected not only with the cooling system or cutting down the functions of the video card (to reduce the cost and price), but also in the possibility of flashing and storing different BIOS versions. In the case of the Sapphire Nitro Radeon RX 470 8G D5 Mining Edition, for example, four BIOS versions can be stored. The user can choose, for example, BIOS for games, as well as optimized BIOS for Ethereum or Monero. In any case, before changing the BIOS, we recommend that you make a backup so that you can roll back to it.
Our tests have shown how much latency optimization can affect hash performance. To be honest, we did not expect such a significant increase. But manually optimizing delays can take a decent amount of time. Still, you should make sure that the optimized delays are suitable for your video card. On the Web, you can find various manuals that make the user’s task easier.
Mining on RX 470 video cards: profitability, overclocking and drivers
Not all video cards are equally well suited for mining. In order for cryptocurrency mining to be profitable, it is necessary to strictly select the parameters of the video card for creating a farm. One of the most successful series is the MSI Radeon RX 470.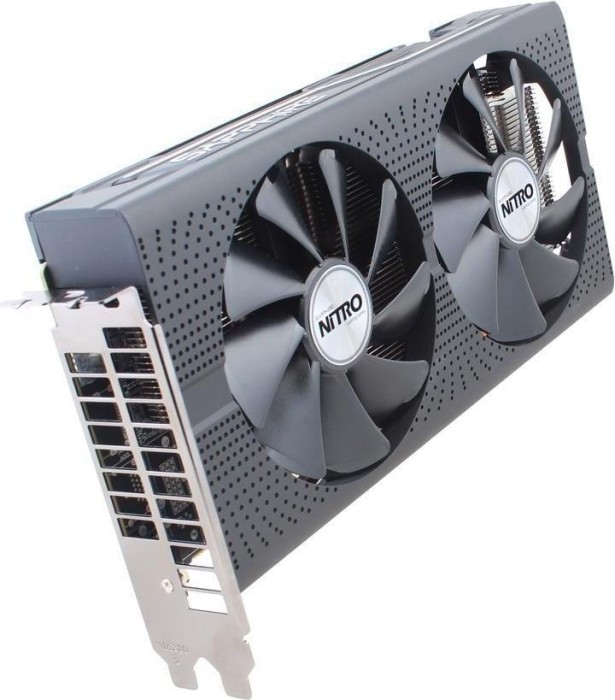 It has attracted a lot of attention, as evidenced by its huge demand in the market.
Despite the fact that it was recently replaced by a new family — RX 500, the RX470 series continues to be sold even at inflated prices, thanks to the mining-friendly architecture — Polaris.
Let’s review the characteristics of the models of this series and conclude how profitable it is to mine cryptocurrency now.
Article content
- MSI Radeon RX 470 GAMING
- Sapphire RX 470 Nitro+
- Gigabyte Gaming 1 RX 470
- Ethereum mining on RX 470
PCI-E connection system is used.
Name Meaning Energy consumption 180 Power supply 8-pin Minimum power supply wattage 450 W Payback 183 days (16% per month) Payback excluding electricity 145 days (20.  6% per month)
 If you create a farm of 6 video cards, then the consumption will be no more than 1 kW per hour. The RX 470 is a good analogue of the GTX 1060. With a 1200 W power supply, it is quite possible to rig a 5-6 GPU.
If you use algorithms that do not take the amount of video memory as the basis for the work, then on the RX 470 with 4GB of memory, mining will not be much different from 8GB. Also, to increase efficiency, it is worth flashing the BIOS and setting higher frequencies for the device to work.
This version was released by ASUS specifically for miners. This is expressed in the fact that the video card is overclocked to the maximum, and has a flashed BIOS. Memory from samsung gives additional processing power (samsung creates chips specifically for cryptocurrency mining).
This was a tempting proposition for beginner Shakhtar players, since they don’t have to make any additional adjustments. It is enough to purchase an rx 470, install a miner, and you can immediately start mining the currency.

Name Meaning Energy consumption 120 Power supply 8-pin Minimum power supply wattage 450 W Income $26.19/month Income excluding electricity $17.55/month Memory 4 GB GDDR5 7000 MHz Air cooling consists of 2 noisy coolers. But even with intense loads, the temperature is stable around 65 degrees.
Sapphire RX 470 Nitro +
This series can be called the most powerful in comparison with other models. On an rx 470 video card with 8gb memory, mining will produce power corresponding to the older models — RX 480 (running at 2000 MHz).
Name Meaning Maximum power consumption 175 Power supply 8-pin Connectors DisplayPort (2pcs), HDMI (2pcs), DVI-D Memory 8 GB GDDR 8000 MHz Recommended power supply 500 W Even without overclocking, you can get a hashrate of 24.
 5 mh/s on ether mining.
 The main role here is played by the video memory frequency of 8 Ghz. Cards with 4 gb memory will give a lower frequency of 7 or even 6.6 Ghz.
Gigabyte Gaming 1 RX 470
As the name suggests, the Gigabyte Gaming 1 RX 470 is a gaming device. But, nevertheless, it is great for mining. The main feature here is the cooling system.
The WindForce 2X cooler system keeps the temperature during etherium mining within 55-60 degrees.
Name Meaning Maximum power consumption 120 Power supply 8-pin Connectors DisplayPort (x3), HDMI, DVI-D Memory 4 GB GDDR 6600 MHz Recommended power supply 500 W There are other series of video cards suitable for mining (for example, Power Color, Asus strix, etc.
 ), but we will not analyze them, since they all produce approximately the same hashrate.
 Ethereum mining on RX 470
Ethereum is the most profitable algorithm for the RX 470 series. The average hashrate will be about 24 megahash. With proper overclocking, this indicator can be increased to 30. For the Radeon RX 470, this mining indicator will be “Above average”.
If you compare the RX 470 with other graphics cards, you can immediately see that this series is able to compete even with older GPU families.
Video card Hashrate Energy consumption Ethash Efficiency (MHS/W) RX 550 10 MH/s 65 W 0.153 RX 460 11 MH/s 75W 0.146 RX 560 12 MH/s 90W 0.133 RX 470 24 MH/s 120W 0.  200
200 RX 570 25 MH/s 150 W 0.166 RX 480 29 MH/s 150 W 0.190 RX 580 30 MH/s 185 W 0.162 RX Vega 56 32 MH/s 210 W 0.152 RX Vega 64 36 MH/s 295 W 0.122 Without firmware and driver setup, payback at 24 MH/s will be about 424 days. Such results come out with a standard cost of $390 video card.
Currency ETH ETH income per day 0.00294964 ETH income per month 0.0884892 Hashrate 24 MH/s USD income per day $1.15 USD income per month $34.45 Consumption 120W Net profit per day $0.  92
92 Net income per month $27.6 For the 4GB version, the NiceHash Pool Capacity Calculator shows the following results.
Algorithm Hashrate Blake256r8vnl 0 GH/s Hodi 0 kH/s 25.07 MH/s Decred 0GH/S CryptoNight 0.65 kH/s Equihash 280sol/s Pascal 0.65GH/s X11Gost 6.2 MH/s Sia 0GH/s Blake2s 0GH/s The CryptoNight algorithm shows a good forecast. But Monero mining will be inferior to Dual mining Decret and ETH.
The ZEC algorithm may show a high level of Sol, but they have already fallen in price a long time ago.
 For mining Zcash, CUDA
 is more suitable. At the current BTC rate ($6741), the calculator predicts a profit of $16 per month.
The Sapphire Nitro+ AMD Radeon RX 470 video card, which is considered the best option for mining ether, unfortunately did not show a good result during overclocking.
Instead of the expected 8.8 or 9 GHz, overclocking is only possible up to 8.2. This indicator is the maximum in the WattMan application. The ASUS GPU Tweak II utility made it possible to overclock to 8.4 Ghz. But this result is not enough.
With such indicators, the hashrate was raised by only 1.3 Mhs. Unfortunately, in this regard, the older RX 480 series bypasses the Sapphire Nitro in performance.
With the right settings, you can reduce your electricity bill without sacrificing performance. By setting the core voltage to 88mv and the settings to 1070/2100, we get a video card consumption of only 57 watts. At the same time, the hashrate remains at the level of 27.
 6 mh/s.
 This setting is ideal for creating farms, as it allows you to install many devices in one outlet. For one or a pair of GPUs, it makes no sense to make such settings, since the difference in consumption will be insignificant.
Decred and Ethereum dual mining
Dual mining is a process when 2 cryptocurrencies are mined at the same time. This gives the maximum load on the GPU, but at the same time allows you to increase profitability. The most profitable combination for dual mining is Decred and Ethereum (ETH).
Although the video card is busy mining another cryptocurrency, the Ethereum hashrate continues to stay at 23 Mh/s. Decred shows results at 937 Mh/s. These are excellent indicators, considering that the video card has not yet been flashed. By overclocking it, we can increase the speed to 28 and more than 1000 Mh / s.
Usually, users do not have to run dual mining themselves. Mining programs automatically start mining two cryptocurrencies when it is profitable.
 To do this, you just need to make a benchmark and set the resolution in the settings.
 If other currencies (Zcash, Cryptonight) become profitable at some point, they will also be launched.
With the help of special settings, you can further increase the performance of dual mining, as well as reduce consumption.
For maximum processing power, you can set the voltage settings to 967mv (frequency 1200/2100). GPU power consumption will be 95 watts.
As a result, we get a hashrate performance of 30/450. The dcri setting is 30. If you raise it to 40, then the processing power drops. We get this result on the GIGABYTE RX470 4GB video card.
If we reduce the frequency settings to 1070/2100, we get 880mV. In this scenario, the consumption drops from 95 W to 70. The hashrate remains at the level of 28.8/430. Thus, the profitability of mining is practically unchanged, but the cost of electricity is falling. And this will be especially noticeable when creating a farm.

Overclocking RX 470
Overclocking increases GPU performance and profitability by changing the applied voltage. Without knowledge, you should not experiment with this, as you can easily ruin the device.
Afterburner is required for overclocking. The utility is needed to make changes to the frequencies of the device.
The FurMark utility will also come in handy, which will allow you to detect settings above which the device will no longer work correctly. As soon as this happens, the frequency will be reset to the base.
More details about overclocking methods are described in the video.
Power down RX 470
Mining memory overclock RX 470
Firmware RX 470
To update the BIOS, you need 2 programs: for editing and for flashing.

First, save the original BIOS. And Atiflash will help us with this. We make 2 copies at once.
After that, run the program Polaris Bios Editor, and open the saved copy for editing.
We edit only one thing — the timings (micron), located in the lower right part of the screen.
Click on the «One Click Timing Path» button so that the program will independently set the timing for the installed video card. You can install them manually, but they differ for each GPU.
Now among the results we find timings with a frequency of at least 1375, and copy them.
To do this, select the desired timing, and select the line at the bottom of the screen. Copy the text and paste it into the line of the next timing, replacing the value that is set there.
When the action is completed, click on «APPLY CHG» to save the settings. When all the steps are completed, save the new flashed BIOS to a separate file.
Now open the folder with the Atiflash program, and transfer the file with the new Bios there. It remains just to open startnew.bat, and the installation process will begin. If there are problems, then start.bat returns the original firmware.
RX 470 mining drivers
AMD has released special mining drivers that can increase performance. They can be downloaded from the official website.
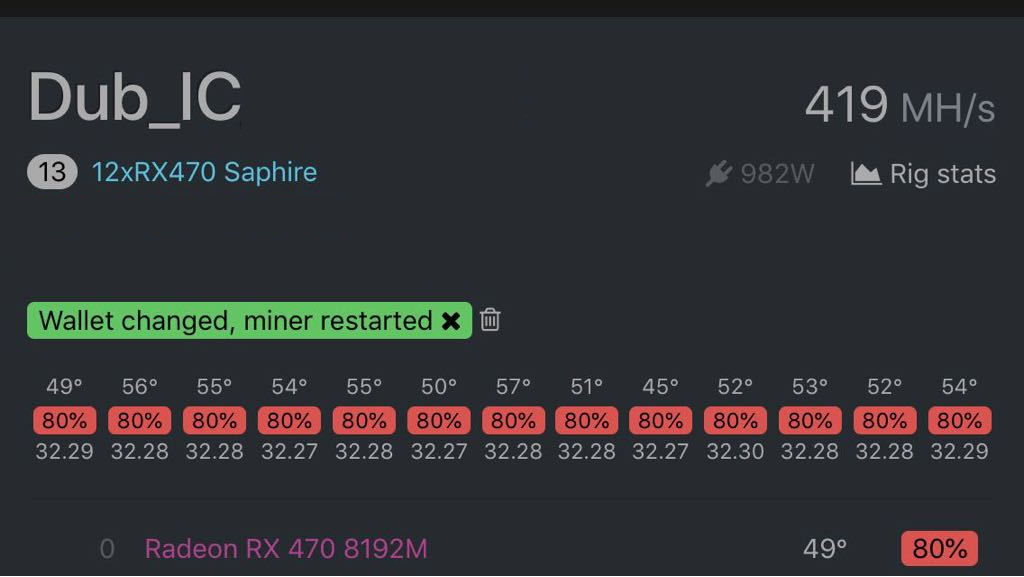
Video card Algorithm Hashrate (old driver) Hashrate (new driver) Shapphire Nitro+RX 470 4GB Ethash 27.1 MH/S X 1 GPU (5 GPU rig = 695 W) 29.5 MH/S X 1 GPU (5 GPU rig = 671 W) Shapphire Nitro+RX 470 4GB Ethash + Sia Dual 27.4 MH/s + 460 MH/s x 1 GPU (5 GPU rig = 858 W) 29.5 MH/s + 410 MH/s x 1 GPU (5 GPU rig = 832 W) Shapphire Nitro+RX 470 4GB Ethash + Decred Dual 27. 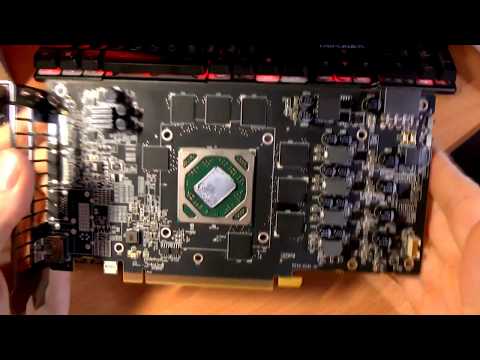 3 MH/s + 627 MH/s x 1 GPU (5 GPU rig = 840 W)
 29.5 MH/s + 678 MH/s x 1 GPU (5 GPU rig = 822 W) Clearly positive results are seen from the test. But this is a beta version of the driver, without technical support and performance guarantees. Therefore, in case of not working correctly, users should experiment with other drivers.
Specification RX 470
From all this, it is easy to conclude that mining on the RX 470 is really profitable. And according to the criteria «Price — quality — performance» this device can be safely called the winner in 2017.
If we look at the characteristics, we will see that the video card is not inferior to its competitors and older series.
Specification Meaning Number of video chips 1 Minimum chip operating frequency 1206 MHz Acceleration frequency 1254 MHz Number of processors 2048 Shader version 5.