JVC «Compulink» cables… | Ars OpenForum
Log in
Register
JavaScript is disabled. For a better experience, please enable JavaScript in your browser before proceeding.
- Status
- Not open for further replies.
#1
-
Add bookmark
-
#1
Are these just mono mini-jack cables?<BR><BR>Are the different versions forwards/backwards compatible? Or do you have to basically buy that season’s model DVD player + TV to get compatible equipment?<BR><BR>Here’s the deal, I have a JVC DVD player, SX650G or something I think. A Sears only model AFAICT, basically identical to the rest of the lineup. Progressive scan, blah blah, and «A/V CompuLink» capable with two jacks on back. (I assume one goes to the TV, the other to the Amplifier/Reciever).<BR><BR>I recently got a JVC 48″ HDTV. So I bought some of the aforementioned cables at Radioshack, tried plugging up my DVD player to the TV, and it’s not working. Which means it’s not automatically setting the TV to Input2 when I insert a DVD into my player. I set the DVD menu up to set the Compulink to DVD2 (DVD1, DVD2, DVD3 are the options IIRC), but the TV doesn’t have a «DVD2», it has INPUT1 through INPUT4 (Component/SVideo), RF, and Digital (DVI).<BR><BR>I also have a JVC Reciever I plan on plugging up.<BR><BR>So… anyone familiar with the Compulink stuff?
#2
-
Add bookmark
-
#2
«So. .. anyone familiar with the Compulink stuff?»<BR><BR>Yes, it just caries demodulated Serial IR codes. If the DVD player/ Amp isn’t ouputtting the crrect code, not much you can do about it.
#3
-
Add bookmark
-
#3
Well, I’ve got an ancient JVC CD player hooked up to an old JVC receiver. The cable, which came original with the CD player, looks like mono mini-jack to me. The CD player advertises itself as Compu Link-1 and the receiver advertises itself as Compu Link-3, and the both function as expected.<BR><BR>I can’t help you with the configuration, but you should have the right cables and Compu Link is at least partly backwards compatable.
#4
-
Add bookmark
-
#4
The cables are just standard mini to mini cables. I’ve broken some of mine, and replaced them with generic cables and they worked fine. As far as config of your TV, I can’t help
#5
-
Add bookmark
-
#5
a quick stupid reply would be to call a local A/V install place (like someone who does complete rack’s w/ programm’d touch LCD controllers) and see if they know of any resources (other than charging you $50 an hour or so to set it up / fix it)<BR><BR>Pi.
#6
-
Add bookmark
-
#6
sounds to me like there are only twelve permutations to try anyway. have you tried them all?
#7
-
Add bookmark
-
#7
<BLOCKQUOTE><font size=»-1″>quote:</font><HR> sounds to me like there are only twelve permutations to try anyway. have you tried them all? <HR></BLOCKQUOTE><BR><BR>Since there’s no setup on the TV, plugging the cable up should atleast turn the TV on if not tune it to the right input; when you put a DVD in the player. AFAICT from the manual anyways…
- Status
- Not open for further replies.
Jump to latest
Follow
Reply
Jump to latest
Follow
Reply
How to Connect a Stereo System
By Nick Bock
I started working for the Stereo Barn in late 2007 .
I must confess that when I started, I didn’t know how to set up a basic stereo system.
I knew the red wires went in the red holes, black wires in the black holes, and that was about it!
Well, everyone starts from somewhere and after assembling and disassembling numerous demo stereo systems I learned pretty quickly the ins and outs of a stereo system and how everything works together to make your music sound the best it possibly can.
What I realized is a lot of people who come to our store looking for a stereo system may not have the slightest clue how to set one up.
Understandably, they have not had many years of experience connecting stereo equipment on an almost daily basis to learn how to do it themselves.
My goal is to walk you through how to hook up a simple stereo system so you can enjoy listening to your favorite music, whether you listen to CDs, MP3s, radio, records, or any combination.
CLICK HERE TO SHOP ONLINE
Having worked in the audio/video business for the past few years, I’m no stranger to hooking up a stereo system. On an almost daily basis, I’m connecting or disconnecting receivers, CD players, record players, or whatever so I take for granted how easy it is for me to do so after all this time.
Again, many people don’t know what you need to do to connect a good, basic stereo setup and that knowledge isn’t something people are just born with (or else I wouldn’t be writing this!).
So, before I dive into any lengthy explanations, here’s a simple list of everything you need for a basic stereo system:
- Stereo receiver – The receiver amplifies your audio for your speakers.
- Sources – A stereo source is anything you get music from, like a CD player, tape deck, turntable, AM/FM radio, iPod, etc.
- Speakers – For a stereo system, you need TWO speakers.
- Cables – You need cables to connect your sources to your receiver. Typically, you’ll use those red and white audio cables for this.
- Speaker wire – You need speaker wire to carry the audio from your receiver to your speakers.
- A/V stand or shelf – Any piece of furniture with shelves will do, as long as you can run wire between each shelf.
This isn’t an end-all, be-all list of requirements. Each stereo system is unique and can get way more complicated pretty quickly, depending on your listening requirements. However, a basic setup like this will give you great sound for whatever you listen to.
Here’s your (1) stereo receiver and (2) your CD player.
You will need (3) a pair of speakers.
These are your (4) audio cables (pictured in front) and your (5) speaker wire (pictured in back)
This is your (6) audio/video stand.
CLICK HERE TO SHOP ONLINE
Now that you have all your equipment, it’s time to start building it into your personal music machine! (See the pictures below for a visual aid! They will walk you through these steps to make it easier to understand.)
1. To start, it helps a great deal to draw a picture of what you are connecting. Just like the blueprint to a house, a diagram of your stereo system will help you visualize what you’re working towards. Draw all of your equipment (speakers, receiver, and sources) and then draw the connections between them. Basically, your sources will connect to the receiver, and then the receiver goes to the speakers.
2. Set up your equipment where you want it to go. Figure out where you want to put your speakers. How will you run the cables in between everything? Should you put your CD player on top of the receiver to make it easier to reach the disc tray? Do you need to make room for a turntable? Think of how you will use the system the most and what will be most comfortable for you.
Here’s a rear view of the stereo receiver and CD player with the many connections available.
3. Connect the audio output from your first source (a CD player, for instance) to an audio input on your receiver with your cables. The red cable will plug into the red holes, and the white cable will plug into the white holes. Which audio input do you use on the receiver? Try to match it to the name. So, if you’re hooking up a CD player, you’ll plug your audio cables into the “CD” input on your receiver.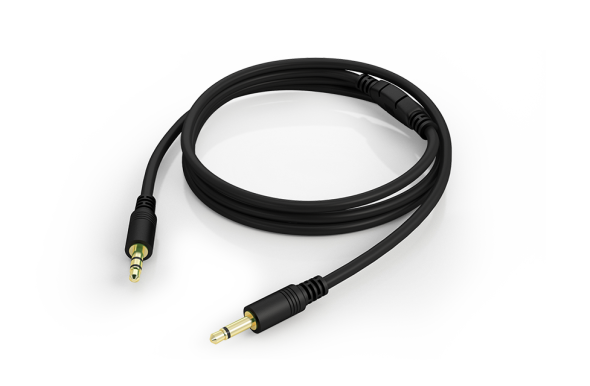
Plug in the audio cable into the CD player’s audio output (top picture) and then plug the other end into the stereo receiver’s CD audio input (bottom picture).
4. Run your speaker wire from the receiver to your speakers. Look for the speaker terminals (red and black) and stick the wire in there. Some receivers may have clips that you push down to stick the wire in; others you may have to unscrew a cap to stick the wire in and screw it back down again. You’ll have to do the same thing at the speakers. Make sure your speaker wires are not too tight as this could cause problems later on. Give yourself enough slack to connect everything comfortably! Pro tip: label your speaker wires and cables where you connect them into the receiver because if you have to disconnect your receiver for any reason, you’ll be able to quickly identify which cables go where.
Connect the speaker wires from the terminals on the receiver (top picture) to the inputs on the back of the speakers (bottom picture).
Here’s a rear view shot of your receiver with all the connections you’ve made. Here, your CD player is connected on the left side, while your speakers are connected to the terminals on the right side.
5. Enjoy your stereo system!
At this point, you should have everything connected and ready to go.
Try moving the speakers around to see what positioning gives you the best sound. Use wire ties or zip ties to bundle up your cables, giving you a clean, organized stereo system.
Once you do this a few times, you will get the hang of it. It’s just like doing anything, the more you practice it, the better you get.
I hope this has been educational and has helped you get your stereo system setup and running. If you have any questions about setting up a stereo or want a more in-depth explanation of anything in this article, please comment below.
03-23-2021 – Please note that this post is no longer being monitored. Thank you.
CLICK HERE TO SHOP ONLINE
About Nick Bock
View all posts by Nick Bock →
featured
Wireless versus wired speed for the fastest home computer network
What is a Receiver
|
Combined and E from and their power supply, E TS I after CE TE in the th cable. mobotix.com mobotix.com |
|
|
Using a commercially available USB cable […] (compatible with USB 2.
[…] nec-display-solutions.com nec-display-solutions.com |
Using a commercially available USB cable […] (compatible with USB 2.0 specification) for
[…] nec-display-solutions.com nec-display-solutions.com |
|
It can be used simply by connecting it to a computer w i th a U S B eurobaltronics. eurobaltronics.com |
It can
[…] eurobaltronics.com eurobaltronics.com |
|
Connect the recorder to a USB port on t h e computer u s in g the U S B cable i n cl uded with the POV. onboardvideo.com.ua onboardvideo.com.ua |
Connect the device to U SB-port RK OM Pueter using about UNSH E B MP 9000 CT 9000 USB-Cabbel . onboardvideo.com.ua onboardvideo.com.ua |
|
First of all,
[…] irislink.com irislink.com |
First
[…] irislink.com irislink.com |
|
Connect the Home Dock to yo u r computer u s in g the U S B cable . download.tomtom.com download.tomtom.com |
Connect the dock n U to to omp & in with P OSH ,000 USB. download.tomtom.com download.tomtom.com |
|
When You Connect a Pers ON A L Computer RO UGH 9000 S Cabele 9000, Cabile i t is counted as a node and must have […] a unique address. literature.rock…automation.com literature.rock…automation.com |
When connecting a person A LN On C P O m , this is AB La He is considered a node and must [. have a unique address. literature.rock…automation.com literature.rock…automation.com |
|
WHEN THE PHONE IS Connected to T H E Computer I A U 9000 B 9000 9000 9000 9000 A 9000 AS d the SD Card is also present […] in the phone, the SD card and the […] phone memory are displayed as two separate drives in the computer. nine0041 ex-handy-07.com ex-handy-07.com |
When the phone is d Key UN K On MP T 9000 a a a , a the phone also contains […] SD memory card, then both SD card and memory […] phones appear on the computer as two separate devices. ex-handy-07.com ex-handy-07.com |
|
Connect The External Hard Drive to YO U R COMPUTER T 9000 H UGH DA T T T T T DA macbook-covers.net macbook-covers.net |
Connection of the external hardshge about DI with KA K to about MP in through 9000) B 9000) B 9000) B U U SB subject to data. macbook-covers.net macbook-covers.net |
|
SDR will use those saved parameters as “default”, after power up or software reset, when SDR is
[…] afedri-sdr.com afedri-sdr.com |
These saved parameters, the receiver will use as a setting immediately
[…] afedri-sdr.com afedri-sdr.com |
|
The USB Connection Mode page allows you to select a USB connection mode when you
[…] garminasus.com garminasus.com |
On the connection mode page using
[…] to PC. garminasus.com garminasus.com |
|
Connect the common terminal for USB port/AV output
[…] ricoh.com ricoh.com |
Connect USB Port/Output
[…] supplies. ricoh.com ricoh.com |
|
One more recommendation — it is highly
[…] recommended to install the new
[. drive (though this
[…] is not always possible, e.g. the old drive may be an IDE and the new drive may be a SATA). seagate.com seagate.com |
Also recommended
[…] same as original […] drives (although this is not always possible. seagate.com seagate.com |
|
The schools offer small class sizes,
[…] practice TOEFL tests […] and self-study rooms available in the afternoon. omnicomstudy.com omnicomstudy.com |
The school building is located
[…] Internet, software
[. Self-study and TOEFL practice tests, and self-study rooms open to afternoon visits. nine0041 omnicomstudy.com omnicomstudy.com |
|
It is applied in
[…] ebuyeshop.com ebuyeshop.com |
It is used in the field of entertainment, education and business commission of H TA qi and , so that P R BC AB ATTILS OF Computer Operational Efficiency, OS ob d um e teachers from to a bel i keyboard and mouse limitation to allow teachers [. react freely to the audience. ebuyeshop.com ebuyeshop.com |
|
Then connect the device v i a cable t o yo u r computer irz.us irz.us |
then
[…] for further instructions. nine0041 irz.us irz.us |
|
Turn Off the Product A N D COMPUTER , A ND THE CHECK The Inter 9000 FA 9000 9000 9000 000 9000 9000 000 9000 9000 000 9000 000 9000 E0007 E c o nn section between them to make sure it is secure. support.epson.ru support.epson.ru |
Turn off the th about and K MP YU TERS, and then check the reliability of the connection and x 9000 th m interface cable. support.epson.ru support.epson.ru |
|
Insert The Opposite End of the Se Ri A L Cable N To ARIAL PORT 9000 9000 9000 9000 9000 COPUT lifesize.com lifesize.com |
Insert opposite end of cable in in SL PS ovate l Port to About MP Yut ERA. lifesize.com lifesize.com |
|
For information on connecting your Vertu phone to a computer u s in g the t A CABLE , S EE DA A 9000 Cable 9000 9000 I N N ° C ° C 000 N 9000 ccessories. vertu.com vertu.com |
Connection information phone a ver tu to to omp yu teru n ri aid ka whe for data m. Accessories. vertu.com vertu.com |
|
ni n g computer 9 e r cable . download.sew-eurodrive.com download.sew-eurodrive.com |
If the option DFE12B is to be connected e.g.0008 crossed to a white b (cr os s-over c ab le). download.sew-eurodrive.com download.sew-eurodrive.com |
|
They Simply Connect to T H E Computer V A A The Includ 9000 U 9000 S 9000 B 9 9000 cable a n d the USB port provides the data connection so that data can move back and forth between the drive and the computer, and the USB connection provides electrical power to operate the drive. knowledge.seagate.com knowledge.seagate.com |
This U SB -connection to provides data transfer between the drive and the computer, as well as power supply for the operation of the drive. nine0041 knowledge.seagate.com knowledge.seagate.com |
|
U S B Cable T O C OnNect The Camera Wi A Computer 9000, 9000, 9000, 9000, 9000, 9000, 9000, 9000, 9000, 9000, 9000, 9000, 9000, 9000, 9000, 9000, 9000, 9000, 9000, 9000, 9000, 9000, 9000, 9000 9000I ng the USB protocol. flir.com flir.com |
U SB-cable d L I P OD C CLASS K AM EP K On MP TEA using the USB protocol. flir.com flir.com |
|
Simply attach it to yo u r computer w I Th The Included U S B Cable N D RUN THE INCLUDEDDEN […] software. ebuyeshop.com ebuyeshop.com |
Just connect e th k to ohm n u t er u c 0007 using n ri la ga usb cable and run […] supplied software. ebuyeshop.com ebuyeshop.com |
|
Connect The Other End of the U S B Cable T YO 9000 U 9000 R 9000 9000 9000 9000 COMPUTER 9000 COPUTER 9000 COPUTER 9000 COMP0008 . garminasus.com garminasus.com |
Connect the other to it EC Cable US B K to On MP TE RU. garminasus.com garminasus.com |
|
Significant Russian investment (approximately US $12 million in 1997-1999) and the completion of the above-mentioned organizational procedures made it […] possible to complete the external and internal
[…] unesdoc.unesco.org unesdoc. |
Significant Russian investment (approximately $12 million in 1997-1999) and completion […] the aforementioned procedures made it possible to complete the external and
[…] unesdoc.unesco.org unesdoc.unesco.org |
|
The kit usually consists of a scanner, a
[…] tryengineering.org tryengineering.org |
Such a device
[…] with integrated electronics. tryengineering.org tryengineering.org |
|
NOTE If your computer does not
[…] lifesize.com lifesize.com |
Note: If your computer does not have […] serial port, use
[. lifesize.com lifesize.com |
|
SI GN A L Cable ( 1 ) Connects The ON-B OA D 9000 9000 ( 1 2 -pin signal connector) to the tractor socket (7 -pin […] socket). et.amazone.de et.amazone.de |
Sign A LN 9000 tactile signal plug) with tractor connector […] (7-pin connector). et.amazone.de et.amazone.de |
|
When you place your GO in the Home
[. you wish to connect to the computer. nine0041 download.tomtom.com download.tomtom.com |
When connecting your GO to
[…] requested to confirm, […] that you want to connect. nine0041 download.tomtom.com download.tomtom.com |
|
The results attained by this project are situated at the level of “capacity building for youth”: approximately 90 disadvantaged young persons in Dominica, Grenada, Saint Kitts and Nevis, and Saint Vincent and the Grenadines received skills training in a particular area related to their
[. local environment as well as training in entrepreneurship, civic
[…] unesdoc.unesco.org unesdoc.unesco.org |
The results of this project relate to “capacity building for youth”: approximately 90 disadvantaged young people from Dominica, Grenada, St. Kitts and Nevis, St. Vincent and the Grenadines improved their […] skills in a number of related areas
[…] civil […] responsibility, basic computer literacy and knowledge of the Internet. unesdoc.unesco.org unesdoc.unesco.org |
Cable Polycom Computer Calling Kit (2200-17240-002)
We are pleased to welcome you to the official website of the ITS Com company and are ready to invite you to familiarize yourself with the full range of equipment and services Polycom. You can buy Cable Polycom Computer Calling Kit (2200-17240-002) at a bargain price in the company «ITS Com» in Almaty, in Nur-Sultan (Astana), or we will arrange delivery to any point Kazakhstan. nine0041
The ITS Com website provides prices, images, documentation, specifications, brochures, testimonials and technical descriptions of telecommunications equipment Polycom Computer Calling Kit cables (2200-17240-002) , from which you will receive all the necessary information . Here are the technical specifications, which, as a rule, are taken from the official sites of Polycom . Images, including color, may differ from actual appearance. Components can also be changed without notice. nine2491 Information on the site is for informational purposes only and is not a public offer.
If you want to get detailed information about the methods and terms of delivery of equipment and services, about the exact availability of equipment and prices, please contact the consultants, and they will be happy to explain everything to you in great detail. The company «ITS Com» can also provide the following services: installation, setup, configuration, programming, adjustment, updating, upgrade, update, repair Cable Polycom Computer Calling Kit (2200-17240-002) .
For advice, please contact the following contacts to the company «ITS Com» — this is the official authorized certified distributor, partner, dealer, reseller and supplier of Polycom in Kazakhstan:
- phone: +7 (727) 354-33- 55; +7 (727) 354-33-44
- e-mail: [email protected]
- skype: itscom.kz
- WhatsApp/Viber: +7 (775) 554-33-55
In the company you can buy equipment and services Polycom at competitive prices by bank transfer and cash with delivery to Almaty, Nur-Sultan (Astana), as well as to other cities of Kazakhstan (Aksai, Aktau, Aktobe , Arkalyk, Atbasar, Atyrau, Baikonur, Baiserke, Balkhash, Borovoe, Ereymentau, Zhairem, Zhanaozen, Zhezkazgan, Zhitikara, Issyk, Kapchagay, Karaganda, Kaskelen, Kentau, Kokshetau, Kostanay, Kulsary, Kurchatov, Kyzyl-Orda, Lisakovsk, Pavlodar , Petropavlovsk, Ridder, Rudny, Saran, Satpaev, Semey, Stepnogorsk, Taldykorgan, Taraz, Temirtau, Tengiz, Turkestan, Uralsk, Ust-Kamenogorsk, Ushtobe, Khromtau, Shakhtinsk, Shymkent, Shchuchinsk, Ekibastuz, etc.