Deepcool Assassin III Review: Slaying the Competition
Skip to main content
When you purchase through links on our site, we may earn an affiliate commission. Here’s how it works.
A thermal Assassin for enthusiast-level CPUs
Editor’s Choice
(Image: © Tom’s Hardware)
Tom’s Hardware Verdict
The Deepcool Gamer Storm Assassin III should be on every enthusiast and HEDT system builder’s colling short list. With seven copper heatpipes and twin 140mm cooling fans, it provides excellent thermal performance at a competitive price of $90.
Pros
- +
Excellent thermal performance
- +
Simple installation
- +
Sharp design, sans lighting
Cons
- —
Expensive for an air cooler
- —
Slightly higher noise levels than competitors
Why you can trust Tom’s Hardware
Our expert reviewers spend hours testing and comparing products and services so you can choose the best for you. Find out more about how we test.
Today’s best Deepcool Gamer Storm Assassin III deals
$89.99
View
$99.99
View
No price information
Check Amazon
With continued focus on high-end desktop (HEDT) and enthusiast CPUs, the battle of processor cores and overall performance supremacy between AMD and Intel is alive and well. But with higher core counts and clock speeds comes more heat generation with modern high-end chips—and there are always more promising, powerful slices of silicon on the horizon.
(Image credit: Tom’s Hardware)
Enter Deepcool and its Assassin III.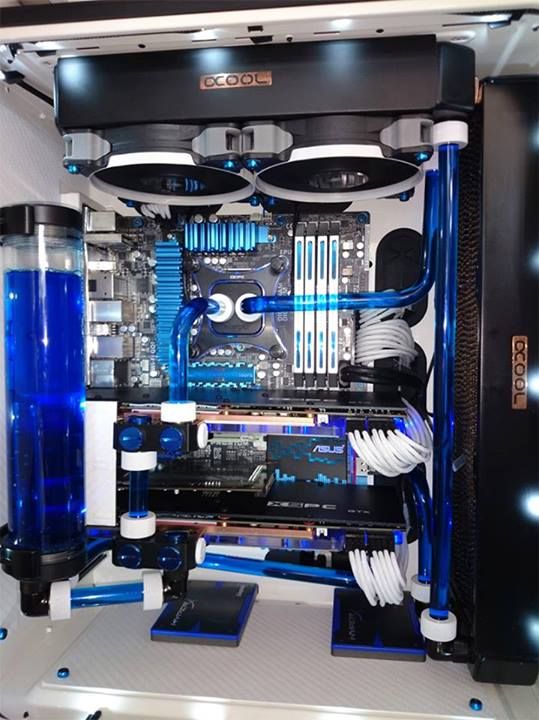 This big air cooler ships with a bountiful accessory set, including a long-reach magnetic screwdriver, syringe of thermal compound, spreading card, alcohol swab pad, PWM splitter cable, RPM reduction cables (x2), metal case badge and mounting hardware for most current AMD and Intel CPU sockets. The mounting hardware is nickel plated for a bright, chromed finish, which contrasts nicely with the blacked out color scheme from the fans and plastic accent pieces on the cooling tower.
- Deepcool Gamer Storm Assassin III at BHPhoto for $89.99
Deepcool covers the Assassin III for 5 years under its heat pipe air cooler product warranty.
Specifications
Swipe to scroll horizontally
| Height | 6.75″ / 171.5mm |
|---|---|
| Width | 5.50″ / 139.7mm |
| Depth | 5.25″ / 133.4mm, (6. 25″ / 158.8mm w/fans) 25″ / 158.8mm w/fans) |
| Base Height | 1.50″ / 38.1mm |
| Assy. Offset | Front (1.0″ / 25.4mm w/fans) |
| Cooling Fans | (2) 140 x 25mm |
| Connectors | (2) 4-pin PWM |
| Weight | 42.7 oz / 1210g |
| Intel Sockets | 115x, 1366, 2011x, 2066 |
| AMD Sockets | FM2(+), FM1, AM2(+), AM3(+), AM4 |
| Warranty | 5 years |
| Web Price | $90 |
Features
(Image credit: Tom’s Hardware)
Seven heatpipes account for the bulk of the cooling prowess of the Assassin III, each which are nickel plated and run the entire height of both cooling towers. The cooling fin stack provides enough density of fins to assure good heat displacement, while a partially vented side skirt to allows some air dissipation laterally, without negating the ducting effect of airflow through the structure.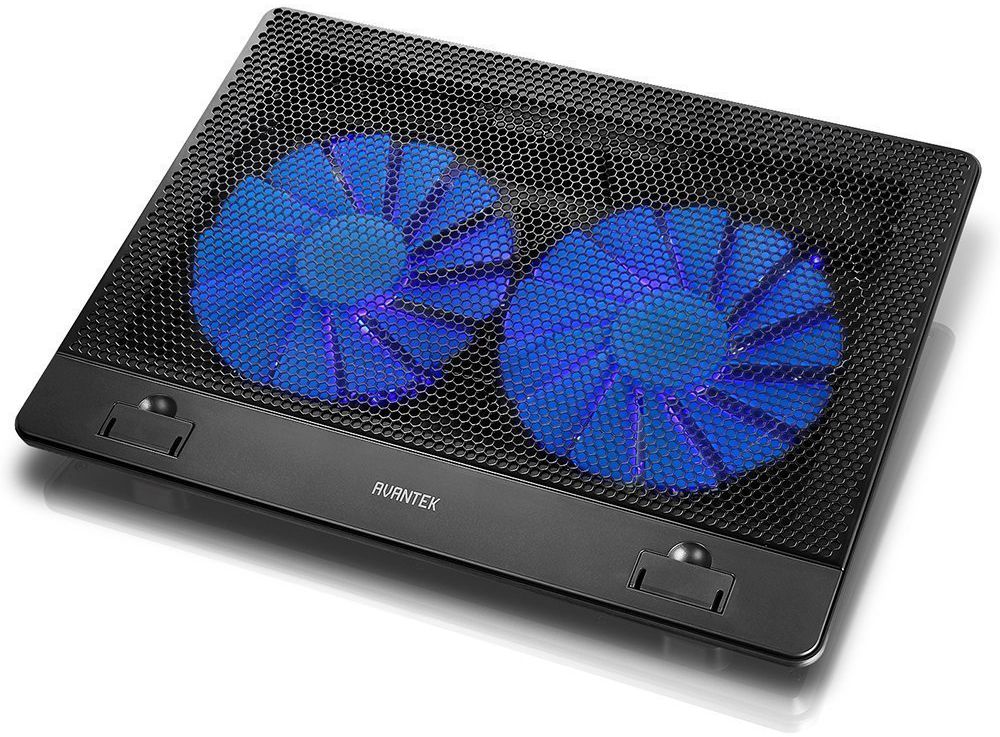
The Assassin III uses a fixed torsion plate atop the cooling base, which is then affixed with tension screws to the mounting plate cross bars during installation. Having this torsion plate permanently attached smartly prevents misalignment of the large cooler as it is installed.
(Image credit: Tom’s Hardware)
Airflow through the Assassin III is made possible by a pair of Deepcool GamerStorm TF-140S fans rated up to 1400 RPM (+/- 10%) at full speed. The fan blades have what resembles trailing-edge ducting arches on each blade while sporting a satin finish. Rubber isolation grommets adorn each corner around the mounting holes.
A pair of glossy black spoilers sit atop the cooler on each fin stack. These exist solely as decorative covers for the tips of the pinched and soldered heatpipes, but do provide aesthetic contrast to the polished nickel plating.
Both fans are installed to the cooling tower using wire spring clips; one fan moves air through the front of the first cooling tower, and another situated in the center moves air front-to-rear on the second tower.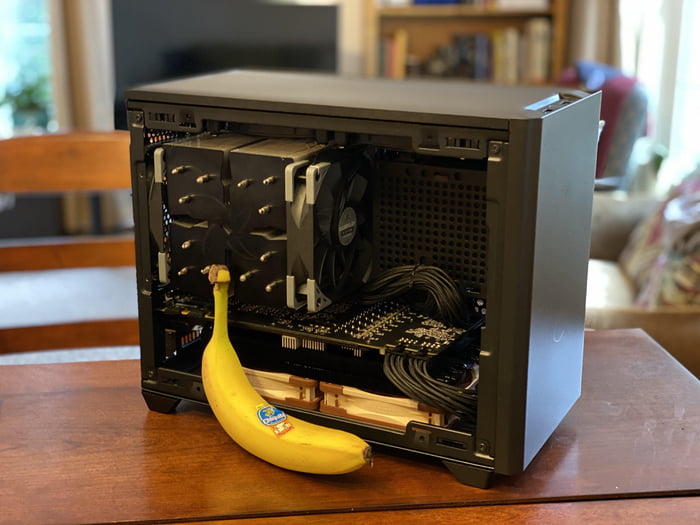 Only two sets of wire clips are shipped with the cooler, so those hoping to add a third fan at the rear of the cooler should be prepared to bring some DIY spirit.
(Image credit: Tom’s Hardware)
The base of the Assassin III is made up of multiple pieces, where the collection of the seven heatpipes is sandwiched between the base mounting block and the base plate itself. This allows for the base plate to be machined precisely, while avoiding any milling issues and abnormalities from the heatpipes themselves, as would happen in a direct-contact arrangement.
The tension spring screws and torsion mounting bar are easily seen from this orientation, as are the partially ducted side fins along both cooling tower sides. The black plastic runner bars at the base of the cooler are mounting points for the black spoiler pieces covering the heatpipe tips. These spoilers have arms running down the front and rear faces of the cooler between fin cutouts, and are secured with small hex screws under the fin stack.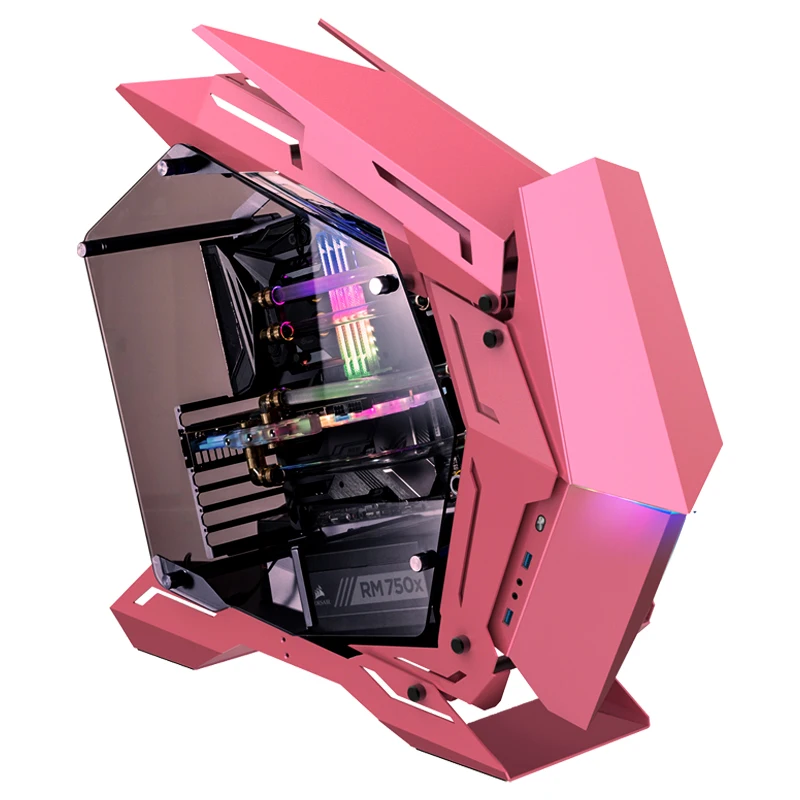
(Image credit: Tom’s Hardware)
Installation of the Deep Cool Assassin III is relatively straightforward, and depending on whether your system will need to make use of the included backplate, the rest of the cooler mounting follows the same procedure. The transverse mounting bars support the base’s fixed torsion bar. Align these spring tension screws over the threaded holes and secure with the included screwdriver.
(Image credit: Tom’s Hardware)
Fan installation only requires slipping the wire clips into the eyes of the rubberized mounting holes and clipping them around each side of the cooler heatpipe towers. The fan clips allow for vertical adjustment of the cooling fans. Although most memory DIMMs should have little issue with clearance, extreme fan height adjustment may result in diminished airflow over the lower cooling fins. So avoid RAM with tall heat spreaders if you want the best CPU cooling performance.
MORE: Best CPU Cooling
MORE: How To Choose A CPU Cooler
MORE: All Cooling Content
- 1
Current page:
Features and Specifications
Next Page Comparison Coolers, Testing Results and Conclusion
Garrett Carver is a contributor for Tom’s Hardware, primarily covering thermal compound comparisons and CPU cooling reviews; both air and liquid, including multiple variations of each.
Tom’s Hardware is part of Future US Inc, an international media group and leading digital publisher. Visit our corporate site .
©
Future US, Inc. Full 7th Floor, 130 West 42nd Street,
New York,
NY 10036.
Air cooling Vs. liquid cooling in PC builds
Search Kingston.com
To get started, click accept below to bring up the cookies management panel. Next, tap or click on the Personalization button to turn on the chat feature, then Save.
Your web browser is out of date. Update your browser now for better experience on this site. https://browser-update.org/update-browser.html
Jul 2022
-
Gaming
-
System Builders
-
DIY PC
Blog Home
When it comes to a PC build, there are two main options to safely mitigate heat from your CPU: air cooling and liquid cooling. Both options have their benefits but choosing a cooling method depends on your PC’s needs. In this article, we will explain how both types of cooling methods work and help you to consider the benefits and drawbacks of each type of cooling.
What is air cooling, and how does it work?
Air cooling is a very simple method for dissipating heat but can be extremely effective and easy to install! An air cooler consists of two parts: a heat sink and a fan. The fan sits either on top or to the side of the heat sink and pushes the air away from your CPU in order to cool the components down.
Benefits:
- Cost – Air cooling is much more affordable than liquid cooling due to its straightforward operation. If you’re on a budget, it could be worth opting for air cooling and using your excess budget to purchase more storage or faster DRAM.
- Installation – Air cooling systems are easier to install than liquid cooling and are therefore the better choice for beginner PC builders. You also won’t need to worry about water potentially leaking into your system!
- Maintenance – There is a lot less maintenance required with air cooling, as once you have set up your system you just need to clean dust out of your PC every few months.
Despite the low price and ease of use, there are some drawbacks to air cooling:
- Noise – The fans in an air-cooled system are generally noisier than in a liquid cooling system, this can be quite distracting when gaming.
- Performance – Air cooling is not as efficient as liquid cooling, but it is still a good option for cooling your PC build.
- Visuals – The heat sink from an air cooler is quite bulky, which can ruin the aesthetics of a build. There is also no option to change the visual look of an air cooler.
What is liquid cooling, and how does it work?
Liquid cooling or water cooling is one of the best ways to cool down a PC due to the high thermal conductivity of water.
A liquid cooling system consists of water blocks, a pump, a radiator, pipes and optionally a reservoir. The pump pushes the liquid coolant to and from a radiator through the water block, which is attached to the CPU. The heat is then transferred from the component to the cool liquid which is then continuously pumped throughout the system.
When it comes to water cooling, you have two main options: AIO (all in one) liquid cooling and custom loop. AIO coolers come as a single unit, and you don’t have put the parts together yourself. With custom loop cooling, you can customise every aspect of your cooling system to give the best performance and visual appearance. AIO and custom loop cooling have different benefits and drawbacks, so it is important to distinguish between the two.
*
Benefits:
- Noise – Liquid cooling has a quieter operation, the fans in a liquid cooled system tend to rotate more slowly and quietly than those in an air-cooling system.
- Performance – PC users who plan to game at maximum settings should consider water cooling. Pushing your PC to its limit requires more power, and therefore will potentially heat up your system to a dangerous level. Water cooling can bring these temperatures down faster and more efficiently than air cooling.

- Visuals – Liquid cooling systems can be very visually impressive, as you can include RGB elements to enhance your machine’s visual appeal. Custom loop cooling can look very impressive as you can mix and match parts and have a completely unique system.
Although liquid cooling can be 2-10 times more effective than air cooling there are still some drawbacks:
- Cost – Custom liquid cooling will cost you a lot more than a standard air-cooling system. You are paying for the more complicated operation and the better performance. However, AIO cooling will have a price closer to air cooling.
- Installation – Custom liquid cooling can be laborious to set up, especially for beginner PC builders. An AIO (all-in-one) liquid cooler is easier to install and should take you around 30 minutes. However, either way it can also be quite unnerving to have water running through your system.
- Maintenance – Custom liquid cooling systems require more maintenance than air cooling, as you need to sustain proper fluid levels, and make sure the components are clean and functional.
 Also, if any of the parts of a custom cooling system fail it could be catastrophic for your computer. AIO requires less maintenance and as everything comes assembled, the risk of the system leaking is reduced.
Ultimately, the decision is up to you! Choosing between air cooling and liquid cooling is really up to your personal preference, your budget and what your system needs. Both are excellent solutions; they are just designed for different system requirements. But whichever type of cooling method you go for, the most important thing is that you’re keeping your PC as cool as possible so that it can stay at its best performance and avoid any throttling issues.
#KingstonIsWithYou #KingstonFURY
4:06
Tips for liquid cooling systems for PCs
Traditional air-cooling fans with heat sinks will do just fine. But for the enthusiasts out there, liquid cooling looks cooler, runs quieter and is more effective on the whole than traditional air-cooling techniques.
5:40
How to Choose a Power Supply and Cooling
Part 4 of our PC build series, where we discuss PC cooling options.
6:26
Installing CPU, RAM, cooling
We show you how to install these components into a custom PC rig.
5:12
How to clean off PC dust AND free up disk space
How to physically clean dust from your computer and delete old files you no longer need from your drives.
Sort by
Default
Load More
No products were found matching your selection
Types of computer cooling and proper installation
How to understand computer cooling systems
There are three types of cooling — air, water and «aquarium» cooling
A fan and a cooler are one and the same. In English, the word «cooler» among other things means «fan», with the advent of computer technology, it has firmly entered the lexicon of computer-related topics.
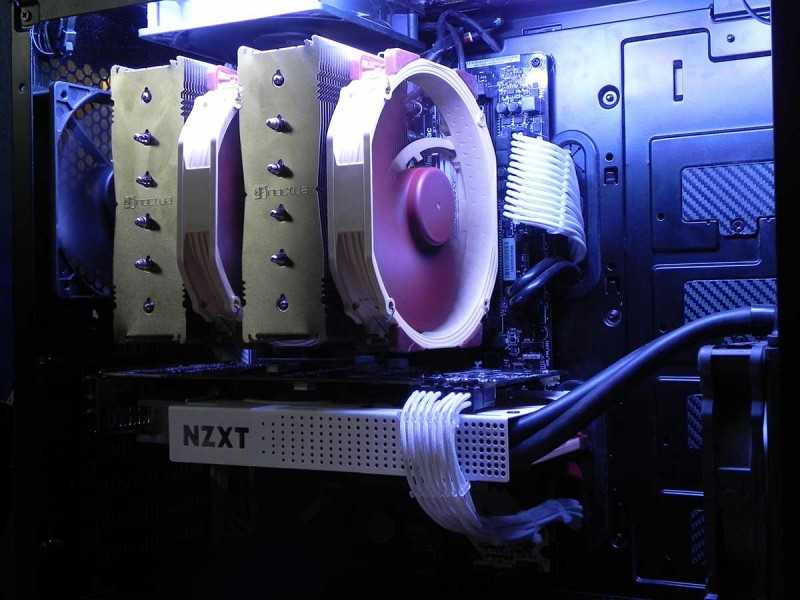
Air cooling
The principles of air cooling have been described above. It implies the presence of fans on large radiators and air blowing through the entire case. Thus, you need to ensure that cold air is taken in front of the case, and the warm air can be ejected from the back.
Water cooling
A more difficult and much more expensive way to remove heat from a computer. But it is more efficient, and the system itself is much quieter and more beautiful. It is water cooling that is installed in premium gaming computers.
Illuminated items can be purchased and synchronized with the motherboard. For example, ASUS offers a CBO Easy Install Kit for the Asus ROG Strix LC 360 RGB processors. The backlight is synchronized with ASUS motherboards and video cards of the ROG series. Management is carried out through a common software.
Remember the tower-style copper-jacketed radiator shown above? Water cooling instead of copper tubes uses tubes with water or a special liquid, which has a high thermal conductivity and high heat capacity.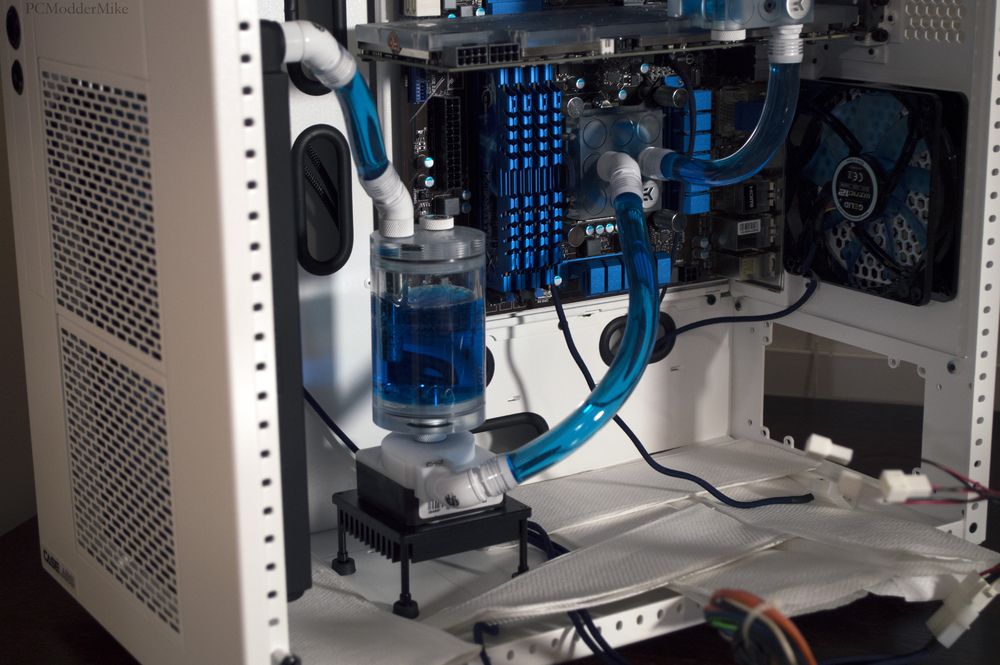 Small copper or aluminum plates are installed, which are called water blocks. They take the temperature from the chip or processor and transfer it to the liquid, which, in turn, gives it to the heatsink. Radiators of water systems are cooled by conventional fans.
The complexity of installing a CBO (water cooling system) is that each component (processor, video card) needs specific heatsinks with a suitable type of mount.
«Aquarium» cooling
There are no ready-made solutions on the market, this is a homemade product, which is of little interest to anyone in terms of efficiency. Its biggest advantage is the complete absence of dust. Filling the aquarium with water is a bad idea, it will just immediately short out all the contacts, and oxidation will also begin. Instead of water, oil with low electrical conductivity or «dry water» is used.
Dry water is an invention of the American company 3M, which was developed to extinguish fires. In fact, the composition of this substance is far from water, they have nothing in common, except for a couple of similar physical properties, such as the fact that it is a liquid, it flows, it transmits light and all that.
The disadvantage of «aquarium» cooling is that this area is little studied, and it is also difficult to find fans that will work under water. Despite the high thermal conductivity of these liquids, you still have to install a radiator and somehow drive water through it. It is also desirable to have one of the walls of the aquarium made of aluminum to ensure even more efficient heat dissipation.
This option is only suitable for the most desperate enthusiasts who are not afraid to experiment.
How to change the fan
All moving parts in a computer or any other equipment fail. Somewhere the blade will fall off, somewhere the bearing will buzz, in some cases the replacement of the cooler is purely cosmetic, for example, you want to make a backlight or create a special design due to unusual blades.
How to remove the fan from the computer
Before replacing, you need to get rid of the old cooler. A regular case fan is mounted on four screws, in some cases these can be quick-release clips or special anti-vibration silicone screws. Unscrew the fasteners or unhook the quick releases.
An anti-vibration gasket made of silicone or rubber and a dust filter should be placed between the housing and the fan. Carefully remove them — with long-term use, the gaskets can stick well to the body, if they are cracked or have already crumbled, then they need to be replaced.
It is better to use an anti-vibration pad rather than silicone screws, it works much better and will extend the life of the cooler. If it is securely pressed against the body, then its vibrations will not loosen the axis. Silicone screws do not dampen vibration, but simply prevent it from being transmitted to the case.
One of the variants of anti-vibration rubber.
Disconnecting the power plug from the motherboard is also very simple, just pull the wire a little, there is no latch. There may be several connection options — some coolers are included in the motherboard, some via the MOLEX connector directly to the power supply.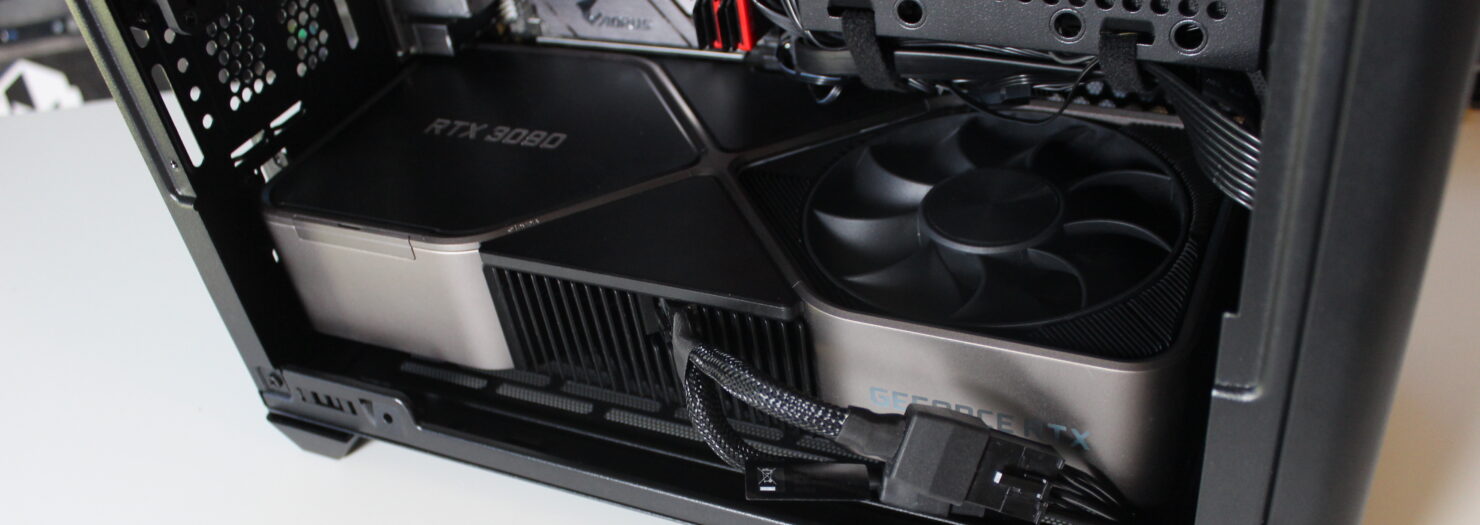 Detaching the MOLEX is very easy, there are no latches either.
How to put the cooler on the case
When installing the fan, the main thing is to observe the direction of the air. Usually on the cases, the fence goes in front, and blowing out at the back. If you install it incorrectly, then the cooling efficiency will decrease significantly.
To install the fan on the chassis, screw it into the appropriate holes or use silicone clamps. There is nothing complicated here, all the holes are standardized, you just need to choose a fan of a suitable diameter.
120mm coolers on the front side are considered standard for the case, while 80mm or 90mm are used at the back. Gaming cases are usually equipped with 120mm fans on all sides. Special design models may have an original purge system.
Usually such cases come with a set of installed cooling or at least instructions.
How to connect the cooler to the motherboard
After you have screwed the cooler into place, you need to connect it. There are different connectors on the motherboard, usually 3 PIN and 4 PIN. If you have a fan with 3 pins, then it can be connected to a 3 PIN connector and a 4 PIN connector, but if you connect a 4 PIN cooler to a 3 PIN connector, you will not be able to use the adjustment system for it through the utility.
How to adjust the speed of coolers
There are separate devices for this — a hub board or a reobas.
The hub board allows you to connect many coolers to a single motherboard outlet. The downside is that it does not have an external regulator, and you will not be able to set a command for each individual fan, but only all together.
Mechanical Reobas does not have such drawbacks, you can adjust each individual cooler as you like, but you will have to have a constantly open temperature sensor, which is not very convenient. Such a model, as in the photo, does not have its own screen, which limits its capabilities.
Reobas electronic has a screen and displays all the necessary information on it, through the touch panel you can easily adjust the fan speed.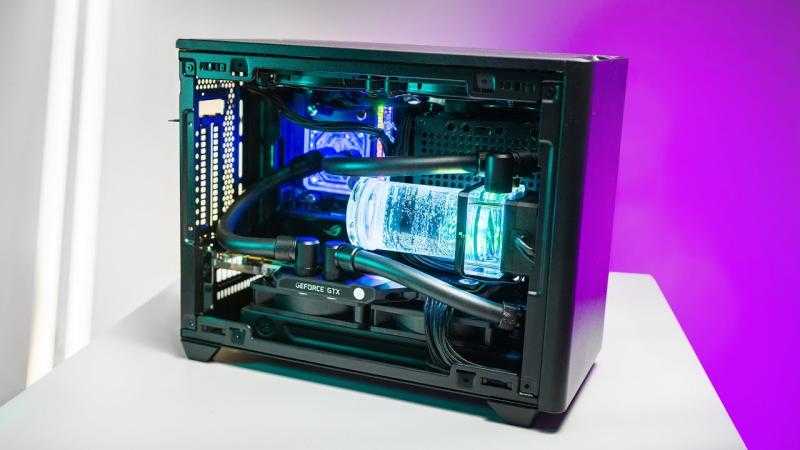
In fact, reobas is rather an element of decor and has no practical application. Modern boards themselves regulate the speed of rotation of all fans depending on the temperature on the chassis modules. But if you want to install one of them, then they are placed in the hole for a 3.5 ”device, and this is most often a DVD-ROM. Please note that on modern gaming cases, very often there is simply no such hole.
Video card cooler replacement
If you have a problem with your heatsink, there is no easy solution. All cooling systems for video cards vary depending on the model and performance. You will have to look for exactly the same radiator, and it is most profitable to order it at a company service center or look for it at a disassembly. Most often, coolers and radiators are the most valuable thing that can be pulled out of a burnt card, so the price will not be very high.
Once you have your new radiator on hand, it’s time to replace it.
How to replace a heatsink on a video card
Disconnect all wires from the video card and pull it out of the case. Remove all screws from the top side of the board.
Then you need to unplug the power cable. Fortunately, the manufacturer thought of us and made a connector, and did not solder the wiring directly.
Important! The video card gets very hot during operation, and thermal paste does not always withstand such loads. In a damaged state, the paste turns to stone and can firmly stick the heatsink to the chip. Do not jerk or make sudden movements, try to gently loosen the radiator, trying to find a weak spot. This is the only way to remove the heatsink from an already used card.
Now you need to clean everything from the old thermal paste. Use only plastic tools and alcohol — the chip must remain intact, even a small scratch can affect its performance. Do not use water-based cleaning solutions, only those that can clean boards. Water on the tracks after a few weeks or months will lead to oxidation, and you will have to change the video card.
Some places are not smeared with thermal grease, in particular this applies to memory chips with a plastic case. For their cooling, special thermal pads are used (pictured). Do not use the old ones, you definitely need to buy new ones, this is the only way you will ensure reliable heat dissipation.
The next task is to lubricate the chip with thermal paste. Don’t skimp on such an important item. In the first couple of days, even the cheapest thermal paste will show great results. But after a couple of weeks, and at best in a month, it will dry out, and the card will start to overheat. High-quality pastes do not dry out for a long time and have maximum thermal conductivity.
It is also worth mentioning the already dying out KPT-8, the Soviet thermal grease. Never use it for modern electronics. It was designed for completely different tasks and chips of a completely different size. The cost of modern specialized thermal pastes is not so high as to risk overheating due to the use of KPT-8.
Apply the thinnest layer of thermal paste you can. The picture shows how the joint should look like in the section. If you are doing this for the first time, then squeeze a droplet the size of half a match head onto the video card chip and gently smear it with a plastic card, a small plastic spatula, or just your finger, after wrapping it with cling film or a plastic bag.
After these operations, you can install a new radiator in place and lightly press it. There are always springs at the attachment points that will not give you the opportunity to pinch and crush the chip. Remember that the screws should not be tightened to the end, but only until the heatsink fits snugly against the chips.
Replacing the cooler on the video card
In contrast to the coolers on the case, the video card has a decorative plastic overlay, on which the coolers are already placed. It is quite difficult to change each one separately, different manufacturers use different types of fasteners and different bearings, you need to look at each specific case separately.
Some manufacturers, such as MSI, try to install separate coolers that are attached to the radiator with three screws. Changing them is very simple: we unscrew the old fan and disconnect it, then we fasten the new one and connect it in place of the old one. Unlike a radiator, there is no need for thermal paste or other sophistications, everything is as simple as possible.
The only difficulty may arise if the manufacturer has paralleled two fans on one connector. In this case, you will have to solder the wires. This is a simple task, you just need to follow the pinout. Given that you will have a new cooler with a ready-made input, then there should be no difficulties with this, the main thing is to connect the wires in order when unsoldering. Be sure to isolate the soldering points, in case of a short circuit, something may burn out even before the protection turns on, if it turns on at all and is provided by your manufacturer.
Changing the plastic cover with all coolers is much easier. You just need to unscrew the old plastic shield and screw the new one in its place.
How to properly install a tower heat sink on a processor
Almost all modern models of air cooling for processors are tower heat sinks (pictured).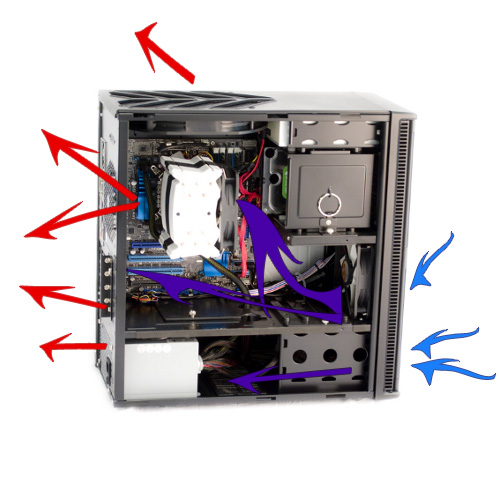 Other models with direct blowing towards the motherboard are used only on very weak CPU models. Any more or less powerful processor requires a tower-type heatsink.
Let’s start with the fact that you need to pull the motherboard out of the case and disconnect all devices from it, remove all modules (RAM, SSD, etc.).
Turn off the cooler of the existing cooling and further instructions will be slightly different for Intel and AMD processors.
AMD
Remove the old heatsink by removing the quick release bracket. This can be done by turning the eccentric clamp. Then you need to remove the thermal paste and apply a new one (the technology is described above). As a result, thermal paste should only fill microcracks, and not be a layer between two metal surfaces. Please note that many heatsinks already have thermal paste applied from the factory, in which case you do not need to apply a new one.
The usual cooler is fixed with the same clip with an eccentric or a hook.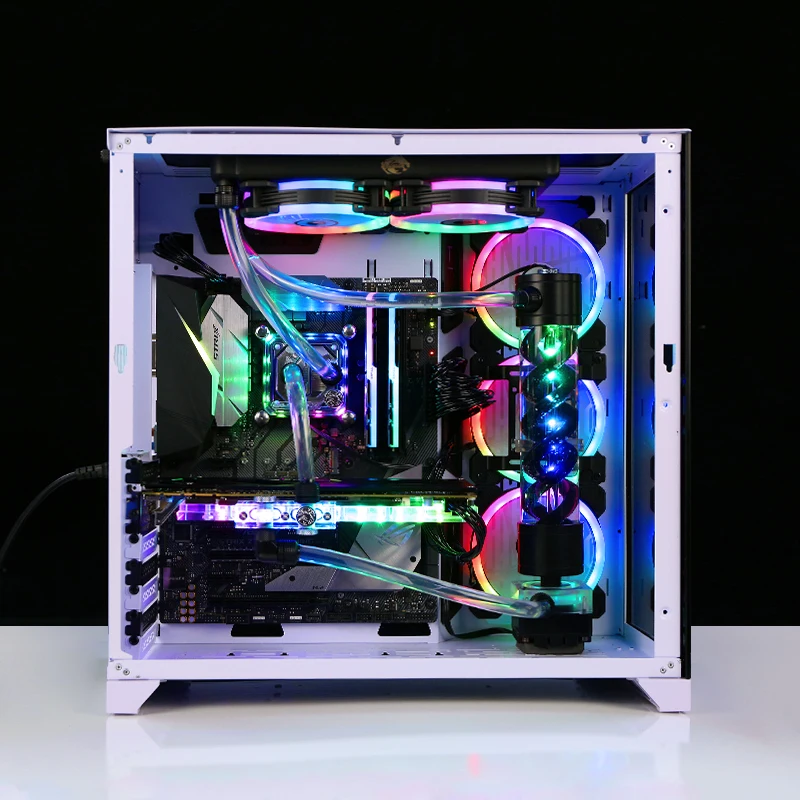 Simply slide it into place and secure with the quick release mechanism.
Then you need to connect the fan to the motherboard via the 4 PIN connector and this completes the installation of the tower type heatsink.
INTEL
The old heatsink can be removed by turning the snap fasteners counterclockwise. Next comes the cleaning of the old thermal paste and applying a new one.
Fasteners with clip-on legs need to be screwed to the new cooler. Screw them from the bottom, otherwise the legs will not reach the motherboard.
After you have fitted the new radiator with fasteners, you need to put it in place of the old one, snap the plastic feet into the mounting sockets and turn the lock clockwise.
Connect the cooler to the motherboard and you’re done, no configuration needed.
How to properly install the cooler on the motherboard
It makes sense to install a heatsink on the motherboard itself only on the power circuit, sometimes even the manufacturer himself installs cooling in places where bridges can overheat.
If you actively use the processor overclocking function, then you may overheat the power circuits (MOSFETs). In this case, you need to install radiators or a system of radiators with coolers there.
Very simple
Very basic
Stylish
Water cooled
Heavy Artillery
As you can see, the choice is quite wide. But do you need it? Mosfets or the power circuit are calculated together with other components of the motherboard for the processor models that it supports.
Typically, overclocked motherboards come with the required number of heatsinks, most often stylized so as not to spoil the aesthetic appearance.
If you mercilessly overclock your processor, and at the same time the motherboard overheats, then heatsinks on these transistors alone will not do.
If you still decide to install a heat sink on the motherboard, then the only way to do it bypassing the manufacturer’s recommendations is to glue the heat sink with a thermally conductive self-adhesive gasket or using a special thermal paste-glue.
Under the radiators for the water cooling system, there must be a mount on the motherboard itself.
Notebook Cooler Replacement
To get to the heatsink with fan, you need to completely disassemble your laptop. How to do this — you can find out through the search engine.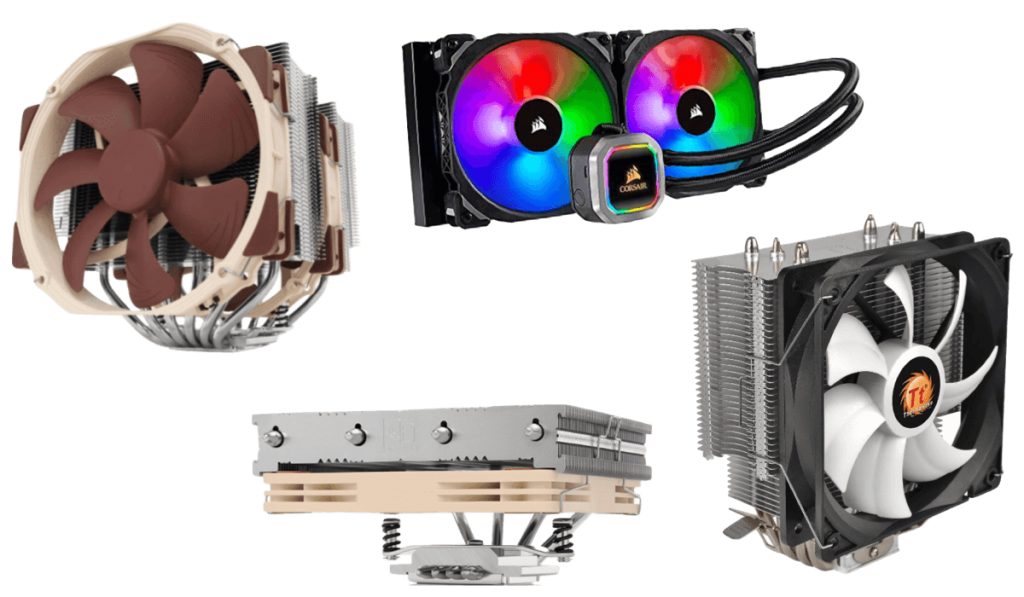 Each laptop model is disassembled differently and it is impossible to give any universal recommendations. In any case, you will need a Phillips screwdriver and a small plastic spatula to release the latches on the case.
If you need to replace the entire cooling system, then again, there are no universal systems. You need it exactly for your model, otherwise it simply won’t fit. If the laptop has a discrete graphics card, then most likely it has one copper tube on it, which removes heat from the graphics chip and from the processor. You cannot repeat its special bend, it is quite difficult, especially considering the need to solder the heat remover.
The only thing that can be removed from such a radiator is the cooler (pictured). They are, in principle, interchangeable, no need to look for your specific model, just choose exactly the same size. The copper tube and heatsink are non-separable and soldered to each other for better heat transfer.
Once you find a suitable cooling system, you can safely remove the old one.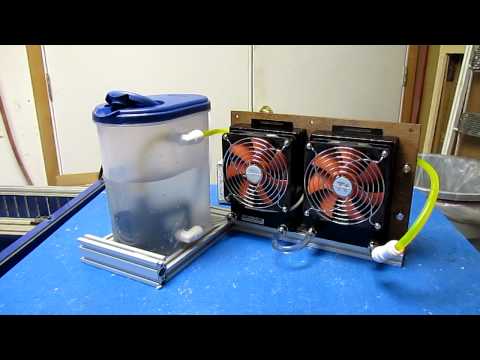 Unscrew it and carefully remove it without damaging the chips with dried thermal paste. The new one needs to be screwed into its place, having previously lubricated the chips with thermal paste.
Do not forget to connect the fan to the motherboard, otherwise you will have to disassemble the laptop again.
Assembling the water cooling system
Everything is very individual and depends on the case and the choice of decorative elements, the number of water blocks and the location of the pump with the tank.
The essence of the installation is to assemble everything into a single system through which the pump will drive water, the main thing is that after all hot spots the liquid enters the radiator for cooling.
There are simpler systems built for a single processor, they don’t need to be assembled, they are already assembled and have the simplest possible design.
A prime example is be quiet! pure loop. The heat exchanger is plated with nickel, which makes it easy to cover it with liquid iron instead of thermal paste.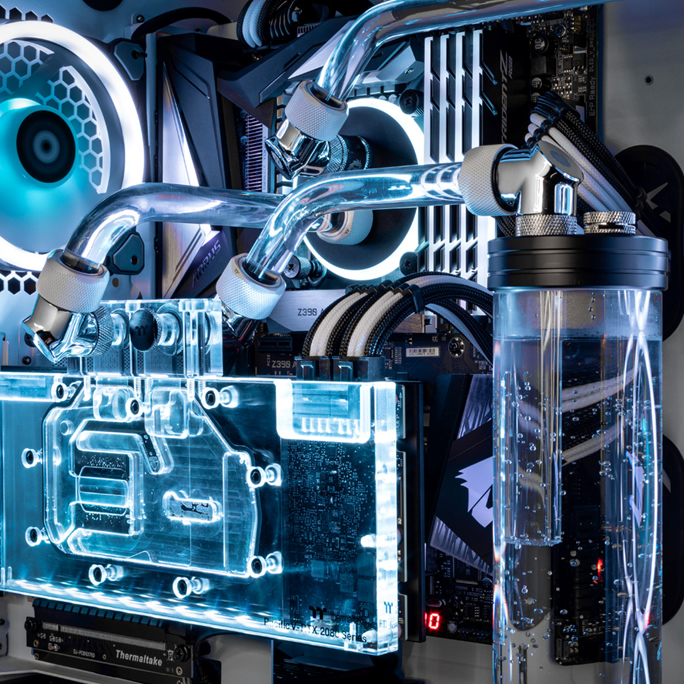 Recall that liquid iron corrodes aluminum, it cannot be smeared on radiators with an aluminum heat exchanger.
In this case, your case must support the installation of CBO. Secure the heatsink with bolts or quick-releases, and attach the heatsink to the processor as you would a normal heatsink. Don’t forget to apply thermal paste. Connect coolers to your motherboard and enjoy next generation cooling.
How to install water cooling on a video card
To remove heat from a video card, you need an appropriate water block. It is selected for each video card model separately.
for NVIDIA GeForce GTX 1080 Ti
for ASUS ROG Strix RTX 2070
for NVIDIA GeForce RTX 2080 Super
for NVIDIA GeForce RTX 3090 and 3080
After that, you need to connect it to the CBO — accordingly, in order to connect water cooling to the video card, you need to mount a complete system.
And if you do not want to delve into the intricacies of installing cooling systems or are afraid to spoil something, contact HYPERPC. Our masters will determine the problems of your computer and carry out its professional upgrade to suit your needs.
What types of CPU cooling are available?
Introduction
There are many elements in the computer that require cooling, but one of the main components is the central processing unit, and in this article we will tell you what popular cooling systems exist for the CPU and deal with their pros and cons. At the same time, we will not touch exotic types now, such as cooling on Peltier elements, phase transition systems, etc. They are extremely rare and place high demands on the user’s skills.
In general, the main principle of computer cooling is to dissipate heat from a heating element in the atmosphere. And the difference in the usual types of cooling lies in the methods of transferring thermal energy from the source to the point of dissipation. Therefore, the main ways to improve heat dissipation are to reduce the ambient temperature, increase the dissipation area, and improve the methods of transferring thermal energy.
Air-cooled
Air-cooled is the most popular at the moment due to the relatively low price, ease of installation and maintenance, as well as maximum reliability, because only the fan can break, which is very easy to replace.
The connection between the heatsink and the fan is usually called the cooler. And the most effective for cooling the CPU are coolers tower design with heat pipes.
Let’s look at their device. The heatsink consists of a copper base that contacts the processor cover. U-shaped heat pipes pass through the base, on which, in turn, plates (also called fins) are strung, which significantly increase the heat exchange surface area.
The fins are made of aluminum, rarely copper, and on the tubes they are crimped at the point of contact. In the most expensive coolers, the contact points are additionally soldered, which improves heat transfer. Many manufacturers make plates with cutouts or serrated edges to optimize airflow, which affects cooling efficiency.
We have mentioned heat pipes several times, but what are they? A heat pipe is a sealed copper tube, from which air is pumped out, and inside there is a low-boiling liquid — water, ammonia, methanol or ethanol. Heat transfer occurs due to the evaporation of liquid at the hot end of the tube with energy absorption. At the cold finned end, the liquid is condensed and returned to the hot area by a fine wire wick or sintered ceramic chips.
The fan provides air flow that blows over the plates and dissipates heat into the atmosphere. Everything is simple and clear.
But these cooling systems are not without drawbacks. Heat pipes have limitations in heat transfer, so they usually use several pieces at once, but it is impossible to increase their number indefinitely due to the size of the processor itself.
At the same time, the most efficient coolers feature a large heatsink, which can warp the motherboard, and fans create noticeable noise, especially at maximum speed, when the computer starts to look like an airport branch in a single room.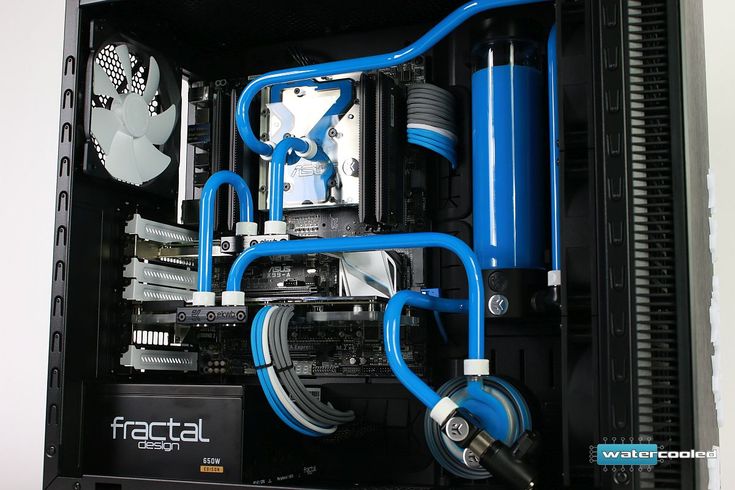 At the same time, the cooling efficiency of even the best air coolers is inferior to the flagship liquid cooling solutions.
In addition, air cooling systems have almost exhausted the development possibilities. Many manufacturers are simply polishing their best models from a few years ago to squeeze out additional percentages of efficiency.
Closed Liquid Cooling
The next step in CPU cooling is Liquid Cooling Systems (LCS). Their principle of operation also consists in transferring heat to the radiator, but this happens with the help of a working fluid (usually a mixture of distilled water and various additives against corrosion and bacteria), which circulates in a closed circuit through special tubes. This compares favorably with water cooling, since the liquid has a much higher heat capacity and thermal conductivity, which allows more energy to be removed per unit of time.
Among the LSS (or CBO, call it what you want) we can distinguish an extensive group of models that do not require maintenance and represent a complete and ready-to-work system.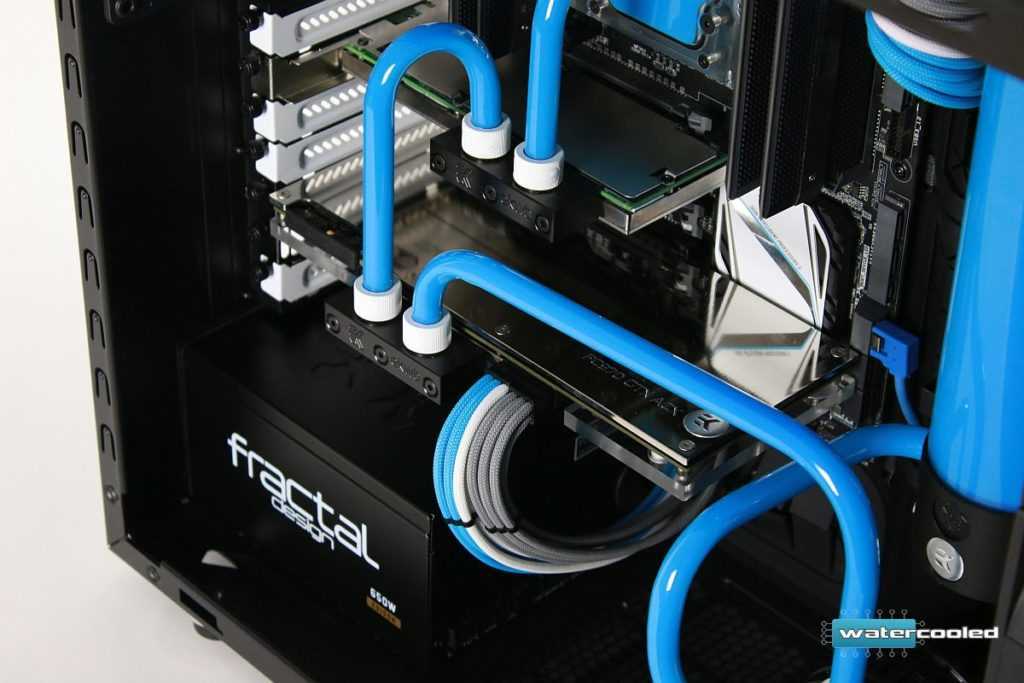 The happy owner only needs to install them on the processor and fix them in the case. Their name is appropriate: “All in one” or “all in one”.
AIO designs are almost the same for all manufacturers. The block that is installed on the processor includes a pump and a water block.
The latter is a copper plate with a lot of very thin ribs that is in contact with the processor cover. Such an internal structure can significantly increase the contact area with the refrigerant.
Flexible hoses connect the processor unit and the aluminum heat exchanger to the fans. Only, unlike air CO, a liquid-cooled radiator is not a heat pipe, but several liquid channels, between which an aluminum corrugated tape is glued or soldered.
In fact, it is the radiator that is responsible for the cooling efficiency, since the performance is no longer limited to the thermal energy transfer channel. They come in various sizes, depending on compatible fans.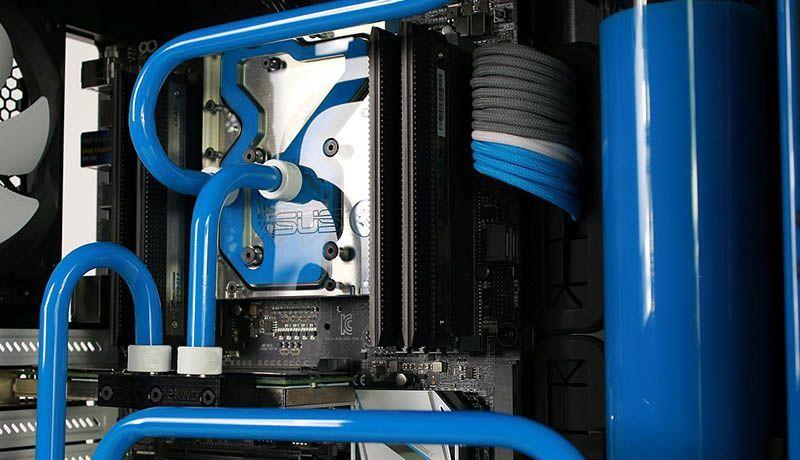 These can be propellers 120 or 140 mm, and their number can reach up to 4 pieces. Although the most popular options are models with three hundred and twenty, as a reasonable compromise between performance and dimensions.
A number of advantages can be noted in the use of LSS. Better cooling efficiency with less noise, less stress on the motherboard PCB, unlike a heavy tower radiator. At the same time, no special knowledge is required from the buyer, even direct hands are not required.
Also, one should not forget the aesthetic side — with the spread of cases with huge transparent windows, multi-colored illumination of fans and the processor unit looks much more advantageous than volumetric air cooler radiators. In addition, manufacturers now practice installing displays on the pump cover to display significant system information.
Of the minuses, one can single out the price (relative to the “air vents”), as well as the nuances of installation — nevertheless, flagship solutions require capacious enough cases to accommodate a radiator. Even at a certain angle, the convenience of a closed system becomes a minus, because it is impossible to clean the water block or change a failed pump. The hoses are crimped on the fittings, so it is simply impossible to drain the liquid and fill in a new one, except in rare cases when the manufacturer himself has provided this possibility.
Custom Liquid Cooling
The latest popular CPU cooler is custom liquid cooling. Their difference from AIO (unattended systems) is complete freedom of configuration and maximum flexibility. Custom CBO is like a puzzle — you decide which fittings, hoses, tubes to use, the size and thickness of radiators, and more.
Another important difference from AIO is that custom cooling can be installed not only on the processor. There are waterblocks for video cards, RAM, motherboards, and even power supplies. Moreover, water blocks for video cards are complex solutions that can remove heat from the GPU, power circuits and memory.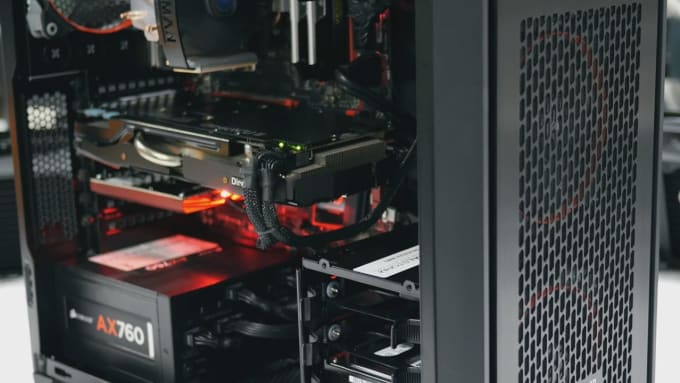 And the cooling efficiency with a sufficient number of radiators is much better than in maintenance-free CBOs, and even more so with an air cooler.
For example, a GPU can be cooled with CBO to less than 50 degrees at full load. Even the best air coolers can only dream of such indicators. And this is with almost no noise. It is the possibility of flexible configuration that leaves practically no alternatives when creating a very powerful, but quiet and cold computer. And to this it is worth adding the fact that custom CBO allows you to turn a PC into almost a work of art.
But you have to pay for everything, and in the case of liquid cooling, you have to pay in the truest sense of the word. The biggest downside is the cost of the components. A CPU and GPU circuit with a couple of heatsinks can easily go for $1,000, which is why these systems are usually found in high-end computers with the hottest and most expensive components. This disadvantage is slightly smoothed out by the fact that with the change of components it will be necessary to replace a minimum of water cooling elements, and not the whole thing.
Another disadvantage of LSS is the complexity of assembly, the potential risk of leakage, as well as the need for periodic cleaning and refilling of the system.
Conclusions
At the moment, in most cases, the air cooler is still the most popular cooling method. At a fairly low price, they provide acceptable cooling, a high level of reliability and maximum simplicity for the most inexperienced user. However, they are now increasingly being chosen for entry-level and mid-level computers, and AIO is preferred for powerful gaming PCs.
Maintenance-free cooling systems provide good performance, reasonably low noise and good looks. Which is quite enough for most demanding users who want to get efficient cooling at an adequate price.
But if you have a lot of money, and your PC already has the top-end hardware, then the most logical choice is a custom CBO. It is water cooling that is the pinnacle of serial types of cooling available without dancing with a tambourine. Vodyanka provides the best cooling, almost complete noiselessness, allows you to flexibly customize the system to your needs, offers a comprehensive solution not only for the CPU, but also for the video card, motherboard and other components. And it may look like it will open your mouth in surprise.
Although it will not do without a tambourine at all, since the threshold for entering the «club of watermen» is quite high — you need to have some knowledge in order to independently select the components of the CBO and anatomically correct limbs in order to assemble the contour. At the same time, it is worth remembering that the liquid in the computer is still a liquid that flows next to very expensive components. And poor-quality installation entails understandable risks to kill the entire system.
If you are not confident in your abilities, then we recommend that you contact the professionals from the Boiling Machine team. Below are our gaming PCs with water cooling systems, and for true enthusiasts we can produce PCs with custom water cooling.