boot — problem booting from 3.0 USB
Asked
Modified
4 years, 9 months ago
Viewed
2k times
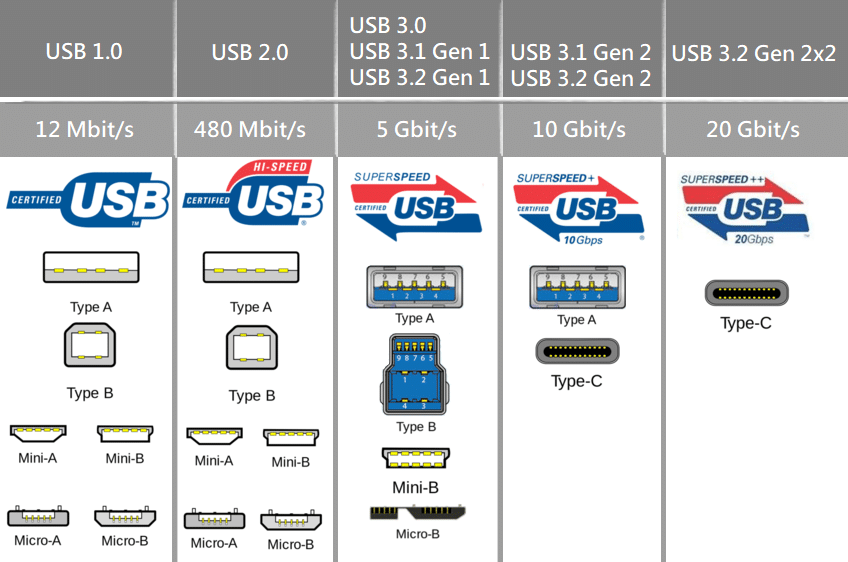
I have a Dell xps 13 9370 with only 3.0 USB ports. I’m trying to install Ubuntu (Windows 10 is now installed), I followed all the steps indicated here https://tutorials.ubuntu.com/tutorial/try-ubuntu-before-you-install#0https://tutorials.ubuntu.com/tutorial/try-ubuntu-before-you-install#0 .
The problem is that when I restart the pc and press f12 to boot from usb I cannot find such option, just the ordinary windows boot option.. I read that there might be problems with 3.0 usb ports, do you think this might be the case? I’m plugged in with a 2.0 usb through a 2.0 to 3.0 adaptor, does this effectively count as a 2. 0 or a 3.0?
Thank you!
- boot
- system-installation
- usb
- windows-10
I do not think that the USB 2.0 stick is the source of the problem. It seems like some kind of bios configuration problem. The following steps may help:
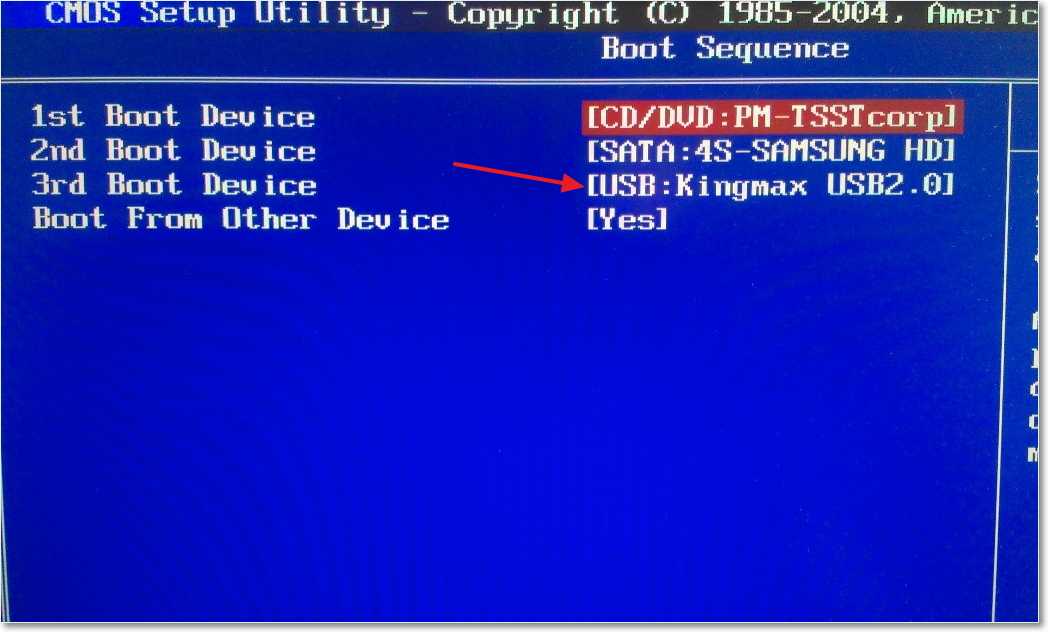
- Tap F12 continuously to enter bios configuration.
- Go to Settings -> Boot sequence. If your USB drive appears there, make it be the 1st in the list. Save and reboot.
- If it does not appear, go to System configuration -> USB Configuration. Select «Enable boot support» and «Enable external USB port» (if they are not selected). Save and reboot to bios configuration. Now under Settings -> Boot sequence you must see your USB. Goto 2.
- If 3 did not work, check if your USB was properly prepared. Also, check that you downloaded a 64-bit version of the OS.
If after booting from your live USB, Ubuntu does not recognize your SSD, and your SSD is M.2 PCIe, reboot again to bios and go to System Configuration -> SATA Operation.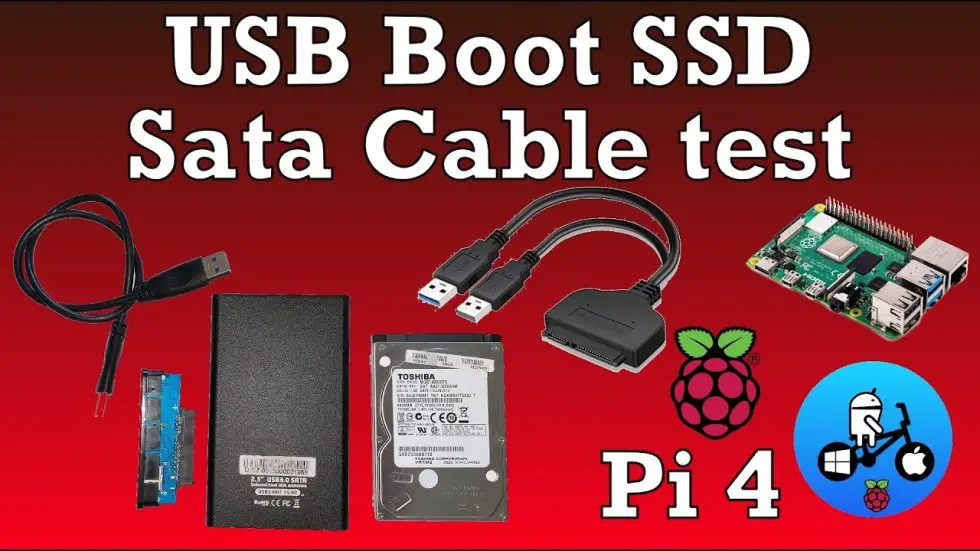 If «RAID On» is selected, select «AHCI». Before doing this I recommend you to prepare a separate windows restoration USB.
See also https://www.dell.com/community/Windows-10/Dell-Inspiron-15-7567-won-t-boot-from-USB/m-p/5162753#M9759
Sign up or log in
Sign up using Google
Sign up using Facebook
Sign up using Email and Password
Post as a guest
Required, but never shown
Post as a guest
Required, but never shown
By clicking “Post Your Answer”, you agree to our terms of service, privacy policy and cookie policy
usb installation — Ubuntu won’t boot from USB 2.
 0
0
Ask Question
Asked
Modified
1 year, 9 months ago
Viewed
155 times
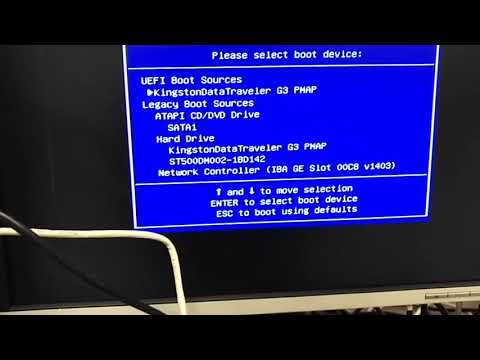
Although my computer is capable of booting from USB devices and I have set the boot order correctly in my BIOS, I find that I am unable to boot any installation of Ubuntu I have (be they on external Hard Drives or USB card readers etc.) from either of my USB 2.0 ports.
These exact same installations boot perfectly fine from my USB 3.0 port!
Now, I get that USB 2.0 is much slower but it should still boot eventually provided the computer can do it. I know my computer can boot from the 2.0 ports because ubuntu IS found and does actually initiate the booting process but after several long minutes of light flashing and disk access, the booting process freezes and Ubuntu never comes up even if you wait hours.
Take the same disk out, place it in the USB 3.0 port and Ubuntu loads in a few minutes perfectly.
I would be perfectly happy with that situation if it wasn’t for the fact that I only have one USB 3.0 port which I need for other purposes once Ubuntu is booted and it seems you cannot boot anything from a USB hub… so I’m kind of ‘up the creek without a paddle’…or ‘without a USB 3.0 port’ as the case may be.
Any help would be greatly appreciated. 🙂
- boot
- usb-installation
17
Ok, I’m going to answer my own post, as seems to be the tradition on here. I really don’t understand this forum. I’ve used MANY forums in my life and I’m never used another forum where everyone just sends comments and no one actually answers the question by replying to the post… anyway… putting that weirdness to one side…
For anyone having this same difficulty I’ve worked out how to get Ubuntu (regardless of which version is used, which is, as I said, UNIMPORTANT) to boot over USB 2. 0. The answer is at install time, do not format the disk you plan to install Ubuntu on as ext4! Instead, format as ext3! Works perfectly on USB 2.0 now. Ext4 works fine for USB 3.0. I have no idea why this is the case, I just know that it works.
Thanks me!
Sign up or log in
Sign up using Google
Sign up using Facebook
Sign up using Email and Password
Post as a guest
Required, but never shown
Post as a guest
Required, but never shown
By clicking “Post Your Answer”, you agree to our terms of service, privacy policy and cookie policy
Installing Windows 7 from a USB 3.
 0 flash drive
Since manufacturers often completely refuse to install USB 2.0 and DVD / CD-ROM on modern laptops and tablets, I decided to make a public memo on installing the operating system from a USB 3.0 flash drive. In my case, we will talk about installing Windows 7. The new version of the USB interface is much faster than its predecessor, and it’s a sin not to use this when reinstalling the system, especially since the entire installation after that will take only a few minutes. At the moment, by inserting a USB 3.0 installation flash drive into a USB 3.0 port, Windows 7 will ask for USB drivers at the beginning of the installation, because. it itself does not have built-in drivers from USB 3.0. In most cases, people solve this problem by plugging a flash drive into a USB 2.0 port, and at the same time the installation stretches for a long time, but no troubles, which will be described later in this memo, are required. All steps below assume you are running Windows 7.
Create a folder somewhere on your hard drive winpe .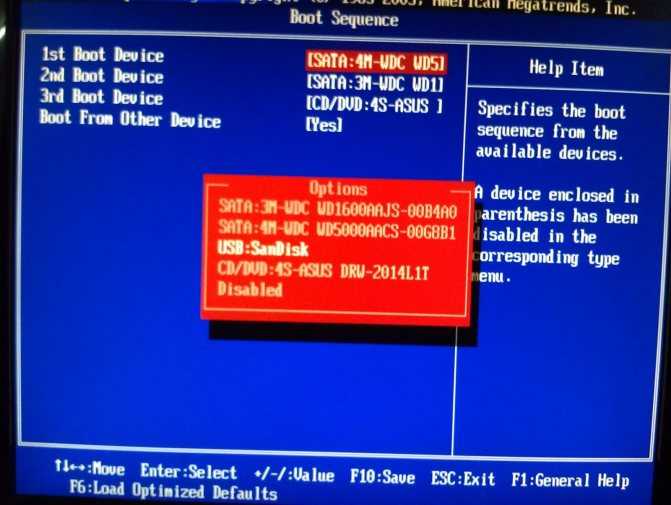 In it, create a folder mount and a folder usb3 . They will be needed for the next step. For example, I created a folder winpe in the root of drive D:.
To prevent the installer from asking for drivers from USB 3.0, you need to integrate them into it. Therefore, we first find USB 3.0 drivers for our motherboard. Unzip them if necessary, and copy them to the folder usb3 , which was created in the previous paragraph (the main thing is that the drivers contain inf files, which will be used in the future). There are several USB 3.0 controllers on my motherboard, this is the built-in intel chipset controller and another controller from asmedia, so I copied the drivers from both controllers to subfolders usb3\intel and usb3\asmedia. This is necessary so that Windows 7 can be installed from any available USB 3.0 port (strangely enough, in my case, the asmedia USB 3.0 controller works faster than the Intel one).
Let’s move on to the flash drive. It is assumed that you have already created a bootable USB flash drive with the Windows 7 installer, if not, then the easiest solution is to use the Windows 7 USB / DVD download tool, as described in my article — How to make a bootable Windows 7 flash drive. On a USB flash drive, go to folder sources , find the file boot.wim there and copy it to the folder winpe .
Run command prompt as administrator. There we go to our test folder (in my case, we type the command cd / d D: \ winpe and press enter ). Next comes a set of three commands (they typed the first one, pressed enter , ran percentages, dialed the second one, pressed enter , etc.), which I don’t see the point of explaining here, you can search their description on the Internet, the main thing is that they doing their thing: 9dism /mount-wim /wimfile:boot. wim /index:2 /mountdir:mount
dism /image:mount /add-driver:usb3 /recurse
dism /unmount-wim /mountdir:mount /commit
If you did everything without errors, then the file boot.wim that you copied to the folder winpe should have successfully integrated the drivers from your USB 3.0 controllers. And all that remains for you is to copy this file back to the USB flash drive in folder sources , over the old file. After that, the installer will no longer require drivers from you when installing Windows 7 from a USB 3.0 port, and the entire installation process will take much less time. And to make your USB 3.0 flash drive more versatile, i.e. in order to be able to quickly install the system from any USB 3.0 port, any computer, you will need to integrate all the drivers of existing third-party USB 3.0 controllers. Fortunately, there are not so many of them, in my memory, there are about three or four of them together with Asmedia (Etron, Renesas / Nec, etc.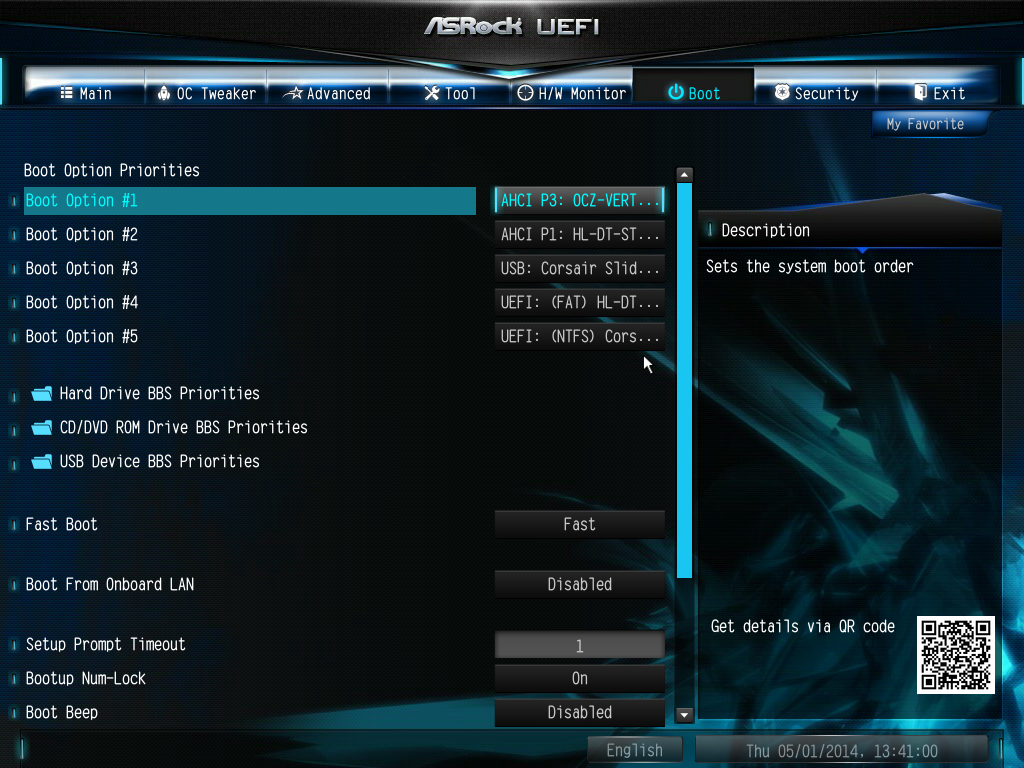 ). nine0003
We are always happy to help you. Service center — Free-IT-expert
Category Useful articles
Configuring Raspberry Pi to boot from USB HDD and SSD drives
quite quickly «kill» microSD cards with intensive read-write operations.
The way out of the situation is to install the system on an external HDD or SSD drive and boot the microcomputer from it. nineOl000 Action required:
- Raspberry Pi 3 / 4
- External memory stick with USB interface
- microSD card (Raspberry Pi 3 only)
The good news is that all recent models of the Raspberry Pi microcomputer line out of the box support booting from USB drives. And only on older models this feature needs to be activated manually. nine0003
Enable USB boot on Raspberry Pi 2 / 3
Raspberry Pi 2/3 only
Skip this step if you are using a Raspberry Pi 3B+ or Raspberry Pi 4.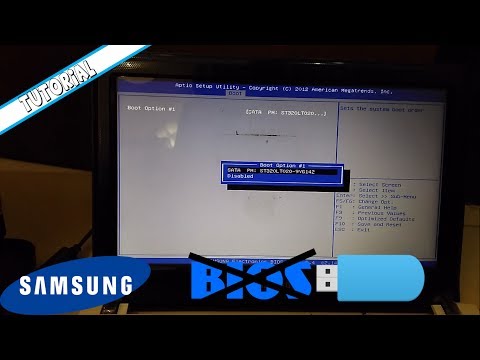
To enable USB boot to Raspberry Pi 3 you need to activate the USB Boot Mode option by entering the value in the OTP memory.
To boot into Raspberry Pi OS from a microSD card and add a line with the command to the config.txt file:
echo program_usb_boot_mode=1 | sudo tee -a /boot/config.txt
And then reboot the system:
sudo reboot
During the next boot, the command will be processed and write the value that activates the ability to boot from USB disks to the OTP memory of the microcomputer. This operation is irreversible. But you should not worry about this: activating USB Boot Mode will not deprive you of the ability to run Raspberry from a microSD card, but will only add a new option that is active by default in more recent microcomputer models.
I also note that the line program_usb_boot_mode=1 from config.txt itself will not go anywhere, so after rebooting it is advisable to remove it from there. nine0003
Installing the system
Installing the operating system for Raspberry Pi on a USB drive is no different from installing it on a microSD card: we still need to download the image of the desired system and burn it to a suitable disk.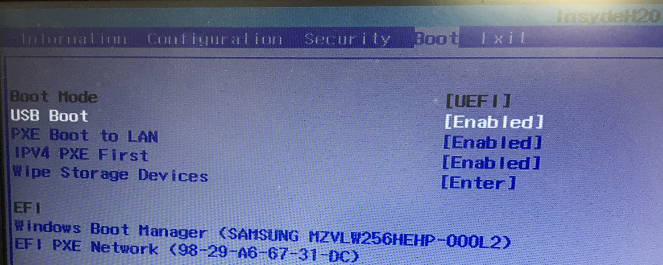
The most convenient way to do this is to use the dedicated Raspberry Pi Imager utility available for Windows, Ubuntu and macOS. Unlike universal applications for burning images (Rufus, Win32DiskImager, balenaEtcher, etc.), it can work not only with locally stored files, but also download the desired image from the Raspberry Pi Foundation site right during the burning process.
nine0003
Select the desired image from the list:
Select the drive to write:
And wait for the end of the process:
That’s it. But if in the future you plan to use the Raspberry Pi in headless mode, then you should immediately drop an empty file called “ssh” without extension into the root of the resulting boot disk. And if a wireless interface will be used to connect to the network, then you need to add the wpa_supplicant.conf file to the root with the data for connecting to the access point:
 ctrl_interface=DIR=/var/run/wpa_supplicant GROUP=netdev
update_config=1
country=RU
network={
ssid="ACCESS_POINT_NAME"
psk="PASSWORD_FROM_ACCESS_POINT"
key_mgmt=WPA-PSK
}
Loading
We remove the microSD card with the system from the Raspberry Pi, connect our external disk to USB and supply power.