Will it Run? VR Hardware Requirements for your PC or Laptop
No matter if you’re developing virtual reality applications or playing VR
games — you’re going to have to have the proper hardware to run those
immersive environments. Unfortunately, this often means investing into a
higher performance hardware.
However, you don’t have to look at the most advanced gaming PC at the
moment. As we all know buying top-of-the-line computers will hurt our
wallets and judging by the pace of technology, what’s top of the line today
is only an average machine a year later. Thus, we’re going to focus on the
facts — what VR requirements you really need to satisfy so you can buy
something today and use it for years to come without breaking your piggy
bank.
Firstly, why should your computer be powerful? Because it does all the
heavy-lifting: processing and rendering.
Not every computer is up to a
task. If you want your virtual reality apps to run smoothly you’ll want an
above average station or laptop.
But fear not, there are still affordable options on the market that fit
minimum requirements.
In this guide we’ll help you to check whether your computer is powerful
enough to run VR applications on any high-end headsets, or whether you need
an upgrade to any of its components. You’ll also find out what to buy to
satisfy recommended specifications for immersive realities as well as the
budget options for meeting minimum specs.
We’ll also share the latest computer builds for every price segment so that
you could purchase or build a VR-ready computer from scratch.
One more thing. VR completely envelops users into the digital world while AR
just super-impose the digital assets in the physical world. This often means
that AR and mixed reality (MR) applications are far more forgiving than VR
ones. So by focusing on being VR-ready first, you should be good for AR and
MR needs as well.
Let’s dive in.
Table of Contents
- Can I Run VR on my PC or Laptop?
-
System Requirements For High-End VR Headsets (HTC, Oculus, Valve,
Pimax, HP Reverb G2) - VR Ready PC Builds
- VR Ready Laptops
- Recommendations for AR/VR Developers
Can I Run VR on my PC or Laptop?
Source: twentynext.com
There are three main components that determine whether a computer is
VR-ready: processor (CPU), graphic video card
(GPU), and random access memory (RAM).
Let’s walk through each one of them.
GPU VR Requirements for Running VR
The demands on GPU are particularly high because it has to render two
displays to create VR experience, one for each of your eyes. Add to that a
much higher render resolution for VR apps and you’ll get the idea why an
average graphic processor may not be enough.
We recommend purchasing at least a minimum recommended GPU to ensure
consistent 90+ FPS refresh rate. Cheaper GPU might handle VR apps, but the
lower FPS may cause nausea.
HTC Vive & Oculus Rift S minimum GPU requirement:
Nvidia GTX 970 or greater. [benchmark 9563+]
Alternatives: Radeon R9 Fury, GeForce GTX 1060,
Radeon R9 390X
Valve Index headset minimum GPU requirement: GTX 1070 or
greater. [benchmark 10570+]
Alternatives: GTX 900,
Radeon Pro Vega 64
Note: AMD’s VR Ready FX and
Ryzen graphic cards and processors have been dominating
VR performance due to close partnership with VR headset vendors and native
LiquidVR interface.
CPU Requirements for Running VR
Generally, most of the processor with four ore more processors (Quad Core)
are recommended for enough computational power. Below are the minimum CPU
requirements for the majority of VR headsets including HTC, Oculus, and
Valve.
Minimum CPU requirement for all models: Intel i5-4590 or
greater [benchmark 1600+]
Alternatives: AMD Ryzen 3
PRO 2200GE, AMD Ryzen 5 2400GE, AMD FX 8350 or better
RAM Requirements for Running VR
The majority of VR headsets require at least 8 GB of RAM. The only exception
is HTC Vive Pro and HTC Vive Pro Eye that can run with just 4 GB. HTC Vive
Cosmos also requires 8 GB+ RAM.
How To Easily Check If Your Current PC Is VR-Ready
Instead of relying on writing performance statistic, use a software test to
determine whether your system is powerful enough. Download and use
SteamVR Performance Test
from the Steam store. The tool will automatically measure your system’s
rendering powers using a 2-minute VR demo.
With this tool you can easily determine whether your PC is capable of
running VR smoothly at 90 FPS or whether any upgrades are necessary to your
GPU, CPU, or both.
SteamVR Performance Test will identify your hardware and return a score
based graph. This way you will know whether your desktop is good enough or
whether you need to upgrade or even replace your computer system. It will
also give you an idea on what kind of experience you can expect playing the
latest virtual reality games.
A note about I/Os: To ensure compatibility between your
hardware and the headset you are using, make sure to check what inputs and
outputs the headset uses. In 98% of the cases the headset uses standard
connections like USB-C, USB 3.0 and HDMI 1.4 cables. However older headsets
like Oculus Rift S use DisplayPort instead. We’ve listed a few examples of
popular headsets but make sure to do your own research before investing in a
headset and a new vr gaming rig.
System Requirements For Different VR Headsets
System requirements for computers to support high-end VR headsets are more
or less the same. The difference usually comes down to RAM requirements and
m in some cases, interfaces for US.
At the same time Pimax 8K headsets require
roughly 2.5x more graphics power than Vive and Rift headsets due to twice
higher resolution.
Below are system requirements for every VR headset from official developer
websites.
Oculus Rift and Oculus Rift S System Requirements
Official page: oculus.com
Minimum computer requirements for Oculus Rift:
Processor: Intel i3-6100/AMD Ryzen 3 1200, FX4350 or
greater
Graphics Card: NVIDIA GTX 1050 Ti/AMD Radeon
RX 470 or greater
Alternative Graphics Card: NVIDIA
GTX 960 4 GB/AMD Radeon R9 290 or greater
Operating System:
Windows 10
Memory: 8 GB RAM
USB Ports:
1 x USB 3.0 port
Video Output: Compatible Mini
DisplayPort video output (Mini DisplayPort to DisplayPort adapter included
with Rift S)
Recommended computer specs for Oculus Rift:
Processor: Intel i5-4590/AMD Ryzen 5 1500X or greater
Graphics Card:
NVIDIA GTX 1060/AMD Radeon RX 480 or greater
Alternative Graphics Card:
NVIDIA GTX 970/AMD Radeon R9 290 or greater
Memory: 16
GB RAM
Operating System: Windows 10
USB Ports:
1 x USB 3. 0 port (3x USB for Oculus Rift C1)
Video Output:
Compatible DisplayPort
Oculus Quest 2 System Requirements
Oculus Quest is a tetherless device that doesn’t usually require a PC to
operate. However, if you want to access a library of applications developed
for Oculus Rift, you need to connect Oculus Quest to your PC.
Recommended system requirements for Oculus Quest 2 with Air Link PC:
Processor: Intel i5-4590 / AMD Ryzen 5 1500X or better
GPU: NVIDIA GeForce GTX 1070 or AMD 500 Series and higher
Memory:
8GB
Operating System: Microsoft Windows 10
USB Ports:
1x USB port
Note: you also need to purchase Oculus Link cable to connect Oculus Quest
with your PC.
Source: oculus.com
Valve Index System Requirements
Official website: steampowered. com
com
Minimum computer requirements for Valve Index:
Processor: Dual Core with Hyper-Threading
Graphics Card:
Nvidia GeForce GTX 970 / AMD RX480
Memory: 8 GB RAM
Operating System:
Windows 10, SteamOS, Linux
USB Ports: USB 2.0 Port
required
Video Output: Available DisplayPort
(Version1.2)
Recommended computer specs for Valve Index:
Processor: Quad Core+
Graphics Card:
Nvidia GeForce GTX 1070 or better
USB Ports: Available
USB 3.0 or never Port required for Headset Pass-Through Camera
HTC Vive Pro & HTC Vive Pro Eye System Requirements
Official website: vive.com
Minimum computer requirements for HTC Vive Pro and HTC Vive Pro Eye:
Processor: Intel Core i5-4590 or AMD FX™ 8350, equivalent
or better.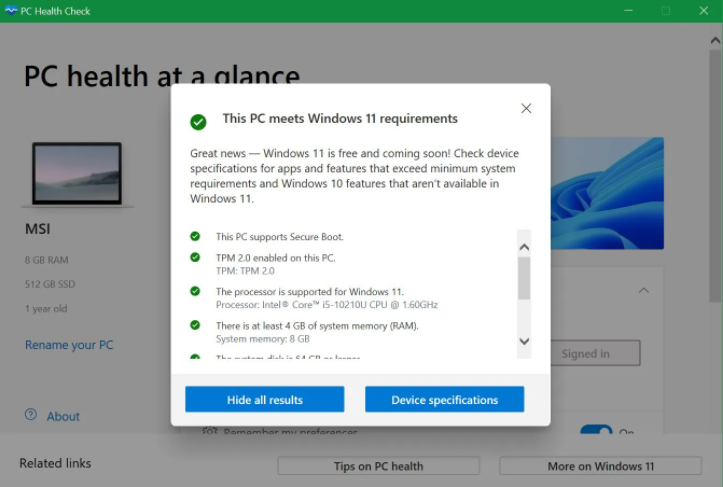
Graphics Card: Intel Core i5-4590 or AMD
FX™ 8350, equivalent or better.
Operating System:
Windows 7, Windows 8.1 or later, Windows 10
Upgrade to Windows 10 for
the best results with the dual front facing cameras
Memory:
4 GB RAM or more
USB Ports: 1x USB 3.0 or newer
Video Output:
DisplayPort 1.2 or newer
Recommended computer specs for HTC Vive Pro and HTC Vive Pro Eye:
Graphics Card: NVIDIA GeForce GTX 1070/Quadro P5000 or
above, or AMD Radeon Vega 56 or above.
Memory: 8 GB
RAM or more
HTC Vive Cosmos System Requirements
Source: bestbuy.ca
Official website: vive.com
Recommended computer specs for HTC Vive Cosmos:
Processor: Intel i5-4590 / AMD FX 8350 or better.
Graphics Card:
Nvidia GTX 1060 / AMD Radeon RX 480 or better
Operating System:
Windows 10
Memory: 8GB RAM or more
USB Ports:
1x USB 3. 0 or newer
Video Output: DisplayPort 1.2 or
newer
Pimax 8K X and Pimax 8K PLUS System Requirements
Source: uploadvr.com
Official website: pimax.com
Recommended computer specs for Pimax 8K & 8K Plus:
Processor: Intel i5-9400 or better
Graphics Card:
NVidia RTX 2060+ (Upscale mode) and NVidia RTX 2080+ (Native mode)
Operating System:
Windows 10
Memory: 8 GB RAM or more
USB Ports:
USB 3.0
Video Output: DisplayPort 1.2 or newer
Recommended computer specs for Pimax Artisan and Pimax 5k XR:
GPU: NVidia GeForce GTX 1070 or better
Confused about Pimax models? Take a look at their entire roster below:
HP Reverb G2 System Requirements
*The
HP Reverb G2 has
been updated with better tracking and FOV in late 2021!
Source: https://support. hp.com/
Official Website:
https://support.hp.com/us-en/product/hp-reverb-g2-virtual-reality-headset/33835976
Minimum computer requirements for HP Reverb G2:
Processor: Intel Core i5, i7, Intel Xeon E3-1240 v5 or AMD
Ryzen 5 equivalent or higher
Graphics Card: NVIDIA
GeForce GTX 1060 or AMD Radepm RX 580 / VEGA equivalent or better (may only
run at half resolution)
Operating System: Microsoft
Windows 10
Memory: 8 GB RAM or more
USB Ports:
USB 3.0 Type-C port
Video Output: DisplayPort 1.3
Recommended computer specs for HP Reverb G2:
Processor: Intel i7 or Intel i9+ or AMD Ryzen 7, AMD Ryzen
9
Graphics Card:
NVIDIA GeForce RTX 2060 SUPER, NVIDIA GeForce RTX 2070, NVIDIA GeForce RTX
2070 SUPER, NVIDIA GeForce RTX 2080, NVIDIA GeForce RTX 2080 SUPER, and
NVIDIA GeForce 2080 Ti
NVIDIA GeForce RTX 3070, NVIDIA GeForce RTX
3080, and NVIDIA GeForce RTX 3090
AMD Radeon RX 5700, AMD Radeon RX
5700 XT, and AMD Radeon 7
Can Macbook/Apple run VR?
Some Macs won’t ever be able to run VR applications. Others will require
slight modifications, and some Apple computers are able to run VR
out-of-the-box. Let’s see what is what.
With the latest M1 processors (Max and Ultra in the Mac Studio) Apple
platform definitely meets the CPU criteria. The problem comes to graphic
cards. Apple doesn’t conform to the GPU race the PC ‘master race” is
pushing.
With the launch of AR glasses (or VR device), Apple is definitely going to
have solutions for developing XR applications on mac machines but at this
moment it’s sadly recommended to use a PC for XR development.
Source: makeuseof.com
Hardware requirements for running VR on Macs
The majority of Macs run with graphic cards that are not sufficient to
perform demanding virtual reality and augmented reality applications. Yet
certain models and configurations are up to the task.
For example the
starter configuration for
the latest desktop Mac Pro runs with
AMD Radeon Pro 580X which is below the required minimum for
running any high-end VR headset on the market. However, a more advanced
configuration with Pro Vega knocks it out of the park.
[check out GPU benchmarks in our previous GPU section].
Current
iMac’s also fail to meet minimum GPU requirements.
However, iMac Pro with Radeon Pro Vega 56 meets VR
requirements perfectly. Even 2017 iMacPro models with their powerful GPU
setup can easily run VR apps.
Here are Macs that meet VR requirements for GPU:
- iMac Pro with Radeon Pro Vega
- Mac Pro with AMD Radeon Pro W5700X or AMD Radeon Pro Vega II+
Here are Macs that don’t meet VR requirements for GPU:
- Any Mac mini
- Any iMac
- Any MacBook (Air, Pro)
If you have a Mac computer that meets CPU and RAM requirements, but doesn’t
meet GPU requirements all is not lost, there is a workaround.
In 2019 Apple introduced support for
external graphics cards, or eGPU. Basically you can connect a graphics card via an enclosure box with a
PCIe expansion slot that connects to your Mac’s Thunderbolt 3 port.
Requirements for eGPU setup:
- macOS Sierra 10.13.4 or later
- Thunderbolt 3 port
- Appropriate graphic card
Not all graphic cards will do. Check out the
list of supported GPUs.
Also due to the Thunderbolt’s bandwidth limitations there might be a
performance loss of up to 20% with this setup. Also, make your research
about compatibility of eGPUs with Macs with M1 chips. Connect with Apple
support team would be smart.
Software requirements for running VR on Macs
If you’re a VR developer and use Valve Index you should know that Valve has
recently
stopped supporting SteamVR
on macOS systems as of May, 2020.
Oculus Rift S, Oculus Rift and Oculus Quest 2 via link are all optimized to
work with Windows PCs, so you might need to use BootCamp with Windows OS on
your Mac.
Currently there aren’t many applications that support macOS out of box.
There are
rumors that Apple actively works on their own VR solution, but currently the majority of developers will benefit from PC-oriented VR
setup.
Summary:
If you’re building a VR-ready station from scratch, in 2020 it’s much
more money efficient to invest into a capable PC rather than buying any
Mac on the market.
How Much Will VR-Ready Computer Cost Me?
Source: asus.com
In this section we’ll cover the most optimal PC-builds and laptops to
support VR headsets and VR development.
First let’s cover the most recent PC builds.
VR-Ready PC builds (as of October 2020)
Minimum PC VR build (before ~$700)
CPU: Intel Core i3-10100F ($85) or AMD Ryzen 3 3200G
($200)
GPU: Radeon RX 6500 XT ($165), Intel NVIDIA GTX
1060 ($320)
Motherboard: ASUS X570 TUF Gaming (ATX)
RAM:
8 GB ($65)
Recommended specs PC VR build ($1200 — $1500)
CPU: Intel Core i5-11600k ($220) or AMD Ryzen 5 5600X
($230)
GPU: Nvidia GeForce RTX 3060 Ti ($400) or AMD
Radeon RX 6600 XT (~$530)
Motherboard: ASUS ROG Strix
X470-F
RAM: 16 GB DDR 4 (~$65 — $80)
Advanced performance PC VR build ($2600 — $3500)
CPU: Intel Core i9-11900K ($~400) or AMD Ryzen 7 5800X
($350)
GPU: GeForce RTX 2070 ($750)
Radeon RX
6900X XT ($1,400)
MSI Gaming GeForce RTX 3090 Gaming ($2,000+)
Motherboard:
ASUS Prime Z690-P ROG or X570 Crosshair VIII Formula
RAM:
32 GB DDR 4 (~$100 — $150)
VR-Ready Laptops (as of March 2022)
Who doesn’t want the mobility and format of a laptop and performance of a
gaming desktop? Laptops have come a long way and you can get a virtual
reality ready laptop for a fraction of the gaming rig.
Source: asus.com
If you want a VR ready laptop, get ready to dip into your pocket as any
decent VR-supporting laptop will cost you at least $1000. Below are the most
optimal configurations.
Almost every station comes in several configurations, so make sure to check
the satellite GPU.
Budget Option: ($1000 — $1500)
- Lenovo Legion 5 15” with GeForce RTX 3050 ($1000)
- Dell G15 with GeForce 3050 ($1200)
- ASUS ROG Zephyrus G14 with GeForce GTX 1650 ($1,100)
- HP Omen 15 with RTX 3060 ($1,400)
- ASUS ROG Zephyrus G15 with GeForce RTX 3070 ($1,500)
Optimal Choice: ($1750+)
- Acer Predator Triton 300 SE with Geforce RTX 3060 ($1750)
- Alienware m15 r7 with GeForce RTX 3070 (~$2,100)
- Razer Blade 15 with GeForce RTX 3070 (~$2400)
Ultra Performance Option: $3000 and higher
- Alienware M15 r4 with GeForce RTX 3070 (~$2,300)
- MSI Stealth GS66 with Core i9 and GeForce 3080 ($3,000)
- ORIGIN EON17-X with Core i9 RTX 3080 (~$4,000)
Circuit Stream Recommendations for VR/AR Developers
If you’re serious about VR development, invest in the hardware that is going
to perform for the next five or more years. This means a hardware setup that
has 16 GB memory, a quad core processor and gaming level graphic card. Pay
special attention to Asus Ryzen chips since they are efficient and
affordable.
Below are some tips to ensure that you’re getting the most out of your VR
station and workflow.
Recommendation #1. Have two screens
When you have two monitors, you can significantly increase your speed of
development and reduce the number of useless routine operations. Instead of
switching between different tabs in your browser or applications you can
have the important information for your work on one monitor and your IDE /
code / project on the other.
Examples: follow the class instructions and work at the same time, open a
library of examples on one monitor and test it on the other, edit Unity
assets in one monitor and test or work on your project in another.
Recommendation #2: Having VR Headset Is Optional
Although it’s useful to get your hands on VR headset for VR development,
it’s not necessary.
You can participate in our XR development course with only a PC or a laptop,
and test your applications using Unity visual editor.
Having a VR headset is useful for testing purposes, but not
development-wise.
Our recommendation for best VR headset to start with:
Oculus Quest 2.
The runner up? The late 2021
HP Reverb G2
offers the best money can buy with the performance it delivers!
Recommendation #3: Set Up Your Unity For Development
You can start developing until you have software and hardware aligned.
Read our setup guides to prepare your Unity project for VR development.
- Oculus Rift Unity setup guide
- Oculus Quest Unity setup guide
- HTC Unity setup guide
What about XR Designers Do they Need a Beastly PC?
Not at all and thanks for asking.
Designing for XR uses different skill-set than development and
consequentially you’ll employ different tools and softwares. More on
differences in
Choosing Your Career in XR
article.
Designing and viewing their creations for AR and VR is now absolutely doable
on a Mac, provided your machine is fairly recent and powerful enough. This
includes the 2021 iMacs with M1 chip.
Here’s a short FAQ for die-hard Apple Users
Q. Can I run the required software (Unity) for this XR Design course on a
Mac?
A. Depends on the Mac. Macs can run AR applications for iOS, but some Macs
won’t ever be able to run VR applications, if they are not powerful enough
(e.g. MacBook Air, older iMacs). Others will require slight modifications,
and some newer Apple computers are able to run VR out-of-the-box. We
strongly suggest you contact our student enrollment advisor with your
computer specs if you’re still having doubts after reading this post.
Ideally, you want:
- 16GB RAM (minimum)
- 8 core GPU
- 8 core CPU
- M1 chip (optional)
Q.
 Can I design, build and test VR experiences without a PC?
A. Yes. You absolutely can build on a Mac (if it’s powerful enough) and load
your creations into your Quest 2 headset. There is only ONE limitation,
which is that you cannot use «Oculus Link» to see your project in immediate real-time while developing. That
requires a PC. Instead, you make a build in Unity and push it to your Quest.
This only takes about 30 seconds for a small project. You will do this over
and over again while testing and tweaking.
Alternatively, you can design a 3D prototype using just your Quest 2 headset
and a VR app called ShapesXR which
allows a team or a single designer to prototype in VR, using a VR headset
and controllers. The results can be imported to Unity and updates to your
design within ShapesXR refresh instantly within Unity.
Q. Why is there such a strong bias towards PCs for VR software?
A. Who knows? Apple likes to play by their own rules and the majority of
Mac-owners aren’t gamers (because they can’t be). PC on the other hand is an
easily upgradable machine and can be adapted to the hardware requirements
without buying a completely new unit.
That said, the market is expanding and democratizing. Many believe we are at
an inflection point, based on the success of Oculus Quest 2 and the uptake
of AR/VR by industry. Apple is working on
AR Glasses
and VR and will be releasing an SDK (software developer kit).
Can my PC run Windows 11? Here are the system requirements
By
Rich Woods
Microsoft has published the system requirements for its new Windows 11 operating system, and it requires a 64-bit dual-core processor.
Windows 11 has been around for over a year now, but the first big feature update has arrived. The original OS brought with it a new UI, a whole new Microsoft Store, Snap Layouts, and even Android apps by way of the Amazon Appstore. But now, you’re probably wondering what the system requirements are so you can see if your PC can even run Windows 11, or if those requirements have changed as a result of Windows 11 version 22h3.
Luckily, Microsoft already has a support document ready. And yes, the system requirements increased for the original version of Windows 11, although in fairness to the Redmond firm, it really hasn’t raised system requirements in any significant way since the Windows 7 era. The Windows 11 system requirements did not change with version 22h3.
First of all, RAM requirements went up. You need 4GB of RAM to run Windows 11, double that of a 64-bit Windows 10 machine and quadruple that of the 32-bit requirement for Windows 10. You’ll also need 64GB of storage instead of 32GB.
You’re going to need a 64-bit processor to run Windows 11. 32-bit support is out, and it was even out for new Windows 10 PCs, although they were still getting updates. The CPU also needs to have two or more cores, and that includes everything sold in the modern era.
However, none of those listed CPU requirements matter, and it’s unclear as to why Microsoft even lists them. The firm actually has a specific list of CPUs that are supported. If you don’t want to look up yours, it’s pretty simple. For Intel, it’s eighth-gen or newer; for AMD, it’s Zen 2 or newer; and for Qualcomm, it’s Snapdragon 850 or newer.
Microsoft had promised to reconsider its position on Intel seventh-gen and AMD Zen 1 processors, but not much changed. Seventh-gen Core X and Xeon processors were added, as well as one single mainstream chip: the Core i7-7820HQ, also known as the processor in the Surface Studio 2.
The other key change is TPM 2.0, although if you’ve got a supported processor, you should have TPM 2.0. It’s been a requirement for new PCs since Windows 10 version 1607. You can check and see if your PC has it, and if not, you might even be able to enable it in the BIOS.
|
Processor: |
1 gigahertz (GHz) or faster with 2 or more cores on a compatible 64-bit processor or System on a Chip (SoC) |
|---|---|
|
RAM: |
4 gigabyte (GB) |
|
Storage: |
64 GB or larger storage deviceNote: See below under “More information on storage space to keep Windows 11 up-to-date” for more details. |
|
System firmware: |
UEFI, Secure Boot capable |
|
TPM: |
Trusted Platform Module (TPM) version 2.0 |
|
Graphics card: |
Compatible with DirectX 12 or later with WDDM 2.0 driver |
|
Display: |
High definition (720p) display that is greater than 9” diagonally, 8 bits per color channel |
|
Internet connection and Microsoft accounts: |
Windows 11 Home edition requires internet connectivity and a Microsoft account to complete device setup on first use.Switching a device out of Windows 11 Home in S mode also requires internet connectivity. Learn more about S mode here.For all Windows 11 editions, internet access is required to perform updates and to download and take advantage of some features. A Microsoft account is required for some features. |

If you’d like, you can take a look through the full requirements of Windows 11, which gets a lot more granular. One thing that’s not listed here is that PCs will require a Precision touchpad, something that may be an issue with older PCs, and even some newer HP laptops.
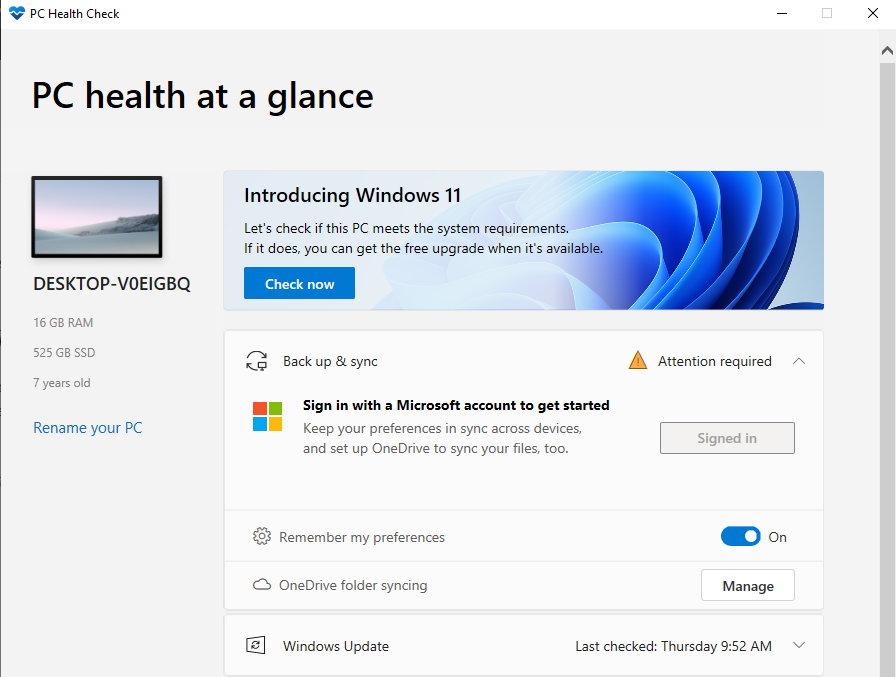
If you aren’t sure if your PC meets the Windows 11 minimum requirements, you can also run Microsoft’s PC Health tool, which will check your PC’s compatibility for you.
Note that since this article was originally written, there have been various workarounds published for these requirements. As it turns out, you won’t need a workaround. Microsoft will just let you install Windows 11 via an ISO if you don’t have a supported CPU, although you might not get updated.
What should I do if my computer has been hacked?
What happened?
You discovered that it seems that someone else has visited your computer
Can I not find out?
Of course! And in 90% of cases, users learn about what happened after the fact. The attacker has already left, having done everything he needs.
There is a possibility that you will never know about it, which, of course, is the saddest thing.
Well, let it be. What will he find there? Pancake recipes?
And them too. But the attacker’s target isn’t your favorite recipes or photos from your last vacation (if you’re a famous person, photos will come in handy).
If you got access to your home computer, then everything will come in handy:
- Passwords for Internet banking, social networks and mail
- Plastic card numbers
- Your entire computer
much more serious. Even the office manager’s computer is a very valuable item. There an attacker can find:
- Lists of employees with positions and email addresses
- Passwords to the internal portal
- Sometimes access to internal disk resources (very often they are not protected)
In addition to documents and passwords, the computer itself is of value. You can install a special program (or maybe more than one) on it, which, imperceptibly, without showing itself at all (it cannot be detected without special other programs), will record everything that you do on the computer and send it to the attacker. It can also attack other computers on your behalf (from your own computer). Which could lead you to a meeting with law enforcement.
What other misfortunes are there?
Recently, extortion of money from users whose computers have been hacked has become popular. The fact is that a program can be downloaded and secretly installed on your computer that will block you from accessing your own computer. In addition to blocking, such a program can change all your files by encrypting them. So even if you disconnect your computer from the Internet (or office network), you will not be able to restore everything: both access and files.
However, the purpose of the program, no matter how funny it is, is not to harm you and run away. No. You will be offered a way out: send a certain amount of money to a mobile phone number (the most common option). How will they offer? The program itself will offer, appearing on your monitor with some laconic phrase explaining what happened and for what amount you can get rid of it.
They do not require money, but I cannot enter the mail. Is my computer hacked?
Yes and no. Mail could be hacked by simply guessing a password, or by finding your email address (with a password) in stolen user databases of sites that provide free mailboxes. Or they could get the password through hacking a computer by installing a program that records all keystrokes (and clipboard) and sends it to an attacker.
Everything is clear. What to do?
If your computer has already been hacked and you know about it, change the password you use to log in. If the computer is working, report the incident to the technical support team. They will already perform all the necessary actions, including prompting you to change your password.
On a Microsoft Windows computer, this is done through Start, Control Panel, User Accounts and Family Safety, User Accounts, Change Your Password. On a Windows 10 computer, the steps are: Start, Settings, Accounts, Sign-in options. If you are working with Mac OSX, then you need System Preferences, Users and Groups, Change Password.
Would your date of birth be suitable?
No. And the date of birth of the child, wife, husband, mother-in-law will not work either. The rule of good manners says that the password must contain Latin letters in upper and lower case, numbers, non-alphanumeric characters (brackets, hyphens, pound signs, percent signs, etc.). All this should not go sequentially, but in discord. Also, the password must not be a word or part of it in natural language.
Excellent. But I won’t remember it. I’d better write it down.

Do not do this anywhere, especially in the office. Remember, an internal hacker is more dangerous than any external one.
The password can be made mnemonic, i.e. consisting of letters and numbers that indicate a certain word (but is not a word) that only you know. It can be an unrecognizable word changed: the parts are rearranged, separated by numbers and other signs. However, a good password (by the way, change it periodically) is only half the battle. The computer visited by the attacker most likely contains malware that needs to be removed.
And how to treat all this?
If your computer had an antivirus, then either the malware bypassed it, or the attacker himself made changes to the antivirus settings, where he added an exception for his «spyware».
If the antivirus tells you that everything is fine and there is no danger, check if its virus databases have been up to date for a long time. Update. Also remember to download and install operating system updates regularly. 70% of all updates are dedicated to security.
Check your anti-virus settings. Are there any changes in them? Especially the exception sections.
If you still don’t have an antivirus installed on your computer, then it’s time to do it.
Back to school!
Today, there are practically no pure anti-virus programs. Those. those that only scan your disk and running (or running) programs for malware. Today, antivirus is the center of security. It is both a classic antivirus, it is also a network traffic monitor (that is, it constantly monitors what your computer sends and receives via a local or global network). These security centers check your mail if you use programs like Outlook. Some provide the ability to check the Internet sites that you visit — whether they are dangerous for your computer.
Which program to choose is a matter of taste and wallet. There are free versions, such as Microsoft Security Essentials (built-in since Windows 8). There is a subscription option. You do not buy the program itself for perpetual use, but once a year you pay a certain amount (much less in cost than buying forever) and fully use the program.
In the end, at work, an antivirus must be installed on your computer. This is the responsibility of the technical service.
A few words about Mac OSX
The fact is that there are no viruses for this operating system. There are opportunities to penetrate a computer, so to speak, remotely, i.e. from another computer. However, this problem is solved by installing a different class of program than an antivirus. Firewall. This is also a protector program for your computer (and sometimes even a whole group of computers). All it does is allow or deny data being sent or received over the network. For connections unknown to her, she asks the user whether to allow or deny, and remembers his choice.
For Mac OSX, the best of this class of programs, in my opinion, is Little Snitch. The program is paid (but with a free demo period). Works quietly without affecting the performance of the computer. With unknown connections, it prompts you to make a decision to prohibit or allow, while indicating what kind of program on your computer wants to go online and where specifically. There is a silent mode, when you will not be disturbed at all, and only suspicious connections will be blocked.
What else can be done?
In general, security starts with you, not with your computer. Most of the most resonant hacks were not done with the help of technical means, but only using social engineering. The protection rules are very simple
- Do not open files attached to e-mails if they resemble a program. Modern mail programs will warn you about this
- Do not visit suspicious sites. A simple WOT extension for Chrome and Firefox browsers will warn you in time about the insecurity of the site for your computer
- If you yourself did not request on a social network site, online store, etc.
 password recovery, do not open such letters and do not follow the links indicated there. Most likely they lead to a very similar site and the purpose of it is to steal your password or even install malware on your computer.
 - Don’t use simple passwords even on harmless sites where your personal, especially financial, data seems to be missing. There are many known cases where access to online banking was obtained through successive hacks of social media accounts and email.
- Where possible, use two-factor protection. You can recover your password only using your mailbox or a group of security questions and, most importantly, sending an SMS to your mobile phone with a code to confirm the operation.
- In the office, make it a rule to always lock the computer (in general, you don’t need to turn off the computer). Even if you went out for tea. Still not up from the table, first lock the computer. This is done very easily. For computers with Windows, you need to hold down the Windows button on the keyboard (usually on the left next to Alt) and press the Latin L.

What is the minimum technical requirement for a computer?
In terms of hardware, your computer should have the following:
- An operating system with the latest updates that are installed regularly and by themselves
- Antivirus or a comprehensive computer security product. Also with the latest updates that are regularly installed. You must set a password to access the protection program itself. Different from the password for logging into the computer.
- In order to protect important information for yourself, save copies of files to external drives, flash drives or even an external disk array (NAS). The latter can do this automatically.
Two stories for the end
Famous hacker Kevin Mitnick gained remote access to the accountant’s computer using only his phone. He called the company and introduced himself as either a system administrator or an accountant, and thus obtained a letter from the real system administrator of the company to his personal mail with full instructions and a password for remotely logging into the accountant’s computer.
A friend of mine, working for a security company, implemented a project. One working day, employees began to find flash drives in the office, as if they had been left by someone. Some of the finders inserted these flash drives into their work computers. Some looked at what was on the flash drive at home.
The bottom line was that those flash drives were not simple — when connected to a computer, they automatically launched a program without the knowledge of the user, which was located on a section hidden from him on the flash drive. So the company’s management checked the vigilance of their employees.
Frequently Asked Questions about Remote Desktop Clients
Change
E-mail address
- Questions and answers
Applies to: Windows 11, Windows 10, Windows 8.
1, Windows Server 2019, Windows Server 2016, Windows Server 2012 R2
Now that you’ve set up the Remote Desktop client on your device (Android, Mac, iOS, or Windows), you may have questions. Here are answers to the most frequently asked questions about Remote Desktop Clients.
- Installation
- Connections, gateway and networks
- Web client
- Monitors, sound and mouse
- Mac Hardware
- Error messages
Most of these questions apply to all clients, but some only apply to certain clients.
If you have additional questions that you would like answered, leave them as feedback to this article.
What computers can I connect to?
See the supported configuration article to see which computers you can connect to.
How do I set up my computer to use Remote Desktop?
Device setup completed, but I don’t think the computer is ready. Help.
First, have you seen the Remote Desktop Setup Wizard? It will help you prepare your computer for remote access. Download and run this tool on your computer to set everything up.
Otherwise, if you want to do it manually, read on.
For Windows 10, do the following.
- On the device you want to connect to, open Settings .
- Select System and Remote Desktop .
- Use the slider to enable Remote Desktop.
- It is generally recommended to leave the computer awake and discoverable to facilitate connection. Click Show settings to go to the computer’s power management settings, where you can change this setting.
Note
Cannot connect to a computer that is in sleep or hibernation mode. Therefore, make sure that the sleep and hibernation settings on the remote computer are set to Never . (Hibernation is not available on all computers.)
Write down the name of this computer from Section How to connect to this PC (How to connect to this PC). You will need it to set up clients.
You can grant individual users permission to access this computer. Click Select users that can remotely access this PC to do this.
Members of the Administrators group have access automatically.
For Windows 8.1, follow the instructions to allow remote connections in Connect to another computer using Remote Desktop Connection.
Why can’t I connect using Remote Desktop?
The following are some possible solutions to common problems that you may encounter when trying to connect to a remote computer. If these solutions don’t help, you can get more help on the Microsoft Community website.
-
The remote computer could not be found. Make sure you are using the correct computer name and that you have entered it correctly. If you still can’t connect, try using the remote computer’s IP address instead of a name.
-
A network problem has occurred. Make sure you have an Internet connection.

-
The Remote Desktop port may be blocked by a firewall. If you are using Windows Firewall, follow these steps.
-
Open Windows Firewall.
-
Select Allow an application or feature to interact with Windows Firewall .
-
Click Change settings . You may be asked to enter an administrator password or confirm your actions.
-
Under Allowed programs and features select Remote Desktop and then click OK .
If you are using a different firewall, make sure that the remote desktop port is open on that firewall (usually port 3389).
-
-
Remote connections may not be configured on the remote computer. To resolve this issue, scroll up to the question How do I set up my computer to use Remote Desktop? in this section.
-
The remote computer may only allow connections to computers that are configured for Network Level Authentication.

-
The remote computer may be turned off. You cannot connect to a computer that is turned off, in sleep mode, or in hibernation mode. So make sure the sleep and hibernate settings on the remote computer are set to Never . (Hibernation is not available on all computers.)
Why can’t I find or connect to my computer?
Check the following conditions.
-
Is the computer on and awake?
-
Did you enter the correct name or IP address?
Important!
If you entered a computer name, your network should resolve it correctly using DNS. In many home networks, you must use an IP address to connect, not a hostname.
-
Is the computer on a different network? Have you configured your computer to allow external connections to it? See Remote Desktop: Allow access to a computer from outside the network for more information.
-
Are you connecting to a supported version of Windows?
Note
Windows XP Home, Windows Media Center Edition, Windows Vista Home, Windows 7 Home, and Windows 7 Starter are not supported without third party software.

Why can’t I log on to the remote computer?
If you see the remote computer logon screen but cannot sign in, you may not have been added to the Remote Desktop Users group or any other group with administrator rights on that remote computer. Contact your system administrator to add you.
What are the supported LAN connection methods?
If you want to access your office computer from outside its local network, your organization needs to provide you with remote access tools. The Remote Desktop Client currently supports the following features:
- Terminal Server Gateway or Remote Desktop Gateway;
- Remote Desktop Web Access;
- VPN (using built-in VPN capabilities in iOS).
VPN not working
VPN problems can have several causes. First, make sure the VPN is on the same network as your PC or Mac. If this cannot be verified using a PC or Mac computer, you can try opening the company’s intranet web page in a browser on your device.
Additionally, you should check the following:
- Is the 3G network interfering with the VPN. There are several 3G network providers around the world that seem to be blocking or corrupting 3G traffic. Verify that the VPN connection is working properly for a minute.
- VPN based on L2TP or PPTP. If you are using L2TP or PPTP on your VPN, then in the VPN configuration, set the «Send all traffic» setting to «Enabled».
- VPN setup correct. An incorrectly configured VPN server may be the reason why VPN connections do not work or stop working after a while. In this case, be sure to test using a web browser on an iOS device, PC, or Mac on the same network.
Can I check if the VPN is working properly?
Make sure VPN is enabled on your device. You can check the VPN connection by going to a web page on the internal network or by using a web service that is only accessible through a VPN.
How do I set up L2TP or PPTP VPN connections?
If you are using L2TP or PPTP on your VPN, be sure to set Send all traffic to Enabled in the VPN configuration.
What browsers can be used?
The web client supports Microsoft Edge, Mozilla Firefox (55.0 and later), Google Chrome, and Safari.
What computers can I use to access the web client?
The web client supports Windows, macOS, Linux, and ChromeOS. Mobile devices are not currently supported.
Can I use the Web Client in a Remote Desktop deployment without a gateway?
No. The client requires a Remote Desktop Gateway to connect. Don’t know what that means? Ask an administrator about it.
Does RD Web Access replace the RD Web Access page?
No. The RD Web Access is hosted at a URL other than the RD Web Access page. To view remote resources in a browser, you can use the web client or web access page.
Can I embed the web client on another web page?
This feature is not currently supported.
How to use all monitors?
To use two or more screens, do the following.
- Right-click the remote desktop that you want to enable multi-screen support for, and then click Edit .
- Enable options Use all monitors and Full screen .
Is bi-directional audio supported?
Bidirectional audio can be configured in the Windows client on a per-connection basis. Relevant parameters are available in section Remote audio on the options tab Local resources .
What should I do if there is no sound?
Log out of the session (don’t just log out, log out completely) and then log back in.
Are Retina resolutions supported?
Yes, the remote desktop client supports Retina resolution.
How do I enable extra right click?
To use right-click in an open session, you have three options:
- Standard two-button USB PC mouse.

- Apple Magic Mouse. To enable right click, select System Preferences in the docking bar, click Mouse , and then enable Secondary click (Secondary click).
- Apple Magic Trackpad or MacBook Trackpad. To enable right click select System Preferences on the docking bar, click Trackpad (Touchpad) and then turn on the option Secondary click (Secondary click).
Is AirPrint supported?
No, the Remote Desktop Client does not support AirPrint. (This applies to Mac and iOS clients.)
Why are the wrong characters displayed in the session?
When using an international keyboard, you may encounter an issue where the characters that are displayed in the session do not match the characters that you have entered using the Mac keyboard.
This can happen in the following cases.
- You are using a keyboard that is not recognized by the remote session.
 When Remote Desktop does not recognize the keyboard, it defaults to the language that was last used for the remote computer.
 - You are connecting to a previously disconnected session on a remote computer that uses a keyboard language that is different from your current input language.
This issue can be resolved by manually setting the keyboard language for the remote session. See the next section for instructions.
How do language settings affect keyboards in a remote session?
There are many types of Mac keyboard layouts. Some of these are native Mac layouts or custom layouts that may not be exactly matched on the version of Windows you’re remotely interacting with. The remote session matches your keyboard with the closest keyboard language available on the remote computer.
If the Mac keyboard layout is set to the PC keyboard layout version (for example, «French — PC»), then all keys should map correctly and the keyboard should work.
If the Mac keyboard layout is set to the Mac keyboard layout version (for example, «French»), the remote session will map it to the PC version of the French keyboard layout. Some Mac keyboard shortcuts that you are accustomed to using on OSX won’t work in a remote Windows session.
If a language variation is selected for the keyboard layout (for example, «Canadian-French» (French (Canada)) and the remote session cannot match it with exactly the same variation, then it will match it with the nearest language (for example, French). Some Mac keyboard shortcuts that you are accustomed to using on OSX won’t work in a remote Windows session.
If a keyboard layout is configured for which the remote session cannot find a match at all, it will apply the default settings and use the language you last used on this computer. In this case, or in cases where you need to change the language of the remote session to match your Mac keyboard, you can manually set the keyboard language of the remote session by selecting the language that best matches your desired language, as described below.
To change the keyboard layout in a Remote Desktop session, follow these steps.
On Windows 10 or Windows 8:
- In a remote session, open the Regional and Language Options window. Select Start > Settings > Time and language . Open the Regional and Language window.
- Add the language you want to use. Close the Regional and Language Options window.
- The remote session will now be able to switch between languages. (On the right side of the remote session window, next to the clock.) Select the language you want to switch to (for example, Eng (English)).
You may need to close and restart the application you are currently using for keyboard language changes to take effect.
Why am I getting an «Insufficient Privileges» error?
You are denied access to the session you want to connect to. The most likely cause is that you are trying to connect to an administration session.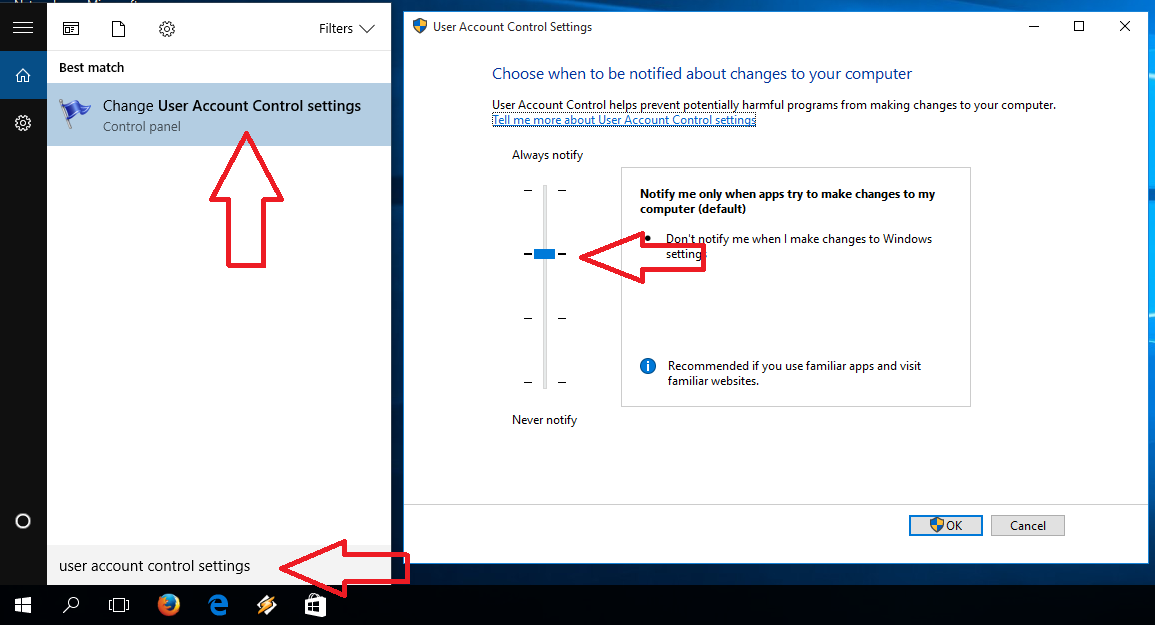 Only administrators can connect to the console. Make sure that under Advanced Remote Desktop Options, the console switch is disabled. If this is not the source of the problem, contact your system administrator for further assistance.
Why does the client report that there is no client license?
When a Remote Desktop client connects to a Remote Desktop server, the server issues a Remote Desktop Services Client Access License (RDS CAL) that is stored on the client. When the client reconnects, it will use that client license and the server will not issue another license. The server issues a different license if the Remote Desktop Services CAL is missing from the device or is corrupted. When the maximum number of licensed devices is reached, the server stops issuing new Remote Desktop Services CALs. Contact your network administrator for help.
Why am I getting an «Access Denied» error?
An «Access Denied» error is generated by RD Gateway as a result of incorrect credentials used when trying to connect. Check the username and password. If the connection worked before and the error occurred recently, you may have changed your Windows user account password and haven’t updated it in Remote Desktop settings yet.
What does «RPC Error 23014» or «Error 0x59″ mean?e6»?
For message RPC Error 23014 or Error 0x59E6 try again after waiting a few minutes, the maximum number of active connections has been reached on the RD Gateway server. The maximum number of connections depends on the version of Windows that you are running on the Remote Desktop Gateway. In the Windows Server 2008 R2 Standard implementation, the maximum number of connections is 250. In the Windows Server 2008 R2 Foundation implementation, the maximum number of connections is 50. All other Windows implementations allow an unlimited number of connections.
What does the «Failed to parse NTLM challenge» error mean?
This error is caused by incorrect settings on the remote computer.