Scratch Remover Inside Car Cabin? Interior Plastic Fixed!
HELP
DETAILDIY
& SHARE
-
Staff Writer
-
August 14, 2020
Photo by Charles Kettor from Pexels
Photo by Charles Kettor from Pexels
-
Staff Writer
-
August 14, 2020
HELP DETAILDIY & SHARE
Affiliate Disclosure Statement
When you are going through the hustle and bustle of daily life, sometimes scratches can’t be avoided. Once you start throwing in kids, different personal belongings, and pets—the number of interior scratches just seems to build up and become a negative focal point for your car.
In this article, I will show you the best way to DIY repair the scratches, no matter the size, out of the interior of your car, or on the plastic trim. With a little bit of care and patience, you can remove scratches yourself and you can get your car back to reflecting the care that you put into it.
How do you get scratches out of a car interior?
Scratch removal for cars is easier than you think and costs a lot less money, especially on your interior panels, than taking your car to a garage to get professionally detailed. You must approach this car scratch remover task with patience and some time. Although this DIY project to remove scratch in car interiors does not take a lot of time to repair, it is essential that you don’t rush to remove scratches. Rushing could cause the interior of your car to look worse than if you would have to just leave the scratches alone. By using the recommended tools and some tips that I provided, you will have all you need for a successful plastic repair project.
You will need:
- Interior Cleaner – Having a good interior cleaner can make or break a DIY project.
 Without having this to clean the area, you have to deal with the dirt and debris from normal activities restricting your view of how deep the scratch may be or how far it extends. The interior cleaner that I recommend is Meguair’s All-Purpose Cleaner. This product works to clean on all interior surfaces and softens the fabric and brighten up the already existing color of the plastic. By using this cleaner, you are one step closer to making your interior area look brand new.
 - Microfiber Towel – For every interior car DIY repair, a good microfiber towel such as the options from The Rag Company is an important item to use and have within close reach. You don’t want to put more scratches on your interior while you’re trying to remove some already and the microfiber material can completely dry a surface area, deliver a scratch-free finish to plastic trim and plastic interior, and is more durable than using any traditional shop towel.
- Heat Gun – You will be using a heat gun to heat the interior plastic to a workable level so that you can restore it back to its former glory.
 It is important that you remember to only use the heat gun on half heat so that the plastic doesn’t completely melt off the surface area. You just want the plastic to be soft, so take that into consideration once you start using the heat gun to remove scratches.
 - Grain Pad – A grain pad can be gotten for quite cheap and it is truly what restores the interior to what it was before the scratched plastic. A grain pad can be bought to match all different types of plastic grains and can make the area of plastic look as if the damage didn’t even exist.
- Note: If you don’t have a grain pad, or can’t find one that matches your exact interior, you can make your own to use! Use a quality UV interior protectant like 303 Aerospace Protectant on the area to ensure that the stamp you are making won’t stick. Use a dent pulling tab and apply hot glue to the surface. Let it sit for a few seconds on an undamaged plastic area that is coated with the interior protectant. Let it dry for 30 seconds, then spray the stamp area using isopropyl alcohol, this will allow the stamp to peel right off leaving you with a custom made grain pad to restore your scratched plastic.

- Note: If you don’t have a grain pad, or can’t find one that matches your exact interior, you can make your own to use! Use a quality UV interior protectant like 303 Aerospace Protectant on the area to ensure that the stamp you are making won’t stick. Use a dent pulling tab and apply hot glue to the surface. Let it sit for a few seconds on an undamaged plastic area that is coated with the interior protectant. Let it dry for 30 seconds, then spray the stamp area using isopropyl alcohol, this will allow the stamp to peel right off leaving you with a custom made grain pad to restore your scratched plastic.
- Sandpaper – You will need sandpaper in a finer grit size such as 1500 or 2000 grit. This is optional and should just be used if any area sections look abnormal or stick up more than the rest. This sandpaper should only be used for fine detailing and use caution when sanding to make sure you do not remove too much excess plastic.
- Interior Protectant – A good interior protectant such as the one 303 Products has to offer is essential for making your finished plastic or plastic trim repair to last longer and look its best. This protectant has powerful UV blockers to prevent fading, cracking, and premature aging for your newly repaired interior area. This protectant also constantly works to remove and repel dust and dirt from the surface leaving behind a clean finish with little to no effort.
How to get scratches out of car interiors
- Clean the Surface – Clean the inside of the car with a good interior cleaner.
 You need to clean the area that you will be working on to eliminate any dirt or particles that could get in the way of you having a successful project. Once you have finished cleaning the area, be sure to dry it completely with a microfiber towel to prevent any more scratches or gouging of the paint.
 - Apply Heat – Use a heat gun at around half of its heat capacity and apply it to the scratched interior plastic area. This will warm the plastic piece to where it is soft and malleable. Use caution with this step as you are working with heat which can cause burns from melted plastic.
- Texturize – Select a grain pad that matches the texture of the interior area of your car. Take the grain pad and apply firm pressure to the area softened by the heat. This will take the clean area that has been smoothed from the heat gun and add some texture back into the plastic to match the surrounding undamaged area.
- Cool and Evaluate – Allow the interior plastic to dry and cool.
 This will allow the texturization to finalize that you just applied to the surface. Once the area is cool, look and see if anything is sticking up in the area that you may need to remove using sandpaper. Look for any noticeably large lumps and bumps or anything that you just aren’t satisfied with.
 - Clean up with sandpaper (Optional) – If you find anything that you would like to address, now is the time to do it! Take fine-grit sandpaper (1500 or 2000) and sand down the problem area in a circular motion until the surface has a more uniform appearance. If you do happen to sand down any spots, make sure to clean and dry the area using the interior cleaner before you proceed with finishing to remove all of the sanding particles off of the plastic.
- Protect the Finish – Spray an interior protectant on the air that you repaired to seal in your now damage-free interior. An interior protectant should be wiped over the entire interior surface in a circular motion to avoid streaking.
 This will protect against the UV rays that normally cause your interior plastic to naturally age leading to cracks and fading. Over time, this will allow your project to last longer and keep from depreciating in value.
Does scratch remover for cars work on interiors?
An interior scratch removal car kit is best to remove scratches and deep gouges that you may have embedded in your dash. The typical scratch removal kit for a car’s interior comes with some type of filler (a glue), an activator, and a dye to match the color of the interior. This method can be a bit more pricey than the heating and sanding method, so it is best to evaluate the scratch before deciding on a method.
Can you get key scratches out of a car?
Key scratches are one of the most common marks that we will find all over our car from the exterior paint to the interior dash panels. These scratches also can be short and deep or long and shallow. It is up to you to evaluate how you will deal with it. Do you need the scratch to be filled? Go with the scratch removal kit method. Do you have a bunch of long drug out scratches? Use the heating method and resurface the panel. Either way, those key scratches will disappear right before your eyes with a little bit of time, patience, and effort.
How do I fix a scratch on my dashboard?
Scratches on your dash can be fixed the same way as any interior plastic scratch. You need to evaluate the scratch and then choose the appropriate removal method. Deep scratches get the filler treatment whereas the minor, surface-level scratches can be repaired using the heating and texturizing method.
What if my dashboard is vinyl?
If your dashboard is vinyl, don’t panic. These methods can work for you too! However, a vinyl repair kit is better for this endeavor instead of the heating method. Although heating can be effective, you will get better results with a repair kit. Vinyl is a material that can be hard to work with so eliminating all of the extra variables will do good for the project.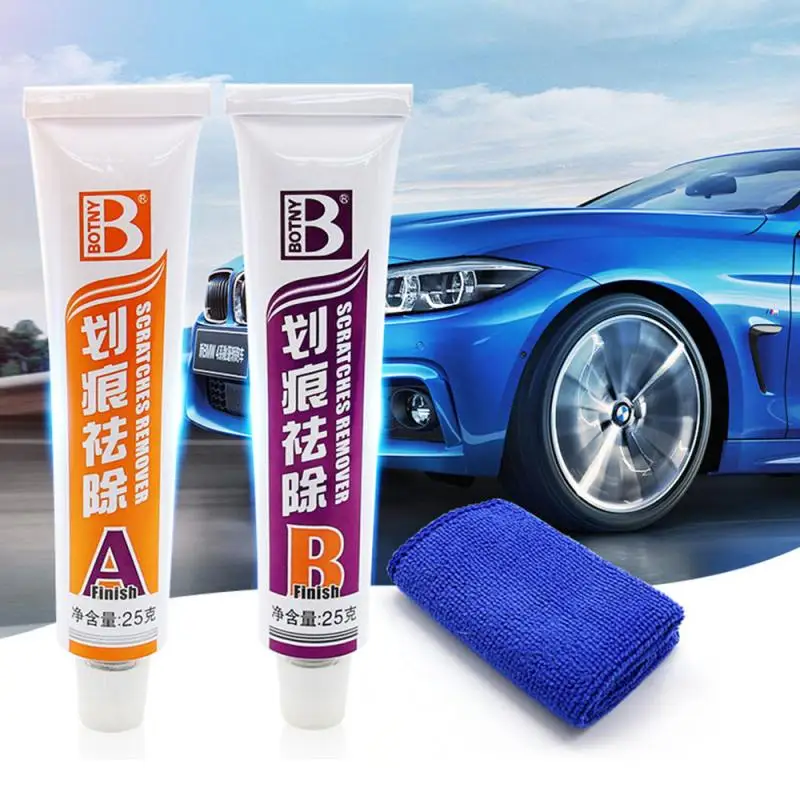 These vinyl repair kits typically come with an epoxy material that will fill vinyl cracks effortlessly and take out a lot of the guessing game that comes with heat settings.
Helpful Links
How to repair dashboard scratches and cracks – Scratch Wizard
Dashboard Scratches – Tesla Motors Club
Conclusion
As you can see by this article, filling in scratches for your car’s interior is a lot easier than you would have ever imagined. With a DIY this easy, why would you not give it a try? It will boost the overall appearance of the vehicle and could increase your trade-in value exponentially. You take care of your car too well for letting daily life get in the way. Repair your interior cabin today and let your car interior shine as if it just rolled off the lot.
report this ad
In This Article
report this ad
Did you find this article helpful? Help Us & Share it.
Related Articles
How To Clean Car Touch Screen Fingerprints (Safely)
Staff Writer
February 18, 2022
How To Make Car Cleaning Slime (4 Ways)
Staff Writer
February 16, 2022
How To Clean Cup Holders In Car Consoles (Sticky Spills)
Staff Writer
February 16, 2022
Using Hydrogen Peroxide To Clean Car Seats (DIY Stain Remover)
Staff Writer
February 15, 2022
How To Clean Between Car Seats And Center Console (Properly)
Staff Writer
February 14, 2022
What To Use Instead Of Armor All (Alternatives)
Staff Writer
November 27, 2021
Keep Up-To-Date
Sign up for our newsletter to get informed about new tips, how-to’s, and reviews.
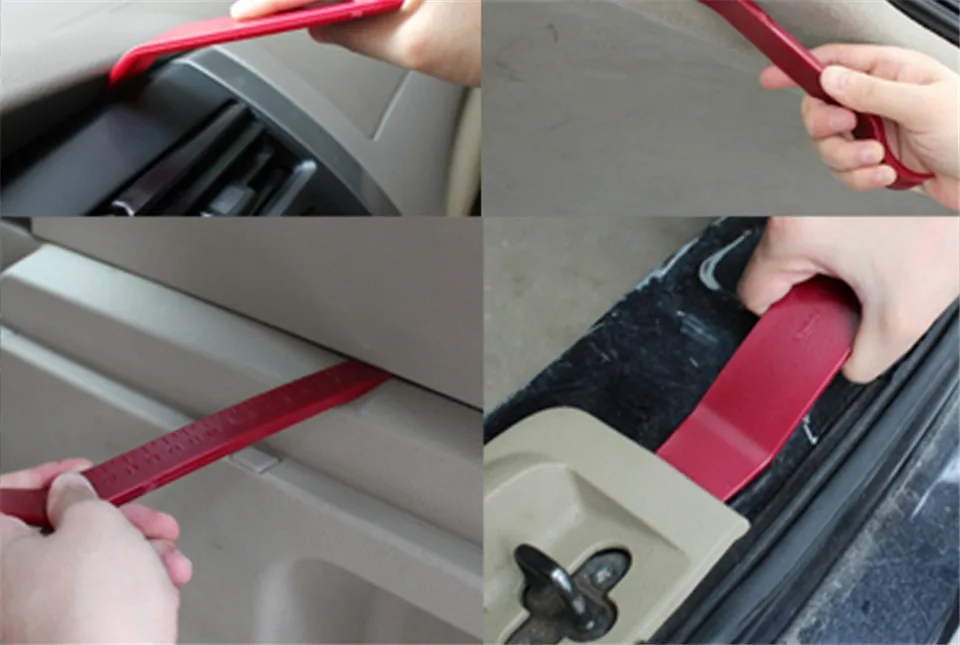
How To Fix Plastic Scratches In Car?
It’s easy for your car’s interior trim to develop scratches and marks from transporting kids, groceries, and luggage on a daily basis.
A scratch on your car’s interior not only looks ugly, but it can also depreciate its value when you go to trade it in. A scratched car cabin is no one’s favorite sight, but there are some ways to reduce or remove them.
You will find out how to remove scratches from the interior panels of your car in this guide, which contains practical tips and tricks.
If you want to remove scratches from the interior panel of your car, you can buy a specialist kit that contains everything you need, or you can remove it by hand using sandpaper, paint, and heating.
How To Fix Plastic Scratches In Car?
It is better to repair scratches and abrasions yourself, specifically if the scratch is very deep, rather than using a kit. You can fix an interior scratch yourself by following the steps below.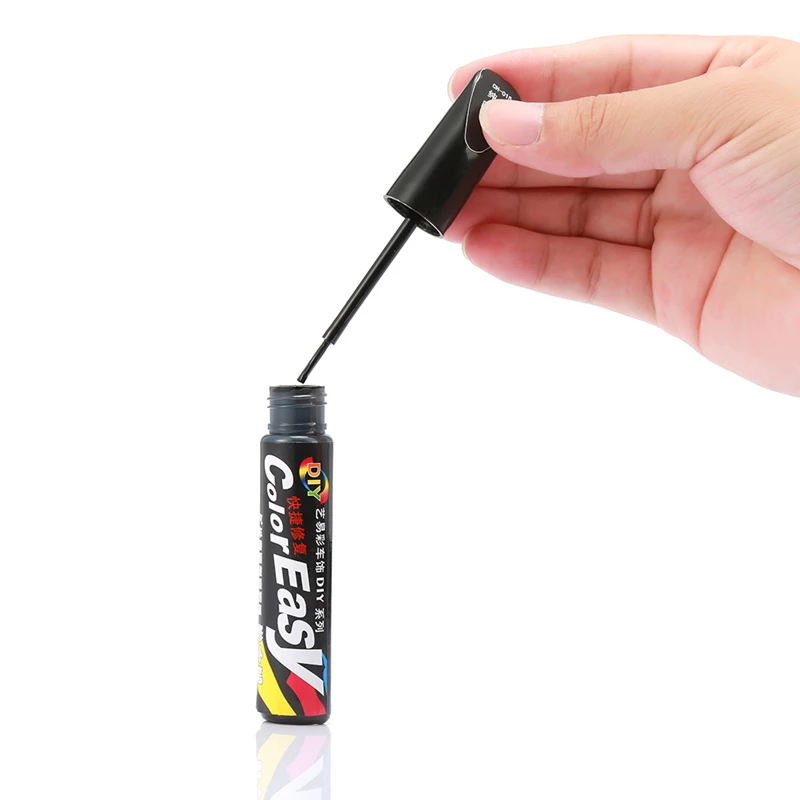
What You’ll Need
Tools and equipment for repairing interior scratches will help you achieve a professional finish:
- Plastic can be remolded with the help of a heat gun
- To recreate the original interior grain pattern on plastic, use a grain pad
- It is best to use superfine grit sandpaper
- Clean your interior car’s plastic surfaces with a quality cleaner that’s made for cars and will remove ingrained dirt
Here’s How It Works:
Step 1:
The area around and on top of the scratch should be cleaned with interior plastic cleaner.
Dirt can melt into the plastic, affecting the color. If all the dirt and debris are removed, the finish will be smooth, and the dirt will not melt into the plastic. Clean and dry the area before you proceed.
Step 2:
The plastic will soften if you gently apply heat to it (at around half power). It’s important not to heat the plastic for too long, as it may warp and burn, causing irreparable damage.
A plastic that is ready for molding will lose its texture and appear slightly glossy when it is ready.
Step 3:
Using very light pressure, apply a grain pad to the affected area. By doing so, the scratch will be smoothed out and the plastic will have a textured finish that blends with the rest of the material.
There are several different finishes available for grain pads online, which can be bought online. With the hard-plastic application pad that comes with the set, choose the one that most closely resembles the plastic trim on your car.
Step 4:
Make sure the area is cooled and hardened. In order to achieve an authentic-looking and smooth finish, sand down the affected area until it appears like the unaffected area. Smooth it out with superfine grain paper as needed.
Step 5:
Repeat step 1 by cleaning and drying the area again.
Clean the Scratched Plastic Surface
Use a mild detergent and water to clean the surface. Apply pressure with a soft cloth when cleaning to make sure all of the dirt, scratches, and residue is removed.
Follow up with a coat of clear car wax or paint sealant to protect the plastic from future damage caused by weathering or fingerprints. If you have multiple areas that need attention, use an orbital buffer tool to smooth out any irregularities before starting each section of the car.
Apply Toothpaste or Similar Product
Clean the area with soap and water Apply a thick layer of paste or other products Rub it in until the scratch is gone Repeat as necessary Be patient – this method may take some time.
Rub Circularly
Use a circular motion to fix plastic scratches in your car. Apply to rub alcohol to a cloth and rub the scratch until it disappears. If the scratch is too deep, use a sandpaper block and start with 600 grit paper before progressing to 800, 1000 or 1200 grits if needed.
Wipe off any excess debris and dry the area thoroughly before applying a clear sealant or wax finish. Avoid using harsh chemicals or abrasive materials on plastic surfaces as they can damage them over time.
Can you buff scratches on plastic?
Buff scratches on plastic with baking soda to restore its shine. Apply a paste to the scratched area and work it into the plastic in a circular motion. Be sure to use a safe solvent when buffing; most plastics are safe with just a light coat of polish applied afterward.
Work quickly to avoid any damage, and allow the plastic surface to dry completely before using it again. Follow these simple steps for restoring scratched or dented plastic surfaces- your clothes will thank you.
Does WD 40 remove scratches from plastic?
WD 40 is a water-displacing oil that is used to lubricate tools and remove water from metal surfaces. It does not remove scratches from plastic, so be careful when using it on your plastic items.
If you do accidentally scratch your plastic item with WD40, use a scraper to try and remove the scratch.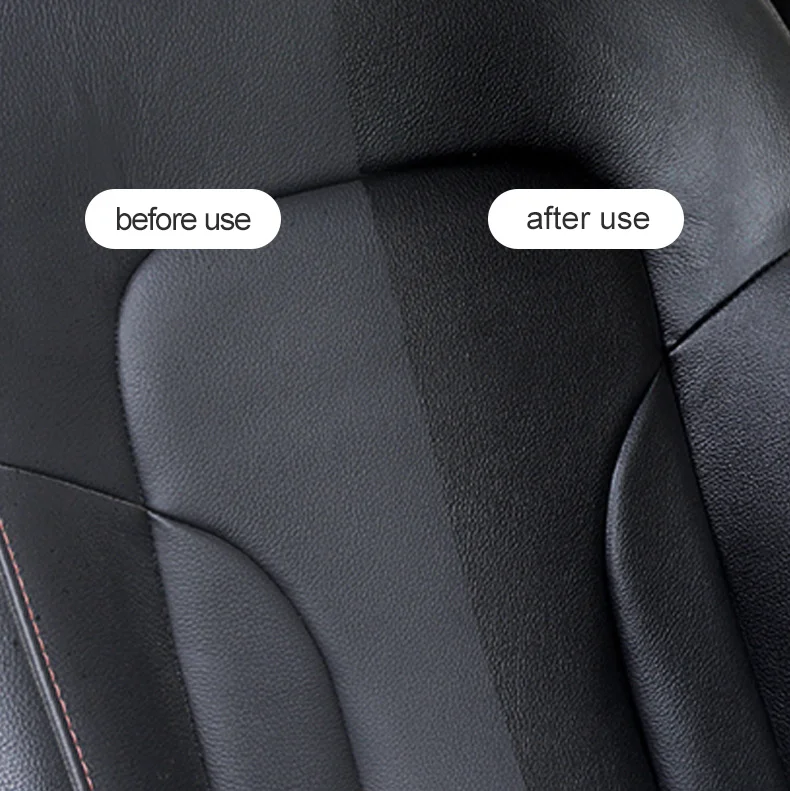 Do not use WD 40 on any electronic devices as it can damage them. Though waxing doesn’t remove scratches, waxing timely is good for your car’s outlook.
To Recap
There are a few ways to fix plastic scratches in a car. One is to use a special polish that removes the scratch and then covers it with a clear coat. Another is to use silicone caulk that fills in the scratch and sand away any excess.
Finally, you can try using touch-up paint or rubbing alcohol on a cotton ball, applying it to the scratched area, and buffing it out.
Volkswagen interior plastic repair in Moscow » Official service BaltAvtoTrade
During the operation of the vehicle, plastic elements wear out a lot. Although manufacturers try to make them strong enough, all the same, over time, small scratches and chips appear on the plastic surface. With a strong mechanical impact, the appearance of cracks is not excluded. It may seem that car plastic repair is a fairly simple procedure, which you can handle on your own. In fact, this is far from the case. Each car needs an individual approach to repair, using the right materials. Therefore, we recommend that you transfer the car for plastic restoration to the BaltAvtoTrade service center.
Reasons for car plastic repair
In addition to aesthetic appeal, the car interior must be safe and comfortable at the same time. Often repair of car interior plastic is required for the following reasons:
- constant temperature changes, especially in winter and hot summers — the plastic trim is simply deformed;
- ultraviolet rays that can change the original factory shade;
- mechanical influences;
- contact with hot objects — for example, with a soldering iron when performing repair work, or when cigarette ash gets in.
It must be understood that various types of plastics are used for the production of plastic trim and body elements. As a rule, the plastic installed inside the vehicle interior has its own structure.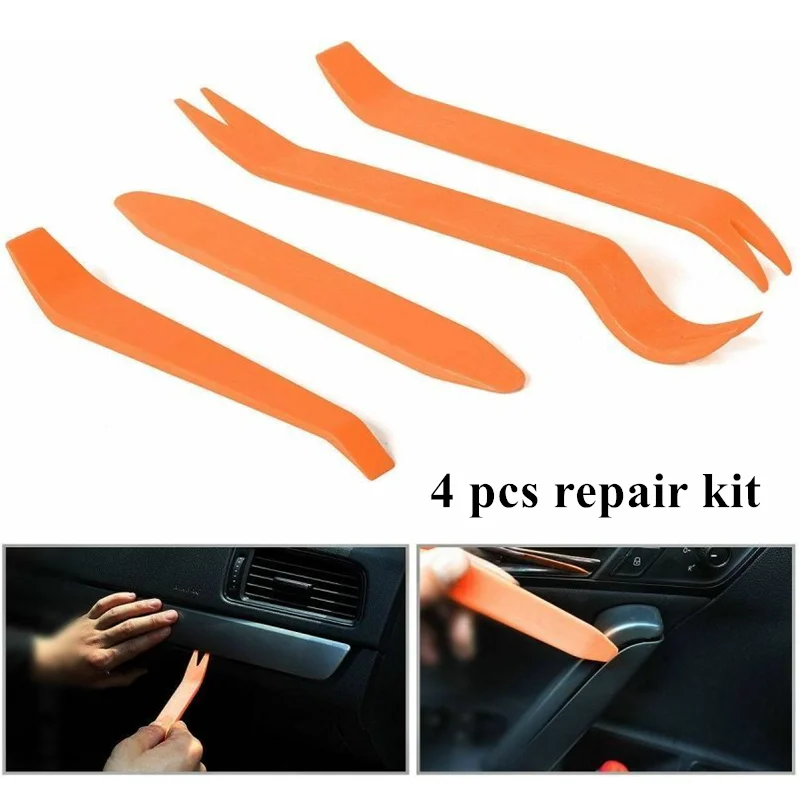 To repair ABS plastic, craftsmen use a special gel that can take on the texture of the part as it polymerizes. To color the plastic coating, we use specially selected plasticizers. With their help, the coating becomes more elastic, but at the same time retains strength. Surface protection is possible thanks to a glossy or matt varnish. Unlike interior parts, plastic bumper repair in Moscow requires a different approach: soldering, grinding, priming and painting.
Service appointment
Plastic recovery is easy with BaltAvtoTrade!
Our specialists carry out a complete plastic repair in Moscow, regardless of the degree of damage. They have everything they need to restore the plastic elements of the interior and body in various ways:
- applying special polish and paint;
- constriction with leather, leatherette or film;
- surface grinding and polishing;
-
soldering and correction of the geometry of deformed elements.

Our craftsmen thoroughly master the technique of restoring the factory plastic of a car, they will perform all types of work: repairing scratches on plastic and restoring bumpers that have been destroyed into several parts. The best materials and a professional set of tools are used to perform the work. We always provide an official guarantee for the work performed. And the price we offer for plastic repair will allow you to restore the plastic elements of your car at minimal cost.
You can consult and sign up for car plastic repair in Moscow by calling us by phone or ordering a callback from a company representative.
Car interior repair
Car interior repair is a set of measures aimed at improving the interior of your vehicle. During the operation of the machine, various defects often occur: burns and cuts on the upholstery, scuffs and scratches on the plastic. And to restore the interior, you may need: full or partial painting, repair of burnt seats and any elements, such as a ceiling or pillar, repair and restoration of any seat defects, as well as plastic repair. Today we will take a closer look at the topic of repairing and restoring plastic in the interior of your car, eliminating scuffs, cracks and scratches.
The condition of a car’s interior can tell a lot about its owner. Giving the interior a well-groomed look, even if the car is not new, is a serious task, but achievable.
Plastic parts are subject to wear and tear as much as seats or handlebars. Surely, many of those who have a used car wondered how to remove scratches, cigarette marks, scuffs and roughness on the interior plastic. The technology of restoration of plastic elements allows you to completely get rid of all defects and give the interior the effect of novelty and grooming.
How does it work?
Specialists use professional paints for plastics from well-known manufacturers, such as HORN — a global brand, on the market since 1975, has earned the loyalty of many professionals in the restoration of car interiors.
These paints contain a plasticizer.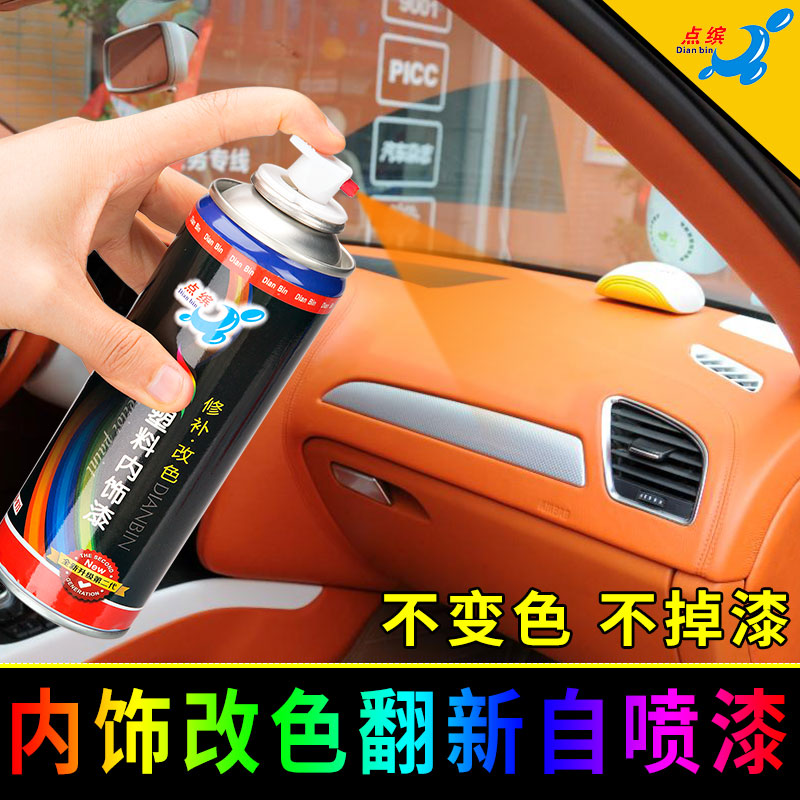 Thanks to what they perfectly are suitable for plastic and vinyl (leatherette). Such paints have high binding properties, are resistant to physical influences, temperature changes, detergents and other chemicals. By adding special pigmented paints to them, you can achieve any color you need.
Interior repair: stages of work on plastic
Surface preparation
First you need to thoroughly clean the surface of the plastic part from dirt and dust, degrease it with a special safe agent. To clean the surface, special chemicals and certain materials are also used, since it is important not only to get rid of dirt, but also not to add new scratches and scuffs. In the presence of large scratches, a special putty is applied to them.
The workpiece is then sanded very carefully with fine sanding paper. For some cases, when the part has a pronounced grooved pattern, this step is skipped.
Next, a primer and a special cleaner are applied to the treated surface.
Color matching
Most interior plastics are black, but not always. In this case, it is required to choose the color of the paint in such a way that the painted part does not differ from the others. The work requires a high skill colorist. Therefore, salon repair must be trusted only by professionals.
Interior plastic painting
For a more uniform relief, the paint is applied to the plastic surface with a spray gun. Then, if necessary, the structure of the plastic pattern is restored.
Why shouldn’t you try to repair the car plastic yourself?
There are many technologies, including the use of spray paint. With the help of them, it is proposed to paint the plastic with your own hands. The main advantage of this option is obvious — this is undoubtedly the cheapest repair option. However, the proverb that the miser pays twice did not appear in vain.
Firstly, even with the most serious approach to the technology of surface preparation and painting, the result of such a repair is short-lived.