What Are They, And Do They Actually Matter?
Whether you’re buying a laptop, a piece of PC hardware, or a smartphone, you want the best performance for your money. Sure, you can look at the specs or get opinions from existing users. But for the most detailed insight, you need to refer to benchmark tests.
There are loads of sites that deal in benchmarks. These websites can throw a whole host of charts and numbers at you for almost any piece of hardware on the market.
But what do they mean? And how can you use this information to make an informed decision?
What Is Benchmarking?
Benchmarking involves running a series of software tests on a piece of hardware that replicates the kinds of tasks it performs in real-world usage.
So, a CPU in a laptop will be subjected to assorted mathematical tests to measure how quickly it can compress or encrypt data. A hard drive is tested on the speed it can write a single, very large file or thousands of very small files.
Benchmarks for a GPU (the graphics processing unit, or graphics card) measures things like the frame rate achieved while rendering different numbers of objects on screen at different levels of complexity and different resolutions.
The results don’t mean much on their own. But once you have subjected two products to the same tests, you can compare the results and begin to judge which device offers better performance in that area.
How to Benchmark Your Own Hardware
If you want to try it out for yourself to see how your own kit compares, there are plenty of apps that can do the job.
The easiest app to get started with is Geekbench. This is a cross-platform tool that works on Mac, Windows, iOS, and Android. As such, it enables you to compare performance across most operating systems.
Geekbench focuses primarily on processor and memory performance. For more detailed tests of other components like graphics cards and drive speeds, NovaBench and PassMark are good for desktop devices, and AnTuTu is a good alternative for Android phones.
Note that a huge number of variables will affect the results of benchmark tests. Even something as simple as the level of charge in your laptop or smartphone battery could skew the results.
Most serious organizations that perform benchmarking tests will make an effort to minimize these variables. Don’t be surprised if your kit—which you’ve no doubt subjected to many months of real-world use—produces different results.
Common Benchmark Tests and What They Mean
Benchmark tests differ based on the software used or the person doing the testing. Since different tests will often focus on different areas, you can use multiple programs to better understand how the hardware performs.
Here are some of the most common tests, what they mean, and what to look out for.
Processors
- Floating-point math tests: Used by most tools, this tests the processor’s ability to perform a series of basic mathematical functions. A floating point indicates that the numbers used in the function involve fractions.
 Integer tests using whole numbers are also tested separately. The results will most commonly be displayed in milliseconds, so a lower number likely indicates faster performance.
 - Compression tests: These test the speed at which the processor can compress large blocks of data in a lossless way. The test will likely express the results as a speed in kilobytes per second, so a higher number is better.
- Single-core tests: Used by services like CineBench or PassMark, these tests focus on the performance of a single-core in the processor. Good single-core performance is essential, as a lot of software is not optimized for multi-core processing.
Graphics Cards
- 2D graphics tests: 2D graphics tests focus on drawing, moving, and scaling lines, fonts, and elements within a user interface. This is often measured in frames per second, so a higher or more consistent number is better.
- 3D graphics tests: A major test for gaming and graphics-intensive applications, and used by tools such as Heaven Benchmark (whose test you can see in the video above) or 3DMark.
 These tests involve rendering a few or very many 3D objects on screen at once. These tests take place at varying levels of complexity, such as detail, shadow, anti-aliasing, and more. They also often test different APIs such as DirectX and OpenGL.
Hard Drives
- Sequential tests: Hard drive benchmarks often focus on sequential read and write speeds and random read and write speeds. Sequential refers to files stored in a single chunk on the drive, such as a large file written to a non-fragmented hard drive. Often, these results are in MB per second, so a higher number is better.
- Random tests: Random tests show how the drive performs when required to access lots of data stored randomly throughout the drive. Random read and write times will be considerably slower than sequential times.
Smartphones
Smartphone-centric benchmark apps will test most of the same elements as desktops and laptops. But they also include a few extras, such as:
- SD card read/write speed: Similar to hard drive tests, this determines the speed at which your phone can access data read or written to a memory card or internal storage.
 As with hard drives, it’s measured in MB/s, so a higher number indicates faster performance.
- Database IO: Used in most smartphone benchmarking apps like AnTuTu, this measures the speed of reading and writing to the database on the device. Slow performance here can affect the overall performance of a device.
How Important Are Benchmarks?
Benchmarks are useful as a guide to hardware performance, but they are not the be-all and end-all. They are particularly good at showing how performance improves from one generation to the next and can help you gauge the value for money of a product since you can easily see how it compares to similarly-priced alternatives.
Generally, you want to use benchmarks when you have specific requirements. For example, if you’re looking to use your hardware for gaming, video editing, or any other specific purpose, a corresponding benchmark is a good solution.
But for everyday computing tasks such as surfing the web, Facebook, or using Office, the performance differences are barely noticeable, especially when other factors affect the speed of your computer.
Find the Best the Internet Can Offer
Hopefully, you now have a better understanding of how benchmarks work. When looking for a new device, what they can do for you can be incredibly helpful, but only as long as you understand how to use them.
Luckily, it’s never been easier to find the perfect fit. With so many options, there’s no reason not to shop around.
5 Best PC Benchmarking Test Software for 2023
PC benchmarking is a process that measures and evaluates the performance of individual hardware components and systems. It can be done internally within the company before products are released to consumers or externally by customers who want to test their system’s capabilities.
There are different types of PC benchmark software designed for benchmarking different parts of your computer, but most will test the central processing unit (CPU), graphical processing unit (GPU), and memory bandwidth and latency. Some software might also measure storage devices like hard disk drives (HDDs) and solid-state drives (SSDs).
Here are our picks for the top PC benchmarking test software.
- PCMark 10: Best for Windows PCs (Read more)
- AIDA64: Best for comprehensive system diagnostics (Read more)
- Cinebench R23: Best for 3D rendering and animation workloads (Read more)
- Superposition: Best for gaming performance and GPU stability (Read more)
- CrystalDiskMark: Best for storage devices (Read more)
Top PC benchmarking test software comparison
Below is a high-level overview of each software.
| Software | Pros | Cons | Price | OS |
|---|---|---|---|---|
| PCMark 10 Professional Edition | • Wide range of tests • Real-world workloads • Easy to use • Free basic edition for home use |
• Limited to Windows PCs • Can be resource-intensive |
• Free for home use • $1,595+ for business use |
Windows |
| AIDA64 | • Comprehensive diagnostics • Stability testing Customizable |
• Interface can be overwhelming • Expensive for home users |
$59.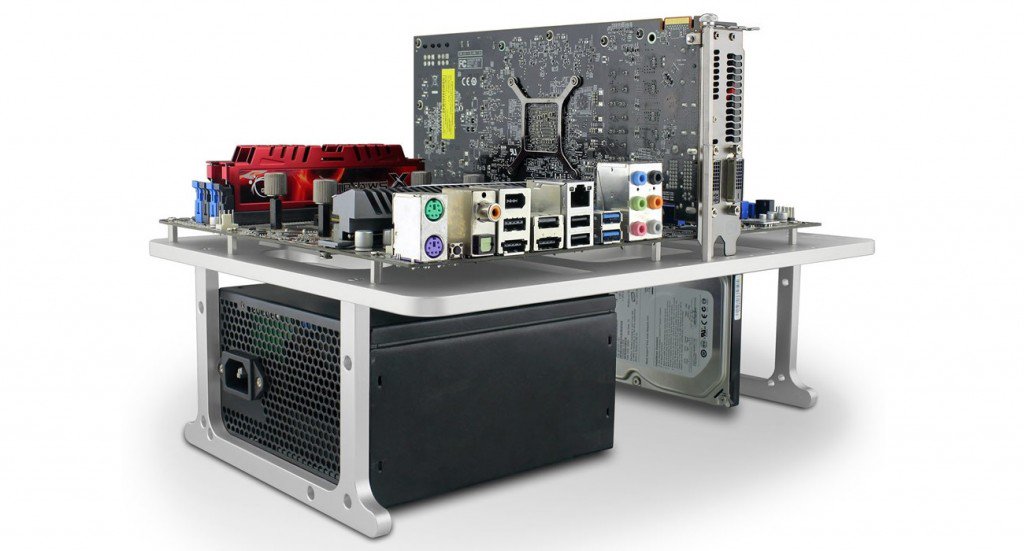 95 – $219.90 (varies by edition) 95 – $219.90 (varies by edition) |
• Windows • Android • iOS • Windows Phone • Tizen • Chrome OS • Sailfish OS |
| Cinebench R23 | • Reliable CPU and GPU testing • Free |
• Lacks system-wide benchmarking | Free | • Windows • macOS |
| Superposition | • Advanced graphics features • Free basic version • VR support |
• Limited to GPU testing • Can be resource-intensive |
Free to $7,500 (varies by edition) | • Windows • Linux |
| CrystalDiskMark | • Simple to use • Fast testing • Free |
• Limited to storage testing • Basic interface |
Free | Windows |
Jump to:
- Key features of PC benchmark test software
- How do I choose the best PC benchmark test software for my business?
PCMark 10
Best for Windows PCs
PCMark 10 is a benchmarking program for Windows computers that uses real-world applications and activities to assess computer performance.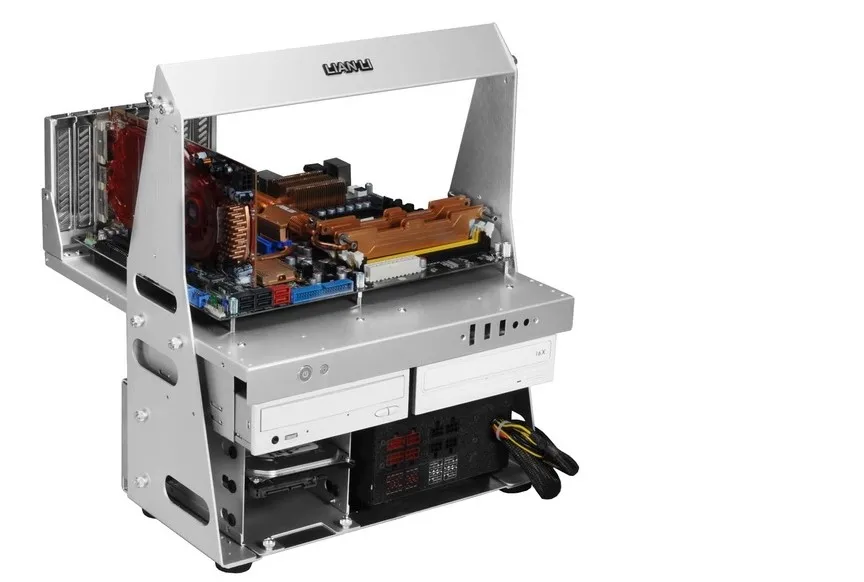 These tests in PCMark 10 include surfing the web, video chatting, writing and spreadsheet work, photo and video editing, and other everyday tasks.
This computer benchmark tool is simple to set up and operate, with no stringent requirements. You’ll receive a PCMark 10 score after running the preliminary test, which you may compare with other systems. Benchmark rankings are much easier to compare than technical specifications.
PCMark 10 is the ideal benchmark for businesses seeking to evaluate and select new Windows PCs for a workforce with diverse performance demands, thanks to its thorough and neutral testing.
Pricing
- Pricing for business use starts at $1,595 per year.
- There is a free tier for home use.
Features
- The industry-standard Windows 10 PC performance test.
- Relevant tests that are appropriate for today’s enterprise computing needs.
- Battery life tests cover several common scenarios.
- With dedicated storage benchmarking, you can evaluate and compare the latest SSDs.
- Accurate and unbiased test results, which is a must-have for vendor-neutral procurement.
Pros
- Evaluate the PC’s overall performance in real-world situations and not just some aspects.
- All PCMark 10 benchmark tests are compatible with Windows 11.
- Compatible with Microsoft Office 2021.
- The professional edition comes with a free trial of Testdriver—a benchmark automation solution for enterprise IT, PC lifecycle management, and production line quality assurance that allows you to remotely test any PC on your network.
Cons
- Only for Windows PCs.
- Known to be resource-intensive.
AIDA64
Best for comprehensive system diagnostics
AIDA64 is a benchmark software developed by FinalWire Ltd. The tool runs on Windows, Android, iOS, Windows Phone, Tizen, Chrome OS, and Sailfish OS operating systems and displays comprehensive data on computer components. Information may be saved in various file formats, including HTML, CSV, or XML.
The product family comprises five options:
- AIDA64 Extreme: A diagnostic and benchmarking software for home PCs.
- AIDA64 Engineer: A diagnostic, benchmarking, and system information tool for IT technicians and engineers.
- AIDA64 Business: A complete hardware and software inventory solution for enterprises.
- AIDA64 Network Audit: A complete network inventory and IT asset management solution for enterprises.
- AIDA64 for Mobile Devices: A complete benchmarking system for mobile devices, smartwatches, and even smart TVs.
Pricing
- AIDA64 Extreme: $59.95
- AIDA64 Engineer: $219.90
- AIDA64 Business: $219.90
- AIDA64 Network Audit: $129.90
- AIDA64 for Mobile Devices: Free
Features
- Comprehensive hardware and software information.
- Benchmarks for the CPU, GPU, memory, storage devices, and Windows settings.

- GPU temperature monitoring on supported AMD/nVidia video cards.
- Supports automated network audit with equipment discovery and IP address scanning.
Pros
- Scans all major platforms, including Android, iOS, Windows Phone, Tizen, Chrome OS, and Sailfish.
- The latest version has accelerated benchmarks for Intel processors.
- The latest version has better support for Intel memory modules.
- Supports DDR5 XMP 3.0 memory profiles.
- Updated to support Microsoft Windows 10 21h3.
- Updated to support Microsoft Windows 11 and Windows Server 2022.
Cons
- It can be slow when running scanning and diagnostic operations.
- Complicated interface.
- Expensive for home use.
Cinebench R23
Best for 3D rendering and animation workloads
If you’re searching for a thorough CPU evaluation, Cinebench has you covered. The freely available software is available on Windows 10 and higher and macOS 10.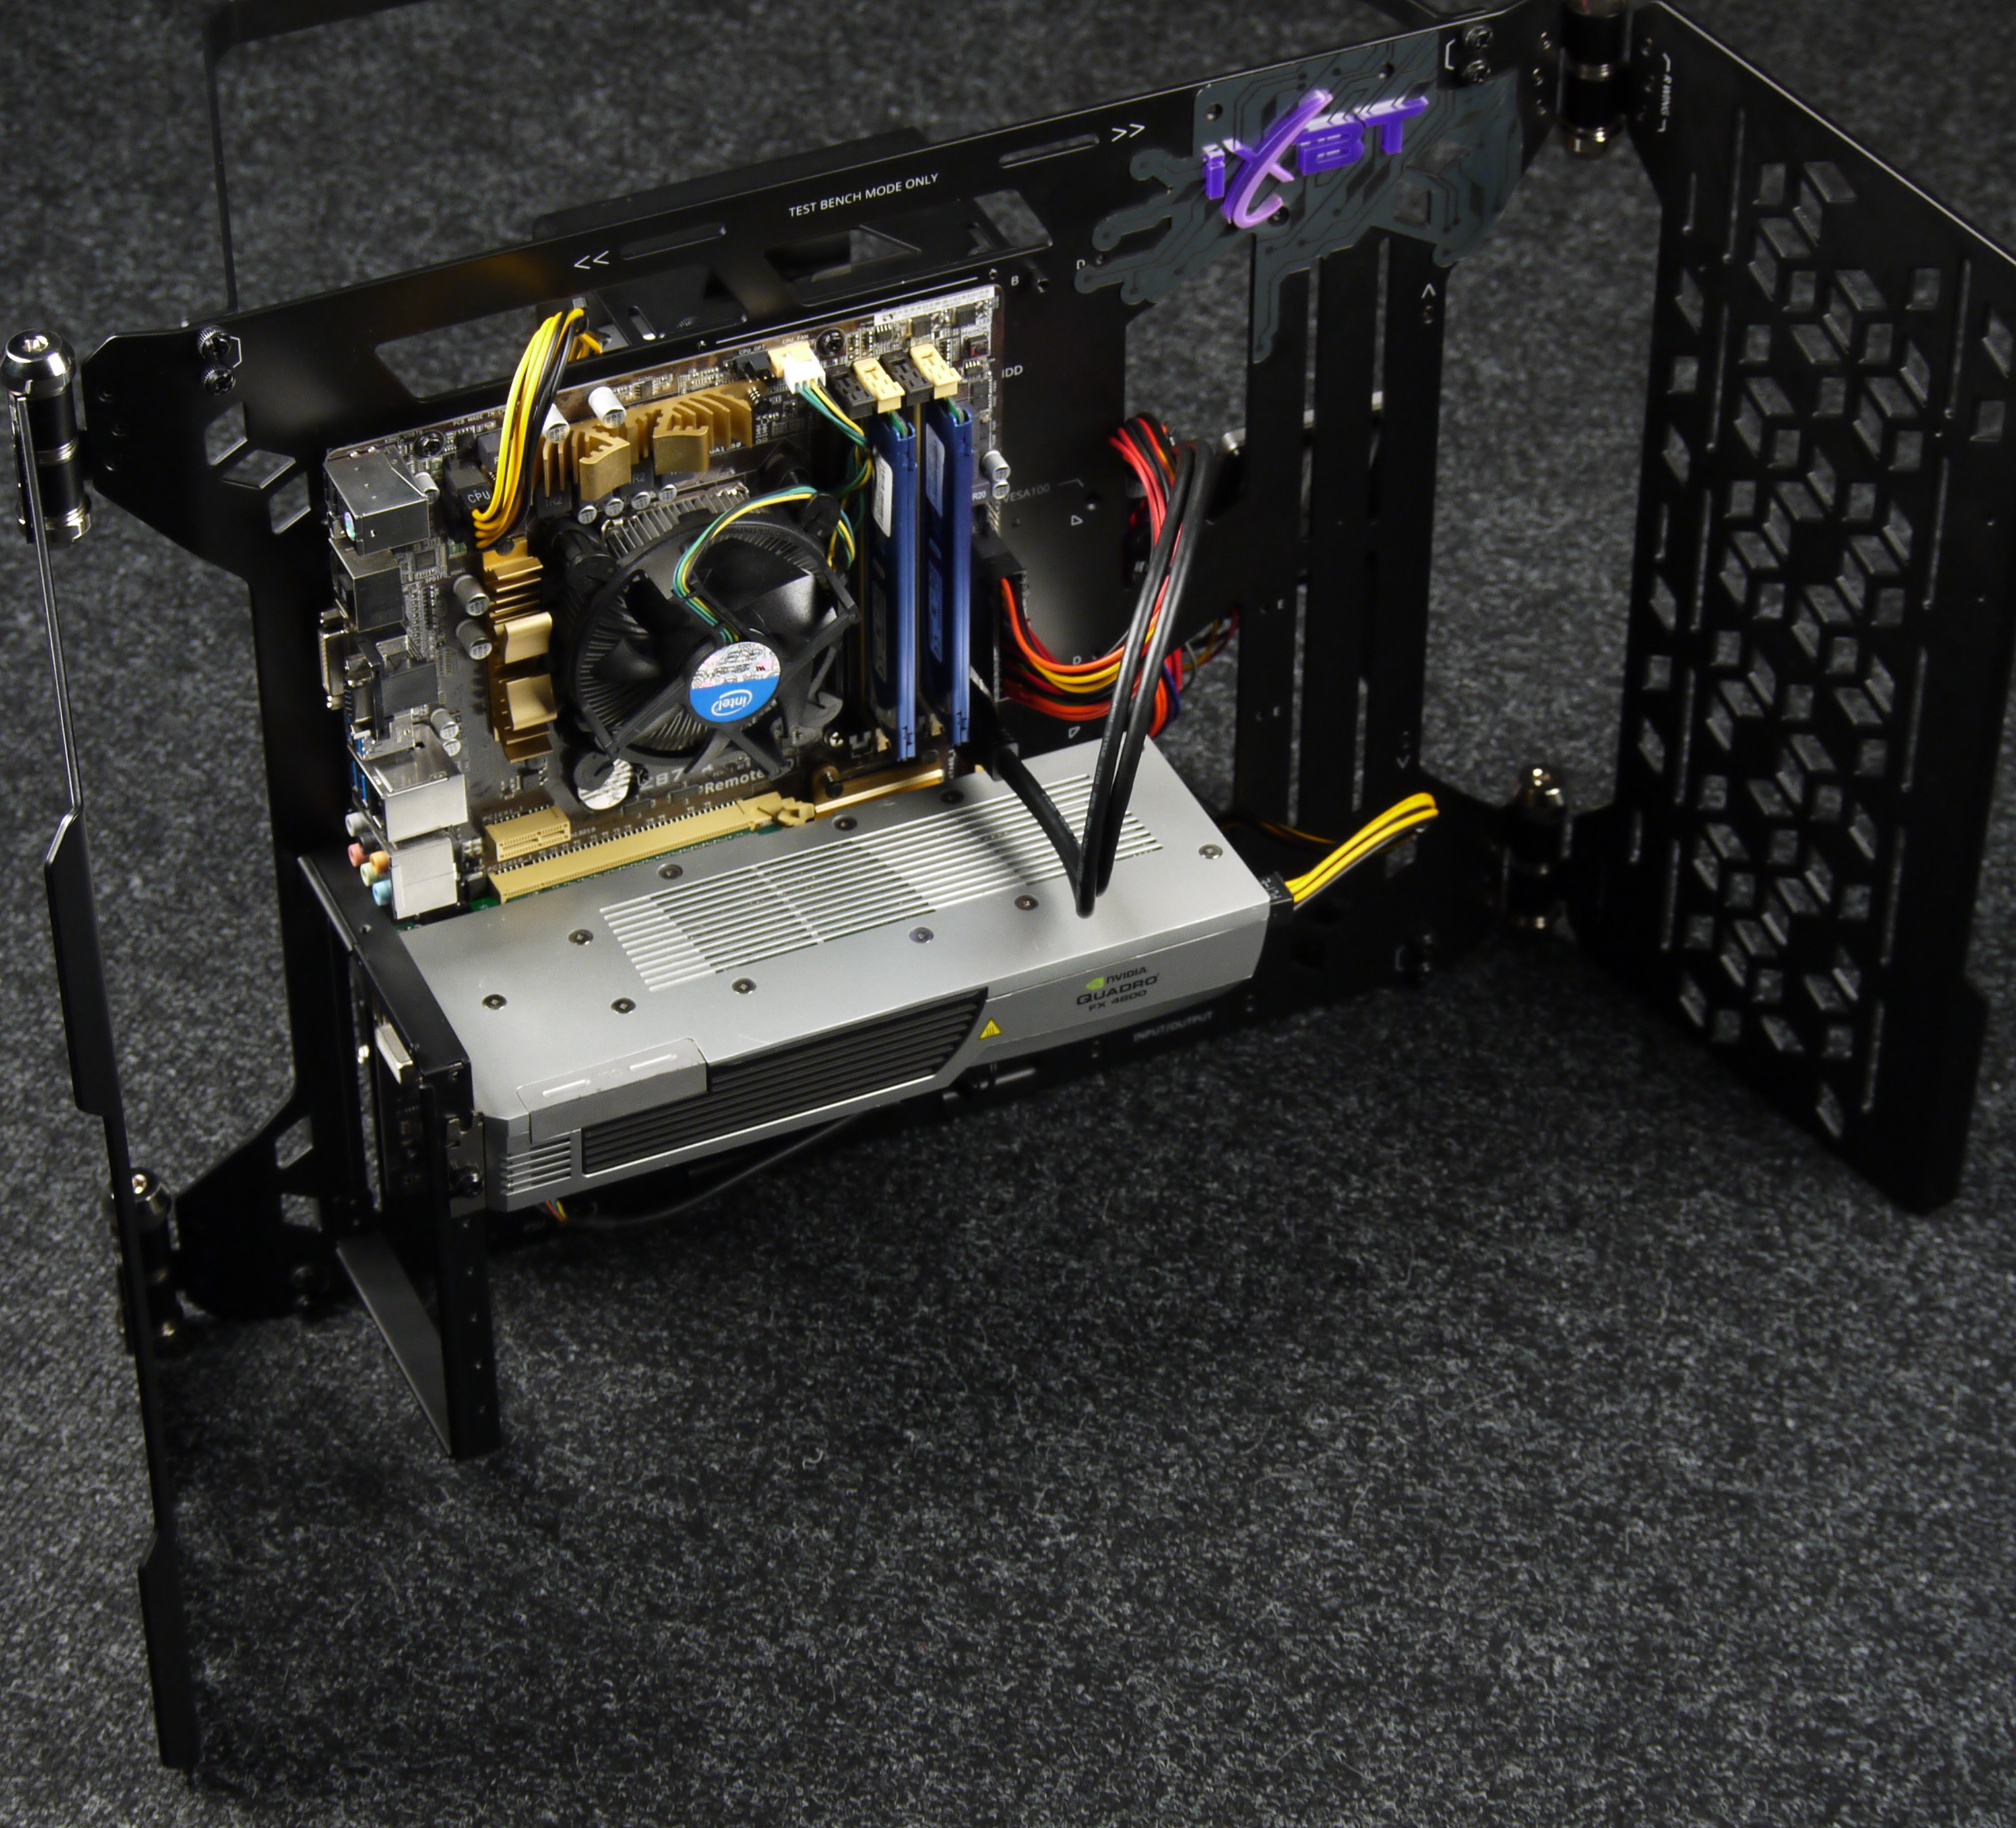 13.6 or higher platforms. The tool assesses the capabilities of your CPU using image rendering operations.
Cinebench uses 4D image rendering tests to grade CPU and OpenGL performance. It’s competent for high-end systems that can grow beyond the capabilities of most benchmarking software. The reports it generates are useful and based on real-world performance.
The key feature of Cinebench’s comprehensive 4D rendering test is that it utilizes all of your CPU’s available cores, stressing it to its absolute limit.
Pricing
- Free.
Features
- CPU performance evaluation.
- Renders a real-world image using all CPU cores.
- Compatible with macOS and Windows platforms.
- Cinebench compares your results to other online users running the same CPU.
- Provides comprehensive reports on the rendered test.
Pros
- Real-world testing based on image rendering.
- Tests all of your CPU’s cores to their limit.
- Free software.
Cons
- No system-wide benchmarking
Superposition
Best for gaming performance and GPU stability
There are many popular GPU-focused benchmarking tools available on the market. One of our favorites is UNIGINE’s Superposition. This tool is available for free for basic users on Windows and macOS platforms.
Superposition offers an impressive range of GPU tests. It also includes a demo mode that lets you explore its capabilities without running any benchmarking tests. It leverages advanced graphics features such as tessellation, volumetric lighting, and global illumination to push modern GPUs to their limits. Superposition is ideal for gamers, hardware reviewers, and enthusiasts looking to evaluate the performance and stability of their gaming systems.
The key feature that makes Superposition a powerful tool is its ability to test GPUs across a wide range of scenarios. You can use it to compare different graphics cards, measure the impact of overclocking, or find out how your card handles different computing environments. That makes it one of the best benchmarking tools for game developers to test their games’ performance on different GPUs.
Pricing
- Basic: Free
- Advanced: $19.95
- Professional: $495
- Enterprise: $7,500
Features
- UNIGINE 2 Engine provides exceptional visuals.
- Extreme testing of hardware stability.
- Monitor GPU temperature and clock.
- Comes with a dynamic lighting technology known as SSRTGI (screen space ray traced global illumination).
- VR experience with leading VR gear.
- Mini-games as well as free exploration mode.
- Hundreds of interactive objects.
- Integrates with global leaderboards.
- The Professional Edition allows you to utilize command-line automation tools, CSV reports creation, and much more, including access to technical support.
Pros
- Test a wide range of computing environments and compare against other systems.
- One of the few benchmark software to run on Linux.

- Beautifully detailed dashboard.
- Free for basic users.
Cons
- Limited to GPU testing.
- It can be resource-intensive and unstable when running intensive benchmarking tests
CrystalDiskMark
Best for storage devices
CrystalDiskMark is a popular storage benchmarking tool, and it’s completely free.
Benchmarking the performance of NVMe SSDs, which are becoming increasingly popular (and faster), is more critical than ever. Benchmarking the speed of your computer’s various storage drives allows you to determine which ones run fastest and should therefore hold your most critical applications.
Pricing
- Free.
Features
- Compatible with Windows platforms.
- It runs on NVMe SSDs, HDDs, SSD drives, and USB flash drives.
- Includes benchmark tests for sequential and random access (read/write/mix) operations.
Pros
- Free-to-download software.
- Benchmarks speed using various scenarios such as data transfer rates in multi-threaded mode, the fastest possible option supported by a given storage device.
- Generates reports based on real-world scenarios like writing files to an external HDD while simultaneously reading from it.
Cons
- No macOS or Linux support as of this writing (though there is a macOS clone called AmorphousDiskMark).
- Regular use can shorten SSD/USB memory life.
Key features of PC benchmarking test software
Some key features of PC benchmarking test software that make them essential for users looking to optimize their systems or make informed purchasing decisions include a comprehensive testing suite with customizable options, real-world workloads, cross-platform compatibility, and easy-to-read results.
Comprehensive testing suite
A robust PC benchmark test software should include a comprehensive suite of tests that cover various aspects of system performance.
These tests should evaluate the performance of individual hardware components, such as the CPU, GPU, memory, and storage devices, as well as assess the overall system performance under various workloads.
Customizable test options
A versatile benchmark test software should offer customizable test options that allow users to select and configure specific tests to suit their needs. This feature enables users to focus on particular components or workloads, making it easier to identify bottlenecks or areas for improvement.
Real-world workloads
An ideal benchmark test software should simulate real-world workloads to provide users with accurate and relevant performance metrics. These workloads should represent a wide range of tasks, including productivity applications, content creation, gaming, and multimedia playback, to give users a clear understanding of how their system will perform in everyday use.
Cross-platform compatibility
Cross-platform compatibility is an essential feature for PC benchmark test software, as it allows users to compare the performance of systems running on different operating systems.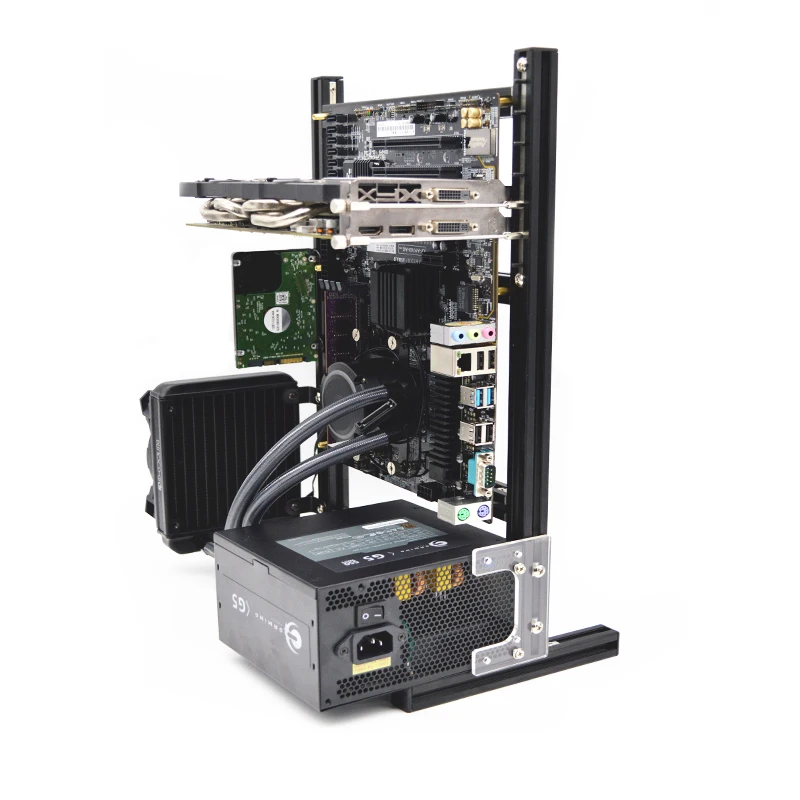 This feature is particularly useful for professionals and enthusiasts who work with multiple platforms or want to assess the performance of various systems in their network.
Easy-to-read results
Benchmark test software should present the results in an easy-to-read format, making it simple for users to understand and compare their system’s performance. This may include graphical representations, charts, or detailed logs, allowing users to analyze their system’s performance in-depth.
System diagnostics and monitoring
In addition to performance testing, some benchmark test software offers system diagnostics and monitoring features. These tools can provide users valuable information about their system’s stability, temperature, power consumption, and other vital parameters. This information is crucial for users who want to maintain the optimal performance and longevity of their systems.
How do I choose the best PC benchmarking test software for my business?
Selecting the ideal PC benchmark software for your business can be challenging, given the variety of tools available and your organization’s unique requirements.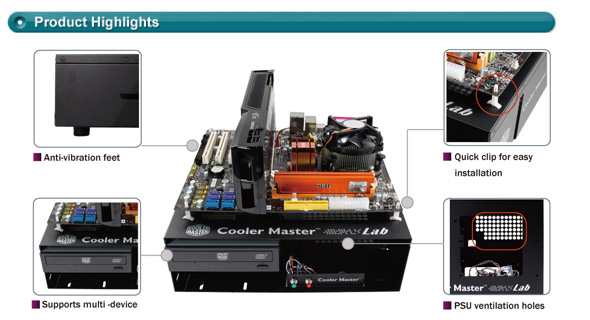 We suggest the following approach.
1. Determine your requirements
Before selecting benchmark test software, it’s essential to identify your business requirements and specific use cases. Consider the workloads your organization deals with, such as productivity applications, content creation, data processing, or 3D rendering. This will help you focus on the benchmark software that caters to your organization’s specific needs.
2. Evaluate compatibility
Secondly, ensure the benchmark software you select is compatible with the operating systems and hardware configurations used within your organization. Cross-platform compatibility is crucial, especially if your business operates in a diverse technological environment.
3. Assess ease of use and reporting
Choose a benchmark software that provides an easy-to-use interface and presents the results clearly and concisely. This will enable your IT team to quickly analyze and interpret the performance metrics, making it easier to identify areas for improvement and make informed decisions.
4. Compare features and pricing
Once you have shortlisted potential benchmark software options, compare their features and pricing. Look for software that offers a comprehensive suite of tests, customizable test options, and additional features such as system diagnostics and monitoring. Ensure the pricing structure aligns with your organization’s budget and provides value for money.
5. Test drive the software
Some benchmark software providers offer demos or basic versions of their products. Take advantage of these offerings to test drive the software and assess its suitability for your business. This hands-on experience will give you a better understanding of the software’s capabilities and help you make an informed decision.
6. Seek feedback and reviews
Lastly, consult online reviews, industry forums, and peers to gather feedback on the benchmark software you’re considering. This will give you insights into the software’s reliability, accuracy, and overall performance, helping you choose the best tool for your business.
Bottom line: Choosing the best PC benchmark tool for your needs
By following these steps and considering the factors mentioned above, you can confidently select the ideal PC benchmark software that meets your business requirements and ensures optimal system performance. Investing time and effort to identify the right benchmark test software will improve your organization’s productivity and efficiency.
If you’re benchmarking your organization’s PCs, you may want to check your network, too. We reviewed the best network testing tools to monitor your network’s speed and performance.
Latest Articles
Follow Us On Social Media
Explore More
Self-made test bench for motherboards / Sudo Null IT News
I think that sooner or later, everyone who regularly tinkers with computer hardware comes up with the idea to somehow optimize the workplace — they get tired of laying out on the table every time, then tidying up. Plus, sometimes the fuss with the motherboard can go on for several days, and during this time you may need to do something else on the table, run something else, etc. And if the motherboard is laid out there, and even some tests are going on, then moving it may be undesirable. So the classic «motherboard box» ceases to suit. This came to me rather late than early, but it’s better than never 🙂
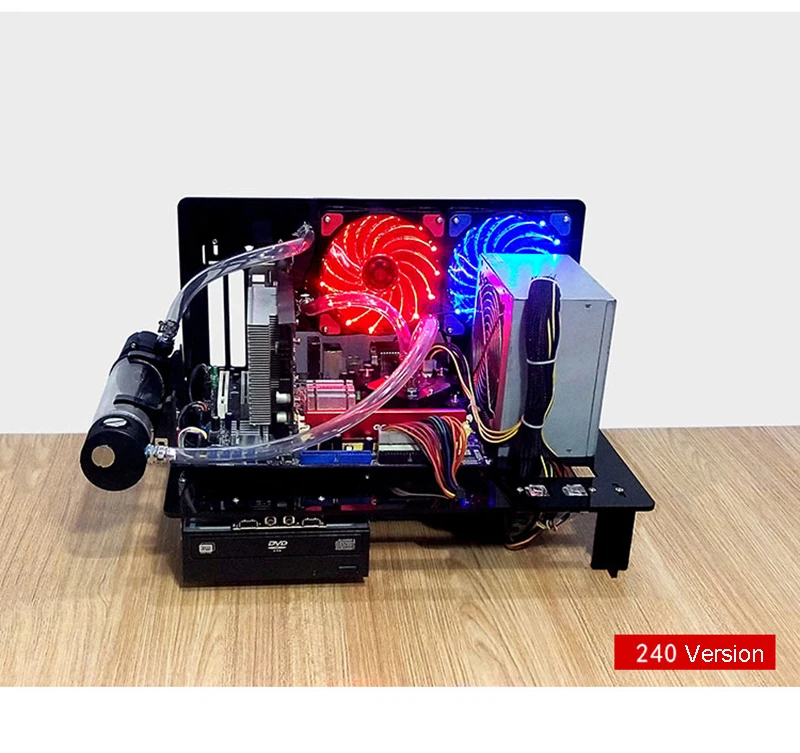
First, of course, I went to look at the finished options. They are, but they are quite expensive, even Chinese ones. The average price is around $ 100, there are cheaper, there are more expensive.
Alpha-DB6 Case. In principle, not such an expensive option, if you do not take into account the delivery. One-story with a «basement» for disks.
BC1 Open Benchtable (This is actually quite an interesting project and there are blueprints on the site for DIY).
X-Frame 2.0. I don’t know why they are asking for that kind of money.
Bench/Test Table Easy V3. 0.
0.
Test Bench V1.0. Only the functionality that is here, that the option is higher.
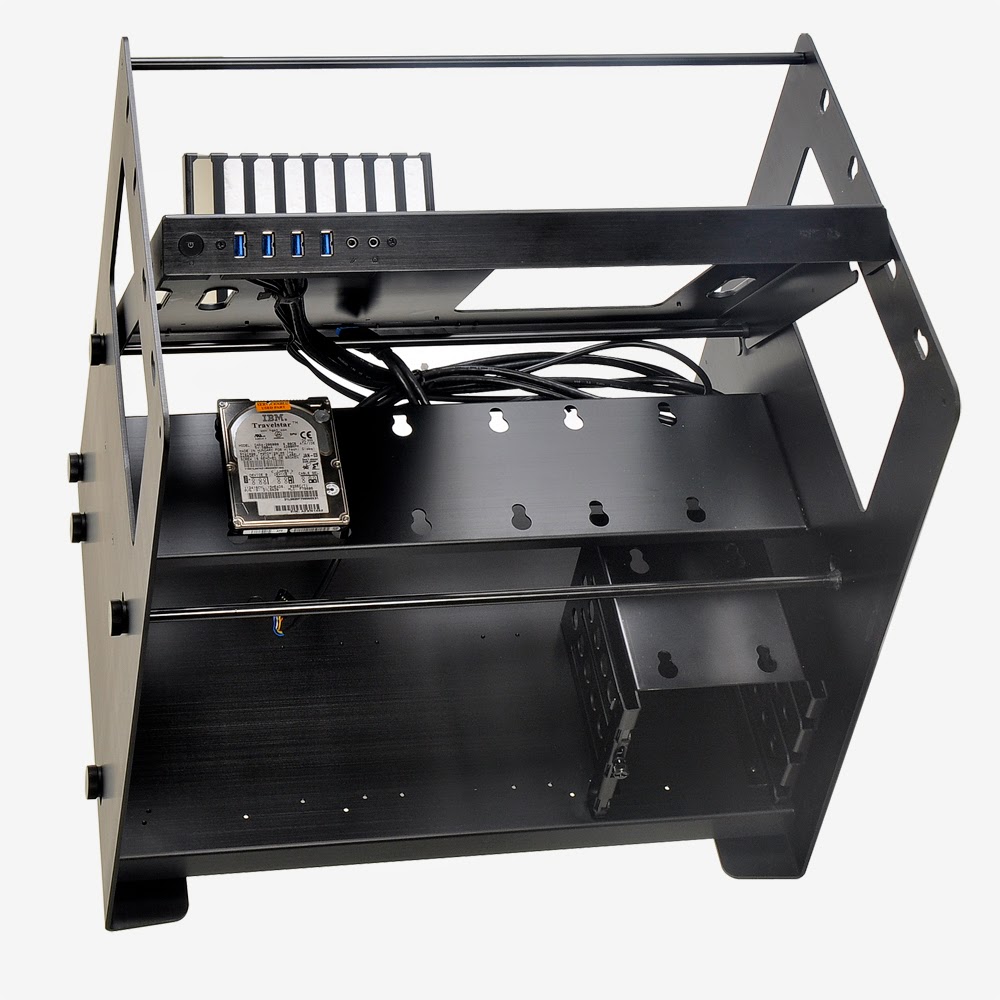
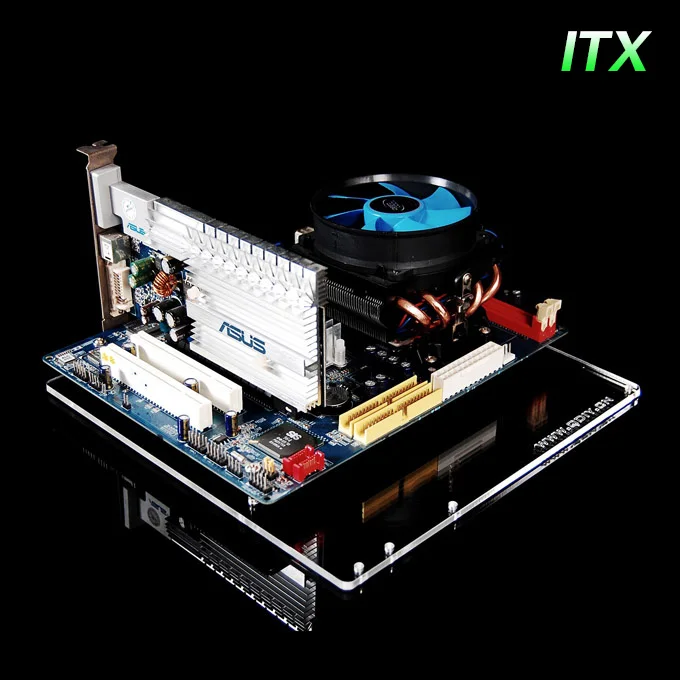
QDIY PC-D60. Chinese version. The bare base for the motherboard, only mATX and less, the PSU is placed on the side, there is no place for an optical drive.
I consulted with a toad and decided that I would not buy anything. You have to do it yourself. I looked at what the Internet can advise on this topic. The Internet advised a lot of things, I was not the first to want this.
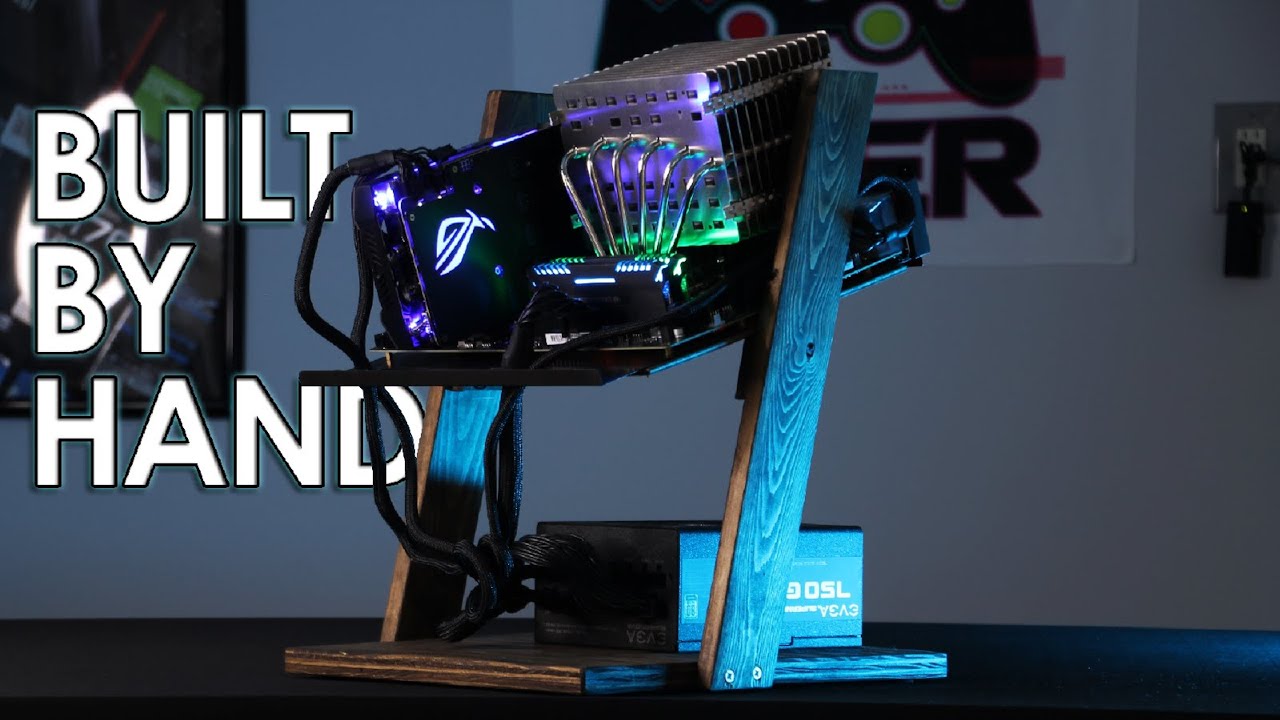
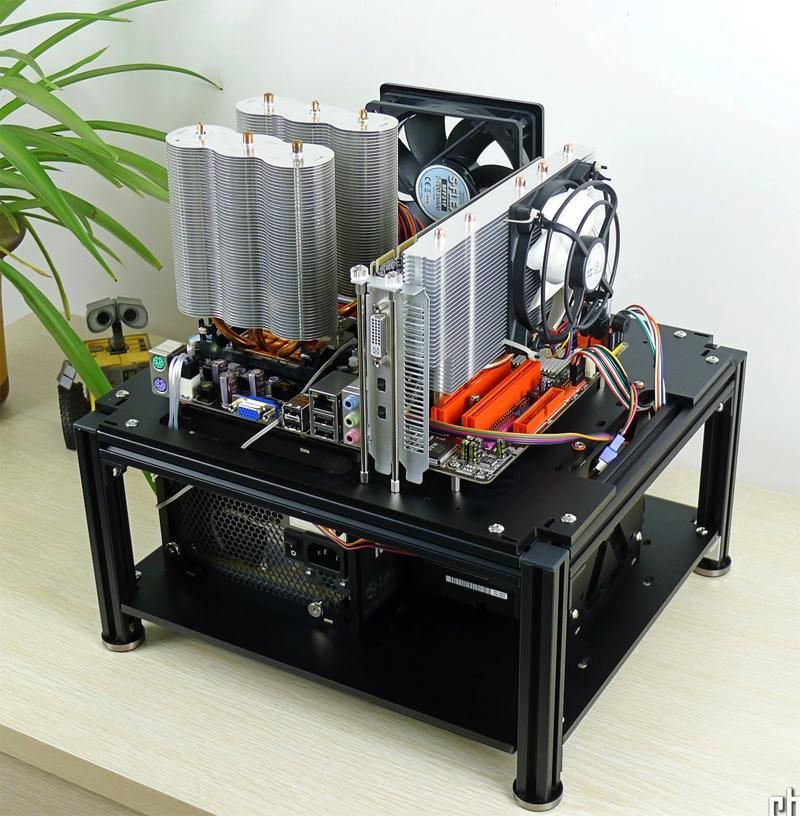
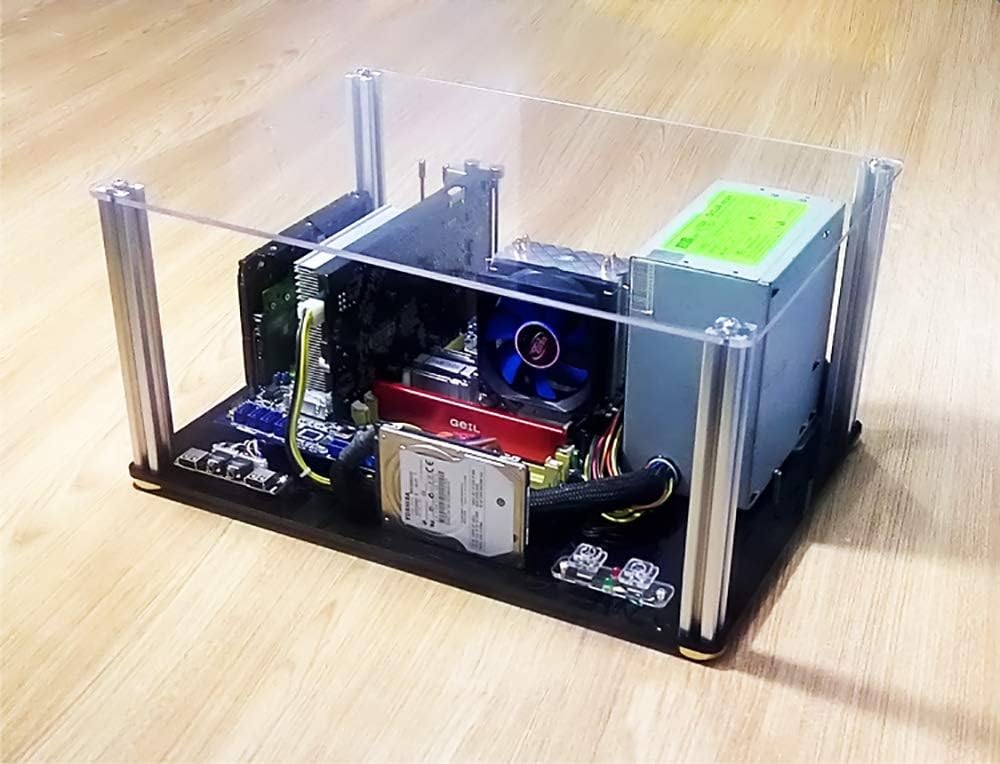
General ideas — two-tier design, on the lower «floor» is the power supply and storage media, on the top — the motherboard. There are single-tier options when the PSU and disks are located next to the motherboard, but they take up more space on the table.
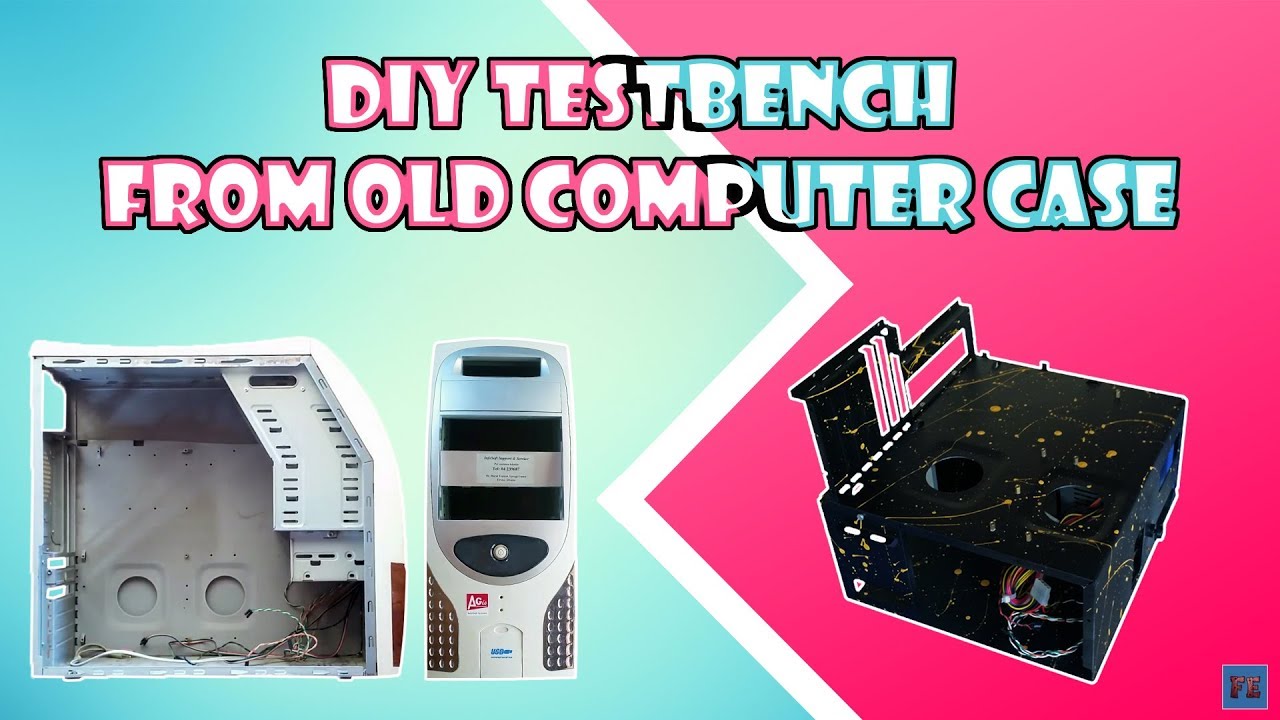
Most make a stand from an old case — they take out the tray for the motherboard from there, make a frame from the remains of the case, then fix the tray from above.
When choosing options, I proceeded from the following things:
- I have crooked hands.
 The mouse and keyboard lie much better in them than a hammer and a hacksaw. That is, I can dig, I can not dig. I can drink, I can not drink. But somehow it’s beautiful to cut — this is no longer for me. Because the less you have to cut, drill, etc. — all the better.
 - I will work with what lies under my arms and under my feet. To save money and not to go far.
- The design should be two-tiered — more compact, more accurate — usually the PSU and storage media are the same, only motherboards and expansion cards change. So it’s easier to permanently fix the PSU and disks — well, or make comfortable seats for them so that you can quickly install and remove them. Seats must be at least 3.5″ hard drive and optical drive. Optional 2.5″ drive and 3.5″ drive.
- Must have power and reset buttons, speaker, power and hard drive activity indicators.
- It should be possible to conveniently move the assembled structure — nothing should stick out of the dimensions, except for external cables, there should be places that are convenient to take.

I chose wood as the material for the base — it is easier to work with it, it forgives more mistakes. which I will have.
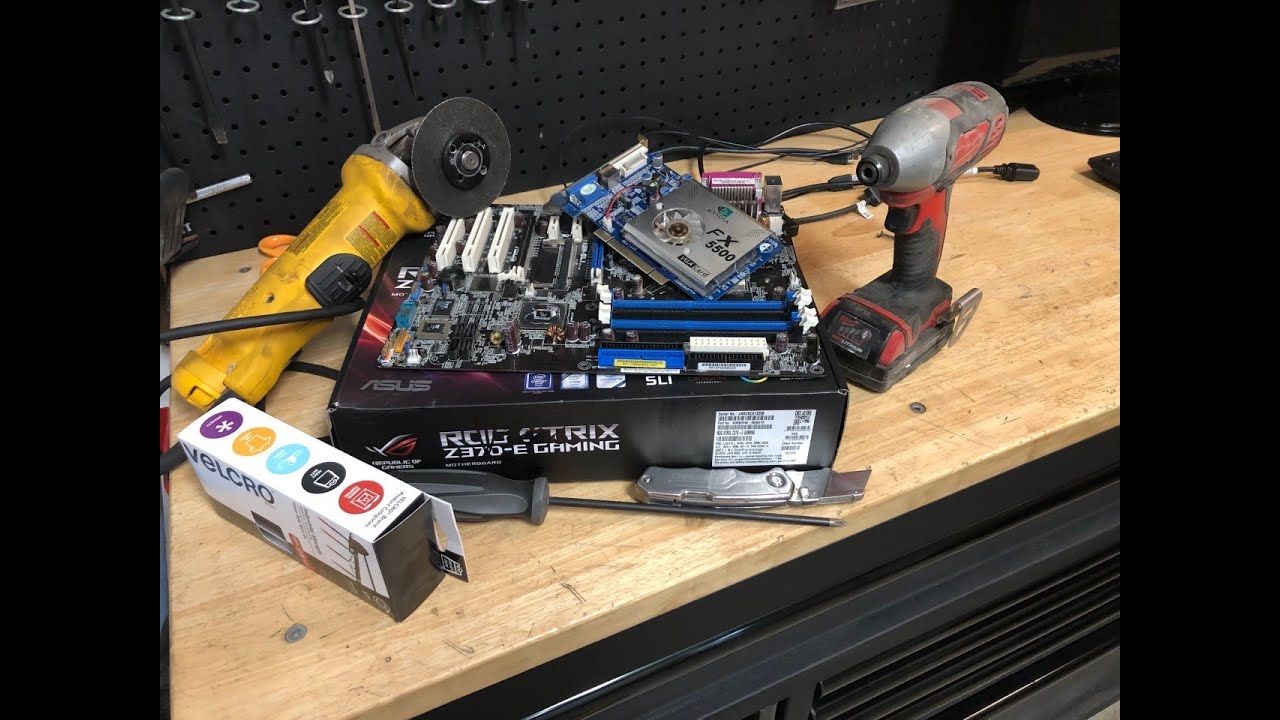
To mount the motherboard, I unscrewed the tray from the old case. It would be possible to install the mounts directly on the base of the stand, but this is extra work — everything is already marked on the pallet for the standard sizes of motherboards, screwing it with four screws to the base is much easier than putting a dozen and a half racks for different types of motherboards. A pallet from an old invin would be ideal (A-series, in my opinion, an early ATX, where the pallet on rails, along with the motherboard, was pulled out of the case). But, unfortunately, I didn’t have anything like that. Yes, and it would be a pity to cut a good case. And so I used some kind of tin can like superpower.
I chose the dimensions of the stand based on the size of the pallet — I threw a couple of centimeters on each side, rounded it a little — it turned out 30×40 cm. The height is equal to the height of the power supply placed vertically — 15 cm. went to the locksmiths and carpenters and said, «I need this crap.» As a result, after a couple of weeks (they were busy, but I didn’t burn), I received the ordered horseradish.
Two pieces of chipboard, legs made of metal tubes. I myself, most likely, would have made wooden legs — I would have taken a handle from a mop and sawed off four pieces of the desired length, then I would have planted them on long screws.
The power supply was thinking about how to put it — vertically or horizontally, as a result I put it horizontally. All the same, the length of the processor power cable was not enough, so, so, so, and the rest of the wires were more convenient to use with a horizontal PSU. The PSU is fixed simply on two corners. The power supply itself is the usual five hundred. Of course, it would be ideal to put a power supply unit with detachable wires here, but what I used as a bench power supply unit I stuck.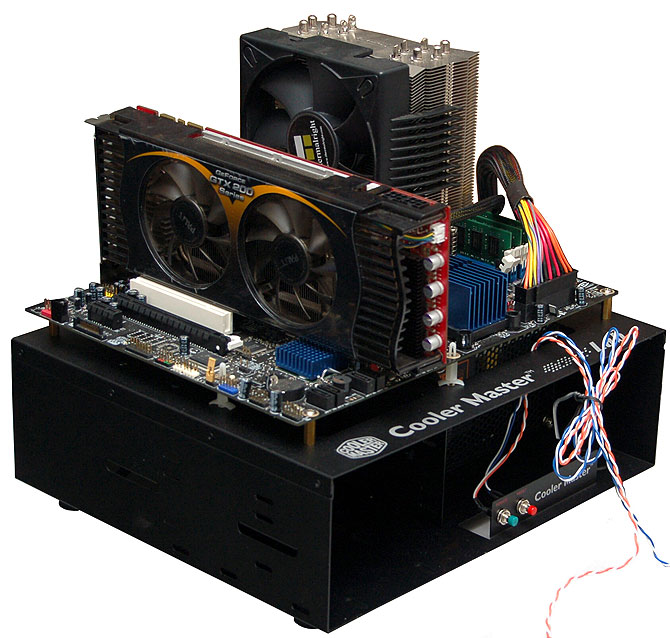
To mount optical drives and disks, I took a rack from another old case, it is convenient because it has a couple of stops for the hard drive and it is not necessary to screw it for secure fastening. But the drive needs to be fixed.
I screwed the tray for the motherboard with five bolts, after the final choice of location I cut a couple of holes for passing cables.
To quickly fix the motherboard, I put a few «pegs» (I just screwed the bolts from below), only in one place I left a bolt with a lamb for twisting with my fingers.
The remaining racks are either plastic or with plastic plugs — so that motherboards can lie on them without fear of shorting something — not all boards have mounting holes in standard places. The lining is glued for the same purpose — AT motherboards hang in the air in this place and, in principle, can bend to the metal (although I don’t have purely AT motherboards, but AT / ATX are found).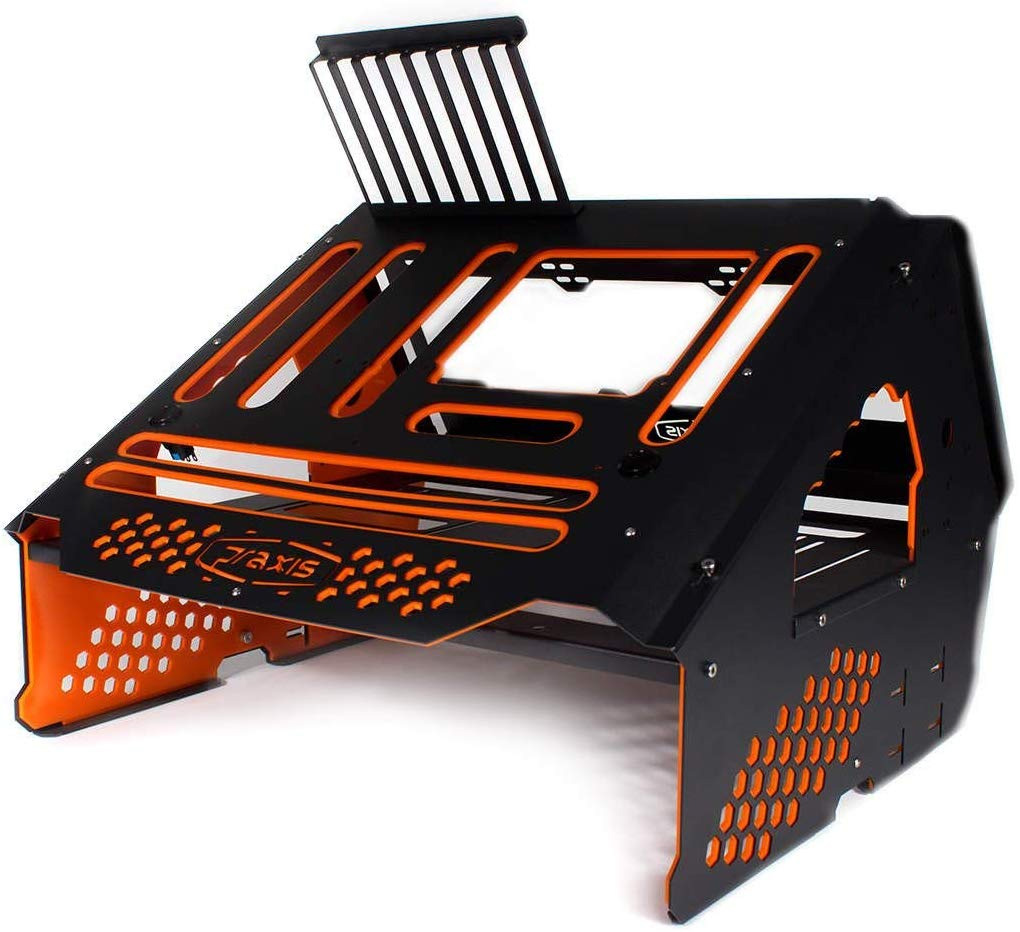
Left a place for whistles and lamps on the side. On the one hand, the power button with a luminous rim — I connect it to the activity of the hard drive, the Reset button and the speaker. I drilled holes of the appropriate diameter and put them on glue from a thermal gun.
I decided not to dilute the power LED, instead I put two voltmeters — 5 and 12 volts. Voltmeters are cheap, the second decimal place is set from the bulldozer, but they allow you to roughly control the voltage, you can see a drawdown of up to 11 volts. If you need to be more precise, then there is a multimeter. Well, the power indicator is working at the same time. I set it aside so far from the buttons in order to make it more convenient to take it with my hands for carrying. I also put it on hot glue, although it was possible to fasten it. I added a reusable tie in the corner to secure the wires from the buttons in my “free time”.
The insufficient length of the processor power cable was solved by gluing an extension cord. The cable from the PSU is connected to it from below, and from above it is long enough to reach almost anywhere around the socket.
I made several additional slots along the far edge for passing cables, closed three, left one open. But no one bothers to open the closed ones if necessary.
From the bottom «on the ceiling» I hung out platforms for fastening the ties, so that it would be more convenient to lay and hang the wires. So far, not everything is hung out, the construction was assembled not so long ago, it has not settled down completely.
Well, everything, in principle, can be used. Outwardly, of course, collective-farm, but it fulfills its tasks.
Of the planned improvements:
 Although, I think I’ll limit myself sled as under 2.5″
 Of the unplanned, but deliberate improvements — a support frame for expansion cards. I’m still not sure that I need it here — boards rarely cost more than one or two pieces and they normally stay in slots.
Of course, there will certainly be a lot of comments on the topic “Aren’t you ashamed of putting such a collective farm on public display? No, first polished and painted in a cheerful color. And I drew a cat!
No, don’t be ashamed. Because I realize that this is a collective farm, but I didn’t find much Russian-language materials on the topic of creating such stands. Let there be one more.
Optimize tests
Marina Tretyakova, tester of the Kontur project. Deliveries
Original publication
First of all, let’s divide all testing by the degree of automation in order to further consider each type in more detail.
According to the degree of automation, tests are divided into:
- Manual.
- Automated.
- Automatic (without human intervention, at the moment — more a myth than a reality).
The approach to test optimization directly depends on the degree of their automation.
Testing includes steps:
- system under test preparation,
- preparation of input data,
- conducting tests (manual or automated, discussed below),
- collection and analysis of results.
It is believed that manual regression takes the most time for testers.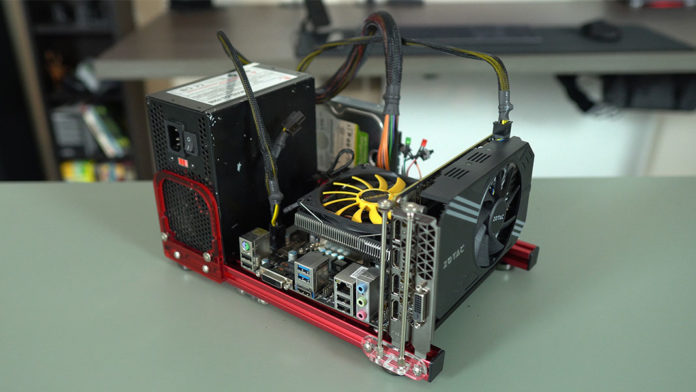 However, in most cases this is not the case. At the very least, this should not be asserted until the problem has been measured and proven.
Consider solutions to typical problems. Many tips may seem extremely obvious to you, but as the experience of conferences and speeches of colleagues from other companies shows, these tips are still relevant and have proven their applicability and usefulness.
Issues:
1. Long preparation of the system under test
Important questions to ask before implementing optimizations:
- Long relative to what?
- Who does this training (testers, programmers…)?
- How many times, if desired, can I prepare a system under test in a working day? Does this number meet the testing needs?
- What is the longest stage in preparation and why?
To find the cause of this problem, it is important to ask the right question.
Consider examples:
Long compilation of all system modules
Correct question : is it necessary to compile all modules?
Solution : not compile all modules of the system, but only those that were affected in the task and that will be included in the release.
A long manual process of updating the entire system on different «virtual computers» on a test bench
Correct question : at what point in the update is human intervention required, and at what point is it not?
Solution : automate the deployment process, use special tools for deploying and rolling out services, or well-established mechanisms for releasing to the “combat”, but using them only for deploying to the test.
A long process of “spilling” source codes into “virtual computers” on a test bench for further compilation and rolling out
Probable Issue : Networking.
Correct question : long relative to what (collection on the local machine, collection on the local network)?
Solution : The test bench and the place where the sources are located must be on the same network to minimize network interaction.
I encountered this problem at work when I decided to change the test site in Yekaterinburg to Moscow. And in the process of testing the “layout” of the site, we quickly noticed that updating the stand began to take not 3 minutes, but almost 15 minutes. The reason turned out to be that the source code with a large number of small files was located in Yekaterinburg, and the booth was in Moscow. The process of laying out “rested” on the network transfer of small files for further compilation and “layout” on the stand. As a result, the code also “left” to Moscow 🙂
2. Long collection and analysis of results
Important questions to ask before implementing optimizations:
- Long relative to what?
- What are the steps in the process of collecting and analyzing results? Which stage is the longest and why?
- Who analyzes the results?
- Who makes the release decision and on what basis? How much time does it take to make a decision?
Example :
Testing results are drawn up according to a template; design according to a template takes most of the time during testing.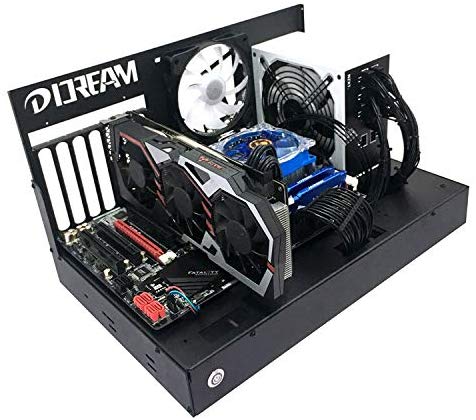
Solution (thank you, Cap!) : no longer fill in results by template, or create an easier template to fill in. You will need to agree with the team and find out from those who read these results (and do they read them?) Is there really a need for just such a template (the risk is to write test results “on the table”).
Optimizations applicable to manual tests
These tests can be divided into two large classes:
- conducted regularly, e.g. before a release (consider regression testing),
- held rarely and only to test new functionality.
If the regression is carried out frequently and manually, then it makes sense to think about automation and the ROI of automation, but in this article we will not consider the ROI of automation.
For tests conducted manually (not regression), we should not talk about automation of testing, but about instrumental support for testing (as Aleksey Barantsev advised at the training, which was held in our company).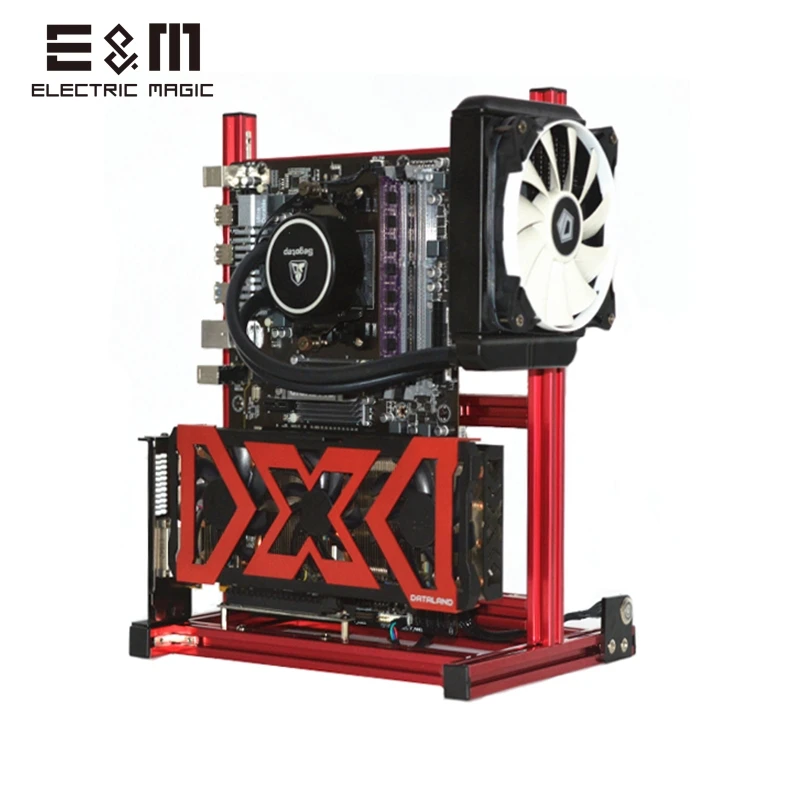 In this case, autotests will act as a tool. In this context, the logic and view of autotests in general will change.
When testing manually, first of all, you need to look for routine tasks (tasks, not tests!), And already optimize them (using automation or reallocation of human resources).
For example, a routine task for tests is preparing test data. There are different ways to carry out this very preparation:
- manually via UI,
- manually via API,
- by running autotests, then the data will be a side effect of these tests,
- automated via scripts/utilities/self-written tools via API or UI.
If you’ve never wondered how long it takes you to manually prepare test data, maybe it’s time to measure it? And it turns out that it is much more effective to use at least the second, and preferably the 3rd and 4th approaches.
The problem of preparing test data is more acute here than with manual testing. Prepare test data should be:
- fast,
- resistant to changes in design/layout,
- resistant to possible parallel test runs,
- resistant to changes in the internal architecture of the system.
It is desirable that data preparation does not require additional skills and time when implementing the solution.
Test data can be prepared automatically:
- via UI,
- via API or HTTP requests,
- through database queries.
Consider the pros and cons of these approaches in more detail in the table:
Preparing test data via API or HTTP requests is the most optimal in terms of pluses and minuses.
There are a number of common optimizations applicable to automated tests:
Parallelism of tests
If one of the problems of tests is precisely the time of their passage, while there are computing resources, you can parallelize and execute them in one of three parallel modes:
- Parallelism on one computer, parallelism by processor threads.
- Parallelism on different computers.
- A combination of the first and second methods, that is, if there are several computer machines, the tests are run in parallel by threads on each and in parallel among all machines.
Removing old tests
If tests are written, they pass, but they don’t really check anything anymore (for example, there used to be business logic, now it doesn’t exist and tests essentially don’t check anything anymore), then such tests should be ruthlessly deleted, because in fact, they do not carry any semantic load, taking extra time from the run. It is also worth removing tests, the result of which does not affect the decision on the possibility of release.
Using Test Design Techniques to Optimize Test Case Sets
Manual testing requires the use of various test design techniques to optimize test case sets. Autotests should also use equivalence classing, pairwise, bound analysis, and many other techniques to optimize the autotest suite.
Migration of existing tests and checks to another level
For example, there is a browser test that opens a search box, enters “apple”, “apples”, “apple”, “apples” (and so on), and sees what when performing a search, he saw a notification about buying apples in a store (the test looks at the very fact of displaying a notification and no more). So a long UI test doesn’t inherently test the UI, it tests logic that a unit test can test, so this test should be removed and a unit test written instead.
Correct decomposition of tests by levels “modular — integration — system”
I will give an example. There is a manual scenario: select a product in the online store, put it in the basket and proceed to checkout. What can be done (and it will be wrong): create exactly one test that will search for a product, add it to the cart and proceed to checkout.
It would be correct in this case to first divide the test into three sub-scenarios: choosing a product, adding a product to the basket, placing an order.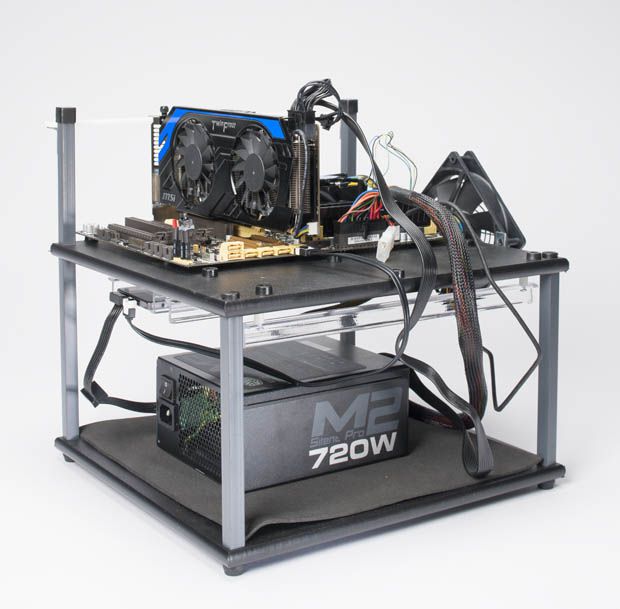 Let’s divide each scenario into more atomic checks.
For example: “opening a store — displaying different product categories for selection” — one test; “selecting a category from different product categories” is another test. We consider each check in more detail and determine what level of tests are needed for it, the previous example can tell you what type of tests it is better to immediately design as unit tests.
A popular scheme of connections between the tested and testing systems in automated testing of web applications:
To optimize automated testing of a web application, it is advisable to consider the optimization of each interaction in the described scheme.
For simplicity, consider the optimization of some interactions:
Using the API not only to prepare data for the test, but also to carry out a number of steps in the test.
For example, if the goal is to check the UI at the end of a long chain of actions, then it is not necessary to carry out all actions through the UI. After all, if something breaks in the middle of the chain in the UI, the test will never reach the end and the target check. The tester will continue to guess, but if they fix this broken link in the chain, will everything that works after it work? If in this case, throughout the entire chain, except for the last action, use the API, then in the event of a UI breakdown of any link, the tester will know whether the system will work as intended if the developers fix the broken link.
2) Interaction “test-cases — SeleniumWebDriver — browser”.
- Closing extra tabs on test completion instead of closing the browser.
On my project, this optimization helped save 10 minutes in running UI tests (instead of 1 hour 10 minutes, tests began to run in 1 hour). This optimization is related to the logic of the SeleniumWebDriver, which is used in the project — it takes a very long time to prepare the browser to open, but closing the tabs occurs almost instantly. - Optimize the system under test application cache to make tests run faster.
