How to get rid of hum, buzz, and other noises from your audio system
So you just unboxed your new entertainment gear, hooked everything up, and you hear a buzz, whine, hiss, chatter, or any number of other annoying noises that have been known to plague audio equipment. You might even see some banding or waves on your TV. So you take it all back to the store, only to watch the salesperson plug it in and have everything work perfectly. What the…?
I’d love to tell you that you did nothing wrong, but you may have, at least inadvertently. Then again, it could be bad wiring, defective equipment, or just a noisy electronic environment. Whatever the type of noise you’re hearing—and whatever the cause—here’s how to get rid of it.
Note: Some noise is inherent, such as tape hiss, or hiss when you turn up the gain on an input. It’s part of the equipment, and generally the only cure is… Better equipment.
EBTech Hum X
Ground loops
The number-one cause of unusual audio noise and weird video is the ground loop, simply because it’s so darned easy to create. The most common manifestations are a loud buzz or hum coming through the speakers, or scrolling bands on a TV screen. It could also be a much quieter, yet equally annoying buzz or hum that you only hear when the room is otherwise quiet.
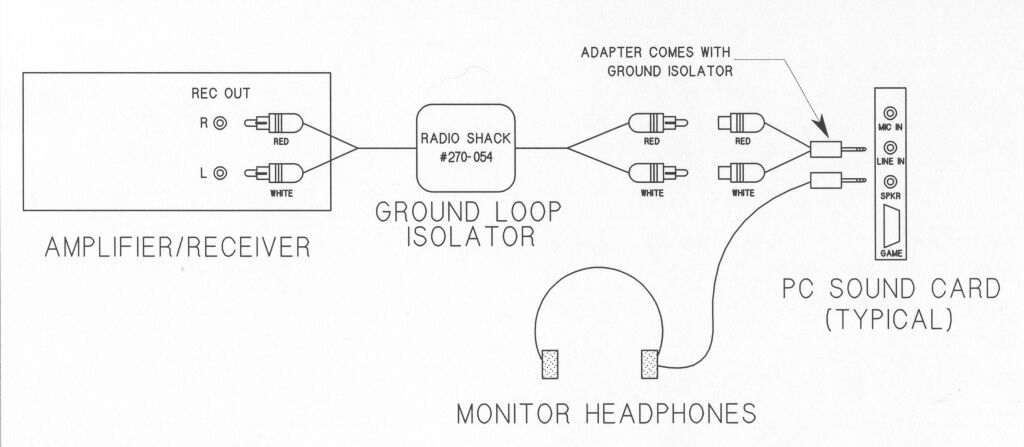
A ground loop typically occurs when one or more pieces of your entertainment system are plugged into the AC (alternating current) at different locations, then connected together by electrical (versus optical) signal cables—RCA, HDMI, composite, component—whose shielding is connected to ground. In the simplest terms, this creates a single-loop antenna that just loves to suck in various types of noise via electromagnetic induction. You can see how a loop is created in the diagram below.
Power inter-connected equipment from different AC outlets is likely to create a ground loop: The ground will travel through the shielding of the signal cables.
Anything that breaks the loop will remove the noise, and the easiest way to do it is to power everything through a single AC socket.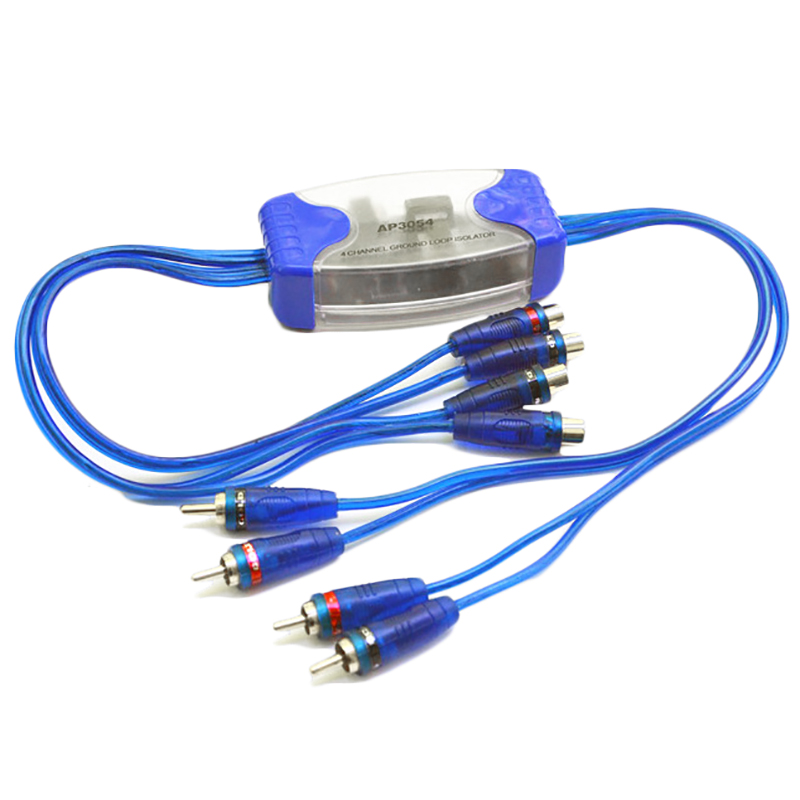 As shown below, simply plug all your equipment into a single power strip, surge protector, or power center and plug that into the wall. Problem solved. Most multimedia setups can be handled easily by a single 15-amp circuit and most household circuits can deliver at least that.
Powering connected equipment from the same AC socket eliminates most ground loops. If you still get hum, see if your antenna or cable wire has its own ground connection.
There might be occasions where you simply can’t reach the same outlet with a piece of equipment. Self-powered speakers and subwoofers come to mind. You could just “pull the ground” by using a three-prong to two-prong adapter but this represents a potential shock hazard. Look up Les Harvey and Stone the Crows for an extreme example of what can happen with high-powered equipment.
If using an extension cord is impractical, you can buy a hum eliminator, such as Ebtech’s Hum X. But that costs $70. There are other products that do roughly the same thing, some of which interrupt the loop in the signal cables, but they’re all expensive as well. If you have the skills, you can build your own hum eliminator for about $10 or $15. You’ll find plenty of information online that will show you how, but the task requires moderate skill with a soldering iron and similar tools.
Ebtech’s Hum X eliminates ground loop noise safely. There are also DIY solutions online that are less expensive if you have the skills.
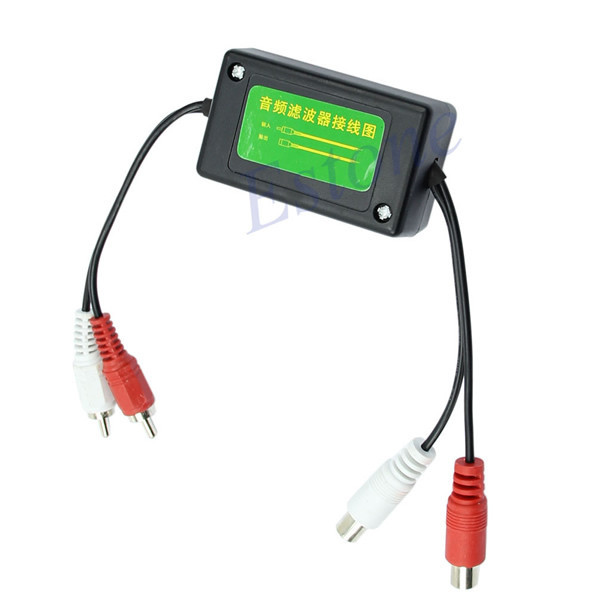
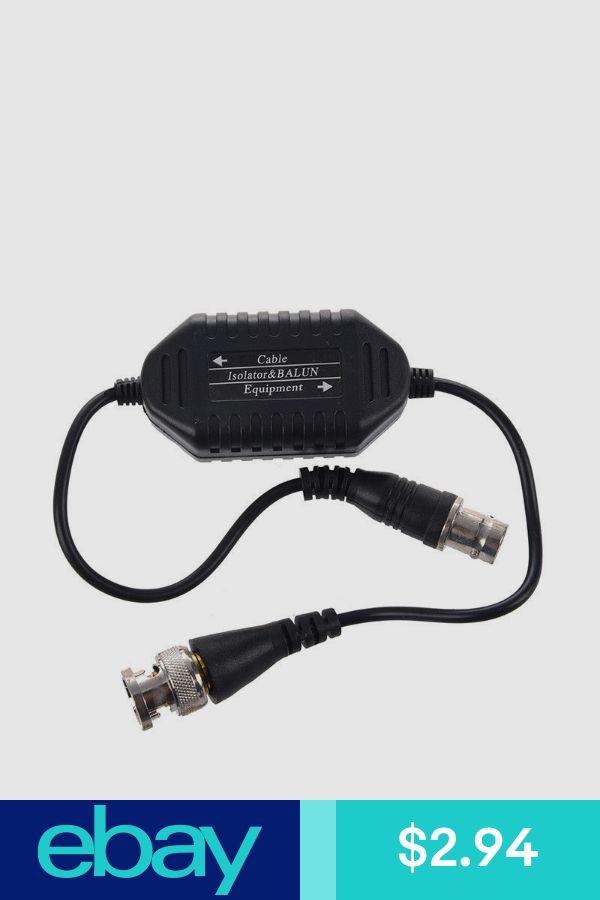
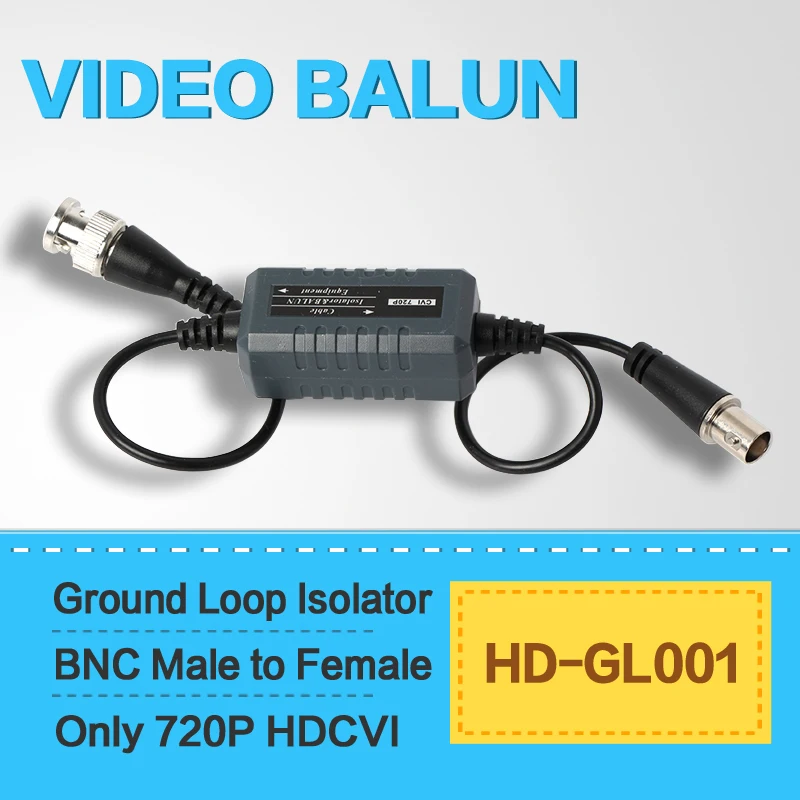
If those methods don’t fix things, the problem could be an over-the-air (OTA) antenna or a cable-TV coax cable that has its own path to ground. I’ve received some pretty annoying shocks when handling coax signal splitters. Normally—because of the isolation built into cable modems, cable boxes, and similar equipment—this will occur only if you’re connecting directly to the TV or to a video recorder.
If you’ve traced the problem to the TV signal wire that’s attached to a cable modem or similar (disconnect it and see if the problem goes away) replace that piece of equipment—there’s something wrong with it. If you’re connecting directly to a TV, there are ground-loop isolators available for $20 to $30.
A ground loop isolator for coaxial (antenna and cable TV) cables.
AC line noise
Ground loops are hardly the only thing that cause electrical noise; pretty much any device with a motor (hair dryers and blenders, for instance), as well as dimmer switches and failing fluorescent fixtures will create this type of interference. It might be audible through your audio equipment or visible on your TV, or it might not. The obvious solution for this type of noise is to not use those types of devices while you’re watching TV or listening to music. You might be able to make that work—if you live alone. If there are other people under the same roof, perhaps not.
If you’re willing to part with a few Benjamins, you can assure yourself of pristine AC without ground-loop noise by using a line interactive UPS (uninterruptible power supply) or an isolation transformer. A line interactive UPS is a battery-backup system whose battery is always engaged between the input AC and the output AC. This requires the electrical power to go through a conversion to DC (direct current) and then back to AC, which will remove all the noise.
Line interactive UPSes are more expensive. The SU1000XLCD UPS that Tripplite sent me to clean up my apartment’s super-dirty AC, for example costs about $600. It’s also heavy, about size of a small dehumidifier, and it has some features (such as USB monitoring, so that it can gracefully shut down an attached computer in the event of a power failure) that bear no relevance to noise elimination. But darn if it isn’t 100-percent effective at providing protection against power surges and outages.
Tripp Lite IS1000HG Isolation Transformer
It’s also much less-expensive than one of those high-end power conditioners you see marketed to gullible audiophiles. If you’re not worried about defeating ground-loop noise, you can get away for not much more than $100 with a UPS that advertises pure sine wave output.
Slightly cheaper than an online UPS, but absolutely effective against all kinds of line noise is an isolation transformer.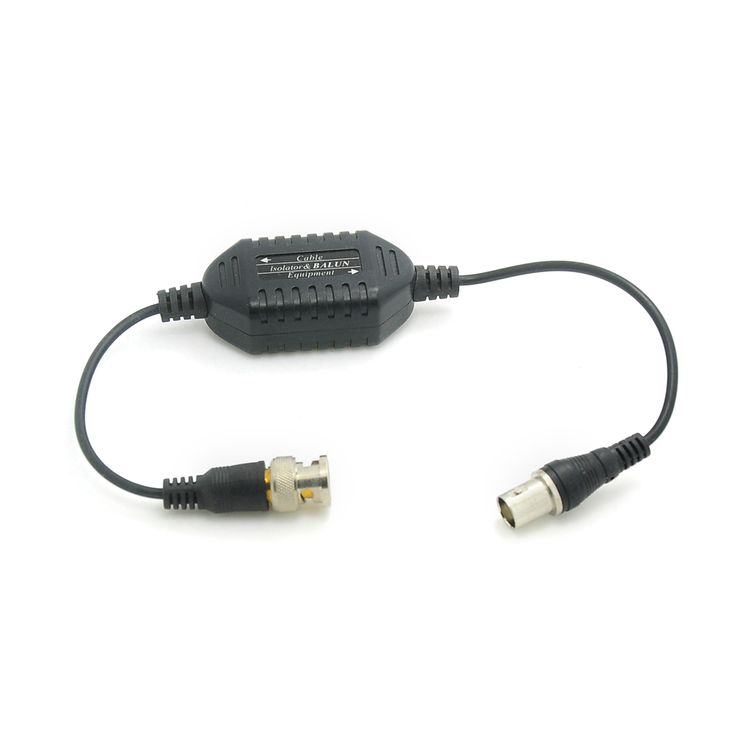 Tripplite sent me one of these as well: the excellent 1000-watt IS1000HG (Hospital Grade) with four outlets. It’s about $500, but you can easily get away with a lower wattage (500 or 250) model for less than $250. Note that I’ve seen much cheaper on Amazon, but not from a known vendor, so I can’t vouch for them.
An isolation transformer is one of those products whose name describes it to a tee—it employs a special, shielded transformer that turns dirty AC into clean AC via electromagnetic induction—yes, the same thing that causes ground-loop noise.
Isolation transformers are designed for use with delicate diagnostic equipment, where even minimally noisy AC can cause spurious readings. That means they’re substantially more than adequate for multimedia setups.
The back of the IS1000HG isolation transformer, which is designed to eliminate all AC noise that could affect sensitive test equipment. It works for entertainment systems as well.
Wires
There are really only one or two hard and fast rules for cables and noise. The first is to never run a power cable across or near audio or video signal cables, including antenna wires. Modern signal cables are well shielded, but if you’re getting hum and it’s not a ground loop, this could well be the cause. Note that the cables running to self-powered speakers (non-Wi-Fi) are audio signal cables, not output cables.
Also note that three-wire balanced signal cables (two signals, one with reversed polarity are sent—just like the famous humbucker pickup) are far less susceptible to power cable hum and other noise than two-wire cables. If your equipment gives you the option of using balanced outputs or inputs, XLR or TRS (Tip/Ring/Sleeve), do so.
Speaker cables, because of the far stronger signal travelling across them, shouldn’t be affected audibly. But just to be safe, try to keep your AC cords isolated.
Circled in red are the balanced inputs for this Yamaha HS7 speaker. Many high-end DACs and audio interfaces have corresponding outputs. Balanced connections eliminate any noise induced into the signal traveling the cable.
The other rule for wires is not looping antenna signal cables (twin-lead), which tends to induce the same noise by making them antennas themselves. Electromagnetic induction; it’s a blessing, it’s a curse. (If you don’t know about it)
As to the quality of cables: A poorly made cable can cause noise issues, but there’s no real advantage to spending a fortune on them. A common misconception is that the more expensive the metal, the better the cable. Wrong. Gold is used on connectors because it doesn’t oxidize, not because it’s the best conductor of electricity. It’s quite good, better than nickel and chrome, but actually a bit worse than silver and copper. Forget platinum—it sounds sexy, but is about 20th down the conductivity list.
Mentioned in this article
VSIS-EU Cable TV Ground Loop Isolator
Copper wire with gold connectors are the best combination; but again, don’t listen to the boutique audio sales propaganda. There are plenty of cables in the $10 to $20 range—or even lower—that will serve just as well.
One thing you could check for, though it’s mostly an issue in high-impedance (higher gain/voltage, aka Hi-Z) applications, such as with guitar cables, is that they aren’t microphonic. Poor or loose shielding and other factors can actually turn physical shocks into audio signal. I’m not kidding. I’ve experienced this only once in my life with component-connecting cables and that was for a turntable. But if you’re noticing odd noises that seem to be in time with the bass or vibrations, give the signal cables a hard tap with a finger (with the equipment powered on) to see if this is a problem.
One more wire issue: size. While larger gauge wire can actually help an amp work a little easier and cooler when driving speakers by lowering cable impedance (resistivity), the impact on signal cables is negligible. That is, it’s inaudible to anyone who didn’t pay a lot for a fat wire and needs to hear a difference.
RF interference
Ever wonder why the walls of your stereo receiver and other electronic devices are metal, when it seems like everything else in the world is made of plastic? It’s not for tensile strength, it’s to block incoming and outgoing RFI (radio frequency interference). Any conductive material tends to block RF signals and shunt their charge to its surface. Indeed, the shielding on cables work as Faraday cages.
Since it wouldn’t be practical to turn your home theater into Faraday cage, you should instead look to lessen the strength of the radio signals your A/V needs protection from. I’m talking portable phones, cell phones, Wi-Fi equipment, and even computers.
If a Faraday cage can block this, it should have no problem with the RF surrounding your multimedia equipment.
Computers can generate a lot of RF, which is why I shy away from fancy see-through plastic sides which allow it to travel both ways. I’ve also heard wireless peripherals, such as mice, can cause interference. If that happens, it’s a malfunction or bad design and the only fix is to replace them.
Back to the point: Don’t be paranoid about it, but it’s not a bad idea to keep your RF-emitting equipment as far away from your multimedia setup as you can. And if it’s a device that’s meant to be near your setup, make sure it’s sufficiently shielded.![]()
USB/HDMI cable noise
I use external USB and Thunderbolt audio interfaces because they sound a lot better than anything you’ll find on a motherboard. Believe me, if my old ears can hear the difference—there is one. But when I first started using it, I would occasionally hear very faint static. For rather complicated reasons, current can leak into the shielding of USB cables which affects the signal. It was annoying.
TRIPP LITE SU1000XLCD UPS
There are three methods for removing USB (and HDMI) cable noise. One is to use a cable with a ferrite noise suppressor sleeve (that big round slug at one end. You can also buy a clip-on ferrite noise suppressor). These are sometimes called a ferrite bead.
HDMI cable with a ferrite noise filter to block spurious current traveling through the shielding.
The second method is to run a wire that’s less resistive than the USB/HDMI cable shielding from the case of the USB audio interface or HDMI-connected audio component to the case of your computer.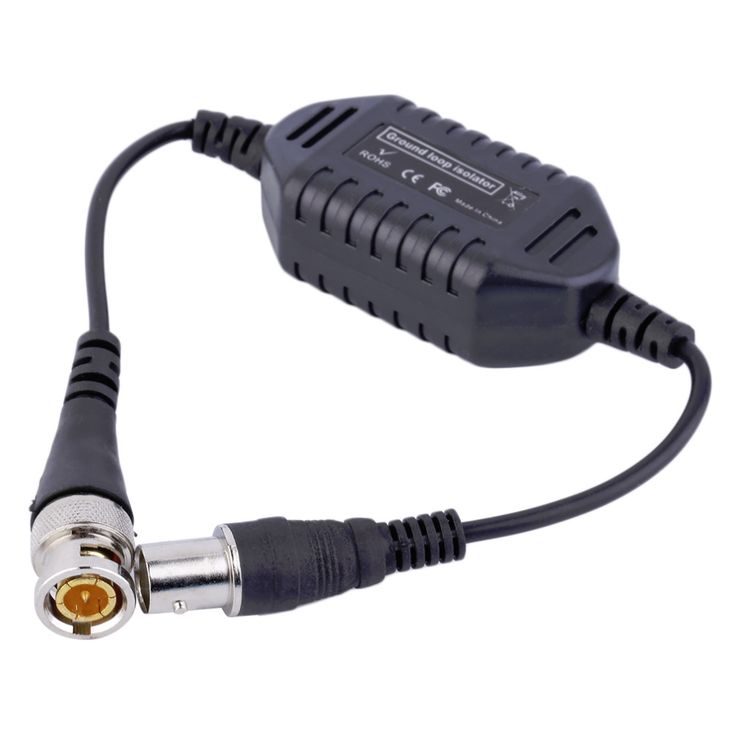 Speaker wire works fine. Electricity always follows the path of least resistance, so spurious current runs down the ground wire rather than the cable’s shield. This is also known as a ground shunt, or simply a shunt.
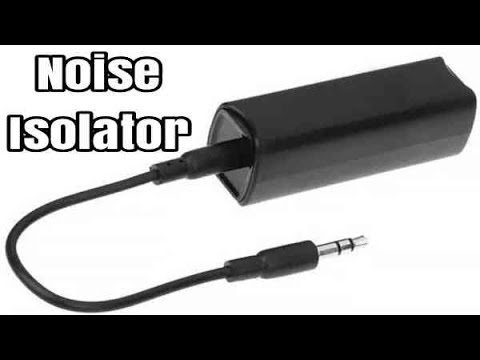
The third method is to get a USB noise filter (I’ve never seen one for HDMI, but an HDMI adapter could work), which is actually a USB re-transmitter that splits the shield connection. These cost around $50 and are said to indeed eliminate the noise. I’ve never used one, because the first and second methods are far cheaper and have never failed me.
PC audio noise
The other reason I use external USB and Thunderbolt interfaces is that they simply aren’t subjected to as much RFI. Internal audio solutions, especially those that reside on the motherboard, are susceptible to all sorts of line noise and electromagnetic interference that can’t be eliminated. As you might have noticed, I just gave you the solution—go external USB or Thunderbolt. That said, there are PCI and PCIe cards that might also eliminate the problem, as well provide more outputs for gaming and surround.
Once you heard it, now you don’t
Using the above methodologies, you should be able to eliminate all the noise that’s not inherent in your audio system, as well as some you might have thought was inherent. But if you’re suffering a type of noise that I haven’t covered, or have a home-brew fix that works, please share it with us by leaving a comment on our Facebook page and/or emailing me at [email protected].
10 Best Ground Loop Isolator For Pc of 2022
| best products
Results are Based on
1,927
Reviews Scanned
Powered by
Trending Searches
-
Gel Builders
-
Ebay
-
Apple Planers
-
Duvets
Powered by
|
1 |
AV Link Ground Loop Isolator |
9.9 |
9.9 |
|
|
2 |
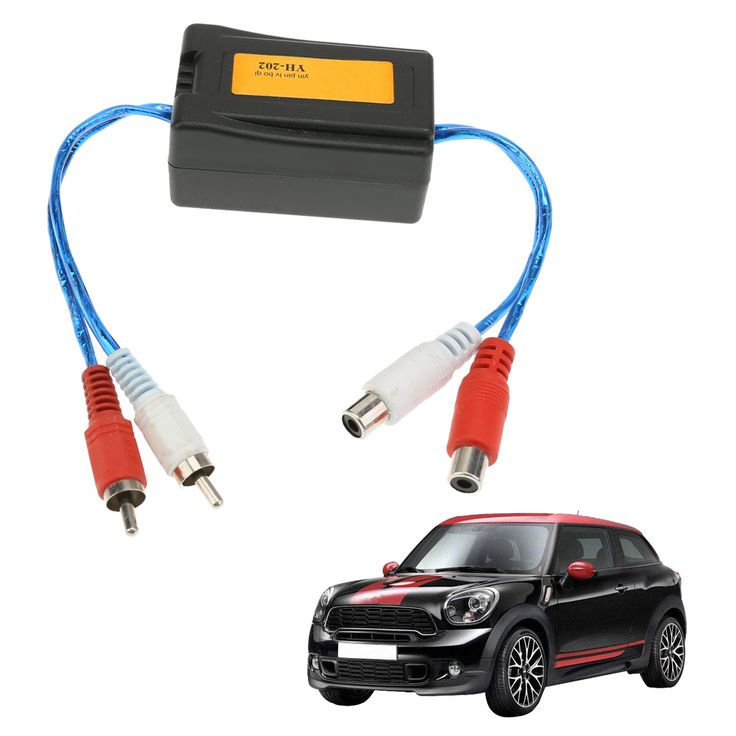
Ground Loop Noise Isolator for Car Audio/Home Stereo System Eliminate The Buzzing Noise |
9.1 |
9.1 |
|
|
4 |
FeinTech ATG00101 Audio Ground Loop Isolator Filter Suppressor Noise 3.5 mm Jack Stereo |
8.9 |
8.9 |
|
|
5 |
Ground Loop Noise Isolator Neoteck Auido Noise Filter Eliminator with 3.5mm Jack Audio |
8.6 |
8.6 |
|
|
6 |
VIBE Critical Link Ground Loop Isolator |
8.4 |
8.4 |
|
|
7 |
DriverGenius GI35-A | Ground Loop Noise Isolator / Filter / Eliminator For Home |
7.7 |
7.7 |
|
|
9 |
Seatecks Ground Loop Noise Isolator Noise Filter Car Speaker with 3.5mm Jack Audio |
7.4 |
7.4 |
|
|
10 |
【????????】 Smof Ground Loop Noise Isolator for Car Audio/Home Stereo System |
7.2 |
7.2 |
You May Also Like
The 10 Best Ground Loop Isolator For Cable Tv Applications
6,853
reviews scanned
The 10 Best Rca Ground Loop Isolators
8,759
reviews scanned
The 10 Best Ground Loop Isolators
6,986
reviews scanned
Product comparison table
|
1 |
AV Link Ground Loop Isolator |
9. |
9.4 |
10.0 |
||
|
2 |
Ground Loop Noise Isolator for Car Audio/Home Stereo System Eliminate The Buzzing Noise |
9.4 |
8.9 |
9.5 |
||
|
3 |
Ground Loop Noise Isolator,Auido humming hissing buzzing Noise filter Eliminator with 3.5mm Jack |
9.1 |
8.6 |
9.2 |
||
|
4 |
FeinTech ATG00101 Audio Ground Loop Isolator Filter Suppressor Noise 3.5 mm Jack Stereo |
8.9 |
8.4 |
9.0 |
||
|
5 |
Ground Loop Noise Isolator Neoteck Auido Noise Filter Eliminator with 3.5mm Jack Audio |
8.6 |
8.1 |
8.7 |
||
|
6 |
VIBE Critical Link Ground Loop Isolator |
8. |
7.9 |
8.5 |
||
|
7 |
DriverGenius GI35-A | Ground Loop Noise Isolator / Filter / Eliminator For Home |
8.0 |
7.5 |
8.1 |
||
|
8 |
Jeylly 3.5mm Jack Ground Loop Isolator, Audio Humming Hissing Buzzing Noise Filter Eliminator |
7.7 |
7.2 |
7.8 |
||
|
9 |
Seatecks Ground Loop Noise Isolator Noise Filter Car Speaker with 3.5mm Jack Audio |
7.4 |
6.9 |
7.5 |
||
|
10 |
【????????】 Smof Ground Loop Noise Isolator for Car Audio/Home Stereo System |
7.2 |
6.7 |
7.3 |
 9
9 4
4See The Top 10 {{name}}
{{/resultItems}}
Microsoft and partners may be compensated if you purchase something through recommended links in this article.
Ground loops — what is it and how to do it correctly
If you are reading this article, then you already know that you need a ground loop. But perhaps you don’t fully understand what it is, how it works and how to do it right once and for all, is it possible to “save” and etc. Let’s start with a small block of theory.
What is grounding and why is it needed in a private house? This means that on the side of the substation, the neutral wire is grounded, that is, connected to the ground loop.
Grounding is the connection of electrical appliances to the ground. A grounding conductor is one or more conductors that are in the ground, in direct contact with the ground. The figure shows two ground loops, one near a substation, the second near a production facility or a private house where protection is needed.
Ground loop resistance is very low (no more than 4 ohms by regulation). This means that if there is voltage on the body of the electrical appliance, for example, a breakdown of the motor winding occurs, then a very large current will flow through the body of the equipment through the grounding conductor and the circuit. In essence, a breakdown to a grounded case will cause a short circuit. And the short circuit current will cause the circuit breaker to trip or the fuse to blow.
The substation ground loop works in a similar way. For example, if a phase wire breaks and falls to the ground, a short circuit will occur between the phase and ground, and the protection at the substation will work.
Even if it happens that the protection does not work, for example, a breakdown occurs at the end of the winding and the leakage current is insufficient to trip the protection, then the resistance of the ground loop is much lower than the resistance of the human body. And if a person touches grounded equipment, they will either feel a slight electric shock or not feel it at all. Electric current follows the path of least resistance, and the ground loop has less resistance.
If everything is clear for the industry, then why is there a ground loop in a private house, what kind of motors are there and where is the danger? The cases of most electrical appliances are generally plastic.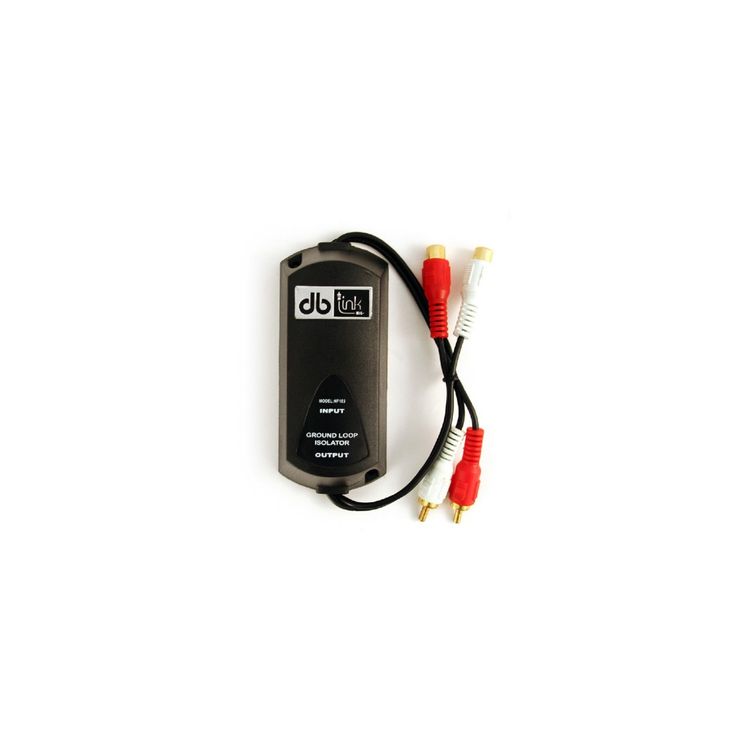
And that’s a good question. Is it really the requirement that a new house cannot be connected to the power grid without a ground loop — this is just a bureaucratic fiction.
Not really. Previously, in private homes, electrical appliances were only light and iron, well, even a radio with a TV. Now the quantity and quality of household appliances has changed dramatically, and a breakdown on the body in many of them can be fatal. Here are some of them:
- Boiler — not only the body, but the entire plumbing system will be energized. You can get an electric shock just by turning on the water in the kitchen.
- To a lesser extent, but still the same applies to the borehole pump.
- Automatic washing machines present a similar type of hazard with access through the water to any point, any bathroom in the house.
- Heating appliances — oil heaters and electric convectors are dangerous when touched.
- Microwaves, electric ovens and refrigerators are also not to be discounted.
- All devices with switching power supplies: computers, modern TVs, the same washing machines. The capacitors in these power supplies are connected to the PE ground terminal, which, in turn, is connected to the device case. And a voltage of 100-110V can get on the case of the same home PC. Most often, we do not notice this due to the fact that we are standing on a dry floor in rubber-soled shoes, and a large current through the capacitors and such parasitic pickup will not pass, but there is still a real risk of getting an electric shock from an ungrounded PC with a pulse power supply.
Therefore, we strongly do not recommend making a ground loop formally just to pass it. In addition, we strongly recommend that you connect all sockets in the house not through conventional circuit breakers, but through differential circuit breakers or a combination of a circuit breaker and a differential relay. Differential protection in addition to the standard short circuit protection functions.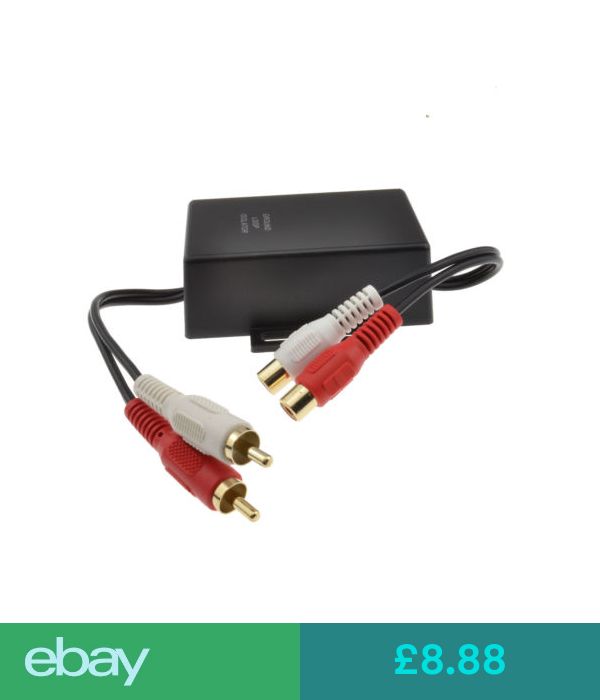 and overload responds to leakage currents. Ground loop and differential protection do not replace, but perfectly complement each other. After all, grounding will not protect if the child puts a nail into the socket, and the difavtomat has time to work before significant harm is caused to health.
Earth loop calculation
The size and depth depend on the type of soil. The least problems will be if you:
- peat soils
- loam
- wet clay soils.
Worse, if it is sand, then more conductors are needed and they need to be hammered to a greater depth. It will not work at all to arrange a ground loop in rocky or mountainous soils.
Ideally, you need to have geological maps of the area, then it will be possible to calculate the ground loop. But in practice, they simply make a standard circuit according to general recommendations, measure the resistance, and, if it is not low enough, add one or more electrodes.
The illustration below shows a typical ground loop that will work 90% of the time.
This is an equilateral triangle with a side of 1.5-3 meters, but if the area of \u200b\u200bthe site does not allow making a triangle, you can bury and connect vertical conductors in a row, but it is more likely that more vertical grounding will be needed.
The material for the ground loop can be copper, galvanized and black steel. The shape and dimensions are not particularly regulated, but the cross section and thickness of the grounding elements are important. Here are the recommendations for black steel:
The thickness and sections of the grounding loop are calculated so as not only to give the desired resistance, but also to ensure durability. After all, steel will inevitably rust, and in order for the ground loop to serve at least 30-40 years, there must be a good margin for the thickness and cross section of steel.
Installation of a ground loop — what and how to make
We will analyze the installation of a ground loop from classic rolled steel on a welded joint.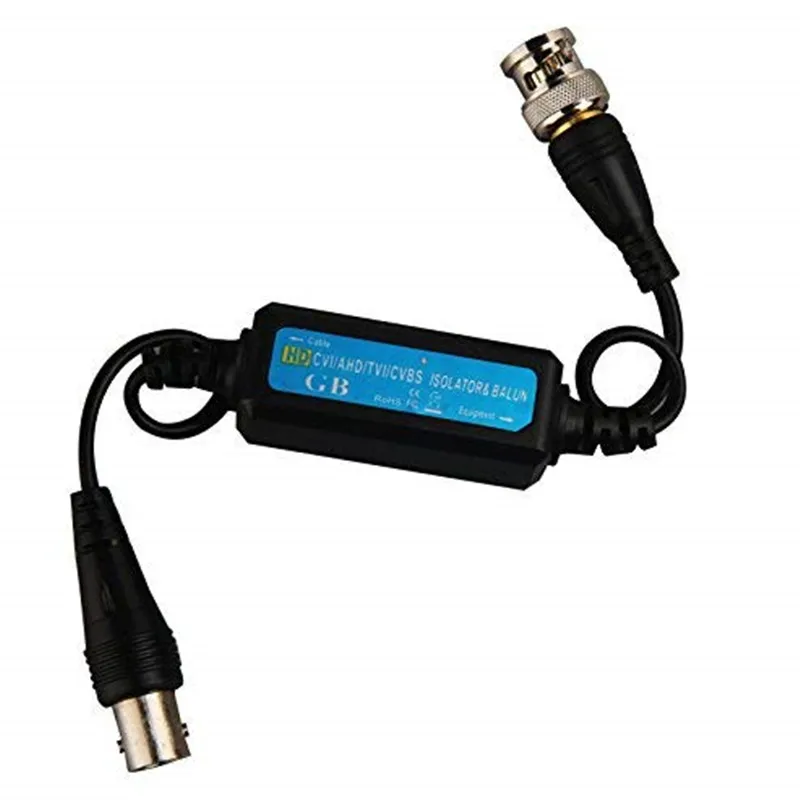 Of course, you can buy a set of special electrode pins, with a tip that can be screwed into the ground with a perforator. They consist of several sections (rods of circular cross section) and the next one is added as you sink.
But, firstly, the price of such grounding kits is unreasonably high. Secondly, the couplings for connecting the type electrodes are threaded and over time, the electrical contact will deteriorate greatly. And good old welding is a monolithic connection and will last as long as the entire ground loop.
IMPORTANT! It is not necessary and even forbidden to paint the elements from which the ground loop is assembled. Iron should be «naked» so that nothing interferes with contact with the ground.
But the welds need to be painted over with nitro paint or something similar, since they are most susceptible to corrosion, and the circuit may fail in 5-6 years just because the welds have rusted.
It is also necessary to paint with black paint (this is important, the paint must be black according to the standards, even if it is your private house) the strip that comes out of the ground and connects to the conductor
In fact, the installation of the ground loop is reduced to simple, although labor-intensive operations:
- Dig a trench 0.
 4-0.7 meters deep, in the shape of a triangle or a straight line if the area does not allow digging a triangle. The place for mounting the ground loop must be chosen as close as possible to the input shield. After all, it is with the grounding bus of the input shield that it will be necessary to connect the ground loop, and in order not to pull the steel strip or the grounding conductor through the entire house, this distance must be minimized. The size of the side of the triangle is on average 2-3 meters.
 - Indentations must be made in the corners of the triangle. A drill with an extended shaft for a drill is ideal. The depth of the «mine» must be at least 2 meters. If this is not done, it will be difficult to drive a 3-meter pipe or square into the ground, and in the case of clay soil it is completely impossible. It will be easier to go into sandy soil, but most likely you will need more electrodes.
- Hammer the vertical parts of the earth loop. As you dive, fill in and tamp the soil into the drilled niche so that the contact of the electrode with the soil is tight throughout the entire depth.
 It is necessary to hammer in such a way that about 20 cm of a corner or pipe remain above the level of the bottom of the trench.
 - Connect clogged earth electrodes together with a strip or round conductor. Connect by welding. Keep in mind that the strip is easier to bend and lay in the right direction. Bring the end of the strip to the foundation in the same part, you need to make a hole in the wall for the grounding conductor. Or hold it on the surface if the introductory switchboard is located outside the building.
- Fasten the steel strip outlet to the foundation. Weld a bolt or stud to the end of the steel strip (tire). You can make a hole and screw the busbar or cable lug of the ground wire with a bolt, but in this case there are more transient resistances and it will be more difficult to achieve the desired resistance. In extreme cases, make two holes side by side and press the steel bus to the copper with two bolts. But if you have a grounding conductor from a wire, then you need to weld a bolt, and press a cable lug onto the end of the wire.
 The cross section of the ground wire that goes to the input shield should be:
- not less than 10 mm2 — for copper bars and wires;
- not less than 16 mm2 — for aluminum busbars and wires;
- if a steel strip or a round conductor goes inside the building, then its cross section must be at least 75 mm2.
7. Check. Before calling the electrical laboratory, you can first check the circuit with a conventional multimeter, and in voltmeter mode. To do this, you need to measure the voltage between the phase and zero, and then between the phase and the ground bus. It should be almost the same, for example, 221 and 216 Volts, respectively. If the device shows that the voltage between the phase and the ground loop is much lower, for example, 220 and 180 Volts, you need to add another vertical conductor and weld it to the existing ones. Then repeat measurements. The difference will decrease. If you managed to get a difference within 10 volts, most likely the resistance of the ground loop is within the normative 4 ohms, and you can call the local RES specialists to check and issue an opinion on connecting the house to the mains.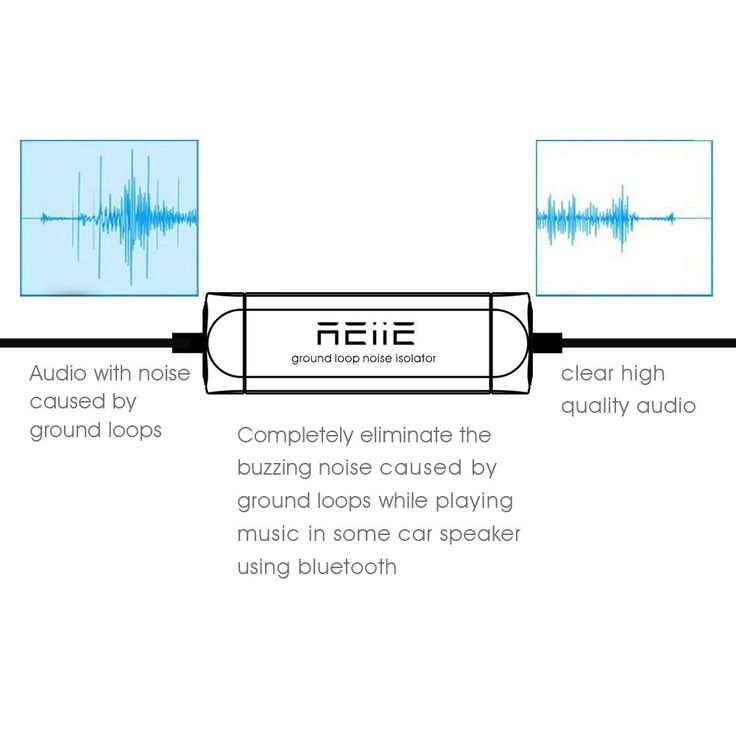
We hope the material in this article was useful to you. Until next posts.
Do-it-yourself computer grounding — Tokzamer
How to make a computer ground and what it is for
Why ground a computer
Two-wire electrical networks are still common in Russia and other post-Soviet countries.
There are several reasons why you need to ground your computer. Let’s consider them in more detail:
- The PC power supply is designed so that its housing is permanently connected to the midpoint of the input circuit. In other words, there is always a potential on the case equal to half the mains supply. If you put one hand on the case of the system unit and the other on the radiator, then you will feel a tingling sensation — this is an electric current from the PC case flows through your body into the ground through the heating system.
- Grounded case prevents static electricity buildup.
 You will not be shocked, and its internal elements will not fail. This improves the reliability and durability of the PC.
 - Ground your PC to keep your speakers, microphone and headphones from flickering. The fact is that interference from the environment and from other elements of the computer enters the audio signal formation circuit. These pickups have a high frequency and arise due to the operation of other household appliances and its switching power supplies in particular.
The computer power cord has three pins — live, neutral and ground.
To sum it up, you need to ground your PC:
- To protect yourself from static and protect computer parts.
- To keep the microphone and audio system quiet.
- To prevent the computer from shocking you.
How to organize grounding
In most cities of the post-Soviet space, to this day, two-wire wiring has been laid in apartments, houses and offices. It does not provide grounding. Therefore, all of the above problems with the computer occur. In new buildings, according to modern requirements, three-wire wiring with a protective grounding conductor is laid. This means that all outlets must be grounded.
I think you have already convinced yourself whether it is necessary to ground the PC if your sockets in the apartment are not grounded, and two-wire wiring is laid in the walls?
In a private house, you can make your own earthing switch and make a zero separation by going to the TN-C-S scheme. Or don’t do it, then you have a TT scheme.
The ground electrode is made independently as follows:
- Three metal pins about 2 meters long are driven into the ground so that they are located at the vertices of an imaginary triangle.
- A shallow trench is made between them and connected with a metal strip by welding.
- A bolt is welded to the metal strip and a copper wire with a cross section of at least 4 square meters is attached to it.
 mm or a metal strip that is brought into the building. This is the main ground bus.
 - Further, all equipment and sockets to be grounded are directly connected to it, avoiding daisy chain connections.
We examined in more detail the stages of organizing grounding in a private house in a separate article: https://samelectrik.ru/pravilnoe-zazemlenie-v-chastnom-dome.html.
Interesting! You can use ready-made earthing kits, they are commercially available and are manufactured by different companies.
It is more difficult for apartment dwellers to ground PCs. In the ideal case, you need to change the wiring to a three-wire one and wait for the power grid of your house to be upgraded and a five-wire three-phase line with a PE conductor through a common riser. However, this will not solve the problem at the moment. There is an option to make your own ground and switch to the TT scheme, but first you should discuss all points with your management company. If she gives permission, then just move from words to actions.
How not to do it
On the Internet, and live from unfortunate electricians, you can hear 5 tips on how to ground a computer:
- On a heating battery, because it goes underground.
- For fittings.
- On the neutral conductor, because the network is solidly grounded and this is “almost the same”.
- To the braid of the antenna wire.
- To the access electrical panel.
In the first two cases you will not get good ground contact. Heating pipes in most apartments have been replaced with plastic ones, and although water conducts electricity well, it will not fully fulfill the function of a conductor. Therefore, dangerous voltages can appear on the batteries at any time. The armature must not be grounded because it will also not provide good contact with the ground.
Connecting the computer case and other electrical appliances to the neutral wire is called grounding.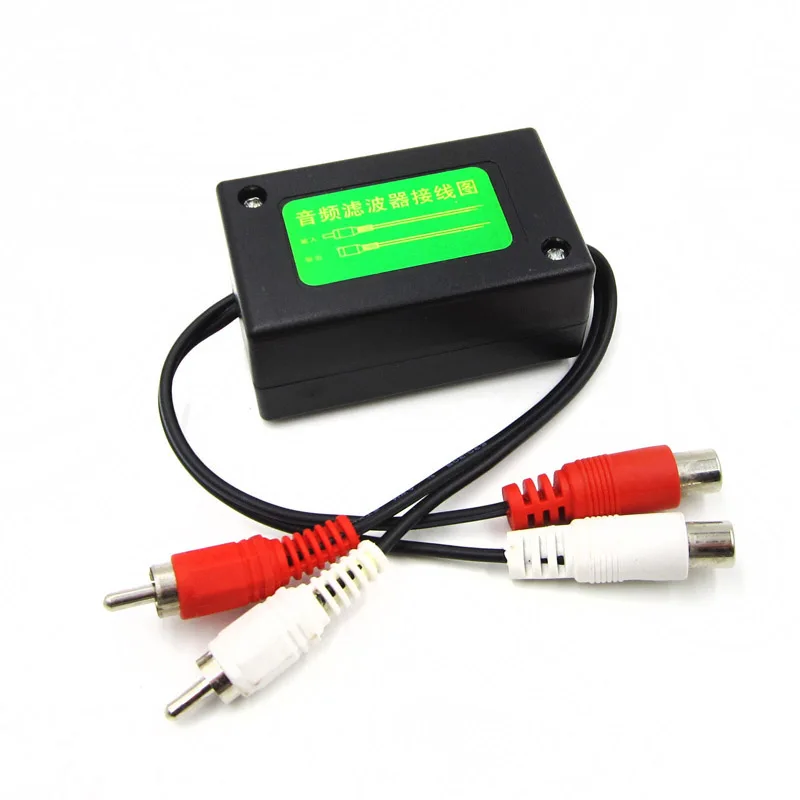 The difference is that if you turn off zero at the input or it burns out, the potential of the phase wire will appear on the cases of electrical appliances.
Grounding to the antenna wire or from the shield is also doubtful. You cannot test the functionality of this method. Over the long years of operation of the house, the ground electrode could simply rot, and the antenna wire could be grounded to the same electrical panel in the entrance of a multi-storey building.
We looked at ways to ground your PC and printer sockets. The best of them is, of course, the organization of a full-fledged ground electrode system or the transition to a three-wire power supply scheme. But for those who live in apartment buildings, this decision is difficult for obvious reasons. We repeat that in no case do grounding to the battery in the alternative ways that we have indicated.
How to properly ground your computer
Absolutely everyone who, due to various circumstances, works with computers and peripheral equipment at home should know this.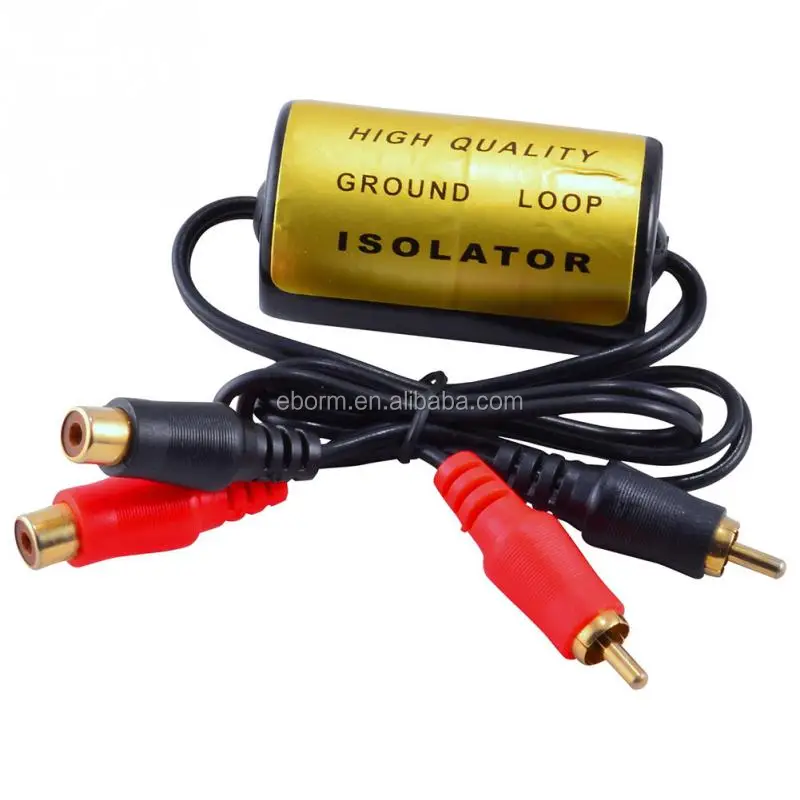 If you do not want expensive equipment to fail, then it must be grounded without fail. In addition, grounding the computer will eliminate the possibility of electric shock to a person during a breakdown of the power phase to the device case. Unfortunately, in old houses and apartments, a separate wire for grounding household appliances is not provided in the internal wiring line, although modern sockets have a contact for connecting it.
Any desktop computer or laptop, originally prepared for grounding. The power cable of these devices has three wires and the same number of contacts designed for both connection to power supply networks and to the ground wire. If your apartment or house has electrical wiring without a special ground wire (PE cable), then in order to connect the computer to the ground, you need to perform a series of electrical work. In this article, we will look at how to do it correctly and what is strictly prohibited!
Why is it necessary to ground the computer
Is it possible to use computer equipment without grounding? Of course, you can, and that’s what most people do. For the time being, this option will not bring any negative consequences, but this is only up to a certain point. The consequences of this irresponsible approach can be the saddest, from the failure of a computer to the shock of a person. Let’s look at the reasons why this might happen.
- The case and other metal parts of the system unit and peripherals can accumulate a static charge of electricity, which is quite large in terms of potential difference between the ground. Under certain circumstances, a person can receive an electric shock, though not very strong. In addition, such a discharge can disable some of the electronic components of the computer.
- In the electrical network, powerful impulse noise often occurs, which can be not only the cause of computer malfunctions, but also its complete failure. Impulses appear as a result of the operation of various electrical equipment. There is only one way to deal with this unpleasant phenomenon — to reliably ground computer equipment.

- The most dangerous scenario for a person is the contact of the phase wire of the internal electrical network with a metal case and other computer elements. This can lead to severe electric shock with all the ensuing consequences.
Attention! Often the computer microphone starts to flicker, due to electromagnetic interference from the entire set of devices in the system. This unpleasant phenomenon, as a rule, can be eliminated by grounding the case of the system unit.
Think about it! To ground the computer or not? Of course yes! This will protect your equipment from failure, and you from electric shock. But to ground the computer, you need to comply with all the requirements of regulatory documents!
Prohibited Methods for Connecting a Computer to Ground
Many unfortunate masters, in the absence of a PE cable in the internal electrical wiring, try to solve this problem in unacceptable ways, which can lead to unpredictable consequences. It is strictly forbidden to ground the computer like this:
- in the apartment to the heating battery — when carrying out welding work in the heating system of the house, your computer will simply fail;
- to metal pipes of the gas pipeline — an explosion of the entire gas supply system is possible, with all the ensuing consequences;
- to the lightning protection system (lightning rod) — if you want to destroy your computer, then connect to your health;
- to the neutral wire of a simple outlet — at any time, a 220 V phase can get on the computer case, which is very dangerous for humans;
- to metal water pipes — all the same problems can arise as when connecting to a heating system.
All of the above methods of grounding a computer or any other household appliances are prohibited by the rules of the PUE (rules for electrical installations). For the correct connection to the «ground» of a computer and other devices, of course, if there is no PE wire in the electrical wiring of an apartment, house or cottage, it is necessary to create a ground loop.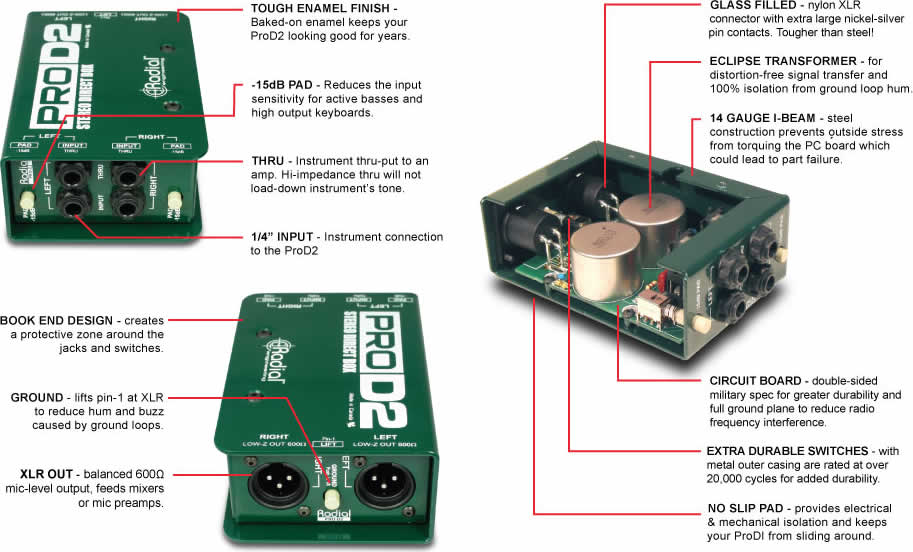 How to do this, we will describe below.
Grounding a computer in an apartment
In old multi-storey buildings, power distribution to consumers is implemented according to the TN-C scheme, which does not provide for a separate ground conductor. In such a system, a single PEN wire acts as a protective and working ground. The supply of electricity to the apartment electrical panels is carried out by a cable with four cores: three phase conductors and one zero. Zero grounding is carried out at the distribution substation. In the apartments, the wiring is laid with a two-wire wire and the sockets do not have grounding.
How to ground a computer in an apartment located in such a house? Everything is quite simple! Of course, you can create an individual ground loop or dismantle the old wiring and replace it with a new three-wire one, but this is an expensive undertaking. The easiest way is to lay an additional conductor from the apartment electrical panel to the location of the computer.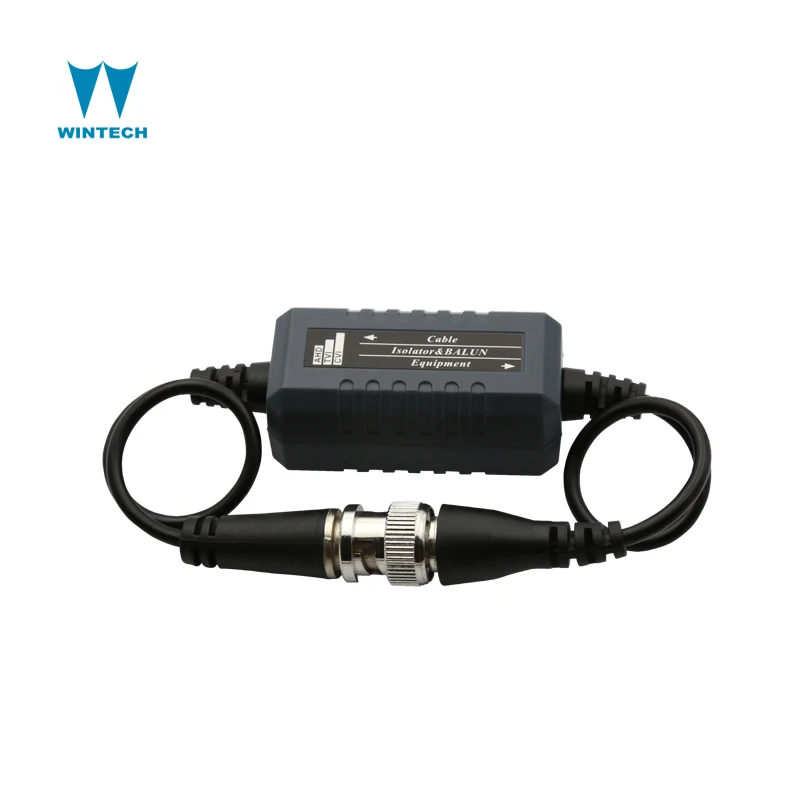 This is the most commonly used method of grounding not only a computer, but also any household appliances. The algorithm for performing work using this method will look like this:0003
- we lay a ground cable (preferably stranded copper of large cross section) from the computer to the apartment switchboard;
- in the electrical panel we find a place where a lot of conductors are screwed to its metal case;
- using a self-tapping screw or a bolt, we fix the end of the grounding cable on the body of the electrical panel in a free place;
- the connection must be reliable, so the installation site and the end of the wire must be carefully cleaned;
- after all these operations, you can ground the computer in two ways: fix the ground cable on the device case or connect it to the socket contact.
Important! Do not run the ground wire under the bolt connecting the two conductors N and P. Never connect a copper wire to aluminum, this will lead to a quick destruction of the contact and a fire.

There are two ways to connect the ground wire to the case of the system unit: using a threaded connection located on the chassis of the device, or through the GND connector specially designed for this purpose. Grounding the computer through an outlet with a ground connection to a special contact will be the most competent, from a technical point of view, option. In any case, whichever method you choose, your computer will be grounded in accordance with the requirements of the PUE.
Grounding a computer in a private house or country house
Grounding a computer in a private house or country house can be the same as in an apartment, of course, if a three-phase network with a residential PEN is connected to the property. But most often in old houses and especially in summer cottages, electrification is carried out according to a single-phase scheme. In this case, only one option is suitable for grounding the computer — installing a separate ground loop, to which you can connect not only the computer, but also all household appliances.![]() For those who are not in the subject, it should be said that there is nothing complicated in such works. They can be performed by a person with minimal knowledge in the field of electrical engineering.
For those who are not in the subject, it should be said that there is nothing complicated in such works. They can be performed by a person with minimal knowledge in the field of electrical engineering.
In addition, at present, in specialized stores, you can buy a ready-made kit of parts for self-assembly of the ground loop. If the task is only to ground one system unit and a set of peripheral devices, then there is no need to install a complex ground loop. It is enough just to drive a metal pin into the ground to a depth of 1.5 meters, securely fasten the grounding cable at its end with a clamp and connect this conductor to the computer case or the grounding contact of the socket. How to lay such a cable, everyone chooses at their discretion.
Conclusion
In conclusion, I would like to say: if you are not able to cope with computer grounding on your own, due to lack of basic knowledge of electrical engineering or for other reasons, do not risk it! Contact the professionals and they will do this work quickly and efficiently!
Related video