DFI LANParty UT nF4 Ultra-D
DFI LANParty UT nF4 Ultra-D
DescriptionChipsDownloadsCPUs
Chipset
Nvidia nForce4 Ultra
CPU socket
Socket 939 (mPGA939)
CPU family
K8 — Athlon 64 FXK8 — Athlon 64K8 — Athlon 64 X2
FSB speed
1000MHz
Cache
None/Integrated in the CPU
RAM types
DDR UDIMMDDR UDIMM ECC
Max RAM size
4GB
PSU connector
12V P4 Connector (4-pin P4)ATX 2.x (24-pin ATX)
Form factor
ATX (max 305 x 244 mm)
Dimensions
305mm x 240mm
I/O ports
1x
Floppy interface
1x
Gameport
2x
IDE interface
1x
PS/2 keyboard
1x
PS/2 mouse
1x
Parallel
2x
Serial
8x
USB 2.0
4x
SATA I
2x
IEEE 1394
1x
RJ-45 LAN
1x
S/PDIF
Expansion slots
2x
32-bit PCI
2x
PCIe x16
1x
PCIe x4
1x
PCIe x1
Last updated 2023-06-15T23:59:53Z
TRW ID: 15849
Chipset
Nvidia nForce4 Ultra
Chipset parts
Nvidia CK8-04 (nF4)
Audio chips
Realtek ALC850 (AC97)
Network chips
Marvell 88E8001 (Yukon 1 32bit PCI Gigabit)
Super I/O chips
ITE IT8712F
FireWire ctrl. chips
VIA VT6307 (Fire IIM, PCI FireWire 400a)
Drivers:
not available
BIOS images:
1 file
Manuf.
POST String
Note
Core Ver.
BIOS Ver.
Award
04/06/2006-NF-CK804-6A61FD49C-00
6.00PG
NF4LD406
Documentation:
not available
Other files:
not available
Model
Speed
FSB
Voltages
L1 Cache
L2 Cache
L3 Cache
Core
Process
TDP
AMD Athlon 64 FX-57
2800MHz
1000MHz
1.35V
128KB
1MB
—
San Diego
90nm
104W
AMD Athlon 64 FX-60
2600MHz
1000MHz
1.35V
256KB
2MB
—
Toledo
90nm
110W
AMD Athlon 64 FX-55
2600MHz
1000MHz
1. 35V
35V
128KB
1MB
—
San Diego
90nm
104W
AMD Athlon 64 4000+
2400MHz
1000MHz
1.35V
128KB
1MB
—
Toledo
90nm
89W
AMD Athlon 64 3800+
2400MHz
1000MHz
1.35V
128KB
512KB
—
Venice
90nm
89W
AMD Athlon 64 4000+
2400MHz
1000MHz
1.35V
128KB
1MB
—
San Diego
90nm
89W
AMD Athlon 64 3500+
2200MHz
1000MHz
1.35V
128KB
512KB
—
Manchester
90nm
67W
AMD Athlon 64 3500+
2200MHz
1000MHz
1.35V
128KB
512KB
—
San Diego
90nm
67W
AMD Athlon 64 3700+
2200MHz
1000MHz
1.35V
128KB
1MB
—
Toledo
90nm
89W
AMD Athlon 64 3500+
2200MHz
1000MHz
1.35V
128KB
512KB
—
Venice
90nm
67W
AMD Athlon 64 3700+
2200MHz
1000MHz
1. 35V
35V
128KB
1MB
—
San Diego
90nm
89W
AMD Athlon 64 3500+
2200MHz
1000MHz
1.4V
128KB
512KB
—
Winchester
90nm
67W
AMD Athlon 64 3200+
2000MHz
1000MHz
1.4V
128KB
512KB
—
Winchester
90nm
67W
AMD Athlon 64 3200+
2000MHz
1000MHz
1.35V
128KB
512KB
—
Venice
90nm
67W
AMD Athlon 64 3200+
2000MHz
1000MHz
1.35V
128KB
512KB
—
Manchester
90nm
67W
AMD Athlon 64 3000+
1800MHz
1000MHz
1.35V
128KB
512KB
—
Venice
90nm
67W
AMD Athlon 64 3000+
1800MHz
1000MHz
1.4V
128KB
512KB
—
Winchester
90nm
67W
AMD Athlon 64 FX-55
2600MHz
1000MHz
1.5V
128KB
1MB
—
ClawHammer
130nm
104W
AMD Athlon 64 FX-53
2400MHz
1000MHz
1. 5V
5V
128KB
1MB
—
ClawHammer
130nm
89W
AMD Athlon 64 3800+
2400MHz
1000MHz
1.5V
128KB
512KB
—
Newcastle
130nm
89W
AMD Athlon 64 4000+
2400MHz
1000MHz
1.5V
128KB
1MB
—
ClawHammer
130nm
89W
AMD Athlon 64 3800+
2400MHz
1000MHz
1.5V
128KB
512KB
—
ClawHammer
130nm
89W
AMD Athlon 64 3500+
2200MHz
1000MHz
1.5V
128KB
512KB
—
ClawHammer
130nm
89W
AMD Athlon 64 3500+
2200MHz
1000MHz
1.5V
128KB
512KB
—
Newcastle
130nm
89W
AMD Athlon 64 3200+
2000MHz
1000MHz
1.5V
128KB
512KB
—
Newcastle
130nm
89W
AMD Athlon 64 3000+
1800MHz
1000MHz
1.5V
128KB
512KB
—
Newcastle
130nm
89W
No NPUs listed.
Image 1 of 1
Disclaimer
The info found in this page might not be entirely correct. Check out this guide to learn how you can improve it.
[FIXED]DFI Lanparty UT NF4 SLI-DR Expert won’t post.
JavaScript is disabled. For a better experience, please enable JavaScript in your browser before proceeding.
22673
Views
51
Replies
14
Participants
Last post by
MIKEYPTHEKING,
Jump to Latest
AlexCuria
Discussion starter
·
Hi everyone,
I’ve just found this website because the DFIStreet web I knew doesn’t exist anymore and I’ve just ran across a problem after several years of happily using the DFI Lanparty UT NF4 SLI-DR Expert (Socket 939).
I had installed the following:
CPU: AMD Athlon64 3500+ (Venice)
PSU: OCZ GameXstream 600w
GPU: Nvidia GeForce 7900 GS
RAM: 2GB GSkill F1-4000USU2-GBHZ
COOLER: Thermalright XP-120 + Akasa fan
BIOS: Award Phoenix 6.00PG
All was working quit perfectly until l decided to install an Opteron 154 and a new cooler.
Problem is that the system won’t start up. (4 red diagnostic LED’s are on).
Things I have already tried:
— Clearing CMOS (30+ minutes). Nothing
— Reinstalling to the original CPU but now this doesn’t work either.
The only thing I’m suspecting is that my PSU has given up, although it turns on and even the cooler fan turns on.
Any ideas?
Thanks in advance
See less
See more
3
Reply
Save
Like
1 — 20 of 52 Posts
Put in your old CPU and update the BIOS.
Reply
Save
Like
Quote:
| Originally Posted by AlexCuria Hi everyone, I’ve just found this website because the DFIStreet web I knew doesn’t exist anymore and I’ve just ran across a problem after several years of happily using the DFI Lanparty UT NF4 SLI-DR Expert (Socket 939). I had installed the following: CPU: AMD Athlon64 3500+ (Venice) All was working quit perfectly until l decided to install an Opteron 154 and a new cooler. Problem is that the system won’t start up. (4 red diagnostic LED’s are on). Things I have already tried: — Reinstalling to the original CPU but now this doesn’t work either. The only thing I’m suspecting is that my PSU has given up, although it turns on and even the cooler fan turns on. Any ideas? Thanks in advance |

Did you clear the CMOS before installing the new cpu?
See less
See more
4
Reply
Save
Like
This worked for me a very long time ago…
The proper Clear CMOS recovery. Not to be confused with a Normal CMOS Clear.
You can not use a USB keyboard for this procedure. You must use a PS2 keyboard.
You will need your manual to find the jumpers that must be changed.
If you skip or miss any step you must start again since the results will not be valid.
——
Remove power from the rig by pulling the plug or switching the PSU off.
Move the PC Speaker jumper to the ON position.
Remove the Battery.
Move the CMOS jumper to CLEAR.
Press the Start Button on the case or motherboard to drain the capacitors.
You may leave the board in this condition for as long as it takes to clear the CMOS. If a short 30 second clear or a 15 minute clear doesn’t work, try an 8 hour clear.
Plug in a PS2 Keyboard.
Put one stick of RAM in the slot marked DIMM2.
Move the CMOS jumper to Normal.
Replace the Battery.
Press and hold the Insert Key on the Keyboard.
Apply power to the rig by plugging the power in or using the switch on the PSU.
Press the Start Button to power the rig up.
When you hear the BEEP, release the Insert Key and press the Delete Key on the Keyboard.
Once you enter the BIOS set the DATE and TIME then Load Optimized Defaults.
Save and Exit.
Enter the BIOS again and set it up the way you want for your particular rig.
NEVER load any saved CMOS settings from CMOS Reloaded once you have a new BIOS installed.
See less
See more
Reply
Save
Like
Quote:
| Originally Posted by DaGuv This worked for me a very long time ago… The proper Clear CMOS recovery. Not to be confused with a Normal CMOS Clear. You can not use a USB keyboard for this procedure. You must use a PS2 keyboard. You will need your manual to find the jumpers that must be changed. If you skip or miss any step you must start again since the results will not be valid. Move the PC Speaker jumper to the ON position. Remove the Battery. Move the CMOS jumper to CLEAR. Press the Start Button on the case or motherboard to drain the capacitors. You may leave the board in this condition for as long as it takes to clear the CMOS. If a short 30 second clear or a 15 minute clear doesn’t work, try an 8 hour clear. Plug in a PS2 Keyboard. Put one stick of RAM in the slot marked DIMM2. Move the CMOS jumper to Normal. Replace the Battery. Press and hold the Insert Key on the Keyboard. Apply power to the rig by plugging the power in or using the switch on the PSU. Press the Start Button to power the rig up. When you hear the BEEP, release the Insert Key and press the Delete Key on the Keyboard. Once you enter the BIOS set the DATE and TIME then Load Optimized Defaults. Save and Exit. Enter the BIOS again and set it up the way you want for your particular rig. NEVER load any saved CMOS settings from CMOS Reloaded once you have a new BIOS installed. |


You forgot the part about standing on your head
See less
See more
2
Reply
Save
Like
Quote:
| Originally Posted by iceman0803 you forgot the part about standing on your head |
lol
:d
See less
See more
2
Reply
Save
Like
Quote:
| Originally Posted by Penicilyn Put in your old CPU and update the BIOS. |
As in my message I already tried this and now none of the CPU’s boot.
See less
See more
1
Reply
Save
Like
Quote:
| Originally Posted by DaGuv This worked for me a very long time ago… The proper Clear CMOS recovery. Not to be confused with a Normal CMOS Clear. You can not use a USB keyboard for this procedure. You must use a PS2 keyboard. I use PS2 keyboard by standard. You will need your manual to find the jumpers that must be changed. If you skip or miss any step you must start again since the results will not be valid. Move the PC Speaker jumper to the ON position. DONE Remove the Battery. DONE Move the CMOS jumper to CLEAR. DONE Press the Start Button on the case or motherboard to drain the capacitors. DONE You may leave the board in this condition for as long as it takes to clear the CMOS. If a short 30 second clear or a 15 minute clear doesn’t work, try an 8 hour clear. 30+ minutes Plug in a PS2 Keyboard. DONE Put one stick of RAM in the slot marked DIMM2. DONE Move the CMOS jumper to Normal. DONE Replace the Battery. DONE Press and hold the Insert Key on the Keyboard. DONE Apply power to the rig by plugging the power in or using the switch on the PSU. DONE Press the Start Button to power the rig up. DONE When you hear the BEEP, release the Insert Key and press the Delete Key on the Keyboard. Once you enter the BIOS set the DATE and TIME then Load Optimized Defaults. Save and Exit. Enter the BIOS again and set it up the way you want for your particular rig. NEVER load any saved CMOS settings from CMOS Reloaded once you have a new BIOS installed. |

 I hear no beep and the 4 red LED lights are on
Anything else I could try? I’m a bit afraid I might have killed the mobo because I wouldn’t believe that both CPU’s are bad, specially because the older one WAS working perfectly before.
See less
See more
1
Reply
Save
Like
Quote:
| Originally Posted by Iceman0803 You forgot the part about standing on your head |
haha, tell me about it, that was my reaction when a guy off DFIStreet told me to do it lol… But in all honesty, It actually worked after a normal reset didn’t. Another user on ocn also had issues with booting and this method also solved the problem.
It is by far the most ridiculous cmos reset ever created lol, but it did the job
See less
See more
3
Reply
Save
Like
Quote:
| Originally Posted by AlexCuria As in my message I already tried this and now none of the CPU’s boot. |
Hey man sorry to hear about that, I have a similar Secondary system Opteron 165, DFI LanParty SLI DR and the Same PSU (is actually running my Core I7 Build for now)
First thing I would suggest, try running 1 memory slot, and mixing up the dimm that you place it in as well.
Was the old CPU being run at a high FSB or higher Voltage? Was any of the MOBO settings you had with the old CPU not reset to default settings before attempting the new CPU install?
Also, have you removed the motherboard and PSU and tried booting up out of the case? Put the motherboar don the motherboard box, nothing that can conduct electricity and generally the Boxes are fine to use for Testing.
Make sure all power connectors are plugged in properly again and make sure no pins are bent or possibly missing (maybe lodged into the Socket?)
Also I highly suggest Posting all this Here, at the OCN s939 Appreciation Club
These guys all knwo every litle detail about that socket and many have exact experience with that motherboard.
I know my Mobo has odd power plugs. Just of course make sure that every open Power plug of any form is connected properly, the 20+4 pin, the other 4 pin above CPU, the 4 Pin Under CPU with the Extra (smaller) 4 pin connecter as well. And then try booting with memory Modules, single, dif dims, play around till it works hopefully.
and if it doesnt work after all this, I would have to say that you somehow zapped the mobo =( or the PSU is no longer providing enough Current to the Machine. (volt meter can check if your Wall socket, and PSU are giving proper power)
Good Luck! Though I will say, it is pretty painfull to see that Uber Mobo with only a Single Core Processor, bu tnone the less, No 939 build deserve to die.
See less
See more
1
Reply
Save
Like
Quote:
| Originally Posted by DaGuv haha, tell me about it, that was my reaction when a guy off DFIStreet told me to do it lol… But in all honesty, It actually worked after a normal reset didn’t. Another user on ocn also had issues with booting and this method also solved the problem. It is by far the most ridiculous cmos reset ever created lol, but it did the job |
I have an Expert board in my backup rig. I had to do that same CMOS clear as well and it worked for me too. The amount of steps required to complete the task just makes me laugh every time I see them listed. It’s madness lol
See less
See more
3
Reply
Save
Like
Quote:
|
Originally Posted by StormX2 Hey man sorry to hear about that, I have a similar Secondary system Opteron 165, DFI LanParty SLI DR and the Same PSU (is actually running my Core I7 Build for now) First thing I would suggest, try running 1 memory slot, and mixing up the dimm that you place it in as well. Was the old CPU being run at a high FSB or higher Voltage? Was any of the MOBO settings you had with the old CPU not reset to default settings before attempting the new CPU install? Well, yes I fiddled a lot with the FSB, Voltage and more things BEFORE changing the CPU. Oooops hope I didn’t make some unrepairable mistake by doing this.. Also, have you removed the motherboard and PSU and tried booting up out of the case? Put the motherboard on the motherboard box, nothing that can conduct electricity and generally the Boxes are fine to use for Testing. (If nothing else works will try later this evening. Make sure all power connectors are plugged in properly again and make sure no pins are bent or possibly missing (maybe lodged into the Socket?). Sorry, what does lodged mean? Also I highly suggest Posting all this Here, at the OCN s939 Appreciation Club I know my Mobo has odd power plugs. Just of course make sure that every open Power plug of any form is connected properly, the 20+4 pin, the other 4 pin above CPU, the 4 Pin Under CPU with the Extra (smaller) 4 pin connecter as well. And then try booting with memory Modules, single, dif dims, play around till it works hopefully. Plugged and unplugged at least 5 times. and if it doesnt work after all this, I would have to say that you somehow zapped the mobo =( or the PSU is no longer providing enough Current to the Machine. (volt meter can check if your Wall socket, and PSU are giving proper power). Hope I haven’t «zapped» the mobo, and I don’t have a Volt meter to check the PSU. Wouldn’t know how to use it anyway . Good Luck! Though I will say, it is pretty painfull to see that Uber Mobo with only a Single Core Processor, bu tnone the less, No 939 build deserve to die. |
 Have tried also.
 Thanks, will do.
 The history of this mobo is quite interesting. The previous user didn’t know what he had in his hands, and when I bought it off him a couple of years ago I was a total n00b. I just bought this Opty because I wasn’t sure at all that my Socket939 Lanparty would like a Dual Core.
Many thanks for your help. I appreciate it alot. Oh, and btw. sorry if my english is a bit strange and I ask about some abbreviations. I’m from Spain and from time to time I don’t understand expressions (such as DOA or RMA).
Getting back to your message I’ll answer directly underneath to make it easier.
See less
See more
2
Reply
Save
Like
And you tried the rediculousely Long Suggest CMOS Reset Steps Word for Word?
Reply
Save
Like
Quote:
|
Originally Posted by StormX2 And you tried the rediculousely Long Suggest CMOS Reset Steps Word for Word? |
I second that…..even if you have to let it sit for 8 hrs while CMOS clears. I know it’s a pain but it’s worth a try.
See less
See more
1
Reply
Save
Like
Quote:
| Originally Posted by Iceman0803 I second that.  ….even if you have to let it sit for 8 hrs while CMOS clears. I know it’s a pain but it’s worth a try. ….even if you have to let it sit for 8 hrs while CMOS clears. I know it’s a pain but it’s worth a try. |
OK. I won’t ask why it can take so long to clear but just a question while it sits.
I read about pressing the onboard start button to drain the capacitators. Should I press it several times, keep it pressed down a couple of seconds or just once will do the job?
Thanks to everybody for your help.
See less
See more
1
Reply
Save
Like
Quote:
| Originally Posted by AlexCuria OK. I won’t ask why it can take so long to clear but just a question while it sits. I read about pressing the onboard start button to drain the capacitators. Should I press it several times, keep it pressed down a couple of seconds or just once will do the job? Thanks to everybody for your help. |
The idea is to drain residual current that may be stored in the caps to ensure a successful CMOS reset. As for the power button once should do.
See less
See more
1
Reply
Save
Like
yah unplug the Power to the PSU, place the CMOS jumper to clear and hold Power button for 10 seconds. I don’t think anything longer than that is neccesary
Reply
Save
Like
Did the full reset work for you Alex?
Reply
Save
Like
hi, i got a almost the same problem to alex here but i managed to get mine up using that UBER of a cmos reset word FOR WORD!!! now my only problem is that it is HIGHLY unstable with random crashes and bsod ,what can i do to make it stable???yes we are talking about the sli-dr expert and my opty 165
Reply
Save
Like
Quote:
|
Originally Posted by StormX2 And you tried the ridiculously Long Suggest CMOS Reset Steps Word for Word? |
I third that, I currently run the Expert and it’s very finicky. It did take over 4 hours to get it to post properly. I am almost certain the Mobo isn’t dead and it’s not the PSU. Just be patient with it.
See less
See more
1
Reply
Save
Like
1 — 20 of 52 Posts
- This is an older thread, you may not receive a response, and could
be reviving an old thread. Please consider creating a new thread.
Top
Dfi lanparty ut nf4 ultra-d 939 drivers – Telegraph
Dfi lanparty ut nf4 ultra-d 939 drivers====== Dfi lanparty ut nf4 ultra-d 939 drivers ++++++ 900 download link 07
====== Download link Dfi lanparty ut nf4 ultra-d 939 drivers ++++++
Dfi lanparty ut nf4 ultra-d 939 drivers
Yes, I don’t like everything at all!!! While most manufacturers do realize that overclocking is not merely just a fringe hobbyist activity, and do include some tweaking options, there are few that go all out and really let loose the options in the BIOS to allow the end user to really break something. Yes, I don’t like it at all! Version Update Operating system Description 5. Network driver Drivers for network configuration on DFI LANPARTY UT nF4 Ultra-D. Product names and trademarks are the property of their respective owners. After setting their mark with theiras the enthusiast board to get for the Socket A platform, DFI has further extended their LanParty lineup to both the Socket 754 and Socket-T line ups all of which have been well received. Version Update Operating system Description 21.
While most manufacturers do realize that overclocking is not merely just a fringe hobbyist activity, and do include some tweaking options, there are few that go all out and really let loose the options in the BIOS to allow the end user to really break something. Most likely your operating system is Windows XP. Russia — done with difficulty. DFI LANPARTY UT nF4 Ultra-D motherboard drivers: Name: DFI LANPARTY UT nF4 Ultra-D WinXP 64-bit Version: 2.
All trademarks used are properties of their respective owners.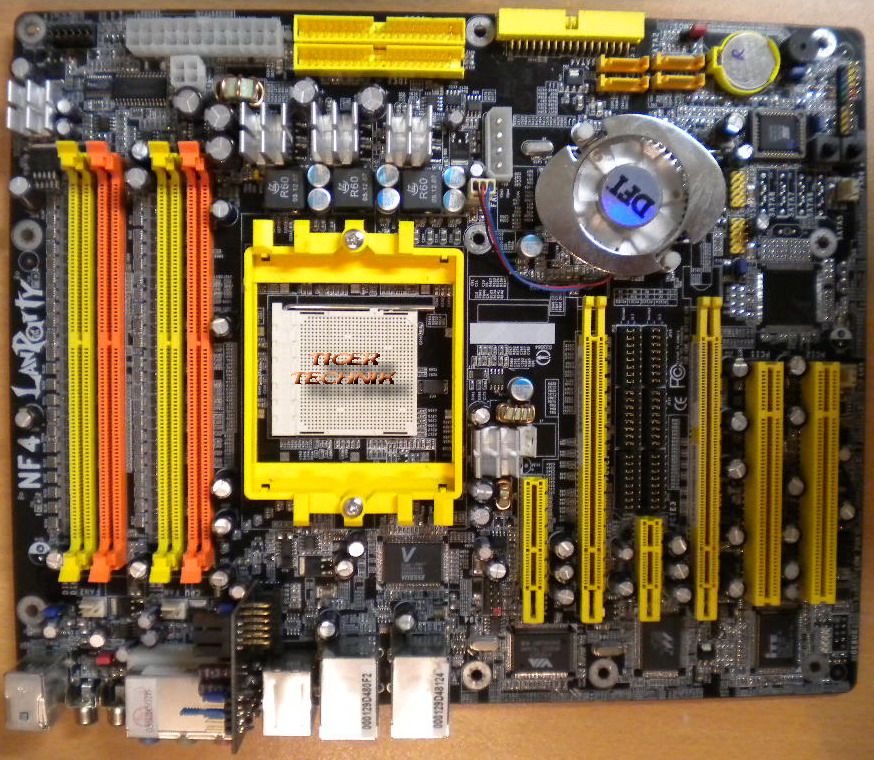 Are you looking for a driver for DFI LANPARTY UT nF4 Ultra-D motherboard? For NForce4 Chipset Didn’t find the right type of driver for your DFI LANPARTY UT nF4 Ultra-D motherboard? While most manufacturers do realize that overclocking is not merely just a fringe hobbyist activity, and do include some tweaking options, there are few that go all out and really let loose the options in the BIOS to allow the end user to really break something. Yes, I don’t like it at all! Introduction The transition between AGP and PCIe has also brought out a crop of new chipsets from everybody including which brings arguably the richest feature set out of the current generation of K8 boards. When using the site materials reference to the source is required. Driver for motherboard DFI LANPARTY UT nF4 Ultra-D On this page you are offered with driver for motherboard LANPARTY UT nF4 Ultra-D existing in our database DFI.
Dfi lanparty ut nF4 ultra-d 939 drivers
Icons placed to the left of the file name will prompt you in which format and in what language drivers download DFI LANPARTY UT nF4 Ultra-D Motherboard are represented in this file.