Display Driver Uninstaller (DDU) | Wagnardsoft
Display Driver Uninstaller (DDU)
19
Sep
by Wagnard
Display Driver Uninstaller (DDU) V18.0.5.5 Released.
ChangeLog:
AMD : additional files and registry cleanup (pnplockdownfiles region).
Nvidia: additional files and registry cleanup (pnplockdownfiles region).
Read More
03
Aug
by Wagnard
Display Driver Uninstaller (DDU) V18.0.5.4 Released.
ChangeLog:
All: Fixed «Installer\UpgradeCodes» section that was not cleaning up.
Intel: Removal of the IGN folder.
Translation: Hungarian
Read More
29
Jul
by Wagnard
Display Driver Uninstaller (DDU) V18. 0.5.3 Released.
ChangeLog:
All: Fixed the registry installer section was not cleaned completely.
AMD: Added removal of «AdvancedMicroDevicesInc-2.AMDLink».
AMD: Added removal of «AMDNoiseSuppression».
Intel: additional removal of vp8/vp9 decoders.
Translation: French.xml
Read More
10
Jul
by Wagnard
Display Driver Uninstaller (DDU) V18.0.5.2 Released.
ChangeLog:
All: First time launch message can now be translated.
All: CLSID registry section fix/enhancement.
All: Cleanup of the VFW capture Class Manager in the registry.
Intel: Additional registry and folder cleanup.
Intel: Removal of the Intel Arc Control right click context menu.
Intel: additional Intel Arc Control removal.
Intel: additional removal.
AMD: Removal of AdvancedMicroDevicesInc-RSXCM (possibly fix a boot pop-up message)
AMD: Additional folders removals (DX cache related).
Nvidia: Folders and registry additional removal. (Nvidia RTX voice)
Translation : Swedish.xml
Read More
16
May
by Wagnard
Display Driver Uninstaller (DDU) V18.0.5.1 Released.
ChangeLog:
All: Fixes / Enhancements to the driver store cleaner.
AMD: AMD Crash Defender and AMD Link Controller Emulation cleanup enhancements
AMD: Fixed a bug with the AMD Chipset Software installer.
Translation update: French.xml
Read More
02
May
by Wagnard
Display Driver Uninstaller (DDU) V18.0.5.0 Released.
ChangeLog:
Intel: Added several cleanup additions / enhancement.
All: Fixed an issue with the «components» registry clean-up.
All:added additional command lines arguments.
-RemoveAMDKMPFD
-RemoveAudioBus
-RemoveVulkan
Translations: updated Swedish.xml
Read More
19
Feb
by Wagnard
Display Driver Uninstaller (DDU) V18.0.4.9 Released.
ChangeLog:
Intel: Additional folder cleanup
NVIDIA: Fixed small issues when NOT removing Geforce Experience.
NVIDIA: NVIDIA Broadcast removal is now optional (enabled by default)
NVIDIA: New command line argument (-RemoveNVBROADCAST)
NVIDIA: registry cleanup enhancement.
All: Fixed a bug in the cleanup.
Read More
20
Jan
by Wagnard
Display Driver Uninstaller (DDU) V18.0.4.8 Released.
ChangeLog:
All: Fixed rare Null exceptions.
Intel: Fixed «method not found» that can happen on some systems.
Translations: Swedish.xml
Read More
22
Dec
by Wagnard
Display Driver Uninstaller (DDU) V18.0.4.7 Released.
ChangeLog:
ALL: Target .Net Framework 4.8
ALL: Dropped support for Windows Vista.
AMD: AMDKMPFD removal enhancements
AMD: Files / registry removal enhancements.
NVIDIA: Additional files removal.
Read More
31
Oct
by Wagnard
Display Driver Uninstaller (DDU) V18.0.4.6 Released.
ChangeLog:
NVIDIA: Removal of some left over logs from NVContainer.
All: threading enhancements.
All: Fixed issue (64) When using -Silent the program stays open after being done uninstalling.
All: Registry cleaning improvement.
Read More
How To Uninstall Nvidia Drivers from Windows
Skip to content
It would be near impossible to run some of today’s most graphically intensive programs – such as online PC games – without a good graphics or video card.
Nvidia has been in the business for some time, and their graphics cards are widely used. As time goes on, these heavily-stacked GPU cards have become more powerful and feature-packed – thus requiring more advanced software and drivers.
At some point, the question of how to uninstall Nvidia drivers may arise.
There are various reasons you would want to remove the software that controls a graphics adapter. Perhaps you’re installing a newer device. Maybe the current one has stopped working or is causing some conflict.
Whatever the case, there are a couple of methods generally used to remove drivers and their associated software.
Some devices, such as Nvidia’s cards, have drivers that are packaged with other software (control panels and other application enhancements) that get installed.
In such scenarios, it’s wise to start by removing the device’s application packages – and determine if anything is left afterward.
Uninstall Nvidia Drivers from Windows
First, you’ll want to go into Window’s Program Manager. Type program into the search box on the taskbar and choose Add or remove programs.
Click the Programs and Features then select the Nvidia application(s). You can click the Uninstall button from the top bar.
You can repeat the same steps for any other software Nvidia placed on your computer. Be sure and reboot the machine afterward.
Verify Drivers were Removed
After the Nvidia software is uninstalled, you may want to verify the drivers were removed as well. To do so, use the search box again to find and click on the Device Manager.
In Device Manager, click the View menus and check Show hidden devices.
If you find that the Nvidia driver is still there, right-click and choose Uninstall. Otherwise, you’re good.
Cleaning up after Removal of Nvidia Driver
Typically, if Windows properly removed everything, you should be done. However, there are optional steps you can take to clean up residual items left by Nvidia.
You may want to do these steps if you feel some of the files or entries left behind are contributing to some issue.
Remove Residual Folders
From the windows search box on the taskbar, type File Explorer and click on the app that appears in the list.
You can choose the desired drive and click on the Program Files (or Program Data).
From here, you can delete the desired Nvidia folder(s).
Remove Orphaned Registry Entries
Sometimes software – when it’s removed doesn’t clean up the entries that were initially placed in the Windows registry. If these aren’t causing any issues – such as pointing to locations that no longer exist – then don’t worry.
However, if problems surface after the software’s removal, feel free to remove these entries. Before doing so, perform a backup of your registry in case something goes wrong.
Using the search box, type regedit and select the item that appears. Once the registry editor loads, you can right-click on any entry (such as HKEY_CURRENT_USER) and choose Find.
Type in Nvidia to locate any related entries. There may be other keys or values that need to be sought, but these can vary with different versions of the driver software.
Need for Keeping Device Drivers Updated
Whatever your reason for initially wanting to remove the Nvidia drivers, know that it’s a good practice to keep your computer’s device drivers up to date.
Numerous known issues have occurred due to corrupt, missing or outdated device drivers.
While there are several ways to update a driver, the most obvious is allowing Windows to try. Don’t be surprised if that doesn’t produce the best results.
If Windows doesn’t find and install the correct drivers, you may need to take a different approach.
Manually Updating Drivers
You can search the manufacturer’s website for the latest drivers. You’ll generally need the exact model (or serial number) to find it. Once you do, you can download and unzip the driver files.
Afterward, you can go into the Windows Device Manager (using the taskbar’s search box to find it) and locate your device in the list.
Two choices will appear. Select Browse my computer for driver software. This will take you to a window where you can browse for the downloaded driver.
Automated Approach to Nvidia Updates
Imagine an approach to keeping device drivers up to date that requires less effort on your part.
Software, such as Driver Support, can do the work for you. Taking the automated route can save you time and frustration. Such software works in the background and doesn’t require your input to do its job.
Automatic Download With Driver Support
Since 1996, Driver Support has been alleviating the pain involved in hunting for new drivers.
Driver Support software can inventory your computer for all supported devices. When fully registered it will update any drivers that are missing or out of date.
Keep your PC Devices Up-to-Date and Improve Online Safety
For only $9.99 a month Driver Support | ONE can help you save time and frustration dealing with common Windows device issues as well as added optimization and safety features.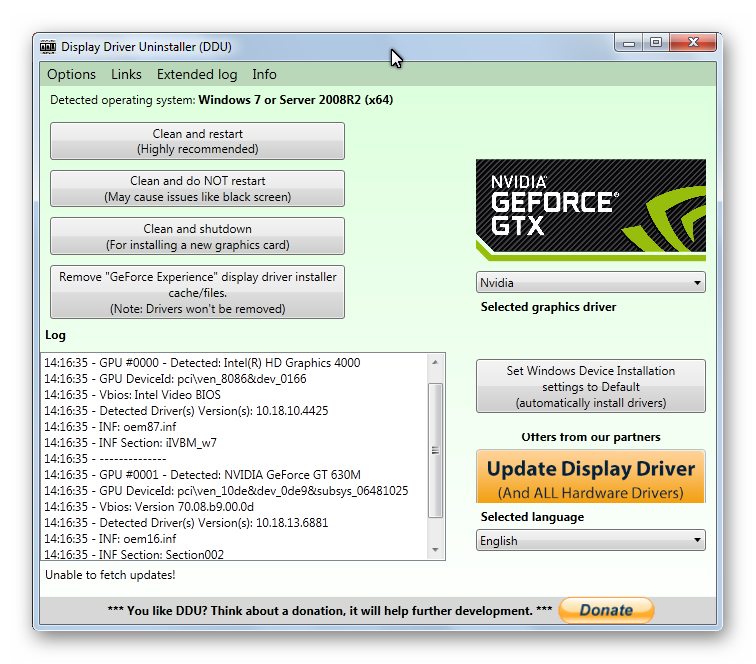
Give Driver Support a Try Today
If you’re not too busy removing old drivers, you’ll have time to test that Nvidia graphics card on your new game.
Give Driver Support | ONE a try today! to get started today.
Page load link
If you’re having graphics card problems, try a clean driver install
How-To
Many graphics card problems can be fixed by performing a clean install of your GPU drivers.
By Brad Chacos
Executive editor, PCWorld
Brad Chacos/IDG
If you’re suffering from software bugs or other problems with your graphics card, one of the first things to try is performing a clean installation of your drivers. That point was driven home for PC gamers this week when AMD, in a post announcing WHQL certification for its bug-squashing new Radeon Software Adrenalin 2020 Edition 20.2.2 driver, told gamers to factory reset the software if they encounter futher issues.
It’s a great reminder. Performing a clean install won’t fix GPU issues all the time, but it’ll sure fix them a lot of the time.
Modern graphics card drivers are complicated beasts, sinking hooks deep into your computer. Considering that both AMD and Nvidia’s drivers weigh in at roughly half a gigabyte, they’re some of the more complex software on your PC. They build atop your existing installation, and that’s generally a good thing! It keeps your existing settings intact. But express-installing drivers can cause issues sometimes. Performing a clean install starts over from scratch, potentially eradicating conflicts that can manifest as bugs or performance issues. I even do it every now and again on my personal rig, just for general system health.
AMD
How to factory reset (clean install) Radeon graphics drivers.
“Often, many problems can be resolved with a clean installation of our driver,” AMD’s Warren Eng said in the company’s post. “In order to perform a clean installation, you must select the ‘Factory Reset’ option at the beginning of the installation process. Once this is selected, old instances of the driver will be removed, and the uninstaller will restart your system before the new driver installation begins.”
Easy-peasy.
If you have a GeForce graphics card, resetting the drivers takes a slightly different (but still simple) process. Start the installation process, click Custom install, and make sure to check the “Perform a clean installation” box. From there, complete the task normally.
Brad Chacos/IDG
As Nvidia’s checkbox warns, performing a clean driver install blasts away your previous version of the software, which means that all settings will be returned to their default. The same goes for AMD’s clean installation process, which it dubs “Factory reset.” That could be a headache if you heavily customize your graphics card’s software, but worthwhile if you’re suffering from software issues. If you’ve tinkered extensively, you might want to jot down your altered settings before initiating the process, so you can get everything back the way you want it more easily afterward.
Pulse Radeon RX 5600 XT
Performing a clean install has solved problems we’ve seen more times than not, especially for Radeon graphics cards. But sometimes, even that isn’t enough. Seriously: Graphics drivers sink their hooks deep, and sometimes the default clean installation options misses things. If you’re still having troubles after performing a clean installation using Radeon Software or GeForce Experience, give the superb Display Driver Uninstaller software—simply called DDU by enthusiasts—a whirl.
“Display Driver Uninstaller is a driver removal utility that can help you completely uninstall AMD/Nvidia graphics card drivers and packages from your system, without leaving leftovers behind (including registry keys, folders and files, driver store),” the description reads.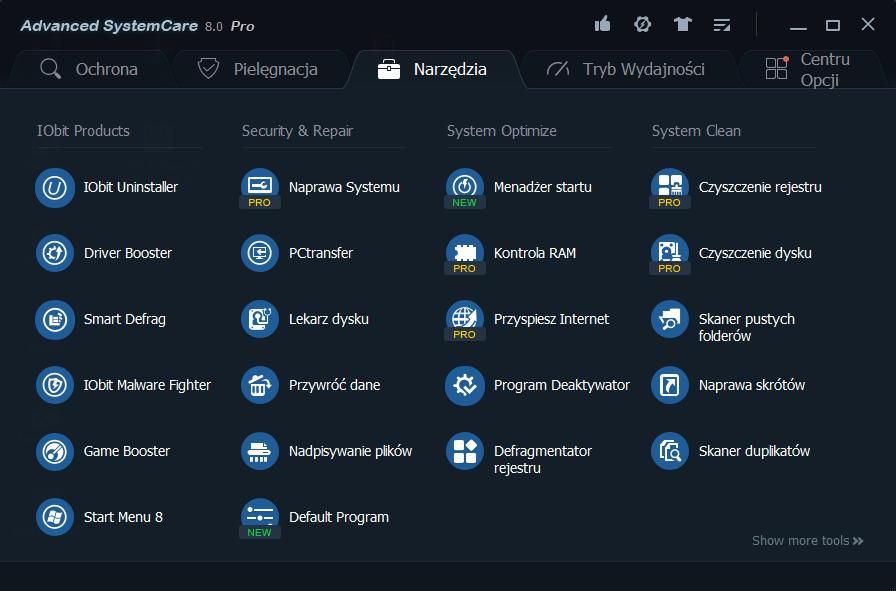 The free, long-established program is a must-use tool in our own graphics card testing process. DDU’s saved our bacon dozens of times when we’ve encountered driver bugs.
Display Driver Uninstaller performs invasive surgery, so the creators warn that you’ll want to create a system restore point before you begin—there’s a button to do so right in the software. For best results, you’ll also want to run it in Safe Mode. When DDU’s done working its magic, try installing your graphics card drivers yet again.
If you’re still running into troubles, well, you’re out of luck. Check your driver’s release notes to see if you’re encountering a known issue. If not, you can hop into forums to try and find help, or you can uninstall the problematic software and reinstall a previous driver version that you know worked. You can find Nvidia’s driver archives here.
Brad Chacos/IDG
Where to find older drivers for your Radeon graphics card.
AMD doesn’t maintain a central archive, but if you head to its driver page and search for your graphics card, you’ll get a list of the latest available drivers. Scroll past those, and at the very bottom of the new releases, you’ll see a tiny blue “Previous drivers” link, as shown above. Click that to summon past versions.
Good luck. If you’d rather splurge on new hardware than fiddle with software problems, be sure to check out our guide to the best graphics cards for PC gaming.
Author: Brad Chacos, Executive editor
Brad Chacos spends his days digging through desktop PCs and tweeting too much. He specializes in graphics cards and gaming, but covers everything from security to Windows tips and all manner of PC hardware.
How to uninstall an installed driver for an NVidia AMD or Intel
video card Method #1: uninstall using regular OS tools
1. Go to the Start menu (click on the Windows icon in the taskbar or press the Win key).
2. Go to Control Panel.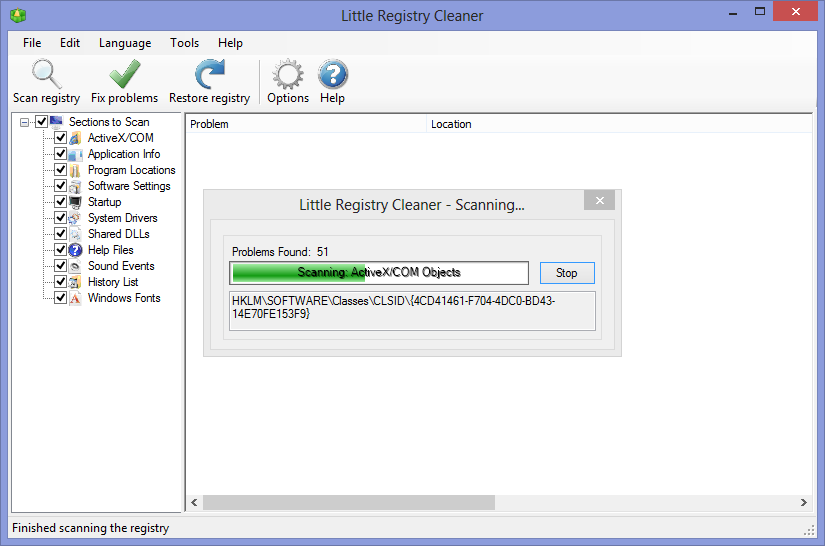
3. In the Programs section, click Uninstall a Program.
4. Remove all driver items from the list of installed software (right-click → Uninstall/Change option).
If Nvdia drivers are used:
- sequentially uninstall all components in the list: PhysX, 3DVision, Experience, HD Audio Driver, etc.
If AMD (including for ATI Radeon video cards):
- Enable the AMD Catalyst Install Manager and Quick Stream modules.
5. Carefully follow the instructions of the uninstaller.
Removal using built-in OS tools
Many users are interested in the question — how to remove the installed video card driver from the computer? There are several ways, however, the easiest way is to use the new Settings panel in Windows 10. To perform the required actions, you need to get to the Applications section. To do this, you need to go to the context menu of the «Start» button on the desktop (right-click on the icon) and select the «Apps and features» line. By default, the window should open in the item of the same name, if not, then go to it.
In the open window, a list of utilities installed in the OS will be slightly lower. Among them, it remains to find the driver you are looking for, click on the line with the name, and in the expanded window, click the «Delete» button. Depending on the manufacturer and software version, the name may differ, however, the following options are most common:
- NVIDIA graphics driver;
- AMD Catalyst Manager;
- Intel graphics driver.
You can also uninstall using the control panel. There, you need to find the «Programs» submenu and click on the «Uninstall programs» item. When a window opens in the list with utilities, you will find the driver you are looking for, on which you will need to right-click, and then select «Delete». If you do not know why drivers are needed, then one of the articles located on the pages of the site will help you figure it out. The above methods have certain drawbacks:
- there may be several programs, and it is inconvenient to delete them one by one;
- driver may not be listed;
- sometimes not all components are removed;
- Drivers can be installed by themselves using Windows Update immediately after uninstallation.
Uninstalling using the Device Manager
If the driver you are looking for is not in the list, you can use the Device Manager. To open it, you will need to call the Run system utility using the Win + R key combination. Then, in the program field, enter devmgmt.msc and press «ENTER» or the «OK» button. Also, this utility can be accessed through the context menu of the Start button on the desktop.
Next, you should find the «Display adapters» tab, and in it the required video driver, which you need to right-click on. In the menu that appears, it remains to click on the line «Delete device».
Method #2: cleaning while installing a new driver version
(for Nvidia video drivers) When you need to replace an old driver with a new one, that is, update, it is not at all necessary to completely remove its components using standard tools. Uninstallation can be done by enabling special cleanup options in the installer.
For example, in the Nvidia installer, this procedure is performed as follows:
1. In the installer window, select «Custom installation …» (click on the radio button next to the option name).
2. Click Next.
3. Under the list of components, enable the «Perform a clean installation» option (check the box). When this mode is activated, the installer automatically destroys all profiles and restores the default settings.
4. Click Next, and then complete the installation.
If not in the list of installed programs.
If there is no software for your video card in the list of installed programs.
You can uninstall the driver by uninstalling the device itself.
Open the device manager
In windows 7
click start, then right-click on the Computer icon and select properties
The device manager window will open where you can select the desired device and remove it.
Method #3: Uninstalling with the Display Driver Uninstaller
For those who don’t know how to uninstall video card drivers using standard functions and the installer and, in fact, are not going to master this skill, the Display Driver Uninstaller utility seems to be an excellent solution. It automatically finds video driver files and neutralizes them from the system.
1. Open the page in your browser — wagnardmobile.com/forums/viewtopic.php?f=5&t=113.
2. Click on the Official Download Here link in the forum topic.
3. Unzip the downloaded DDU archive using WinRAR or 7-Zip.
4. Run the Display Driver Uninstaller.exe executable as an administrator.
5. Set the display of the utility interface in Russian: in the lower right part of the window on the right, open the drop-down menu and select «Russian».
6. In the «Select video driver: (top left)» option, set the name of the software product (INTEL, NVIDIA or AMD).
7. Click the «Delete and restart …» button (recommended!).
Attention! If the driver does not uninstall, restart the operating system in safe mode and try cleaning again.
Uninstall the driver in the standard way
Open programs and features:
If you have windows 7
In windows 7, you need to open the start menu, control panel and select Programs and Features.
In the window that opens, select your video card software and click on «Delete». The software for your video card will be removed along with the drivers.
If you have windows 10
Select start, then settings, then Applications.
In the window that opens, look for the installed software from your video card in the list.
If not listed or not convenient, you can open the program and features item in the upper right corner. A window of installed programs and components will open in front of you, just like in windows 7
In the window that opens, select your video card software and click on «Delete». In this case, shown on the example of Nvidia.
The software for your graphics card will be removed along with the drivers.
Removing the driver using third-party programs completely
The authors of the Display Driver Uninstaller program made sure that you do not have to manually search for driver remnants, but complete the entire procedure by pressing a couple of buttons. The only condition for deletion will be in safe mode, but even the program will launch it itself with your consent.
The program has a clear interface in Russian, does not require installation and is absolutely free.
How to remove the AMD, nVidia, Intel video driver — clean and completely!
Question from user
Tell me how you can remove the video drivers from Windows if they are not displayed in Add/Remove Programs (in the control panel). The fact is that I want to install newer drivers, but during installation an error pops up that the driver is already there. What can be done?
Good afternoon.
Quite a popular problem. In fact, if you do not find an application (including a driver) in Add and Remove Programs in the Windows Control Panel, this does not mean at all that it is not in the system.
Contents
- Where driver installers are stored in the system
- Regular disk cleanup
- Driver Store Explorer 9 utility0022
- Driver Booster program
- Driver Genius program
files to install the system after the update? Typical third-party Windows cleaners usually don’t work with system driver installer storage areas. And if the system has been standing for a very long time, if during this time a lot of different devices have been connected to the computer, an impressive amount of space on the local drive C as a result can be occupied by the installation files of all possible versions of the drivers for the computer stuffing and ever connected peripherals. How to clean Windows of unused drivers?
Where driver installers are stored in the system
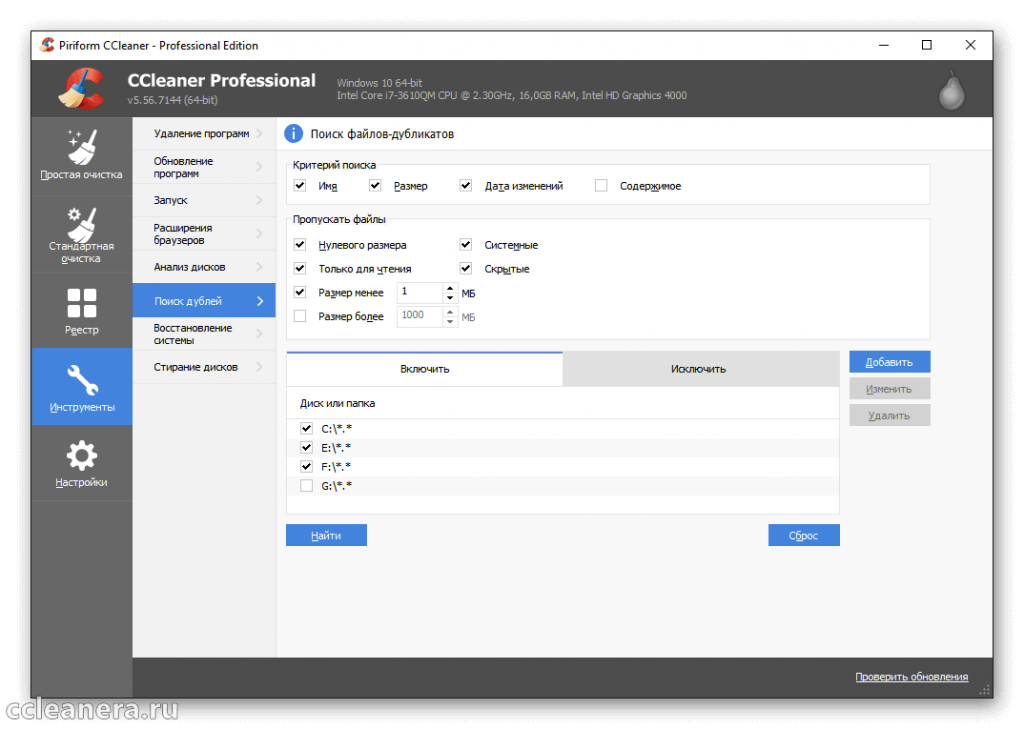
Video card driver installers are usually stored on the C drive.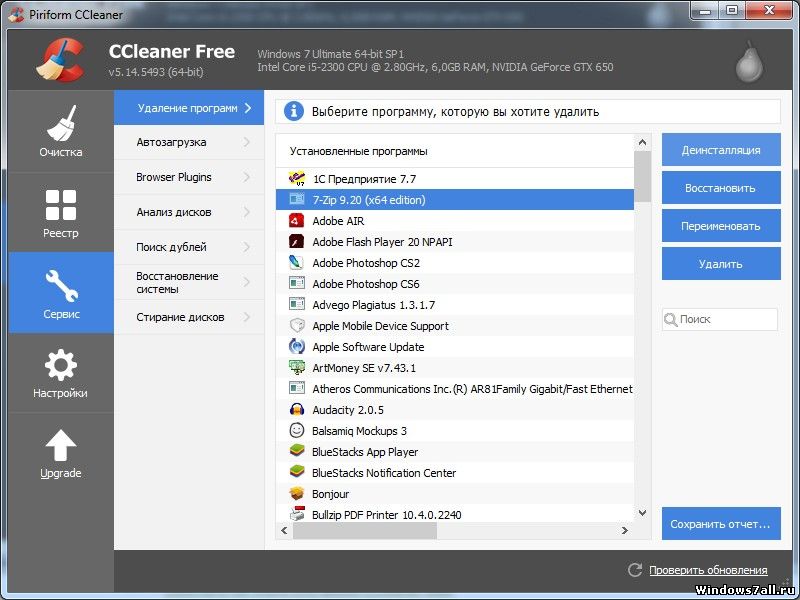 Sometimes they are located in folders right at the root of the drive — «Nvidia», «ATI», «AMD». Sometimes they can be found in the system directories «ProgramData» and «Program Files». In the first case, you can simply manually remove the folders in the root of the disk. In the second, it is better to trust the well-known cleaner and optimizer in one person CCleaner. It can remove video driver installation files when you clean up your computer.
This option is not enabled by default, it must be activated during cleaning in section « Application «.
Driver installers for other devices are usually stored in a system folder called «FileRepository». In the screenshot below, we see that same folder on board a relatively recently installed Windows, and it already takes up almost 2 GB of space.
On older systems, this folder can be up to 10 GB, and sometimes even 20 GB. The longer the Windows OS was installed, the more the internal hardware or external equipment changed, the more weight this folder will have, respectively. It stores driver installers for all devices that have ever been connected, moreover, all possible versions of drivers for such devices — old, medium old, new. When updating driver versions, their installers do not go anywhere, they are stored in the «FileRepository» folder to implement the ability to return to older versions.
In this folder, as well as in other system ones, you cannot just go in and manually destroy the contents. At least this cannot be done inside a working Windows. Only access from the Live-disk environment or another operating system will help. But there are correct ways to deal with this problem, consider them.
Please note: cleaning by any of the methods proposed below will result in the impossibility of returning to older versions of drivers using the regular device manager mechanism. Therefore, it is better to carry out such cleaning only if all current versions of drivers are working correctly. Or if there are installation sources for any versions of them.

Regular disk cleanup
You can get rid of installers of unnecessary drivers using the tools of the Windows system itself as part of system disk cleanup. In the properties of the latter, select Disk Cleanup. Click on the cleanup command.
Check that the driver packages checkbox is checked in the list of data types. Then press « OK » to start cleaning.
Driver Store Explorer utility
The free portable Driver Store Explorer utility can remove installers of unnecessary drivers. In its window there is a list of devices that were once connected to the computer, as well as old versions of the device drivers used. The utility must be run as an administrator. How to work with her? In its window, we check the boxes next to the driver installation files for those components and equipment that were previously connected to the computer, but will no longer be connected. You can also check the boxes next to the installers of older versions of the drivers, if they are not needed. Then on the panel on the right, activate the option « Force Start » and click « Delete Package «.
If there is no special experience in this topic, then you can trust the automation of the utility. It can itself detect unused drivers. When you press the « Select Old Drivers » button, the checkboxes of the old versions are automatically activated.
Driver Booster program
The well-known Driver Booster program is a modern usable solution to the problem of updating drivers and deleting those that are no longer used. The program is automated as much as possible, all that is required of us, the users, is to start an operation to clear the data of disconnected devices.
And Driver Booster will clean everything up by itself. True, what exactly the program cleared, we can only find out after the fact in its log.
This is an ideal option for an average person who knows how to create a system backup and has made it a rule to do this with any kind of interference with the Windows OS. In the basic edition, which provides for the above possibility, the program is free.
Driver Genius
Another product for automatically injecting drivers with the added option of removing their installation files for unused devices is Driver Genius. This feature provides for the selection of devices from among those displayed. Here we can specify the drivers of which components we want to leave in the system, and which ones we want to delete. And such, respectively, we mark with ticks.
The program is paid, but the developers allow you to test the trial version for a month, and that includes the function just discussed.
Troubleshooting graphics device problems with error code 43
Windows 10 More…Less
This error occurs when the graphics device driver notifies Windows that the device is not working properly. This may indicate a hardware problem, driver or driver software failure. To resolve this error, follow these steps.
Driver updates for Windows 10 and many devices (such as network adapters, monitors, printers, and video adapters) are automatically downloaded and installed using Windows Update. While you may have already installed the latest driver, if you’re having problems with your device, you can try to fix it by updating the driver.
-
Press and hold or right-click button Start and select Device Manager .
-
Find the device in the list that has a problem with its driver (usually it will have a yellow exclamation mark next to it). Then press and hold the device (or right-click it) and select Properties .
-
Go to tab Driver and select Update .
-
Press and hold or right-click the Start button and select Device Manager.
-
Find the device in the list that has a problem with its driver (usually it will have a yellow exclamation mark next to it). Then press and hold the device (or right-click it) and select Properties .
-
Click the tab Driver and select Rollback .
In some cases, uninstalling and reinstalling the driver fixes the .
-
Find the device in the list that has a problem with its driver (usually it will have a yellow exclamation mark next to it). Then press and hold the device (or right-click it) and select Uninstall > OK .
-
After uninstalling the driver, press and hold (or right-click) the computer name (at the top of the device list) and select Update hardware configuration . This will reinstall the device driver.
-
To check if the problem is fixed, press and hold (or right-click) the device name again.