Uninstall Nvidia Drivers on Mac
Asya Karapetyan
Content marketer, who specializes in Mac how-to guides
12 minutes to read
CUDA Driver is not supported for Mac with OS higher than MacOS Mojave. If you want to uninstall Nvidia CUDA, you should note that uninstalling drivers on a Mac slightly differs from uninstalling simple applications. A complete and correct driver uninstallation is essential to prevent issues and crashes of other drivers on Mac. This article will explain how to entirely and safely remove Nvidia drivers from your Mac.
Contents:
- How to uninstall Nvidia CUDA Driver from Mac manually.
- How to uninstall Nvidia CUDA Driver using App Cleaner & Uninstaller.
Important notes and the methodology used to uninstall Nvidia CUDA from Mac
- Before writing this guide, we searched for the Nvidia uninstallation guide on its official website and found nothing.
- To altogether remove Nvidia from Mac, you need to find and remove its remaining files even after removing them from System Preferences.
- Since we have been coding an uninstalling tool for Mac’s apps for many years, we know all about the service files applications create on Mac. That’s why we decided to prepare our guide on how to remove CUDA Driver correctly.
- We used a free application Funter and App Cleaner & Uninstaller from Nektony to find Nvidia leftovers using.
- This article will explain how to uninstall Nvidia manually and using App Cleaner & Uninstaller completely. It’s up to you which method to use. If you have any questions related to this article, contact the Nektony support team.
What is an Nvidia CUDA Driver, and why remove it?
Nvidia Cuda is a driver that brings support for all Nvidia graphic cards on a computer. In short, it is a platform for a different software, allowing to target NVIDIA hardware. Nvidia CUDA was introduced in 2006. However, since macOS 10.14 (Mojave), Apple does not support CUDA. Developers were experiencing slow performance after upgrading the macOS.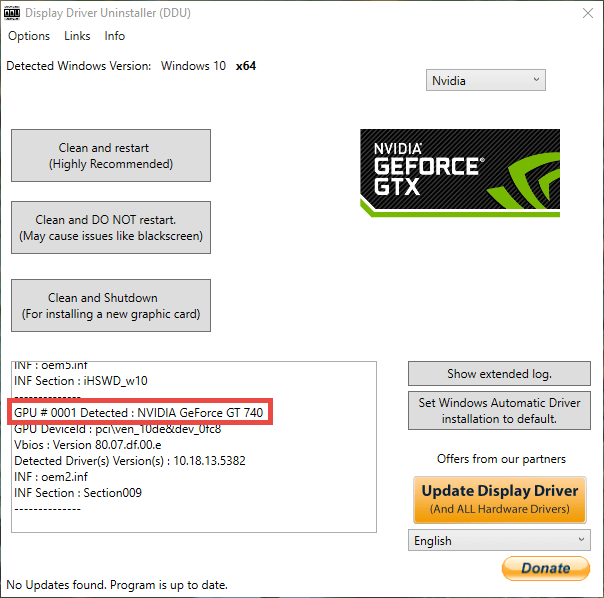 Thus, you should uninstall Nvidia CUDA from your Mac. Keep reading to learn how to do this correctly.
Quick Tip – Uninstall Nvidia Driver with App Cleaner & Uninstaller
Below you can learn how to uninstall Nvidia Driver from Mac manually. However, if you don’t have much time to read the guide, download and use App Cleaner & Uninstaller from Nektony to entirely remove Nvidia with one button click. Here is the download link for the latest version of the application.
How to uninstall Nvidia CUDA from Mac manually
You have to follow two essential steps to remove the CUDA driver on Mac completely and safely. First, you need to remove the driver. Then you need to remove its remaining files from your Mac.
Steps on how to manually delete Nvidia Cuda from Mac:
- Quit Nvidia CUDA driver.
- Close all the Nvidia processes working in the background. For this, open Activity Monitor, find these processes, and close them using the “X” button in the left-top corner.

- Open System Preferences. You can find it in the Launchpad, in the Applications folder, or go to the Apple Menu and select System Preferences.
- In the System Preferences window, find the CUDA driver icon. It should be in the bottom section. Make a right-click on it and select Remove “CUDA” Preference Pane.
Now you need to find all the leftovers (service files) of the Nvidia driver on your Mac’s disk. These files are usually hidden and stored in the system Library folder. To find them do the following:
- Open Finder and press the Shift+Command+G shortcut. This will open the Go to the Folder search field. Type ~/Library and click on Go.
-
Check the following subfolders in Library for Nvidia temporary files:
- ~/Library/Application Support/
- ~/Library/Caches/
- ~/Library/LaunchAgents/
- ~/Library/LaunchDaemons/
- Remove all files associated with Nvidia.

- Empty your Trash and reboot your Mac.
After the provided steps, Nvidia should be removed entirely from your Mac. However, note that some service files may be scattered on the disk, so it’s not so easy to find absolutely all of them. You can use the free application Funter to check your Mac for Nvidia’s remaining files or use App Cleaner & Uninstaller for this.
Funter is an application to find hidden system files. To find Nvidia files using Funter, do the following:
- Launch Funter.
- Type CUDA in the Funter’s search field and press Enter.
- Funter will display a list of all files that contain the search word in their names.
- Select the service files of the CUDA driver, and click to remove them.
The manual uninstallation of Nvidia CUDA Driver seems to be complicated, doesn’t it? The good news is that there is another, much easier way to uninstall the driver. We invite you to learn how to easily uninstall Nvidia CUDA or any other driver from Mac with App Cleaner & Uninstaller.
How to uninstall Nvidia CUDA Driver using App Cleaner & Uninstaller
App Cleaner & Uninstaller is a tool that allows you to completely remove any application from your Mac and find the leftovers of already deleted applications.
Steps on how to uninstall CUDA Driver with App Cleaner & Uninstaller:
- Launch App Cleaner & Uninstaller.
- Select CUDA from the list of scanned applications.
- Click the Remove button and confirm the removal.
If you have already removed Nvidia, you can check your Mac for its remaining files. For this, switch to the Remaining Files section. Here you will find the list of all unneeded files that applications left behind after their removal.
App Cleaner & Uninstaller is free to download. Use this driver uninstaller to delete Nvidia from your computer entirely.
Articles you may be interested in:
How to Uninstall NVIDIA Drivers on Windows 11/10 [Complete Guide]
This article provides various methods to uninstall NVIDIA drivers on Windows 10 with detailed procedures related to the same.
Respective NVIDIA drivers are quite important to run any graphics card from the brand. These drivers help in establishing simple and stable communication between your device and the system. Hence, one can not ignore the importance of the updated drivers in easing the working of the device.
Although the drivers are very important for your system, sometimes you may need to uninstall the same as well. When you face any problem while using the device, you may be forced to uninstall the driver. If you are facing any kind of problem with the NVIDIA graphics card. You can also uninstall NVIDIA drivers on Windows 10. But before you proceed, there are certain things you should do first before uninstalling the graphics driver.
Run the PC in Safe Boot Mode
We established that if your NVIDIA driver is not working properly, then you may need to uninstall NVIDIA drivers on Windows 10. However, to perform the same, you should run your PC in safe boot mode for ease. This will allow all errors to get fixed and run the software properly. Additionally, when you proceed with the updates, Safe Boot will protect you from system crashes and other errors as well. The below steps will help you do that with ease:
- Press Win+R keys on your keyboard to bring upon the Run utility
- Search for MSConfig in the utility and press Enter
- Wait while the System Configuration Menu appears and click on the Boot tab afterward.
- Select the Operating system you are using.
- Checkmark the box of Safe boot and click Ok.
- When the system reboots, follow the same procedure to unmark the box and Uninstall the driver.

Now that the precautionary method before the driver uninstall is complete, proceed with the methods to perform NVIDIA driver cleaner.
Also Read: How to Download and Update NVIDIA GeForce RTX 3050 Driver
Solutions to Uninstall NVIDIA Drivers on Windows 10 Easily
You should use and execute both of the below-explained methods to uninstall NVIDIA drivers on Windows 10. These will ensure that the driver is removed completely from the system without leaving any residual file.
Method 1: Display Driver Uninstaller NVIDIA with Device Manager
One of the best and safest ways to uninstall NVIDIA drivers on Windows 10 is via the Device Manager. This is an integrated tool of Windows PC that allows you to update, remove, and manage the device driver. Here are the easy steps to help you do the same:
- Right-click on the Windows button on the taskbar and run the Device Manager.
- Wait for the manager to appear and then expand Display Adapters
- Look for your NVIDIA graphics device and right-click on it to Uninstall device.

- If any warning pop-up appears, proceed to mark the box of Delete the driver software for this device and then press Uninstall.
To perform the complete process of NVIDIA uninstaller, follow the next method as well.
Also Read: How to Fix NVIDIA GeForce Experience Not Working in Windows 10
Method 2: NVIDIA Driver Cleaner Using the Control Panel
You can also use the Control Panel to uninstall NVIDIA drivers on Windows 10 or remove additional files and software related to the same. Follow the detailed instructions provided below and get rid of the driver at once:
- Search for the Control Panel in the taskbar’s search option and press Enter.
- Click on Uninstall a program to proceed.
- From the list of software installed on your PC right-click on all the NVIDIA programs and uninstall them
- Follow the instructions that appear on the screen and uninstall the driver.

- Reboot your system to introduce the changes.
The tool will remove NVIDIA drivers very easily however before you go on with the procedure. Have a look at the pro tip below and know what else you can do to fix the problems faced with the NVIDIA drivers.
Also Read: How to Fix Nvidia Driver Crash on Windows 10
Pro Tip: Update NVIDIA Drivers With the Quick Driver Updater
Although we explained two methods to uninstall NVIDIA drivers on Windows 10. This is not always the answer to the problem faced while using the graphics processing unit. If you are facing any you should try updating the drivers. Most times, the main reason behind the misbehavior of any driver is outdated drivers. When proper drivers are not installed on the system, you may face problems.
Hence, the best and the safest thing to do in such cases is to update the drivers instead of using the NVIDIA uninstaller. You can do this with the help of the Quick Driver Updater. This is a safe tool that allows you to update all kinds of graphics, network, and other device drivers on your PC. Additionally, the software also offers other features as well.
With advanced features like single-click execution of driver updates instantly, you can save time and effort. Additionally, the software also allows you to backup and restore the drivers as well. With the help of the driver update scheduling option on the tool, schedule the drive updates when you want, as you want. As users sound the globe use and love this tool, the interface of Quick Driver Updater is multilingual to help you.
And that’s not all, you will also find various other features of the software when you install and use it on your Windows PC. However, for now, you should follow the below procedure to use the tool safely:
- Hit the button provided below and download the Quick Driver Updater tool.
- When the download is complete, install it and run the Scan for your system drivers.

- When the updates do appear, click on the Update All button.
- Restart your system to apply the changes.
Also Read: Download and Update GeForce RTX 3060 Ti Driver for Windows PC
Uninstall NVIDIA Drivers on Windows 10 and 11: Successful
We hope that after using the above methods to uninstall NVIDIA drivers on Windows 10 and 11. You will be able to do the same without facing any problems. You should not forget to Safe Boot your PC before using both of the methods to uninstall the driver. This will ensure that no problem occurs during the uninstall.
However, we recommend that instead of taking the “HUGE” step to remove NVIDIA drivers, you should try updating them. This will allow you to get rid of errors while running the device as well. Quick Driver Updater is one of the best tools to do that. If you have any questions or suggestions, the comment section below is there to help you.
boot — Trouble removing NVIDIA drivers
Ask Question
Asked
Modified
1 year, 3 months ago
Viewed
4k times
I’ve recently installed graphic drivers for an nvidia geforce RTX 2070. After that, Ubuntu (version 21.04) wouldn’t boot anymore. (Lots of people seem to have this issue, see e.g. [1], [2], [3].) I’ve installed the driver via the built-in app (forgot the name and can’t look since I can’t boot, I think «Something & Packages»). I’ve then managed to remove the drivers by running some variant of sudo apt purge nvidia-.* in the Root Shell Prompt accessed via recovery mode, which allowed me to boot again.
I’ve next tried installing drivers by running the file downloaded here from the terminal. I figured that, if it doesn’t work, I could remove the drivers again with the above command. However, this time, the same command returned a message saying there are no packages that start with ‘nvidia’ installed. As a result, I’m now unable to boot Ubuntu.
I’ve also tried
- Navigating to the file (also in the recovery mode root shell) and launching it with the
--uninstalloption. It threw some error messages during the process but told me the drivers were successfully removed. However, I still can’t boot. - Reinstalling and uninstalling with the file
- Navigating into
/etc/and removing all files withxorgin their name (I have no idea what those files are, but it was among the suggested fixes I’ve found.)
Still can’t boot. Any ideas other than the three things above or reinstalling Ubuntu?
Aside from being unable to boot, I still really need to get the drivers going. I only have Ubuntu to run ML stuff, which also requires a functioning GPU. Is there anything better than trying another of the suggested drivers and hoping for a different result?
EDIT: I believe this is (also) a hardware issue; the behavior changed after I changed BIOS settings (the action, only in the opposite direction, is described here. )
)
EDIT2: I’ve been told I need another power supply, I’ll try that next.
- boot
- nvidia
- recovery-mode
6
List all Nvidia related packages
dpkg -l | grep nvidia
Purge all the Nvidia related package you see in the list
When you have done this successfully
sudo ubuntu-drivers autoinstall
sudo prime-select nvidia
Reboot and now your system should work fine
5
I had similar problem. Exact steps might be different but you should get an idea from what I did.
-
uninstall nvidia drivers as mentioned above.
-
reboot and instead of login to UI, login to console
-
make sure nvidia modules are not loaded. You can do that by running command
sudo lsmod | grep nvidia
This will list any nvidia modules loaded by the kernel. If the modules are loaded that means your nvidia uninstall was not clean and you will need to manually remove the kernel module.
rmmod <name of nvidia modules>
- Install xserver-xorg
sudo apt-get install --reinstall xserver-xorg-video-nouveau
This will set your system to use nouveau.
-
Reboot and connect your monitor. It should detect now.
-
Use «Additional Drivers» from «Show Application» to install nvidia drivers. (I think latest right now is «nvidia driver metapackage from nvidia-driver-470».
Reboot.
-
Assuming you don’t have secure boot enabled. If secure boot is enable you need to ensure that nvidia kernel modules are signed and loaded.
-
run
sudo lsmod | grep nvidiaandnvidia-smito check if nvidia drivers are loaded. -
Now run torch.cuda.is_available() and see if it is able to use GPU.
Sign up or log in
Sign up using Google
Sign up using Facebook
Sign up using Email and Password
Post as a guest
Required, but never shown
Post as a guest
Required, but never shown
By clicking “Post Your Answer”, you agree to our terms of service, privacy policy and cookie policy
How to uninstall video card driver
How to uninstall video card driver
Updating the video driver is a procedure recommended by graphics accelerator developers to perform regularly to improve system performance. Recently, automatic updating has been used, but in some cases it will be necessary to first uninstall the driver, and then download the latest version.
You can uninstall the video driver using standard system functions or by using additional software. It is worth remembering that sometimes it is impossible to use the first option.
Method 1: Driver Sweeper
Driver Sweeper is a useful utility that allows you to uninstall not only the video driver, but also similar software for other devices. Thanks to a simple interface without unnecessary functions and Russian localization, even inexperienced users will understand the program. You need to do the following things:
- In the main menu, select item «Analysis and purification» .
Analysis and cleaning in Driver Sweeper
- After that, a list of drivers that can be uninstalled using the program will appear in the window. It is necessary to set opposite the software of the video card that is installed on the computer.
 It could be AMD or NVIDIA. Next, you need to press button «Analysis» .
Selecting drivers from the list in Driver Sweeper
- The program will search for all information about installed drivers. To delete files, you need to select all the items, and then click on the button «Clear» .
Analysis results in Driver Sweeper
- The program will issue a warning. To delete information, click on «OK» .
- Video card driver uninstallation will start, the process will take some time. When finished, you will need to restart your computer.
Method 2: Driver Fusion
This program has great functionality and can automatically update, delete and backup drivers. There are also other features that are available in the premium version of Driver Fusion. To delete you need:
- Run the program as administrator.
- In the window that opens, select item «Driver cleaner» and click on the button «Video adapters» .

Driver Cleanup Menu via Driver Fusion
- Select the manufacturer of the GPU installed on the computer. The system scan process will begin. After it is completed, information about the video card and a list of files that can be deleted will appear.
Video card drivers found in Driver Fusion
- To start the process, click on Cleaning . at the top of the program window
Cleaning found drivers in Driver Fusion
- Confirm the action by pressing the button «Yes» .
Driver Fusion 9 Video Driver Uninstall Confirmation0003
Method 3: Display Driver Uninstaller
This utility is designed to remove video card drivers only. She will cope with the process even if it does not work correctly. It is recommended to work with Display Driver Uninstaller in safe mode. When launched, it will automatically detect the brand of the installed video adapter. To remove the software you need:
- In the main window, click on the button «Settings» and select options, for example, refuse to remove NVIDIA PhysX, enable the creation of a restore point, and others. For novice users, it is better to skip this paragraph.
Display Driver Uninstaller operating parameters
- Returning to the main window, select one of the actions — complete removal and reboot, removal without reboot, or removal and shutdown of the video adapter. If you do not plan to install a new video card, it is recommended to select the first item.
Uninstall and reboot via Display Driver Uninstaller
- After that, the process of deleting all files will begin and, after it is completed, the computer will restart.
Method 4: Programs and Features
This is the standard cleaning method, no additional software needs to be downloaded. But to delete all information, this method will not be enough — it only deletes files from the main directories. The algorithm on the example of AMD is as follows:
- Go to «Control Panel» and select item «Programs and Features» .
Programs and Features in Control Panel
- In the window that appears, select the driver itself, after which the install / uninstall program will open. You have to press button «Next» .
- Select item «Deletion Manager» .
- A warning will appear, which must be accepted.
NVIDIA and Intel owners need to follow the same steps, the difference will be only in the software through which the uninstallation takes place.
Conclusion
Uninstalling graphics card drivers is a simple process that is recommended to be performed using additional software. This will ensure a complete cleanup of files and registry entries.
Do you need to use the driver cleaner when updating your drivers?
UNCACHED CONTENT
Some computer geeks use «driver cleaners» when updating their drivers — usually graphics drivers — to make sure the old driver has been completely removed and that no leftover files will conflict with the new driver. But is it necessary?
If you have ever used a driver cleaner, it was probably quite a few years ago. You no longer need to run them unless you run into problems after updating your drivers.
What is the Driver Cleaner?
Hardware drivers are not just stand-alone programs. When you install something like NVIDIA or AMD graphics drivers, the installer leaves many separate driver files all over your system.
When you uninstall an existing hardware driver, the uninstaller may not clean up properly and leave some of these files behind. For example, you may have updated your NVIDIA or AMD graphics driver to the latest version. If the uninstaller was unable to remove all old driver files, you may be left with driver files from two different versions. This could cause problems because these driver files were never meant to work together. Conflicting driver files can lead to crashes, slowdowns, and other failures.
If you were worried about a driver conflict when updating, you can uninstall the driver using its standard uninstaller and then go through your system by removing the hardware device and manually deleting the remaining driver files. The Driver Cleaner automates this last part — once the driver is removed, the Driver Cleaner will find the remaining files and remove them for you.
In the past…
In the past, much more popular utilities were driver cleaners. There was a time when NVIDIA and ATI (now AMD) instructed their users to uninstall existing graphics drivers before installing new drivers.
Users have uninstalled existing graphics drivers, rebooted their Windows PCs into low-res VGA mode, and often run a driver cleanup program to make sure old drivers have been completely removed. They then installed new graphics drivers and restarted Windows again.
The drivers did not handle the update process intelligently — users had to run the uninstaller manually, and users who never ran driver cleanup programs sometimes encountered problems where the NVIDIA or ATI uninstaller was unable to completely remove previous driver files.
Everything is different today
RELATED:
Do you need to worry about updating your desktop programs?
Today we live in a different world — the process is much automated. NVIDIA and AMD graphics drivers
automatically check for updates
. When an update is available, they download the graphics drivers and update them on the spot for you. The installer automatically removes old drivers and installs new ones without even requiring you to restart Windows. The worst thing you will see is a momentary black screen when switching graphics drivers.
This non-reboot upgrade process was made possible by the Windows Display Driver Model (WDDM) graphics driver architecture that was introduced in Windows Vista.
It’s necessary?
First, driver cleaners were only needed for graphics drivers. Other drivers may experience the same issues when updating, but Windows users usually just have issues with their graphics drivers. you probably
no need to worry about updating most of your hardware drivers
anyway, but you have to
Update your graphics drivers if you want to get the best gaming performance on your PC.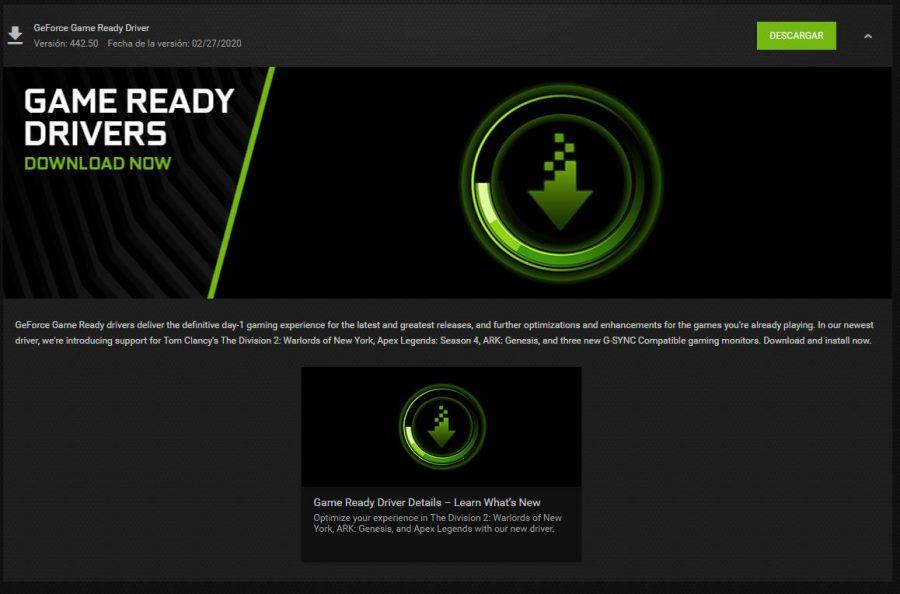
.
Driver cleaners were only needed because users experienced problems installing new versions of graphics drivers. Many users have gotten into the habit of running the driver cleaner every time they update their drivers — after uninstalling a previous version and before installing a new one — just so they don’t experience any issues after updating.
Users who didn’t and ran into problems had to uninstall their drivers, run a cleaner to erase all traces of the drivers, and reinstall the drivers.
So, do you need a driver cleaner? Only if you have updated the graphics and are experiencing crashes or other issues. If you, like most users, usually update your drivers when prompted and don’t notice any issues — or you may not update your graphics drivers at all, which is fine if you never play games on your PC.
Driver cleaners are not for you unless you run into a real problem after updating your driver. There is no point in running a driver cleaner just in case — if you still have a habit of uninstalling your drivers and running the driver cleaner every time you update them, stop using the driver cleaner and save yourself some time.
RELATED:
When do you need to update your drivers?
Using the Driver Cleaner
If you really want to use a driver cleaner, you can download and use something like
Sweeper Guru3D
. But don’t say we didn’t warn you — you probably don’t need it. There is a reason this program hasn’t been updated in years and doesn’t even officially support the latest version of Windows 7. Given the lack of updates, we don’t recommend even running this outdated program.
One thing is for sure — you don’t have to spend money on downloading a driver cleaner. It will not solve typical PC problems or make your computer run faster, no matter what the scam sites say.
Thus, cleaners for drivers are largely a thing of the past. In the past, they were sometimes necessary, but now we are at a stage where you do not need to run them.
Image credit:
Long Zheng on Flickr
How to remove all drivers from a Windows 10 system: 6 reset methods
Every PC owner is interested in regularly updating software components. But at the same time, the user must know how to remove all computer drivers from the Windows 10 system. This need arises due to the fact that outdated software negatively affects the stability of the OS, and the correct installation of the update becomes possible only after the removal of residual elements.
CONTENT OF THE ARTICLE:
Third party software
A user who has little idea of the features of the software components of a computer should be advised to turn to the help of applications from third-party developers. Such software allows you to quickly reset unnecessary drivers using a special function. In particular, Driver Fusion is worth considering. The application has a Russian-language interface and is easy to learn.
To clean the drivers you will need:
- Download and install the program on your computer.
- Start the application.
- Go to the Driver Cleaner tab.
- Expand the category with the required type of device (video adapters, keyboards, and others).
- LMB click on the equipment name.
- Press the «Clear» button.
- Confirm deletion.
Important. The free version of the app has limited functionality, so you won’t be able to delete all hardware files. Only a few of them will be cleared.
If Driver Fusion is not enough, then consider other similar programs like Driver Cleaner or Driver Sweeper. In addition, you can refer to the built-in system tools.
Via Device Manager
Uninstalling gamepad, mouse, keyboard and other hardware drivers is also done without the help of third party software. To implement your plan, you will need to turn to the built-in tool in Windows 10:
- Right click on the start menu icon.
- Select Device Manager.
- Expand the tab with the desired device type.
- Right-click on the name of the selected type of equipment.
- Click the Remove device button.
- Check the «Delete the driver software for this device» box.
- Confirm deletion.
If you find yourself in a situation where the computer does not start after an unsuccessful graphics adapter software update, you will have to perform the operation through safe mode. To do this, you need to use a bootable USB flash drive. After cleaning up unnecessary drivers, you should restart your computer in standard mode.
Application section
Installed drivers are displayed not only in Device Manager, but also in Settings. This menu also allows you to completely get rid of unnecessary software, whether it be Realtek High Definition Audio Driver or NVIDIA graphics card software:
- Open Settings using the Start menu.

- Go to Applications.
- In the first tab «Applications and features» find the name of the driver responsible for a particular type of equipment.
- LMB click.
- Click the «Delete» button.
After clicking on the uninstall button, a dialog box opens that allows you to complete the process by cleaning your computer of unnecessary software. Just follow the instructions that appear on the screen, and at the end, do not forget to restart your PC.
Print Management Application
This method is worth considering for those who wish to get rid of printer drivers. Judging by the name of the application, you could already guess that it will not work with it to clear the software of other devices (USB or audio adapters). If this option suits you completely, then follow the instructions:
- Open the Windows 10 search bar by clicking on the magnifying glass icon (located in the lower left corner of the Taskbar).

- Enter the query «Print Management» and launch the application of the same name.
- Once launched, expand the Print Servers tab and then the Drivers tab.
- LMB click on the name of the software of interest.
- Right-click, and then click the Remove Driver Package button.
- Confirm the operation.
«Print Management» allows you to get rid of not only the software of certain types of equipment, but also the firmware. So be careful when removing print components.
How to remove hidden devices
The vast majority of users remove drivers through Device Manager. This method is indeed one of the most convenient when you need to reset your sound card or video adapter software. However, the catch is that the DZ only displays the software of the connected devices. If you, for example, disconnect the keyboard, mouse and any other equipment from the computer, it will not be displayed in the Device Manager.
A person who encounters a similar situation is advised to do the following:
- Run «Settings».
- Go to System and then About.
- Click on System Information (located at the bottom of the interface).
- Select Advanced Options.
- In the Advanced tab, click on Environment Variables.
- Click the Create button in the first field.
- Name «devmgr_show_nonpresent_devices» and set the value to «1».
- Save the variable.
- Open Device Manager.
- Through the «View» tab, check the «Show hidden devices» item.
- Uninstall the software using the «Device Manager» cleanup method.
If you try to reconnect hardware whose drivers have been removed, the software will be forced to load.
Via Command Line
The PC may not want to uninstall the software.