How to use HDMI Input on PC? ( Solved !!! )
Meta Description: In today’s article, we have highlighted everything you need to know about HDMI and how to use HDMI input on a PC.
First, you should know that your laptop has HDMI input, and then you can use it.
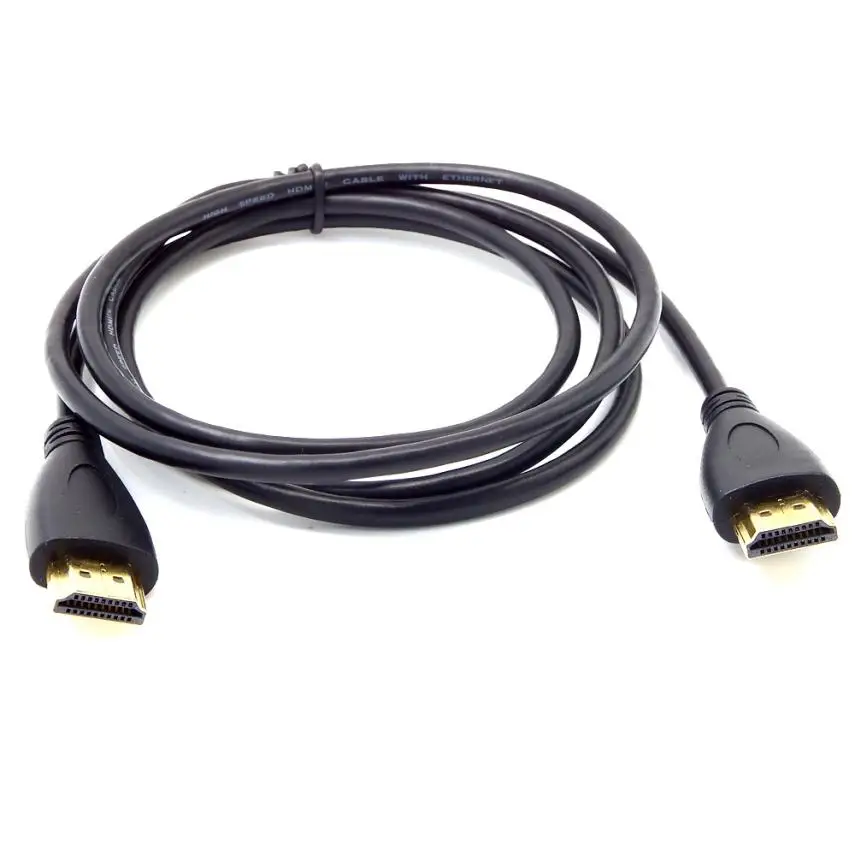
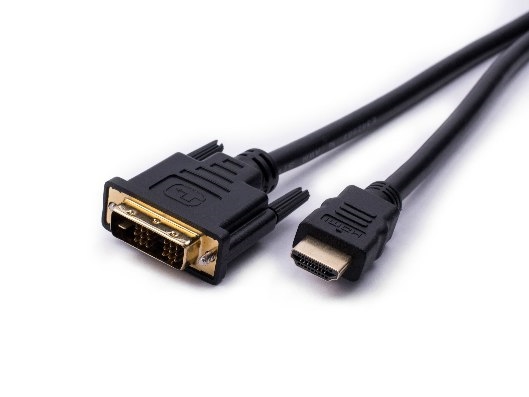
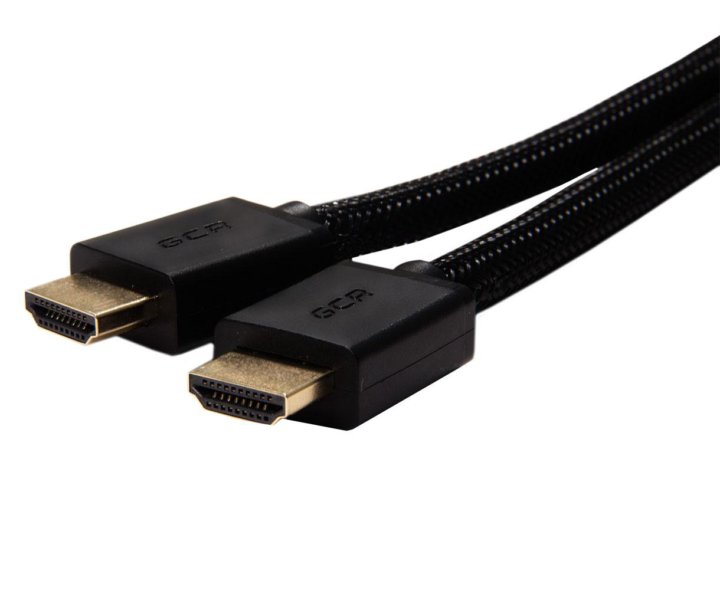
HDMI ports are very widely used nowadays and it is a great way for networking and different kinds of IT-related connectivity. Mostly used to transmit digital signals to build a connection between a computer and HDTV for gaming or multimedia viewing purposes. On the backside of these computing devices, there is a connection point for the cable, which is a distinctive six-sided plug with every plug having 19 steel connector pins.
Note: These pins transmit high-definition video signals and are capable of transmitting up to eight digital audio channels.
It is a great alternative to the old adapters and old wire system which was not that compatible and suitable to the newly designed HDMI cable system, its operation is a major leap in this sector.
Related Articles
- Best Laptop for Non-Gamers
- Best Laptop for Architecture
- Cheapest laptops with backlit keyboard
- Best Laptop for Live Streaming
- Best Laptop for Adobe Suite
- Best Laptop for video editing under 1000
- Which laptop lasts the longest
- Cheap Surface Pro Alternatives
What is an HDMI?
HDMI represents High-Definition Multimedia Interface and is the most habitually utilized for transmitting video and audio signals. High-Definition Multimedia Interface is an exclusive audio/video interface standard for communicating uncompressed video information and packed or uncompressed digital sound information from an HDMI source.
Many people use HDMI by connecting their laptop to the television for entertainment purposes mainly since it transmits high-quality videos. Gaming consoles also work through HDMI ports, so it plays a big role these days.
Benefits of HDMI – A multi-featured port
There are many advantages of HDMI like for instance; transmission of data from one device to another, transmits both audio and videos, plays 4k videos, sends heavy videos, and has an outstanding encrypted system.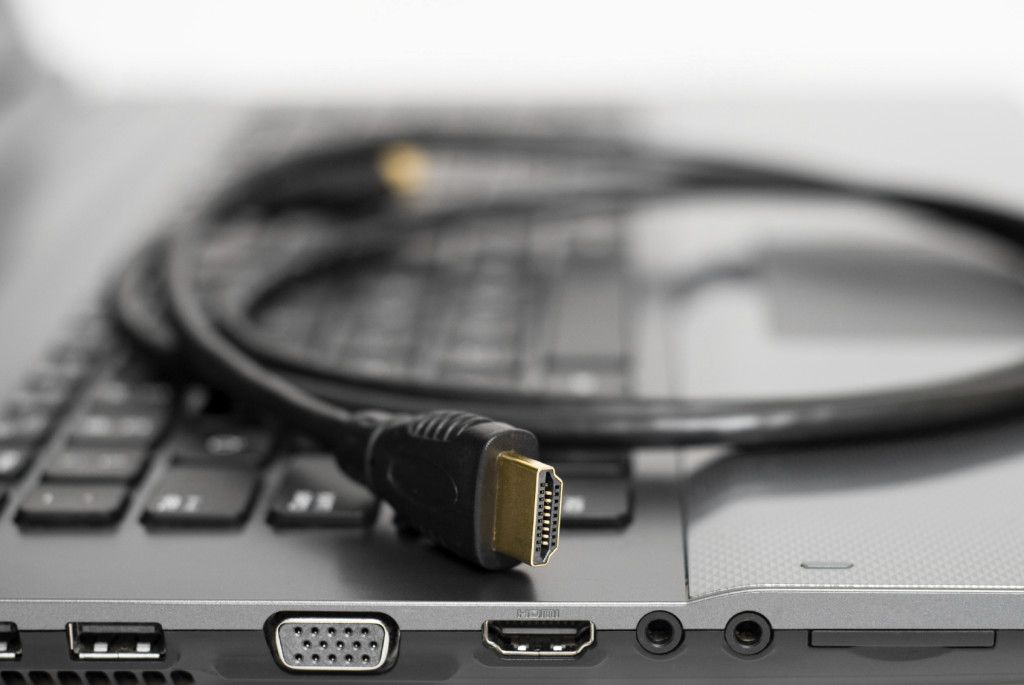
There is absolutely no need to worry about a data breach, it can display RGB colors, produce vibrant colors and pictures. It is very compatible with interfaces, formats, and adapters hence, provides safe data transfer and you will not have to worry about video wires tangling and confusion related to wire connection because it is very safe and simple.
Basic types of HDMI cables or connectivity
There are 5 types of HDMI cables:
-
HDMI Standard
This is the most common type of HDMI cable. It can only provide a resolution of 720p or 1080p.
-
HDMI Ethernet
This kind is for the internet supply and is compatible with 100MBps networks.
-
HDMI High Speed
This is an advanced HDMI cable that is compatible with more bandwidth, high-end resolution compatibility and also supports 3D image,
-
HDMI High-Speed
Ethernet
This one is the same as ethernet i.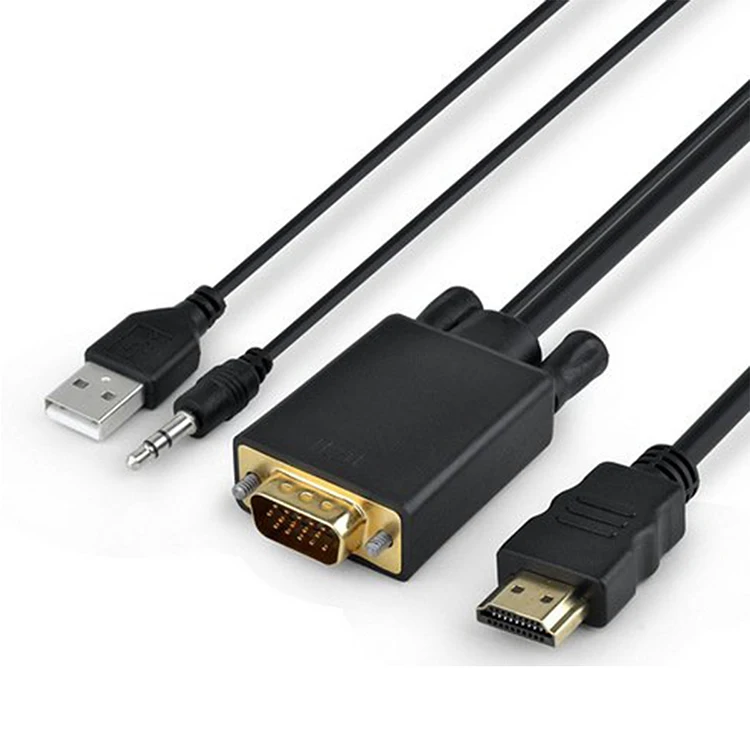 e., has compatibility with 100MBps networks.
-
HDMI Ultra High Speed
This is the most advanced HDMI cable used by the HDMI 2.1, which supports 8K and up to 10K.
How to use HDMI Input on PC?
- Step 1
Insert the plug on one end and the HDMI output port on the back of the PC’s CPU then, turn the wider end of the plug upward.
- Step 2
Connect the other end of the cable to another audio/video device with an HDMI Input port like an HDTV
- Step 3
Turn on the computer and wait for the “New Hardware Detected” notification, after that, double-click “Display Settings” in the computer’s control panel to switch the display output to HDTV.
Now, Click the “Advanced” tab under display settings, it will allow you to adjust the resolution from the computer in a way that it adjusts to HDTV resolution as well.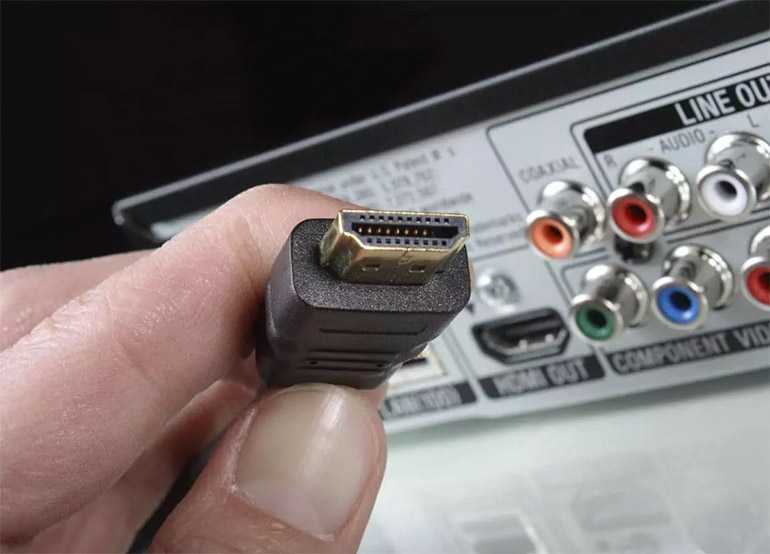
Genuinely take a look at the HDTV owner’s manual to determine the resolution for that specific model.
- Step 4
Click “Save Settings”, turn on the Internet connection, and then use the computer in order to transmit Web content to HDTV. Enjoy the computer’s DVD or Blu-ray player to enjoy movies with digital sound.
FAQs
Is it possible to use the PC’s HDMI port as an input?
No, mostly it is not possible to get HDMI input on a laptop until and unless it needs to have a separate HDMI port labelled as HDMI-in or something like that which is also quite rare. You can’t convert your PC’s HDMI input to output, the alternative is to get game capture devices to receive signals.
Does a PC have any HDMI input?
Yes, it can be found on modern TV sets. Many new PCs also have this feature built-in in them, they just include an HDMI output.
If your PC lacks it, you can connect with an adapter or by utilizing a VGA-to-HDMI converter.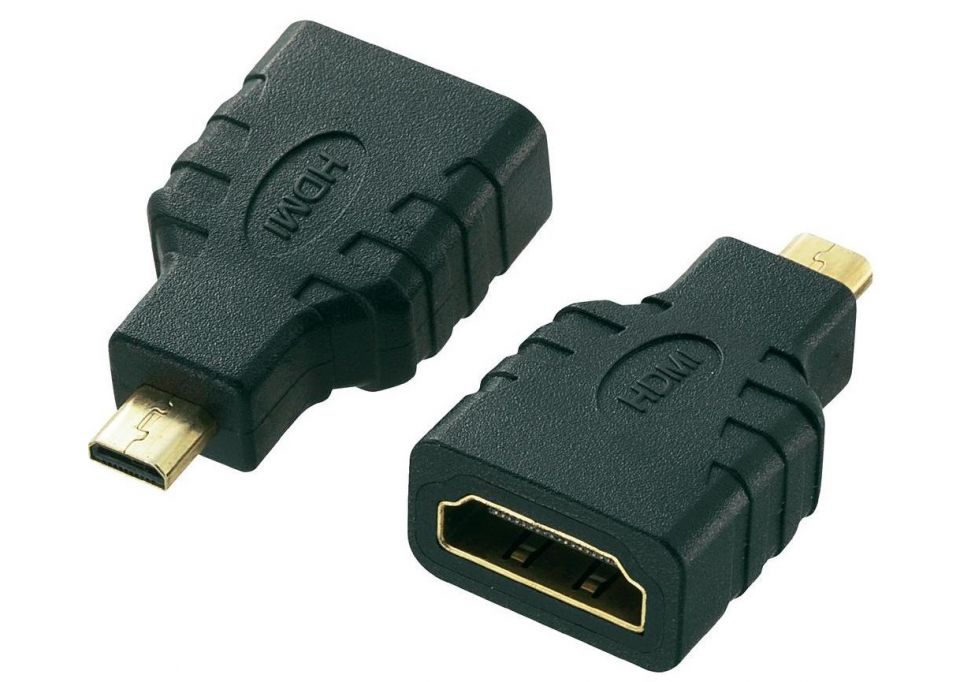
Can we use a USB port for video input?
Most PCs have USB 2.0 or 3.0, it is not recommended to run a video with only 2.0 as bandwidth will not be very smooth with USB 2.0 but it will run MS PowerPoint and other basic applications very smoothly whereas USB 3.0 supports both compressed and uncompressed video
Is it possible to convert USB to HDMI?
USB to HDMI Converter is an application that can convert USB to HDMI, you can run any HDMI device with that. USB to HDMI Adapter is getting old these days and the easier way is to use USB3.0.
USB 3.0 to HDMI cables can work, and, at times, they’re more helpful than adapters since you needn’t bother with an extra HDMI link. The issue is USB to HDMI cables are not as famous as adapters, and they’re somewhat bulkier.
What is the ultimate best USB to HDMI adapter?
Most USB-to-HDMI converters will uphold a scope of common output resolutions up to the 1080p goal.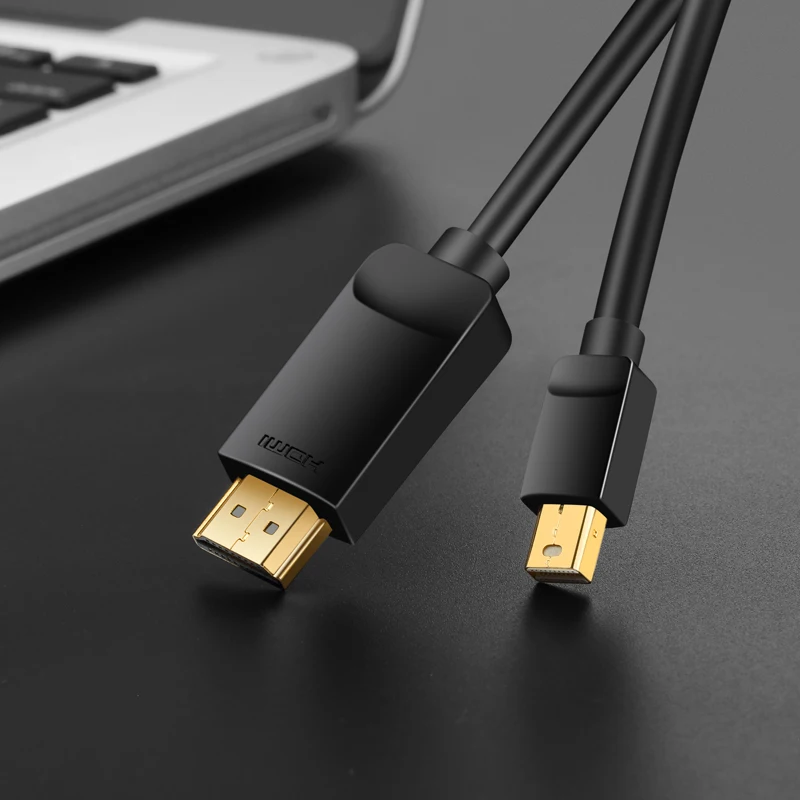 Why Mini deck 3.0 HDMI is magnificent: The Minideck 3.0 backings full HD up to 1080p for HDTVs, yet it additionally upholds higher resolution up to 2048 x 1152 for PC screens.
Conclusion
Technology is moving very fast; we must keep up with it in order to make the most out of the technological advancements that are taking place in the world. It is a very convenient way to use HDMI cables which are also very easily and widely available in the market.
The gaming industry is one of the biggest industries in the world and console gaming is one of the most popular ones if not the most popular one and the HDMI cable support is the backbone of console gaming. That speaks enough about how important HDMI cables are in our lives these days.
This Article is Updated.
Related Articles
- Best Gaming Laptops Under $700
- Best gaming laptops under 1100
- Best laptops for constructions business
- Best laptops for digital marketing
- Best Chromebook under 400
- Best laptop for non-gamers
- Best budget laptop for writers
- Best laptop for live streaming
- How Many PCIe Lanes Does NVMe Use
- How to Enter BIOS on Acer Laptop
- How to use HDMI Input on PC?
- How to fix a cracked computer screen on the inside?
- How To Factory Reset Lenovo Thinkpad Without Password
- How To Connect Galaxy Buds To Macbook
- How to Find Out Your Laptop Screen Size Without Measuring
- Does Time Machine Backup Bootcamp
- How To Screenshot On A Chromebook Without a Windows Key
- Hp Laptop Keeps Losing Wifi Connection Window 10
- How Long Will A Gaming Laptop Last
- Thunderbolt Bridge Not Connected
- Author
- Recent Posts
Robert Smith
Robert Smith is a technology lover and loves to write about laptops, monitors, printers, tablets, Apple products and anything that’s related to computers and games.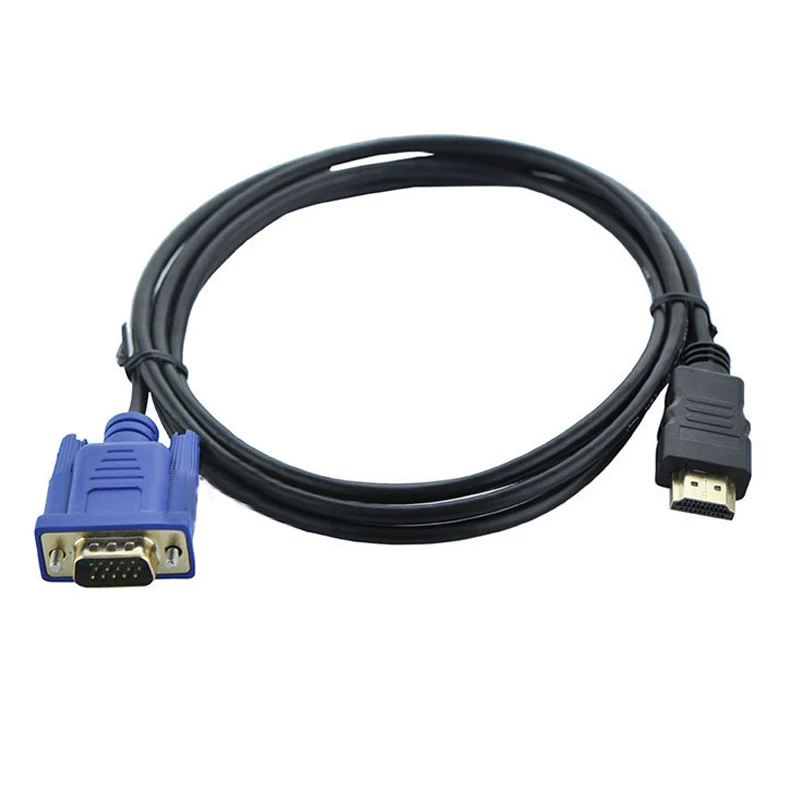 He is passionate enough that he maintains this blog regarding tech updates on a daily basis.
Latest posts by Robert Smith (see all)
Content Details
- How to use HDMI Input on PC?
- What is an HDMI?
- Benefits of HDMI – A multi-featured port
- Basic types of HDMI cables or connectivity
- HDMI Standard
- HDMI Ethernet
- HDMI High Speed
- HDMI High-Speed
Ethernet - HDMI Ultra High Speed
- How to use HDMI Input on PC?
- Is it possible to use the PC’s HDMI port as an input?
- Does a PC have any HDMI input?
- Can we use a USB port for video input?
- Is it possible to convert USB to HDMI?
- What is the ultimate best USB to HDMI adapter?
HDMI Cables: Types and Specifications Explained
Choosing the best HDMI cable for your computer, TV or gaming system
According to the HDMI Forum website, more than 1,700 manufacturers have sold over 8 billion HDMI-enabled devices, making HDMI the most popular way to transmit uncompressed audio and video between a source and a receiver or display.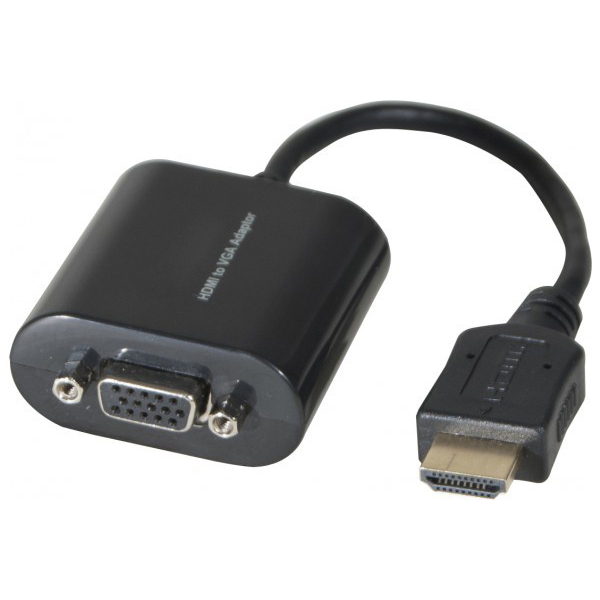
What is HDMI?
HDMI means High-Definition Multimedia Interface, a standard for simultaneously transmitting digital video and audio from a source, such as a computer or TV cable box, to a computer monitor, TV or projector. Originally developed by a consortium of electronics manufacturers, it has been widely adopted with almost all televisions and computer monitors supporting the interface.
The goal of the HDMI initiative back in 2002 was to improve on existing connectivity standards (e.g. DVI, component video) by creating a smaller connector, adding support for embedded audio and delivering a higher resolution video signal. Such was HDMI’s success that by 2008, shipments of HDMI-enabled devices exceeded those of DVI. By the end of 2009, all HDTVs had at least one HDMI port.
HDMI Cables
The HDMI interface allows a port to send high-resolution digital video, theatre-quality sound and device commands through an HDMI connector and down a single HDMI cord, each designed to support a video resolution and features in the HDMI specification.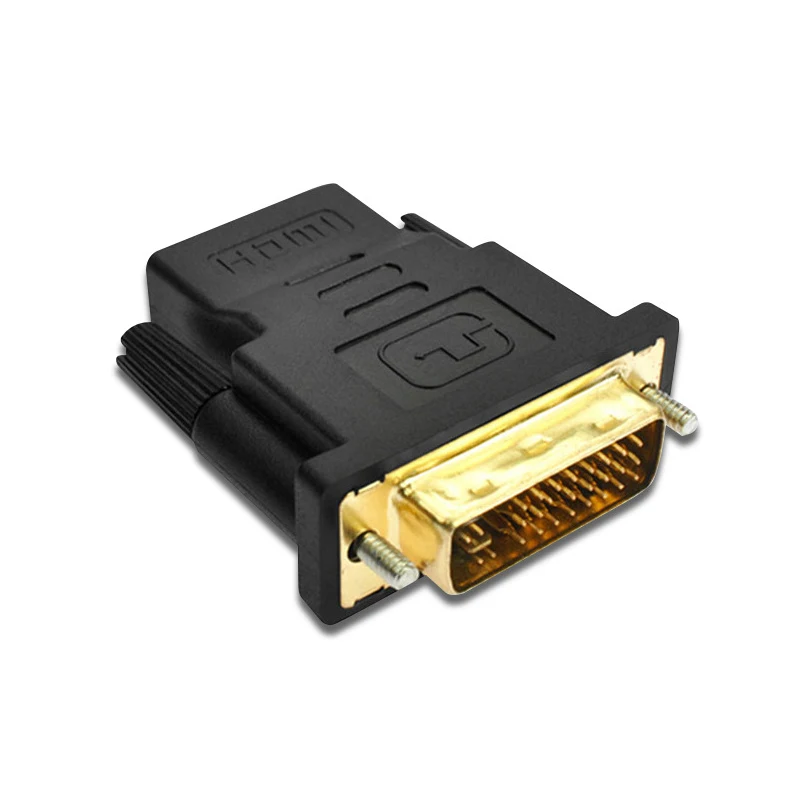
HDMI connectors are available in three sizes: standard, mini and micro.
There are also different types of HDMI cable (see the chart below). Not all cables use the logo but the cable specifications should indicate whether it is Standard, High Speed, Premium High Speed or Ultra High Speed. If the type is not indicated, assume Standard.
HDMI Cable Types
| Cable Type | Logo | Resolution | Bandwidth |
|---|---|---|---|
| Standard (Category 1) | 1080i oder 720p | 4.95 Gb/s | |
| Standard with Ethernet | 1080i oder 720p, plus a dedicated HDMI Ethernet Channel | 4.95 Gb/s | |
| High Speed (Category 2) | 1080p 4K @ 30 Hz |
10.2 Gb/s | |
| High Speed with Ethernet | 1080p oder 4K @ 30 Hz, plus a dedicated HDMI Ethernet Channel | 10.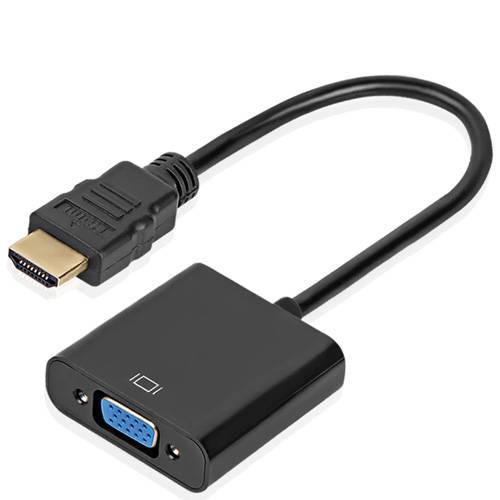 2 Gb/s 2 Gb/s |
|
| Kategorie 3 (4K) | 4K @ 60 Hz | 18 Gb/s | |
| Kategorie 3 (8K) | 8K @ 60 Hz 4K @ 120 Hz |
48 Gb/s |
4K HDMI cables are sometimes referred to as Premium High Speed and 8K HDMI cables as Ultra High Speed. Premium High Speed HDMI Cable and Ultra High Speed HDMI Cable are trademarks or registered trademarks of HDMI Licensing Administrator, Inc.
HDMI Ports and Connectors
The majority of HDMI connectors in use today are the Type A (Standard), Type C (Mini) and Type D (Micro) shown below. HDMI Type B (Dual Link) was developed for very high-resolution displays but was never used. Also not shown is the HDMI Type E connector which is intended for automotive and industrial applications.
Cables are available in male and female versions, with space-saving right-angled connectors and gripping or locking connectors.
HDMI cable is considered low voltage so you can install it inside a wall. HDMI faceplates give a clean, finished appearance and have a female connector on the internal side, making termination easy. HDMI keystones are also available for digital signage applications and large conference facilities with many displays that are fed from a central location.
Gripping and Locking HDMI Connectors
HDMI connectors do not latch like DisplayPort connectors but some do provide a spring mechanism that makes the blade of a male connector grip the receptacle and makes it less likely that the cable will be accidentally pulled out. If an HDMI device may be subject to vibration or accidental movement, use a connector with a screw lock.
Which is best… in-wall HDMI cable or wireless HDMI?
A cable connection is a relatively inexpensive option that gives a strong, reliable signal but can be difficult to install, it’s limited to one location and a distance of 25-50-ft. , depending on the resolution. Longer distances require an active cable or HDMI extender. A wireless HDMI extender is much easier to install, can be easily relocated and can broadcast a high-resolution video signal to multiple receivers.
Note: In-wall HDMI cables have a CL2 or CL3 rating. This means that the cable jacket is fire resistant and suitable to low-voltage in-wall applications.
Is there a difference in functionality between the Standard, Mini and Micro HDMI connectors?
All three connectors have the same 19 pins, but some may have different pin assignments. Functionally, they all support the resolutions and features of HDMI 1.4 onwards.
Can a USB-C Port be used to Transmit HDMI to a Monitor?
Yes. In Alt Mode, some of the pins in a USB-C connector are used to transmit other protocols. This allows the widely adopted USB-C port/connector to be used for more than just USB data or power. To date, there are four Alternate Modes: DisplayPort, Mobile High-Definition Link (MHL), Thunderbolt and HDMI. HDMI Alt-Mode supports all of the features of HDMI 1.4b, including video resolutions of 4K @ 30 Hz and above.
I need an HDMI cable for my 4K TV. What should I buy?
Buy a High Speed HDMI cable that supports at least HDMI 1.4, the first HDMI standard to support 4K signals. To get a 4K picture, all components must support 4K: the cable box or streaming service, the HDMI cable and the TV. If you are using an old Standard HDMI cable purchased before 2009, it will not have the bandwidth to carry a 4K HDR signal.
Evolution of the HDMI Standard
* Higher refresh rates are possible using Display Stream Compression (DSC).
** HDMI encodes data and uses some of the available bandwidth to ensure the integrity of the signal. This means that the actual data rate is something less than the maximum transmission rate. For example, under HDMI 2.1, the maximum transmission rate is 48 Gbps but the maximum date rate is 42.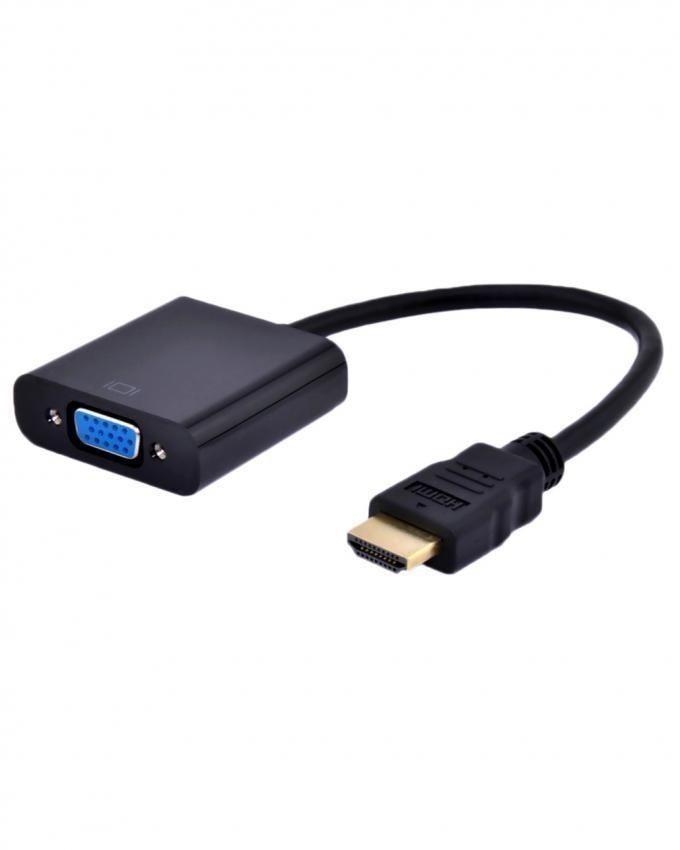 6 Gbps.
HDMI 1.0
- Initial release of the HDMI standard
- Audio and video interface for the transfer of video and audio over a single cable
- Data transfer up to 4.95 Gbps
- 1080p at 60 frames per second (UXGA)
- 8-channels of 192kHz/24-bit uncompressed audio (PCM)
- Playback of standard Blu-ray video and audio
HDMI 1.1/1.2
- DVD Audio
- Support for YCbCr color space
- Support for low voltages sources, such as PC video cards using PCI Express
- HDMI Standard (Type A) connector for PC applications
- Consumer Electronic Control (CEC)
HDMI 1.3/1.3a
- Increased bandwidth to 10.2 Gb/s
- Increased color depth to 10-bit, 12-bit, or 16-bit per channel («Deep Color»)
- xvYCC color space support
- HDMI Mini connector (Type C) for use with portable devices such as camcorders
- Support for Dolby TrueHD and DTS-HD Master Audio formats
HDMI 1. 4/1.4a
- Support for HDMI Ethernet Channel (HEC)
- Support for 3840 x 2160 at 30Hz and 4096 x 2160 at 24Hz
- Audio Return Channel (ARC)
- HDMI Micro connector (Type D) for use with phones
HDMI 2.0
- Increased bandwidth to 18 Gb/s
- 4K at 60 Hz
- 8b/10b signal encoding
- Support for 32 audio channels
- Support for ultra-wide 21:9 cinema aspect ratio
HDMI 2.1
- Increased bandwidth to 48 Gb/s
- Resolutions up to 10K at 120 frames per second
- Dynamic HDR
- Display Stream Compression (DSC) 1.2a
- Enhanced Audio Return Channel (eARC)
HDMI Features
Transition-Minimized Differential Signaling (TMDS) – When digital data is transmitted, especially over long distances, it is susceptible to noise and signal loss.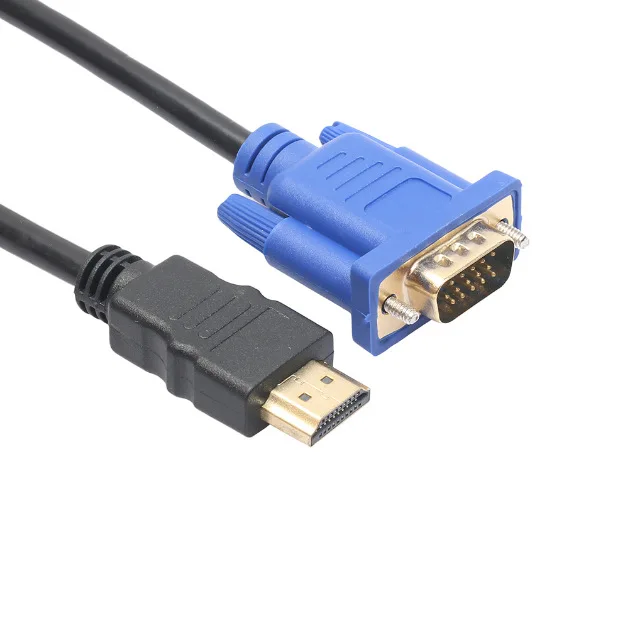 TMDS is a way of encoding an HDMI signal to protect it from interference as it travels from source to receiver. It works like this:
- The sending device encodes the signal, organizing the ones and zeros to reduce the chance that the signal will degrade.
- Two copies of the signal are transmitted over different internal wires, one an «out-of-phase» version of the actual signal.
- The receiving device puts the out-of-phase signal back in phase and compares the two versions, ignoring any differences (noise) between the two.
Consumer Electronic Control (CEC) – This feature allows a user to control up to 15 connected HDMI devices using one remote controller. Most TVs and streaming devices support CEC but it may be turned off by default. Manufacturers sometimes refer to CEC using their own branded term (e.g. Anynet+, Viera Link) so it may not be apparent that your device supports it.
High-Bandwidth Digital Content Protection (HDCP) – this authentication protocol allows a sending and receiving device to verify each other’s credentials (stored on each device’s Extended Display Identification Data (EDID) chip) and, if every checks out, create a shared key that is used to encode and decode the data passing between them. This process, known as a handshake, happens almost instantaneously at the beginning of a session and ensures that an unauthorized device cannot intercept the data as it travels between two devices. In the United States, HDCP support is mandated by the Federal Communications Commission (FCC).
Display Data Channel (DDC) – The HDMI interface includes support for VESA DDC, a set of protocols that allow a source (a computer’s graphics card, for example) to ask a monitor what audio and video formats it can handle, and adjust settings on the monitor, such as brightness and contrast. The information exchanged by a source device and a display is called Extended Display Information Data (EDID) and is transmitted through the Display Data Channel.
Chroma Subsampling – Chroma subsampling is a form of video data compression. It reduces the amount of color data in a video signal in such a way that there is little or no visible impact on image quality.
Each pixel in a video image includes information on brightness (luma) and color (chroma).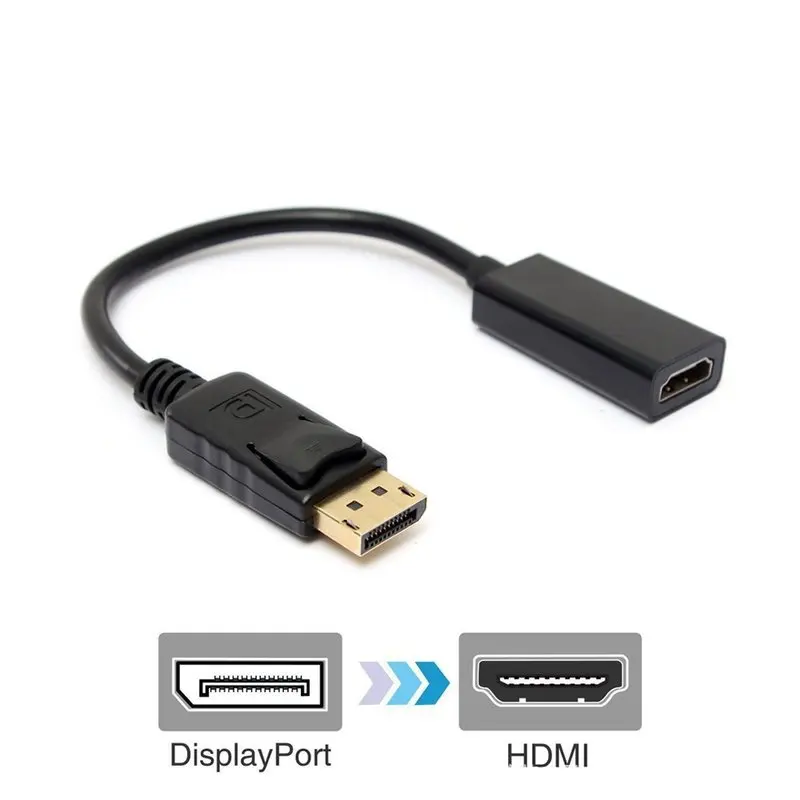 Since human eyes are more sensitive to differences in brightness than color, chroma subsampling reduces the amount of data transmitted by allowing pixels to share color data with adjacent pixels.
Chroma Subsampling is represented as three digits. The first number is the number of pixels in each row of the sample. The second number indicates the number of pixels in the TOP row that have color information. The third number indicates the number of pixels in the BOTTOM row that have color information.
- 4:4:4 means no subsampling. Each pixel has its own color information
- 4:2:2 indicates that two adjacent pixels on each row share color information, representing a 50% reduction in color data
- 4:2:0 means the bottom row has no color information and uses the information provided for the top row. This approach reduces the color data by 75%.
Color Spaces and Deep Color – A color space is a defined range of colors that can be represented in an image. The two primary color spaces used to represent digital video are RGB and YCbCr. Two important characteristics of a color space are Color Depth and Gamut. Color Depth is the number of bits used to represent the color of a single pixel and determines the amount of shading or gradation. Gamut refers to the number of colors available.
The initial HDMI specification provided support for 24-bit Color Depth (8-bits per color x 3 colors RGB). HDMI 1.3 introduced Deep Color, which added support for 30-bit, 36-bit and 48-bit color depths. It’s worth keeping in mind that the human eye can only distinguish around 10 million different color, so 24-bit color is adequate for most situations.
Color Depths
Audio Return Channel (ARC) – Most TVs connect to a sound bar or AV receiver using an optical cable. ARC enables a TV to send audio back to a sound bar or AV receiver through the same cable that delivered the HDMI signal to the TV. In other words, video and audio to the TV and audio back to the sound bar (the «return» part). The benefits of ARC include fewer cables, use of the TV remote to control sound, and the ability to transmit higher resolution audio, such as Dolby TrueHD or DTS HD Master Audio, to your sound bar or receiver. [Version 1.4]
HDMI Ethernet Channel (HEC) –First introduced in the HDMI 1.4b specification, HEC allows Ethernet-enabled devices to share an Internet connection. It combines the features of an Ethernet cable into the HDMI cable, thereby avoiding the need for a separate Ethernet cable. Xbox 360 and Roku are two examples of devices that can take advantage of HEC to connect to the Internet. [Version 1.4]
Dynamic HDR – High Dynamic Range (HDR) is achieved by sending additional information with the video signal that tells the TV or monitor how to display the content. It results in greater brightness, contrast, and better color accuracy as compared to Standard Dynamic Range (SDR). Dynamic HDR simply means the dynamic range can be set on a per-scene basis (or frame-by-frame in the case of high-end TVs).
Enhanced Audio Return Channel (eARC) was introduced in HDMI 2.1 and provides support for higher-quality audio bandwidth and speed. eARC requires a High Speed HDMI cable with Ethernet or an Ultra High Speed HDMI cable. eARC is not backwards compatible with ARC but some products may support both eARC and ARC. [Version 2.1]
Display Stream Compression (DSC) – HDMI is uncompressed audio and video. The higher the resolution, color depth and frame rate, the more bits need to be transmitted until the maximum bandwidth is reached. Then, the only way to transmit more bits is to add more lanes to the cable or compress the signal.
HDMI 2.1 introduced support for Display Stream Compression (DSC) 1.2a, a visually lossless compression for ultra-high definition (UHD) video. Using DSC, an HDMI 2.1 cable can support a maximum compressed bandwidth of 128 Gbps (sufficient for 10K, although it will be some time before there are commercially available devices that need that much bandwidth).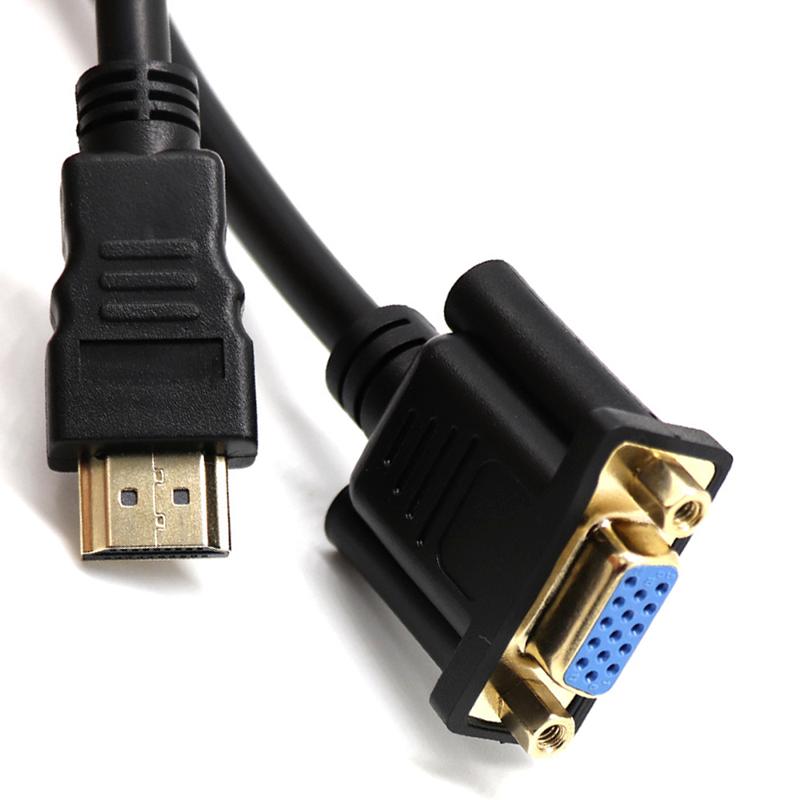
Transmitting HDMI Signals
Active vs. Passive HDMI Cables
A passive HDMI cable is a simple cable assembly with an HDMI connector at each end. Passive cables have a limited range (more on this later). Active cables on the other hand include a signal booster that enables video and audio to be transmitted over longer distances. Active cables sometimes require a power supply.
HDMI Cable Length
Passive Cables – Opinions vary over the maximum length of a passive HDMI cable. Consensus seems to be about 50 feet for 1080p and 25-feet for 4K video, but distances of over 50-feet are achievable. A good practical approach is to try a passive cable and, if you have problems with signal strength, add an in-line signal booster at the receiver end. Tripp Lite Model Number B122-000-4K6 will boost a 4K/60 Hz signal up to 50-ft and B122-000-60 will extend a 1080p/60 Hz signal up to 125-ft.
Active Cables – Length is more definitive in the case of an active cable because signal transmission is designed and tested over the advertised distance. For example, Tripp Lite’s P568-065-ACT active HDMI cable will support video transmission up to 65-ft.
HDMI Extenders
When transmission distance requirements exceed the limits of passive and active cables, it’s time to consider the various forms of signal extension.
In-Line HDMI Signal Extender – For distances up to 50-feet, an in-line equalizer or repeater can extend a 4K/60 Hz signal up to 50 feet and a 1080p/60 Hz signal up to 125-ft. Greater distances are possible at lower frame rates.
HDMI over Cat5 and Cat6 – A Cat5/6 extender will convert the HDMI signal into similar Ethernet IP packets that can be transmitted over the category cable and reconverted at the other end with no loss of signal strength or fidelity. Using this approach, an HDMI signal can be transmitted about three times further than an active HDMI cable–approximately 100 meters (328 ft.). Shielded (STP) Cat6 cable is recommended for its ability to reduce EMI interference from power lines and crosstalk within the cable.
HDMI over Fiber – The connectors on fiber HDMI convert conventional electrical inputs to pulses of light that are transmitted at high speed through optical fiber, then converted back to electricity on the receiving end. Since signal transmission is optical, it isn’t subject to EMI/RFI line noise. HDMI over Fiber can be extended well beyond the 100 meter/328-foot limit of copper Ethernet cable.
Wireless HDMI Extenders – A hardwired extender uses an Ethernet or Active Optical Cable to pass data between a transmitter and receiver. A wireless extender sends the HDMI signal using one of the WiFi protocols (e.g. 802.11ac or 802.11n). Wireless is generally slower than hardwire so make sure the video resolution and frequency is sufficient for your needs. For example, Tripp Lite’s B127-1A1-WHD1 can extend a 4K/30 Hz signal up to 98-ft.
Converting To and From HDMI
HDMI and Thunderbolt 3
Can I connect a TB3 port to an HDMI display?
Yes, but not directly. Thunderbolt 3 has native support for DisplayPort and from DP you can get to HDMI by way of an adapter. You can also use an adapter cable like Tripp Lite’s U444-006-h5K6BE to convert DP Alt Mode to HDMI.
HDMI to DisplayPort / DisplayPort to HDMI
Can I connect DisplayPort to an HDMI display?
Yes, a DisplayPort to HDMI adapter cable allows you to connect a computer with DisplayPort video output to an HDMI-enabled monitor or TV. If you use a passive cable, make sure the video source is a DP++ (DisplayPort ++) dual-mode port. If your graphics card does not support DP++, use an active cable such as Tripp Lite P582-006-HD-V2A.
Can I connect a DisplayPort monitor to an HDMI port?
Yes. Even though HDMI and DisplayPort use different signal protocols (TMDS vs. LVDS), it is possible to convert HDMI to DisplayPort with no loss of image quality using an active adapter. The adapter may require an external power source. The Tripp Lite P130-06N-DP-V2 4K HDMI to DisplayPort Active Adapter uses power from the USB-A port.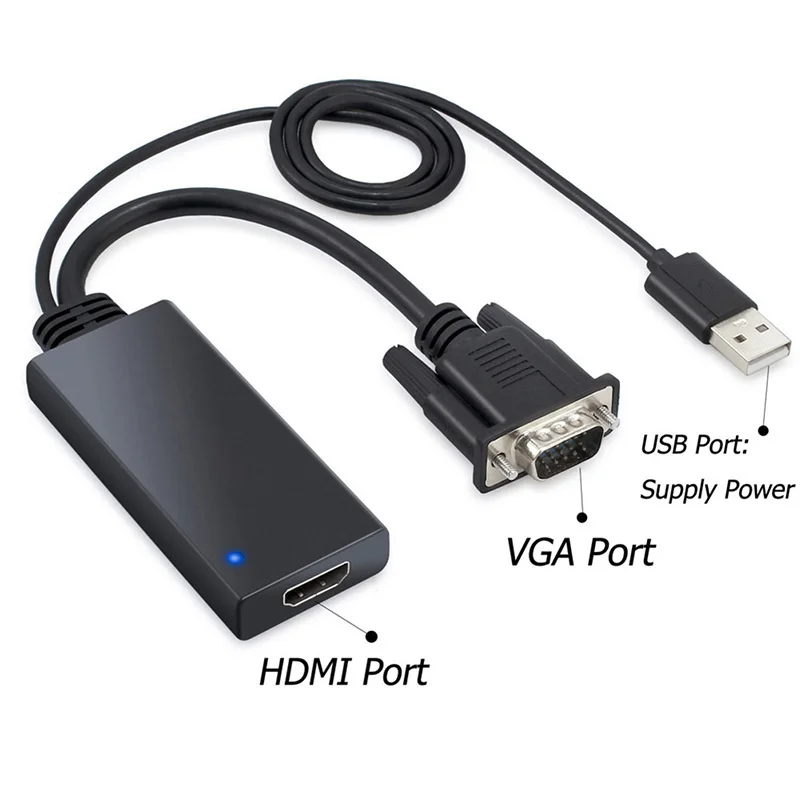
HDMI to DVI
Can I connect an HDMI port to a DVI monitor?
Yes, HDMI and DVI video signals are compatible. An HDMI to DVI adapter will support resolutions up to 1920 x 1200. However, DVI will not support HDMI audio.
HDMI Alt Mode over USB Type-C
USB Alt Mode allows a USB-C connector or port to transmit non-USB signals, making it extremely versatile. For example, a laptop, Chromebook or Android phone might use Alt Mode to directly connect a USB-C port to an HDMI-enabled monitor without the need for an adapter. This is an important feature because many laptops and tablets have a USB-C port but no HDMI port.
To take advantage of HDMI Alt Mode, you need a USB-C port that supports USB Power Delivery. It is the PD handshake that establishes an Alt Mode connection. You will also need a cable with a USB-C connector on one end and a USB-C or HDMI connector on the other. Older USB-A cables do not support Alt Mode.
Another option is to use an adapter cable supporting DisplayPort Alternate Mode, such as Tripp Lite’s U444-006-HDR4BE, to connect a USB-C port to an HDMI display.
As a general rule, video and audio can be converted from one protocol to another equal or lesser protocol as the table below shows. Protocol conversion requires an adapter.
| An | ||||||
| HDMI | DisplayPort | DVI | VGA | USB-C | ||
| Von | HDMI | Ja | Ja | Ja | Ja | |
| DisplayPort | Ja | Ja | Ja | Ja | ||
| DVI | Ja | Ja | ||||
| VGA | Ja | Ja | ||||
| USB-C | Ja | Ja | Ja | Ja | Ja | |
Blue: Standard cables and no protocol conversion
Green: Adapters and Adapter Cables
Switching and Splitting HDMI Signals
Switches and splitters are often confused and for good reason.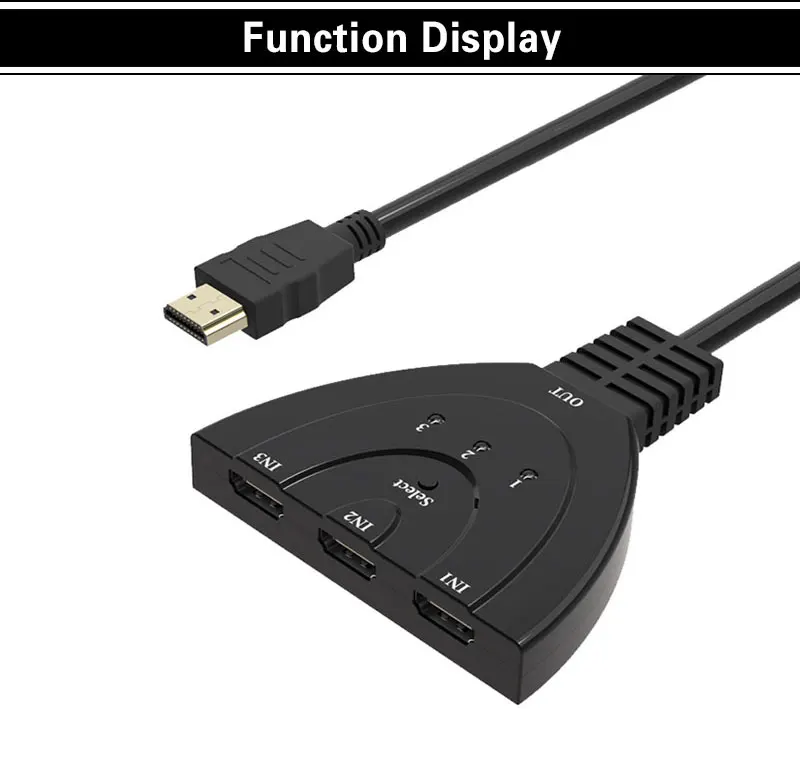 They perform similar functions. A switch takes multiple inputs and lets you choose which one to display on your TV or computer monitor. A splitter does exactly the opposite. It takes a single video signal and replicates it to multiple displays.
HDMI Splitters
An HDMI splitter takes one HDMI video signal and sends it to multiple displays. Each display will show the same image. Splitters are often classified according to their inputs and outputs. For example, a 2-port splitter might be referred to as «1×2» because it has one input and two outputs.
When choosing a splitter, make sure the output is at the resolution and frequency you want. A video splitter may also perform protocol conversion, for example, converting DisplayPort to HDMI.
HDMI Switches
An HDMI Switch, also called a Presentation Switcher, outputs audio and video from multiple sources but only one at a time. For example, a boardroom presentation might include Powerpoint slides and video from a streaming service like YouTube or Vimeo.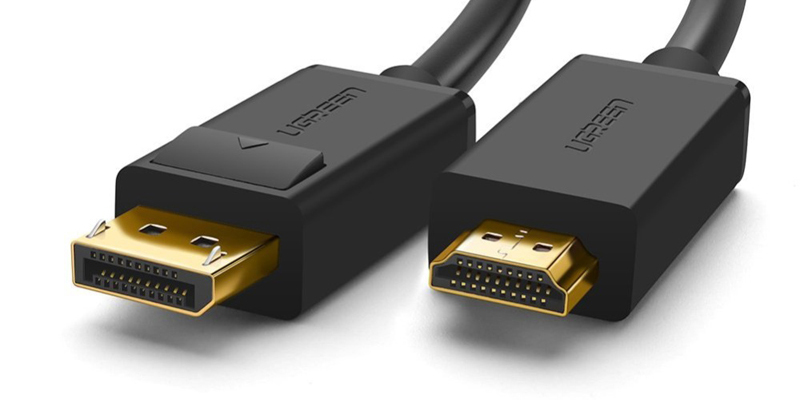
A matrix switch has multiple inputs AND outputs. For example, a 9×2 matrix switch has 9 inputs and 2 outputs.
Another variation on the many-to-one theme is the Multiviewer, which consolidates a number of video inputs on a single monitor. Multiviewers are found in broadcast control rooms and video surveillance systems.
Can I extend my desktop using an HDMI splitter?
No, an HDMI splitter takes one video signal and replicates it to multiple displays so each display shows the same image. This is known as «mirroring». Here are your options for extending your desktop:
- If your laptop has an available DisplayPort or Mini DisplayPort port and you want to add an external HDMI monitor, use a DP or mDP to HDMI adapter.
- If you have a laptop with a USB-C port and want to add an external HDMI monitor, consider a multiport adapter with an HDMI video port.
- If you have an available USB-C or Thunderbolt port and want to add two or three external monitors, use a dock.
HDMI Surge Protectors
A power surge is typically a brief increase in voltage due to, for example, an overloaded circuit, power outage or lightning strike. A surge protector detects excess voltage and safely diverts it through the building’s grounding system so it doesn’t damage connected equipment.
HDMI surge protectors are intended to supplement primary surge protection and are installed «in line» between a video source and display.
Important: surge protectors do not provide two-way protection against power spikes. If you want to protect both source and display, you should install two surge protectors: one with its output facing the video source and one with output facing the display.
Do in-line surge protectors degrade the HDMI signal?
All in-line surge protectors introduce a small impedance into the line and a capacitance across the line. Tripp Lite’s in-line HDMI surge protector (Model Number B110-SP-HDMI) is designed with lower line capacitance and impedance to avoid Transition Minimized Differential Signaling (TMDS) loss.
HDMI Audio Extraction
An HDMI signal includes both video and audio, which is convenient because you need only one cable to connect a cable box, game console or streaming device to your television. But if you want to play audio through an older analog sound system that doesn’t have HDMI support, you will need to separate the audio track from the video. That’s where an audio extractor comes in.
An HDMI Audio Extractor splits an HDMI signal into a separate HDMI signal and an audio output. Depending on the capabilities of the audio extractor, you may have the choice of compressed or uncompressed (LPCM) audio outputs, for example, 3.5mm stereo or a multi-channel format like 7.1 surround sound via TOSLINK.
When buying an audio extractor, make sure the video and audio output formats match the capabilities of your television and sound system.
Tripp Lite Model Number
P130-000-AUD4K6
HDMI vs. DisplayPort
HDMI and DisplayPort are similar standards with a different focus. HDMI has been widely adopted by consumer electronics manufacturers. DisplayPort’s main focus is computer connectivity and professional audio/video applications.
If you need to connect a Blu-Ray player, cable box, game console or streaming device to your television, HDMI is the logical choice. Your options for connecting a computer monitor to your laptop or desktop PC may be less clear. Many computers (and docking stations) offer both HDMI and DisplayPort. Which one will give you the best results? In terms of image quality, there isn’t much difference. DisplayPort 2.0 has a higher bandwidth, allowing it to support higher resolution video, but there are currently few applications requiring video beyond 4K. However, if you need multiple displays, you can daisy-chain three 4K monitors @ 90 Hz or two 8K displays @ 120 Hz.
| HDMI 2.1 | DisplayPort 2.0 | |
|---|---|---|
| Released | 2017 | 2019 |
| Typical Application | Consumer TVs | Computer Monitors |
Max.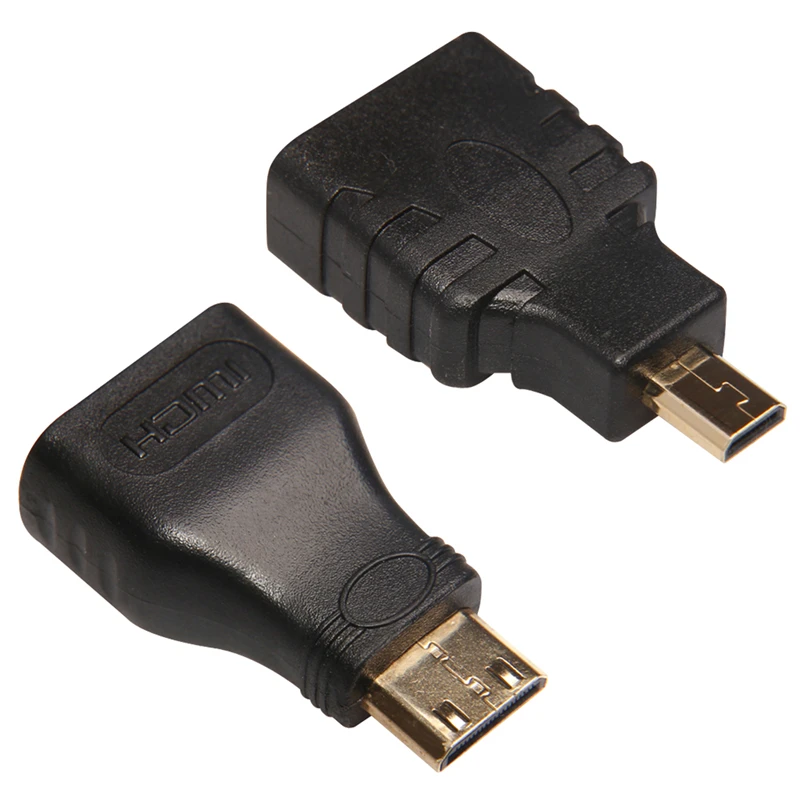 Transmission Rate Transmission Rate |
48 Gbps | 77 Gbps |
| Max. Resolution (uncompressed) |
4K @ 144 Hz 5K @ 60 HZ 8K @ 30 HZ 8K @ 120 HZ (DSC*) |
4K @ 240 Hz 8K @ 120 Hz 16K @ 60 Hz |
* Display Stream Compression (DSC)
What’s Next for HDMI: 16K Video?
With 8K TVs and cameras now readily available, first adopters are turning their attention to even higher resolutions, including 10K and 16K, and refresh rates above 60 Hz.
Bandwidth is the biggest barrier to higher resolutions and refresh rates. Ignoring all of the extra data layered on top of the video itself, the simple formula (resolution x refresh rate x color depth) adds up to a lot of bits which need to be moved from a video source to a display.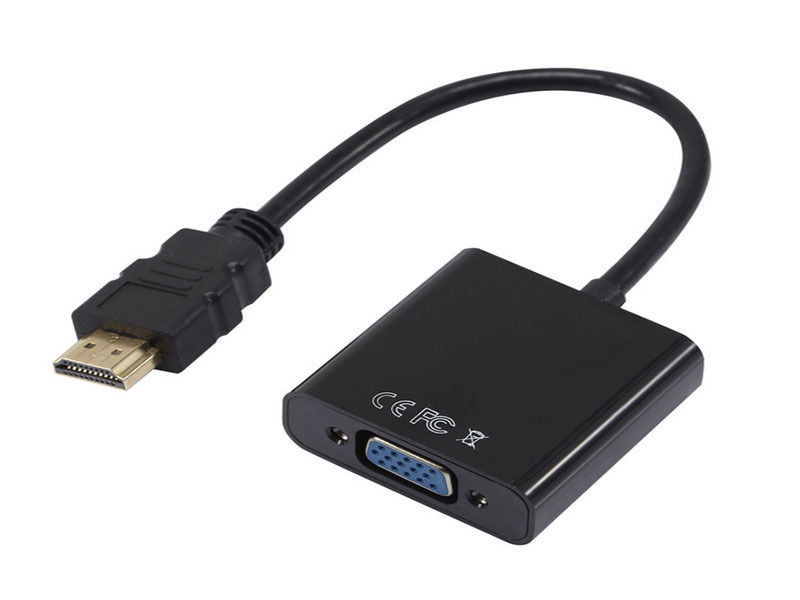 An uncompressed 8K, 24-bit color video signal at 60 Hz needs almost 50 Gbps of data bandwidth.
The current HDMI specification tops out at 8K/120 Hz so a revision will be required to go beyond that.
Products Mentioned in this Article
HDMI Cables
HDMI Adapters
HDMI Adapter Cables
HDMI Surge Protectors
HDMI Switches
HDMI Splitters
HDMI Extenders
HDMI Couplers
Why Buy from Tripp Lite by Eaton?
We know you have many brands to choose from. On the surface, they may all seem alike. It’s what you don’t see that makes the difference. With Tripp Lite by Eaton, you get solid engineering, proven reliability and exceptional customer service. All our products undergo rigorous quality control before they are offered for sale, and independent testing agencies verify our products meet or exceed the latest safety and performance standards. Our commitment to quality allows us to back our products with industry-leading warranties and responsive customer service. It’s the Tripp Lite by Eaton difference.
[Tutorial]6 Methods to Fix HDMI Port Not Working on Windows 10 Laptop
«My HDMI port is not working on my Windows 10 System. I’m trying to connect my HDMI with my Laptop and TV, but HDMI is not showing the content properly. How to fix the HDMI port not working on laptop issues?»
HDMI is an excellent option when you want a high-quality output. But several users have reported an issue where HDMI simply doesn’t work with your Windows 10 system. There can be many reasons for it. But you can follow the below-mentioned methods in terms of fixing the HDMI not working error.
- Part 1: Why is My HDMI not Working on Windows 10?
- Part 2: What to Do If HDMI Port not Working on Laptop? [6 Methods]
1. Check your Hardware
2. Restart and Reconnect your Devices
3. Set your HDMI Device as the Default Device
4. Remove Recently Installed Software
5. Configure your Computer’s Display Settings
6. Update or Reinstall your Graphics Driver
- Bonus: What to Do If You Lost Data Due to This Problem?
Part 1: Why is My HDMI not Working on Windows 10?
There can be several factors behind the failure of your HDMI cable or HDMI port. If your HDMI is not working properly with your Windows 10 system, then it might be a hardware issue, graphic driver issue, device’s display configuration issue, or any other issue.
There are several ways in which an HDMI error can play out;
- HDMI not working at all on your HDMI device.
- The audio or video not working through your HDMI connection.
- The content playing through your HDMI isn’t playing properly.
Part 2: What to Do If HDMI Port not Working on Laptop?
You can try several fixes if your HDMI port not working on laptops. As various factors might cause the problem to your HDMI, thus, there are respective methods to fix all those issues separately. Try each method one by one and see which one proves to be helpful for you.
You can also check the attached video to find out detailed instructions on How to Fix HDMI Not Working on Laptop Windows 10. You can explore more from Wondershare Video Community.
Recent Videos from Recoverit
View More >
Download | WinDownload | Mac
1. Check your Hardware
The issue of your HDMI port not working on your Windows Laptop can be simply a hardware failure. Damaged or corrupted hardware can easily cause an error in your HDMI experience. Thus, before we move onto some other solutions to fix the HDMI that’s not working on your Windows, you should check your hardware.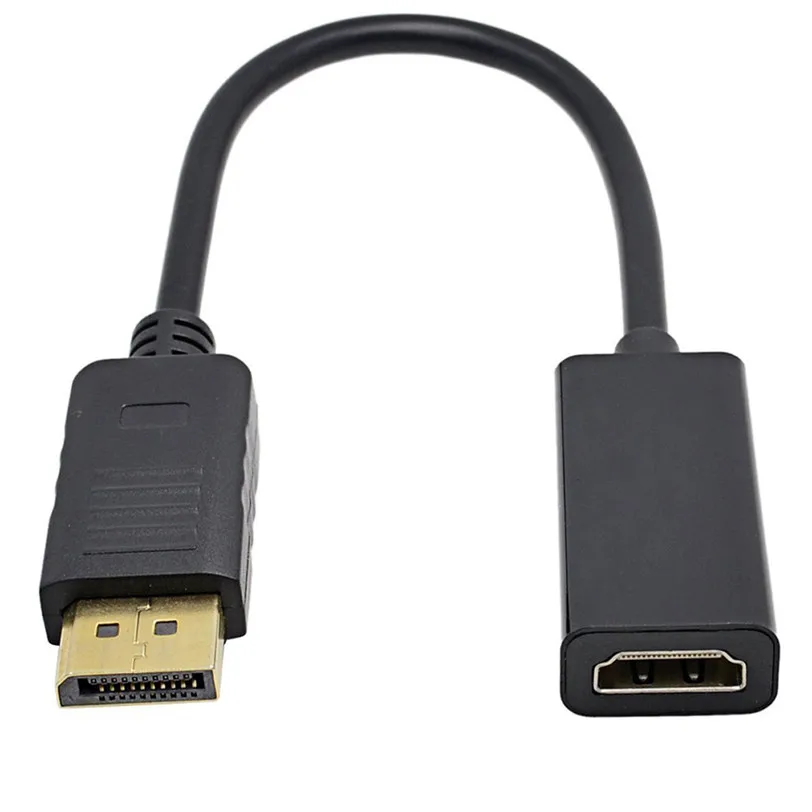
- Check your HDMI cable. Your HDMI cable needs not to be damaged and properly connected with your Windows laptop and HDMI device. Check if your HDMI cable is compatible with your System or another HDMI device.
- Check your HDMI ports. You need to check if the HDMI ports of your Windows System and other HDMI device are in good and working condition. Damaged or corrupted HDMI ports might cause the error that restricts your HDMI to work on the Windows system properly.
2. Restart and Reconnect your Devices
Most of the time the HDMI not working issue is not due to any problem but simply improper bootup of devices. Yes, not properly booting up your Laptop or your HDMI device can result in the error where you might find your HDMI not working.
Thus, you are recommended to restart your systems and re-plug your devices with HDMI. You can use the below-elaborated pattern to make sure you do everything right:
First turn on your HDMI device i. e. TV, speaker, etc., and only then turn on your Windows PC or Laptop. Once you have turned on all the devices, you need to turn off your HDMI devices again while keeping your Widows System On. Now unplug all the HDMI connections, and then plug them again with your HDMI device and your Windows PC. This will refresh your HDMI connection and might fix the issue where your HDMI port is not working.
3. Set your HDMI Device as the Default Device
If both the above-elaborated methods didn’t fix your problem of HDMI not working on Windows 10, then you should try to check if your HDMI device is set as the default of not. Yes, most of the time your HDMI device won’t work if it’s not set as a default device for your Windows system. Thus, you need to set the HDMI device you want to use as a default device.
Step 1. Once you are on the Home screen on your Windows 10 Laptop or PC, go to the «Volume icon» on Task Bar and Right-click on it.
Step 2.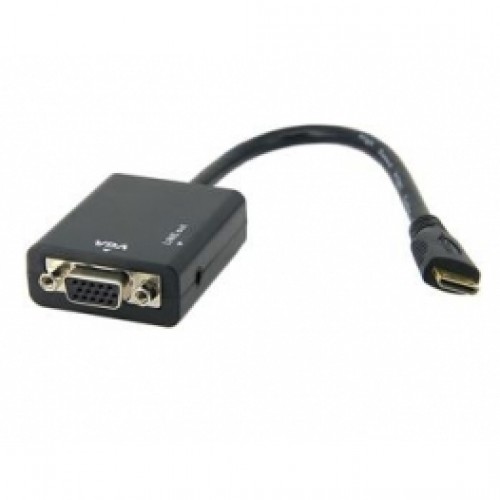 You will be taken to a mini «Sound» window. Once you are on the mini window, go to the «Playback» tab. Under the Playback tab, you will see all your playback devices listed, including your system’s integrated playback speakers and HDMI devices.
Step 3. Select the HDMI device you want to set as default. Now, click on «Set Default» and then «Ok». This will set your HDMI output device as the default HDMI device for your Windows 10 System.
4. Remove Recently Installed Software
Sometimes a recently installed program or software can also disrupt the HDMI connection. Yes, if you have recently installed a program, the program may be buggy, or simply incompatible with your system. Thus, installing that program might fix the issue of HDMI not working on Windows 10 PC.
Step 1. From the Home-screen of your Windows 10 System, go to the Search-panel on the Task Bar, and search for «Control Panel». Click on the Control Panel in the search result to go to the Control Panel window.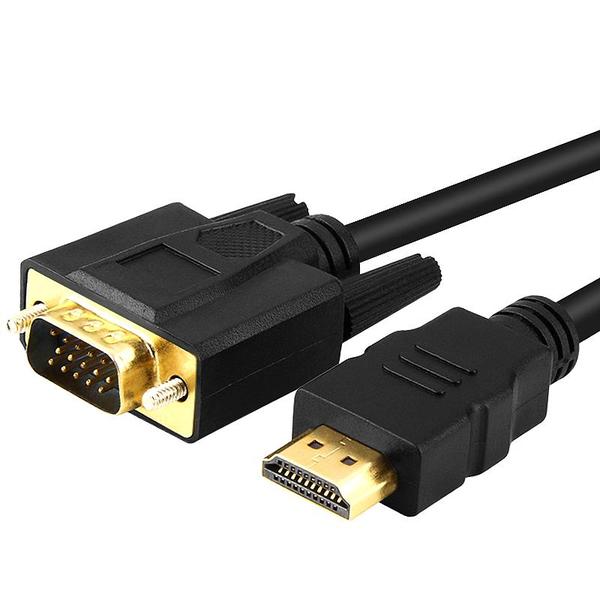
Step 2. On the Control Panel window look for the «Programs» option. Click on the «Uninstall a Program» option under the «Programs». This will take you to the list of all the programs on your Windows 10 system that you can uninstall.
Step 3. Now, under «Uninstall or Change a Program» on the «Programs and Features» window, look for the recently installed software. Right-click on the recently installed software and click on the «Uninstall» option that pops up.
Step 4. Once you have uninstalled all the recently installed software, exit the Programs and Features windows and Restart your computer to see if the problem of the HDMI port not working on the laptop is fixed or not.
5. Configure your Computer’s Display Settings
If the display setting of your Windows PC isn’t properly configured, then the content might fail to display on your HDMI device. Thus, try to configure the Display settings of your Windows system.
Once you are at the Home-screen of the Windows 10 PC on which your HDMI cable is not working, you need to use the shortcut key «Windows key + P». This will bring a panel of computer display settings in front of you. You are required to choose a Display setting among the listed once to configure your Device’s display correctly.
The Display settings you’ll see on the panel:
- PC Screen Only – Choose this option for a normal display condition. When you want your content to be displayed only your 1st Computer Display.
- Duplicate – Choose this option to Duplicate the display. When you want to display the same content on both the connected monitors, the one that’s your 1st Display monitor, and then another that’s connected via HDMI or other sources.
- Extended – Choose this option to extend the content between two or more Displays. When you want to display the one content extending from your 1st Display to all other connected Display via HDMI or other sources.
- Second Screen Only – Choose this option to display content on the Secondary Display. When you want to display the content only on the Secondary monitor and not the 1st monitor.
Choose the Display setting in a manner you want your Display to be, and see if it fixes the issue of HDMI not working on Windows 10.
6. Update or Reinstall your Graphics Driver
Graphic Drivers play a major role in displaying content. Any issue with the graphic drivers can mean the failure of the system in communicating the data between the HDMI device and your System. Thus, update or reinstall your Graphic drivers to fix the problem.
Step 1. From the Home-screen of your Windows 10 laptop, go to the search panel on the Task Bar and search for «Device Manager». Go on the «Device Manager» option with a thumbnail in the search results.
Step 2. On the Device Manager window, you’ll see all the output, input, and other necessary devices and components of your Windows 10 System listed.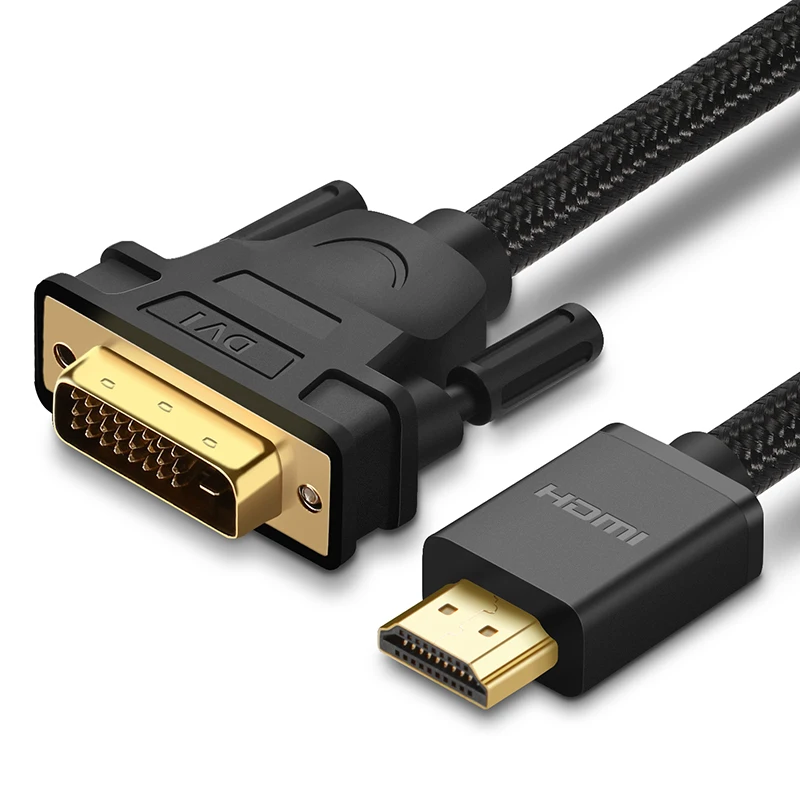
Step 3. To update the Graphics Drivers, go to the «Display Adapters» option and click on the Arrow to see your Graphics Device. Now, right-click on your Graphics Device and proceed with the «Update Drivers» option you’ll see. Follow the on-screen instructions to successfully update the Graphic drivers.
Note!
- If you have already had up-to-date Graphic drivers, in this case, you might try other options like Disable and Reenable the Drivers, or Uninstall and Reinstall the graphic drivers to fix the issue of HDMI cable not working on laptops.
- If updating the graphic drivers of your display doesn’t fix the issue of HDMI not working. Then you might follow the same process to update other drivers. You can try to update the Audio Input and Output Drivers, USB Drivers, Monitor Drivers, etc. Thus, if the issue is in another component than the Graphic card, it will be fixed with the driver update.
Bonus: What to Do If You Lost Data Due to This Problem?
Whenever a problem occurs in your System and you try to fix it, the biggest concern that remains is the possible loss of your data. Yes, any issue with your system can damage your data. Your important data once lost can be permanently lost if not recovered immediately. So, if such a case occurs, you need to take help from the Recoverit Data Recovery tool as quickly as possible.
Recoverit tool being one of the most powerful and feature-rich recovery tools in the market can help you to recover all of your lost data. With the help of Recoverit, all it takes is three steps and you’ll have all of your lost data recovered in its original quality.
Recoverit Data Recovery — The Best File Recovery Software
- Recovers your lost data in its 100% original form and quality.
- Recovers over 1000+ File Types.
- Recovers data from a crashed Windows through Bootable Recovery feature.
- Recovers data from all kinds of Storage Devices.
Download | WinDownload | Mac
Step 1. Select drive
Launch the Recoverit tool and wait for the «Drive Selection Window» to appear.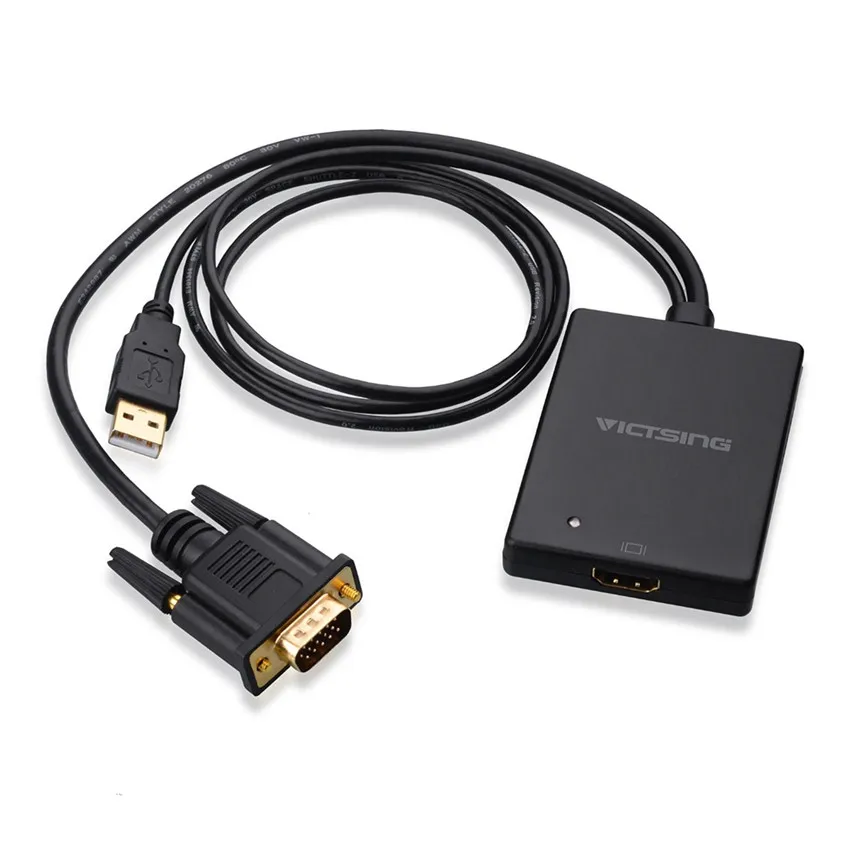 On the Drive selection window, from all the listed Drives and Location. Choose a Drive or Location from where you want to recover your lost data. Click «Start».
Step 2. Scanning the location
During the scanning, the scanned and recoverable files will start getting listed on a window that you’ll be directed to. You can filter, pause & resume, or configure your scanning with the help of various options available on the window.
Step 3. Preview the recovered data and recover it
Once the scanning is finished, you can recover all the listed files by selecting all. Or, you can use the search panel to search through the files and preview the files to find which ones you want to recover. After file selection, click on the «Recover» button, and then choose the desired secure location on your PC for the restoration of recovered files.
Following these three easy steps can recover all of your important data from any device or System.
Conclusion:
Don’t panic if your HDMI is not working with your laptop. You can simply try all the methods in this article one by one, and fix the HDMI not working issue. Keep trying the next method if one doesn’t work, and we are sure you’ll be able to fix your HDMI.
Download | WinDownload | Mac
How Many HDMI Ports Does a PC Have?
Generally, a computer comes with a host of ports to connect to external devices. A laptop may skip on specific ports, but a full-fledged stationary setup, or a desktop PC, is likely to offer you pretty much all the ports you need to roll and accomplish much more.
Most modern laptops do not come with the ports that were once standard. On the other hand, desktop PCs continue to offer pretty much all ports because there’s still lots of room on them to accommodate them all.
Needless to say, the HDMI port is the most ubiquitous of all the I/O ports.
That begs the question, how many HDMI ports does a PC (Windows or Mac) have?
Is an HDMI port a given with desktop and laptop computers? Can a workstation not have an HDMI port at all? And what are your options if your computing device doesn’t have an HDMI port or has just one?
Keep reading to find out the answers and more.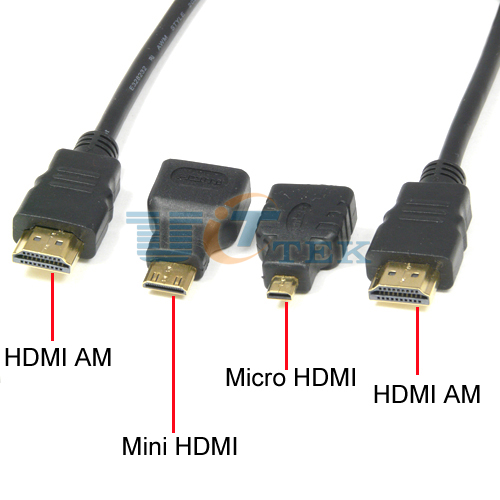
Quick Navigation
- Can a PC Have Multiple HDMI Ports?
- How Many HDMI Ports Does a PC Have?
- What Are the HDMI Ports on the PC For?
- PC HDMI Port Is Output-Only
- How Can I Tell How Many HDMI Ports I Have?
- Differentiating an HDMI Port From USB and DisplayPort
- Ascertaining the HDMI Version
- How Do I Add an HDMI Port to My PC?
- Conclusion
Can a PC Have Multiple HDMI Ports?
Yes, a PC can most certainly have multiple HDMI ports. Since HDMI is a standard digital interface, almost no PC comes without one.
A laptop computer is likely to have just one. However, a desktop PC would have more than a single port since there’s enough space for two or more HDMI ports on it, alongside a host of other connectors.
How Many HDMI Ports Does a PC Have?
As mentioned above, a PC can have anywhere between one or two ports.
More than two ports is not standard — be it a laptop or desktop computer.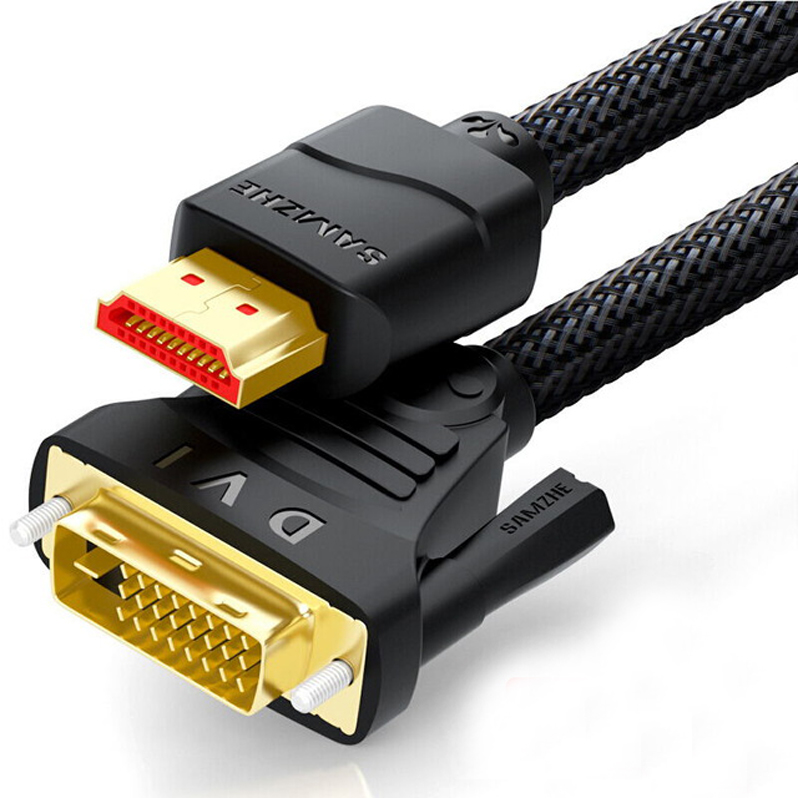 And a no-HDMI-port situation is also rare. The number of ports in a PC usually depends on a PC’s form factor and configuration.
A desktop PC usually has more than one.
The I/O (input-output) section would have at least one HDMI output port alongside other connectors — USB (Type A and/or C), DisplayPort, LAN, audio jacks, etc. There could be one more for the video card.
A laptop would rarely have more than one, especially the slim and light notebooks, which cut out as many ports as possible and push users to live the dongle life.
If the computer has dedicated graphics, it’s bound to have one HDMI port since it needs to output that raw graphics power to an external device, such as a monitor.
If your PC has no standalone graphics and needs one, use a separate GPU. It would lend you that HDMI port, besides all that raw power.
To get an overview of the ports a typical desktop PC would have, watch this video:
What are the ports on the back of my computer? HDMI, DVI, DisplayPort, USB, PS/2
Watch this video on YouTube
Before buying a GPU, make sure your computer is relatively new or has a capable CPU. If the primary device is more than three to five years old, the GPU will mismatch or not pair well with your archaic device.
Instead, upgrade your system to have an intelligent enough CPU to complement a powerful video card.
What Are the HDMI Ports on the PC For?
An HDMI port helps transmit audio-video signals between devices.
The HDMI ports on your PC help connect it to other devices such as an external monitor or a television. If you’d like to watch web content on a bigger screen, the HDMI port on your PC helps.
Your USB A port will not provide the video input a monitor needs. An audio-video port such as HDMI or DisplayPort is needed for that.
HDMI is arguably the most mainstream digital interface of the two, since many more devices sport HDMI ports than they do DP. Gaming consoles, for instance, only use HDMI.
Not to mention, HDMI transmits both audio and video signals, which other video ports such as DVI do not.
PC HDMI Port Is Output-Only
Kindly note, the HDMI port on your desktop or laptop computer is output-only.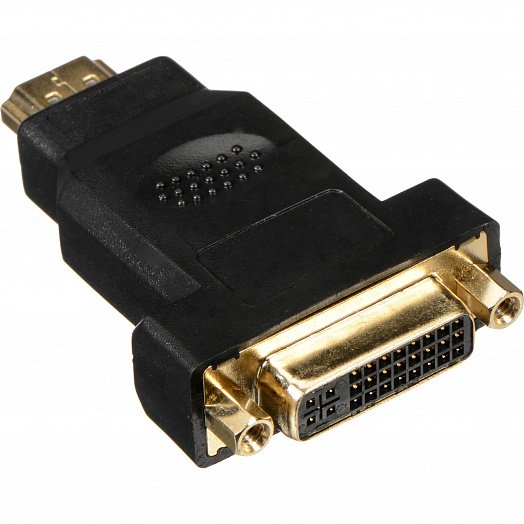 The HDMI port on your TV or monitor, on the other hand, takes in digital information.
Your laptop or desktop PC’s HDMI ports cannot work as output jacks, since they don’t have any input circuitry.
Laptops may have an HDMI input port, but those are rare and were found only on laptops launched during the late 2000s, perhaps. Those were the days when laptops were briefcase-like thick and came with a bevy of ports, including a slot to slide in your CDs/DVDs.
The HDMI input port is pretty much non-existent on current laptops, and it looks like it won’t be returning any time soon.
Other modern electronics to sport an HDMI output port are gaming consoles (connect to monitors, projectors, etc.), set-top boxes (connect to TVs), etc.
How Can I Tell How Many HDMI Ports I Have?
If you are new to computers, you may confuse an HDMI port for a USB port, as the two don’t look very different. And because the DisplayPort jack also doesn’t have a very distinct design, you may confuse it for an HDMI port as well.
Compared to the thick and heavy laptops of yore that came with pretty much all the ports you need, the existing slim and light notebooks have limited or only a handful of ports to boot.
Therefore, discerning an HDMI port from others should not be that difficult with them. But some people could still struggle due to the aforementioned similarities.
Differentiating an HDMI Port From USB and DisplayPort
A full-size HDMI port is marginally bigger than a regular USB port if you look closely. It also has a characteristic trapezium shape, with slot sides or opposing faces of unequal length.
Though there are various HDMI port configurations and sizes, the ones in computers are usually full-sized or mini-HDMI — the latter being a lot more recognizable from your DisplayPort and USB ports since it’s a much smaller size.
To learn more about HDMI port types, the cables that go with them, and how they are different from DisplayPort, watch this video:
Types of HDMI Cables — Standard, Micro, & Mini
Watch this video on YouTube
Ascertaining the HDMI Version
To help newbies, and for easy identification in general, the term “HDMI” is mentioned near the port on your computer.
If there are multiple HDMI ports and one is newer, the specific versions could also be marked. If the exact type is not mentioned on your PC, you may refer to the user manual or the product’s specifications online.
Since HDMI has not changed in size, shape, or design across all versions, you cannot just look at a port and say which one’s the newest.
Even if that were a possibility, only people who knew more than just a thing or two about HDMI would be able to draw that line.
Suppose you have a basic idea of what the various versions of HDMI bring to the table and your PC’s HDMI capabilities. In that case, you may be able to draw parallels and ascertain the HDMI kind on your device without perusing its manual.
For example, if the HDMI on your computer supports 4K at 60 Hz (maximum), it’s most likely HDMI 2.0 since v1.4 can transmit 4K video at only up to 30 Hz.
How Do I Add an HDMI Port to My PC?
If your computer does not have enough HDMI ports or has none at all, you can either upgrade your setup or use an HDMI splitter — with the latter being the more cost-effective option.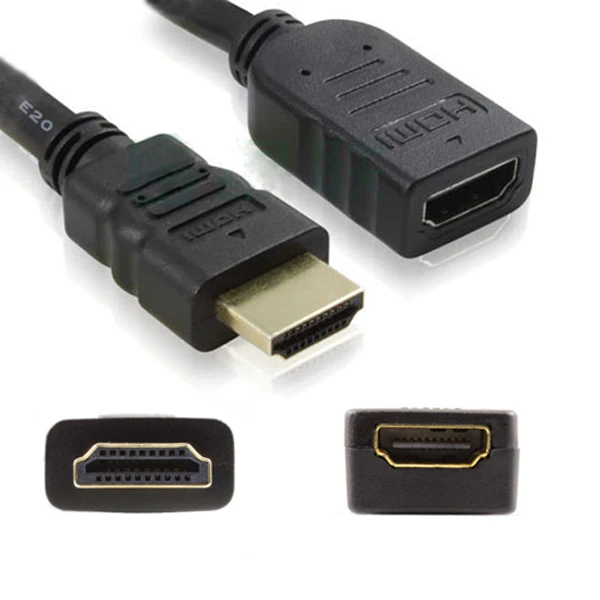
The HDMI adapter plugs into the HDMI port of your computer on one side, and the other side of the dongle would have two or more female ports to allow plugging in an HDMI cable.
Take a look at the following HDMI splitters:
-
- Enbuer 1×4 HDMI Splitter
- Orei Ultra-HD 4K 1×4 HDMI Splitter
- Orei 4K 1×2 HDMI Splitter
- J-Tech Digital JTD4KSP0108 1×8 HDMI Splitter
1×4 HDMI Splitter, 1 in 4 Out HDMI Splitter Audio Video Distributor Box Support 3D & 4K x 2K Compatible for HDTV, STB, DVD, PS3, Projector Etc
Orei UltraHD 4K @ 60 Hz 1 X 4 HDMI Splitter 1 in 4 Out 4 Port 4: 8-Bit — HDMI 2.0, HDCP 2.0, 18 Gbps, EDID, Duplicate / Mirror 4K Screens — UHDS-104
4K 1 in 2 Out HDMI Splitter by OREI — Ultra HD 4K @ 30 Hz 1×2 V. 1.4 HDCP, Power HDMI Supports 3D Full HD 1080P for Xbox, PS4 PS3 Fire Stick Blu Ray…
J-Tech Digital JTD4KSP0108 Premium Quality Ultra HD 4K 60HZ 1×8 HDMI Splitter High Resolutions Up To 4Kx2K 36-Bit Deep Color
Check Price on Amazon
Check Price on Amazon
Check Price on Amazon
Check Price on Amazon
1×4 HDMI Splitter, 1 in 4 Out HDMI Splitter Audio Video Distributor Box Support 3D & 4K x 2K Compatible for HDTV, STB, DVD, PS3, Projector Etc
Check Price on Amazon
Orei UltraHD 4K @ 60 Hz 1 X 4 HDMI Splitter 1 in 4 Out 4 Port 4: 8-Bit — HDMI 2. 0, HDCP 2.0, 18 Gbps, EDID, Duplicate / Mirror 4K Screens — UHDS-104
Check Price on Amazon
4K 1 in 2 Out HDMI Splitter by OREI — Ultra HD 4K @ 30 Hz 1×2 V. 1.4 HDCP, Power HDMI Supports 3D Full HD 1080P for Xbox, PS4 PS3 Fire Stick Blu Ray…
Check Price on Amazon
J-Tech Digital JTD4KSP0108 Premium Quality Ultra HD 4K 60HZ 1×8 HDMI Splitter High Resolutions Up To 4Kx2K 36-Bit Deep Color
Check Price on Amazon
Last update on 2022-10-01 / Affiliate links / Images from Amazon Product Advertising API.
Do not confuse between an HDMI splitter and a switch, as the latter has one output port and multiple input ports.
The Gana HDMI Switch 4K and Vilcome HDMI Switch , for instance, are HDMI switches even though they have “splitter” in their listing texts.
If your computer has a USB port, you may use a USB-to-HDMI adapter, such as the following:
- Anker USB C to HDMI Adapter
- StarTech USB 3.0 to Dual HDMI Adapter
- TWOPAN USB C to HDMI Multiport Adapter
- Mokai Start USB 3.
 0 to HDMI 5-in-1 Hub
Anker USB C to HDMI Adapter ([email protected]), 310 USB-C Adapter (4K HDMI), Aluminum Portable USB C Adapter, for MacBook Pro, MacBook Air, iPad Pro,…
StarTech.com USB 3.0 to Dual HDMI Adapter — 1x 4K 30Hz & 1x 1080p — External Video & Graphics Card — USB Type-A to HDMI Dual Monitor Display Adapter -…
TWOPAN USB C Hub HDMI 4K, 5-in-1 USB C to USB Hub 4 Ports, USB Hub Multiport Adapter, USB C Splitter for Laptop, New iMac 24″ 2021, MacBook Pro/Air,…
Check Price on Amazon
Check Price on Amazon
Check Price on Amazon
Check Price on Amazon
Anker USB C to HDMI Adapter ([email protected]), 310 USB-C Adapter (4K HDMI), Aluminum Portable USB C Adapter, for MacBook Pro, MacBook Air, iPad Pro,…
Check Price on Amazon
StarTech.com USB 3.0 to Dual HDMI Adapter — 1x 4K 30Hz & 1x 1080p — External Video & Graphics Card — USB Type-A to HDMI Dual Monitor Display Adapter -…
Check Price on Amazon
TWOPAN USB C Hub HDMI 4K, 5-in-1 USB C to USB Hub 4 Ports, USB Hub Multiport Adapter, USB C Splitter for Laptop, New iMac 24″ 2021, MacBook Pro/Air,.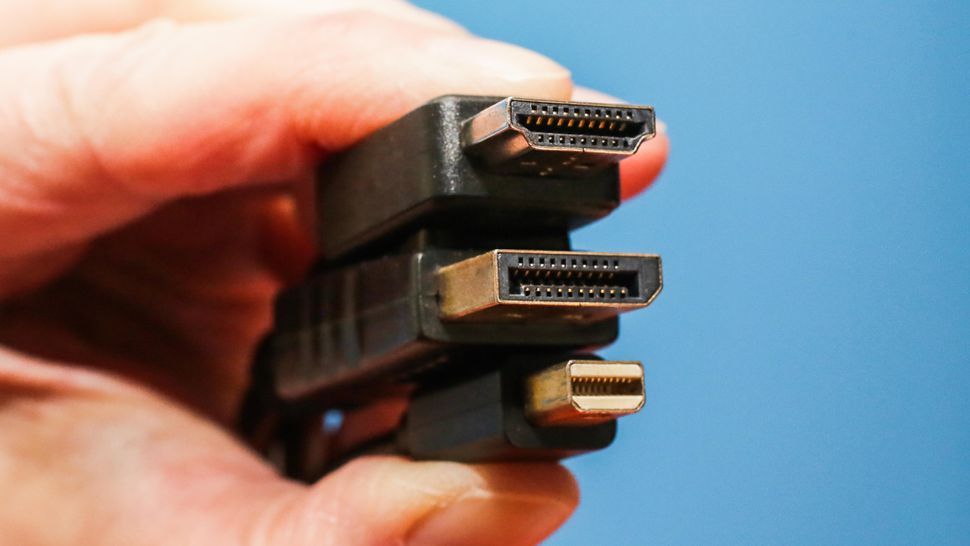 ..
..
Check Price on Amazon
Check Price on Amazon
Last update on 2022-10-01 / Affiliate links / Images from Amazon Product Advertising API.
The USB-to-HDMI adapters will also help add HDMI capabilities to laptops devoid of DisplayPort and HDMI ports.
If your computer uses only integrated graphics and wants something more powerful and discrete, use an external graphics card. The video card shall also provide you with an HDMI port (as mentioned earlier).
Also, if your device has a VGA port, which transmits analog signals to an external monitor, you may use a VGA-to-HDMI adapter — for instance, the Vention VGA to HDMI Adapter , to make the signal digital.
There is also the option to convert your computer’s VGA port into HDMI. But that’s a long and difficult path that will require enlisting the services of an expert. It is also not recommended with the much easier alternatives mentioned above.
Conclusion
HDMI ports are hard to not find on almost any kind of computer — of course, excluding tablet PCs and smartphones.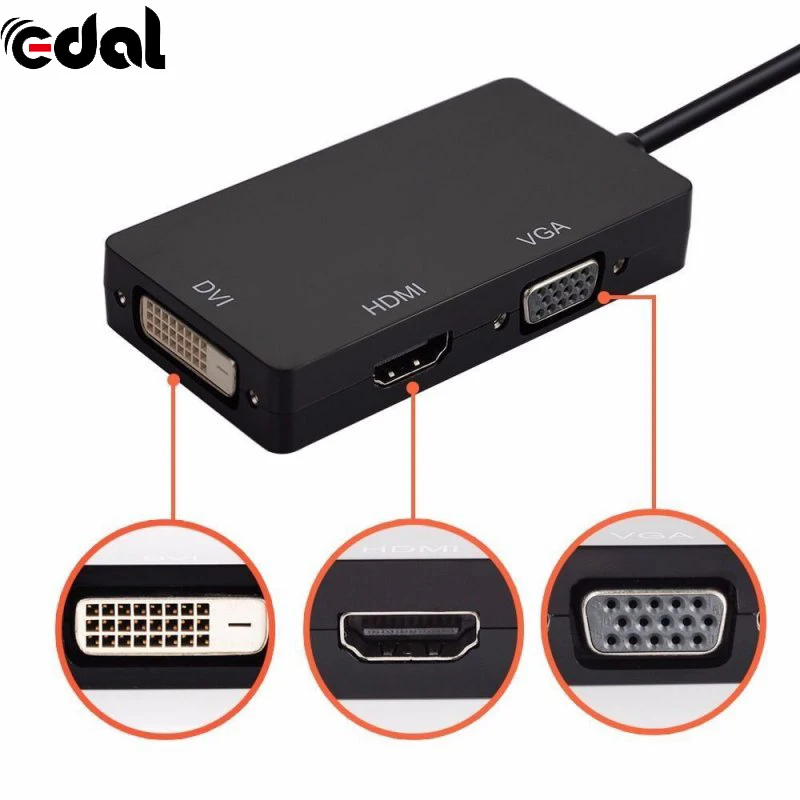 They use micro-HDMI instead.
And even if your device doesn’t have one, adding HDMI capabilities to the machine is as straightforward as hooking it up with an adapter or dongle-like device.
Besides being “essential”, HDMI ports are also extremely robust and capable of delivering more speed or bandwidth than most other digital interfaces.
That could be one of the reasons Apple decided to bring back the legendary audio-video interface with its 2021 MacBook line-up, which was conspicuously missing on their laptops since 2016.
If you are not planning to buy the latest Apple computers or have a Windows PC (old or new) that doesn’t sport an HDMI port or have enough of them, an HDMI adapter is always there to save your boat.
Catherine Tramell
Catherine Tramell has been covering technology as a freelance writer for over a decade. She has been writing for Pointer Clicker for over a year, further expanding her expertise as a tech columnist. Catherine likes spending time with her family and friends and her pastimes are reading books and news articles.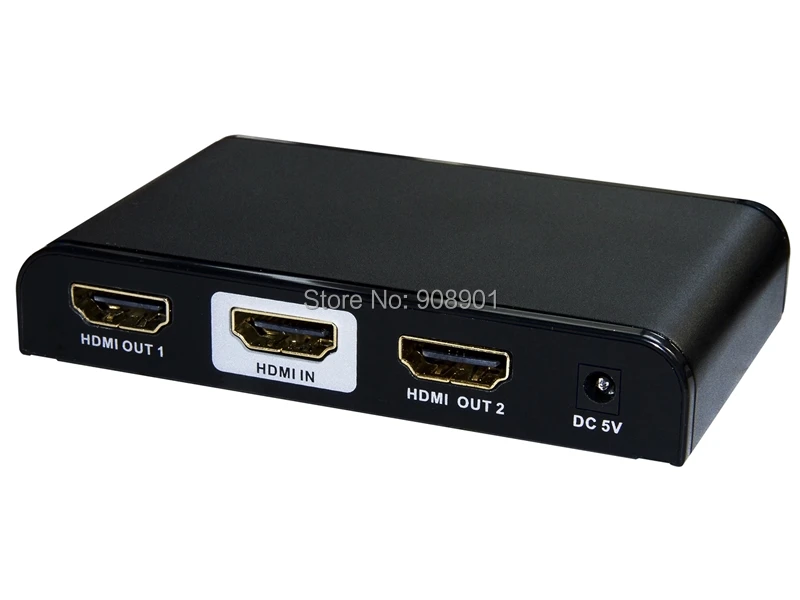
Hooking your PC up to an HDTV with a USB to HDMI Adapter/Converter
What is HDMI?
With the advent of the so called Golden Age of Technology, peripherals are also undergoing a major overhaul. The big guns of the technology industry like Sony, Hitachi, Toshiba, Thompson and Philips created the HDMI or High Definition Multimedia Interface. California saw the Next Big Thing in Media technology for the first time in 2003 where an Authorized Testing Center was set up for the testing of HDMI devices. Japan followed the next year and then there was no looking back. HDMI is a compact audio/video interface for transferring uncompressed video data and compressed/uncompressed digital audio data from an HDMI compliant device to a compatible digital audio device, computer monitor, video projector or HDTV. That is what an expert is going to tell you. I know it is full of jargon and you want to throw the jargon right into the trash. Hang around and I’ll cover some of the benefits of HDMI and the great uses of a USB to HDMI Converter.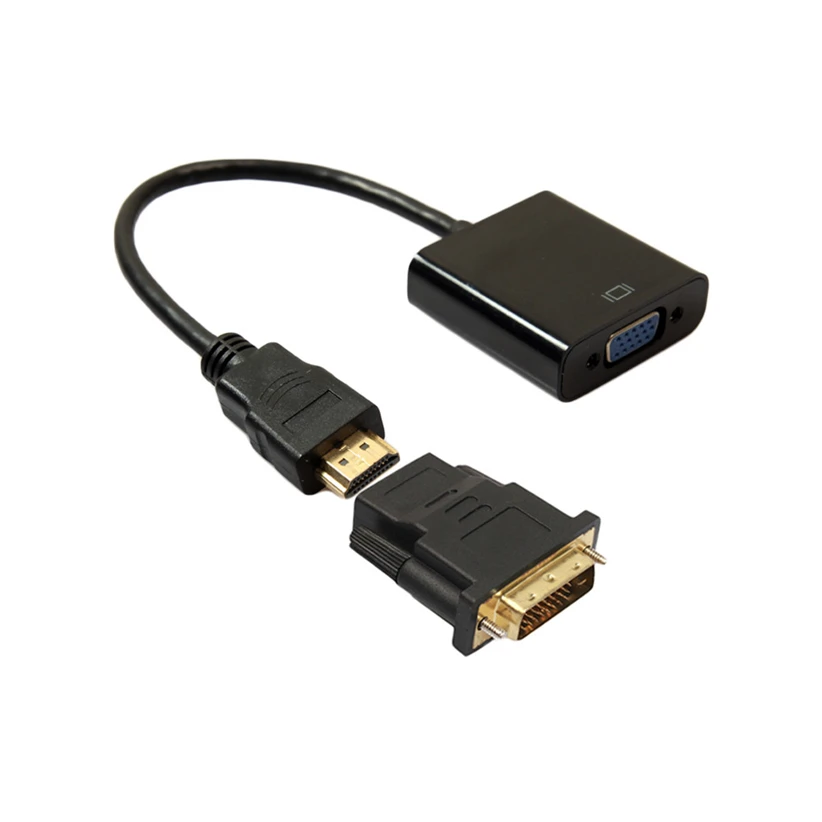
What places HDMI in a league of its own?
HDMI is the most prominent connection in consumer-level audio and video devices. Your LED monitor, HD television, or Blu-Ray players all have an HDMI output. The HDMI specification enables your devices to pass uncompressed digital audio/video signals allowing your HDTV to produce brilliant colors with jaw dropping clarity.
- Offers superior audio and video quality
- Only a single cable is required per device which will cut downon that tangled mess behind most home theater systems
- A humungous decrese in the number of frames that is lost during gtransmission, give you an uninterrupted, crystal clear display
In addition to being a great fit for your HD Video and Home Audio cravings, HDMI is extremely versatile. It is highly flexible because it supports all the enhanced high definition formats such as 720p, 1080i and even 1080p. HDMI does not discriminate and also serves the 480p definition format and standard definition formats like NTSC and PAL.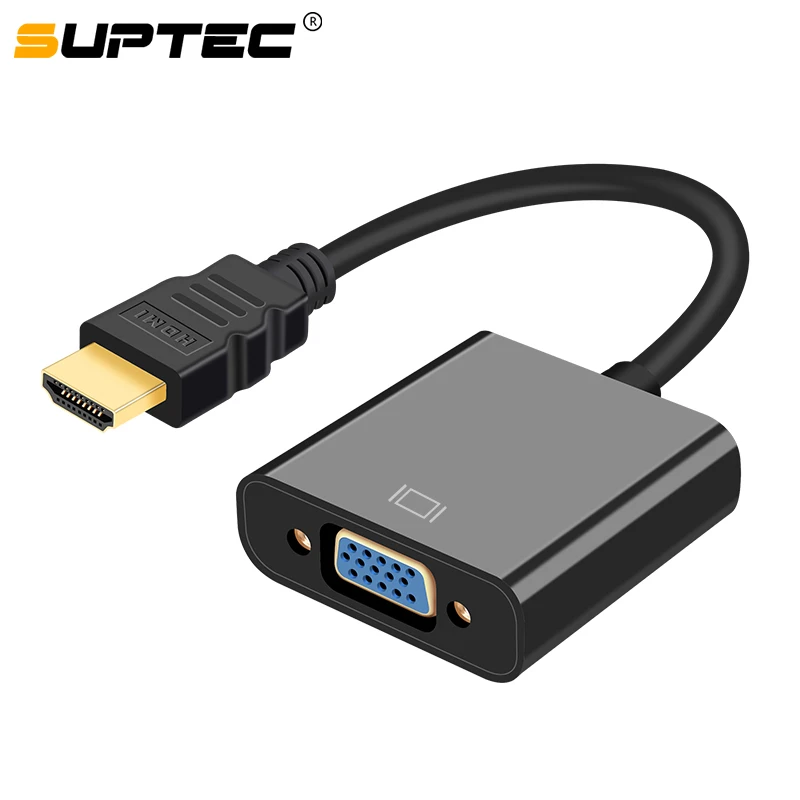 Let us note some striking and game changing differences between the USB port that you are harboring at the moment and the future HDMI port that you are contemplating about.
- Take a look at the part of your pen drive that connects to your computer. You will see 4 golden lines running through the column. Those are the pins. So a USB port has only 4 pins. An HDMI cable has a total of 19 pins. This significantly increases the transfer rate which is my next point of difference.
- HDMI transfers data at the speed of 10.2 gigabits per second. The standard USB port transfers the load at a menial speed of 480 megabits per second. That is less than half of what an HDMI is capable of.
So, in theory an HDMI port can act as a USB port but a USB port can never work like an HDMI one.
Why get a USB to HDMI Converter?
All this is more than enough to highlight the importance of an HDMI support. You might be thinking of getting an HDMI supported monitor right now isn’t it? Maybe for multi panel gaming or to splurge in a large video output display.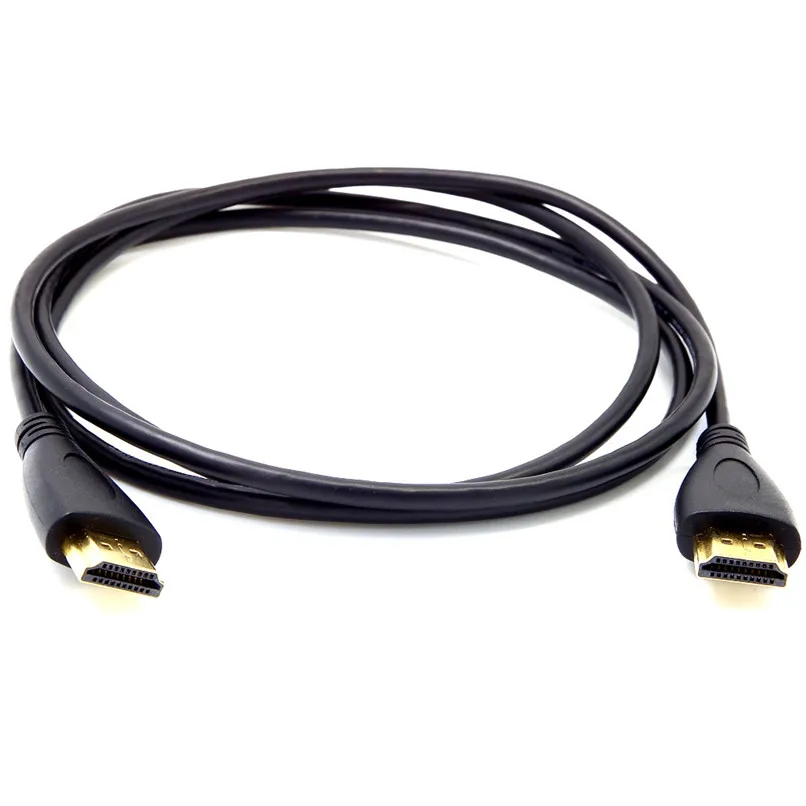 But just wait and follow me to the end of the article. There is still one problem left. Like every technology the good things take time to hit the market. There are still some machines out there which lack an HDMI output. Probably if you have an NVidia Graphic card or perhaps an ATI GPU then there might be a chance of your system having HDMI support. Otherwise some computers don’t have this life changing facility. But every problem has a solution, right? And so does this minor quibble. There are a plethora of devices on the market that allow you to hook up your aging PC/Laptop to your brand new HDTV. All you need is a single USB port, which there are usually many available on most computers. Look at the front and at the back. There should be an average of 4 USB ports. With a USB to HDMI Converter you will not have to worry about the lack of an HDMI port in your system. With the USB to HDMI Converter you can run any HDMI device with your USB port. Thus, this universality will add the HDMI support to any existing computer.
Using the USB to HDMI Adapter
Setting up the adapter is a breeze. All you have to do is install the driver software that is provided so that your computer can interact with the USB to HDMI Converter. After that, simply take the HDMI cable from the USB to HDMI Adapter and hook it up to your HDTV. Your computer will recognize the adapter and the audio or video device that is attached to it. Considering that the correct output has been selected in the output device, the television or home theatre will be up and running in a jiffy. Yes, it is as simple as that.
Introducing the Vivid AV™ USB to HDMI Adapter with Audio
VividAV USB to HDMI Converter The Vivid AV™ USB to HDMI Adapter is an incredibly simple and effective way to add an additional monitor to your laptop, netbook or desktop computer without the need to upgrade the video cards or software. With the ability to view two separate things on each monitor, multitasking has never been more efficient; view notes from two different emails or edit that huge spreadsheet by expanding it over two monitors. Although the urge to work is overwhelming; this USB to HDMI Adapter can be used for play as well. Hook your computer up to your favorite HDTV and view your favorite pictures and videos like you’ve never seen them before; on the big screen. Crystal Clear HD images and video will come to life when viewed in 1080p on an HDTV. This simple box uses a built in USB cable and one HDMI cable to deliver the latest HD content right from your PC, Laptop or Mac to your TV. 2 Channel audio ensures that no extra cables will be needed for audio support.
How to troubleshoot HDMI connection problems
The HDMI Handshake
HDMI is now the main type of connection used in home theater setups that include HDTVs, video projectors, Blu-ray Disc players, home theater receivers, network media players, and even cable/satellite boxes. One purpose of HDMI is to simplify connecting all your components together by using one cable for both audio and video.
However, there is another purpose, copyright-protection (known as HDCP).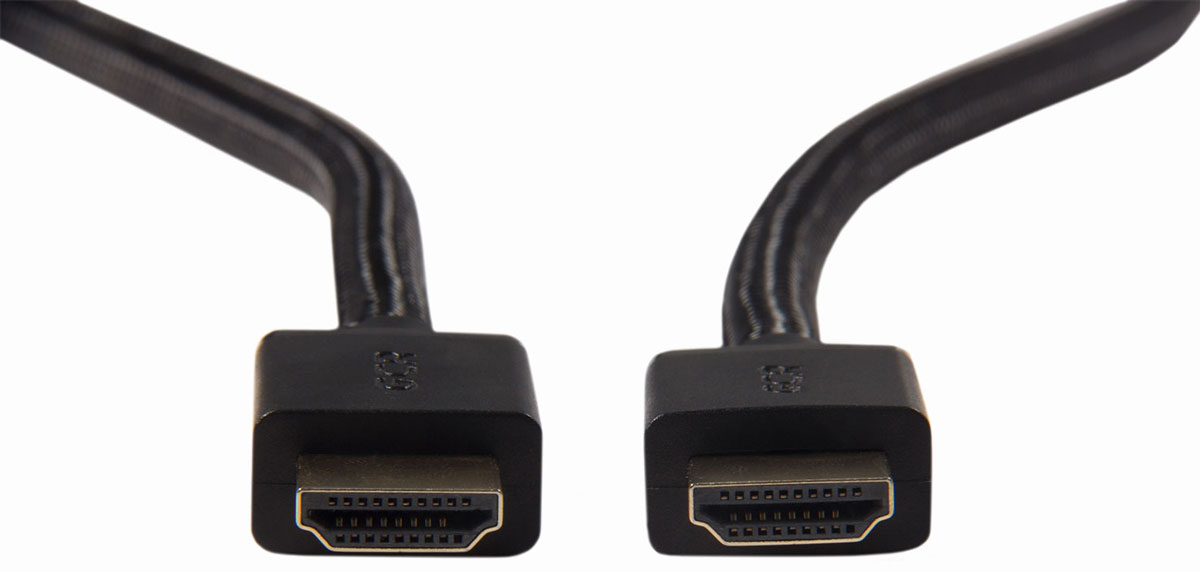 High-bandwidth Digital Copyright Protection requires that all HDMI connected components be able to recognize and communicate with each other. This is referred to as establishing an “HDMI handshake”. If the “handshake” doesn’t work or HDCP compliance is not met, the HDCP encryption that is embedded in the HDMI signal is not being recognized properly by one, or more, of the connected components. This most often results in not being able to see anything on the display or a pink hue across the entire image.
Before frustration sets in, there are some things you can do yourself to remedy the issue.
HDMI Troubleshooting Tips
- Check Your HDMI Cable Connections: HDMI connections don’t fit as tight as component or composite video connections and can slip out sometimes if equipment is moved slightly. Please ensure that all HDMI connections are seated firmly and in the correct orientation of their corresponding HDMI ports.
- Try a Different Power Up Sequence for Your Components: In other words, if you have a habit of turning on your TV first, then your Blu-ray Disc player, or other HDMI source component, try the reverse power up sequence and see if that works.

Also, if you have a Blu-ray Disc player, or other component, connected through a home theater receiver and then to the TV – try different startup combinations and see if that works. If you find a sequence that works, remember it. Of course, make sure when everything is turned on, and that you have selected the correct input on your TV that the Blu-ray Disc player, or other source component, is connected to.
However, if changing the power up sequence of your TV and connected components doesn’t seem to do the trick, with both the TV and source component on, just try switching to another input on the TV and then switch back to HDMI input and to see if the signal locks in correctly.
- Check Your Source Device’s Video Resolution & Refresh Rate Output Setting: If your Blu-ray Disc player or other HDMI source device has a video resolution output setting menu, check to see if it is set to AUTO. If so, reset it to match the native resolution of your TV or video projector (such as 720por 1080p) and see if that provides a more stable result.
 If your source device has the option for adjusting the refresh rate of the output signal, ensure that your source device is outputting a refresh rate supported by your display (30Hz or 60Hz).
 - Use the Process of Elimination: If you have a Blu-ray Disc player (or other HDMI source) connected through a home theater receiver to a TV and you still don’t get anything to show up your TV screen regardless of the power up sequence you try, use the process of elimination. Connect the Blu-ray Disc (or other HDMI source) directly to the TV. This bypasses the home theater receiver. See if that does the trick. If so, the home theater receiver, or the HDMI source component/home theater receiver combination is most likely the culprit.
What you can do now is keep the HDMI source connected directly to your TV and then make a separate audio connection from your source device (such as a Blu-ray Disc player) to your home theater receiver. This is not necessarily the most efficient connection method, but you can still use the separate video and audio connection workaround as the best option for the time being, or as a permanent solution if you prefer.
On the other hand, if you find that none of the above solutions work or work consistently – check to see if there are any announced firmware updates for your HDMI source and home theater receiver (or even your TV) that may resolve this issue. Also check to see there have been complaints filed or posted by other users regarding HDMI handshake issues with your components.
Connecting Your PC/Laptop to a TV Using HDMI
With more consumers using their PC or Laptop as a home theater source component, problems can arise when trying to connect an HDMI-equipped PC/Laptop to an HDMI-equipped TV. First, make sure that you go into your PC/Laptop settings and designate HDMI as the default output connection for both video and audio. If you can’t get an image from your laptop to show up on your TV screen, try the following:
- Try booting up your PC/Laptop with the HDMI cable connected to a TV that is on.
- You can try booting up the PC/Laptop while the TV is off and then turn on the TV.

- If the above options don’t work, try booting up the PC/Laptop first, and, with the TV on, connect the HDMI cable to both the PC/Laptop and TV.
- Ensure that your PC’s output resolution and refresh rate are supported by your display (1920 x 1080, 60Hz is a good starting point)
- Verify your display mode. “Windows Key + ‘P’ key” will cycle through your different display modes. Try duplicate mode to mirror your pc monitor or extended mode to treat your TV as a second display.
Final Take
In the vast majority of cases, you won’t encounter any problems that are the fault of HDMI connections. However, there are instances where you can run into a problem. If you do, don’t panic, before you make any phone calls, or pack everything up and return to the store upset, try the above suggestions. If none of these solutions work, then proceed to contact the J-Tech Digital Support Team. Only after exhausting all of the options you can try yourself should you call a tech or return to the store.
For further troubleshooting and to better understand how your equipment is behaving, consider using these helpful J-Tech Digital tools.
J-Tech Digital JTECH-EDIDM4 4K EDID Emulator –
If you’re able to get a video signal from your source device to your display, but is the incorrect resolution, consider using the JTECH-EDIDM4 EDID emulator. The EDIDM4 connects between your source device and display. The EDIDM4 will provide your source device customized EDID information (resolution & refresh rate) so that you may optimize the signal to your display. Please note that your cabling and connected devices will need to support your desired resolution and refresh rate.
J-Tech Digital JTECH-18GA HDMI 2.0 Signal Generator & Analyzer –
Can’t figure out exactly why your setup isn’t working? Narrow down the possible culprits with the JTECH-18GA signal generator. Generate an HDMI AV signal with custom resolution, refresh rates, HDR setting and color modes. A great tool for determining your devices capabilities and diagnosing system issues.
Original Article by:
By Robert Silva
Home Theater Expert
How to connect a TV to a computer
You might think that connecting a computer to a TV is easy enough: you just need to take an HDMI cable and connect it to the TV, right? But what if your computer doesn’t have an HDMI port? This guide will show you how to connect your Windows 10 PC to your TV.
HDMI
All modern desktop monitors and TVs are equipped with HDMI ports. Often you can find several ports at once on the back or side panel. Most desktops and many laptops also offer this connection option, making it one of the easiest ways to connect a computer to a TV, especially since both video and audio signals are carried with just one cable.
Two smaller versions of this interface, Mini HDMI and Micro HDMI, are also in use today.
To connect two devices, connect one end of the HDMI male to male cable to the port on the TV and the other end to the computer. Windows 10 recognizes the TV as an external display, which can be verified by right-clicking on the desktop and selecting Display Settings from the pop-up menu.
To display the Windows 10 desktop on your TV, grab the remote and cycle through connections until your PC’s desktop appears.
If the image is distorted, do the following:
Step 1: Right-click on the desktop and select «Display Options» from the pop-up menu.
Step 2: Select your TV from the diagram. The main screen should show «1» and the TV should show «2» or more if more than two displays are connected.
Here you can change the screen resolution, orientation and scaling. You can change the refresh rate if necessary. Here’s how to do it:
Step 1: In the Display panel with your TV selected, scroll down and click on Advanced Display Options.
Step 2: In the next window, click «Display Adapter Properties #» — change the symbol to the assigned TV number.
Step 3: In the pop-up window, click the «List All Modes» button.
Step 4: Select a refresh rate and click OK.
Display Port
Most desktop PCs with dedicated graphics cards have at least one DisplayPort connector, while laptops have fewer. Some laptops have a modified mini-DisplayPort adapter. Unfortunately, TVs don’t usually have DisplayPort connectors — they’re mostly designed for desktop monitors.
In this case, a DisplayPort male to HDMI male cable is required, or you will need an adapter with a DisplayPort male and HDMI jack. In both cases, the computer is connected to the TV in the same way as via HDMI.
Windows 10 should detect the TV as an external display and offer it as extended or duplicated depending on your preferences.
USB-C
Modern computers that do not have an HDMI or DisplayPort connector often have an alternative connection option in the form of USB-C.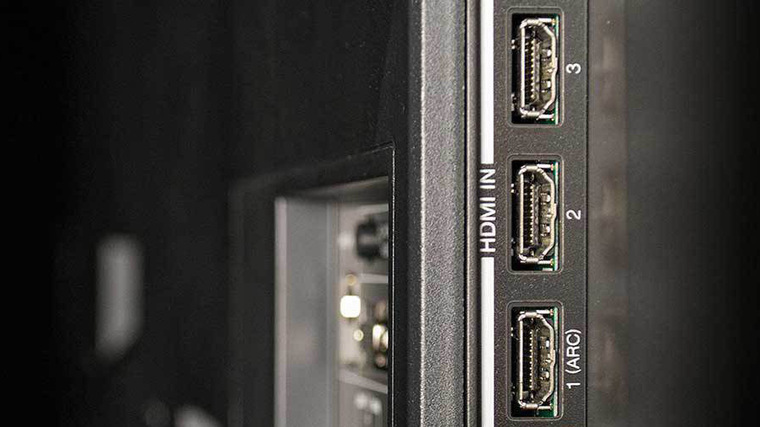 Keep in mind that not all USB-C ports support video output — it’s just an interface that promises no technology other than USB 3.2 connectivity. Before assuming a USB-C port supports HDMI and DisplayPort output, check your computer’s specifications.
In this case, a plug-in cable is required — a plug with USB-C on one end and HDMI on the other. A USB-C adapter with a USB-C plug and an HDMI socket will also work.
As with a standard HDMI connection, Windows 10 should recognize the TV as an external display.
USB-A
This port was never really intended for video transmission. Unlike DisplayPort and HDMI, it requires third-party DisplayLink drivers. This method works best with the blue USB ports (USB 3.0, USB 3.1) shown in the image above due to their speed. However, the DisplayLink system requirements also list older non-blue USB 2.0 connections that are slower.
This method requires an adapter or docking station with an HDMI port, as shown in the image above on Mokai Start. Most of them automatically install DisplayLink drivers when they are connected to a computer’s USB-A port. However, these drivers may be out of date, so you must download and install the latest version directly from DisplayLink.
After you connect the adapter or dock and install the driver, Windows 10 should detect the TV. Please be aware that video quality may vary as PC depends on third party software.
VGA and DVI
VGA, short for Video Graphics Adapter (video adapter), first appeared in 1987 and supports only analog video signals. It cannot boast of versatility, but in some it will be useful. Use a male-to-male cable with VGA on one end and HDMI on the other, or use an adapter with VGA male and HDMI female. Mini-VGA is the smaller variant.
Digital Visual Interface, abbr. DVI — (Digital Video Interface) is a more recent development and is still used in some exceptional cases. There are seven variants of this interface: DVI-I Single Link, DVI-I Dual Link, DVI-A, DVI-D Single Link, DVI-D Dual Link, Mini-DVI, and Micro-DVI.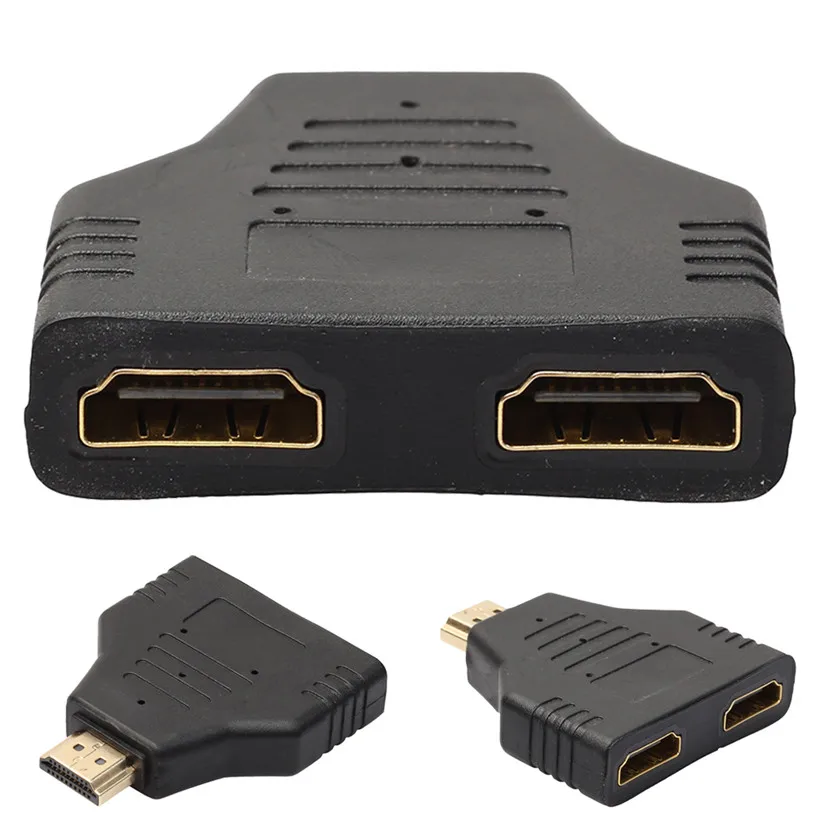 This variety makes it difficult to find the right adapter, so check your PC’s specs to determine the right cable or adapter before you buy.
Miracast
Make sure your TV is turned on, compatible, and set to receive broadcast from PC. For example, on LG Smart TVs running webOS, owners must first download the Device Connector app and select the PC option, followed by Screen Share and Miracast.
This method will not work if any device is connected to a wired network.
Step 1: Click the Notifications icon next to the system clock. You will see the Action Center.
Step 2: If only four tiles are visible, click Expand at the bottom.
Step 3: Click the Project tile.
Step 4: From the drop-down menu that appears on the right, select «Connect to a wireless display».
Step 5: Select a compatible TV from the list.
Step 6: Follow the instructions on the TV screen, if any.
Step 7: To end the broadcast, click «Disconnect» in the toolbar at the top of the main PC screen.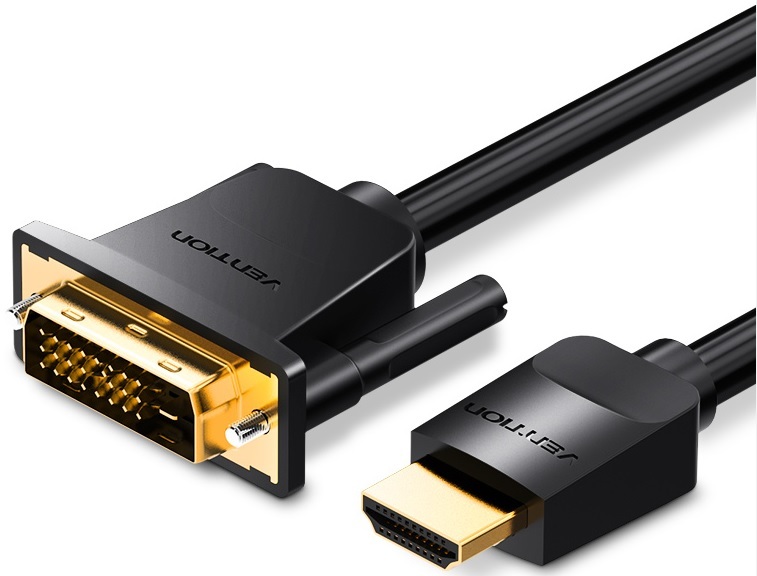
Note that this toolbar has a settings icon. Click it to open the settings for three optimization options: for games, for work, and for watching videos. The first mode reduces latency to achieve optimal frame rates. Video view mode increases latency to reduce buffering. The working mode is the middle between the other two modes.
To change the broadcast mode, do the following:
Step 1: Right-click the desktop and select Display Settings from the pop-up menu.
Step 2: The Settings app will appear on the screen. Select a TV in the diagram.
Step 3: Scroll down to «Multiple Displays» and click the down arrow to expand the selection.
Step 4: Choose a mode: Expand, Duplicate, Show on TV only, or Disable.
Resolution, scaling, etc. can be adjusted just like any other display.
How to connect a TV to a computer via HDMI
I decided to prepare a separate article in which I will tell in detail and show with an example how to connect a TV to a regular desktop computer using an HDMI cable.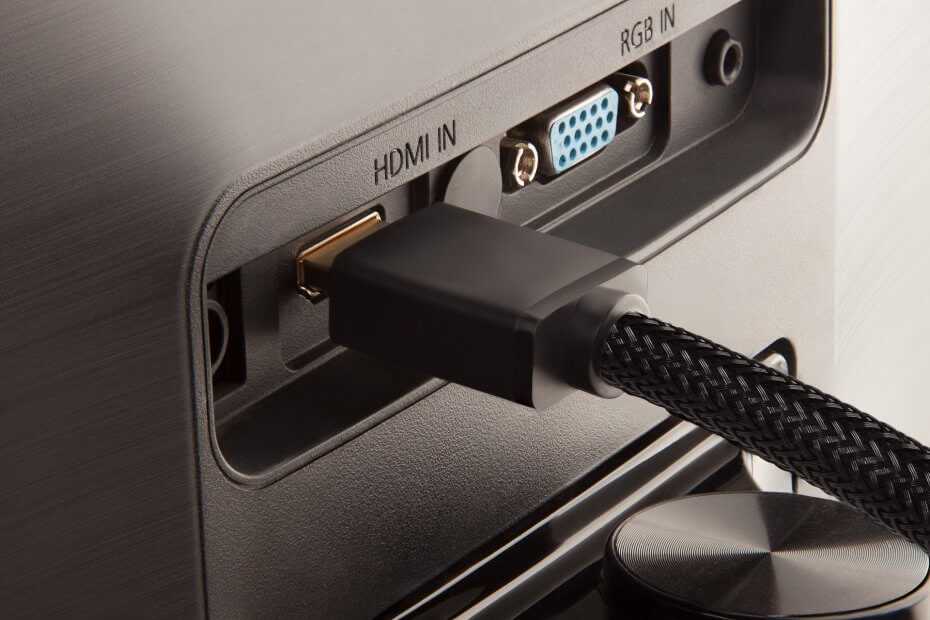 The topic is relevant, and I often get asked about it. In fact, nothing is difficult. But there are some nuances that we will try to understand in the framework of this article.
Almost every, not even the newest TV has at least one HDMI input. And in the computer, on the back panel of the system unit there is an HDMI output. This means that we can easily connect a PC to a TV using a regular HDMI cable, which you can probably buy in every digital equipment store.
Why connect them? Everything is very simple. TV can work as a monitor. That is, you can display an image from a computer on a TV screen. The TV can be used as the main monitor or as a second monitor. This means that the image from the PC will be displayed on the screen of a conventional monitor and TV at the same time. Or just on TV. It already depends on your tasks. It should be noted that not only the image is output via HDMI, but also the sound.
I myself, and other users, most often connect a PC to a TV to watch movies on the big screen, or to play games. You can also connect a gamepad to your computer and play on the big screen. Some people use TVs instead of monitors. They work with documents, surf the Internet, etc. But it seems to me that this is not very convenient. Yes, and the eyes get tired faster. For constant work at the computer, it is better to use a monitor. A TV to connect to watch movies, photos, games, etc.
The connection process will be the same for TVs from different manufacturers: LG, Samsung, Sony, Philips, Panasonic, Ergo, Hitachi, etc. Just like there will be no big differences in Windows settings. Yes, the settings in Windows 10, Windows 8, Windows 7 are slightly different, but not critical. I’ll show you everything.
If you have a laptop, then you can do everything according to this article: how to connect a laptop to a TV via HDMI.
Preparation: check HDMI ports on TV and computer, select cable
First we need to check if our devices have the required ports. We also need an HDMI cable to connect.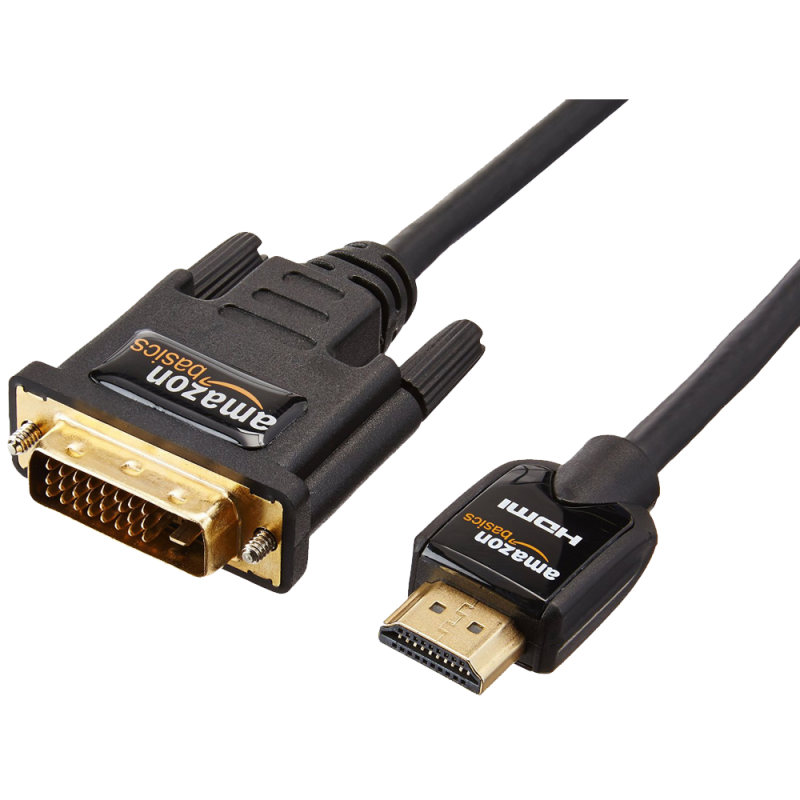 Let’s look at everything in more detail. If you have everything, then you can go directly to the connection and configuration.
- The HDMI input on the TV is usually located on the side face, or on the back panel (sometimes here and there). They must be signed and numbered. They look like this (Philips on the left, LG on the right):
If your TV has at least one such port, then everything will work out. - Next, take a look at the back panel of your computer (I’ll enter the system unit). There we need to find the HDMI output. HDMI can be either on the motherboard (integrated graphics on newer boards) or on the video card. But, even if you have this port on the motherboard (as I have in the photo below), and there is a separate discrete video card with HDMI output, then the TV needs to be connected to the video card.
I took a photo of the system unit in a horizontal position. In my case, the TV can be connected to the HDMI output on the video card. If your computer does not have an HDMI output, but has DVI, then you can buy a DVI-HDMI adapter.And if there is only the old VGA, then you can also use a VGA-HDMI adapter, but then the sound will not be output to the TV, since VGA is not a digital output. If you want to connect a TV and a monitor to your computer at the same time, you will need either two HDMI or HDMI and DVI. We will also need the appropriate cables.
- HDMI cable must be the length we need. If I’m not mistaken, they are up to 20 meters. If you do not have a separate cable, then you can use the one with which the monitor is connected. If you have it connected via HDMI. I have this cable:
The most common, inexpensive cable.
If you have ports on both devices and a cable, you can connect.
Connect TV to computer using HDMI cable
Simply take a cable, plug it into the HDMI output on your computer and the HDMI input on your TV.
Important! Devices need to be connected when they are turned off and the power is off. There is a risk of burning ports. There are such cases.
If you connect the TV as a monitor, that is, the only screen, then the circuit will look something like this:
Also, let’s look at another case when a TV and a monitor are connected at the same time.
TV set as second monitor for PC
The monitor can also be connected via HDMI (as I have in the photo below), via DVI, or even via VGA. As a result, two screens will be connected to the PC.
We figured out the connection. Most likely, in your case there will already be a system unit with a monitor connected to it. And all you need to do is connect a TV to it.
Select HDMI input as signal source in TV settings
Most often, after connecting and turning on devices, there is no image on the TV. There will be an inscription like «No signal», «No signal source selected» or something like that. On the TV, you need to select the signal source. The port where we connected the cable.
To do this, your TV remote must have a separate «SOURCES», or «INPUT» button.
After clicking on it, a menu should open in which you can select the signal source. You can see which port on the TV you connected the cable to (each port has its own number). Or just select an active source. The process itself may differ depending on the TV. I have an old LG.
The picture from the computer should appear on the TV. This will be either a copy of what is displayed on the monitor (if any), or a blank desktop (expand).
An article that may come in handy at this stage: why there is no image on the TV from a computer (laptop) via an HDMI cable.
The main thing is that the picture from the computer appeared on the TV screen. Further, in the Windows settings, we can already change the image output mode. There are several of them.
Setting up an HDMI-connected TV in Windows
The screen resolution is adjusted automatically in most cases. So in the Windows settings, we can only change the mode of operation with multiple displays. This is only relevant when a monitor and TV are connected to the PC. If there is only one display, then these settings are not needed.
The easiest way to change the mode in Windows 10, Windows 8 and Windows 7 is the keyboard shortcut Win + P .
After clicking on them, the «Project» menu will appear. In ten it looks like this:
In Windows 7:
Let’s look at each mode in more detail.
- Computer screen only (turn off the projector) — in this mode, the image will be on the monitor only.
- Duplicate (duplicate) — will be the same image on the screen of the monitor and TV. There is one caveat in this mode. This is the screen resolution. For example, if you, like in my case, have a monitor resolution of 1920×1080, and a TV of 1366×768, then 1366×768 will be set on the monitor and the picture will not be very good. And if the monitor is 1920×1080 and the TV is also 1920×1080, then the picture will be clear on both screens.
- Extend — The desktop will be extended to a second screen. In our case, this is a TV.
- Second screen only (projector only) is when the image from the computer will be displayed only on the TV. The monitor is disabled.
In most cases, these settings are sufficient.
Additional screen parameters
To open them, just right-click on an empty area of the desktop. In Windows 10, you need to select «Display Settings», and in Windows 7 — «Screen Resolution».
A settings window will open where you can see how many screens are connected to the computer.
You can also define them (by clicking on the «Define» button), change the resolution of each screen and the mode of operation (which I talked about above).
In Windows 7, the settings of a TV connected via HDMI look like this:
We figured out how to set up the image on the computer.
What should I do if the sound from the computer does not go to the TV?
This happens very often. The picture appeared on the TV, but there was no sound. It does not exist at all, or it sounds from the speaker system connected to the computer. If you want the sound to go through the TV, then first check if the sound on the TV is muted or twisted.
Next you need to go to «Playback devices».
Your TV must be in the device list. You need to right-click on it and set «Use as default».
If the TV is not in the list, then right-click on an empty area and check the boxes next to two items: «Show disconnected devices» and «Show disconnected devices».
If this does not work and the TV still has no sound from the PC, then try reinstalling the video card driver. Just download it and run the installation. Let the HDMI cable be connected to the computer at this moment.
How to check these settings in Windows 7, I showed in the article Why there is no sound via HDMI on the TV when connecting a laptop (PC). Be sure to watch it and read the comments. There is a lot of useful information there.
I have never encountered a problem with HDMI audio output. How many connected, everything worked immediately after connection. But there is such a problem.
Connecting a 4k TV to a computer. Ultra HD over HDMI
If you have an Ultra HD TV (aka 4k) and your video card supports this resolution, then there is a chance to get a beautiful and clear image. I checked, everything works. I have a Philips 4K TV. And the computer has a GeForce GTX 750Ti video card that supports resolutions up to 4096×2160.
There are a lot of nuances there. I’m not a gamer, so I’ll try to explain as best I can. The fact is that you can output a 4k image via HDMI, and I did it. But most likely we will get a frame rate of 30 Hz. Which is very little. To get 60Hz, we need a video card with HDMI 2.0 and the same cable. That is why DVI cables are used to connect to 4k monitors. And I haven’t seen anything on DVI TVs.
I connected everything, started the computer, and saw that the image on the TV was some kind of strange, wrong colors. Maybe it’s just in my case.
Everything is solved very simply. First, I tried to disable UHD (Ultra HD) in the TV settings for the HDMI port to which the PC is connected. The image became normal, but the resolution turned out to be normal, 1920×1080. Therefore, this method is not very suitable for us.
To get a real 4k image with natural colors, you just need to change the screen resolution to the maximum 3840×2160 in the display properties in Windows 10.
The image immediately returned to normal. The scale was automatically set to 300%. Otherwise everything would be very small. It can be changed if necessary. I have not tried to play at this resolution. But I don’t think it’s realistic. Moreover, the video card on my computer is not the newest and not the most powerful.
Waiting for your comments. Ask questions and don’t forget to share your tips. Good luck!
How to connect a computer to a TV via HDMI + video ?
If you have a large LCD or plasma TV, sooner or later there is a desire to connect a laptop or computer to it to watch a movie, or maybe work or just feel how it is ? The temptation is not small and your hands itch ?
In the first part of the article I will talk about possible ways to connect devices, in the second part we will talk about video card settings in Windows 7/8/10, and in the third part I will tell you how to output sound via HDMI. At the end there is a visual video describing everything that happens.
Contents
Connecting a computer to a TV via HDMI
I tried to work on a 32” Toshiba TV with a resolution of 1366×768 and I didn’t really like working with text, although designers and gamers will probably appreciate this ability to connect equipment. In the simplest case, you only need one HDMI cable to connect your computer and TV. The cable has the same connectors on both ends:
The cable can be bought inexpensively, just note that if you plan to use 3D mode, the cable must be HDMI 1. 4 or higher.
Now all you have to do is find the HDMI socket on the back of the TV and the same on the computer. This is how the sockets on the back of the TV device look like:
on the side:
. With one correction, if you do not have a discrete graphics card, then the socket will be located on the motherboard, simply speaking, somewhere near the USB ports, but it will look the same.
It’s easier with laptops, their HDMI socket looks the same, except that it is located on different sides in different models:
Compact devices such as tablets, netbooks, cameras and cameras have mini-HDMI connectors. They are 3 times smaller in size and, accordingly, they need a mini-HDMI cable.
Often the TV hangs on the wall and it is not possible to insert a massive cable from behind. Especially for such cases, cables are sold with a plug at an angle of 90 degrees. There is also an option to buy an HDMI corner:
Using a similar corner, you can connect both from the back and from the side. You can find a very cheap Chinese adapter, searched for a search query like «hdmi corner 90». There are even with an adjustable angle and with a bend not directly, but to the side. Just before buying, estimate in appearance in which direction the cable will come out after connecting through the corner (up-down-right-left). It’s just that there are corner adapters oriented to different sides, be sure to keep this in mind!
You won’t be able to connect without HDMI connectors. Is that if there is a free connector for a DVI monitor, then you can buy a DVI-HDMI adapter and use it.
So, to connect the computer to the TV via HDMI, insert the cable into both connectors until it stops. Be sure to disconnect both devices from the network before connecting! Be sure to read more about this in How HDMI Ports Burn!
If some negative factors coincide, burn-out of HDMI ports or even the entire TV, computer or laptop is possible!
If the TV does not have enough ports, then you can purchase the so-called HDMI switcher or «switcher». It connects to just one input on the TV, and multiple sources can be connected to the switcher. Using a button or a separate remote control, you can switch between devices:
You can buy ordinary Chinese switches for $ 10, and not those that are sold in online computer stores for $ 50-100 and more! Already tested by many people and everything works fine even without an external power supply. The only thing is that if you are going to watch heavy 1080p high-definition movies through it, then you should look at more expensive models.
Setting up the HDMI connection
So, everything is connected and now it remains to set it up a bit. If only one TV is connected, the picture should appear immediately. Note that in order for the computer to boot on TV, the monitor must not only be turned off, but disconnected from the system unit!
After loading Windows, all that remains is to select the appropriate screen resolution. You can do this by right-clicking on the free space on the desktop and selecting «Screen Resolution»
Here you can select your preferred resolution. The higher — the clearer the picture, but the smaller everything on the screen. By default, the system chooses the maximum resolution that the device supports. You can leave it like that if you’re happy with it. But if it is uncomfortable to work, the font is too small and difficult to read, then you can reduce the resolution, but there are nuances.
LCD televisions and monitors are designed to display a certain number of dots (pixels) horizontally and vertically, such as 1920×1080 (this is the resolution of the matrix). And if you set a non-standard resolution, then in order to display it on its matrix, the TV will scale it, and this MAY lead to a deterioration in quality and blurring of the picture, or maybe everything will be fine anyway.
If your TV supports 1920×1080 (Full HD), it will also display well at 1280×720, with all details and fonts larger. For an HD Ready TV (not Full HD), it makes no sense to set 1920 × 1080, because. its actual resolution is 1366×768 pixels.
The «More Options» button on the «Monitor» tab allows you to set the screen refresh rate. I recommend setting it to 60Hz or more if your TV supports it:
The TV on this tab may not be called by its name, but something like “Universal PnP Monitor”. If, when watching a video, it twitches a little or somehow does not go smoothly, then you can experiment with this parameter. Color quality on this tab, select «True Color (32 bit)».
Any change in resolution, frequency or color depth, the system will show a window to confirm the change. If the device does not work with the new settings, then you will not be able to see this window and will not confirm your actions. No need to panic, just wait 15 seconds and the system, realizing that you do not see anything, will return the previous settings.
How to set up multiple displays
If a monitor is connected to the TV at the same time, Windows 7/8/10 will assume that multiple displays are connected. In general, it doesn’t matter what it is, a TV set or a monitor, for the system it’s all — displays.
There are two modes of operation for multiple displays: duplication (cloning) and desktop extension. This is selected in the same place where you set the permission.
Screen mirroring
Cloning will display your desktop the same way on both devices. At the same time, the screen resolution is common for both devices, and it is impossible to set it to different ones, at least for now. If you know how to do this, please write me in the comments ?
It turns out that to use this mode, it is better to have both a TV and a monitor with the same resolutions, otherwise someone will have to work on their own wave ? Or the devices must be at least one format, for example, both widescreen. If the monitor is square (with an aspect ratio of 4:3 or 5:4), and the TV is widescreen (16:9 and others), then the picture on it will be with black bars on the left and right, like this.
Desktop extension
Everything is more interesting here ? This mode allows you to have two or more desktops. That is, if you put two displays side by side, then when moving, the mouse cursor will move from the monitor to the TV and back.
Each device is assigned a number by the system, which is visible in front of the display name. If it is not clear who is under what number, then press the «Define» button and all displays will display a large number on the whole screen with its number:
Above you can see pictures of devices with signed numbers, they mean the location of the displays in space. By dragging them with the mouse, you yourself set who is on the left, right or top, bottom. Click «Apply» and voila! The desktop expands to two displays. With the corresponding checkbox, you can make one of the devices the main monitor, i.e. where is the «Start» button, roughly speaking.
For a computer and a TV connected via HDMI, you can separately adjust the screen resolution and frequency in the same way as you did before for one device.
NVidia, AMD (ATI) and other graphics cards have their own options for installing multiple displays. For example, for NVidia GeForce series video cards, you need to right-click on an empty spot on the desktop and select «NVidia Control Panel». In the «Display» section, you can configure your monitors:
How to output sound to a TV via HDMI
First, you must have all the drivers for your video card installed. You can see if the HDMI audio output driver is installed in the «Device Manager». To open it, press the «Win + Pause» buttons and select «Device Manager» on the left. In Windows 10, you need to right-click on the Start menu and select the item of the same name.
Under «Sound, game and video devices» should be something like «High Definition Audio capable device», i.e. high definition audio support:
Secondly, in playback devices (right-click on the speaker near the clock or «Control Panel -> Sound») there must be a digital audio device (HDMI) or something similar in name.
Thirdly, when the TV is connected to the computer, the device will change the status to «Ready». Now you need to right-click on it and select «Set as default».
Fourth, not all HDMI inputs can receive sound on different TVs! The port called «HDMI 1» should definitely be able to do this. If it doesn’t work on its own, then you need to delve into the TV settings to see if HDMI input No. X uses a digital audio stream, and not analog (used when additionally connecting tulips).
The sound setup on the TV connected as a monitor can be considered complete. Restart your programs or the entire Windows at once. If you have no sound at all on your computer or laptop, then read my article on solving this problem.
Results + video
That’s all, now you know how to connect a computer and TV via HDMI to output video and sound. In the simplest case, you just need to take the cable and connect the two devices. Don’t forget the precautions I mentioned earlier!
Watch two videos (playlist) with a visual process of connecting and setting up Windows 7
Accessories
Sometimes there are difficulties with the HDMI connection. If the TV is placed in such a way that it is difficult to bring a cable to it, for example, a wall interferes with this, there are special corners. They are made in such a way that they create a bend, which makes it much easier to connect the cord, even if the appliance is snug against the wall.
It is worth noting another accessory that is useful for connecting via HDMI — a switcher. A similar device is used in TVs with a shortage of connectors. It occupies only one socket of the specified format, instead providing 3-4 connectors in its housing.
Picture Adjustment
When you have connected your laptop to your TV via HDMI, you often need to adjust the picture that is now on the big screen. This is done through the context menu on the computer as follows:
- Right-click on the free space of the desktop and select the «Screen Resolution» menu;
- In the window that appears, you can change the resolution of the TV monitor — usually the higher the value, the better and clearer the picture;
- In the same menu, in the «Multiple screens» list, you can edit their display — they can work in duplicate mode, in which case everything that happens on the computer is displayed on the large display. If you select the «Extend» option, the TV will become an extension of the laptop display.
It is also possible to choose to display the desktop on only one of the monitors;
- There is also a «Set as primary monitor» line, where you can specify exactly which display to consider as the main one.
This is how the image is adjusted, and you can also edit the sound as follows:
- In the bottom line of the laptop, right-click on the sound icon and open the Playback devices menu;
- You will see a window showing all the equipment that outputs sound. Here you can mark the TV with the line «Use by default». Now all the sound will come directly from its speakers, you can change the volume with the remote control.
Other connection methods
If the required connector is not available on one of the devices, you can connect the laptop to the TV via VGA-HDMI. The VGA socket is present by default on all appliances, but it is now used much less frequently. Why? Due to the fact that the VGA format allows you to output only an analog image, which is of poorer quality than a digital one. In addition, when connecting via VGA, you transfer only the picture to the screen, but not the sound — you need to take care of it separately.
Be that as it may, if HDMI is not available, you need to use what is. Connecting a laptop to a TV in this case is done as follows:
- Purchase the appropriate adapter;
- Connect the laptop and TV connectors — you can leave them on.
In extreme cases, you can always use a VGA-VGA connection, you just have to additionally output the sound to a TV or play it through a laptop.
Connecting Apple products
Connecting products of this brand is a little different — they have a connector called Mini DisplayPort. You can purchase a cable for it, at one end of which there will be a connector for this input, while the second can be in the format of HDMI, DVI or VGA.
The connection is quite simple — you install the cable into the appropriate sockets and select the signal source on the TV — nothing more is required.