Signs & Symptoms of a Clogged Computer Heatsink | Small Business
By Seamus Islwyn
A computer’s heat sink draws heat away from the CPU, preventing its tiny, delicate circuits from overheating. The large surface area of the heat sink, which is made up of many thin metal fins, allows it to efficiently cool the processor. Over time, in a normal operating environment, the heat sink will become clogged with dust and other debris. The dust reduces the cooling power of the heat sink by lessening the surface area available for cooling. Eventually, the CPU may begin to overheat due to this lower cooling power. To prevent the heat sink from becoming clogged, clean it regularly.
Fan Noise
-
A loud, constantly running, overworked computer fan is often the first sign that the heat sink is clogged. Dust accumulation on the heat sink causes it to become less efficient at drawing heat from the CPU. The less efficient the heat sink becomes, the harder the computer’s fan must work to reduce the system’s temperature.
If you notice that your system’s fan seems to be working harder than it normally does, clean the heat sink immediately. Eventually, the fan will be unable to cool the CPU sufficiently; at this point, system errors may start to occur.
Temperature
-
High temperatures are, of course, a symptom of overheating due to a clogged heat sink. The computer case, however, may not feel hot to the touch, especially in the case of a desktop PC. To see the temperature of the CPU, download and install a utility like Core Temp, HWMonitor or SpeedFan. These utilities sit in the Windows system tray, monitoring the CPU’s temperature as the system runs. A high CPU temperature may indicate that the heat sink is clogged and requires cleaning. HWMonitor and SpeedFan can also monitor the CPU fan’s speed, providing an accurate picture of how hard the fan is working.
System Instability
-
System instability is a sign of a seriously dust-clogged heat sink.
 When a clogged heat sink causes the CPU’s temperature to reach a critical level, the system protects it from damage by shutting down or restarting. If your computer starts experiencing unexplained instability, especially in conjunction with excessive fan noise — and you’ve ruled out malware or other software problems as the cause — check the heat sink for dust and debris. In extreme cases, the system may start overheating before it can boot the operating system, and will display an error message instead.
Prevention and Solution
-
To prevent the heat sink from becoming clogged with dust, clean it regularly. Shut down and unplug your PC, then open the case. Carefully remove the CPU fan to expose the heat sink, which is square and is made up of many thin sheets of metal with gaps between the sheets — something like a car radiator. Use a can of compressed air to blow the dust out of and away from the heat sink. If the heat sink is extremely clogged, compressed air may not be powerful enough to remove the dust.
 In this case, gently wipe the dust from the heat sink using a lint-free cloth.
References
- Intel: Processors
- WCC Technologies: Clogged Heat Sink
- Laptop Repair Help: Why My Toshiba Laptop Suddenly Shuts Down by Itself Without Warning?
Resources
- CPUID: HWMonitor
- Core Temp
- SpeedFan: Download
Writer Bio
Seamus Islwyn has been writing for radio, print and online publications since 2003, covering subjects from independent Canadian music to automobile smuggling in the Balkans. His work has appeared in the «Tirana Times» in Albania, and he also composes and produces electronic music. Islwyn holds a Bachelor of Arts in English from McGill University and a certificate in radio broadcasting from Humber College.
How They Work, Their Functions, and Types
Heat sinks are another component you do not want to miss out on when working on electronics.
Have you experienced an overheating CPU? This happens a lot, and multiple factors usually cause it.
For one, too many applications running at once can cause the fans to go into overdrive. Plus, built-up dust can block the fans, causing the CPU to overheat.
Thus, thermal management within a device is crucial, ensuring electronics are reliable. Most thermal management is regulated through a heat sink.
Read on to learn the importance of heat sinks for the thermal management of electronics!
Thermal Management Explained
Heat is an inevitable by-product of electronic devices. Thermal management helps control and dissipate the heat produced by a device.
Overheating can be disadvantageous to the reliability of your device. And thus requires thermal management to improve reliability and prevent premature failure.
Thermal management makes it possible to improve battery power and longevity. And behind this is mostly controlled through a heat sink.
What Are Heat Sinks?
Heat sinks are metal thermal conductors that carry heat away from the CPU. A variety of metals can be used for a heat sink to help an electronic device from overheating. All of which exhibit different thermal conductivity values.
Two of the most commonly used metals for heat sinks are aluminium and copper. Both of which display high thermal conductivity values.
Overall, without heat sinks, modern computers could not run at the speeds they do. Or worse, your computer processor is at risk of overheating. This could destroy your entire system, costing you more money.
Heat sinks can further be classified by their physical designs and the material used, such as:
- Stamped
- Machining
- Bonded-fin
- Folded-fin
- Forged Heat Sinks
- Single Fin Assembly Heat Sinks
- Swaged Heat Sinks
- Skived Heat Sinks
Thermal Conduction
The heat sink operation is based on Fourier’s law of heat. There are three different ways of heat transfer, and that is through:
- Radiation
- Convention
- Conduction
Thermal conduction occurs whenever two objects at different temperatures are in contact. This involves the collisions between the fast molecules vs slow-moving molecules.
Fast molecules are from the hotter object, while the slow ones are from the colder object. This leads to the energy transfer from the hot to the cooler object.
Thus, heat sinks transfer heat from the high-temperature component to the low-temperature medium. This is through conduction and then convection.
Other factors that affect a heat sink’s performance include:
- Thermal Resistance
- Airflow
- Volumetric resistance
- Fin density
- Fin spacing
- Width
- Length
How do heat sinks work?
A heat sink is a component that increases the heat flow away from a hot device. This includes the amount of low-temperature fluids that move across the surface area.
Generally, heat sinks move heat away from a critical component in four basic steps:
1. The source generates heat. This source can come from any system, such as:
- Mechanical
- Electrical
- Chemical
- Nuclear
- Solar
- Friction
They need heat removal to function well.
2. Heat transfers away from the source. The heat moves into the heat sink and away from the source via natural conduction.
This process impacts the heat sink materials’ thermal conductivity. Thus, high thermal conductivity materials like copper and aluminium are ideal.
3. Heat distribution throughout the heat sink. Heat will naturally travel through the heat sink via natural conduction.
It will move across the thermal gradient from a high- to a low-temperature environment. This means that the heat sink’s thermal profile will not be consistent.
As such, heat sinks will often be hotter than the source. Then, cooler towards the sink’s extremities.
4. Heat moves away from the heat sink. This process relies on the heat sink’s temperature gradient and working fluid. Most commonly, air or a non-electrically-conductive liquid.
The working fluid passes across the surface of the warm heat sink. Then it utilises thermal diffusion and convection to remove heat from the surface.
This stage relies on a temperature gradient to remove heat from the heat sink. If the ambient temperature is not cooler than the heat sink, no further heat removal will occur.
In short, heat sinks dissipate excess heat to prevent overheating and premature failure. At the same time, it improves the reliability and performance of the components.
Types of Heat Sinks
There are two types of heat sinks: active heat sinks and passive heat sinks.
1. Active heat sinks
Active heat sinks utilise forced air to increase fluid flow across the hot area. Forced air is usually generated by a fan, blow, or movement of an object.
This type of heat sink basically uses a cooling fan or blower to cool the heat sink. They have excellent cooling performance but need maintenance due to the moving parts.
A great example of a fan producing forced air across a heat sink is when the fan in your PC turns on after your computer gets warm. This allows more unheated air to move across the heat sink surface.
As a result, it increases the total thermal gradient across the heat sink system. This lets more heat exit the overall system.
2. Passive heat sinks
Passive heat sinks rely on convection. This simply means the buoyancy of hot air alone causes the airflow generated across the heat sink system.
They do not use any fans and have no moving parts, and are more reliable. This type of heat sink does not also need secondary power or control systems to remove heat.
But it is less effective at transferring heat from a system than its active counterpart.
3. Hyrbid heat sinks
Now, this type of heat sink combines the aspects of passive and active heat sinks. These configurations are less common and often rely on control systems.
When the system operates at cooler levels, the forced air source is inactive. Thus, the cooling system is passive.
Once the source reaches higher temperatures, the active cooling mechanism engages. This increases the cooling capacity of the heat sink system.
Choosing a Heat Sink
If you are building your own computer, there are factors you need to consider when purchasing a heat sink. For one, the thermal output of the processor you buy should match the thermal handling capability of the heat sink you buy.
To determine the heat sink performance required by the processor, consider the following:
- The maximum allowable case temperature. Consider how hot the actual case of your computer can get without damage.
- The maximum allowable inlet temperature to the heat sink.
- Maximum power dissipation of the processor.
Get Your Heat Sink Supplies Here!
1. HS510 Series Heatsinks
The HS510 series is based on an aluminium extrusion. It is supplied in different lengths in both punched and unpunched versions.
All come with a black anodised finish. Universal punch allows mounting of TO.3, TO.66 and TO. 220 packages.
We also have HS410 Series Heatsinks. Universal Punch allows mounting of TO.3, TO.66 and TO.220 Packages.
2. Small Heatsinks
These heatsinks are designed to suit TO-126 to TO-220 Transistors, SCR, Triacs, and more:
- TO220 Heatsink Small 13mm Wide (HT1815)
- TO220 Heatsink Small 18mm Wide (HT1825)
3. Heatsink Plier
Product code: HT1806
This heatsink plier can be used to remove heat from components when soldering. It is a fantastic tool to have around when electronics work.
4. Heat Transfer Compound
Product code: HT20xx
A heat-conducting paste that facilitates heat transfer from semiconductors to heatsinks. One 10g tube will do up to 30 TO-3 package transistors.
Technology products must be reliable. They should be able to perform their required functions under stated conditions.
One way to ensure that an electronic device is reliable is thermal management. This is where heat sinks come into play!
A heat sink is basically a component made of good thermal conducting material. It is attached to an electronic device to dissipate unwanted heat.
In computers, heat sinks are used to cool CPUs, GPUs, some chipsets, and RAM modules. But these are plenty of other devices where these components also come in handy!
Computer processor radiator — how to remake the mounting system
The computer suddenly stopped turning on, an autopsy showed the presence of a swollen electrolytic capacitor in the +5 V power circuit on the motherboard. I had to replace the capacitor.
When I removed the motherboard, I was extremely surprised by its strong deflection in the processor installation area. I attached a ruler and realized that if urgent measures were not taken, then soon I would have to buy a new system unit. nine0003
Why does the motherboard flex?
I’ve seen cases of motherboard failure due to flex. Since the conductive tracks on the motherboard are very narrow and thin, they stretch and microcracks form in them. From temperature drops due to the linear expansion of materials, microcracks gradually turn into cracks. The track is broken and the board stops working. At first, the computer starts to freeze occasionally, then more and more often, and there comes a moment when it stops working forever. nine0003
Such a motherboard cannot be repaired, since it has up to seven layers, and it is almost impossible to find a broken track. You have to replace it with a new one, and additional costs arise, since most likely the processor, memory modules and other cards installed on the old motherboard will not be installed on the new motherboard, since there are no longer the necessary connectors. In practice, you have to buy a new system unit, although the old one was quite suitable for your tasks.
When studying the device for pressing the heatsink to the processor, it became clear that the deformation of the motherboard is due to its illiterate (or deliberate) design. The heatsink is pressed against the processor, and the engagement holes for creating a force for pressing the heatsink against the processor are also located on the printed circuit board at a distance from the processor installation site. Thus, the processor presses on the board in one direction, and the heatsink engagement points in the opposite direction. This leads to deformation of the motherboard. nine0003
To avoid deformation, it is necessary that the acting and opposing forces that are applied to the motherboard from different sides are on the same axis, this requirement was the starting point for upgrading the design of the heatsink clamping device that does not deform the motherboard.
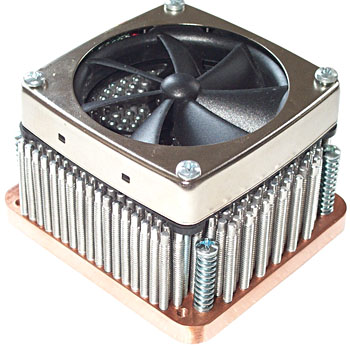
As you can see, the plastic clips have been replaced by spring-loaded screws, but that’s not the only difference. The design used a metal plate and a dielectric thrust bearing. Screws are screwed into the plate, and the plate rests with a thrust bearing instead of installing the processor. Thus, the conditions for deformation of the motherboard are excluded. nine0003
Processor Heatsink Mounting System Upgrade
In the photo you can see the upgraded clamping device assembled. Its design is so simple that almost anyone with minimal material processing skills can repeat it.
First, a metal plate is made of steel or aluminum alloy, 85×85 mm, 3 mm thick. The thickness of the plate is determined by the required mechanical strength. Dimensions are for GIGABYTE GA819 motherboard clamp15P-G. Four holes with a diameter of 3.5 mm are drilled symmetrically at the corners of the plate at a distance of 72 mm along the perimeter from each other and an M4 thread is cut into them.
Next, a square dielectric plate 50×50 mm in size and 1.5 mm thick is made. The thickness of the plate is determined by the gap that must be provided to prevent the soldering on the motherboard from touching the metal plate. I cut out from foil fiberglass with metal scissors.
It remains to glue the plates together with any suitable glue or double-sided tape and the structure is ready. Before gluing, it is necessary to attach the processor to the place of soldering and see if the solder protrusions or soldered radio elements will interfere. If they interfere, then in the insulating plate you need to make a sample or drill holes in the places where they touch. The plate should lie on the board with the entire plane. After gluing, it is necessary to attach the resulting combined plate again and check whether the metal part will touch the soldering points of the electrolytic capacitors. There are usually a lot of them around the processor. All protruding legs must be cut with side cutters. It remains to pick up the screws, springs and washers. nine0003
Ready-made compression springs of the desired diameter and stiffness could not be found and the most suitable tension spring had to be modified. Of course, you can do without springs by putting plastic washers, but then it is difficult to get a perfect fit of the heatsink to the surface of the processor. I made springs from one spring from stretching the ground wire of the kinescope of the monitor. Such springs are used in any kinescope TV. The inner diameter of such a spring has 5 mm, the diameter of the wire is about 0.5 mm. nine0003
In order to stretch the spring, you need to pass two screwdrivers into its rings at the ends or take two pliers and, applying a small effort, very slowly pull to the sides until you feel that the metal “succumbed”. Release the spring and see what happens. The step of winding the spring should be about 1 mm, if less, repeat the operation. In case of a miss, there are usually four springs in the kinescope, so there is something to practice on. The stretched spring is cut with wire cutters into segments eight turns long. nine0003
It remains to pick up four screws with M4 thread 20 mm long.
I used beautiful screws that tighten the clamps that secure the deflection system to the neck of the kinescopes. But any will do, you just have to put standard washers on each side of the spring.
Processor Heatsink Presser Upgrade Hardware Kit prepared. Everything is ready to install a new mounting device, but first you need to dismantle the old one.
How to remove the heatsink of a clip-on processor
Installing the prepared new processor heatsink clamp requires the heatsink to be removed. The radiator is fixed to the eyelets with four plastic clips. To release them, you need to insert a screwdriver with a flat sting into the slot of each clip, and turn its moving part counterclockwise by 90 °.
Then press the heatsink from above with your hand and pull the moving parts of the clips upwards one by one. The fixing pins will come out of the gap between the tabs of the latches, and the heatsink will easily pop up. nine0003
On the left of the photo, the pin has spread the latches, and they are securely fixed in the board. In the center, the movable black part of the clip is raised up. On the right, the pin has released the latches, they no longer catch on the board, and the heatsink can be easily removed. Next, the latches are removed from the radiator mounting lugs, they are no longer needed.
How to remove the cooler from the processor heatsink
Coolers are usually attached to processor heatsinks in two ways: — with latches and screws.
How to remove the cooler from the processor
secured with latches
After the heatsink is removed, it is necessary to detach the cooler from it and clean the heatsink fins from dust. The cooler also needs to be cleaned of dust and, if necessary, greased the bearings with graphite grease.
To remove the cooler from the radiator, you need to use a flat-blade screwdriver to pry out two rather tight latches located diametrically opposite.
How to remove the CPU cooler from the
secured with screws
On some modern motherboards, the CPU heatsink is secured with four long screws, in the manner described above for upgrading the mounting. nine0003
The board does not deform, but if you need to lubricate the noisy cooler, you have to remove the heatsink as well, since the cooler is fixed to the heatsink with common screws.
For ease of installation of the cooler and radiator, the screws have grooves in which curly lock washers are fixed, and in order to remove the cooler for lubrication, you must first remove them.
To do this, place the radiator with the cooler on the edge of the table so that the wine can move freely along the axis without resting on the table surface. Next, you need to put a wooden block or plywood on the screw so as not to spoil the thread, and apply a few blows with a hammer. nine0003
When removing the washers, you must be careful not to fly the springs, otherwise you will have to look for them for a long time. The cooler is removed and you can start cleaning it from dust and lubrication.
Installation of the cooler on the radiator is done in reverse order. Springs are put on the screws, they are threaded through the mounting holes of the cooler and radiator. Next, lock washers are put on the screws and put in their original place.
To put the fixing washer on the screw, you need to pick up a piece of pipe or a nut that fits freely over the entire length of the screw. nine0003
Next, adjust the vise so that there is a distance between their jaws slightly greater than the diameter of the screw. Hammer blows on the head of the screw are hammered into the lock washer until it sits in the groove.
If you don’t have a vice handy, you can use a tube or some nuts. The length of the tube or the total thickness of the nuts should be slightly greater than the length of the screw from the beginning of the thread to the groove.
It is possible not to put fixing washers on the screws, but in this case it will be very inconvenient to install a heatsink with a cooler on the processor. nine0003
The processor heatsink and cooler are assembled and it remains only to install them on the motherboard processor, do not forget to evenly smear the old thermal paste (if it is not dried) on the surface of the processor and heatsink or apply fresh one.
How to apply thermal paste
The old thermal paste from the processor and the contact surface of the heatsink must be completely removed, as it thickens over time and if you install a heatsink without replacing the paste, the efficiency of heat dissipation by the heatsink from the processor will be lower. nine0003
It is better not to remove the processor from the crib, but if necessary, it is enough to move the lever aside and lift it up, then open the clamping frame and remove the processor.
Thermally conductive paste is based on silicone and can be easily removed with a cotton cloth. It is enough to press the fabric to the surface to rub it well.
Before applying a new thermal paste, you need to check the device for fixing the heatsink, install the heatsink and tighten it with screws. If everything has risen well, you can proceed to the final installation of the heatsink on the processor. Since the contact surfaces of the processor and heatsink have good flatness, it is enough to apply a thin layer of thermally conductive paste on them. There are no requirements for the uniformity of application, since the paste has a soft consistency and spreads well when pressed. nine0003
I apply with a screwdriver blade. Thermal conductive paste can be purchased at any computer hardware store. Sold in tubes or syringes. One milliliter will be enough for application.
Installing the Heat Sink on the Processor
You are now ready to install the heat sink. Put the heatsink on the processor, orienting it so that you have access to the cooler latches, then if you need to lubricate or replace it, you will be able to remove the cooler without removing the heatsink. The holes in the mounting tabs of the heatsink must be directly above the holes in the motherboard. nine0003
It remains to tighten the four screws, and the radiator will be installed in its place. To ensure uniform pressure, it is necessary that the ends of all screws protrude from the metal plate by the same length. The springs must be compressed by at least half of their length in order to create the necessary force for pressing the heatsink against the surface of the processor.
After installing the cooler on the radiator and connecting it to the motherboard, the modernization of the radiator clamping device to the processor on the motherboard can be considered complete. nine0003
If the computer’s system unit does not provide for processor cooling by supplying air from the environment, then I recommend to work a little more by modifying the processor cooling system as described in the website article «Refining the processor cooling system».
How to choose a cooling solution for a processor
Often novice users prefer boxed processor cooling systems for no reason. A separate cooling system in some cases is more preferable. This is due to the fact that better heat dissipation can be provided from the processor heat spreader cover. nine0003
Consequently, new possibilities open up in overclocking the processor without the danger of overheating the processor chip. In this publication, we will tell you how to choose the optimal cooling system (cooler) for specific tasks.
Aspects of choosing a processor cooling system
First, you need to decide on the socket. There are very few truly universal CPU coolers. Therefore, it is important to check the list of compatible sockets before purchasing a specific cooling system. nine0003
A socket is an electrical connector that is designed to install the processor on the motherboard. The cooling system itself is attached directly to the processor installed in the socket.
Secondly, study the structural features of the cooling radiator. The material of the radiator base is responsible for the high-quality removal of heat from the heat distributor cover. In wide sale there are the following versions of the radiator base: copper, aluminum and copper-aluminum alloy variations. nine0003
The best radiator design is by far the one with the largest copper base. Copper heatsinks have an excellent ability to dissipate heat from the CPU. They work more efficiently than any aluminum counterparts, but their cost is incomparably higher. A compromise option is processor cooler models that have a solid copper base or a central copper rod with an aluminum base. Copper-aluminum radiators are the best solution in terms of price and heat dissipation efficiency. nine0003
Thirdly, focus on the amount of heat dissipated, the so-called TDP parameter, measured in watts. All processors are different when looking at the heat dissipation parameter. Be sure to match the power dissipated by the processor and the power dissipation of the cooling system. If the TDP of the processor is 95 W, then the cooling system should provide the same parameter or higher.
To ensure stable operation of the computer under high loads (games, video conversion, etc.), it is very desirable that the power dissipation of the radiator be greater than that provided by the heat spreader cover of your CPU. nine0003
Fourth, for hot processors, use tower coolers with heat pipes. Their number characterizes the degree of efficiency of all cooling systems. The main advantage of using heat pipe cooling systems is the more efficient transfer of heat energy from the hot cover of your computer’s CPU heat spreader to the cool heatsink.
Easily boiling liquid in the copper tube, during active work on the hot end of the processor cover, instantly evaporates, and subsequently condenses on the cold end of the heatsink. This is more efficient than the traditional tubeless system. nine0003
Fan size in the processor cooling system
Let’s deal with the fan and its main parameters. The noise level of your system unit will depend on its actual size, the presence of a speed controller and the minimum rotation speed.