powershell — Silently Uninstall NVIDIA Display Driver using Uninstall String
I can uninstall NVIDIA Graphics Driver from PowerShell but I am unable to figure out how to do it silently. The normal code looks like this:
#Get Uninstall String from Registry
$us = Get-childItem -Path "HKLM:\SOFTWARE\Microsoft\Windows\CurrentVersion\Uninstall" -ErrorAction SilentlyContinue | Get-ItemProperty | Where-Object {$_.DisplayName -like "*NVIDIA Graphics Driver*"} | select DisplayName, UninstallString
# Splitting the Uninstall String into executable and argument list
$unused, $filePath, $argList = $us.UninstallString -split '"', 3
# Any of the following command can start the process
Start-Process -FilePath "C:\Windows\SysWOW64\RunDll32.EXE" -ArgumentList $argList -Wait
# or
Start-Process $filePath $argList -Wait
Once the process is started it displays the NVIDIA Uninstaller dialog box for manual selection/click of the UNINSTALL button to proceed further.
My UninstallString looks like:
"C:\Windows\SysWOW64\RunDll32.EXE" "C:\Program Files\NVIDIA Corporation\Installer2\InstallerCore\NVI2.DLL",UninstallPackage Display.Driver
I have tried following ways but nothing seems to work.
Start-Process -FilePath "C:\Windows\SysWOW64\RunDll32.EXE" -ArgumentList "/X $argList /quiet" -Wait
Start-Process $filePath -ArgumentList $argList "/S" -Wait
Please guide me, how to do silent uninstallation.
- powershell
- nvidia
- uninstallstring
8
To summarize the comments into an answer:
#Get Uninstall String from Registry
$us = Get-childItem -Path "HKLM:\SOFTWARE\Microsoft\Windows\CurrentVersion\Uninstall" -ErrorAction SilentlyContinue | Get-ItemProperty | Where-Object {$_.DisplayName -like "*NVIDIA Graphics Driver*"} | select DisplayName, UninstallString
# Splitting the Uninstall String into executable and argument list
$unused, $filePath, $argList = $us.UninstallString -split '"', 3
# Append arguments for silent uninstall
# -deviceinitiated avoids a system restart
$argList += ' -silent -deviceinitiated'
# Any of the following command can start the process
Start-Process -FilePath "C:\Windows\SysWOW64\RunDll32.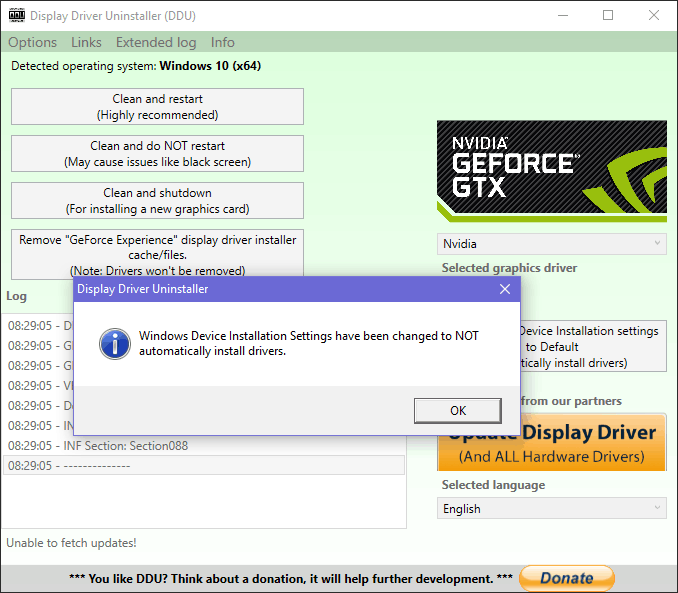 EXE" -ArgumentList $argList -Wait
The key is to add any arguments intended for rundll32.exe to the $argList string.
Sign up or log in
Sign up using Google
Sign up using Facebook
Sign up using Email and Password
Post as a guest
Required, but never shown
Post as a guest
Required, but never shown
How To Uninstall NVIDIA Drivers In Windows
If you are planning to upgrade your NVIDIA graphics card or switch from NVIDIA to AMD, you might want to uninstall the drivers for your old NVIDIA graphics card.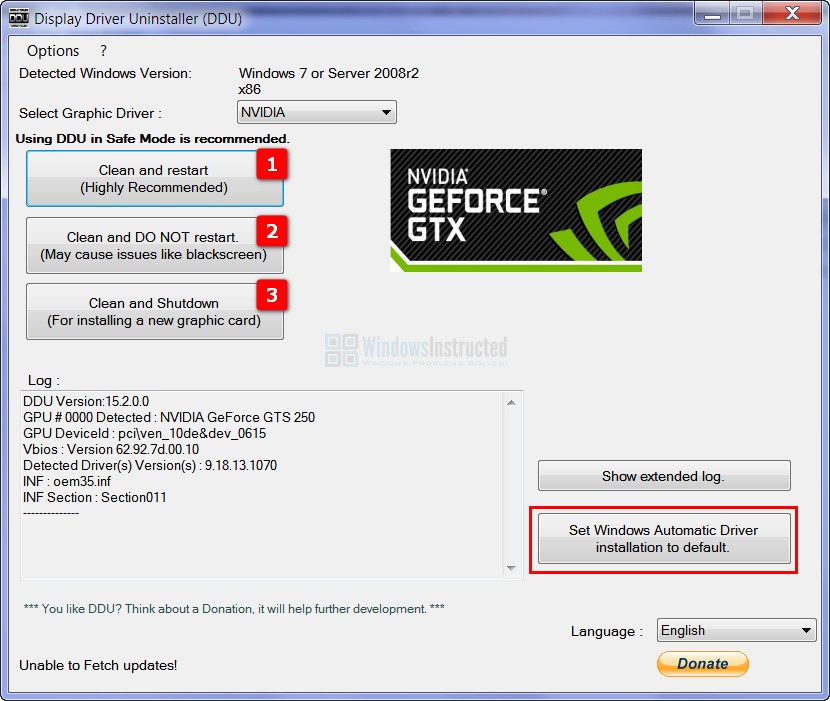
Having old or residual drivers may cause stability issues and applications like games to stutter or hardware to malfunction. It is also a good idea to completely remove the drivers for old hardware that you are not using to improve Windows boot time.
In this article below, we will show you how to completely uninstall the drivers for your NVIDIA GPU and clean up residual files and registry entries.
Table of Contents
Why Uninstall NVIDIA Drivers?
Nvidia drivers are the software that help your operating system communicate with the graphics card or related hardware components. A user may uninstall their device’s graphics drivers for the following reasons:
- Compatibility issues with software, hardware or both
- Performance issues with hardware or software
- Availability of new driver versions
- Installation of other driver softwares
- To disable the hardware associated with the device
- Installation of different brand of GPUs
- The device drivers are causing issues like crashes after installing
How to Uninstall NVIDIA Drivers?
Before proceeding, make a backup of your system files and all the drivers.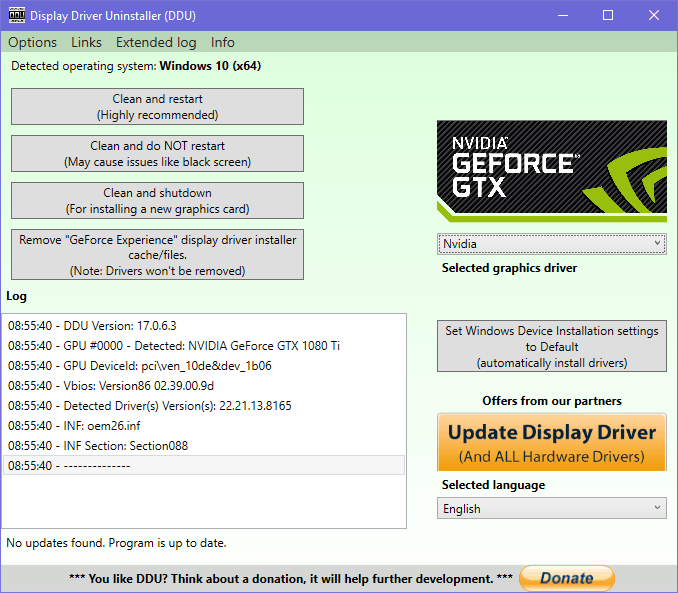 Search the NVIDIA driver page and download the latest drivers supported by your device before uninstalling or making changes. This process may potentially render your NVIDIA device unusable or brick your system in case of an unsuccessful installation.
To uninstall NVIDIA drivers from your device and remove any residual files from the following methods, try the following fixes:
Using Add or Remove Programs
You can remove the drivers from this method from the Settings menu. To do this, firstly:
- In the desktop, type Windows Key + I and enter settings
- Go to Apps > Apps and features
- Search for NVIDIA Graphics Driver and select Uninstall from the dotted menu.
Follow the onscreen instructions and prompts to uninstall the drivers from your device.
Using Device Manager
If you want to remove the drivers from Device manager:
- Type Windows key + R in the desktop
- Type
devmgmt.in the text box and press Enter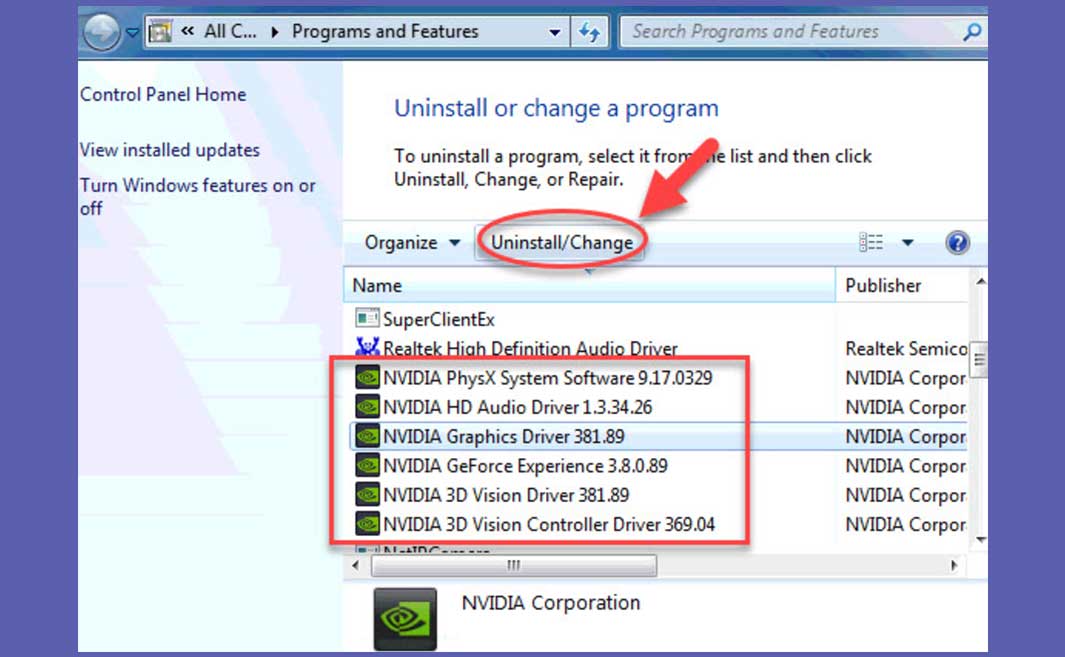 msc
msc - In the device manager, search for Display Adapters
- From the drop down menu, Right click on your NVIDIA Graphics driver
- Select Uninstall
The device drivers should be uninstalled from your device completely.
From Safe Mode
If you have problems uninstalling NVIDIA drivers from your device, booting Windows in safe mode and uninstalling may solve the issue. Safe mode allows for troubleshooting your device and makes it easier to remove programs.
To uninstall NVIDIA drivers from your device in safe mode, firstly we need to enable safe mode. To do this:
- On the start menu, click on the power button.
- Hold the Shift key and click on Restart.
- From the UEFI menu, select Troubleshoot > Advanced options > Startup settings
- Click on Restart
After restarting, you will be able to select the startup settings in Windows and enable them. To enter safe mode there, you can either use the function keys or the number pad keys to enter your desired safe mode option.
After entering the safe mode, to uninstall the graphics drivers, follow these steps:
- Open Control Panel
- Select Programs > Programs and features
- Select Uninstall or change a program
- Here, search for NVIDIA Graphics Drivers.
- Right click on it and select Uninstall.
- Follow the prompts shown on the screen
You should be able to successfully uninstall your device’s NVIDIA drivers.
With a Utility Program
When installing a different branded GPU or if your NVIDIA drivers are causing issues, removing it completely may be the only solution.
Some programs can remove all the residual files and settings from the previously installed drivers in your system. Software like GhostBuster and DDU can be installed and used in order to remove files that may cause conflict with the installation of new drivers in your device.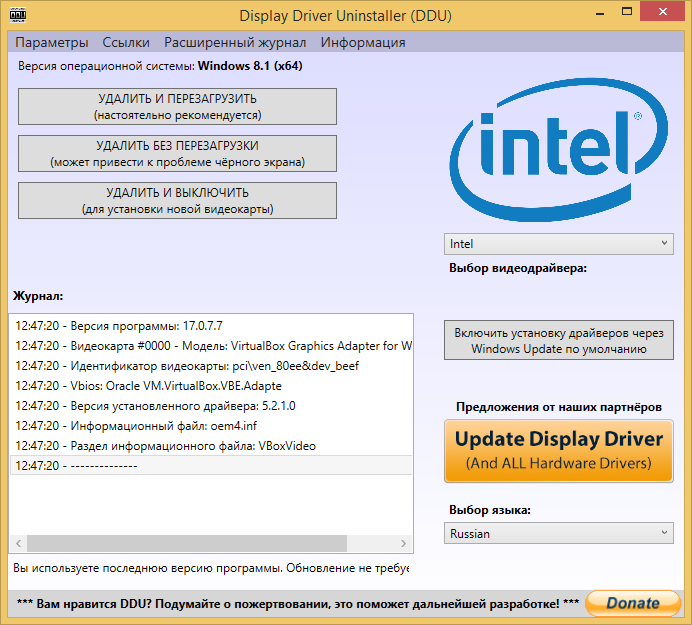
Follow the instructions listed carefully before installing and running the software.
Note: Some utility softwares require safe mode enabled to operate and make edits on the Registry of your device.
How to Remove Residual Files and Folders?
Before installing a new NVIDIA GPU or swapping for an AMD one, uninstalling the drivers may not be sufficient for a clean removal. You may need to delete the installation files and clean up registry entries from your device if you are planning to completely remove any NVIDIA drivers and files from your device.
You can remove the residual files from your device by using the following methods:
Remove Installed Files and Folders
To remove the Nvidia files from your device, firstly:
- Press Windows key + E to open file explorer
- If you have chosen the default folder for installation, go to C drive.
- Look for a folder labelled Nvidia.
- Select the folder and delete it.
To remove hidden NVIDIA folders, firstly enable view hidden files and folders. To do this,
- Open file explorer
- On the top select View > Show > Select Hidden items
There should be a check mark beside the icon.
To remove the Nvidia files from ProgramData folder:
- Press Windows key + R to open Run
- Type
C:\ProgramDatain the dialogue box to open the ProgramData folder - Look for folder named NVIDIA
- Delete the folder
- Navigate back and Open Program Files
- Search for NVIDIA Corporation labelled folder
- Delete the folder
Repeat the same process as above for folder labelled Program Files (x86) as well.
To remove from the Users folder:
- Press Windows key + R to open Run
- Type
%userprofile%/Appdata/localin the dialogue box - Search for folders named NVIDIAand NVIDIA Corporation
- Delete the files and the folder
Note: Enable administrator access to remove and edit the files from your Windows drive.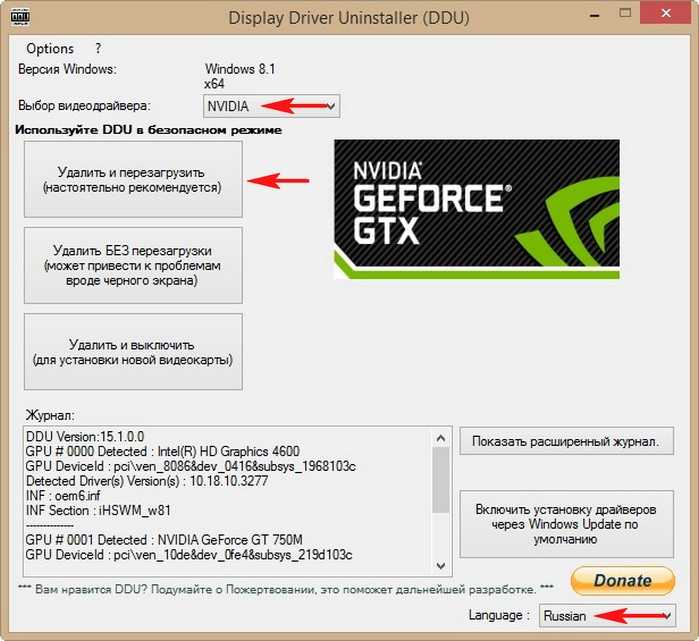
Remove from Windows Registry
The residual files on the Registry may create issues when installing a new graphics driver on your device. To prevent your system from crashing in case you deleted a wrong file, we’ll first be creating a backup of the Registry.
To clean the registry entries of your old NVIDIA GPU, follow these steps:
- Press the Windows key + R and open Run
- Type
regeditand then press Enter - In the Registry, go to
HKEY_LOCAL_MACHINE\SOFTWARE\NVIDIA Corporation - Right click and select Delete to erase the folder.
- Again, go to
HKEY_CURRENT_USER\SOFTWARE\NVIDIA Corporation - Right click and select Delete to erase the folder
Restart your device and install your new graphics drivers.
Related Questions
Is it Safe to Uninstall NVIDIA Drivers?
It is generally safe to uninstall the NVIDIA drivers from your device. Sometimes it is recommended by the manufacturer if the drivers are malfunctioning or not working as intended to fix the issue.
Can I Uninstall My Device’s Graphics Drivers from Geforce Experience?
No, as of Version 3.25.1.27 Geforce Experience only allows reinstallation of NVIDIA drivers. There is no such feature to uninstall the Graphics driver using it.
How to completely uninstall nvidia driver in Windows 10?
- Main
- Useful articles
- Windows 10 instructions
- How to completely uninstall the nvidia driver in Windows 10?
When purchasing a computer, many of us assume that there is nothing to delete in it in the near future, but very little time passes and it turns out that it is absolutely necessary to remove the old video card drivers from the system. This is where the main problems begin for most PC users, since Completely remove the nvidia driver in Windows 10 Not everyone knows how, and partial removal of drivers can lead to problems when installing new drivers or failures of varying degrees during system operation.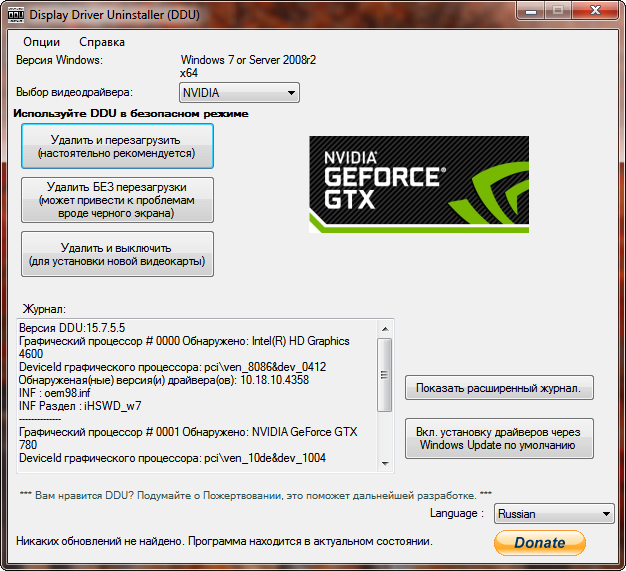 That is why, so that you do not have such problems and have real freedom of action, we suggest that you start using this article as a complete guide.
The first way that we will consider today is to use the system’s capabilities to remove video card drivers. Everything is simple here, as you need to: click on the «Start» menu button → go to the «Control Panel» → go to «Change or remove a program».
In a new window, you can independently find the video driver you want to remove or use the Search, which is located in the upper right corner of the window.
After selecting the nvidia video driver you no longer need, move the mouse cursor over it → right-click → in the context menu there will be only one Change / Remove button that you need to click.
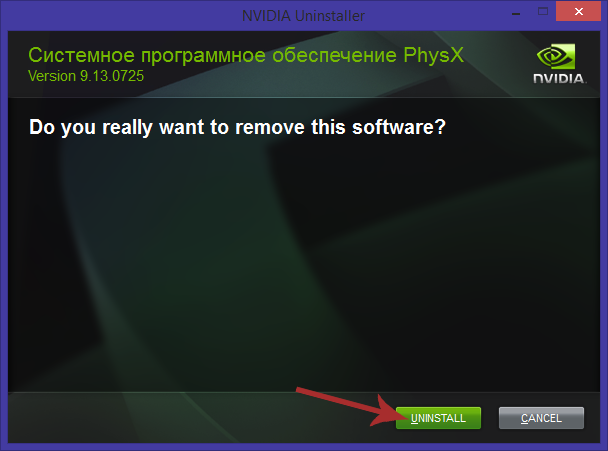
Please note that although the drivers are removed using the Windows 10 system, it will still run a specialized application from Nvidia during the removal, which will initially scan everything and then ask for confirmation to remove the driver.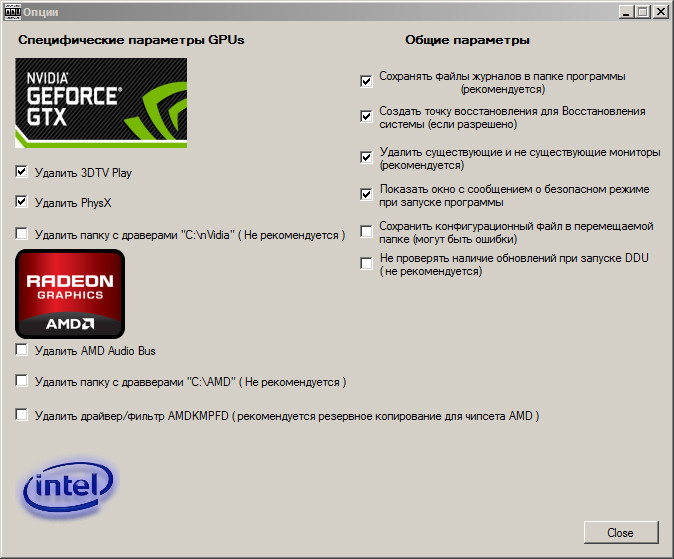
Removing the video driver proceeds quite quickly and after everything is over, you can either remove some more drivers from nvidia or reboot the operating system so that the program realizes that it no longer has video drivers.
If for some reason the method described above does not suit you, then in this case, it is best to start using the Display Driver Uninstaller program, which you need to: download from the Internet → unzip → install → agree with the program’s offer to restart the OS and run it in «Safe Mode» and only after that, you can start setting up the program itself: select the language → select the video card → click on one of the three buttons located on the left side of the window of this software.
Program completely remove the nvidia driver in Windows 10 and leave no trace of them! It is also important to note that this software can be configured additionally using the built-in “menu”, where there are various items that become active if you check the boxes next to them. Also, the program has the ability to disable «Windows Update» and if you need this application to update the system to become active again after uninstalling the drivers, then go into the program and use the activator in the face of the «Enable driver installation via Windows Update» button.
We hope that this relatively small, but very capacious article turned out to be useful for you and you will certainly use it!
4 ways and how to reinstall
Trying to free up space on the computer’s internal drive, users get rid of all sorts of software. Therefore, some people want to figure out how to uninstall GeForce Experience on the Windows 10 operating system. Before performing the operation, it is strongly recommended that you study the features of the software and the consequences of uninstalling. Only after that you can proceed to the removal.
TABLE OF CONTENTS:
What is GeForce Experience
GeForce Experience is a special program designed to manage and change settings for NVIDIA video cards.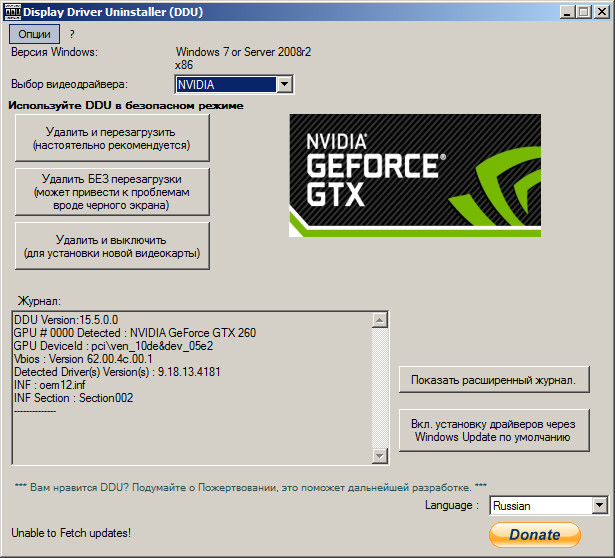 It is installed by default on computers that have a graphics adapter from the specified manufacturer under the hood.
Despite the fact that the application is one of the standard utilities, it is uninstalled without any problems. True, you first need to understand whether it is worth deleting the program in order to free up a couple of hundred megabytes.
What is the threat of removal?
The only consequence of uninstalling the proprietary NVIDIA utility is the lack of access to the video card management functions. If during the daily operation of the PC you do not do point adjustment of the graphics adapter, then the removal will not entail anything terrible.
However, it is better to immediately clarify which specific functions will be unavailable without GF Experience:
- Driver update. The creators of NVIDIA graphics cards regularly release updates for their components. Their installation allows you to avoid problems when servicing your computer and in the operation of individual programs.
 Uninstall the application — you will have to update the drivers manually.
 - Graphic settings setting. NVIDIA software adapts the capabilities of the video adapter to the current tasks. Therefore, after uninstallation, the level of optimization will be reduced.
- Access to services. The NVIDIA Shadowplay Game Bar and NVIDIA SHIELD Broadcasting Utility will also disappear after the software is uninstalled. However, if you are not an avid gamer-streamer, then you will not experience any inconvenience.
- Company news. The program has a special section where notes are posted about the latest events in the camp of NVIDIA, including the release of new games. Without a utility, information will have to be obtained using the browser.
Evaluate for yourself how critical the allocated losses will be for you. As practice shows, the main threat of removing specialized software is the difficulty with updating drivers. Keep this in mind if you do not know how to update the software yourself. But at the same time, remember that GFE can be reinstalled at any time.
How to uninstall NVIDIA GeForce Experience
If you are determined to get rid of NVIDIA software once and for all, you can perform the operation in any convenient way. Below are four main uninstall options, each of which is good in its own way.
Third-party software
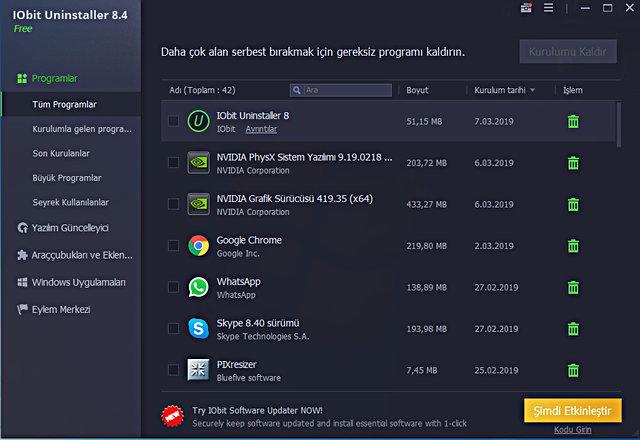
You can completely remove GFE from your computer using highly specialized software. In particular, the CCleaner program allows PC owners not only to remove unnecessary applications, but also to clean the drive from garbage.
When you want to get rid of the NVIDIA program, do the following:
- Download and install CCleaner.
- Start the application.
- Go to «Tools» and then «Uninstall programs».
- Find NVIDIA GeForce Experience in the list and highlight the software.
- Click the «Uninstall» button.
- Follow the instructions that appear on the screen.

Note. Normal uninstallation via CCleaner may leave behind traces of the removed software. So at the end of the operation, do not forget to start cleaning up the garbage.
Having dealt with GFE, you will free up about two hundred megabytes on the internal drive. If you suddenly need to use the functions of the utility again, then download it from the official website of the developer.
Standard removal
It is not necessary to turn to the help of third-party software when it comes to uninstalling programs. You can perform the operation much faster with the built-in tools of Windows 10:
- Open This PC.
- Expand the ribbon by clicking on the down arrow icon.
- Select Uninstall or change a program.
- Find the NVIDIA software in the list, select it with a LMB click and click on the «Delete» button.
You can do the same by referring to «Settings», where a similar section «Applications and features» is presented.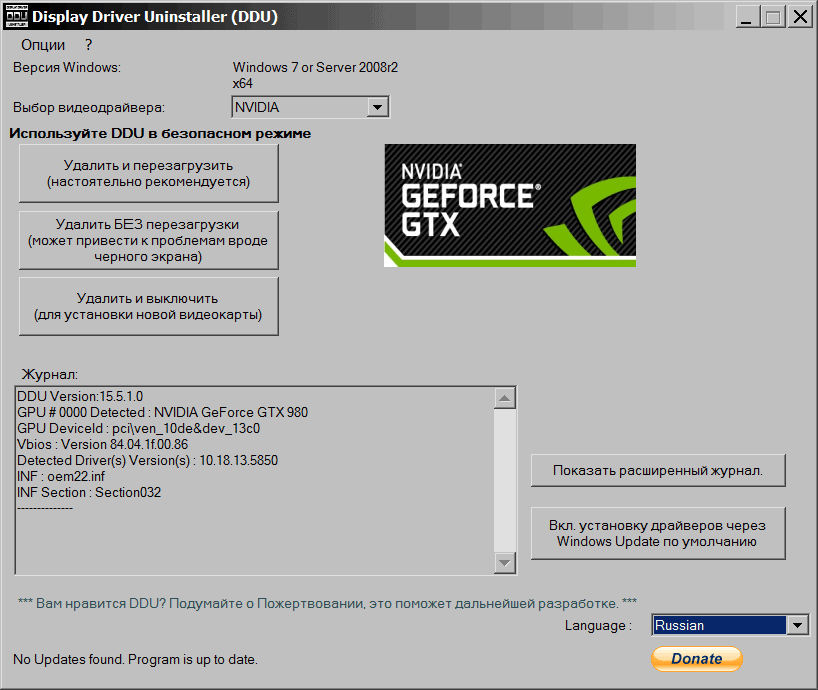 Choose for yourself which method of launching the uninstaller seems the most simple and convenient.
Uninstall via Start
Typically, GeForce Experience appears in the Start menu. You can get rid of it right here:
- LMB click on the «Start» icon to open the corresponding menu.
- Locate the GFE folder or application shortcut in the list.
- Right-click on the shortcut and click «Delete».
Performing the operation will open an additional window where you need to find GF Experience again and click on the delete button.
Non-standard method
Those who are used to getting rid of files and programs directly through Explorer should look for the «NVIDIA GeForce Experience» folder in the «C:\Program Files (x86)\NVIDIA Corporation» directory. Then it remains to remove it to get rid of the program. But remember that this method of uninstallation is not complete.