How To Update Motherboard Drivers
The Operating System controls all the internal and external hardware connected to the computer with the help of component-specific drivers.
Drivers act as an interface between the hardware component and the Operating System. So, if you face any issue with specific hardware, its driver is most likely at fault.
Therefore, for the OS to have a smooth and flawless information exchange with the component’s driver, both of them need to be up-to-date. The same goes for motherboard drivers as well. The motherboard driver also controls the communication between CPU, RAM storage, and peripheral devices.
Table of Contents
Updating Motherboard Driver
You can also find many motherboard-specific drivers on the manufacturer’s download center.
Although some of these drivers can also be considered motherboard drivers, the one driver that handles the motherboard is the Chipset.
There are a few ways you can download the Chipset driver. Follow any one of these processes to update this driver.
Manual Download
To download the latest motherboard driver manually, use the official motherboard manufacturer’s site. To know which motherboard do you have and its manufacturer, follow the following steps:
- Press the Windows + R key to open Run.
- Type “cmd” and press Ctrl + Shift + Enter to open Command Prompt as administrator.
- Once the Command Prompt opens, type the following.
wmic baseboard get product,Manufacturer,version,serialnumber
The above command will display the motherboard’s manufacturer, product name, and serial number.
Alternately, you can also use the msinfo32.exe, which displays the system summary.
- Press the Windows + R key and type msinfo32.exe
- This will open the System Information dialog box.
- Check for BaseBoard Manufacturer and Baseboard Product. These represent the motherboards manufacturer and motherboard’s name, respectively.
Once you figure out the motherboard’s manufacturer and its model name, follow these process to download motherboard driver.
- Go to their official Download Center.
- Find your product by selecting the Product Line/Type (motherboard), Product Series (AMD or Intel), and then the Product Model (Motherboard’s name).
- Now the site will automatically provide you with motherboard support such as the latest BIOS version, Driver & utility, Manual & Documentation, Warranty type, and CPU & Memory Support.
- On the Driver tab, select your Operating System.
- The web application will now give you a list of the latest drivers specific to your motherboard.
- Here, search for a driver named Chipset. The Chipset is the driver for your motherboard.
In this webpage section, you can also find the latest driver for all other hardware components like LAN, Audio, VGA Drivers, Software Utility, BIOS-Utilities, SATA, and many more.
- Select the driver you want, in this case, Chipset, and click on Download.
- Now, a file with a .zip extension should download.
- After the download is complete, extract the .zip file anywhere on your computer.
- Once extracted, open the file and search for
setup.exeand install the driver. - Once the installation process complete, restart your computer.

Update from Device Manager
Another method to update the motherboard’s driver is from the Device Manager utility. You can download the latest driver for all internal and external hardware components, including the motherboard, using the Device Manager.
To update the motherboard’s driver from the Driver Update, you can follow the steps mentioned below.
- Press the Window + X key and click on Device Manager.
- Here, you can see all the sections of the driver. Expand IDE ATA/ATAPI controllers.
- The driver that is listed inside IDE ATA/ATAPI controllers is the motherboard’s driver. Right-click on it and select Update Driver.
- Click on Search automatically for drivers.
- If there is an update, the Device Manager will automatically download and install the latest version.

- Once the download and installation process is complete, restart the computer.
IDE ATA/ATAPI: the Integrated Drive Electronics Advanced Technology Attachment/Advanced tech Attachment Packet Interface
If you have a different motherboard driver stored locally, select Browse my computer for drivers after step 3. The Device Manager will let you browse the driver. Click on next once you have located the driver. The installation will start. After completion, restart your computer.
Using Windows Update
The Windows Update is also another utility that lets us download and install any updates, whether it be a Windows update, a driver update, or even a BIOS update, at once. Using the Device Manager to update the driver, you should manually right-click and update every driver. The Windows Update saves us from this hassle.
- Press the Windows + I key to open Settings.
- Go to Windows Update (Update & Security > Windows Update in Windows 10)
- Click on Check for updates or Install Updates.
- If there are any pending updates, the OS will automatically download and install them.
- It will install all pending driver, Windows or BIOS updates
Updating the BIOS
BIOS acts as the interface through which users can control the component connected to the motherboard. BIOS update makes the system more stable and compatible with other computer modules like drivers.
However, if there is a loss of power and the computer turns off during a BIOS update, the motherboard as a whole could be rendered useless.
Before starting, first, you need to check if the motherboard manufacturer has launched any BIOS update.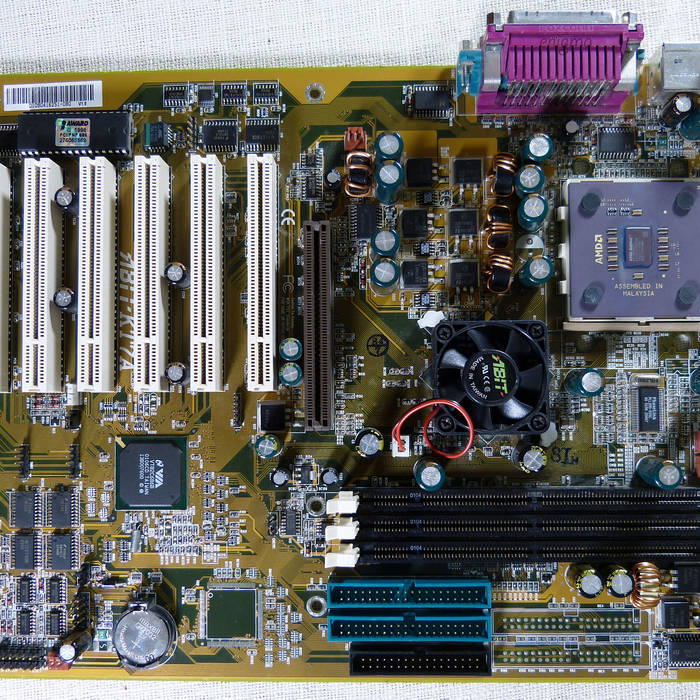
Run msinfo32 in Command Prompt as administrator to know your BIOS version. Check for BIOS Version/Date. This is your motherboard’s current BIOS version.
Now that you know the current BIOS version, follow these steps to update your BIOS.
- Go to the motherboard manufacturer’s download center and search the motherboard’s model.
- Once you have located the motherboard model in the download center, search for BIOS & Firmware.
- Check the latest BIOS version. If it matches your BIOS version, it is unnecessary to update it. If not, download the file.
- Extract and copy the file you just downloaded and paste it on a blank pendrive. If there are any instructions inside the
.zipfile, it may have more information on updating the BIOS. Thus, it may be worth a read. - Now, restart your computer and enter the BIOS by pressing the Del, F2, or F9 key depending on the manufacturer.
 Make sure that the pen drive containing the update file is attached to the computer,
 - Once in the BIOS, search for settings named EZ Flash, Q Flash, or M Flash. you can use these menus to update BIOS using a USB drive.
- Now, select the file. The update should automatically start.
- Make sure that the computer/laptops does not turn off during the update.
Related Questions
Why Should You Update Motherboard Drivers?
As discussed above, a driver acts as a software interface between the Operating System and the internal motherboard components. These components include input and output audio, network adapters, display adapters, USB ports, etc.
Updating the motherboard driver ensures that all motherboard components work flawlessly without any issue. A corrupted or outdated motherboard driver will decrease the system’s overall performance.
Can I Update all Driver at Once?
The Windows Update utilities in Windows allows you to download and install all pending driver update at once. However, if you want to install a specific driver, the Device manager is one of the best choice.
PRIME B660M-K D4|Motherboards|ASUS Global
ASUS Prime series motherboards are expertly engineered to unleash
the full potential of 12
th Generation
Intel® processors. Boasting a robust power
design, comprehensive cooling solutions and intelligent tuning
options, Prime B660M-K D4 provides users and PC DIY builders a range
of performance tuning options via intuitive software and firmware
features.
FLEXIBILITY
Comprehensive controls form the foundation of the ASUS Prime
series. The Prime B660 motherboard packs flexible tools to tune
every aspect of your system, enabling performance tweaks to
perfectly match the way you work to maximize productivity.

Intelligent Control
UEFI BIOS
The renowned ASUS UEFI BIOS provides everything you need to
configure, tweak and tune your system. It offers intelligently
simplified options for PC DIY beginners, as well as
comprehensive features for seasoned veterans.
Advanced Tuning for Serious Tweakers
An intuitive Advanced mode offered via the UEFI lets you
take complete control. A built-in search feature makes it
easy to find options, and various advanced functions let you
intelligently make nuanced adjustments so you can dial in
performance just the way you want.
Quick and Simple Setup
EZ mode displays vital settings and stats and also offers
guided wizards, drag-and-drop functionality, and one-click
application of important settings — all to help you get your
rig up and running in no time.
COOLING
Prime B660 series are engineered with multiple onboard heatsinks
and an array of hybrid fan headers to ensure your rig stays cool
and stable under intense workloads.
Heatsinks
Cooler by Design
Prime B660 series feature comprehensive cooling controls that
are configurable via Fan Xpert software or via the UEFI BIOS.
PERFORMANCE
Prime B660 series are built to handle the additional cores and
increased bandwidth of 12
th Generation
Intel® processors.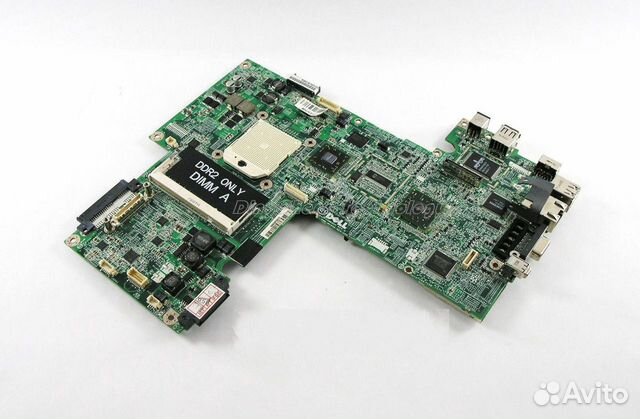 ASUS B660
motherboards provide all the fundamentals to boost daily
productivity, so your system will be ready for action with
stable power, intuitive cooling and flexible transfer options.
Power Design
Stable power is essential to extract every last bit of performance
out of 12
th Generation Intel processors.
Prime B660M-K D4 is geared to cater to the demands of these
high-core-count CPUs.
Memory
Storage
Two M.2 slots (up to 64 Gbps)
Prime B660M-K D4 offers a total of two M.2 slots that support
data-transfer speeds of up to 64 Gbps via PCIe
®
4.0, enabling quicker boot-up and app load times with OS or
application drives.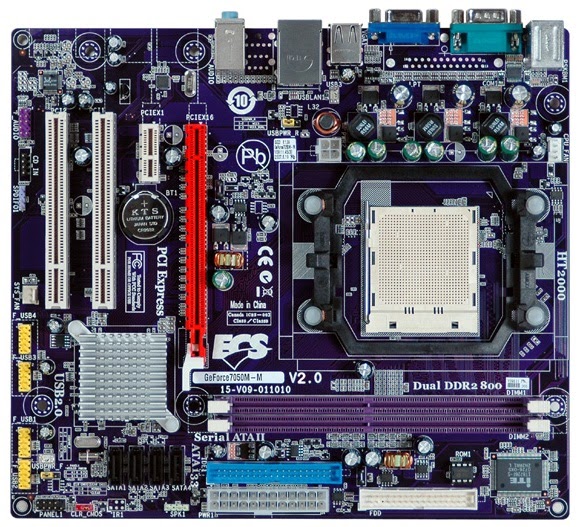
* Actual transmission speeds will be lower than the theoretical
maximum speed.
Connectivity
CUSTOMIZATION
Prime B660 series add the nuanced details that improve every
experience, from exclusive codecs that provide pristine audio
quality to intuitive RGB lighting controls that let you
customize your system to create a uniquely personal look.
Audio
Personalization
DIY Friendly
What are Motherboard Drivers? (with picture)
`;
 McGee
McGee
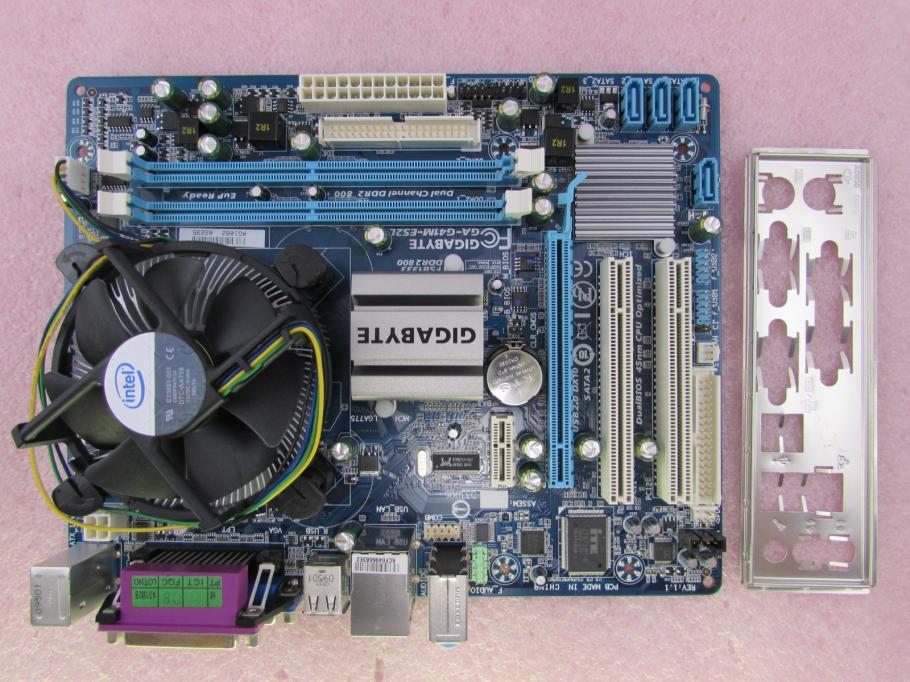
Motherboards are the parts of computers that control nearly all their functions. Motherboard drivers are the software interface between a computer’s hardware motherboard and the system’s software. Since the computer’s motherboard controls the entire system, fully functioning and updated drivers are important to the computer’s functions. In order to update motherboard drivers, an individual must know the manufacturer and model of the motherboard.
A computer motherboard.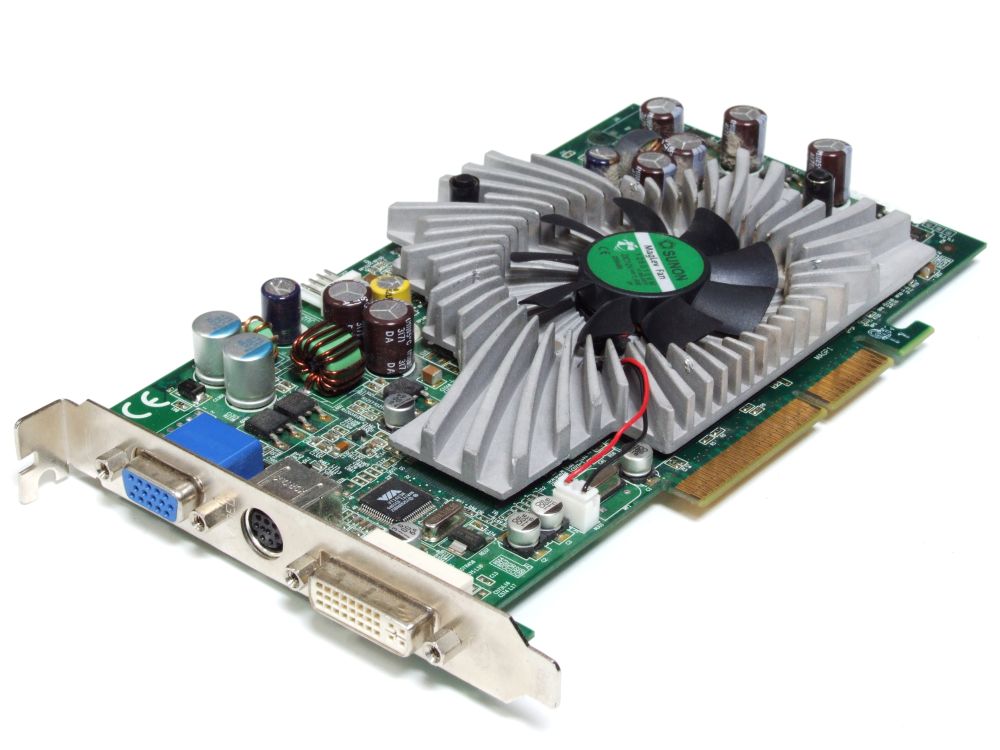
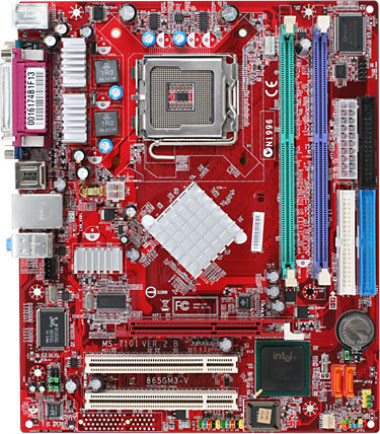
Originally, motherboards were simple with few extra features. These motherboards had a handful of necessary pieces and ports where users could add whatever they wanted. While motherboards like this still exist, newer motherboards often have embedded sound and network systems and possibly even external hard drive hookups or graphics cards. These motherboards are much more complicated, from both a hardware and a driver standpoint, than older models.
Computer drivers are software systems that instruct computer components and software in the proper use of a piece of hardware. A basic understanding of hardware functions is included with any modern operating system. Drivers provide additional information on how to use a specific make and model of hardware. For instance, an operating system may know how to use a video card, but without the driver for that video card, several of its special functions would go unused since the system wouldn’t know they were there.
Motherboard drivers often end up separated into different installation packages that affect one aspect of the board. The basic driver for any motherboard is for its chipset. This driver covers the basic functionality of the board; it is the driver that sits right in the heart of a computer. Each additional section of the board would have its own separate drivers–one for the network systems, one for the sound systems, and so on. While these drivers are less important than the chipset, a motherboard with security issues or inefficiency in one area can cause problems in others.
Fully updating a set of modern motherboard drivers can be a time-consuming process. Some aspects, such as network or sound updates, may come from the operating system’s update process. The majority of the updates, however, will come from the motherboard’s manufacturer or the manufacturer of the motherboard’s specific components. Some motherboard manufacturers will collect any necessary updates on their site; others will direct users to places where the updates may be found.
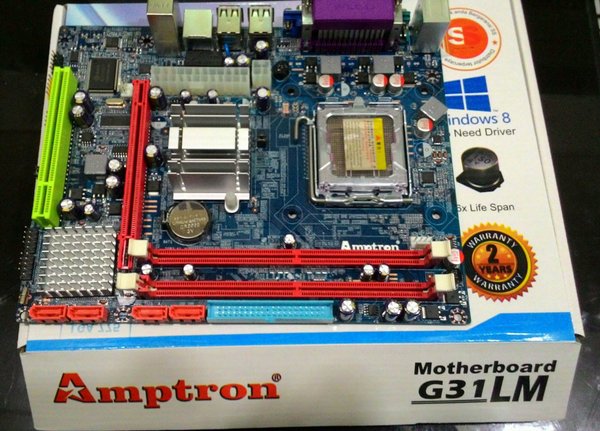
In order to find these motherboard drivers, a user needs to know the manufacturer and model of their motherboard. While this information is usually clearly printed on the board itself, most of the time, an average user can’t see it. The necessary information is also usually in the board’s manual or on the website of the computer’s manufacturer, if the computer was purchased preassembled. Lastly, certain software programs will determine the motherboard type.
You might also Like
Recommended
How to view a windows 10 motherboard driver
Contents
- View driver information in Windows 10
- View a list of drivers
- Method 1: Third party programs
- Method 2: System information
- Method 3 Device Manager
- Method 4: Command Prompt
- Conclusion
- 6 Ways to View Drivers on Windows 10
- View Drivers Through Device Manager
- How to identify components without drivers
- If the system did not find a driver
- Installing in Device Manager
- Using PowerShell to save a copy of drivers
- Official websites of device manufacturers computer
- Method 1: Official websites of manufacturers
- Method 2: Utilities for automatic software update
- Method 3: Online Services
- How to View a List of Installed Windows Drivers
- Using InstalledDriversList
- Unknown Devices
- DriverPack Solution for Help
- Driver Auto Installers
- Auto Install Drivers on Windows 10 with Local PowerShell 905 Basic
- Method 2: Software for updating drivers
- Finding a driver by device ID
- Video
Viewing driver information in Windows 10
Viewing a list of drivers
There are rare situations where you need to get this information. For this reason, tools that allow you to solve the problem are not very popular. At the same time, they exist both in the system itself and can be obtained from outside. Next, we will look at a few simple ways to view a set of drivers.
Method 1: Third party programs
In this paragraph, we will get acquainted with the products of the NirSoft developer, which offers many free utilities for interacting with the system. They have more functionality than the built-in tools, and in some cases give the average user the ability to look much deeper «under the hood» of Windows than Microsoft allows. Today we will use two programs — InstalledDriversList and DriverView.
In order to download the archive, you need to scroll down the page and find the links. Please note that there are options for different OS versions. If you are using 64-bit Windows, then download the file with the appropriate name.
Both utilities are portable, that is, they do not require installation.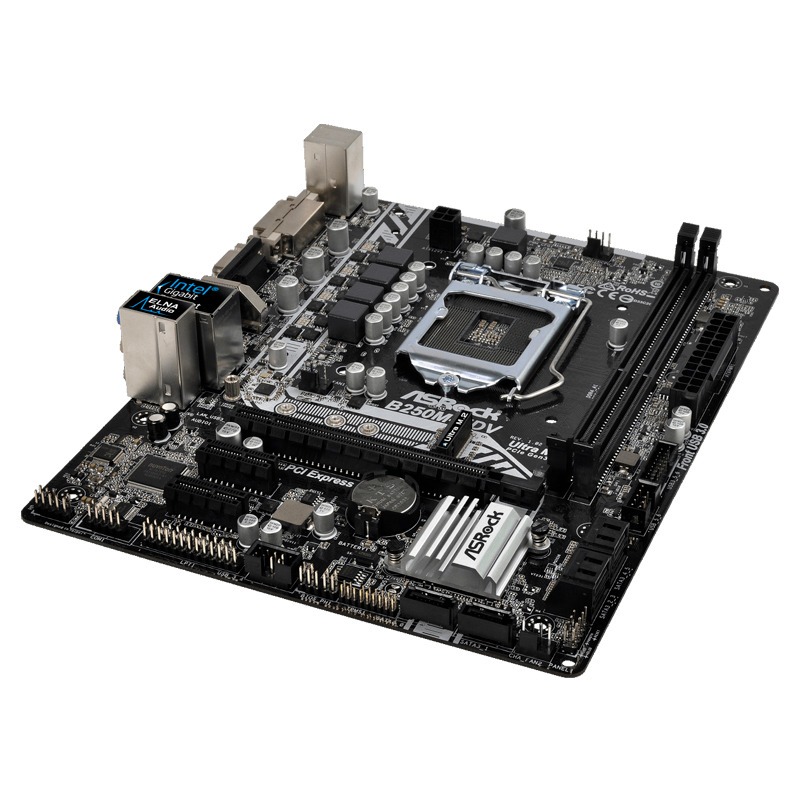 It is enough to unpack the resulting file into a folder prepared in advance.
InstalledDriversList
This program allows you to view a list of all drivers installed in the system and get detailed information about them. We launch the executable file with the appropriate name from the folder where we unpacked the archive.
The main window contains the target list and many feature columns that can be moved around for convenience. The main ones are «Driver Name» (driver name), «Display Name» (display name), «Description» (description) and «Startup Type» (startup type).
If you drag the scroll bar to the right, you can get other information, such as the type of the driver itself and the file, its version and location, memory settings, and so on.
Double clicking on the driver opens a window with data collected in a more compact block.
As you can see, there are colored icons next to all positions. They mean the following:
Right-clicking opens a context menu with which you can save data as a text file or HTML document. You can do this both for the selected driver and for the entire list.
DriverView
This utility has similar functionality, but only displays the drivers that are currently running on the system.
Firewood from third-party developers, that is, independent programs that are not related to Windows, is highlighted in pink.
Method 2: System Information
If you need to quickly get a list of installed drivers without resorting to third-party programs, you can use the built-in Windows tool called «System Information» . It is called from line «Run» ( Win+R ) by command
The data we need is in the branch «Software environment — System drivers» .
Method 3: «Device Manager»
You can get information about drivers for specific devices included in the system in «Device Manager» Windows.
The list shown shows the location of each of the software files, and below is the details of the selected document.
Method 4: «Command line»
If for some reason you need to get information about drivers without using the graphical interface, you can resort to using the «Command Prompt» run as administrator.
There are two options for obtaining the necessary data — in a compressed and detailed form. In the first case, the command
driverquery /fo list
will help us. If more detailed information is required, then enter the following command:
To improve the readability of the data, you can copy the entire contents0115 «Command line» ( CTRL+A , CTRL+C ) and then paste into standard notepad. In order for all columns to be displayed correctly, function «Word Wrap» must be disabled in menu «Format» .
Conclusion
We have provided several ways to view driver information in Windows 10. Each of them will be useful in a specific situation. The most «advanced» is the use of utilities from NirSoft. If there is no desire to run third-party programs on a PC, standard tools are quite suitable. «Command line» will help out if it is impossible to access the graphical interface in case of failures or remote administration.
Source
6 ways to view drivers on Windows 10
In general, a driver is a software layer between the operating system and the hardware configuration of the computer. Its task is to translate the commands coming from the OS into a language understandable for devices and establish feedback between them. Our experts tell you how to get and view complete information about the drivers installed in Windows 10.
Viewing drivers through Device Manager
All information about the hardware configuration of the computer, along with management tools, is collected in the Device Manager.
We call an additional menu «Start» using the keyboard shortcut «Win + X». Open the item highlighted in the screenshot.
In the dispatcher window, find the group of interest and expand it to view the devices included in it. For each, you can call the context menu. Let’s take the keyboard as an example and open the «Properties» item.
Switch to the «Driver» tab. In the upper part of the window, under the device name, general information about the manufacturer, development date, software version and digital signature is provided. By clicking the «Details» button, we can get data on the location of the driver components.
The window that opens contains their general list, which indicates the name and location in the operating system. Selecting a specific file, we look at its characteristics.
By going to the «Details» tab in the properties window, you can collect even more information about the driver. By expanding the drop-down menu indicated by the arrow, we get a long list of parameters, starting with a general description.
The msinfo32 utility has been part of Microsoft operating systems since Windows 98, but is rarely used. With its help, you can get almost complete information about your computer, including a list of installed drivers.
Call the keyboard combination «Win + R» window «Run». We type in the text field «msinfo32». We start the execution of the entered command by pressing «OK» or the enter key.
The «Components» section contains information about the hardware configuration and is similar in structure to the device manager. For example, expanding the «Input» group, you can see the characteristics of the keyboard. The driver displays the path where it is located on the system, software version, file size, and installation date.
The «Software Environment» section lists the main features of the operating system. The item indicated in the screenshot contains information about the standard drivers included in Windows.
Opening the «File» menu in the line of control commands, you can see two items shown by arrows. «Save» implies the creation of a complete copy of the collected information. The data is transferred to a file with the NFO extension, which opens in the msinfo32 program. «Export» allows you to record the characteristics of a particular device in a plain text document.
View drivers on Windows 10 via the command line
The entire list of drivers installed in Windows can be obtained using the command line.
In the additional menu of the Start button, use the checked item to launch the console with administrative privileges.
Type the «driverquery» command. The window displays a complete list of all drivers, sorted alphabetically.
For ease of study, it can be copied using hotkeys. Select all the contents of the command line window with the combination «Ctrl + A». Copy the information by pressing «Ctrl + C», and paste it into Notepad with the combination «Ctrl + V».
The use of additional keys allows you to display detailed information. For example, the «driverquery /si» command is shown. It opens a list of only signed drivers. A complete list of additional options can be obtained by typing «driverquery /?».
View drivers on Windows 10 using PowerShell
PowerShell was developed by Microsoft and promoted as a modern alternative to the CMD console. In addition to supporting legacy commands, it uses object-oriented scripting.
Open the additional menu of the Start button. Run PowerShell in elevated privilege mode.
The input command takes a few seconds to process, after which it is displayed as shown in the screenshot. The array of received data does not fit into the default 3000 rows. To study it from the screen, the output size must be increased in advance in the Powershell settings.
In the search window, enter the full name of the file, including the extension. The number «2» marks the field with available options for action. You can open the document for study, or change to the system32 directory and move it to a more convenient location on your hard drive.
If you copy the path highlighted in the screenshot from Notepad to the Explorer address bar, you can directly open the configuration file of the selected driver.
View drivers on Windows 10Third-party programs
Third-party programs allow you to get information in a more familiar graphical representation.
AIDA64
AIDA is designed to collect and display detailed information about the computer. The program is paid, but with a 30-day trial period.
The partition indicated by the arrow is similar to Windows Device Manager. The tree structure of the hardware configuration is displayed in the upper part of the right half of the window. Information about the device selected in it is displayed at the bottom. For a driver, you can view a general description, release date, vendor, and version.
The «Operating system» section contains all the characteristics of Windows installed on the computer. The item indicated by the arrow in the screenshot contains information similar to that displayed in the Msinfo32 program. Here is a complete list of system drivers.
The built-in reporting wizard allows you to save data to a TXT or HTML file for later detailed study.
InstalledDriversList
Free utility from a large collection developed by Israeli programmer Nir Sofer. You can download it from the official website of the developer. Distributed by InstalledDriverList as a ZIP archive, the Russian language pack is downloaded as a separate file.
After starting the utility displays a list of drivers in the window. Opposite the name of each arrows are colored labels. A green indicator indicates that the driver is in use by the system. Items that are installed but not currently active are marked in yellow. Detailed information can be viewed by calling the context menu. The «Properties» item opens a separate window with the characteristics of the selected driver. The group of elements indicated by the number «3» allows you to create reports in TXT or HTML formats.
The screenshot shows the characteristics that open when you click on the «Properties» button in the dialog menu.
DriverView
Another utility from the same developer that collects information in more detail.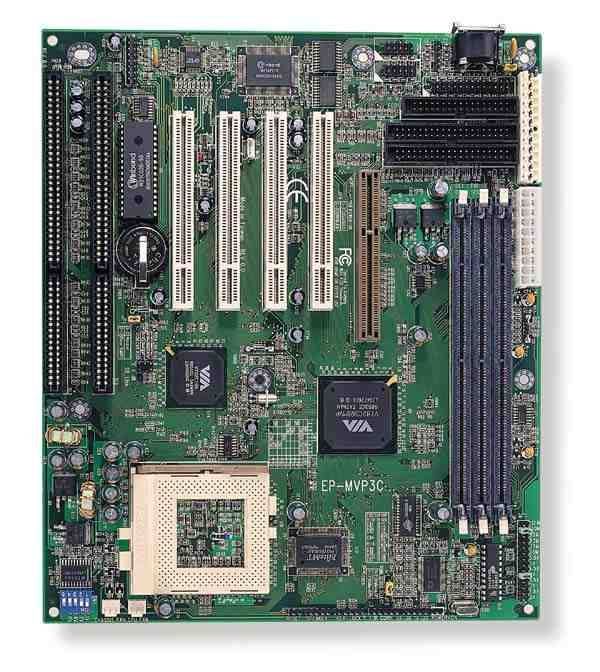 You can download it from the official NirSoft page as a ZIP archive. The Russian language is also downloaded as a separate file.
After starting, DriverView analyzes the state of the system and lists the currently used drivers. To obtain detailed information, select the element of interest and call the context menu with the right mouse button.
Let’s take a closer look at the actions performed when using the items marked with numbers.
«Select column» opens a menu in which you can tick the items of interest. The buttons located on the right side of the selection area are intended for sorting the display order of columns with information. Having thus configured the appearance of the main program window, click «OK».
The «Properties» item contains data collected by the utility about the selected driver. To view information, DriverView can save information to local report files. Like the applications before it, TXT and HTML formats are available.
In conclusion
The methods given by our experts allow you to see which drivers are installed in Windows 10 with varying degrees of detail. It remains only to choose the most suitable one and start studying the information collected.
Source
How to find drivers for a computer with a self-selected configuration!
Installing drivers is the next step after installing Windows itself. In some cases, when a version of Windows 8.1 or 10 was installed on a modern computer with very common components, this process may not be necessary. Modern versions usually implement all the necessary drivers themselves, and they can only be updated if necessary. In the case of Windows 7, PCs and laptops with very old, very new or specific stuffing, as a rule, user participation is required. So, how to install drivers in Windows?
What is a driver
A driver is software for an operating system, in this case for Windows, which is responsible for accessing certain hardware components of a computer. In an extended sense — for access and the correct functioning of this very stuffing. Windows contains the basic drivers necessary for its primitive functioning on computers, laptops, supported tablets and other devices..png) But if we are talking about the full-fledged operation of the system, then individual drivers must be implemented for some components and separate peripherals (connected external equipment). They are provided by manufacturers of these components and peripherals.
But if we are talking about the full-fledged operation of the system, then individual drivers must be implemented for some components and separate peripherals (connected external equipment). They are provided by manufacturers of these components and peripherals.
Most drivers are components that are embedded in the Windows system without their own interface and personal control environment. But there is another type — supplied with both an interface and an environment for configuring the operation of components or peripherals. For example, in the case of video cards, audio cards, printers, modems, music and other connected equipment, etc.
View drivers on Windows 10 via the command line
The entire list of drivers installed in Windows can be obtained using the command line.
In the additional menu of the Start button, use the checked item to start the console with administrative privileges.
We type the “driverquery” command. The window displays a complete list of all drivers, sorted alphabetically.
For ease of study, it can be copied using hotkeys. Select all the contents of the command line window with the combination «Ctrl + A». Copy the information by pressing «Ctrl + C», and paste it into Notepad with the combination «Ctrl + V».
The use of additional keys allows you to display detailed information. For example, the «driverquery /si» command is shown. It opens a list of only signed drivers. A complete list of additional options can be obtained by typing «driverquery /?».
How to identify components without drivers
The absence of drivers for individual devices makes itself felt by very obvious signs. If the system has a skewed, low resolution screen, then there is no video driver. If there is no Internet, there is no network card driver or Wi-Fi module. There is no sound or access to the microphone — it means that there is no sound card driver. There is no access to the video camera — there is no driver for it. But we will find the lack of USB 3. 0 drivers only when slowly copying data to a USB flash drive or external hard drive. Outdated or inappropriate drivers for motherboard components will be felt by the clumsy operation of Windows.
Components without drivers can be found in the system device manager. In Windows 8.1 and 10, you can get to it from the menu using the Win + X keys.
In Windows 7, you can press Win+R and type: devmgmt.msc
If a device does not have a driver, it will be marked with a yellow triangle with an exclamation mark.
In this case, the operating system does not always determine the specific type, and often even the type of components. And in such cases they are displayed either with a common name like “Multimedia controller”, or as “Unknown device”.
In the case of a video card, the absence of a driver will be indicated by its definition as «Basic video adapter (Microsoft)». This means that the system is running on the base generic driver, not the individual driver. Hence the skewed screen — only for basic needs.
If the system did not find the driver
However, there is a chance that in your hands, or rather in your system unit, there will be a device for which Windows cannot find a driver on its own. Then you have to install it from the disk or the manufacturer’s website. When updating a device driver, you should select «Locate a driver on this computer» and specify the path to the folder where you downloaded it.
For most modern devices, the Microsoft Windows operating system itself is able to find the appropriate driver without your participation. Just check if automatic driver updates are enabled.
If you decide to try some beta driver from the device developer at your own risk, then update it manually through the «Find a driver on this computer» option.
Also, do not forget about the built-in mechanism for automatic driver updates, which are supplied by the driver developer himself. You should not disable it if you want to have the most up-to-date versions of installed drivers.
Installation in Device Manager
If you have access to the Internet, you can try to install the missing driver directly in Device Manager. On the problem device, we call the context menu, click «Update driver».
Select automatic search.
We are waiting for his results.
If the system finds a driver on the network, it will automatically download it.
And notify us of this.
If the system does not find anything and reports that the most suitable drivers are already installed, try searching in the Update Center. But for this, of course, the updates themselves should not be disabled. And after installing Windows, it should take some time for the system to download update packages from Microsoft servers.
If, in this case, the system claims that the most suitable drivers are already installed, or honestly admits that it could not find anything,
proceed to the manual installation of the drivers.
Using PowerShell to save a copy of drivers
Another way to do the same is with Windows PowerShell.
When using all three methods, the backup will be the same, however, knowing that there is more than one of these methods can come in handy if the default one fails.
Official websites of device manufacturers
You can manually install device drivers in the same way as regular programs — by running their installation files in EXE format. You can take such driver installation files on the DVD that comes with the package for laptops, motherboards, video cards, external audio cards, external network cards, camcorders and other components or peripherals. However, such a DVD is not found in every case. Moreover, outdated versions of drivers will be stored on it. And fresh and always up-to-date versions are on the website of component manufacturers.
To get to the manufacturer’s website, in the case of laptops, enter the name of their model into the search engine and add the word «website».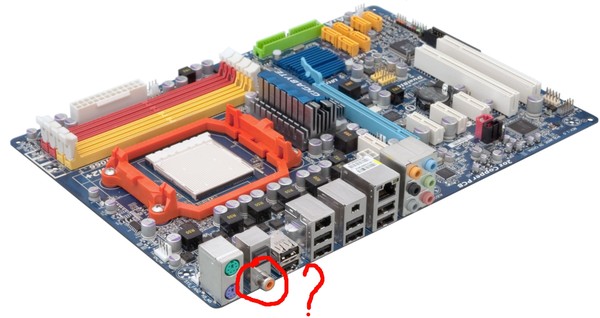 For example, «Samsung R780 site». A special type of software will help us find out the names of internal components and peripherals — diagnostic programs AIDA64, CPU-Z, Speccy, etc. With their help, you can determine the names and copy them to the clipboard.
Then, we insert the names into the search engine, add the word «site» and find the official website of the desired manufacturer among the first search results. Let’s open the device page and look for driver installers. As a rule, they publish them in the «Support» section. And we download everything we need.
We do this with video cards: find out the model.
Go to the manufacturer’s website:
Specify the series, model and other required characteristics of the video card on the website, select the version and bit depth of Windows.
And download the video driver installers.
Find out what drivers you need to install on your computer
Probably everyone who has ever reinstalled the operating system on their own has a popular question: how to find out what drivers need to be installed on the computer for its stable operation? This is the question we will try to answer in this article.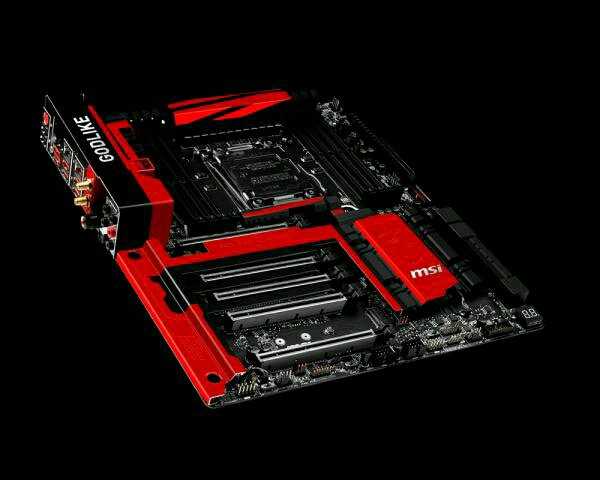 Let’s understand in more detail.
What software is needed for a computer
In theory, software for all devices that require it should be installed on a computer or laptop. Over time, operating system developers are constantly expanding the Microsoft driver base. And if in the days of windows XP you had to manually install almost all the drivers, then in the case of newer operating systems, many drivers are already installed automatically. However, there are devices for which software has to be installed manually. We bring to your attention a number of ways that will help you in solving this issue.
Method 1: Official websites of manufacturers
In order to install all necessary drivers, you need to install software for all boards in your computer. This refers to the motherboard, video card and external boards (network adapters, sound cards, and so on). At the same time, the Device Manager may not indicate that drivers are needed for the equipment. When installing the operating system, the standard software for the device was simply used..png) However, software for such devices must be installed original. Most of the installed software falls on the motherboard and the chips integrated into it. Therefore, first we will look for all the drivers for the motherboard, and then for the video card.
However, software for such devices must be installed original. Most of the installed software falls on the motherboard and the chips integrated into it. Therefore, first we will look for all the drivers for the motherboard, and then for the video card.
Method 2: Utilities for automatic software updates
If you are too lazy to search and install all the software manually, then you should look at programs that are designed to facilitate this task. We reviewed the most popular programs for automatically searching and updating software in a separate article.
Lesson: Best Software for Installing Drivers
You can use any of the described utilities. But we still recommend using DriverPack Solution or Driver Genius. These are the programs with the largest database of drivers and supported hardware. We have already told you about how to use DriverPack Solution.
Lesson: How to update the drivers on your computer using DriverPack Solution
Therefore, let’s tell you how to find and install all the drivers using the Driver Genius program.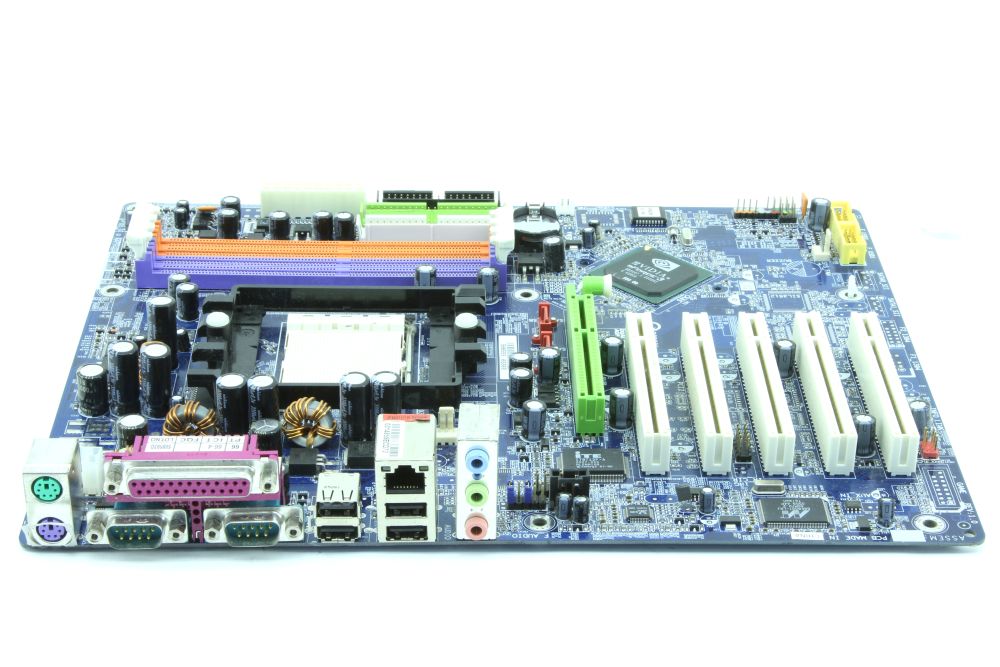 So, let’s begin.
Method 3: Online Services
If the previous methods did not work for you, you can only hope for this option. Its meaning is that we will manually search for software by a unique device identifier. In order not to duplicate information, we recommend that you familiarize yourself with our lesson.
Lesson: Finding Drivers by Hardware ID
Here you will find detailed information on how to find the ID and what to do next. As well as a guide to using the two largest online driver search services.
It is not important for the average user to know where they are and what drivers they have installed, but if you encounter any problems, it may be useful for you to look at the list of all installed Windows drivers. But who wants to click on every item in Device Manager?
How to list installed Windows drivers
For this purpose, Windows has a built-in utility that lists all installed drivers, which should make your life easier.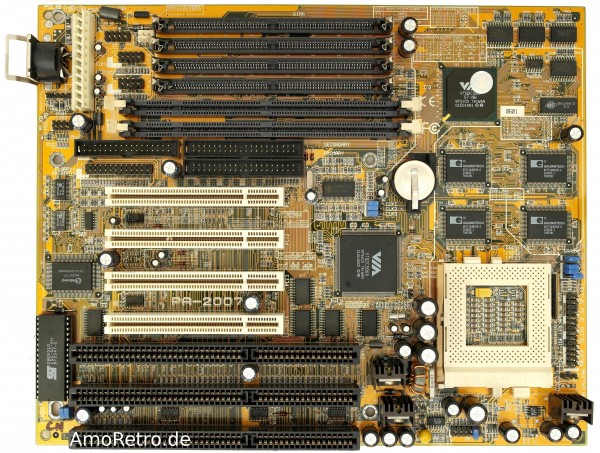 All you need to do is enter the following command at the command line:
This will allow you to see a list of drivers and the date of each one. If you want to get more information about the drivers, you can add the switch “ /V”
to the command, which can be used with “
| more
” to prevent the list from scrolling automatically. There are also other ways to get a list of installed Windows drivers, uploading to a CSV file and showing the drivers you signed. To learn more about this, use the key “
/?
«.
Using InstalledDriversList
After downloading the archive with the program, extract it and run the utility as an administrator. You will see a list of all installed Windows drivers with all the details. By double clicking on the driver you are interested in, you can get more information such as the date, version, and location of the driver. A green icon indicates that the driver is currently in use, if the icon is yellow, the driver is installed but not active.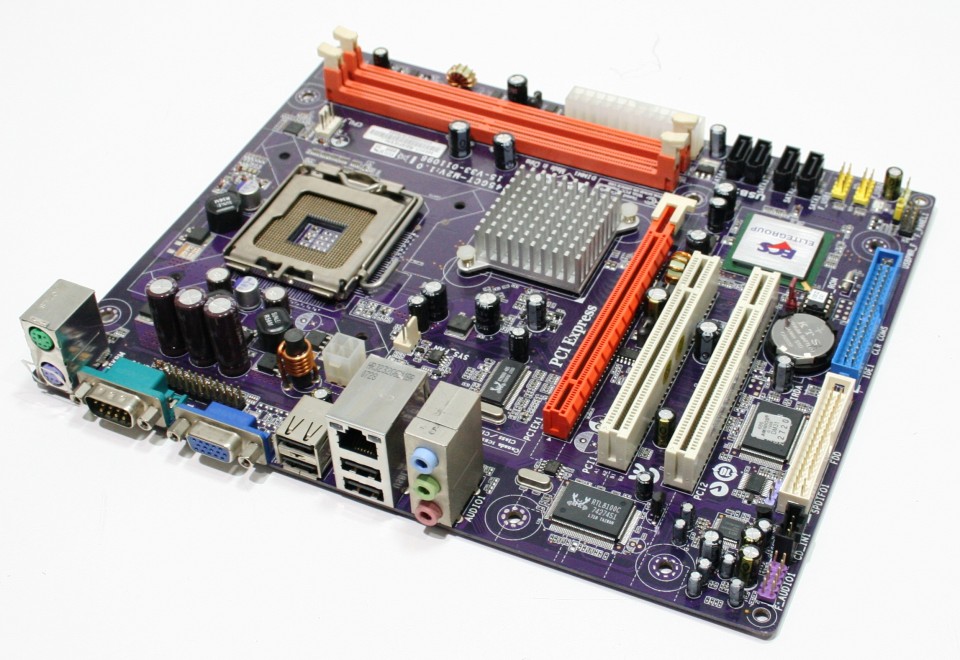 If you see a red icon, it means that there are some problems with the driver, and you can fix them by disabling or uninstalling this driver.
Where does almost any hardware problem start on the tech forums? That’s right, with a suggestion to update the driver. The fact is that a driver is a program, and its developers collect feedback and error messages that users send them, and then release new versions with bug fixes. But how do you check if you have the latest drivers for your devices? In this article, you’ll learn how to check for up-to-dateness and update drivers without resorting to non-standard tools and third-party applications.
Unknown devices
How can I find drivers for unknown devices that are not identified by Windows Device Manager or diagnostic programs? In such cases, we need to search by ID. In the manager on the problem device, we call the context menu, select «Properties».
In the properties window, we go to the «Details» tab. Select the item «Hardware ID» in the «Property» column. And copy its first value.
The copied value is entered into the Internet search engine. And we are looking for a driver by ID. If nothing is found, use the second, third, and so on. «Hardware ID» value. In order not to download a dummy, non-working trash or even a virus instead of a driver, it is better to look for drivers (at least initially) on special sites like: Use the DriverPack Solution program.
It will always keep you informed about what wood your computer needs. In addition to ease of use, one of its main advantages is that the program is free.
You can download this driver package here: https://drp.su/ru/foradmin
This software has long established itself as a good assistant in such matters. At first, users had to create disk images for it, which took up 10 GB each. Now everything is much simpler: you only need to download a file about 3 MB in size and perform an elementary installation. The developers have finally developed an online version of the package, but an offline version (weighing 10-12GB) is also available.
After installing this program, it will monitor and show which drivers you are missing for sound, video components, external devices, etc. To see them, after scanning, click «Expert Mode».
See what you really need from the proposed, check these items and click the green Install automatically button. But I do not recommend installing everything, as DriverPack can supply you with a bunch of extra stuff.
Don’t oversleep this moment, it’s important.
This completes your work. It remains only to wait until the utility finds and downloads the software. This can take quite a lot of time. When the process completes, be sure to reboot your system for the updates to take effect.
There are a bunch of similar programs, but I personally don’t quite like them, and most of them are paid.
I hope you found this article helpful. And there is? Then tell your friends about it.
In order to find out which driver is needed for a video card, you need to know which video card is installed on your computer. You can get information about the installed video card in different ways. If a video card driver is already installed on the computer and you want to update it, then the name of the video card can be viewed in the «Device Manager». In order to launch the «Device Manager» simply open the «Start» menu and use the search.
After launching GPU-Z, you will see a small window with detailed information about your graphics card. At the top of this window there is a text line «Name», the name of the installed video card is indicated here. In this case, the screenshot shows the NVIDIA GeForce GTX 950 video card. In this case, it’s ASUS. If you have multiple video cards installed in your system, you can view information about each of them. To do this, use the drop-down list, which is located at the bottom of the GPU-Z window.
So, we already know what model of video card we have, but how do we know which driver is needed for the video card?
After we have determined the model and manufacturer of the video card, we can start searching for a driver for our video card. If you have a video card from ATI / AMD, then go to and fill out the form to search for a driver.
After we have filled in all the fields of the search form, we click on the «Display Results» button. Next, a page will load on which you will be prompted to download the driver for the video card.
This search form works in a similar way: choose your video card model and fill in the rest of the fields. After clicking on the «Search» button, you will be offered the necessary driver.
Drivers can be called small programs that allow Windows 7 to recognize the hardware that is on your computer. This can be found in 2 ways. For the device you have selected, Device Manager is the best option. And to view the entire list of installed drivers, use the System Information utility.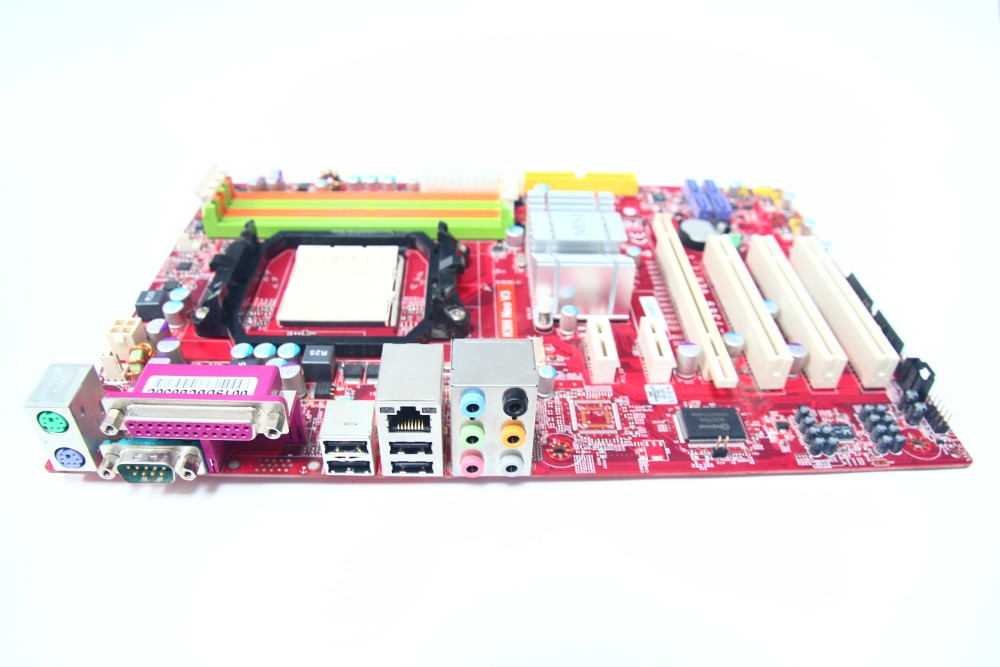
2. Click on the small triangle to the left of the equipment category, for example, «Video card» to open the category.
3. Click the right mouse button on any equipment and click «Properties».
4. Click on the «Driver» tab in the properties window to view the driver vendors, date, version, and signature.
5. Click «Driver Details» to see a list of driver files associated with this driver.
«System Information»
2. When the list appears, click on «System Information».
3. Click on the plus sign to the left of Software Environment to open the category.
4.Click on «System Drivers» to display a list of all system drivers.
Driver auto-installers
There is a simpler and more convenient alternative to manually searching and installing drivers — special programs for automatically installing and updating drivers. Many of them are:
The essence of their work is reduced to the complete automation of the task. These programs scan Windows for missing and outdated drivers, download their installers from the Internet and embed them into the system. For example, in the free DriverHub program, we need to run a search.
Wait for the system scan to complete.
Select all or some of the detected drivers to be installed/updated. And, in fact, start the installation process itself.
The convenience and usability of this method, unfortunately, has the other side of the coin: if the driver is detected incorrectly, installing it or updating it to some unfinished alpha version can lead to problems in Windows. Based on this, some of these programs provide for the creation of a system restore point before starting their work. When using programs that do not provide for creating a point, you need to create it yourself. Another disadvantage of autoinstallers is that free programs can simultaneously introduce a variety of commercial junk into the system. Well, of course, auto-installers will be powerless in the absence of a network card driver, Wi-Fi, or just an Internet connection. In such cases, autoinstallers with a local database of drivers will help.
Note : Windows 7, and sometimes modern versions 8.1 and 10, can surprise us in the form of the absence of at least a basic driver for a network card or Wi-Fi. If there is no DVD with laptop or motherboard drivers, you should always prepare for such cases in advance, before reinstalling Windows. And store on a non-system disk or external media the network card or Wi-Fi driver installer downloaded from the website of the laptop or motherboard manufacturer. Or even store the auto-installer program with a local database.
View drivers on Windows 10 using PowerShell
PowerShell was developed by Microsoft and promoted as a modern alternative to the CMD console. In addition to supporting legacy commands, it uses object-oriented scripting.
Open the additional menu of the Start button. Run PowerShell in elevated privilege mode.
The input command takes a few seconds to process, after which it is displayed as shown in the screenshot. The array of received data does not fit into the default 3000 rows. To study it from the screen, the output size must be increased in advance in the Powershell settings.
In the search box, enter the full name of the file, including the extension. The number «2» marks the field with available options for action. You can open the document for study, or change to the system32 directory and move it to a more convenient location on your hard drive.
If you copy the path highlighted in the screenshot from Notepad to the Explorer address bar, you can directly open the configuration file of the selected driver.
Auto-installers of drivers with a local database
There are not so many auto-installers of drivers with a local database on the software market. Their absolute advantage is that they are not dependent on the Internet. The disadvantage is that they have an impressive weight due to the fact that, in fact, they come with drivers for all possible computer stuffing. A popular such auto-installer — the program Snappy Driver Installer Full — weighs more than 16 GB.
But it can quickly bring Windows to a working state. When launched, it will scan the system for missing or outdated drivers. We just have to select all or individual drivers with checkboxes and install them.
That’s about it. See you on the next blog pages. For now… For now.
Method 2: Driver Update Programs
The previous method of checking your drivers may seem quite complicated, and in part it is. For an ordinary user, it will be much easier to use special programs that will automatically scan the computer for outdated versions of software and offer the appropriate updates for them. One such program is Driver Booster.
Immediately after this, the process of downloading and then installing drivers for computer devices will start. Your computer may restart several times during this step.
Searching for a driver using the device ID
If the OS could not find a suitable driver, and the user does not have the necessary information about it, you can independently find the driver using the ID of the equipment being installed. This method is also suitable for finding drivers for non-standard equipment on a PC.
Launch Device Manager (see above).
Right click on «Unknown device» and left click on the line «Properties».
A device that is not recognized by the system or does not have a device is usually indicated in the manager with a question or exclamation mark.
Open the Details tab and select Hardware IDs from the drop-down list. The ID of the selected equipment will be displayed in the Value area.
Click on the top line in the «Value» area and copy it to the PC memory by pressing the «Ctrl + C» keys on the keyboard.
Go to the DriverPack Solution website using the link: https://devid.drp.su/?l=ru and, placing the cursor in the search bar, paste the copied data into it by pressing «Ctrl + V». Click to select the OS version and bit depth. Click the «Find Drivers» button.
The site will provide the correct driver. Click «Download».
The file can be found in the browser options.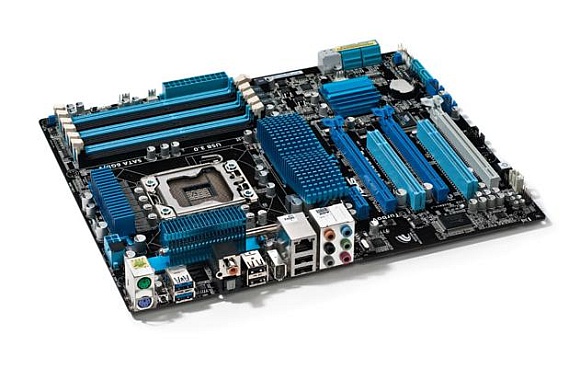 Click on the icon of the three stripes «Settings», then on the line «Downloads».
Double-click the file and click Install Manually.
In the Wizard that opens, click Next.
Wait for the driver to install. Click Done.
In the manager, an unknown device will appear activated.
Source
Video
Where are the drivers on the computer. How to find out if there are drivers on the computer
and video card?
how to check if all drivers are installed on windows 10
How to find out the model of the motherboard on a computer and laptop windows 10, 7, 8,XP THREE easy ways
How to find out the model of the motherboard, video card, processor, DirectX version , BIOS ? Windows PC in 2021
How to find out which drivers are needed
Where are Windows 10 drivers stored
How to install drivers on the ASUS motherboard correctly?
What is the name of the motherboard driver. How to update the chipset driver of any motherboard? Detailed instruction
Hello dear readers.
New system (or motherboard) boards have two functional modules. The first is a southbridge chip that interacts with various interfaces. The second is the northern one, which serves the memory and processor. For the correct collaboration of these two components, special software is used. In order to always get the most out of your equipment, you need to constantly install newer versions of the program. This will allow you to work with the desired applications at the proper speed. But how to update motherboard chipset driver? After all, this is in fact the most important part of the device.
The first thing you need to find out for yourself — do you need to update? If you have old equipment installed, it is advisable to do this. Of course, it is impossible to say that without modification you will significantly lose performance. But in general, performance should increase. This will also eliminate errors that could be associated with this component. So the benefits are obvious.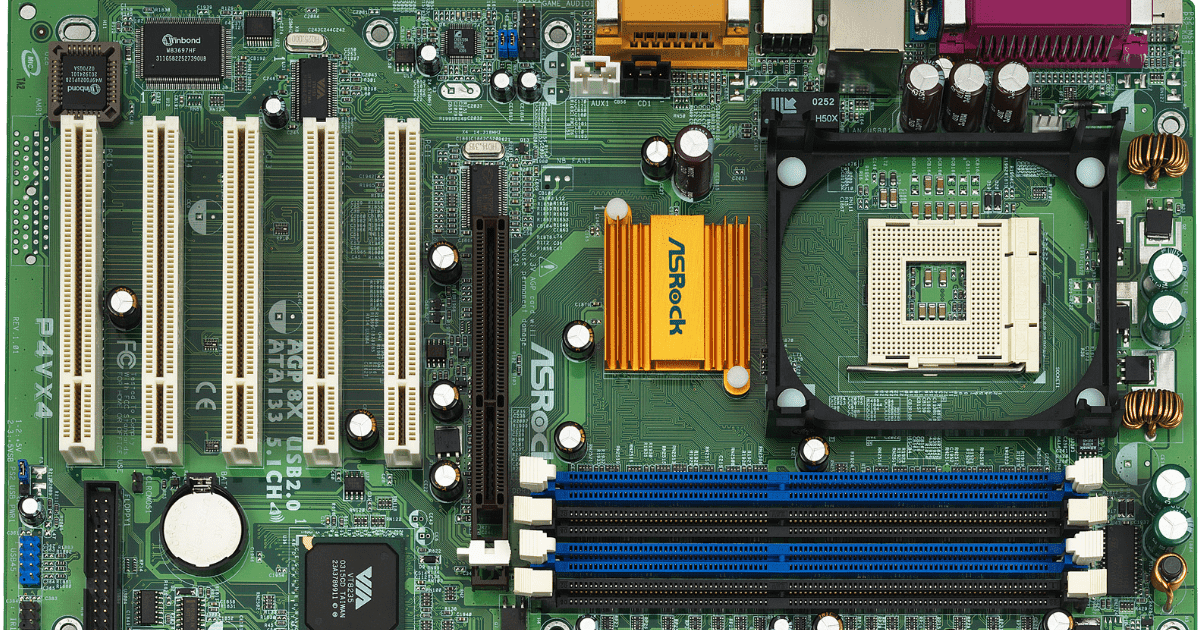
But in the case when you are already using completely new equipment, problems may arise with the update. So you have to even roll back the system. Therefore, it is better to first evaluate your capabilities. It’s also a good idea to go online first to find out what people are saying. To do this, in the search engine you need to write the model of your motherboard with the phrase « driver update
«. And the first results will be messages from forums where people share their experiences.
Find out the chipset version using built-in features
( )
To find out the version of the motherboard with the Intel chipset, you need to make a few steps:
However, this option is also suitable for the AMD chipset. So try.
Sometimes it happens that the corresponding line does not contain the information we need.
Another option is to visually inspect the board itself. To do this, it will be enough just to open your system unit.
With additional software
( )
Another equally effective way to update chipset drivers is to use third-party software to find out the model.
Although there are many such developments today, many experts agree that it is best to use CPU-Z for this. This utility easily determines the type and model of the chipset. To do this, you need to make several movements:
This method is suitable when you are about to change « firewood
» on a laptop. After all, spinning it to find out the model will be problematic.
To update the driver, go to the developer’s website and find the appropriate software. Download and run the file. Using the prompts, install the software. This may take up to ten minutes. After the end of the process, reboot.
Your hardware should now work without any errors. In addition, the speed of data processing will noticeably increase.
Hello friends! In this article, we will show you how to download Asus motherboard drivers.
in three different ways, choose any, of course, the most correct way is to download the drivers on the manufacturer’s website mat. fees, but unfortunately this is not always possible. At the beginning of the article there are several letters from our readers.
How to download drivers for motherboard Asus
In fact, everything is very simple here! The easiest way to install drivers on the motherboard is from the driver disk that came with the motherboard when you bought it, but if your dog ate this disk, then download the drivers to the mat. board, you can from its official website, if the necessary drivers are not there, you need to use the built-in Windows tool «Device Installation Settings
» or DriverPack Solution
. Let’s analyze all the options in detail, and at the same time, along with the drivers for the motherboard, install the drivers for the sound device, network adapter, and so on.
A friend of mine asked me to assemble a system unit for him. He chose the ASUS motherboard, the Windows 8 operating system, after assembling the computer and installing the system on it, the eight installed automatically most of the drivers.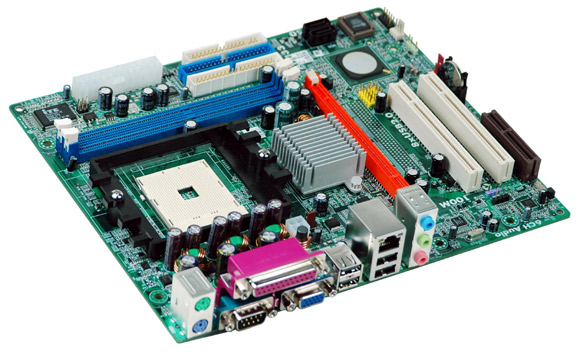 But here are the versions of the drivers installed, new or old, and what to do if not all drivers are installed, let’s go to the official Asus website and figure it all out.
First of all, you need to look for drivers first of all on the official website of the motherboard. You may not be able to find everything, and sometimes nothing. For example, the site of your outdated motherboard will not have drivers for the new Windows 8 operating system. What should I do then? Read on!
Note:
Just in case, before work.
Go to the site http://www.asus.com/ru/
, you only need to enter the motherboard model, for example, your motherboard is called Asus P8Z77-V LX, and you need to enter P8Z77-V LX.
In the window that appears, click on the name of our motherboard.
Support.
Download and specify the version of the operating system we have installed. For example, I have Windows 8 installed, we see 82 files (s) were found.
Which one should be installed and in what order? First of all, install the drivers on the motherboard
.
Friends, what are motherboard drivers? The motherboard consists of a Chipset (from the English ChipSet) a set of chips that, interacting with each other, ensure the operation of everything that is connected to the motherboard. There are few main manufacturers of chipsets for motherboards: Intel, AMD, NVIDIA, VIA Technologies and SIS.
A few years ago there were two main chips on the motherboard:
The northbridge provided the interaction of the processor with the RAM and the video card.
The southbridge was responsible for the operation of PCI, SATA, Ethernet, RAID, USB controllers, power management (Power management, APM and ACPI).
In order for all the listed devices to work correctly, you need to install drivers on the motherboard or, more precisely, on the motherboard chipset.
At the moment, on all new Intel and AMD chipsets, there is no longer a division into north and south bridges.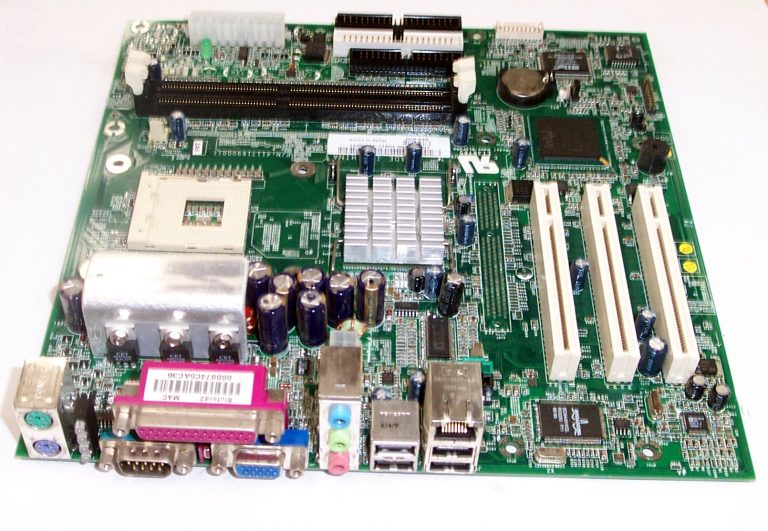 In simple words, the video card (PCI Express graphics bus) and RAM (memory controller) are now controlled by the processor.
And everything else is controlled by a single chip responsible for supporting SATA 3 Gb / s, 6 Gb / s ports, USB 3.0 and 2.0 ports, a RAID controller, an Ethernet controller and much more.
In simple words, installing drivers for this chip is the same as installing drivers for the motherboard.
Chipset
Intel Management Engine Interface V8.1.0.1263 for Windows 8 32/64bit
— A set of drivers for motherboards assembled on Intel chips and designed to work in the Windows 8 operating system, but this is in simple words. But these are smart words.
Intel Management Engine Interface — This is a subsystem built into the motherboard chipset that performs tasks such as monitoring (observation) of temperature, fan speed, Windows loading, sleep mode, and much more. Therefore, it is very necessary to install these drivers.
So, select the latest version and click on the Global (server) button.
Downloading the archive, unzip the contents into a folder. For those who do not have an archiver program, download free 7-Zip on site
http://www.7-zip.org/
. After unzipping the archive, run the AsusSetup.exe installer file in the folder
And install the Intel Management Engine Interface drivers
.
Here, in the Chipset section, we see the component we need the most.
Intel Chipset Driver V9.3.0.1021 for Windows 8 32bit & Win8 64bit—(WHQL)
– Necessary set of drivers for Intel chipsets. The operating system installs INF files that configure the chipset components necessary for the correct functioning of many motherboard components (PCI, SATA, IDE, RAID, USB 3.0 and 2.0) and other system devices) and their accurate identification in the Device Manager. Also select the latest version and click Download.
Download the archive, unzip it to a folder, run the AsusSetup. exe file and install the driver for the motherboard chipset.
Even on the website of the motherboard manufacturer, the driver for the chipset may not be the latest version. The latest chipset driver can only be downloaded from the chipset manufacturer’s website. The chipset for our motherboard was manufactured by Intel, which means that the drivers for the chipset of our motherboard are also posted on the Intel website. Since the devil will break his leg on this site, I offer you a little guide.
Go to website
https://downloadcenter.intel.com/Detail_Desc.aspx?lang=rus&DwnldID=20775
The very first one is IT — Intel® Chipset Device Software (INF Update Utility). As I told you, the latest version of the driver for the chipset of our motherboard is posted here: 9.4.0.1022, a slightly outdated version 9.3.0.1021 is posted on the motherboard website. Driver for all Intel chipsets, with support for new 8-series chipsets. Intel Chipset Device Software — drivers for motherboards based on Intel chipsets are needed for the normal functioning of all motherboard components: PCI-Express, AGP, PCI, USB, IDE and so on. Click Download and download the driver.
Starting the installation of version 9.4.0.1022.
Done.
All friends, we installed the main drivers on our motherboard. Now you can download and install all other drivers in the same way.
We return to the site of our motherboard.
Sound
Realtek Audio Driver
The driver for the sound device built into the motherboard may be a little outdated, of course, in most cases, the capabilities of this driver will be enough for you. Simply, if someone wants to install the latest driver for your sound device into the system, then you need to download it from the office. Realtek website. How to do it? Check out our article
LAN (network card)
Realtek LAN Driver
After I installed Windows 8, the system installed its driver on the network card.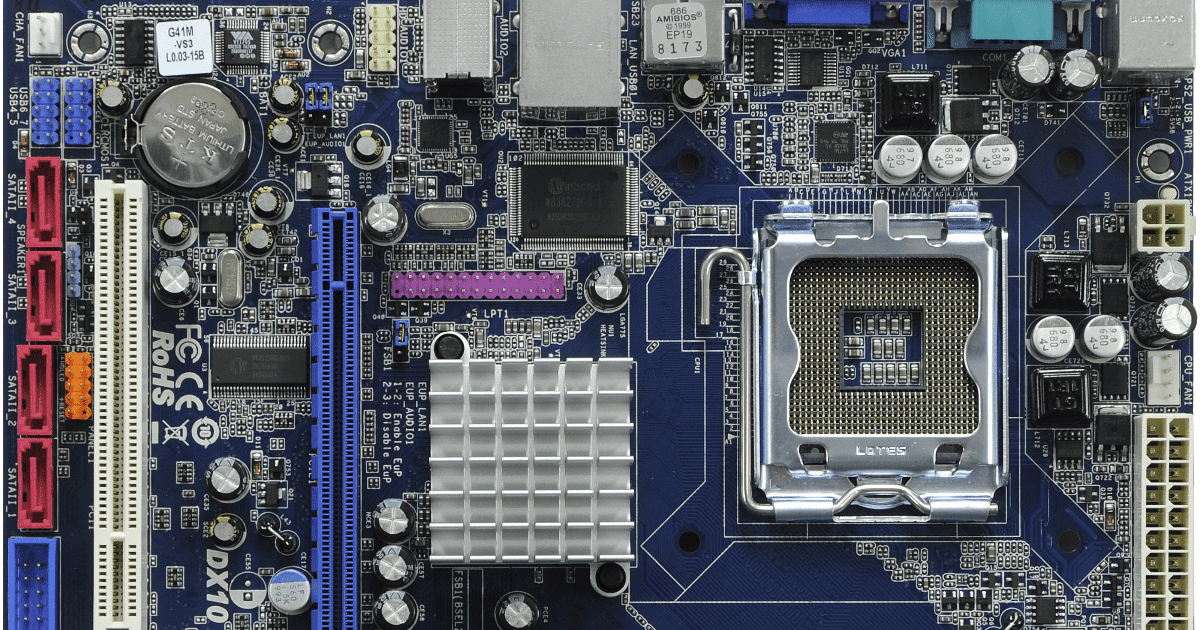 After installing the network driver from the motherboard site, its version became newer and the supplier was already Realtek. But I’m sure if you go to the office. Realtek website, you can find an even newer version.
Integrated video:
Intel Graphics Accelerator Driver
Your motherboard has an integrated video card, if you do not use it, these drivers can not be installed.
Install other drivers as you wish.
SATA
Intel(R) Rapid Storage Technology Driver Software
Intel® Rapid Storage Technology slightly increases the speed of the hard drive and reduces its power consumption.
http://www.intel.ru/content/www/ru/ru/architecture-and-technology/rapid-storage-technology.html
Intel Smart Connect Technology
Intel Smart Connect Technology intermittently wakes up the system and establishes a network connection when the computer is in sleep mode. E-mail, social networking sites, various cloud services can receive data from the Internet and quickly update the data.
Intel AHCI/RAID Driver Path for Windows Win8.1 32bit & Win8.1 64bit.
We have a new motherboard and it works in AHCI mode
.(AHCI) —
is a new technology for working hard drives and SSDs using the Serial ATA protocol, which allows using command queuing (NCQ) and hot swapping. Download and install this driver.
How to install drivers on the motherboard automatically
Windows 7 and Windows 8 have a fairly large database of drivers in their arsenal and support almost all known devices. In order for the operating system to find all the necessary drivers itself, you need to »
Control panels
» Enable the Device Installation Options tool
» to «Automatic mode
»
In Windows 7 Start->Devices and Printers.
In the Windows 8 operating system, right-click in the left corner and also select «Control Panel», then «View: Small Icons» -> Devices and Printers
Right-click on the name of our computer and select «Device Installation Settings»
Check «Yes, do it automatically (recommended)» and Save.
Please note that the operating system immediately started searching for an unidentified device.
If the driver installation in automatic mode failed, then we use another method.
Many experienced users believe that installing drivers in this way is not very good, since the automatic mode installs truncated and often not the latest drivers. Yes, this is true, but these drivers are quite efficient and in most cases will suit the average user. If you are not satisfied with this option, try another way.
How to download and install motherboard drivers using DriverPack Solution
To do this, you just need to download the special program «DriverPack Solution», which has a huge number of drivers, in general, after downloading the program, you can put it on a USB flash drive and carry it with you. And you and your friends will forget about problems with drivers in general. Download the program only on the official website. Follow the link
http://drp.su/ru/download.htm
The very first thing we are offered to download is DriverPack Solution Lite, a small 10 Mb program. Downloads and installs in seconds, scans your computer for uninstalled drivers and prompts you to install them. In one of his articles, with the help of this program, you can read. But it often happens that DriverPack Solution Lite does not find all the necessary drivers, so I suggest you download the 6.2 Gb version of «DriverPack Solution Full», which has almost all the drivers. click download,
I hope you have a free torrent program, if not, download it here http://www.utorrent.com/intl/ru/
, Save, select which folder, Save again and the disk is downloaded to our computer.
Downloaded. The driver disk has the .rar extension. If you have an archiver installed, unzip the contents of the archive into a folder and run the DriverPackSolution.exe file.
If you don’t have an archiver, you can download free 7-Zip from http://www. 7-zip.org/
The main window of the program contains all the information about drivers installed and not installed in your operating system. You can also see which drivers can be updated.
Interesting, but despite the fact that we updated the drivers for our motherboard from the manufacturer’s website, the drivers for some components of the motherboard still need to be updated, for example:
LPC controller for the Intel Z77 chipset — 1E44
has a driver version from 06.21.2006
If we look into the Device Manager, we will see the same thing.
LPC is a low-speed bus for connecting low-speed devices to the I / O controller: FDD (floppy disk drive), old LPT interface printers and so on. Most of these devices, this is history. The updated driver for this LPC controller, and for all other devices, can be found on the official Intel website, but is it worth it to bother yourself when you can simply check all the boxes in the DriverPack Solution Full program and click install, the drivers you need will be updated automatically within a few seconds.
You can install and update drivers selectively, tick the desired device and click Smart installation (recommended).
Let’s update the drivers for our LPC Controller for the Intel Z77 — 1E44 chipset and also for the Realtek network card, check the boxes and click Install.
After the update, go to the device manager and see the result. Updated drivers have been installed on our selected devices.
The most important tip. Friends! If everything in your computer works fine and everything suits you, you don’t need to bother with finding and installing new versions of drivers.
One of the main components in a computer is the motherboard. All other equipment is located on it and connected to it. Before you start using the PC, you will need to install drivers for the motherboard so that all its components function correctly. Let’s look at all the methods for implementing this process.
The system board contains a network adapter, various connectors, a sound card, and some other components, so each of them needs to be supplied with separate software. The methods given in this article involve installing all the files at once, while in others the user will need to install everything one by one. Choose the most suitable method and just follow the instructions, then everything will work out.
Method 1: Manufacturer’s official help page
There aren’t many companies that manufacture motherboards, they all have their own website where you can find all the necessary information, including the latest drivers. You can find them and download them like this:
The download of the file will start, after which it remains only to open it and the automatic installation process will start. After it is completed, it is recommended that you restart your computer for the changes to take effect.
Method 2: Manufacturer’s utility
Large component manufacturers often have their own software that scans and then installs the updates it finds. With it, you can install all the desired new drivers at once. You need:
Method 3: Driver software
Another option that allows you to immediately install all the required drivers is to use special software.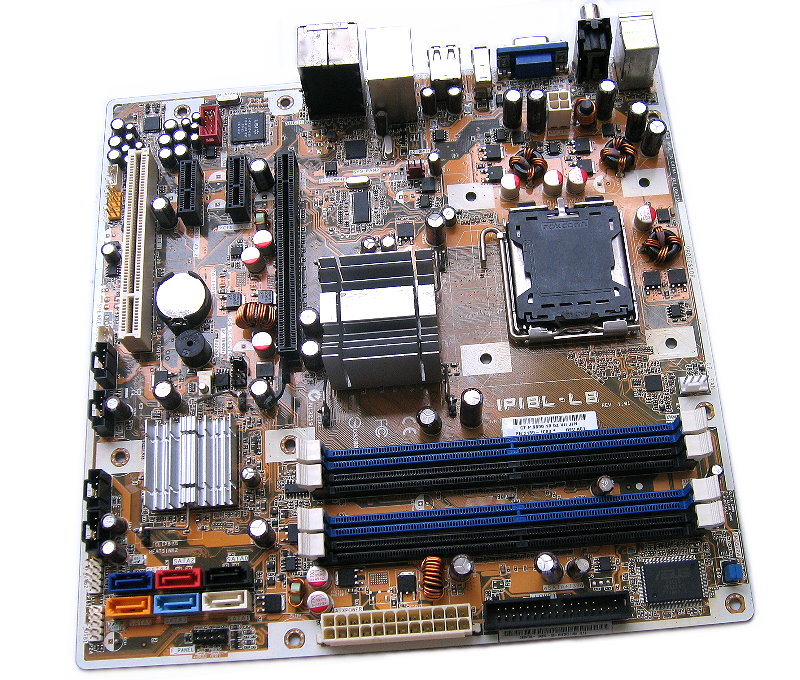 It works on the principle of official utilities from the developer, only it performs a more global scan of the entire PC. The downside is the payment of some representatives and the imposition of additional software. Installing drivers for the motherboard with the help is done like this:
In addition to DriverPack, there are a large number of similar software on the Internet. Each representative works on approximately the same principle, and even a beginner can figure it out. We recommend that you read our other article at the link below, in which you will learn in detail about the best software for installing drivers.
Method 4: Install by hardware ID
Each component is assigned a unique number. As mentioned above, the motherboard consists of several built-in components, each has its own ID. You only need to recognize it and use a special service to find fresh files. This is done as follows:
Method 5: Standard Windows Tools
The Windows operating system has its own utility that allows you to find and update device drivers via the Internet. Unfortunately, the components of the motherboard are not always correctly determined by the OS, but in most cases this method will help to install the correct software.
If new files are found, just confirm the installation and it will run itself.
As you can see, each method is very simple, all actions are performed in just a few minutes, after which all the necessary files will already be installed on the computer. Regardless of the model and manufacturer of the motherboard, the algorithm of actions will always be approximately the same, the interface of the site or utility can only change.
The motherboard is one of the most important elements of every computer or laptop. In particular, the selection of other elements of a personal computer largely depends on its technical characteristics. For the normal and correct operation of various computer devices, the required drivers must be installed.
A driver is a program through which the operating system communicates with various computer components. Without a suitable driver, the operating system does not know how to interact with the device and often cannot recognize it.
How to install drivers for the motherboard
As a rule, when buying a computer or laptop, the package includes a disk with the necessary software and a package of drivers for the motherboard and other computer components. We find this disk and insert it into the drive.
Find the file Setup.exe or Autorun.exe (Run.exe or msi file) and select it. Find and select the Drivers tab. As a rule, at the top, we see the * InstAll button, when selected, the drivers marked in the list below will be automatically installed. Often there may be a trial version of the antivirus program, and it will automatically install along with the drivers.
Where to download drivers for the motherboard
If you are not satisfied with the installed antivirus, you can safely remove it. If you are an advanced user and want to install drivers manually, choose any driver separately and install it following the manufacturer’s instructions.
We have considered the easiest and most affordable way to install drivers on the motherboard. But what to do if you did not have an installation disk or you lost it? The answer is obvious, the drivers can be downloaded from the official website of the motherboard manufacturer. This method has a great advantage, as it allows you to install the most modern and latest drivers. In order to do this, you need to go to the website of the manufacturer and find your motherboard model in the support section, then select the operating system installed on your computer and download the proposed driver file.
This method assumes that you know which motherboard is on your computer or laptop. If you do not own such information, you can find out by carefully looking at what is printed on the motherboard. It’s even easier with a laptop, you need to go to the manufacturer’s website and select your laptop model, then the installed operating system and download drivers.
For example, let’s go to the ASUS website (http://ru. asus.com). Let’s resort to the search and enter the model of the motherboard we need. Select the «Download» tab and select your operating system in the drop-down window. We select the category we need and download the top driver, it will be the latest.
Official websites of motherboard manufacturers:
http://www.asus.com/ru/
http://www.gigabyte.ru
http://ru.msi.com/
http://eu.evga.com/
https://downloadcenter.intel.com/?lang=eng
Where are the motherboard drivers installed. How to update the chipset driver of any motherboard? Detailed instructions
Hello friends! In this article, we will show you how to download Asus motherboard drivers.
in three different ways, choose any, of course, the most correct way is to download the drivers on the manufacturer’s website mat. fees, but unfortunately this is not always possible. At the beginning of the article there are several letters from our readers.
How to download drivers for motherboard Asus
In fact, everything is very simple here! The easiest way to install drivers on the motherboard is from the driver disk that came with the motherboard when you bought it, but if your dog ate this disk, then download the drivers to the mat. board, you can from its official website, if the necessary drivers are not there, you need to use the built-in Windows tool «Device Installation Settings
» or DriverPack Solution
. Let’s analyze all the options in detail, and at the same time, along with the drivers for the motherboard, install the drivers for the sound device, network adapter, and so on.
A friend of mine asked me to assemble a system unit for him. He chose the ASUS motherboard, the Windows 8 operating system, after assembling the computer and installing the system on it, the eight installed automatically most of the drivers. But here are the versions of the drivers installed, new or old, and what to do if not all drivers are installed, let’s go to the official Asus website and figure it all out.
First of all, you need to look for drivers first of all on the official website of the motherboard. You may not be able to find everything, and sometimes nothing. For example, the site of your outdated motherboard will not have drivers for the new Windows 8 operating system. What should I do then? Read on!
Note:
Just in case, before work.
Go to the site http://www.asus.com/ru/
, you only need to enter the motherboard model, for example, your motherboard is called Asus P8Z77-V LX, and you need to enter P8Z77-V LX.
In the window that appears, click on the name of our motherboard.
Support.
Download and specify the version of the operating system we have installed. For example, I have Windows 8 installed, we see 82 files (s) were found.
Which one should be installed and in what order? First of all, install the drivers on the motherboard
.
Friends, what are motherboard drivers? The motherboard consists of a Chipset (from the English ChipSet) a set of chips that, interacting with each other, ensure the operation of everything that is connected to the motherboard. There are few main manufacturers of chipsets for motherboards: Intel, AMD, NVIDIA, VIA Technologies and SIS.
A few years ago there were two main chips on the motherboard:
The northbridge provided the interaction of the processor with the RAM and the video card.
The southbridge was responsible for the operation of PCI, SATA, Ethernet, RAID, USB controllers, power management (Power management, APM and ACPI).
In order for all the listed devices to work correctly, you need to install drivers on the motherboard or, more precisely, on the motherboard chipset.
At the moment, on all new Intel and AMD chipsets, there is no longer a division into north and south bridges. In simple words, the video card (PCI Express graphics bus) and RAM (memory controller) are now controlled by the processor.
And everything else is controlled by a single chip responsible for supporting SATA 3 Gb / s, 6 Gb / s ports, USB 3.0 and 2.0 ports, a RAID controller, an Ethernet controller and much more.
In simple words, installing drivers for this chip is the same as installing drivers for the motherboard.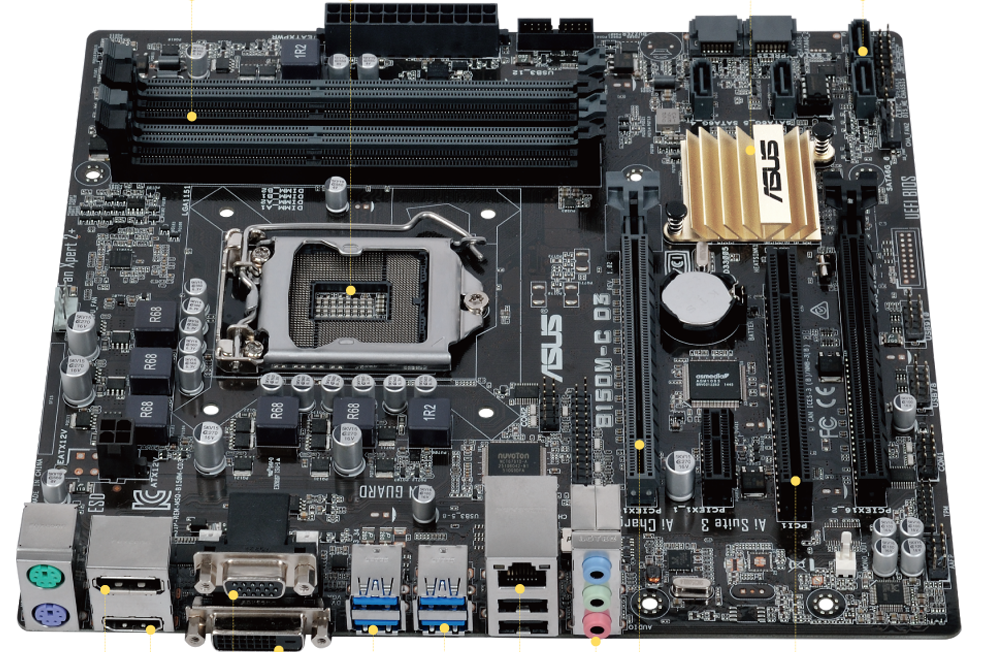
Chipset
Intel Management Engine Interface V8.1.0.1263 for Windows 8 32/64bit
— A set of drivers for motherboards assembled on Intel chips and designed to work in the Windows 8 operating system, but this is in simple words. But these are smart words.
Intel Management Engine Interface — This is a subsystem built into the motherboard chipset that performs tasks such as monitoring (observation) of temperature, fan speed, Windows loading, sleep mode, and much more. Therefore, it is very necessary to install these drivers.
So, select the latest version and click on the Global (server) button.
Downloading the archive, unzip the contents into a folder. For those who do not have an archiver program, download free 7-Zip on site
http://www.7-zip.org/
. After unzipping the archive, run the AsusSetup.exe installer file in the folder
And install the Intel Management Engine Interface drivers
.
Here, in the Chipset section, we see the component we need the most.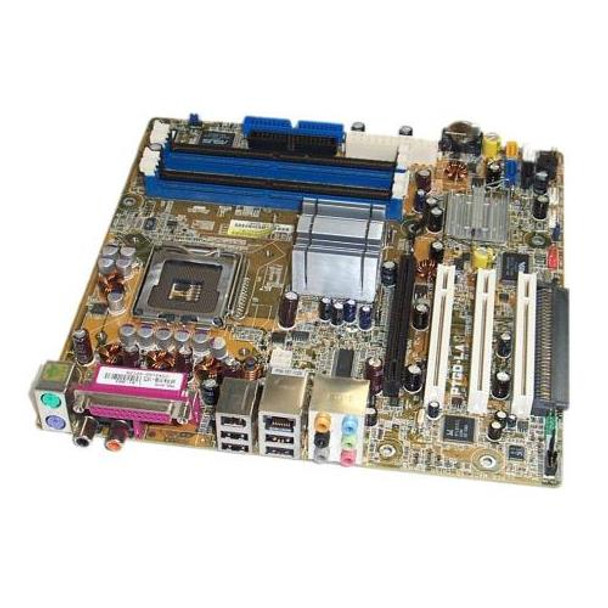
Intel Chipset Driver V9.3.0.1021 for Windows 8 32bit & Win8 64bit—(WHQL)
– Necessary set of drivers for Intel chipsets. The operating system installs INF files that configure the chipset components necessary for the correct functioning of many motherboard components (PCI, SATA, IDE, RAID, USB 3.0 and 2.0) and other system devices) and their accurate identification in the Device Manager. Also select the latest version and click Download.
Download the archive, unzip it to a folder, run the AsusSetup.exe file and install the driver for the motherboard chipset.
Even on the website of the motherboard manufacturer, the driver for the chipset may not be the latest version. The latest chipset driver can only be downloaded from the chipset manufacturer’s website. The chipset for our motherboard was manufactured by Intel, which means that the drivers for the chipset of our motherboard are also posted on the Intel website.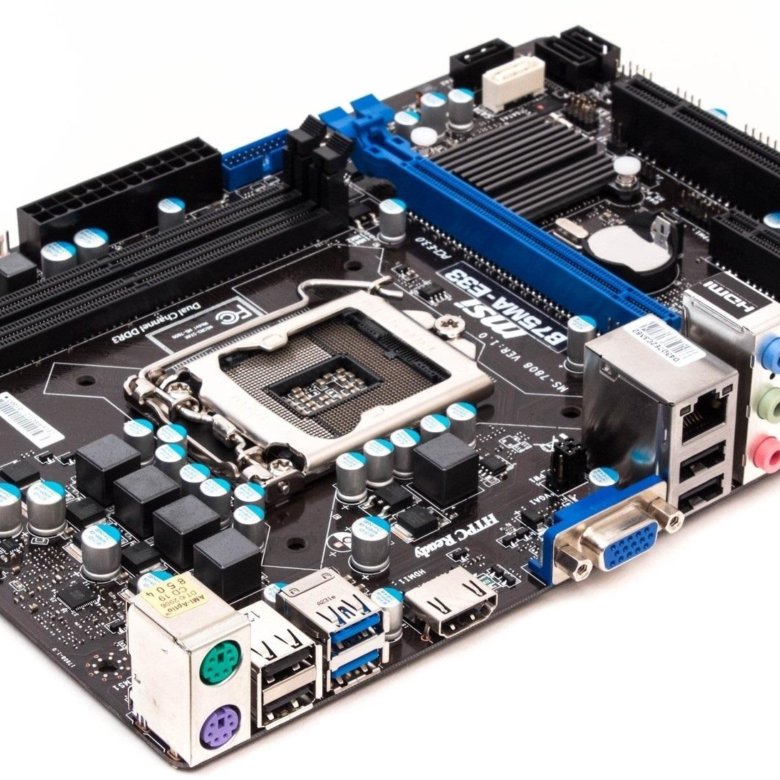 Since the devil will break his leg on this site, I offer you a little guide.
Go to website
https://downloadcenter.intel.com/Detail_Desc.aspx?lang=rus&DwnldID=20775
The very first one is IT — Intel® Chipset Device Software (INF Update Utility). As I told you, the latest version of the driver for the chipset of our motherboard is posted here: 9.4.0.1022, a slightly outdated version 9.3.0.1021 is posted on the motherboard website. Driver for all Intel chipsets, with support for new 8-series chipsets. Intel Chipset Device Software — drivers for motherboards based on Intel chipsets are needed for the normal functioning of all motherboard components: PCI-Express, AGP, PCI, USB, IDE and so on. Click Download and download the driver.
Starting the installation of version 9.4.0.1022.
Done.
All friends, we installed the main drivers on our motherboard. Now you can download and install all other drivers in the same way.
We return to the site of our motherboard.
Sound
Realtek Audio Driver
The driver for the sound device built into the motherboard may be a little outdated, of course, in most cases, the capabilities of this driver will be enough for you. Simply, if someone wants to install the latest driver for your sound device into the system, then you need to download it from the office. Realtek website. How to do it? Check out our article
LAN (network card)
Realtek LAN Driver
After I installed Windows 8, the system installed its driver on the network card. After installing the network driver from the motherboard site, its version became newer and the supplier was already Realtek. But I’m sure if you go to the office. Realtek website, you can find an even newer version.
Integrated video:
Intel Graphics Accelerator Driver
Your motherboard has an integrated video card, if you do not use it, these drivers can not be installed.
Install other drivers as you wish.
SATA
Intel(R) Rapid Storage Technology Driver Software
Intel® Rapid Storage Technology slightly increases the speed of the hard drive and reduces its power consumption.
http://www.intel.ru/content/www/ru/ru/architecture-and-technology/rapid-storage-technology.html
Intel Smart Connect Technology
Intel Smart Connect Technology intermittently wakes up the system and establishes a network connection when the computer is in sleep mode. E-mail, social networking sites, various cloud services can receive data from the Internet and quickly update the data.
Intel AHCI/RAID Driver Path for Windows Win8.1 32bit & Win8.1 64bit.
We have a new motherboard and it works in AHCI mode
.(AHCI) —
is a new technology for working hard drives and SSDs using the Serial ATA protocol, which allows using command queuing (NCQ) and hot swapping.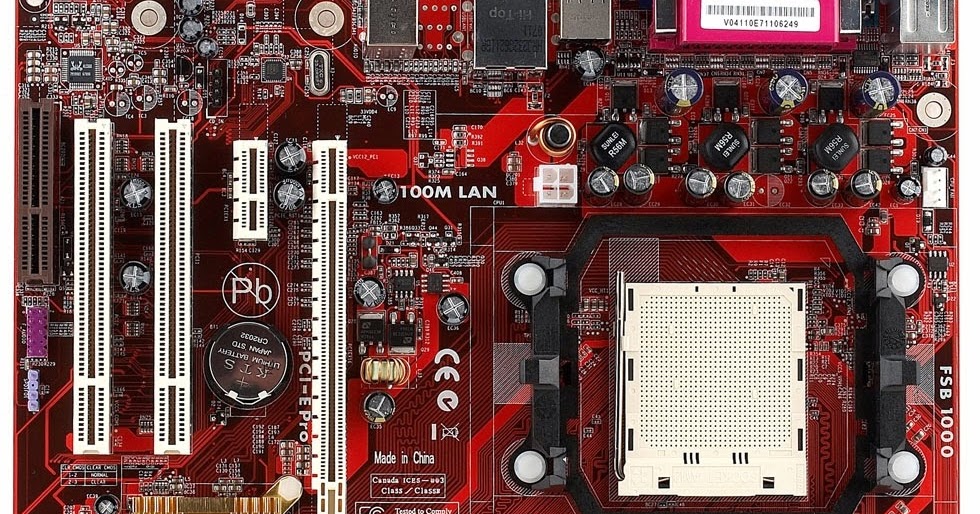 Download and install this driver.
How to install drivers on the motherboard automatically
Windows 7 and Windows 8 have a fairly large database of drivers in their arsenal and support almost all known devices. In order for the operating system to find all the necessary drivers itself, you need to »
Control panels
» Enable the Device Installation Options tool
» to «Automatic mode
»
In Windows 7 Start->Devices and Printers.
In the Windows 8 operating system, right-click in the left corner and also select «Control Panel», then «View: Small Icons» -> Devices and Printers
Right-click on the name of our computer and select «Device Installation Settings»
Check «Yes, do it automatically (recommended)» and Save.
Please note that the operating system immediately started searching for an unidentified device.
If the driver installation in automatic mode failed, then we use another method.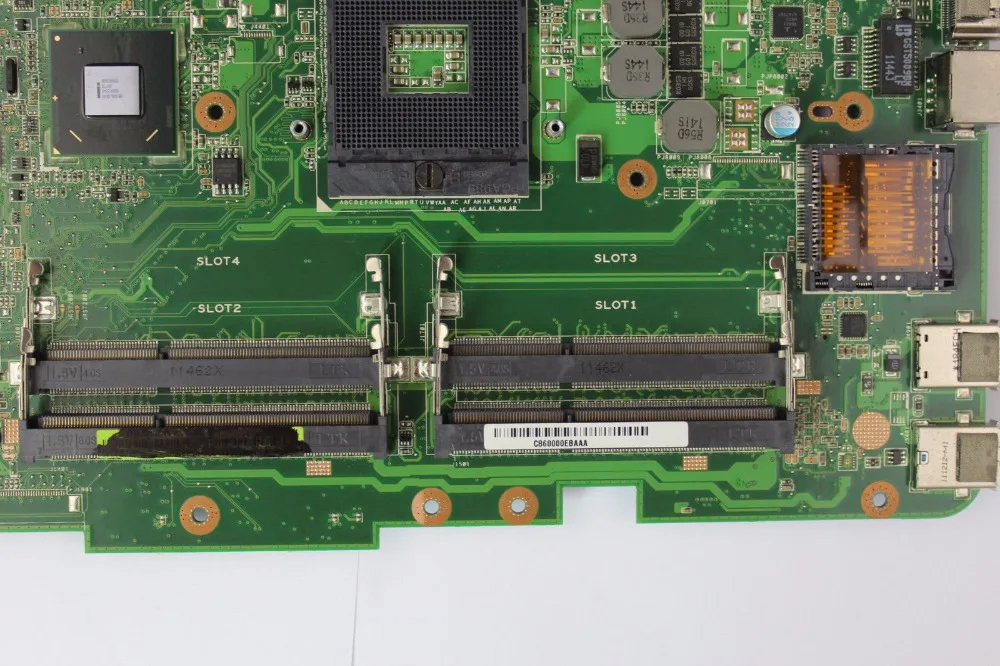
Many experienced users believe that installing drivers in this way is not very good, since the automatic mode installs truncated and often not the latest drivers. Yes, this is true, but these drivers are quite efficient and in most cases will suit the average user. If you are not satisfied with this option, try another way.
How to download and install motherboard drivers using DriverPack Solution
To do this, you just need to download the special program «DriverPack Solution», which has a huge number of drivers, in general, after downloading the program, you can put it on a USB flash drive and carry it with you. And you and your friends will forget about problems with drivers in general. Download the program only on the official website. Follow the link
http://drp.su/ru/download.htm
The very first thing we are offered to download is DriverPack Solution Lite, a small 10 Mb program. Downloads and installs in seconds, scans your computer for uninstalled drivers and prompts you to install them. In one of his articles, with the help of this program, you can read. But it often happens that DriverPack Solution Lite does not find all the necessary drivers, so I suggest you download the 6.2 Gb version of «DriverPack Solution Full», which has almost all the drivers. click download,
I hope you have a free torrent program, if not, download it here http://www.utorrent.com/intl/ru/
, Save, select which folder, Save again and the disk is downloaded to our computer.
Downloaded. The driver disk has the .rar extension. If you have an archiver installed, unzip the contents of the archive into a folder and run the DriverPackSolution.exe file.
If you don’t have an archiver, you can download free 7-Zip from http://www.7-zip.org/
The main window of the program contains all the information about drivers installed and not installed in your operating system. You can also see which drivers can be updated.
Interesting, but despite the fact that we updated the drivers for our motherboard from the manufacturer’s website, the drivers for some components of the motherboard still need to be updated, for example:
LPC controller for the Intel Z77 chipset — 1E44
has a driver version from 06. 21.2006
If we look into the Device Manager, we will see the same thing.
LPC is a low-speed bus for connecting low-speed devices to the I / O controller: FDD (floppy disk drive), old LPT interface printers and so on. Most of these devices, this is history. The updated driver for this LPC controller, and for all other devices, can be found on the official Intel website, but is it worth it to bother yourself when you can simply check all the boxes in the DriverPack Solution Full program and click install, the drivers you need will be updated automatically within a few seconds.
You can install and update drivers selectively, tick the desired device and click Smart installation (recommended).
Let’s update the drivers for our LPC Controller for the Intel Z77 — 1E44 chipset and also for the Realtek network card, check the boxes and click Install.
After the update, go to the device manager and see the result. Updated drivers have been installed on our selected devices.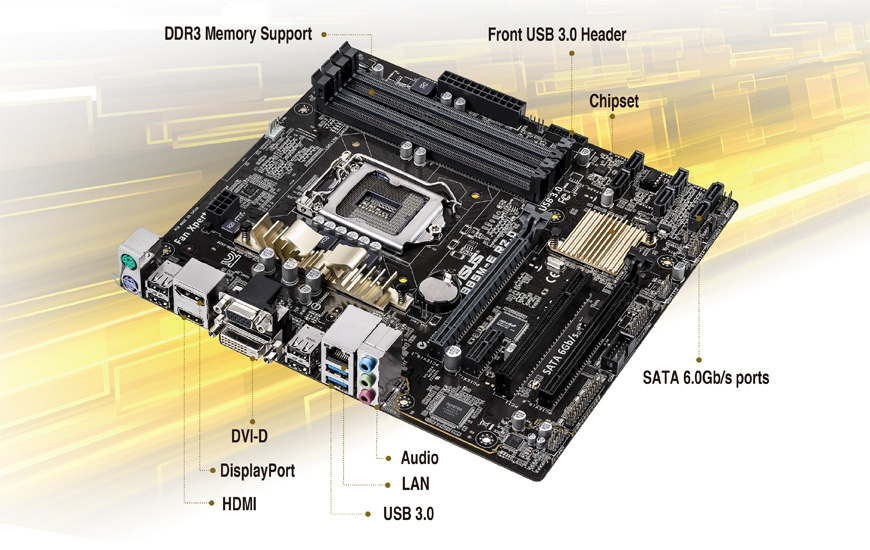
The most important tip. Friends! If everything in your computer works fine and everything suits you, you don’t need to bother with finding and installing new versions of drivers.
Hello, dear readers.
New system (or motherboard) boards have two functional modules. The first is a southbridge chip that interacts with various interfaces. The second is the northern one, which serves the memory and processor. For the correct collaboration of these two components, special software is used. In order to always get the most out of your equipment, you need to constantly install newer versions of the program. This will allow you to work with the desired applications at the proper speed. But how to update motherboard chipset driver? After all, this is in fact the most important part of the device.
The first thing you need to find out for yourself — do you need to update? If you have old equipment installed, it is advisable to do this. Of course, it is impossible to say that without modification you will significantly lose performance.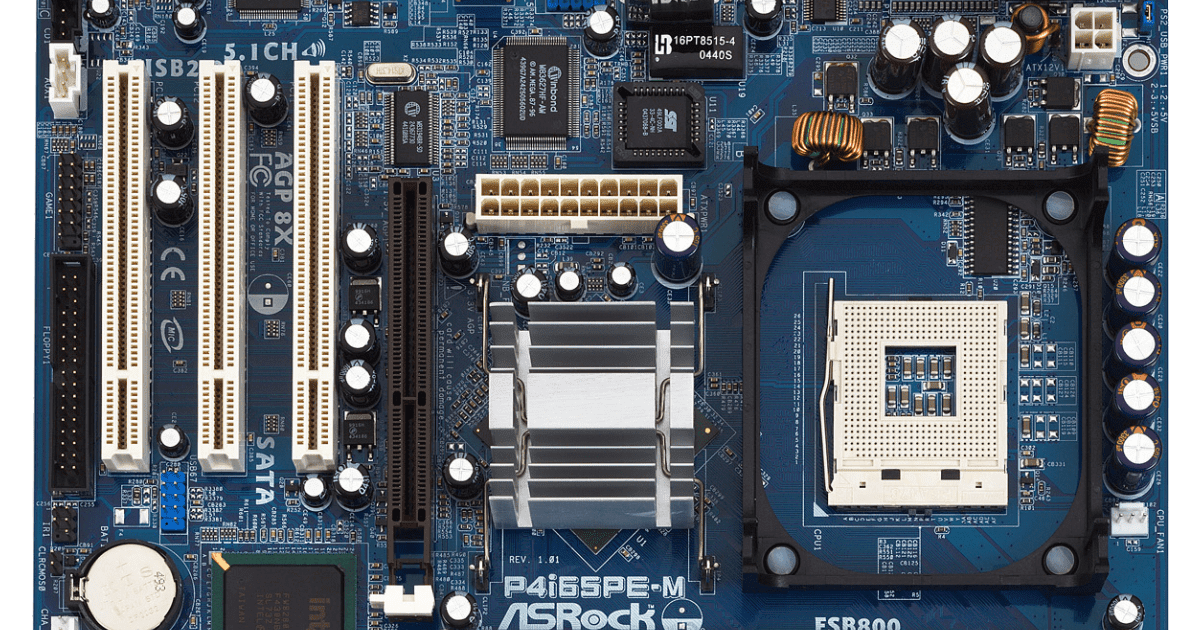 But in general, performance should increase. This will also eliminate errors that could be associated with this component. So the benefits are obvious.
But in the case when you are already using completely new equipment, problems may arise with the update. So you have to even roll back the system. Therefore, it is better to first evaluate your capabilities. It’s also a good idea to go online first to find out what people are saying. To do this, in the search engine you need to write the model of your motherboard with the phrase « driver update
«. And the first results will be messages from forums where people share their experiences.
Find out the chipset version using built-in features
( )
To find out the version of the motherboard with the Intel chipset, you need to make a few steps:
However, this option is also suitable for the AMD chipset. So try.
Sometimes it happens that the corresponding line does not contain the information we need.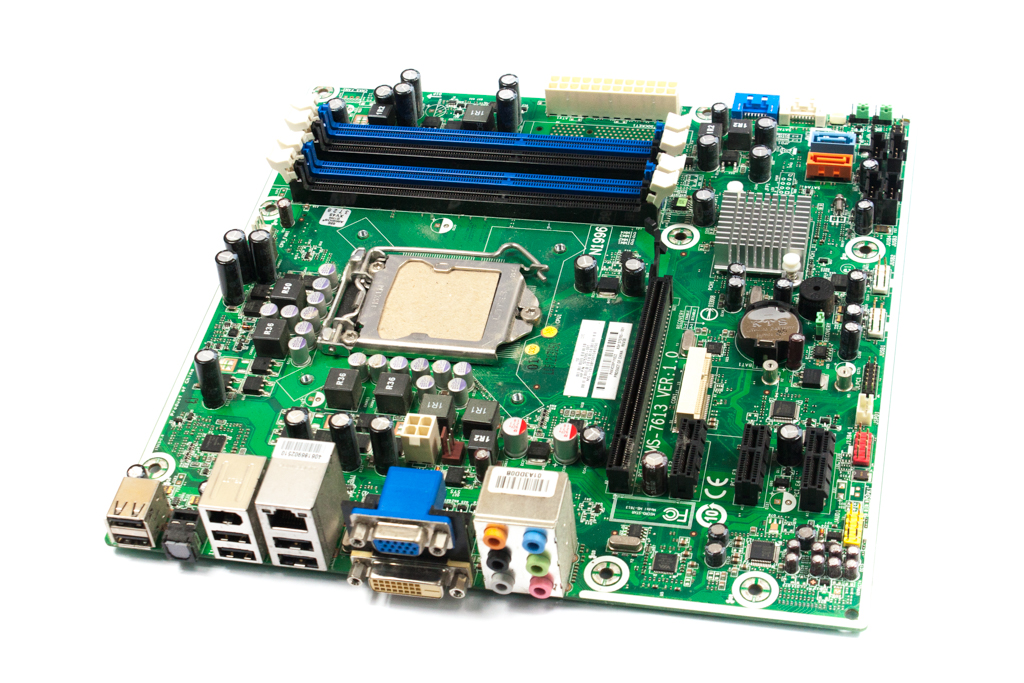
Another option is to visually inspect the board itself. To do this, it will be enough just to open your system unit.
With additional software
( )
Another equally effective way to update chipset drivers is to use third-party software to find out the model.
Although there are many such developments today, many experts agree that it is best to use CPU-Z for this. This utility easily determines the type and model of the chipset. To do this, you need to make several movements:
This method is suitable when you are about to change « firewood
» on a laptop. After all, spinning it to find out the model will be problematic.
To update the driver, go to the developer’s website and find the appropriate software. Download and run the file. Using the prompts, install the software. This may take up to ten minutes. After the end of the process, reboot.
Your hardware should now work without any errors. In addition, the speed of data processing will noticeably increase.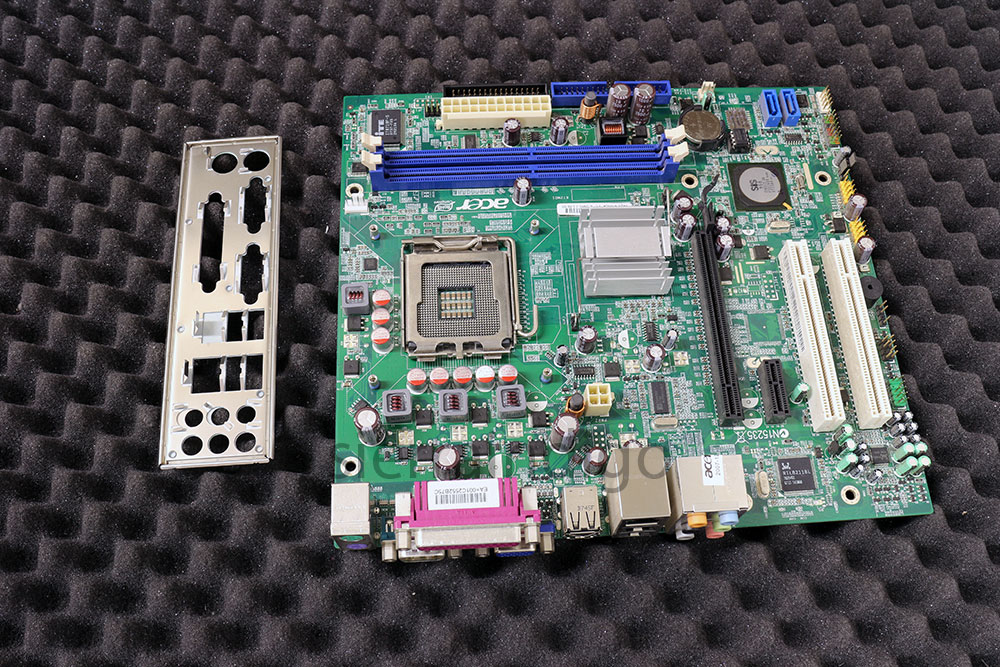
After reinstalling the operating system, especially when Windows XP is installed and the computer is new, it will not be possible to find drivers for the latest hardware in an outdated OS. And even the latest release of Windows, with the third service pack, will not save the day. Practice shows that the most difficulties for users arise when it is necessary to install a driver for the motherboard. The difficulties here are understandable, 99% of modern PCs are equipped with a built-in network card based on chipsets that did not exist when WinXP was released. And it’s good if you have a disk at hand that contains a driver for the motherboard, but if it’s not there, then just go online.
Accordingly, a freshly installed operating system without network drivers cannot be connected to the Internet, and the circle closes. To download the driver on the motherboard, you need a network, to get into the network, you need a driver for the network card of the motherboard.
The best and easiest solution in such cases is to go with a flash drive to any computer connected to the World Wide Web, and then download the necessary drivers.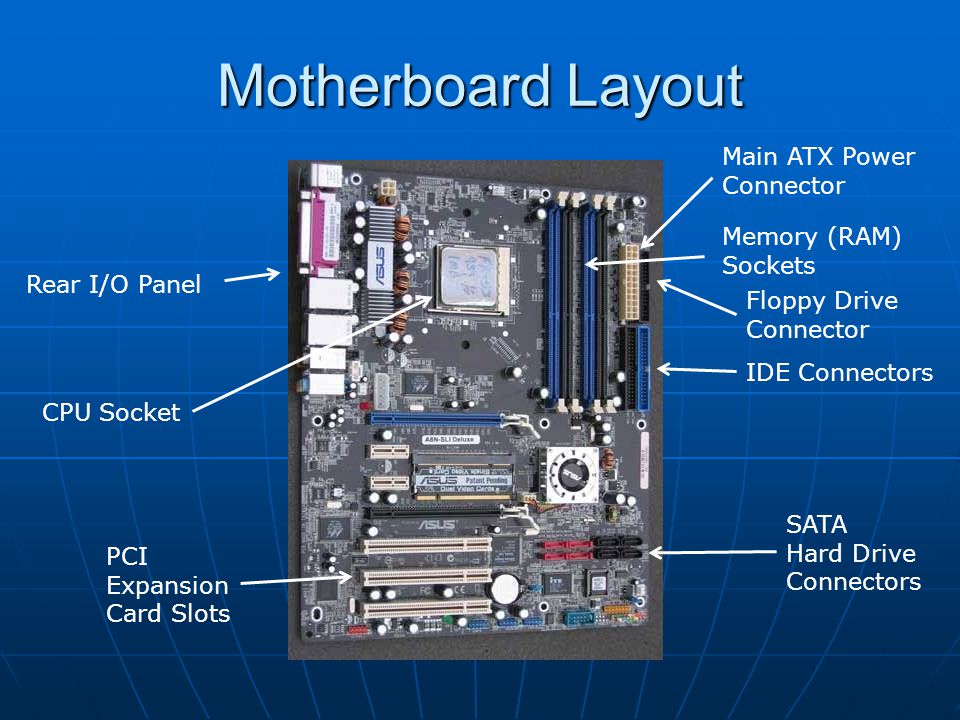 The only snag that may await not very experienced users is the question: what kind of drivers do you need to download for your computer? That is, you first need to identify the motherboard, and only then run for the «firewood» for it.
The easiest way (if you do not want to open the case) is to do this with the help of which should be in the D: \ Install folder, on a USB flash drive or, in extreme cases, on a DVD disc for every self-respecting PC user. With its help, finding out the model of the motherboard is as easy as shelling pears, go to the «Motherboard» section and there in the second line you see the text, something like If there is nothing in this line, look at the first line (the ID of the motherboard), it should definitely contain information with which you can determine what kind of board is in your computer. So, for example, the string — 64-1201-000001-00101111-101408, driven into a Google search, will give you the result —
By the way, on the same page of Everest, only at the very bottom, you can find links by which you can easily download drivers for your computer’s motherboard.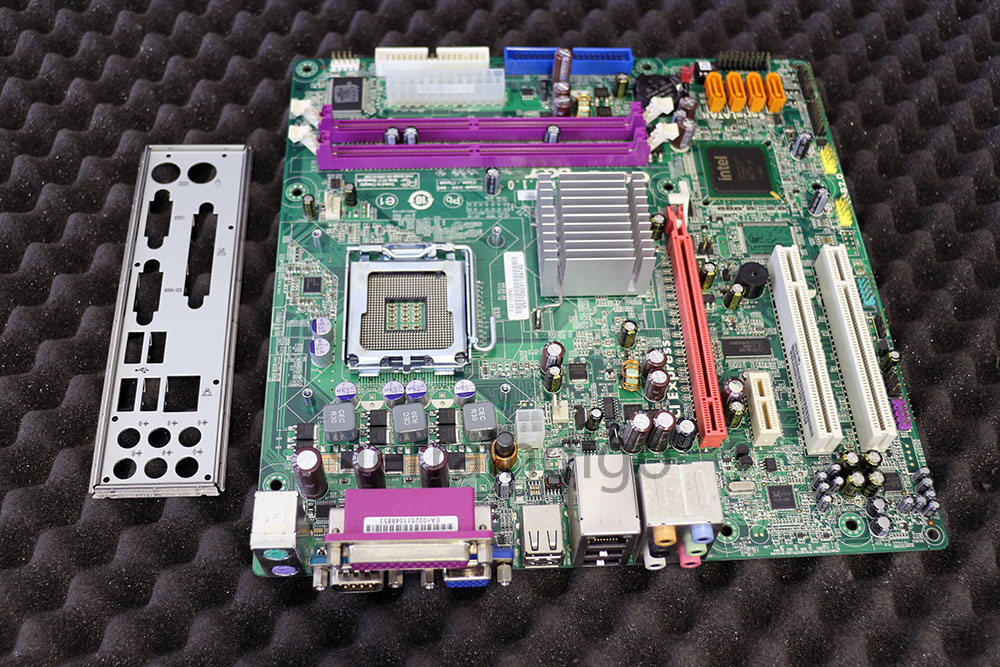 True, occasionally, they lead to outdated addresses, but there’s nothing to be done about it.
If you are lucky and the network card on your motherboard works fine after reinstallation, but, for example, sound or other necessary devices are not detected, then programs that are designed to install the missing drivers in the system will help you. It is not difficult for them to find drivers for the motherboard, video card or some exotic BlueTooth adapter.
I consider the DriverPack Solution utility to be the first candidate for your attention. It is very popular, because, firstly, it is free, and, secondly, it can install drivers automatically. What does this mean for the user? This means that when you run DriverPack Solution, you simply wait for your computer to be scanned for problematic and outdated drivers, and then you will be asked to allow the program to download and install the missing drivers and new ones instead of expired ones.
The second most popular program is Driver Genius. It is also free and has a rich arsenal of options for working with drivers. For example, she can make backup copies of the set that is currently installed on the computer, which is relevant when the OS reinstallation is planned in advance, and you do not want to crawl along dusty shelves in search of a disk from a particular device. Naturally, in addition, DG is able to determine the missing drivers in the system and install them, and it does it quite quickly.
The third utility in our mini-review is the Device Doctor utility. What’s more, it’s also free. Its functionality is not much different from similar features of the first program, except that we can note a simple and very convenient, thoughtful interface.
Well, we have come to the end of this article, I wish you always have at hand all the necessary drivers for the motherboard. And if you don’t want to get into trouble, copy all the installation disks of your computer to HDD. Then in case of any failure you will be fully armed.
Hello Friends! Driver installation
. The question that worries the majority of the world’s population after the successful installation of the Windows operating system. What is a driver. Definition
. A driver is a program through which the operating system interacts with computer devices. Without the appropriate driver, the system does not know how to work with this device, and may not even know what kind of device it is. Therefore, the process of installing drivers must be taken carefully, otherwise you will not get pleasure from work.
In this article, you will learn everything you need to find, select, and install drivers.
- motherboard
- Installing the video adapter driver (integrated or discrete)
- Installing the remaining drivers
Installing drivers from disc
We are looking for the file Setup.exe
(or Autorun.exe
or simply Run.exe
can also be a file with extension *. msi
msi
) and run it
Go to tab Drivers .
We see the top button ASUS InstAll
, clicking on which will automatically install the drivers listed below. Let’s take a closer look at this list and find that the trial version of antivirus Norton Internet Security 2011 will be automatically installed in the same way.
. It’s easier to click install everything and if you are not satisfied with the installed antivirus, remove it.
If you want to install drivers manually
— I do this, select each driver separately and install following the instructions.
Confirm by pressing the Enter key on the keyboard. Click on the found product
On the product page, go to the tab Support
Press Drivers and Utilities
From the drop-down list select the installed operating system
You can see the search result in the figure below.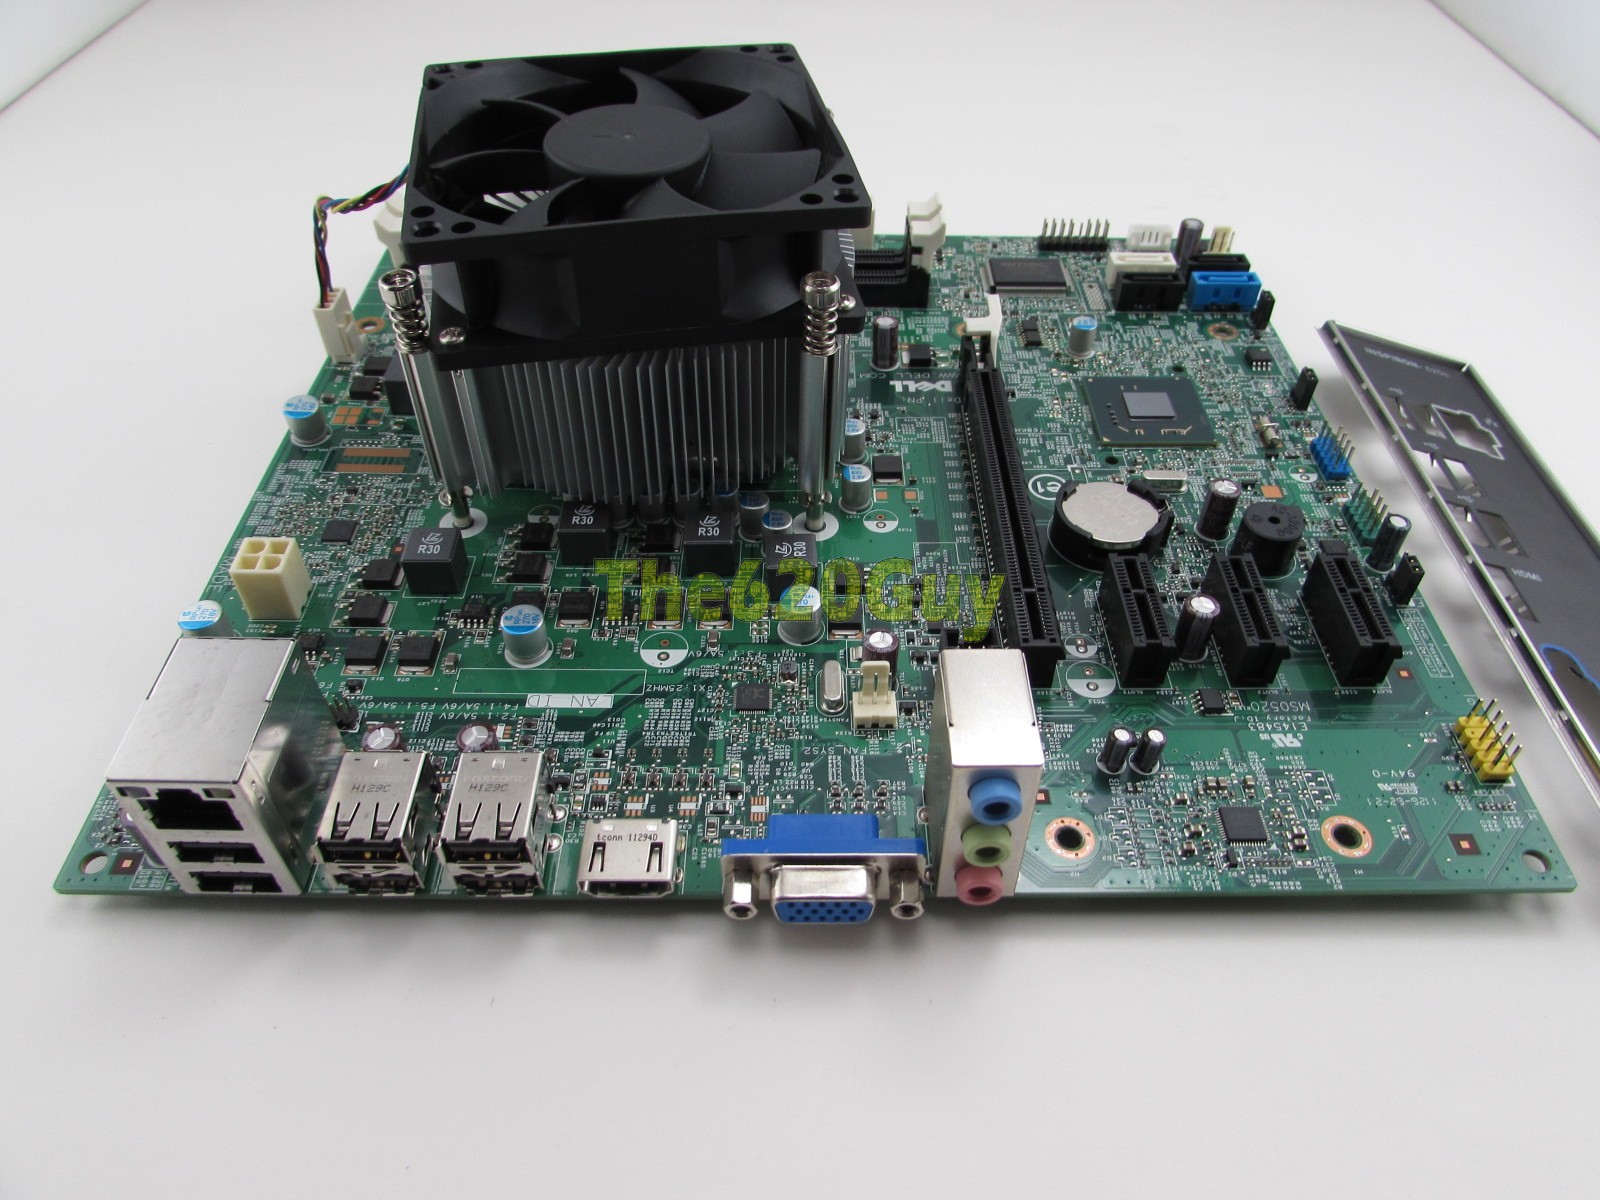 First of all
we are interested in drivers for Chipset
.
Click on the link Global
and download.
Intel Driver Update
You have successfully installed the drivers, but sometimes (once a year for example) it would be good to update them. Manufacturers are constantly improving the software for their products, expanding their functionality and releasing new versions of drivers. Therefore, it makes sense to install them.
You can always check for new drivers on the website of your computer or motherboard manufacturer. But you can, and it’s much more convenient, take drivers from the official Intel website.
If you know your video adapter settings, then you can use Option 1.
If you do not know your graphics settings, then I recommend using Option 2. Click Graphics drivers
A window will appear with permission to run the application. Press Run
Then another similar request will come out.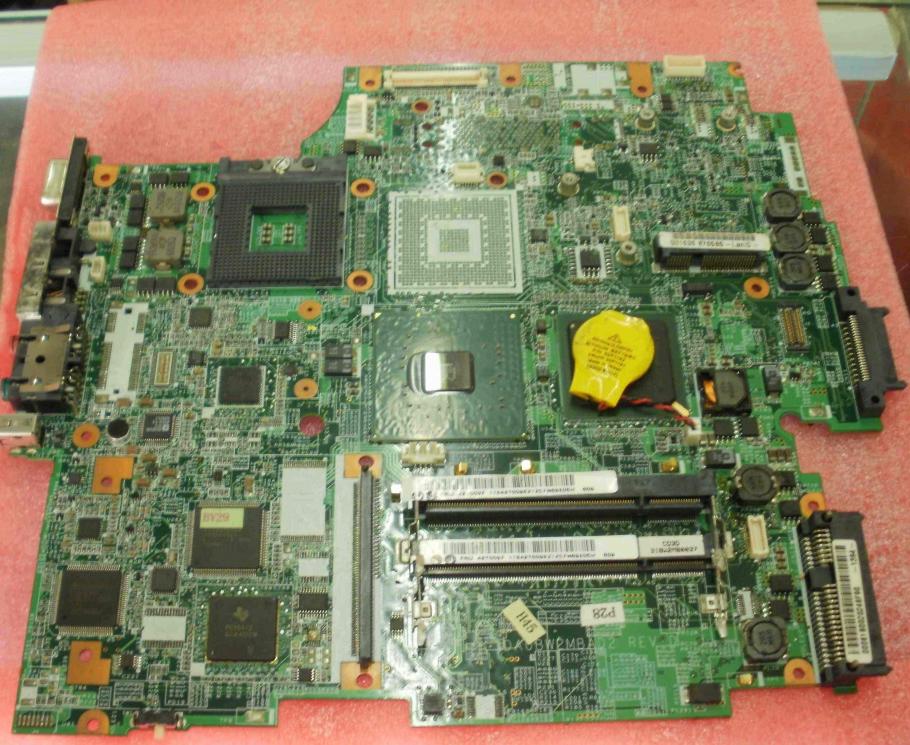 We also press Run
In my case, Smart Scan was unable to scan my computer. Tried on Google Chrome and Internet Explorer. Perhaps because my system does not have NVIDIA components
If you have an NVIDIA video card installed, then most likely you will be picked up a fresh driver and given a link to download it.
If Smart Scan cannot check your computer, you will have to use Option 1. There you need to select the Series and Product Family. The operating system and language were automatically installed correctly for me. Press Search
and Download now
Install the downloaded driver.
Find and install driver by ID
Sometimes there are situations when there is no driver for the device. For example, drivers for the ASUS X55U laptop chipset
Or you found any device without drivers
In the device manager, it can simply be written — Unknown device
.
In this case, you can use the http://devid.