Washers for motherboard screws? | PC Review
JavaScript is disabled. For a better experience, please enable JavaScript in your browser before proceeding.
-
Thread starter
hdtv guy -
Start date
hdtv guy
-
-
#1
Do you need to put non-metallic (fiber or whatever) washers under the
screws that you attach the motherboard to the case with?
Is that necessary for preventing an electrical connection or
something?
Advertisements
-
-
#2
Do you need to put non-metallic (fiber or whatever) washers under the
screws that you attach the motherboard to the case with?
Is that necessary for preventing an electrical connection or
something?Click to expand.
..
The argument for them is to make it more unlikely to short the
motherboard, but there is usually a ring of protection around the hole
to avoid this. I used to put the washers on, with great difficulty in
placing them and not have them fall off — often I resorted to putting
a touch of glue to hold them in place. Eventually I didn’t bother and
have had no problems with some 60odd systems I have built.
km
-
-
#3
hdtv said:
Do you need to put non-metallic (fiber or whatever) washers under the
screws that you attach the motherboard to the case with?
Is that necessary for preventing an electrical connection or
something?Click to expand.
..
No washers. The motherboard holes for mounting to the case have a
solder ring around them so the screw will make electrical contact with
the motherboard and the metal standoffs underneath, providing multiple
grounding points to the case.
-
-
#4
Depends on the case metal. If you are using a
steel case, and the standoffs make contact with
the mobo ground, you can «push» the ground
potential up to 2 or 3 volts …. and really screw
up your performance with lots of blue screens.
Steel is resistive and makes a poor ground.
If the case is aluminum. The standoffs can help
ground the mobo, but after the aluminum corrodes
a bit, you get the same «push».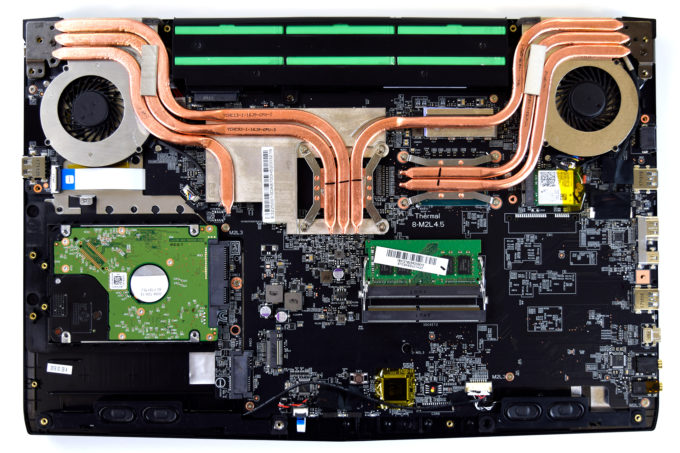 Aluminum oxide
is resistive too.
But .. !!! …. modern power supplies have much
better ground connections at the mobo power
connector now. Generally, this single point ground
is the best conductor, and no current will flow on
the resistive ground connections at the standoffs.
So most techs ignore the problem now.
johns
-
-
#5
johns said:
Depends on the case metal. If you are using a
steel case, and the standoffs make contact with
the mobo ground, you can «push» the ground
potential up to 2 or 3 volts …. and really screw
up your performance with lots of blue screens.
Steel is resistive and makes a poor ground.
Nonsense.If the case is aluminum. The standoffs can help
ground the mobo, but after the aluminum corrodes
a bit, you get the same «push». Aluminum oxide
is resistive too.Click to expand…
Nonsense.
Where do you operate your computer? In a kayak?
But .. !!! …. modern power supplies have much
better ground connections at the mobo power
connector now. Generally, this single point ground
is the best conductor, and no current will flow on
the resistive ground connections at the standoffs.
So most techs ignore the problem now.johns
Click to expand…
The solder rings on the motherboard where the standoffs are used are
connected to the internal ground plane layer of the MB. Having multiple
ground points to the case ensure there is no potential between PSU
ground, MB ground and/or chassis ground. It also helps reduce stray RF
emissions.
jørgen
-
-
#6
RobV said:
The solder rings on the motherboard where the standoffs are used are
connected to the internal ground plane layer of the MB. Having multiple
ground points to the case ensure there is no potential between PSU
ground, MB ground and/or chassis ground. It also helps reduce stray RF
emissions.Click to expand…
It is also worth noting that all the other components you install (psu,
harddrives, pci cards, io shield etc) has a connection to the case. So
So
even if you use washers for the motherboard screws, you’ll end up with
an electrical connection to the case
Advertisements
-
-
#7
All electronic devices must have «single-point»
grounds, or you will dereferece the psupply.
You can get the same effect by running a coax
cable from one building to another where each
building has its own «earth ground». And
you can wind up with 100s of amps flowing
from building to building over the coax ground
cable. I use to pull the ground cable connection
off and reference the cable to the higher dc
voltage to prevent that … or just leave it
unconnected, and reference each circuit
to its own supply. Ask any radio engineer
…. oops .. that’s right … they don’t teach that
any more … do they
johns
-
-
#8
Sure, but try that in a cheap plastic case …
run multiple ground connects instead of the
single point psupply ground at the mobo
connect, and you will learn a lot about
ground loops.
johns
jørgen
-
-
#9
johns said:
Sure, but try that in a cheap plastic case .
..
run multiple ground connects instead of the
single point psupply ground at the mobo
connect, and you will learn a lot about
ground loops.Click to expand…
So depending on the case, you will isolate all the points where the
board and other components make contact? Unless you do that, those
washers really don’t do anything when talking about isolating the board
from the case
-
-
#10
johns said:
Sure, but try that in a cheap plastic case …
run multiple ground connects instead of the
single point psupply ground at the mobo
connect, and you will learn a lot about
ground loops.
johns
Click to expand…
You’re talking about steel and aluminum cases in your post, not plastic
(how many people use a plastic case for a computer)? We’re (TINW) not
talking about stringing a coax cable between two buildings (something
I’m sure most of us [TINU] would just love to do).
I repeat: your comments about steel and aluminum computer cases are
plain nonsense. Stick to the subject.
Advertisements
ProfGene
-
-
#11
hdtv said:
Do you need to put non-metallic (fiber or whatever) washers under the
screws that you attach the motherboard to the case with?
Is that necessary for preventing an electrical connection or
something?Click to expand.
..
On older motherboards small cardboard washers were used to protect the
board but the newer ones seem to have a built in insulation so washers
are no longer used.
Advertisements
Want to reply to this thread or ask your own question?
You’ll need to choose a username for the site, which only take a couple of moments. After that, you can post your question and our members will help you out.
Ask a Question
| Little red non-metal washers | 9 | |
| Mounting a new Motherboard | 5 | |
| chipped cpu die a problem? | 12 | |
| insulators needed under mobo’s mounting screws? | 25 | |
| Antec 900 case grommets? | 4 | |
| Urgent: Antec P180B Case | 4 | |
| screwed over by 6 TB drives | 2 | |
| Hard Drive Spinning Noise | 5 |
Share:
Facebook
Twitter
Reddit
Pinterest
Tumblr
WhatsApp
Email
Share
Link
Cardboard washers between motherboard and fixing screws?
JavaScript is disabled. For a better experience, please enable JavaScript in your browser before proceeding.
- Status
- Not open for further replies.
#1
-
Add bookmark
-
#1
I got a new case recently that came with fixing screws and cardboard washers. The instructions tell me that when installing the motherboard, I should place the cardboard washers between the motherboard and the fixing screws. Seems reasonable?
I do have a concern, however, since I’ve never placed anything between the the screws and the motherboard when building previous PCs. And it seems to me that the motherboard is deliberately designed to have bits of metal in the areas around each screw hole, as if they’re needed for grounding or something?
So, use the cardboard, or allow screw-metal to motherboard-metal contact?
#2
-
Add bookmark
-
#2
You’d have to place them on both sides of the motherboard to prevent it from grounding to the screws, so if it only says one side, then I don’t see the difference.
Old motherboards used to come with plastic standoffs, and that wasn’t an issue (beyond being super annoying, they worked kinda like the Intel stock cooler).
#3
-
Add bookmark
-
#3
Hinton»:3vei5pve said:
You’d have to place them on both sides of the motherboard to prevent it from grounding to the screws
Click to expand.
..
The screws would still ground the board, unless all the screws went down the center of the holes (they never do), as the bore of the hole is usually plated.
Toss the washers away, and screw the board in.
#4
-
Add bookmark
-
#4
They’re just there to protect the motherboard while you’re installing it. They’re not meant to be any form of electrical insulation.
The reason the board’s ground is exposed around the mounting holes is because it’s meant to be grounded to the chassis.
#5
-
Add bookmark
-
#5
Definitely not needed.
#6
-
Add bookmark
-
#6
They could be needed if the screw heads were oversize (to prevent the underside of the head scraping on something not designed to have screw head scrape it).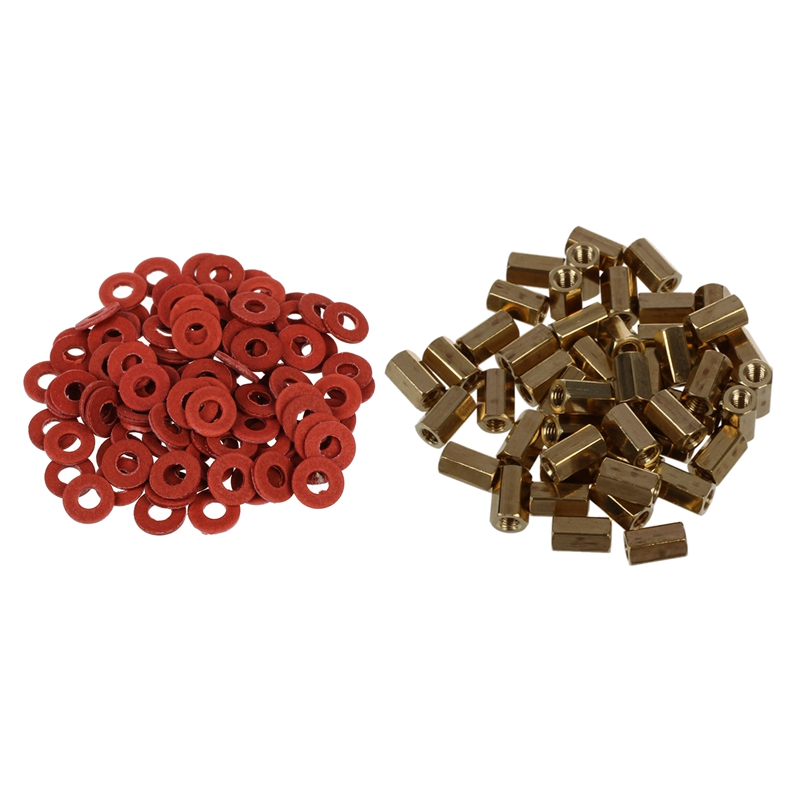 I can’t think of another reason to have them though.
#7
-
Add bookmark
-
#7
If your like me and tighten screws until they strip, and then back them off a quarter turn, then the cardboard washers might just be to keep you from breaking anything.
On a brand new $200 Nvidia graphics card I snapped a screw in two just attaching the monitor cable.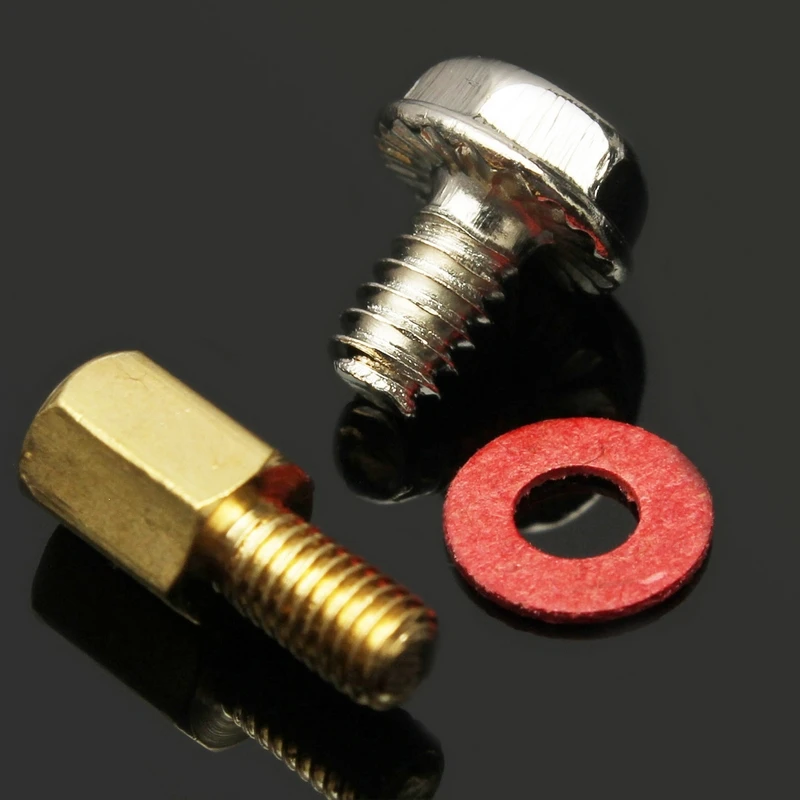
#8
-
Add bookmark
-
#8
I keep them around for when I’m mounting case fans as a little bit of vibration dampening.
#9
-
Add bookmark
-
#9
jsalpha2″:3skh5dv1 said:
If your like me and tighten screws until they strip, and then back them off a quarter turn, then the cardboard washers might just be to keep you from breaking anything.

On a brand new $200 Nvidia graphics card I snapped a screw in two just attaching the monitor cable.Click to expand…
Stop using your impact driver on your PC. I know you love the sound, everybody does, but you’re just tearing up parts now.
- Status
- Not open for further replies.
Four washers can help reduce Intel Alder Lake processor temperatures by 5°C
It has been reported that some Intel Alder Lake processors may run hotter than expected due to slight bending of the processor and socket. But if you get to your motherboard early enough, you can prevent the kink from occurring with a simple fix. This can cause your 12th gen chip to drop a few degrees Celsius while working, and all you need is a few washers, a Torx T20 screwdriver, and a pretty strong nerve to get it done.
Igor’s lab reports that following this method, first noted by overclocker Buildzoid, was able to bring the Core i9 12900K down to 5°C under load in Prime95. This is nothing to fault, as this temperature drop can make PC builds more enjoyable and quieter over time.
The mod’s main concept is to reduce the slight heat sink (IHS) and CPU flex at the high pressure point of the Independent Boot Mechanism (ILM), which is actually the socket and locking mechanism on the motherboard itself.
Igor’s lab found that a slight bend in the ILM could be a potential problem before opening the mod, and that reinforcing the back of the motherboard before installing the CPU could prevent any problems. However, in addition, it seems that applying four washers to the socket where it attaches to the motherboard PCB can bypass the problem entirely and make the chip look cooler.
The ILM is attached to the motherboard with four Torx screws, which are easily installed with M4 washers after removal. Re-tighten to a reasonable degree by hand and this should be enough to prevent any unwanted bending of the CPU and ILM.
The four Torx screws are located on the edge of the socket and should be fairly accessible. (Image credit: Future)
Igor’s Lab results show that 1mm shims are the best for this task, with the biggest drop in chip temperature (by 5.76°C) during Prime95 testing after being installed with an Intel Core i9 12900K .
This is a serious reduction, and it is no more necessary than on the top Intel chip. The Core i9 was the hottest of all its current competitors at a peak temperature of 84°C during our testing, so anything that can be done to keep its temperature down is much appreciated.
Mod performance may vary from motherboard to motherboard and socket to socket, although the ILM configuration should be set to the same specification on 12th generation compatible motherboards. Similarly, we don’t have data on the long-term effects of the modification, so obviously use it at your own risk. Personally, I can’t foresee that a 1mm washer, equally set on all four corners, will have any major adverse effects on the system over time anyway.
Testing by Igor’s Lab has definitely shown a permanent drop in temperature as a result of the mod, nevertheless proving its immediate value. Respect for the discovery.
There may be further optimizations that can be made to motherboards by their actual manufacturers to fully mitigate this mod with future LGA 1700 boards, which may prove to be the best outcome of this discovery overall.
10 mistakes that will kill your PC motherboard
July 2, 2020
Technologies
Never do this if you are building a new machine or performing maintenance on an already used computer.
1. Incorrect installation of the processor in the socket
Photo: Christian Wiediger / Unsplash
If the processor is installed incorrectly, it will not sit in the socket. Apply force — damage both the processor legs and the socket on the motherboard. Not every service center will undertake the elimination of such damage, and it is not a fact that repair will be possible at all.
Before inserting the processor into the socket, orient it in the way indicated by the manufacturer. Labels can be found on the socket and on the processor — the so-called keys. It is necessary to combine the key on the processor with the key on the socket, and the “stone” seems to fall into the socket without the use of force.
2. Thermal paste applied too generously
Photo: Richard Lewis / Flickr
There are many misconceptions on the Internet about how to properly apply thermal paste.
Most often, it is recommended to squeeze a little paste into the middle of the heat-distributing cover of the processor — a drop the size of a grain of rice, about one gram. The paste itself will smear when you install the cooler pressure plate. This is the classic method. If you apply less or more thermal paste, this will only worsen thermal conductivity.
Craftsmen from the Net, by the way, found out that the most even distribution of thermal paste will be obtained if it is applied crosswise on the cover.
But this is a tricky way, more suitable for overclockers.
But smearing the paste with a spatula or a credit card, as some collectors advise, is not worth it. If you spread it over the entire surface before installing the cooler, then when you press the heatsink against the processor, the excess paste will spread outside the heat distribution cover. This may cause a short circuit. So do not overdo it with thermal paste — one drop, and that’s it.
3. Touching the contacts
Photo: stock
Inexperienced assemblers grab electronic components with dirty hands and run their fingers over the contacts, and then wonder why the computer won’t start.
Human hands are sweat-fat and damp. Dirty contacts can cause a variety of problems, ranging from incorrect registration of RAM or initialization errors to a complete system failure.
Do not touch electronic components with your fingers, especially the gold-plated contacts of the video card and RAM, and the processor feet. Handle the accessories carefully by the edges, and wash your hands with soap and water beforehand and dry with a clean towel.
Anti-static nitrile gloves should ideally be worn prior to assembly.
If you do get dirty, you can use electrical contact cleaner, which you can buy at computer supply stores, radio parts stores, or even auto parts stores. But it’s better not to bring it up.
4. Static electricity
Photo: Praewnaaaaaam / Wikimedia Commons
If you assemble a computer while standing on your grandmother’s rug, you can easily damage the motherboard with electrostatic discharge, and it will completely fail. Therefore, before touching any electronics with your hands, at least basic precautions must be observed.
Be sure not to stand on statically charged surfaces such as wool carpets. Do not wear synthetic or wool clothing. Before touching electronic components, touch something metallic, such as the computer case itself, while it is empty.
Even better, ground yourself with a grounding strap around your wrist or ankle and wear anti-static gloves.
5. Careless handling of screws
Photo: Afrank99 / Wikimedia Commons
Be careful with all the small screws that come with the case. Don’t drop or lose them. And it’s not that your dog or robot vacuum can swallow them.
An unfortunate screw that fell into the case and you didn’t notice is quite capable of making a short circuit and killing the motherboard. So take some kind of container and put the screws that you don’t need right now.
And get a magnetic screwdriver — with it you will not keep dropping just unscrewed screws on the motherboard.
6. Lack of racks under the motherboard
Photo: Petteri Aimonen / Wikimedia Commons
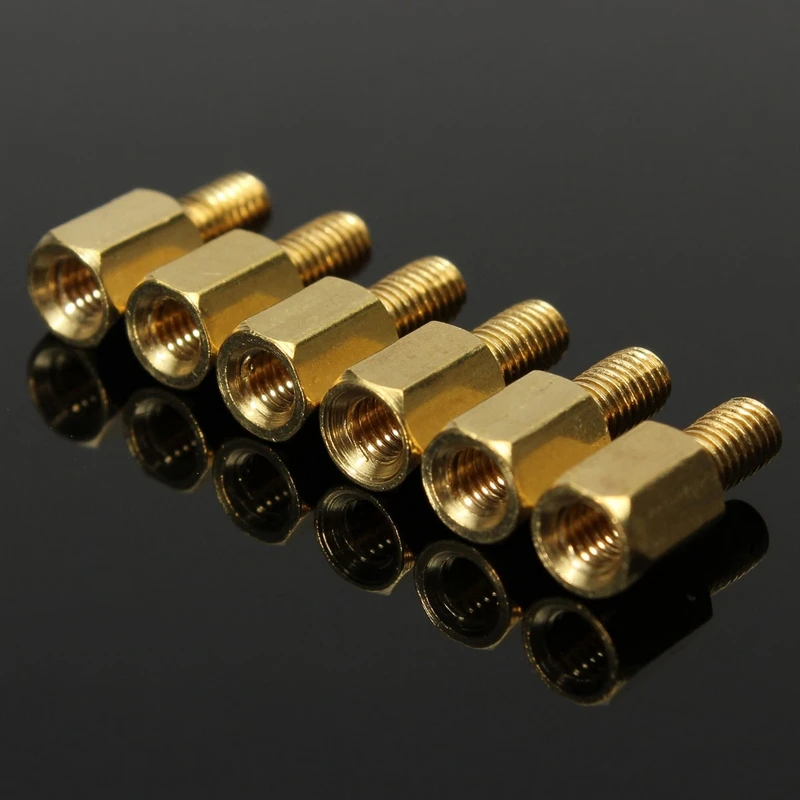
You can’t just screw the motherboard to the base plate: it is installed on special racks. These are hex screws pre-screwed into the case by the manufacturer. They align with the holes on the motherboard, and it is bolted to them.
Builders often attach the motherboard to three or four racks. And the rest do not bother to rearrange in suitable places and fasten as expected. So the motherboard can bend when you connect new components, or even short out on a metal base plate.
Before installing the board, unscrew the stands located by the manufacturer in inappropriate places on the base plate and install them under the mounting holes of your motherboard. Different boards have different layouts, and case manufacturers can’t provide everything for you, so you need to pay attention to this.
7. No cable management
Photo: Alexandru-Bogdan Ghita / Unsplash
Modern computer cases, even budget ones, are equipped with special compartments for cable management. As a rule, they are located behind the base plate on which the motherboard is installed.
Neat cable management will make your build look prettier, but it also has a practical purpose. If the wires are loose, they can get caught in the fan blades, cause noise or damage them. Or cause a short circuit.
Make sure all cables are properly routed behind the base plate and secured with cable ties. Feed only the necessary wires to the motherboard through the technical holes provided by the manufacturer.
8. Vacuuming the computer
Photo: Lukas ter Poorten / Unsplash
If you’re not building a new computer, but just wanting to take care of an existing one, don’t use a vacuum cleaner to clean the insides of your PC.
The vacuum cleaner is too rough for such purposes, it can damage the fan blades or suck in some component that is not screwed tightly enough. And vacuum cleaners perfectly accumulate static charge, which, as already mentioned, is also not very useful for the motherboard.
So buy a can of compressed air and put the vacuum cleaner away.
9.
case side cover open Photo: Constant Loubier / Unsplash
After you have completed the assembly, it is necessary to close the components with the side cover and secure it with a few screws. The computer is ready, you can use it.
But some builders prefer not to install the side cover. This is argued by the fact that the components are better cooled this way.
Never do that.