Guide for low input lag and consistent framerate : Spellbreak
Software you need:
-
Rivatuner Statistics Server (RTSS) (comes with MSI Afterburner if you have that). If you already have it running, open it from system tray and add Spellbreak. To find Spellbreak’s exe, go to Windows Task Manager when it’s running, right click -> open file location. Copy and paste the path to RTSS. For better monitoring of individual frametime spikes, click Setup and click «Enable frametime history overlay»
-
CPU/GPU monitoring software to identify bottleneck. There is GPU-Z, and MSI Afterburner has monitoring options. If you want to use Windows Task Manager, click on Performance -> CPU -> right click graph -> change graph to -> logical processors.
Contrary to old belief, unlocked framerate does not always result to better input lag. GPU bottleneck will cause increased input lag (further explanation here: https://www.youtube.com/watch?v=QzmoLJwS6eQ). In most cases, it’s better to find suitable settings and a locked framerate with lower GPU load (with some overhead for explosions and stuff).
I’ve found that Spellbreak’s framerate limiter is extremely good for low input lag. My theory is that the game monitors performance and delays inputs until the last moment it will manage to complete the frame. Even at lower framerates like 30, it is very responsive, though I would still recommend to try to get at least 60 due to the inherent advantage of more updates.
-
To reduce chances of GPU botteneck due to fluctuating clock speed, from Nvidia Control Panel 3D settings for Spellbreak, set GPU power management mode to «prefer maximum performance».
-
Run Spellbreak at fullscreen mode.
-
Disable Vsync and find suitable framerate that doesn’t bottleneck your GPU. You can use RTSS to quickly test any frame rate limit, but for final value, use Spellbreak’s limiter. If your choice doesn’t exist in Spellbreak’s options go to C:\Users<username>\AppData\Local\g3\Saved\Config\WindowsNoEditor open GameUserSettings.
 ini and set FrameRateLimit to your value.
 -
If you have variable refresh rate monitor (Gsync/Freesync) and your GPU can run faster than it’s maximum, for consistent performance and no tearing you should limit FPS at least 6-10 FPS below your monitor’s maximum refresh rate. Then enable both Gsync and Vsync and you are set, guide ends here. (Reasons: https://www.youtube.com/watch?v=OAFuiBTFo5E)
If you don’t have variable refresh rate monitor you have a few options to further enhance the experience. Don’t enable Vsync or it will tank your input lag.
For 60Hz monitor, I would limit it to 60 (as long as your GPU can run it). If your GPU is potato and struggles to run 60, you may be able to create custom resolution and refresh rate in Nvidia Contol Panel: Change resolution -> Customize -> Create custom resolution. For example, you could use 50Hz. You may also be able to overclock a 60Hz monitor (read more guides online, and do at your own risk).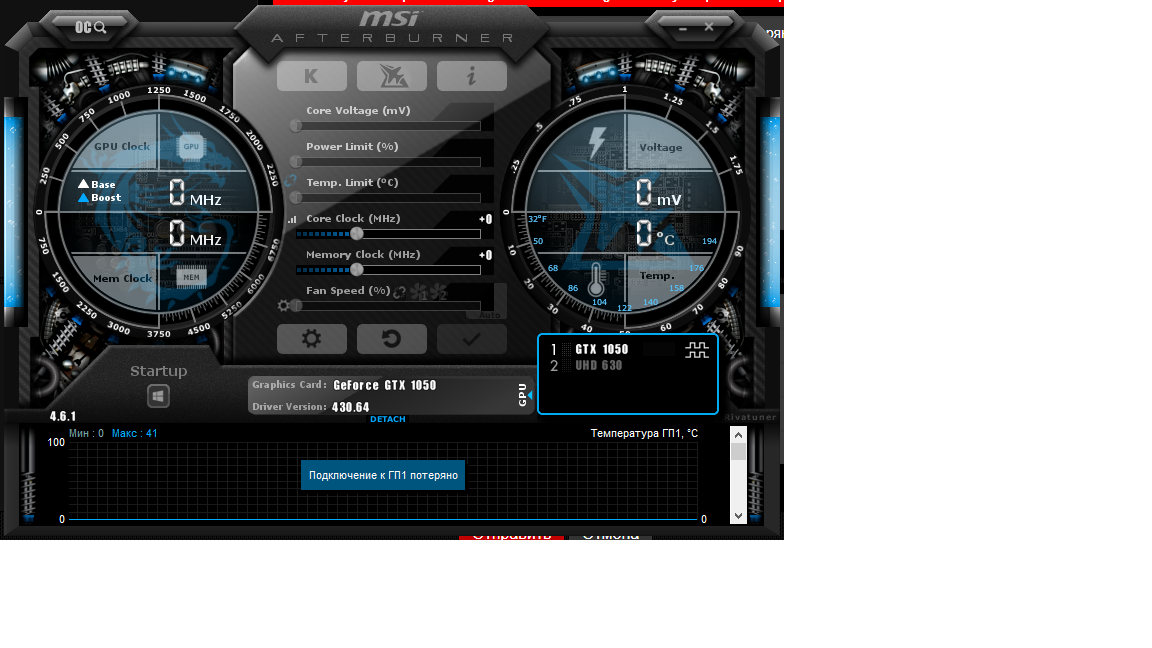 However, if your CPU is too potato (game is stuttery without GPU bottleneck), just keep it at highest possible refresh rate and let it run freely at whatever speed that doesn’t bottleneck your GPU.
RTSS scanline sync is an alternative to Vsync to reduce tearing but without Vsync’s frame buffer and input lag. It’s an intelligent framerate limiter that attempts to pace the game in a such way that rendered frames land on your display’s refresh cycles with tearline settling to the top/bottom of the screen.
-
To try out scanline sync, first disable Spellbreak’s framerate limit. In RTSS, type some other value than 0 to the Scanline sync field . Stability depends on PC, and you may want to read more guides, but as a general rule, you should use a negative value -1 to -100 (or further to negative) to adjust tearline position to top/bottom of the screen. To help at seeing the tearline, click Setup and check «Enable frame color indicator». Try making some fire tornadoes or something to see if it’s any stable.
When used individually, in my testing at monitor at 30 Hz mode, the tier list of input lag from worst to best is: Vsync < scanline sync < Spellbreak’s limiter. If you value smooth framerate and scanline sync works for you, it may be a great middle ground between vsync on and off.
When Spellbreak’s limiter and scanline sync are used together, you can potentially get both extremely low input lag and get rid of mid-screen tearing. However, in this situation the two framerate limiters are kind of fighting each other, and I’ve found that in some cases, like after heavy load, you may end up in a state with more input lag. However, it’s never more than scanline sync alone. For example, if I enable scanline sync first and Spellbreak’s limiter 2nd, I get more input lag until I disable and re-enable scanline sync. Fortunately, when launching the game with both enabled, it works out of the box when the game is launched (since RTSS gets injected to the game with delay).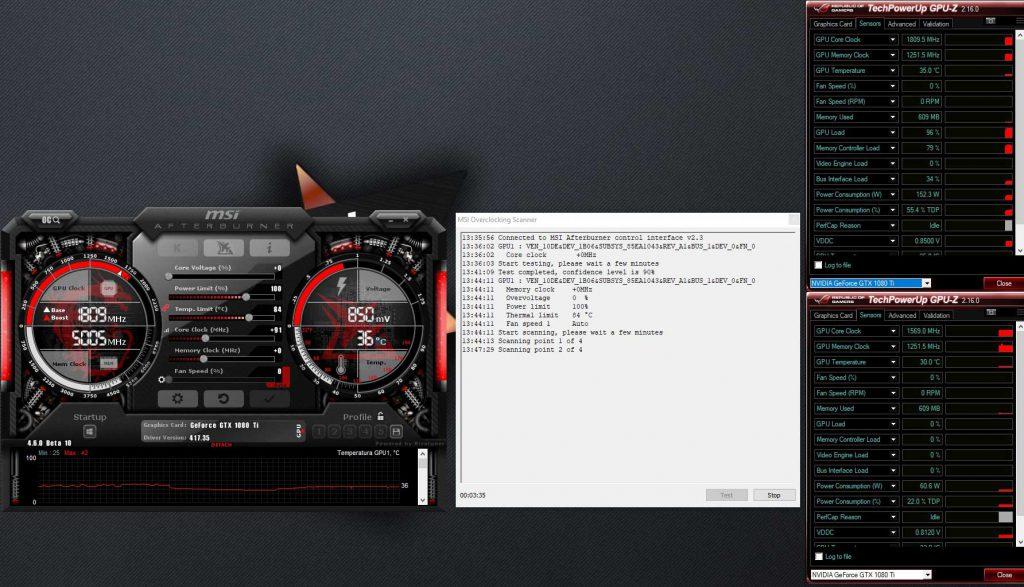
In short (for static refresh rate monitor):
-
If you want absolutely best input lag, just use Vsync off and Spellbreak’s limiter at a value that your GPU can run, preferably to your monitor’s refresh rate for improved smoothness.
-
If you also value smooth performance without tearing, use both Spellbreak’s limiter and scanline sync together. You may sometimes lose the low input lag benefit of Spellbreak’s limiter, but it’s still better than Vsync.
-
You might also consider running at a lower framerate that your CPU can handle for more consistent framerate.
Personally, I was previously running 144Hz (no gsync/freesync), vsync off, limited to 144 fps. I got smooth but teary 144 sometimes, with stuttery dips to 105 fps. Now I’m using 100hz mode limited to 100 fps with scanline sync and it’s extremely responsive for aim tracking, but even better, it’s pretty much butter smooth which makes reading the action and manuevering much easier. On my old CPU, I got very fluctuating 75-144, and now I wouldn’t hesitate to lock it to 60 the same way with the in-game limiter and scanline sync together. Again, the in-game fps limiter is very good, everything is good as long as you don’t enable vsync.
Tearingless VSYNC OFF now possible with RTSS beta.
Blitzhex
-
-
#1
Unwinder (MSI Afterburner/RTSS) with some help from mdrejohn (BlurBusters) has created a method for getting tearing-less VSYNC OFF with fps capped at your refresh rate for low input lag (no additional vsync input lag), perfect frame pacing and little to no tearing.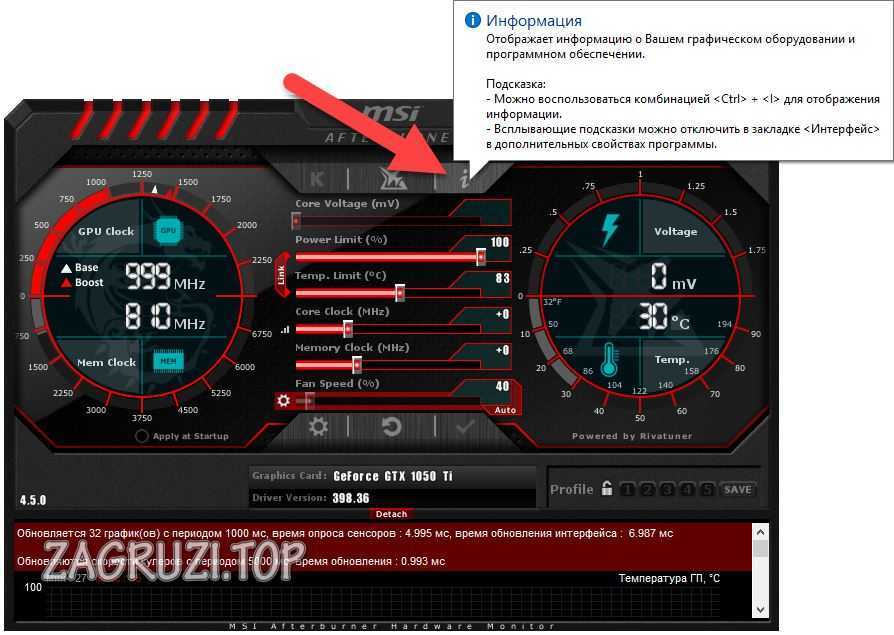 Which was something you could only previously achieve with VRR. You do however need a quite a bit of performance overhead to achieve it.
Edit: Removed old unsupported methods and added new method below.
Blitzhex said:
Beta 3 is out with the gui update. https://forums.guru3d.com/threads/rtss-6-7-0-beta-1.412822/page-64#post-5561023
The older VSYNC ON methods aren’t recommended anymore and you don’t have to edit the cfg anymore.Uninstall your old rtss install and make sure the rtss folder is deleted in program files to remove previous cfgs.
Requirements for tearing-less VSYNC OFF:
Don’t use vsync or fps caps ingame and set rtss fps limit to 0. Set exclusive fullscreen ingame. Needs <65% gpu usage (in my experience in dx11 games) for it to work correctly or you would get large tearbands and random jump tearlines.— Set Scanline sync in rtss GUI anywhere from 1050 to 1070 on a 1080p monitor (1125 scanlines total) to move the tear line to the bottom of the screen at 1050 or offscreen at 1070.
Experiment with the it. The value would be higher on a higher res monitor. Move it to the bottom rather than the top of the screen(link).
You can also click Scanline sync in the gui to toggle to x2 Scanline sync, so it caps at [email protected] etc for tearlingless vsync off.
Setting Scanline sync to 0 turns it off.Click to expand…
Click to shrink…
Blitzhex said:
RTSS Beta 4 is out and added «ScanlineSync x/2», which is half refresh rate tearingless VSYNC OFF. A feature I requested Unwinder for and one that a lot of people will appreciate.
https://forums.guru3d.com/threads/rtss-6-7-0-beta-1.412822/page-64#post-5562770-Click the scanlinesync button in rtss twice for Scanline sync x/2, which would give you half refreshrate tearingless vsync off i.e [email protected] or [email protected] etc.
This is really great for demanding games, console ports etc.
-An additional command for powerusers «SyncPeriods» has been added, to be used in the cfg under [Framerate] for tearlingless vsync off at multiples less than your refresh rate. SyncPeriods command is calculated by RefreshRate/(SyncPeriods+1), so SyncPeriods=1 would be [email protected] and SyncPeriods=3 would be [email protected] etc.
There’s no need to alter your monitor’s refresh rate anymore to get tearingless vsync off working at any multiple of your refreshrate.You still need less than 70% gpu usage, vsync off ingame and exclusive fullscreen for it to work correctly.
Click to expand…
Click to shrink…
Source, additional commands and read first if you want to try it out:
https://forums.blurbusters.com/viewtopic.php?f=2&t=4173
https://forums.guru3d.com/threads/rtss-6-7-0-beta-1.412822/page-64#post-5561023
Last edited:
Mullet2000
-
-
#2
Uh, wow. If this works as good as it should, this is pretty huge. I ponied up for a gsync monitor just to kill tearing.
-
-
#3
I tested this beam racing method with WinUAE the other day, and it’s pretty cool. I didn’t expect to ever see it outside of emulators.
-
-
#4
Tearingless v-sync off the way to go, as long as you don’t get tearing.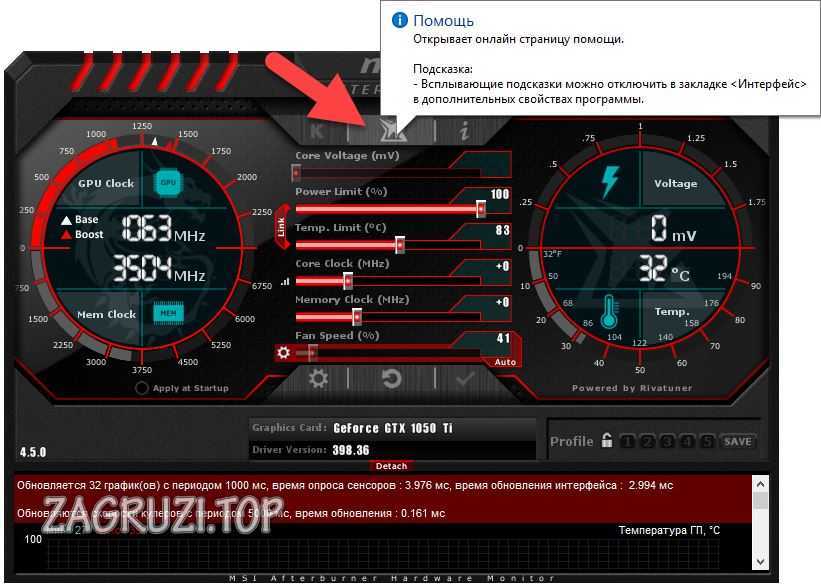 I don’t know why but my previous desktop system had little to no tearing at all. I wouldn’t even care for turning v-sync on because it would only give me more input lag. Windows 10’s triple buffering when in windowed mode is also much better than v-sync, at the cost of a few frames.
Does anyone know where the old config is stored? I have over 50 games each with their own unique setting and don’t want to risk losing this for the new version.
Crayon
-
-
#5
Whoa it’s like the gsync monitors made people aware of the need and here’s the solution.
ThisIsMyDogKyle
Prophet of Truth — One Winged Slayer
-
-
#6
huh, that seems amazing.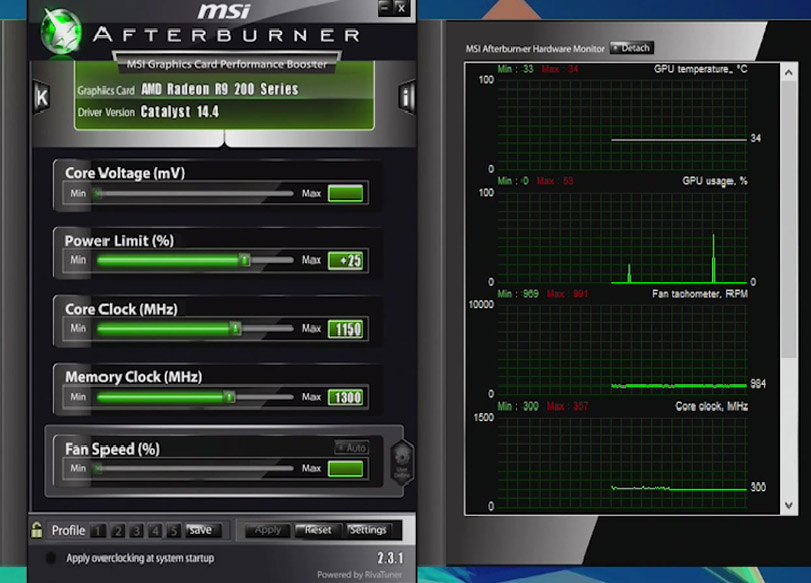
-
-
#7
Any idea if the low lag V-sync ON option works with games capped at 30fps? Or does the method also rely on running the game at refresh rate framerate?
franklyshankly
-
-
#8
Very curious to see how this develops.
wwm0nkey
-
-
#9
Where is the global config file located for RTSS? Never messed with it much
Mr_Blue_Sky
-
-
#10
So is this worth trying to get running now? I was reading through the threads posted on this a bit and it seems like maybe I should wait for a bit more coverage/stability across more games.
RAWRferal
-
-
#11
I have problems forcing Nvidia vsync through drivers half the time, so this is a game changer for me! (if it works).
Blitzhex
-
-
#12
Skip said:
Any idea if the low lag V-sync ON option works with games capped at 30fps? Or does the method also rely on running the game at refresh rate framerate?
Click to expand.
..
Click to shrink…
You would need to set the screen to 30hz for it to work correctly, but the inherent inputlag of 30hz would kill it imo.
I haven’t tested it in half refresh rate scenarios. Consider asking the blurbusters admin at the linked thread because he wants more people testing it out in more games for him.
Smash-It Stan
-
-
#13
This could be a game changer for me. Playing borderless windowed was my go to but introduces unfixable microstutter, but doing fullscreen removed alt tabbing and introduced eye killing screen tear, with vsync adding tons of input lag. Everyone said my solution was a $500 monitor(how did PC gaming work before those monitors?)
Gonna try this on every single game the second I get home, I’ll fund their patreon if it means I can PC game again.
Blitzhex
-
-
#14
Smash-It Stan said:
This could be a game changer for me. Playing borderless windowed was my go to but introduces unfixable microstutter, but doing fullscreen removed alt tabbing and introduced eye killing screen tear, with vsync adding tons of input lag.
Everyone said my solution was a $500 monitor(how did PC gaming work before those monitors?)
Gonna try this on every single game the second I get home, I’ll fund their patreon if it means I can PC game again.
Click to expand…
Click to shrink…
People just lived with bad frame pacing, tearing or vsync input lag before VRR. Gsync is still by far the best option and has a lot more uses. You can cap at any fps you want within the gsync range, or have it fluctuate and still get perfect frame pacing with almost no additional input lag created.
This has limited usage and works best in older games/games where you less than 60% gpu usage and your cpu isn’t maxed out, like competitive fps games.
You can test how the vsync off method tearing behavior works in a game like Overwatch, where you can easily alter your gpu usage by changing rendering scale from 50-200%
I’m on 1080ti with 1080p display right now, away from my gsync monitor. Since the gpu is overkill for everything at 1080p, I’ve got tearingless vsync off working perfectly, give or take a few tearline jumps, in a handful of games I’ve tried.
Lashley
<<Tag Here>>
-
-
#15
This is phenomenal.
I have a gsync monitor, but this is great from RTSS
Parsnip
-
-
#16
Huh, fascinating.
Though I don’t think I play a ton of games where my gpu usage sits under 60%.
Do both methods need the low gpu usage or just the tearingless vsync off?
Blitzhex
-
-
#17
Unwinder is considering adding scanline sync options in the gui for non power users in the next beta.
Parsnip said:
Huh, fascinating.
Though I don’t think I play a ton of games where my gpu usage sits under 60%.Do both methods need the low gpu usage or just the tearingless vsync off?
Click to expand.
..
Click to shrink…
I haven’t tested the vsync on scanline methods.
actualrefreshrate — 0.01 would be a better option to use in all cases with vsync on, since there’s no performance implication.
Here’s how you do it. https://www.blurbusters.com/howto-low-lag-vsync-on/
mdrejhon
-
-
#18
Chief Blur Buster here.
The old low-lag VSYNC ON technique is wonderful but it creates a sawtooth input-lag artifact caused by the slow-slewing between framerate and refreshrate, as it slowly beat-frequencies.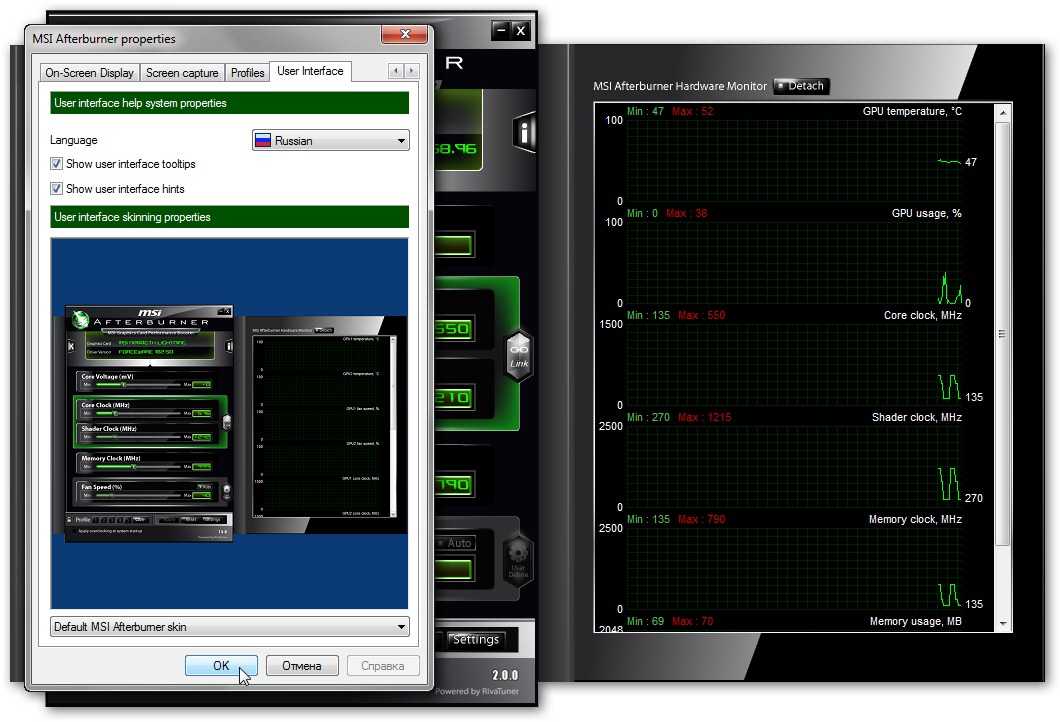 At 144Hz, the lag variance amplitude is only 6.9ms.
Sometimes for some games, the low-lag VSYNC ON capping technique is a tough goldilocks compromise on stutter beat frequency between:
— Too large (e.g. 59fps at 60Hz) and you get one single microstutter stutter per second.
— Too tight (e.g. 59.99fps at 60Hz) and you get a 100 second cycle of 80 seconds perfect smooth followed by 20 seconds of stutters.
So you have to tweak until you’ve essentially getting only 1 near-invisible microstutter every many seconds. For example, 59.9fps cap at 60Hz (0.1 difference) would generate 1 microstutter every 10 seconds. You keep going until the tiny microstutter becomes a sustained annoying burst of stutters (because of rounding error margins as it jitters back and forth past the blanking intervals). It’s a very fiddly tweak that sometimes is hard to find a Goldilocks setting.
______________
The new perfect-matching raster-scanline based capping method is theoretically more user friendly (but it has a few catches that makes it fiddly in different ways — further improvements are ongoing to automate some common sense, based on some suggestions).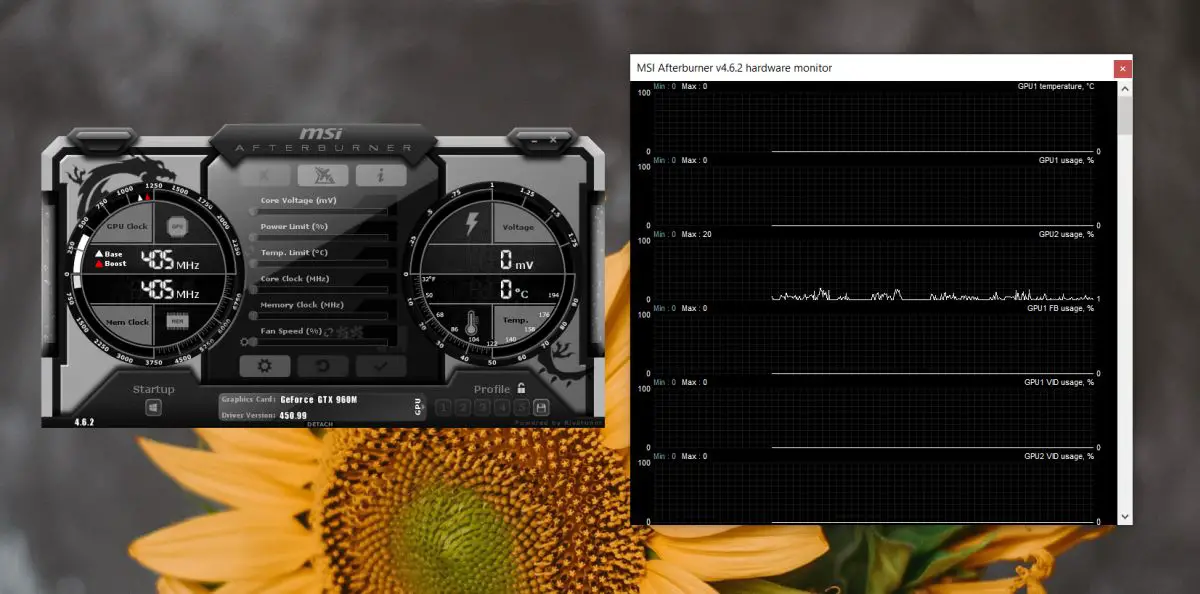
The perfect framerate sync method eliminates this, and if you have excess GPU headroom, then why the heck not. If your game can blast 200fps anyway, then capping to 120fps won’t degrade performance if your GPU has tons of headroom for the raster-synchronized tearingless VSYNC OFF mode that looks just like VSYNC ON (but with less lag).
The catches:
— It only works if you have excess GPU horsepower and your GPU almost always want to run framerates above the cap. So this works well with older games.
— In exchange for eating into some GPU headroom, you get more perfect framepacing with low-lag at capped framerates, creating a «VSYNC ON looking mode» via tearingless VSYNC OFF.
— Tearing will reappear once your GPU utilization becomes high again. Tearlines will disappear again once GPU utilization falls below a threshold. Its quite dynamic. (So even if this happens only a percentage of the time, it doesn’t mean this is useless)
Use SyncFlush=2 if you want to have even fewer tearlines, at the cost of eating up more headroom.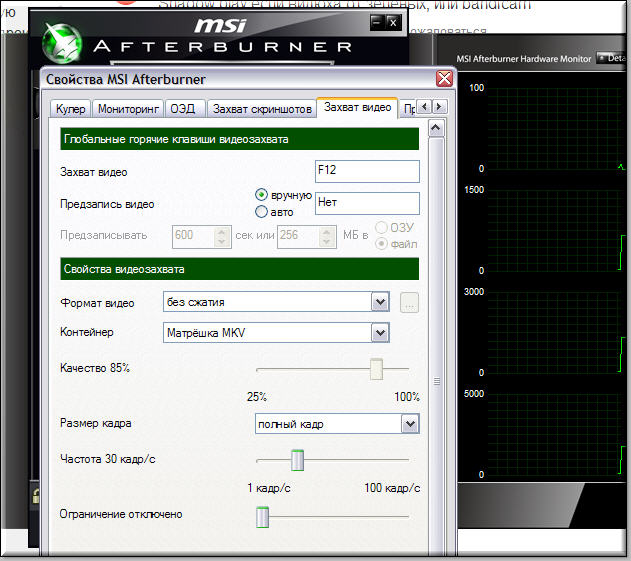 It works best when your GPU utilization is well below 100%, which occurs when you’re capping older games anyway. That way, you avoid the performance loss. Please be noted, it is a beta-only feature, and can be fiddly, and not guaranteed to make it all the way to the release version of RTSS. However, I’d love to hear more comments to see if it helps you.
Incidentially, it improves ULMB a lot:
Then doing 100Hz «perfect stutter-free jitter-free tear-free low-lag ULMB/LightBoost» at 100fps perfect cap — then who cares if you’re using only 50% of your GPU to get perfect low-lag ULMB motion? Many of us have hated the amplified stutter/tearing of ULMB, and the only way to fix that is using VSYNC ON with ULMB, which adds horrible lag. This allows people who like strobing otherwise) to have cake and eat it too (to a certain extent). There’s still slight strobe lag, but ~75% of the lag seems gone (give or take), which can make strobing much more enjoyable, depending on which games you play ([email protected] or [email protected] or [email protected] — choose one depending on how much GPU headroom you have).
Again, remember — this is a feature only avaialble in RTSS betas.
It is more likely to make it into final release if people say they like the feature. Test some older games (e.g. CS:GO) with this new capping feature.
And for ULMB users, test this out too, and find out how much snappier the aiming may feel during strobed operation.
Last edited:
-
-
#19
mdrejhon said:
Chief Blur Buster here.
The old low-lag VSYNC ON technique is wonderful but it creates a sawtooth input-lag artifact caused by the slow-slewing between framerate and refreshrate, as it slowly beat-frequencies. At 144Hz, the lag variance amplitude is only 6.9ms.Click to expand…
Click to shrink…
Hi! I had no idea this is a thing. What is the lag variance at ~60Hz?
Also, «tearingless VSYNC OFF» sounds like a pc gaming unicorn so all this is really great news. Props to everybody working on this.
Starviper
-
-
#20
Guess I better sell my G-Sync monitor before it’s worthless, lol.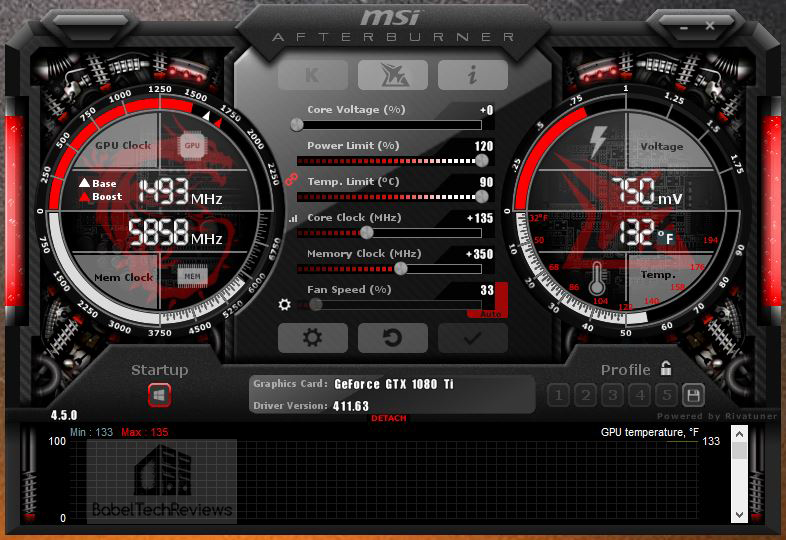 .
.
Deleted member 10549
User requested account closure
-
-
#21
Starviper said:
Guess I better sell my G-Sync monitor before it’s worthless, lol..
Click to expand…
Click to shrink…
I don’t think it will have that much of an impact.
mdrejhon
-
-
#22
MomoVideo said:
I don’t think it will have that much of an impact.
Click to expand…
Click to shrink…
It’s different tools in the same toolbox. GSYNC/FreeSync is useful and has a lot of benefits. It smooths out varying framerates quite well, and is wonderful for newer games that bog the GPU down and the framerate varies quite a lot. You get the newest fancy graphics-heavy game, it’s much more pleasant to play on Ultra Detail settings with GSYNC.
This is more applicable to fixed-framerate situations (including use with ULMB).
And besides, you need to get GSYNC in order to get ULMB anyway (which benefits from this trick).
mdrejhon
-
-
#23
Skip said:
Hi! I had no idea this is a thing.
What is the lag variance at ~60Hz?
Click to expand…
Click to shrink…
1/144sec = 6.9ms
1/60sec = 16.7ms
Skip said:
Also, «tearingless VSYNC OFF» sounds like a pc gaming unicorn so all this is really great news. Props to everybody working on this.
Click to expand…
Click to shrink…
There are still caveats with it, it requires excess GPU horsepower — your GPU will only be able to be milked to roughly ~60%+ of its potential — in order to do this new mode very well.
Starviper said:
Guess I better sell my G-Sync monitor before it’s worthless, lol..
Click to expand…
Click to shrink…
There’s a massive number of other GSYNC benefits other than this. Varying framerates becoming stutter free. Existence of ULMB. Etc.
And the low-lag VSYNC ON tricks starts glitching a little (major tearing can suddenly appear) if your frame rate fall below refresh rate and/or your GPU utilizes starts nearly maxing out. So there’s a double-edge sword element. Plus, you still have a smidgen more lag than unsynchronized VSYNC OFF. Still far less than unoptimized VSYNC ON, though!
Works great for several use cases, though.
-
-
#24
Sorry for hijacking this thread with another semi-related question, but what is the best approach for lower lag in a game where you do get those occasional drops below 60fps on a regular 60Hz display? Nvidia’s adaptive V-sync does not seem to work with RTSS framecap, I get tearing all the time.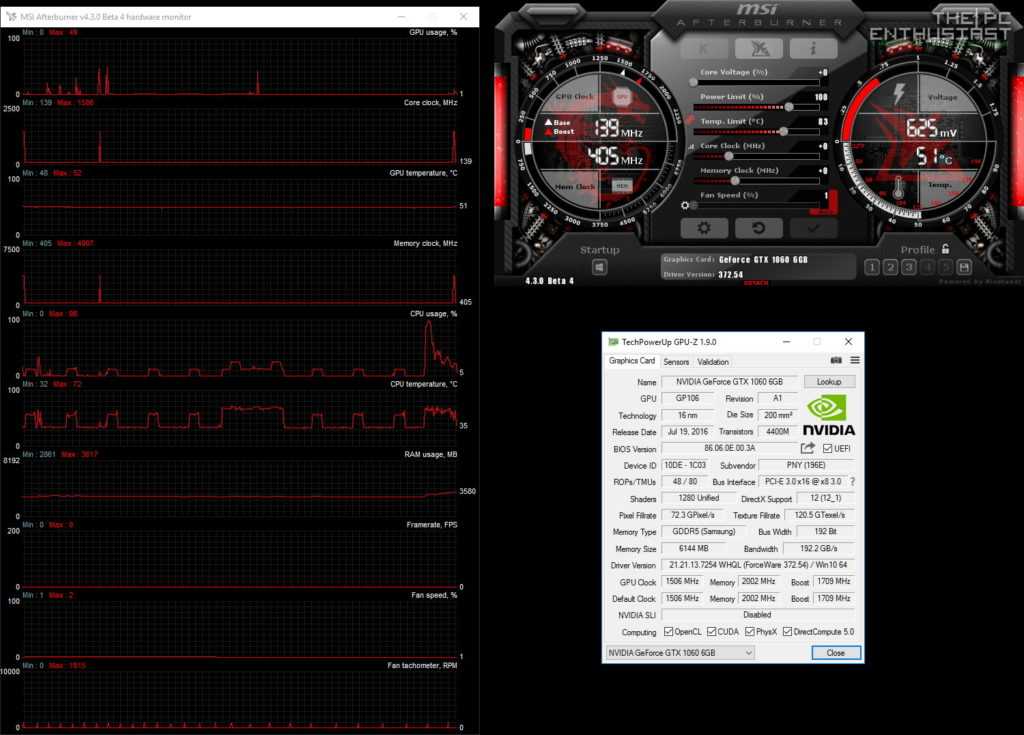 Is there anything extra I can do?
-
-
#25
Skip said:
Sorry for hijacking this thread with another semi-related question, but what is the best approach for lower lag in a game where you do get those occasional drops below 60fps on a regular 60Hz display? Nvidia’s adaptive V-sync does not seem to work with RTSS framecap, I get tearing all the time. Is there anything extra I can do?
Click to expand…
Click to shrink…
The previous «hack»/»workaround» prior to this was:
https://www.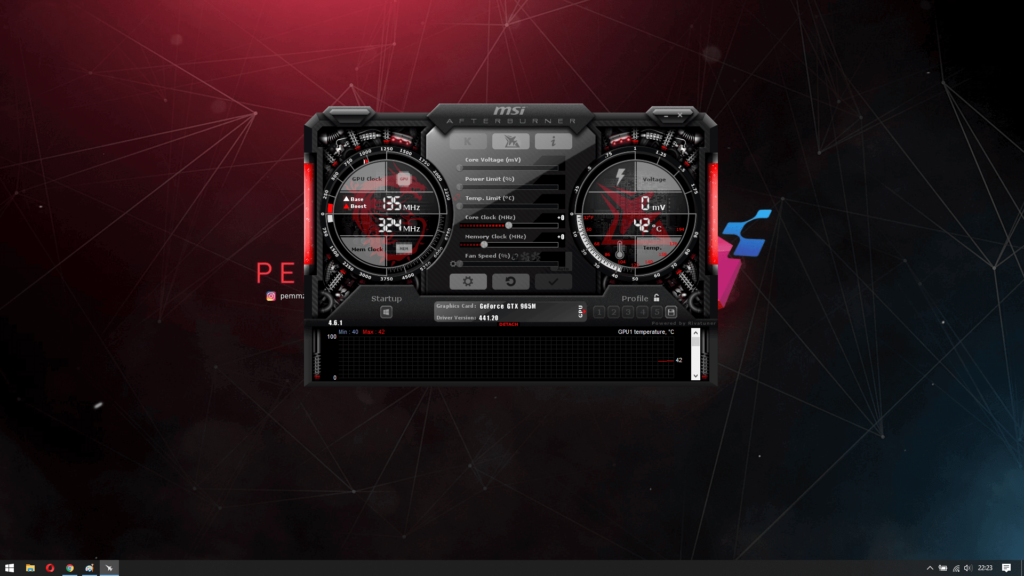 blurbusters.com/howto-low-lag-vsync-on/
As mentioned in the OT. But you’ll notice that if your fps drop below your limit you’re gonna have a bad time. Either get better hardware, lower the in game graphics settings or if you can stand it, lock to 30fps.
A VRR Monitor would alleviate and create a better experience as well, although once you get down to 45 fps or lower a vrr monitor won’t help you much, if i recall correctly (maybe it’s 25 fps, i can’t remember).
Blitzhex
-
-
#26
Beta 3 is out with the gui update. https://forums.guru3d.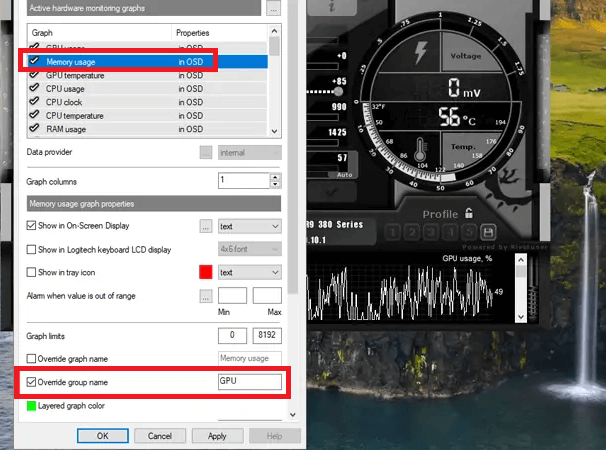 com/threads/rtss-6-7-0-beta-1.412822/page-64#post-5561023
The older VSYNC ON methods aren’t recommended anymore and you don’t have to edit the cfg anymore.
Uninstall your old rtss install and make sure the rtss folder is deleted in program files to remove previous cfgs.
Requirements for tearing-less VSYNC OFF:
Don’t use vsync or fps caps ingame and set rtss fps limit to 0. Set exclusive fullscreen ingame. Needs <65% gpu usage (in my experience in dx11 games) for it to work correctly or you would get large tearbands and random jump tearlines.
— Set Scanline sync in rtss GUI anywhere from 1050 to 1070 on a 1080p monitor (1125 scanlines total) to move the tear line to the bottom of the screen at 1050 or offscreen at 1070.
Experiment with the it. The value would be higher on a higher res monitor. Move it to the bottom rather than the top of the screen(link).
You can also click Scanline sync in the gui to toggle to x2 Scanline sync, so it caps at [email protected] etc for tearlingless vsync off.
Setting Scanline sync to 0 turns it off.
-
-
#27
From the release notes:
adaptive VSync with low input lag on 60Hz refresh rate
Click to expand…
Click to shrink…
There it is! I missed it somehow. I guess I’ll have to try to make it work.
So it seems you can now use RTSS to cover multiple possible game performance variants: with lots of spare performance you go with tearingless VSYNC OFF, for games running not as fast but comfortably above 60 you go with low lag VSYNC ON and there is also a low lag adaptive VSYNC variant for those titles where you do get those dips. Nice!
Nice!
Last edited:
-
-
#28
This sounds amazing. I’ll have to try it soon. I’d love to read more impressions in the meantime.
I don’t really all the tech talk but if I understand correctly, if I have a pretty good rig it should work well with games that are a few years old? I was planning to play Metal Gear Rising next so if I can play games like this with vsync off and without tearing I’ll be in heaven.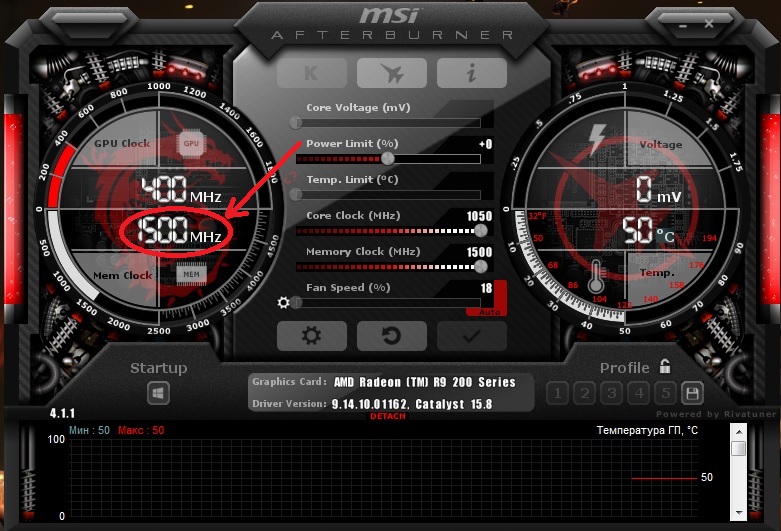
Blitzhex
-
-
#29
Nikus said:
This sounds amazing. I’ll have to try it soon. I’d love to read more impressions in the meantime.
I don’t really all the tech talk but if I understand correctly, if I have a pretty good rig it should work well with games that are a few years old? I was planning to play Metal Gear Rising next so if I can play games like this with vsync off and without tearing I’ll be in heaven.Click to expand…
Click to shrink…
If you have a good enough rig it should work in all games. Goal is to keep less than 70% gpu usage. It should work fine in MGS Rising since it’s not very intensive to run.
With the feature being included in the GUI now it should only take a second to setup.
Unwinder is adding support for framerate multiples less than your refresh rate in the next release.
So scanline sync would be the best and lowest input lag method to play 30/[email protected] or [email protected] etc games pretty soon. As 1/2 refresh rate vsync adds a ton of input lag.
Blitzhex
-
-
#30
RTSS Beta 4 is out and added «ScanlineSync x/2», which is half refresh rate tearingless VSYNC OFF.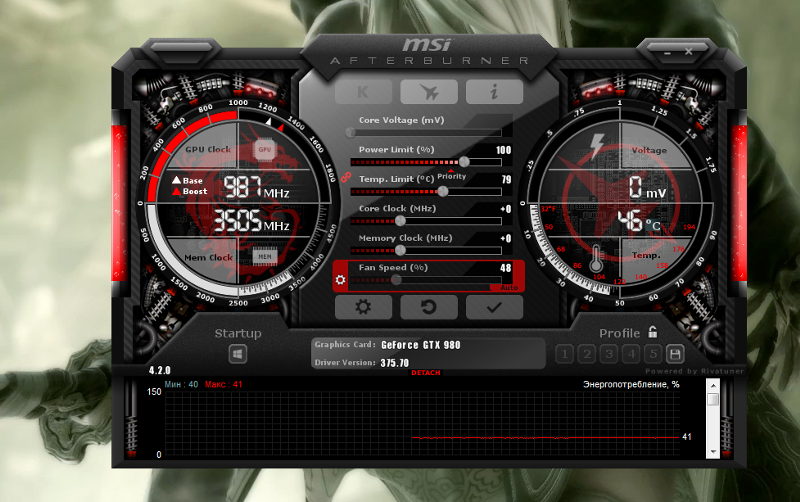 A feature I requested Unwinder for and one that a lot of people will appreciate.
https://forums.guru3d.com/threads/rtss-6-7-0-beta-1.412822/page-64#post-5562770
-Click the scanlinesync button in rtss twice for Scanline sync x/2, which would give you half refreshrate tearingless vsync off i.e [email protected] or [email protected] etc. This is really great for demanding games, console ports etc.
-An additional command for powerusers «SyncPeriods» has been added, to be used in the cfg under [Framerate] for tearlingless vsync off at multiples less than your refresh rate. SyncPeriods command is calculated by RefreshRate/(SyncPeriods+1), so SyncPeriods=1 would be [email protected] and SyncPeriods=3 would be [email protected] etc.
There’s no need to alter your monitor’s refresh rate anymore to get tearingless vsync off working at any multiple of your refreshrate.
You still need less than 70% gpu usage, vsync off ingame and exclusive fullscreen for it to work correctly.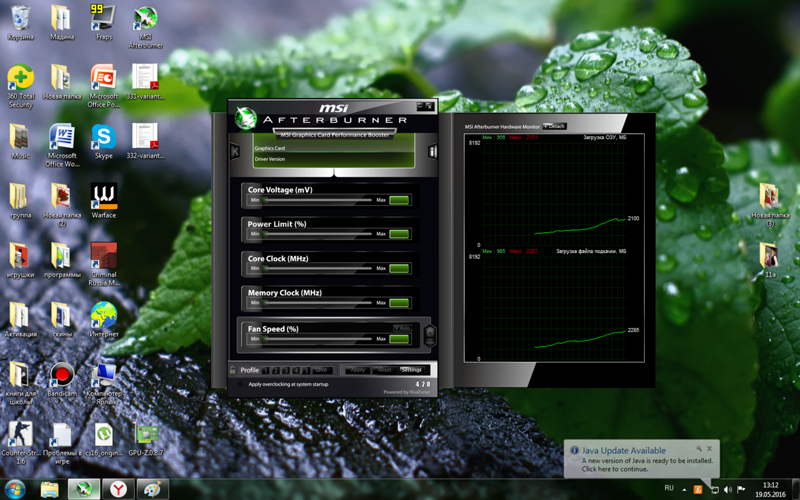
-
-
#31
LTTP, but it seems like no matter what settings I use with the latest Rivatuner, I always get tearing, and too much of it. Any tips if I want to cap a game to 30 / 60 fps, and with minimal input lag?
Deleted member 10852
User requested account closure
-
-
#32
Anyone here tested S-sync? im trying with witcher 3 but feel weird, any guide or something? i was told i should use -30 for 1080p
Simboubou
-
-
#33
Hello here,
I’ve tried using this in Assassin’s creed oddysey, to play at 30fps.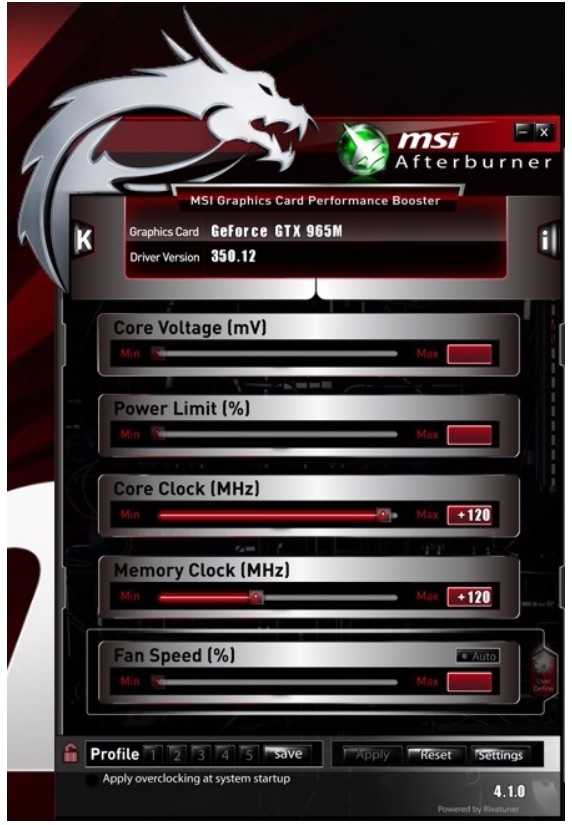 Fps does go to 30, but the frame pacing reported by SpecialK is not as good as using SpecialK limiter. I tried reactivating SpecialK framerate limiter, it does improve frame pacing, but I’m not sure if to two are supposed to work together.
Also, previous messages indicate that I need to have some extra GPU to spare. I do, but I don’t have any CPU to spare. Does it count ?
Thanks !
-
-
#34
I tried S Sync with some games that get very very high frame rates and it didn’t work correctly. Juddery or has tearing that I can never move off the screen.
Skyfireblaze
-
-
#35
I just saw this, do I get that right that you need near double the FPS for this to work, eg. 120fps @ 60hz?
mdrejhon
-
-
#36
You must have your GPU to mostly stay below 50% for scanline sync to work reliably.
See HOWTO.
Technical Explanation: This is because VSYNC OFF tearlines are rasters, and you need ultra-precision to time tearlines (rasters) between refresh cycles. It’s easy to do with older games, but much harder to do with Witcher.
New Trick: If you hate occasional tearing from frametime spikes, you can also calibrate RTSS scanline-sync to co-operate with NVIDIA Fast Sync or AMD Enhanced Sync, using HOWTO: Combining RTSS scanline-sync with NVIDIA Fast Sync or AMD Enhanced Sync
Last edited:
-
-
#37
mdrejhon said:
You must have your GPU to mostly stay below 50% for scanline sync to work reliably.

See HOWTO.
Technical Explanation: This is because VSYNC OFF tearlines are rasters, and you need ultra-precision to time tearlines (rasters) between refresh cycles. It’s easy to do with older games, but much harder to do with Witcher.
New Trick: If you hate occasional tearing from frametime spikes, you can also calibrate RTSS scanline-sync to co-operate with NVIDIA Fast Sync or AMD Enhanced Sync, using HOWTO: Combining RTSS scanline-sync with NVIDIA Fast Sync or AMD Enhanced Sync
Click to expand…
Click to shrink…
If you use Fast / enhanced sync with Scanline, do you still have to keep gpu usage low for it all to work? Is there any way in the future that scanline sync (or something similar) could hide the tearline at or near 100% gpu usage?
Blitzhex
-
-
#38
BeImonkey said:
If you use Fast / enhanced sync with Scanline, do you still have to keep gpu usage low for it all to work? Is there any way in the future that scanline sync (or something similar) could hide the tearline at or near 100% gpu usage?
Click to expand.
..
Click to shrink…
Scanline sync near 100% gpu usage would be great.
I’ve stopped using this now since nvidia released freesync support. Scanline sync still has some pros though, like getting tearling less vsync-off at x2 your refreshrate in easy to run competitive shooters etc.
Mindman
-
-
#39
Old thread resurrection:
Can someone tell me the keyboard shortcut for moving the tear line up and down???
EDIT: And how to enable said keyboard shortcut?
Last edited:
-
-
#40
Mindman said:
Old thread resurrection:
Can someone tell me the keyboard shortcut for moving the tear line up and down???
EDIT: And how to enable said keyboard shortcut?
Click to expand.
..
Click to shrink…
You have to add «SyncHotkeys=1» (without quotation marks) to your Global RTSS CFG file, under [Framerate].
Then, you control the scanline by holding CTRL+SHIFT and pressing UP/DOWN (arrow keys) to move the tearline up and down.
Era, help me understand/solve this frametime problem using RTSS
Joris-truly
-
-
#1
So i’m trying to fix my frame-pacing issues using RTSS (RivaTuner Statistics Server). Some of my games stutter, even though no real inconsistent framerate is detected.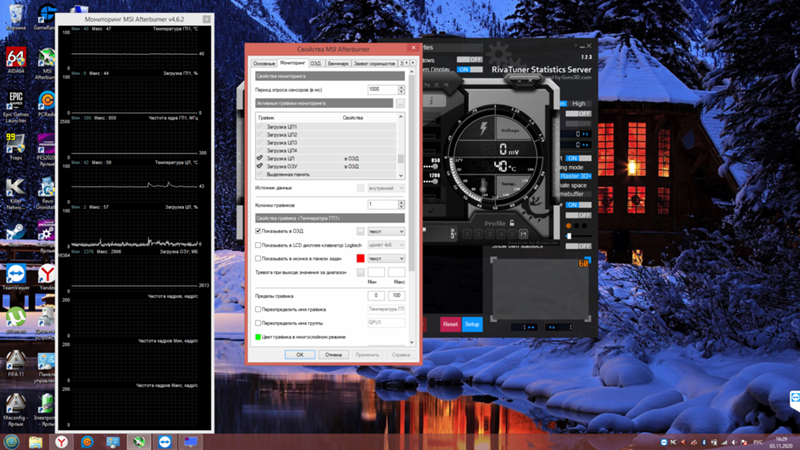 I’ve finally found a solution without suffering input latency using Scanline Sync 2/x. All the frames are nicely paced. SUCCESS!
But wait, when I checked my performance profile I noticed that 1 thread is running unusually high load when the scanline sync is toggle on. Could find any solution on forums. Reinstalling RTSS and MSI Afterburner did nothing.
SCANLINE SYNC ON
SCANLINE SYNC OFF
I’m a missing something here? Or is this how it’s supposed to work? Thanks for the help!
Edit: before anyone notices, Yes, i could run this game (The Outer Worlds) at a locked 60 easily. I used this game as a example because it shows the huge difference in CPU load more clearly. 😉
Darktalon
-
-
#2
Use Special K instead.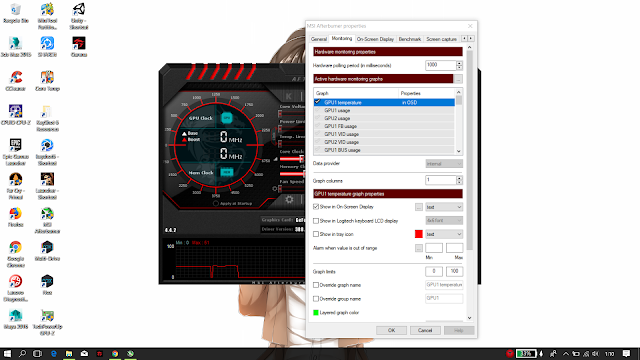
Invite URL:
Join the Special K Discord Server!
Special K’s devs and userbase communicate and have a great time with tech-related topics and broken games to fix 🙂 | 25,182 members
discord.com
Koklusz
-
-
#3
Framerate limiter is running on CPU, that’s why you have higher load.
Darktalon said:
Use Special K instead.
Click to expand…
Click to shrink…
Special K has compatibility issues with some games, and it’s generally more of a hassle to set up correctly.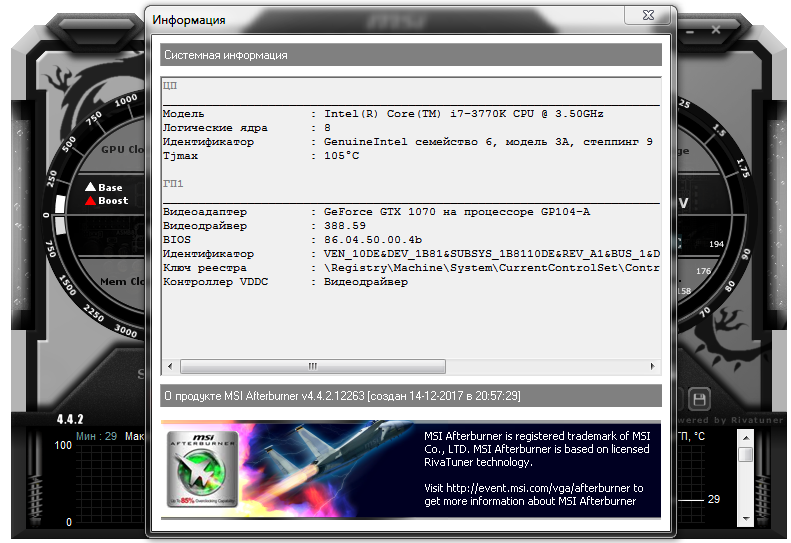 Unless you run a game that’s super demanding on the CPU, RTSS works just fine.
Darktalon
-
-
#4
They asked about the outer worlds, which SK works just fine with. And SK has superior framepacing and latency on the frame limiter, can inject hdr, can enable flip model for perfect borderless windowed performance, and can utilize nvidia reflex.
Joris-truly
-
-
#5
Darktalon said:
Use Special K instead.
Invite URL:
Join the Special K Discord Server!
Special K’s devs and userbase communicate and have a great time with tech-related topics and broken games to fix 🙂 | 25,182 members
discord.com
Click to expand…
Click to shrink…
Thanks, looking into it! Seems a lot less user friendly but maybe i’ll just need to get used to things.
On The Outer World subject: it’s just an example. I first tried CP2077, but that game has quite high utilization on all cores on normal runs, so the one thread peak is a lot less noticable there.
Koklusz
-
-
#6
Darktalon said:
They asked about the outer worlds, which SK works just fine with.
And SK has superior framepacing and latency on the frame limiter, can inject hdr, can enable flip model for perfect borderless windowed performance, and can utilize nvidia reflex.
Click to expand…
Click to shrink…
ScanlineSync can give you perfect framepacing (since it actually synchronizes with your display, unlike standard framerate limiters) while eliminating v-sync lag, so I’m not sure how Special K can improve on it. If you only care about framepacing and latency, IMO there’s really no reason to use it over RTSS, unless RTSS doesn’t work for some reason.
You must log in or register to reply here.
Share:
Facebook
Twitter
Reddit
Pinterest
Tumblr
WhatsApp
Email
Share
Link
MSI Afterburner 4.
 6.3 Final + 4.6.4 Beta 2
What is MSI Afterburner for Windows 10? This question is faced by users who for the first time need to independently perform an increase in the performance of their device. In practice, we are talking about a universal utility that will help you significantly improve the performance of your video adapter. Of course, not everyone has an idea about the procedure for using this software, which is why it is necessary to clearly consider all the important points here.
↓ You can download the MSI Afterburner program from the direct link at the bottom of the article ↓
MSI Afterburner
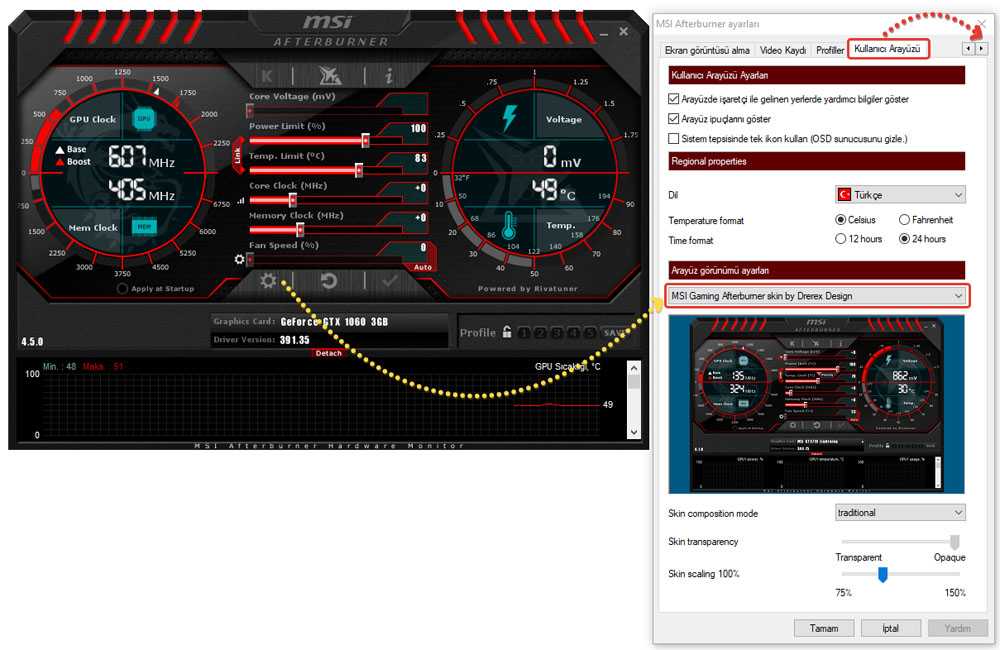
settings First of all, turn on the classic skin. It is much easier and more convenient. Click on the gear icon and go to the very last tab «Interface». Select Default MSI Afterburner v3 skin — big edition from the dropdown list. Apply the changes.
Do not exit settings.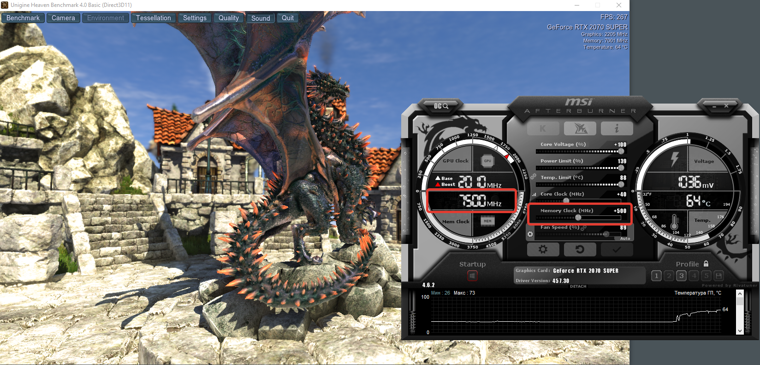 Go to the third tab «Monitoring». The sensor polling period can be set to 1000 ms. If you set the parameters too low, then the monitoring indicators may jump. It will be difficult to understand, for example, CPU usage.
Next you need about the parameters that you want to see. First, click on the desired line, for example, “GPU Temperature”, and then check the box below.
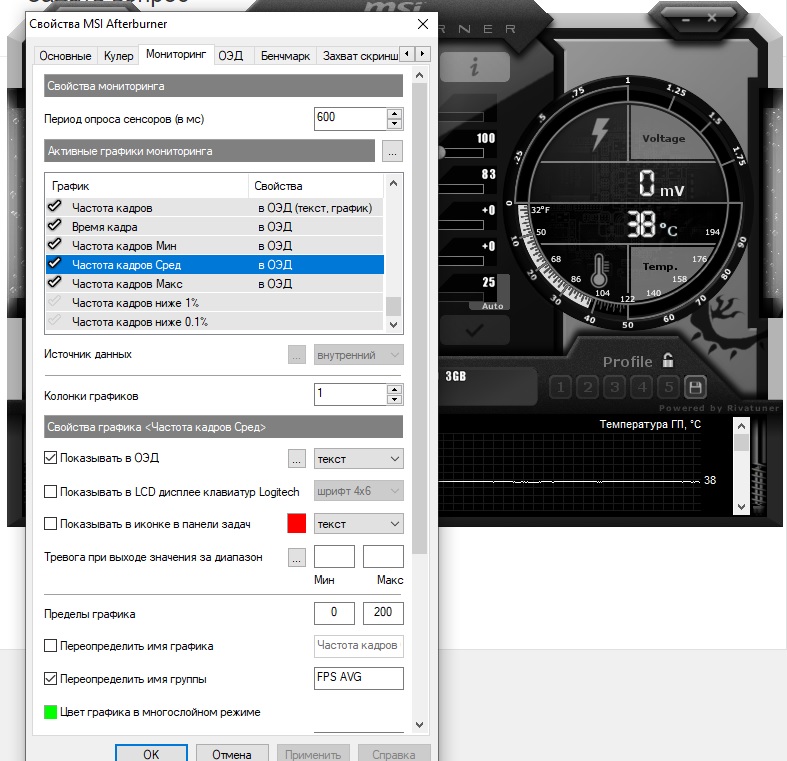
You can also choose how the information will be displayed: text, graph or text + graph. In most cases, it’s better to leave the text. But, for example, for the frame counter and frametime counter, it is convenient to set text + graph. Here you choose at your discretion.
Next, give the selected parameter a name. It is not necessary to do this, but it is still better to prescribe the names. Below about and write the name of your processor or video card. Depending on what parameter you are calling. RAM can be left untouched, it is designated RAM by default. But if you want, you can specify the operating frequency and volume (example — 16 Gb 3200 MHz).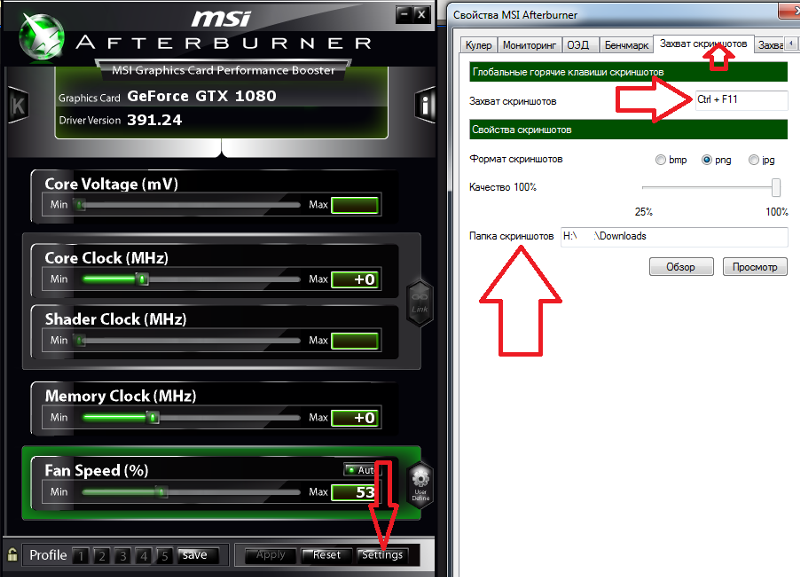 Video memory can be referred to as VRAM to make it clearer.
Please note that some of the items may not be active. This is easy to understand by the lack of a check mark on the left. In this case, simply click on the outline of the checkmark and the item is activated. You can choose as you like, but we recommend displaying the following parameters:
- GPU temperature,
- GPU load,
- memory load,
- core clock,
- CPU temperature,
- CPU load (you can check all available threads) ,
- CPU frequency (all available threads can be checked),
- RAM load,
- frame rate,
- frame time.
As for the popular indicators «Frame rate below 1%» and «Frame rate below 0.1%», they need to be measured at a certain period of time, activating the calculation manually. This is mainly for tests, but not on a daily basis. If you still want to enable it, then you need to configure the «Global monitoring hotkeys» at the very end of the «Monitoring» tab.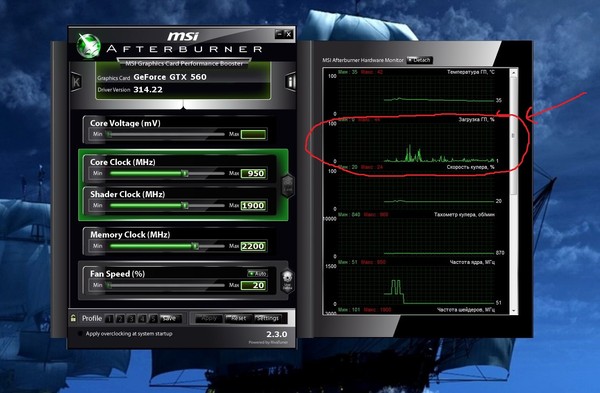
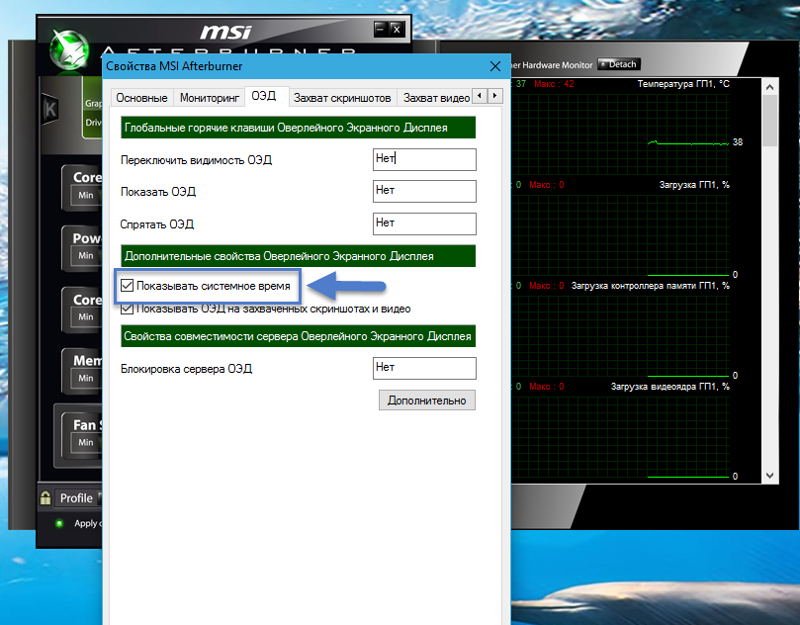
We also recommend assigning buttons to show or hide monitoring. Go to the «OED» tab and select the keys that you will use to turn the overlay on and off. In our case, these are F10 and F11, but you can put any that do not overlap with the game control. Thus, you can turn the overlay on and off at any time.
How to install MSI Afterburner on Windows 10
Users are looking for how to download MSI Afterburner from the official website in Russian. There really is such an opportunity, since you can change the localization of the interface right in the program. It is also recommended to choose a more convenient program skin, since the standard one is not suitable for every user.
It is worth noting before installation that you need to be careful when using MSI Afterburner. Since the hardware overclocking functionality and the ability to adjust the fan speed can harm the computer, especially in the hands of beginners.
- Go to the official website of the MSI Afterburner program and in the section Download click the button Download Afterburner .
- Next, open the downloaded file and follow all the steps of the program installer.
The main thing is to make sure that MSI Afterburner and RivaTuner Statistics Server are selected at the step of selecting the components of the program to be installed. Since RivaTuner Statistics Server extends the capabilities of MSI Afterburner by adding the ability to enable FPS monitoring.
After installation, we immediately start changing the language of the program interface. Just open MSI Afterburner and go to the settings by clicking the gear at the bottom of the program. Then go to section Interface and in paragraph Regional settings select Russian language.
If there are two graphics cards in the system
If you have two graphics cards in the system: integrated and discrete, they will be displayed as GPU1 and GPU2. In order not to confuse and not display the indicators of the built-in card, look at which card is discrete.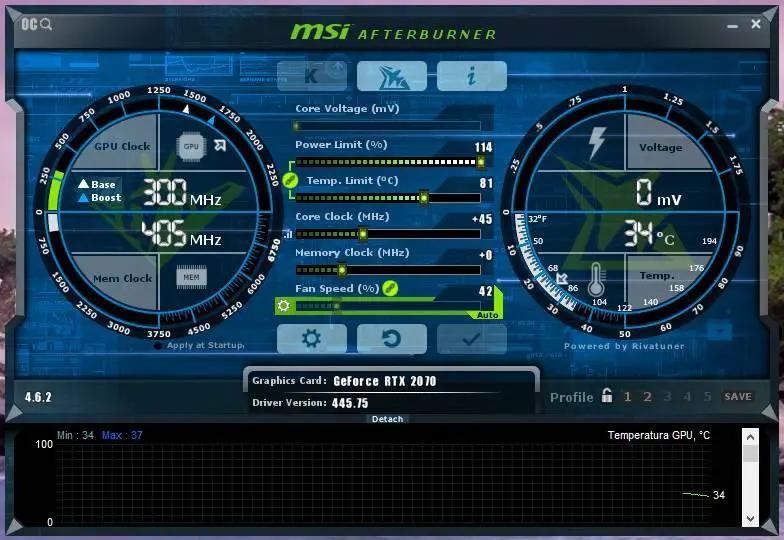 You can do this on the first tab «Basic». The first line is «Selecting the Leading GPU».
Possible errors in the Msai Autoburner 9 utility0013
Although this is a multi-functional sample program, you can also encounter certain problems when working with it. In practice, you can expect the following:
- The utility crashes, indicating that the current version of the application is incompatible with the OS used on the device.
- The program gives an error when trying to save the changed parameters, most likely the adapter is not selected correctly.
- When trying to change options, the plug-in is automatically closed, it is possible that the actions are not applicable for changes.
- Some parameters do not open, in this case the user changes the settings incorrectly.
These are the most common crashes that can occur when the plugin is running. That is why before you start working with the software, it is recommended to read the instructions and description.
Important! When downloading this utility, you need to select the software version that corresponds to the current modification of the system, so that later there are no problems with interaction.
Low performance often causes user resentment and difficulties, however, if it is not possible to purchase new hardware components, you can overclock performance without any problems, as manufacturers lay additional limits in their products. They can be increased if you use third-party software, and in addition, the correct instructions for making changes to the parameters.
Of course, no one promises a huge increase in power, however, you can easily increase this figure by 15-20%, which is often more than enough for everyday tasks.
Where to download and how to install Msai Autoburner
If you plan to download this overclocking scanner, you can use our thematic resource. The subsequent process of downloading and installing the software consists of the following steps:
- upon completion of the download, the installation file is launched;
- license agreement accepted;
- you need to confirm changes to the system;
- follow prompts and pop-ups;
- Upon completion of the installation process, the PC or laptop restarts.

It should be noted that in order to work with this software module, you will also need to select the hardware variant for which you will subsequently make changes to the parameters or perform health monitoring.
Features
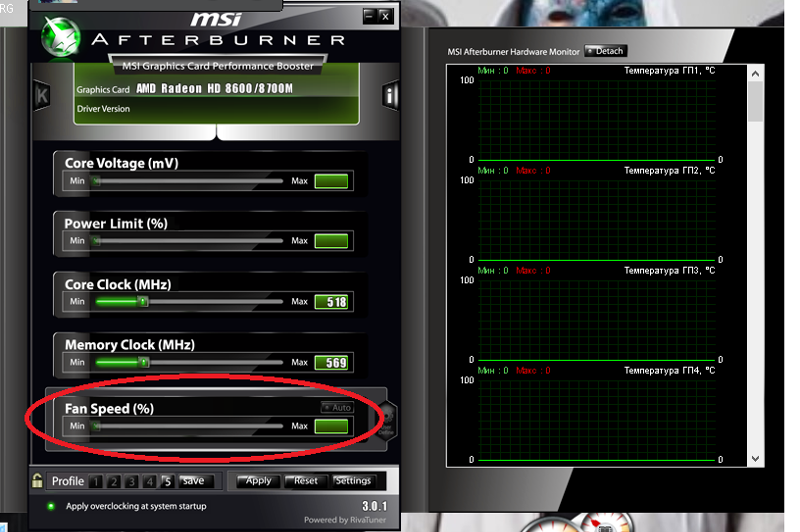
Riva is designed to monitor the temperature and frequency of the graphics card, memory. In addition, it allows you to configure the basic parameters regarding the video adapter.
Fan configurations allow:
- to set the fan speed on a constant basis or to specify the speed as a percentage of the load;
- assign screen configurations — brightness and contrast parameters, gamma of color type channels;
- set OpenGL installation options;
- set the frequency of the core, memory and shaker block;
- set frequency for 2D, 3D graphics;
- use the ability to overclock the graphics card using RivaTuner.
The applied settings become active immediately, the device does not need to be rebooted.
MSI Afterburner updated to version 4.6.3 beta 2
Alexey Nikolaychuk presented the second beta version of his MSI Afterburner utility, number 4.6.3.
In MSI Afterburner 4.6.3 beta 2, the main focus is on support for graphics cards with GPU Ampere, as well as changes to the automatic overclocking system, which is now implemented through the driver.
MSI Afterburner
Full changelog includes:
Added support for NVIDIA Ampere GPU Architecture:
- Added support for the new Fan Control API 3.0.
- Added integrated support for the new OC Scanner API.
- Updated included MSI Overclocking Scanner: Starting with the 455.xx driver family, NVIDIA OS Scanner is no longer implemented as a separate software component distributed with overclocking software from each graphics card manufacturer. NVIDIA OC Scanner is now integrated into the driver and third party software can directly access it via NVAPI. This implementation simplifies the maintenance process of OC Scanner for NVIDIA, there is no longer a need to deliver updated software components to production partners and re-release software when something needs to be changed inside OC Scanner by NVIDIA.
 MSI Overclocking Scanner supports both NVIDIA OC Scanner API implementations: Legacy legacy NVIDIA OC Scanner implementation via separate software components for NVIDIA Pascal and Turing architectures for driver family up to 455.xx.
 - New integrated NVAPI-based NVIDIA OC Scanner implementation for NVIDIA drivers 455.xx and newer.
- Automatic overclocking support for both core and memory clocks.
Download MSI Afterburner 4.6.3 beta 2.
Installing Afterburner
As for the installation, everything is done in the standard way:
- Unpack the downloaded archive.
- Run the installer.
- Select the interface language and then click OK.
- Next, you will need to select the installation path. You can leave the default option to achieve the desired result.
- After completing the entire procedure and following all the instructions, all that remains is to click on «Finish». In this case, you can check the corresponding checkbox to launch the program instantly.
Please note! It is recommended to restart the PC in order for the system to correctly determine the operating parameters of the graphics adapter.
MSI Russia
December 1,2021
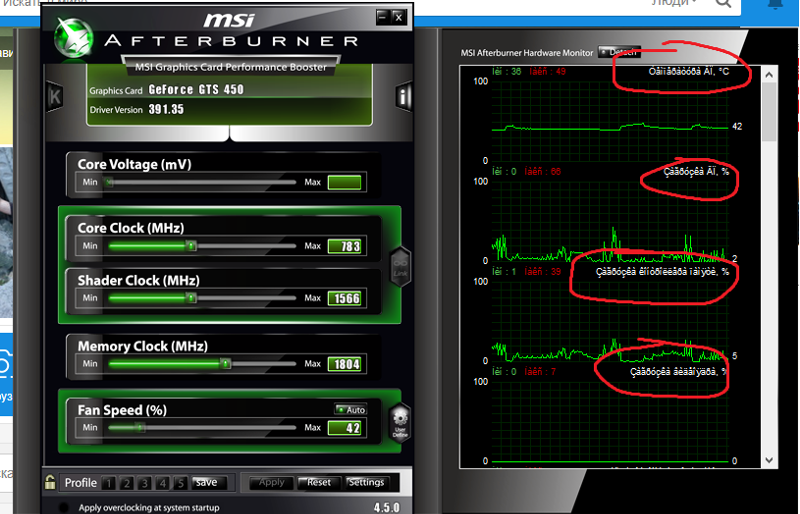
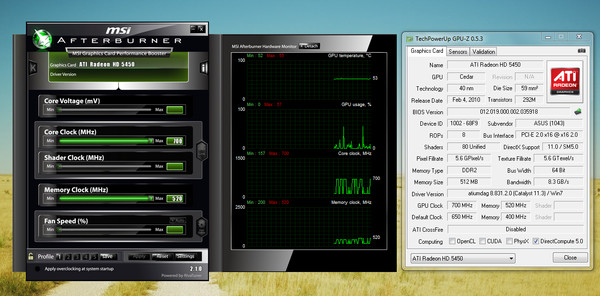
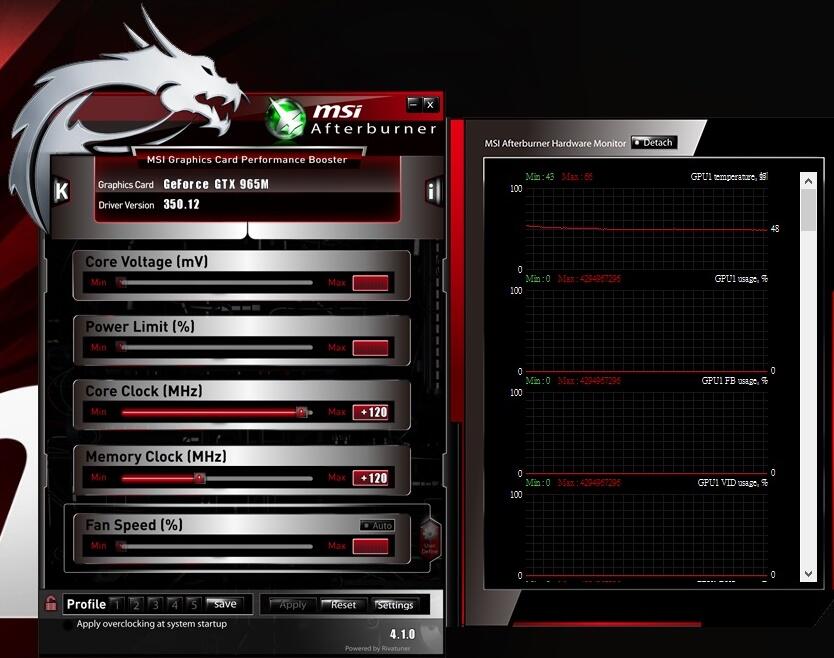
Jointly developed by MSI and RivaTuner, MSI Afterburner can improve the performance of MSI graphics cards and monitor device information.
Driver Version: Video card driver version.
Core Voltage (mV): Adjusts the core voltage of the graphics card’s main processor.
Core Clock (MHz): Adjust the core clock of the graphics card’s main processor.
Shader Clock (MHz): Adjusts the shader clock of the graphics card’s main processor.
Memory Clock (MHz): Adjusts the memory clock of the graphics card’s main processor.
Fan Speed (%): Allows you to adjust the fan speed of the main processor of the video card in automatic or manual mode.
Apply overclocking at system startup: If enabled, this feature will apply the current voltage, clock speed, and fan control settings at Windows startup.
Apply: Apply the current setting to the graphics card’s main processor.
Reset: Resets the graphics card main processor settings to default values.
Settings: Display advanced settings.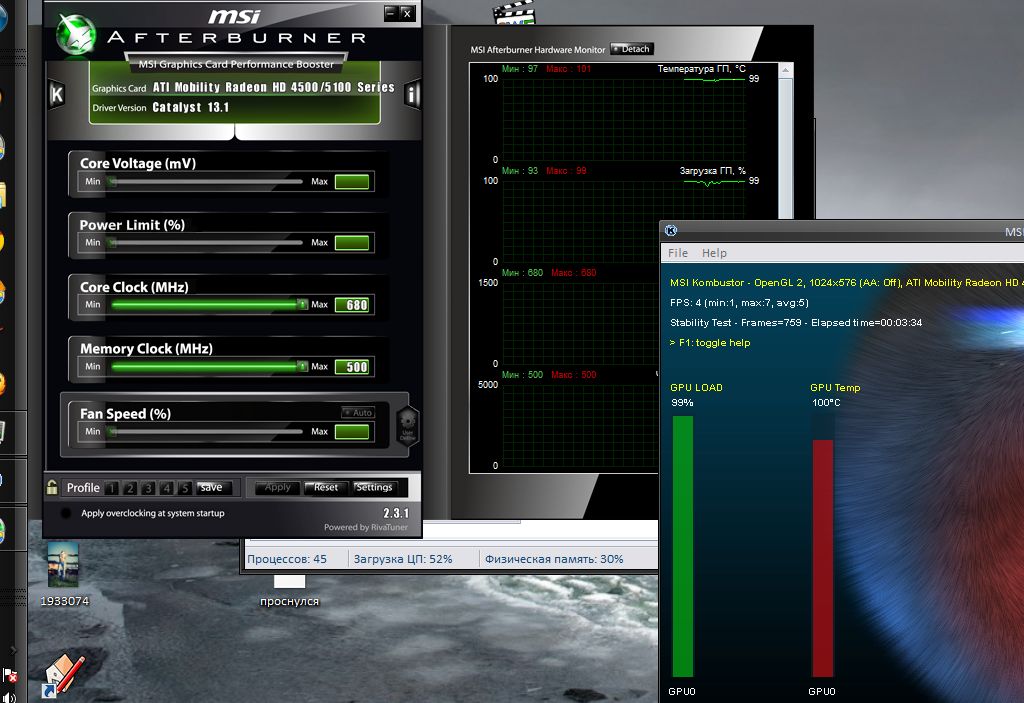
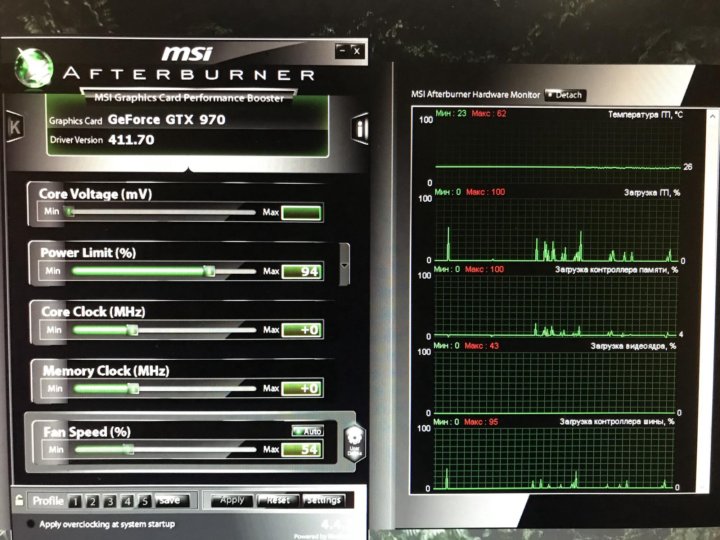
● Hardware monitor
o Hardware Monitor: A graphical setting that displays log records of the temperature of the video card’s main processor and other hardware in operation.
● Advanced Settings
o o Click the Settings icon on the main page of MSI Afterburner to enter the advanced property settings interface.
o General
|
Master graphics processor selection: Using the drop-down menu, users can select the main graphics processor to adjust overclocking settings and monitor its temperature and other hardware health parameters. |
➢ General Properties
♦ Start with Windows: Start Afterburner after logging into Windows.
♦ Start minimized: After logging into Windows, start Afterburner and minimize it on the system.
o Fan
o Monitoring
➢ Hardware monitoring properties: Hardware monitoring period (milliseconds): If you increase/decrease the set value, the response time in the monitoring window will be slower/faster.
➢ Hardware active monitoring schedules
♦ If you check any item, such as “GPU1 temperature” and so on, it will be displayed in the monitoring window.
➢ GPU 1 CPU Temperature Graph Properties
♦ Show in OSD (On-Screen Display): If this item is selected, GPU 1 CPU temperature can be displayed in the upper left corner of the screen when 3D is running -games/applications.
♦ Show in Logitech keyboard LCD display: Selecting this item will display the GPU 1 CPU temperature on the Logitech keyboard LCD.
♦ Show in tray icon: When this item is selected, GPU 1 CPU temperature will be displayed in the tray icon.
♦ After completing the settings, click OK to apply the settings, close the MSI Afterburner window.
o On-Screen Display
➢ Hotkeys for on-screen display .
♦ Show On-Screen Display: Sets the hotkey combination for displaying information on the screen when running 3D applications.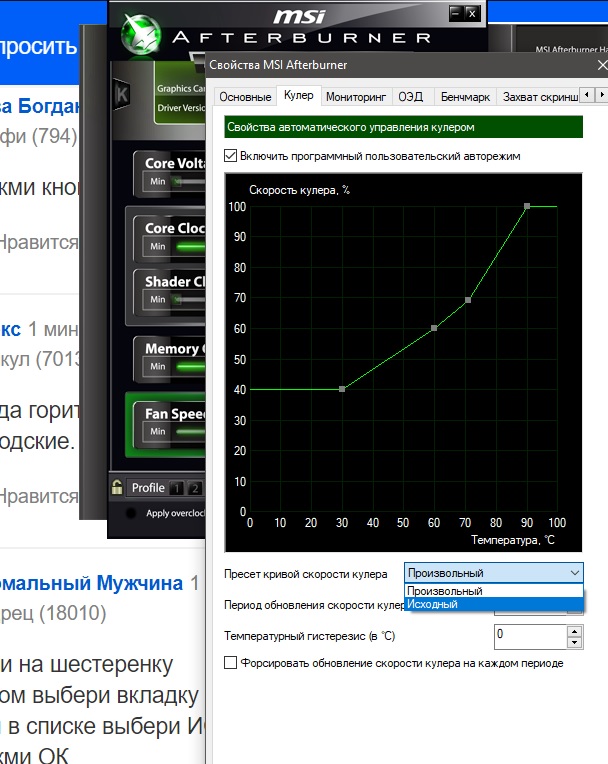
♦ Hide On-Screen Display: Sets the hot key combination for turning off screen information when running 3D applications.
♦ After completing the settings, click OK to apply the settings, close the MSI Afterburner window.
o Profiles
➢ Hot Keys for Global Profiles
♦ Setting 1 ~ 5: By setting the corresponding hotkeys, users can set their own password to quickly switch between profiles.
➢ Auto profile management
♦ 2D profile: Set in 2D mode.
♦ 3D profile: Set in 3D mode.
♦ After completing the settings, click OK to apply the settings, close the MSI Afterburner window.
o User Interface
➢ Regional Features
♦ Language: You can select the language here.
♦ Temperature format: Here you can select the temperature display format.
♦ Time format: Here you can select the time display format.
➢ User interface skin properties
|
Using the drop-down list at the bottom, users can select the type of cover they want and see a preview of what their chosen cover will look like. |
 When finished making settings, click OK to apply the settings, close the MSI Afterburner window.
 MSI Afterburner setup: instructions, programs and reviews
Today, modern computer games, more than ever, have become very demanding on hardware. In particular, this applies to video cards. But how to properly set up the graphics chip so that the gameplay is comfortable and the card works at its maximum capabilities? To do this, there is a special free utility MSI Afterburner. Setting up a video card in it at first glance is very simple. But this is only at first glance, because when setting certain parameters, you need to take into account some nuances so that the card does not fail.
MSI Afterburner: An Introduction
In short, MSI Afterburner is a program for controlling all the parameters of video cards, adjusting their performance and overclocking. That is why it is very popular among gamers who are trying to «squeeze» everything possible out of the card, and overlockers.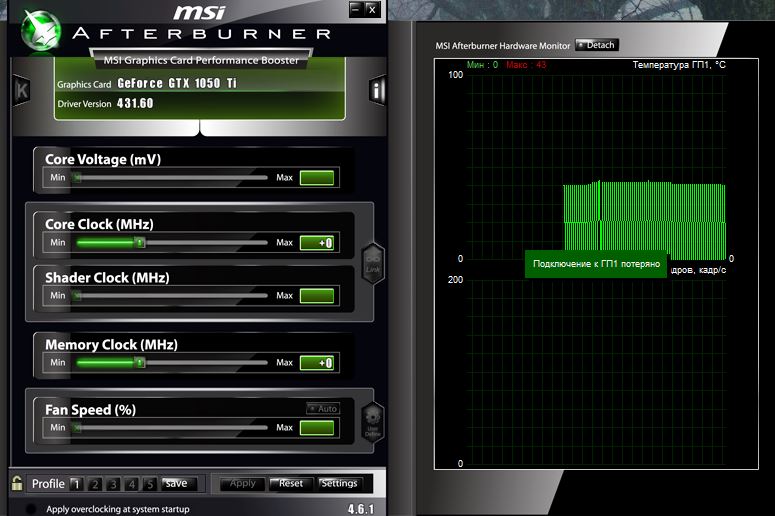
But there is one caveat, which is that the MSI Afterburner setting only works with officially released models of NVIDIA and AMD Radeon graphics chips. In addition, some application settings may be blocked, and the automatic mode for applying settings in the program is not the best. Below will be described how to work with this utility, and so as not to disable the card.
Installation and initial setup of MSI Afterburner
The first step in setup is to install the utility correctly. After launching the installer, the normal installation process will begin, during which the application will offer to additionally install Riva Tuner Statistics Server. You must agree with this without fail, since some functions and settings of the main program may not be available.
Once the installation is complete, setting up MSI Afterburner for games involves changing some key interface elements. If the English version was installed by default, use the Settings menu, where we select the User Interface section.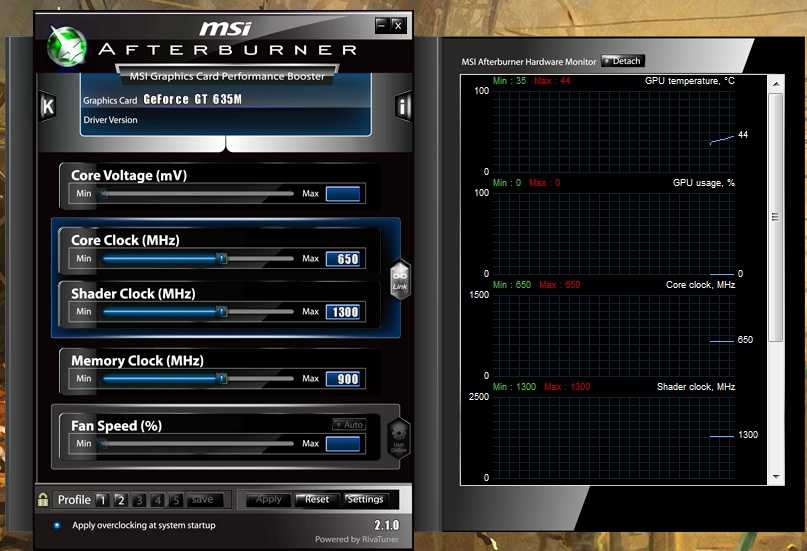 Here you need to change the language and turn off prompts if they are not needed.
After that, you need to use the basic settings tab. Here you should check all the boxes, except for the top line for synchronizing the settings of identical GPUs (it is used only if there are several video cards), the voltage boost line and the check for beta versions check box (optional). You can also set the program to start when the operating system starts. After saving the presets, the application will need to be restarted for them to take effect.
Core Clock Settings
MSI Afterburner initial setup completed. Now let’s look at the main points with the available options. Let’s move on to the GPU frequency section.
First, you can move the slider a little to the right (about 40-50 MHz). The current frequency will be displayed in a special window. After that, it is advisable to test the video card with any utility designed for this, for example, 3D Mark or FurMark.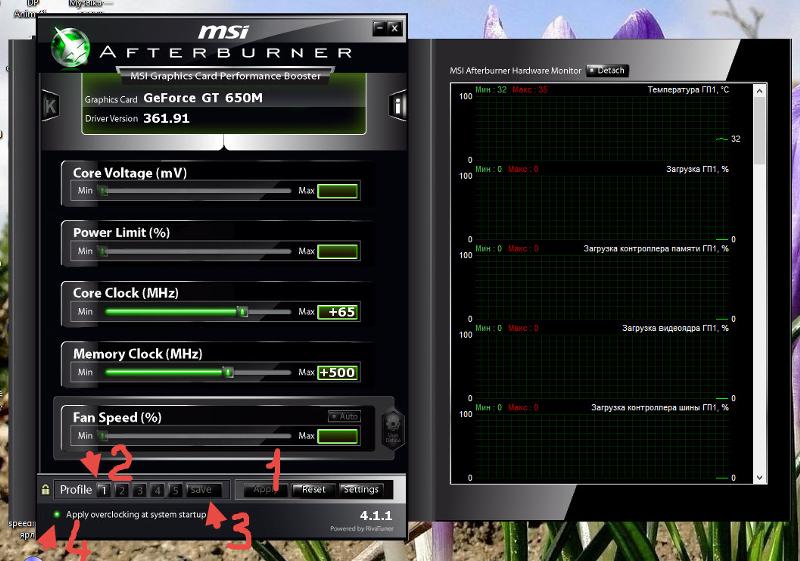 In this case, you should pay attention that during the test the temperature does not rise above 90 degrees and the monitor showed no side effects (banding, flickering, color mismatch, etc.). If the test did not reveal anything critical, for reliability it is better to launch some resource-intensive game and play for at least an hour. If everything is fine here, you can move the frequency slider even more to the right, but by a lower value (say, not 40, but 20 MHz) and test again. The further to the right the slider is moved, the lower the value used.
During the course of the game, you can display the current parameters on the screen in the form of a translucent window. As soon as the incorrect operation of the map at a certain value is noticed, the slider should be returned to the previous position and stop there.
Memory Clock settings
Memory has its own slider, located just below. In principle, you can do the same as in the previous case. First we shift it to the right by 50 units, test it, then add another 20 units, etc. Again, the value will need to be reduced by approximately 1.5-2 times, compared to the previous state.
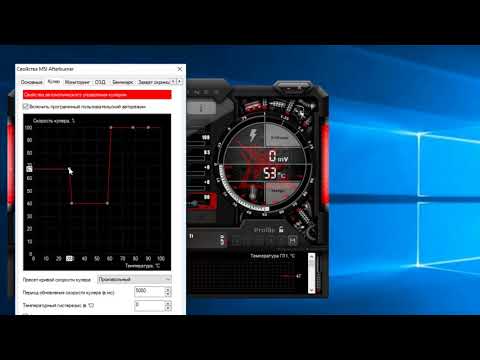
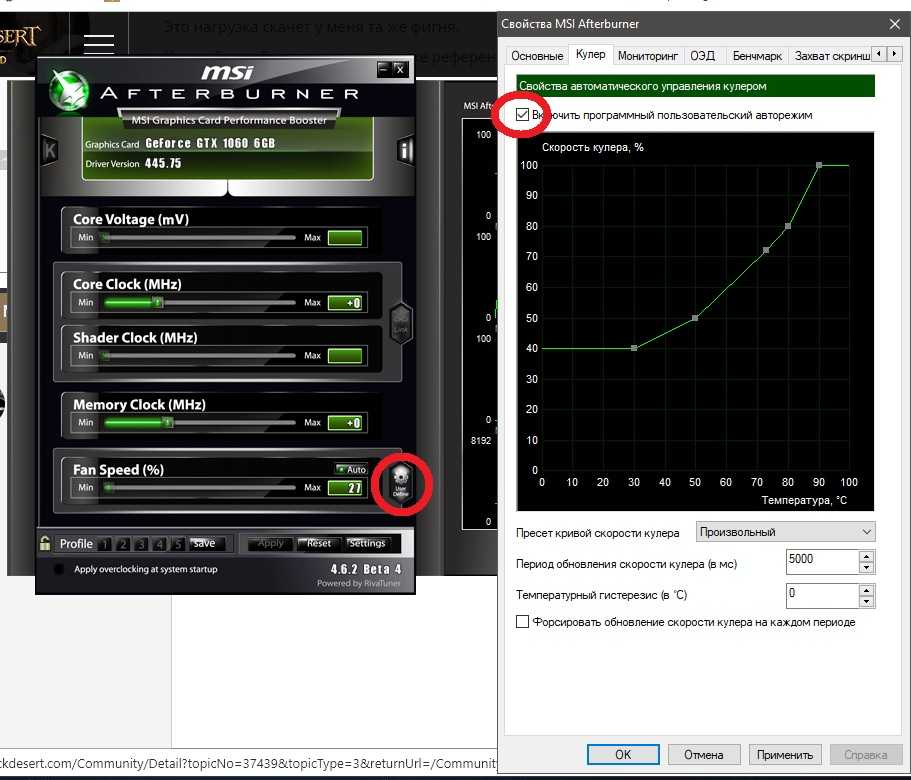
MSI Afterburner: cooler setup
These settings can be called from the settings section, in which the corresponding tab is selected. For full access to them, you should immediately check the box next to the line for enabling the program user mode.
Below is a graph showing the direct dependence of the fan speed on the temperature of the video card. You can change the parameters by moving around the area of the graph of gray squares, but for more fine-tuning, it is advisable to use more of them, simply by clicking on the empty space of the dependency line and changing the position of certain points. But do not get carried away by setting the maximum values for any temperature. So the cooler itself can fail. By combining the graph parameters and the above settings, you can achieve the optimal result.
Saving settings and profiles
To save the current settings, the MSI Afterburner setup offers the user a choice of five profiles.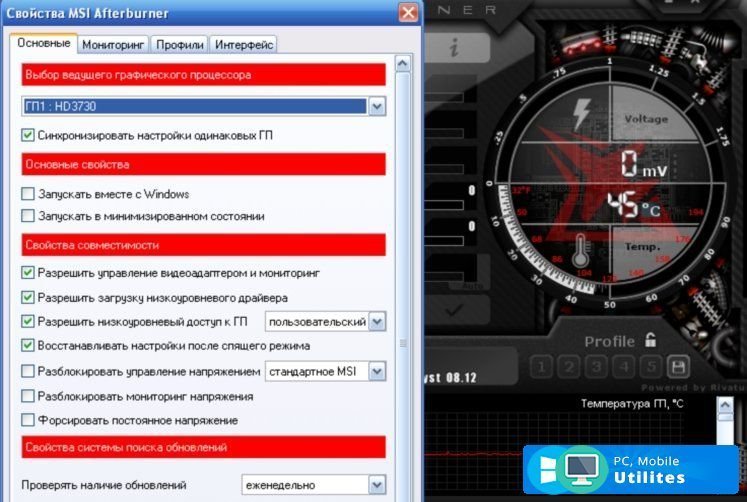
On the corresponding tab in the 2D section, we leave everything unchanged, and in the 3D drop-down menu, select our newly configured profile, in which the settings will be indicated (there is also the “Auto” value, that is, this profile will be used by default when application start).
What if the settings are not available?
Sometimes you may come across a situation when all the sliders are shifted to the right, but it is impossible to change their position. This is a common lock in case the video card does not support overclocking. But there is a way out.
First, in the directory where the program was installed, find the MSIAfterburner.cfg file and open it with Notepad. We scroll through the contents to the line UnofficialOverclockingEULA. In it, after the equal sign, you need to write the text «I confirm that I am aware of unofficial overlocking limitations and fully understanding that MSI will not provide me any support on it» ”, and then in the line UnoficcialOverlockingMode after the equal sign, put one.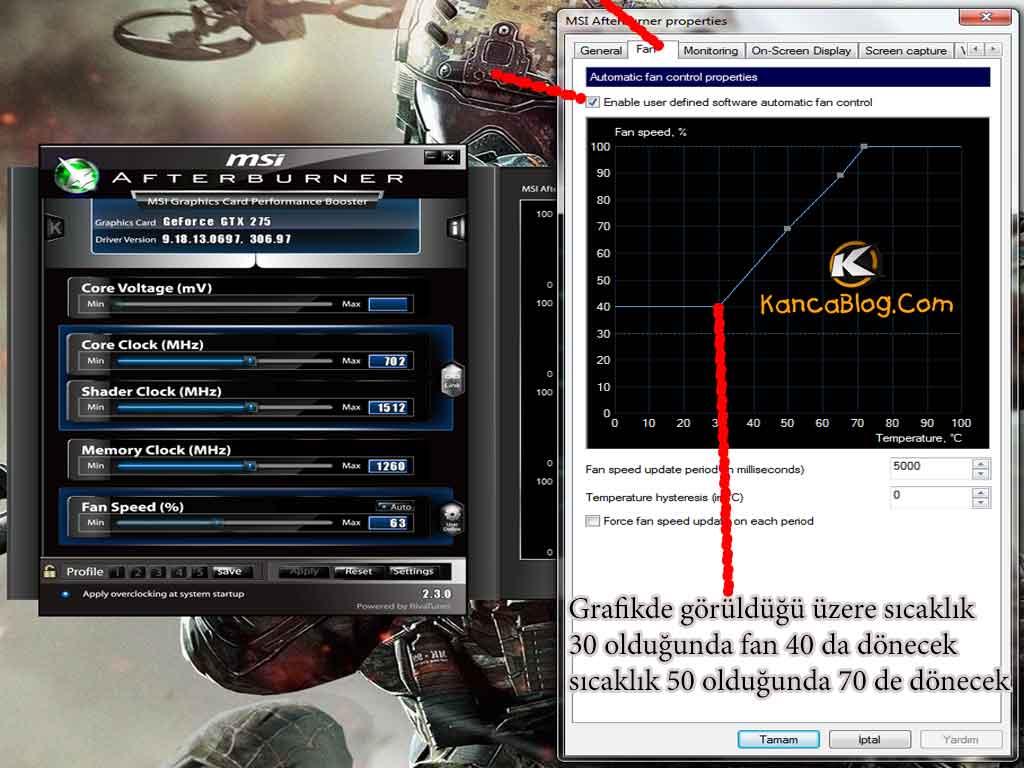
Overlay Monitor
These were the main points related to the question of how to use MSI Afterburner. User reviews indicate that it is very convenient to call all the current characteristics of the video chip right during the game.
To set the mode, use the monitoring tab, where we select the necessary parameters, set the display in the overlay display in the field values, and then on the OED tab we assign buttons or keyboard shortcuts to call and turn off the monitor, although in most cases it is enough to use only one key (F9default).
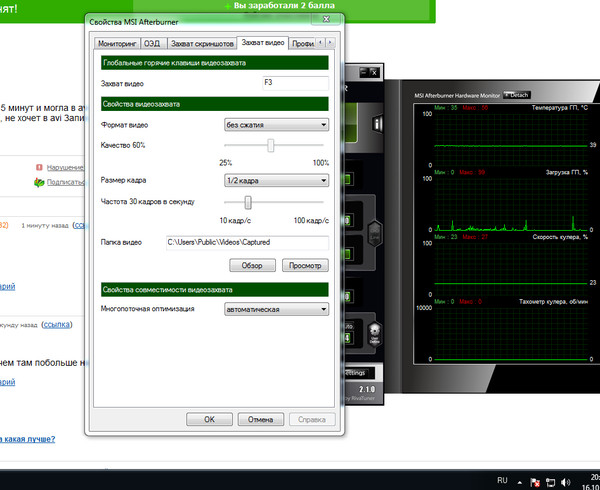
Capturing video and screenshots
Finally, on the tabs for capturing video and screenshots, you can specify the appropriate parameters and settings that will be applied to these processes (specify saved formats, file locations, configure sound recording from a microphone, storyboard, hotkeys for each procedure and much more).
You don’t have to call the program additionally during the game.
Reset settings and total
Finally, let’s see how to reset MSI Afterburner settings if something does not suit the user.