NVIDIA GeForce GTX 980 Ti Overclocking & Best Playable Settings – Techgage
We established last week that NVIDIA’s GeForce GTX 980 Ti is a great high-end card. The GTX 980 itself was what I considered to be “amazing”, when it was released back in September, and the Ti makes it even better by adding more cores to the mix. The GTX 980 Ti carries a $150 premium over the non-Ti, but it’s fortunately warranted. At least, as of the time of writing. Once AMD’s new series drops, which is expected to happen on the 16th, we could see a shake-up. At least, I hope we will.
We know that the GTX 980 Ti is a “mini TITAN X“, in that it’s very fast for its $649 price tag, but it’d be no fun to leave things alone. No, it’s fun to push buttons, and see what kind of true performance we can eke from the card through overclocking. So, as I did with TITAN X, I spent a fair amount of time overclocking the 980 Ti. At the same time, I knocked the card back down to stock and conjured up some Best Playable results across nine titles.
So without further ado, let’s do this!
Our GTX 980 Ti Overclock
Not long after undertaking the task of overclocking the GTX 980 Ti, I realized that this card is more difficult to push than the TITAN X. With an ultimate boost of 210MHz to the core, though, that’s a bit odd to say, but I just felt like I was reaching hard ceilings very easily – ceilings, where if you merely dropped 5 or 10MHz, you’d be 100% stable.
What’s interesting, though, is that I hit the same core overclock as I did with TITAN X – +210MHz. Even more interesting, perhaps, is that on TITAN X, that required a slight voltage boost, but it didn’t on the GTX 980 Ti. Where I failed to match the TITAN X is on the memory. At +300MHz, I fell short of the TITAN X’s +400MHz, but ultimately, that won’t matter nearly as much as the core overclock.
+210MHz core, +300MHz memory, 60% fan speed
At first, I thought that +400MHz was stable, until a few specific tests told me it wasn’t.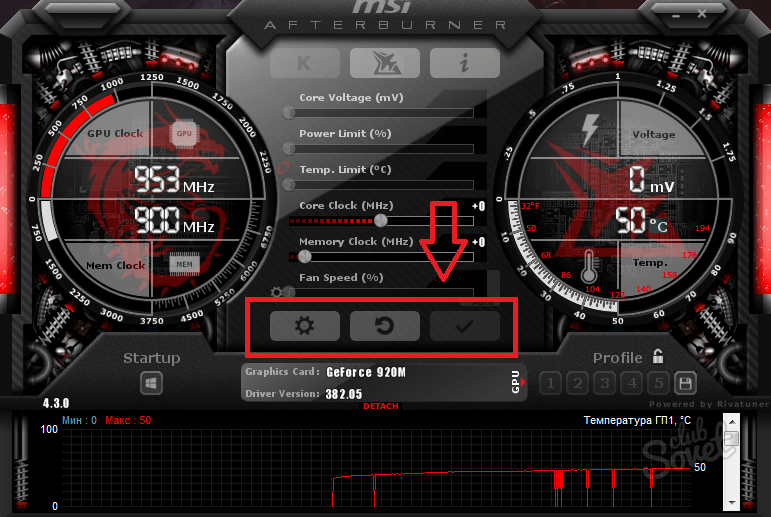 I came to believe that +350MHz was stable, then, as those specific tests passed without issue. Then I loaded up AC IV: Black Flag and quickly found myself looking at memory corruption on the screen. This card sure is sensitive. In the end, I dropped the memory down another 50MHz to settle on +300MHz, and that remained stable in every possible test I threw at it.
The core overclock had a similar evolution. It seemed to me at first that +230MHz was stable, but it wasn’t, and likewise, the same happened at +220MHz. But at +210MHz, the card behaved like a champ – and all without a voltage boost.
Because overclocking inevitably means “more heat”, as I did with the TITAN X, I manually set the fan speed on the 980 Ti to 60%. At this level, the card’s fan is noticeable, but it’s at a point where any reasonable game sound is going to more than drown it out. Even 70% is what I’d consider to be acceptable. It’s at the 80% mark where your cat’s ears might perk up.
I should be clear, though, that while I increased the fan speed, you might not have to.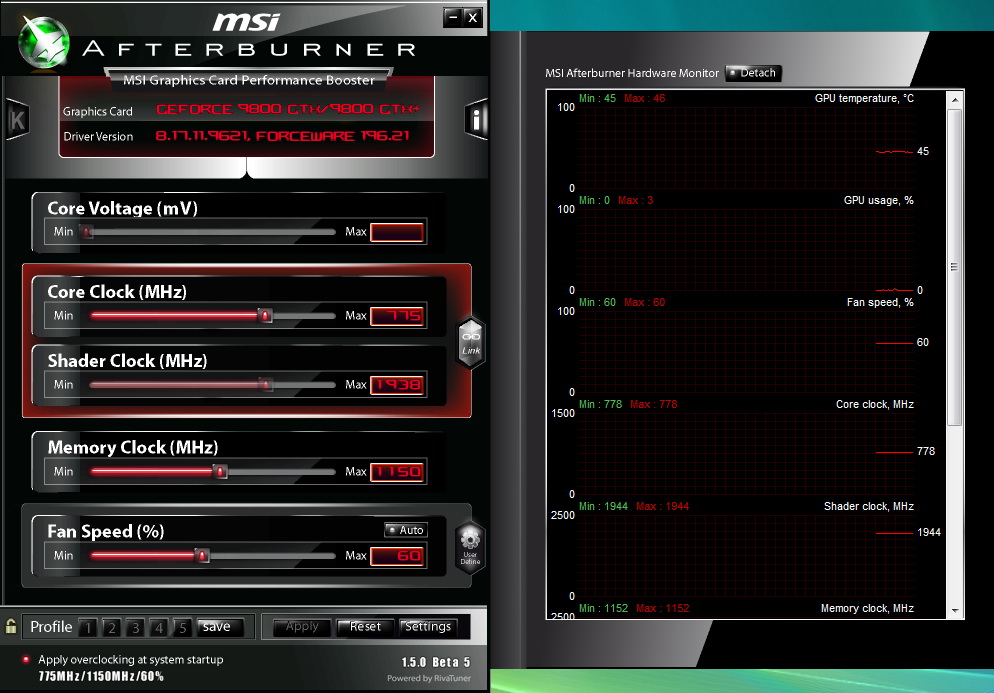 Even I didn’t have to, as putting it to 60% kept the temps well under 80°C. I just increased it for the sake of keeping things as cool as possible. Your chassis and ambient room temp will ultimately decide whether you need to force a higher fan speed or not. To test for yourself, you could run AIDA64 or GPU-Z’s logging feature to see where your card’s temperature is peaking, and whether or not that’s adversely affecting the clocks when that temperature is reached.
Putting The Overclock To Work
When it comes to overclocking, I don’t produce results unless I consider the overclock to be 100% stable. For that to be the case, it has to pass a long stress test (in this case, 100 minutes of 3DMark Fire Strike 4K), and also prove flawless through all regular benchmarking. That proved to be the case here.
To provide what I feel is the most accurate apples-to-apples representation of reference vs. overclocked performance, I forced the fan speed to 60% for both configurations.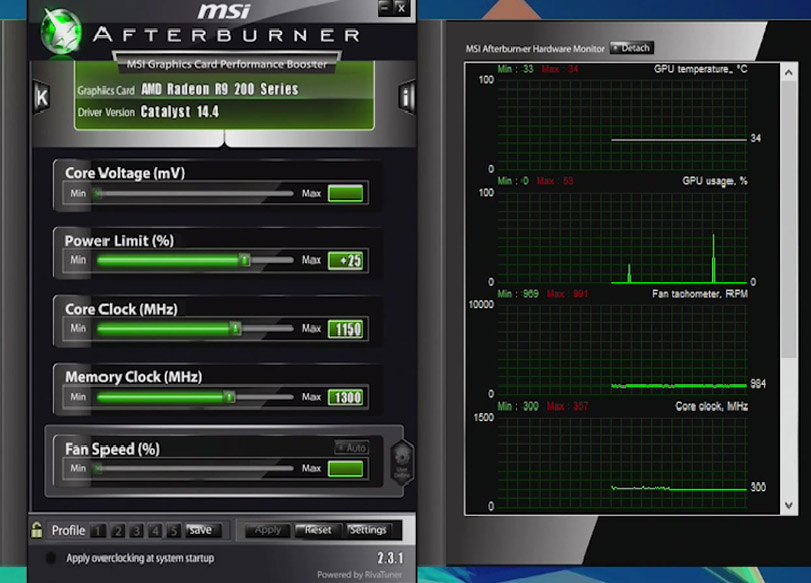 Even if a card like the GTX 980 Ti is running at stock speeds, its GPU Boost clocks can throttle a little bit if heat becomes an issue. That means that one GTX 980 Ti might appear to run a little bit faster (or slower) than someone else’s, because their PC and ambient room temperatures are different.
That means a couple of things: We can assume that the GTX 980 Ti’s “stock” results below represent its best possible performance; it also means that if I did leave the fan to its normal auto speeds, the results below would work even more in the overclock’s favor, given that configuration’s fan speed boost.
Enough of that; let’s get on with the performance results, shall we?
So far, so good. At all three resolutions, the overclock gave me a 14% boost. That’s a bit shy of the 16% increase I saw with the 4K test with TITAN X, but it’s hard to complain: 14% for free is fantastic. Let’s see if that kind of boost carries through to real games:
| Stock | Overclock | Gain (Avg) | |||
| 4K (3840×2160) | Min | Avg | Min | Avg | + / – |
| Assassin’s Creed IV | 27 | 35 | 34 | 40 | +14% |
| Battlefield 4 | 33 | 43 | 34 | 48 | +12% |
| Crysis 3 | 37 | 50 | 40 | 55 | +10% |
| Dying Light | 33 | 44 | 41 | 52 | +18% |
| Grand Theft Auto V | 29 | 36 | 34 | 43 | +19% |
| GRID 2 | 62 | 72 | 70 | 80 | +11% |
| Metro Last Light | 28 | 41 | 34 | 49 | +20% |
| Sleeping Dogs | 43 | 53 | 47 | 58 | +9% |
| Splinter Cell: Blacklist | 47 | 57 | 52 | 63 | +11% |
| The Crew | 43 | 53 | 52 | 59 | +11% |
I should note that the settings used for each of these games didn’t necessarily match the ones I use in our normal testing.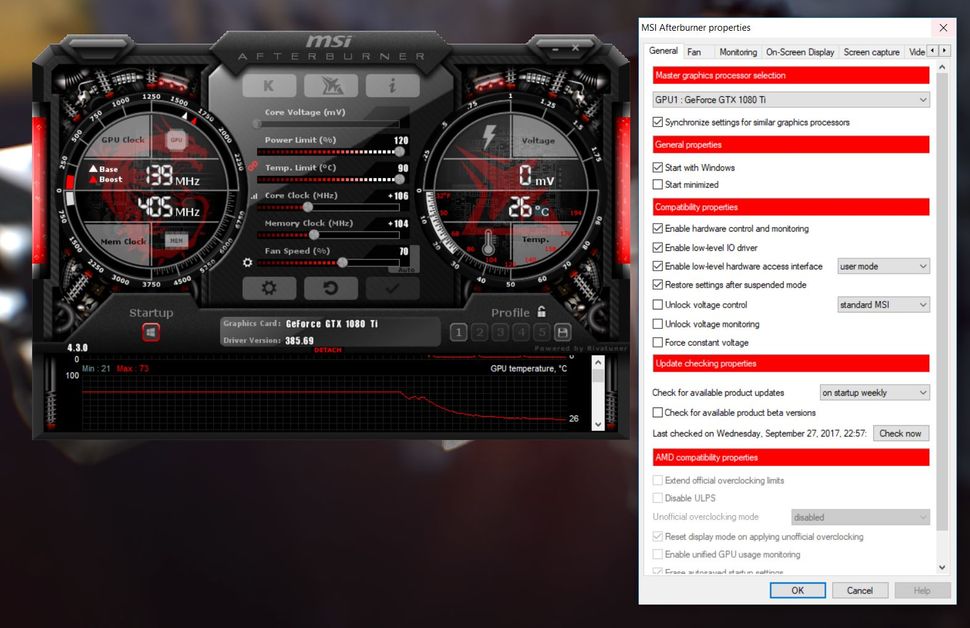 In the case of AC IV: Black Flag, I cranked up the ambient occlusion in order to push the card harder, since Ubisoft deems it appropriate to cap its games at 60 FPS. Nonetheless, for the sake of improved accuracy, each test was run twice over, with the results averaged.
While 3DMark told us that our overclock improved performance by a definitive 14%, our real-world benchmarking showed us that gains can actually be seen anywhere from 9% to an impressive 20%. I’d chalk that 20% off to being that it was done with Metro Last Light‘s timedemo, but even my manual runs of Grand Theft Auto V and Dying Light exhibited boosts of 19% and 18%, respectively.
As I’ve mentioned in the past, I don’t typically overclock my gear, but when there’s a major performance boost like this to be had for just a few clicks of the mouse, I wouldn’t hesitate to run it whenever I run a game that could benefit from it. If you increase the fan speed, you could get that performance boost and see lower temperatures than stock.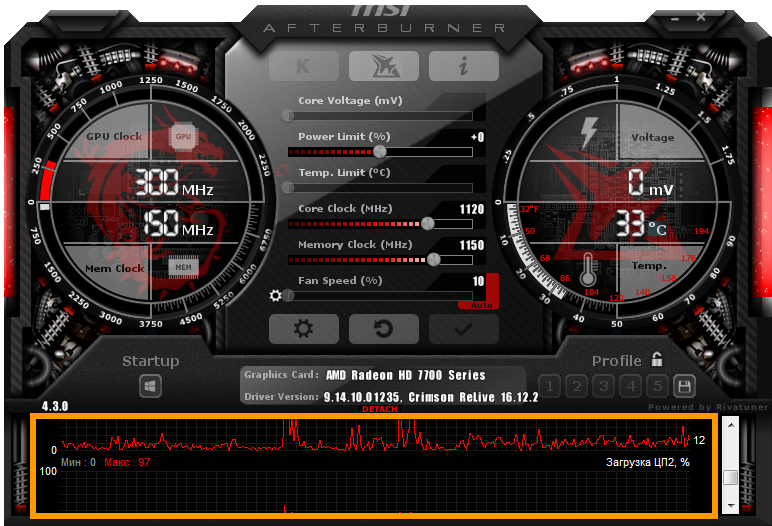
As with the “Best Playable” sections in our regular graphics card reviews, I went through most of the games benchmarked above and modified their settings to get as close to 60 FPS as possible on average. While the GTX 980 Ti is an undeniably fast card, 4K is likewise an undeniably mammoth resolution. You can’t expect to max everything out – overclock or not – but the settings you will be left with will still look fantastic.
Assassin’s Creed IV: Black Flag
(Click here to view screenshot in native 4K)
| Assassin’s Creed IV: Black Flag | |||
| Minimum | Average | ||
| 57 | 62 | ||
With the TITAN X, this game could effectively be maxed out, albeit with HBAO+ set to Low. On the GTX 980 Ti, I had to drop the shadow quality from Very High to High, and God Rays from High to Low. With God Rays still set to High, the average framerate was 59, so it’s not exactly a stark performance improvement, and thus might not be a change you’d yourself make.
Battlefield 4
(Click here to view screenshot in native 4K)
| Battlefield 4 | |||
| Minimum | Average | ||
| 39 | 59 | ||
A minimum FPS of ~40 might not seem too impressive, but there are many occasions in this scene where the framerate just tanks because of the sheer amount of action. Overall, performance is quite good when AA is disabled. If you want to give things a nice boost, I’d disable ambient occlusion, or decrease effects and post processing to High.
Crysis 3
(Click here to view screenshot in native 4K)
| Crysis 3 | |||
| Minimum | Average | ||
| 41 | 59 | ||
The settings above mimic those I established with the TITAN X, except the Post Processing has been dropped from High to Medium. Even with that change, we’re still sitting at just under 60 FPS, but that’s just fine. The game still felt very fluid, because if the game did dip to the minimum FPS of ~40, it was because of all the action on the screen, which makes that slowed performance barely noticeable.
Dying Light
(Click here to view screenshot in native 4K)
| Dying Light | |||
| Minimum | Average | ||
| 45 | 60 | ||
Dying Light is a bit of an odd game, because some of its settings can affect the framerate more than you’d expect. To give me a helping hand here, I used GeForce Experience to choose settings for me, and then went from there. Interestingly, the settings NVIDIA chose were not what I’d consider to be playable (if I recall, average FPS was 44), so I had to do a bit more tweaking.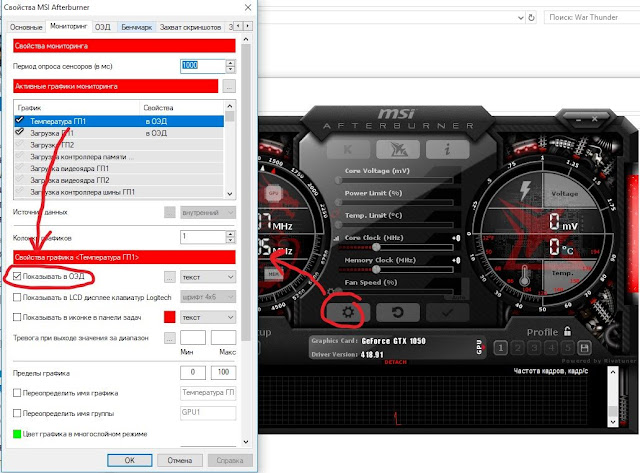 Ultimately, ambient occlusion was turned off, and the view distance was pegged to 60%.
Grand Theft Auto V
(Click here to view screenshot in native 4K)
| Grand Theft Auto V | |||
| Minimum | Average | ||
| 48 | 59 | ||
That’s quite the settings list, isn’t it? As I did with Dying Light, I let NVIDIA’s GeForce Experience configure the game for me. Fortunately for me, it chose well, as the benchmarking runs averaged 59 FPS, and kept close to 50 FPS on the minimum side.
GRID 2
(Click here to view screenshot in native 4K)
| GRID 2 | |||
| Minimum | Average | ||
| 53 | 61 | ||
GRID 2 and Grand Theft Auto V are two peas in a pod when it comes to a comprehensive graphical settings list.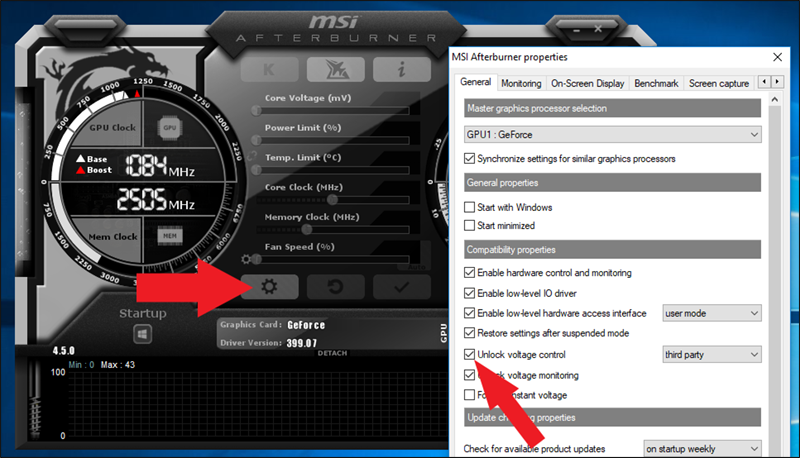 What is it about games that begin with G and involve lots of driving? As expected, the 980 Ti can handle GRID 2 just fine at max detail.
Sleeping Dogs Definitive Edition
(Click here to view screenshot in native 4K)
| Sleeping Dogs | |||
| Minimum | Average | ||
| 52 | 62 | ||
Yet another non-surprise here: Topped-out, Sleeping Dogs Definitive Edition runs great at max detail. The exception is with AA; it runs at Normal instead of High or Extreme, which is fine since those higher settings don’t make too much of a difference.
The Crew
(Click here to view screenshot in native 4K)
| The Crew | |||
| Minimum | Average | ||
| 58 | 60 | ||
GRID 2 might not be too demanding nowadays, but as far as racing games go, The Crew definitely is.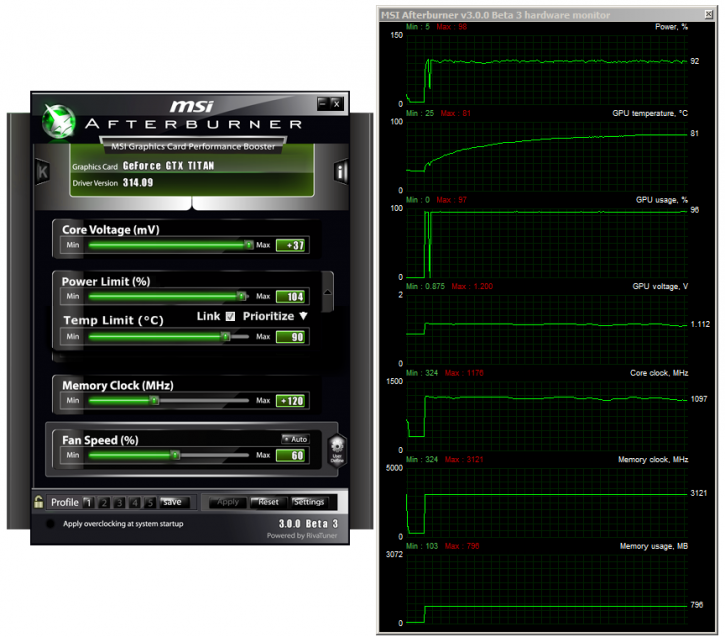 Surprisingly enough, the game can run super-high details and still hit 60 FPS easily at 4K. This was based on a single-player race in Long Beach, so this performance might not be representative of the entire game.
Tom Clancy’s Splinter Cell Blacklist
(Click here to view screenshot in native 4K)
| Tom Clancy’s Splinter Cell Blacklist | |||
| Minimum | Average | ||
| 57 | 72 | ||
The TITAN X allowed us to enable HBAO+ in Blacklist and breach the 60 FPS mark, but that proves to be a bit too much for the 980 Ti. To fix that, I simply disabled HBAO+ and retained the Field AO option, which, as you can see, gives us awesome performance.
Final Thoughts
And… there we have it.
I admit that I was a little surprised I couldn’t match the memory overclock with this card as I did with the TITAN X, since both offer identical configurations, but the upside to that is that the extra 100MHz wouldn’t have made a big difference to begin with.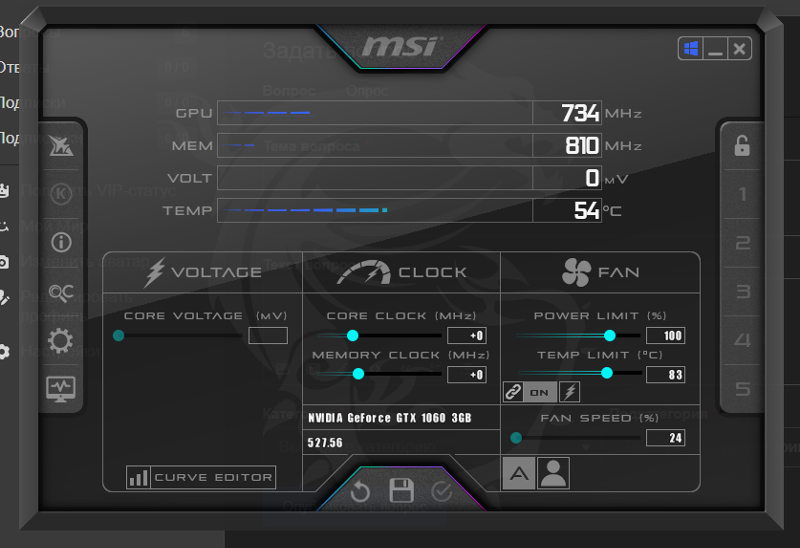 What was nice to see was that I could match the core overclock on this card as I did the TITAN X, +210MHz. As seen earlier, that clock increase gives us an effective 9~20% performance boost.
Once the 980 Ti begins to flood the market, I’ll be interested to see what kind of overclocks will become typical. I felt like I should have been able to push our sample harder, but it just wasn’t happening. A small clock boost rendered instabilities rather quickly, and increasing the voltage accomplished absolutely nothing. Still, despite all that, the performance improvements exhibited are impressive, so even if I were able to push the card another 20MHz on the core, the real-world performance gain would have been extremely minimal when compared to the original +210MHz.
Here’s another way to look at it: EVGA’s top-end 980 Ti model, the Hydro, is clocked at +140MHz over reference. The overclock I deemed stable on our sample improved that by another 70MHz. Not too shabby!
Overclocking aside, the Best Playable results tell us something that wasn’t entirely clear in my full review, due to the apples-to-apples comparisons: the card is fantastic for 4K.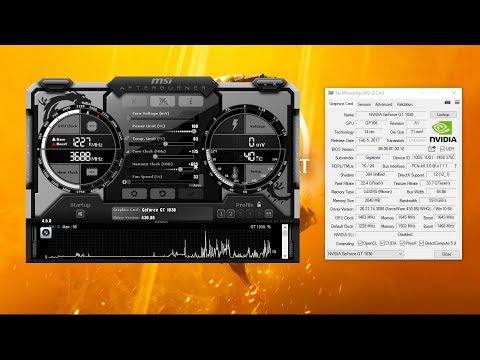 Of course, some graphical sacrifices need to be made, but that’s the case with the TITAN X as well. 4K is just an intense resolution. If you want an “ideal” 4K experience in the latest games, multiple GPUs will be required. Your wallet may hate you, but something tells me NVIDIA sure wouldn’t!
A selection of GTX 980 Ti Graphics cards are available from Amazon and Newegg.
Support our efforts! With ad revenue at an all-time low for written websites, we’re relying more than ever on reader support to help us continue putting so much effort into this type of content. You can support us by becoming a Patron, or by using our Amazon shopping affiliate links listed through our articles. Thanks for your support!
Overclocking NVIDIA’s GTX 980 Ti Graphics Card — A 19% Performance Gain | GamersNexus
Our initial review of the $650 GTX 980 Ti, published just over twelve hours prior to this post, mentioned an additional posting focusing on the card’s overclocking headroom.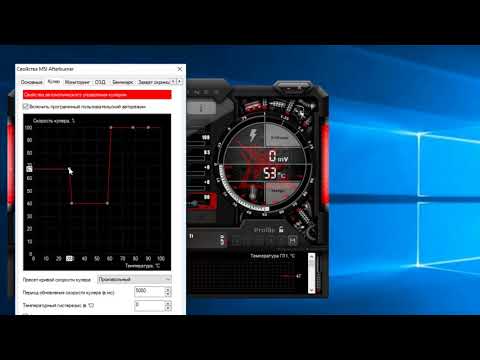 The GTX 980 Ti runs GM200, the same GPU found in nVidia’s Titan X video card, and is driven by Maxwell’s new overclocking ruleset.
Maxwell, as we’ve written in a how-to guide before, overclocks differently from other architectures. NVidia’s newest design institutes a power percent target (“Power % Target”) that increments power provisioning to the die to grant OC headroom. Unfortunately, this metric can’t be exceeded beyond what the BIOS natively allows (without a hack, anyway), and means that we’re sharing watts between the core clock, memory clock, and voltage increase. Overclocking on Maxwell offers some granularity without making things too complicated, though it’s not until we get hands-on with board partner video cards that we’ll know the true OC ceiling of the 980 Ti.
This post showcases our GTX 980 Ti initial overclock on the reference cooler, yielding a considerable framerate gain in game benchmarks.
NVidia GTX 980 Ti Specs
| GTX 980 Ti | GTX Titan X | GTX 980 |
GTX 780 Ti | |
| GPU | GM200 | GM200 | GM204 | GK-110 |
| Fab Process | 28nm | 28nm | 28nm | 28nm |
| Texture Filter Rate (Bilinear) |
176GT/s | 192GT/s | 144. 1GT/s 1GT/s |
210GT/s |
| TjMax | 92C | 91C | 95C | 95C |
| Transistor Count | 8B | 8B | 5.2B | 7.1B |
| ROPs | 96 | 96 | 64 | 48 |
| TMUs | 176 | 192 | 128 | 240 |
| CUDA Cores | 2816 | 3072 | 2048 | 2880 |
| Base Clock (GPU) | 1000MHz | 1000MHz | 1126MHz | 875MHz |
| Boost Clock (GPU) | 1075MHz | 1075MHz | 1216MHz | 928MHz |
| GDDR5 Memory / Memory Interface |
6GB / 384-bit | 12GB / 384-bit | 4GB / 256-bit | 3GB / 384-bit |
| Memory Bandwidth (GPU) | 336.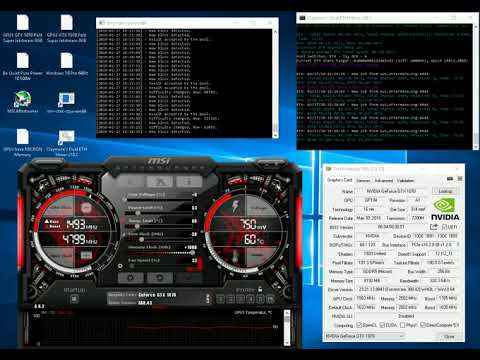 5GB/s 5GB/s |
336.5GB/s | 224GB/s | 336GB/s |
| Mem Speed | 7Gbps | 7Gbps | 7Gbps (9Gbps effective — read below) |
7Gbps |
| Power | 1×8-pin 1×6-pin |
1×8-pin 1×6-pin |
2×6-pin | 1×6-pin 1×8-pin |
| TDP | 250W | 250W | 165W | 250W |
| Output | 3xDisplayPort 1xHDMI 2.0 DVI |
3xDisplayPort 1xHDMI 2.0 1xDual-Link DVI |
DL-DVI HDMI 2.0 3xDisplayPort 1.2 |
1xDVI-D 1xDVI-I 1xDisplayPort 1xHDMI |
| MSRP | $650 | $1000 | $550 now $500 | $600 |
Test Methodology
We tested using our updated 2015 GPU test bench, detailed in the table below. Our thanks to supporting hardware vendors for supplying some of the test components. Thanks to Jon Peddie Research for GTX 970 & R9 280X support.
The latest GeForce press drivers were used during testing. AMD Catalyst 15.5 was used. Game settings were manually controlled for the DUT. Stock overclocks were left untouched for stock tests.
VRAM utilization was measured using in-game tools and then validated with MSI’s Afterburner, a custom version of the Riva Tuner software. Parity checking was performed with GPU-Z. FPS measurements were taken using FRAPS and then analyzed in a spreadsheet.
Each game was tested for 30 seconds in an identical scenario on the two cards, then repeated for parity.
| GN Test Bench 2015 | Name | Courtesy Of | Cost |
| Video Card |
GTX 980 Ti 6GB
|
NVIDIA | $650 |
| CPU | Intel i7-4790K CPU | CyberPower | $340 |
| Memory | 32GB 2133MHz HyperX Savage RAM | Kingston Tech. |
$300 |
| Motherboard | Gigabyte Z97X Gaming G1 | GamersNexus | $285 |
| Power Supply | NZXT 1200W HALE90 V2 | NZXT | $300 |
| SSD | HyperX Predator PCI-e SSD | Kingston Tech. | TBD |
| Case | Top Deck Tech Station | GamersNexus | $250 |
| CPU Cooler | Be Quiet! Dark Rock 3 | Be Quiet! | ~$60 |
Average FPS, 1% low, and 0.1% low times are measured. We do not measure maximum or minimum FPS results as we consider these numbers to be pure outliers. Instead, we take an average of the lowest 1% of results (1% low) to show real-world, noticeable dips; we then take an average of the lowest 0.1% of results for severe spikes.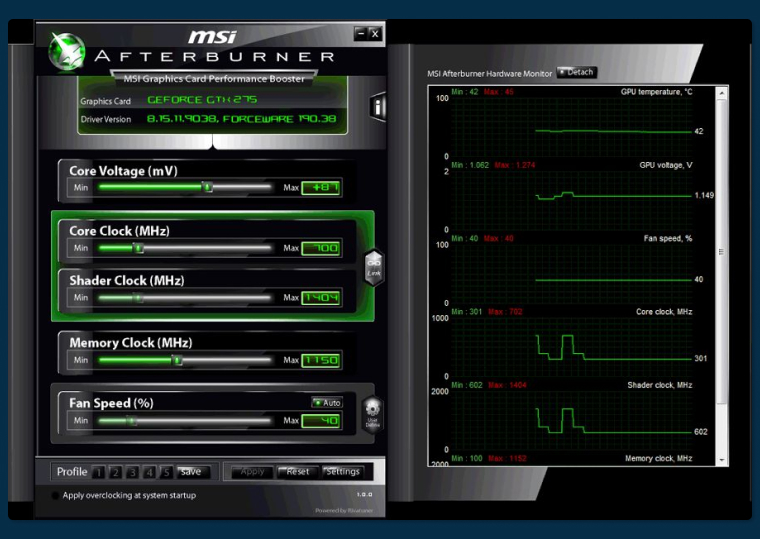
We conducted a large suite of real-world tests, logging VRAM consumption in most of them for comparative analysis. The games and software tested include:
- Far Cry 4 (Ultra 1080, Very High 1080).
- GRID: Autosport (Ultra 1440, Ultra 4K).
- Metro: Last Light (Very High + Very High tessellation at 1080; High / High at 1440).
- GTA V (Very High / Ultra at 1080p).
- Shadow of Mordor (Very High, 1080p).
- 3DMark Firestrike Benchmark
- GTA V
- The Witcher 3
We already know ACU and Far Cry 4 consume massive amounts of video memory, often in excess of the 2GB limits of some cards. GRID: Autosport and Metro: Last Light provide highly-optimized benchmarking titles to ensure stability on the bench. Shadow of Mordor, GTA V, & Battlefield Hardline (not shown here) are new enough that they heavily eat RAM. 3DMark offers a synthetic benchmark that is predictable in its results, something of great importance in benchmarking.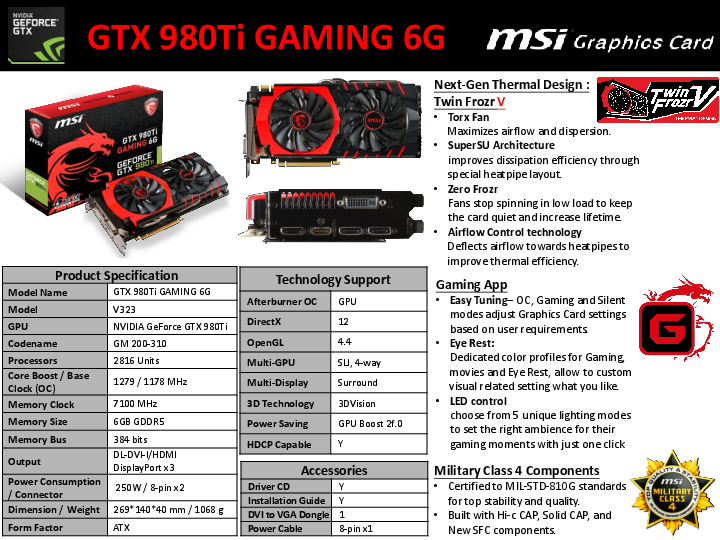
Games with greater asset sizes will spike during peak load times, resulting in the most noticeable dips in performance on the 2GB card as memory caches out. Our hypothesis going into testing was that although the two video cards may not show massive performance differences in average FPS, they would potentially show disparity in the 1% low and 0.1% low (effective minimum) framerates. These are the numbers that most directly reflect jarring user experiences during “lag spikes,” and are important to pay attention to when assessing overall fluidity of gameplay.
Overclocked tests were conducted using MSI Afterburner for application of settings. All devices were tested for performance, stability, and thermals prior to overclocking to ensure clean results. On the OC bench, devices were set to maximize their voltage ceiling with incremental gains applied to the core clock (GPU) frequency. MSI Kombustor, which loads the GPU 100%, was running in the background. Once stability was compromised — either from crashing or artifacting — we attempted to resolve the issue by fine-tuning other OC settings; if stability could not be achieved, we backed-down the core clock frequency until we were confident of stability. At this point, the device was placed on a burn-in test using Kombustor and 100% load for 30 minutes. If the settings survived this test without logged fault, we recorded the OC settings and logged them to our spreadsheet.
Final OCs were applied and tested on games for comparison.
Thermals were reported using Delta T over ambient throughout a 30-minute burn-in period using 3DMark FireStrike — Extreme, which renders graphics at 1440p resolution. This test loads the VRAM heavily, something Kombustor skips, and keeps the GPU under high load that is comparable to gaming demands. Temperatures were logged using MSI Afterburner.
Overclocking Results
| CLK Offset | Max Clock | Mem Offset | Mem CLK | Voltage | Initial Test | Endurance? |
| +68MHz | 1245MHz | +500MHz | 4001MHz | 1.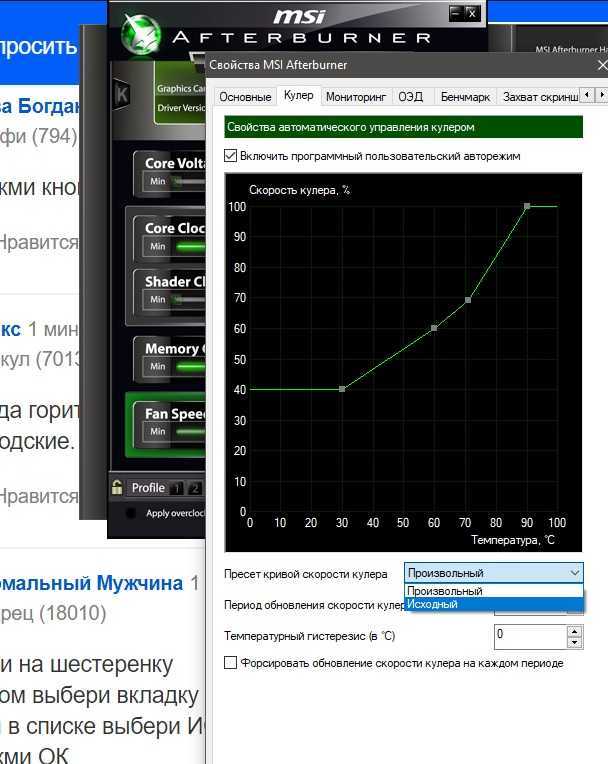 187V 187V |
Pass | N/A |
| +100MHz | 1289MHz | +500MHz | 4001MHz | 1.187V | Pass | N/A |
| +150MHz | 1339MHz | +500MHz | 4001MHz | 1.187V | Pass | N/A |
| +175MHz | 1364MHz | +500MHz | 4001MHz | 1.187V | Pass | N/A |
| +200MHz | 1389MHz | +500MHz | 4001MHz | 1.187V | Pass | N/A |
| +225MHz | 1414MHz | +500MHz | 4001MHz | 1.187V | Pass | N/A |
| +250MHz | 1439MHz | +500MHz | 4001MHz | 1.187V | Pass | N/A |
| +275MHz | 1464MHz | +500MHz | 4001MHz | 1.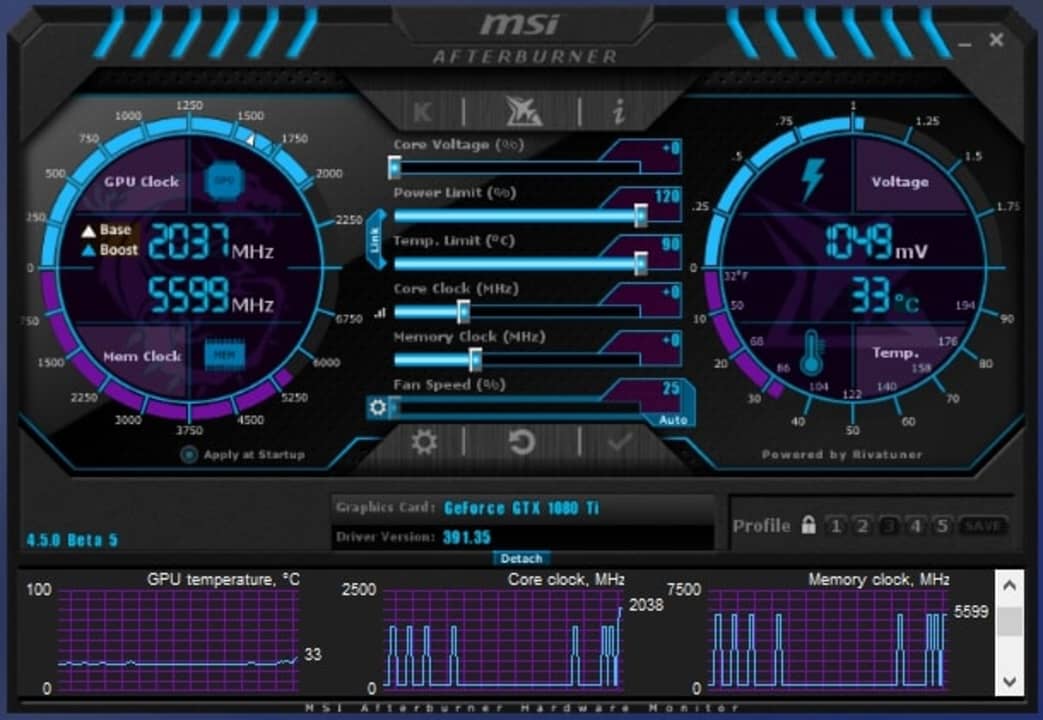 187V 187V |
Fail | Fail |
| +250MHz | 1427MHz | +500MHz | 4001MHz | 1.187V | Pass | Pass |
| +255MHz | 1444MHz | +500MHz | 4001MHz | 1.187V | Pass | Pass |
| +260MHz | 1450MHz | +500MHz | 4001MHz | 1.187V | Pass | Fail |
For overclocking, we configure the power percent target to its maximum value before adjusting voltage to its own max setting. The 980 Ti allows 110% of base power to be supplied to the GPU for overclocking and seems to hover around 1.187V after overvolting. We then slowly increment clockrate, observing for visual artifacting or catastrophic failures throughout the process. Each increment is left only for a few minutes before moving to the next step.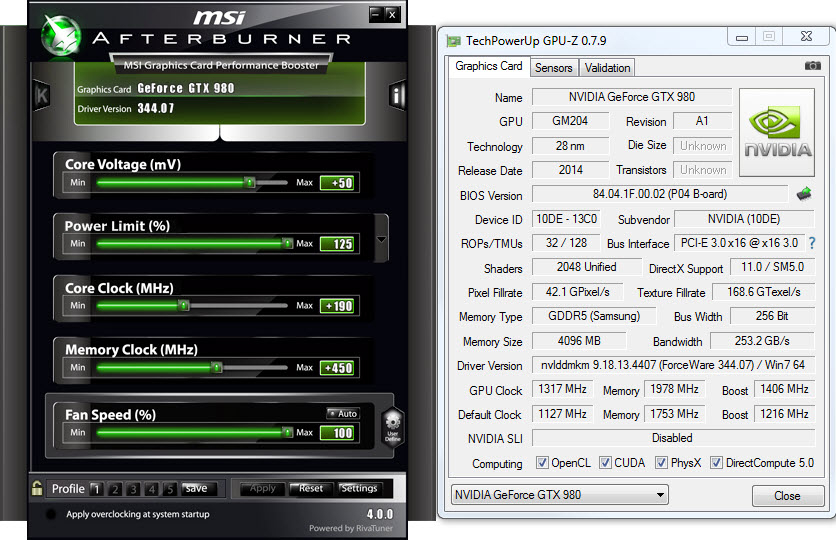 We’re eventually confronted with a driver failure, at which point the clockrate is backed-down and then endurance tested for 20-minutes using Kombustor.
Kombustor, an MSI-branded Furmark, is used for burn-in testing and stability. Running Kombustor forces the GPU to see 100% utilization, which evokes the highest boost clock possible under the current clock settings. We left the memory clock to +500MHz, though it could assuredly be pushed further.
The results are above.
We were able to achieve a stable frequency at +255MHz over base (1000MHz), achieving an output of 1444MHz max boost clock. Voltage throughput was logged at 1.187V.
Let’s look at the performance difference after overclocking.
GTX 980 Ti Overclocking Benchmark
The GTX 980 Ti pushed an impressive clockrate over base, resulting in great gains in some games. The Witcher 3 at 4K sees a jump from 33FPS average to 40FPS average, with a massive 2x gain in 1% low FPS. At this point, the game becomes truly playable at 4K after lowering foliage viewing distance, bringing the framerate closer to 50FPS.
1440p sees a similar jaunt for the GTX 980 Ti. The card moves to 68FPS, ranked against the Titan X at 59FPS and 980 Ti base at 57FPS.
Shadow of Mordor also produces a ~10FPS gain over base and noteworthy gain over the TiX base at 4K.
GRID: Autosport is a bit of an anomaly with the 980 Ti, and I’m not entirely sure why. This is the one game where we see a large disparity in framerate between the Titan X and 980 Ti, and that continues here; gains are still noteworthy after overclocking, though.
The overall performance gain sits at about +19% for the GTX 980 Ti, a marked improvement with minimal effort. Note that the reference cooler is throttling us at this +255 configuration and could become a concern for longevity of the GPU. We haven’t received any yet, but aftermarket GPU coolers designed by board partners should greatly improve overclocking potential. EVGA’s liquid-cooled 980 Ti looks particularly promising.
Read the full GTX 980 Ti review here.
microcode modification for Maxwell generation video cards — i2HARD
Articles
Oleg Martynov
March 8, 2017
Maxwell generation graphics cards end their era, giving way to the improved Pascal architecture.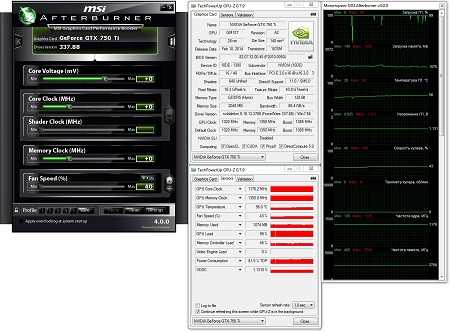 But this did not stop the GM20x from being interesting in terms of its hidden potential, expressed in MHz. We remember that the introduction of Boost 2.0 technology put many spokes into the wheels when overclocking video cards using utilities (MSI Afterburner, EVGA Precision, Palit ThunderMaster and others), and the frequency shift led to the fact that the base and intermediate frequencies changed along with the BOOST frequency, and sooner or later this led to instability when changing the load on the video card. As a result, many reduced overclocking, and for further overclocking, they either had to use the microcode editing method called «BOOST shutdowns» (in fact, the Boost 2.0 technology itself did not disappear anywhere, the video card just worked at higher frequencies even under light loads), or use third-party programs for fixing maximum frequencies (for example, -Nvidia PowerMizer Manager). The disadvantages are increased frequencies and voltage in idle mode and a small load, as a result — excessive heating and consumption.
 In this case, the capabilities of the Maxwell II BIOS Tweaker and the driver part of the video cards act as limiters. But what if we look into the subtle world of microcode using a HEX editor and see what this approach will give us. nine0003
Preparing to edit the video card microcode
First you need to flash the latest BIOS version (without modifications) for your video card. You can find it both on the manufacturer’s website and on third-party sites, for example -TechPowerUp. In order to flash the BIOS, you can use the NVFlash program. I recommend immediately downloading the version with bypassing certificate verification, since it is it that will be useful to us later. For firmware, create a folder in the root of drive C with the name nvflash and unpack the contents of the previously downloaded archive into it. we also add a file with the microcode that we are going to «burn» to the root of the folder. Then we launch the command prompt as an administrator and enter the following commands in turn:
where namebios is the name of the BIOS file.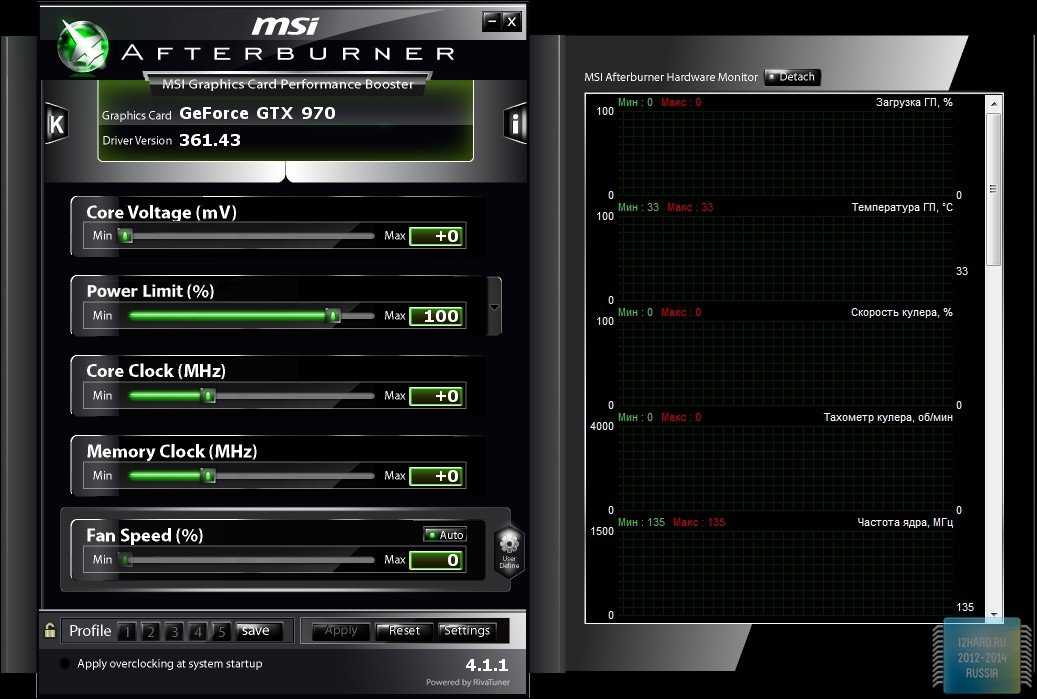
I mainly use MSI Afterburner for overclocking, so it will be featured in this article. Download the latest version and install it. We also download the GPU-Z program and install it. nine0003
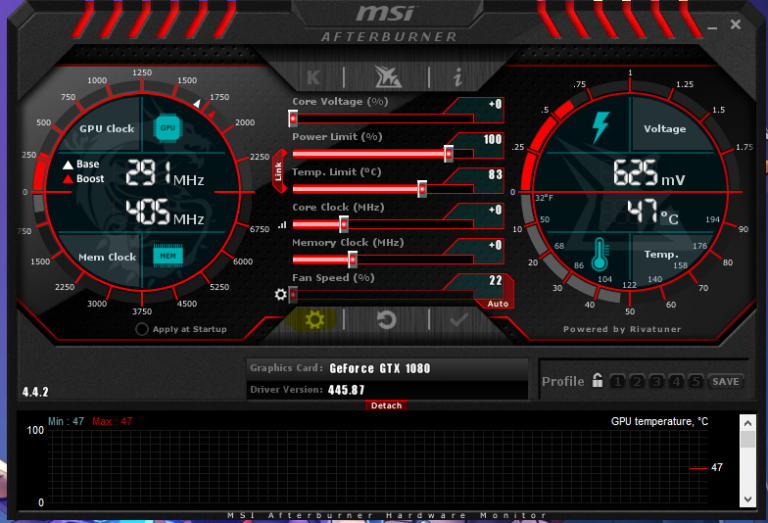
The next step is to determine the value of the maximum frequency and operating voltage at full load on the video card without using overclocking. It is more convenient to do this using the renderer and sensor monitoring built into GPU-Z
C. We remember these parameters, they will still be useful to us. nine0003
Now we open the BIOS version that we loaded into our video card using the Maxwell II BIOS Tweaker. In parallel, consider the main tabs and the values presented in them.
Common tab
TDP Base Entry/3D Base Entry/Boost Entry — do not touch these parameters, leave as is.
TDP Base Clock/3D Base Clock/Boost Clock — value of base and BOOST frequencies. In fact, TDP Base Clock / 3D Base Clock do not depend on the asic video card, and we can set it manually, but choose the frequencies from the Boost table tab.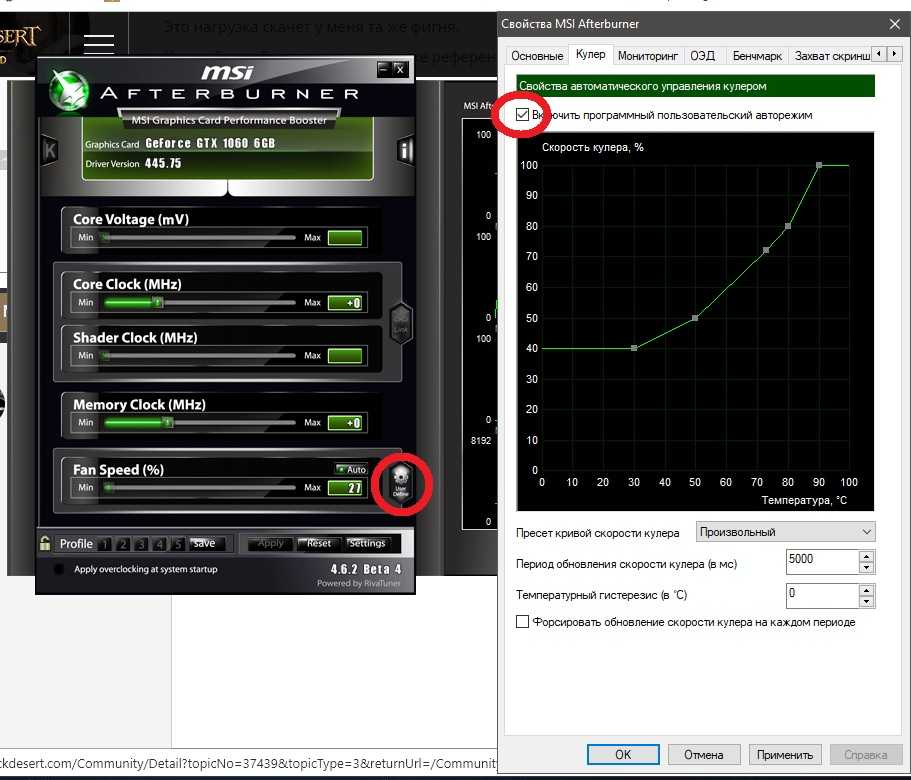 In my example, you see the frequency from 34 table cells. nine0003
But the Boost Clock frequency tells us the minimum BOOST frequency for the video card (1329 MHz — 59 cell of the table), but the actual frequency will be determined by the asic of the card (you can see it in gpu-z) — the higher the asic, the higher the actual frequency in the mode BOOST (on my video card with asic 73.5% boost out of the box to 1392.5 MHz — 64 position in the frequency table). By changing the Boost Clock to values from the table above the stock ones, we transfer the BOOST frequency. Frequency change 1329 MHz (59table position) to 1354.5 MHz (61 positions) in my case will change the actual frequency in BOOST mode from 1392 MHz (64 cells) to 1418 MHz (66 cells). This will allow you to change the maximum boost frequency without using AB. This is a method for the lazy. Also, the Gpu Clock Offset + 13MHz button will do the same, but it will also change the TDP Base Clock / 3D Base Clock (but they can be manually returned to the desired ones).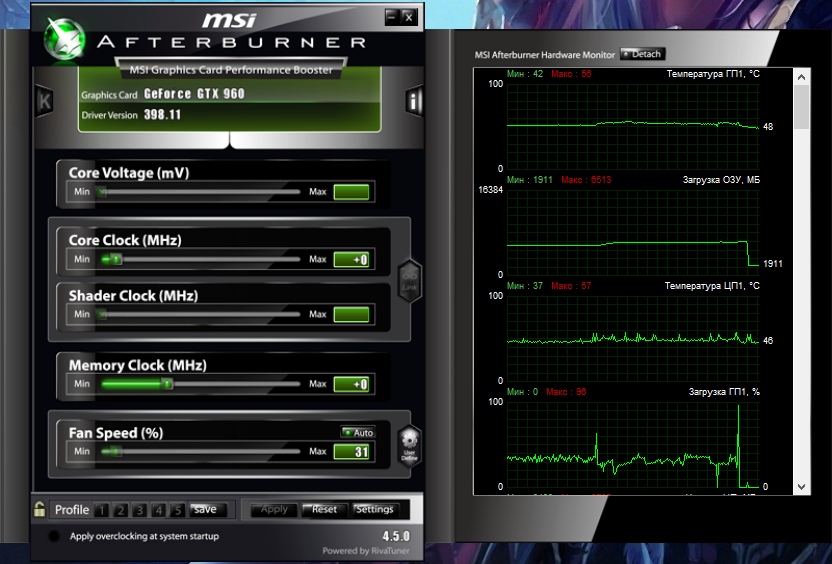
Temp Target/Max Temp Target — temperature limits, the same sliders are in MSI Afterburner. Set the value to 89/91 provided that the video card does not heat up 80+ degrees.
Fan Control — control of the fan speed of the video card cooling system.
RPM1x/TMP1x/PER1x are the desired RPM (when using PWM controlled fans)/Temperature/Percent RPM (when using voltage controlled fans) to adjust the valves. It is desirable to adjust the percentages by the calculation method (2600/3200 = 81%, not 70, like mine, but I have a PWM adjustment). nine0003
How it works.
RPM13 / TMP13 / PER13 — the maximum speed values, leave RPM13 / PER13 unchanged, and set TMP13 to the value that you think is necessary (in my example 3200 rpm (maximum passport value) at 90 degrees) .
RPM11/TMP11/PER11 — up to these values the valves will spin up from zero or the initial values.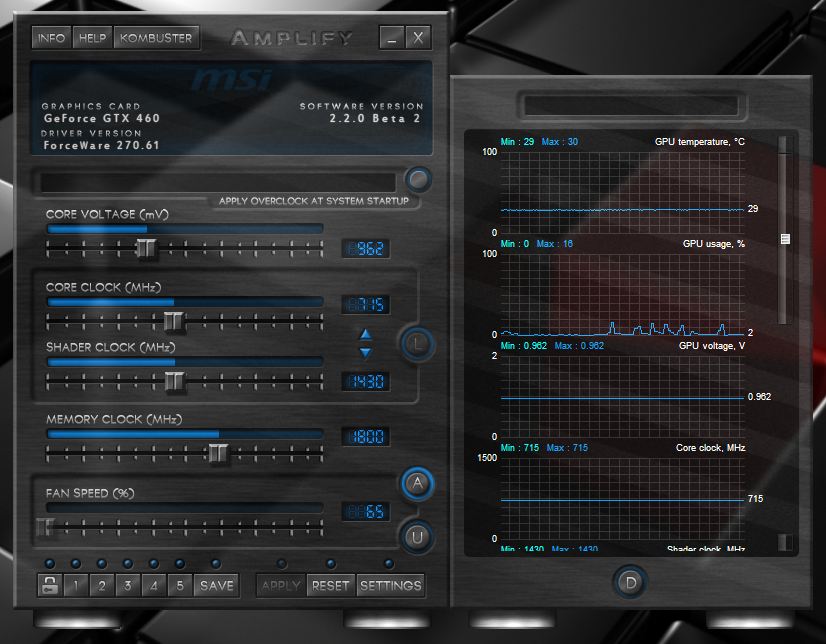 In the picture above, up to 35 C to , the fans spin from the technically minimum possible value to 1000 rpm, after 35 and up to 70 C to (TMP12) spin smoothly up to 2600 rpm (RPM12).
To stop the RPM11/TMP11/PER11 valves, write as 0/0/XX, where XX is the temperature up to which the valves will stand.
Memory Clock — video memory frequency. We set a value that is stable in your opinion and subtract 100 MHz. For more stability and confidence.
Voltage Table Tab
This tab displays the voltage for each frequency in the frequency table. nine0003
If you have a GM200 and this tab looks like this:
then you need to open the second and third lines in the voltage table. To do this, open the BIOS in Kepler BIOS Tweaker and move the selected sliders to an arbitrary position:
It turns out something like this:
Now the BIOS looks like this in Maxwell II BIOS Tweaker: depends on the voltage regulator of your video card, it can be both 1281 and 1250 as much as possible, as you’re lucky). We put 1281.3. nine0003
Line 2: is our base voltage for Boost Clock.
If you want to step down the voltage — change the maximum voltage in this line one step down with the keyboard arrows and flash the BIOS with this voltage, perform rendering manipulations in GPU-Z. The resulting voltage (this will be a minus step from your stock voltage) is written as the first value in the second and third lines.
If you don’t want to reduce the voltage of by one step, set the voltage found at the preparation stage using the GPU-Z render to the minimum and plus one step to the maximum. With this setting, frequencies will NOT be reset under temperature. We set the maximum voltage in this line one step more from the minimum. nine0003
3rd line: The minimum value is the same as in the second line, the maximum is the same as in the first one. This is exactly the voltage that we can adjust using the sliders through MSI Afterburner.
Software monitoring (GPU-Z, MSI Afterburner, HWiNFO) is not always true and the displayed GPU voltage may be higher/lower than the actual one. You can verify this with a multimeter.
And now that the displayed voltage steps in the same gpu-z are not the only possible ones. We will make the change using the example of my video card, the VID of which on the stock BIOS is 1.150, 1.175, 1.193, 1.218, etc.
First, fix the voltage of 1.175 V to determine the cell number for this voltage. To do this, put the following values in the first three lines of the voltage table:
- 1.281-1.281
- 1.175-1.181
- 1.175-1.281
As a result, we get the BOOST frequency corresponding to cell 59.
Next, go to cell 59 in the voltage table and shift the values in such a way as to shift the voltage range to the value we need. Having made a table, as in the screenshot, I got the VID of the card, which did not exist before. It becomes one of the range for each cell, and as seen in the video below, the voltage step can be adjusted more precisely. nine0003
It is worth considering that for a voltage offset of 6-10 mV, we move to the next cell of the boost table and get +13 MHz. You can change the voltage step, make it larger or smaller.
Power Table tab
These are power limits. We are interested in the first 6 groups (each group consists of Min|Def|Max values).
The first group is TDP cards. In fact, this calculated value of heat, which the manufacturer takes into account when designing the cooling system, has nothing to do with the power limit. We set it the same as the values \u200b\u200bof group 6. nine0003
Second group — skip it.
The third group is the power of the PCI-E slot, we set this group taking into account 75 W maximum.
The fourth group is the permitted power of the first auxiliary power connector. We put 75000 for 6-pin and 150000 for 8-pinPCI-E.
Fifth group — permitted power of the second auxiliary power connector. We put 75000 for 6-pin and 150000 for 8-pin PCI-E.
Sixth group — power limit. This is what interests us the most. The values are set in the calculation from the sum of the values of all the power supplies of the video card, which we set in the table. We write the same values \u200b\u200bin 1 group (optional). nine0003
Boost Table tab
Here we see the same table of frequencies, because of which we are here. Each frequency here is associated with a voltage from the corresponding table, the binding goes by the cell number. Using the Max Table Clock slider, we can shift the frequencies from 35 to 74 cells both up and down. This is similar to the steps in MSI Afterburner. Also here we can clearly see that with an increase in the maximum BOOST frequency, all intermediate frequencies also change. nine0003
Boost States tab
We only change Max GPC in P00 and P02 to a value from 74 cells of the frequency table, the rest does not concern us.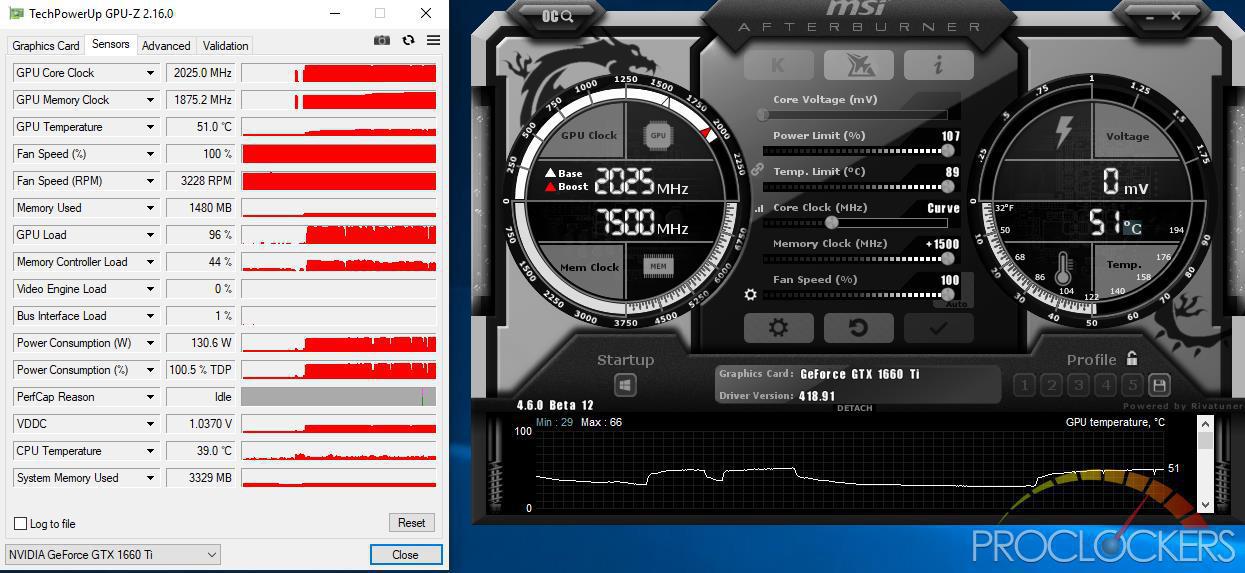
Clock States tab
In the DDR profile P00, set the memory frequency from the first tab (more precisely, it will change here itself when the frequency changes there), but DDR in P02 is either left as it is, or changed to the value as in P00. If we leave it as it is, when using CUDA, it will drop the frequency to this value.
Editing the frequency table with the HEX editor
To begin with, we set the boost voltage we need in the second and third lines in this way (in this example, I lowered the voltage for BOOST to 1.175 V, but it is worth remembering that at the beginning of the article using GPU-Z we already determined the operating voltage and frequency, so set the voltage you need).
In the second line we add one step to the right value, in the third we set the maximum value to which the voltage can be increased through MSI Afterburner. It is worth considering that when the voltage is increased using MSI Afterburner, the voltage during heating will decrease to the minimum specified in the second line.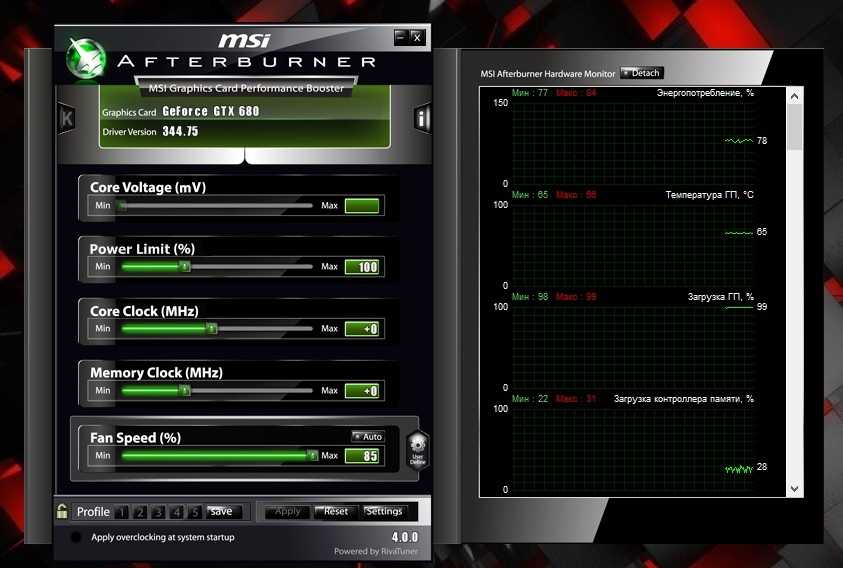 nine0003
We remember in which cell the 3D Base Clock frequency is located:
On the BOOST position (On my copy of the video card at 1.174 V, this is cell 59), we set the frequency, which is stable at this voltage (I recommend setting it 2-3 steps lower , adjust the rest in MSI Afterburner).
Next, open the BIOS in any HEX editor (I used HxD) and look for the BOOST cell as follows: add 12 to the cell number (in my example, 59+12=71) and convert to hex (71d = 47h). Next, we take the frequency on this cell (1455.5 for me), multiply by 2 (1455.5*2=2911) and also translate into hex (2911d = 0B5Fh). Zero is not lost. Next, we are looking for the following hexadecimal sequence in the Bios code: 47 5f 0b 00 01
Where 47 — the HEX code of the Boost cell, 5F 0B — doubled frequency by the younger categories of forward (0B_5F), 00 01 01 01 — command code. To the left (from position 46) are cells from 58 to 1 groups of 5. We take the frequency value that we will have between the base and BOOST frequency (I chose 1405 MHz), translate it into a familiar format (1405 * 2 = 2810d = 0AFAh) and we insert them from the cell before the boost one (58 in my case) to the one on which the base frequency + 1 was (43+1=44) and change them to the value we need (FA 0A). After editing the frequency table, we correlate the values \u200b\u200bin the voltage table (for all cells with the same frequency, one voltage range can be set), save the BIOS (be sure to then open it in Maxwell II BIOS Tweaker and save it to rewrite the checksum) and flash it. nine0003
You can write any frequencies, choose any step, but the tweaker can cross out frequencies that are not packed into it. It’s okay, this is a flaw in the program, Kepler BIOS Tweaker also shows the BIOS from Maxwell.
Conclusion
Video card overclocking has several reasons. Here and sports interest, and the need for a few extra frames per second, or just the pursuit of beautiful numbers.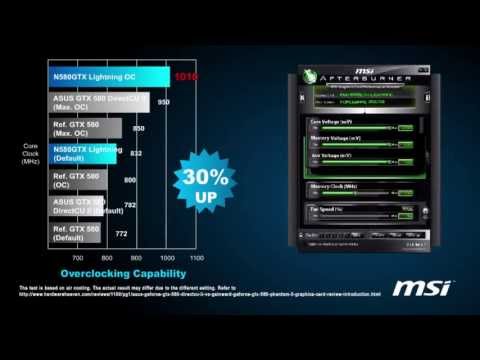 In this article, we looked at a small example of how to get rid of sticks inserted into our wheels during acceleration. Boost 2.0 technology, in my opinion, is no different from a software sequence of cause and effect, so changing conditions leads to a change in operating mode. With the help of a HEX editor and changing the voltage and frequency tables, I achieved on the GTX 980 TI (using air cooling) achieved unprecedented results for it — with a core frequency of 1592 MHz and an effective video memory frequency of 8500 MHz at a voltage of 1.27 V, the Firestrike software application from the 3DMark package achieved a result of 22666 graphic points, in Firestrike Extreme at the same voltage and 1596 /8400 MHz, respectively, the result was 10641 graphic points.
For games, the use of this technique also turned out to be quite useful. For example, absolute stability at a core frequency of 1558 MHz (the memory frequency was 8400 MHz) under any load was achieved at 1.199 V.
At the same time, the frequency was set with some margin
When the load changed, there were no many intermediate frequencies, there was a BOOST frequency, the base and the only intermediate one, for which a stable voltage was selected for it. At the same time, energy-saving functions worked correctly, which you can see in the picture above. nine0003
Be creative, adjust the BIOS for yourself and your needs, but remember that you do all the manipulations at your own peril and risk. Good luck and stable overclocking!
MSI GTX 980Ti GAMING 6G Video Card
|
Core/memory clock
Video output functions
|
|
TWIN FROZR V: COOLER AND QUIETER, IS BETTER GAMING With the release of each new generation of GPU, the performance of the graphics subsystem increases. |
 With every new generation of MSI Twin Frozr, we make your system quieter and cooler! We always listen to your wishes, which is why the new Twin Frozr V cooling system is more compact, has more powerful fans and lower noise level, better cooling of graphics card components and perfectly matches MSI GAMING series motherboards, not to mention stylish LED lighting. We spent 18 months developing the Twin Frozr V cooling system, including extensive testing in gaming clubs. This guarantees the highest quality and stability of video cards at maximum FPS. nine0003
AIRFLOW CHART
Improved dispersion blades create 19% more powerful airflow without increasing overall noise levels.
|
SuperSU Heat Pipe
SuperSU architecture is the best cooling solution for graphics cards. |
 The GPU on MSI’s GAMING series graphics cards is cooled by a massive nickel-plated copper plate connected to 8mm Super Pipes heatpipes. In addition, the special arrangement of heat pipes increases the efficiency of heat dissipation by reducing their length and the special shape of the SU. nine0003
|
ZERO FROZR
MSI Twin Frozr V Cooling System supports Zero Frozr technology, which was first introduced by MSI in 2008. Zero Frozr technology eliminates fan noise at low graphics card load by stopping them completely. Compared to other graphics cards, there is no constant noise generated by the fans, thus reminding that a powerful graphics card is installed in the system. This means that you can fully focus on the game without being distracted by extraneous sounds from your computer. nine0003 |
|
AIRFLOW CONTROL TECHNOLOGY
MSI introduces the new Airflow Control technology on the Twin Frozr coolers, which allows more airflow to be directed directly to the heatpipes through the use of special baffles mounted on the heatsink. |
 In addition to this, the exclusive heatsink design has an increased surface area for better heat dissipation. nine0003
|
GAMING APP
The latest version of MSI Gaming App has been enhanced to support MSI Scenamax technology (EyeRest tab), which can greatly improve picture quality. |
|
MSI Gaming app, EyeRest tab
Quick setting of display parameters. Open the tab by clicking on the appropriate icon and select your preferred options. nine0003 Helps you fall asleep easier and makes you sleep more restfully by reducing the blue light emitted by the screen. This allows the body to more easily tune in to sleep at night. Gaming Mode Vibrant colors and improved contrast lets you see the game the way the creator intended. Movie Mode Dynamically adjusts gamma and contrast for better picture quality when watching movies. nine0268 |
MILITARY CLASS COMPONENTS
One of the decisive factors in performance is the quality of the components used.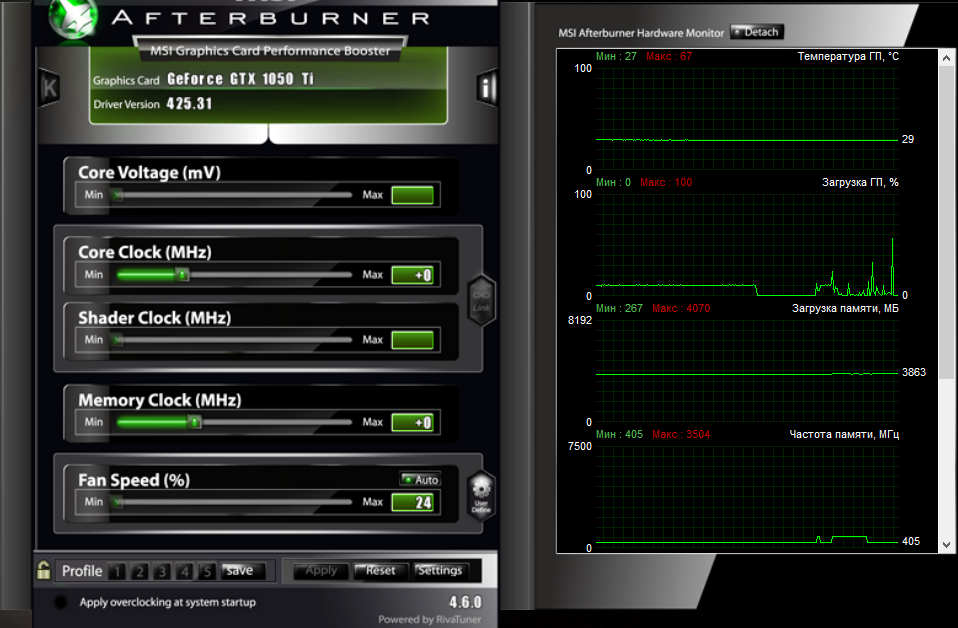 That’s why MSI only uses MIL-STD-810G certified components for the Lightning series, because only these components are able to withstand the most demanding conditions of extreme overclocking.
Hi-C CAPs
Hi-c CAPs are very small but incredibly efficient capacitors. In addition to providing enough space around the CPU socket to install large coolers, they also cost 93% less energy. That is why MSI boards are the most energy efficient on the market.
SOLID CAP — SOLID STATE CAPACITORS
Solid CAPs with their aluminum core have long been one of the defining factors in the design of high-quality motherboards, as they provide a lower equivalent series resistance (ESR), as well as a 10-year service life .
NEW SUPER FERRITE CHOKES
The new Super Ferrite Choke (SFC) are superconducting ferrite core coils. This allows the SFC to operate 35°C cooler on average, carry 30% more current, and be 20% more power efficient, thus providing better stability during CPU overclocking.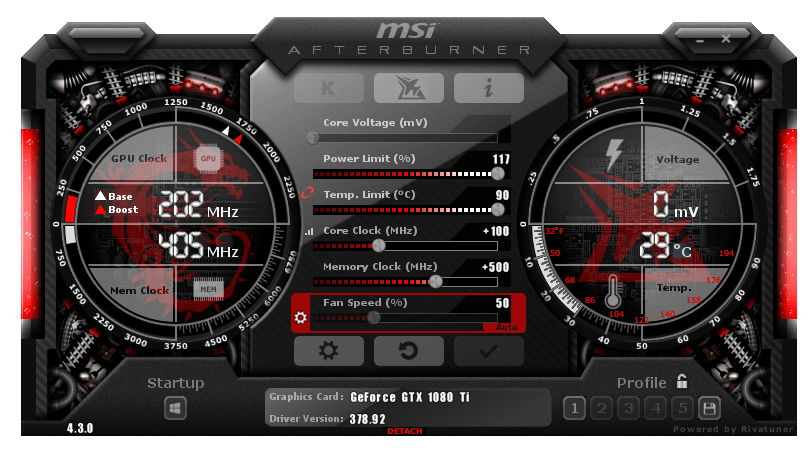 nine0003
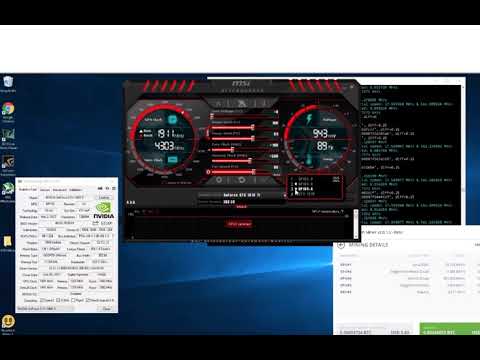
AFTERBURNER
MSI Afterburner quickly became the go-to overclocking software for journalists, overclockers and general users. Its simple interface makes it easy to use, but at the same time it contains a myriad of powerful features, such as the built-in Kombustor benchmark, which can work in both stability and performance test mode.
Do not speak English? No problem: MSI Afterburner has been translated into many languages, including Russian, Spanish, Chinese and Korean! Don’t like the default shell? Just change to one of dozens of different skins or create your own unique one! nine0003
Even better, you can run Afterburner directly from your smartphone! Download the MSI Afterburner App from Google Play or the Apple Store and overclock directly from your phone!
Cookies
We use cookies to store information about the items added to your shopping cart, comparison lists and desired items, online chat, and to display offers that we think may be of interest to you.