Gigabyte GTX 1070 G1 Gaming
HOW TO GET A 24/7 OVERCLOCK FOR GIGABYTE GTX 1070 G1 GAMING
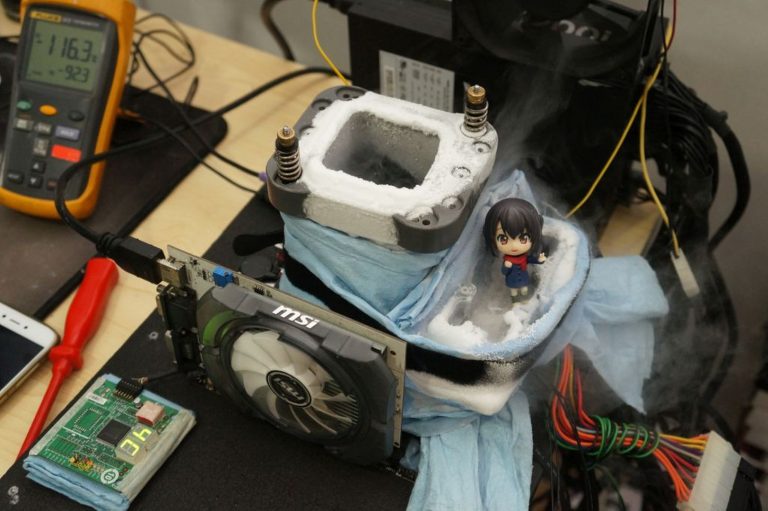
Remember that any overclocking process is risky, so be aware that you try this on your own risk
A) Setout
What is a 24/7 Overclock (OC)?
In easy words, it is the overclock profile for your graphic card that can be used 24 hours a day, seven days a week and 365 days a year, as it is stable under full load conditions and does not reduce the lifespan of your device.
The process to determine this special overclocking profile is not fast. It requires patience and a lot of time to properly complete all its stages.
How can we trust that we will not reduce the lifespan of our graphic card?
Through two essential preventions:
-
Keep a safety GPU temperature, applying a proper fan mode or a custom fan curve that will always keep it between 60 and 70 Celsius degrees.
-
Do NOT modify the stock GPU voltage.
How do we measure graphic performance improvement?
Through the following benchmarking and graphic stress-testing programs:
-
3DMark
-
Heaven 4.0
-
Valley 1.0
-
FurMark
-
OCCT
All of them must be installed and updated before starting the overclocking process.
In addition you can also use these ones:
How to get this bench/stress softwares?
Easy, you can get them by clicking on the names of the list above or searching by their names through your Internet browser.
How to check the stability of your OC profile?
Through these same programs using them as graphic stress tests. That is to say:
-
3DMark: Running its Fire Strike Stress Test, consisting of 20 uninterrupted loops of the Fire Strike benchmark Graphic Test 1.
-
Heaven: Running it in loop mode for at least 30 minutes.
-
Valley: Running it in loop mode for at least 30 minutes.
-
FurMark: Running its GPU Stress Test at least 1 hour.
-
OCCT: Running its GPU stress test at least 30 minutes (tick Error Checking box only when you are testing Memory OC).
Other programs needed
Our main overclocking utility, one GPU monitoring software and one spreadsheet tool.
Specifically, these are the ones I used:
-
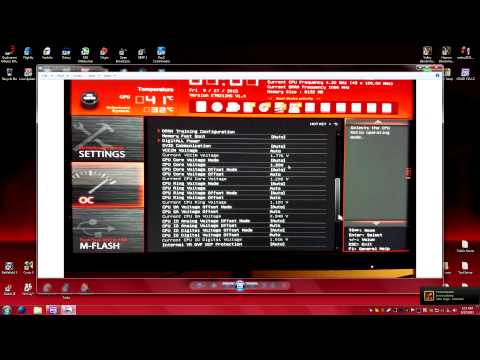
Gigabyte — Xtreme Gaming Engine: To configure and apply overclocking profiles.
-
TechPowerUp GPU-Z: To know key information about our graphic card and its maximum clocks, temperature, TDP and cap or throttling reasons.
-
Microsoft Excel or a free equivalent.
Instead of the Gigabyte utility you can use other overclocking tools like MSI Afterburner or EVGA Precission X. Just use the OC program you prefer.
GPU-Z must be open for registering all key data related with the applied OC profile while Heaven, Valley, FurMark and OCCT are running as stress tests.
With Excel we will create a worksheet where we will record all the relevant data for this overclocking process and with which we will identify the most stable OC level. Here is an empty but formatted spreadsheet sample you can use.
Process to identify our 24/7 Overclock
The full process consists of 3 main stages:
-
GPU Overclock (GPU OC)
-
Memory Overclock (Memory OC)
-
Games & 24/7 Overclock (Final)
B) First Stage — GPU Overclock
At this stage we will check the stability / performance of the different GPU OC profiles.
Please, follow the procedure below step by step:
-
Checking the factory profiles stability and its performance scores. This profiles are called Gaming Mode (stock) and OC Mode by Gigabyte. Ensure you through XGE that the default values of these two profiles are applied (by clicking Default or Apply button).

-
Set through XGE these common values for each of the following OC variables:
-
GPU Voltage: +0%
-
Power Limit: +11% (max)
-
Temperature Limit: -3 ºC (target: 80 ºC)
-
Memory Clock: +0% (stock)
-
FAN: Choose a suitable fan mode or set a custom fan curve. The fan mode or curve we set must keep GPU temperature below 70 Celsius degrees in any stressful condition.
Record all of these values in the spreadsheet for each OC profile.
3) Increase the stock GPU clock by 5% through XGE and then continue with 10 MHz increments per step. Note each increment in our spreadsheet.
4) At each OC level start by running the 3DMark Fire Strike Stress Test. This point is passed only if this stress test ends with a result of at least 97% in its Frame Stability Rate (FSR) AND without noticing artifacts during the test.
Recommendation: during this test look at the screen almost all the time to detect possible artifacts. Save the result / report that 3DMark gives you, take note of the maximum temperature shown in the chart and click the Compare Result Online button to get an extra online report. In the online report find the values for FSR, Core Clock and Memory Bus Clock.
In our worksheet we will write Yes / No in the column called Passed? and all previous data.
Follow this writing pattern:
5) If the OC profile seems stable in 3DMark continue by running Heaven for 30 minutes in loop mode with GPU-Z been opened. Take a look at the temperature and the maximum theoretical clocks shown by this program during the test to also confirm in this way that the OC profile has been applied.
Recommendation: Observe your screen repeatedly but only occasionally and for a few minutes to detect possible graphics errors.
We will close the program if we observe artifacts or if we exceed 30 minutes without seeing errors.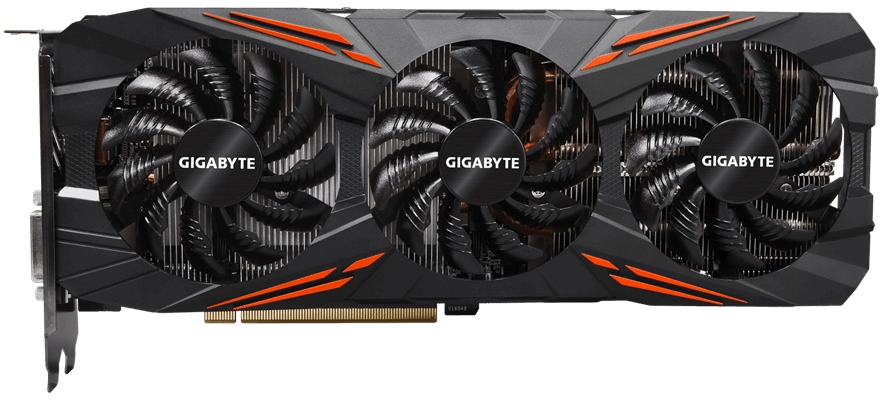
Whenever we exit to desktop due to artifacts or program / driver crashes or when the loop time end successfully, we will go to GPU-Z Sensors tab and we will register Max Core, Max Mem Clock and Max Temp values.
In our worksheet write Yes / No in the column called Stable? and all previous GPU-Z data.
6) If it seems stable in Heaven continue by running Valley for 30 minutes and do the same.
7) If it seems stable in Valley run FurMark for 1 hour and do the same.
8) If it seems stable in FurMark run OCCT for 30 minutes with Error Checking Off and do the same.
Common GPU OC Recommendation: Once you detect instability in any test do not continue testing with the remaining programs.
Common GPU OC Guidelines: Once instability is detected we must record it in the spreadsheet and we will not continue with the other programs, after that we will apply the immediately preceding stable GPU OC profile and we will re-check its stability. If it was stable we will stop and we will stay at this step. If it was not stable we will roll back a step further and we will check its stability again. We will proceed thus until we find a GPU OC level that is stable for sure.
Final first stage recommendation: For less risk you should reduce 4-5 MHz extra the maximum stable clock reached and then apply it.
Congratulations! At this point you will have identified the maximum stable GPU OC in stability tests of your GTX 1070 G1.
NOTE: The 24/7 GPU OC does not necessarily match with the maximum stable GPU OC in stability tests, since it will depend on the third stage of the process that involves intense and long gaming sessions (at least 2 hours) with your most demanding games.
C) Second Stage — Memory Overclock
Once our new maximum stable GPU OC is set, we will check the stability / performance of different Memory OC profiles.
Procedure:
-
Set through XGE these common values for each of the following OC variables:
Note all this values in your spreadsheet.
2) Increase the Memory Clock by 24-48 MHz per step using XGE (or by 12-24 MHz if you use MSI Afterburner) and then write it down in your Excel spreadsheet.
3) Run and observe the Fire Strike Stress Test running and register your data for each Memory OC profile.
4) If it was stable, continue with Heaven for 30 minutes with GPU-Z in the background and write all data down.
5) If it was stable, continue with Valley …
6) If it was stable, continue in the same way with the rest of programs.
Common Memory OC Guidelines: Once instability is detected we must record it in the spreadsheet and we will not continue with the other programs, then we will apply the immediately preceding stable Memory OC profile, we will re-check its stability and if it was stable we will stop and we will stay at this step. If it was not stable, we will roll back a step further and we will check its stability again. We proceed thus until we find a Memory OC level that is stable for sure.
Writing Guidelines: Same as in the previous stage.
7) Run 3DMark Fire Strike Benchmark for each stable Memory OC level. If the benchmark ends correctly and without seeing artifacts or unexpected crashes, note the overall score and the average frame rate in Graphic Test 1 and 2 and Physics and Combined tests.
Writing Note: Write in red the overall score when you observe any signs of instability.
8) Write in bold the overall scores which are better than those of the first stable Memory OC level and which are also and at the same time better in FPS 1, FPS 2 and FPS Combined partials scores (corresponding to those of the Fire Strike benchmarking tests that are sensitive to graphic overclocking).
Note: Sometimes we will check that although we raise the memory clock we get lower scores than a previous stable step.
Guideline: identify stable Memory OC levels with which the performance improves and between these stay with the one that give you the highest score.
9) Final Memory OC setting: Set through XGE the intermediate clock between the best and maximun stable Memory OC profile and the immediately preceding stable profile and test its performance with Fire Strike Benchmark.
Guidelines: If the benchmark finish successfully note the new profile and its scores, then check if the scores are better than the ones of the preceding best and maximum stable Memory OC profile. If there was an improvement stop the memory overclocking in that new profile and otherwise roll back to the best and maximum stable Memory OC profile.
Congratulations again! You have identified the maximum and best stable Memory OC profile in stability / performance tests for your GTX 1070 G1.
NOTE: The 24/7 Memory OC does not necessarily match with the maximum and best stable Memory OC in stability / performance tests, since it will depend on the third stage of the process that involves intense and long gaming sessions (at least 2 hours) with your most demanding games.
Personal Note: In my case the maximum and best stable OC profile in stability tests was also stable with Games, so if you have properly followed the steps of this two stages the same thing may happen to you.
D) Third Stage — Games & 24/7 Overclock
In this final stage we will check the stability of our maximum and best stable OC profile in stability tests through intense and long gaming sessions with demanding video games.
Setout: Install at least 4-5 demanding video games which together make it possible to check the stability under DX11, DX12, OpenGL and Vulkan APIs.
Procedure:
-
Apply through XGE your max stable GPU OC in stability tests and check clock frequencies with GPU-Z.
-
Test its stability in each game by 2 hours of uninterrupted play.
Guidelines: Run the game at least on its Ultra preset and look for artifacts or unexpected crashes. If there are not you can consider the profile stable and you can write it down in your spreadsheet but if there are errors you must reduce -5 MHz the GPU Clock and re-check stability. We will continue this way until we find an stable level.
For each game and each GPU OC profile add all the OC Settings in your spreadsheet and write down Yes / No in ‘Stable?’ column.
The maximum stable GPU OC in Games will be our 24/7 GPU OC.
3) With our 24/7 GPU OC been set, apply via XGE the max and best stable Memory OC in stability tests and check clocks with GPU-Z.
4) Test its stability in each video game by 2 hours of uninterrupted play and note the results.
Guidelines: Same as previous but if you notice errors lower -12 / -24 MHz (or -6 / -12 MHz if you use MSI Afterburner) the Memory Clock and re-test stability. We will continue this way until we reach stability.
For each game and each new Memory OC profile add all the OC settings in your spreadsheet and write down Yes / No in ‘Stable?’ column.
The maximum stable Memory OC in Games will be our 24/7 Memory OC.
We did it! The union of the maximum stable GPU OC and the maximum stable Memory OC in Games will be the desired 24/7 Overclock for our Gigabyte GeForce GTX 1070 G1 Gaming. Enjoy it!
Personal Final Note: Here is my 24/7 OC profile:
Please, use it ONLY as a reference. You should find your own 24/7 OC profile! Remember that all Systems and graphics cards (also those of the same model and subvendor) are physically different. These differences make the OC profiles not directly extrapolable. In fact, what was valid for me, does not have to be valid for you.
I hope you find this guide useful and do not hesitate to comment it!
GIGABYTE GTX 1080 G1 GAMING
It’s been over a month since the GTX 1080 launch and there’s not a single vendor that doesn’t have some OC version of the graphics card. There’s about eight I can think of at the top of my head and they are all leveraging the insanely high clock speeds of the GP104 silicon.
Initially, NVIDIA demonstrated a sample operating at 2.1GHz which of course gave enthusiasts and in particular extreme overclockers, high hopes for unprecedented clock speeds in the region of 2.8GHz and beyond. As we all know, that did not materialize and between the limited scaling with more voltage and the somewhat lack of comprehensive overclocking tools and BIOS modification software. There’s simply no case to be made for the GTX 1080 to extreme overclockers. Unless there’s a drastic change in the near future or some discovery on how to truly unlock the GTX 1080, it looks as if the GTX 980 TI remains the king of the hill. After all, it was just a couple of weeks ago that a new 3DMark Fire Strike Extreme record was recorded with GTX 980 TI GPUs. So hold on to those GPUs if competitive overclocking is your game. You just may have to wait for the TI successor which may only arrive in 2017.
It isn’t all doom and gloom however – in fact; the GTX 1080 offers exceptional value and unparalleled performance for gamers, easily besting all 980 TI cards, at least that is true for the G1 GAMING. It is meant to be a GTX 980 replacement, but it offers close to twice the performance in some instances courtesy of some tuning on NVIDIA’s part and a terribly efficient 16nm TSMC node. From a 180W TDP GPU (Founder’s Edition) we are recording performance that is not accessible by GPUs consuming twice as much power. This speaks volumes to the progress made in both manufacturing process and design decisions undertaken by NVIDIA.
That aside, one is not here to tell you about the technical merits of the PASCAL GPUs. This is about the GIGABYTE GTX 1080 G1 GAMING. A mouthful indeed but it is a graphics card worth your consideration especially given its comparatively low retail price, but high performance.
What seems to have occurred is that GIGABYTE has in some way moved away from the Windforce naming scheme and instead, re-dubbed those products as the G1 GAMING parts. Replacing the previous G1 Gaming graphics parts would be the Xtreme Gaming alternatives which are supposedly of the highest workmanship from GIGABYTE. I will examine a number of these in future, but for now it is the G1 GAMING that has my attention and I must admit that it is one impressive graphics card.
At its core is a straight forward design, slightly improving on what NVIDIA offers, but dialling in the GPU clocks to offer near peak performance out the box. There’s really not much for you as the end user to do but install the card and the Xtreme Gaming software should you so choose. Even without this utility, you will still experience the best performance money can buy. Whatever other GTX 1080 cards may offer, there isn’t a single one that can claim to offer tangible performance gains over what GIGABYTE has delivered here.
Performance and Benchmarks
With a measured clock speed as high as 1964MHz, that’s pretty much at the limit of what the GP104 silicon can deliver at present with the limitations NVIDA has built into both driver, BIOS and perhaps silicon as well.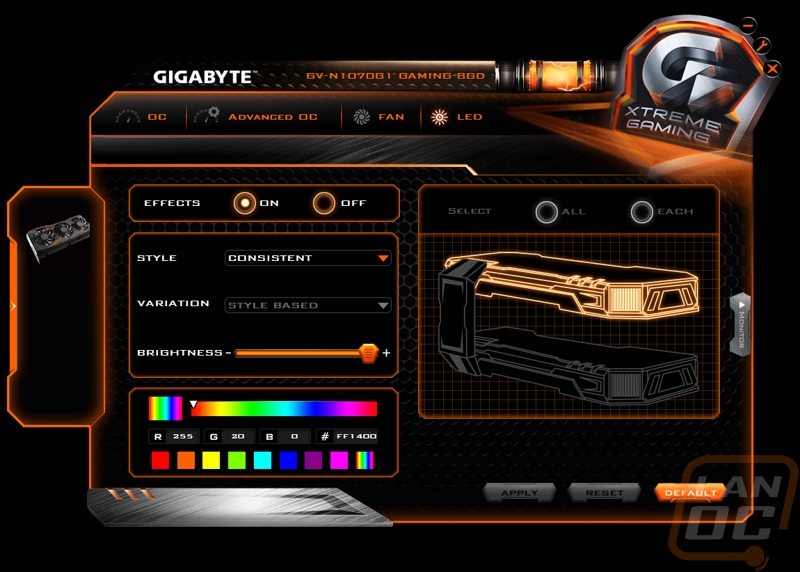 In my overclocking I was able to reach clocks as high as 2113MHz for 3DMark Fire Strike Ultra runs, but those are not game stable frequencies and as such, the results recorded are ones with the GPU at only 2030 to 2067MHz, a far more realistic target for normal and artefact free game operation. A GPU block from the likes of BitsPower or EKWB would likely allow one to extend that clock speed to the 2.1GHz mark, but as it is, the manual overclocking is not worth it given just how high the shipping clocks are to begin with.
In fact, I found that the performance differences between the out the box clocks and the OC mode were largely down to the memory clock differences. The G1 GAMING like all other G1 cards makes use of the MICRON GDDR5X chips which are rated at 10GHz. This particular sample was able to operate happily at 11.2GHz (1400MHz SDR). That boost in bandwidth seems to have let the GPU stretch it’s legs a bit and deliver a few frames more in both minimum and average frame rates.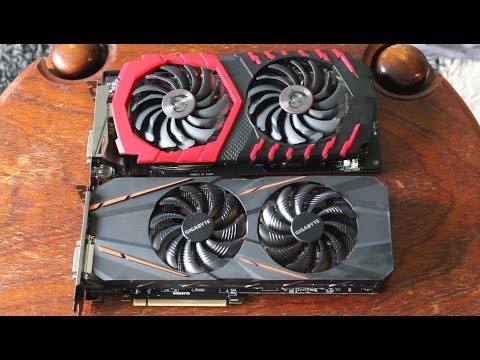 The graphics card which the G1 GAMING was matched up against was the EVGA GTX 980 TI K|NGP|N Edition which is undoubtedly the fastest GTX 980 TI on the market.
Test Configuration
- CPU : INTEL Core i7 6950X
- Memory : G.SKILL 16GB DDR4 3466MHz C16
- Motherboard: ASUS Rampage V 10 Edition (0801)
- Storage: Samsung PX941 512GB SSD
- OS: Windows 10 x64
- Driver: Forceware 386.39
First up is 2014’s Metro Last Light REDUX using the 4A Engine. It’s getting a bit long I the tooth, but does feature some modern rendering techniques and can bring even the most demanding graphics card to their knees, especially at 4K resolutions. The GTX 980 TI holds its own here, especially at the high resolutions, but the G1 still comes out ahead ultimately.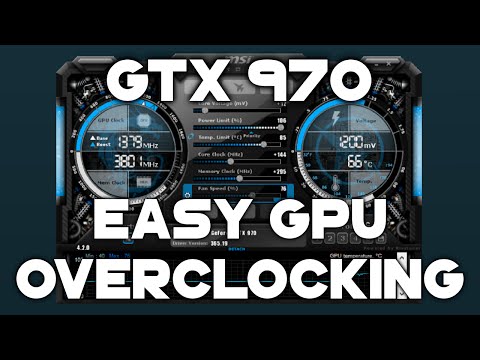
Next is BATMAN ARKHAM KNIGHT, this Unreal Engine 3 based game could have been the pinnacle of the franchise, but marred with so many issues on the PC. It became the epitome of what was wrong with so many sub-standard PC ports. Either way, it is a beautiful looking game that makes use of the latest rendering techniques. These results were recorded with full NVIDIA GameWorks features enabled. Again the G1 Gaming does well here, matching the overclocked GTX 980 TI out the box and beating it when overclocked at 4K. At every other resolution, it’s just outright superior.
Dragon Age Inquisition, was the last of the trilogy and by far the prettiest of the lot. Using the Frostbite 3 engine, it represents what many modern day games are capable of and is sometimes more demanding than many titles from 2016. There still isn’t a single GPU solution that is capable of cracking the 40fps barrier here at 4K but the overclocked G1 GAMING is proving a lot more playable than what the overclocked GTX 980 TI can provide. Again, at the other resolutions, the G1 GAMING runs away with it.
Using the highly scalable RAGE engine, GTA V is sometimes just incredible to look at, able to render vast distances and vistas with alarming detail and vistas. This game was highly taxing on GPUs prior to the 980 TI and of course the GeForce 10 series. It seems to have been tamed now, with frame rates well above 45fps for both the GTX 980 TI and the G1 GAMING. The GIGABYTE card offers exceptional performance even at 4K, making it an amazingly smooth experience.
The latest entry to this old franchise, is essentially a re-boot, hence, the “HITMAN” title. Built on the GLACIER ENGINE 2 it has support for DirectX12 and host of relevant ad related features. The game looks good, but does not represent anything that would otherwise not be possible with DirectX11 class hardware and performance between the two APIs is roughly the same. Either way, performance from the GTX 1080, is far ahead of what the mightiest GTX 980 TI of them all can deliver. Perhaps a nod to the fact that the GTX 1080 was built for the latest titles and beyond. The GTX 980 TI, even though superior on paper, just cannot keep up.
Built on the MADNESS Engine, Slightly Mad studio’s Project CARS was the poised to be the definitive racing simulator on the PC until ASSETTO CORSA (A title that we will switch to in future for testing). This game can look absolutely stunning in pictures, but not so much in motion. It isn’t poor by any stretch of the imagination, but a little bland visually especially compared to its modern day competitors such as FORZA motorsport APEX on the PC and of course ASSETTO CORSA. The 980 TI here puts in respectable numbers, but once again the G1 GAMING is just faster.
Rise Of The Tomb Raider is the final game, which like HITMAN supports DirectX12. Unfortunately for whatever reason, the DX12 performance is no faster than what is available when using DirectX11 and in some instances causes performance issues. Built on the Foundation Engine it features breath-taking visuals sometimes and is a great example of what is possible with game technology today. At 1080P the difference between the two cards is rather substantial but diminishes at the resolution is increased. Once again though the G1 GAMING is just superior.
Last is Synthetic tests. 3DMark and 3DMark 11. As soon as Timespy is released, we will be letting go of 3DMark11. It’s served us well, but it is old and it’s results are not as meaningful as they used to be.
It can’t be clearer than this, the GIGABYTE GTX 1080 G1 GAMING is hands down faster than the fastest GTX 980 TI money can buy. So hopefully that puts the matter to rest for those who may have still been wondering.
Design and Final Verdict
The electronic differences between the G1 GAMING and the Founders Edition card are not that many. Mainly it’s the use of an 8+2 Phase VRM, while still employing the same uP 9511P controller. Cooking is via a familiar Windforce 3X cooler that houses three heat pipes and three fans. The Heatpipes make contact with the GPU core directly which does help dissipate heat that much faster. As always, the cooling performance is impeccable and even though there are better, more exotic solutions out there. For the GP104 there’s not much more needed than what GIGABYTE has provided. The card remains cool even within a case. Should you wish to maintain those high boost clocks, simply set a minimum fan speed of 50% and you’re good to go. It’s hardly audible above the case fan noise and it keeps the GPU operating at reliable frequencies.
If there’s any concern one has about the G1 GAMING cooler or most GPU cooling solutions from GIGABYTE (and other vendors as well) is that it is a uniform single piece design. That isn’t necessarily undesirable, but given that this is a high end graphics card, there surely must be a way to have this as a two-piece assembly. The reason being that the GPU core cooler, should not I’d imagine be one part with the VRM and DRAM heatsink. Imagine if you will the system that EVGA uses on their high end KPE cards or that which MSI has on some of their high end parts as well. The VRM and DRAM are cooled by a single plate or heatsink, which can remain on the GPU even with the main cooler removed. This helps those with just GPU blocks for their liquid cooling systems. As it stands, if you remove the cooler, you will have to devise some other means of cooler the VRM and DRAM via small heatsinks, which are certainly not an ideal at all. Moreover, with an isolated GPU core heatsink assembly, there cooling capacity is further optimized as the bulk of the cooling capacity is concerned only with keeping the GPU cool and not burdened with the additional stress of cooling the VRM and other smaller components as well, which more often than not just need moving air. That isn’t a complaint, but perhaps something GIGABYTE could look at in the next generation of cards, as it would complement what is already a competent cooling system
The last thing that one should make mention of is the back plate, which is more for aesthetic purposes than anything else. It does aid in structural rigidity and cools some smaller components, but you’d be hard pressed to notice a difference in temperatures, with or without it. Having said that, it remains one of those things that you’d rather have than not. As gaming cards go then, it doesn’t get much better than this. It’s a straightforward solution that maximises what you can get from the GP104 Core at a more than reasonable price.
So there you have it, the GIGABYTE GTX 1080 G1 GAMING is faster than the fastest GTX 980 TI ever made. Is it worth upgrading if you own a highly overclocked GTX 980 TI? Probably not, but if you did, you’d get ever increasing performance as drivers mature. For those who own GTX 980 GPUs, this is a definite must have. It is significantly faster than your current GPU and will literally make setting previously unplayable butter smooth. Is it a 4K capable GPU? It’s close, really close. Overall, this is a great graphics card whichever way you look at it. For the going price, I see no reason to skip this one. Well deserving of the VALUE and HARDWARE AWARD
- Price: $649.99
- Homepage: www.gigabyte.com
- GPU: GP104
- Memory: 256-bit 8GiB GDDR5X @ 10GHz
- Base Frequency: 1695MHz Gaming Mode / 1721MHz OC Mode
- Outputs: HDMI 2.0b / DisplayPort 1.4 x3 (Max displays 4)
- Dimensions: 286mm x 115mm x 42mm
Tags: G1 Gaming, GIGABYTE, GTX 1080, GTX 980 TI vs 1080
RX 400 — Overclocking (firmware) RX 470 4Gb Gigabyte G1 Gaming
pavlich
Own person
-
-
#one
I flashed the cards, timings from 1500, they work extremely unstable, then 27. 7, then 17, then generally 3 mx. The question is, in AB there is no power limit slider, instead of it there is some kind of shader clock that is blocked. What am I doing wrong?
Last edit:
abundante
Own person
-
-
#2
pavlich said:
I flashed the cards, timings from 1500, they work extremely unstable, then 27.
7, then 17, then generally 3 mx. The question is, in AB there is no power limit slider, instead of it there is some kind of shader clock that is blocked. What am I doing wrong?View attachment 6509
Click to expand…
Shay for 1750. I have the same ones, for 1500 they even got artifacts in stock. Memory samsung
pavlich
Own person
-
-
#3
Memory hynix for all, also 1750 to sew up?
mainer_spb
Own person
-
-
#four
Slider — rummage around in the AB settings.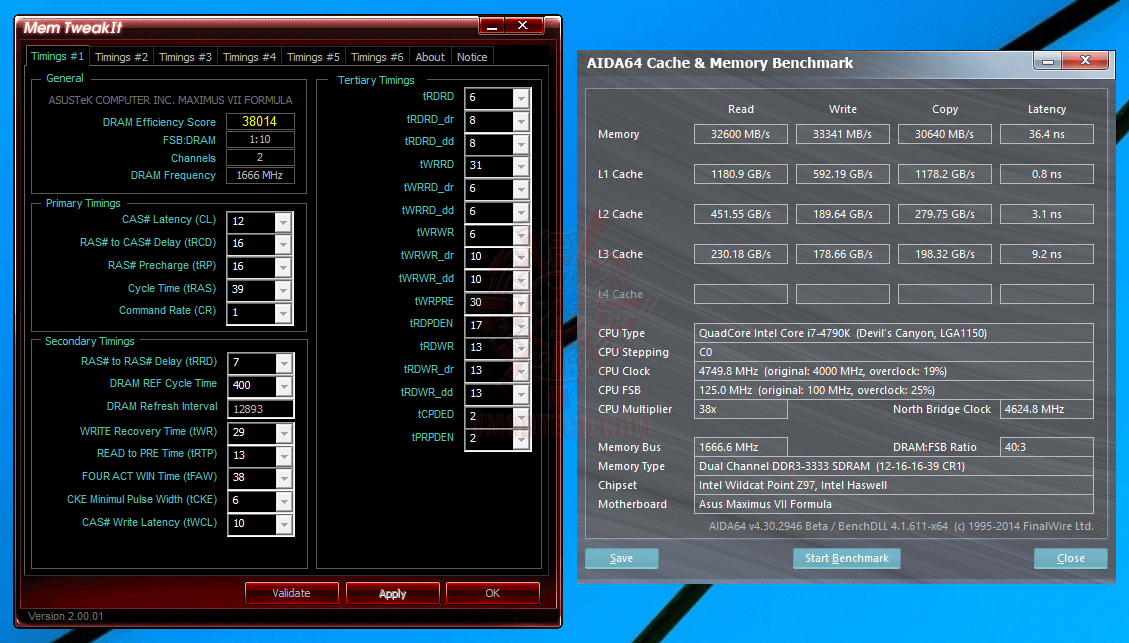
What kind of memory? Hynix — there is 1500, the limit is -96, the core is 1120, the memory is 2015 (for someone else it comes in), gives: 28.5 air + 500 decred.
The hashes jump on the pool, the miner does not swear — about the same stability.
Synchronizers 80r — piece, wholesale.
MaJIau
Knowledgeable
-
-
#5
Change the skin of AB, there will be a turn limit.
pavlich
Own person
-
-
#6
mainer_spb said:
Slider — rummage in the AB settings.
What kind of memory? Hynix — there is 1500, the limit is -96, the core is 1120, the memory is 2015 (for someone else it comes in), gives: 28.5 air + 500 decred.Click to expand…
Memory hynix, -96 does not pull, it is cut down almost immediately.
Maybe I asked it crookedly ???
cryptonoob
Experienced
-
-
#7
pavlich said:
Memory hynix, -96 does not pull, it is cut down almost immediately.
Maybe I asked it crookedly ???Click to expand.
..
Pulls. Possibly depends on the card
slashoker
Own person
-
-
#eight
pavlich said:
Memory hynix, -96 does not pull, it is cut down almost immediately.
Maybe I asked it crookedly ???Click to expand…
3 huniks -96 at 1070/2050 20.8/400 song!
azazel666
Guest
-
-
#9
pavlich said:
I flashed the cards, timings from 1500, they work extremely unstable, then 27.
7, then 17, then generally 3 mx. The question is, in AB there is no power limit slider, instead of it there is some kind of shader clock that is blocked. What am I doing wrong?View attachment 6509View attachment 6511
Click to expand…
Change the screen, the limit will appear. And when it appears, add it. And there will be stability.
Andreas
Own person
-
-
#ten
I also suffered for a couple of days with 3 cards (Gigabyte G1),
2 cards with Hynix and one Samsung, in the end it turned out like this: Samsung 28-29 ether, Hynix 24-25 ether.
Samsung — 1100/2000, 950 mV, Temperature 76, socket 70-75 Watt
both Hynix — 1100/1900, 950 mV. Temperature 70, from a socket 60-65 Watt
I tried it in dual, it seems that it only comes from a socket up to 100 Watt cha nut,
The miner found a little boy,
He put it in the socket, and he went to sleep,
Sparks fell, the hut broke out,
The wiring there was rather weak.
Andreas
Own person
-
-
#eleven
Timing on all 1750
The miner found a little boy,
He put it in the socket, and he went to sleep,
Sparks fell, the hut broke out,
The wiring there was rather weak.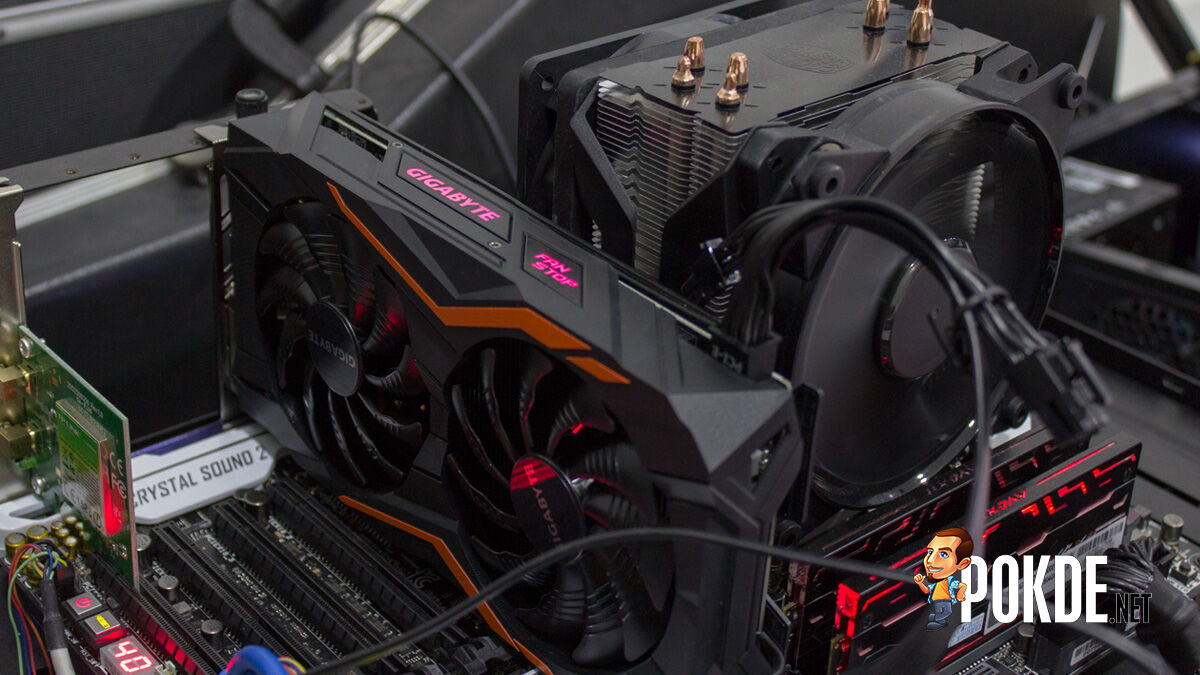
azazel666
Guest
-
-
#12
2 pieces Gigabyte G1. Both hunix. 1500 timings.
1120/2040. solo 29.3 air.
970 mV. 57-59 watts zhor on AB from the card, 306-310 watts from both sockets.
Temp. 55-59 degrees. 60% turntables.
Andreas
Own person
-
-
#13
yes.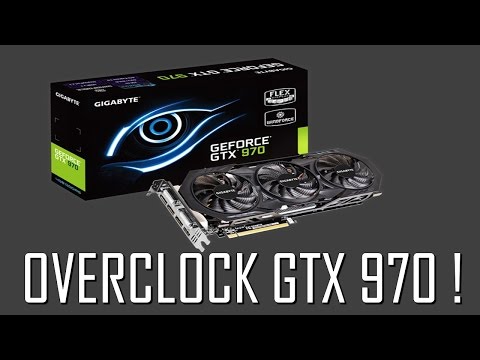 ..i will try tomorrow
The miner found a little boy,
He put it in the socket, and he went to sleep,
Sparks fell, the hut broke out,
The wiring there was rather weak.
Coroller
Forum friend
-
-
#fourteen
slashoker said:
3 huniks -96 at 1070/2050 20.8/400 song!
Click to expand…
20.8? No error? And then the song suggests itself «Evening bells»
Bitcoin life matter!
azazel666
Guest
-
-
#fifteen
Coroller said:
20.
8? No error? And then the song suggests itself «Evening bells»
Click to expand …
Should not. 1070 core is the answer.
azazel666
Guest
-
-
#16
pavlich said:
Memory hynix at all, also 1750 to sew up?
Click to expand…
Khuniks for 1500 sew.
Coroller
Forum friend
-
-
#17
azazel666 said:
Should not.
1070 core is the answer.
Click to expand…
I mean, why such an «overclocking» when cards in the drain give out more than these 20.8?
Bitcoin life matter!
mainer_spb
Own person
-
-
#eighteen
People and when they bought it, I was in January 2017 (I repeat Khuniks), maybe they are leftists on new ones ??
Synchronizers 80r — piece, wholesale.
sergic
Experienced
-
-
#19
Andreas said:
I also suffered for a couple of days with 3 cards (Gigabyte G1),
2 cards with Hynix and one Samsung, in the end it turned out like this: Samsung 28-29ether, Hynix 24-25 ether.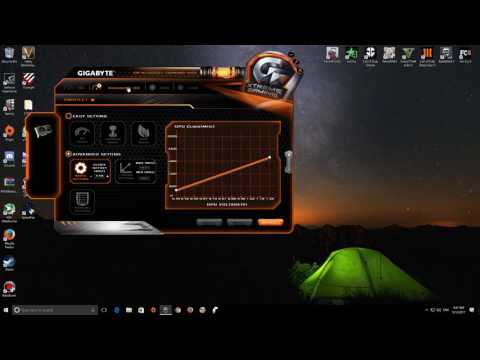
Samsung — 1100/2000, 950 mV, Temperature 76, socket 70-75 Watt
both Hynix — 1100/1900, 950 mV. Temperature 70, from a socket 60-65 WattI tried it in a dual, it seems that it only comes from a socket up to 100 Watt
Click to expand…
I myself came up with the idea that in the dual they eat 100 from the socket — did you look in the program? ))) Didn’t forget about the raiser — throw another 60 for each? And then a miracle turns out))))
Pelalum
Experienced
-
-
#twenty
4 gigs, memory of Hunix, took in January 2017, came in mid-February. Without dancing with tambourines, I flashed each with 1500 timings.
Tweaked such settings. Above 2030 — work is not stable.
— dcri 32
GIGABYTE GeForce® GTX 980 and GTX 970 G1 Gaming Series Graphics Cards
GIGABYTE, the world’s leading gaming hardware manufacturer, today announced the release of the GV-N980G1 GAMING-4GD and GV-N970G1 GAMING-4GD, two new graphics cards from the G1 Gaming series. new generation G1 Gaming. Both graphics cards are powered by the Maxwell-architecture GeForce® GTX 980 and GTX 970 GPUs and feature GIGABYTE’s innovative technologies to outperform the reference cards. Next-Generation G1 Gaming Graphics Card Series Equipped with Original Flex Display and Super Overclocking Technologies Specially Designed for Enthusiast Gamers
GIGABYTE G1 Gaming Series Graphics Cards are designed to excel in achieving amazing graphics experiences for enthusiast gamers . With GPU Gauntlet Selection Technology, graphics cards are crafted using only the best GPU cores to deliver the best overclocking performance.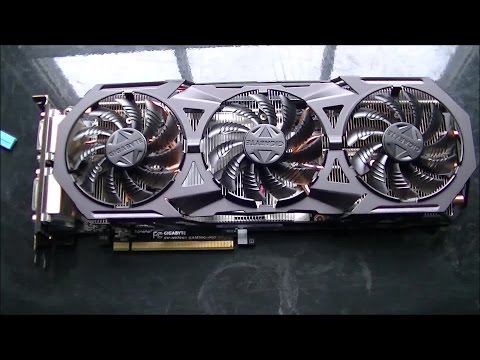 Equipped with the award-winning WINDFORCE cooling system and innovative Flex Display technology, the G1 Gaming series graphics cards deliver incredibly fast and quiet performance without overheating and flexible multi-display connectivity.
G1 Gaming graphics cards are the ideal solution for performance, thermals and display connectivity that gamers are looking for to maximize their gaming experience.
WINDFORCE 3X Cooling System
Both G1 Gaming series graphics cards are equipped with the WINDFORCE 3X Cooling System. Thanks to the unique screw design, the airflow splits and moves smoothly through the heatsink. This design effectively increases airflow by 23% while reducing turbulence.
The cooling capabilities of the GV-N980G1 GAMING-4GD are based on the WINDFORCE 600W cooling system, which occupies only two slots. Featuring GIGABYTE’s patented Triangle Cool technology and custom heatsink architecture, the WINDFORCE 600W cooling system delivers up to 35% better cooling performance than traditional heatsinks for an efficient and quiet gaming experience.
Flex Display Technology
GIGABYTE continues to advance its multi-display connectivity with Flex Display Technology, which provides support for two DVI ports in addition to 3 DisplayPort ports and 1 HDMI port. This patent-pending technology from GIGABYTE offers gamers more flexible display options than reference cards.
Whether someone wants to build a 2-monitor DVI gaming machine or enjoy 4K 360-degree viewing by connecting multiple monitors to their graphics card via DisplayPort, G1 Gaming graphics cards are capable of satisfying a variety of needs.
Gauntlet™ GPU Selection Technology
With the best GPU Gauntlet™ selection technology, GIGABYTE G1 Gaming series graphics cards provide the best power efficiency and lowest power consumption. Only the most reliable processors can pass a rigorous selection to be used in G1 Gaming graphics cards and fully meet the expectations of enthusiastic gamers and extreme overclockers.
Extensive features make the G1 series perfect
GIGABYTE OC GURU II offers gamers unlimited overclocking options with a user-friendly interface.