JIT Companies — Engraved Metal & Paint Filling the Easy Way
9th August 2018 |
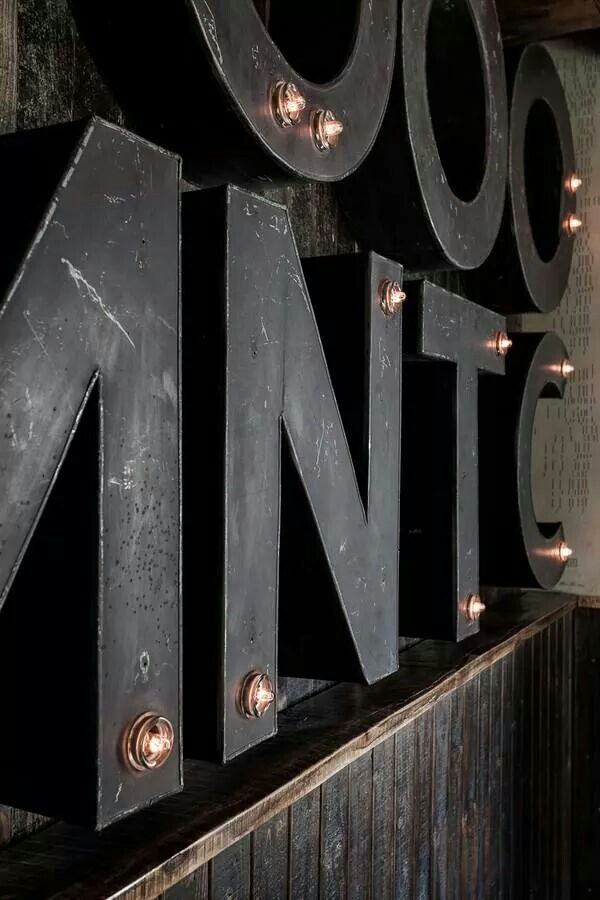
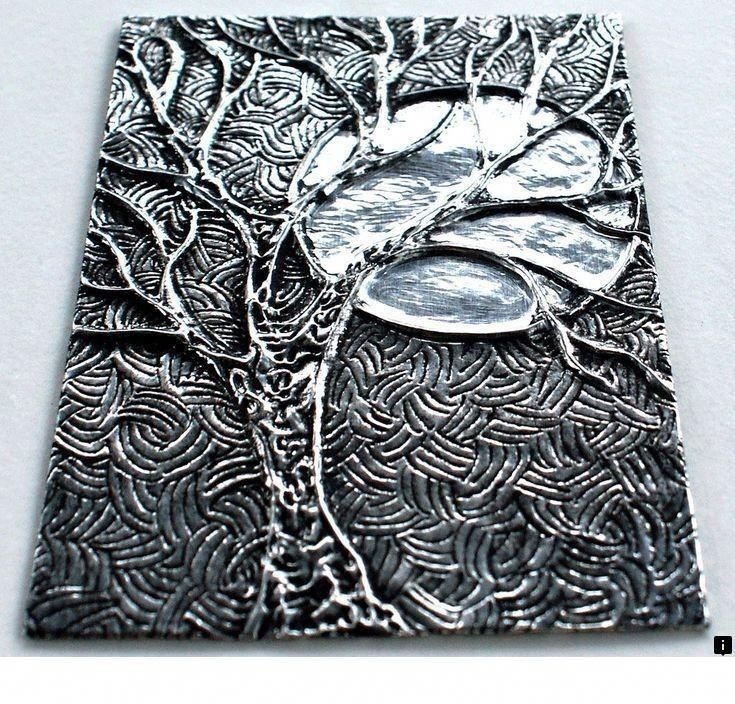
Fully engraved and painted aluminum surface
Most sign shops that offer engraving on special substrates have it figured out already, so let’s move on to another challenge – engraved metal & paint filling. In this case, how do you process a large metal panel that has a ton of small and large text that will not fit the working envelope of your equipment? Or if you can do it, how do you mask it off for paint filling after it is engraved? Many projects we work on incorporate a variety of metals such as aluminum, bronze and stainless steel and usually the metal surface is in its raw form with a mill finish. The final finished surface is sometimes an afterthought for some.
If you’ve tried paint filling individual letters by hand with an eyedropper and needle and end up with a perfect result, well then you are a true master. Unfortunately, some of us are not that talented nor have the time. Many are set up to handle the engraving and spray painting, but on the metal finishing side, it’s another story. This is when you hit the proverbial “Brick Wall” because, without the proper equipment, it is going to be nearly impossible to achieve a perfectly brushed surface finish.
Engraved Metal & Paint Filling – the JIT Companies Way
The beginning of paint removal and directional brushing
So what’s the easy way you ask? This is how you do it. First, pick your metal of choice depending on what the project calls for. If you have the ability to engrave, we suggest a minimum depth of .025” for paint filling. Deeper is always better depending on the material thickness. If tooling marks are an issue after engraving, use a sandblaster with 150 grit silicon carbide or aluminum oxide to remove them. This will also give the surface more tooth for the paint to adhere to and prevent tool marks from telegraphing through the paint finish. You can then paint the panel surface but use a 2-part catalyzed paint. Matthews paint is usually the standard for this. Do not use a rattle can paint as this does not harden like a 2-part and gets soft due to heat buildup during metal finishing causing other issues. There is no need to be concerned about masking any of the text as this is addressed in the next step.
“If you have the ability to engrave, we suggest a minimum depth of .025” for paint filling. Deeper is always better depending on the material thickness.”
Metal Artisans at JIT Companies
Final #4 Brushed Finish
Once the panels are painted and fully cured, the next step is wide belt finishing. This equipment is referred to as a stroke sander and it takes a very talented operator to handle this final step of the project. If this equipment is not available to you, don’t worry. JIT can help you get this done in record time. Just send your material to JIT and have one of our talented Metal Artisans put the finishing touches on it for you.
If you have questions or need assistance with your next engraving project, let JIT help you bust through that “Brick Wall” and on to the finish line. Contact us at 952-777-0022 – You’ll be glad you did!
Filed under: Metal Finishing
Tags: engraved metal, paint filling
- Latest News
- Testimonials
- Downloads
-
Confused about Metal Finishing Processes?
At JIT Companies we will bring clarity and a gleam to your eye when it comes to answering your questions about the perfect metal finish you are seeking. Our customers have been asking for what many think is the impossible finish, so we have answered by expanding operations to now include High Energy Centrifuge Polishing… Read more »
26th September 2022 | JIT Companies
Read More
-
JIT is the Clear Solution in Custom Sized Glass Lenses
Need new glass lenses? Your eye doctor is not the only place you can go to get your lenses replaced, especially when it’s not related to your eyeglasses.
 At JIT Companies, we specialize in making custom sized glass lenses for optical equipment, instrumentation gauges, viewing ports, light fixtures and a variety of other applications found… Read more »
19th August 2022 | JIT Companies
Read More
“JIT plays an integral part in my role as a public artist. I have had the wonderful opportunity to interact with every team member at JIT over the last 10 years. Quick turn around time, excellent customer service, and very fair pricing. They pay close attention to detail and exceed my expectations each and every time. They have helped me grow my business with their unique glass lamination services.”
By: Allison Luedtke
“Great organization. Chris was great to work with and was attentive to detail on a very involved glass engraving project. Prompt and responsive service and top quality product. Highly recommended!”
By: Greg Schwartz
“Our company has done a few projects with them and its usually something that needs a very quick turn around. They have handled the timelines perfectly and have been very easy to deal with. We would recommend them without hesitation!”
By: Jeremy Hegle
“JIT has done great work for us! They are my go-to when I need a quick turn on anything that can be waterjet cut. The team at JIT are a pleasure to do business with.”
By: Spencer Quart
«A very communicative team that responds quickly to order requests. Variety of manufacturing and pricing options, quick to respond to new design implementation.»
By: Tom Keen
<< Previous
Next >>
© 2022 JIT Companies. All Rights Reserved. · Privacy Policy · Member of:
Back To Top
CNC Machining | How to colour fill engraved text? | Practical Machinist
KristianSilva
Aluminum
-
-
#1
Hi all,
Please see the picture attached of some ID jaws im machining to grip a casting.
Im engraving the jig-fixture number on top of the jaws so that the operator can identify the easily, the only problem is when I have done this in the past the writing doesn’t stand out clearly. I was wanting to fill the engraving in with some form of paint or something and then skim across the top face of the jaws to remove any excess paint and leave bold black text behind.
Has anyone done this before? If yes, what did you use to fill in the engraving? I want something hard wearing that isnt going to come off with coolant. Hope this makes sense.
Kristian
adama
Diamond
-
-
#2
Not sure how it would hold upto coolant, but if the engraving is deep enough, i just use a humble paint marker pen, do it quick and wipe the excess off, done it both in engraved and stamped txt and it really makes it POP out at you. key thing is having some depth to the engraveing, not just a scratch, you want like 20 ish thou in my experience so the paints got some were to hide, 5-10 thou and it does not last anything like as well with just handling. Gotta remember, this is not a fine pocket watch dial, this is industrial sht that tends to get knocked about and slid around a bit and enough depth keeps it there.
Karl_T
Cast Iron
-
-
#3
I do firearms with those itty bitty paint jars you get for model airplanes. Brush it on, wipe top surface clean. Works a treat.
Red James
Stainless
-
-
#4
Check out McMaster
Paint Crayons for Recessed Characters
Rub the crayon over engraved or stamped characters to make them stand out. Paint completely fills crevices and dries with a luster. These paint crayons work well even on dirty, rusty, and oily surfaces.
Stroke
Wd., mm Drying
Time, hrs. For
Use On Application
Temp. Range, °F Specifications Met Choose a Color Each
Extra Bold
9.5 24 Metal -50° to 150° Fed. Spec. TT-F-325a, MIL-STD-171
Black, Red, White, Yellow
2018T3 $2.62
KristianSilva
Aluminum
-
-
#5
Red James said:
Check out McMaster
Paint Crayons for Recessed CharactersRub the crayon over engraved or stamped characters to make them stand out. Paint completely fills crevices and dries with a luster. These paint crayons work well even on dirty, rusty, and oily surfaces.
Stroke
Wd., mm Drying
Time, hrs. For
Use On Application
Temp. Range, °F Specifications Met Choose a Color Each
Extra Bold
9.5 24 Metal -50° to 150° Fed. Spec. TT-F-325a, MIL-STD-171
Black, Red, White, Yellow
2018T3 $2.62Click to expand…
Knew I could rely on this forum for an answer! Cheers guys, im not in the US so will try and find and equivalent to the items you mentioned on McMaster.
Could you provide a link?
Thanks!
cameraman
Diamond
-
-
#6
Red James said:
Check out McMaster
Paint Crayons for Recessed CharactersRub the crayon over engraved or stamped characters to make them stand out.
is used a lot for letters and numbers on lens / lens barrels even cinematic lenses / primes etc.
Surprisingly seems to hold up for years really. And if its fading you can re-crayon it.
NAST555
Stainless
#7
I think those Paint crayons are the same as the one’s they use to fill in engraving on golf clubs.
Maybe searching for that will lead you in the right direction?
adama
Diamond
#8
Sakura Yellow Solidified Paint Permanent Marker | Pens & Pencils | Screwfix.
com
here you go
Whysosharp
Cast Iron
#9
Engrave it deep mix some epoxy with black dye in it and let it set buzz the top off and your done if you don’t ever want it to come off
EmanuelGoldstein
Diamond
#10
There’s also those little ECM marking kits that work really well.
They aren’t expensive and the lettering holds up really well. Some customers in the engine business used to mark their parts with those, lasted for years in hot engines. A litle easier to do, too.
DDoug
Diamond
#11
Whysosharp said:
Engrave it deep mix some epoxy with black dye in it and let it set buzz the top off and your done if you don’t ever want it to come off
Click to expand…
Yup, I would add, to sandblast the whole surface, thereby adding tooth
in the engraved channels, for more grip.Belt sand or grind off top when hard.
rons
Diamond
#12
Etch the surface below grade. Then fill with any two-part automotive paint. Without heat the curing time may be as much as one week.
doug925
Titanium
#13
@ Red James,
I don’t need any now, but darn sure ordered some for next need.
Thanks!!!!!
Wlodek
Aluminum
#14
The standard material is a liquid paint fill and sold by engraving supplies, for example:
Paint Fill, Markers and Oxidizers | Engraving Supplies | Engraving | Johnson Plastics Plus
The crayons do work, but the fill is not as good as with the paint fill — it is softer, it tends to crumble and gets easily discoloured through contamination.
And depending on the fixture material chemical colouring might work better.
EnderDRM
Aluminum
#15
Although all of these marking solutions sound good,they are jaws.
How much do you want to spend just to mark jaws?
If the engraving is unreadable, just use a bigger tip on the engraving tool.
Conrad Hoffman
Titanium
#16
This is the brand I’m familiar with- Lacquer-Stik — Pack of 12 – http://markal.com/
Kyle Smith
Stainless
#17
EnderDRM said:
Although all of these marking solutions sound good,they are jaws.
How much do you want to spend just to mark jaws?
If the engraving is unreadable, just use a bigger tip on the engraving tool.Click to expand…
My motto has always been; If it’s worth doing, it’s worth overdoing.
KristianSilva
Aluminum
#18
adama said:
Sakura Yellow Solidified Paint Permanent Marker | Pens & Pencils | Screwfix.com
here you goClick to expand.
..
Cheers, im ordering one now! I like the epoxy idea but sounds a bit messy for my liking
Rewt
Hot Rolled
#19
We always used Loctite Black Max superglue. It doesn’t come off.
crij
Cast Iron
#20
Just raid the nearest kid’s Crayola box.
For better results warm the part where is it warm to the touch, but you can still hold it in your bare hand for the count of 10. Rub the crayon into the grooves and polish smooth with a rag.
Last I heard the McMaster stuff is basically the same compound, tinted wax, maybe softened with a solvent to make application easier. Try to put the engraving on the side that will receive the least direct coolant spray to maximize life.
Paint/color filling etched metals
Where the world gathers for
plating, anodizing, & finishing Q&As since 1989(——)
An ongoing discussion beginning back in 1998 …
1998
Q. Hi metal finishers,
Let me «paint» this picture. We etch most metals to create architectural nameplates or equipment ID plates. We are using dry film for deeper etching and we have to introduce color(s) in the etched areas.
We currently strip the plate and then spray the color(s)for the in-fill and then tediously sand the plate’s face to remove paint from the surface. There has to be an easier way! Is there a stripper that will undermine the paint covered resist and not affect the paint if-fill? Should we try to strip the resist before the paint fully cures? Should we use a special paint that will stick to the metal but not to the resist? I’ve seen other etched products with beautiful fills but we haven’t found the right procedure. Sometimes I feel we’re «painting ourselves into a corner»! Any thoughts? Thank you in advance.
Mike Dywan
— Phoenix, Arizona
1998
A. Just an idea:
Depending on what you have for a resist and what you have for paint, there may be a temperature rating difference. In case of thermal photolaminates, the resist becomes quite soft, even liquid, around 150-200 deg. It may be possible to let the paint dry, heat the work, and skim off the unwanted paint along with the resist.
The remaining resist residue should be exposed well enough to remove with its normal stripper, as long as it’s compatible with the paint.
Danny Miller
A. Hi, Mike. As long as you’ve put resist on the surface for your etching anyway, why not electrophretically lacquer the etched lettering? This electropaint won’t stick to the resist, so you can easily strip it since it won’t be covered with paint.
Regards,
Ted Mooney, P.E.
Striving to live Aloha
finishing.com — Pine Beach, New Jersey
2003
Q. I am working on a job that requires me to fill engraved letters with paint. In the past, 1960’s and 70’s when I worked in Phila., we would fill the letters using what we called «Lacquer Sticks» which were like a crayon that you would scrape across the engraved letters and wipe off the excess, then let it dry. I have visited different paint stores and hardware stores, but no one knows what I’m talking about.
Does anyone know if they exist anymore and if they do how can I acquire some?
Bill Gladwin
Defense Supply Center Richmond — Richmond, Virginia, USA
2005
Q. I’d like to know the most effective way to fill the background of an etched sheet of stainless steel nameplates with enamel, leaving the areas coated with blue resist a natural color. Does anyone have any idea as to which products are most commonly used, and what techniques? thanks in advance.
Ron Arbogast
associated printers — Pennsville, New Jersey
black Lacquer fill-in stick
Affiliate Link
(your purchases make finishing.com possible)2003
A. Drop into your local bowling alley and ask where to get a bowling ball engraved. Lacquer sticks are used to fill the lettering.
Tom Gallant
— Long Beach, California, USA
2003
A.
You might look into «paint Markers» These are like giant ballpoint pens that have paint instead of ink. Sold in many industrial supply stores. Look at Grainger. We used syringes because we had to use mil spec paint. This is slow!
James Watts
— Navarre, Florida
2004
A. Try EFD Precision Dispensers in Rhode Island. They have variety of such instruments to help you out.
Stephen Lee
CONNELL PROCESSING, INC. — Burbank, California
March 18, 2014
A. I also used to do paint fill in panels w/ engraved lettering. I used a device similar to an air brush, but no air. I did an internet search and found what I was looking for. Here is the link:
www.bellcoinc.com/shopsite_sc/page2.html
I think this will do the trick.grant ripley
— seattle, Washington usa
Hi Stepgen, Hi Grant.
Thanks!
Update July 2020
But readers, this site has been on the air since 1989 as a BBS before the internet, and as times changed, we’ve had to. We can no longer post brand or sourcing suggestions, for a number of reasons (why?). If you think your mailbox overflows with spam, imagine a public forum with 60,000 topics in this age of spambots: hundreds of attempts to post ads in this forum every day, and impossible to discern actual satisfied users from people paid to post.
Also, we’re trying to consolidate this 30+ years of effort into a permanent reference, whereas 99% of links break in a year or two 🙂Luck & Regards,
Ted Mooney, P.E. RET
Striving to live Aloha
finishing.com — Pine Beach, New Jersey
2006
Q. Please help point me in the correct direction as to where I can learn how to «etch and fill» (on the high end) or simply produce metal nameplates.
I would like to learn this for my business.
Thank you for your help.Mark Adler
Screen Printer — industrial label printer — Saint Louis, Missouri
A. Hi Mark. This page covers the «fill» portion of your question. The etching depends upon what material the nameplate is made of (aluminum, stainless steel, brass).
The following pages should be helpful:Thread 14847, «Safe acid etching of aluminum»
Thread 22035, «Need a replacement process for etching aluminum»
Thread 40756, «Laser etching of anodized aluminum»
Thread 45834, «How to print patterns onto Anodized Aluminum»Luck & Regards,
Ted Mooney, P.E.
Striving to live Aloha
finishing.com — Pine Beach, New Jersey
Fast coloring process for SS etched data name plates
March 30, 2014
Q. Hello everyone,
We’re into manufacturing of industrial data name plates, as we’re new to the field, experiencing issues with color filling etched areas with single color & multicolor.

We used oil paints and NC auto paints but later excess paint scrubbing takes a lot of time and consumes labor. Is there any process for faster color filling?
Kindly reply with best working results.Regards
Avinash M Belavade
Artistic electroplating of an engraved recessed area
March 5, 2018
Q. If I cut a picture into a sheet of either stainless steel or aluminum would there be a way to electroplate the cuts to produce a sheet of metal with a picture inlaid of a different metal, for example aluminum sheet with bird outline cut in it then cuts filled with copper, then polish to have copper bird picture in the sheet?
Brandon Herman
— Kissimmee,Florida,usa
March 2018
A. Hi Brandon. This sounds like no particular problem. Just mask the non-engraved area, do the plating, and remove the masking.
There is the practical problem, of course, of either acquiring sufficient experience to do it yourself, or finding a shop willing to do it.
Both stainless steel and aluminum require somewhat specialized pretreatment before plating, so it would be easier to, for example, nickel plate an engraving in a brass or copper plate. Good luck.
Regards,
Ted Mooney, P.E. RET
Striving to live Aloha
finishing.com — Pine Beach, New Jersey
March 6, 2018
A. Hi Brandon
You will find it easier to mask the surface first and engrave through the mask. Touch up any scratches in the mask and then plate. Masking after engraving inevitably ends up with maskant in the etched areas where it is difficult to remove.
This is standard practice for making metal name plates and printed circuits.
If you use photoresist or screen printing to apply the design, you can etch the substrate instead of engraving.
Geoff Smith
Hampshire, England
March 2018
A. Excellent point Geoff!
Regards,
Ted Mooney, P.E. RET
Striving to live Aloha
finishing.com — Pine Beach, New Jersey
March 11, 2018
Thank you for your help
Brandon Herman [returning]
— Kissimmee Florida usaQ, A, or Comment on THIS thread -or-
Start a NEW ThreadDisclaimer: It’s not possible to fully diagnose a finishing problem or the hazards of an operation via these pages. All information presented is for general reference and does not represent a professional opinion nor the policy of an author’s employer. The internet is largely anonymous & unvetted; some names may be fictitious and some recommendations might be harmful.
If you are seeking a product or service related to metal finishing, please check these Directories:
About/Contact — Privacy Policy — ©1995-2022 finishing.
com, Pine Beach, New Jersey, USA
Stainless steel letters: advantages and types of backlights
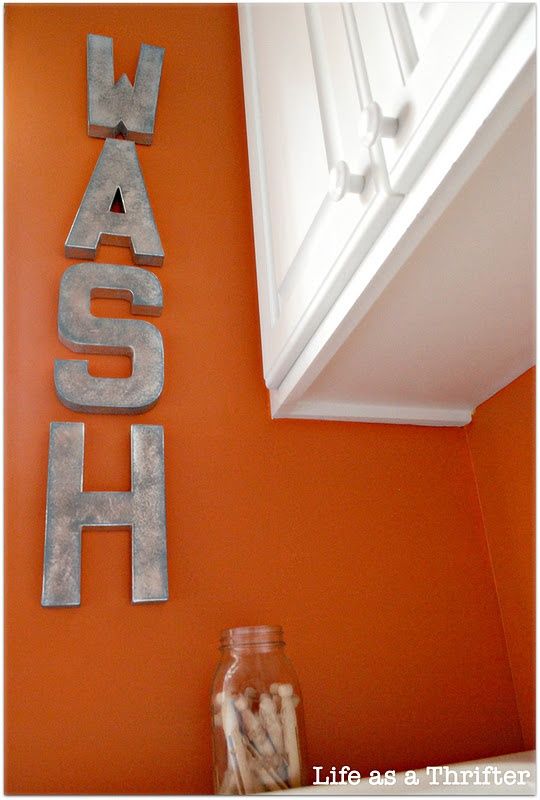
Metal is the embodiment of reliability and durability. Stainless steel outdoor advertising will last a long time without losing its appearance. At the same time, sign care is minimized. Volumetric letters made of metal are used for both interior and facade signs.
Stainless steel letters: what is it?
Stainless steel is regarded as one of the spectacular materials for outdoor signage. Signs from «stainless steel» are made of flat or three-dimensional letters.
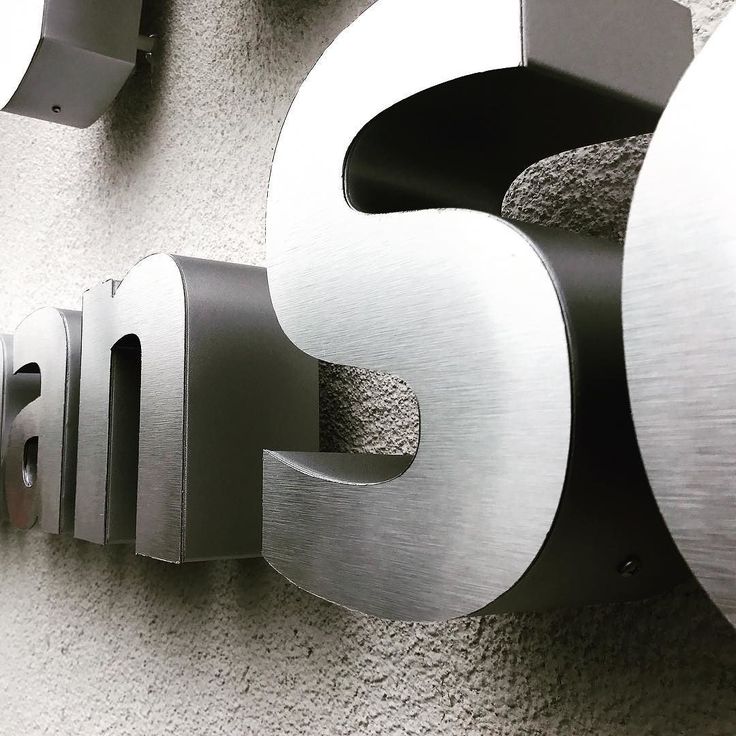
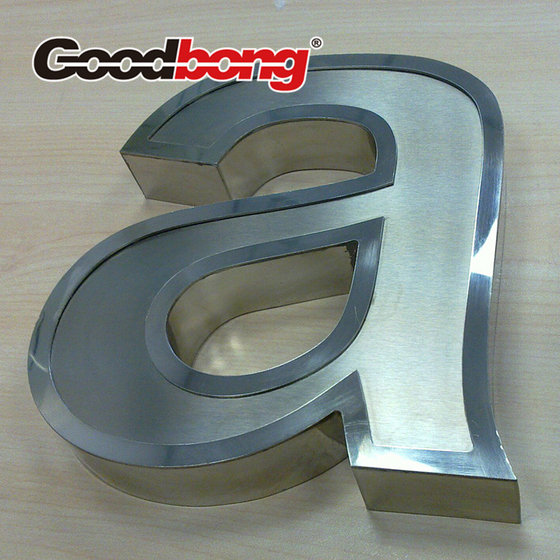
The surface of the stainless steel letters is available in «gold», «silver» or powder coated in RAL colors. The volume of the metal sign is given by the side parts welded by laser to the front side.
In a normal environment, metal 3D letters do not corrode, but if the sign is located near the roadway, it may become stained due to reagents and chemicals.
The front side of the metal sign can be illuminated. Light elements are installed inside the sign, and the «face» is made of light-scattering acrylic.
Manufactured from 0.5 to 1.5 m thick stainless steel sheet m, which guarantees structural strength. In order for the metal sign to not lose its appearance, take care of it. To do this, it is enough to regularly wash with a clean cloth without the use of chemicals.
Benefits of metal letters
Appearance
Three-dimensional stainless steel letters are associated with the solidity of the company. The texture and shine emphasize the high image. PVC letters no longer evoke emotions and admiring glances of passers-by and customers. Whereas a stainless steel sign will attract customers due to its uniqueness. Most street signs are made of plastic and do not stand out from each other. Volumetric stainless letters are a premium segment product with utilitarian properties.
Weather resistant
Stainless steel not only impresses with its beauty and refinement, but also with its durability. The material is not afraid of weather conditions, whether it be gusty winds or heavy rain. Signs made of «stainless steel» are resistant to moisture, frost and even temperature extremes. These properties make it possible to place a sign in places with increased requirements for operating conditions.
Durability
Particular attention should be paid to such a property of stainless steel as durability. Steel is a strong and resistant raw material, and its rustproof properties add resistance to corrosion. The appearance of the steel sign is preserved for several years.
Stainless steel letter colors
Production of metal signs is possible from three types of stainless steel sheet: decorative, ground and polished .
All types of steel do not deform when bent. Decorative steel is more convenient, as it does not leave fingerprints on itself.
Silver
groundSilver
polishedGold
groundGold
polishedPowder coated
matt, RAL colorPowder coated
glossy, RAL colorWhen choosing the type of advertising structure and the location of the sign, pay attention not only to the presence or absence of lighting. The choice of the color of the advertising sign is also important.
You can choose the color of metal 3D letters from: ready-made basic colors for mirror or polished gold (titanium nitrite) or silver, or a catalog of colors for powder coating.
The desired color is selected according to the RAL standard, which includes more than 200 colors and 9 shades0016 .
Important! Advertising companies can offer to cover stainless steel letters with Oracal self-adhesive film (641 series), which is ideal for PVC structures. We do not recommend this method of adding color to the sign.
Types of stainless steel letter illumination
Signboards with three-dimensional metal letters can be symbolically divided into illuminated and non-illuminated. Non-illuminated letters are popular in interior advertising. Stainless steel signs are durable, so one sign will serve you for years to come. Non-illuminated letters do not require additional care and maintenance.
Illuminated stainless steel three-dimensional letters are an eye-catcher not only during the day, but also at night. Light elements are placed inside the structure or a special film is used.
Illumination can be backlight or front.
Backlighting
Backlighting is an excellent option for illuminating separately mounted three-dimensional metal letters. Under such lighting, soft light or a halo pours from the letters on the reverse side. Backlight highlights the shape of the letter due to the fact that the light source is located inside. With backlighting, the light is very soft and does not hurt the eyes.
Light emitting diodes act as backlight, which are attached to the back of the letter and shine into the depth of the structure. Such letters are attached to the wall with remote holders.
Facelight
Facelight uses milky acrylic plexiglass on the front of the letter. Acrylic plexiglass is covered with a translucent film, due to which the letters glow in the desired color. The backlight color is chosen by the customer.
Stainless steel letters without backlight Backlight Face Light Front and Backlight Flat letters
Equipment for the production of stainless steel letters
Production of metal signs is possible from three types of stainless steel sheet: decorative, ground and polished.
All types of steel do not deform when bent. Decorative steel is more convenient, as it does not leave fingerprints on itself.
For bending, grooving and trimming the sides of the letters, a bending and grooving machine is used, which allows bending steel sheets with a thickness of up to 1 mm or more.
High speed manufacturing of stainless steel letter boards is provided by a bead bending machine. The integrity of the front side of the letters is preserved due to one-sided cutting.
Precise sheet cutting down to the millimeter is possible thanks to the electric manipulator. The device selects the cutter depending on the metal and leaves neat cuts in the right places without damaging the profile.
Bending of stainless steel is performed by the device in automatic mode, forming angles of the required degree with switching tools. As a result, we get a stainless steel sidewall of the shape we need.
Automated production of stainless steel letters
Laser cutting of stainless steel letters
The development of metal laser cutting has greatly facilitated the production of three-dimensional letters for signs.
Laser cutting helps designers go beyond their ideas for letters and symbols. With the help of laser cutting on metal, you can create signs of different sizes, styles and colors.
Laser cutting stands out from other types due to the fact that the beam cuts out details without mechanical damage to the material. And the process is controlled on a computer, which eliminates errors and marriages.
Most advertising companies use laser cutting materials such as wood, plywood, MDF, acrylic, PVC, steel, copper or aluminium.
Manufacture of borders for three-dimensional letters from metal
An automated bending and grooving machine is used for cutting, bending, grooving letters and other symbols. The device can bend metal sheets up to 1 mm thick without damaging the structure and surface.
The bead bending machine is used to create the bead of bulk structures made of aluminium, stainless steel or galvanized steel. The machine cuts at high speed.
Automated software control helps to avoid complexity and not waste working time on equipment calibration or material change. The device independently selects the cutter for cutting depending on the material. The cuts are made in the right places without damage. Bending of metal occurs automatically. To create corners, the machine switches from tool to tool depending on the degree of the angle.
The outer side of the surrounds of the 3D letters remains intact thanks to one-sided cutting.
Laser-welded metal letters
Laser-welded is a high-tech process for joining individual parts of a sign that is superior to soldering or gluing. Laser welding fastens parts of the structure faster and better, which allows customers to receive orders in a short time without worrying about the appearance and strength of voluminous metal signs, logos or plates.
Laser welding is used to create metal signs of complex shapes and designs. The method of laser welding of stainless steel three-dimensional letters consists in the impulsive action of a high-power laser beam.
How does the welding process work?
- Parts are connected together. A laser beam is directed into the connection zone by a flexible optical fiber.
- A pulse is applied that leaves a shiny dot mark on the surface of the parts. The dot diameter is about 1 mm.
- Weld point overlap provides a connecting seam. The number, distance of points varies depending on the requirements for structural strength. Pulsed laser welding is different in that in less than 6 miles of seconds it is able to melt stainless steel from the inside, where the seam is formed. And the outer side is not amenable to heating and melting.
Laser-welded 3D letters and other stainless steel promotional structures are placed on a high-gloss nailboard. The laser beam is guided along a flexible light guide to the desired welding spot. Thanks to the flexible light guide, the laser beam connects parts of the structure in places where conventional welding or soldering will not work.
This feature allows the production of small parts.
choose paint and application method
Questions discussed in the material:
- How can metal products be painted
- How to prepare a surface for painting
- How to paint metal products
Applying a paint coating to the metal allows you to reliably protect the surface from corrosion and other adverse external influences, as well as give the metal product an attractive appearance. This method of protecting a metal surface is the most common. How to paint metal products in accordance with technology and safety precautions, we will consider in our article.
How to paint metal products
Currently, the following coatings are used for applying to metal:
- Oil . The usual choice for painting metal. Before applying the main layer, they require a preliminary coating with a special primer.
The toxicity of the material and the pungent odor make it possible to use it only in well-ventilated areas.
- Epoxy . Consist of two components — silicone resin and hardener. They are very toxic, therefore they are used only for outdoor work, besides, the application process is quite complicated and requires a fairly good knowledge of the technology from the performer.
- Alkyd . They are distinguished by good covering ability, which allows them to be applied directly to a previously prepared metal surface without additional priming. Are applied to internal and external works.
- Acrylic . Polymer coatings of the latest generation. Due to the ease of application and non-toxicity, they are becoming increasingly popular. They require a careful approach to preparing the surface for painting.
- Rubber . Specially designed for outdoor use, they are an excellent protection for roofs and other metal surfaces that are exposed to atmospheric precipitation.
All of the above compounds can be used in various situations and are widely used.
We should also mention the powder method of painting metal products. It creates high-strength coatings, but can only be carried out in a production shop, since powder painting technology requires special equipment and conditions.
If you have to choose a paint for a metal product, first evaluate the expected consumption, the degree of labor for surface preparation, the level of toxicity of the composition, its durability, the presence of additional properties and cost.
In addition, in order to increase the service life of the coating and ensure its reliability, sometimes additional materials are used when preparing the surface for painting:
- Enamel primer. Universal paint that combines the functions of primer, paint and corrosion protection.
- For treatment of corroded areas — epoxy resins with special additives .
When applied, they form a durable film that prevents rust from spreading further. Apply directly to rusty areas without prior preparation.
- Anti-corrosion coatings . Protect the treated surface from moisture and oxygen.
- Hammer sets . They create the effect of multiple hammer blows and are used as a decorative technique in interior design. Resistant to external influences. To create this effect, epoxy, alkyd, and acrylic coatings can be used.
- Forging mixes . Consists of polymers that give coatings excellent wear resistance. Easy to apply.
- Nitro Paint . It is highly toxic and is usually sold in cans. Quick dry formula.
- Heat-resistant coatings — special varnishes and enamels for painting ovens and similar products.
Powder painting, invented in 1950, is a fundamentally different process for painting metal products. There is no liquid component here, although from the side the application process is similar to spraying with compressed air, but there is no suspension of paint in the air — the so-called «fog».

The powder compound is attracted to the part by electricity. A positive charge is applied to the part, and a negative charge of high voltage is applied to the paint. Since opposite charges are attracted, there is a uniform adhesion of particles of powder paint to the metal. After that, the part is heated to a temperature of +200 … +250 °C, the powder melts, spreading over the surface and forming the thinnest elastic layer several tens of microns wide. This layer is very dense and durable.
The cost of powder paint is one and a half to two times higher than traditional painting methods due to the use of expensive equipment and the specifics of the technological process. But since powder coating is extremely durable and of the highest quality, in some metalworking industries, this technology has completely replaced traditional painting.
Preparation of metal products for painting
In order to obtain an even and durable coating that will retain its properties and appearance for a long time, the surface of the product must be properly prepared.
The technological process consists of the following stages:
- Cleaning.
Dirt, dust, old paint residues and rust are carefully removed from the surface of the metal product. To do this, use coarse-grained abrasive materials, special brushes or a drill with a nozzle. The choice of the right tool depends on the degree of contamination and the area of the corrosion area. Then, using a clean paper towel, wipe off the remaining dust. When processing large surfaces or hard-to-remove old coating residues, a sandblaster is usually used.
Recommended articles on metalworking
- Steel grades: classification and interpretation
- Aluminum grades and applications
- Defects in metal products: causes and search methods
If the old layer of paint is “tightly” adhered to the surface of the workpiece, it can not be removed. To check its strength, notches are made in the form of a lattice with a sharp knife, and then an adhesive tape is glued to this place and sharply torn off.
In the event that there are no traces of paint left on the adhesive tape, the coating can not be removed. If there are particles of the old coating on the tape, it is completely cleaned.
- Priming and degreasing.
The step of removing greasy contaminants is mandatory in the process of preparing for painting a metal product if polymeric materials are selected or dipping is the next step. When applying other types of coatings, this stage can be skipped. But if there is a visible fatty coating on the product, it must be removed.
For this, non-greasy solvents — acetone or xylene — are used, which are applied to the part with a tissue or in the form of an aerosol. The latter type of spray allows you to degrease even hard-to-reach places.
Be sure to wear protective gloves and breathing protection when working to avoid contact with these aggressive chemical fluids. In the case of sandblasting, additional degreasing is not required, since the greasy coating is removed along with other contaminants.

Primer — the application of the first coat — is necessary for a higher degree of protection of the metal surface from adverse environmental conditions. It also makes the surface smoother by filling in small defects.
VT-metall offers services:
Manufacturers offer a wide range of primers with anti-corrosion components. We also offer universal primer-enamel paints that combine the properties of primer and paint at the same time. Such compositions reduce the cost of the process of painting metal products and reduce the repair time. But the traditional method of pre-priming is still used more often.
Usually two coats of primer are applied. This amount is enough to create a reliable and durable coating, even without applying a layer of paint. It is recommended to apply the primer with a roller, which covers visible surface defects well. The final layer of paint is used to give the part an attractive appearance, beautiful color and glossy sheen.
How to paint metal products
Paint can be applied to the prepared surface in several ways using different tools, which are selected depending on the type of product and its purpose.
Painting:
- Roller.
This accessory is used when a large surface needs to be painted. To obtain a high-quality coating, it must be even and pre-prepared.
Procedure:
- The selected paint is pre-diluted with a suitable solvent.
- The paint, thinned to the desired consistency, is poured into a container, the width of which must correspond to the width of the roller so that it can be dipped in the prepared paint.
- The application of the coating should be started from one edge and gradually move towards the opposite. This achieves color uniformity and eliminates visible transitions.
- A roller soaked in paint is applied to the surface and rolled up and down with uniform pressure. Horizontal movements are best avoided. In one approach, an area several times the width of the tool is covered.
- Work continues until the entire area of the product is painted.
If roller is selected for coating, a minimum of two coats of paint will be required. The next layer is applied after the previous one has completely dried.
- Brush.
This method of painting metal products requires the most labor. Usually with a brush they work with hard-to-reach areas and reliefs. The coating is applied with the utmost care and precision. To save paint, you need to lower the brush into it only a third. This technique will also help to avoid drips.
Remove excess paint by tapping on the inside wall of the paint can. Brush movements are directed in one direction, the coating is applied with the first strokes, and then it is evenly distributed with subsequent strokes. The number of layers is selected depending on the purpose of this part.
Brushes of the required width can be obtained from specialized shops, taking into account the fact that wide brushes are used for simpler designs, and narrow ones for complex ones.
- Using a spray gun.
The spray gun can be applied in three ways:
- Airless. Under high pressure, exceeding the pressure in domestic water supply by 100 times, the paint breaks out of the nozzle of the spray gun and is instantly sprayed, forming a narrowly directed cone or “torch”. Almost without losing speed, paint particles literally «shoot» into the painted surface.
- Air. Paint is injected into a jet of air, forming an air mixture due to vortex processes (turbulence). The resulting suspension is sent to the product, creating an even coating with a beautiful gloss. The air pressure with this method is much lower, but for this reason, in addition to the working torch, an excess amount of paint is formed from the smallest drops, called fog.
This method of painting metal products increases the consumption of materials and costs much more to protect workers and the environment from harmful effects.

- Combined. The working pressure is set to about 20–30 atmospheres, and compressed air is additionally supplied to the torch. Thanks to this method, the coating is more uniform, and fog is not formed.
A feature of metal surfaces is poor adhesion to the material. Therefore, there are certain techniques when working with a spray gun:
- when spraying paint on a part, breaks must not be allowed, otherwise it will not be possible to apply a layer evenly;
- application should be started with smooth and slow movements;
- the first layer is recommended to be applied in parallel;
- subsequent coats may be applied in any direction.
All types of painting work when painting metal products must be carried out in compliance with safety regulations. We list the main ones:
- The room in which the metal product will be painted must be well ventilated.
- It is important to strictly follow the safety requirements specified in the instructions for use of this paint.
- If paint or solvent is accidentally spilled, the resulting stain should be covered immediately with sand and disposed of carefully to prevent fire.
- After painting, all used containers must be discarded or washed thoroughly. It is forbidden to use them for other purposes.
- Always wear personal eye and skin protection when handling paint.
- Remaining materials should be tightly covered and stored in a dark place out of the reach of children and pets.
- Do not eat in areas where painting is being carried out.
- Paint residues must not be poured into the central sewer.
Why you should contact us
We treat all clients with respect and carry out tasks of any size with the same scrupulousness.
Our production facilities allow us to process different materials:
- non-ferrous metals;
- cast iron;
- stainless steel.

When fulfilling an order, our specialists use all known methods of metal machining. Modern equipment of the latest generation makes it possible to achieve maximum compliance with the original drawings.
In order to bring the workpiece closer to the sketch presented by the customer, our specialists use universal equipment designed for jewelry sharpening of tools for especially complex operations. In our production workshops, metal becomes a plastic material from which any workpiece can be made.
The advantage of contacting our specialists is their compliance with GOST and all technological standards. At each stage of work, strict quality control is carried out, so we guarantee our customers a conscientiously executed product.
Thanks to the experience of our craftsmen, the result is an exemplary product that meets the most demanding requirements. At the same time, we build on a powerful material base and focus on innovative technological developments.
We work with customers from all regions of Russia. If you want to place an order for metalworking, our managers are ready to listen to all the conditions. If necessary, the client is provided with a free profile consultation.
Metal letters. Signboards from metal letters in St. Petersburg.
Metal letters. Signboards from metal letters in St. Petersburg.
Signs made using this technology look solid and stylish. Made from stainless steel or aluminium.
- Maximum aesthetics with the general severity of the metal texture.
- Choice of metal texture (polished, mirror, «super mirror»), metal color (silver, gold) or painting in any RAL color.
- Possibility to use different lighting options.
- Unlimited service life when used correctly.
Stainless steel letters
24
Illuminated metal letters (stainless steel) with LED illumination (the front and side surfaces of the letters are not illuminated, the glow on the substrate is “backlight”)
3D
A PHOTODescription
This version is used for facade and interior signs.
Stylish and high-status version of the sign made of three-dimensional letters. Of the minuses, it is possible to single out the need to use substrates for a uniform and bright “contra-jour” effect. You can order three-dimensional metal letters or buy ready-made illuminated metal signs.
More
Letter depth — from 50 to 130 mm.
Front surface — stainless steel «mirror silver» 1 mm.
Side walls — stainless steel «mirror silver» 0.5 mm.
The back wall is acrylic transparent 5 mm.
Electrical fittings — LED hermetic clusters of white light SMD 3528, degree of protection IP67.Price
Characteristics
Letter depth — from 50 to 130 mm.
Front surface — stainless steel «mirror silver» 1 mm.
Side walls — stainless steel «mirror silver» 0.5 mm.
The back wall is acrylic transparent 5 mm.
Electrical fittings — LED hermetic clusters of white light SMD 3528, degree of protection IP67.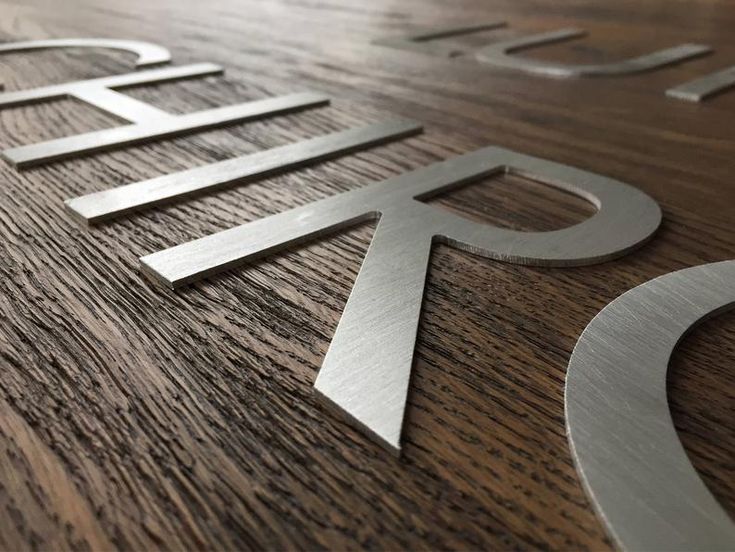
Cost
Simple font
200 rub / 1 cm
Serif font
RUB 240 / 1 cm
Complex font
RUB 275 / 1 cm
Calculate cost
25
Illuminated metal letter (stainless steel) with LED illumination (only the front surface of the letter lights up)
3D
A PHOTODescription
This version is used for facade and interior signs. Stylish and solid version of the sign made of three-dimensional letters. The main advantages are increased brightness and premium status of the sign.
More
Letter depth — from 90 to 130 mm.
The front surface is acrylic milky 3 mm, along the perimeter of the letter there is a stainless steel contour “mirror silver” 1 mm.
Side walls — stainless steel «mirror silver» 0.5 mm.
Rear wall — PVC — plastic 5 mm.
Electrical fittings — LED hermetic clusters of white light SMD 3528, degree of protection IP67.Price
Characteristics
Letter depth — from 90 to 130 mm.
The front surface is acrylic milky 3 mm, along the perimeter of the letter there is a stainless steel contour “mirror silver” 1 mm.
Side walls — stainless steel «mirror silver» 0.5 mm.
Rear wall — PVC — plastic 5 mm.
Electrical fittings — LED hermetic clusters of white light SMD 3528, degree of protection IP67.Cost
Simple font
200 rubles / 1 cm
Serif font
240 rubles / 1 cm
Complex font
275 rub / 1 cm
Calculate cost
26
Illuminated letter made of metal (stainless steel) with LED illumination (the front surface of the letter is illuminated, the side surface is not illuminated, the glow on the substrate is “backlight”)
3D
A PHOTODescription
This version is used for facade and interior signs.
A solid and stylish version of the sign made of three-dimensional letters. The main advantage is the combination of increased brightness of the sign and premium status.
More
Letter depth — from 90 to 130 mm.
The front surface is acrylic milky 3 mm., along the perimeter of the letter there is a stainless steel contour “mirror silver” 1 mm.
Side walls — stainless steel «mirror silver» 0.5 mm.
The back wall is acrylic transparent 5 mm.
Electrical fittings — LED hermetic clusters of white light SMD 3528, degree of protection IP67.Price
Characteristics
Letter depth — from 90 to 130 mm.
The front surface is acrylic milky 3 mm., along the perimeter of the letter there is a stainless steel contour “mirror silver” 1 mm.
Side walls — stainless steel «mirror silver» 0.5 mm.
The back wall is acrylic transparent 5 mm.
Electrical fittings — LED hermetic clusters of white light SMD 3528, degree of protection IP67.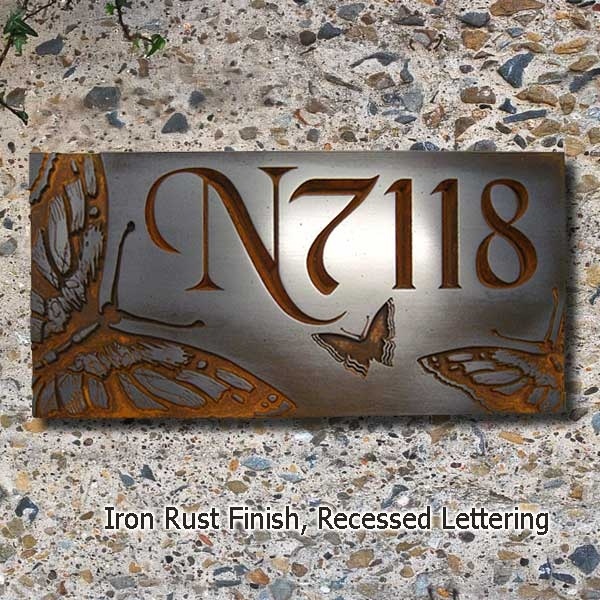
Cost
Simple font
220 rubles / 1 cm
Serif font
275 rubles / 1 cm
Complex font
335 rub / 1 cm
Calculate cost
Aluminum letters
Premium sign design at a reasonable price.
27
Illuminated letter made of metal (aluminum sheet) with LED illumination (the front and side surfaces of the letter are not illuminated, the glow on the substrate is “backlight”)
3D
A PHOTODescription
This version is used for facade and interior signs. Stylish and high-status version of the sign made of three-dimensional letters.
Of the minuses, it is possible to single out the need to use substrates for a uniform and bright “contra-jour” effect.
More
Letter depth — from 50 to 130 mm.
Front surface and side walls — aluminum «mirror silver» 0.6 mm and PVC — plastic 2 mm.
The back wall is acrylic transparent 5 mm.
Electrical fittings — sealed white LED clusters SMD 3528, degree of protection IP67Price
Characteristics
Letter depth — from 50 to 130 mm.
Front surface and side walls — aluminum «mirror silver» 0.6 mm and PVC — plastic 2 mm.
The back wall is acrylic transparent 5 mm.
Electrical fittings — LED hermetic clusters of white light SMD 3528, degree of protection IP67Cost
Simple font
RUB 165 / 1 cm
Serif font
RUB 200 / 1 cm
Complex font
RUB 240 / 1 cm 9000
Calculate cost
28
Illuminated letter made of metal (aluminum sheet) with LED illumination (only the front surface of the letter lights up)
3D
A PHOTODescription
This version is used for facade and interior signs.
A solid and stylish version of the sign made of three-dimensional letters. The main advantage is the combination of increased brightness of the sign and premium status.
More
Letter depth — from 90 to 130 mm.
The front surface is acrylic milky 3 mm.
Side walls — aluminum «mirror silver» 0.6 mm and PVC — plastic 2 mm.
Rear wall — PVC — plastic 5 mm.
Electrical fittings — LED hermetic clusters of white light SMD 3528, degree of protection IP67.Price
Characteristics
Letter depth — from 90 to 130 mm.
The front surface is acrylic milky 3 mm.
Side walls — aluminum «mirror silver» 0.6 mm and PVC — plastic 2 mm.
Rear wall — PVC — plastic 5 mm.
Electrical fittings — LED hermetic clusters of white light SMD 3528, degree of protection IP67.Price
Simple font
RUB 165 / 1 cm
Serif font
RUB 200 / 1 cm
Complex font
RUB 240 / 1 cm 9000
Calculate cost
29
Illuminated letter made of metal (aluminum sheet) with LED illumination (the front surface of the letter is illuminated, the side surface is not illuminated, the glow on the substrate is “backlight”)
3D
A PHOTODescription
This version is used for facade and interior signs.
Stylish and solid version of the sign made of three-dimensional letters. The main advantage is the combination of increased brightness and premium signage status at a reasonable project cost.
More
Letter depth — from 90 to 130 mm.
The front surface is acrylic milky 3 mm.
Side walls — aluminum «mirror silver» 0.6 mm and PVC — plastic 2 mm.
The back wall is acrylic transparent 5 mm.
Electrical fittings — LED hermetic clusters of white light SMD 3528, degree of protection IP67.Price
Characteristics
Letter depth — from 90 to 130 mm.
The front surface is acrylic milky 3 mm.
Side walls — aluminum «mirror silver» 0.6 mm and PVC — plastic 2 mm.
The back wall is acrylic transparent 5 mm.
Electrical fittings — LED hermetic clusters of white light SMD 3528, degree of protection IP67.Cost
Simple font
180 rub / 1 cm
Serif font
220 rub / 1 cm
Complex font
275 rub / 1 cm
Calculate cost
* — The cost is approximate (depends on the specific layout).