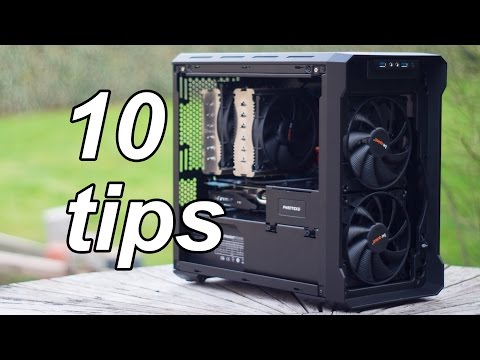
Top 10 Tips on Building a PC
Have all your PC part orders arrived from Ebuyer? No doubt you’re raring to go, but hold on. From jump-starting a motherboard to applying thermal paste, read these top-10 tips on building a PC first for a smooth and pain-free experience.
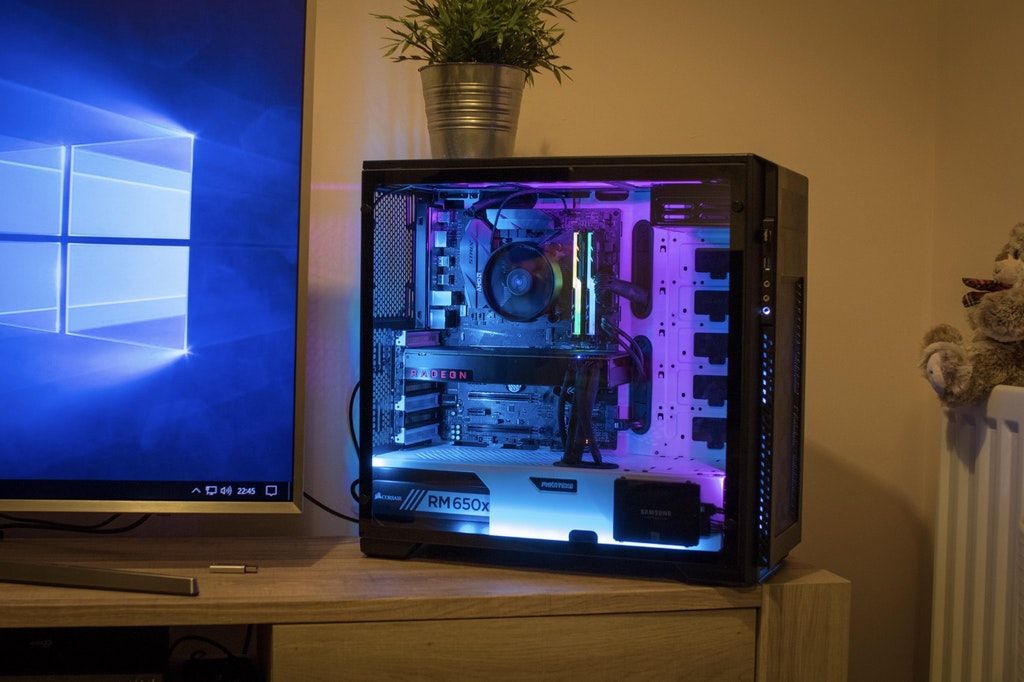
Choose a suitable build area
When the time comes to build a PC, you’ll want to clear out a large, insulated surface that’s easy to build on. In a home environment, a wooden dining table or desk would be prime examples.
They’re around waist height, so you can lower PC parts into the computer case and plug in front-panel connectors without having to hunch over uncomfortably, or needing to tip the case at a perilous angle. You can lay out the case at one end of the desk and the PC parts at the other, with your active building area in-between.
Plus, wood is a great insulator (as opposed to conductor) of electricity, reducing the risk of zapping PC parts.
Manage electrostatic discharge
Conversely, try to avoid building on a carpeted floor. Rubbing against carpet is going to generate static electricity – which, if you don’t take precautions, can discharge into PC parts and damage them.
ESD Anti-Static Strap
As long as you don’t go out of your way to wear fuzzy socks and brush back and forth on carpet, however, static isn’t as big of a risk as it’s made out to be. Modern PC parts are designed to be protected from electrostatic discharge – they can withstand a fair amount before any real damage is dealt.
Regardless, losing an expensive graphics card to static is a daunting prospect. There are a couple of common techniques to ground yourself and safely discharge any built-up static.
Plugging in a switched-off PSU to the wall grounds it. Touch it, and any static is discharged, equalising your body’s voltage. Whenever you’re about to handle a PC part, simply touch the grounded PSU for safety.
Taking this a step further, wearing an ESD anti-static strap is the easiest and most foolproof way to mitigate static. Connect one end to the ground and wrap the other around your wrist – or ankle as it’s out of your hand’s way – to ensure you always discharge. If you’re a first time PC builder, no doubt you’re nervous about damaging PC parts. We’d recommend wearing an ESD strap for peace of mind.
Keep a clear build area
You’ll want to keep your active building area neatly organised. As there are so many PC parts, it can quickly devolve into a rubbish pile of empty boxes, plastic baggies and pamphlets. Beneath all the rubbish might be the one screw you’ve been looking for, with the search for it slowing you down.
Not the tidiest build area, but at least everything’s near!
You’d be surprised how fast you can build a PC when everything’s laid out ready at arm’s length, neatly and with no rubbish in the way. Once you’ve unboxed a PC part, set aside the packaging and only keep its contents near you. You could unbox everything ahead of time and spread it out over your building area, but that’ll only limit space.
We’d recommend building a PC one part at a time. There’s no need to have your computer case’s screws strewn about when you’re dropping in the CPU, for instance. This has a number of advantages, such as ensuring you won’t misuse a wrong screw and strip a thread.
Hold onto PC part boxes
Notice how we said set aside the packaging, not throw it away. As frivolous as it sounds, we’d recommend storing away boxes for PC parts, or at least for the big-ticket items like CPU, GPU and motherboard.
We hope you won’t run into hardware-related issues building a PC, but if you do, having the original packaging makes returns easier and safer. From a motherboard’s socket cover to anti-static bags and foams inserts, they help protect a PC part.
Some manufacturers won’t accept a return unless it’s adequately packed back in the original packaging, with the original protection. Otherwise, it could be damaged in transit through no fault of your own.
Plus, when it’s time to upgrade your PC, you can give away your old hardware safely or re-sell it at a higher price with the original packaging. Chuck all the loose items in the part’s box and store it away, you’ll never know when they’ll come in handy.
Follow along with YouTube build guides
When building a PC, we’d recommend bringing a smartphone, tablet or laptop and loading it up with YouTube. Having a physical manual on hand is helpful, but they’re often not detailed enough, relying on snippets of text and generic infographics.
A video that walks you through building a PC is such an invaluable resource. If you’re ever stuck, you can scrub through a video that’s tailored for your PC part frame-by-frame to see where every cable and screw goes. Ebuyer’s own YouTube channel has plenty of build guides, so get subscribed.
Don’t toss out the manuals, however, as they contain crucial information for configuring dual-channel RAM and plugging in your case’s front panel connectors.
Don’t worry so much about thermal paste
One of the most contentious PC building topics is how much thermal paste you should use, and what’s the best method of applying it. We’ve gone into detail about thermal paste in our PC Cooling – What You Need To Know blog.
In all honestly, however, you shouldn’t fret too much over thermal paste. On online forums and image boards, people can be too stringent about applying an exact ‘pea-sized’ amount, and no more. This builds up thermal pasting as some monumental task and can make a first-time PC builder needlessly nervous. In reality, there’s some leeway.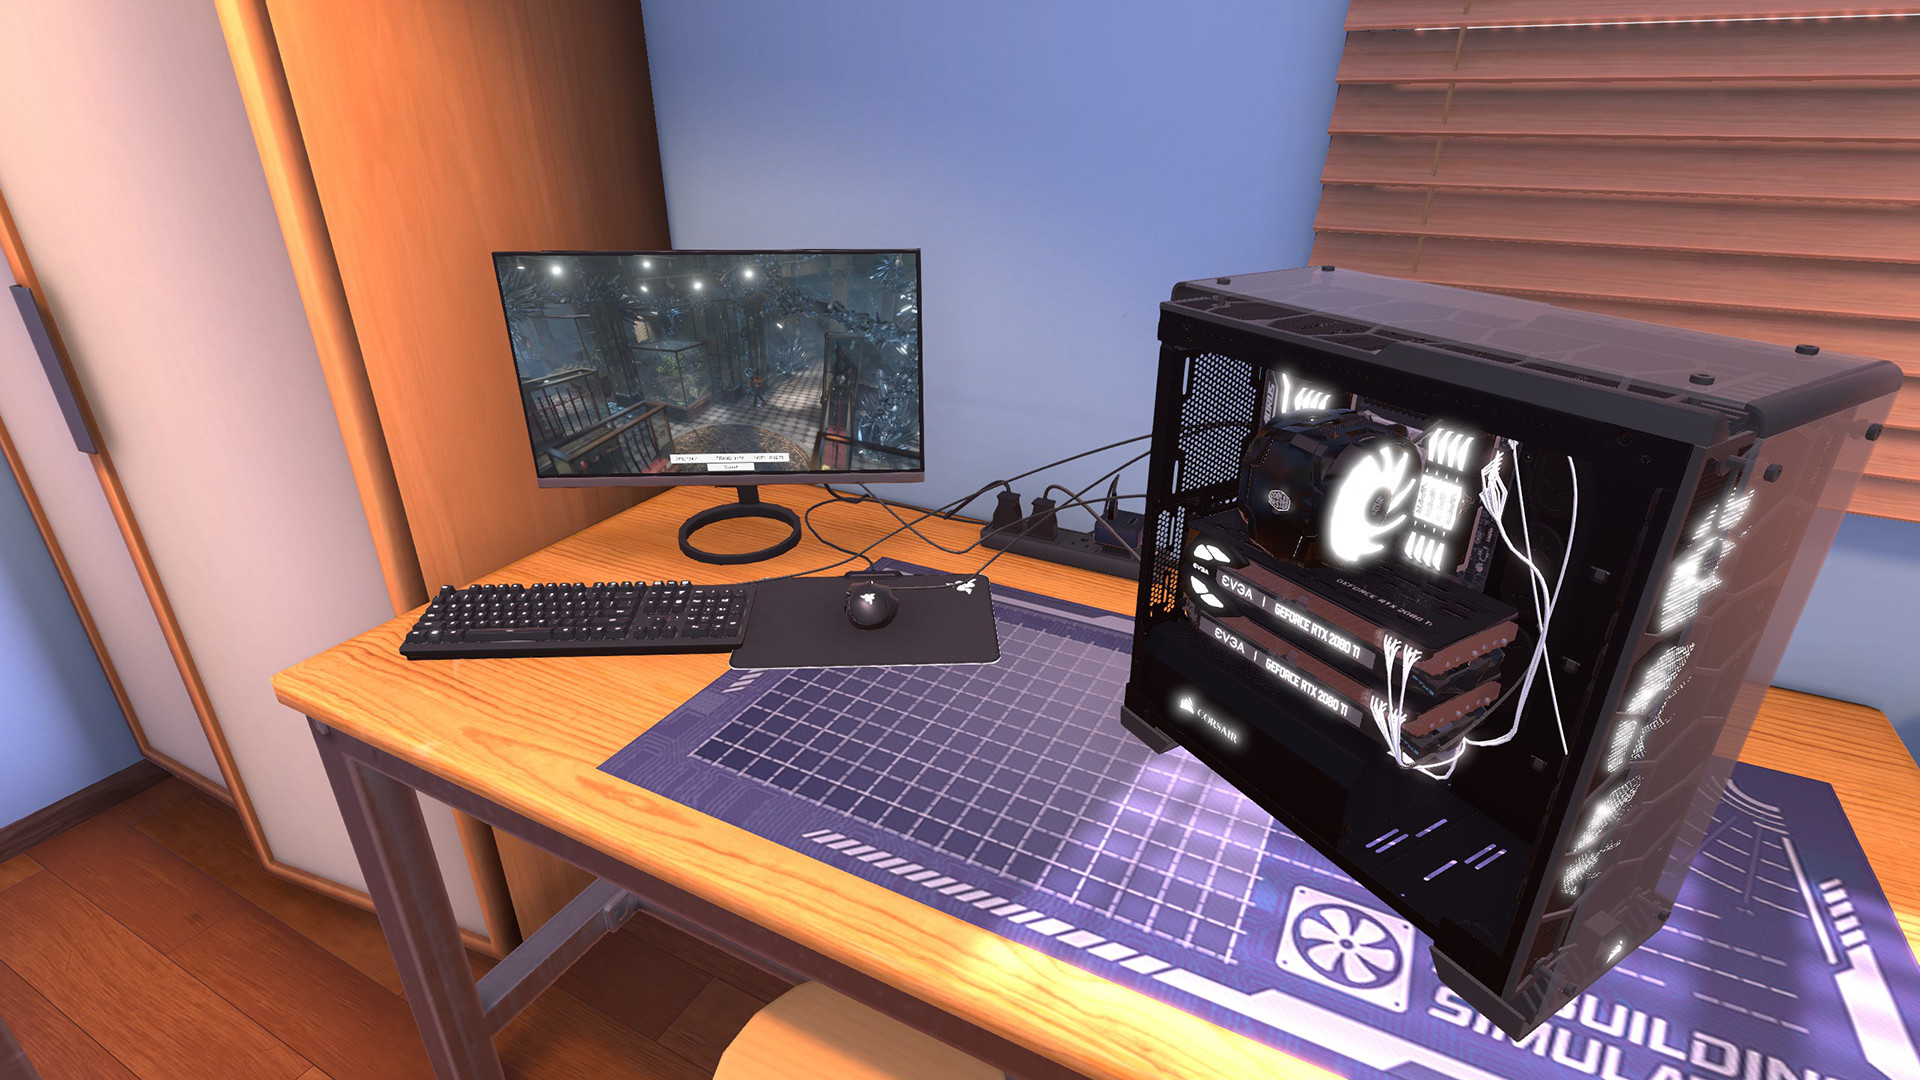
Aim for a pea-sized amount, yes – but if a bit more squishes out of the tube than you were anticipating, that’s not a problem. We’d recommend erring on the side of slightly more thermal paste than less anyway, to completely cover the CPU’s integrated heat spreader.
It’s hard to control how much thermal paste you’re applying. Sometimes it’s dried-up and takes forever to come out, or it’s extremely viscous and comes pouring out. As long as you haven’t dumped a huge blob on the CPU, don’t be overly fussy with the thermal paste. It’s a weird, messy compound; cleaning it up for the ‘perfect’ amount is more hassle than it’s worth.
Don’t force anything
Building a PC is often likened to even more expensive Lego. As with the plastic bricks, many PC parts snap into place, often accompanies by an audible click. They may require a bit of pressure to ensure they’re seated properly, but you should never feel the need to force things.
An example of RAM’s notched design preventing installation.
PC parts are designed to go in one way. If there’s any resistance, like something’s blocking the way, don’t proceed. Ramming a part in won’t get you anywhere and only serves to damage it. Lift it out, check the part’s manual if needs be and start again. From scratching a RAM DIMM’s gold contact to snapping off the pins of a CPU, PC parts are quite delicate and can be rendered inoperable if you’re not careful.
Notice the small triangle on the CPU?
Fortunately,
there are also a few handy guidelines built right onto PC parts to help you. For
instance, on one corner of a CPU, you’ll notice a small triangle. This
corresponds with another triangle on a motherboard’s CPU socket. Line up both
triangles, and you’ll have the correct orientation needed to install the CPU.
Do a test boot
Building a PC is quite an involved process. There are many parts which need to be installed one after another, with steps in-between like applying the thermal paste and screwing in the case’s stands-offs./cdn.vox-cdn.com/uploads/chorus_asset/file/12793577/akrales_180824_2838_0130.jpg) Factor in the time spent poring over the manual and double-checking everything’s correct if you’re a first-time PC builder, and the hours can quickly add up.
Factor in the time spent poring over the manual and double-checking everything’s correct if you’re a first-time PC builder, and the hours can quickly add up.
For a PC builder, there’s no worse feeling than labouring over a build for hours, only for it not to turn on. As it’s hard to diagnose what exactly went wrong – did electrostatic discharge zap something, did an over-tightened screw short out a part or was a PC part simply faulty from the factory? There could be any number of reasons why the PC isn’t turning on.
Rather than waiting right until the end of a PC build to test it, we’d recommend performing a mid-build test outside of the case. You can quickly get a PC up-and-running using only the bare-essential PC parts.
What do you need for a test boot?
Place the motherboard on a non-conductive surface – the motherboard’s box is common choice – and install the CPU, CPU cooler, RAM and GPU. Plug in power cables as required and hook up this open-air test bench to a monitor for video output. At this point, we’re not worried about cable management or an operating system. We’re simply seeing if the PC turns on and can reach the BIOS to confirm everything’s working as intended, before it’s all screwed down.
Building on the motherboard’s box.
The only
problem is that you won’t have your case’s power switch to turn it on. Some
high-end motherboards have power switches built right onto the motherboard for
this exact purpose. However, you can also bridge the motherboard’s front-panel
connectors with a screwdriver to jump-start the motherboard. First-time PC
builders might not feel comfortable prodding their hardware with a screwdriver,
but it’s normal practice.
Don’t forgot the I/O shield
Even the most seasoned of PC builder forgets this tip from time to time. Before lowering the motherboard down into place, make sure you haven’t forgotten the I/O shield. Mounted at the rear of a computer case, the I/O shield prevents dust from entering and secures a motherboard’s input/output in place, so they’re not flexed and jostled about as you hook up your peripherals and accessories.
I/O Shield
Importantly, the I/O shields needs to be in place before the motherboard – it can’t go in after the fact. This will have caused many frustrations when building PCs, no doubt. You could be wrapping up a build, with every part screwed down and cable managed, only to have to undo all your hard work when you’ve noticed the I/O shield is missing.
MSI B550 Unify-X
Some high-end motherboards, like the MSI B550 Unify-X we’ve covered here, have the I/O pre-attached.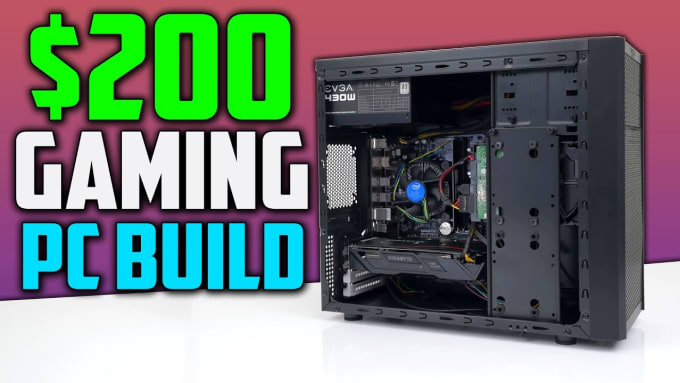 Otherwise it’ll be in your motherboard’s box and, with a bit of fiddling, snaps into the case.
Manage your cables
Celebrations are in order once you’ve past your first successful boot of a complete PC build, but you’re not done yet. As soon as everything’s hooked up and confirmed working, it’s tempting to hastily bunch up all the loose cables, slap on the case’s side panel and call it a day. After all, there’s still the long-winded Windows and driver installs ahead of you before you can download games to test out your new hardware. However, as tedious and uneventful as it seems, we’d recommend taking the extra time to properly manage your cables.
You’ll not
only be reminded of how ugly unmanaged cables are if you have a tempered glass
side panel, but they’ll also make future upgrades harder and can impede
airflow. Lay out your cables using your case’s cable management routes and zip
tie loops down. Your future self will thank you for it. As when it comes time
to upgrade or replace a PC part, you won’t have to spend ages untangling a web
of cables and deducing what each one does again. If they’re managed, you can
easily see what cable goes where, unplug it and slot in the new PC part.
Build a PC at Ebuyer
That’s our top 10 tips on building a PC! As mentioned, check out Ebuyer’s YouTube channel for build guides – you’ll find more insightful PC building information there. Looking to build a PC, but can’t decide on the specs? Check out our blog Gaming PCs in 2022 – The specs you should be looking for.
PC Building Tips for Beginners
Building your own PC is a thrilling way to get a deeper understanding of how computers work. Not only is it an economical approach to getting a desktop custom-made for your exact needs and wants, but it allows you to get your hands dirty (figuratively, of course) and take true ownership of something you’ll use every day. You’ll finish the project with a sense of pride and a loyal connection to your creation.
Joining the build community seems like great idea…until you realize how intimidating it can be. You’ve learned about all the necessary components and peripherals and are ready to invest time and money. But then you’re hit with a wave of uncertainty. How hard is this going to be? Will you really end up with a functioning PC in the end?
Approaching your first PC build with a calm, optimistic and eager mindset will help things go smoothly. If you’re not sure on the process for building a PC, check out our how-to guide with step-by-step instructions. To help, we’ve also created this list of beginner’s tips.
1. Before you do anything, determine the purpose of your build.
What’s the reason you’re making this computer? Is it because you want the best gaming PC? Are you looking for something that can handle your creative work, or just want a build that can manage common web browsing? Or do you want a machine that’s as flashy as a nightclub? Maybe it’s a combination of these. In any case, your motivations will influence your decisions when shopping for components.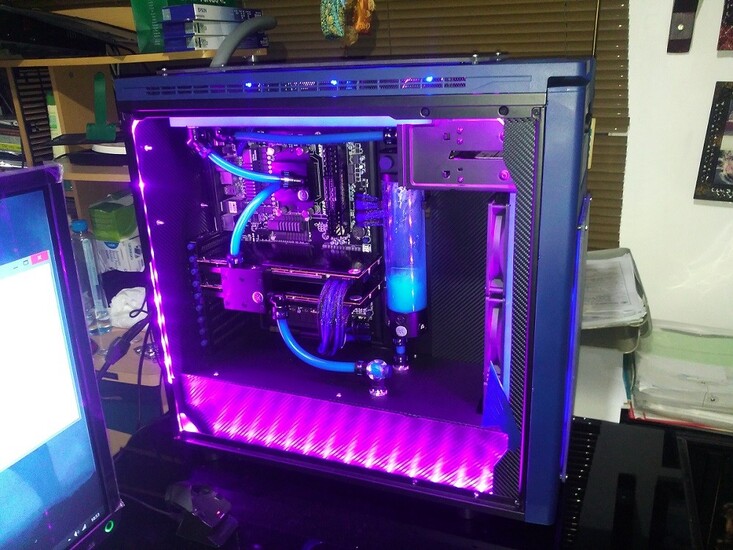
2. Pick a side: Intel or AMD.
Do your research on which CPU has the power and specs you need for your dream build. The CPU will be the core of your PC, so your selection is a very important decision. But it’s not the only component in your computer, so don’t blow your entire budget on it.
In short, you can’t wrong with either brand, but which model you choose will determine what kind of motherboard you can get. For help selecting a CPU, make sure to check out our CPU buying guide and our best picks for gaming and performance. Our CPU Benchmarks Hierarchy ranks all current chips from fastest to slowest. The video below also features some quick tips for CPU shopping.
3. Consider a cooler with thermal paste included.
Using thermal paste can be a messy ordeal, especially for first-time builders. It also adds an extra step to the process. If you’d like to simplify things, opt for a cooler that offers pre-applied thermal paste.
4. Make sure all the components you buy are compatible with one another…and your budget.
Components come in many different flavors from various vendors, and not all of them play well together. For example, you will hit a roadblock if you find out your motherboard doesn’t have the right type of socket for your CPU or an M.2 slot for your speedy SSD.
Make sure you’re building a PC symphony comprised of components that perform together harmoniously, not a discordant, mismatched group of parts that literally won’t play a thing. Again, there are resources to help guide you to the right choices, including our motherboard, SSD and PSU buying guides.
If you have a limited budget and splurge most of that on a high-grade CPU or graphics card, for instance, you’re going to be SOL when it’s time to get a motherboard or key additions, like an SSD. Don’t forget to check out our best picks, from budget to premium, for each component for some solid recommendations:
- Best (Non-Gaming) Performance CPUs
- Best Gaming CPUs
- Best CPU Coolers 2018: Air and Liquid
- Thermal Paste Round-up: 85 Products Tested
- Best Graphics Cards for Gaming in 2018
- Best GPUs for Crypto Mining
- Best Motherboards
- Best Memory 2018: Fast, Cheap & RGB
- Best SSDs 2018: From Budget to Blazing Speed
- Best Power Supplies
- Best Power Supply Units For Cryptocurrency Mining
- Best PC Cases 2018: Our Tested Picks for Your New Build
5. Open each component carefully.
Components are fragile and can break before you even install them. Ripping open the packaging on your CPU can lead to bent pins, as an example, and any damaged component may very well result in a non-functioning build.
6. No socks on a carpet.
Beware of static electricity. A static discharge can destroy expensive components. To be safe in high-static environments, you can use an anti-static wrist strap or simply touch a metal object that’s not part of the computer before you begin work.
7. Keep the Band-Aids close.
Some cheaper cases have sharp edges, which mean it’s possible to cut yourself. Consider it a badge of honor, but keep the first-aid kit nearby.
8. Get your toolkit in order.
You don’t want to have to hold off on starting your build because you forgot to get the tools you need. You can get by with a mid-sized Phillips head screwdriver, but we also recommend getting a tool kit that has a three-pronged parts retriever that you can use to rescue screws that fall into the case.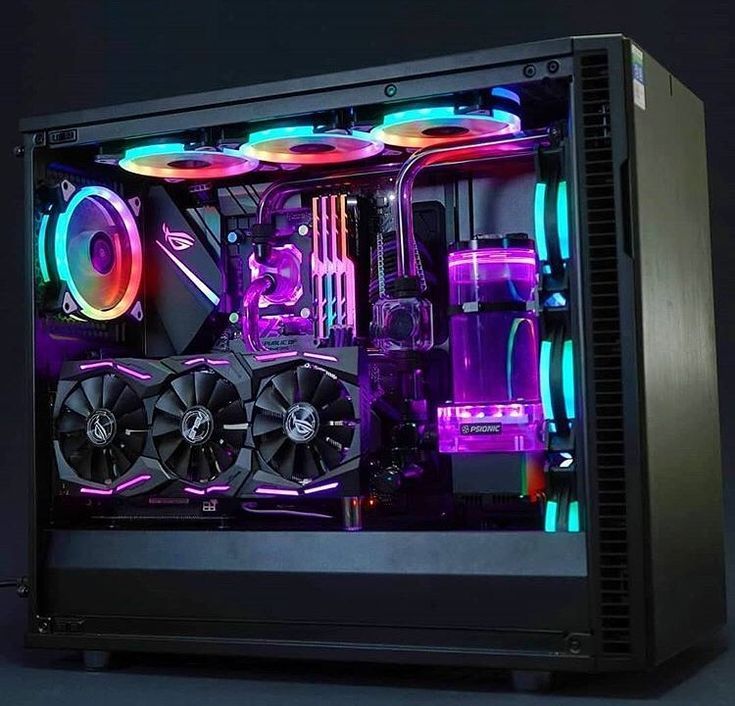 Pliers can also come in handy for stubborn screws or bolts.
9. Make sure you have an appropriate workspace.
Building goes more smoothly when you’re backed by good lighting or a flashlight to get visibility into the dark, narrow corners of your build. It’s also helpful to have a table large enough for laying out all your components.
You also need to be comfortable. For a recent build we did at Tom’s Hardware, we worked on a table that’s relatively high, so we stood on a box for extra height, allowing us to reach into the case for long periods without straining our arms.
10. Long fingernails can be helpful.
Like with many things that require dexterity, longer nails come in handy. In a PC build, a lengthy manicure can be useful for prying things open, using as pseudo-fingers in tight spaces or holding teeny tiny screws.
11. Long hair is not helpful.
Tie that mane up to prevent it from getting in your eyes, blocking any lighting or making you too hot – yes, you may work up a light sweat on your first build!
12. Keep, or better yet, read the instructions.
You may think you know what you’re doing, but different parts come with unique features and set-ups. Reading the instructions beforehand can save you a lot of guesswork, and looking things up in a manual can help you solve any problems you may encounter.
13. Many parts click when installed properly.
If you don’t hear or feel a satisfying click when implementing a cable or installing your RAM, for example, your component may not be in all the way.
14. Don’t jam anything!
As mentioned earlier, components are fragile and can be bent or broken by haphazard handling. If a piece isn’t fitting where you think it’s “supposed to,” that may be because you’re installing it wrong, not because you’re failing to shove it in aggressively enough. If you’re certain you’re inserting the right part into the proper spot but it’s not fitting correctly, try rotating the component.
15. Try to keep the cables neat as you’re building.
Eventually you’ll have a bunch of cables in there, which can make it hard to see around the case or motherboard. Also, when you’re done, your build will look a lot sleeker, professional and impressive if your cables are neat and orderly. You can always fix this later, but who wants to take two steps backwards to get one step forward? Keep your cables neat by carefully untangling them beforehand and adding them to the build while vigilantly avoiding interweaving with cables already in place. You can also use zip ties to group installed cables together and give you more space in the case.
16. Be patient with the I/O backplate.
Installing the I/O backplate can be a frustrating process. You need to make sure it is flushed against the case; it will likely making a clicking noise when in properly. Use two fingers to cover the length of the backplate, and push it in while eyeing the outside of the case to ensure proper alignment. Extend two fingers to two diagonally opposite corners. Pop those corners in before moving over to the next corners. Run your fingers along the backplate’s perimeter to make sure it’s in all the way.
17. Don’t forget to flip the switch on your power supply.
While you probably won’t forget that your PC needs a power supply, it can be easy for you to overlook flipping the on switch after it’s installed.
18. Make sure all your peripherals work beforehand.
It’s real anticlimactic to spend hours on a build just to hit power and see nothing happen, as will be the case if you try to pair it with a non-functioning monitor. And while the PC will boot even if the keyboard or mouse is bad, it won’t be much use to you. You definitely don’t want to disassemble your build piece by piece when all you needed was a different peripheral to get things going.
19. Prepare an OS install disk
As soon as your computer is built and powers on, the first thing you need to do is install Windows or Linux. Prepare a USB boot drive in advance.
20. Use the enthusiast community.
Whether that means asking a friend who’s a more expert builder, or hitting up reliable and informative online forums, like the Tom’s Hardware community, you can learn a lot from tech enthusiasts or just get some great ideas for your build. These resources are especially helpful when troubleshooting or if you get stuck. You’re never alone in the world of PC building!
21. Have fun!
Remember, building a PC is supposed to be fun. And while roadblocks or hiccups may appear, frustration doesn’t have to follow. Think of it as a game or creative process; every issue just gives you the opportunity to work on a new strategy or try a different approach.
Scharon Harding has a special affinity for gaming peripherals (especially monitors), laptops and virtual reality. Previously, she covered business technology, including hardware, software, cyber security, cloud and other IT happenings, at Channelnomics, with bylines at CRN UK.
Topics
PC Builds
experience and recommendations from readers of Tinkoff Magazine
Efim Gugnin
assembled the first PC at 15 years old
Author profile
When you need a new computer, you can save a lot of money and assemble it yourself.
We asked readers who have experience building a PC about all the tricks and difficulties they encountered in the process. We collected their tips on how to get a computer that will run all the games and won’t burn out from running 4K video.
These are the stories of Community readers. Collected into one material, carefully edited and formatted according to editorial standards.
Board No. 1
Save wisely
Maxim Rykov
loves when it’s cheap, but not angry
I decided to build my own PC because I understand a little about this topic. I thought that I could save money if I choose accessories that I can afford. Did this in 2019. I was especially lucky with the video card: I managed to grab the GeForce 1660 for 17,000 R. Six months later, the price of the video card tripled.
I assembled a PC from Aliexpress, so all the main components came out very cheap. A set of motherboard, RAM and processor, for example, cost only 8000 R. So cheap because they are server components — and if I want to replace parts, I will only have to change them to other server components.
/sobral/
How much does it cost to assemble a computer yourself
The only thing I would pay special attention to is the power supply. Do not order it on Aliexpress, buy it better in a regular electronics store. This will be safer for you and your new computer. You don’t want everything to burn down, do you?
Board No. 2
Check component compatibility
Roman Kazykhanov
does not trust ready-made solutions
Before assembling a computer, make sure that the case can accommodate all your components, including the cooler: it happens that high CPU coolers do not allow you to close the side cover of the system unit. Also pay attention to the maximum length of the video card, the form factor of supported motherboards, the presence or absence of case fans. If they are not included with the case, you should buy separately and install at least a couple of pieces.
It may seem funny, but I have come across cases where people forgot to remove the protective film from the base of the CPU cooler before installing it on the processor, which led to overheating.
Carefully read the specifications for the chosen pieces of iron, pay attention to the reviews, look at the reviews. If you are not sure of the correct choice, ask your knowledgeable friends or in thematic groups on Vkontakte.
The main advantage of self-assembly is the ability to select components yourself. Often in ready-made solutions, even from the high price segment, they save on minor components. For example, they put a cheap power supply, and RAM can stand at one bar, which negatively affects performance — especially in games.
/list/gamer-portfolio/
How much you earn if instead of a computer game you buy shares of its developer
Dragon Slayer
is reinsured
Difficulties can be avoided by checking whether all your components are compatible with each other. There are constructors on different sites that allow you to immediately select the parts that suit each other. Well, in general, there is quite a lot of information on the Internet about what and where to connect — there should be no problems.
The only pain is if you have some of the components that are defective and the assembled computer does not start after assembly. In this case, it will be difficult to do without outside help.
Board No. 3
Be more attentive to the body
Alexander Kuzmin
assembles a PC meticulously and intelligently
In order for the motherboard and video card to fit into the case, you need to clarify their dimensions and compare them with the dimensions of the case. In modern powerful computers, liquid processor cooling systems are often installed — you need to imagine where you will mount the radiator and whether it will fit in height and width. Detailed specifications are listed on the websites of electronics stores — just study them carefully to avoid problems.
When I assemble a computer, I try to select components as accurately as possible, based on my requirements and wishes. I read specifications, reviews, reviews, think for a long time and ask the price. If I had an infinite amount of money, I would choose less carefully, and so I have to adjust the iron not only to my desires, but also to financial capabilities. But in the end, I am satisfied: meticulousness in the choice of components practically guarantees the success of the assembly.
Board No. 4
Read instructions
Markus2525
has been collecting computers since childhood
Since I have been following the components for a long time, I just went and bought the necessary configuration in DNS. Came home and collected. All components are in perfect condition, everything works like clockwork. I do not confuse the wires, as I have been doing this for more than 15 years. With this experience of assembling, disassembling and setting up a PC, everything is done somehow automatically.
Difficulties can be avoided by carefully reading the instructions for the boxes you buy. Even from the first time, anyone can assemble a computer just by watching a video on YouTube or finding information on the Internet. But if you yourself are very scared, it is better to entrust the assembly to the store where you buy the computer.
Board No. 5
Love cables
Eugene Kazakov
not nervous
I had — and still have — a laptop, but I wanted a desktop computer for more flexible upgrades. I use it to play Minecraft, GTA V, develop, run office software and instant messengers.
The main difficulty in assembly is cable management./cdn.vox-cdn.com/uploads/chorus_asset/file/12793573/akrales_180824_2838_0138.jpg) If this process is not directly adored, it is not for the faint of heart. Fortunately, my cables hid under the back wall without any problems, and what is visible from the outside turned out quite neatly.
If this process is not directly adored, it is not for the faint of heart. Fortunately, my cables hid under the back wall without any problems, and what is visible from the outside turned out quite neatly.
/guide/gaming-laptops-2021/
How to choose a gaming laptop in 2022
Board No. 6
Don’t forget about cooling
Stas Zagorodny
solved the problem with fans
The case, power supply and cooling of my computer are completely modular, so I had to figure out which specific fans to take, where to fix and direct. I was afraid that the selected set of fans would make the system unit hover slightly above the floor level, so I had to look for a way to adjust their power.
The motherboard was not intended to power such large fans, and then it was not in the mood to burn it. Therefore, I found adapters for fans that allowed them to be powered from the power supply, but to regulate the speed with a signal from the motherboard: it makes a decision based on the temperature of the central processor.
I puffed for a long time, spent a lot of money and now I want a bigger monitor, but the computer itself does the job perfectly. Of the recent games, only New World on «ultra» makes my computer sound louder than usual, and then about half the available fan power.
Board No. 7
Check nutrition
Slava
afraid of the current
Assembling a computer is quite easy: if something doesn’t fit, then don’t judge, just think.
Probably the hardest part is the power supply. You need to make sure that the cables can power all the components, then connect all the small wiring such as coolers and SSDs. I had to tinker here, but maybe it’s only me who has such problems because of the primal fear of electricity.
/ferma-bitkov-fail/
I spent 110,000 R on the mining farm and did not earn anything on it
Board No. 8
Don’t ask anyone for advice
Mischa Eliseev
put the wires aside for later
I assembled a computer to play. It seems that the Playstation will be cheaper, but this is only until you calculate the cost of the games themselves. On a computer, you will pay for them from 150 to 2000 R, and on consoles it is already about 2000-6000 R.
I bought almost everything for my computer from hand. The components are already old: there are still enough for games, but for any worker — with difficulty. It was also very difficult to deal with wires in a small case. Everything barely fit in there — and it doesn’t look that great. I think I’ll do this so that it doesn’t hurt my eyes when I update the components.
I also recommend not to turn to Russian resources for advice. Everyone there is very evil. Small computers for them are an oven, and such, they say, can never be assembled. If you know English, I advise you to immediately go to Reddit.
Readers build computers. Stories about how to build a PC yourself
Share experiences
How to build a computer yourself
In this article, we will talk about the general principles of assembling a PC with our own hands and see if it is possible to do it yourself or it is better to turn to specialists.
Content
- Accessories and compatibility
- CPU
- Motherboard
- RAM
- Memory: hard drive and SSD
- video card
- Power Supply
- Frame
- Assembly sequence
- Assemble yourself or contact a specialist
- Tips
Accessories and compatibility
There are several basic parts of a computer:
- processor controls the operation of the entire computer;
- motherboard connects components and coordinates their work;
- in RAM temporary information about programs is stored;
- hard disk stores data and files that are necessary for the continuous operation of the machine;
- video card is responsible for the speed and quality of displaying the picture;
-
power supply provides energy.
All components must be compatible — that is, work with each other without conflicts. This applies both to physical characteristics — for example, the type of connector and the size of the motherboard, and indicators of power, volume and performance. This is especially important for the processor and motherboard, but it will be useful to make sure that the hard drive, RAM, and video card are compatible. This can be done on manufacturers’ websites by manually checking the characteristics of each part. Or use the online configurator — most major electronics stores have them.
CPU
The processor processes information and controls the operation of the entire computer. You will have to choose from two brands: Intel or AMD.
Intel processors are more expensive, but they are better suited for gaming computers. Choose mid-gen Intel Core i5 and i7 chips. If the model name ends with the letter K, for example, Intel Core i7-10700K, then the processor has an unlocked multiplier. It can be overclocked, that is, to increase performance with the help of a special program. True, in this case, you will have to invest in a sufficiently powerful motherboard.
In the case of an assembly based on Intel processors, you should not take a processor with the K prefix and a motherboard on a B-, and even more so A-chipset.
As well as vice versa: in the case of assembly on processors without the possibility of overclocking, there is no point in buying a board on an expensive Z-chipset, it is better to invest in something else.
If you’re leaning towards AMD, then go for the A and Athlon series for budget PCs. The Ryzen Threadripper series is suitable for video editing or work in graphic editors. Finally, Ryzen is a series with an unlocked multiplier. These are the most productive processors, they are suitable for gamers and developers.
If the budget is very limited, and the requests are low, a hybrid processor will be enough. It allows you to solve simple tasks without a separate video card.
The processor is attached to the motherboard through a connector on it — a socket. Be sure to check their compatibility in order for the PC to work.
A common error is a mismatch of processor specifics when installed on certain boards. For example, people choose a processor from the AMD Athlon Gold series and buy boards on fresh chipsets with the appropriate socket. But these chipsets simply do not support old and weak processors from AMD. To avoid this, you need to go to the motherboard manufacturer’s website and look for a list of supported processors on the «Support» tab.
Another important characteristic of the processor is the type of cooling. Air — these are simple fans that are placed at different ends of the case and physically cool the hardware. Water is tubes with liquid that «takes» the heat of the processor and transfers it to radiators, and they are already cooled by ordinary coolers. The second type is more expensive, but more efficient, so it is more often installed on gaming PCs.
Motherboard
The processor, video card, data drives are connected to the motherboard. From its form factor — that is, the size, number and type of connectors, the configuration of the case depends. Therefore, before choosing this part, you need to consider how many and what kind of components you will have.
The board is connected to the processor through the chipset. Do not forget to check the compatibility of components. For example, motherboards based on the B460 and h510 chipsets are not compatible with the new Core 11000 processors.
The client may miss picking a processor. The connector will be suitable, but the processor generation is higher. And in this case, the computer will not start. For example, ASRock h510M-HDV R2.0 board is not compatible with Intel Core i5-11400 processor. The motherboard supports the 10th generation, and the processor supports the 11th.
The form factor is the size of the motherboard and the number of connectors. The smaller it is, the more compact the board and, consequently, the system unit. The more, the more components will fit in the case. ATX is a standard form factor for home PCs, Micro-ATX and even smaller compact ones, but more stripped down in functionality. If there are no large performance requests, you can select them so that the system block takes up less space.
© Hans Haase / CC BY-SA 3.0 / Wikimedia Commons
| Form factor name | Dimensions in mm | Purpose |
|---|---|---|
| ATX | 305 × 244 | Office, home and professional PCs |
| Micro-ATX | 244 × 244 | Office and home PCs |
| Mini-ATX | 284×208 | Office, home and professional PCs |
| EATX | 305×330 | Powerful gaming and professional machines |
| Mini-ITX | 170×170 | Silent home computers |
| Mini-STX | 140×140 | Computers with external power supply |
Random access memory, or RAM
RAM stores temporary information about the processes taking place in the computer. The speed and multitasking of the entire system largely depends on it. The more complex and modern the programs, the more RAM is required.
Memory is issued in the form of dies. The volume of one die is 4, 8, 16 or 32 GB. The largest manufacturers are CORSAIR, HyperX, Samsung, Gigabyte. The choice again depends on your needs. If you are building a gaming PC, then buy Dual Rank — boards with two groups of memory chips. These are two not the cheapest 16 or 32 GB sticks.
When choosing RAM, it is necessary to take into account the frequency characteristics of operation and whether the processor and motherboard support this memory.
Computer memory: HDD hard disk and SSD drive
The operating system, programs, videos, photos and other documents need to be stored somewhere. To do this, you will need a hard drive or SSD. They differ in price, processing speed and memory capacity.
Hard disk — built-in computer memory up to 26 TB. For everyday tasks, 4-8 TB is enough with a margin. Files are written to the hard drive using magnetic technology, which is gradually becoming obsolete and inferior in speed to SSD.
SSD is a solid state drive. It writes data three times faster than a hard drive, does not make noise, and retains information longer. SSD is ideal for the operating system, office programs, browser, antivirus — in a word, everything that requires speed. Thanks to the SSD, the machine will boot up faster and freeze less.
video card
The video card is responsible for the image, objects and textures. This is not a required item for a PC, because it can be built into the processor as a video chip. It will turn out cheaper and more compact, but there are disadvantages. If the integrated graphics card fails, the entire processor will have to be replaced. In addition, the chip does not have high performance; it will not be enough for games and work with graphics.
A separate video card consists of a GPU, coolers and memory. GPUs are made by two companies: AMD and NVIDIA. And the video cards themselves are assembled by ASUS, MSI, Gigabyte, Palit and other companies.
AMD Radeon RX 570 or 580 is suitable for the mid-range. Designers and gamers choose NVIDIA GeForce RTX.
Pay attention to the amount of memory — an important indicator for demanding games. For example, Assassin’s Creed Valhalla at high settings requires 8 GB of video memory.
Choose a graphics card with active cooling because passive cooling fails faster. Two coolers is the best option.
Power Supply
The power supply should be chosen last, when the performance of your PC is already clear.
When choosing a power supply, you must take into account the power of all devices connected to the system unit.
At the same time, the rated power of the power supply should be 20-30% more so that the computer does not freeze on complex tasks. On average, this is 600-650 watts.
Do not install the cheapest power supply, because all components depend on this seemingly simple part. A power surge can «burn out» an expensive video card and motherboard.
Don’t skimp on the power supply. No matter how budget the assembly is, the power supply is the key to the stability of the system. It protects the computer from external and internal threats. As a rule, I allocate 10% of the entire assembly budget to this item.
PC case
Choose a case based on your motherboard form factor. Pay attention to the place under the cooler — there should be enough space for the fan. There must also be enough space for a video card, otherwise the side cover of the case will not close.
When choosing a case, you must immediately consider airflow cooling and the location of coolers, power supply, and, if any, water cooling system. It is also important to consider the length of the video card mounted inside.
Cases are vertical — Tower, and horizontal — Desktop. Horizontal ones look unusual, but they are not suitable for powerful PCs — they are too compact.
Vertical cases can be found much more often. Plus, they’re more comfortable. The most compact ones have the Slim or Micro prefix in their name: sometimes a discrete video card does not fit into such a case. Midi and Full sizes allow you to place almost any video card and cooling system. Ultra- and Super-Tower are the largest, can accommodate multiple processors and many drives.
Please note that the bulky case allows you to place more powerful components and larger fans. A gaming PC can hardly fit into a miniature case.
Step-by-step instructions: how to assemble a computer with your own hands
To assemble, you will need the case itself, a magnetic screwdriver and thermal paste, a substance that improves heat dissipation. The sequence for installing parts in a housing is usually as follows:
-
Power supply .
 The largest and heaviest part, so immediately screw it to the allotted place on the case. At the same time, you can carefully stretch the wires under the back cover.
 - Motherboard . First, you need to connect the processor, cooling system and RAM to it. Then a fully equipped part can be installed in the system unit.
- Processor . The most trembling moment in the assembly is to connect the processor and the motherboard. Remove the socket cover, move and lift the lever. Install the processor into the socket.
The most common mistake: people bend the legs of the processor. They also confuse the power cables of the processor and video cards. They are very similar.
- SSD . A stand with a screw for an M.2 SSD drive is installed on the motherboard, and you need to fix the part in it.
-
RAM . Before installation, check the layout of the dies in the motherboard: it is important to take into account the connector and the position of the models.
- Cooling system . The system unit should have two fans: on the side and in the back, less often — on top. Before installing the cooling on the processor, apply some thermal paste.
- Hard disk . It needs to be fixed on the case and carefully connected to the motherboard via a flexible SATA cable.
- Video card . It is attached to a special connector with a latch on the motherboard. The video card can overlap other parts of the components, so it is installed last.
- Enclosure front panel . In order for the buttons and USB inputs to work, you need to connect them to the motherboard. The connection scheme varies depending on the model — it is better to check the instructions.
- Side cover . Cooling in a closed case is better than in an open one, so don’t forget to install a sidewall.
After the first connection, nothing may happen. Do not rush to worry, restart your computer several times and wait. Indicators on the motherboard will help you figure out if something is connected wrong.
Build a computer with your own hands or contact a specialist
Both options have pros and cons. It will be cheaper to assemble a computer from components on your own, but it takes time, accuracy, and at least basic knowledge. A weak cooling system, an incorrectly selected power supply, bent sockets and connectors — this is not a complete list of popular problems that arise after self-assembly.
If you are not confident in your abilities, it is better to delegate the selection and assembly of components to a specialist.
Every tenth application for Pro looks like this: “I tried to assemble a computer, the socket legs were bent. Doesn’t turn on. Help!»
Summary: if there is not enough time and experience, contact the pros. If you have a desire, enough free time and at least a little experience in handling components, assemble a PC yourself.