How to get HDMI Input on Laptops – A Crash Course in HDMI Ports – PC Webopaedia
Whether you are a video game console enthusiast or a PC Master Race proponent, chances are — you own a laptop. After all, laptops are practical in more ways than one. They can efficiently handle your technological necessities without imposing on your mobility. Moreover, owning a laptop also means that you get to run thousands of Windows-supported games on the fly.
With that said, you may have thought about taking your laptop’s versatility to the next level. Because hands down, having to switch between different devices to play your favorite games can be quite a hassle. For this reason, the HDMI feature on our modern-day laptops is sure to have caught your eye at some point.
On that note, if you are looking to find out more about the HDMI connectivity your laptop offers and whether it is compatible with your video game devices, stick around. We are about to do an HDMI speedrun and give you all the necessary hints on how to handle this overpowered, multiplatform boss fight like a pro.
Table of Contents
- 1 What You Should Know About the HDMI Port on Your Laptop
- 2 No HDMI Input on Your Laptop — No Problem!
- 3 How to get hdmi input on your laptop – 4 Solutions
- 3.1 ★ Option #1: Video Capture Card
- 3.2 ★ Option #2: Miracast
- 3.3 ★ Option #3: Space Desk
- 3.4 ★ Option 4: Steam In-Home Streaming
- 4 Can You Add HDMI Input to Your Laptop?
- 5 What Does the Future Hold?
What You Should Know About the HDMI Port on Your Laptop
An HDMI input laptop is a rare commodity. Today’s laptops mostly feature HDMI-out ports and they differ from their HDMI-in counterparts. This means that different pieces of hardware, circuitry, and connectors are needed to decode the two HDMI signals. In other words, an HDMI-out port cannot be used as an HDMI-in port.
To emphasize, a plug-and-play solution to swapping the HDMI input and output signals is not possible. While there are adapters that convert signals, such as VGA/DVI to HDMI and vice versa, the signal itself travels in one direction only — out. However, certain laptop brands included HDMI-in ports in the past.
For example, you are probably acquainted with Alienware. If you are not “late to the game”, you may have even thought about purchasing one of their two-way HDMI models back in the day. These models allowed the user to switch between the HDMI input and output signals seamlessly without losing any of the laptop’s core functionalities. That is to say, the lucky owners never had to worry about how to get HDMI input on a laptop.
Unfortunately, manufacturers opt-out of including HDMI-in ports in modern laptops for one reason or another. Therefore, if your steal-of-a-deal pre-owned market adventures somehow end up leading you to a functional Alienware HDMI input laptop, we strongly recommend that you snatch it.
No HDMI Input on Your Laptop — No Problem!
Be that as it may, we have to be honest. Since HDMI-in laptops shamelessly sport a holy grail status in today’s market, you will want to explore more probable options.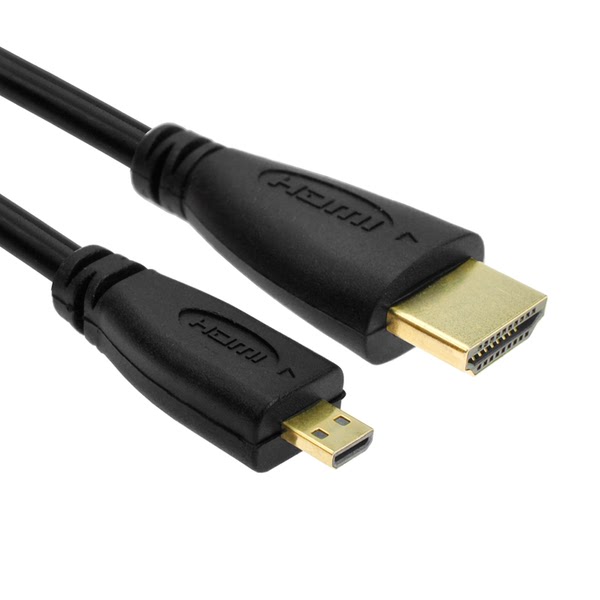 After all, working with the HDMI laptop you already have is as good of an alternative as any.
If you would rather not think about how to get HDMI input on a laptop, we got your back. Luckily, there are a couple of ways for you to use your laptop as a monitor for your video game devices. Without further ado, let us get straight to it!
How to get hdmi input on your laptop – 4 Solutions
★ Option #1: Video Capture Card
A video capture card (VCC) will allow you to stream and record the gameplay directly onto your laptop. It works by connecting your laptop through the VCC to your PS4/XBox/etc. The downside of VCC is that you may have to deal with a game-breaking amount of lag. This is dependent on your rig specs and the quality of the VCC.
With that said, we understand that this is not an ideal solution. However, VCCs can record gameplay from older video game consoles that do not support modern streaming technologies. On top of that, with a VCC, an HDMI input laptop will be off your radar.
★ Option #2: Miracast
You can set up your laptop as a secondary display within the same Wi-Fi network with Miracast. To do so, both your main PC and your laptop need to have the ability to connect to the broadband wirelessly.
To that end, the downside of Miracast is that you may have to purchase a Wi-Fi adapter for it to work. Additionally, Miracast utilizes Intel HD graphics. This means that a dedicated GPU may result in poor compatibility and a bumpy road to optimal performance.
On the other hand, if your rigs meet all the Miracast requirements to a fault, you are golden. All you have to do is configure the System settings on them and ensure that you have Projecting to this PC enabled. By doing so, your main PC and laptop will be able to communicate and successfully establish a connection. In the long run, you will be able to use your portable rig as an external monitor.
★ Option #3: Space Desk
In contrast to Miracast, Space Desk is a third-party application.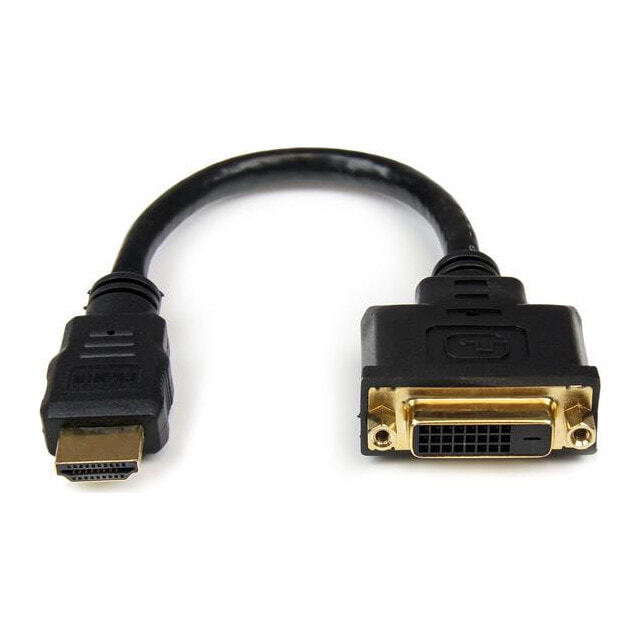 Despite that being the case, you are less likely to experience compatibility issues with it. After downloading Space Desk Drive to your main PC and Space Desk Viewer to your laptop, you can easily tweak the settings to set your portable rig as an extended screen within minutes. This way, the question of how to get HDMI input on a laptop will be a thing of the past.
★ Option 4: Steam In-Home Streaming
If you plan on streaming your Steam account game library to your laptop, In-Home Streaming is the best solution. It is simple, straightforward, and does not require you to think about getting an HDMI input laptop. You only need to log into your account, download the app on both of your rigs, and get them to pair with a few simple clicks.
However, that is not to say that In-Home Streaming does not come with its disadvantages. You will probably notice a drop in latency, which may negatively impact the gameplay experience in competitive games. On the bright side, you will have no issues using your laptop with older specs as an external monitor. With In-Home Streaming, playability is not dependent on the rig’s hardware components.
Can You Add HDMI Input to Your Laptop?
You may have already noticed that only the first option on our list was not related to computers exclusively. And perhaps you are thinking that adding an HDMI input to your laptop could solve this issue. After all, why not create an HDMI input laptop yourself?
If that is the case, the good news is that it is entirely possible. The bad news is — well, it is tricky. Still, we advise that you do not unleash your tinkering skills on an operational laptop, but a broken one instead.
You can start by looking for an embedded display controller board that features an HDMI-in port. With that said, the board has to be compatible with the 30-pin low-voltage differential signaling connector found in your laptop. In addition, you will need an external power adapter to get this to work. Also, you may want to consider getting a custom 3D-printed casing to house your new HDMI input feature.
Once you are done rearranging and connecting all the bits and pieces, you will get a fully functional HDMI-in feature on your laptop. Thus, your journey to an HDMI input laptop will be officially over.
What Does the Future Hold?
Having a single portable device that can effortlessly display all of our favorite cross-generational video games would be a dream come true. With or without the existence of an HDMI input, it would present a leap forward in terms of much-needed, multi-device support.
As technology actively progresses, so do the means of its utilization. For all we know, using our laptops as full-fledged monitors for various video game devices may be a stone’s throw away.
Fixing Resolution of HDMI Output on PC
Skip to content
If you’re using your HDMI-enabled TV or screen as a second monitor on your PC, you may experience issues with the resolution. This can occur when you’re streaming TV shows and watching movies or using it to perform work. For normal use as a monitor, Windows will control the display settings for your HDMI connection. When you’re watching videos, the source application may override the Window settings, leading to inconsistent results. If you face issues with your Windows resolution, this guide will help you with fixing the resolution of the HDMI output on your PC.
HDMI Resolution Issues
Fixing HDMI Resolution Issues
Keep your PC Devices Up-to-Date and Improve Online Safety
For only $9.99 a month Driver Support | ONE can help you save time and frustration dealing with common Windows device issues as well as added optimization and safety features.
Give Driver Support a Try Today
When you experience variations in resolution from your HDMI TV connected to your PC, it could point to a setting on the TV. Depending on the manufacturer, you may have to adjust the picture settings using the menu options. Specifically, there’s a legacy setting on older TVs called “overscan.” This can lead to inappropriate resolutions and screen sizes.
Change the HDTV Settings for PC Use
Overscan is a technology that helped content creators to deliver consistent pictures on a variety of different screen sizes and aspect ratios. As technology improved and manufacturers followed new standards, overscan became obsolete.
If you can’t access or see all the edges of the desktop on the screen, it’s likely that overscan is to blame. To fix it, make sure you change your HDTV’s aspect ratio to the Screen Fit setting in the Picture settings.
Finding the right setting will vary between manufacturers and models. Usually, the setting is available under Picture Settings or Advanced Options. Look for the Aspect Ratio you’re currently using and make sure it is set to Screen Fit whenever you use the HDMI TV as a monitor.
Adjust Aspect Ratio
Some models will have an overscan setting instead of specific aspect ratios.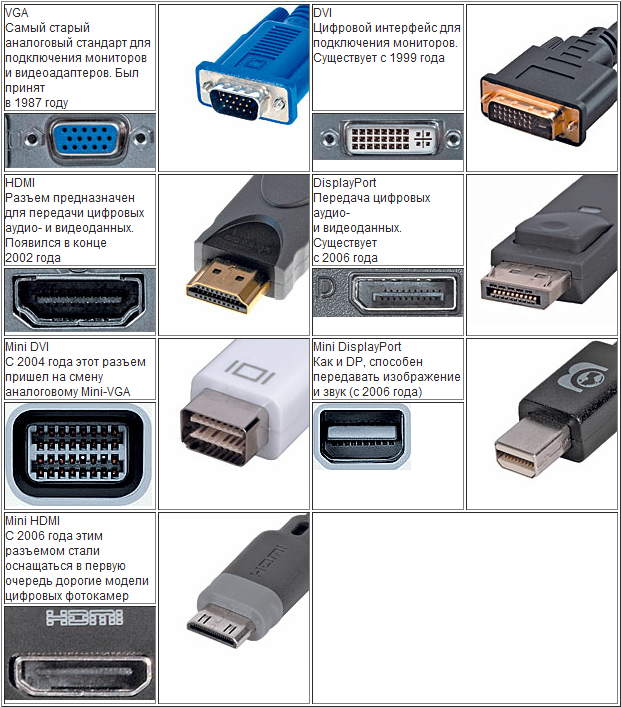 If this is the case, ensure you use the Screen Fit option for the best results or turn off overscan. If you’re unsure about the settings, check the User Manual of your HDMI TV.
How Do I Change the Resolution for My HDMI TV from My PC?
If you’ve changed the Aspect Ratio and the screen now fits on the TV, you may also face issues with the resolution settings on the PC. To change your resolution settings, you’ll need to access your PC’s display options.
- Hit the Windows Key and type Change Display Settings. You can then click on the top result.
Open Display Settings
- Once the Display Settings App opens, you’ll see two screens (or more if you’ve got multiple HDMI outputs connected). Make sure you select the right display for the HDMI TV before making any changes. You can do this by clicking on Identify.
Find Your HDMI Monitor
- You’ll see the number from the screenshot above displayed on the monitors for a brief period.
 Depending on which screen is set to your primary display, make sure you change the settings for the HDMI monitor.
Identify the HDMI Monitor
- Select the HDMI monitor from the available displays.
Select HDMI Monitor
- Scroll down until you see the current resolution settings for your HDMI monitor.
Find Current Resolution
- You can change the resolution settings and test different values that match your HDMI TV’s configuration.
Change Resolution Settings
- Once you change the setting, Windows will apply the new resolution for a limited time and revert if you don’t accept the new setting.
Time Remaining To Apply Setting
- Once you’ve found the best resolution for your TV, select Keep Changes to keep the new resolution.
Keep Resolution Settings
Note that if you do not have all the different resolutions available you may need to use your Graphics Card’s software to update the resolution.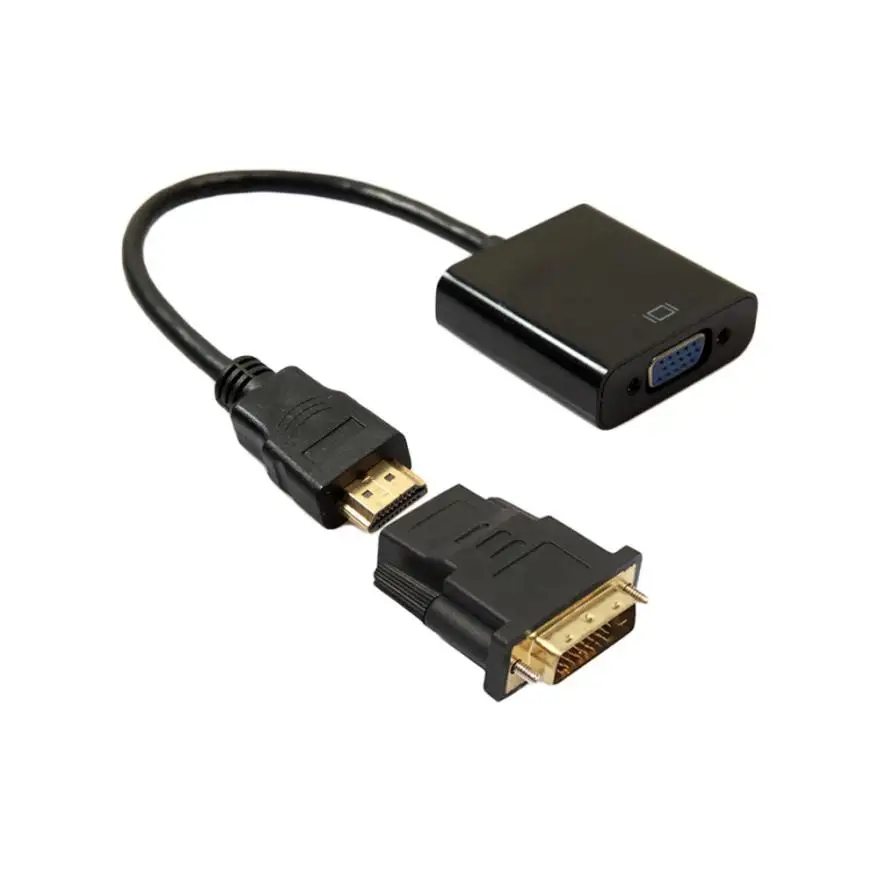
Changing Resolution Settings in Graphics Card Software
If you want to change your resolution settings, you can use the manufacturer of the graphics card’s software instead of Windows. Depending on your specific set up there will be different methods for changing the resolution. Firstly, depending on how you’ve connected the primary and secondary monitors will determine if you’re using onboard graphics or the installed GPU. On laptops, it’s common to use the onboard graphics for the normal screen, and the HDMI monitor will use the installed GPU.
For a set up that uses both onboard graphics and a GPU, you may need to change the settings for the onboard graphics.
Keep your PC Devices Up-to-Date and Improve Online Safety
For only $9.99 a month Driver Support | ONE can help you save time and frustration dealing with common Windows device issues as well as added optimization and safety features.
Give Driver Support a Try Today
Changing Onboard Graphics Settings with Intel Software
To change your Intel Graphics settings, you’ll need to access the graphic properties of the GPU.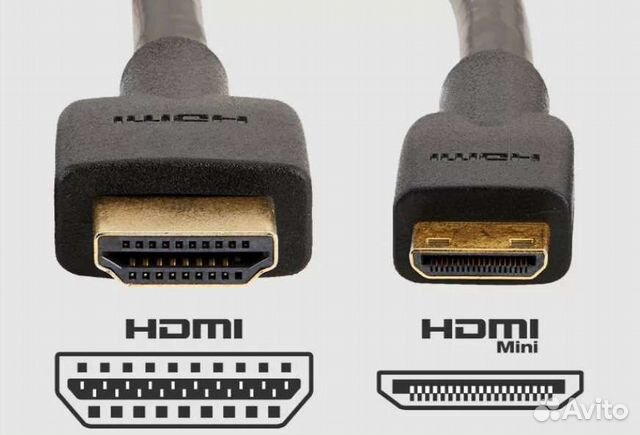
- Use the Right Hand Mouse (RHMB) and click anywhere on the desktop. Then select Graphics Properties.
Open Intel Graphics Properties
- This will open the Intel Graphics Control Panel. Here you can change the resolution settings for the monitors, create profiles, check your 3D and Power Settings, as well as find information on other options and support.
Intel Graphics Control Panel
- Click on Display to access your current Intel Graphics settings.
Open Intel Display Settings
- Similar to the Windows settings, you can change the resolution for each monitor connected to your PC from the Intel Graphics Control Panel display settings. You can also adjust color settings, change which monitor to use as the primary display, and adjust zoom levels using the scaling features.
Intel Display Settings
- To change your HDMI monitor’s display settings, select it from the dropdown provided.
Select Intel HDMI Display
- Once you’ve selected the HDMI monitor display, change the resolution to a suitable setting for your TV. Note you can also use the “Scale Full Screen” setting to match the display to the HDMI TV’s settings. Under advanced settings, you’ll find Aspect Ratio settings, Quantization Range options, and the ability to enable or disable IT content. After making the changes, click on Apply at the bottom of the screen to finish the process.
Apply Changes
Troubleshooting Limited Resolution Settings on your PC
If you find you have limited graphic and resolution settings available, it may indicate that your graphics driver isn’t working properly. To make sure your graphics card operates correctly with your HDMI TV, you’ll need to check for driver updates.
- Open your Device Manager by hitting the Windows Key and typing Device Manager. Select the top result from the list.
Open Device Manager
- In Device Manager scroll down to find your Display Adapters, then click on the arrow to expand and see the full list of available devices.

Expand Display Adapters
- Select an adapter and use the RHMB to open the context menu.
Open Context Menu
- On the context menu, you have the option to Update Driver, Disable Device, Uninstall Device, Scan for Hardware Changes, or access Device Properties.
- Update Driver – Allows you to update the driver either automatically or manually.
- Disable Device – Prevents the Device from working. If you want to use another graphics card as your primary display adapter, you can choose to disable the one you don’t want to use.
- Uninstall Device – Lets you uninstall the device drivers. You can reinstall the drivers after you’ve removed the software.
- Scan for Hardware Changes – Once you’ve uninstalled the device, scanning for hardware changes will add drivers from Windows for the graphics card.
- Properties – Shows detailed information about the device status, the driver used and provides additional settings for device optimization.
- Select Update Driver from the Context Menu.
Select Update Driver
- On the Update Driver window, select Search Automatically for Updated Driver Software.
Automatically Update Drivers
- If a newer driver is available, Windows will download and install it for you or inform you that you are already using the latest driver for your device. Click close once the process completes.
Close Driver Update Window
Let Driver Support Keep your PC Drivers Up to Date
If you’re facing issues with drivers on your PC that limit the options and features available with display adapters, you should use Driver Support to help. Driver Support will create a catalog of your PC’s hardware and connected devices, and once you register the solution it will automatically download and update your driver software for you.
For improved performance with Active Optimization and reliable PC operation, Give Driver Support | ONE a try today!.
Page load link
How do I connect a computer to a TV using an HDMI cable?
Today’s material is recommended for reading to happy owners of plasma or LCD TVs, as well as to all those who plan to acquire such happiness. As experience shows, it is almost impossible to resist the temptation of connecting a computer to such a mega display! But not everything is as simple as it might seem at first glance, so let’s be patient — ahead of the «multi-book».
The article can be divided into three parts: first, we will look at how to connect a computer to a TV via an HDMI cable, later you will learn how to properly configure the video card, and finally, we will deal with audio output via HDMI.
We connect our PC and TV with an HDMI cable.
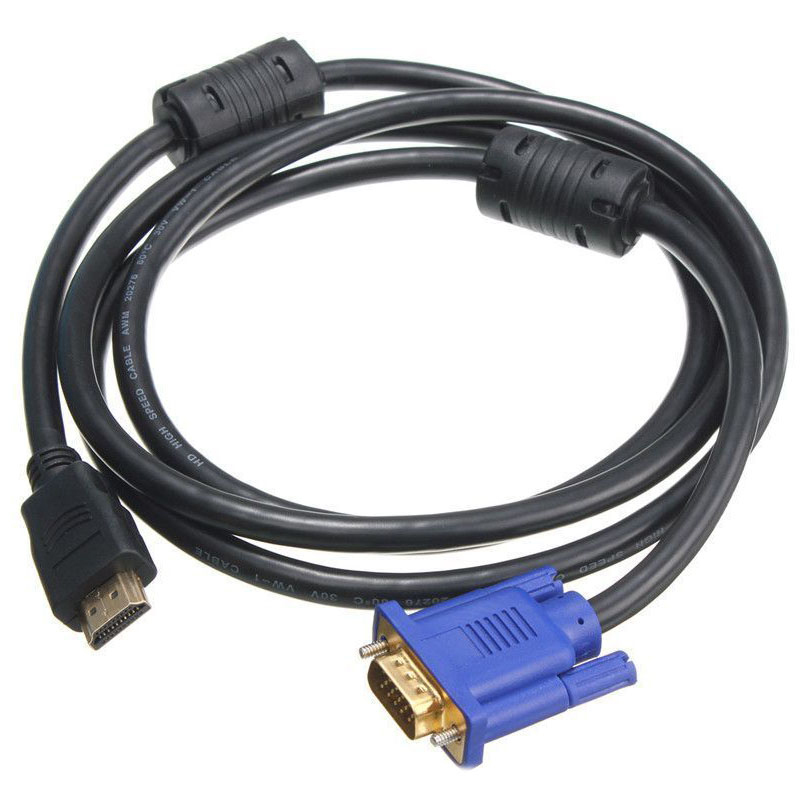
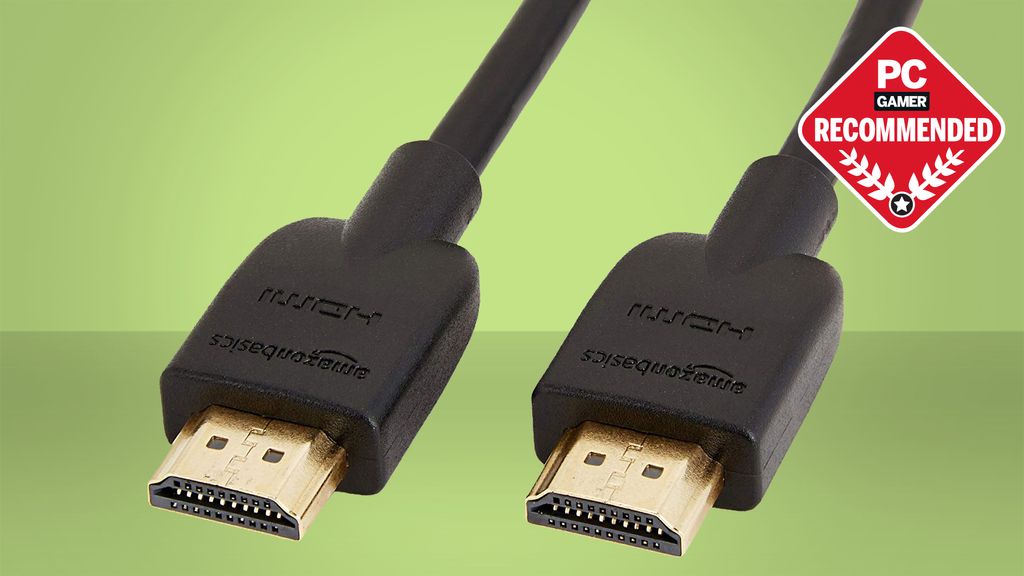
To be honest, for working with text or spreadsheets, plasma is not the best option, it’s a completely different matter when it comes to hacking in computer games or working with graphics and design.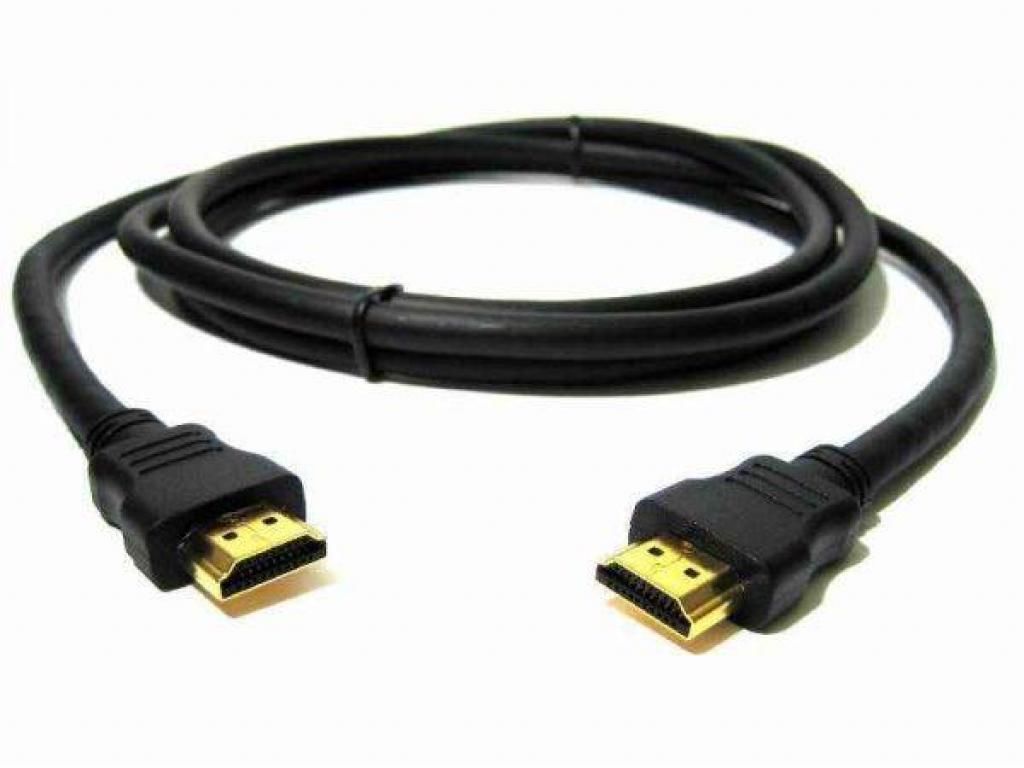 In the most common case, all that is required is a simple, inexpensive Chinese HDMI cable with identical connectors on both ends, which can be easily purchased at any radio parts or computer equipment store. Taking into account the possible work in 3D, you can immediately buy a cable version HDMI 1.4 (or higher).
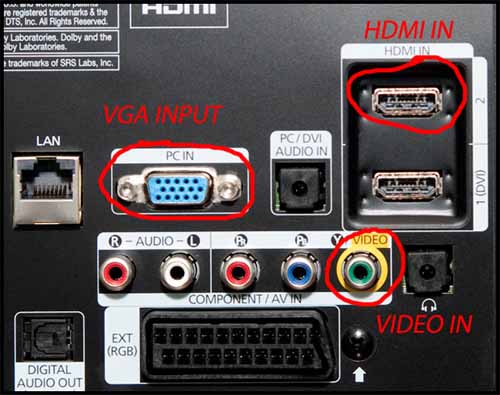
So, we got the cable, now it’s time to find connectors for it on the computer and TV. The picture shows what the corresponding connectors on the back of the TV look like:
The connector on the computer is located in the area where the DVI or VGA connectors for connecting a monitor (video card output) are located. In the event that the video card is integrated into the motherboard, the HDMI connector will be next to the RJ-45 network cable connector and USB ports, while its appearance will be the same.
For laptops, the location of the HDMI connector depends on the manufacturer and model of the specific device.
As for netbooks, tablets, as well as photo and video cameras, they use smaller mini HDMI connectors, and therefore require a cable of the same standard.
Before purchasing a cable, you should decide where the TV will be located. In case it will be mounted on the wall, you will have to buy a corner adapter (see picture):
Please note that such adapters can be directed to the right or left, there are also adapters with adjustable angle, not only0 degrees. To date, it is not difficult to find an inexpensive adapter (most likely Chinese), you can even order it with courier delivery to your home.
As an alternative, you can use the DVI output of the video card, in which case you will need an appropriate adapter to HDMI. The process of connecting a computer to a TV using an HDMI cable is simple, you need to insert the cable all the way into the desired connectors on the PC and TV. But be careful — before that, be sure to disconnect both devices from the power supply! By a fatal coincidence, HDMI ports tend to fail, moreover, the TV itself, video card or laptop can fail!
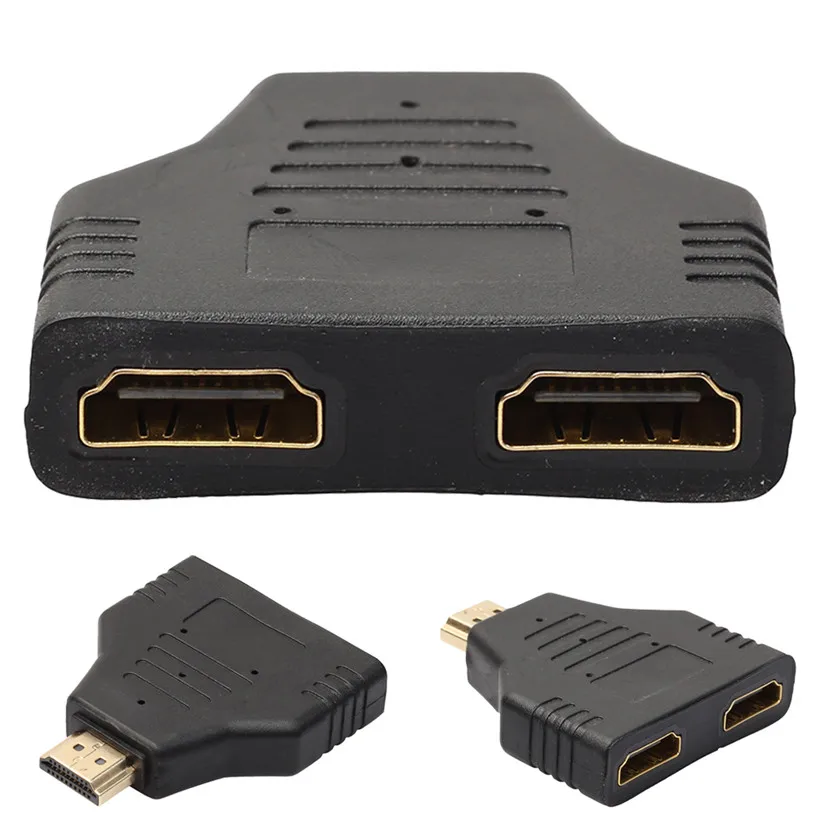
If there are not enough free HDMI ports on the TV panel, you can use an HDMI hub that allows you to connect several signal sources to the TV, switching between them is done using a button or a remote control. Such hubs (also called switches, switches) made in China usually cost around ten bucks, they show themselves no worse than expensive models. But still, if you want to watch videos in 1080p resolution, you should give preference to better options.
Adjust the display image.
Once the computer and TV are connected with an HDMI cable, there are some settings to be made. Keep in mind, if a monitor is also connected to the computer at the same time as the TV, then there will be no image on the TV — the monitor should be disconnected from the output of the video card. When the operating system has loaded, you need to select the optimal screen resolution (by right-clicking on any free space on the desktop). You can leave everything by default, usually the system chooses the highest possible supported resolution.
In this case, the image clarity will be high, but all the elements on the screen will be small — everything is up to you. It is worth considering the moment that different TVs support different resolutions, and if the picture supplied from the computer does not match the TV matrix, it will try to “fit” it to its size. Sometimes this negatively affects the image quality. Also, do not set the resolution higher than the TV supports, for example, do not set the screen resolution to 1920×1080 for an HD Ready TV that maxes out at 1366×768. The screen refresh rate (Monitor tab in Advanced Settings) can be at or above 60Hz (how much support the TV has).
Color rendition — True Color (32 bit). In general, all settings are completely similar to those of a conventional monitor — both confirmation of changes and “blinking” when new settings are applied. The TV is not always defined by its brand name, it may well be «Standard Monitor».
Multi-display setting.
When more than one device is connected to the video card output of the computer, the operating system sees several connected displays (in our case, the Windows TV is the same display as the monitor on the computer desk). In this case, there are two options for working — screen duplication and desktop extension, which can be determined in the display options menu (where the resolution is set).
Screen mirroring mode involves the use of several displays with similar parameters (screen resolution, aspect ratio). But both connected displays (in our case, one monitor and one TV) will display the desktop, but in parallel, the ability to set different screen resolution values \u200b\u200bfor each device will not be available. A not entirely correct picture will be displayed even at different aspect ratios of the monitor and TV.
It is much more interesting to work in the desktop extension mode, which allows you to connect more than two displays at the same time, while each of them is assigned its own number by the system (you can find it out by clicking on the «Define» button — a figure will be displayed for the entire height of the screen with the number of this display ). A little higher you can see the icons corresponding to each of the displays, which can be dragged, thereby changing the order. It is possible to make one of the displays the main one, for this you need to check the corresponding checkbox. It remains only to confirm the changes by clicking on Apply. This mode also allows you to set different refresh rates and screen resolutions for each display. Do not forget about the advanced settings of the video card, they may be different depending on the manufacturer, but usually they can be called from the context menu of the right mouse click on the screen (for example, NVidia Panel).
Broadcasting sound from a computer to a TV via an HDMI cable
find « High Definition Audio Support Device » (High quality audio) or something similar in name.
Make sure you have a digital audio processing device (should be in playback devices, Control Panel and then Sound). Set the connected TV to use by default — after connecting to the computer, its status will become Ready, right-click and select the appropriate item.
Read more in the article: how to output sound from a computer to a TV via HDMI.
Some TV models have separate HDMI inputs that are not designed to receive audio, try to connect to HDMI 1 port. As a rule, in this case everything should work automatically. If this does not happen, you will have to deal with the sound settings on the TV, namely, configure the HDMI input to receive not analog, but digital sound.
So now you can connect your TV to your computer by yourself! I recommend reading the following article in case there are problems with the sound on the computer, it will not be superfluous.
The computer does not see the TV via HDMI: causes and solutions
Today, almost any TV panel can be connected to a personal computer or laptop. The connection of equipment occurs through the HDMI connector. But often users are faced with such a problem that the computer does not see the TV through the HDMI input or there is no sound. There are several reasons why such problems occur, so it is necessary to identify the problem consistently. Read also which cable to choose to connect the TV.
Content
- 1 Methods for connecting devices
- 2 The common reasons for the connection malfunction
- 3 Stages of equipment check
- 3.
 1 Cable Check
 - 3.2 Settings TV
- 3.4 Video 3rd error
- 5 Signal test
Ways to connect devices
Connecting a computer or laptop to a TV can be done in different ways:
- VGA or D-Sud cable. Almost all monitors, PCs and TVs have such a connector. This is an analog connection that will not convey all the nuances of video files in the best way.
- DVI. A more modern version. Can work with analog and digital devices. Has its own subclasses.
- S-Video. In addition to it, you will have to purchase an adapter.
- RCA or tulips. Connecting a laptop and a TV in this way is rare.
- Scart. A popular way, since such a connector is in modern TV models.
- HDMI cable. A good option for connecting a computer.
The HDMI connector on the TV is usually located on the back or side. The computer almost immediately after the connection starts to see another device, but there may be problems that there is no image or other errors.
 Payment for foreign services. At the same time, this is the most proven and common way to connect a laptop to a TV. Read also, ways to connect Xbox to TV.
 Common causes of connection failure
If the TV does not see the laptop, and the connection is made, then the reasons may be the following:
- The cable is connected incorrectly or it is defective.
- Monitor settings error.
- Incorrect operation of the video card of a laptop or PC.
- The settings on the TV itself or any other brand are not configured.
Let’s analyze in more detail why the TV does not see HDMI and the second device through it.
Equipment test steps
- First of all, you need to check the quality of the wire connection and the condition of the connectors.
- Next, you need to check the correctness of the computer settings.
- Next, it checks for driver updates and graphics card settings.
- Starting an antivirus program to scan for malware.

- Port check. It is recommended that you connect to another device.
Read also how to connect a flash drive to a TV.
Checking the cable
If the TV connected to the PC suddenly stopped working, and up to this point everything was set up properly, it means that the cable has come off or it has been interrupted. The first option is more common, as you can hook the adapter just by passing by. But the second one is less common, since the optimal length of the HDMI cable is not so long as to lie on the floor and fall under someone’s heavy leg.
In any case, if there is no display, first check whether the connectors are fully inserted into both devices. And are there any foreign objects on the adapter itself. And you can also try to put another cable to make sure that this error does not exist. Read also why the TV does not connect to Wi-Fi.
TV settings
When the TV does not see the laptop via HDMI immediately after connecting the equipment, it is most likely that the source selection on the TV itself is incorrect.
If there is no signal from the computer, then on the TV remote control you should find the “input”, “source” or “Imput” button, it may be immediately written “HDMI” on the TV from LG. Go to the window that opens and there, in the list of active inputs, select the one you need. Confirm the action by clicking on «OK».
If the equipment still does not connect after the performed operations, we carry out diagnostics further.
See also how to watch iPhone videos on TV.
Monitor settings
After making sure that the signal from the TV is on the right path, we proceed to the diagnostics of the laptop or PC screen, or rather, to the settings. They can be performed by any user with basic knowledge of their computer:
- Move the mouse over any free space on the screen and press the right button.
- In the list that appears, select «Screen resolution» or «Graphics characteristics» depending on the type of OS.
- Select the appropriate option for displaying the picture on TV.
 Permissible permission is written in the device passport, stick to it.
Everything is easier to do on a laptop. Hold down the «Fm» and F4 buttons at the same time, hold until the best option is selected. After that, the laptop will connect to the TV correctly and the error that there is no image will go away.
Video card error
Another reason why the device connection does not work is the incorrect functioning of the PC video card. In this case, the laptop does not see another device or does not display an image on it.
To fix it, you need to try to install new drivers that are available on the global network for each device model. Sometimes it may be necessary to completely reinstall or replace an item.
Read also how to adjust the sound on your TV through your computer.
A few tips
The last thing that could be the reason that the TV does not receive an image via HDMI is a broken port. For diagnostics, check the performance using other adapters.
- 3.