What If Your Computer Can’t Access BIOS? A Guide for You!
- MiniTool
- MiniTool News Center
- What If Your Computer Can’t Access BIOS? A Guide for You!
By Vera | Follow |
Last Updated
When running your computer, you may find it cannot get into BIOS if you need to make some changes to BIOS. What should you do if the PC can’t access BIOS? In this post from MiniTool, some troubleshooting tips are introduced to you.
Can’t Enter BIOS Windows 10/7
BIOS, Basic Input Output System, is a firmware embedded on the chip of PC’s motherboard. It allows you to access your computer system at the most basic level. It is important since it includes a test called POST to check if there are hardware-related issues with the computer and loads the boot loader to initialize Windows.
Usually, you can access your operating system without having to access BIOS. But sometimes, you need to make changes to BIOS to fix some issues but encounter the problem – PC not booting to BIOS.
How to Enter BIOS Windows 10/8/7 (HP/Asus/Dell/Lenovo, any PC)
Check how to enter BIOS in Windows 10/8/7 PC (HP, ASUS, Dell, Lenovo, any PC). 2 ways with steps on how to access BIOS on Windows 10/8/7 are provided.
Read More
This issue is reported by many Windows 7 and Windows 10 users. This seems to be a problem with dual GPU PCs. This is very frustrating, especially if you need to change the boot order to run or install another operating system.
What should you do if your computer can’t access BIOS? In the following part, you can see some troubleshooting tips.
How to Fix PC Not Booting to BIOS
Remove BIOS Battery to Reset CMOS
If you are running Windows 7, you can reset CMOS by removing the BIOS battery. Of course, this way is available for all the operating systems but if you are using Windows 10, we recommend using another method.
On a laptop:
Step 1: Turn your laptop off.
Step 2: Disconnect all the HDMI and USB cables.
Step 3: Remove the laptop battery and unplug the device from the wall socket.
Step 4: Usually, the BIOS battery is plugged to the motherboard via a white connector. Just remove the connector, wait 5-10 minutes, and plug it back in.
Step 5: Put the laptop battery back and restart the machine to see if the issue is removed.
On a desktop:
Step 1: Power off the machine and remove all the USB & HDMI cables.
Step 2: Disconnect the power cord and remove the protecting casing.
Step 3: Based on the model of your motherboard, the location of the BIOS battery is different. Just look for the watch-like flat battery and remove it.
Step 4: Wait 5-10 minutes and insert it back.
Step 5: Reboot the computer.
Tip: In addition to resetting CMOS via removing the battery, you can try this method to reset BIOS. This post — How to Reset BIOS/CMOS in Windows 10 — 3 Steps may be what you are interested in.
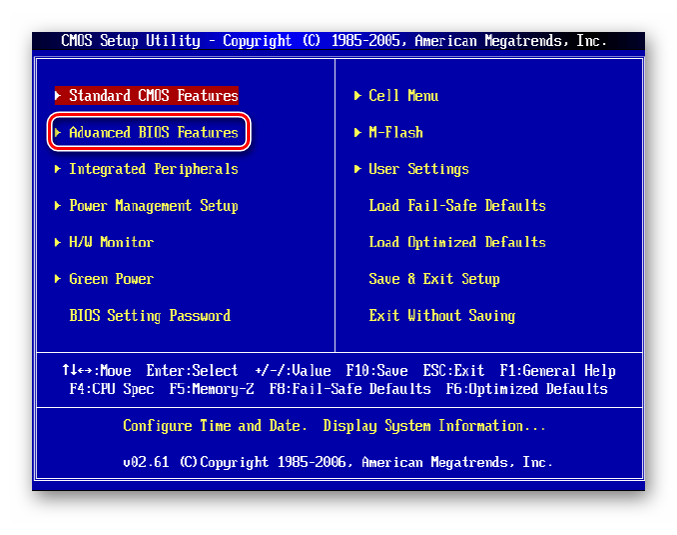
Use UEFI Firmware Settings in Windows 10
If you are running a Windows 10 PC and find it can’t get into BIOS, you can follow these steps to access BIOS. Usually, you can continue to use the operating system. So, do the operation on the desktop without entering the recovery environment.
Step 1: Go to Start > Settings > Update & Security.
Step 2: Under the Recovery window, click Restart now.
Step 3: Click Troubleshoot > Advanced options > UEFI Firmware Settings.
Step 4: Click Restart and your PC can go to BIOS. Just do some changes to BIOS based on your needs.
After reading this post, you know what BIOS is and what you should do if the computer won’t boot to BIOS. Just try these methods if the PC can’t access BIOS.
About The Author
User Comments :
PC Won’t Boot To BIOS? Try These Fixes
Basic Input Output System (BIOS) is the system firmware that provides runtime services for the Operating System. It performs the Power On Self Test (POST) needed to signal the system that the Operating System can be loaded. If your PC does not pass POST, it will not boot.
These days, the Unified Extensible Firmware Interface (UEFI) has largely replaced the BIOS. Most UEFI firmware platforms, however, provide support for legacy BIOS services. Thus, if somebody is referring to the BIOS in the modern system, they are most likely referring to the UEFI. In the context of this article as well, we are using the terms BIOS and UEFI interchangeably.
There are some critical settings that you need BIOS access to change. For example, changing boot drive loading priority, or your RAM XMP profiles, or enabling virtualization, etc. In this article, we address the issue of what to do if you cannot get into BIOS, and more. I hope you have a good read!
Warning: For any fix that involves you opening the PC or laptop casing and handling its components, it is advisable that you properly ground yourself beforehand so as not to fry system components with static electricity.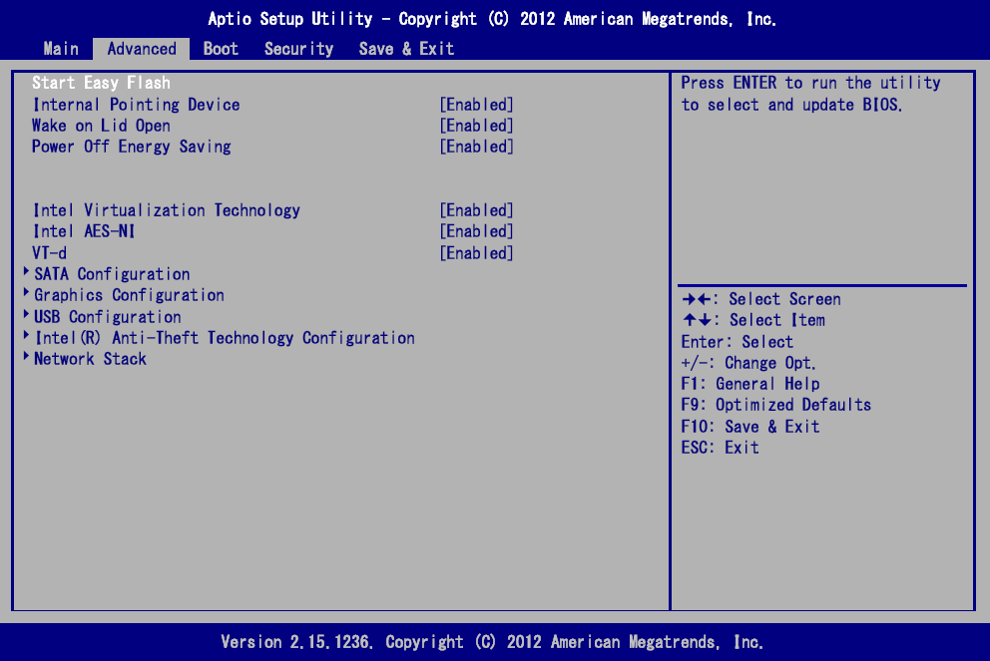 It is strongly recommended that you use an anti-static wristband if you have access to one
Table of Contents
How To Boot Into BIOS
Primarily, you’d boot into your system BIOS from the startup screen. For different makes and models of your device, there are different keystrokes you can press to enter BIOS. The latest versions of Windows users also have the option to boot straight to BIOS after a system restart. Below we discuss both these methods.
Boot into BIOS from Windows
If you use either Windows 10 or 11 and you can load your OS, then you can let Windows know that you’d like to restart the machine and load BIOS. Here is how you’d do it:
For Windows 11
- Launch Settings. (Win + I).
- Navigate to Windows Update > Advanced Options > Recovery.
- Under Recovery options, click Restart Now on Advanced startup.
- Click on Troubleshoot.
- Click Advanced options.
- Select UEFI Firmware Settings.
- Click on Restart.
For Windows 10
- Launch Settings. (Win + I).
- Navigate to Update & security > Recovery.
Under Advanced startup, click Restart now. - Click on Troubleshoot > Advanced options.
- Select UEFI Firmware Settings and click on Restart.
The computer will now restart and automatically take you into the BIOS screen.
If your OS is working fine, then we have an article outlining various other methods in which you can enter system BIOS. Please do give it a read.
Enter BIOS From the Boot Screen
The primary method of entering into BIOS screen is by pressing a certain keystroke immediately after booting your device. Of course, what key or key combination to press varies widely depending upon your device manufacturer.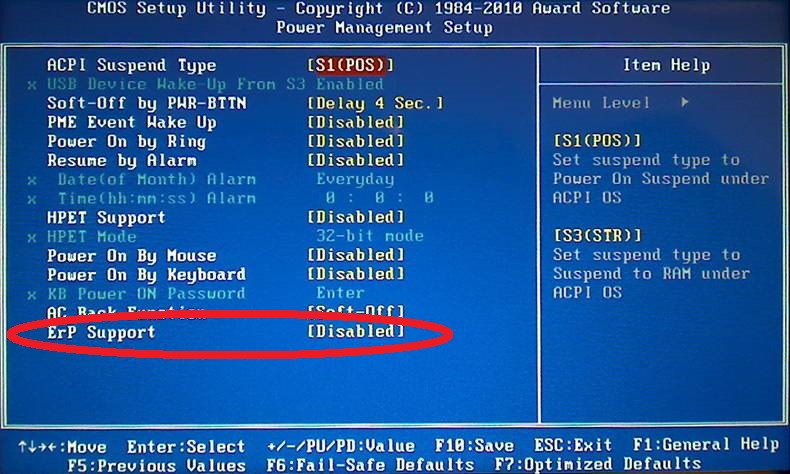 If you have no idea of what keystroke you need to use, you are not entering into BIOS by this method. Below we have listed various manufacturers and the keystroke they require to enter BIOS. Look up the manufacturer of your device in the list below and use the corresponding keystroke.
| Device Manufacturer | Keystroke to Press |
| Acer | F1, Ctrl + Alt + Esc (older models), F2/Delete |
| Asus | Delete |
| Compaq | F1 / F2 / F10 / Delete (older models), F10 |
| Dell | Ctrl + Alt + Enter / Fn + Esc / Fn + F1 / Delete (older models), F2 |
| eMachines | F2 (older models), Tab/Delete |
| Fujitsu | F2 |
| Gigabyte | Delete |
| HP | F1 |
| Intel | F2 |
| Lenovo | Ctrl + Alt + F3 / Ctrl + Alt + Ins / Fn + F1 (older models), F1/F2 |
| MSI | Delete |
| Samsung | F2 |
| Sony | F1/F2/F3 |
| Toshiba | F1/Esc |
If You Have Forgotten BIOS Password
You might have secured your BIOS by locking it with a password.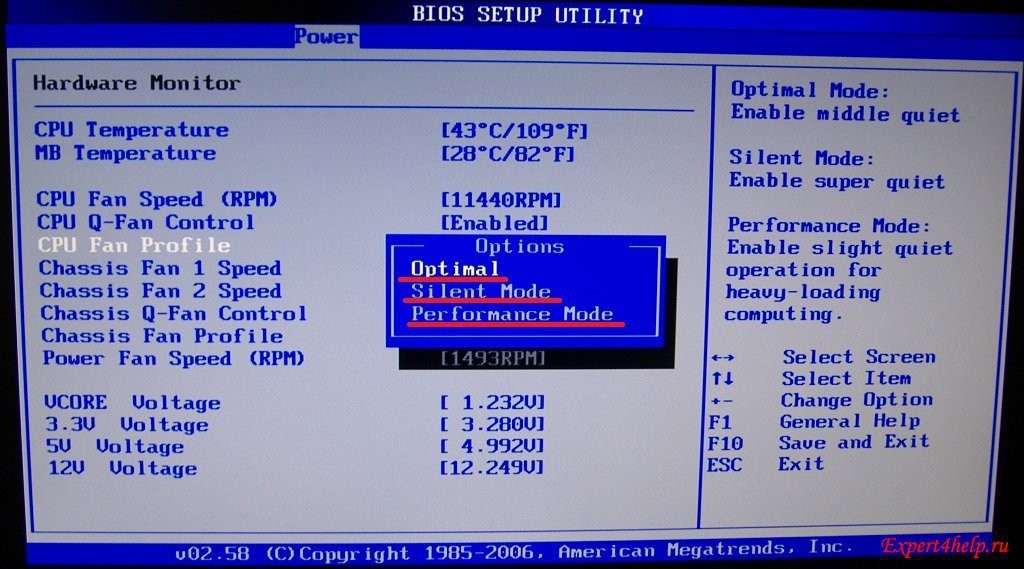 In such a case, you will not be able to enter BIOS without entering the correct password. And if you have not accessed BIOS in a long time, it is possible that you have forgotten the password! You will need to reset the password first. Here are a few methods of how you’d do it.
Remove the CMOS Battery
If you remove the CMOS battery, it will wipe out your BIOS password.
- Power off your PC. Make sure you are wearing an anti-static wristband.
- Open your device casing and find the CMOS battery in the motherboard.
- Remove the CMOS battery and wait 10-20 seconds.
- Put the battery back in, and reboot the computer.
Reset BIOS Jumper
You can also reset the BIOS jumper to reset BIOS password.
- Power off your PC. Make sure you are wearing an anti-static wristband.
- Open your device casing and locate the BIOS reset jumper. It is usually located near the CMOS battery and is blue in color. Refer to the device manual if you have problem locating it.
- Remove the jumper. If the jumper is seated in 2 of 3 pins, move the jumped one pin over instead, Wait 20-30 seconds
- Restore the jumper to its original configuration.
- Reboot the computer.
Use Master Password
Many device manufacturers will have a built-in master password in BIOS that is not available to the user. This master password can be used to bypass the user-populated BIOS password.
- Enter the wrong password three times at the prompt. This will generate a System Disabled message along with a number. Note down this number.
- Go to www.bios-pw.org and enter the number.
- Click on Get password. This will generate a master password (or multiple passwords) that you can enter into the BIOS password screen.
After using the master password, you will be able to enter BIOS screen.
How to Fix BIOS Errors
Sometimes you might not be able to boot into your system because it gets stuck on the BIOS screen, or the BIOS does not load at all. There are a number of reasons why this happens, and below we will try to go through each of these in an easy-to-follow step-by-step manner. Please follow them carefully.
BIOS Error Beep Codes
When an error occurs during POST, the computer will emit a series of beep sounds to let the user know the specific error that caused POST error. The beep error code will vary depending upon the motherboard manufacturer, so we recommend you refer to the user manual and head to the relevant section in this article.
Resolve Problems With the Bootable Media
One of the common problems with your computer not booting beyond the BIOS is that you have a problem with your bootable media. In such a case, keep an eye out for one of the following messages.
- Invalid system disk
- Boot failure
- Hard disk error
- NT bootloader missing
- Missing operating system
- A nonbootable drive containing media is listed first in the boot order
Any of the above messages or something similar indicate that you have a boot drive failure at hand.
Any of the above messages or something similar indicate that you have a boot drive failure at hand.
Check for any USB ports to see if you have accidentally left a USB drive in during boot time.
If your USB drives were clear, then go into BIOS settings to check for boot order and make sure that your bootable drive is at the top of the list.
If this does not fix your issue, then your bootable drive is probably corrupt and needs to be repaired or replaced.
Disconnect Peripherals
A hardware conflict with one of the peripherals could cause a boot issue with your OS. To troubleshoot this problem:
- Power off your PC
- Disconnect all external peripherals (keyboard, mouse, monitor, printers, etc) connected to your PC.
- Connect one of them at a time (starting with the monitor for obvious reasons), and power your computer back up. If you can boot into your OS, the problem is likely one of the peripherals.
- Repeat steps 1-3 for every individual peripheral until your computer fails to boot again, at which point you have identified the faulty peripheral, and replace it.
If you had no success troubleshooting your boot problem, then the peripherals is probably not an issue. Please try another fix below.
Check for Power Connection Problems
A faulty power connection could also lead to your PC not booting. Please check your power outlet and UPS connections at both ends and make sure that your cables are attached firmly and properly.
Also, turn off your PC and make sure that your SMPS cables are connected properly and securely to the motherboard, CPU, graphics card, etc.
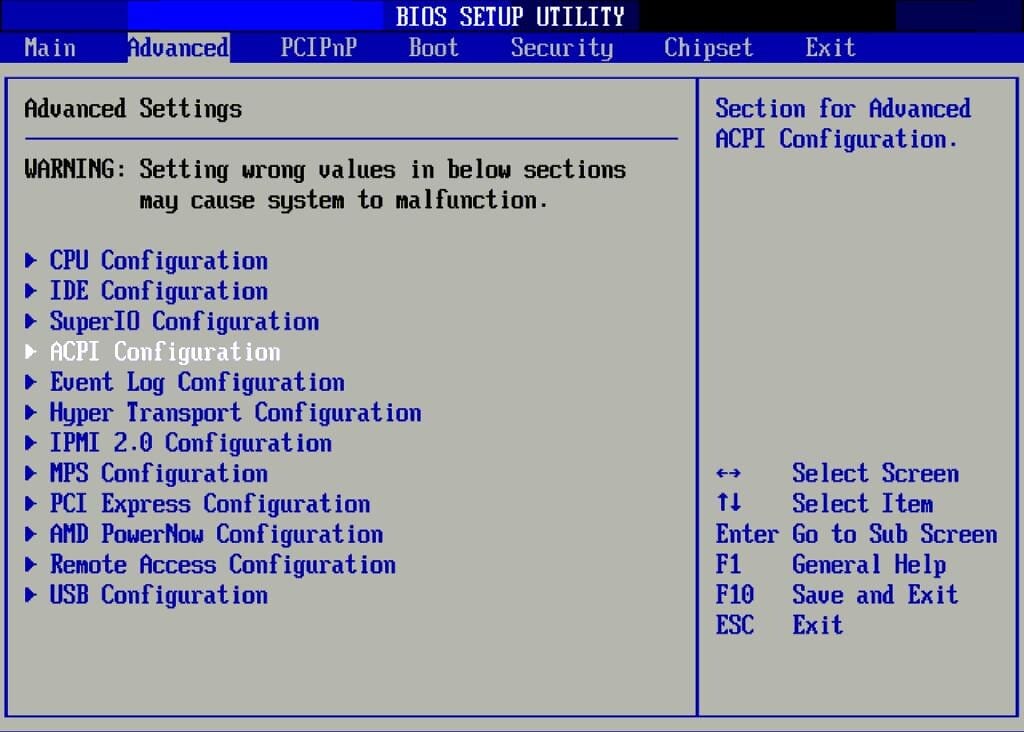
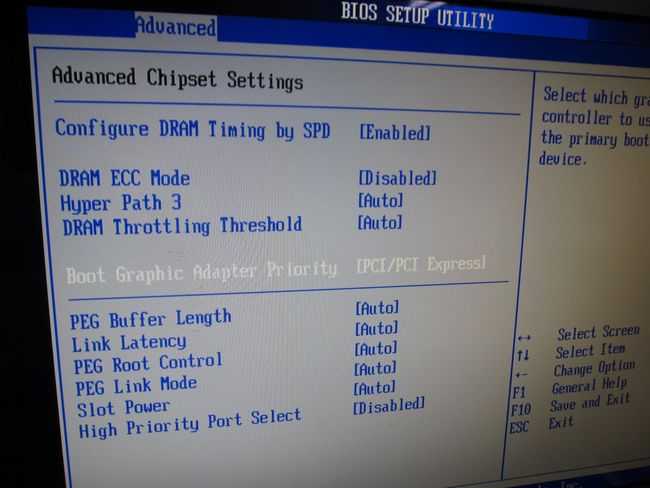
Restore Default BIOS Settings
A misconfigured BIOS setting or two could also lead you to a BIOS error. To see if this is the case, restore default BIOS settings. The location of this option in your BIOS may vary depending upon your system manufacturer.
Diagnose Your RAM Modules
Another reason your PC is refusing to boot is that it cannot access memory. Check if you have faulty RAM sticks or if they are just not seated properly.
- Turn off your PC.
- Open the PC case and locate the RAM slots on your motherboard.
- Take out all RAM sticks from their slots.
- Re-seat one RAM stick back into a slot. Make sure that the notches on RAM stick align with the notches on the slot. When done properly, you will hear a click and the tabs at both ends of the slot will snap close.
- Power your PC back on and see if you can now boot.
- Power off the PC again and repeat steps 1-6 with another RAM module until the PC fails to boot again, at which point you have a faulty RAM stick.
If all this test fails with all RAM modules, it is possible that all of your RAM sticks are faulty. However, it is more likely that the reason for boot failure is something else. Please try another fix in this list.
Make Sure All Fans Are Running
The fans in your device are vital for maintaining system temperature. If any fans, especially the CPU fan, has failed, then your system BIOS might refuse to boot the system. Keep an eye out for a fan failure message.
Disconnect and Reconnect the CPU
CPU is the brain of your device. No CPU equals no boot. If might be pretty silly to think that anybody would try to boot a PC without its CPU, but it’s possible that the CPU has been dislocated from its socket. To see if this is the case:
- Power off the PC.
- Remove the CPU.
- Clean the old thermal paste and re-apply some fresh ones.
- Reattach the CPU to the socket.
- Turn on the power and see if the problem has been fixed.
Re-flash Your BIOS
Sometimes when you update your BIOS firmware, the newer version might not be 100% compatible with your older BIOS, which might result in your BIOS not working properly. If you have recently flashed your BIOS firmware to a newer version and your PC stopped booting thereafter, you should flash your BIOS firmware to the older working version.
- On a working PC, download the version of BIOS firmware that was working and copy it to a blank USB.
- Note down the exact filename and extension of the downloaded file.
- Plug the USB media to your PC that needs to be flashed.
- Enter BIOS upon booting and change boot order to prioritize USB booting.
- At the command prompt, type in the name of the BIOS firmware file and press enter.
- Press Y to confirm update.
Note:If the downloaded file is a compressed folder, you need to unzip it first. Also note if the downloaded driver files contain an instruction, in which case follow that instead.
I can’t enter Bios on Windows 10: what to do
Imagine the situation. Turn on the PC, but it does not start. BIOS won’t open. Or maybe the OS is loading, but there is no way to get into the BIOS.
Contents
- What is it
- What is happening
- Black screen
- Black screen and one beep
- Black screen and several beeps
- screen without beeps
- Combination of keys
- I can not enter the BIOS with USB keyboard
- Conflict of devices
- Settings BIOS
- I can not go to BIOS, problems in MP
- System Nap of
- City
- Conclusion 9000
9000
What is it
BIOS — input output system.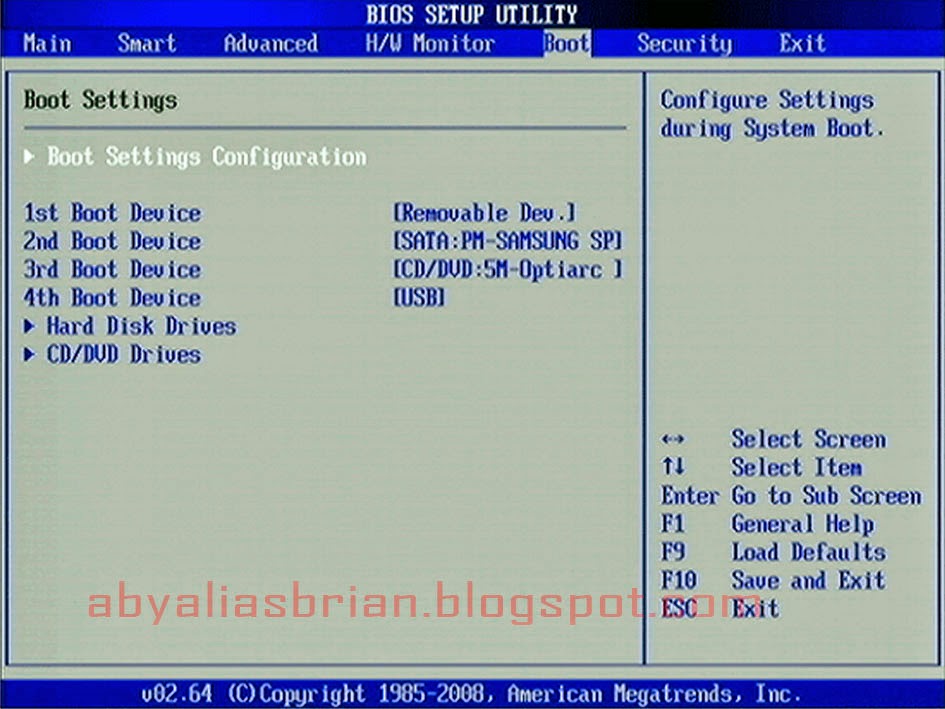 This is a chip that stores the algorithms for the correct operation of the PC. Make changes to it to improve the operation of the device.
What’s going on
If the laptop or PC does not boot, the user sees a black screen. Or maybe the OS starts up, but BIOS messages are displayed. The system may not boot. So, I can’t enter the BIOS, what to do, let’s take a closer look.
Black screen
Pressing the power button does not boot the PC. BIOS won’t start. Listen to what sounds the PC makes.
Black screen and one beep
Check hardware. Often the problem lies in the monitor (if the PC is stationary). It may be badly connected. Check that the cables are connected securely. If this is not the problem, the wrong monitor is defective. Connect your PC to another monitor if possible to check. nine0003
Black screen and several beeps
Unable to enter Bios if there is a problem with the system. Depending on the model, the decoding of the BIOS signals may be different. Look at the information in the instructions. If it is not there, write down the model of the laptop or motherboard (MP) in Yandex or Google.
Black screen without beeps
Problem with the power supply. If it does not work, the voltage does not reach the MP. Check the pins connecting the board to the power supply. nine0003
Key combination
To get into the BIOS, when booting, press key combinations. Depending on the model, these are: F1, F2, F11, F12, Del. On a laptop, they are pressed along with the Fn key.
You can find out which key is suitable for your model by experience, or look in the instructions. If you don’t want to experiment, write the MP model in the search engine.
Can’t access BIOS from USB keyboard
Check if it works. Try connecting to another PC. Perhaps it is not supported by the BIOS. nine0065 If you are using a wireless keyboard, it may not be seen by the BIOS on boot. Connect the wired model to the device. Older PCs may not support the USB keyboard interface. Try to find a model with a PS / 2 connector or purchase an adapter. Check the port to which the keyboard is connected.
Device conflict
The hardware connected to the PC is not working properly. Therefore, the user cannot enter the BIOS. What to do? Disconnect the equipment connected to the PC optional:
- Drive;
- HDD or SSD;
- USB devices connected to MP;
- PCI boards.
If your laptop has an integrated graphics card, disable the discrete graphics card. Try entering the BIOS. If the problem is gone, connect the devices one by one, see after connecting which one the problem appeared. Diagnose the conflicting device. Take it to a service center.
BIOS settings
The problem occurs if the user himself changed the settings in the BIOS. Try a factory reset:
- Open the system unit. Find the switch on the MP. It’s called the CMOS jumper. It is set to position 1-2;
- To reset to factory settings, set the switch to position 3-4.
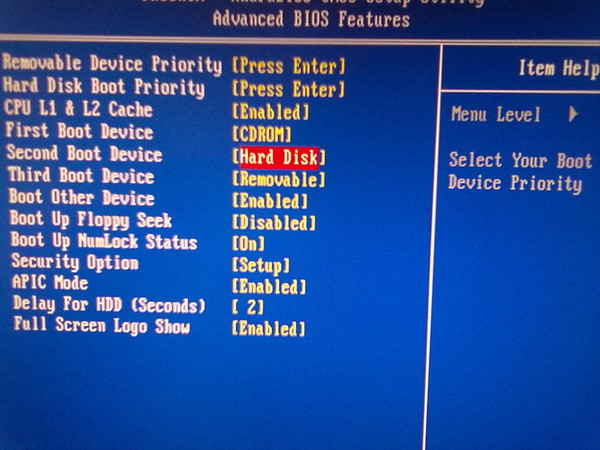 Hold it for thirty seconds;
 - Turn the jumper to position 1-2.
I can’t enter Bios, problems with MP
Visually assess its condition. See if there is any oxidation on it, if the capacitors are swollen. Wipe off oxidation with a rubber band, replace swollen capacitors. nine0065 If the appearance of the MP is OK, do the following:
- Turn off the PC. Pull out the socket. Disconnect additional devices: keyboard, speakers. The system unit must be connected by a network connection cable and a monitor;
- Clear CMOS. Pull the battery out of the board. See the screenshot above. Wait two or three seconds, put it back;
- Pull all boards out of slots. Only the CPU will remain connected;
- Turn on the PC. If there is sound, then the problem with the launch is not in the video card. If not, that’s the problem. Take your graphics adapter in for repair. nine0008
System failure
The OS is booting up, working in it without complications, but it is not possible to enter the BIOS. For Windows 10, press «Win + I», select:
Next:
A window with a choice of actions will load. Go to:
Open:
Select:
BIOS will load after reboot.
Command line
For Windows 7, if the item described above is not present, press «Win + R» next:
Write the command:
By pressing «Enter» the PC will reboot, it will go to BIOS. nine0003
Update
Go to the site to support your laptop. Select your device model. Find the latest BIOS. The update comes down to running the «exe» file. After that, the device will reboot. The BIOS will update automatically.
Output
We looked at what to do if you can’t enter the BIOS. Remember, this is not fatal for the PC. Not often this is the cause of HDD malfunction, in which important information can be lost. Don’t panic, follow the tips below. If all else fails, contact the service center. For example, I had a situation. A small microcrack appeared on the MP. She was not visually visible.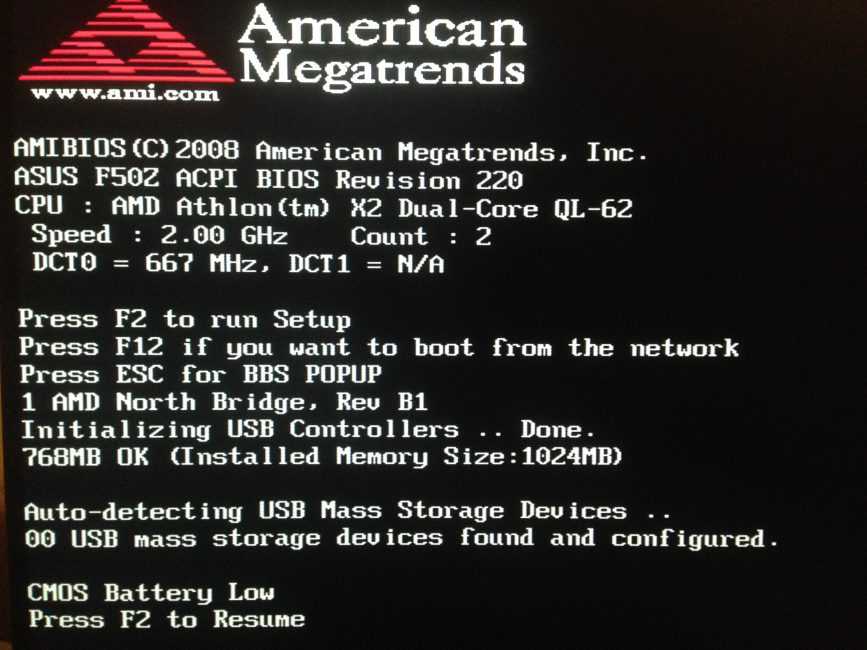 I had to contact the service center. nine0003
the main causes and solutions to the problem
Many PC and laptop owners are faced with a very unpleasant problem. When a person one day tries to start his computer, he fails. In addition, the user understands that his BIOS does not load.
BIOS can rightfully be called the most important part in a computer and its component. The activity of the BIOS is aimed at correctly setting up all the parts and equipment in the machine, checking how well it can function, and starting the entire system. In addition, the component is responsible for many processes during the operation of the equipment. Therefore, the problem when the BIOS does not start is very unpleasant for every user. nine0003
In this article, we will give tips and describe the basic rules of what to do if a laptop or computer turns on, but the BIOS does not load. We will also describe how you can solve this problem and tell you what to do in each case.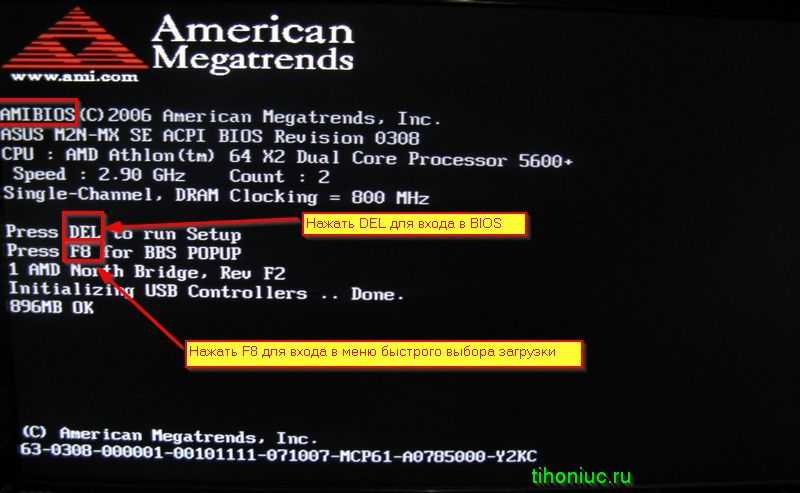
There are several situations where your desktop or laptop won’t boot up. The most common problem is when the user sees only a black screen and hears one or more beeps when trying to start. There may also be a situation where the device starts to boot normally, BIOS messages appear on the screen, but the boot does not continue beyond the system check and this has been going on for a very long time. Let’s try to deal with each problem separately. nine0003
Black screen
The most annoying, but very common situation is when you press a button to turn on a computer or laptop, but it does not work, the computer does not start the boot process, the BIOS does not start, and the user sees only a black screen for long time.
If your computer does not start and you see a dark screen, then you need to listen to what sounds the computer makes.
Black screen and one beep
If you hear one short beep, the BIOS has finished checking the hardware.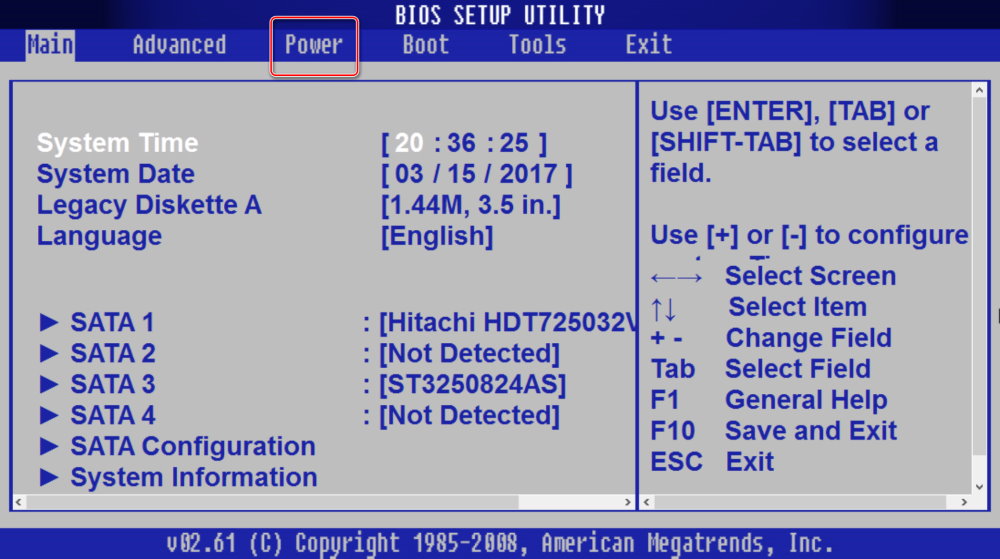 Then the problem is most often in the monitor (if we are talking about a stationary computer), it may be poorly connected. If you checked all the cable connections and it’s not about them, the screen could just completely break. In this case, it is better to check with another monitor (if possible). If everything works with another monitor, you need to carry the old one to a service or to a landfill.
In rare situations, when after one beep with another monitor the computer still has a black screen — it is better for the user to contact the service, professionals will be able to solve this problem. nine0003
Black screen and several beeps
If you hear several beeps when there is a sound of turning on the computer, then this indicates a malfunction in the system. For different BIOS models, the decoding of the signals is different. If there are several signals, but the computer monitor remains black and without “signs of life”, then most likely the problem is again in the video system.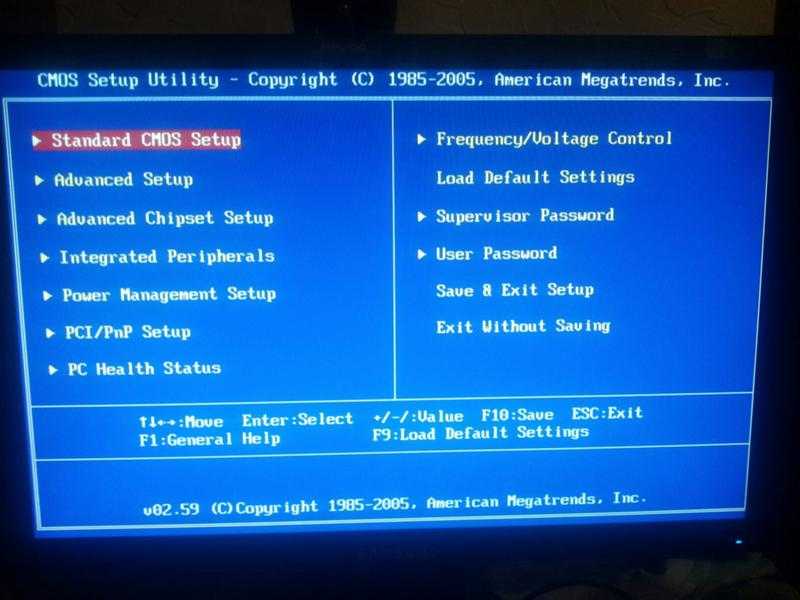 This time, the most common reason for a black screen and BIOS not starting is in a faulty video card. But in order to be sure of the problem, you need to find a list of signals and their interpretation for your computer or laptop. nine0003
Most often, decryption information is indicated in the instructions, but it can be easily found on the Internet if you enter your laptop or motherboard model.
Black screen with no beeps
If the computer turns on but you see only a black screen and the device itself does not beep, the power system may not be working as it should. The power supply could fail, so the electrical voltage does not reach the board. Or the contact that connects the board and the power supply could have come off, so your BIOS is not loaded. nine0003
Check all this and if everything is in order with the power, the computer should be taken in for repair — without special education and equipment, you are unlikely to be able to solve the problem yourself.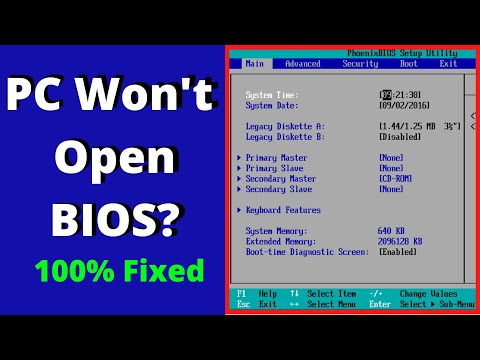
Wrong key or wrong key combination
If the computer starts up, you see some messages from the BIOS, but you cannot enter it using the hot key, then most likely you are using the wrong key or combination of them.
You can most often find out which key in your particular case only by experience — very few manufacturers indicate this in the instructions for a computer or laptop, despite the fact that the item is really very important. In order to find out, you need to press each key in turn on the computer. When one didn’t work out, start again and press another one in order to enter the BIOS using one button, next time you should try another. nine0003
Entering the BIOS is something like this: the user restarts the computer or turns it off and on again. In the very first seconds of turning on the computer, you need to press the hot key many times quickly enough, which starts the BIOS in your case.
If you don’t want to repeatedly experiment with hotkeys, you can try to find them.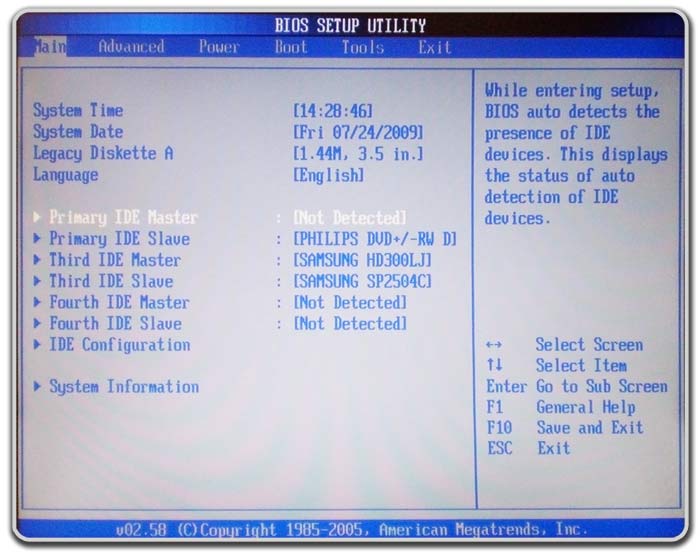 In most cases this is F1, F2 or Del. If none of them managed to start, then you need to Google your motherboard model (if you are using a desktop computer and you can open the cover and see its number) or laptop model, and also add “hot key for BIOS” to the request. You can almost always find tables or answers on the forums. nine0003
Problems with the keyboard
Please note that if you start the BIOS with the correct button or key combination, you will still not be able to enter. And the reason may be in a banal thing — the keyboard. Some users sin that their motherboard is faulty when the reason for the BIOS not starting is in the keyboard. Before you get upset, be sure to check the functionality of the keyboard. To do this, you can simply connect it to another computer. The keyboard can even be connected to a laptop if it has a special connector. nine0003
If the keyboard works well, then it may simply not be supported by the BIOS. This problem is most common in people who use an older model of computer or laptop.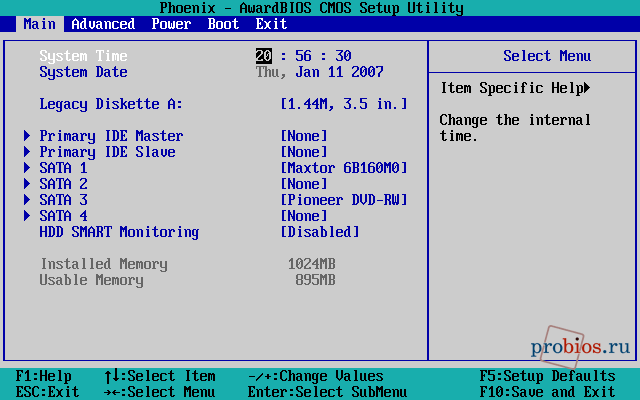 But there may be a problem with the USB keyboard.
If you have a wireless keyboard, then you need to try connecting a wired model to the computer in order to exclude the possibility that the keyboard does not match the BIOS.
If your computer is relatively old, it may not support the USB keyboard interface. Try to find a device with a PS / 2 connector or buy a PS / 2 adapter for a USB keyboard. It is also worth checking the port to which the keyboard is connected, sometimes the reason lies in it. nine0003
Conflicting devices
If your computer turns on but the BIOS does not load, then the problem may be in conflicting devices. One of the devices that is connected to the computer may not work properly. Because of this, a failure (conflict) occurs and the user cannot enter the BIOS.
In order to solve this problem, you need to try to disconnect from the computer all devices that were additionally connected to it:
- Drives. nine0008
- Hard drives.

- Solid state drives.
- USB devices that have been connected to the motherboard.
- PCI cards.
Also, if your computer has an integrated graphics card, you will need to disable the discrete graphics card.
After that, you need to try to enter the BIOS again. If everything is fine and the problem has disappeared, then you need to gradually return the device one by one to its place and see after which connection you will not be able to enter the BIOS again. That way you figure out what’s conflicting. nine0003
After you find the problematic device, you will need to deal with it separately. It is best to go to a service center and leave the repair and diagnosis to a professional. Most often, the element can be repaired, it will be cheaper and easier than buying a new one. This is especially true for hard drives and solid fuel drives.
Problematic BIOS settings
This problem occurs when the user tries to change the operating settings of the BIOS system on their own.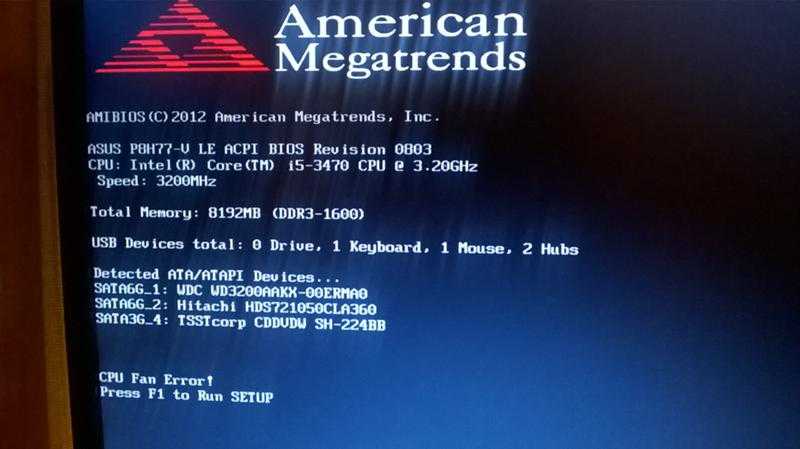 Often the user enters the settings incorrectly and all work is completely lost. In this case, resetting the BIOS to factory settings can help. nine0003
In order to do this, you need to look under the case of the system unit. There you will find the motherboard, and it has a switch called the CMOS jumper. It is set to position “1-2”. In order to return the BIOS to factory settings, you need to move the lever to the reverse position “3-4”. In this position, it should be held for about half a minute. After that, you can return the jumper back to the “1-2” position and try to start the system.
Motherboard problems
The most annoying reason why the BIOS does not start for the user is problems with the motherboard. Since the board is almost the entire computer, its brain. If it seems to you that the whole reason is in it, then you need to check this with a small procedure.
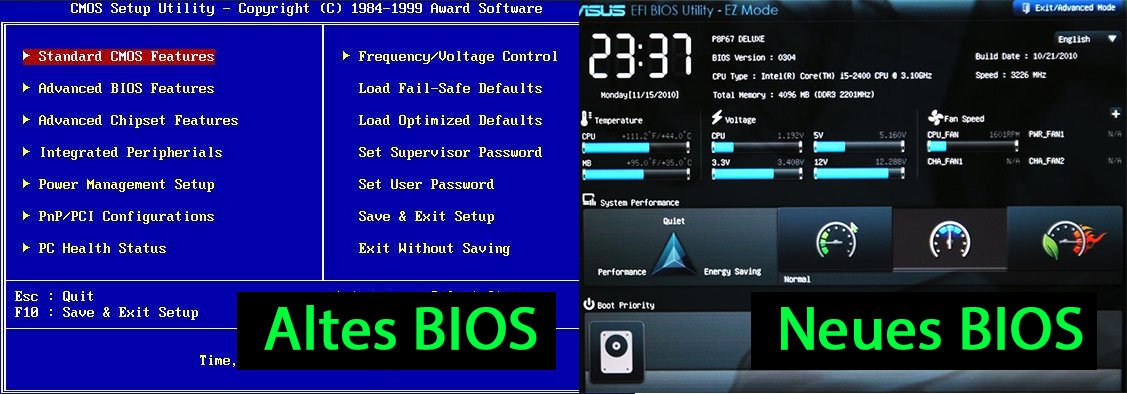
First of all, you should visually assess the condition of the board. You need to look for oxidation, see if the capacitors are of a normal size, perhaps they are swollen.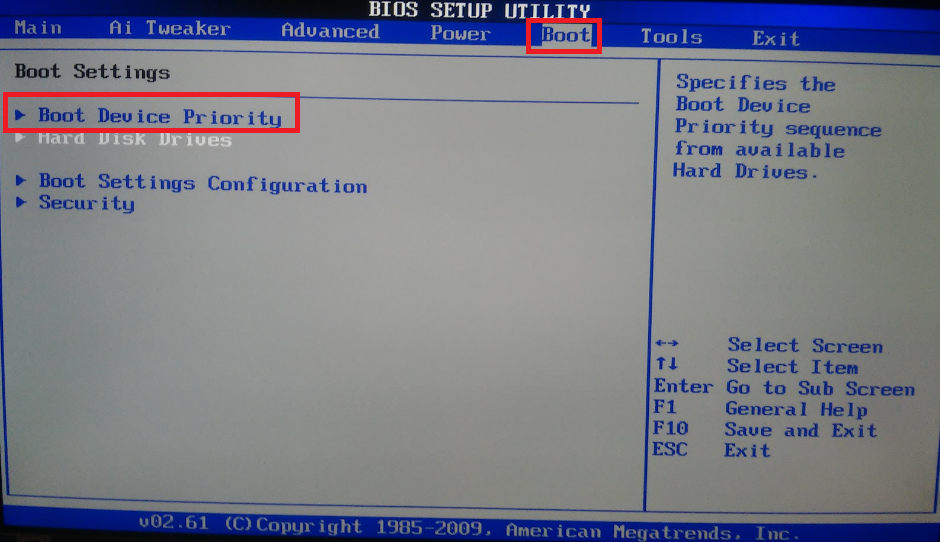 If you don’t know what a normal motherboard should look like without signs of damage, compare it with the picture below to see if yours has any visual deviations. nine0003
If there is oxidation, it must be rubbed off with a rubber band. If you suddenly find that the capacitors are swollen on the motherboard, then they can be replaced with new ones by soldering. It is better to entrust this matter to a professional. If everything looks good with the motherboard, then you need to do the following:
- Turn off the computer from the outlet and disconnect all additional devices from it, such as a mouse, keyboard, speakers. If there are additional devices, cables, then it is worth disconnecting them as well. As a result of your actions, the system unit should be connected only with a cable for connecting to the network, as well as with a monitor. nine0008
- Clear CMOS. In order to do this, you need to remove the battery from the board, wait just a few seconds, and then put it back.
- Remove all cards from the motherboard slots. Only the processor and speaker slot should remain connected.
- Turn on the computer by connecting it back to the network via cable and listen. If there is a sound, then this indicates the operation of the video card and the problem with not starting the BIOS is not in it. If there is no sound, then the situation is sad — the video card does not respond, you need to carry it in for repair. You may even have to completely change it. nine0008
Do not despair right away, specialists can most often fix faults, because the technology of repairing equipment has stepped far forward.
Conclusion
It is always unpleasant for a computer user when the machine does not boot. Especially if the computer is urgently needed for work or study. Nevertheless, it is worth remembering that a computer not starting up or a problem when the BIOS does not load is not always fatal for a computer. Most importantly, do not panic and try to follow our instructions.